
1. Paisley-Anchor Back Hand with Wrist Band
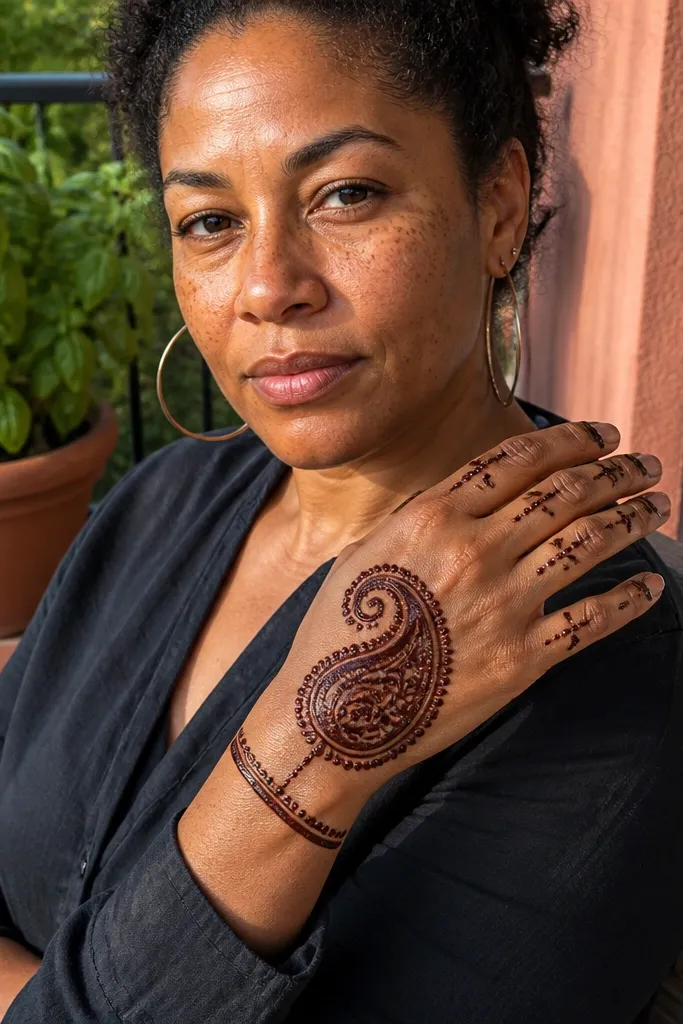
This design saves time because it uses one big paisley as the only major drawing. Everything else is supporting detail: a wrist band that frames the hand and tiny dots on the fingers for rhythm. The paisley shape gives you natural symmetry cues, so you don’t need to copy both sides perfectly. It also photographs well because the eye lands on the center first, then travels to the wrist border. Plan for a clean medium-dark stain by keeping the paisley outline bold and the inner fill simple.
Start by drawing a slightly tilted paisley on the center of the back of your hand. Then add a straight wrist band across the width of the wrist, about 1-1.5 cm tall, with small scallops or short leaf tips along the top edge. Finally, add 2-3 dots or short half-moons on each finger and connect the center paisley to the band with two thin curved lines.
Keep the paisley outline thicker than the inner fill so small gaps don’t look like mistakes.
Don’t overfill the paisley — heavy fill makes quick designs look dark and smudgy after drying.
2. Teardrop Fan Center with Finger Ladder Lines
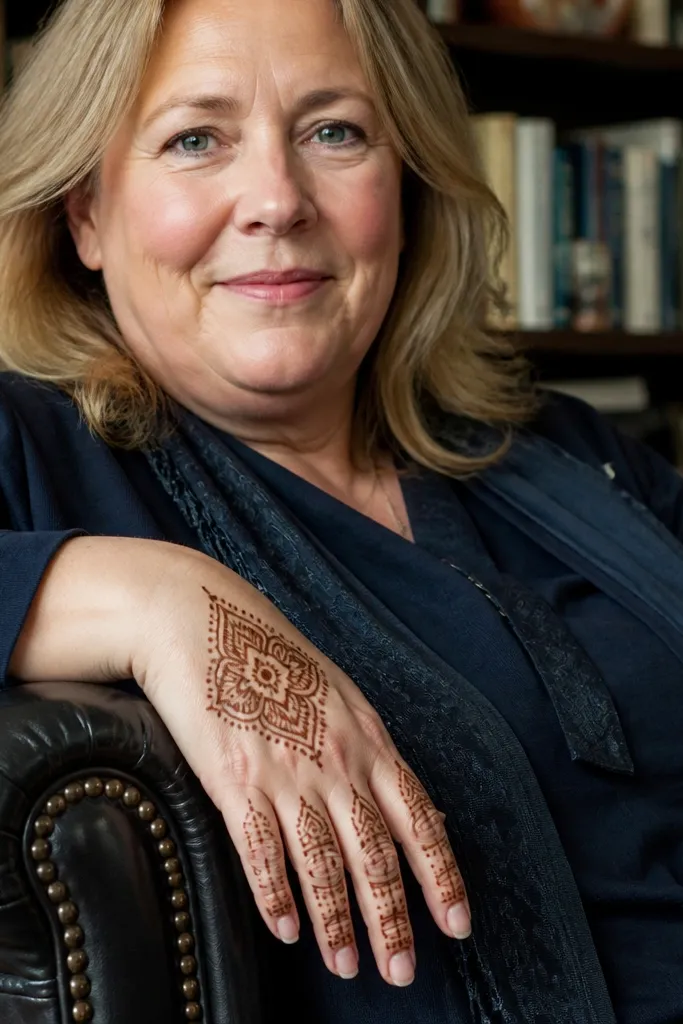
A teardrop fan is fast because you repeat the same curve multiple times without needing complex shading. The center motif sits high on the back of the hand, so it looks full even when you skip heavy coverage near the wrist. Ladder lines on the fingers are forgiving: if your spacing is slightly off, it still reads as intentional structure. This style also gives good contrast on photos because the vertical lines frame each finger. It’s a great pick when you want a clean, modern look with minimal time.
Pro tipUse the cone tip flat for teardrops so the ends stay sharp and don’t blob.
Draw a small base teardrop in the center, then add 5-7 teardrops fanning outward like a half circle toward the fingers. Next, place a thin “ladder” line on each finger: 3-4 short vertical strokes connected by one light horizontal line across the knuckles. Finish by adding a simple curved border at the wrist using 5-6 tiny arches.
AvoidDon’t connect every finger line to the center — leave gaps so the design breathes.
3. Sunburst Dots with Minimal Leaf Corners
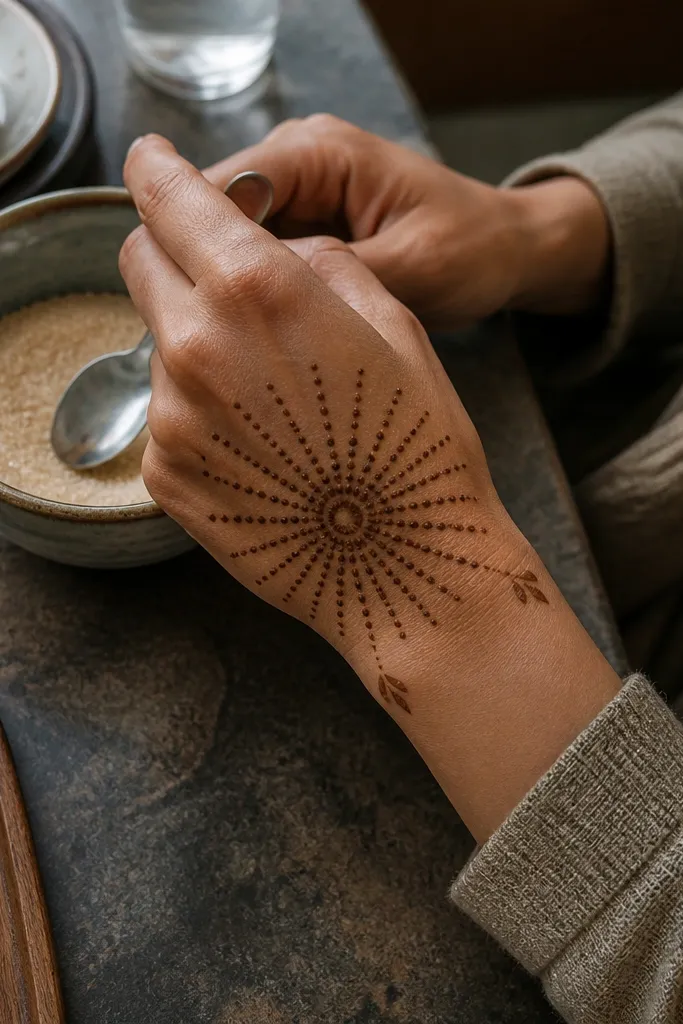
This is one of the quickest looks because it relies on dot placement more than long continuous lines. A sunburst pattern makes the hand look decorated even with sparse details. The tiny leaf corners near the wrist add a soft organic feel without slowing you down. It’s also ideal if you’re new to mehndi, because dots hide minor cone wobble. The design stays photogenic because the dot density creates a strong texture contrast against skin.
Pro tipDot with consistent pressure: squeeze a little longer for filled dots, less for hollow dots.
Start with a small filled circle or tight dot cluster in the center of the back of your hand. Then draw 12-18 dots in a loose circle around it, slightly spaced so they look like rays. Add two small leaf corners at the wrist — one near the thumb side and one near the pinky side — using short curved leaves. Finish with 2-3 dots on each finger, keeping them aligned with the sunburst direction.
AvoidDon’t make the dot ring too big — if it spreads, the design looks incomplete in photos.
4. Double Band Scrollwork Back of Hand
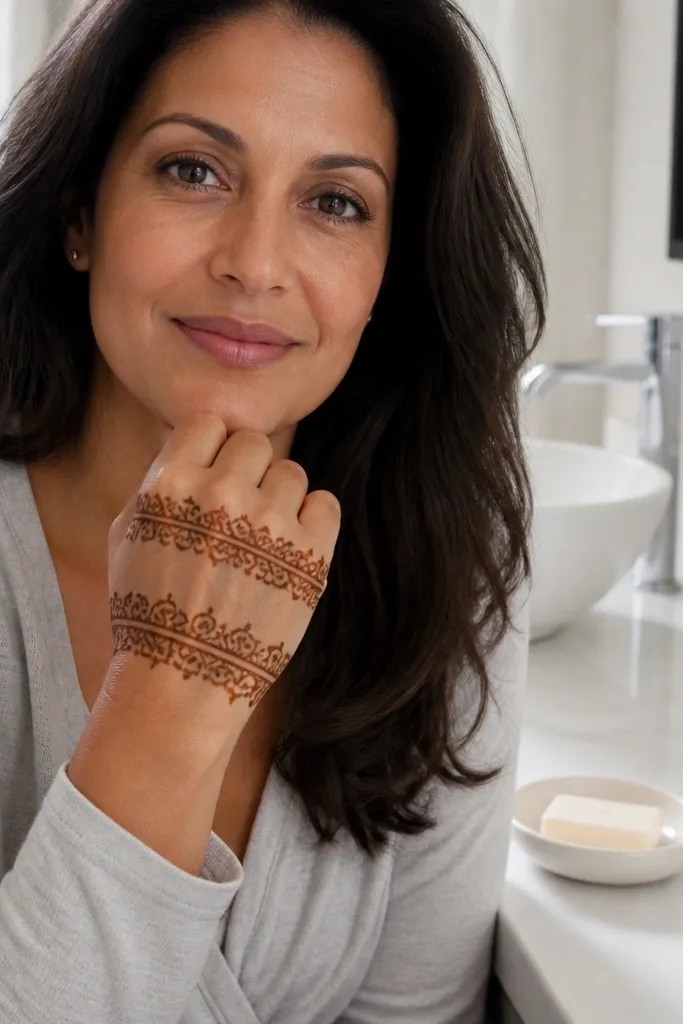
Double band layouts are time-savers because you can repeat the same scroll pattern across two horizontal zones. This design looks “done” because the bands create structure, even if your finger work is light. Scrollwork reads elegant on the back of the hand because curves follow natural hand movement. Keep the scrolls small and consistent, and the overall look stays clean. It’s a smart choice for a weekend event when you want coverage without spending hours filling.
Draw the first band across the midhand area, about 1 cm wide, with small S-scrolls touching each other. Add a second band slightly closer to the wrist, using a mirrored scroll direction. Connect both bands with two thin vertical curves near the center. On the fingers, place one small dot cluster at the base of each finger and skip full coverage.
Practice one scroll shape on paper first; repetition makes it faster on skin.
Don’t add too many extra swirls — scroll density kills contrast in quick designs.
5. Butterfly Wings with Center Stem
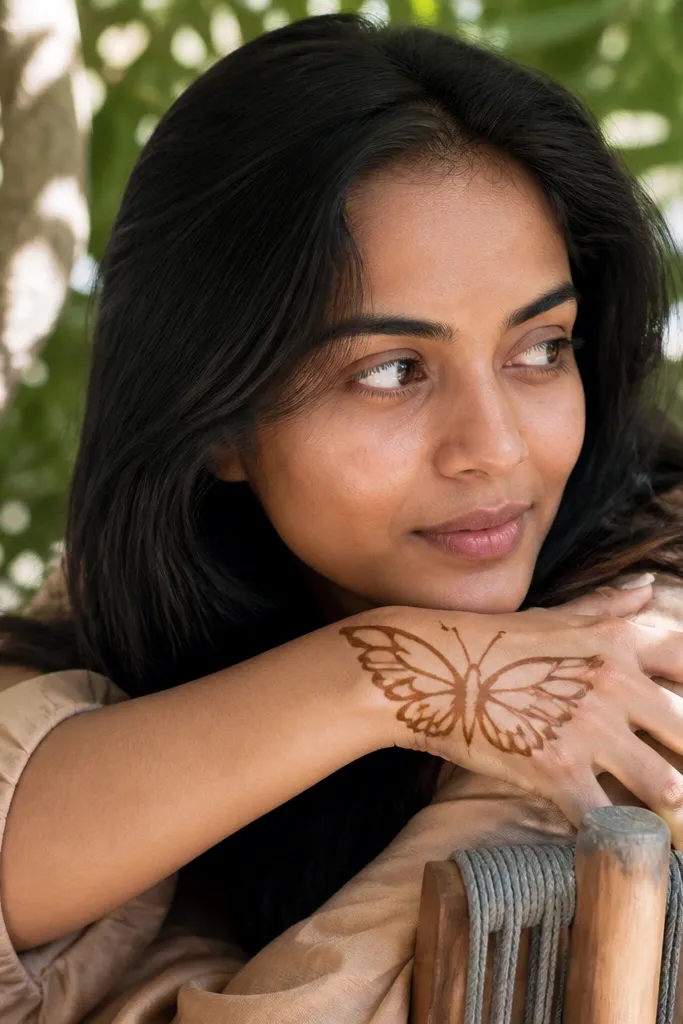
Butterfly wings are fast because you draw one side and mirror it with a clear center stem. The wing shape gives you a big visual element without needing full finger fills. This design looks airy and pretty because the wing outline is the star, while the inside stays mostly negative space. It’s also forgiving for symmetry since the center stem anchors the eye. Great for a casual festive look when you want something photogenic but quick.
Pro tipUse short strokes for wing arcs so the curves stay smooth after drying.
Start by drawing a thin vertical stem down the center back of your hand from knuckle area toward midhand. Add two wing outlines on either side, each made from 3-4 curved arches that taper at the outer edge. Add small dot clusters inside each wing outline, keeping them light. Finish by outlining the wrist with a thin curved line and adding tiny dots on the finger bases.
AvoidDon’t fill the wings heavily — quick butterfly designs look best with open space.
6. Geometric Hex Frame with Corner Flowers
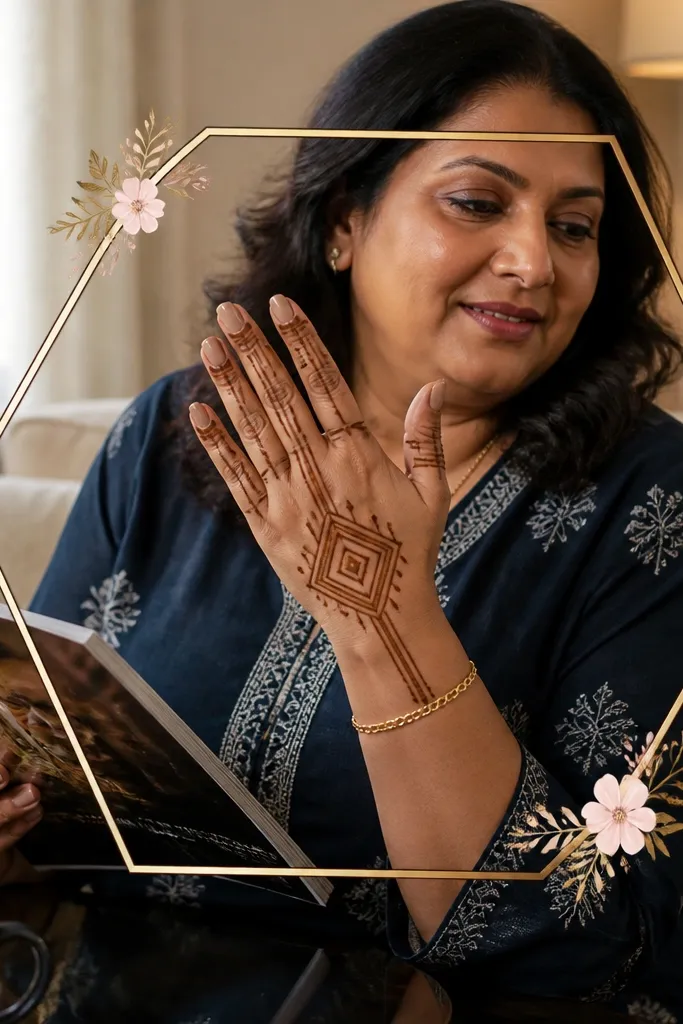
Geometric frames are a cheat code for speed because straight lines are easier to control than flowing vines. A hex frame makes the design look intentional and structured, even when you keep finger work minimal. Corner flowers add a feminine touch without adding hours of detail. This is the best option if your curves are inconsistent but your lines are steady. The design also photographs cleanly because the edges define the shape sharply.
Draw a large hexagon outline on the back of your hand, keeping the top point near the knuckles. Inside, place two small divider lines to form three sections, leaving most of the skin unfilled. Add tiny flower motifs at two or three corners — each flower is just 5 petals drawn with short curved teardrops. On fingers, add 2-3 dots per finger aligned with the hex corners.
Use a light guide with henna-free pencil or soap line before committing if you struggle with straight angles.
Don’t overfill the hex interior; keep it mostly outlined for crisp contrast.
7. Triple Teardrop Cluster on Midhand
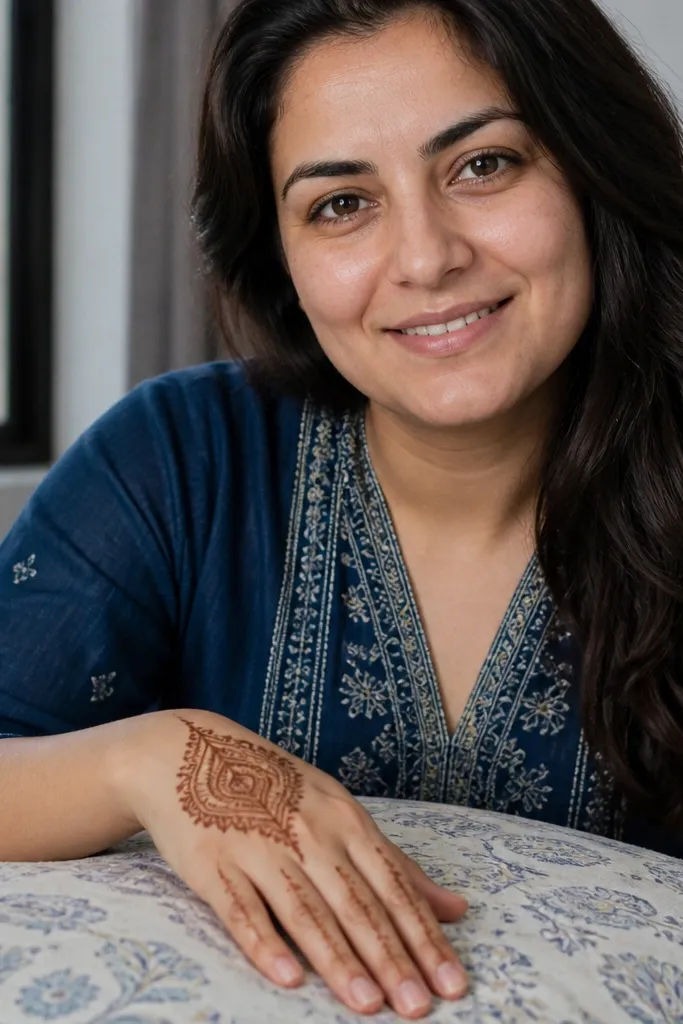
This design looks intricate but is actually built from only three repeated teardrops. The cluster sits in the midhand area, so it looks full even if you keep the wrist and fingers light. Teardrops also create natural symmetry and rhythm, which helps when you’re rushing. It’s ideal for weekend events because it’s quick, clean, and doesn’t require heavy fill. Photographically, the teardrop edges catch light and read as crisp shapes.
Draw three teardrops in a triangle cluster on the center-back of your hand, with the point tips facing upward. Outline each teardrop and add a minimal inner dot or half-fill. Then add a thin curved wrist line and 2-3 dots at the base of each finger. Connect the cluster to the wrist line with two short curved lines for structure.
Keep all teardrops the same size; the uniformity makes the design look planned, not rushed.
Avoid adding extra motifs around the cluster; it turns into clutter fast.
8. Leafy Side Bands with Open Center
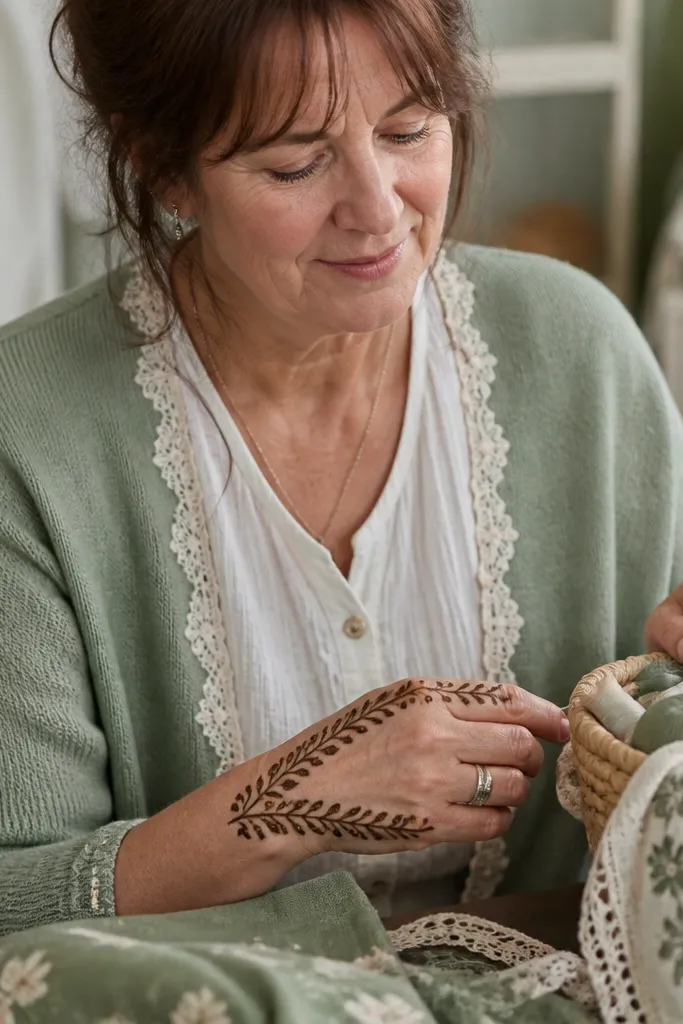
Open-center designs are faster because you’re not filling the entire back of the hand. Instead, you frame the hand with leafy side bands and let the center breathe. This makes your henna lines look cleaner and more intentional, especially when the paste is thick or your drying time is short. The leafy bands also guide the eye toward the wrist and fingers. It’s a great choice when you want a soft, botanical feel without the time drain.
Start by drawing two parallel curved bands on the sides of the back of the hand, leaving the center blank. Each band is made from repeating small leaf shapes facing inward. Add a thin border line at the wrist that connects the two side bands. Finish with 1-2 leaf tips at the base of each finger and a few dots along the knuckles.
Make the leaves small and repeating; one leaf shape repeated looks more professional than varied sizes.
Don’t try to fill the center — open space is part of the look.
9. Knuckle Arch Grid with Wrist Fringe
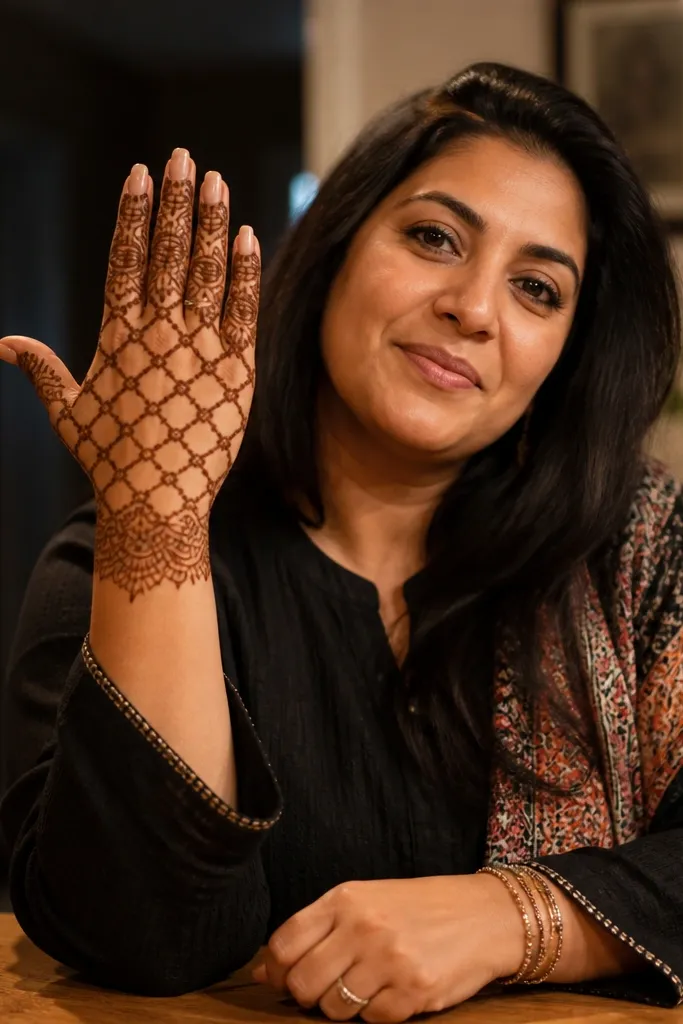
This is a structural design that’s quick because it uses a grid of arches across the knuckle area. The wrist fringe gives it a finished, festive edge without heavy work. It flatters the back of the hand because arches follow the natural knuckle curve. Even if you’re not perfect with symmetry, the grid pattern keeps it looking organized. It’s also good for people who prefer lighter mehndi that still shows well in photos.
Pro tipUse the same arch height for both rows; consistency makes the grid look crisp.
Draw a row of arches across the knuckles, 4-6 arches depending on finger length. Then add a second row of smaller arches under them, aligned to create a grid effect. Place a fringe border at the wrist using short downward lines or tiny scallops. Add one small dot cluster at the base of each finger and stop.
AvoidDon’t make the fringe too tall — long fringe can smear if you’re rushing to dry.
10. Half-Moon Wrist to Finger Connectors
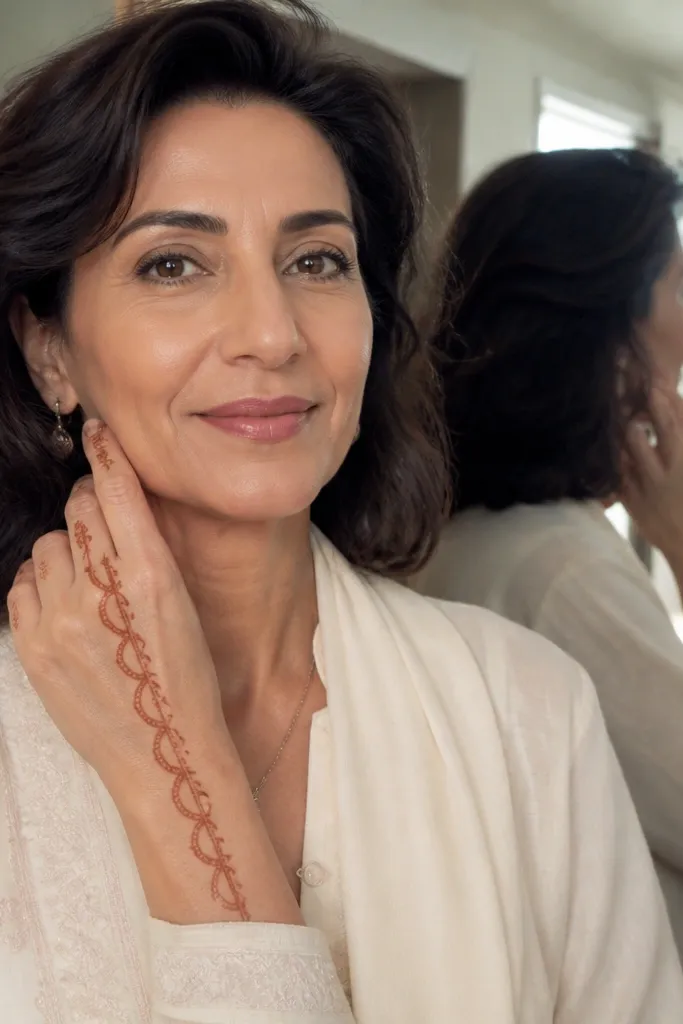
Half-moons are fast and photogenic because each shape is simple but repeated. This design connects the wrist to fingers with gentle arcs, so it looks like a complete pattern even with minimal filling. The center thin line keeps everything organized and stops the design from feeling random. It’s a great weekend option when you want clean, modern mehndi and don’t have time for full floral work. The negative space keeps the pattern bright and readable.
Pro tipMake the half-moons all the same width; it keeps the flow looking intentional.
Draw a thin line down the center of the back of the hand from knuckles to midhand. At the wrist, draw a band of 6-8 half-moons pointing upward. From each half-moon, draw a curved connector line toward the base of each finger, ending with a small dot. Add one half-moon on each finger base and keep the rest blank.
AvoidAvoid thick filling on connectors — thin arcs dry cleaner and look sharper.
11. Rangoli-Style Corner Square with Dots
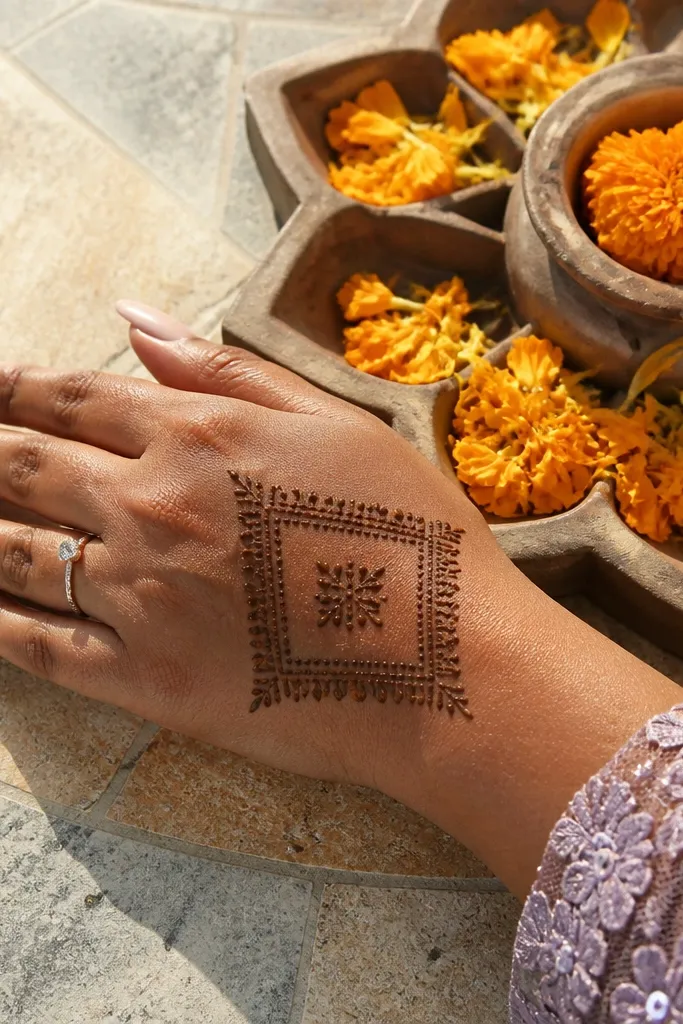
Rangoli-style corners are quick because you draw a simple square or diamond frame and fill the space with dots and short lines. This gives you a decorative look without the time cost of full floral vines. The corner positioning works well on back hands because it visually balances the hand without covering the whole area. It’s also forgiving if your henna line thickness varies. Photos read it as “patterned” even when the design is small.
Pro tipUse dot-to-line consistency: if you dot along edges, also use dots at the ends of rays.
Draw a small diamond (rotated square) on the outer side of the back of your hand near the thumb side. Add a dotted border around it by placing dots along the diamond edges at equal spacing. From each corner, draw 2-3 short rays made of tiny lines. Finish by adding 2-3 dots on each finger base and a thin wrist line across the width.
AvoidDon’t place the diamond too close to the wrist crease; it can distort when you bend your hand.
12. Oval Frame with Tiny Paisley Seeds
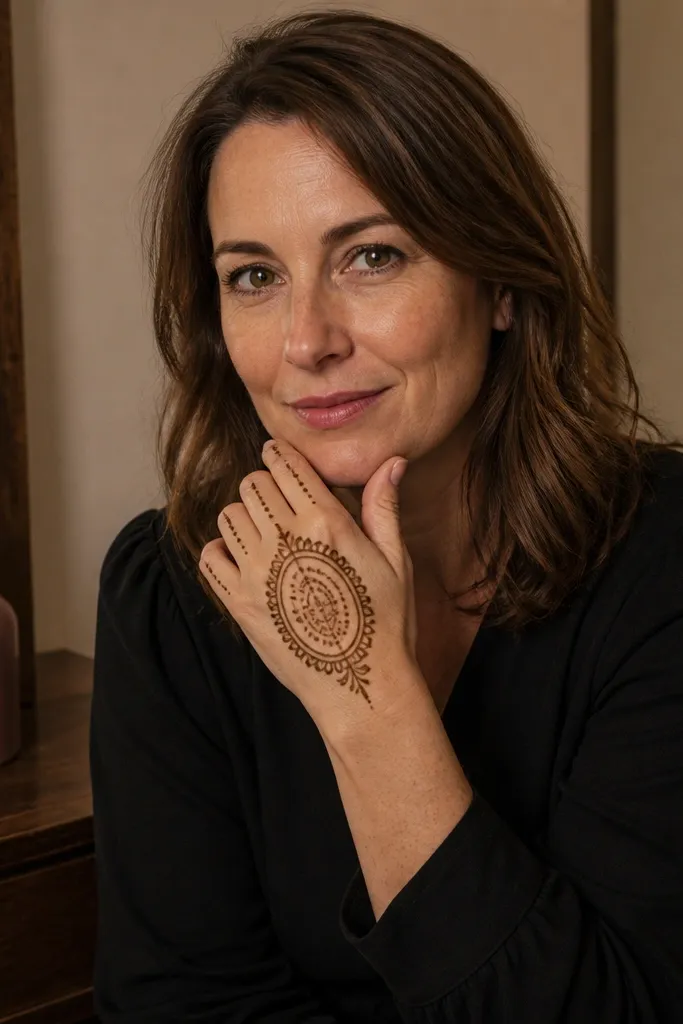
An oval frame makes your design look complete in less time because it creates a boundary for everything you draw inside. Tiny paisley seeds add detail without requiring large fills. The oval also flatters the back of the hand’s shape, so it looks balanced even when you keep finger motifs light. This is a good weekend choice when you want a clean, slightly traditional look without heavy work. It photographs well because the oval outline gives a clear focal area.
Draw a large oval outline on the center-back of your hand, leaving a small gap above the knuckles. Inside the oval, fill with 8-12 tiny paisley outlines like seeds, leaving skin visible between them. Add a small cluster of dots at the top of the oval and a thin curved wrist border beneath it. On fingers, draw one dot cluster at each base and stop.
Keep paisley seeds tiny — about 3-5 mm tall — so the oval doesn’t get crowded.
Don’t fully shade inside the oval; outlines and seed shapes make it look cleaner.
13. Wavy Vine One-Side with Symmetry Guide
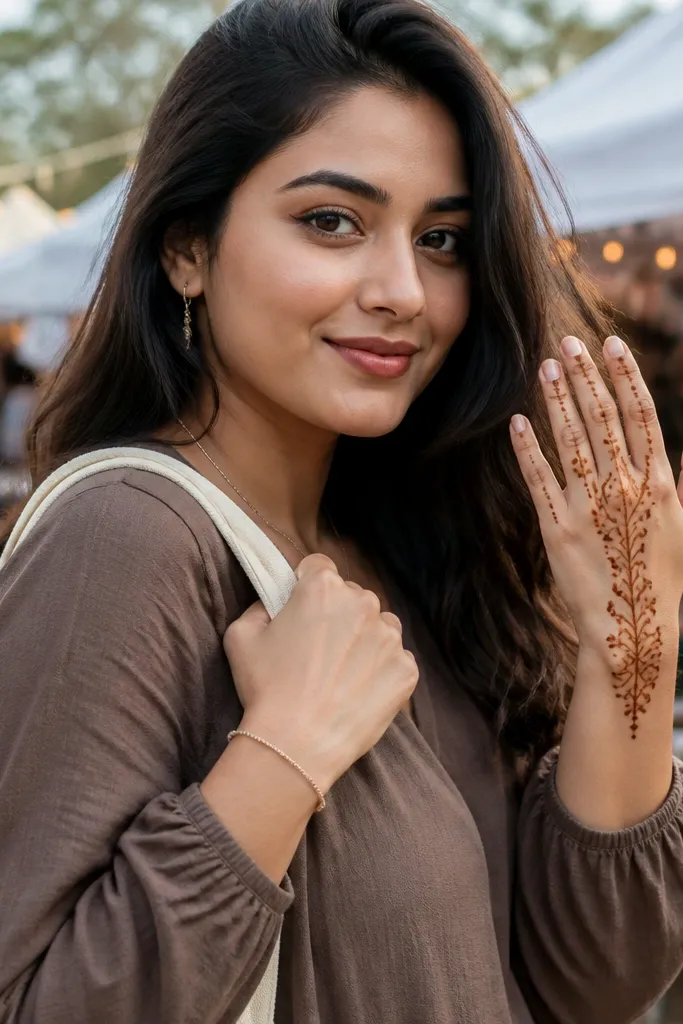
This design is fast because you build one wavy vine and mirror it with a light symmetry guide. The vine creates movement, while the minimal fills keep it weekend-friendly. You get a “mehndi vine” look without spending time on complex leaves. It’s also forgiving: if your vines aren’t perfectly matched, the overall curve still reads as intentional. The result is photogenic because the vine outlines are bold and the center stays open.
Pro tipUse two passes: outline first, then add tiny leaf shapes after the lines settle.
Start by drawing a vertical center line lightly, then outline one wavy vine on one side of the center line from knuckles to midhand. Mirror the same vine on the other side using the center line as a guide. Add small leaf tips along the vine — just 2-3 leaves per side. Finish with a simple wrist border and 2 dots on each finger tip area.
AvoidDon’t thicken the vine too much; thick vines can merge and look like blobs.
14. Mandala Half on Back of Hand
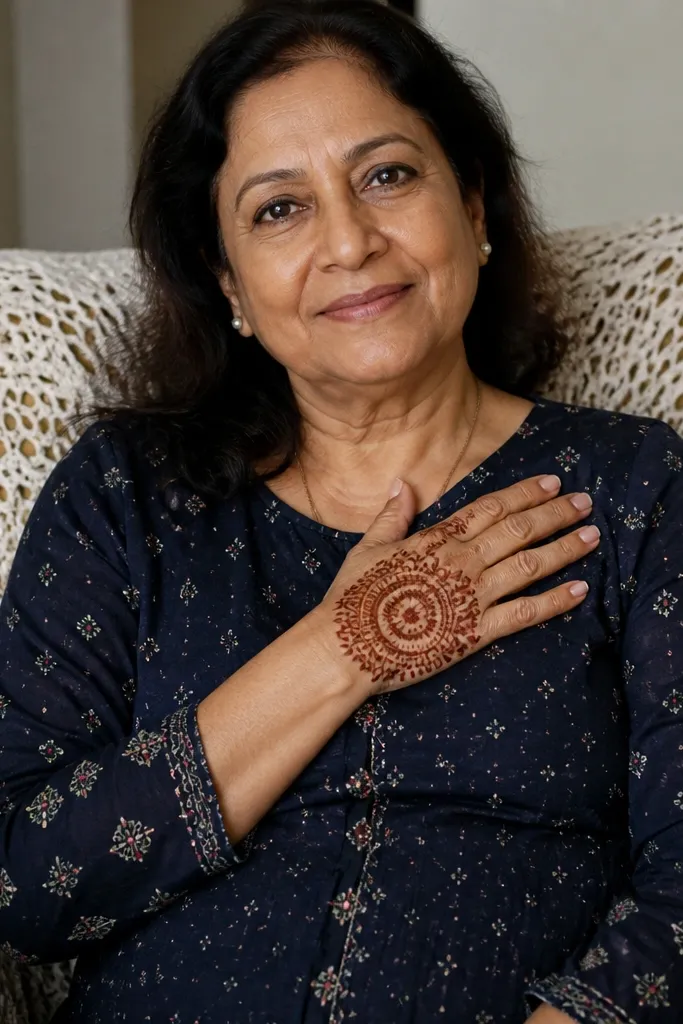
A half mandala looks impressive because it has layered rings, but it’s still quick if you limit it to one side. The center of the mandala sits on the back of the hand, and the outer ring stops before you hit the wrist. This keeps the work contained and prevents you from running out of time. It’s also a great choice for people who like detailed patterns but want a weekend version. Photos show the petal rings clearly even with lighter finger work.
Draw a small circle in the center of the back of your hand. Add a ring of 6-8 petals around it, then add a second ring with fewer petals or tiny dots. Stop the outer ring before the wrist crease. Add a thin wrist border and keep fingers light with only one dot cluster per finger base.
Make petals uniform by using the same stroke length each time.
Don’t extend the mandala all the way to the wrist; that’s where time disappears.
15. Twin Leaf Arches Across Fingers
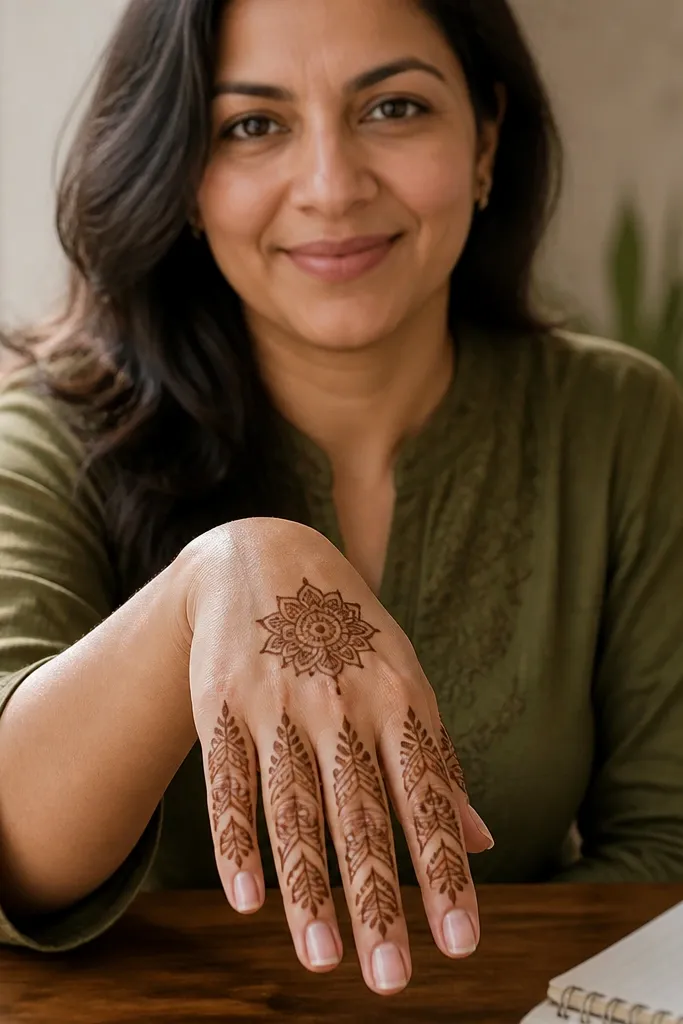
This design speeds you up by putting most of the work on repeatable finger arches. The back of the hand only needs a simple center motif — a small leaf or half paisley — while each finger gets the same two arches. It’s photogenic because the finger area becomes the focal point, and the repetition makes it look neat. Ideal for weekends when you want something bold but don’t want to fill large areas. It also helps if you have limited henna time but steady hand control.
Pro tipKeep arch endpoints aligned across fingers for instant symmetry.
Draw a small leaf or half-paisley on the center-back of the hand. Then on each finger, draw two arches across the finger length: one near the base and one near the middle, each arch made from two curved lines that meet at ends. Add tiny dots at the ends of each arch. Finish with a thin wrist line and skip extra finger fills.
AvoidAvoid adding extra patterns between arches; repetition is the whole speed trick.
16. Wrist Sparkle with Starburst Center
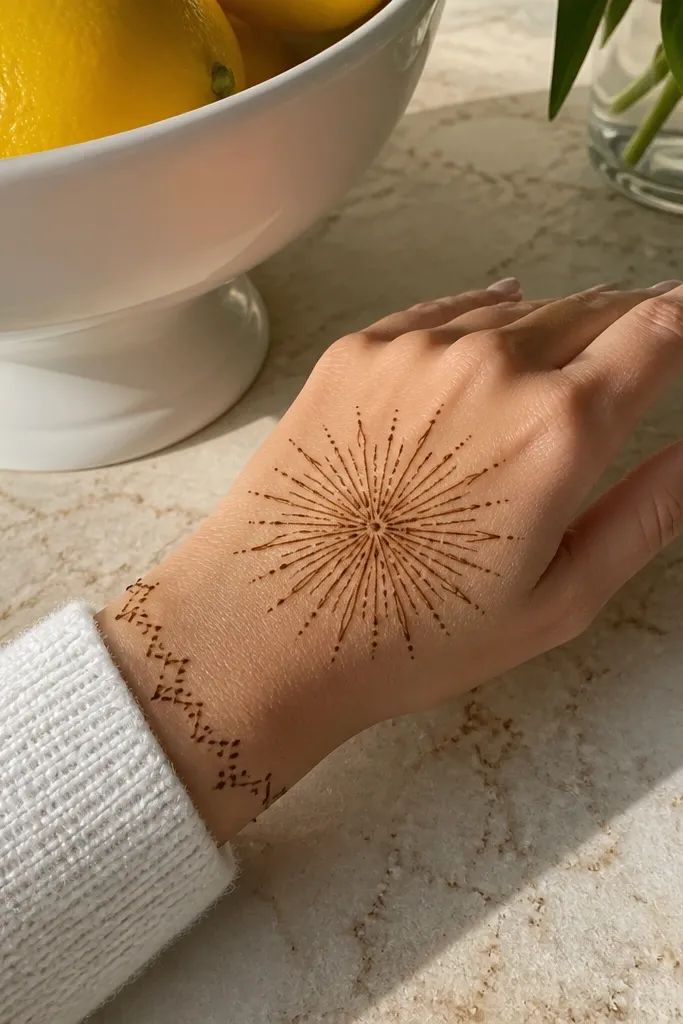
Starburst center motifs are quick because they’re made from short strokes rather than long curves. The wrist sparkle border adds a festive finish without heavy fill. This design looks bright and modern, and it’s easy to keep balanced because the starburst radiates evenly. It’s also a good pick for people who want a “clean but special” look in a short session. Photos show the starburst clearly even if the stain is a bit lighter.
Pro tipMake strokes the same thickness; uneven strokes make the starburst look messy.
Draw a small circle in the center of the back of your hand. Add 10-14 short curved strokes around it to make a starburst, each stroke ending in a tiny dot. Place a thin wrist border line and then add a row of 6-8 tiny sparkle shapes (short crosses or four-point stars). On fingers, add 1-2 dots at each base and stop.
AvoidDon’t draw a giant starburst — keep it compact so it stays crisp.
17. Center Paisley with Side Dots and Thin Outline
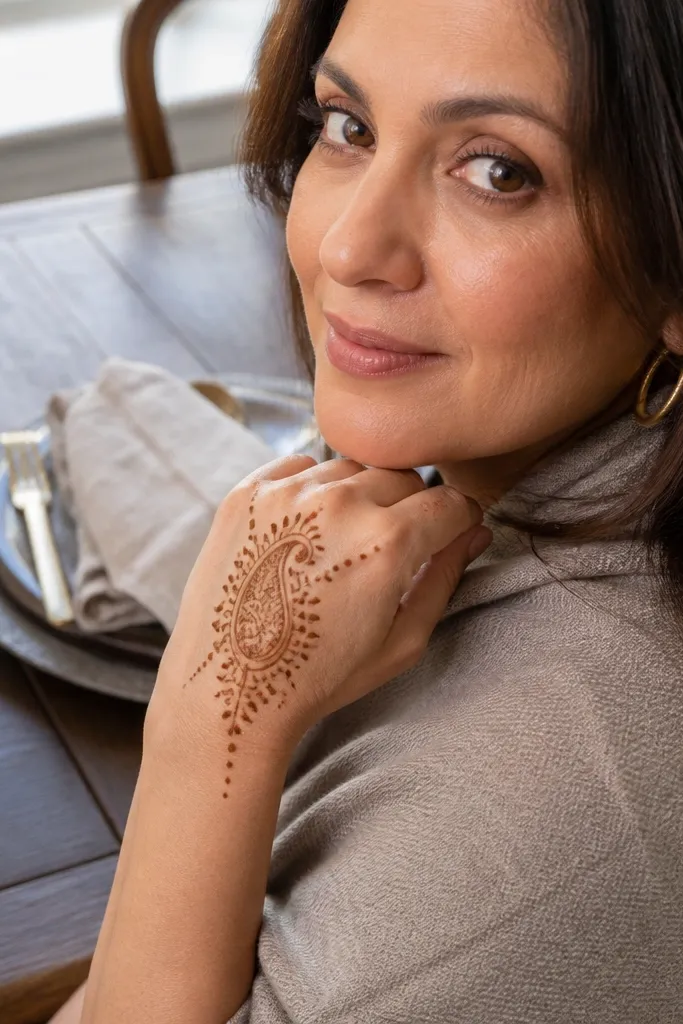
This is a minimalist design that still looks full because the center paisley is crisp and the side dots create a pattern trail. Thin outline work reads elegant and helps you avoid the muddy look that happens when you rush with heavy fill. It’s a smart choice when you’re short on time but want the mehndi to look intentional in photos. The minimal finger work also keeps you from getting stuck on tiny details. If your henna tends to spread, thin outline is the better strategy.
Pro tipLet the outline dry slightly before adding internal dots so they don’t smear.
Draw one center paisley on the back of your hand with a thin, steady outline. Add 3-4 small internal shapes inside the paisley — tiny teardrops or dots — and keep most of it open. Add a line of 4-6 dots on each side of the paisley, spaced evenly down toward the wrist. Finish with a thin curved line at the wrist and add 2 dots per finger base.
AvoidAvoid thickening the outline midway; it makes the paisley look uneven.
18. Chevron Ladder Back Hand with Finger Caps
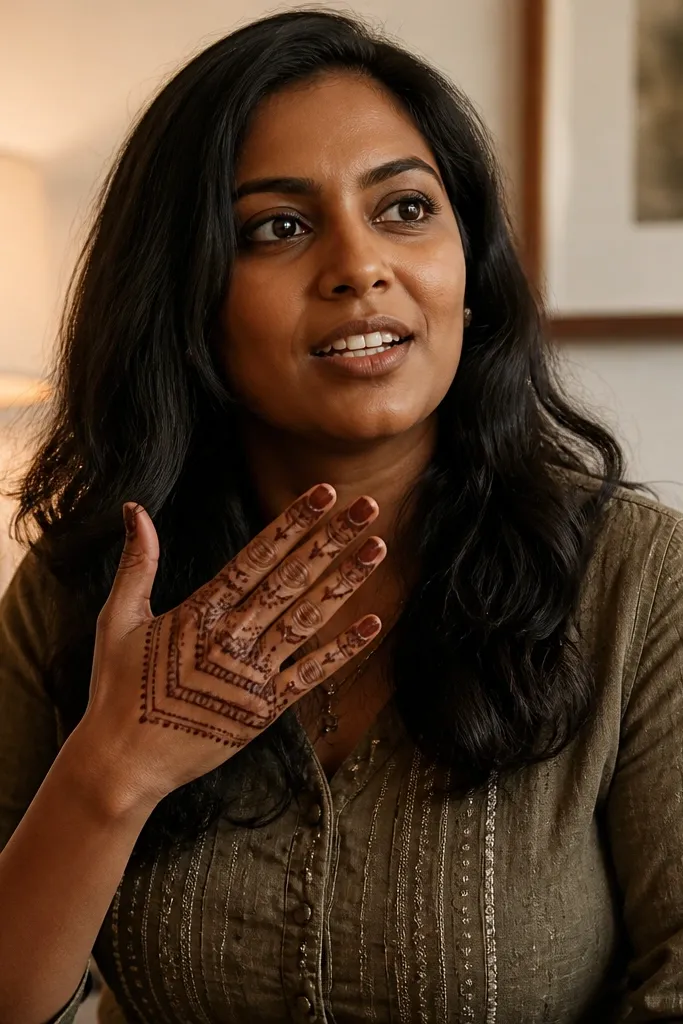
Chevron ladders are fast because you repeat one angle pattern across the back of the hand. The structure looks modern and clean, and it’s easier than floral vines when you’re rushing. Finger caps — small filled chevrons at the base — add detail without requiring full coverage. This design also photographs well because chevrons create strong line contrast. It’s a go-to option for weekends when you want something bold but controlled.
Draw a horizontal chevron ladder across the mid-back of your hand, using 6-8 chevron peaks. Keep the ladder open with skin visible between chevrons. Then add a second smaller chevron line closer to the wrist, mirrored. Finish by drawing a small filled chevron cap at the base of each finger and add a thin wrist border line.
Use the same triangle width for every chevron; it’s the difference between “neat” and “wonky.”
Don’t fill every chevron — leave gaps for a crisp look.
19. Butterfly + Dotted Trail Wrist Extension
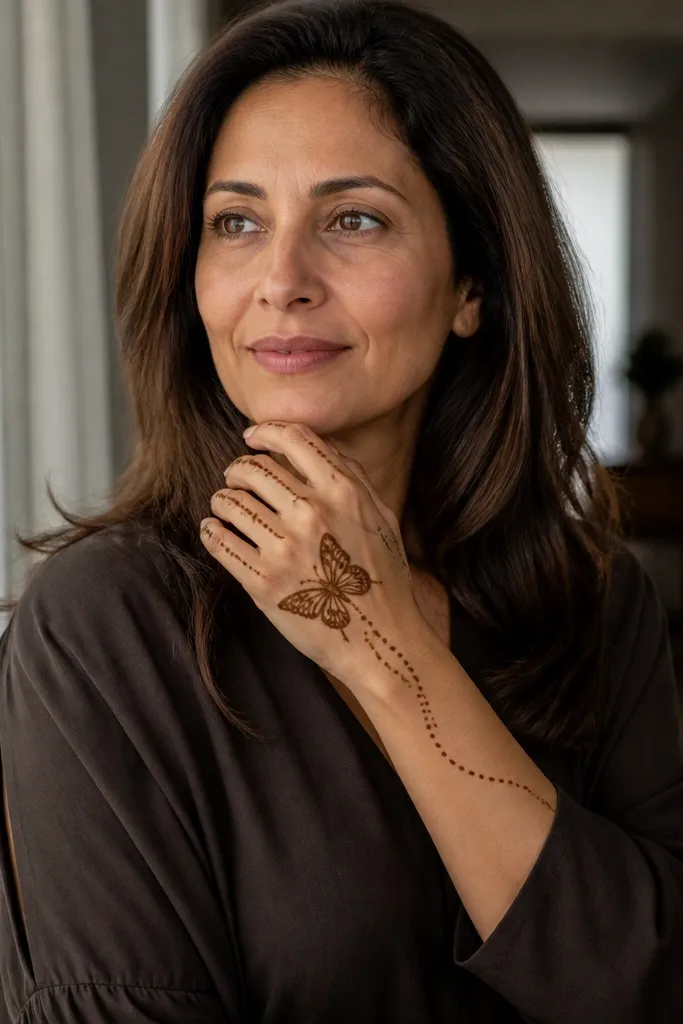
This design is quick because it uses one butterfly outline plus a dotted trail instead of full vine work. The dotted trail creates the illusion of extended pattern without actually drawing long lines. It looks playful and photogenic, especially when your wrist area shows through bracelets or bangles. The finger work stays minimal — just dots at the bases — so you don’t lose time. Choose this for a weekend party look where you want charm without complexity.
Draw a butterfly outline on the upper back of your hand with two wing shapes made from 3 curved segments each. Add a small dot cluster for the body center and two tiny dots for antenna tips. Then draw a dotted trail from the butterfly body toward the wrist using 12-16 evenly spaced dots. Finish with a thin wrist line and 2-3 dots on each finger base.
Keep the dotted trail straight or gently curved; wobbly trails look accidental.
Avoid adding extra flowers on the wrist — the trail is the decorative element.
20. Wrist-to-Knuckle Crescent Frames
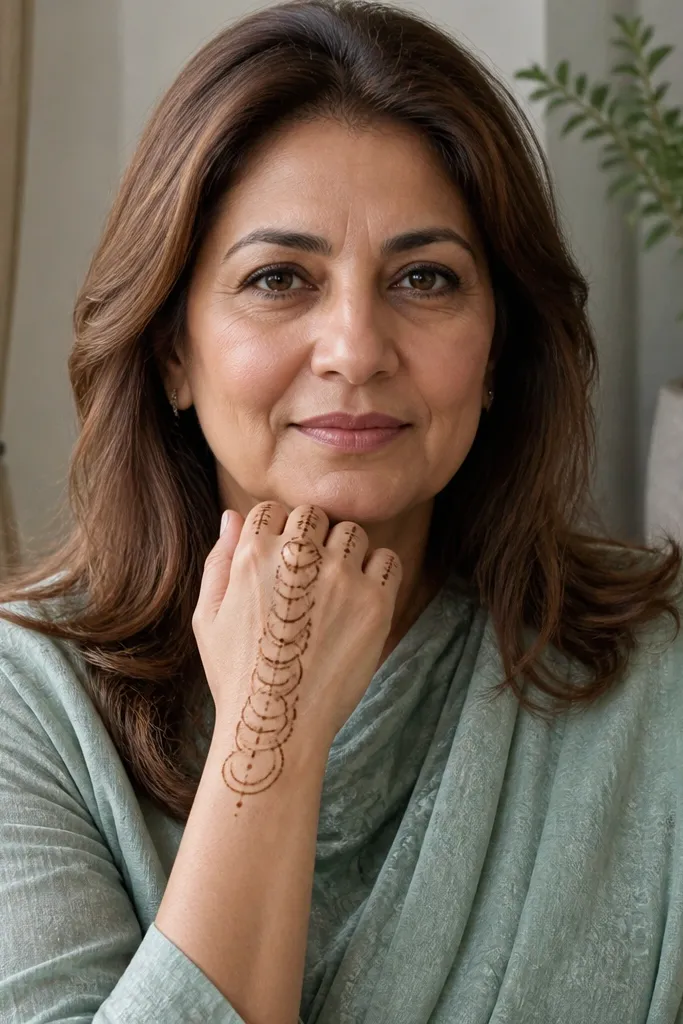
Crescents are fast and flattering because they follow the hand’s natural curves. This design frames the knuckles with crescent outlines instead of detailed fills, so it stays clean even when you move your hand while it dries. The center dot and light finger marks help the pattern read as cohesive. It’s also a great choice if you want a slightly traditional look without spending time on large floral elements. Photos show crescent frames clearly, even with lighter stain.
Pro tipOverlap crescents lightly so you avoid gaps that look like incomplete lines.
Start with a single dot in the center of the back of your hand. Draw 3-4 crescent outlines across the knuckles, each crescent facing upward and slightly overlapping. Add a wrist border made of 6-7 small crescents. On fingers, draw one crescent at the base of each finger and stop.
AvoidDon’t make crescents too large; they’ll crowd the wrist and blur when dried.
21. Mini Florals in Two Rows on Back of Hand
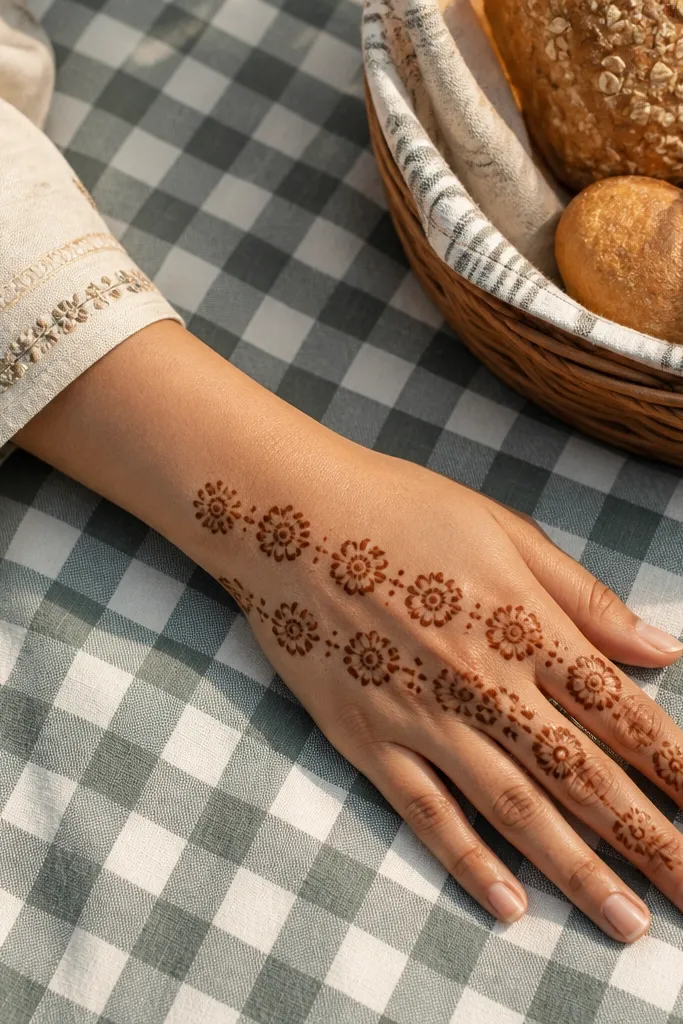
Two-row mini florals look detailed but are quick because you repeat a single flower shape twice. The flowers are placed in rows, so you don’t need heavy symmetry work across the whole hand. This design also creates a nice rhythm between midhand and fingers. It’s a solid weekend pick when you want a feminine, airy pattern that still reads as “mehndi” from a distance. The finger bases stay dotted so you finish on time.
Pro tipMake the flower centers all the same size so the row looks uniform.
Draw a row of 4-5 small flowers across the mid-back of your hand, each flower made from 5 short curved petals around a dot center. Add a second row of 3-4 flowers closer to the wrist, slightly smaller. Connect rows with thin curved lines that touch only the petal tips. Finish by adding dot clusters at the base of each finger and a thin wrist border line.
AvoidAvoid filling petals fully; outlines with dot centers look cleaner and dry darker.
22. Single Big Leaf with Side Vines
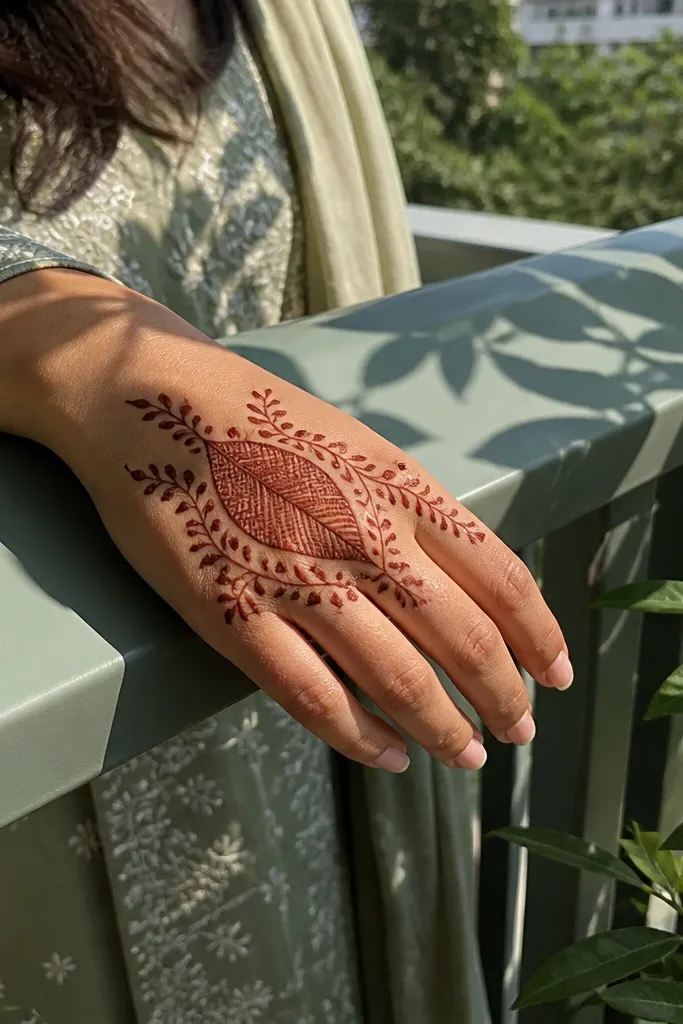
A single big leaf is the fastest way to create a focal point. You get a bold shape that looks intentional without needing multiple motifs. Short side vines add detail while still staying weekend-friendly because they use repeatable curves. The fingers remain light, which keeps the design from turning into a full project. This one is great if you want a clean, modern botanical look that stays photogenic.
Pro tipUse a slightly pointed leaf tip; it gives the design a sharper, more polished look.
Draw one large leaf in the center of the back of your hand, with a clear outline and a center vein line. Add two short side vines on left and right sides, each vine made of 2-3 curves that end in tiny leaf tips. Add a thin wrist border line and 2 dots on each finger base. Keep all vines shorter than the main leaf so the center stays dominant.
AvoidDon’t add too many tiny leaves — they make the leaf look messy instead of bold.
23. Paisley Chain Across the Back of the Hand
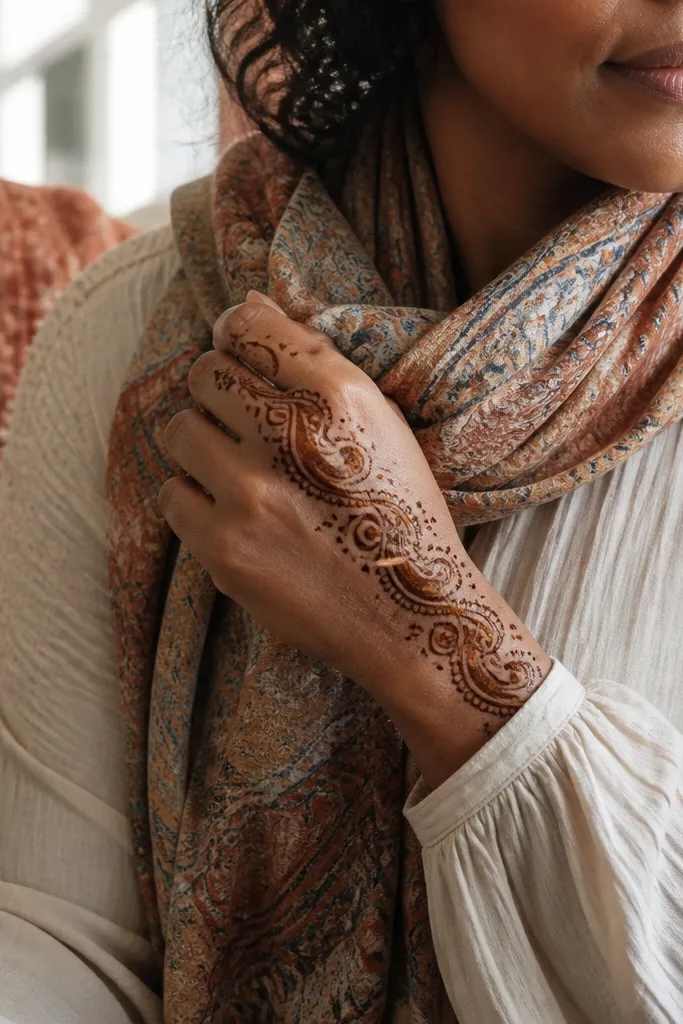
A paisley chain is fast because you repeat the same paisley size in a line. It looks busy in a good way, without requiring you to fill large areas. Place the chain diagonally so it complements the natural hand angle and looks dynamic in photos. Finger dots keep it light and finish quickly. This design works well when you want something traditional-leaning but still weekend-time friendly.
Pro tipOutline first, then add tiny internal dots to each paisley; it prevents smudging from too much fill at once.
Draw 7-9 small paisleys in a diagonal chain across the back of your hand, leaving space between each paisley outline. Keep the paisleys consistent in height so the chain looks uniform. Add a thin wrist border line and connect the chain to the wrist with two short curved lines. On fingers, place 2-3 dots at the base of each finger and stop.
AvoidAvoid changing paisley sizes mid-chain; that’s what makes it look rushed.
24. Circular Dot Halo Around a Center Star
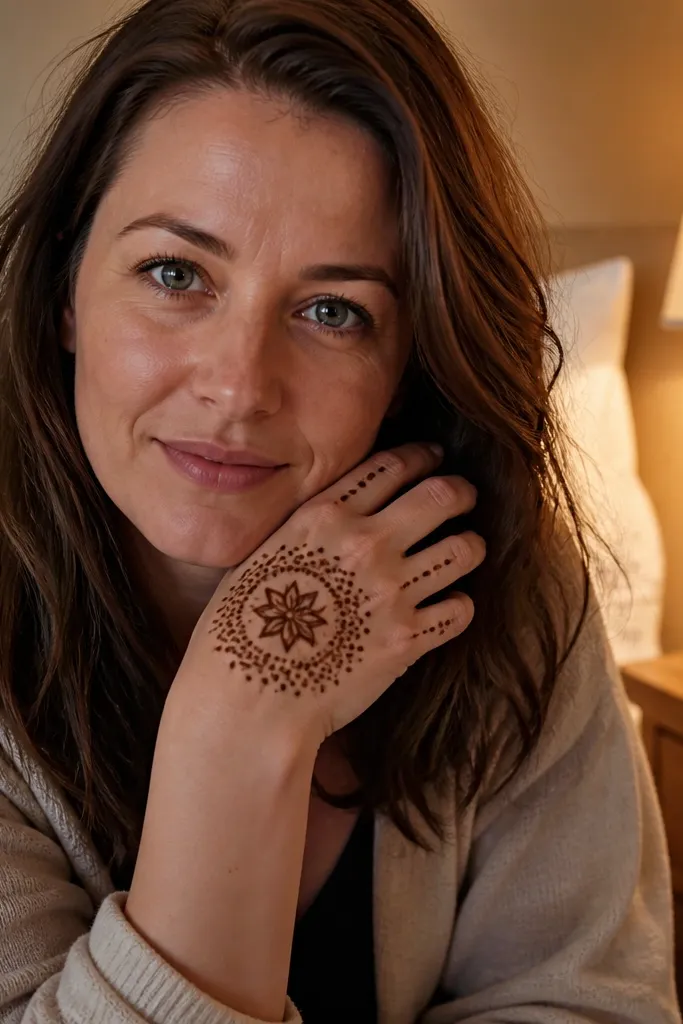
This design looks like a mini mandala without the time cost. The center star gives a clear focal point, and the circular dot halo creates texture fast. It’s also forgiving: if your star points vary slightly, the halo still makes the pattern cohesive. Finger dots finish the look without adding heavy detail. It works well for weekend events because it reads clean and decorative, even with a lighter stain.
Pro tipKeep the halo dot ring consistent distance from the star so the circle looks even.
Draw a small star in the center of the back of your hand using 5 pointed lines. Then surround it with a ring of dots spaced evenly, about 10-16 dots depending on your hand size. Add a thin wrist border line with 6 tiny dots spaced along it. Finish by placing 2 dots at the base of each finger and one dot on the thumb side.
AvoidDon’t crowd the halo too close to the star; it makes it look like one blob.
25. Knuckle Vines with Three Leaf Clusters
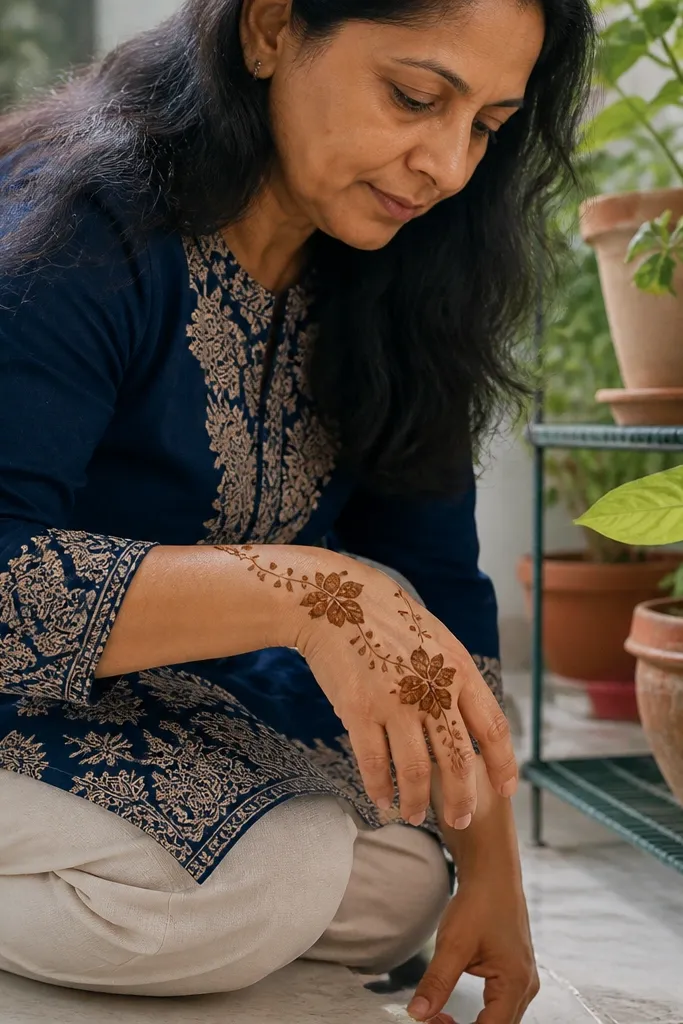
Knuckle vines are quick because you concentrate the work where it shows most. This design uses vine lines across the knuckles and only three leaf clusters, so you avoid filling the entire back. The leaf clusters give a leafy look that’s still light enough for a weekend session. It’s photogenic because the knuckle area becomes the pattern hub. Great for casual festive wear where you want clear mehndi visibility without committing to full coverage.
Draw two thin vine lines across the knuckles, starting near the thumb side and curving toward the pinky side. Add small dots along the vines as you go. Then place three leaf clusters: one near the center knuckles, one slightly toward the thumb side, and one closer to the pinky side. Finish with a thin wrist border and 2 dots at each finger base.
Keep leaf clusters small — 3-4 leaves each — so the vines stay airy.
Avoid adding extra filler vines between clusters; it turns the pattern heavy.
26. Wrist Border Only Plus Finger Full Dots
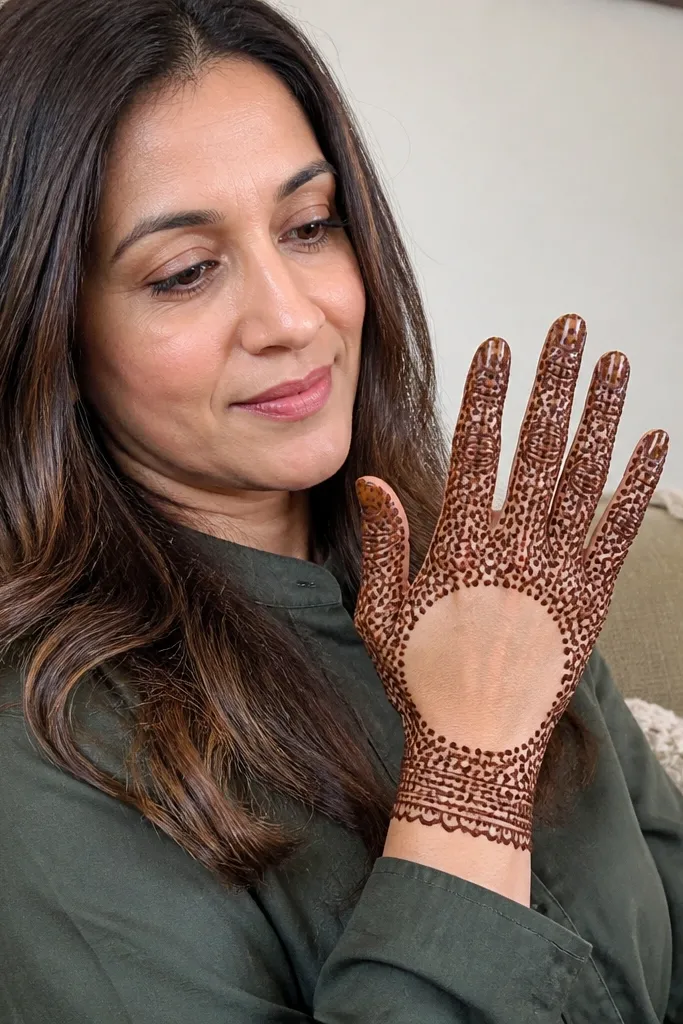
If you’re truly short on time, this is the fastest good-looking option: blank center, crisp wrist border, and dot-heavy fingers. Dots read well in photos and hide minor spacing issues. The finger focus makes the design look intentional because fingers are where mehndi is most visible when you raise your hand. This style is also great if your henna stain is lighter; dots build visible contrast without needing complex fills. It’s minimal, but it still looks decorative.
Draw a thin wrist border line across the wrist width. Then on the fingers, place dense rows of dots: 4-6 rows from base toward mid-finger, stopping before the very tip. Add a small dot cluster at the thumb base. Leave the center back of the hand blank so you don’t run out of time or smear.
Use two dot sizes: tiny dots in the rows and slightly larger dots at the base for depth.
Don’t fill the back of the hand — the blank center is what makes it fast and clean.
27. Two Paisleys Side-by-Side with Center Gap
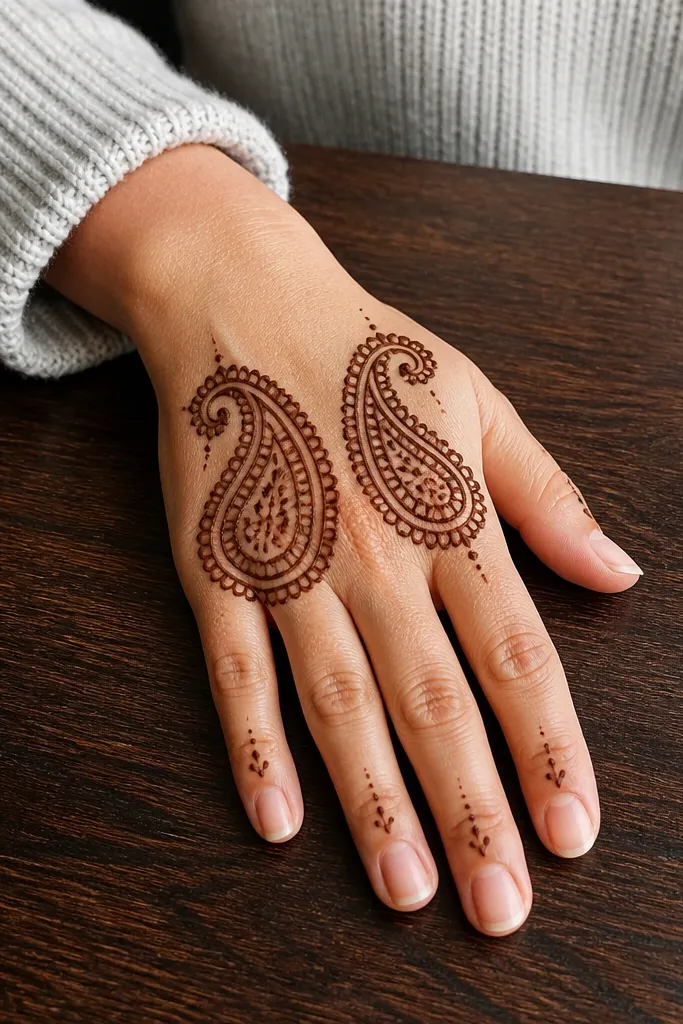
Two paisleys side-by-side looks balanced without requiring mirror-perfect symmetry everywhere. The center gap is intentional and makes the design look airy, not crowded. It’s fast because you’re drawing the same motif twice with consistent spacing. Finger details are minimal, so you finish quickly. This is a good pick for a weekend when you want a traditional feel with modern negative space.
Pro tipMeasure spacing by using the width of your middle finger knuckle — keep the gap consistent.
Draw two paisleys on the back of your hand, one toward the thumb side and one toward the pinky side, leaving a blank center gap between them. Keep paisleys the same size and tilt them slightly toward the center. Add a thin wrist border line and connect each paisley to the wrist with one short curved line. On fingers, add 2-3 dots at the base of each finger and stop.
AvoidDon’t add extra motifs in the center gap; it should stay open.
28. Fan of Arches from Thumb Side to Center
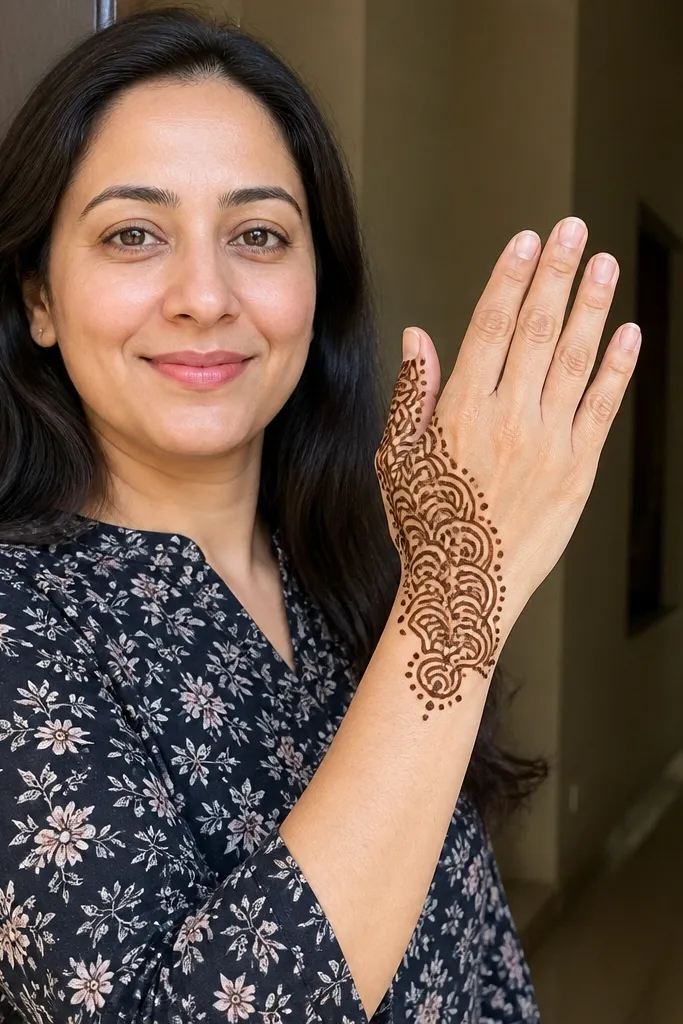
A fan of arches is a time-friendly structure because it uses repeatable curved shapes that you can count. It also looks dynamic since it starts near the thumb side and sweeps across the hand. This design is perfect when you want something visible in photos but don’t have time for full floral work. Finger dots keep the look cohesive without slowing you down. It’s also forgiving if your arches are slightly uneven; the fan still reads as intentional.
Pro tipCount arches out loud so you don’t lose track mid-stroke.
Start with one arch near the thumb side knuckles, then repeat arches across the back of your hand toward the center, aiming for 7-10 arches. Each arch should have a small dot at each end to lock the shape. Add a thin wrist border line and one dot cluster on the thumb base. Finish with 2 dots on each finger base and keep the rest blank.
AvoidAvoid thick fills inside arches; outlines and end dots look cleaner.
29. Corner Bloom with Diagonal Spark Lines
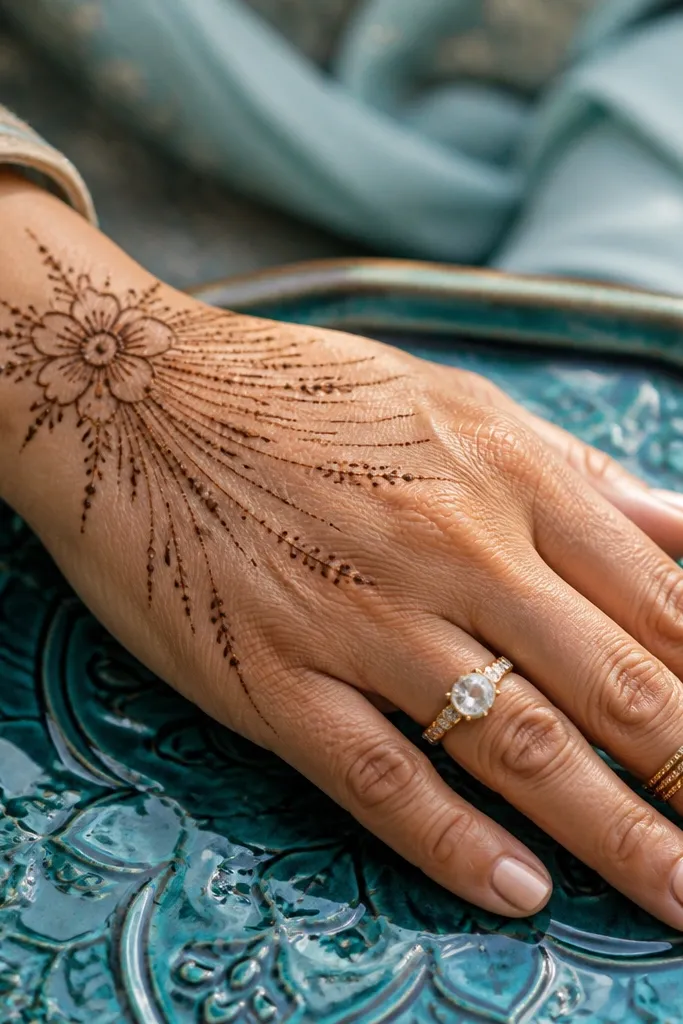
Corner blooms look stylish because they feel placed by design, not because you covered the whole hand. A small flower on the corner of the back hand plus diagonal spark lines creates movement and depth quickly. This is a strong pick for small weekend mehndi sessions because you don’t need to fill the center. The diagonal sparks also guide the eye toward the fingers, so the design looks complete even with minimal finger work. It’s photogenic and easy to execute.
Pro tipMake spark lines all the same length so the radiating effect looks crisp.
Draw a small 5-petal flower near the outer corner of the back of your hand, about 1-2 cm above the wrist crease. Next, draw 6-10 short diagonal spark lines radiating from the flower outward, each ending with a tiny dot. Add a thin wrist line and a single dot at each finger base. Keep the center back of hand blank.
AvoidDon’t add vines between sparks; keep it clean for a fast finish.
30. Wrist Chain Links with Center Dot Spiral
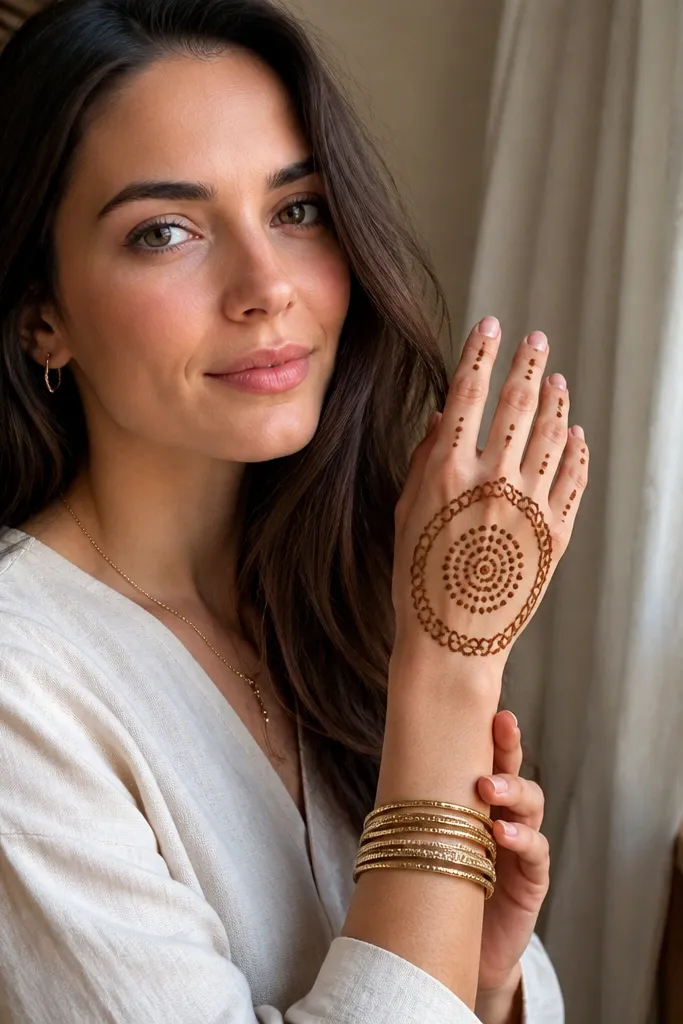
This design is quick because it separates into two simple parts: a wrist chain link border and a center dot spiral. Chain links look detailed but are basically repeated ovals, which makes them fast once you get the rhythm. The dot spiral adds a hypnotic focal point without requiring shading. Finger dots finish it without heavy coverage. This is a great weekend option when you want something graphic and photogenic, not floral-heavy.
Start by drawing a chain link border across the wrist: repeat small interlocking ovals, about 8-10 links. Then draw a dot spiral on the center-back of your hand — start with a dot and circle inward or outward with 12-16 dots. Add two thin curved lines connecting the spiral to the wrist border. Finish with 2 dots at the base of each finger.
Keep oval links uniform by using the same cone angle for every link.
Avoid making the spiral too large; it should stay centered to look intentional.



