

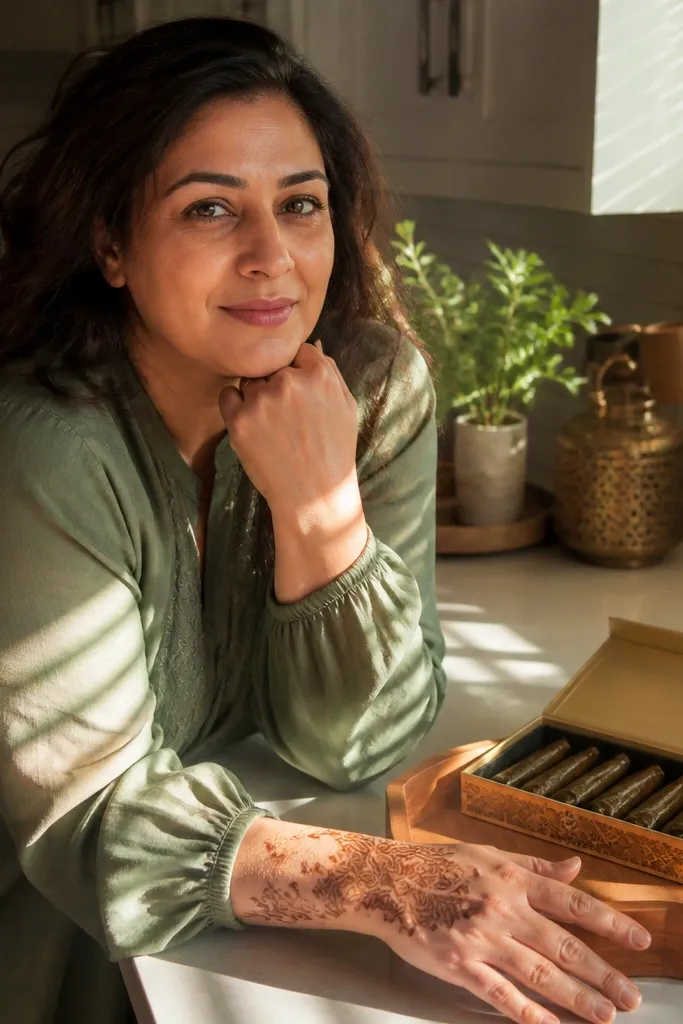
1. Wrist-to-finger chain arcs
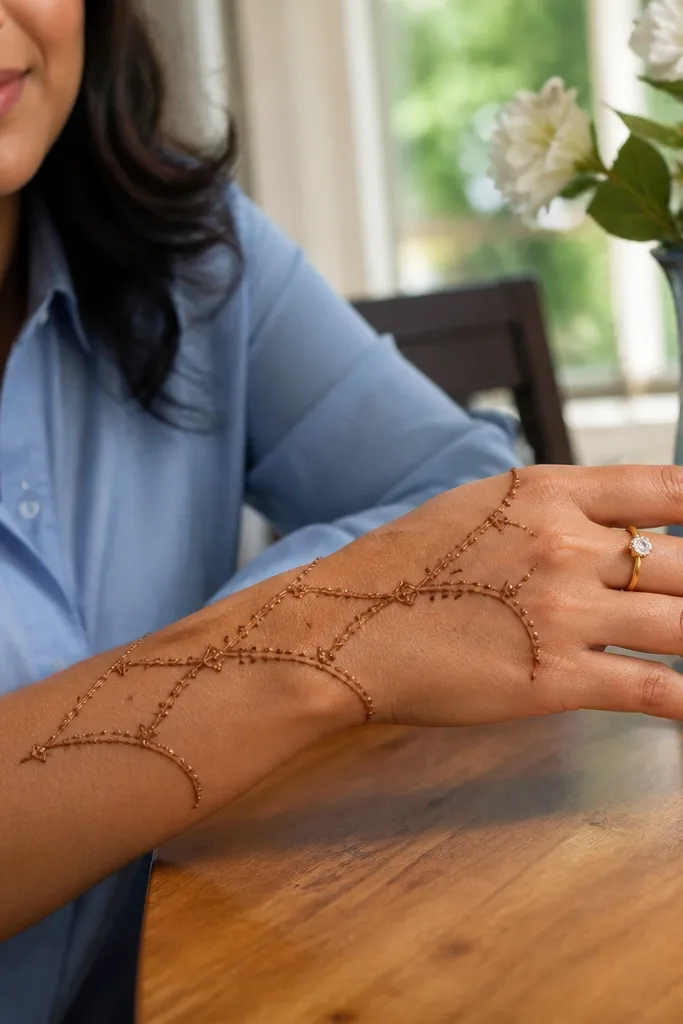
This design gives a clean, jewelry-like look because it uses repeating chain links that follow the natural curve of the back hand. It’s very photogenic since each arc stays separate, so you don’t get smudgy overlap near the fingers. The dots inside the chain sections add sparkle without heavy filling. It works well for weeknight wear because the pattern is mostly lines and repeats, not large shaded blocks. Skill level is beginner-friendly, and it usually takes about 45-75 minutes depending on how steady your hand is.
Step 1: Start by drawing a thin border band at the wrist, then add 3-4 curved “chain” arcs that reach toward the base of each finger. Step 2: Inside each arc, make small teardrop links or oval links by drawing linked curves and closing the ends. Step 3: Fill the gaps with tiny dots and connect the arcs with a light dotted line across the center of the back hand.
Keep your cone tip tiny and practice the chain link on paper first so the spacing stays even.
Don’t thicken the lines mid-design — it makes one area look heavier and ruins the balance.
2. Center ring with branching vines
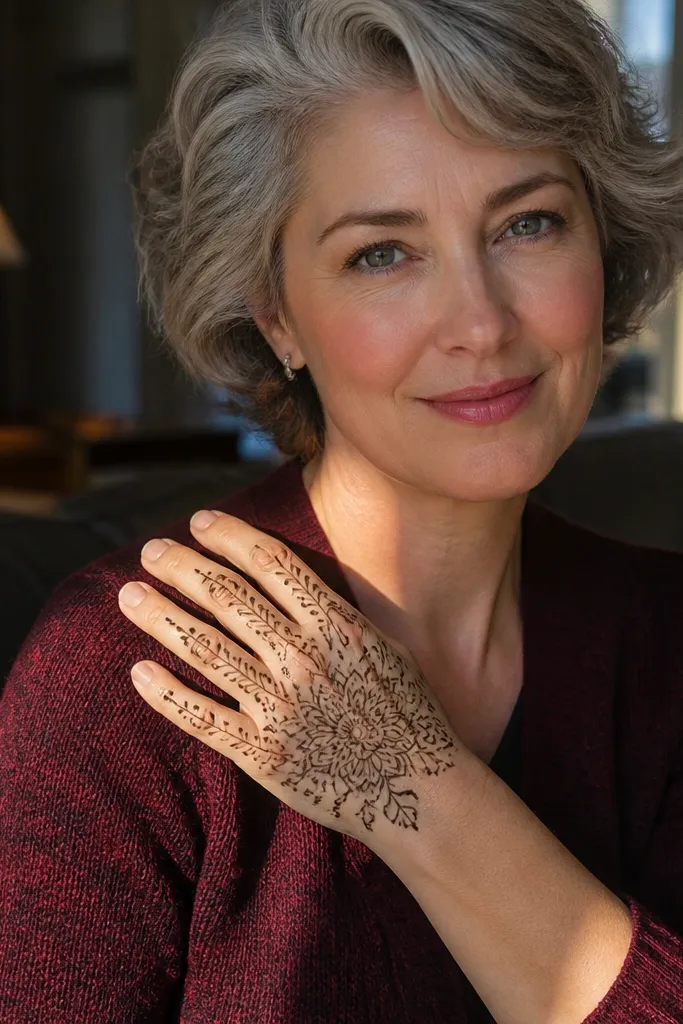
A central ring is a smart choice for the back hand because it anchors the design and keeps everything else light. The vine branches reaching outward create movement without covering the whole hand. This pattern is flattering on both short and long fingers because the branches land near finger bases instead of going deep into the knuckles. It’s also renter-friendly visually because the negative space stays open, so even if you clean up the edges, the design still reads intentional. Expect around 60-90 minutes for a neat finish.
Step 1: Draw a medium ring at the center of the back hand, not too close to the wrist — leave 1-1.5 cm breathing space. Step 2: Add 3-5 branches from the ring edges and let each branch split into two smaller offshoots as it approaches the finger bases. Step 3: Add leaf-like teardrops at the branch ends and place small dots between branches for a lace effect.
Use petroleum jelly lightly around the ring border if you want a cleaner, less-stained edge while staying renter-friendly.
Don’t crowd the ring — if it touches the wrist band, the design looks cramped.
3. Back-hand lattice window
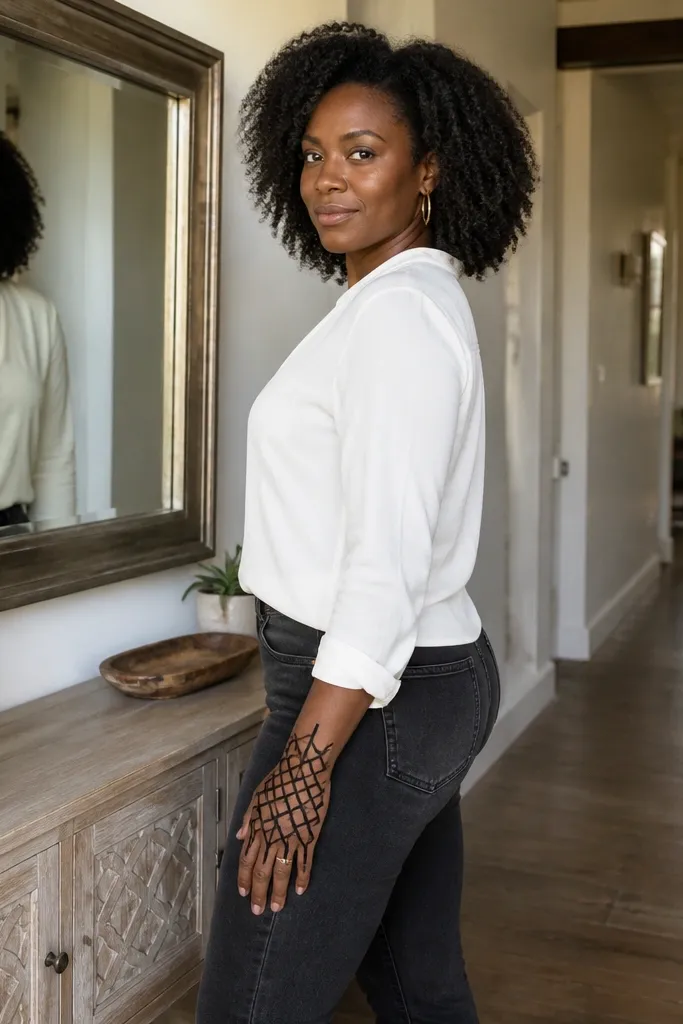
A lattice “window” looks modern and crisp on the back hand because it uses straight lines and spacing. The grid lines create structure, while the open squares prevent that heavy, dark smear look. This one is great if you want something aesthetic but not too busy. It also pairs well with seasonal looks like festive sleeves because the pattern stays tidy and doesn’t fight your outfit. It’s a mid-beginner design that takes about 70-100 minutes.
Step 1: Sketch a soft rectangle or slightly angled square across the center of the back hand, leaving margins from the wrist and finger bases. Step 2: Fill it with vertical lines, then cross with horizontal lines so you form small squares; keep the lines thin. Step 3: Add a thin border around the rectangle and fill two corner squares with tiny dot clusters for depth.
If your lattice lines start wobbling, draw the first set of lines lightly and then commit on the second pass.
Don’t overfill squares — the window effect dies when everything turns into a solid patch.
4. Teardrop border fan

This design is pure back-hand flattering because the teardrop fan follows the hand’s curve and pulls the eye upward. It’s photogenic in daylight since each teardrop has a pointed tip that stays sharp instead of blending. The rest of the hand stays mostly clean, so cleanup is easier and the design looks intentional even if your stain fades slightly. It’s also perfect for renters who want a standout look without full-hand coverage. Plan on 40-65 minutes.
Step 1: Draw a wrist band line, then place 7-10 teardrops that fan out toward the center of the back hand. Step 2: Connect teardrops with thin curved lines so it looks like a continuous fan. Step 3: Add a small dot cluster at the center of the fan and a few micro-dots along the connecting lines.
Keep teardrops the same size by marking a quick guide dot row where tips should land.
Don’t let the fan start too low — it should sit on the wrist curve, not the back-of-wrist crease.
5. Finger-base pearls and dotted spine
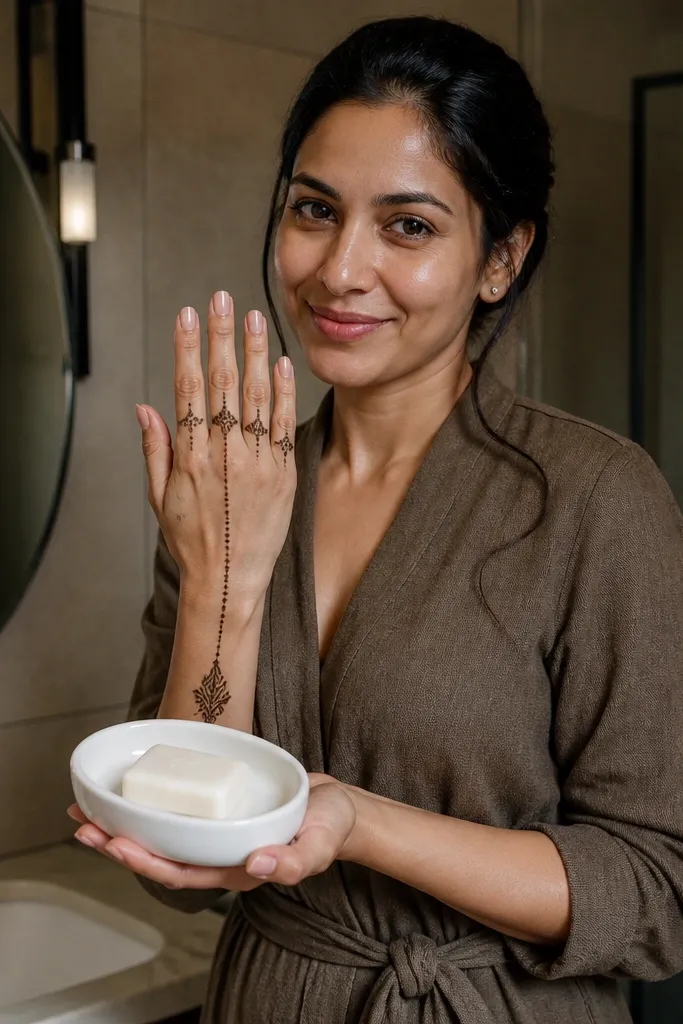
Pearl-like dots at the finger bases look delicate but still show up clearly in photos. The dotted spine down the center gives structure and makes the pattern feel longer without adding bulk. This is ideal if you want renter-friendly coverage that doesn’t stain heavy across the whole back hand. It’s also a great option if you’re using a beginner cone and want forgiving lines. Time is about 30-55 minutes, depending on how many pearls you place.
Step 1: Draw a thin dotted line from the wrist up toward the middle of the back hand. Step 2: At each finger base, add 2-4 small “pearl” dots in a curved row, then connect pearls to the spine with short micro-lines. Step 3: Finish with a small crescent of dots near the wrist band to balance the top.
Use a toothpick to gently tap dots into perfect circles while the paste is still wet.
Don’t make the spine too thick — thick dots blur and look messy.
6. Half-moon knuckle lattice
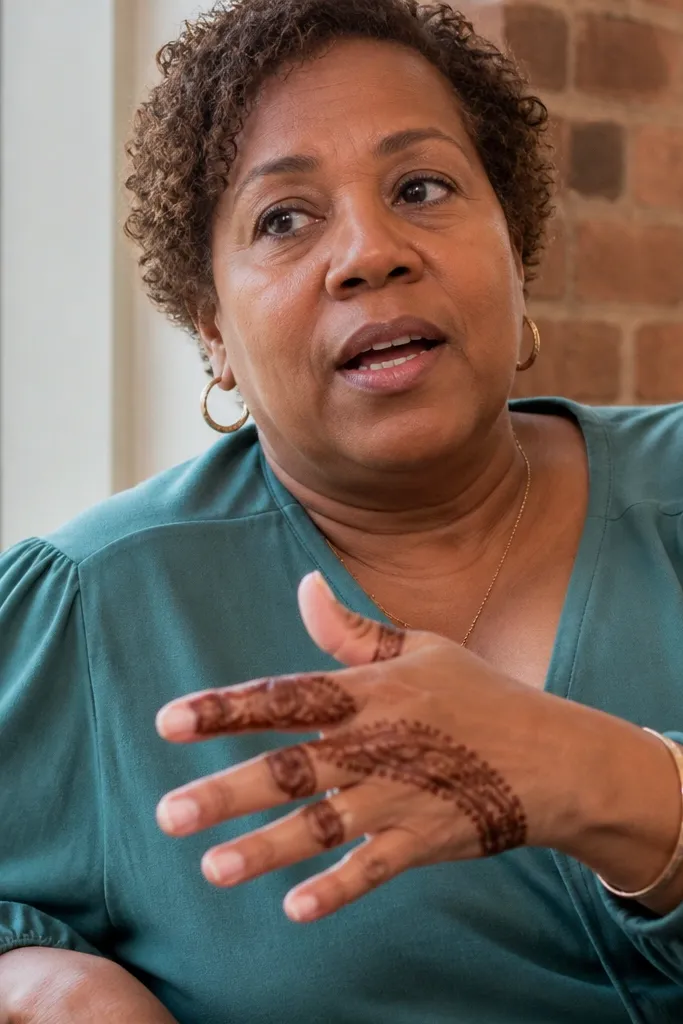
This design targets the back-hand area where people actually notice mehndi — the finger bases and the space between knuckles. Half-moon bands create a clean frame, while the lattice inside keeps it airy. It reads elegant without heavy filling, and it’s renter-friendly because you don’t need to cover the whole hand. The look is also very symmetrical if you keep the half-moons evenly spaced. Expect 60-90 minutes.
Pro tipLet each half-moon dry for 5 minutes before adding the next band so lines don’t smear together.
Step 1: Draw a thin wrist band, then sketch 4 half-moon arcs across the finger bases, each arc facing the center. Step 2: Inside each half-moon, make a mini lattice using 3-4 vertical lines and cross them with 2-3 horizontal lines. Step 3: Add tiny dots at the arc edges and connect the arcs with a light dotted line down the center.
AvoidDon’t extend lattice lines into the fingers too far — it crowds the knuckle area.
7. Single-branch lotus at center
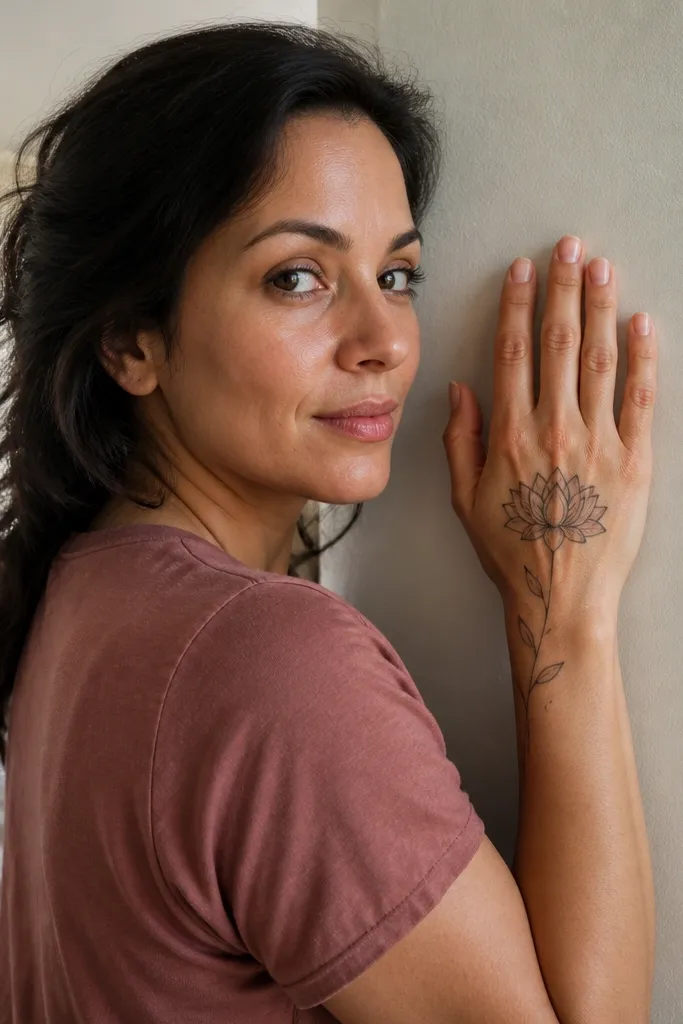
A single lotus bloom is a smart back-hand choice because it gives you a clear focal point without forcing you to fill the whole surface. The petals can be drawn in thin lines, and the negative space inside petals stays crisp. Add one branch toward the wrist and you get a balanced seasonal look that still feels light. This design works for renters because you can keep edges clean and avoid messy full-hand coverage. It takes about 70-110 minutes for a careful version.
Pro tipUse lighter pressure for petal outlines so they dry faster and look sharper in photos.
Step 1: Draw a small circle in the center, then add 6-8 petal outlines around it, leaving small gaps between petals. Step 2: From the bottom of the lotus, draw one branch line that splits into two smaller offshoots heading toward the wrist. Step 3: Add teardrop leaves on the branch and finish with a thin border line near the wrist.
AvoidDon’t shade the lotus heavily — heavy fill makes petal lines disappear.
8. V-shaped diagonal stripe with dots
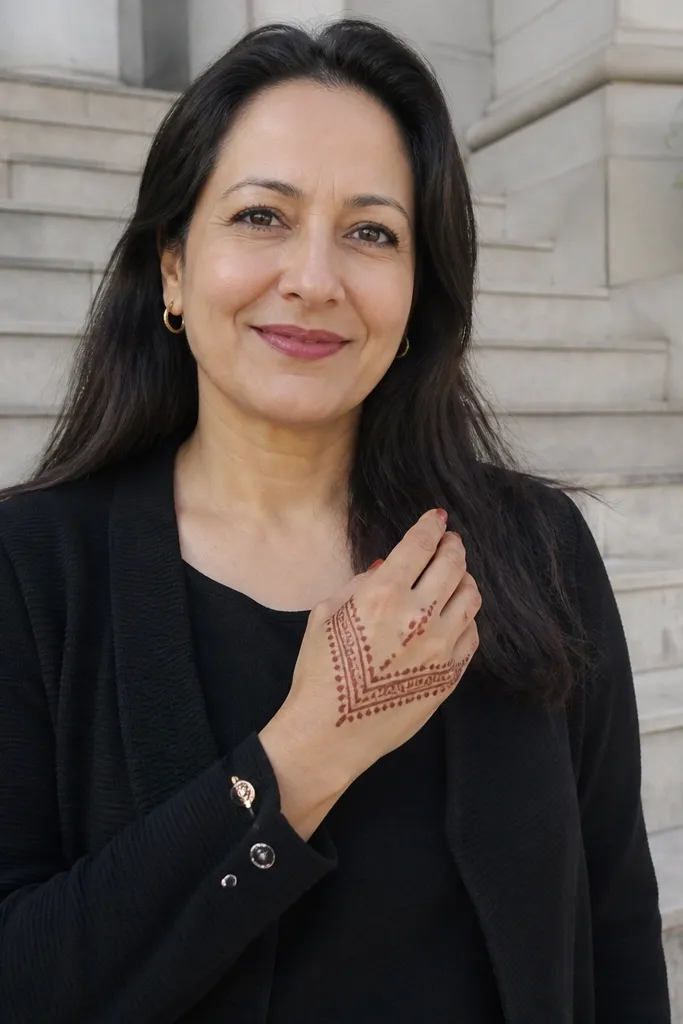
Diagonal stripes look modern and clean on the back hand because they follow the natural angle of your hand when you pose for photos. The V shape gives structure, while dot clusters add a seasonal sparkle effect without filling everything in. This is a great renter-friendly option because the design is contained to a strip — less time, less paste, easier cleanup. It’s also great if you want a design that looks good even if your stain fades a bit. Time: 30-60 minutes.
Pro tipKeep the V point slightly above the center so it doesn’t look like it “falls” toward the fingers.
Step 1: Draw two diagonal lines that meet at a point near the center of the back hand, forming a V. Step 2: Add small dot clusters along both lines and connect dots with short micro-curves. Step 3: Add a thin wrist anchor line and a small crescent of dots on each side of the wrist to balance the V.
AvoidDon’t make the stripe too wide — wide stripes turn into a dark smudge.
9. Wrist rosebud with side scrolls

A wrist rosebud looks sweet and photo-friendly because it sits where bracelets and rings draw attention. Side scrolls add motion and fill space without covering the whole back hand. This design is forgiving for renters because you can stop at the wrist and mid-hand area, keeping edges cleaner. It also works with both minimalist and fuller outfits since it doesn’t compete with everything on your arm. Plan 45-75 minutes.
Step 1: Draw a compact rosebud at the center of the wrist band using 5-7 petal strokes around a tiny dot center. Step 2: Add two scrolls on either side that curve upward toward the back-hand center, with 2-3 teardrop bumps along each scroll. Step 3: Place a few micro-dots in the open space between scrolls and add a thin border line around the wrist band.
If your rosebud looks lopsided, draw the center dot first and build petals evenly around it.
Don’t place the rosebud too close to the back-of-hand thumb side; it can look cramped.
10. Winged leaf arches across the center
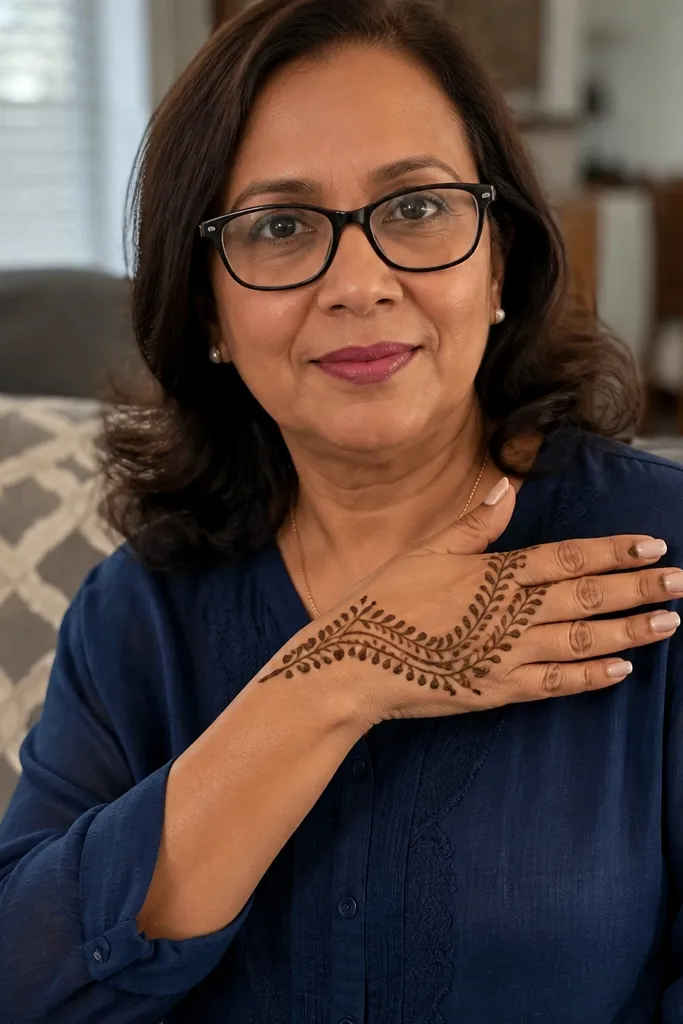
Winged leaf arches are made for the back hand because they create a symmetrical frame across the center without needing heavy shading. Each leaf has a clear outline, so the design reads clean even if the paste dries unevenly. The small dots between wings keep it airy and festive. This is a good pick for back-hand mehndi designs that still look stylish in close-up. Time: 60-95 minutes.
Pro tipKeep leaf outlines consistent thickness; uneven lines make wing symmetry look off.
Step 1: Draw a thin wrist band, then sketch two large arches that meet near the center of the back hand like wings. Step 2: Inside each arch, draw leaf outlines running along the curve, with a tiny dot at each leaf tip. Step 3: Fill the space between the wings with a dotted line and 2-3 tiny teardrop clusters.
AvoidDon’t over-extend the arches into the fingers — stop before knuckles crowd the pattern.
11. Minimal hexagon panel with border lines
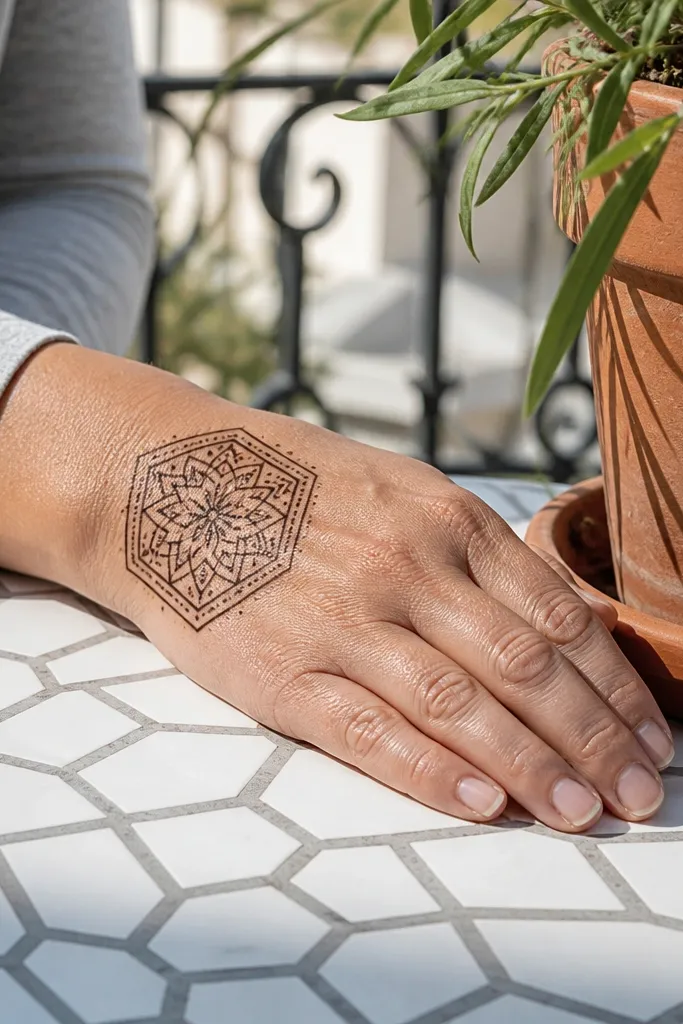
If you want something aesthetic without taking over the whole hand, a hexagon panel is perfect. The geometric shape looks sharp in photos because edges stay defined. Keep the interior mostly open and use a few tiny dot accents so it doesn’t turn into a dark block. This design is also renter-friendly because you can use a smaller amount of paste and avoid messy coverage across the fingers. It’s beginner-friendly and takes about 35-60 minutes.
Pro tipUse a straightedge lightly for the first corner guide if your hand jitters when drawing geometry.
Step 1: Draw a small hexagon centered on the back hand, about the width of two finger joints. Step 2: Add a thin border line around the hexagon and place 6 tiny dot “nodes” at each corner. Step 3: Connect two opposite corners with a dotted line, then add a small crescent of dots near the wrist band.
AvoidDon’t fill the hexagon — keep it open for that crisp look.
12. Double teardrop chain on the wrist edge
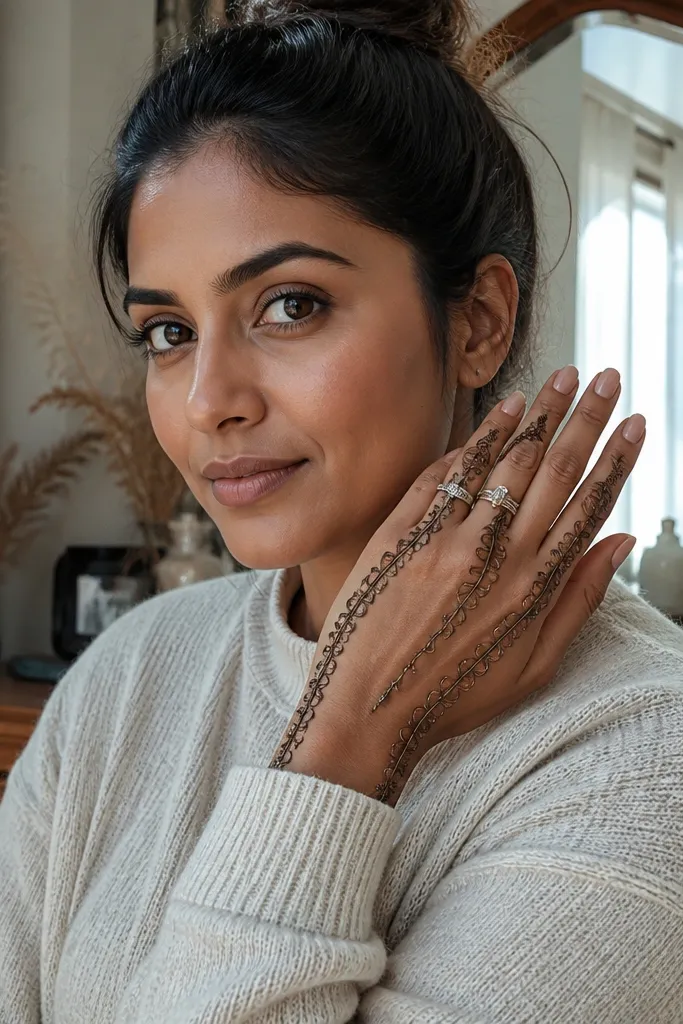
This one looks like fine lace jewelry because it uses two parallel teardrop rows. The back hand stays mostly open, so it’s renter-friendly for cleanup and looks clean even if you wipe stray paste quickly. It also frames your rings nicely since the design sits near the wrist and finger bases. The symmetry is easy to keep if you draw one row first, then mirror it. Time: 35-65 minutes.
Step 1: Draw a thin wrist band line, then place a row of 8-12 teardrops pointing upward. Step 2: Above that row, draw a second row of slightly smaller teardrops that mirror the first row. Step 3: Add a dotted connector line between rows at every other teardrop for texture.
If teardrops keep merging, pause 2-3 minutes after the first row so the paste sets slightly.
Don’t make both rows the same size — the design gets flat.
13. Cross-hatched ribbon stripe
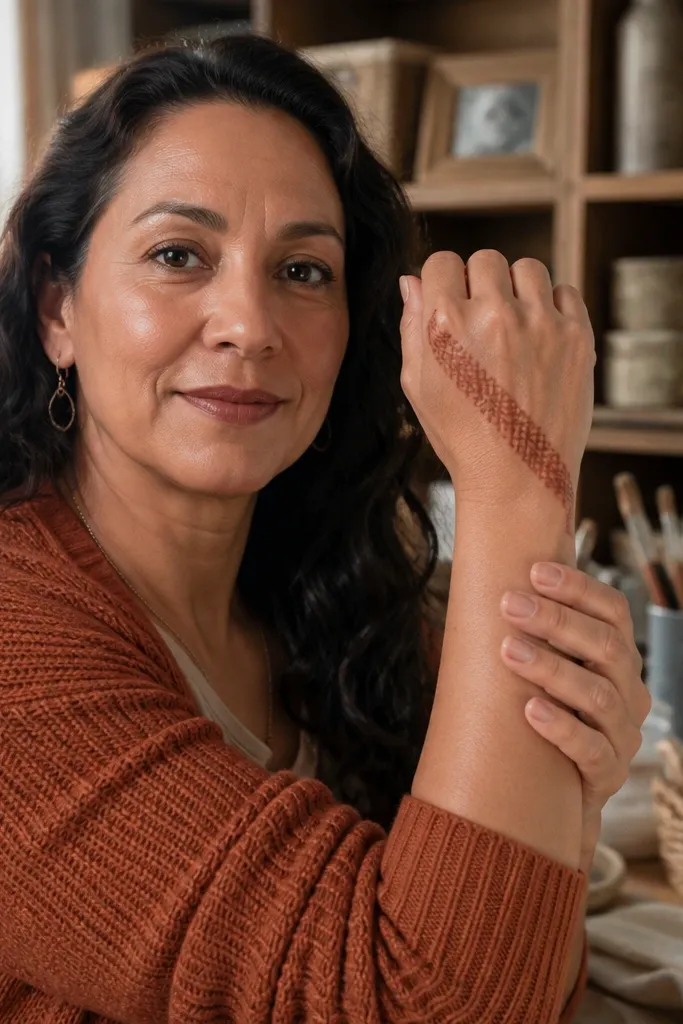
Cross-hatching looks clean on the back hand because it uses thin strokes that dry into a textured pattern instead of a solid stain. A diagonal ribbon stripe gives you a stylish shape, while the cross-hatch creates depth without heavy filling. This is a strong aesthetic pick for seasonal outfits because it looks intentional and graphic. It’s also renter-friendly since the design stays in one strip. Plan 55-90 minutes.
Pro tipUse consistent spacing for hatch lines; uneven spacing makes it look accidental.
Step 1: Draw a diagonal ribbon stripe from near the wrist toward the center, keeping it narrow (about 1 cm). Step 2: Fill the stripe with parallel lines, then cross them with another set of lines to create a grid. Step 3: Add dot clusters at both ends of the ribbon and connect the ends with a thin border line near the wrist.
AvoidAvoid thick outlines around the ribbon — thick edges turn the texture into a blob.
14. Mini peacock tail at the finger base
A mini peacock tail is a fun seasonal look because it gives you a feather shape without needing full-hand coverage. Place it near the base of the ring finger or middle finger and repeat a few dot details for that feather eye effect. The back hand stays light because the motif is small, and the rest can be simple dotted bands. This is renter-friendly because you avoid paste overload and keep cleanup manageable. Time: 50-85 minutes.
Pro tipMake the feather eye dot slightly larger than the other dots so it reads from a distance.
Step 1: Draw a small feather spine — a curved line pointing toward the center of the back hand. Step 2: On both sides of the spine, add 6-10 teardrop “feather barbs,” each ending with a tiny dot. Step 3: Add a thin wrist band and a dotted line connecting the feather base to the wrist for cohesion.
AvoidDon’t place the feather too close to the finger tips; it looks cramped and smears more.
15. Butterfly wing outlines on the back hand

Butterfly wing outlines look airy and sweet on the back hand because you draw only the wing edges, then add small dot accents. That keeps the design photogenic and light, which matters when you’re doing back-hand mehndi that needs to look clean. It also pairs well with seasonal styling because it reads like delicate decoration rather than full coverage. This design is beginner-friendly if you keep the wing lines consistent and stop before the fingers. Time: 40-75 minutes.
Step 1: Draw two symmetrical curved wing outlines across the center of the back hand, leaving a small gap between them. Step 2: Add 2-3 internal arc lines inside each wing and finish with a few dot clusters near the wing tips. Step 3: Place a small dotted wrist band line and connect it to the butterfly center with a thin curved line.
If symmetry is hard, draw a faint guideline with a washable pen on paper under your hand, then erase before applying paste.
Don’t fill the wings solid — outlines keep it crisp.
16. Wrist cuff with micro florals

A wrist cuff is the safest renter-friendly way to get a stylish back-hand look because it’s contained and easy to keep neat. Micro florals on the cuff read pretty in photos, and you don’t need to cover the whole hand to make it look complete. The pattern also works with bangles and watches since it frames your wrist. This design is ideal if you want something that dries evenly and doesn’t smear into the fingers. Time: 35-70 minutes.
Pro tipKeep bud sizes consistent by using the same number of petal strokes every time.
Step 1: Draw a thin double line cuff at the wrist and add small bud shapes spaced along it using 4-5 petal strokes. Step 2: Between buds, add tiny dot clusters and short leaf strokes pointing inward. Step 3: Extend 2-3 thin lines from the cuff up toward the center of the back hand, stopping short of the finger bases.
AvoidDon’t rush spacing — crowded buds make the cuff look messy.
17. Back-hand rose chain with dots
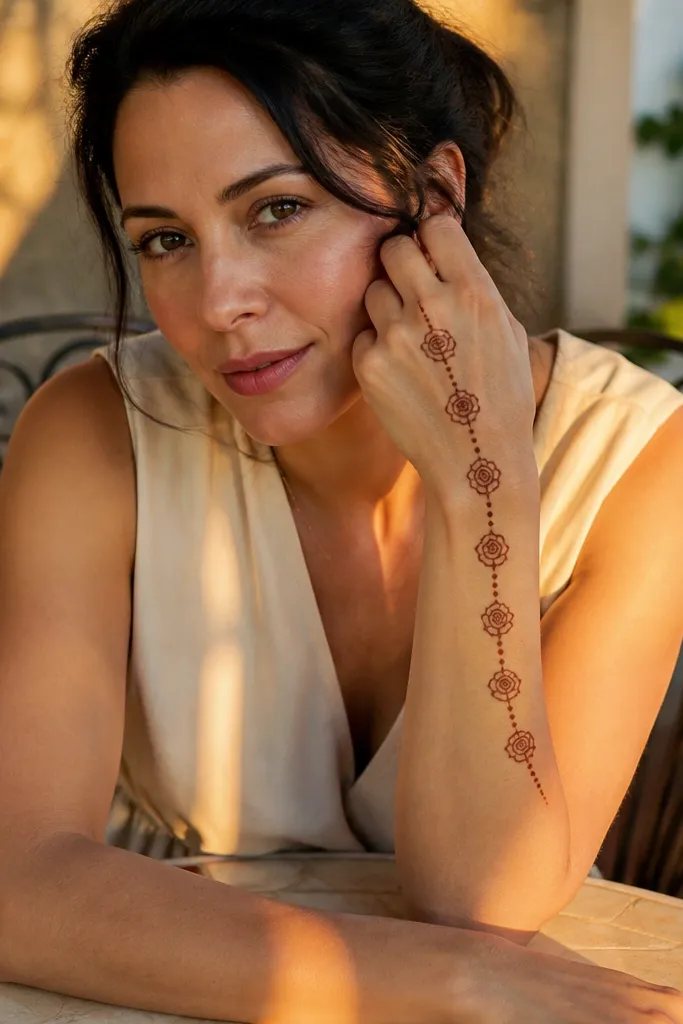
This design looks like a delicate necklace laid across the back hand. Small roses in a chain pattern give you a clear aesthetic rhythm, while dot gaps keep it airy and prevent paste-heavy blobs. It’s also a smart renter-friendly option because the coverage is distributed, not concentrated in one dark area. The roses can be simple 5-petal blooms, so you don’t need advanced shading. Time: 70-110 minutes depending on how many roses you place.
Step 1: Draw a central line from the wrist toward the middle of the back hand, then mark 6-9 positions where roses will sit. Step 2: At each position, draw a small rose using 5-7 petal outlines around a dot center, then connect roses with thin curved lines. Step 3: Add dot clusters between roses and finish with a thin wrist band border.
Let the first three roses dry slightly before continuing so the rest stay aligned.
Don’t overfill rose centers — the petals should stay visible.
18. Chevron border with teardrop spikes
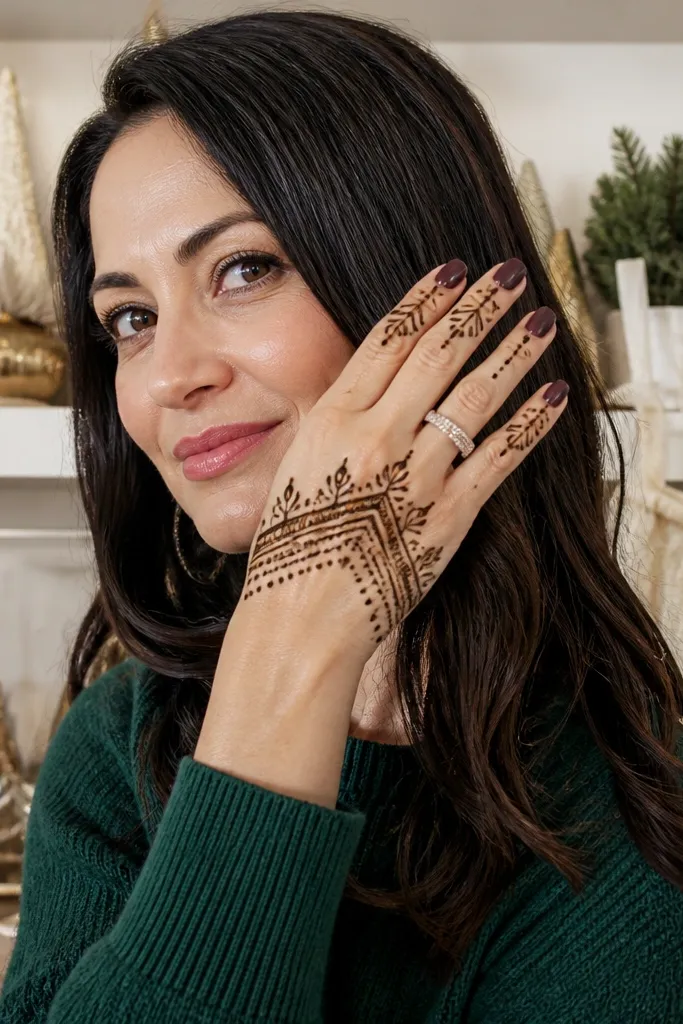
Chevron borders look crisp on the back hand because the angles hold shape while drying. Pairing chevrons with teardrop spikes gives you a festive, structured look without heavy shading. This is a strong seasonal choice because chevrons read bold even in small space. It also stays renter-friendly since it’s mostly around the wrist and lower center, with open space above. Time: 45-80 minutes.
Step 1: Draw a chevron zigzag band across the wrist area using 1 cm segments. Step 2: Along the top edge of the chevrons, add teardrop spikes pointing upward, spaced evenly. Step 3: Add a dotted line down the center of the back hand and stop it where the spikes end.
Keep chevron peaks sharp by lifting pressure at the point tips.
Don’t make the chevrons too wide — wide chevrons turn into a thick dark band.
19. Sunburst rays from the center
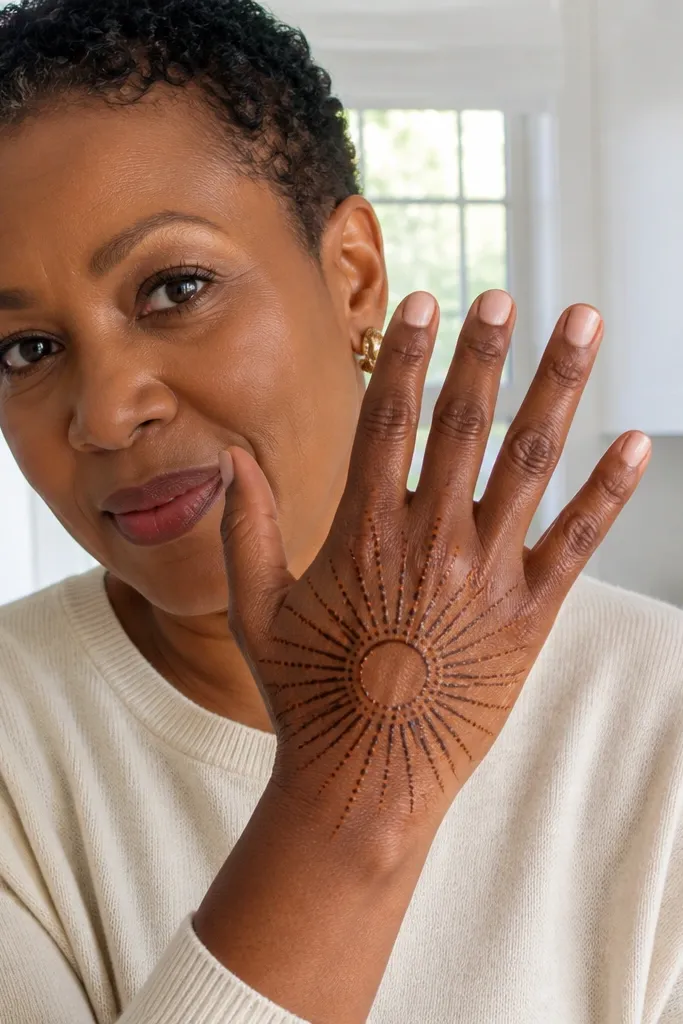
A sunburst pattern is photo-friendly because it creates a starburst effect that reads instantly. On the back hand, keep the rays thin and stop them before the finger bases so the pattern doesn’t smear where you move. Dot accents between rays make it feel festive without turning into a full shaded block. This design is renter-friendly because it uses less paste over a larger area, and cleanup is manageable. Time: 55-95 minutes.
Pro tipCount rays as you draw — 16 looks balanced and easy to repeat.
Step 1: Draw a small circle at the center of the back hand. Step 2: From the circle, draw 14-20 thin rays outward, each ray about 1-2 cm long. Step 3: Place tiny dots between rays and add a thin wrist border line for grounding.
AvoidDon’t draw rays too close together — they merge when dried.
20. Arabic-style spirals with negative space
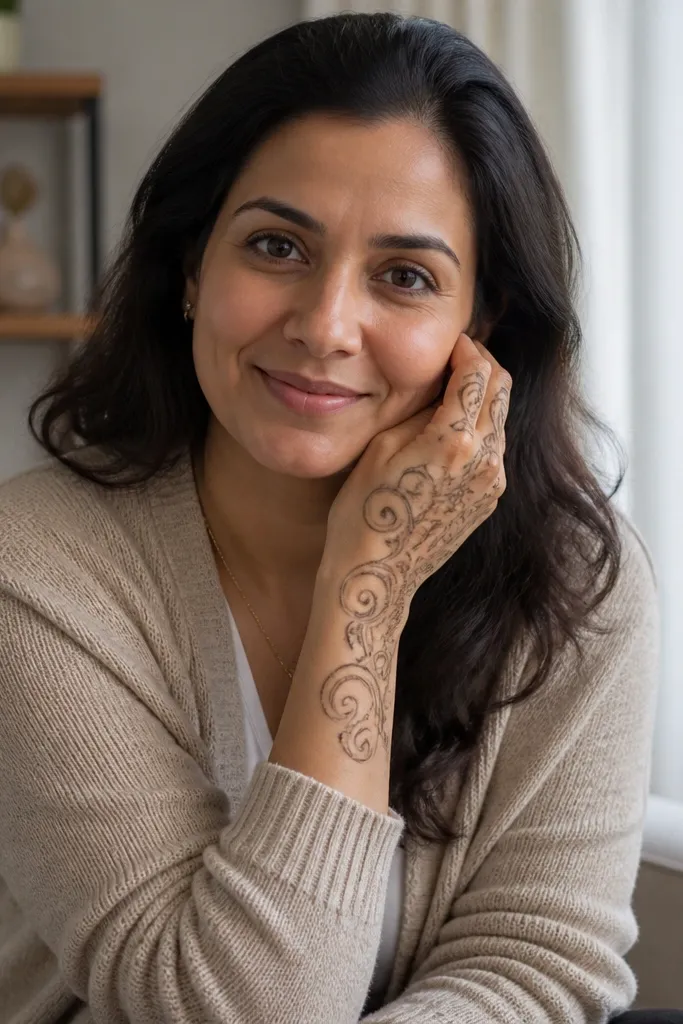
Spirals with open space look elegant and clean on the back hand because you get that flowing motion without a heavy fill. This design uses curved S-spirals that loop and stop, keeping the center breathable. It’s renter-friendly since you can keep paste mostly along lines and spirals instead of covering the entire hand. If you want a seasonal look that still feels light, this is one of the best back-hand patterns. Time: 60-100 minutes.
Pro tipUse slow, consistent pressure so spiral line thickness stays even.
Step 1: Draw a light curved guideline from wrist toward the center and mark 3-4 spiral start points. Step 2: At each start point, draw an S-spiral loop, then connect it to the next spiral with a thin curved line. Step 3: Add a few small dot clusters at spiral ends and finish with a simple wrist band line.
AvoidDon’t overfill the spiral interior — keep it as line work.
21. Wrist-to-center vine with berries
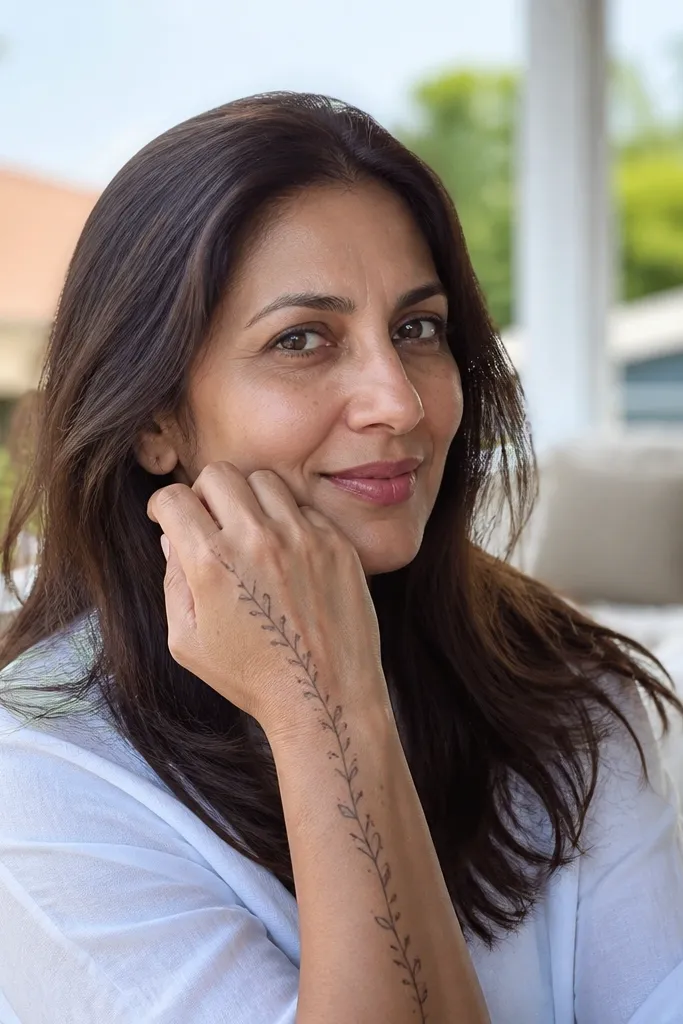
This vine-and-berries design gives you a vertical rhythm that looks great on the back hand and makes fingers look longer. The berries are simple dot shapes, so the pattern stays clean and doesn’t require shading. It’s renter-friendly because it’s mostly a single line structure with small side leaves. The look is also seasonal without feeling too heavy, since the vine occupies the center rather than the whole hand. Time: 40-70 minutes.
Pro tipBerry dots look best when they’re slightly raised with thicker paste, but only at intervals.
Step 1: Draw a thin wrist band line, then draw a vertical vine line from the wrist to the center of the back hand. Step 2: Add small side leaf teardrops on both sides and place berry dots at intervals along the vine. Step 3: Finish with a tiny curved flourish near the top of the vine and add a few micro-dots near the wrist edge.
AvoidDon’t place berries too close together — it becomes a dark dotted block.
22. Two-tier fan with dots at finger bases
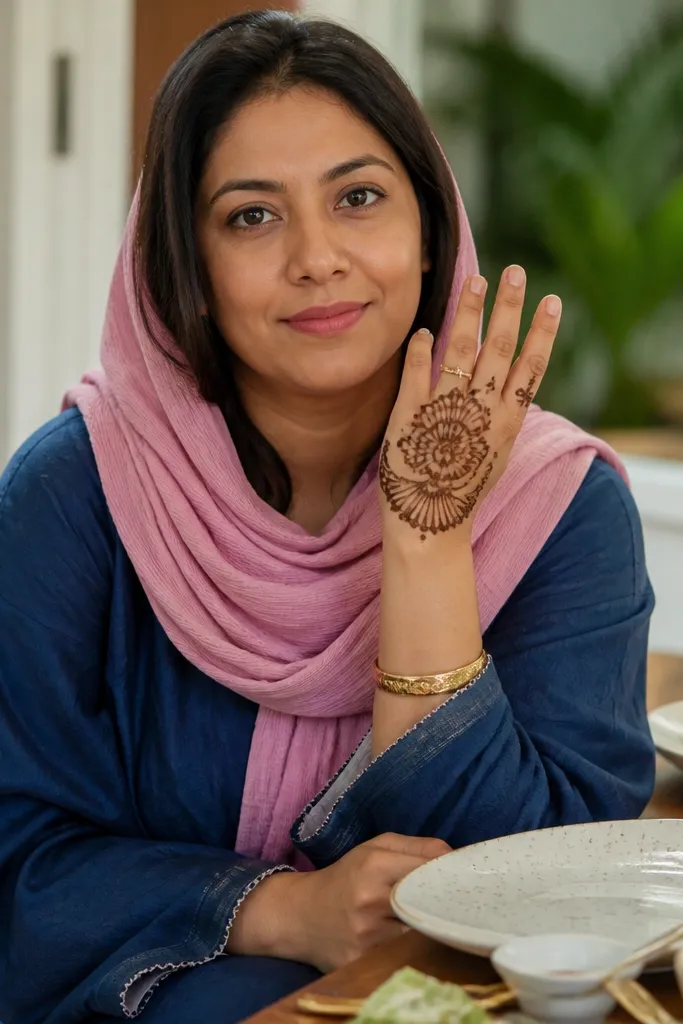
Two-tier fans give you a layered look without covering the whole back hand. The top fan sits toward the center, while the lower fan anchors at the wrist. Dots near the finger bases make it feel festive and balanced even when your top fan is lighter. This design is perfect for renters because it’s contained and easy to clean around the edges. Time: 55-85 minutes.
Pro tipMake the lower fan slightly darker with a touch more paste on teardrop outlines for better photo contrast.
Step 1: Draw a wrist band line, then create a lower fan using 6-9 teardrop shapes pointing upward. Step 2: Add a second, smaller fan above it with fewer teardrops and connect both fans with a thin dotted line. Step 3: Place 2-3 dot clusters near each finger base where the fans approach the knuckle area.
AvoidDon’t let the fans overlap too much — overlap makes it look like one blob.
23. Diagonal floral sprig with tiny buds

A diagonal floral sprig looks intentional and stylish because it imitates a small bouquet laid across the hand. Tiny buds keep it light, and the diagonal placement gives a flattering pose-friendly shape. This is renter-friendly since you’re not filling the whole back hand — you’re placing a clear decorative path. It also works for short sessions because you can stop once the sprig reaches the finger bases. Time: 35-65 minutes.
Step 1: Draw a diagonal center line from near the wrist toward the middle of the back hand. Step 2: Along the line, add small bud shapes (5 tiny petal strokes around a dot) and connect them with short leaf teardrops. Step 3: Add 2-3 micro-dots near the ends and a thin wrist border line to complete the look.
Keep buds spaced so each one has its own outline — crowded buds look like stains.
Don’t extend the sprig into fingers too far; stop at finger bases.
24. Paisley droplet cluster on the back center

Paisley droplet clusters look premium on the back hand because they create a lot of visual detail in a small area. Use thin connecting lines and open interiors so the droplets read as separate shapes. This design is photogenic because the cluster sits in the center where light hits, and it doesn’t require full-hand coverage. It’s renter-friendly because the rest of the hand can stay mostly clean, which reduces smudges and cleanup. Time: 70-105 minutes.
Pro tipKeep droplet interiors mostly empty; outline-only paisley looks sharper after drying.
Step 1: Draw a central base droplet shape, then add 4-6 smaller paisley droplets around it, all facing inward. Step 2: Connect droplets with thin curved lines and add tiny dot accents in the gaps. Step 3: Finish with a light dotted spine line from the wrist to the edge of the cluster and a thin wrist band.
AvoidAvoid heavy shading inside paisleys — it makes them merge.
25. Wrist cuff + micro circles across the back
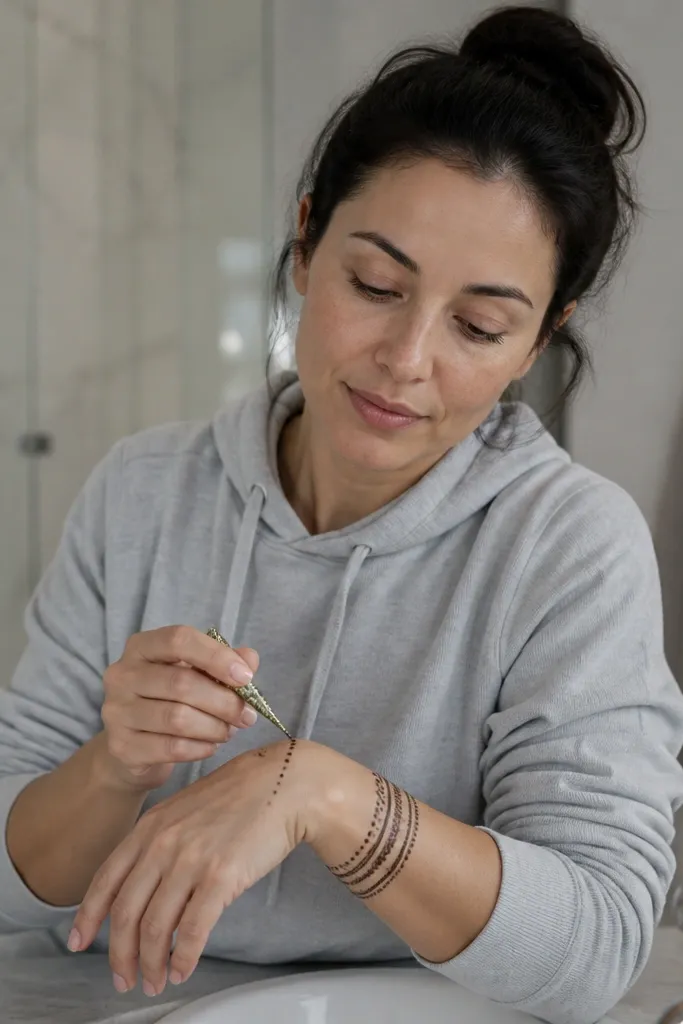
This is one of the cleanest renter-friendly back-hand patterns because it uses micro circles like a trail. The wrist cuff gives structure, and the circles guide the eye upward without clutter. It’s also very forgiving if your cone flow is slightly thick, since circles can hide minor unevenness. The look stays light and modern, perfect for seasonal outfits and quick events. Time: 30-60 minutes.
Step 1: Draw a simple wrist cuff band using two thin lines. Step 2: From the top edge of the cuff, place a line of micro circles that travel toward the center of the back hand, spacing them evenly. Step 3: Add a few larger circles near the center and connect them with a dotted arc.
Use a consistent dot size by keeping the cone tip at the same distance from the skin.
Don’t make circles too large — big circles fill space and look heavy.



