
1. Thumb-Pinky Bridge with Central Teardrop
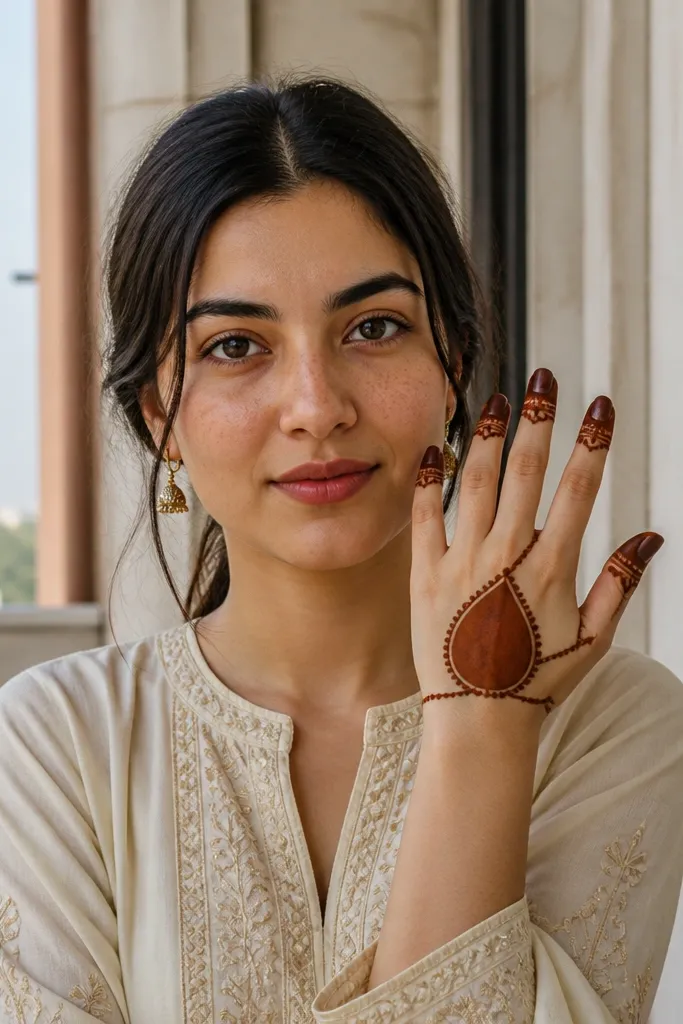
This design is made for small-space back hand mehndi designs because it uses a single big teardrop as the anchor, then connects it to both sides with thin “bridges.” The negative space stays clean, so your hand doesn’t look packed or heavy. The finger caps are simple half-circles that sit at the base of each finger, which makes the whole pattern look finished even if you stop early. Use it when you want a sleek, photo-friendly look without micro-detail. It’s also a good choice for beginners who can draw one teardrop and repeat a small pattern on each side. The final look reads elegant because the center motif catches attention while the sides guide the eye.
Pro tipBefore you start, dry the paste tip by squeezing out a tiny dot on tissue — it helps avoid sudden thick blobs at the start of your teardrop.
Step 1: Draw a vertical teardrop in the center of the back of the hand. Keep it medium-sized — it should take up about one-third of the hand’s back area from wrist to knuckles. Add two small curved lines on either side of the teardrop that angle toward the thumb side and pinky side. Step 2: Create a thin bridge from the teardrop’s lower edge to the base area near the thumb and another to the pinky side. Finish with four finger caps: for each finger, draw a small half-oval at the base, leaving the finger length mostly clear. Step 3: Add 3 tiny dots inside the teardrop and 1 dot at each bridge end to make it look intentional.
AvoidDon’t overfill the background lines; if the center teardrop loses its clean outline, the whole design stops looking airy.
2. Half Mandala Band Across the Back Hand
A half mandala band looks dense on purpose, but this one works in a small-space layout because it’s only half — you’re not trying to wrap the whole back of the hand. The band sits horizontally across the mid-back of your hand, so it reads like jewelry. Inside the band, keep motifs spaced: small circles, short leaf curves, and a few dots. This design is perfect for festive days when you want impact without spending hours. It also hides uneven mehndi darkness well because the band’s structure makes the pattern look consistent even if your skin tone takes the color differently across the hand.
Step 1: Mark a horizontal guideline across the back of the hand from just behind the thumb side to just behind the pinky side. Draw a thick outline band along this line — about 1 cm tall. Step 2: Fill the band with 5 repeating elements: a small flower (center dot with 4 petals), 2 leaf curves, and 2 tiny circles placed between them. Leave small gaps between elements so the paste doesn’t merge into one dark smear. Step 3: Add finger caps on the index through ring fingers only, keeping them small half-ovals at the base. Finish by dotting the wrist-side ends of the band with two tiny dots each.
Use a steady hand and let the band dry before you add any finger caps — it prevents dragging the band lines.
Avoid drawing the band too wide; if it covers the whole back of the hand, it stops looking like a clean bracelet.
3. Single Paisley Spine with Side Sparks
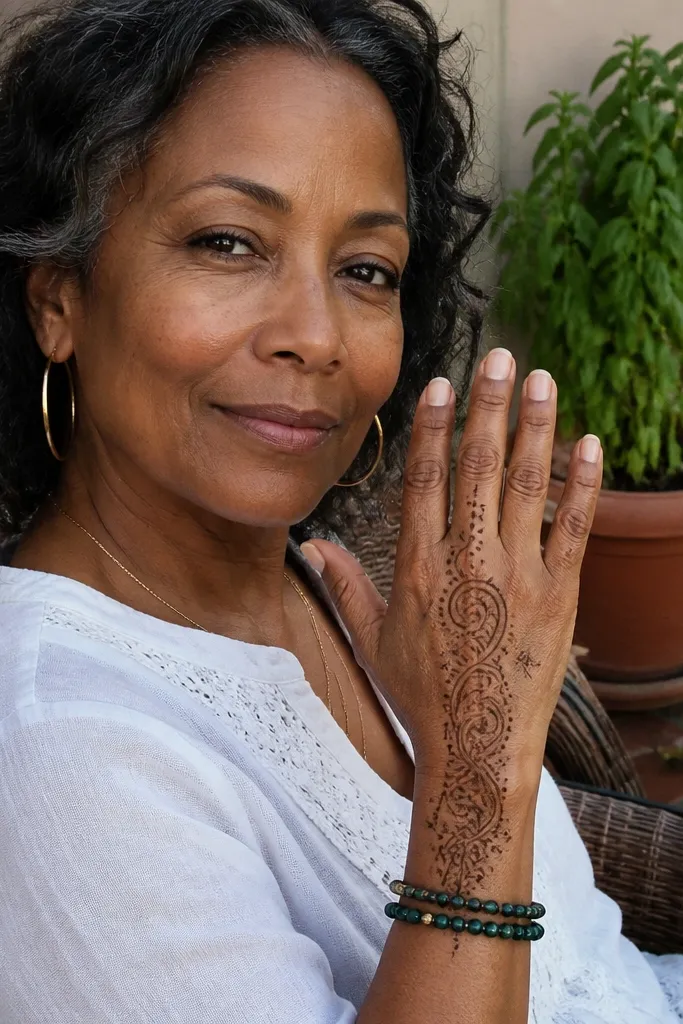
If you want a simple, modern back hand look, this paisley spine design is the one. It’s built around a single paisley running vertically down the center, with tiny “spark” marks on both sides. The sparks are small and controlled, so you get movement without clutter. This works especially well for small-space back hand mehndi designs because the pattern stays centered. Your fingers still look clean, and the paisley gives you a focal point that looks good even if your paste dries lighter in some areas.
Step 1: Draw a vertical paisley in the center. Keep the top narrower and let the base flare slightly toward the knuckles. Outline it cleanly, then add 3 inner curves inside the paisley. Step 2: On both sides of the paisley, add 3 tiny spark marks — short angled lines with a dot at the end. Space them so they don’t touch the paisley outline. Step 3: Add a thin curved border line at the wrist side of the design and place one dot at each end. Finish with small half-circles at the base of the thumb-side finger and the pinky-side finger.
Use the paisley’s inner curves to control symmetry: count your inner lines and match left and right so it looks intentional.
Don’t add extra paisleys; one strong spine reads better than two competing motifs on small hands.
4. Three-Ring Cluster with Teardrop Corners
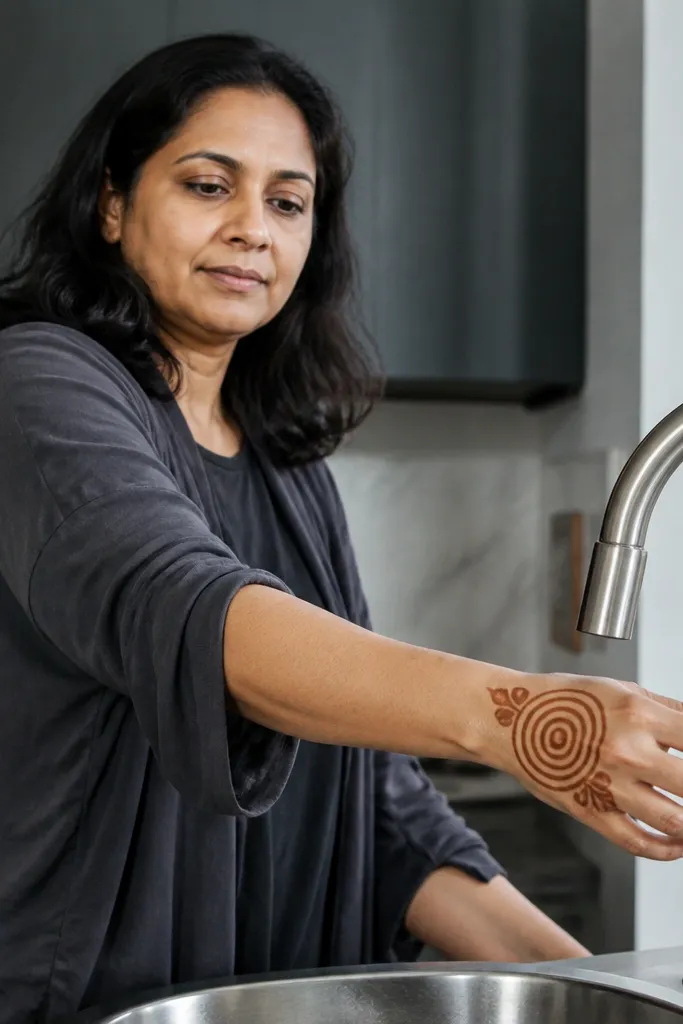
This design looks like a compact piece of jewelry because it uses three concentric rings in the center and teardrop corners to frame the shape. It’s a great pick when you want something geometric but still soft. The rings create structure, and the teardrops add a hand-drawn feel without crowding the whole back. It’s also forgiving for beginners because you can build it step-by-step: rings first, then corners, then finger caps. On small spaces, the rings prevent the common problem of patterns turning into scattered doodles across the hand.
Pro tipLet each ring dry for a minute before you draw inner rings — it reduces smudging and keeps ring edges sharp.
Step 1: Draw three concentric rings in the center of the back of the hand. Make the outer ring about the width of two fingers laid side by side (rough estimate), and keep the ring lines about 2-3 mm thick. Step 2: Add teardrops at the four corners of the ring cluster — one near each side of the hand. Each teardrop should point inward toward the center rings. Step 3: Place finger caps on all fingers using tiny rounded arcs at the base. Optionally, add a single dot inside each ring gap for extra definition.
AvoidAvoid drawing rings too close together; if the gaps vanish, the center turns into a dark blob.
5. Diagonal Leaf Chevron with Wrist Ladder

This is a clean, diagonal design that makes the back hand look longer. The chevron leaf pattern runs from the thumb side toward the pinky side, and a thin “ladder” sits near the wrist. Because the design is diagonal, it uses the hand’s space more efficiently than straight horizontal patterns. It’s a good choice for people who want a modern look without large circles. The leaf motifs also hide minor imperfections better than tiny dots because the leaves have thicker edges and more forgiving shapes.
Pro tipKeep leaf size consistent by using the same cone pressure and the same leaf width each time.
Step 1: Draw a diagonal guideline from just below the knuckle area on the thumb side down toward the wrist on the pinky side. Start a chevron line along this guideline. Step 2: Fill each chevron segment with a small leaf: draw a curved leaf outline and add one center line. Keep 6-8 leaves total so it fits the small back hand area. Step 3: Add a wrist ladder — 5 short vertical ticks connected by a thin horizontal line. Finish with finger caps on the index and ring fingers only.
AvoidDon’t extend the chevron all the way to the fingers; leave a small clear gap so it stays airy.
6. Finger-Cap Medallion with Center Dot Bloom
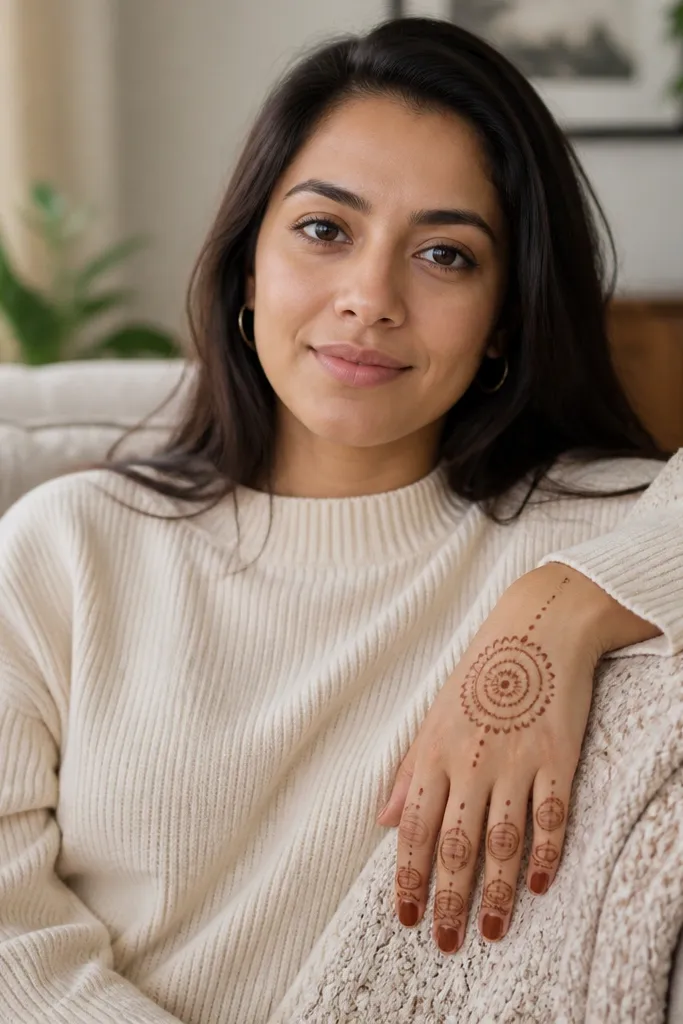
This layout looks like a mini medallion sitting on the back of the hand. The center is a dot bloom — a cluster of tiny dots around a slightly larger center dot — then a simple medallion outline around it. The finger caps make it feel complete even with a small central motif. This is one of the best small-space back hand mehndi designs when you’re short on time but still want a neat, “intentional” look. It photographs well because the center cluster creates contrast against the skin, and the finger caps frame it.
Pro tipIf your dots smear, pause 10-15 seconds between dot clusters so the paste sets slightly.
Step 1: Draw a small circle medallion in the center of the back of the hand. Keep it about the size of a large coin relative to your hand — not bigger than your palm lines. Step 2: Inside the medallion, draw one center dot and 8 tiny dots around it. Connect 3 of the outer dots with short curved lines to make it look like a bloom. Step 3: Add finger caps on all five fingers: half-ovals at the base with one dot in the middle of each cap. Finish with a thin line at the wrist edge and two dots at each end.
AvoidAvoid adding extra vines around the medallion; the center should stay the main focus.
7. Wrist-to-Knuckle Halo with Tiny Beads
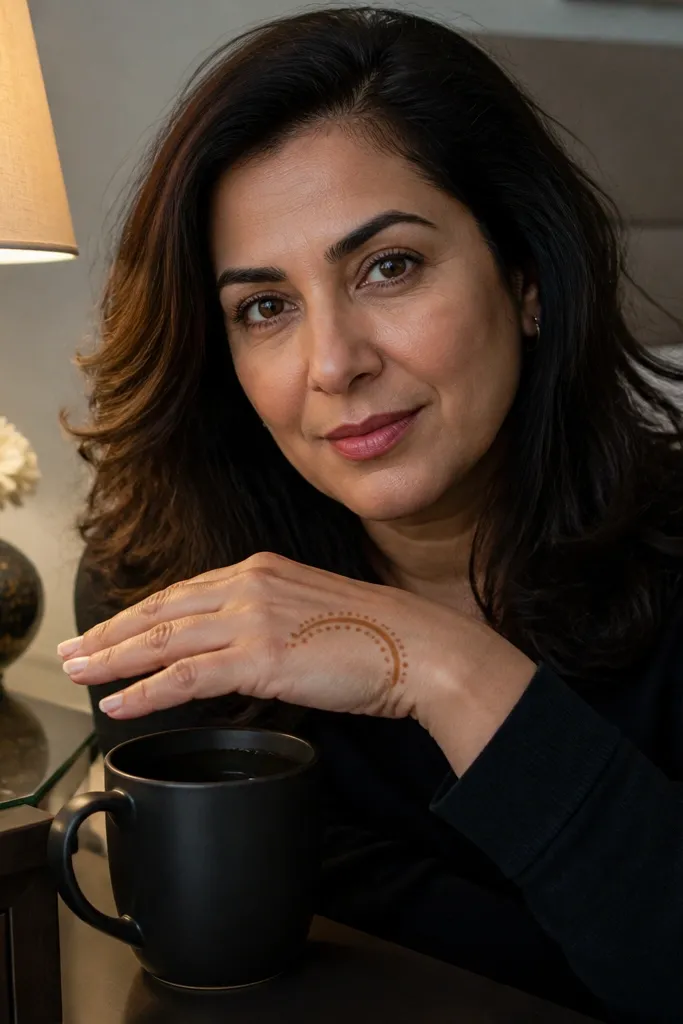
A halo arc is a smart way to fill space without covering everything. This design draws one curved band that starts near the wrist and arches toward the knuckle line, then sprinkles tiny bead dots along the band. The result feels delicate and jewelry-like, which is what small-space back hand mehndi designs need. It also makes your hand look balanced because it respects the natural curve of the back of the hand. Even if your henna color isn’t uniform, the bead dots create a steady pattern that reads clearly in photos.
Pro tipUse a slightly thicker paste for the outline band so the arc stays crisp after drying.
Step 1: Draw an arc band across the back of the hand, starting near the wrist center and curving up toward the knuckle area. The arc should be about 1 cm thick. Step 2: Outline the band and fill it with tiny bead dots: place 10-14 dots evenly along the band. Keep the dots separated by a few mm so they don’t merge. Step 3: Add finger caps on the ring and middle fingers only. Finish with 3 dots aligned vertically on the wrist side of the arc.
AvoidDon’t make the arc too low; if it sits near the wrist crease, it can blur when you move.
8. Geometric Kite Frame with Corner Lines
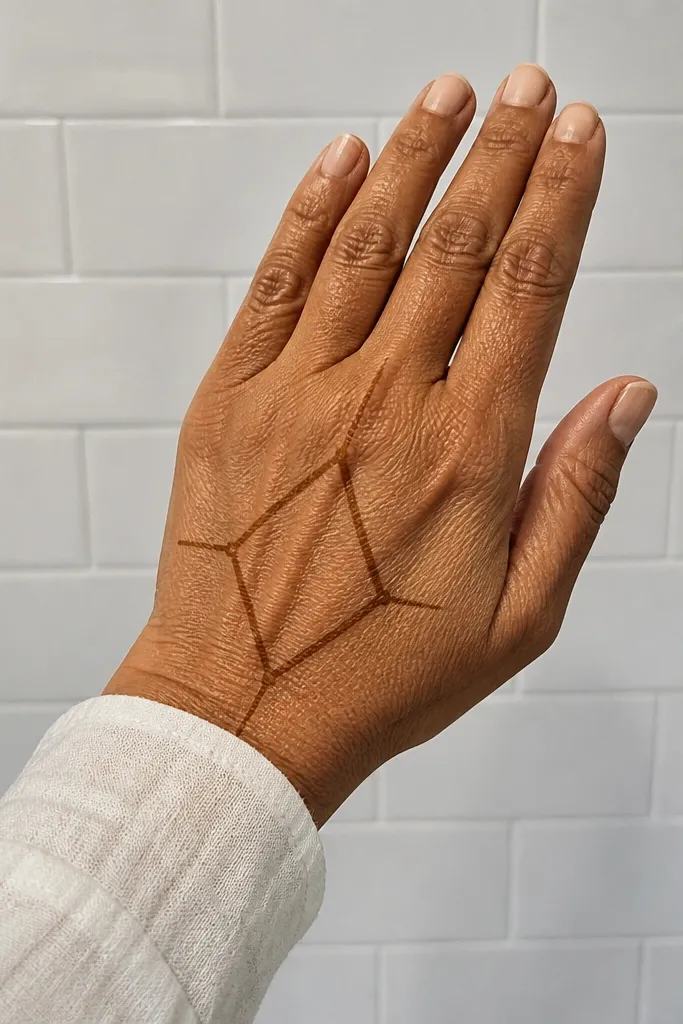
This is a clean geometry design that gives structure without needing heavy filling. You draw a kite-shaped frame in the center of the back of the hand, then add corner lines that point outward toward the knuckles. It looks modern and crisp because you keep everything angular and spaced. This works well in small spaces because the kite frame uses negative space like a design element. You’re not trying to cover every inch; you’re guiding the eye to the center shape, then letting the skin breathe.
Pro tipSketch the kite points lightly first with a dot guide so your angles match left and right.
Step 1: Draw a vertical kite frame in the center: top point near the knuckle area, bottom point toward the wrist side. Outline it with a clean thick line. Step 2: Inside the kite, draw one smaller inverted kite. Add a short line from each inner corner toward the outer frame, leaving gaps. Step 3: Draw corner lines outside the kite at four points — each line should be short and slightly angled. Add small finger caps on index, middle, and ring fingers only.
AvoidAvoid filling the kite interior completely; geometric designs need space to look sharp.
9. Paisley Row Across Knuckles with Open Center

This is the “knuckle focus” design. Instead of filling the center of the back hand, you place a row of small paisleys across the knuckle line, leaving the middle open. That open center is what makes it work in small-space back hand mehndi designs — it looks stylish, not crowded. The paisleys are small enough to fit, but they’re large enough to read on camera. It’s also a good option if your back hand already has natural lines or henna you want to keep minimal — this adds a clear top-band without spreading everywhere.
Pro tipUse the same paisley size for all five motifs; if one paisley is bigger, the row looks uneven quickly.
Step 1: Draw a curved baseline along the knuckle area from index side to pinky side. Keep it light so you can adjust the curve. Step 2: Place 5 small paisleys on that baseline, with their narrow ends touching the baseline and their wider ends pointing up slightly. Leave space between paisleys. Step 3: Add finger caps only on the index and pinky fingers: small half-ovals at the base. Finish with 3 tiny dots in a vertical line near the center of the open area.
AvoidDon’t extend the paisleys down into the center; the open middle is the whole point.
10. Crescent Chain Band with Two Side Vines

This design is one horizontal crescent chain band with two tiny side vines that stop before the center gets crowded. The chain links are drawn as rounded loops, giving a bracelet effect. The side vines are thin and short, so they add movement without turning into a full coverage mess. It’s a strong pick for small-space back hand mehndi designs because the band creates a clear shape, and the vines add detail in controlled pockets. If you want something that looks “done” even when the henna is light, chain links read clearly even with partial staining.
Pro tipIf your loops break at the ends, draw one extra loop at each end to make the chain look continuous.
Step 1: Draw a crescent curve across the back of the hand. Outline it with a thick line about 4-5 mm wide. Step 2: Fill the crescent with chain links: draw 10-12 rounded loops touching each other, alternating direction. Leave a small gap at both ends of the crescent. Step 3: Add two side vines — one on the thumb side and one on the pinky side — each vine has 3 tiny leaf shapes. Finish with finger caps on middle and ring fingers.
AvoidDon’t add more vines into the center; keep the center clean so the band stands out.
11. Two-Flower Corner Layout with Center Smoke Dot
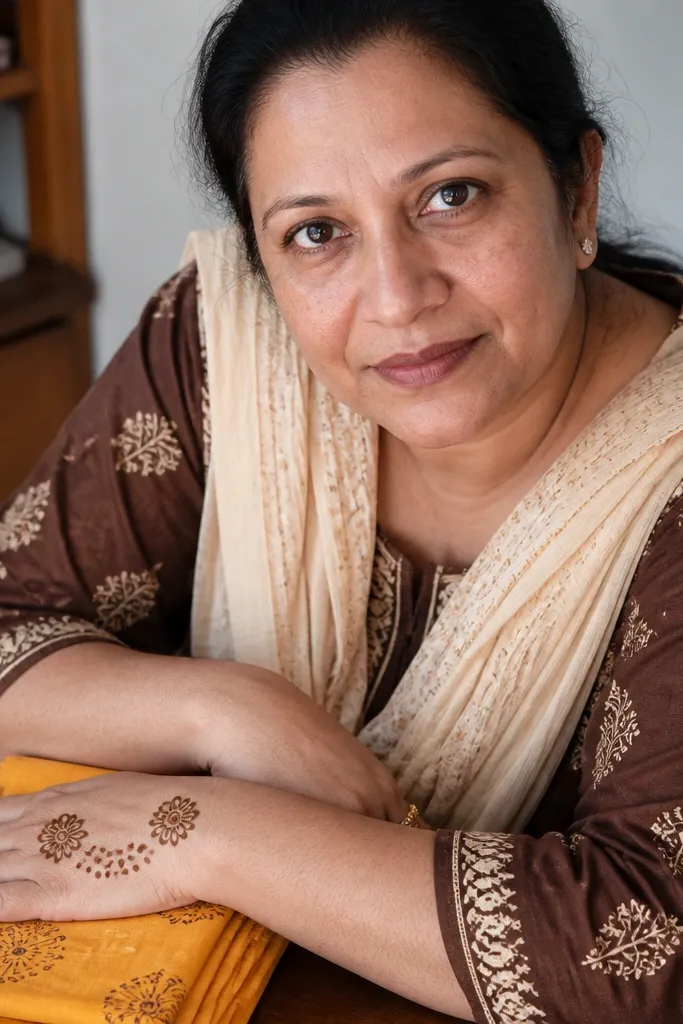
This design is built on imbalance done right: two small flowers placed at opposite corners, plus a single center smoke dot cluster. It looks airy and intentional because the center isn’t filled with random lines. The flowers are small but defined — a clean circle center with petal curves. It’s ideal for small-space back hand mehndi designs when you want something pretty without covering the whole hand. The contrast between the corner flowers and the minimal center makes your hand look sleek in photos.
Step 1: In the center of the back hand, draw a small smoke dot cluster: one larger dot and 6-7 tiny dots around it, slightly uneven to feel organic. Step 2: Place one small flower at the thumb-side corner and another at the pinky-side corner. Each flower has a center dot and 5 petals shaped like rounded triangles. Step 3: Connect each flower to the center cluster with one thin curved line. Add small finger caps on the index and ring fingers only.
Keep petals slightly different sizes by 1-2 mm; it makes the flowers look hand-drawn instead of stamped.
Avoid adding a full outline around the whole design; it makes the hand look boxed in.
12. Wrist Fan with Central Vertical Line
This design uses a fan at the wrist and a single vertical line up the center to keep everything clean. The fan is made of curved strokes that widen outward, then taper back in. The vertical line anchors the composition, so the design looks balanced even with lots of skin showing. It’s a great pick for small-space back hand mehndi designs because it creates height. Your hand looks longer, and the minimal central line keeps the pattern from turning into a dense block.
Step 1: Draw a vertical line in the center of the back hand from wrist crease toward the mid-knuckle area. Keep it straight. Step 2: At the wrist, draw a fan: 7-9 curved lines starting from the wrist center line and spreading outward. Add tiny dots between each curved line tip. Step 3: On the vertical line, add 4 small teardrops spaced evenly. Finish with finger caps on the middle and ring fingers.
Press the cone lightly for the vertical line so it stays thin; thick lines in the center make the design look heavy.
Don’t make the fan too wide; if it spreads across the whole wrist, it overwhelms the small back hand.
13. Crossed Bands with Negative Space Star
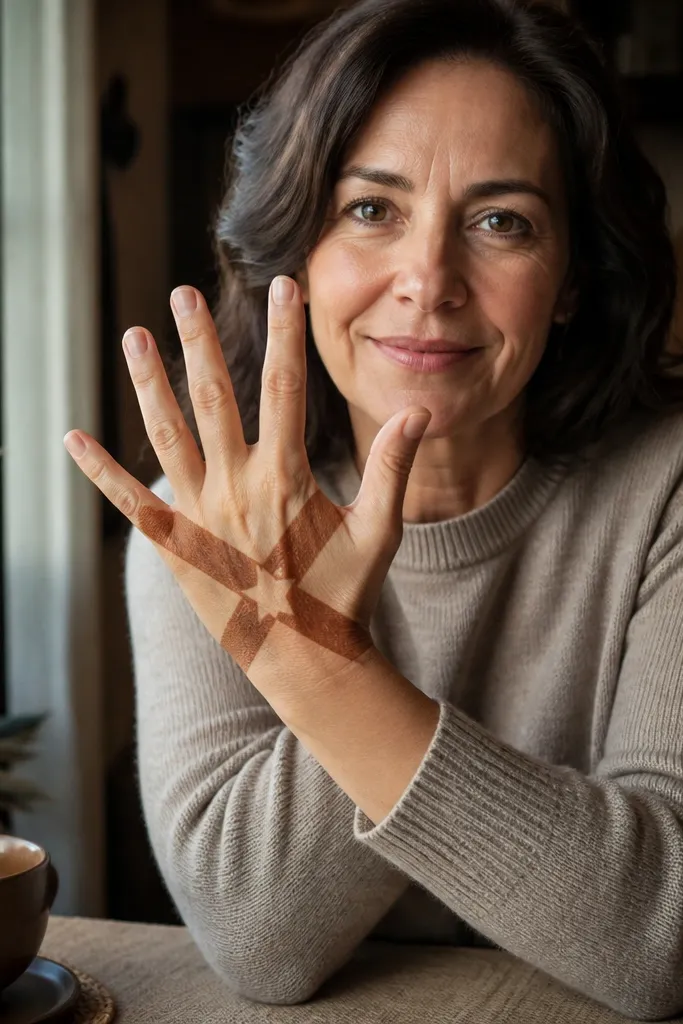
Crossed bands create a strong graphic look, and the negative-space star makes it feel light. You draw two diagonal bands crossing in the center, then leave a star-shaped gap inside the crossing area. That gap is what keeps the design from looking crowded — your skin stays visible as part of the pattern. This is a smart option for small-space back hand mehndi designs because it gives shape without full coverage. It also looks great when the mehndi color is lighter, since the outlines and the star gap still read clearly.
Step 1: Draw a diagonal band from thumb side toward the center, then another diagonal band from pinky side toward the center so they cross. Outline each band with a thin thick-thin look by keeping the edges clean. Step 2: Inside the crossing point, draw a star outline but do not fill it. Leave the star interior empty to create negative space. Step 3: Add small dot clusters at the four outer ends of the crossed bands. Place finger caps on index, middle, and pinky fingers.
To keep the negative-space star crisp, draw its outline first and let it dry slightly before you finish the bands around it.
Avoid filling the star; if you color it in, you lose the airy effect.
14. Sunburst Corner Mandala with One Side Finger Cap
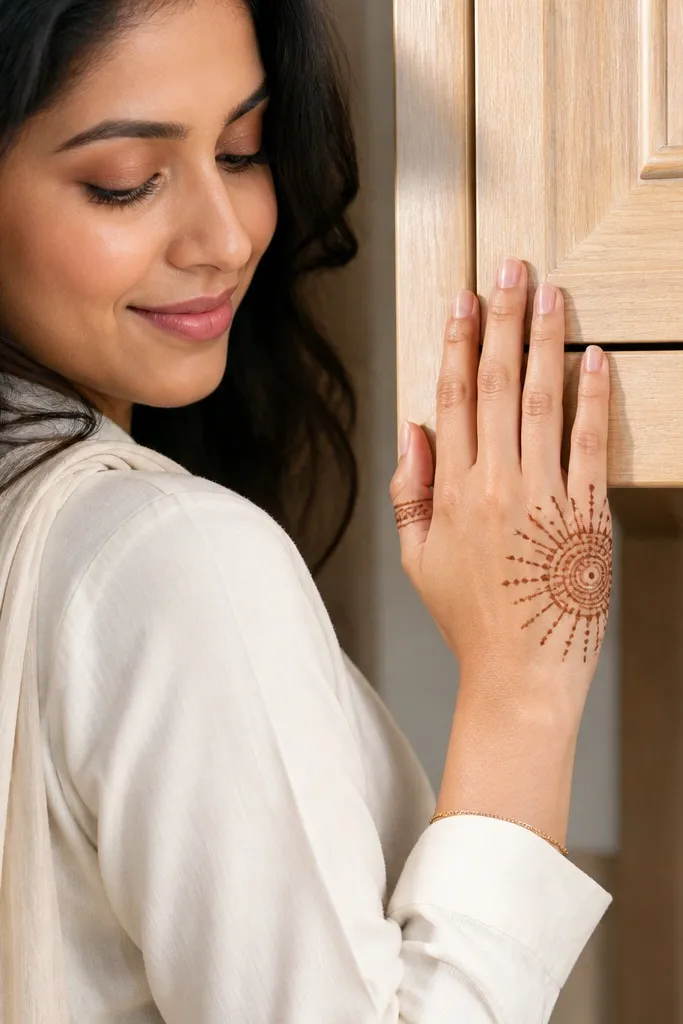
This layout is a corner mandala, not a full center mandala. The mandala sits closer to the thumb side corner, and it’s built from a sunburst pattern with short rays and tiny circles. Because it’s anchored in a corner, it fits small-space back hand mehndi designs without turning into a big block. You only need one side finger cap to finish the look. That restraint makes it look modern and intentional. It’s also a good choice when you want mehndi that doesn’t compete with jewelry or a watch on the wrist.
Step 1: Place a small circular center near the thumb-side corner of the back hand. Draw 10-12 short rays around it like a sunburst. Step 2: Add 2 layers: one ring of tiny dots around the circle, then a second ring of small leaf curves between rays. Step 3: Add one finger cap on the thumb-side finger base (a half-oval) and leave other fingers mostly bare. Finish with a thin curved line from the mandala toward the center of the back hand.
Keep the rays short and consistent; long uneven rays make the mandala look messy on small hands.
Don’t add mandalas on both corners; one corner anchor looks cleaner for small-space layouts.
15. Vertical Vine with Micro Leaves and One Big Leaf
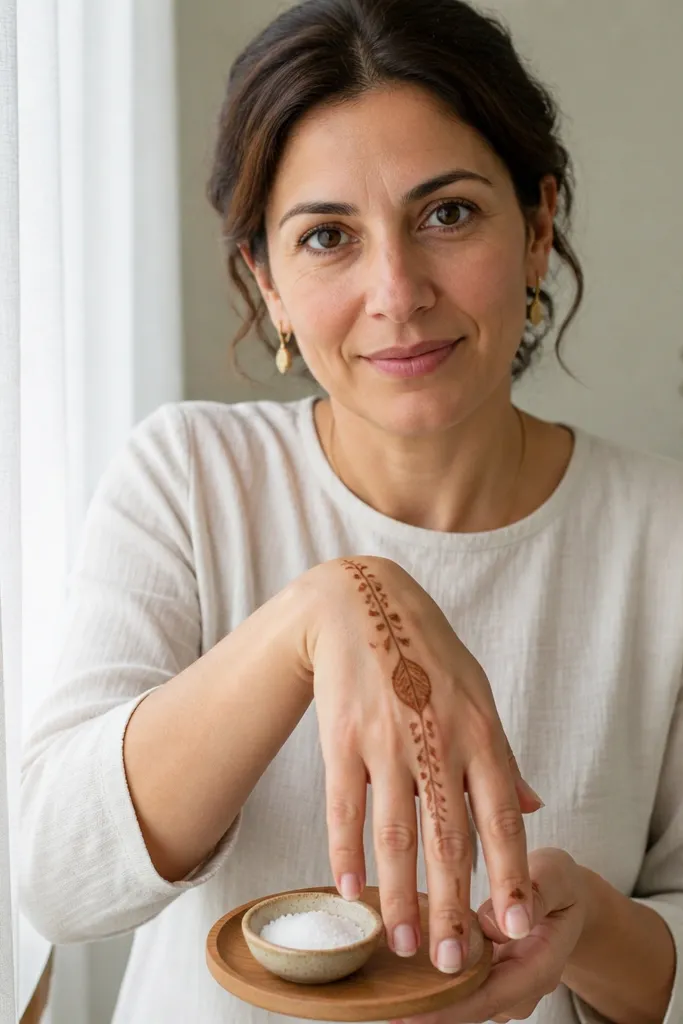
This design balances detail and simplicity: a vertical vine with micro leaves, plus one bigger leaf near the center. The big leaf gives you the focal point, while the micro leaves fill just enough space to look like a complete motif. It works well for small-space back hand mehndi designs because you’re not trying to fill the entire back — you’re creating a vertical path. The linework is what makes it photogenic. When done cleanly, the vine looks like fine lace, but it stays readable because the big leaf anchors the eye.
Step 1: Draw a vertical vine line from wrist side toward the mid-back of the hand. Add alternating micro leaves on both sides — 6-8 micro leaves total. Step 2: Replace one middle micro leaf with a big leaf. Outline it thicker and add a center vein line so it stands out. Step 3: Add small finger caps on all fingers but keep them tiny. Finish by dotting both ends of the vine line near wrist and mid-knuckle.
If your cone tip is too fine, micro leaves break; use a slightly wider opening so leaves stay filled and smooth.
Avoid overcrowding micro leaves; too many small leaves turn into a dark smear.



