
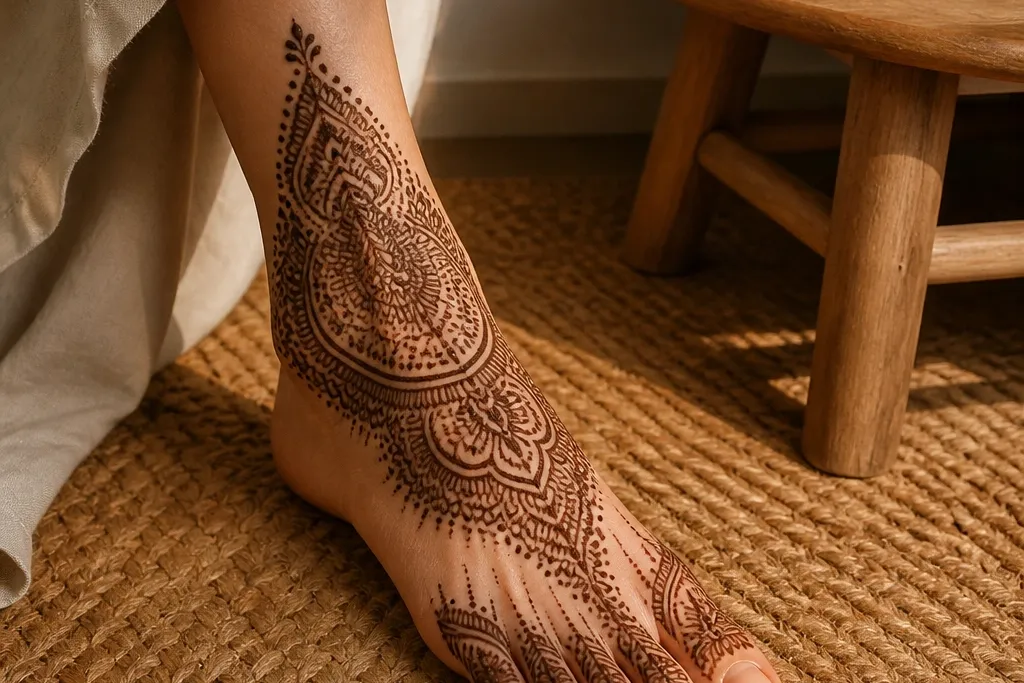

1. Ankle-Bone Halo with Three Micro Fans
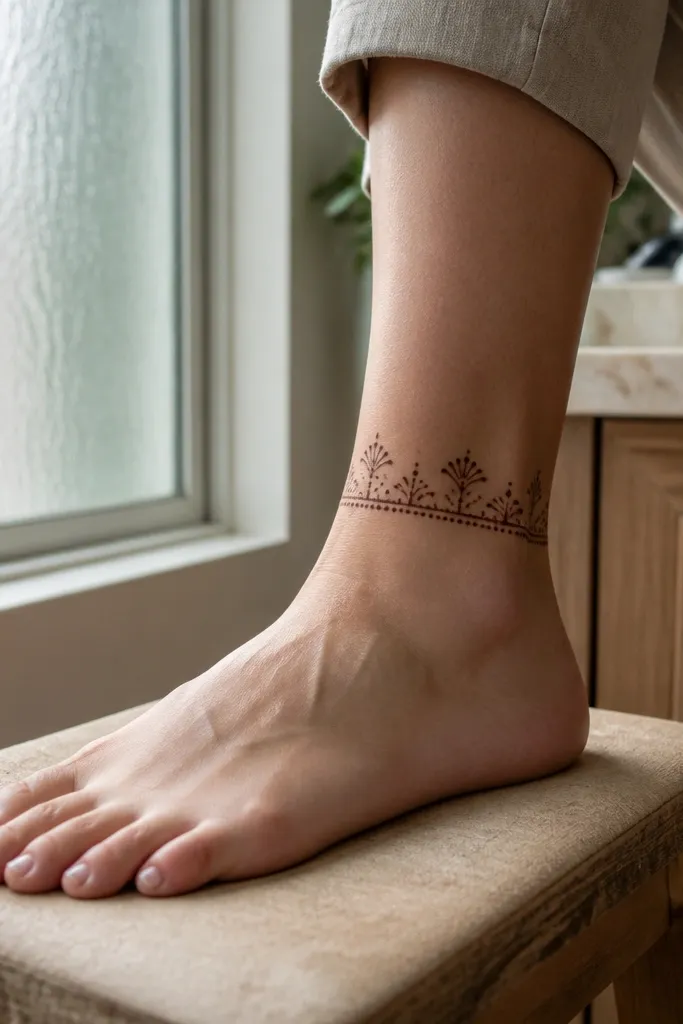
Start by drawing a thin curved line following your ankle bone, then fill it with evenly spaced dots. Add three fan shapes above that line: each fan is five short curved lines fanning out from a single base point. Connect the center fan to the top of the foot with a short vertical dot line, then stop. Thicken the outer edges of the halo dots after the shape is right, and let the interior stay airy so it stays photogenic.
This design is made for small-space feet because it hugs the ankle curve instead of spreading across the whole top. The “halo” band uses tight dots and short dashes, so it reads clean even if your mehndi dries fast. Three micro fans sit slightly above the ankle — one centered and two offset — giving the look height without crowding. It’s perfect for sandals, anklets, and short sleeves of time because you can finish it quickly and still get a strong outline.
AvoidDon’t add extra lace-filling in the ankle area — it makes the band look flat and blurry.
Pro tipIf your cone lines get shaky, practice the ankle curve on paper first — the curve is the whole trick.
2. Big-Toe Paisley Ladder
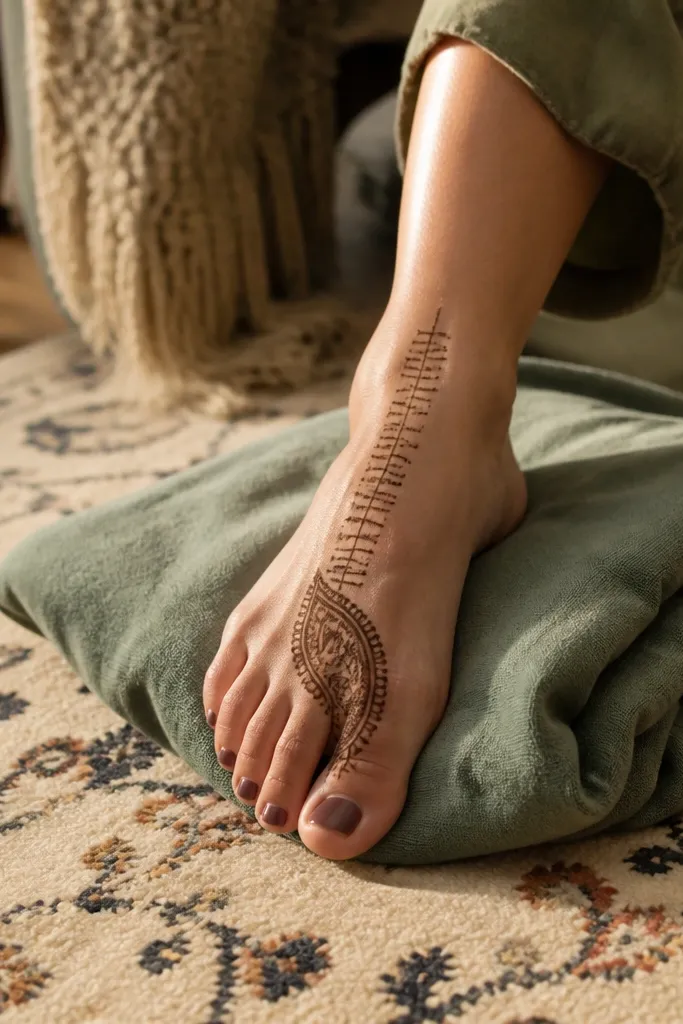
Draw a small paisley at the base of the big toe, pointing upward. From the paisley tip, draw a vertical line toward the arch, then add short horizontal “rungs” on both sides like a ladder. Place tiny dots at the ends of each rung to sharpen the shape. Finish by adding one thin curve line across the arch that mirrors the ladder’s top rung, then let the rest stay open.
This one is for when you want the design to start at the front and still look tidy. The big-toe paisley is your anchor, and the rest of the pattern climbs upward with a ladder rhythm of short lines. Because the ladder gaps stay open, your foot skin shows through and the mehndi looks crisp instead of heavy. It’s also easy to customize: keep the paisley size small and adjust the number of ladder rungs to match your foot length.
AvoidAvoid wide filled paisley — a fat paisley in toe space makes the whole pattern look cramped.
Pro tipUse dot endpoints instead of thick filled ends — they look cleaner on toes.
3. Arch Crescent Dots and Thin Connectors
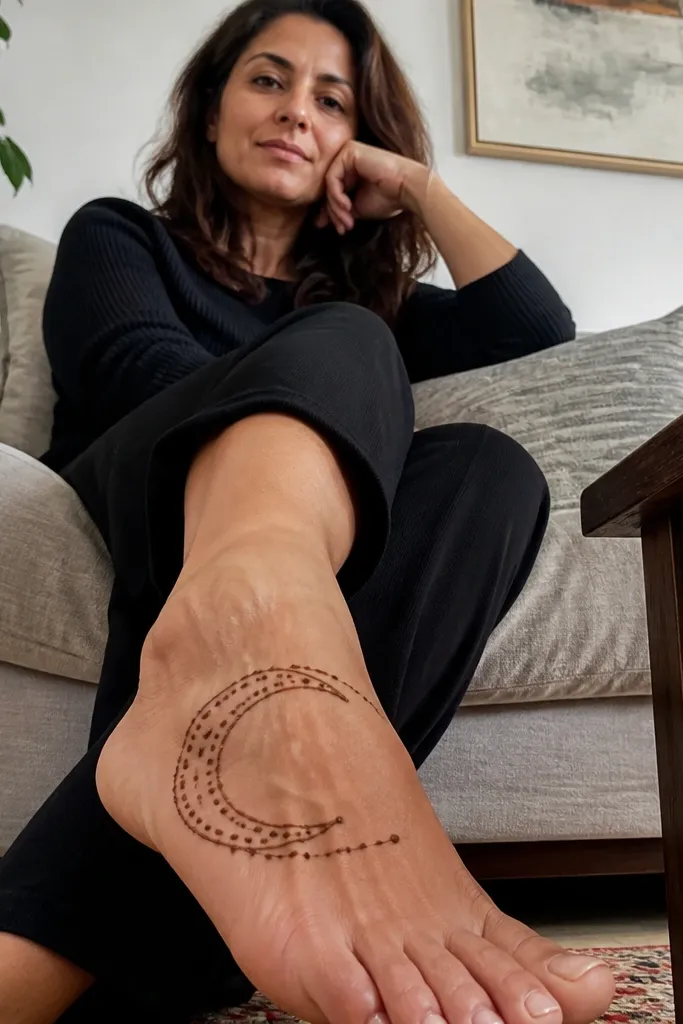
Start with a crescent arc across the arch using a single smooth curve. Fill the arc with small dots at even intervals, leaving small gaps between dot clusters. From the crescent, draw two or three thin connector lines downward toward the inner edge of the foot. Add one tiny dot at the end of each connector line, then stop. Thicken the crescent outline slightly while keeping the connectors thin.
If you hate patterns that feel busy, this is the calm, pretty option. The arch crescent sits right where the camera catches it when your foot is angled, and the dotted points keep it lively without adding bulk. Thin connector lines make it look intentional instead of random. This is a great choice for narrow feet because the design naturally follows the arch curve and doesn’t need lots of width to look complete.
AvoidDon’t add a second crescent — two arcs in small space turn into clutter.
Pro tipKeep the crescent arc one skin-width away from the toe lines so it doesn’t smear into other motifs.
4. Top-Foot Fan Band with Center Dot
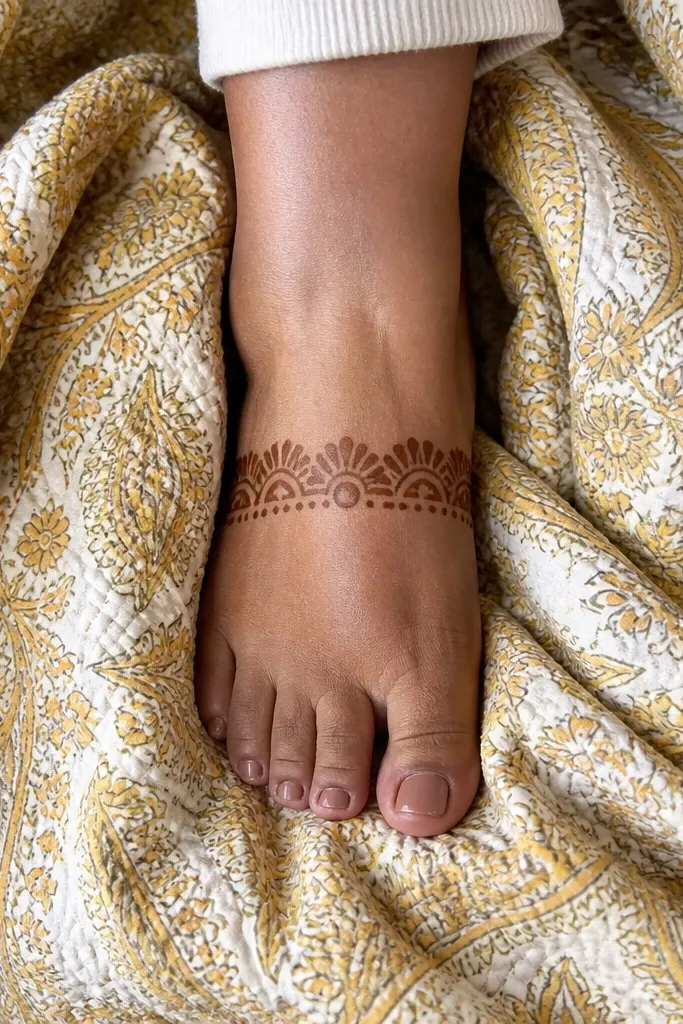
Draw a thin horizontal line across the top of the foot near the middle. On top of that line, create four fan shapes: each fan is five short curved lines that meet at the base. Place a single dot on the line at the center of the band. Add tiny dots between fans to keep spacing even. Finally, outline the band line again lightly so the edges look crisp after drying.
This pattern looks neat even when it’s small because it uses one clear horizontal band. The fans create texture without needing heavy fill, and the single center dot anchors the whole composition. It’s ideal for people who want mehndi that looks “done” but still leaves the toes clean. The band placement also helps it photograph well with sandals and open-toe shoes.
AvoidDon’t spread the band too wide — keep it centered so the toe area stays airy.
Pro tipUse a slightly thicker cone for the fan outlines, then keep the fan interiors open.
5. Toe Tips Garland with Micro Leaves
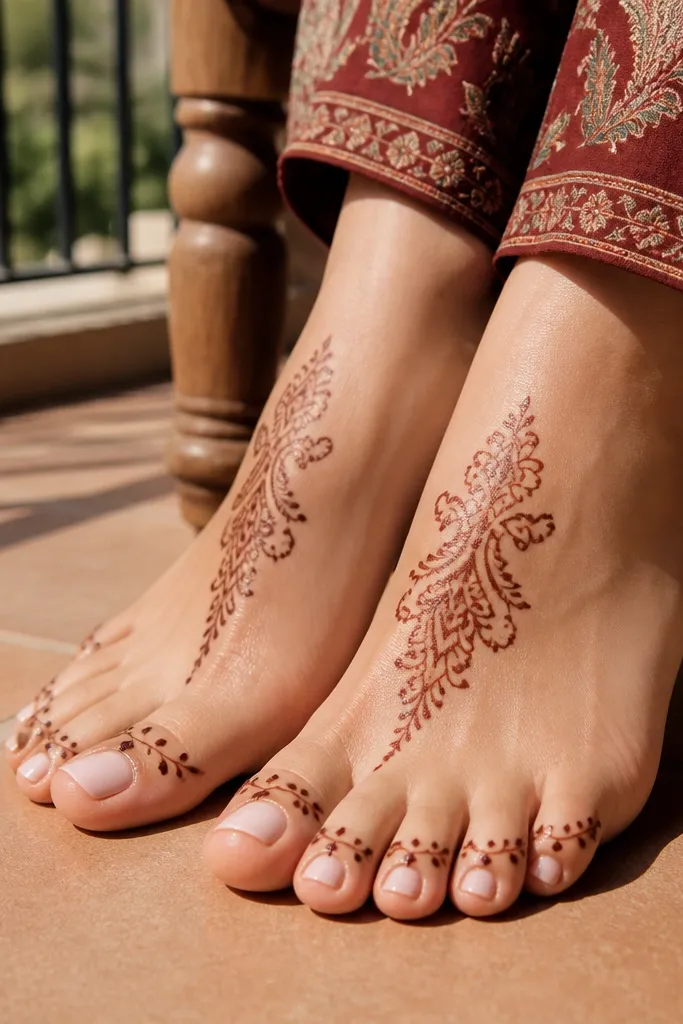
This is a cute, subtle design that still looks intentional in photos. The garland sits at the toe tips, so it doesn’t fight for space with the ankle. Micro leaves add charm without making the toes look crowded. If you’re working with short time or you want a design that looks good even when only the front of your foot is visible, this one nails it.
Start at the big toe tip with a small dot, then add a tiny leaf shape beside it using two short curves. Repeat leaf shapes across each toe tip with one dot between leaves. Connect the toe tips with a very thin dotted line from the big toe to the little toe. Add one extra small dot cluster near the arch so the design doesn’t look like it floats. Leave the rest of the foot mostly blank.
Keep leaf sizes consistent — tiny variation looks messy at toe scale.
Don’t draw long lines down the toe — it smudges and makes the tips look heavy.
6. Ankle Curve Bracelet with Dot Fringe
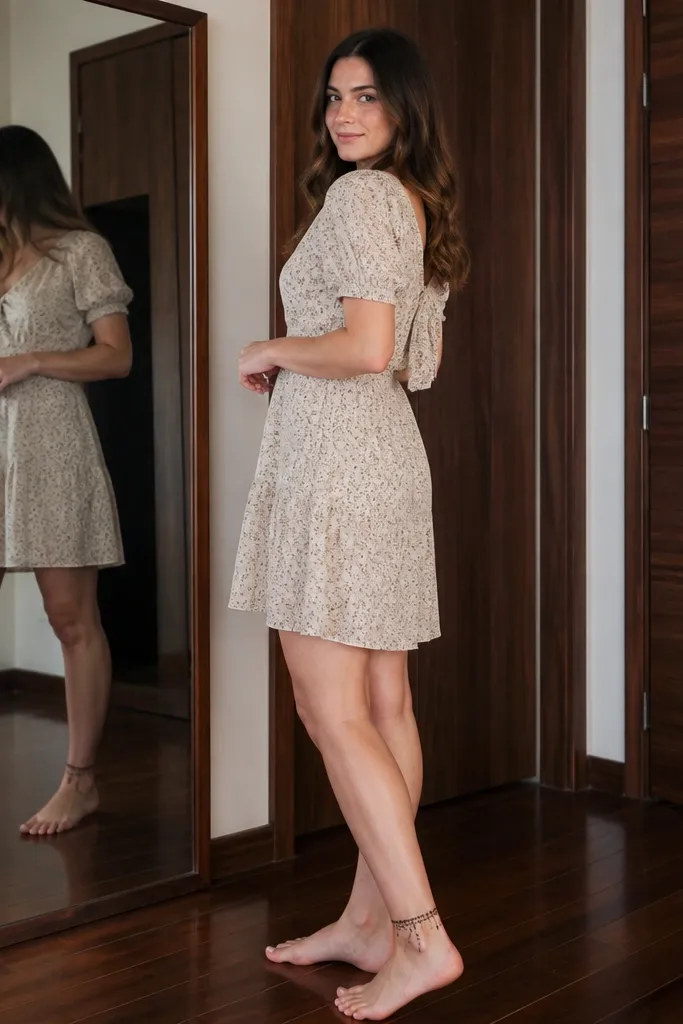
Draw a thick curved bracelet line around the ankle curve, leaving a small gap at the inner ankle. From the outer edge of the bracelet line, drop dots downward in a fringe pattern. Keep the dot fringe uneven by one or two dots — it looks natural. Add one short upward connector line from the fringe to the top of the foot, then stop. Repeat the bracelet outline once more so the edge stays dark after drying.
Think of this as mehndi jewelry for small space. The ankle curve bracelet is clean and bold, and the dot fringe adds movement that catches light in photos. It’s great when you want a strong look without drawing across the top of the foot. The fringe also hides minor cone wobble because the dots break up the line visually.
AvoidAvoid filling between dots — the fringe should stay open so it stays airy.
Pro tipDo the fringe last. If you mess up, it’s easier to fix dot size than to redraw the bracelet.
7. Side-View Sidechain with Two Stacked Arches
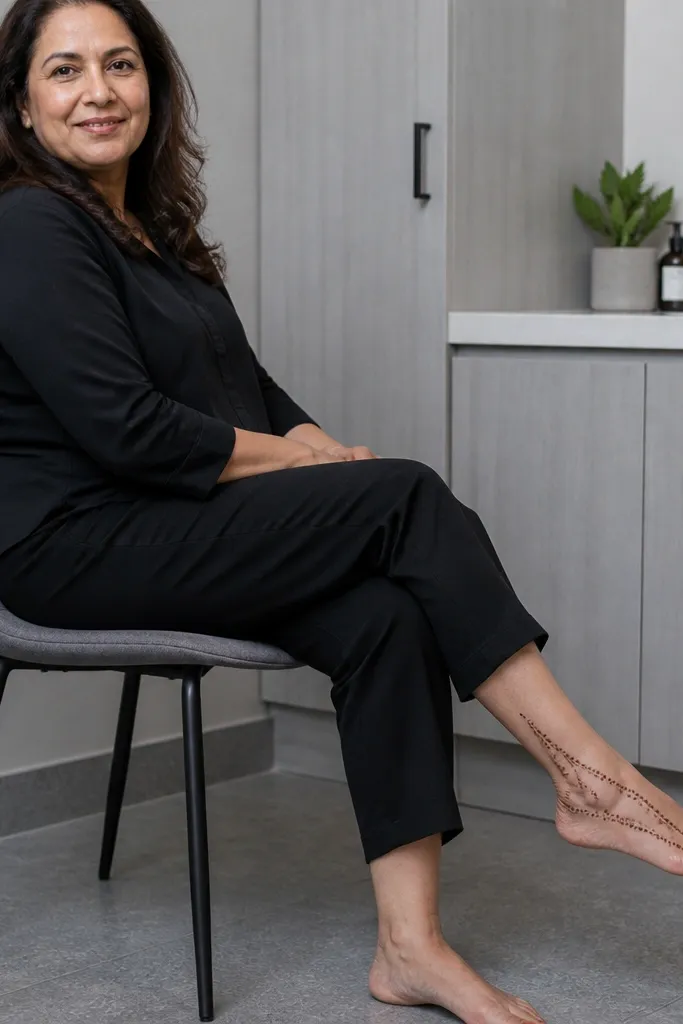
This pattern is built for side-view photos. Two stacked arches run along the side of the foot, and dotted nodes make it look like a delicate chain. Because it’s mostly on one side, it’s easier to keep neat even if your foot is narrow. It also works well under socks because it doesn’t spread across the whole top.
On the side edge of the top of the foot, draw a small arch shape using a single curve line. Place a dot at both ends of the arch, then add a second arch above it with slightly smaller spacing. Connect the two arches with a thin vertical dotted line in the center. Add one short diagonal line from the bottom arch toward the ankle curve. Finish by outlining the arch curves thicker and leaving the inside open.
If your arches look uneven, align the ends first and worry about the curve last.
Don’t add extra side lines — one sidechain is enough for the look.
8. Top-Center Drop Motif with Tiny Dots
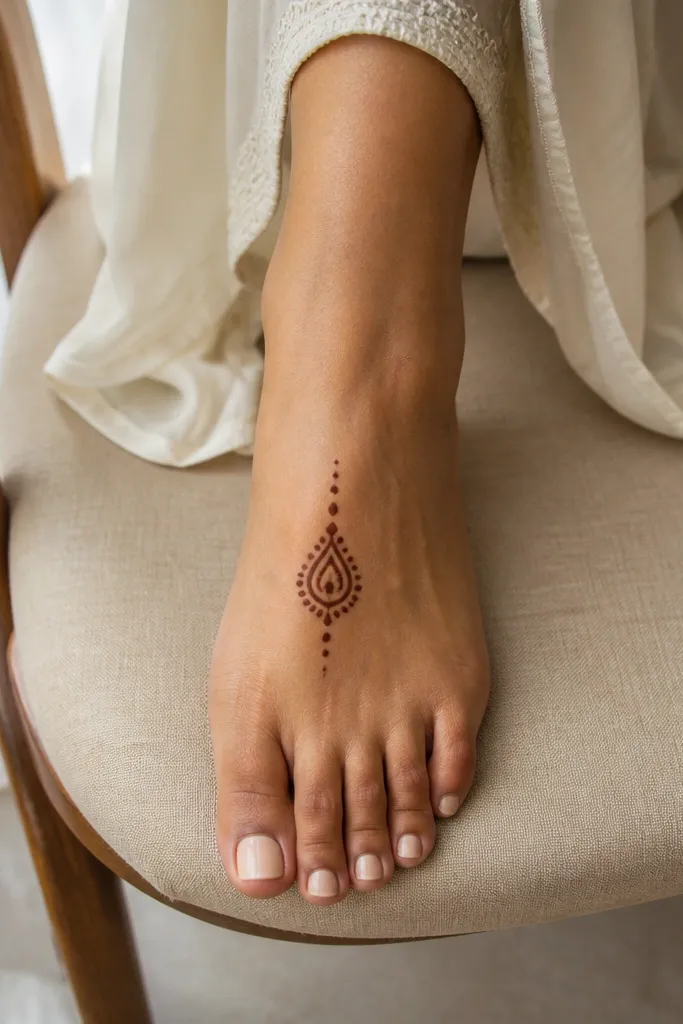
This is the simplest “statement” design in the list. One drop motif on the top center gives you a focal point, and tiny surrounding dots make it look balanced without filling the whole foot. It’s ideal for short sessions and for people who want a clean, modern feel. In photos, the top-center placement reads clearly even if the ankle pattern is minimal.
Draw a teardrop or paisley-like drop motif at the center of the top foot, pointing downward toward the arch. Keep it small and crisp, then add tiny dots around it in a loose triangle arrangement. Add one thin curved line below the drop that follows the arch for a few centimeters. Fill the line with three to five dots, then stop. Thicken the outer edge of the drop motif so it darkens evenly.
Use fewer dots than you think. At foot scale, extra dots turn into mud quickly.
Avoid shading inside the drop — open interior keeps it photogenic.
9. Four-Point Star at the Arch

A star motif looks sharp and graphic, which is why it works in small-space mehndi. The four-point shape sits in the arch area, and dot points around it give it definition. This design is easy to resize — make the star smaller for narrow feet and keep the dot spacing tight. It’s also a good choice if you want mehndi that looks clean even after partial fading because the lines stay distinct.
Draw a small X on the arch with two straight lines crossing at the center. Turn each arm into a pointed shape by adding short lines at the ends to form four points. Add a dot at each point tip. Place four tiny dots between the points to fill the negative space. Outline the star edges slightly thicker, then keep the rest of the foot blank.
Use straight lines for the star arms. Curvy lines look messy at this scale.
Don’t add a halo ring around the star — it crowds the arch.
10. Ankle Crosshatch Patch with Open Corners
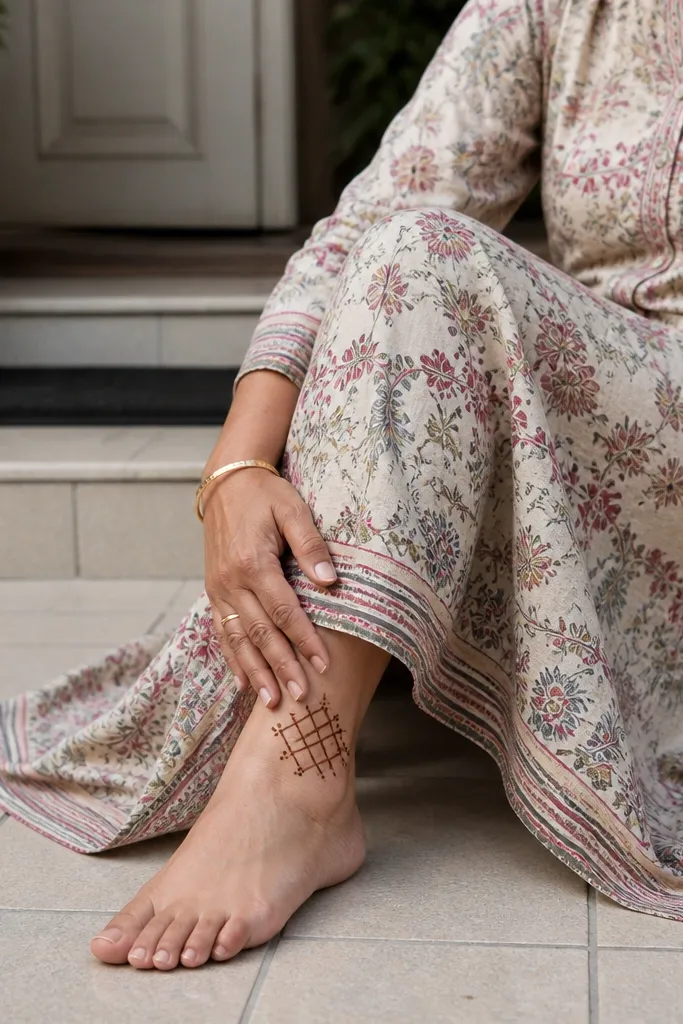
Draw a small square or slightly rounded rectangle on the outer ankle curve. Fill it with diagonal lines in one direction first, keeping spacing consistent. Then add the second diagonal direction to create crosshatch. Leave the four corners empty with just dots at the corner points. Add one thin curved connector line from the patch to the top of the foot and stop.
Crosshatch looks great when it’s controlled. This ankle patch uses a small grid area with open corners so the pattern stays light and doesn’t turn into a dark blob. It’s perfect for people who like geometric looks but don’t want full foot filling. The open corners also give the design a clean border, which matters on small skin areas like the ankle.
AvoidDon’t overfill the crosshatch — dense grids smear and look fuzzy.
Pro tipKeep your grid area small: about 2-3 cm wide for a standard foot.
11. Toe Loop Dots with One Center Trail
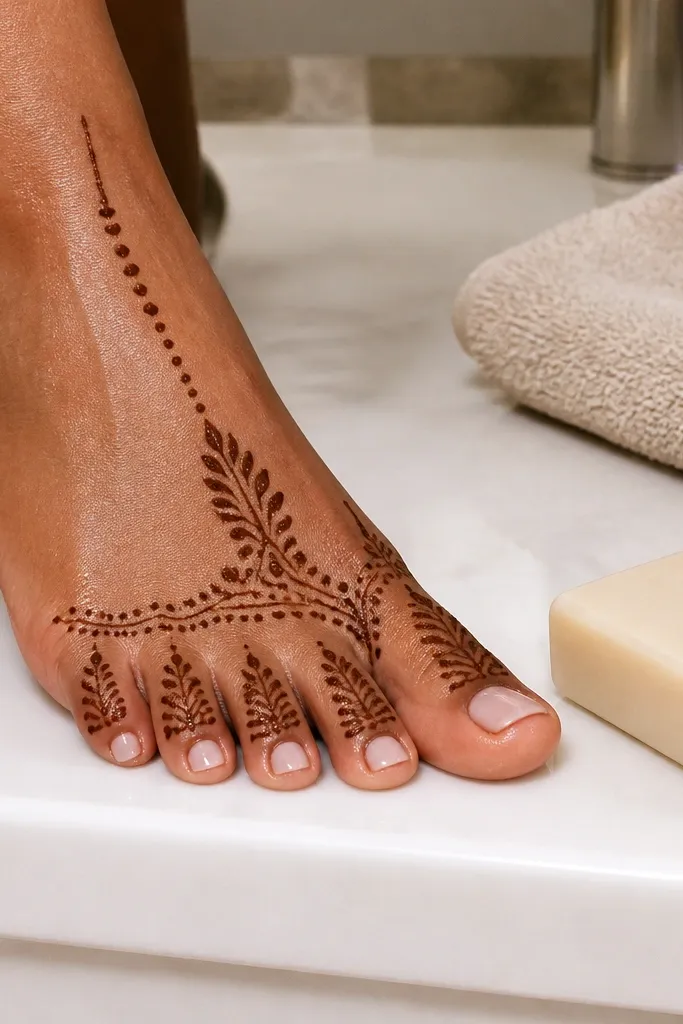
Start at the big toe edge and draw a small loop dot pattern: a dot, then a short curved line that returns to a dot. Repeat a smaller version on each toe edge, keeping the loops light. Draw one dotted trail from the big toe upward toward the arch using evenly spaced dots. Add one small dot cluster at the arch end to finish. Keep everything else blank.
This design is playful and airy. Loop dots trace the toe edges, while one dotted trail runs from the big toe up to the arch. The contrast between the tiny loops and the single trail keeps it from feeling random. It’s a smart pick if you want mehndi that looks cute even with bare toes and doesn’t require filling the whole top of the foot.
AvoidAvoid adding side branches to the trail — keep it one clean path.
Pro tipMake loops look like parentheses. If you make them circles, they thicken too much on toes.
12. Top-Foot Ladder with Side Paisley Caps

This one gives you structure and softness at the same time. The ladder runs down the top of the foot in short steps, and small paisley caps sit on the sides like little stops. It reads tidy because the ladder is consistent, and it looks pretty because the paisley caps add curves. Great for medium time and for people who want a fuller look without going all-out.
Draw a vertical ladder spine down the top of the foot with a thin line. Add short horizontal rungs across the spine at even intervals, leaving gaps between rungs. On each rung’s outer side, add a tiny paisley cap that points upward. Keep the number of rungs to 6-9 depending on foot length. Outline the spine slightly thicker at the top and bottom so it frames the ladder.
If your paisley caps wobble, make them more like teardrops with two tiny curls at the top.
Don’t fill the ladder rungs — the open spaces are what keep it crisp.
13. Minimal Lotus at the Inner Ankle
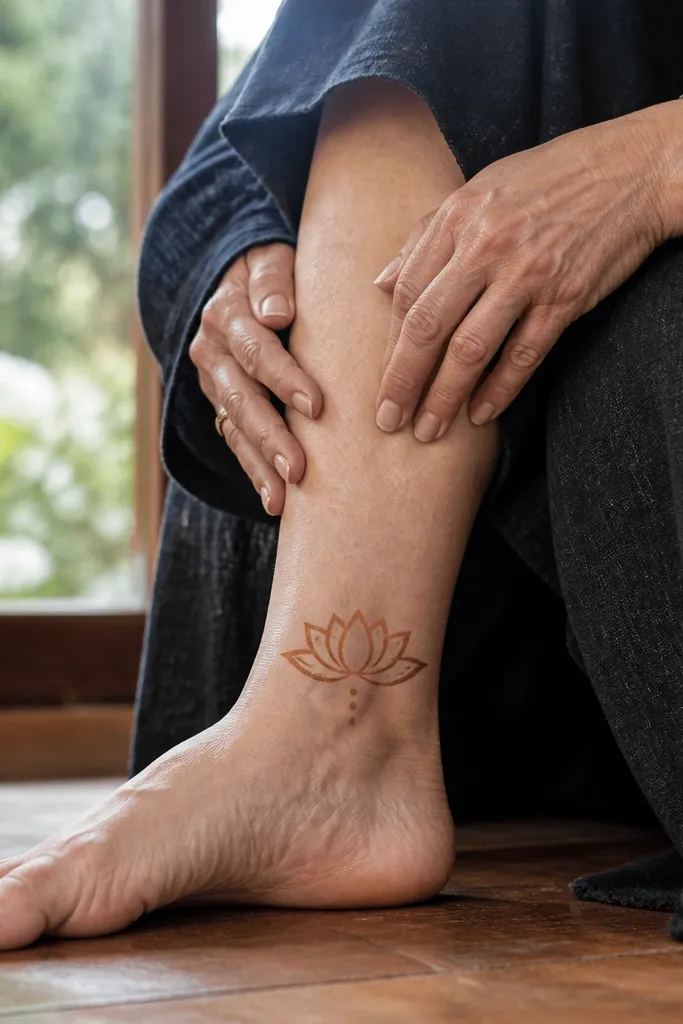
On the inner ankle curve, draw a small dot center. Around it, draw 6-8 petal outlines that look like teardrops pointing outward. Leave the petal bases open so the lotus doesn’t become a filled blob. Add two curved leaf-like lines wrapping upward on either side of the lotus. Finish with a thin dotted line that follows the ankle curve for a short length.
A tiny lotus on the inner ankle looks sweet and clean, and it’s one of the easiest ways to get a “complete” design without covering much area. The petals are spaced so the skin shows through, which keeps the color from going muddy. This is a strong choice if you want something feminine but not busy, especially for smaller ankles where big motifs overwhelm.
AvoidSkip thick filling on tiny lotus petals — it darkens unevenly and smears.
Pro tipPetals should be mostly outline. Filling only the center keeps it neat.
14. Ankle Curve with Three Dangling Drops

Draw a thin curved band around the ankle curve, stopping before the inner ankle. From the outer side of the band, draw three teardrops hanging downward at equal spacing. Keep each teardrop outline crisp and leave the inside mostly open. Add one dot at the top of each teardrop where it touches the band. Thicken the band outline slightly and leave the rest minimal.
This design looks like jewelry because it has a clear top line and dangling elements. The ankle curve band anchors everything, while three teardrop drops add motion. It’s photogenic from the side because the drops create vertical depth. You don’t need a full top-of-foot pattern for it to look finished, which makes it perfect for quick events and small-space feet.
AvoidDon’t add extra dangling lines between drops — it turns into a fringe mess.
Pro tipHang drops from the band edge, not from the air. That one choice makes the whole thing look intentional.
15. Micro Vine on Top with One Leaf Cluster
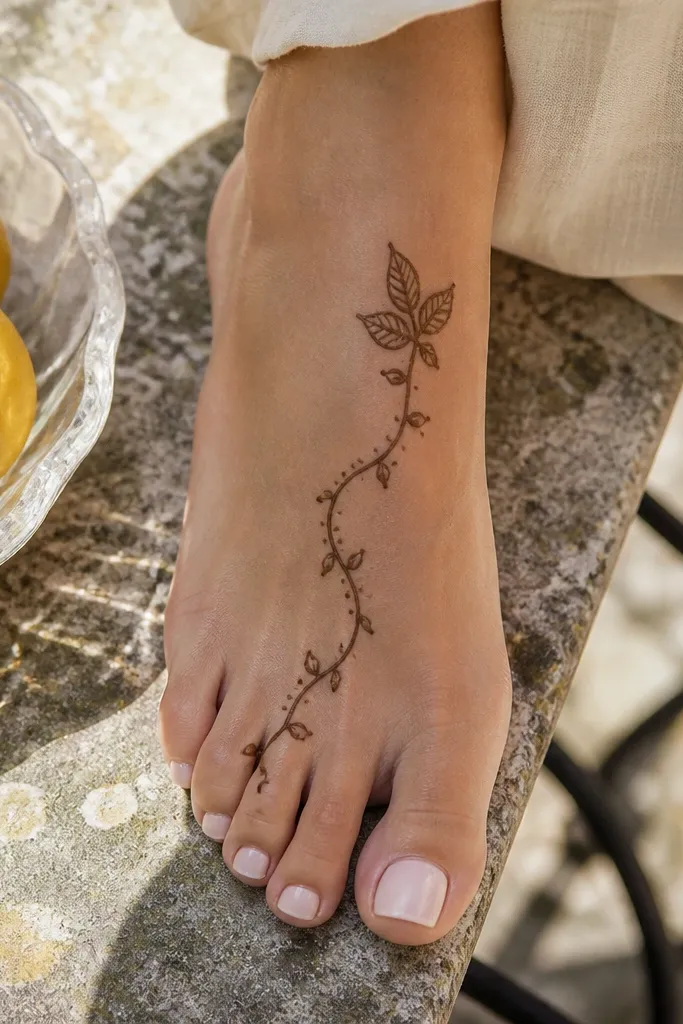
Start near the center of the top foot with a thin curved vine line. Add alternating small leaf outlines along both sides of the vine — each leaf is two short curves meeting at a point. Stop the vine before the toe tips, then create one leaf cluster at the end with 5-7 leaves. Add tiny dots between leaves for clarity. Outline the cluster edges slightly thicker.
This is the cleanest “nature” look that still stays simple. A micro vine trail is thin and controlled, and one leaf cluster at the top gives you the focal point. Because the vine stays narrow, it works on small feet and doesn’t sprawl into toe space. It also fades nicely because the vine lines are distinct even when color lightens.
AvoidAvoid looping the vine too much. Too many curves make it look tangled on feet.
Pro tipKeep vine spacing consistent — equal gaps between leaves make it look designed, not accidental.
16. Half-Moon Arch with Dot Sprinkle
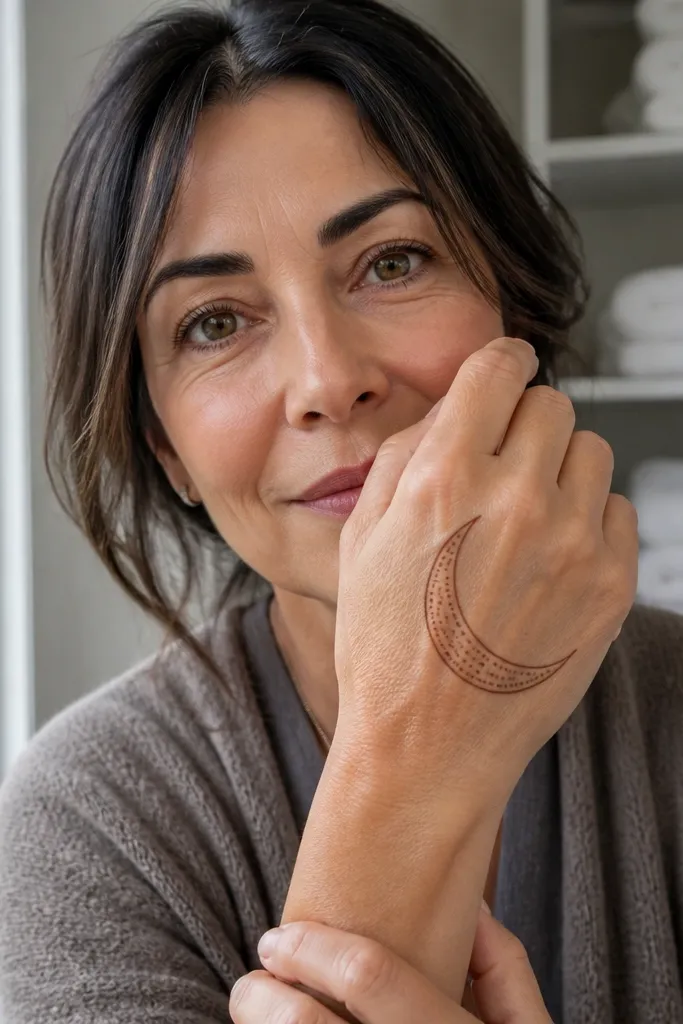
This pattern is made for clean, airy coverage. The half-moon outline sits on the arch, and the dot sprinkle gives texture without heavy filling. It’s great if you want something that looks good even with minimal drying time because there’s less surface area to overwork. Photos look crisp because the outline defines the shape and the dots add sparkle.
Draw a half-moon arc across the arch with a thick outline. Inside the half-moon, leave the center mostly blank and place small dots around the arc edges. Sprinkle dots lightly outside the arc on the upper arch area. Add one thin line connector from the half-moon’s center toward the top of the foot. Thicken the arc outline only, not the dots, so the dots stay light and crisp.
Use dot sprinkle like seasoning — start with fewer dots and add only if you need balance.
Don’t fill the half-moon interior — it makes the arch look heavy.
17. Top-Foot Cross Star with Side Dots

A cross star is bold in a small footprint. This design places a simple star shape on the top of the foot, then adds two dot columns on either side to keep it balanced. It looks clean because the star has clear edges and the dots act like a frame. It’s a good choice if you want a modern look that still feels traditional through the dotwork.
Draw a small cross on the top of the foot using a vertical and horizontal line. Extend each arm into a pointed star by adding short lines at the ends. Add two vertical dotted lines on both sides of the star, about 1 cm away from it. Connect the star tips to the nearest dotted lines with short angled strokes. Outline the star points slightly thicker and leave the center open.
Keep the star centered on the top foot, not toward the toes, so the dotted columns have room.
Avoid thickening the dotted columns too much — they blur when dried.
18. Ankle Bracelet with Tiny Paisley Rows

Draw a thin curved bracelet line around the ankle curve. Directly above the bracelet line, draw a row of 5-7 tiny paisleys pointing upward. Add a second row above it with fewer paisleys so the top row doesn’t crowd. Place a dot at the tip of each paisley for crispness. Finally, outline the bracelet line again slightly thicker and leave space between the two rows.
Rows of tiny paisleys look detailed without being hard. This design uses an ankle bracelet line as the base, then adds two short paisley rows stacked like a double band. The rows create texture that shows up in photos, but because each paisley is small and outlined, it stays manageable for beginners. It also works well when your time is limited because you can repeat the same paisley shape quickly.
AvoidDon’t fill paisley interiors. Outlines only keep the band airy.
Pro tipUse the same paisley size for the entire row. Consistency is what makes it look “designed.”
19. Toe-to-Arch Dot Trail with Side Hooks
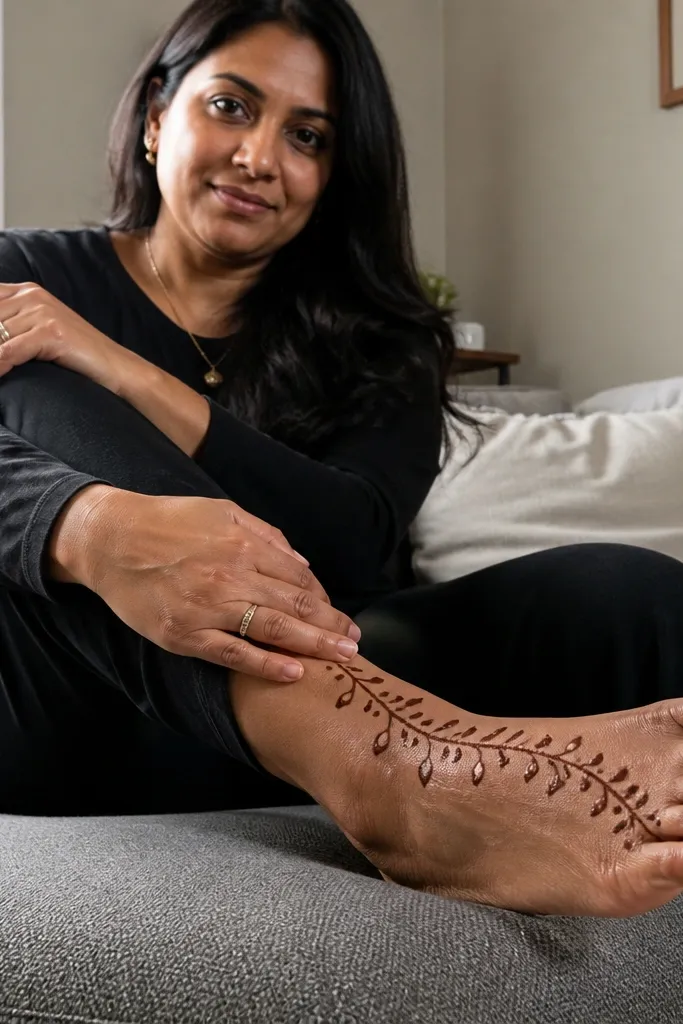
Start near the base of the big toe with a dot, then create a diagonal dotted trail toward the arch. At intervals, add small side hooks: short angled lines that connect to the trail with one dot. Keep the trail spacing even so the hooks look intentional. Add one small dot cluster at the arch end and stop. Outline the biggest hook edges slightly thicker so they darken properly.
This is a clean, elegant structure for small space because it uses one main trail. The dot trail runs from toe area to the arch, and side hooks add rhythm without adding width. It’s especially good when you want the design to look long and flattering on the foot. Photos show it clearly because the trail creates a diagonal line that stands out against bare skin.
AvoidAvoid adding hooks on both sides too frequently. One hook per gap is enough.
Pro tipIf your dots run together, slow down and use lighter pressure. Crisp dots look better than thick blobs.
20. Arch Frame with Two Corner Fans

Draw a thin curved frame along the arch, starting near the inner ankle and ending toward the outer arch. At each end of the frame, draw a small fan: five short curved lines meeting at a base point. Add one dot at the center of each fan for definition. Connect the fan base to the frame with a short curved line. Keep the middle of the arch frame open so it stays light and photogenic.
This design gives you a framed look without covering the whole foot. A thin arch frame outlines the top curve, and two corner fans sit at the inner and outer edges. The fans add softness, while the frame keeps everything tidy. It’s a strong option for small feet because the frame naturally scales to your arch and still reads clearly in side shots.
AvoidDon’t add extra ornaments inside the frame — it turns into clutter.
Pro tipMake the frame line slightly thicker than the fan lines for a clean hierarchy.



