
1. Finger Ring Ladder on One Hand
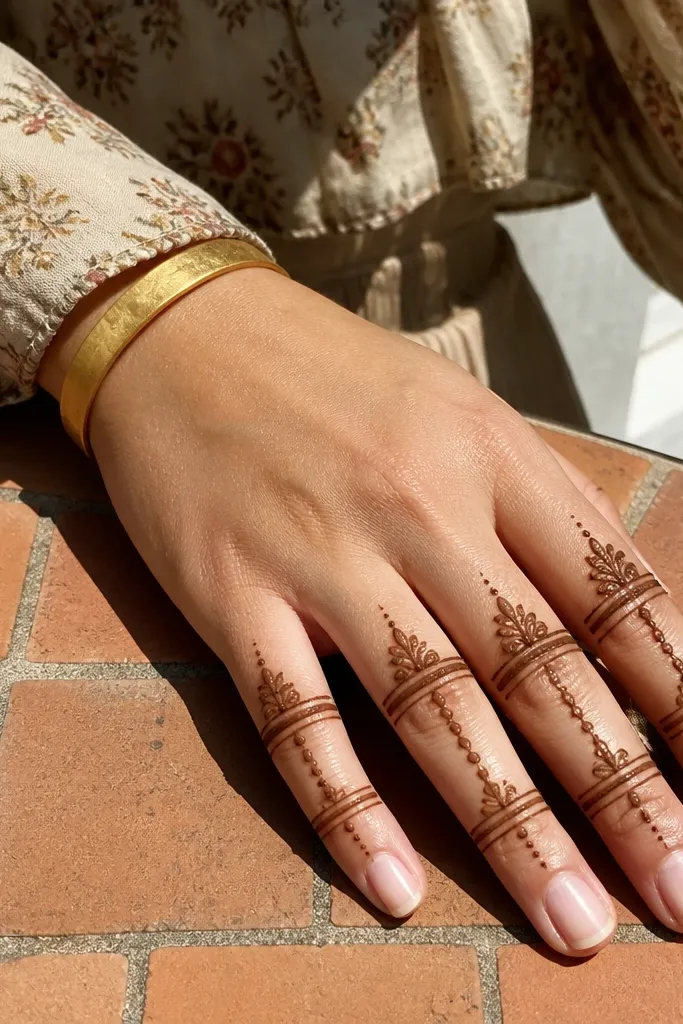
This design is simple but looks intentional because it uses repeatable ring bands with a clear rhythm. The “ladder” dots between rings guide the eye and stop the pattern from looking random. It’s great for parties where you want mehndi to show without covering your whole palm. The lines stay thin, so even beginners get crisp edges and clean symmetry. It also photographs well because the rings catch contrast against skin as they dry darker.
Pro tipUse the same cone pressure for every ring — consistency beats thicker lines.
Start by marking four tiny guide dots across the back of each finger at the knuckle level. Draw a thin oval ring around each finger using a continuous line, leaving a small gap at the top for a dot. Add the ladder by connecting small dots in a straight-ish vertical line between adjacent rings. Finish with one micro-dot at the base of each ring to anchor the pattern.
AvoidAvoid drawing rings of different sizes; mismatched rings look messy fast.
2. Back-of-Hand Three-Leaf Fan
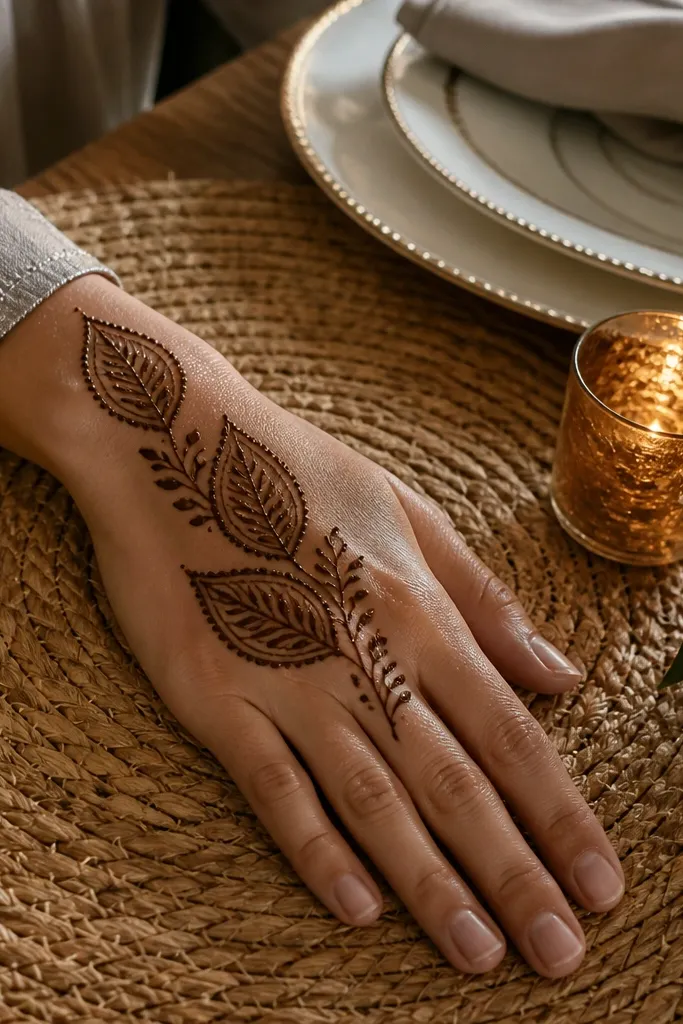
A three-leaf fan looks festive without needing heavy filling. The shape is easy to repeat, and the spacing is forgiving, so it hides early mistakes. Place it on the back of the hand because the leaf tips stretch nicely across skin contours. It also works with most outfits because it doesn’t clash with jewelry — the wrist-to-center flow is the point. You get a balanced look that stays readable even if your henna color is lighter.
Draw a thin wrist band line across the back of your wrist, then place a center dot above it. From that center dot, sketch three leaf outlines: one pointing up, one middle, one slightly down, all fanning outward. Keep each leaf outline thin, then add tiny dot accents at the leaf bases. Finally, connect the leaf tips with two short curved lines that taper toward the center.
Outline first, then fill lightly — outlines create the clean photo look.
Don’t overfill leaves; thick blobs dry unevenly and darken patchy.
3. Wrist Band with Dot-Comma Beads
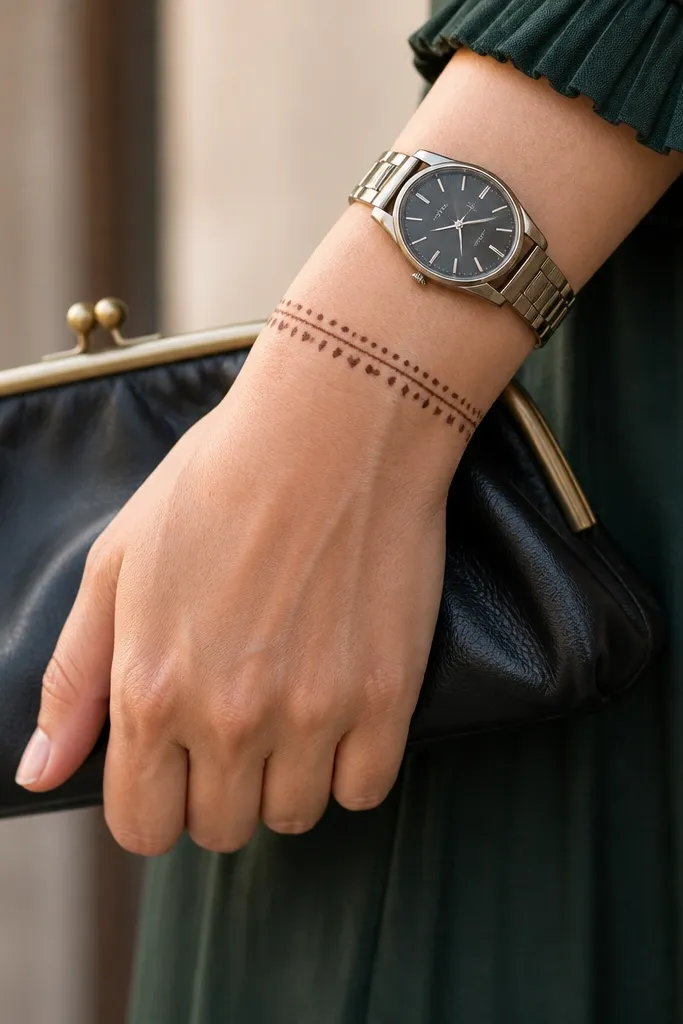
This is the fastest “holiday-ready” design because it frames the hand and looks polished even when the rest is bare. Comma beads are beginner-friendly: you get movement without needing perfect symmetry. The dot accents add sparkle in real life and in photos. Wear it alone for a minimal look or pair it with a small finger ring pattern. It also dries evenly because it’s mostly line work and small shapes.
Start with a straight or slightly curved line band around the wrist using light pressure. Along that line, add repeating comma shapes pointing alternately left and right, each about the same length. Place a tiny dot at the base of every comma so the band looks uniform. Finish by adding a second thin line just above the band, leaving a small gap between the two lines.
If your commas spread, slow down and lift the cone right after each comma ends.
Avoid thick double lines; two heavy bands make the wrist look bulky.
4. Palm Center Star with Micro Rays
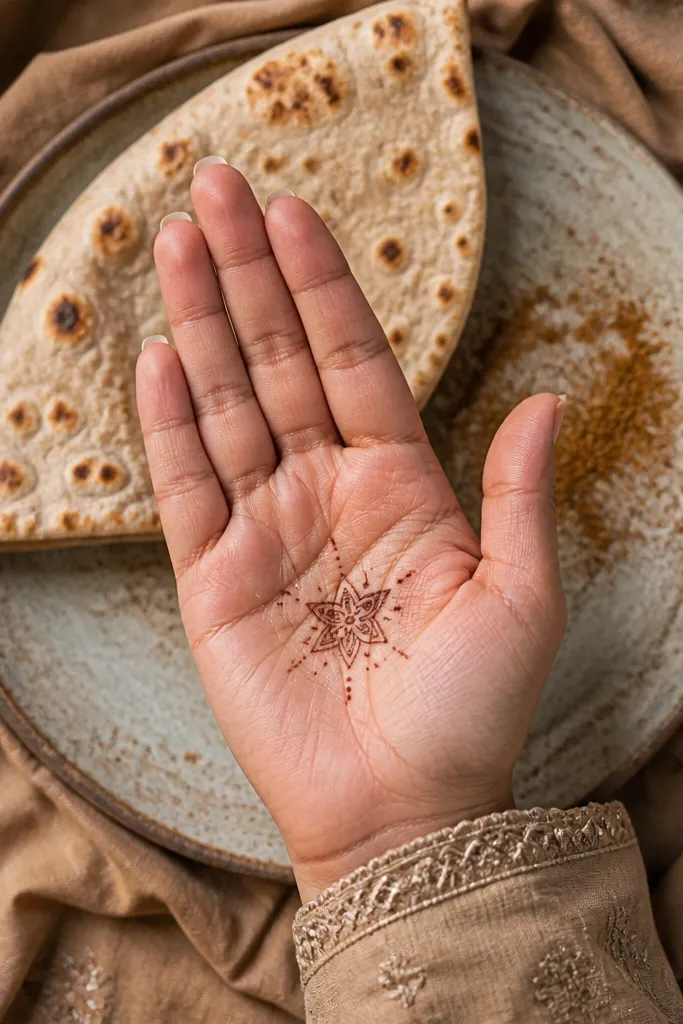
A tiny star in the center of the palm gives a clean focal point without covering everything. It’s surprisingly photogenic because the star creates instant symmetry and the micro rays add texture. This works well for simple mehndi when you want a “statement” detail that still feels light. The design is also practical for daily wear because it’s compact and doesn’t rub off as easily as full coverage. Use it for festive events, especially if you’re wearing rings or a bracelet.
Pro tipLet the star outlines sit slightly thicker than the rays for better contrast.
Lightly mark a center dot on the palm area you want as your anchor. Draw a small six-point star outline around that dot using thin lines, keeping each point equal length. Add 10-12 micro rays around the star — short curved lines or tiny dashes. Finish with a ring of small dots at the outer edge of the rays to frame the center.
AvoidDon’t draw the star too large; oversized palm art smudges and looks crowded.
5. Side-of-Hand Vertical Vine Stripe
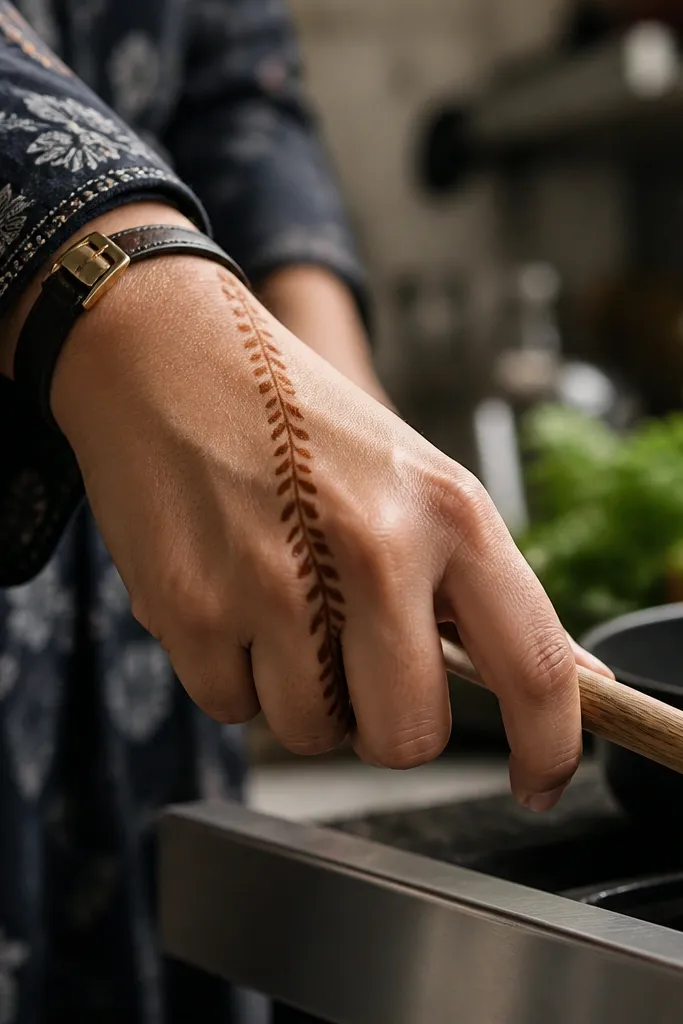
A vertical vine stripe makes the hand look longer and cleaner in photos. It uses one main line plus small leaf steps, so it stays simple while still looking decorative. You don’t need to fill the whole hand; the line path is the design. This is a good choice when you want mehndi that doesn’t compete with a watch or bracelet. The leaves add texture but stay small enough for even drying.
Pro tipKeep leaf sizes consistent; one big leaf ruins the clean rhythm.
Draw a single vertical line from near the wrist up toward the base of the fingers along the side of the hand. Add small leaf outlines branching left and right every 1-1.5 cm along the line. Keep the leaf stems connected to the main line with thin strokes. Add two tiny dot clusters at the top and bottom to make the vine feel finished.
AvoidAvoid zigzagging the main line; it makes the whole piece look shaky.
6. Thumb Curve with Three Dots
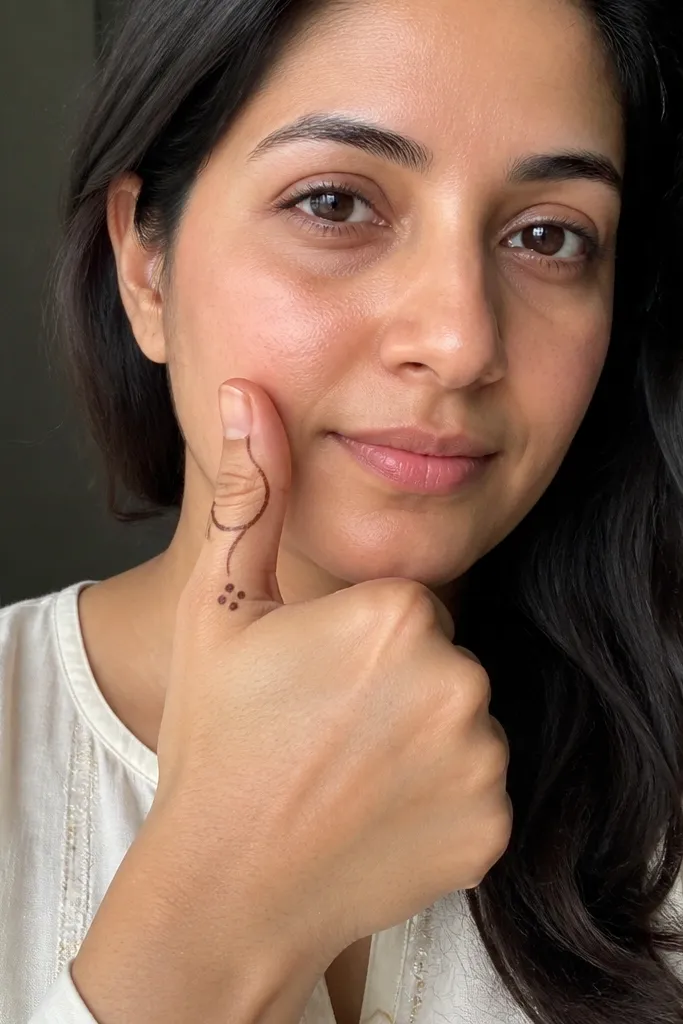
This design is tiny, fast, and looks expensive because it uses negative space on purpose. The curved line follows the thumb shape, and three dots create a neat focal triangle. It’s ideal for beginners who want a win without committing to a full hand design. Place it on the side of the thumb near the crease so it shows when you hold your hand for photos. It also pairs perfectly with other minimalist pieces like wrist bands.
Pro tipUse the cone tip edge, not the hole, to place dots — it keeps them round.
Draw a smooth curved line across the thumb area following your natural crease, keeping it thin. Place three dots in a small arc above the curve, with the middle dot slightly higher. Connect each outer dot to the curve using a short dash line. Finish by adding one micro-dot at each end of the curved line to anchor it.
AvoidAvoid smudging dots into the line; dots should sit cleanly separated.
7. Finger Tips Half-Moon Caps
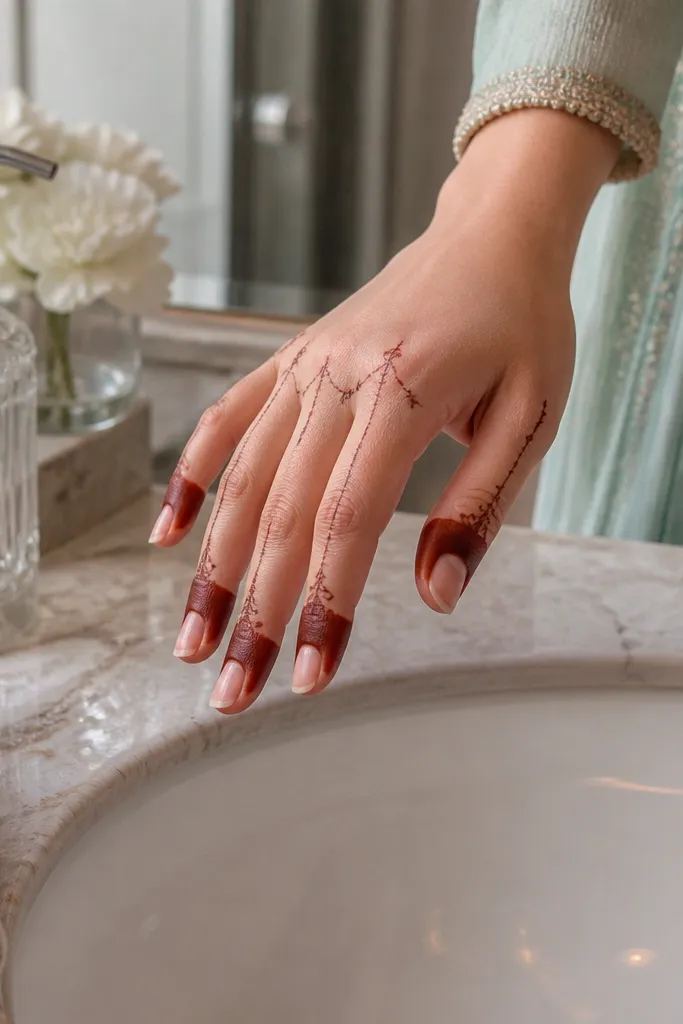
Half-moon caps are a simple way to make fingers look styled without covering the whole finger. The caps create a crisp top detail that shows in close-up photos. Add thin connectors between caps and you get a “designed” look instead of scattered marks. This works especially well for short nails or when you want mehndi that doesn’t touch your palms much. The design also dries quickly because it’s mostly outlines and small areas.
Start at the index finger tip and draw a thin half-moon cap along the top edge of the nail bed area. Repeat on each finger using the same cap size and thickness. Add a thin vertical connector line from each cap down about 1 cm. Finish by placing one dot at the bottom of each connector so the pattern ends cleanly.
Match cap thickness to your cone flow; if lines are wobbling, slow down and tighten your grip.
Don’t make caps too thick; heavy caps crack as they dry.
8. Wrist to Center Geometric Arrow
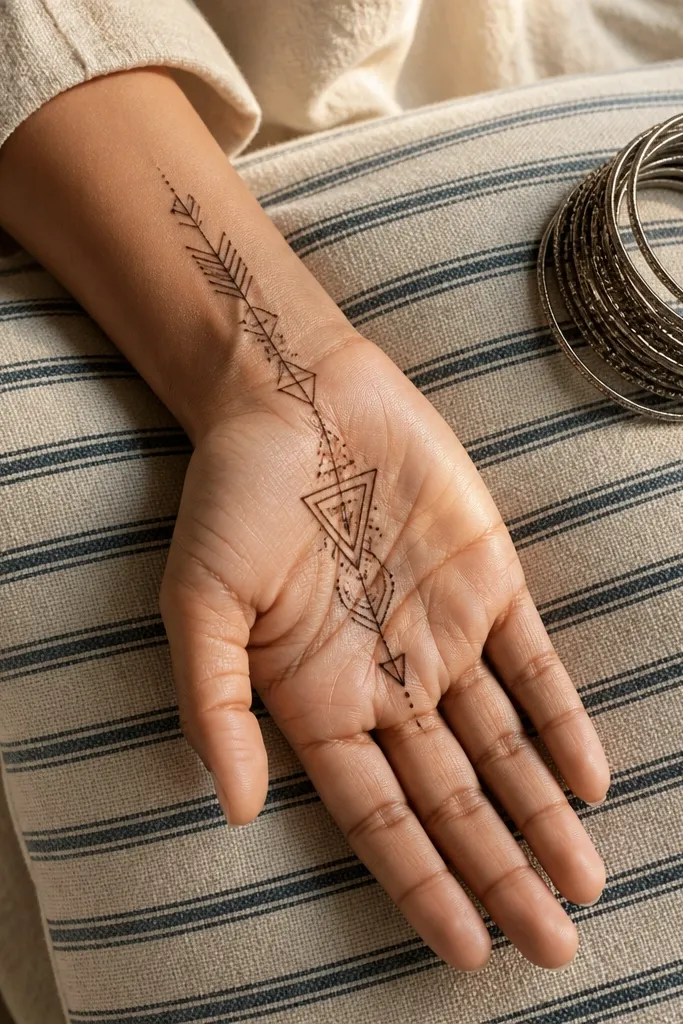
A geometric arrow gives you structure and instant direction. It’s clean, modern, and still counts as “simple” because it’s built from straight-ish lines and triangles. The arrow makes the hand look sharp in photos and pairs well with rings. This is a smart holiday option when you want mehndi that looks neat even if you wear long sleeves or gloves. The design also stays photogenic because it has clear edges and contrast zones.
Draw a thin base line across the wrist, then place a triangle tip at the center of the hand area you want to reach. Create the arrow sides with two lines that meet at the triangle tip. Add two small side triangles near the wrist base to decorate the arrow. Finally, outline the arrow again lightly inside the edges to make the shape read clearly.
Use light guide dots at start and end points so your arrow doesn’t drift.
Avoid curves in the main arrow lines; geometry should stay straight for the clean look.
9. Palm Side Lattice Corner
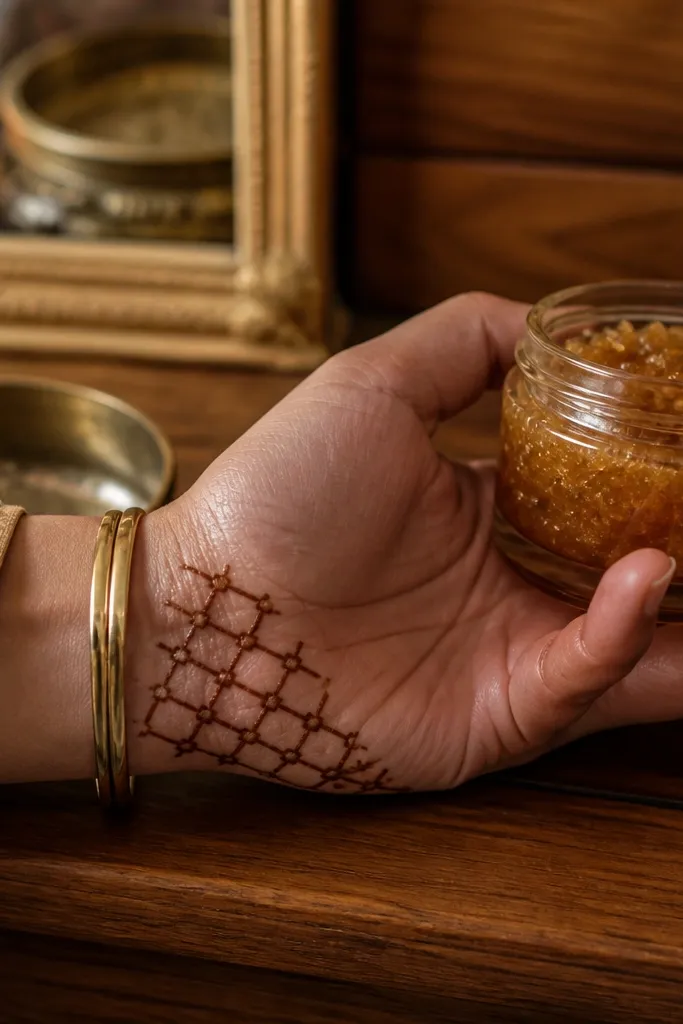
A lattice corner looks delicate but still festive because it adds texture without heavy coverage. It’s also forgiving because lattice lines can be slightly uneven and still look intentional. Put it on the side of the palm so it frames the hand when you show rings. This design reads well in dim lighting because the repeated lines create a darker pattern area. It’s a good choice when you want something more interesting than a single band.
Sketch a small rectangle corner area on the side of the palm using light guide dots at each corner. Draw three vertical lines inside the rectangle, then connect them with short horizontal dashes to form a lattice. Add tiny dots at the intersections where lines meet. Finish by extending one thin border line around the rectangle corner to frame it.
Keep horizontal dashes short; long ones make the lattice look like scribbles.
Avoid closing every square perfectly; tight squares can look stiff and crowded.
10. Back-of-Hand Dot Halo Around a Center Dot
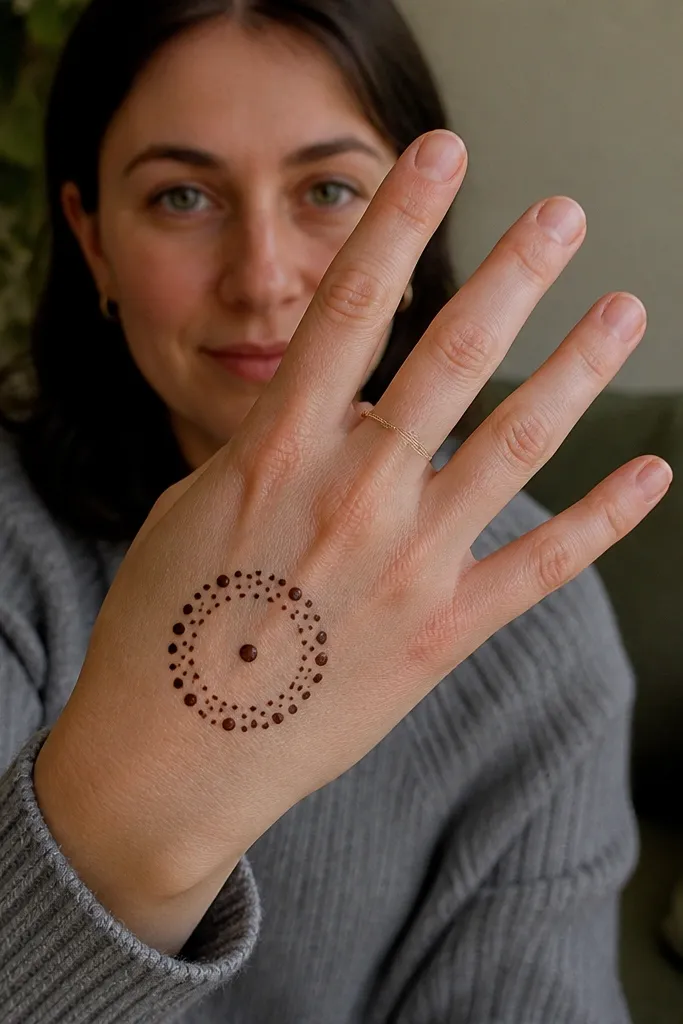
This is one of the easiest designs that still looks styled because the halo pattern is instantly readable. The center dot gives you a focal point, while the dot ring creates a clean border. When the dots dry darker, the halo pops in photos even if the rest of the hand is minimal. It’s also great for people who struggle with drawing leaves or vines. You can scale it up or down based on how much space you want to cover.
Place one center dot on the back of the hand where you want the focal point. Around it, draw a circle of dots — keep them evenly spaced. Add a second inner ring of smaller dots if you want extra contrast. Finish by connecting three opposite points on the halo with short curved lines that taper at the ends.
Use a slow, steady squeeze and lift the cone straight up for round dot edges.
Avoid uneven dot spacing; gaps make the halo look accidental.
11. Simple Paisley Half on Back of Hand
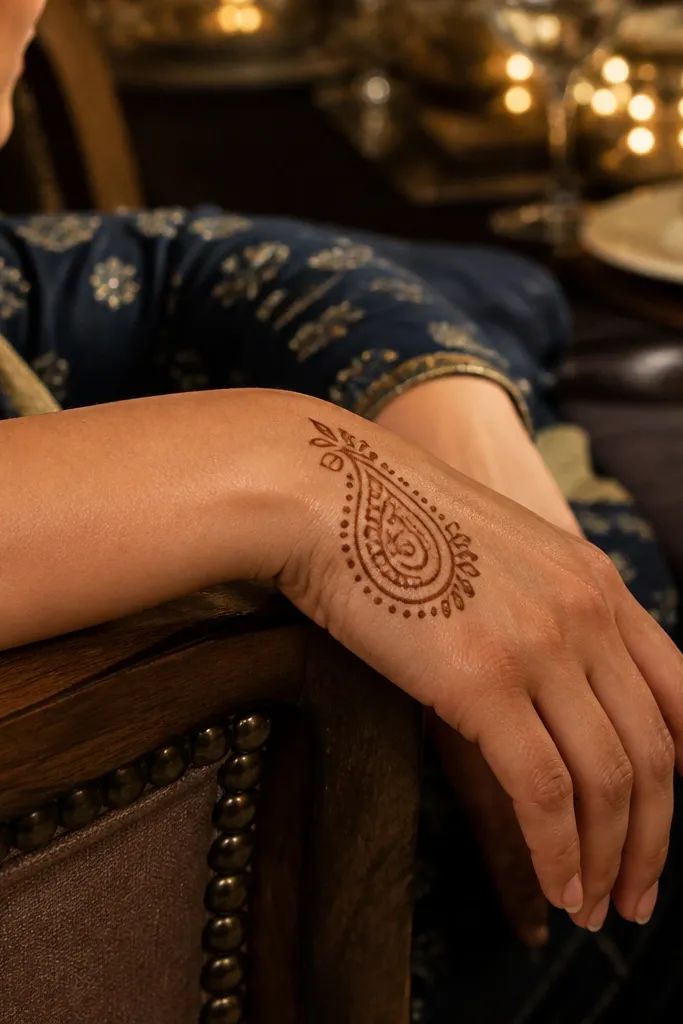
Half a paisley looks classy and holiday-friendly without the time burden of full paisley work. The outline alone is enough to look good because paisley curves naturally catch light and create a graceful silhouette. Place it on the back of the hand where it doesn’t fight with finger rings. This design works for both light and darker henna because the line work holds the shape. It also looks good when you leave the inside mostly blank.
Draw a vertical curved teardrop outline on the back of the hand, stopping halfway so it stays “half paisley.” Add a small curled tail at the bottom end and a tiny hook curl at the top. Outline the inner curve with a second thin line to give it dimension. Finish with 5-7 tiny dots along the outer curve edge to add texture.
Keep the inside mostly open; blank space makes the outline look sharper.
Avoid filling the paisley heavily; it can crack and darken unevenly.
12. Wrist Band Plus Two Side Dashes
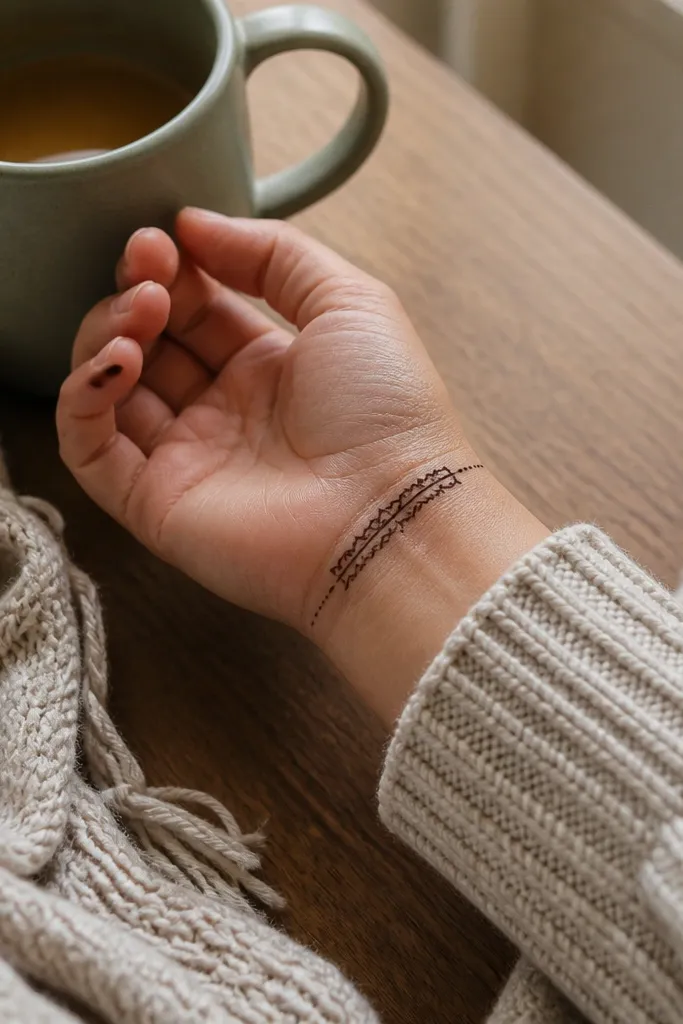
This is a minimalist wrist design that still looks complete. The band gives structure, and the side dashes add decoration without crowding. It’s a good holiday option when you want mehndi to match a bracelet or watch without hiding it. The thin band also dries faster, so you can do it on busy days. In photos, it reads clean because there’s less surface area for smudging.
Pro tipIf you’re using a fresh cone, squeeze out a tiny amount on tissue first so the flow is even.
Draw a thin band around the wrist with light pressure. On each side of the band, add two short diagonal dashes that lean toward the center, keeping the spacing equal. Add one tiny dot at the end of each dash. Finish by drawing a second thin line just inside the band to frame it.
AvoidAvoid thick paste at the wrist crease; it wrinkles as it dries.
13. Minimal Palm Dots with One Curved Line
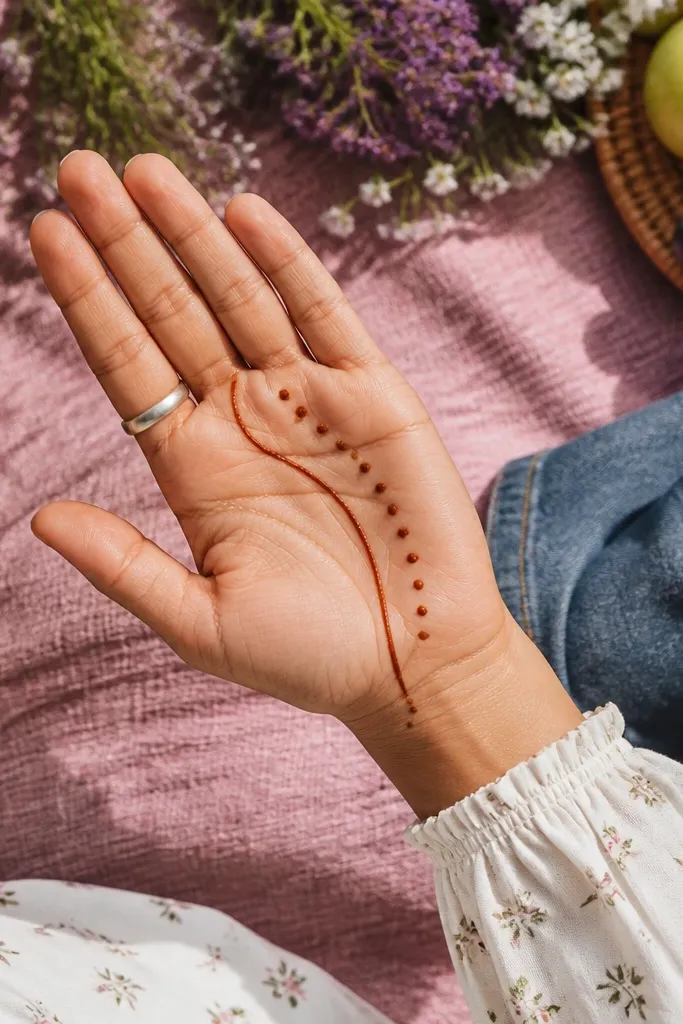
This design is for people who want mehndi that looks neat even when it’s small. One long curved line gives movement, while the dots create a tidy pattern grid you can control. It’s perfect for holiday dinners, quick photo moments, or when you’re pairing mehndi with a bold outfit. The look stays photogenic because the line creates contrast and the dots fill in negative space. It also requires less paste, so you get smoother drying.
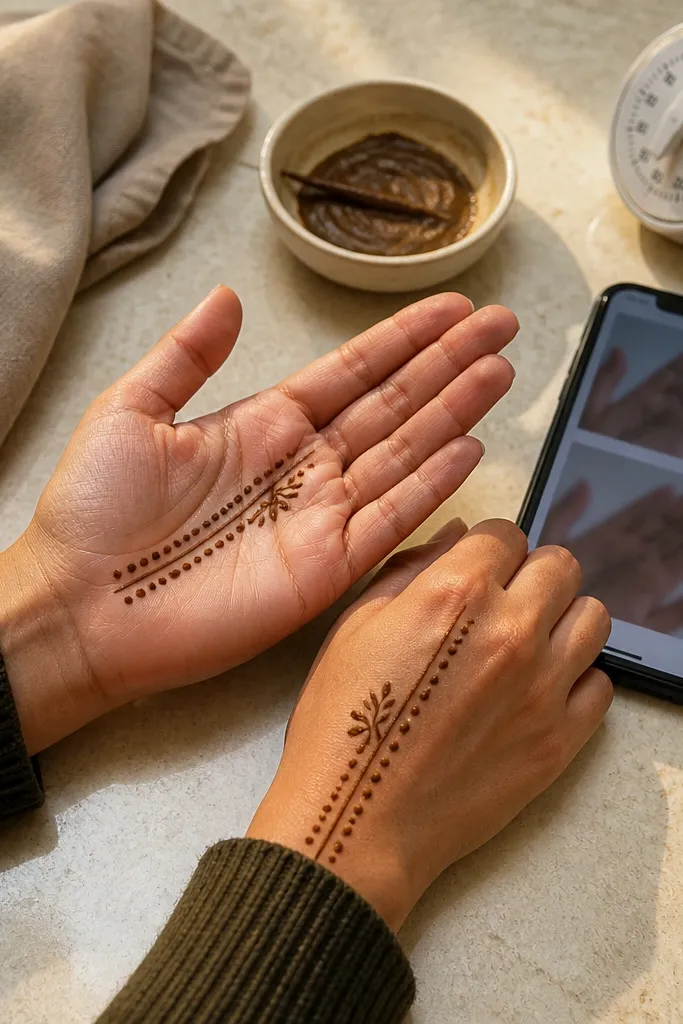
Place three evenly spaced dots on the palm area, roughly in a gentle arc. Draw one thin curved line that passes through the bottom dot and curves upward toward the top dot. Add two short connector dashes between the line and the middle dot. Finish by adding a tiny dot at both ends of the curved line so it looks finished.
Keep dot sizes identical; if dots vary, the whole design looks unplanned.
Avoid adding extra random dots; the clean look comes from a fixed count.
14. Back-of-Hand Ladder Lines Between Fingers
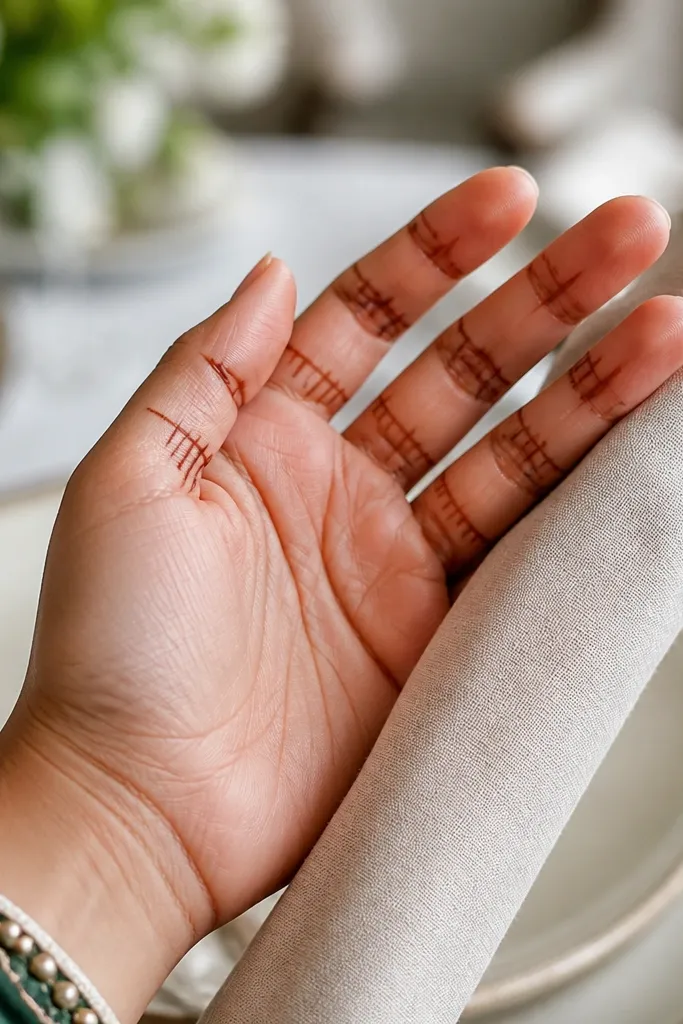
This one makes the hand look “decorated” without covering the palm. Ladder lines between fingers are simple to draw and they create a structured, airy look that doesn’t feel heavy. It’s also a good way to use the space between finger creases, which often gets ignored in beginner designs. The repeated steps create visual rhythm and hold up well in photos. If your henna color is lighter, the line pattern still shows because the shape is defined.
Mark two guide points between each pair of fingers on the back of the hand. Draw a thin vertical line between the points, then add small horizontal steps on both sides of that vertical line. Keep the steps short so they don’t merge. Repeat for two or three finger gaps depending on space, then connect the ends with one thin curved border line.
Use a steady wrist and keep step spacing consistent; the “ladder” effect depends on uniform gaps.
Avoid crossing ladder lines; crossings make it look messy fast.
15. Three-Bead Bracelet Pattern on Wrist
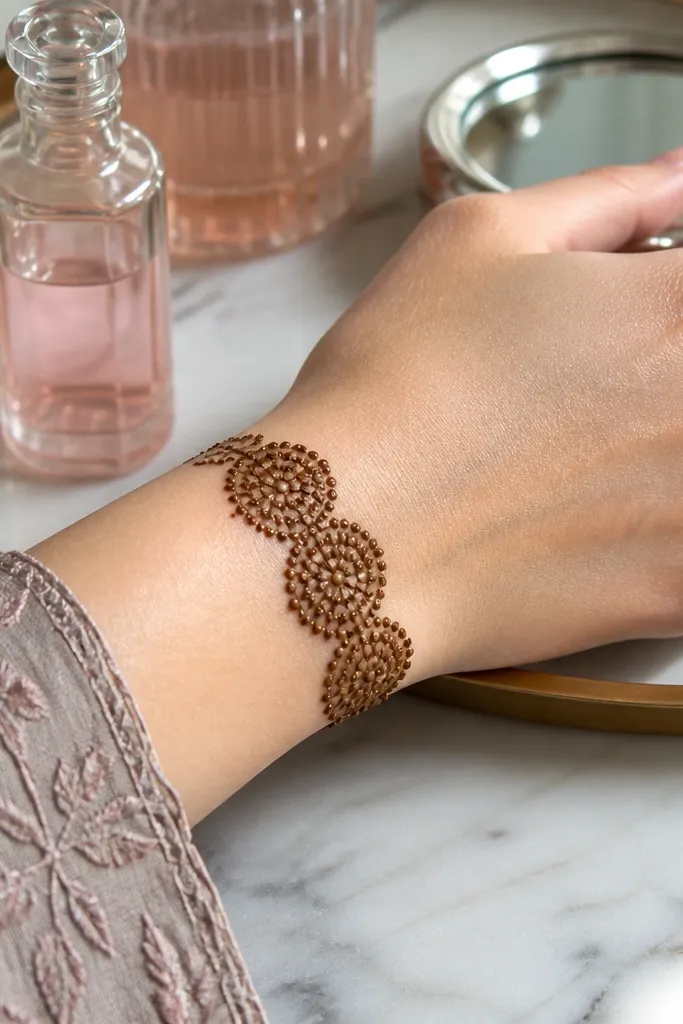
A bracelet-style mehndi on the wrist looks dressed-up even if the rest of your hand is bare. The bead clusters create a festive texture that reads well in photos and matches holiday jewelry. This design is also quick because you repeat one cluster three times. It’s a great option for beginners because bead clusters hide minor line wobble. The result looks intentional because the wrist is framed and the pattern is centered.
Pro tipIf commas are uneven, use smaller bead clusters — tighter shapes look cleaner.
Draw a thin base line around the wrist. Create one bead cluster by drawing three small comma shapes pointing inward, then place a dot at their meeting point. Repeat the cluster two more times spaced evenly along the wrist line. Add a second thin line above the clusters, following the wrist curve to finish the bracelet frame.
AvoidAvoid placing clusters too close; touching clusters look like one blob.
16. Asymmetrical Leaf Sprig with Tiny Fill Dots
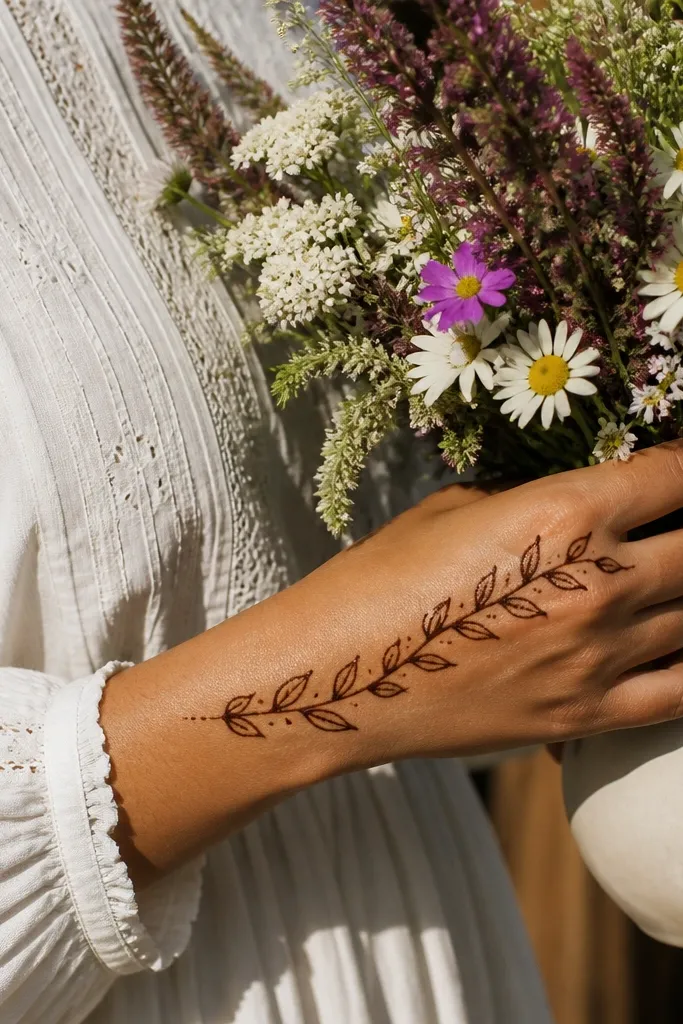
Asymmetry looks modern and holiday-friendly because it feels natural and not overly perfect. A leaf sprig is easy: one stem line, two to four leaf outlines, then tiny fill dots. The dots inside the leaf tips add texture without heavy shading. This design is great if you want something that doesn’t look like a template. It also looks good on both hands because the concept is consistent even if the leaf placement changes.
Draw a thin diagonal stem line from wrist toward the center of the back of the hand. Add 3-4 leaf outlines along the stem, alternating sides and keeping leaf sizes close. Outline each leaf and leave most of the inside blank. Fill just the leaf tip area with 3-5 tiny dots and connect the leaf bases to the stem with short dashes.
Keep leaf tips slightly darker by placing dots only at the tip — it boosts contrast.
Avoid full-leaf dot filling; it makes the sprig look heavy and muddy.
17. Thumb + Index Pair Accent
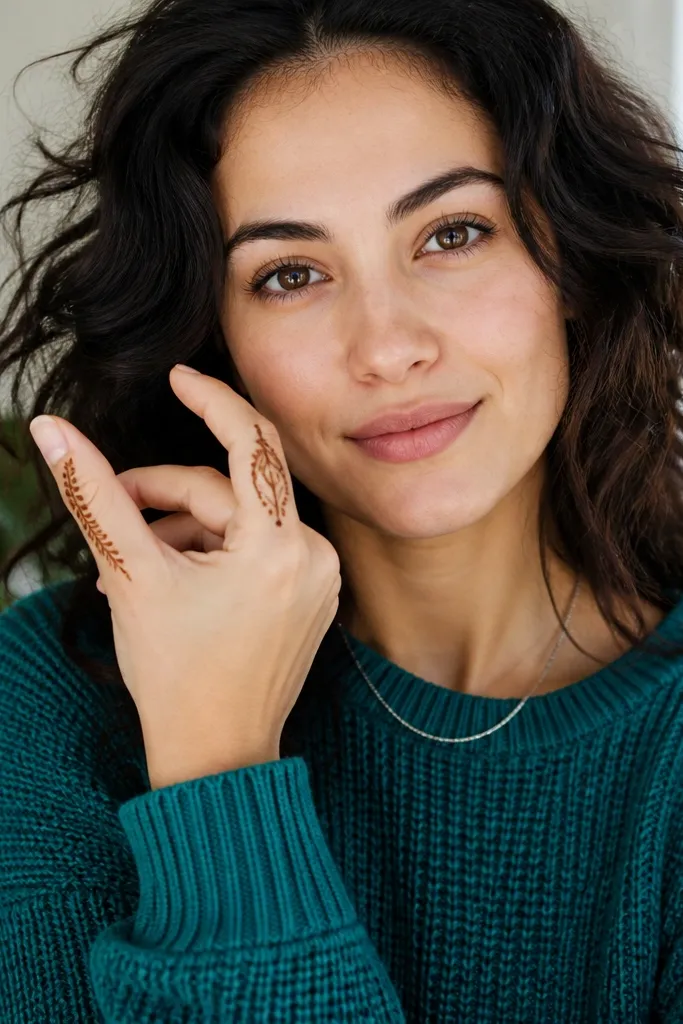
This pair accent gives you a cohesive look across the thumb and index finger, which is exactly what people notice first in photos. The thumb curve is simple and smooth; the index teardrop adds a clear second focal point. You get balance without covering the whole hand. It’s also a smart holiday choice because the accent shows even with party gloves or bangles. The design works well with lighter henna too because the shapes are bold and separated.
Pro tipKeep the index teardrop smaller than you think — small motifs look more premium.
Draw the thumb curve first: a thin curved line following the thumb crease with three small dots above it. On the index finger, draw one small teardrop outline near the first knuckle area. Add a tiny dot at the teardrop tip and one short curved connector line from the teardrop base toward the finger side. Finish by adding one small dot cluster near the thumb curve end so both motifs feel connected.
AvoidAvoid adding extra motifs between thumb and index; spacing is what makes it look clean.
18. Palm Mehndi Mini Border Around the Base of Fingers
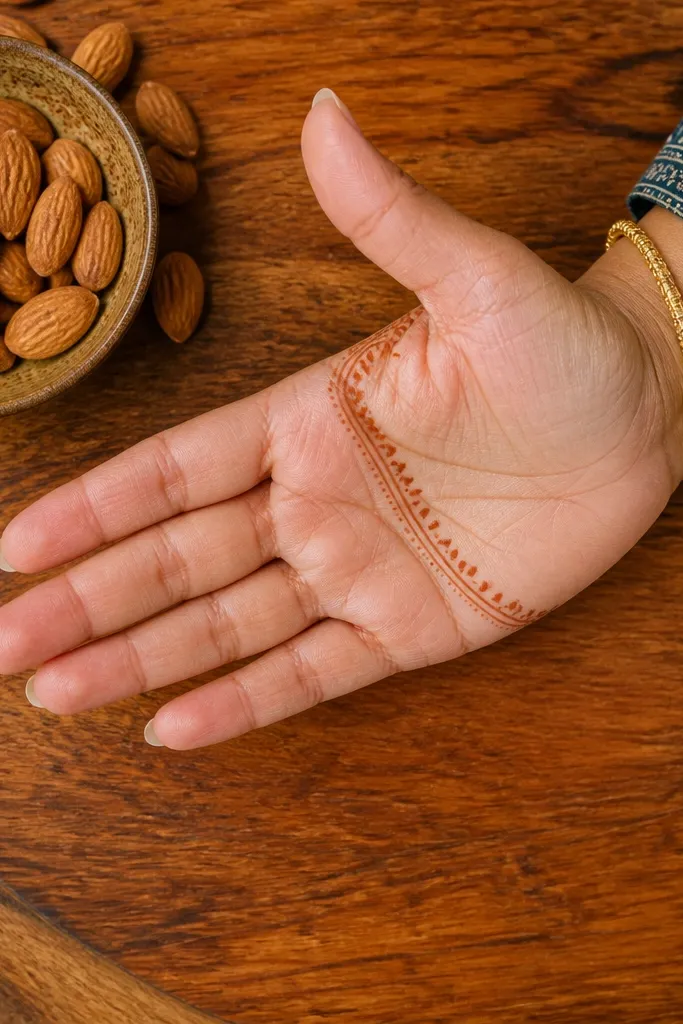
A mini border at the base of the fingers instantly makes the whole hand look intentional. It’s simple because it’s mainly one curved line plus dot placement. You get a “belt” effect that frames the palm and helps the design stay visible even if you do lighter henna. This works for festive days when you want something that looks good in both close-ups and wide shots. The border also helps hide uneven palm application because it creates a visual line across the area.
Pro tipIf your border line breaks, go back and reinforce only the missing spots after the first layer sets.
Use a thin cone to draw a curved line from one side of the palm base across to the other side, following finger roots. Place tiny dots on the underside of the border line, spaced evenly (about one dot every 1-1.5 cm). Add two short curved up-ticks between the dots — one in the center and one slightly off-center. Finish by drawing a second thin line above the border line to create a framed edge.
AvoidAvoid thick paste on the border; thick paste can peel and smear.
19. Tight Double-Ring Band on Fingers with a Single Drop Center
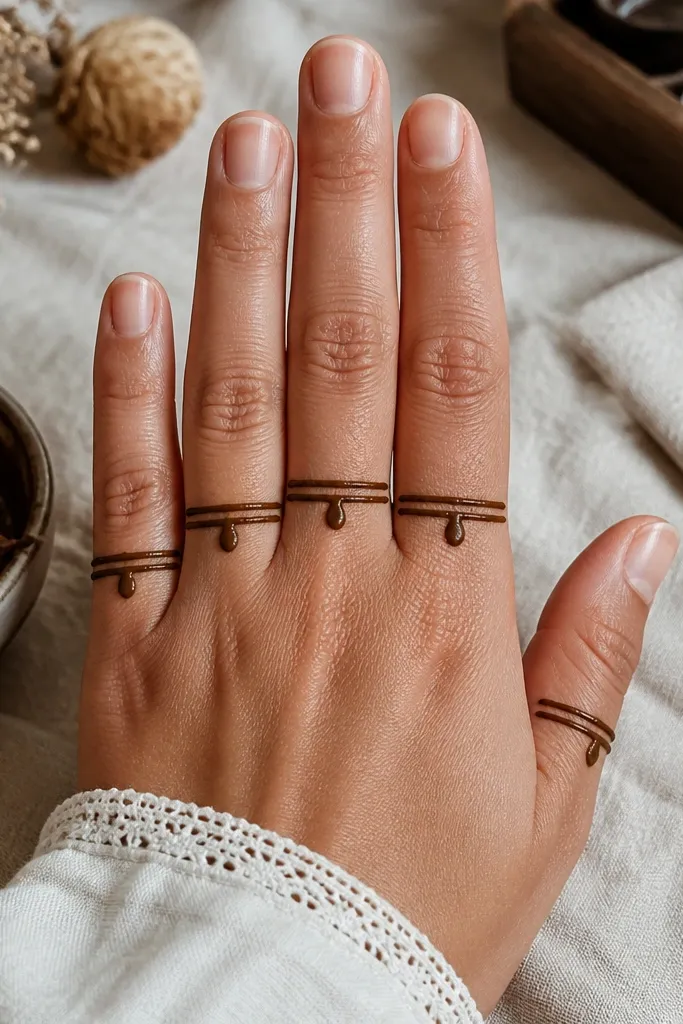
This design fixes the biggest problem with simple mehndi — it looks unfinished when you only do one band. The tight double-ring gives the fingers structure, and the single drop center makes it look intentional even when the rest of the hand is clean. It’s fast because you repeat one motif with tiny spacing rules instead of inventing new patterns. Use it when you want something clean for daily wear or an easy base before you add fuller work elsewhere. Time-wise, plan about 20-35 minutes for one hand with a steady hand and medium-thick cone flow.
Step 1: Pick 4 fingers to decorate (index through pinky works best). Draw a thin circle band at the finger base, then add a second circle band 2-3 mm above the first; keep both bands the same thickness by using a light, steady cone pressure. Step 2: Center one teardrop between the two bands. Make the teardrop point down toward the lower band, then add a tiny comma at the top of the drop so it doesn’t look like a blob. Step 3: Repeat the same spacing on each finger, but vary drop size slightly (about 4-6 mm tall) so it doesn’t look like a sticker. Let it dry fully before adding any extra shading; if you want extra depth, do a soft dot cluster only at the teardrop tip.
Mark the drop center with a single pencil dot on your skin first, then pipe over it. If your paste smears, let the first ring set for 2-3 minutes before you add the teardrop.
Don’t make the rings thick — thick bands turn into a single dark smear and ruin the clean look.
20. Thumb-Arc Side Vine with Two Leaflets and a Micro Dot Trail
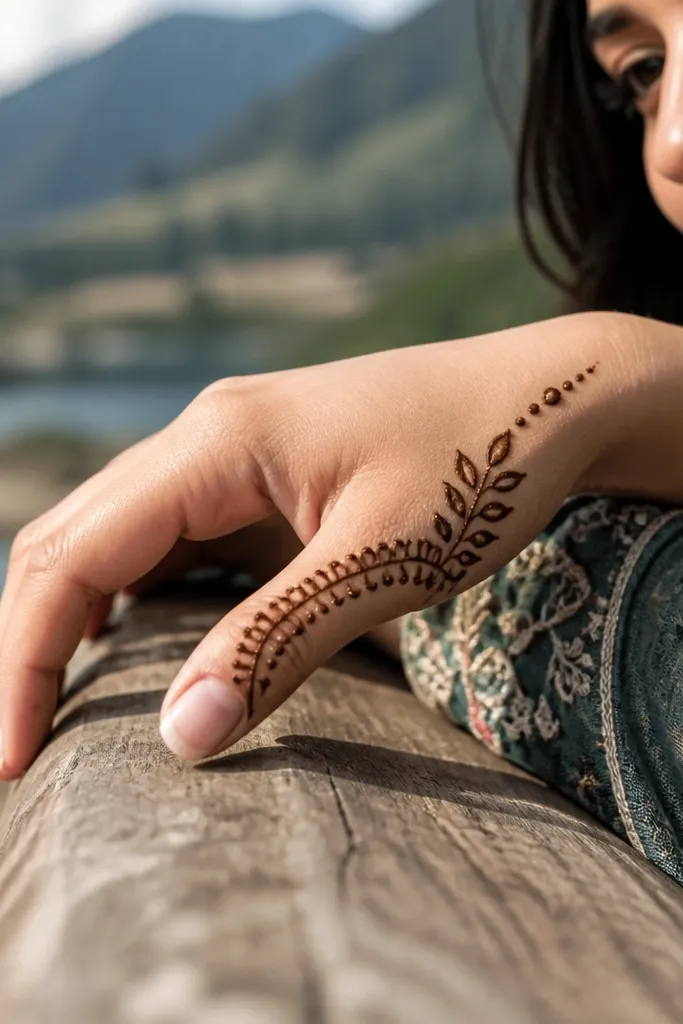
This is a simple mehndi layout that looks more detailed than it is because the curve does the heavy lifting. The thumb-arc vine follows the natural line of the thumb side, so the pattern hugs the hand instead of floating. Two leaflets add shape without filling the whole area, and the micro dot trail ties it together cleanly. It’s ideal for side-of-hand placement when you want a photogenic design but don’t want to commit to a full back-of-hand pattern. Expect 25-40 minutes for one hand, depending on how neat you keep the dot trail.
Step 1: Start at the base of the thumb near the wrist fold. Pipe a smooth arc along the thumb side up to the middle joint, keeping the vine line about 1.5-2 mm wide. Step 2: Add two leaflets on the vine — one around the lower third and one around the upper third. Each leaflet is a teardrop shape with a short center line, about 6-8 mm long, placed so the pointed ends face the thumb tip. Step 3: Create a micro dot trail from the end of the arc down toward the wrist fold. Pipe 5-8 tiny dots in a slight curve, spacing them 2-3 mm apart so it looks like a controlled shimmer line. Let the design dry before you do any touch-ups, especially around the leaflets where smudging is easiest.
Use the cone tip almost flat to the skin for the vine line; it gives you a clean, consistent width. For the dot trail, pause for a half-second per dot so each one stays round.
Don’t overfill the vine with extra curls — too many turns make it messy and less readable.



