
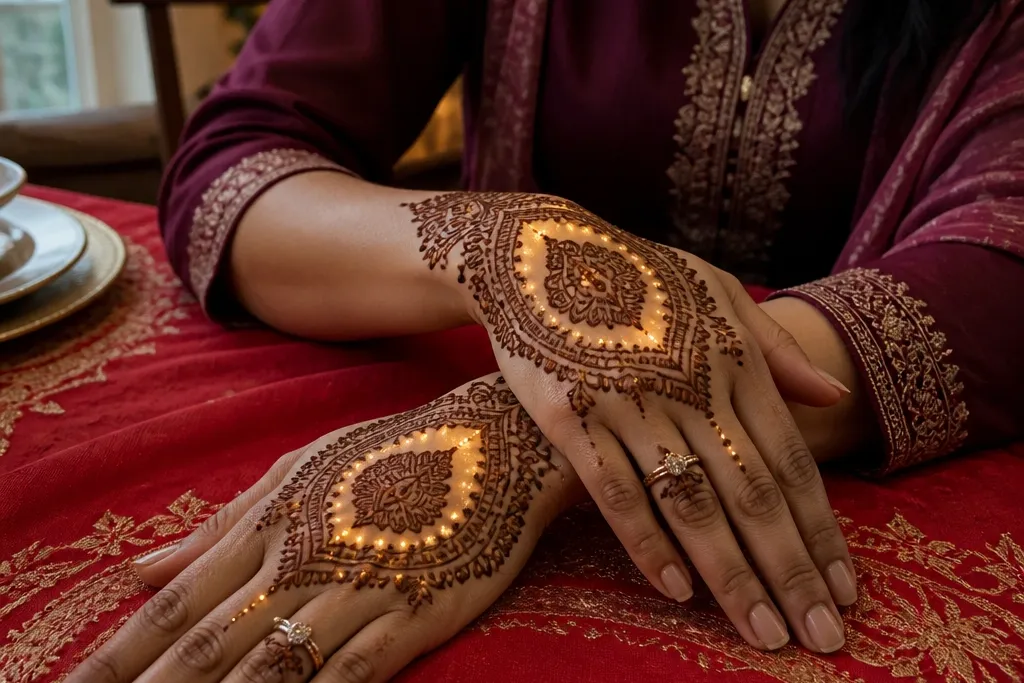
1. Diya Crescent Window Back Hand
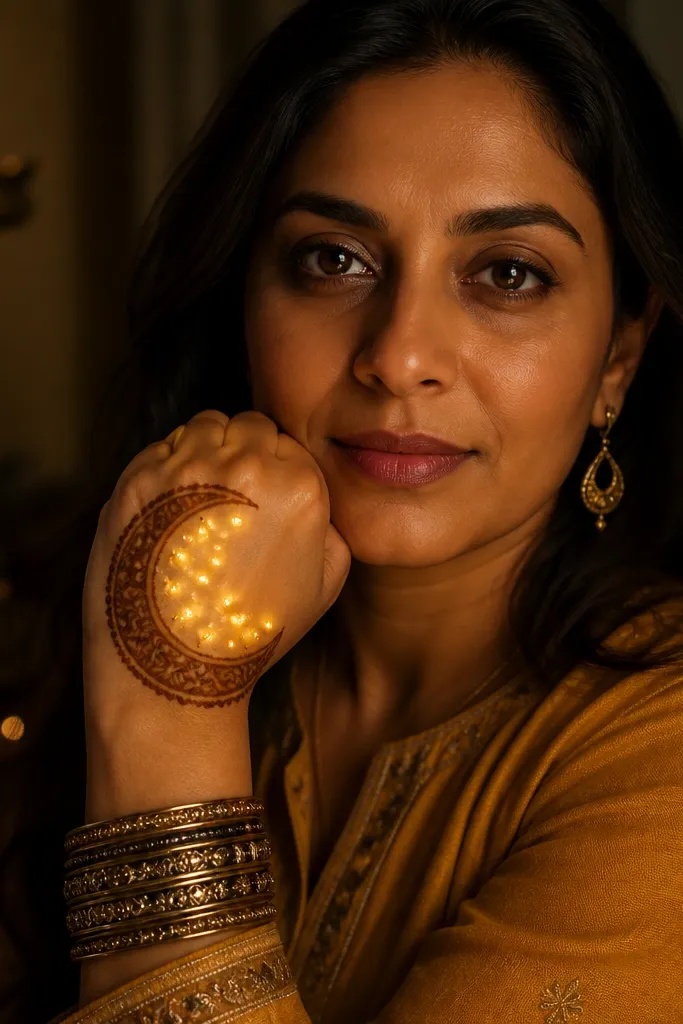
This design is made for the “lit from inside” look. You draw a crescent border across the back of the hand, then leave a clean window in the center where you place tiny LED points. The diya dots sit along the inner edge like a row of lamps, so the glow reads as flicker without needing heavy paste density. It photographs well because the crescent shape gives the eye a strong outline even when the lights are bright at night. Plan for a neat wrist band so the light wire can hide under the bracelet line.
Start by sketching a thin outer crescent from about the base of the thumb to the outer edge of the wrist. Fill only the crescent border with medium lines and add small diya-like dots along the inner border, then leave the center window mostly open. Next, place micro fairy lights or LED points inside the window area using a temporary skin-safe tape bridge, then let the paste fully dry before removing any tape from the skin.
Pro tipUse a stencil for the crescent border so the curve stays even — LED placement looks sloppy when the outline wobbles.
AvoidDon’t pack the center window with paste or the glow turns grey and dull.
2. Neon Rakhi Bracelet + Knuckle Lights
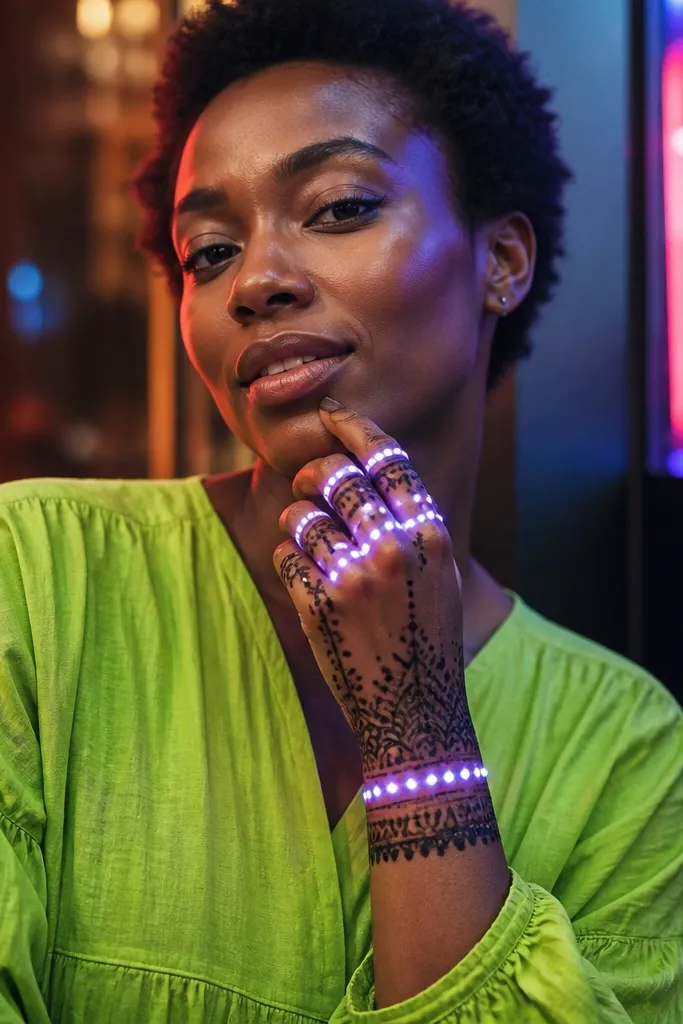
This one looks like a modern rakhi moment: a bold bracelet band at the wrist plus arch lines across the knuckles. The key is to design parallel lines that act like rails for the lights. Put LED points along the arch path so each knuckle curve looks lit, not just the wrist. The result is photogenic even with short fairy lights because the pattern gives the light a direction. It’s also practical — the wrist band hides the power source and keeps the design readable when your hand moves.
Draw a thick-ish bracelet band around the wrist area with repeating semi-circles. Then create two to three arch lines that connect from the band toward the knuckles, leaving small gaps between arcs. Place LED points at the gap intersections so they sit on the “rail” lines, and keep the wire tucked under the bracelet band until the paste is fully dry.
Pro tipChoose warm white LEDs (2700K) so the glow matches mehndi’s earthy brown tone on camera.
AvoidAvoid placing lights randomly over packed knuckles; the pattern needs rails.
3. Holi Powder Confetti Dots Back Hand
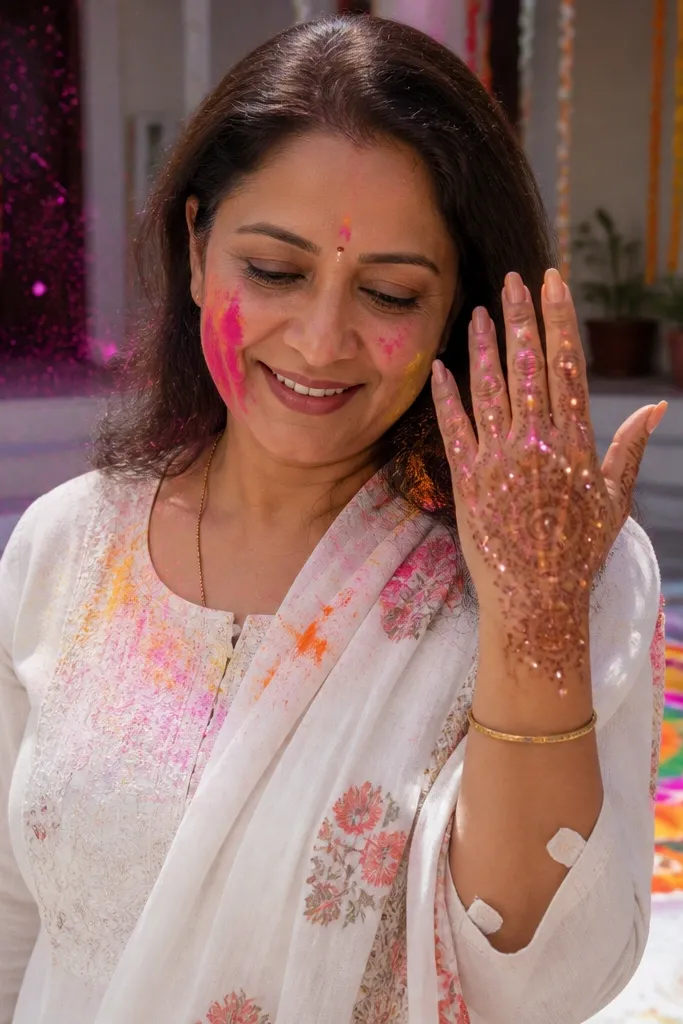
If you want playful, this design uses confetti-style dots and mini bursts instead of heavy filling. The lights sit at the empty spaces between dot clusters, making the dots look like they’re sparkling. Keep the outer border clean and thin, then scatter dot groups in a balanced way across the back of the hand. Photographically, the contrast between dark paste dots and glowing gaps makes it look fun and festive without needing color paste. It’s a good pick for medium skill because you’re mostly doing dotwork with a few light-friendly line arcs.
Outline a light border shape on the back of the hand (thin lines only), then map 4-6 dot clusters spaced evenly. Connect a few clusters with short, thin arcs so there’s movement, then leave open negative space between clusters. Place LED points in the open gaps using small tape tabs at the edges, then let the paste dry completely before you remove any tape from skin.
Pro tipUse a finer henna cone tip for consistent dots; uneven dot sizes make the glow look patchy.
AvoidDon’t cover every inch — the negative space is what makes the lights look like confetti sparks.
4. Diwali Rangoli Lattice Back Hand
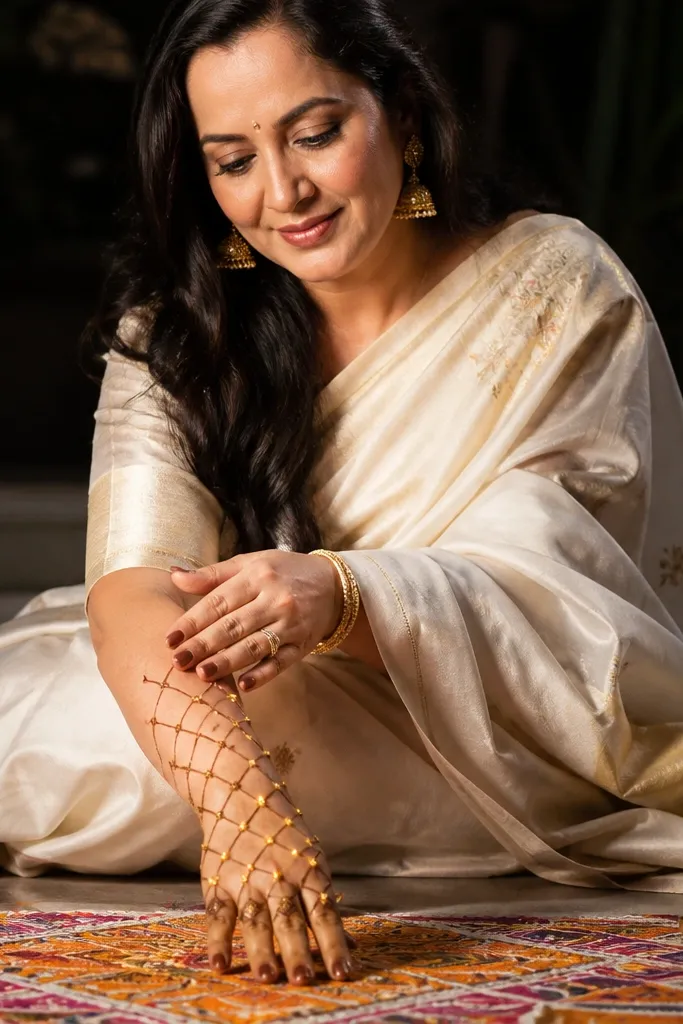
Rangoli-style lattice is a cheat code for lights. Draw a grid of diagonal lines and small corner squares, then place tiny LED points at the intersections. The glow turns each node into a “rangoli lamp,” and the diagonal geometry stays readable even when your fingers bend. This design looks premium because it has structure, not just decoration. It’s also friendly for planning: once the grid is set, you can place lights along predictable lines and spacing.
Start by drawing an outer frame around the back hand area, then lightly sketch a diagonal lattice inside. Fill only some cells with medium linework and keep others open so LEDs have air gaps. Place LED points at the main intersection spots (about every 1-1.5 cm), then hide the wire under a simple wrist band line.
Pro tipMark LED spacing with a ruler before you apply paste — the lattice looks best when nodes are consistent.
AvoidDon’t make every cell closed; lights need open cells to show crisp points.
5. Kemp Flower Chain With Micro Light Center
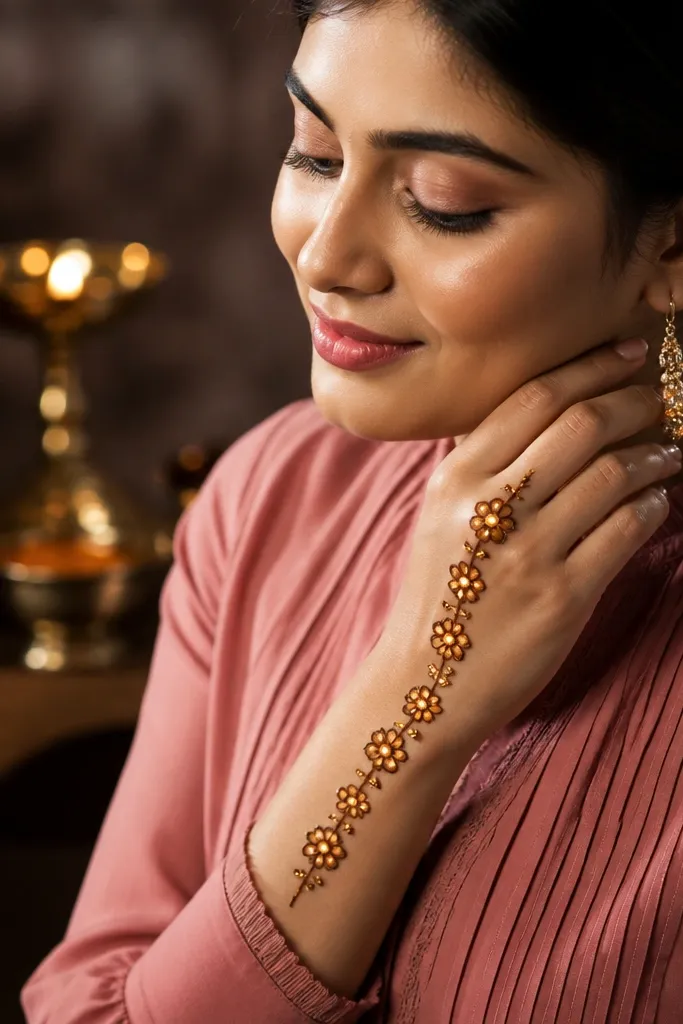
This is a back hand chain design that looks delicate but still dramatic with lights. You draw small flower motifs linked by thin stems, then leave the flower centers open. Place micro LED points in the centers so each flower looks like it has a glowing ember. The chain structure gives the lights a rhythm, and the thin stems keep the glow from overpowering the henna. It’s great for events where you want pretty, not bulky, and it suits both casual festive wear and wedding guest outfits.
Sketch a gentle S-curve path from the outer edge toward the wrist, then place small flower outlines along that path. Keep each flower center mostly empty, with only a tiny ring of paste around it. After the design is drawn, position micro LEDs inside the center rings and secure the wire with skin-safe tape at the wrist edge.
Pro tipUse very small LEDs (coin-cell style or tiny fairy bulbs) so they fit inside the flower centers without pushing the paste.
AvoidAvoid large bulbs — they force you to widen the center and ruin the flower shape.
6. Bridal Mehandi Frame With LED Border Path
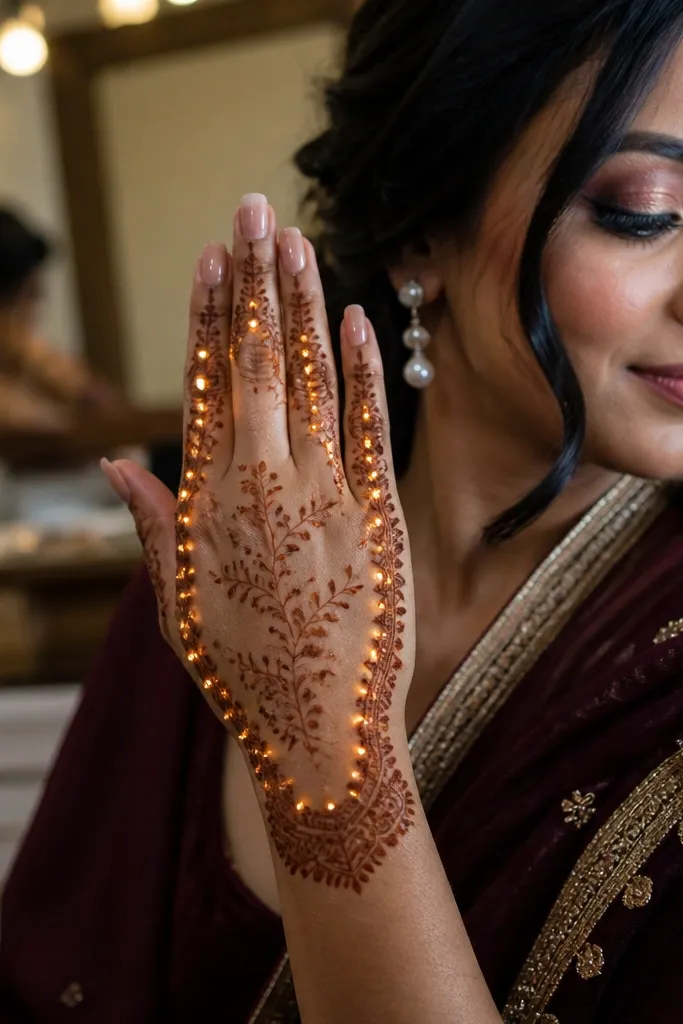
Want the clean, bridal-card look? Build a strong outer frame on the back hand and run the lights along that border path. Inside, keep vines and small leaflets airy so the border glow reads as a crown. This design works because viewers track outlines first; the light makes that outline extra obvious. It’s also forgiving — even if your inner details aren’t perfect, the glowing frame still makes the hand look styled. Use it when you want a “finished” look with minimal clutter.
Draw a bold outer border rectangle or oval across the back hand area, then add thin inner vines that don’t touch the border. Leave a consistent gap between inner vines and the border so LEDs have a clear track. Place LED points along the border line at even intervals, then conceal the wire under a simple wrist band line.
If your border is wobbly, redo it. A straight, steady border makes the entire light effect look intentional.
Don’t run lights across random interior areas; the border path is the point.
7. Sunburst Mandala With Star Lights
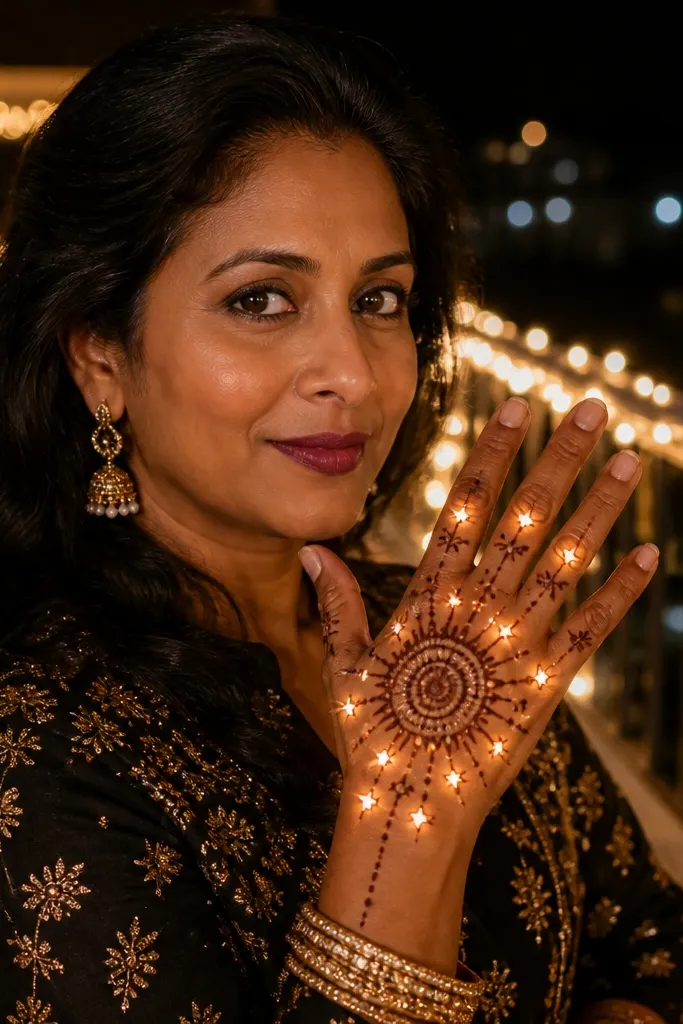
This one turns the back hand into a small stage. You draw a sunburst mandala with rays radiating from a center medallion, then place LED points at specific ray ends. Add tiny star shapes in a few ray gaps so the glow looks like it’s catching on them. The center anchor keeps the design aligned, and the ray pattern makes the lights feel directional. It’s a strong pick for New Year or festival nights because it reads bright and celebratory in photos.
Outline a center medallion near the middle of the back hand, then draw 10-12 sunburst rays radiating outward. Leave spaced gaps between rays so LEDs can sit without smearing paste. Place star-shaped dots (or star outlines) along 4-6 rays and put LEDs at those star positions, then hide the wire under the wrist band.
Pro tipCount your rays and keep them evenly spaced; uneven rays make the light dots look like mistakes.
AvoidDon’t fill the medallion too heavy — keep it lighter so the center glow effect stays clear.
8. Moon & Star Night Sky Liner
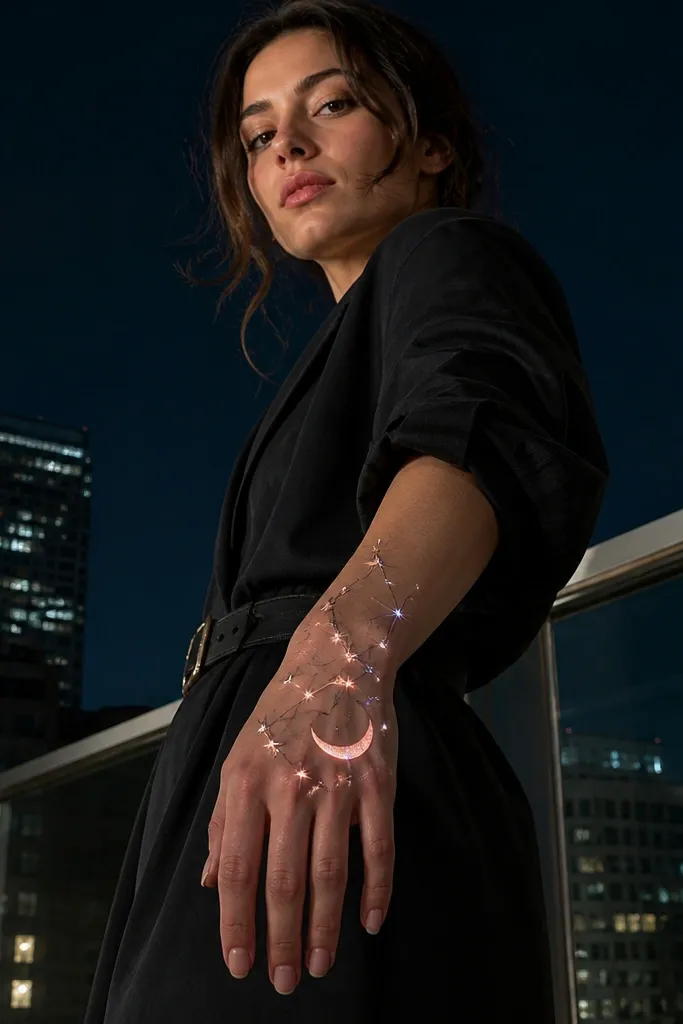
Night-sky designs look amazing with lights because you’re basically making a “sky” out of negative space. Draw a big moon crescent on one side of the back hand, then scatter stars as small outlines. Place LEDs as star points, and keep the rest of the area mostly open with thin connecting lines. This makes the stars look like they’re floating and the moon glow feels cinematic. It’s also beginner-friendly because you’re doing recognizable shapes and dotwork rather than complex full fills.
Draw a crescent moon shape spanning the back hand, then sketch star outlines scattered in the open area above and around it. Use thin lines for connecters so the stars feel like they sit in a sky. Place LED points where the star outlines are, then run the wire toward the wrist and cover it with a simple thin band line.
Use warm white LEDs for the stars; cool blue LEDs can make the mehndi look washed out on camera.
Avoid thick paste blobs in the sky — they block the light and flatten the effect.
9. Gajra Garland With Light Beads
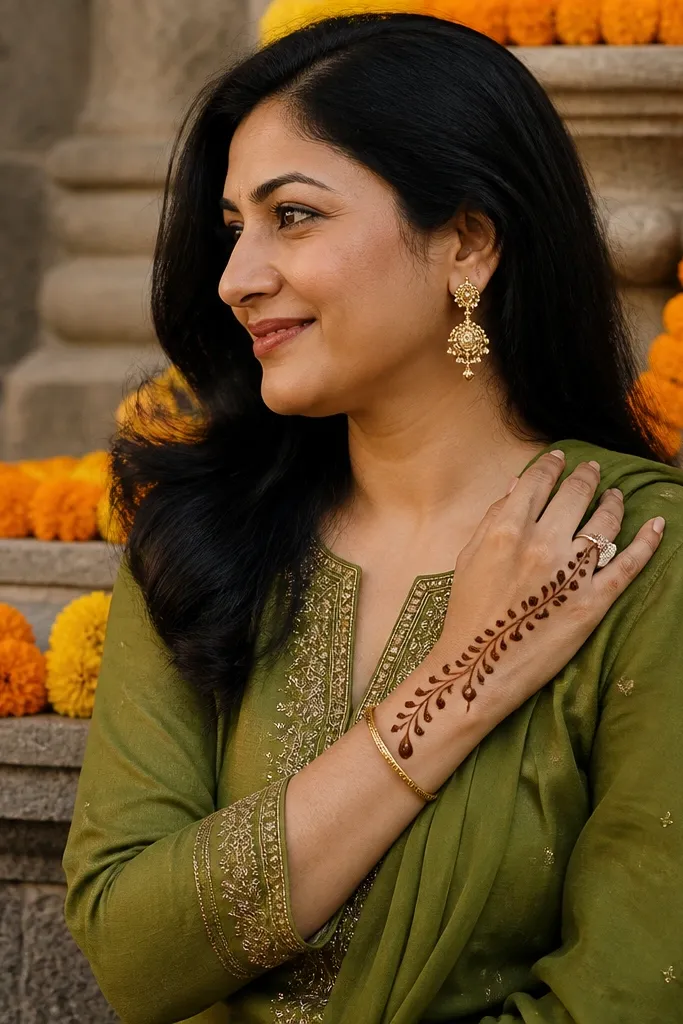
Garland patterns are one of the most flattering back hand looks because they naturally follow the hand’s curves. A gajra-style vine with petal beads looks soft, and lights make it feel like it’s actually draped. Draw the vine with repeating petals, then place LED points inside the petal bead spaces. Keep the vine path centered so the glow reads like a necklace across the hand. This design suits mehndi for receptions, engagement nights, and any event where you want a feminine, photo-ready hand.
Sketch a vine arc from near the index-finger side down toward the wrist, then repeat small petal shapes along it. Leave small gaps inside the petal bead area, not filled solid. Place LED points inside those gaps and secure the wire along the vine edges with tape at the wrist only.
Use a single continuous LED strand rather than scattered bulbs; the garland line looks cleaner.
Don’t double back the vine — the lights look tangled when the path crosses itself.
10. Bracelet Band Only With Knuckle Glow
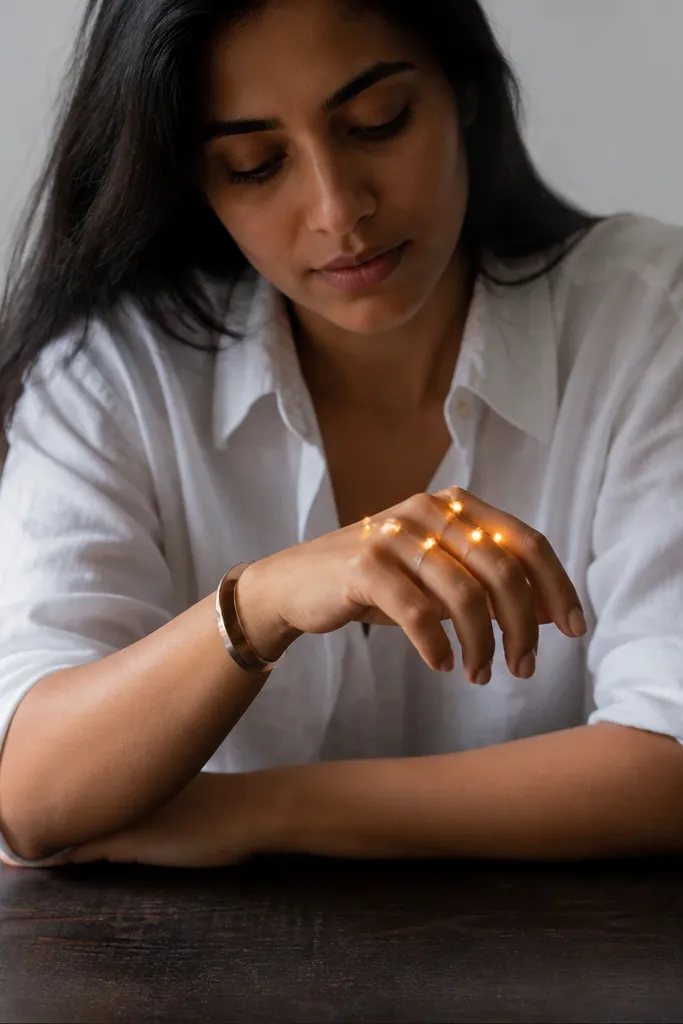
Sometimes the prettiest light effect is minimal mehndi. This design uses a bold bracelet band at the wrist plus a few knuckle arches with LED points. You keep most of the back hand open, so the glow becomes the main visual. It’s fast, it’s clean, and it photographs sharply because there’s less paste texture to compete with the lights. If you’re doing this for a last-minute look, this is the one I’d pick. It also works well when your henna time is short and you still want something “designed.”
Draw a thick bracelet band around the wrist with repeating curves, then add 3-5 thin arches over the knuckles. Leave the rest of the back hand mostly blank. Place LEDs along the knuckle arches at even spacing, then tuck the wire under the wrist band area before drying.
Pro tipIf you’re worried about smudging, keep the knuckle arches thinner than the wrist band — they dry faster and stay crisp.
AvoidAvoid adding extra interior motifs after you place LEDs; the glow gets cluttered.
11. Rangoli Spiral With LED Path Line
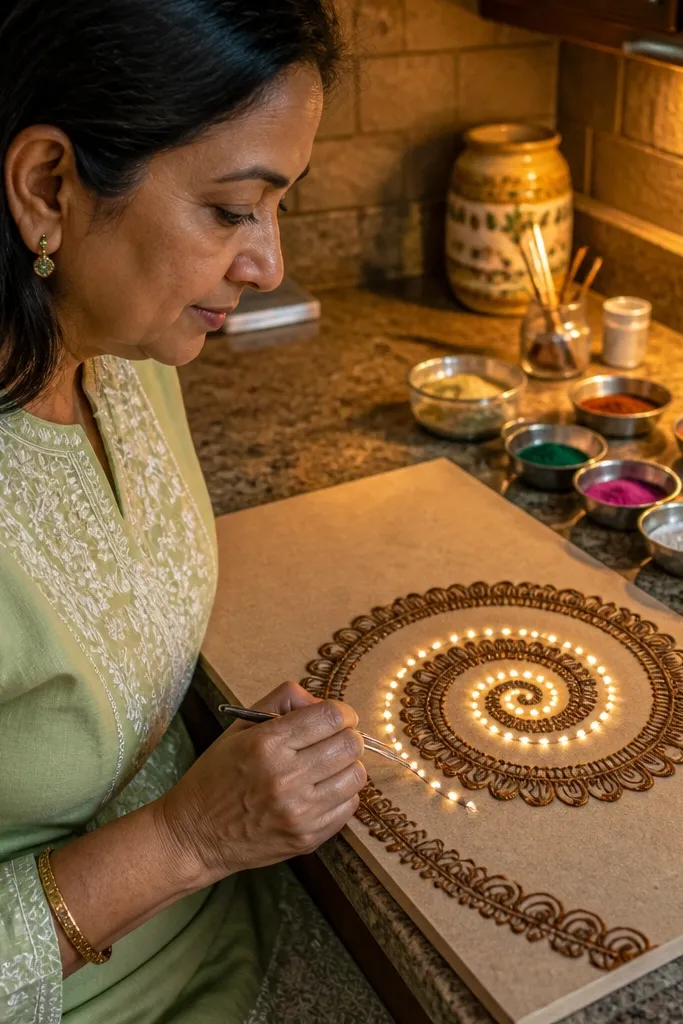
A spiral is perfect for lights because it creates motion. Draw a tight rangoli spiral that starts near the thumb side and curls toward the center, then place LED points along the spiral path. Keep the interior of the spiral open so the LEDs look like they trace the design. This style looks bold in photos because the light line gives your hand a clear focal point. It’s also a good option if you want something modern rather than fully traditional.
Sketch a spiral outline from the thumb-side knuckle area toward the center of the back hand. Add a second thin parallel line to define the spiral boundary, then leave the middle mostly open. Place LEDs along the spiral boundary line at consistent spacing, then hide the wire down to the wrist under a simple band.
Pro tipUse a fine cone to keep spiral lines even thickness; LED placement looks cleaner on consistent lines.
AvoidDon’t overcrowd the spiral interior — the light line is the design.
12. Peacock Tail Back Hand With Light Eye
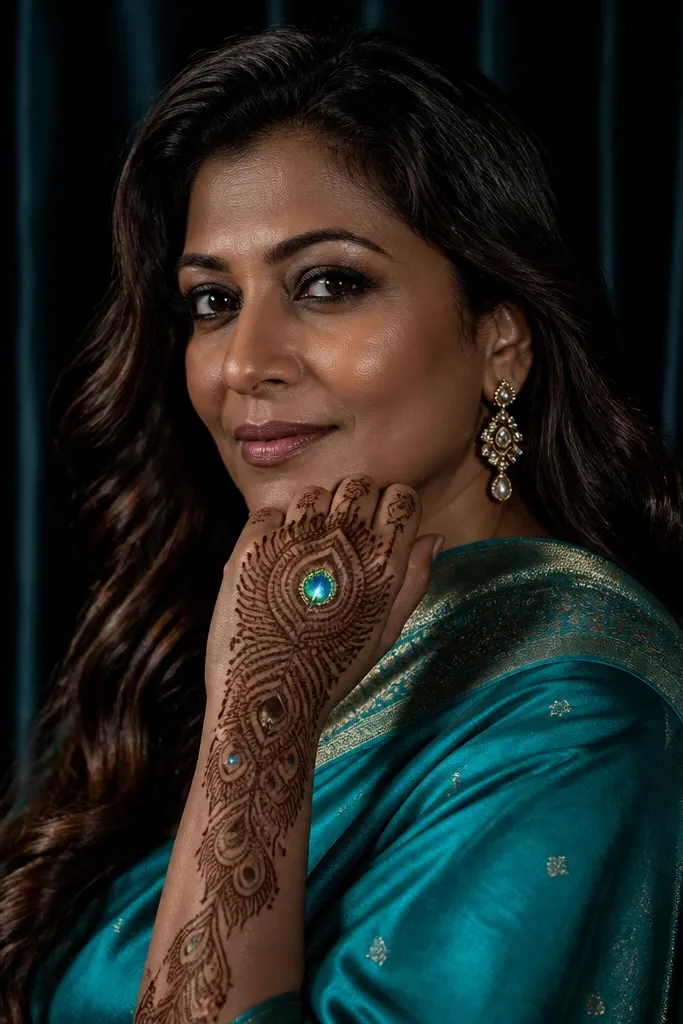
Peacock tails look dramatic with lights because feathers already have layered shapes. Draw a peacock tail across the back of the hand with feather arcs, and put a single LED “eye” at the center medallion. The glow creates a focal point that feels alive, while the feather arcs keep the rest decorative. This design reads well even if your lights are slightly brighter than expected because the eye is positioned where your camera will focus. It’s a strong choice for Diwali and festive nights.
Start with a central medallion in the middle of the back hand as the peacock eye, then draw layered feather arcs extending toward the wrist and outer hand. Keep each feather arc outlined and lightly filled, leaving gaps for LEDs. Place one main LED at the eye center, then add smaller LED points at 2-3 feather arc tips for extra sparkle.
Use one brighter LED for the eye and smaller ones for the tips; the contrast makes the design look intentional.
Avoid placing the main eye LED too low near the wrist — it gets hidden in photos.
13. Christmas Garland Bow + Wrist Starline
This is the holiday version that still looks clean on brown skin tones. You draw a garland vine with a bow at the center and keep the background open, then place lights along a starline that runs near the wrist. The bow gives you a readable shape, and the starline makes the whole hand look like it has festive trim. Use green-toned mehndi paste if you have it, but classic brown works too because the lights do the color job in photos. Great for winter parties where you want the hand to look styled, not plain.
Sketch a central bow shape with two loops and a small knot in the middle, then add a garland vine from the outer edges toward the bow. Leave open spaces between leaf outlines so LEDs can sit without being blocked. Place LED points in a straight starline near the wrist band and tuck the wire under the wrist area.
Make the bow outline slightly thicker than the vine lines so the light doesn’t overpower it.
Don’t scatter LEDs across the whole garland; keep them on the starline for a tidy holiday look.
14. New Year Confetti Border With LED Dots
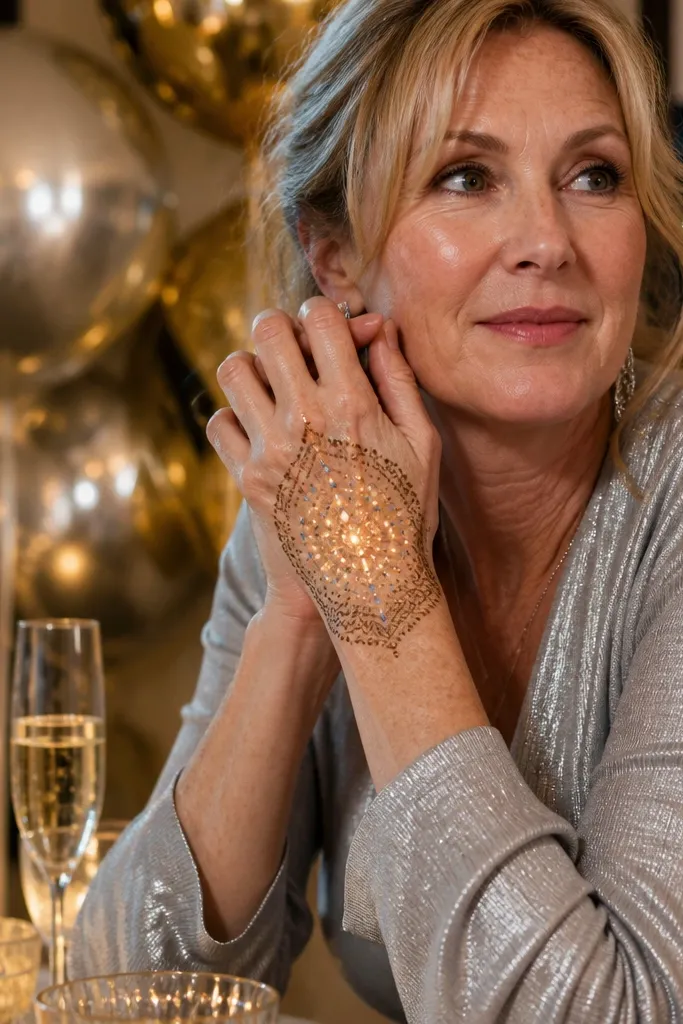
This design is built for parties where you want sparkle without heavy paste. You draw a thin border frame around the back hand, then add confetti dot bursts inside. Lights go inside the border as matching dot points, so the frame makes the glow look like part of the henna, not an external add-on. It’s easy to adjust for hand sizes — keep the border proportionate and the dots evenly spaced. The result is a crisp, photo-ready look that reads instantly in night lighting.
Draw a thin rectangular or rounded border across the back hand area, keeping corners clean. Add dot bursts in 6-8 zones inside the border, leaving plenty of negative space between bursts. Place LEDs at the center of each dot burst cluster and secure the wire at the wrist edge under a simple line.
Pro tipUse a single strand with evenly spaced bulbs so the confetti points match the dot rhythm.
AvoidAvoid thick border lines — they hide the detail when the LED glow hits.
15. Mehndi Lace Spiderweb With Corner LEDs
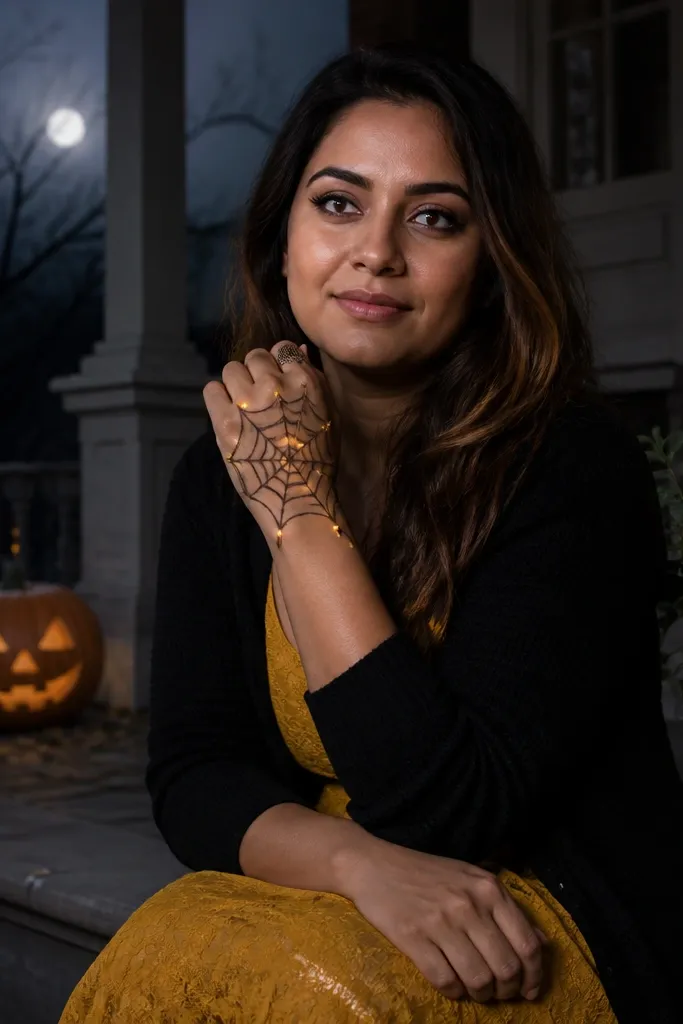
Spiderweb lace looks surprisingly classy when you keep it open. Make a web pattern from a center point with radiating lines and a few concentric rings, then place LEDs at selected corner radii where the web meets the outer border. It reads like Halloween decor but stays elegant because the paste lines are thin and the web is airy. Your camera will catch the glow along the radiating lines, giving it depth. This is a good choice if you want a themed back hand mehndi look that still feels wearable.
Mark a center point near the middle of the back hand, then draw 8-12 radiating lines outward. Add 2-3 concentric rings lightly so it looks like lace, not a filled net. Place LEDs at the outer ends of 4-6 radiating lines, then hide the wire under a minimal wrist band line.
Use thin lines for web radii; thicker lines make the glow look like it’s trapped.
Don’t fill the rings with solid paste — keep the web airy.
16. Starburst Mandala With LED Ring at Wrist
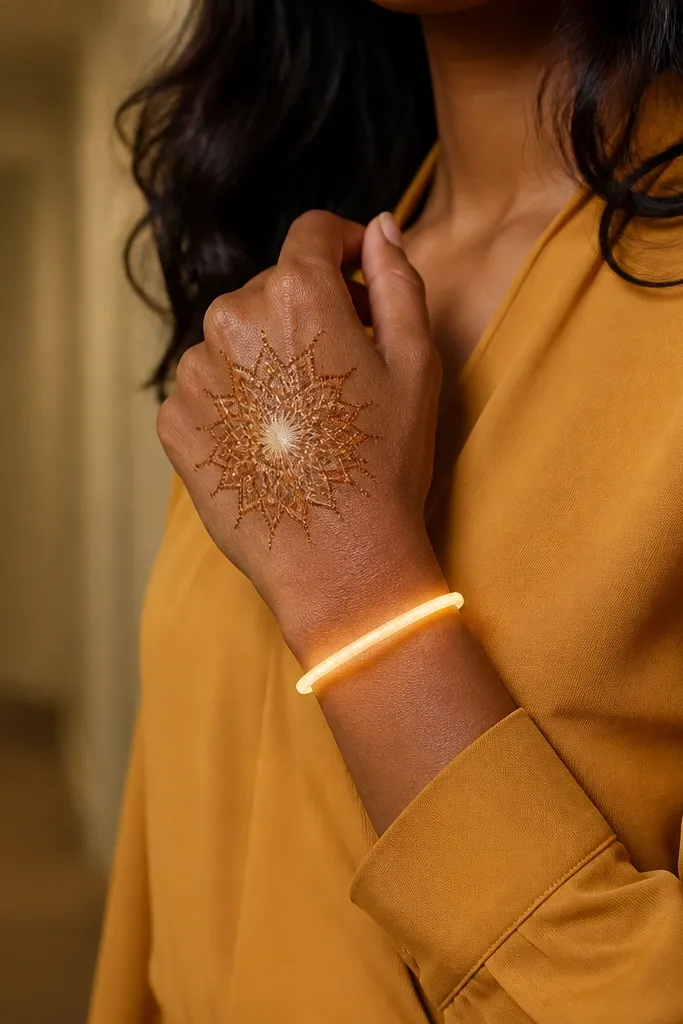
This one uses the wrist as a light stage. Draw a starburst mandala on the back hand and keep it lighter in the center, then add a glowing LED ring where your wrist band would sit. The ring makes the whole design look cohesive, and the starburst adds movement. It’s photogenic because the ring catches light even when your hand is angled, so the glow stays visible. Great for New Year, weddings with evening outfits, and any “night sparkle” theme.
Create a mandala center with 6-8 petals, then add starburst rays around it across the back hand. Leave gaps between rays so LEDs can stand out. Next, place a flexible LED strip or small LED ring at the wrist band position and draw a thin bracelet line over the top of it using paste so it looks integrated.
Pro tipUse a flexible LED strip for the ring; it conforms to the wrist better than individual bulbs.
AvoidAvoid a too-tight wrist ring — if it presses, it shifts and smears the henna.
17. Ganesh Om Swirl With Lantern LEDs
This is for a festival mood that still looks clean and intentional. Draw an Om-style swirl or curved “Om” line across the back hand, then add small lantern dots along the inner curve. Place LED points to form a soft halo around the swirl so it looks like lantern light. The swirl gives one main path, so your lights don’t feel scattered. It photographs well because the swirl and halo create a clear composition. Keep the rest of the hand open to let the glow breathe.
Sketch the Om swirl line across the back hand with a thick outline and thin inner line. Add lantern-like dot clusters along the inner curve at even spacing. Place LEDs around the swirl in a loose halo, then run the wire down to the wrist and cover it with a simple band line.
Use warm white LEDs with a soft diffuser cover if your bulbs look too harsh in photos.
Don’t cram extra motifs around the swirl — the halo needs space to read.
18. Halloween Bat Wing Border With LED "Eyes"
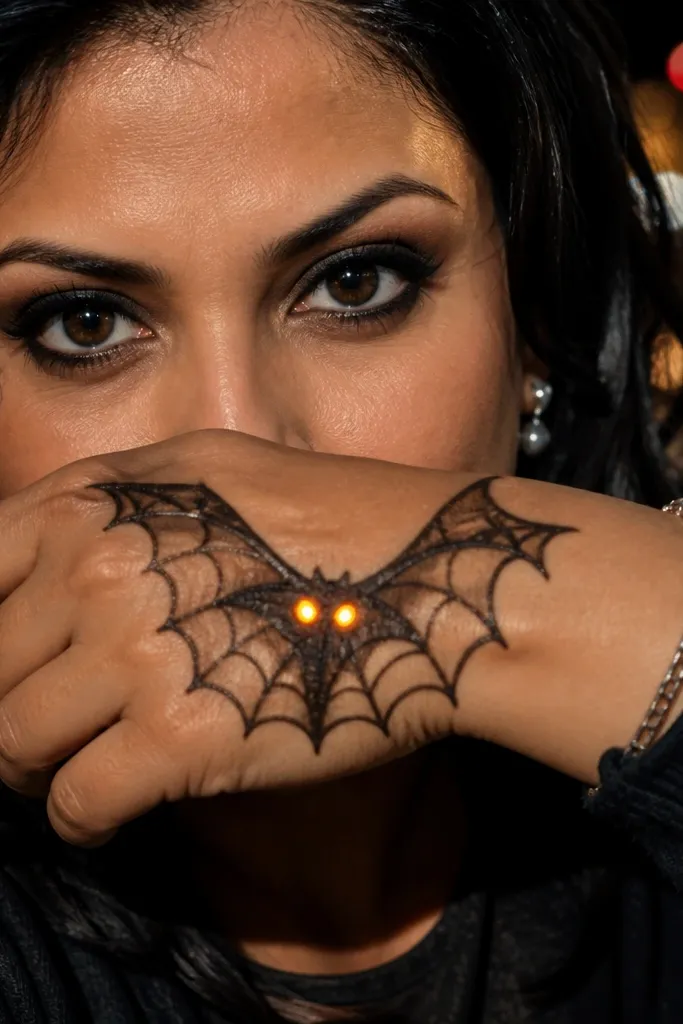
For Halloween themes, bat-wing borders look sharp when lights are placed like “eyes.” Draw a bat-wing silhouette across the back hand — two wing tips pointing up — then keep the inside mostly open with thin web lines. Place two LED points near the center as eyes, and optionally add a few tiny dots to suggest wings. The contrast between open space and glow makes it look spooky without turning messy. It’s also a good way to hide wires because the wings frame them at the edges.
Outline the bat-wing border shape across the back hand, then add thin internal web lines radiating from the center. Keep the interior light and airy so LEDs stand out. Place two LEDs at the center eye position and secure the wire along the wing edges, finishing with a small wrist band to conceal the rest.
Pro tipKeep the eye LEDs slightly above the center line so they show even when your hand relaxes.
AvoidAvoid covering the bat-wing interior with heavy fill; it kills the spooky glow effect.
19. Eid Star Lattice With LED Border Corners
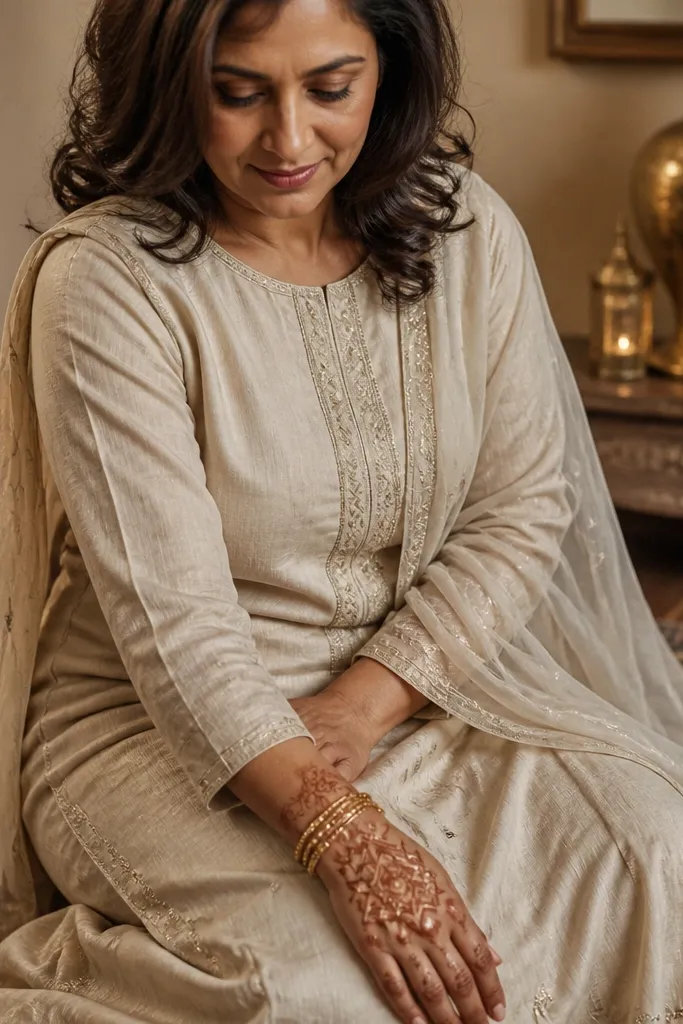
Eid-themed mehndi looks best when it feels geometric and airy. Build a star lattice with interlocking shapes, but keep the center open so the light can create sparkle points. Put LEDs at border corners and along a few star nodes so the glow looks like a pattern, not random decoration. The star lattice is naturally camera-friendly because it has strong symmetry. Pair it with a clean wrist band and you get a polished, celebratory hand that still feels traditional.
Draw an outer star frame on the back hand and sketch interlocking star lines inside, leaving negative space in the larger star cells. Strengthen a few key star nodes with slightly thicker paste so they look like anchor points. Place LED points at the border corners and at 3-5 anchor nodes, then route the wire to the wrist and cover it with a thin bracelet line.
Pro tipUse pencil-light sketching first so you can correct symmetry before you apply henna.
AvoidDon’t fill every star cell; keep the larger gaps for light to show.
20. Royal Vine Corner Frame With LED Corner Clusters
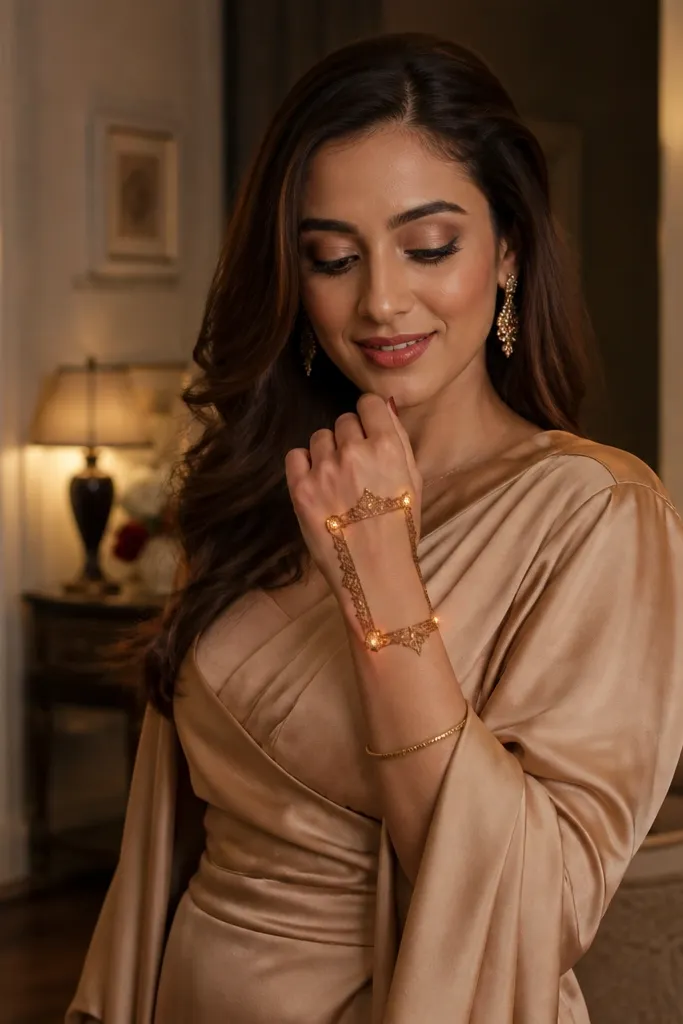
This design looks like a royal invitation because the composition is built around corners. Draw a rectangular-ish frame on the back hand but only complete it at the corners using vine curls, leaving the middle open. Then place LED clusters in each corner so the glow sits in the decorative spots. The middle stays airy, so the glow doesn’t smear and the henna still looks refined. It’s a great pick if you want an aesthetic that looks expensive without covering your whole hand in paste.
Sketch a light outline rectangle across the back hand, then draw completed corner ornaments only — 2-3 vine curls per corner. Keep the center area open with a few thin connector lines if you want movement. Place LED clusters inside each corner ornament space and secure the wire along the frame edges, finishing with a simple wrist band concealment.
Pro tipCorner LEDs look best when they’re grouped in 3-4 points, not spread thin.
AvoidAvoid adding a full border — corner-only framing is what keeps it elegant.



