
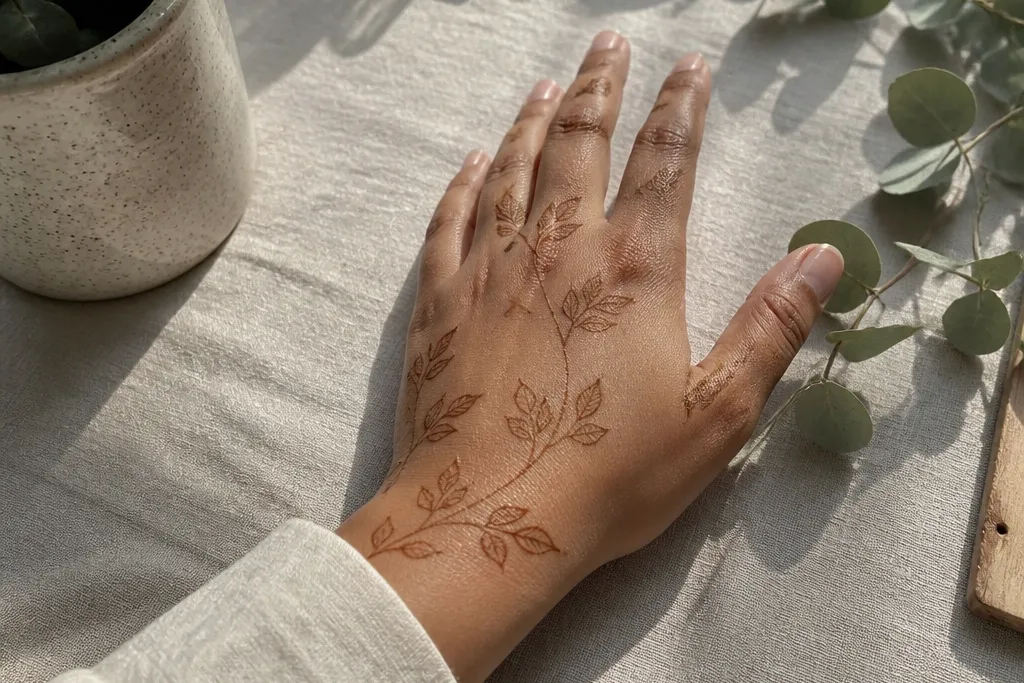
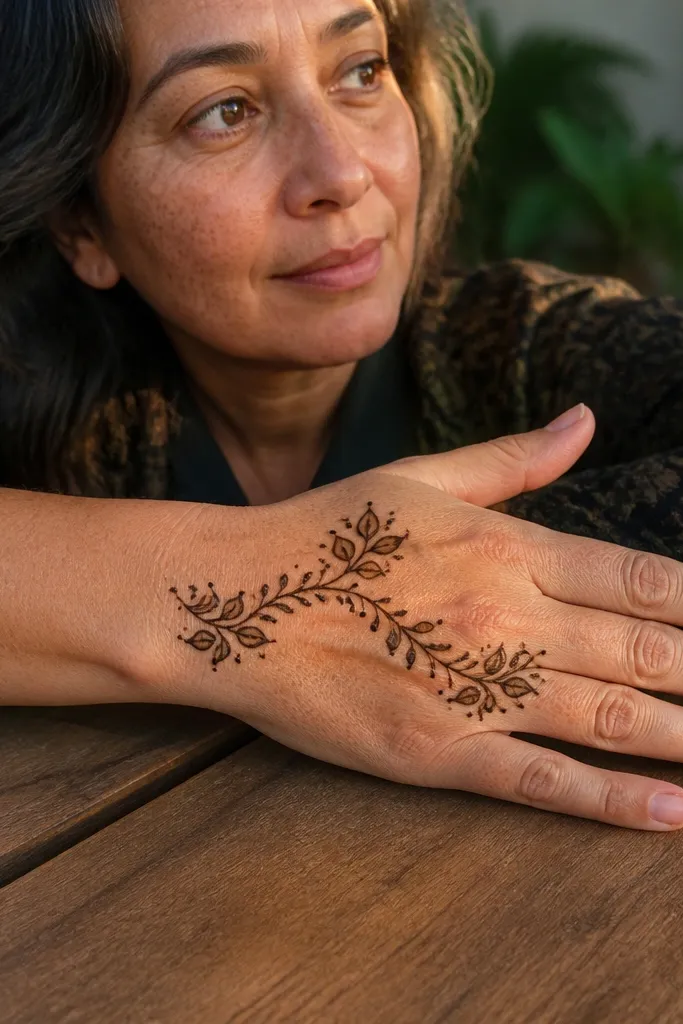
1. Spring Vine Ladder With Leaf Clusters
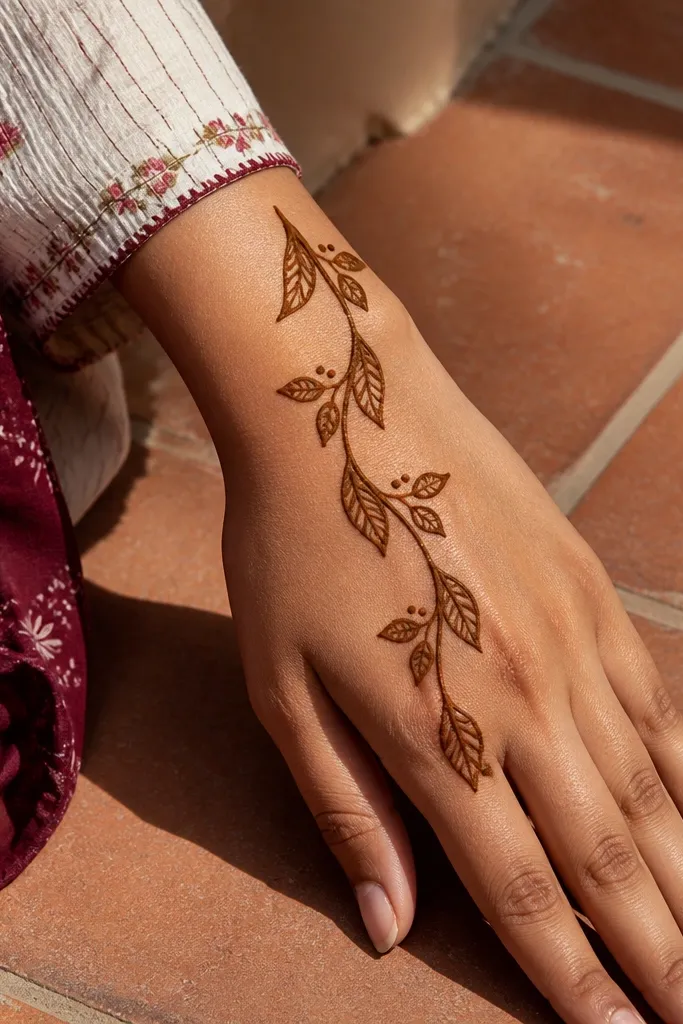
This one is fast and looks like spring greenery because it repeats the same teardrop leaf shape along a diagonal vine. Start near the wrist, run the vine toward the outer edge, and place three leaf clusters like steps — each cluster has two leaves and one small bud dot. The center stays lighter, so the whole backhand doesn’t turn into a dark blob. It photographs well because your eye follows the vine line first, then lands on each leaf group.
Step 1: Draw a single diagonal vine line from the inner wrist area toward the outer back of the hand. Step 2: On the vine, add three leaf clusters spaced evenly — each cluster is two teardrop leaves facing opposite directions with a tiny dot bud below one leaf. Step 3: Connect the vine ends with a short curved tail at the wrist and add 6-10 small dots near the vine for fill.
If your cone line is too wide, do the vine first, then pause 30 seconds and go back with a finer tip for leaf veins or dots.
Don’t fill the center of the hand — the breathing zone is what keeps it looking airy.
2. Mango Leaf Ribbon Across The Backhand
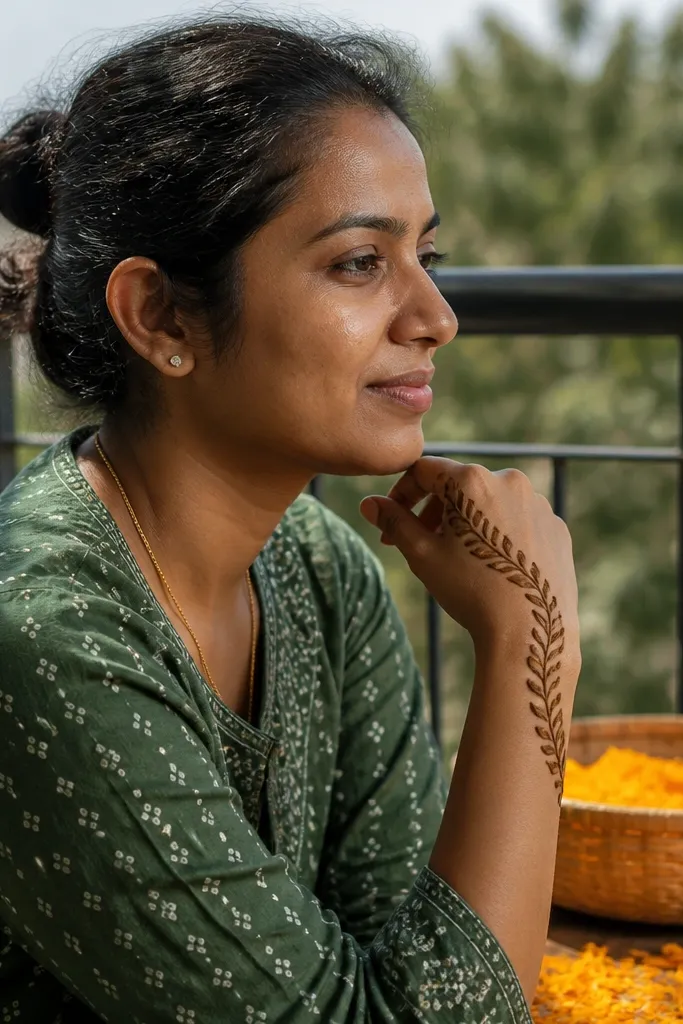
A mango-leaf ribbon reads instantly as plants because the leaf silhouette is unmistakable. The ribbon curve gives a smooth, elegant flow without needing heavy shading. Keep the leaf size consistent so the design looks like a pattern, not random doodles. This is a great choice for festive days when you want something floral but not overly dense.
Step 1: Draw a wide curved band from the wrist area across the back of the hand to the outer edge. Step 2: Along the band, alternate mango leaf shapes — each leaf has a pointed tip, a central stem line, and a short forked vein line. Step 3: Add tiny connector curls at the band edges and finish with 8-12 dot sparkles near the wrist curve.
Use a steady wrist and let the ribbon curve guide your leaf placement — if the curve is smooth, the whole design looks planned.
Don’t make leaves too big; big leaves force you to crowd the center and ruin the clean ribbon look.
3. Rosebud Branch With Three Buds

This design is plant-themed without heavy florals. You get a branch line, three rosebud clusters, and simple leaf hints that stay light but still look intentional. The rosebuds create a holiday-friendly look because buds feel like decoration, not just foliage. It’s also forgiving for beginners because the branch anchors everything.
Step 1: Draw a slightly curved branch from the wrist up toward the middle outer back of the hand. Step 2: Place three buds along the branch — each bud is a small circle with layered petal teardrops around it and one dot in the center. Step 3: Add 4 small leaf marks near the buds using short teardrop strokes and finish with a few tiny dots around the branch.
Keep buds in a triangle layout — one near wrist, one mid-back, one toward outer edge for balanced photos.
Don’t add too many leaves; three buds are the feature, so keep foliage minimal.
4. Monsoon Pea Vine With Tiny Leaf Pairs
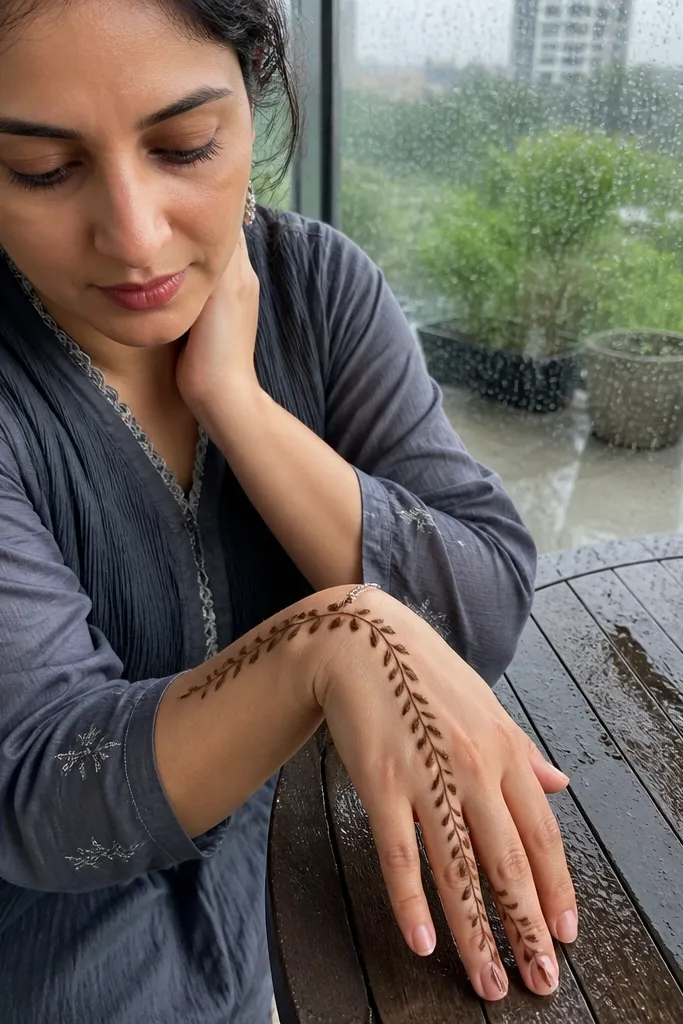
Monsoon-themed mehndi looks best when the line work is delicate. This thin pea-vine pattern uses repeating tiny leaf pairs that create texture without filling the whole hand. The backhand looks fresh and planty because the leaves are small, evenly spaced, and connected by a continuous vine. It’s also one of the easiest ways to get a “designed” look fast.
Step 1: Draw a thin S-shaped vine line starting at the wrist and curving toward the outer edge. Step 2: Add tiny paired leaves every 1-1.5 cm along the vine — each pair is two short teardrops meeting at a small dot. Step 3: Finish with a cluster of 7-9 dots near the wrist and two small curled tendrils at the vine ends.
Pro tipIf your paste is thick, your tiny leaves will blob — loosen the paste slightly with a drop of lemon juice mixture before starting.
AvoidDon’t rush leaf spacing; uneven gaps make the vine look shaky in photos.
5. Winter Pine Sprig With Frost Dots
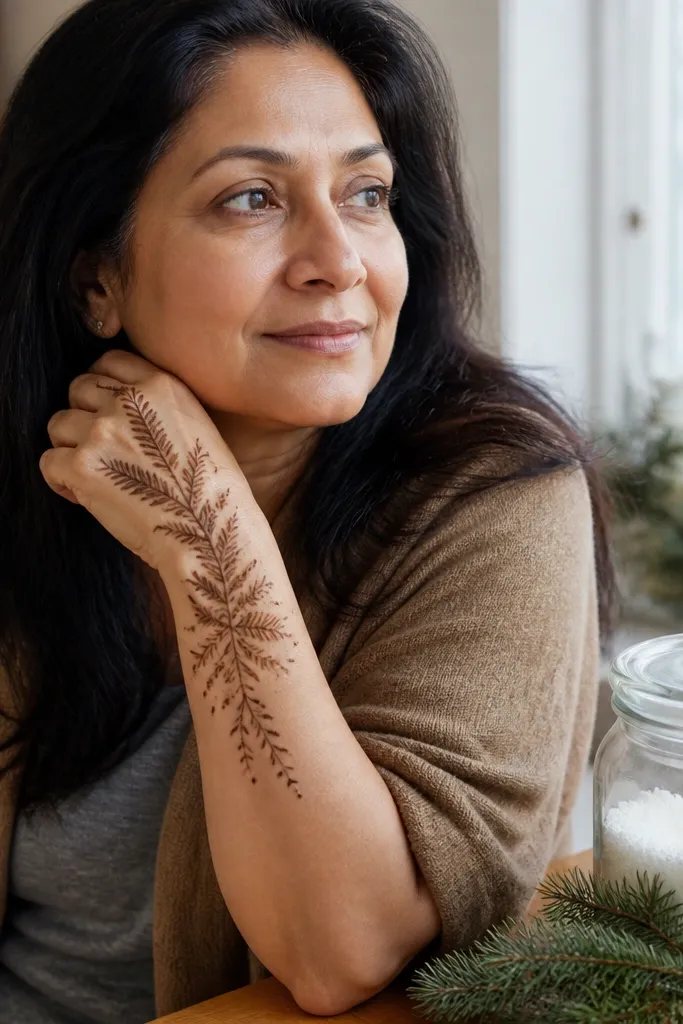
This is a winter greenery backhand that still feels light. Instead of big leaves, you use short needle strokes branching from a central pine line. Then you add “frost” dots around it, which reads like holiday decor on camera. The result looks themed even with minimal area coverage, so you stay within 30 minutes.
Step 1: Draw a central pine sprig line from the wrist upward with a slight curve. Step 2: On both sides, add short needle strokes — each needle is a tiny straight line with a taper at the end, angled outward. Step 3: Add a small dot scatter of 20-25 dots around the sprig, denser near the wrist and lighter toward the top.
Use a slightly finer cone for needles so they stay crisp instead of turning into a scribble.
Don’t shade the whole sprig; the dot frost does the heavy visual work.
6. Diwali Diyas and Leaf Frame Vine
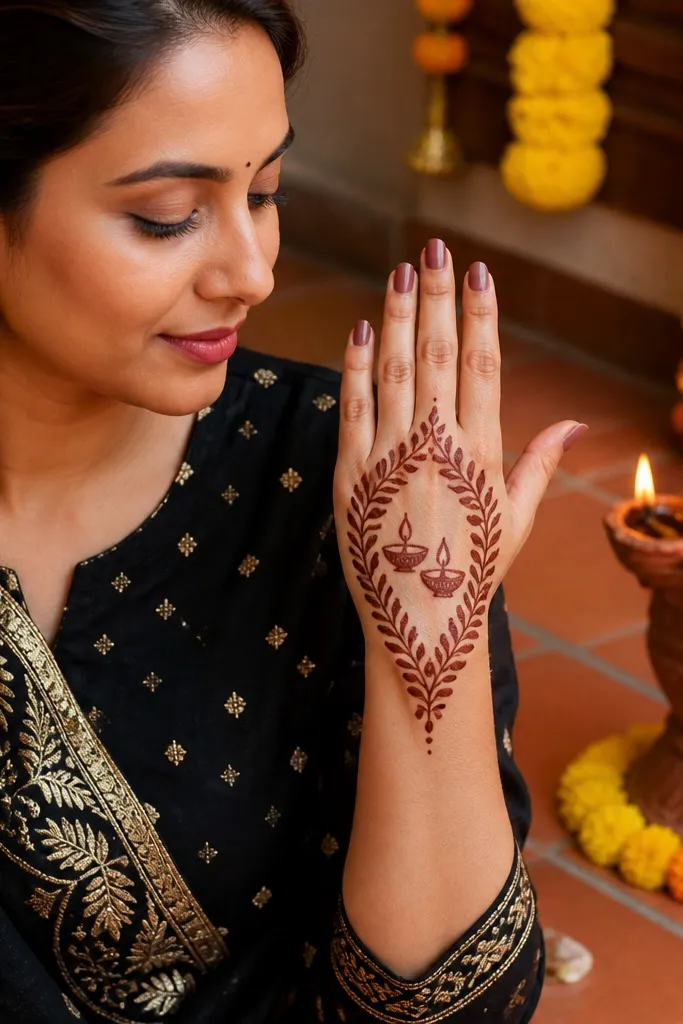
This one ties plants to a holiday frame without turning into a complex scene. You draw a simple vine outline that frames the backhand, then place two tiny diya-like shapes at the center to signal Diwali. The plants stay the main aesthetic because the frame is made of leaf clusters, not solid blocks. It looks balanced and festive in photos even when the design is light.
Step 1: Draw a loose oval frame around the center of the backhand using a vine line, leaving a gap in the middle. Step 2: Add leaf clusters on the frame — two teardrop leaves per segment, spaced evenly. Step 3: Place two small diya shapes in the center — a teardrop base with a tiny flame dot — then finish with 10-12 spark dots near the frame edges.
Keep the diyas small — if they dominate, the plants stop reading as the theme.
Don’t overcrowd the frame; leave small gaps so the vine line stays visible.
7. Lotus Pod Vine With Bud Dots

Lotus pods give a plant-and-flowers theme that still stays quick. The backhand looks polished because pod shapes create clear silhouettes, while bud dots add texture. This design works for festive dates, pooja looks, and even wedding guest mehndi when you want more detail than a simple vine. It’s not heavy, but it has enough focal points to look intentional.
Step 1: Draw a diagonal vine line from wrist to outer back of hand. Step 2: Add three lotus pod shapes along the vine — each pod is a rounded oval with 5-7 short petal lines around the top edge and a small dot inside. Step 3: Fill the spaces between pods with 12-15 tiny bud dots and two short leaf strokes near the wrist.
Make pod tops slightly wider than the base; it keeps the lotus shape readable in quick line work.
Avoid thickening the pod outlines; thick pods blur into blobs on the back of the hand.
8. Hibiscus Side Swirl With Leaf Fans
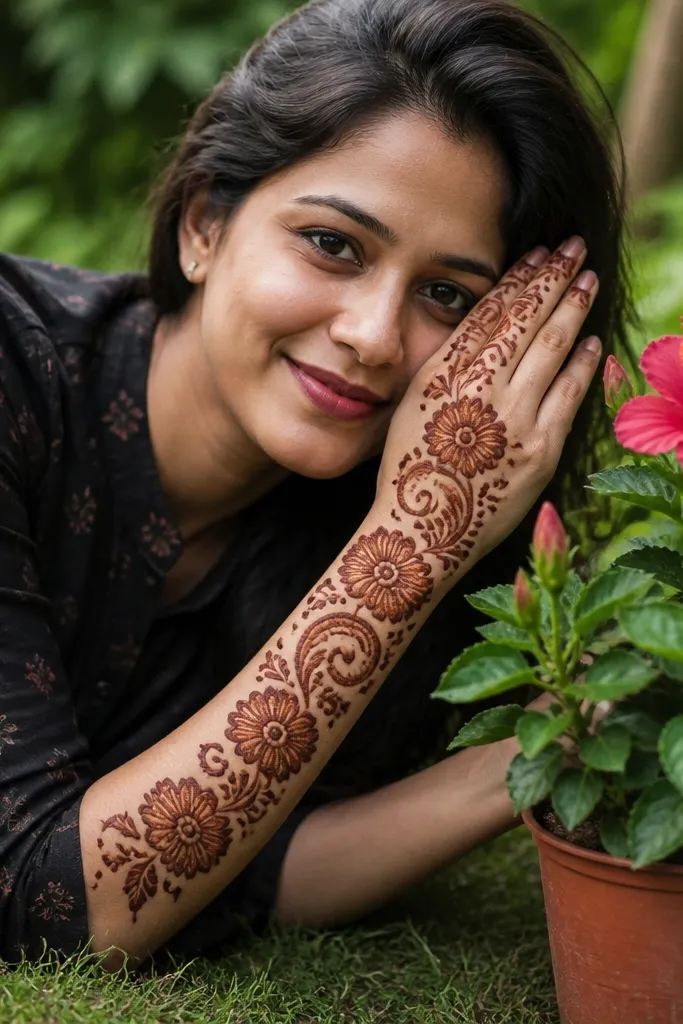
This is a side-swept floral pattern that still counts as themed plants because the hibiscus sits on a vine with leaf fans. The swirl gives movement, and the leaf fans make the area look filled without needing full coverage. It’s a good pick when you want something pretty and photogenic but you don’t want to spend time shading. The flower becomes the focal point; the fans keep it plant-themed.
Step 1: Draw a curved vine swirl starting near the wrist and flowing toward the outer edge. Step 2: Add one hibiscus flower on the outer half — 5 large teardrop petals around a dot center, plus 3 tiny stamen lines. Step 3: On the inner side of the swirl, add two leaf fans — each fan is 4-5 short leaf teardrops radiating from a small stem line.
Keep the hibiscus petals slightly spaced; touching petals makes the flower look like a dark circle.
Don’t place the flower too close to the wrist — it will crowd the leaf fans and look heavy.
9. Palm Frond Half-Cover Vine

Palm fronds read as plants instantly, and the half-cover layout makes it fast. You draw a fan of frond leaves on one side of the backhand and connect it to a simple vine. The center stays open, so your design looks clean and modern instead of dense. This works great for summer-themed parties and warm-weather events.
Step 1: Draw a single base vine line from wrist to mid-back, then curve it into a fan base. Step 2: Add 7-9 palm frond leaves — each leaf is a long teardrop stroke with a central line and 3-4 thin vein lines. Step 3: Add a small dot trail of 10-12 dots along the fan edges and finish with two tiny curled fronds at the wrist.
Pro tipMake the frond tips all the same length — matching tips make the fan look intentional.
AvoidDon’t overfill between fronds; the negative space is what creates a crisp fan silhouette.
10. Tulip Stem With Three Flowers
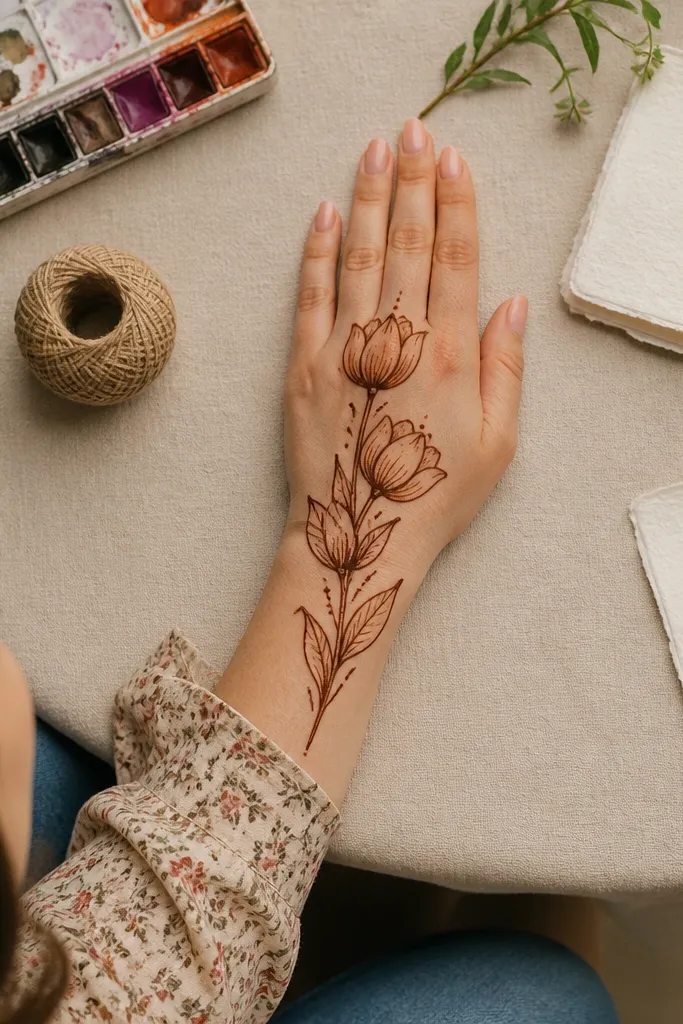
Tulips give a clear seasonal plant theme without heavy shading. This layout uses one stem, three tulip blooms, and two leaf accents, so it stays within 30 minutes and still looks like a planned bouquet. The backhand looks balanced because the stem guides the eye from wrist up to the top bloom. It also looks good on both light and darker mehndi stains because the line work is the focus.
Step 1: Draw a vertical-ish stem line from wrist toward the outer top backhand. Step 2: Add three tulips — each tulip is a rounded cup shape made from two curved lines with a small dot inside; place one near wrist, one mid, one near top. Step 3: Add two leaf accents — long teardrops attached to the stem with a central vein line — then finish with 8-10 tiny dots near the base.
Keep tulip cups narrower at the top; it keeps the “flower” readable even if the stain fades.
Don’t add extra petals beyond the cup shape; extra lines waste time and thicken the flower.
11. Coconut Leaf Border With Wrist Crown
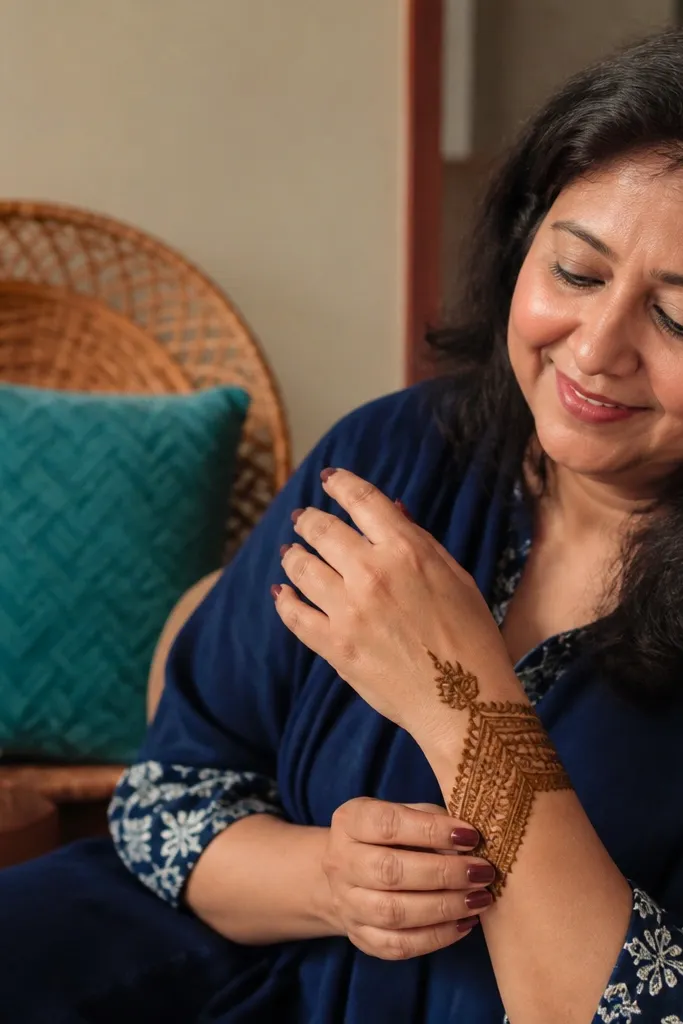
This design is a border approach — it looks complete fast because you focus detail near the wrist and keep the rest airy. Coconut-like leaf segments create a holiday-south vibe and frame the backhand nicely. The “crown” at the wrist makes the design look finished even if the top part is minimal. It’s a smart choice for quick applications where time is tight.
Step 1: Draw a short vine arc at the wrist that curves upward toward the inner and outer sides of the backhand. Step 2: On that arc, add leaf segments like small curved teardrops pointing outward — 9-12 segments. Step 3: From two points on the arc, draw two thin vine lines upward and stop early; add 6-8 dots where the vines meet the wrist arc.
Make the wrist crown symmetrical — count leaf segments on each side so it looks intentional.
Don’t extend the border all the way into the center; you’ll lose the clean crown effect.
12. Berry Vine Garland With Dot Berries
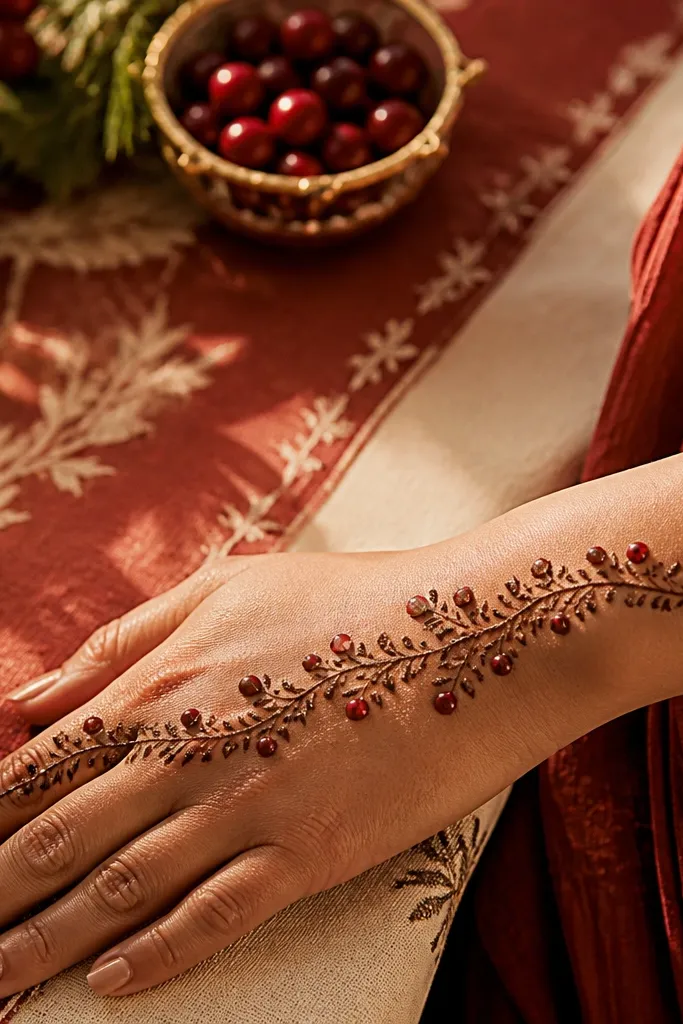
Dot berries are quick and look cute on camera. This themed plant design uses a garland vine across the backhand with berry dots spaced like beads. It’s perfect for holidays because dots read like ornaments, while the vine keeps it plant-themed. You get a sweet, decorative look without needing detailed leaf work across the entire hand.
Step 1: Draw a curved garland vine line from near the wrist to the outer back edge. Step 2: Add small leaf pairs every 2-3 cm — two short teardrops on either side of the vine. Step 3: Place dot berries along the vine — 18-22 dots — and finish with a few tiny curls at both ends of the vine.
Use consistent dot size for berries; mixed dot sizes make it look messy fast.
Don’t make the vine too thick; thick vines swallow the leaf pairs and dots.
13. Creeper Vine With Tiny Leaves and Two Big Twirls
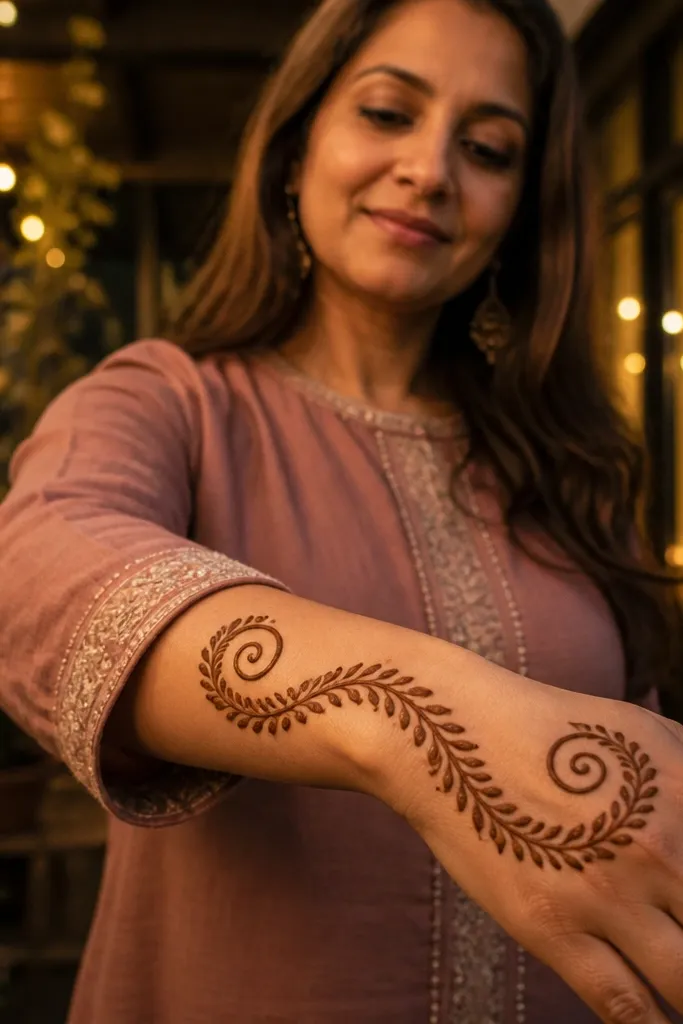
Creeper vines look dense but they’re actually quick if you keep the leaf marks tiny. This design uses lots of small leaf strokes along a vine, then adds two big curled twirls at the ends for drama. The result is photogenic because your eye catches the curls first, then tracks the texture of tiny leaves. It also hides small mistakes because the pattern is repetitive.
Step 1: Draw a main vine line diagonally across the backhand with two ends that curl outward. Step 2: Add tiny leaf marks along the vine — each leaf is a 1 cm teardrop with a short stem line; place them every 0.8-1.2 cm. Step 3: Do the final curls by thickening the end strokes slightly, then add 6-8 dots near the inner side of the twirls.
Pro tipIf you want crisp texture, draw tiny leaves in one direction and keep them the same angle.
AvoidDon’t stop the vine halfway; an incomplete vine makes the pattern look accidental.
14. Peony Bloom on a Leaf Stem
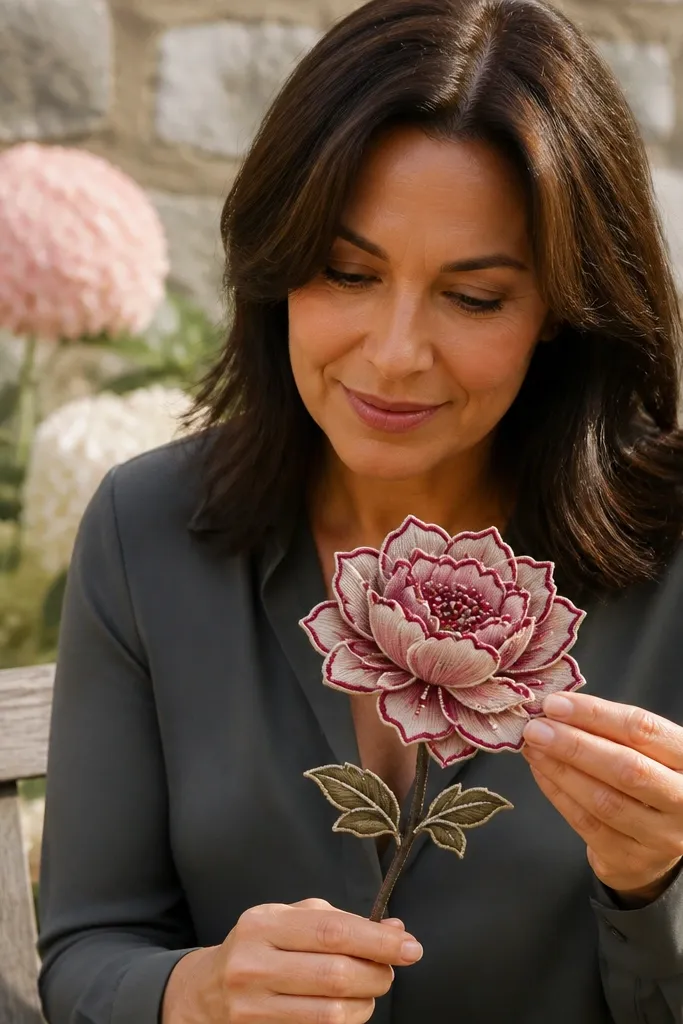
A peony-style bloom gives a big focal point while the plant theme stays grounded with a leaf stem. The design uses one large flower made from layered loops and dots, then a simple vine and a few leaf accents to tie it to plants. It looks festive and aesthetic because the flower shape is high-contrast against the open backhand. You also save time because you’re not building a full floral spray.
Step 1: Draw a short leaf stem line from the wrist to the center outer backhand. Step 2: Create one peony bloom — draw a tight spiral of small loops, then add larger loops around it like petals, ending with a dot cluster in the middle. Step 3: Add two leaves near the stem — long teardrops with a central vein line — and finish with 10-12 small dots around the bloom.
Keep the peony loops rounded, not sharp; sharp loops turn into a messy scribble when stained.
Don’t make the bloom too wide; it should fit comfortably without covering the whole backhand.
15. Grape Vine With Cluster Lines
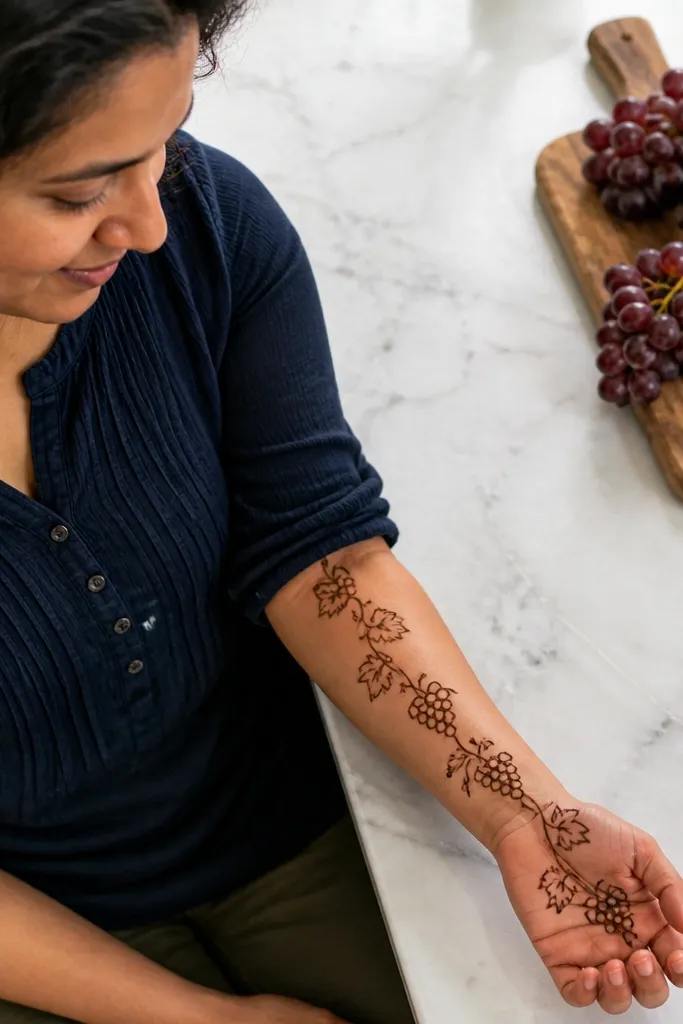
Grape vines look like plants and holiday decor at the same time. This one uses a vine line plus small grape clusters made of grouped dots. The clusters create texture in photos and you avoid long leaf drawing. It’s also a clean way to get a “themed” look for festive dinners because grapes read as celebratory.
Step 1: Draw a diagonal vine line from wrist to outer backhand. Step 2: Add leaf pairs at two points — each leaf pair is two small teardrops with a central line. Step 3: Build three grape clusters — each cluster is 8-10 dots grouped in a loose bunch, with one tiny curl line under each bunch.
Space grape clusters 2-3 cm apart so each bunch is readable.
Don’t turn clusters into a solid line of dots; keep them grouped with gaps.
16. Christmas Greenery Loop With Pine Needles
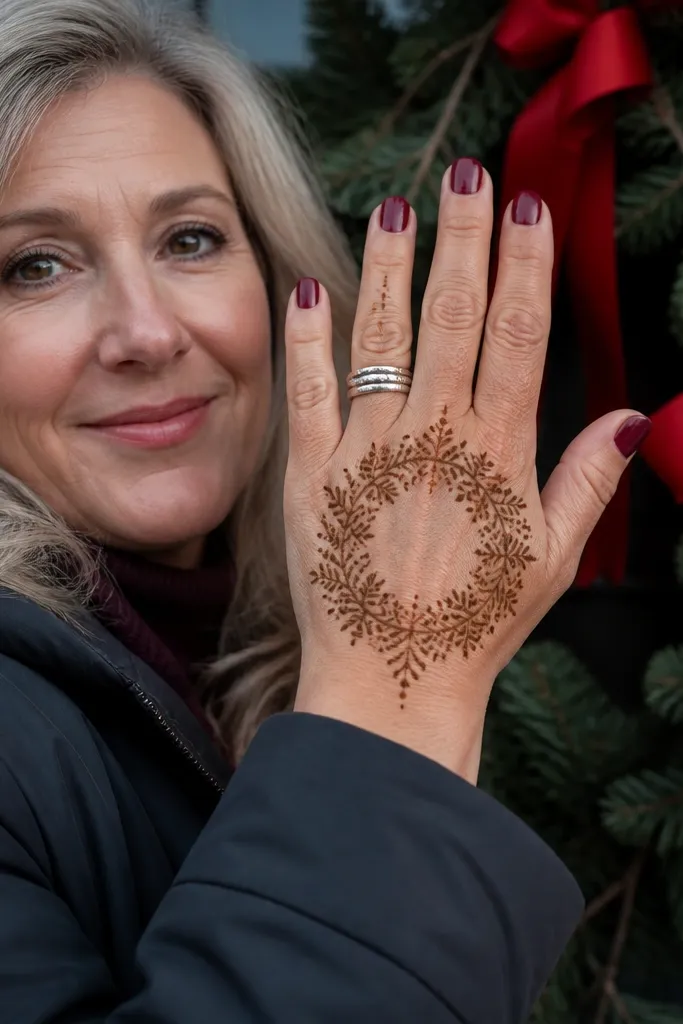
This is a holiday greenery loop that stays simple. The loop shape frames the backhand and pine-needle marks give it that evergreen look. You get a clear theme because pine needles are easy to recognize, and the loop makes it feel like decoration. It’s a good choice when you want something that looks “done” fast without filling every gap.
Step 1: Draw a loop vine shape — a teardrop loop that starts at the wrist and curves toward the outer edge, ending near the center. Step 2: Along the loop, add pine needle strokes on both sides of the vine line — short angled lines with tapered ends. Step 3: Add small dot accents near the loop edges and finish with a tiny curl at the top of the loop.
Pro tipKeep needle strokes short and consistent; long needles make the loop look messy.
AvoidDon’t add extra flowers or ornaments; the greenery loop is already the main visual.
17. Sunflower Stem With Leaf Star
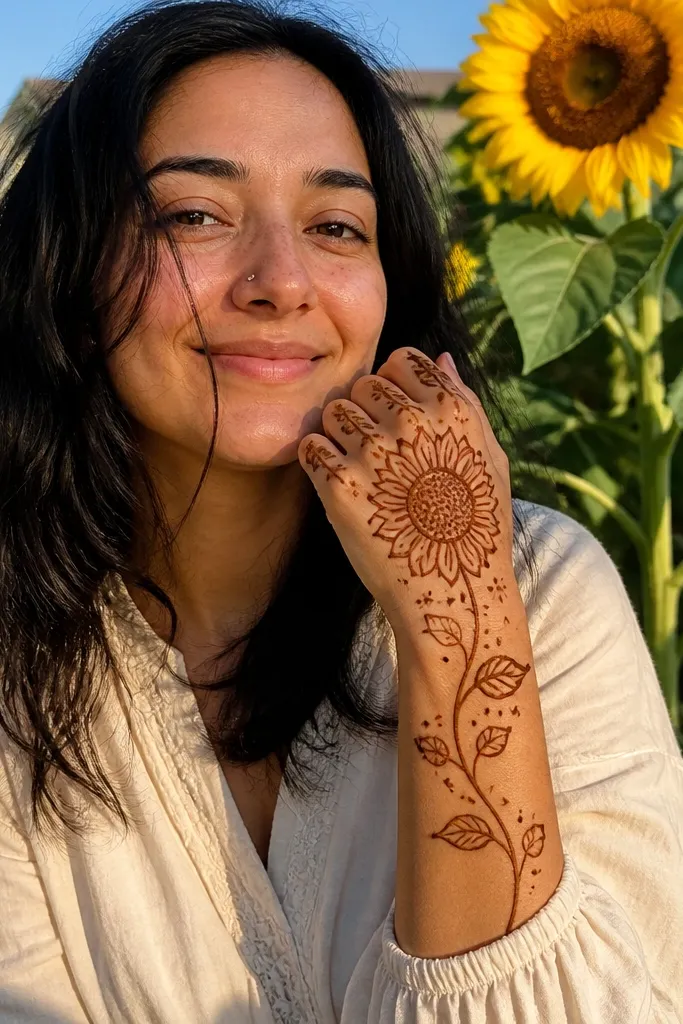
Sunflower themes look cheerful and plant-forward, and this version is quick. You draw a simple stem, then make a sunflower center using dots and arcs, with leaf star accents around it. The leaf star adds texture without needing petals across the whole hand. It works for spring-to-summer events and also reads well in bright lighting.
Step 1: Draw a short stem line from wrist to center and add two leaf teardrops along the stem. Step 2: Make a sunflower center — a small circle filled with tight dots and a few curved arc lines around it. Step 3: Add 6-8 leaf star tips around the center — each tip is a short almond leaf with a central line.
If your dots blur, make them slightly larger and fewer; crisp dots matter more than tiny ones.
Don’t draw full sunflower petals; the leaf star is faster and cleaner.
18. Bamboo Stem With Segments and Leaf Tips

Bamboo looks modern, plant-themed, and easy to read in photos because it has strong line structure. This design uses a vertical stem with segment rings, then leaf tips at two heights. It’s also a great option when you want something simple but not boring. The backhand stays open, so your mehndi stain contrast looks clean as it develops.
Step 1: Draw a vertical bamboo stem from wrist toward the back of the hand. Step 2: Add segment rings — short curved lines across the stem at 1 cm intervals, leaving small gaps. Step 3: At two heights, draw leaf tips — 4-5 almond leaves radiating from a small node, each with a central vein line.
Pro tipKeep segment rings lighter than the stem line so they don’t turn into heavy smudges.
AvoidDon’t over-thicken the leaf tips; too much thickness makes bamboo look like scribbles.
19. Coconut Bow Vine With Two Leaf Knots
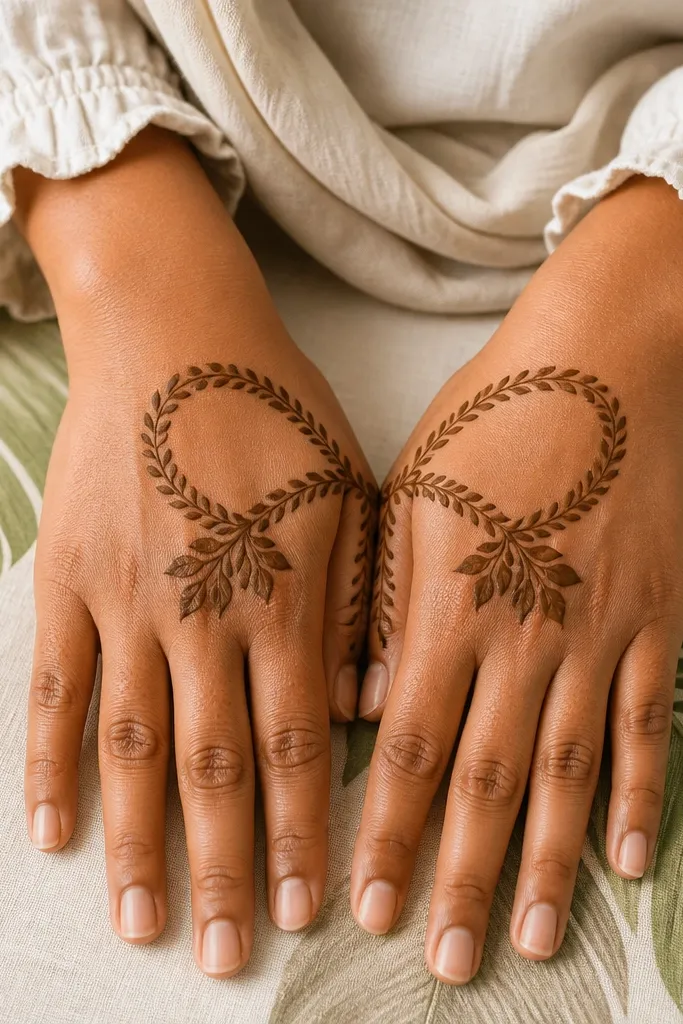
This one looks like a decorative bow made of plants. You draw a bow-shaped vine with two leaf knot clusters, plus a small vine tail. The plant theme stays clear because each knot is built from repeated leaf teardrops. It’s photogenic because the bow shape gives symmetry, and symmetry always reads better in quick mehndi. Great for festive days and family functions.
Step 1: Draw a bow outline — two mirrored curved loops on the backhand, meeting at a center knot point. Step 2: At the knot, add two leaf clusters — each cluster has 4 teardrops around a dot center. Step 3: Add two short vine tails down toward the wrist and finish with 6-10 dots near the tails.
Pro tipUse mirroring: sketch one loop, then trace the same curve on the other side by keeping your cone angle consistent.
AvoidDon’t make the bow loops too big; oversized loops eat time and crowd the center.
20. Aloe Leaf Panel With Side Veins

Aloe shapes are sharp and graphic, so this design looks clean even when you keep it simple. You create a panel of two or three aloe leaves with side vein lines, then connect them with a thin vine. The result looks modern, plant-themed, and very photogenic because the leaf edges show crisp contrast. It’s a solid choice if you want something fast that still looks designed.
Step 1: Draw a small vine line near the wrist and angle it toward the outer backhand. Step 2: Add 3 aloe-like leaves — each leaf is a long pointed shape with a central thick line and short side vein lines on both sides. Step 3: Add a tiny dot at the base of each leaf and finish with a few short connector curls between leaves.
Pro tipKeep aloe leaf edges sharp by drawing the outline first, then adding veins inside — don’t try to do veins while outlining.
AvoidDon’t add round leaf shapes; aloe needs pointed tips to read clearly.
21. Citrus Blossom Vine With Leaf Sparks
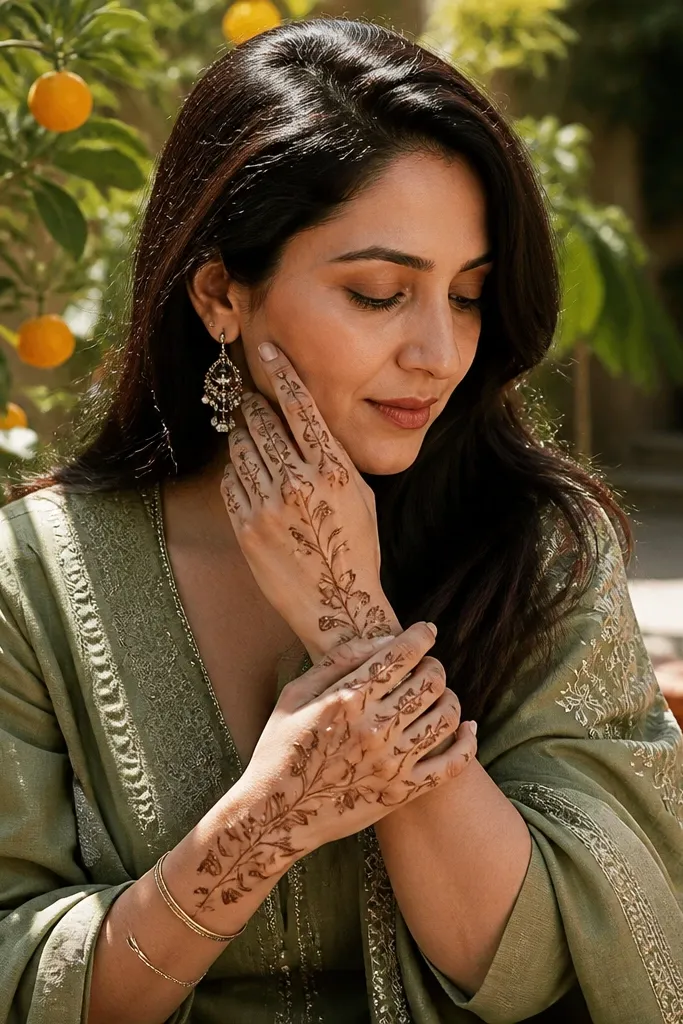
Citrus blossoms add a holiday-food vibe without needing fruits. This design uses tiny star-like flowers along a vine and leaf spark marks to fill the gaps. It’s themed plants because the vine and leaf sparks are consistent, and the blossoms give a festive focal point. It’s also fast because each flower is made from short petal strokes around a dot center.
Step 1: Draw a thin vine line diagonally across the backhand. Step 2: Place 3 citrus blossoms along it — each blossom is 6-8 short petal strokes radiating from a dot center. Step 3: Add leaf sparks between blossoms — each spark is a short almond leaf with a central line — then finish with 10-12 tiny dots near the wrist.
Make blossoms slightly bigger than leaf sparks so the flowers read as the theme.
Don’t overfill with dots; keep dots as accents only.
22. Gulmohar Leaf Fan With Center Dot

Leaf fans look like plants instantly because they create a clear shape. This design uses a fan of teardrop leaves radiating from a center dot near the mid-back of the hand, connected to a thin vine base at the wrist. It gives you a strong aesthetic with minimal steps. The center dot anchors the composition, so even if your leaves vary slightly, the overall fan still looks intentional.
Step 1: Draw a short vine base at the wrist leading to a center dot. Step 2: Build a fan of 9-11 teardrop leaves radiating from the center dot — keep leaf sizes close and veins light. Step 3: Add 6-8 small dots along the fan edges and finish with a short curved connector line on the outer side of the fan.
Pro tipIf your fan looks uneven, count leaves and keep them in a tight arc; the arc matters more than perfect leaf symmetry.
AvoidDon’t spread leaves too wide; too-wide fans look messy and take longer to fix.
23. Pomegranate Vine With Seed Dot Patterns
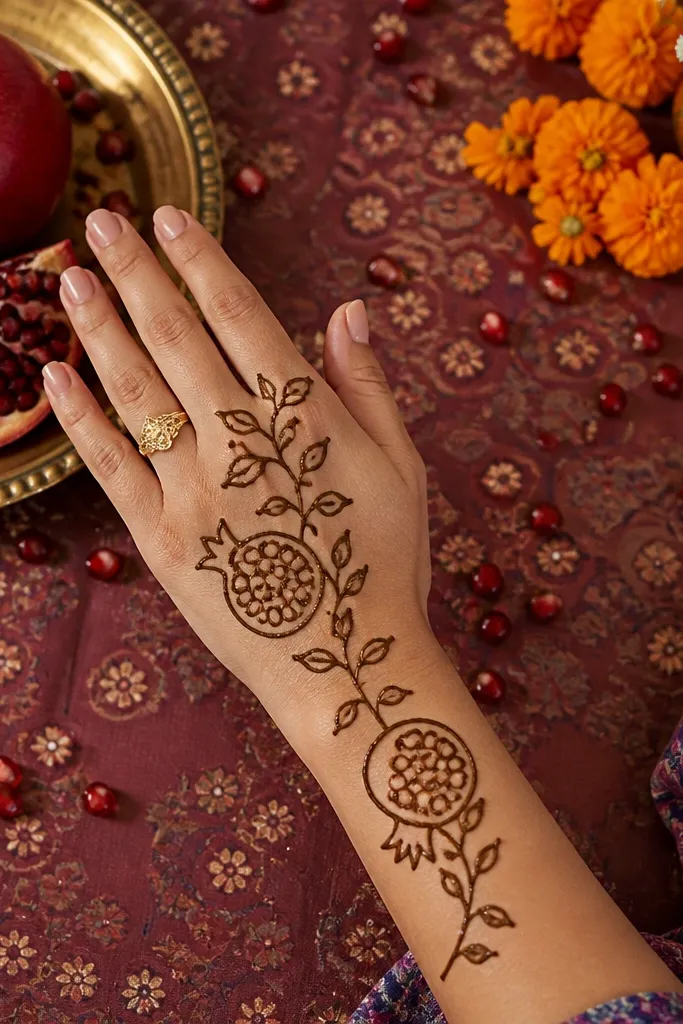
Pomegranate themes feel holiday-ready, and seeds add texture you can do quickly. This design uses a vine path with two pomegranate-like shapes. Each pomegranate is a rounded outline filled with seed dots, while the surrounding leaves stay minimal. It looks plant-themed because you still build the vine and leaf clusters, not just fruit shapes.
Step 1: Draw a diagonal vine line and place two rounded pomegranate shapes on the outer half. Step 2: Inside each pomegranate, draw a top crown line, then fill with 18-25 tiny dots in a loose oval. Step 3: Add two leaf pairs near each pomegranate and finish with 10-12 dots near the wrist for balance.
Use a dot-filling pattern: start at the center and work outward so the seeds look evenly distributed.
Don’t outline too thick; pomegranate seeds need space to read.
24. Herb Sprig With Three Leaf Types
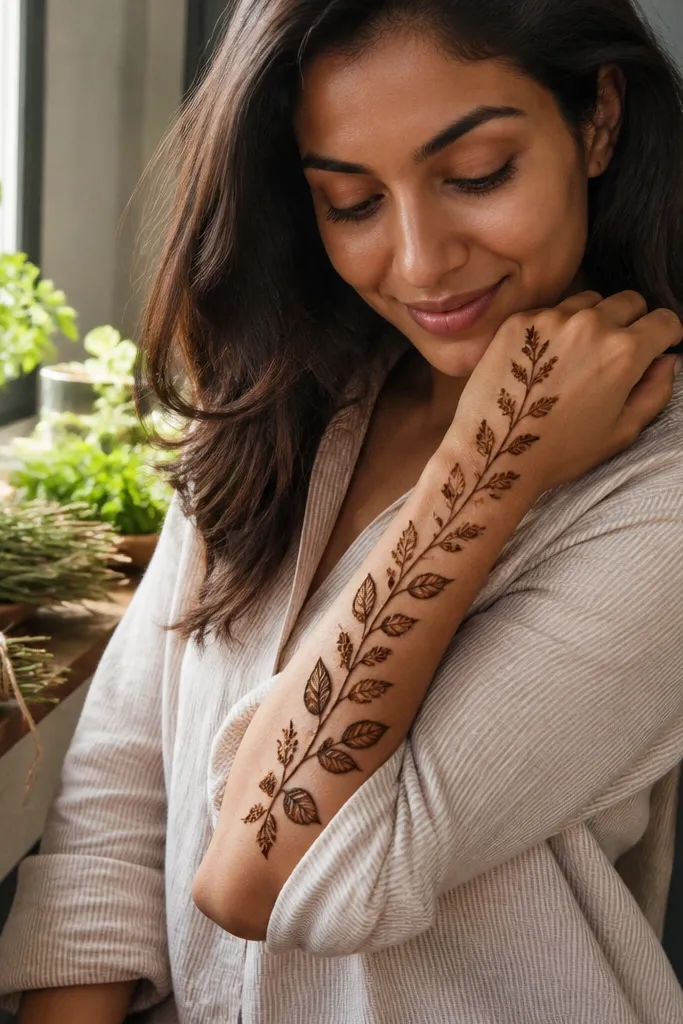
If you want plant variety without complexity, use three leaf types but keep each one simple. This herb sprig layout has one main vine and three small clusters showing different leaf silhouettes. The backhand looks aesthetic because the variety is controlled and clustered, not scattered everywhere. It’s also good for people who want a themed look but don’t like big florals.
Step 1: Draw a short main vine line from wrist to center outer backhand. Step 2: Add three clusters along the vine — one cluster has teardrop leaves, one has almond leaves, and one has tiny round-ish leaf dots with a short line. Step 3: Connect clusters with tiny curl lines and finish with 8-10 dots near the wrist.
Pro tipKeep the clusters small and spaced; variety looks good only when each cluster is distinct.
AvoidDon’t mix leaf styles within the same cluster; that’s what makes it look messy.
25. Sunburst Leaf Medallion on Backhand
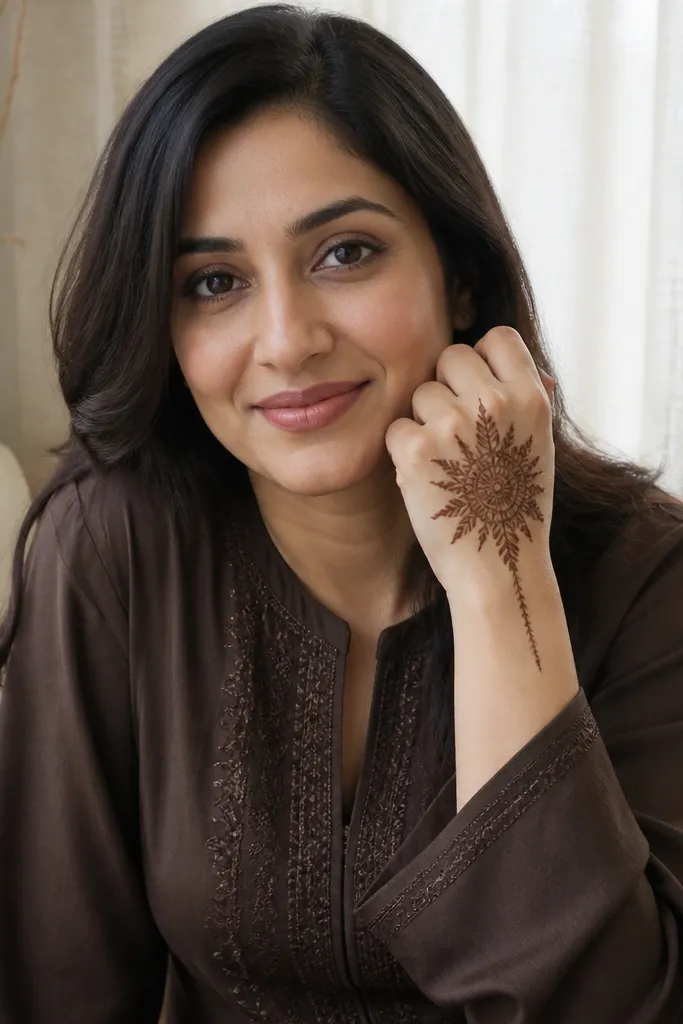
A sunburst medallion reads like a decorative plant piece even in 30 minutes. You draw a small center medallion, then radiate leaf spokes around it. A thin vine line anchors the medallion to the wrist so it feels connected, not random. This design is photogenic because the sunburst spokes create a bright focal point against the open back of the hand.
Step 1: Draw a small circle near the center of the backhand with a dot cluster inside. Step 2: Around the circle, draw 10-12 leaf spokes — each spoke is a narrow almond leaf with a central vein. Step 3: Add a vine stem from the wrist to the medallion edge and finish with 10 tiny dots around the circle.
Make the leaf spokes all the same width; width changes make the sunburst look wobbly.
Don’t overfill the medallion center; keep it dot-based so the leaves stay the star.
26. Orchid-Like Twist Vine With Two Leaves
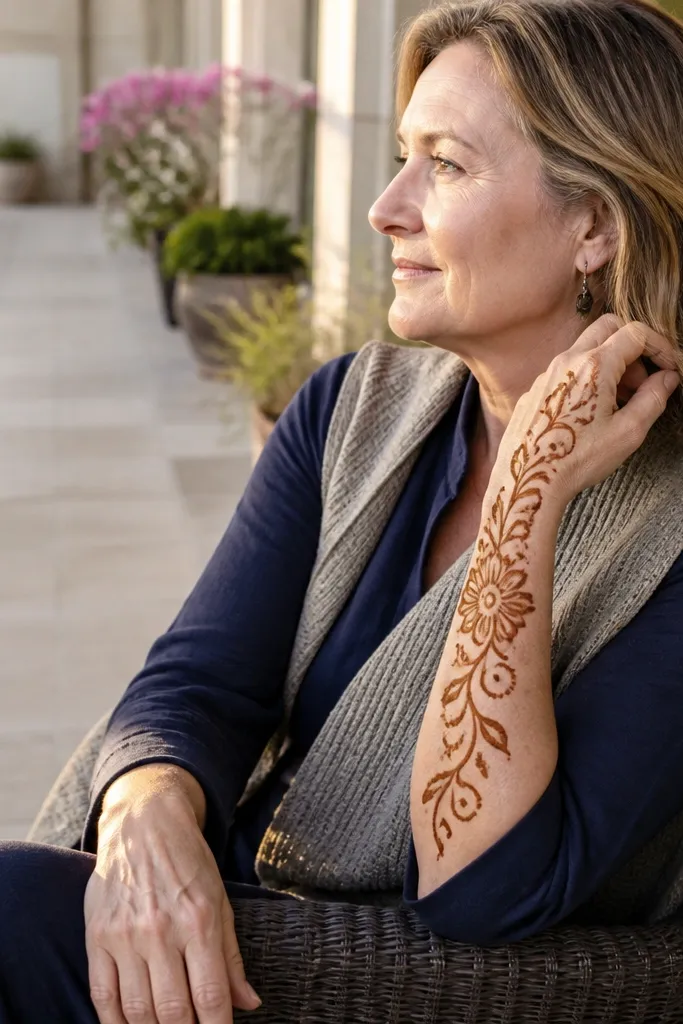
This is a plant twist design that looks fancy without long work. The orchid-like flower is built from a simple central shape and two side petals, then you add two leaf shapes to keep it plant-themed. The twisted vine path gives movement and makes the design look like it belongs on the backhand. It’s a good pick when you want something photogenic with a light footprint.
Step 1: Draw a twisted vine line from wrist toward the outer backhand — twist by changing direction slightly every 1 cm. Step 2: Add one orchid-like flower near the outer half — draw a small central dot, then 3 petals around it using teardrop strokes. Step 3: Add two leaves — one on each side of the flower — and finish with a few dots near the twist turns.
Pro tipTwist lightly. Too many twists make the vine look tangled and hard to read.
AvoidDon’t add a second flower; one focal bloom keeps it fast and clean.
27. Fig Branch With Hanging Leaf Drops
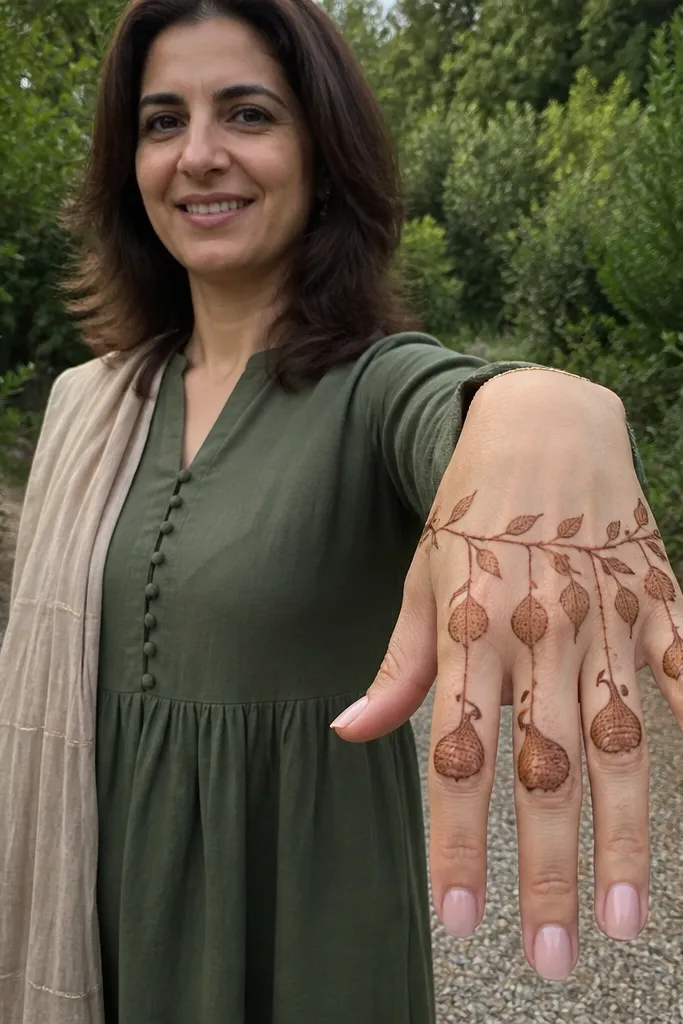
Fig-branch designs look like they’re draping, which makes them feel special even when they’re simple. You draw a branch line and hang leaf drops from it like little ornaments. The hanging effect creates a vertical rhythm that looks good in photos, especially when your hand is slightly angled. It also stays within 30 minutes because leaf drops are quick to repeat.
Step 1: Draw a branch line angled from wrist to upper center. Step 2: From the branch, add three hanging leaf drops — each leaf is a teardrop with a short stem line and a central vein. Step 3: Add small connector lines between the branch and leaves, then sprinkle 8-12 dots near the wrist base.
Keep leaf drops at slightly different lengths; it makes the drape look natural instead of rigid.
Don’t make all leaves identical size; identical sizes read flat and boring.
28. Clover Vine With Plant-Only Fill
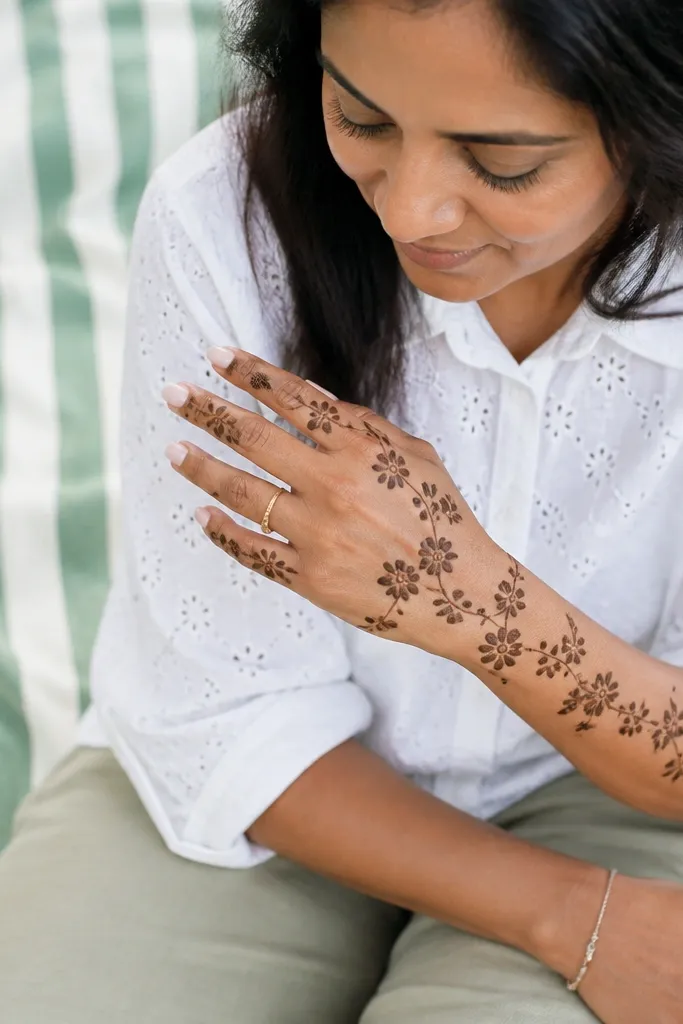
This design looks like a plant meadow because it repeats clover shapes and uses plant-only fill. You avoid heavy geometric blocks and instead fill gaps with tiny clover leaves and dots. It’s aesthetic because the texture is consistent and stays light enough for the backhand to read cleanly. Great for spring and luck-themed days.
Step 1: Draw a vine line diagonal across the backhand. Step 2: Add 4-5 clover shapes along the vine — each clover is three small teardrops around a dot center. Step 3: Fill the small spaces around clovers with tiny single-leaf marks and finish with a dot scatter near the wrist.
Pro tipUse a dot center for each clover; it keeps the clover from looking like random leaves.
AvoidDon’t fill with spirals or heavy lines; plant-only fill keeps it cohesive.
29. Bougainvillea Leaf Frame With Center Air

A frame design makes you look skilled fast because the structure is clear. This bougainvillea-inspired layout uses a leaf frame around the back of the hand, but it keeps a big open center so your mehndi stain shows through. The leaf frame is made of small teardrop leaves and corner curls, and it reads as plants instantly. It’s a strong choice when you want the backhand to look clean and not crowded.
Step 1: Draw a light oval frame around the backhand center, leaving the middle mostly blank. Step 2: Place leaf clusters on the frame edges — 2-3 teardrops per cluster, with tiny dots in between. Step 3: Add leaf corners near the wrist and outer edge, then finish with a few curved vine connectors to link clusters.
Pro tipUse thicker lines for the frame and thinner lines for leaf details; it creates a clear visual hierarchy.
AvoidDon’t close the frame into a full band; the open center is what makes it look airy.
30. Succulent Pair With Tiny Dot Rosettes
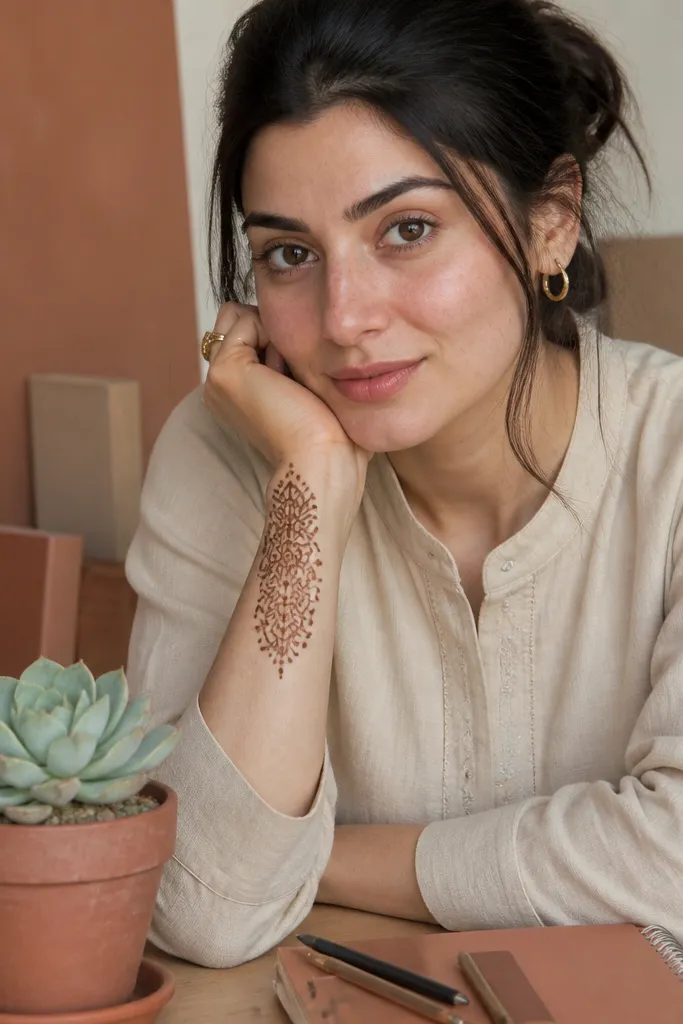
Succulents are perfect for quick themed plant mehndi because rosettes look complex but they’re built from simple dot patterns. This design uses two rosette succulents, each made from tight dot rings and a few short leaf strokes. The backhand looks modern and photogenic because the rosettes are compact focal points. It stays fast because you repeat the same rosette method twice.
Step 1: Draw two small bases near the center-back region, one closer to the wrist and one toward the outer edge. Step 2: For each rosette, draw a ring of tiny dots, then add a second ring with a slightly larger dot size and a few short leaf lines pointing outward. Step 3: Connect them with a thin vine line and add 8-10 small dots along the connector.
Keep dot rings tight. Wide spacing makes succulents look like scattered dots instead of rosettes.
Don’t add long leaves around rosettes; succulents read best with short, compact leaf marks.



