
1. Wrist Floral Arch With Star Dots
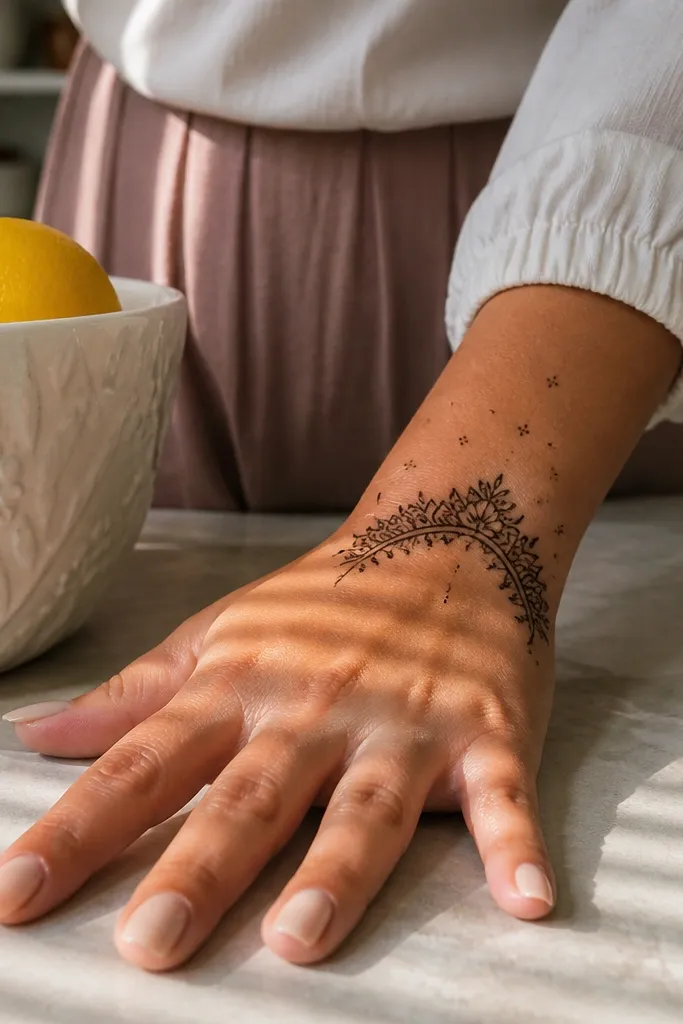
This is the easiest “themed but simple” layout: a floral arch at the wrist gives you instant structure, while star dots on the top hand add a seasonal sparkle without filling the whole palm. The arch frames the hand so your design looks intentional in selfies, even if it’s only half the coverage. Use tight, short strokes for petals so the lines stay crisp after drying. This one is great for new cone users because it doesn’t require long vines — just repeatable petals and dots.
Start by marking a gentle curve across the wrist from one side of the hand to the other. Pipe 5 small petals along the curve, then place 3-5 tiny star dots in a loose cluster on the top center of the hand. Finish by adding 2 short leaf strokes on each side of the star cluster, keeping them mirrored. Let the outline dry fully before you touch water or move your fingers a lot.
If your stars blur, make them with one tight cross and skip extra dots.
Don’t fill the space between petals — leave breathing room so the floral arch stays sharp.
2. Single Rose Stem With Side Buds
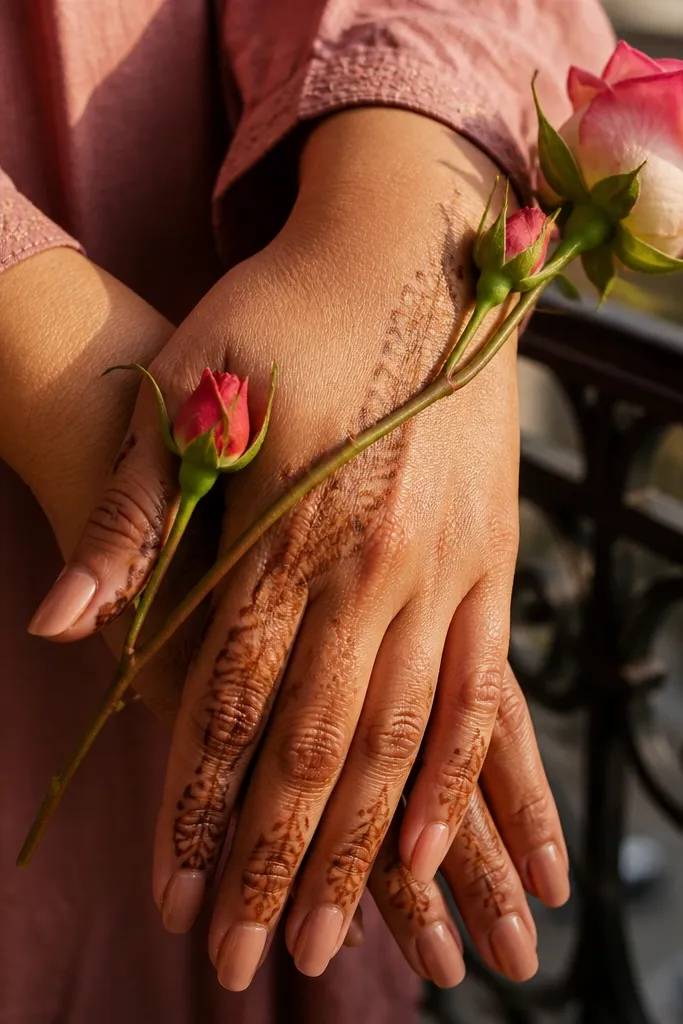
A single rose stem looks more detailed than it is because the eye reads the center rose first, then follows the thin line. Side buds keep it from looking empty, but you only need a few — enough for a clean front-hand photo. This design works for spring and romantic themes, but it also works for any occasion because roses are universally readable. It’s also a smart choice when you want floral touches without spending time on heavy leaf filling.
Pro tipKeep the stem line slightly lighter than the bud lines so the bud pops in photos.
Outline a thin vertical stem from the center of the wrist toward the middle of the hand. At the top, pipe a simple rose bud using a teardrop loop pattern, then add two small bud shapes on each side of the stem at different heights. Connect the buds to the stem with tiny curved lines so everything looks linked. Finally, add a few dot accents near the wrist to finish the theme without extra filling.
AvoidDon’t make the stem too thick — thick stems swallow the rose details when the henna dries.
3. Bangle Knot Band With Tiny Flowers

This one looks festive because the wrist band reads like jewelry. The knot pattern gives texture, while tiny flowers above the band keep it floral and seasonal. You get a high-end look even when the rest of the hand is mostly open space. The design is also forgiving: if one flower isn’t perfect, the band still makes the whole look cohesive. It’s perfect for short sessions because you can repeat the knot segments quickly.
Pro tipUse a ruler or your phone edge to keep the band lines straight.
Draw two parallel lines across the wrist to frame a band area. Pipe a simple knot repeat between the lines — small loops that cross and return, repeated 4-6 times. Then add 1 small flower at the center top of the band and 2 more flowers toward the edges. Finish with 3-4 dot sparkles between flowers so the wrist doesn’t look plain.
AvoidDon’t extend the band too far up the hand — it makes a quick design look unfinished.
4. Lotus Corner With Leaf Fan
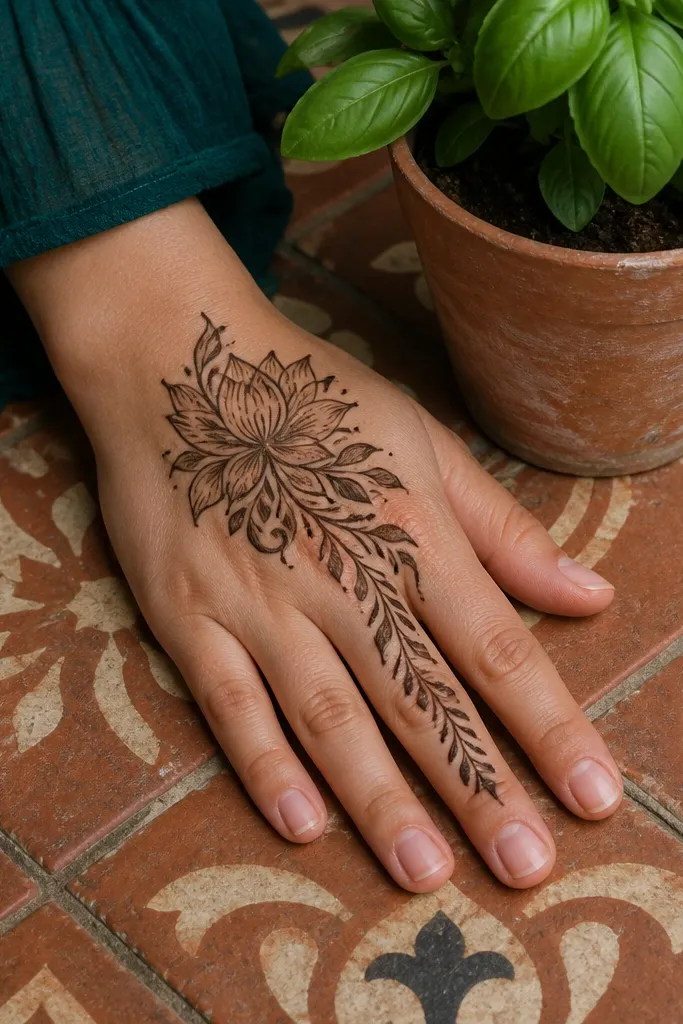
Corner motifs are underrated for front-hand mehndi because they frame the hand without crowding the thumb area. A lotus at the corner gives a clear focal point, and a leaf fan pulls the design toward the fingers so it reads in photos. You can keep it light and still look full because the fan creates movement. This works well for festival and temple-inspired themes, and it’s fast because leaves are basically repeated teardrops.
Start at the side of the wrist near the base of the pinky and pipe a lotus using 6-8 rounded petals around a dot center. From the lotus, draw a curved leaf fan made of 5-7 teardrop leaves pointing toward the middle of the hand. Place the largest leaf closest to the lotus and make the ones toward the center slightly smaller. Add one tiny dot cluster near the wrist edge to lock the motif in place.
Press the cone slightly longer at each teardrop base so leaves look consistent.
Don’t cross leaf lines — keep them separated so the fan looks clean, not tangled.
5. Paisley Drop Chain With Floral Center
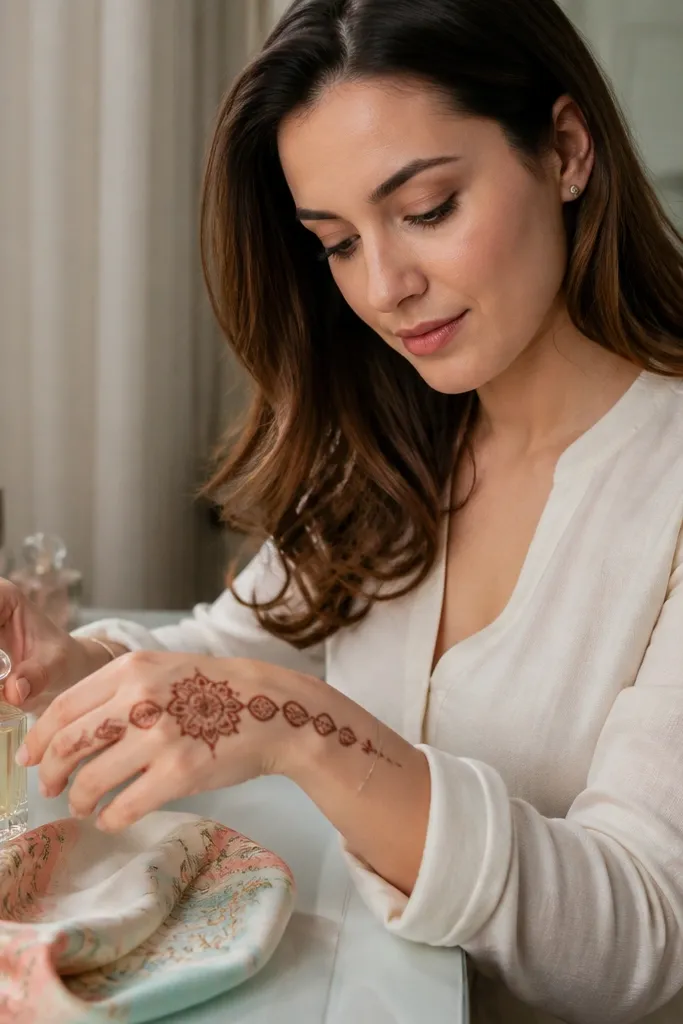
Paisley drops look elegant even when you do only a few. This design uses a short chain of paisley-like teardrops across the top of the hand, then anchors everything with a small floral center. It reads “themed” because paisley feels traditional and decorative, and floral touches keep it feminine and photo-ready. The top chain also hides unevenness — if your drops vary slightly, the pattern still looks intentional.
Pro tipMake the paisley drops slightly pointed at the top so they read as paisley, not random teardrops.
Outline a small floral center near the middle of the hand using 5 petals around a dot. Then pipe a diagonal chain of 4-6 paisley drops from near the wrist toward the center, spacing each drop with a consistent gap. Connect the drops with thin curved lines so they look like they belong together. Finish by adding 2 mini leaves at the sides of the floral center for balance.
AvoidDon’t overfill the paisley center — keep it mostly open for a lighter, quicker finish.
6. Spring Buds On a Curved Vine
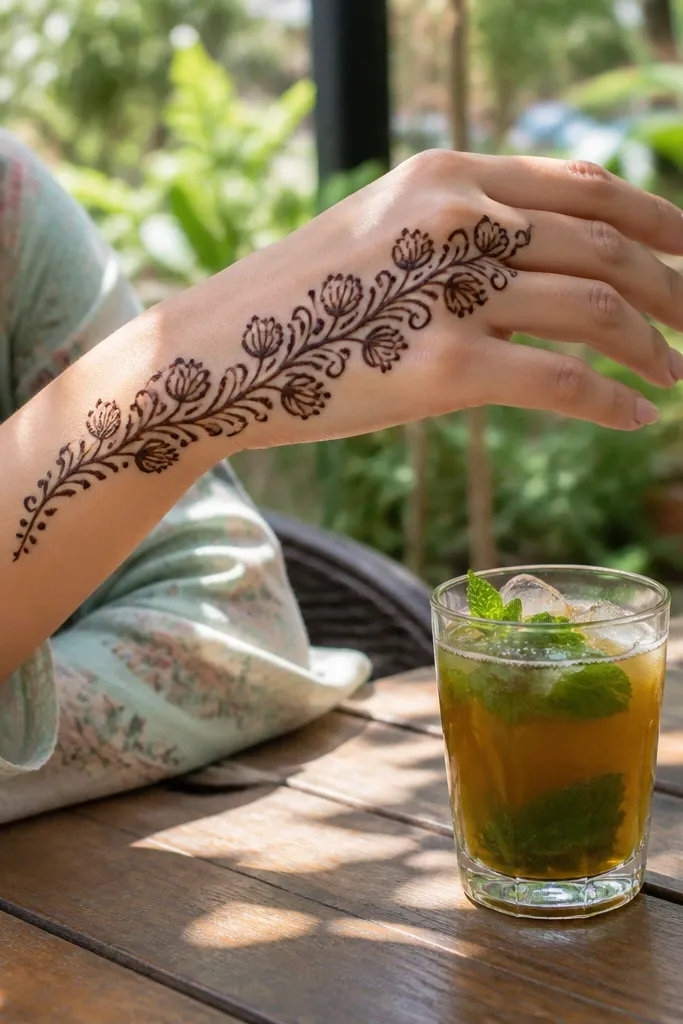
A curved vine is the fastest way to make a front-hand design look “done” without filling large areas. Repeating bud shapes give you that springy theme, and the curve naturally guides the eye from wrist to fingers. This is one of the best options for 30 minutes because you can keep your pace steady: draw the vine, then repeat 6-8 buds along it. It also works for people who struggle with symmetry, since the vine handles the flow.
Draw a curved vine line starting at the wrist and rising toward the middle of the hand. Pipe 6-8 small bud teardrops along one side of the vine, then add 3-4 buds on the other side at slightly different heights. Place a tiny dot at the center of each bud to add floral detail. Finish with a short arc near the wrist to frame the vine start.
If your vine wobbles, fix it by making the buds cover the wobble — the eye follows the buds.
Don’t put buds too close together — they merge after drying and look like a blob.
7. Festival Concentric Petals At Wrist

Concentric petals look festive because they mimic rangoli and decorative motifs. You get a strong wrist focal in minutes, and you can keep the rest of the hand clean for a modern look. Floral touches stay obvious because petals are clear shapes, not vague filler. This design is also great if you want a theme that feels celebratory without heavy work on the fingers.
Pro tipPress the cone slightly slower for the first ring so the center stays crisp.
Start at the center of the wrist and pipe a small dot. Build outward with 3-4 concentric rings of petals, each ring made of 6 rounded petals around the center. Add a few dot rays between rings so the center looks lively. Finally, draw two short leaf strokes on either side of the wrist motif to connect it to the hand.
AvoidDon’t make the rings too large — big rings take longer to fill cleanly and blur.
8. Monsoon Raindrop Lines With Floral Stops
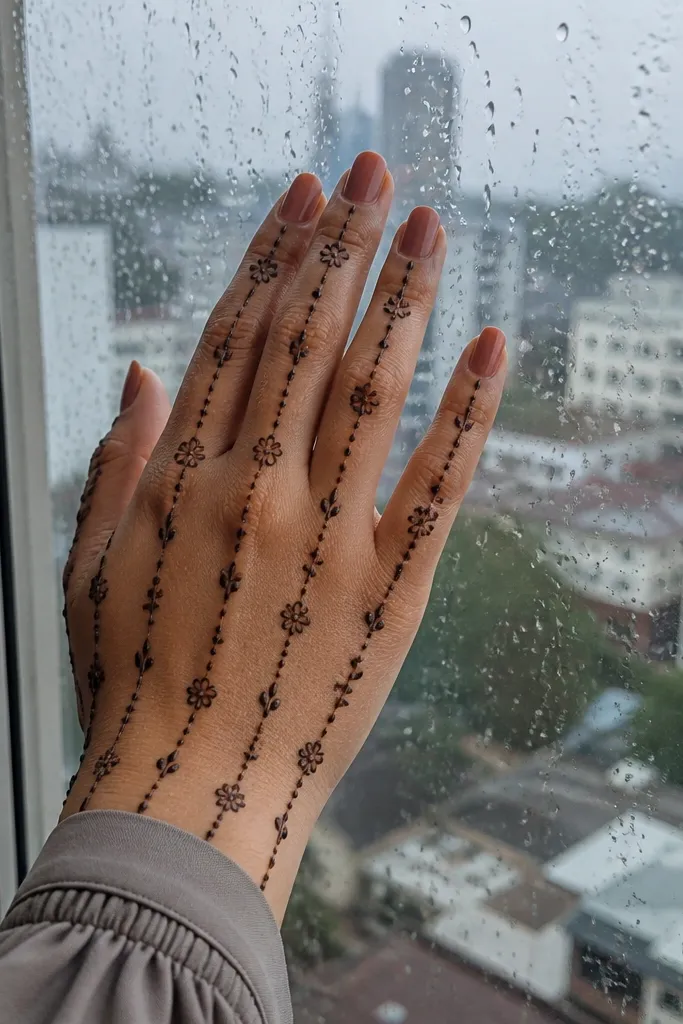
If you want a seasonal feel for rainy days, raindrop lines do it fast. The trick is to stop each drop trail with a tiny flower so it looks intentional, not like random marks. This design is photogenic because it creates vertical movement from wrist to top hand. It also stays simple: you’re repeating the same raindrop shape and only adding a few stops.
Draw a light vertical guide line from the center of the wrist upward. Pipe 5-7 raindrops along that line, each drop shaped like a teardrop with a small notch at the top. After every 2-3 drops, add a tiny 5-petal flower at the top of that section. Finish with a few dot splashes near the wrist edge.
Keep raindrops the same width. Consistency makes it look designed, not rushed.
Don’t spill raindrops onto the thumb crease — it smears fast.
9. Winter Snowflake With Minimal Leaves
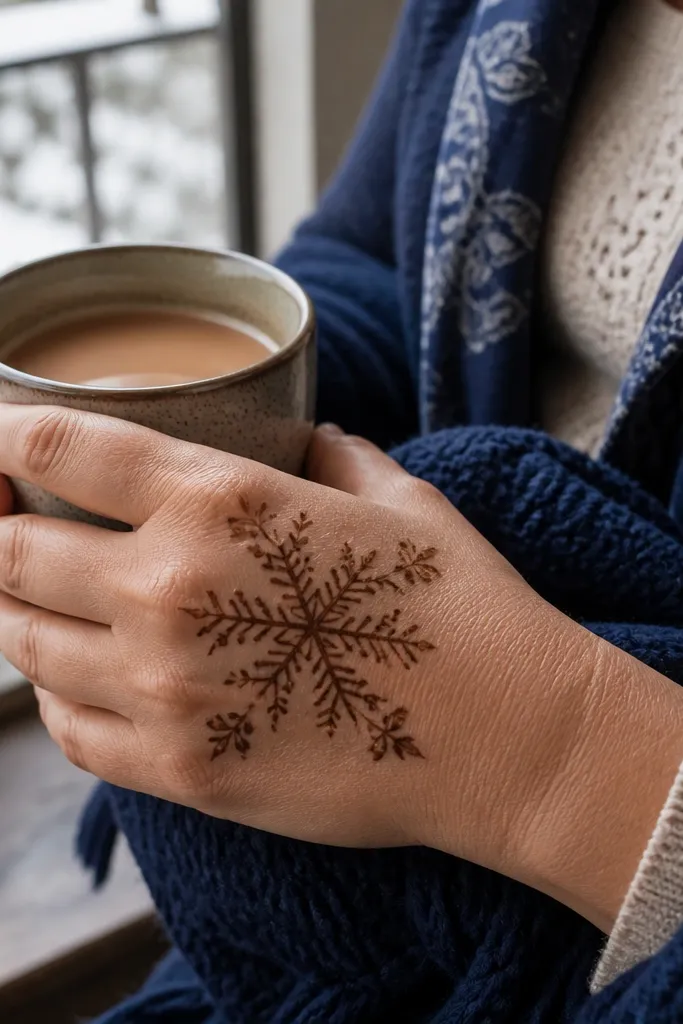
Snowflakes read instantly and they’re quick because you’re not filling large spaces. This design places one snowflake near the center of the top hand, then adds just enough leaves to keep it floral. It’s a strong option when you want winter vibes without spending time on full lace-like patterns. The minimal leaves also prevent the design from looking sterile — it stays warm and feminine.
Pipe a small dot center near the middle of the top hand. Create a snowflake by drawing 6 lines radiating out, then add short cross lines at the end of each arm. Add 4-6 tiny leaf teardrops around the snowflake, placing them in the gaps between arms. Finish by outlining one small leaf near the wrist to connect the theme downward.
Start with a dot compass — place your arms evenly before you add details.
Don’t over-branch the snowflake. Too many arms make it messy in 30 minutes.
10. Half-Moon Floral Corner Frame
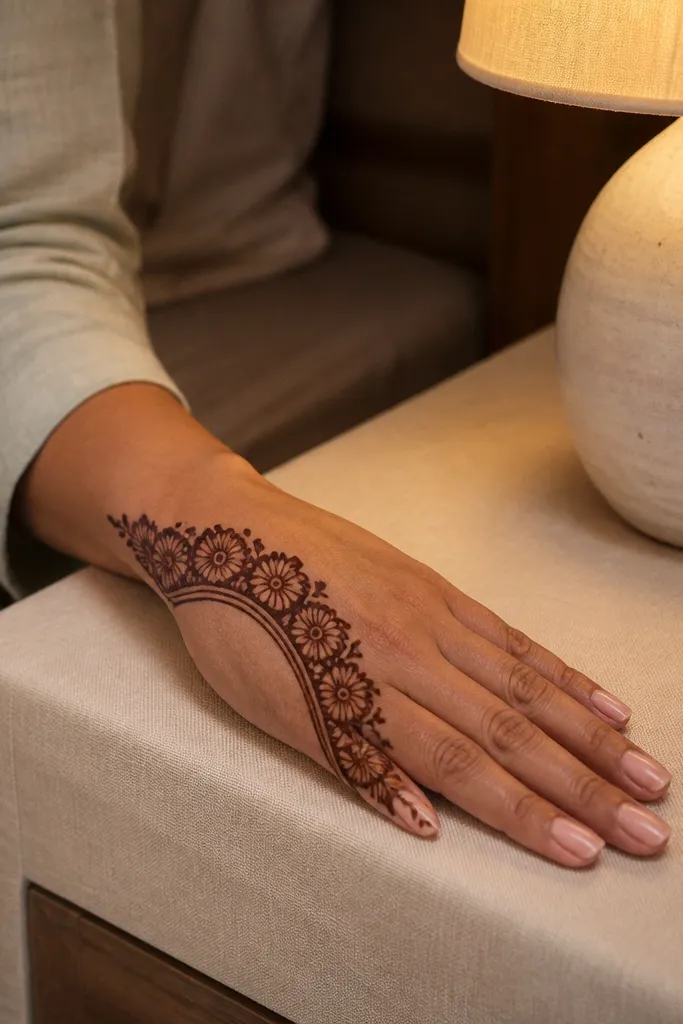
Half-moon frames look polished on front hands because they create a boundary. You get a clean silhouette that photographs well, and the floral touches inside the frame keep it soft. This is a smart pick for short time because you only need one boundary curve and a few repeating petals. It also works for people who dislike finger-heavy designs since it focuses on the top hand.
Pro tipUse the same petal size for the border. It’s the difference between “cute” and “messy.”
At the wrist corner, draw a half-moon arc that curves toward the center of the hand. Inside the arc, pipe 7-9 petals along the inner edge like a scalloped border. Add one small flower at the center of the arc and two leaf teardrops beside it. Finish with 3 tiny dots at the outer arc edge to make the boundary look decorative.
AvoidDon’t draw the arc too thick — thick borders smear and look heavy.
11. Mehndi Braid Across Top Hand
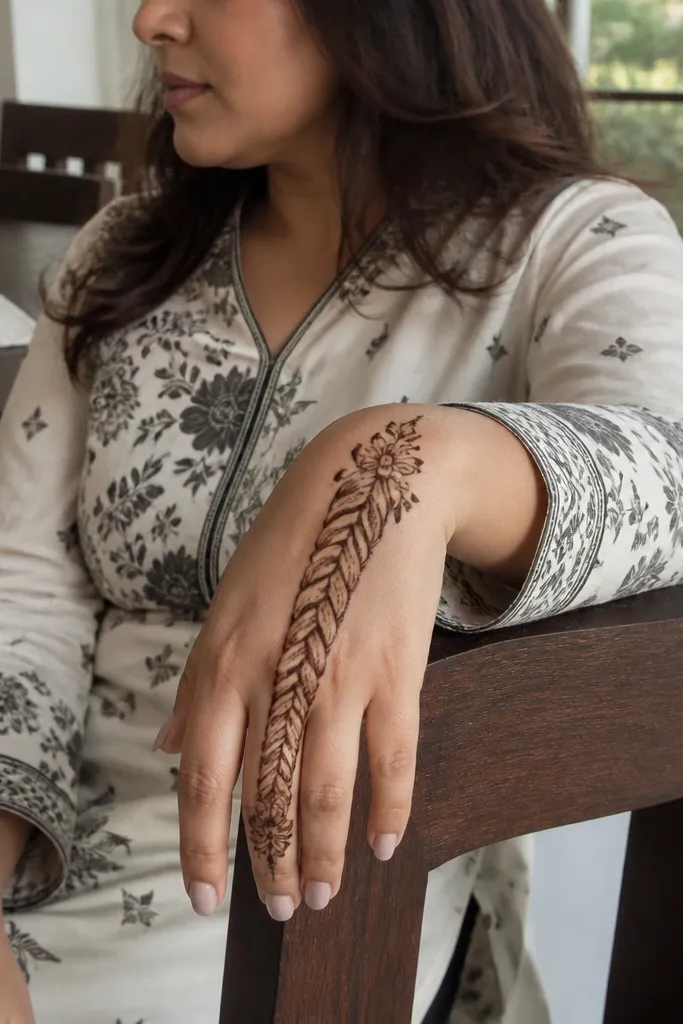
Braids look complex, but they’re just repeated crossings. This design runs a braid across the top hand, then adds small floral touches at the ends so it looks finished instead of like a single line. It’s great for a modern seasonal look because the braid gives structure and the flowers soften it. You can keep the braid narrow so it stays in your 30-minute limit.
Pro tipKeep your braid segments short. Long segments drift and lose the “braid” look.
Draw two parallel guide lines from near the wrist toward the top center of the hand. Pipe a narrow braid by crossing small curved loops over and under each other along the guide area for 6-8 segments. At the start and end, add small 5-petal flowers to mark the motif. Finish by adding tiny dot accents around the flowers so the ends don’t look bare.
AvoidDon’t fill the braid area solid. Leave gaps so it stays airy and dries evenly.
12. Mandala-Inspired Dot Wheel On Top Hand
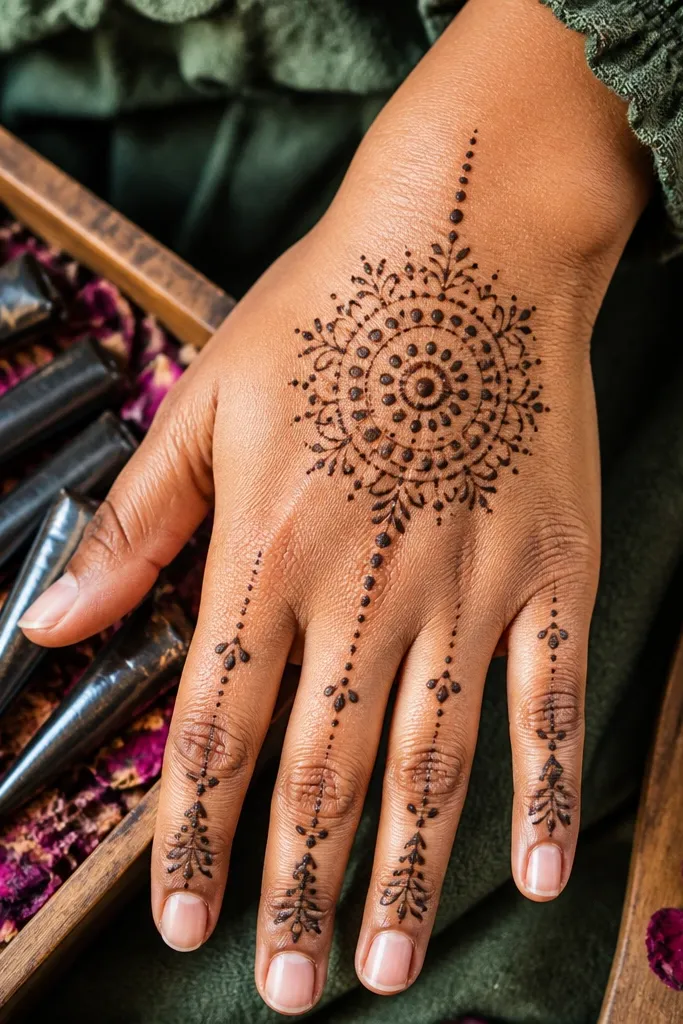
A mini dot wheel gives you a mandala look without the time sink. The floral touch comes from tiny petals around the circle, and the dot symmetry makes it look neat in photos. Place it on the top center and you instantly get that themed, decorative feel. This one is also beginner-friendly because dots are forgiving — you can correct spacing by adjusting dot size.
Pro tipIf your dots look uneven, make every dot the same pressure time on the cone.
Pipe a small center dot near the middle of the top hand. Around it, create 12-16 tiny dots in a circle, keeping spacing consistent. Between every 2-3 dots, add a small petal teardrop pointing outward to create floral accents. Finish with 2 short leaf strokes at the circle’s left and right edges to connect it to the wrist.
AvoidDon’t overfill the center. A heavy center turns into a dark blob.
13. Pomegranate Flower Burst At Wrist

This gives you a holiday-seasonal vibe fast because pomegranate-like blooms read as festive. The burst shape is photogenic: it spreads outward from the wrist and makes the hand look fuller without covering the palm. Floral touches are built into the petals, and leaf tips add lift. It’s a good option when you want a theme that looks “special” but still fits a 30-minute schedule.
Pro tipKeep petals slightly cupped. It makes the burst look dimensional after drying.
Draw a small oval near the wrist center. Pipe 10-12 rounded petals around the oval, alternating petal sizes to create a natural burst. Add tiny dot clusters inside each petal base like pomegranate seed hints. Finish with 4-6 leaf teardrops pointing upward on both sides of the burst.
AvoidDon’t draw the burst too low — you need it on the wrist, not sliding into the finger crease.
14. Peacock Feather Curve With Floral Ends
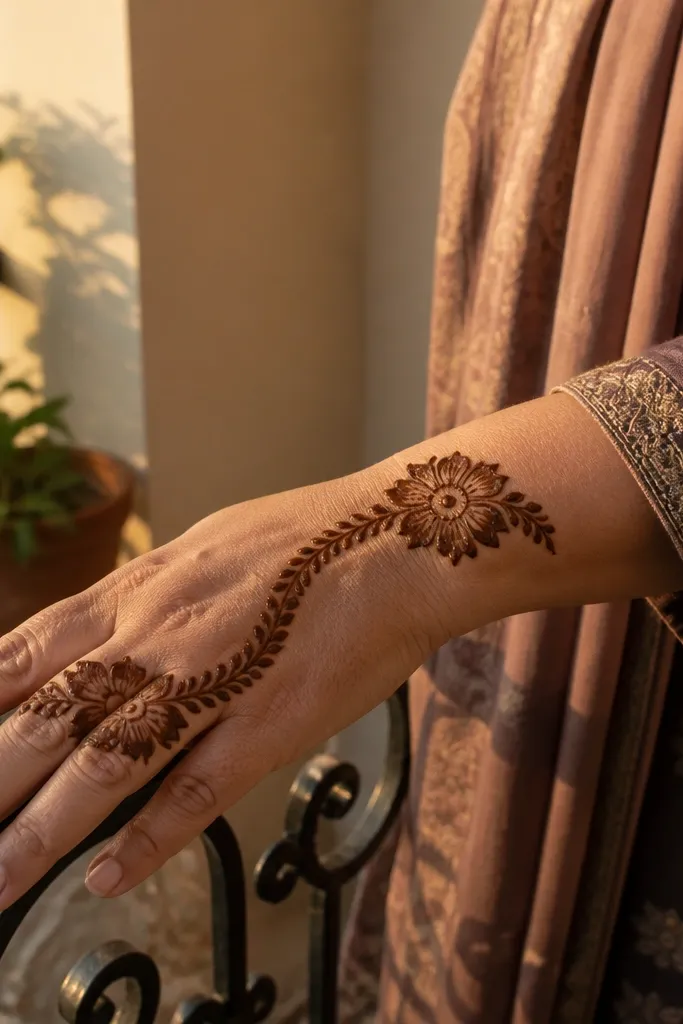
Peacock feather curves look theatrical, but you can do it simply by using repeated leaf teardrops. The feather curve runs across the top hand, and the floral ends keep it pretty instead of too wild. This is a great “seasonal celebration” look that still stays clean because you’re not filling the whole feather body. It photographs well because the curve creates a clear path for the eye.
Pro tipMake the leaves slightly angled outward so the feather shape reads instantly.
Start with a long curved spine line from wrist to top hand. Pipe teardrop leaves on both sides of the spine, starting small near the wrist and increasing slightly toward the middle. Stop when you reach the top — you should have 10-14 leaves total. Add one small flower at each end of the feather curve and finish with a few dots along the spine.
AvoidDon’t add extra random dots all over. Keep dots only along the spine or near flowers.
15. Sunflower Trio With Thin Ring
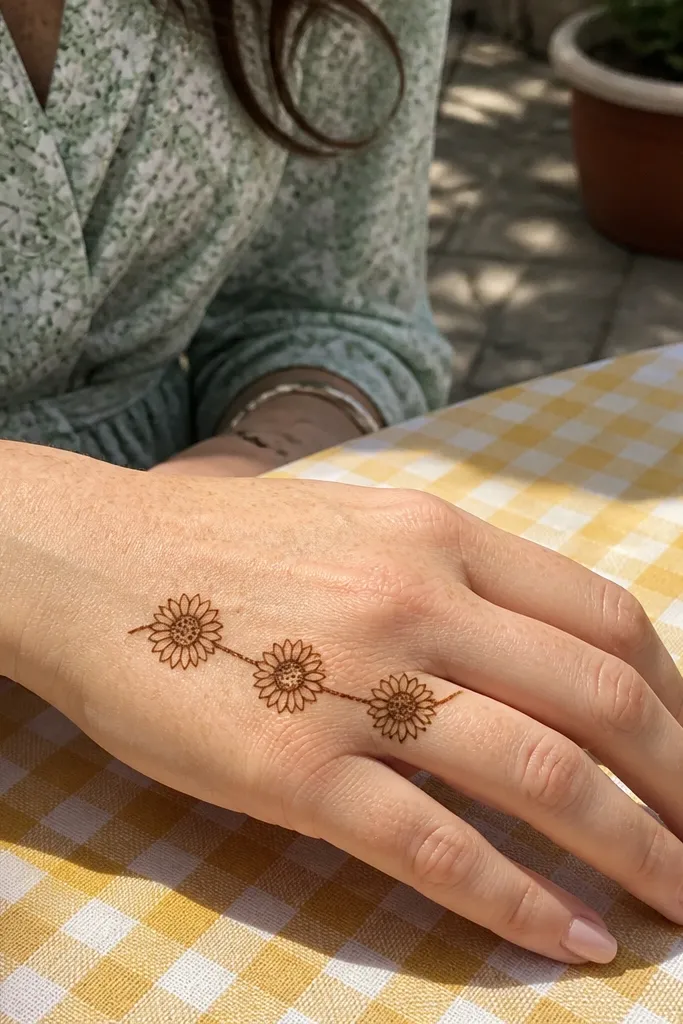
Sunflower motifs are bright-looking even with plain black henna, and they’re easy to make in a short time. This design uses three small sunflowers placed across the top hand, tied together with a thin ring line so it looks cohesive. Floral touches are obvious in the petals, and the center circles add a clean focal. It’s ideal for summer themes or any day you want a cheerful look without busy filling.
Pro tipKeep sunflower centers as dots and short dashes. Too many lines in the center thicken and blur.
Draw a thin ring line across the top hand from near the wrist to the middle. Place a small sunflower at the center of the ring and two smaller sunflowers near the ring’s ends. For each sunflower, pipe 10-12 petals around a dot center, then add 4-6 tiny dots around the center for texture. Finish by adding 2 leaf teardrops under the center sunflower to ground the design.
AvoidDon’t overlap petals from one sunflower into the next. Each bloom needs its own space.
16. Rangoli-Style Diamond Frame With Flowers
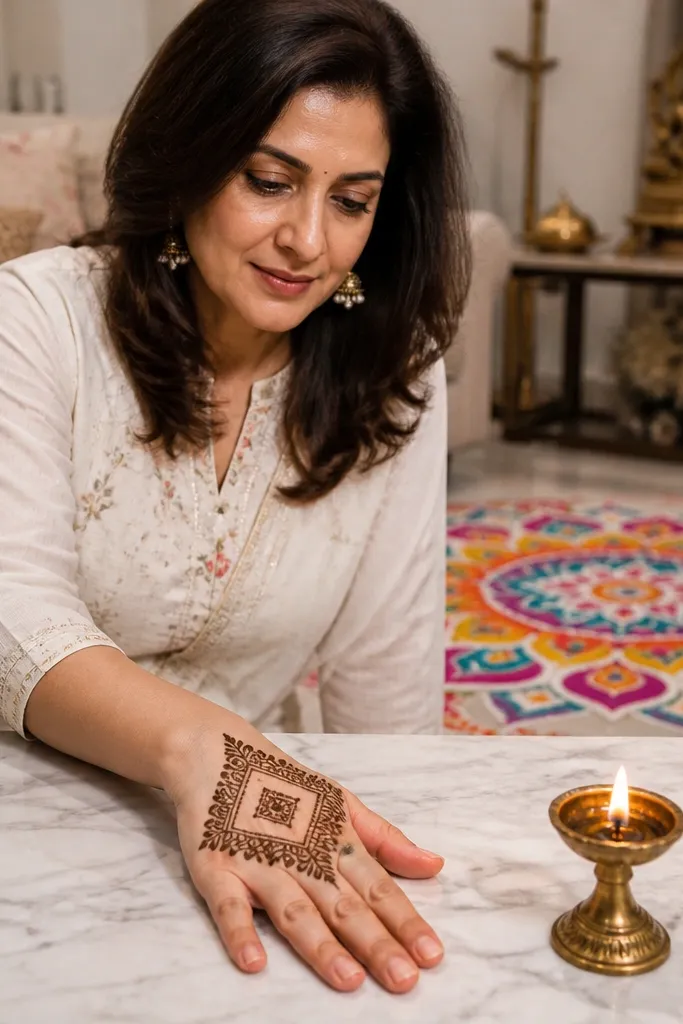
Diamond frames look like rangoli and they instantly read festive without covering the entire hand. This design uses a simple diamond border on the top hand and adds small flowers inside so the floral touch stays clear. It’s photogenic because the frame creates a crisp geometry, and the flowers soften it. The time advantage is real: you’re drawing repeated diamond corners and only a few floral units.
On the top hand, draw a vertical diamond frame using two angled lines meeting at corners, repeated 2-3 stacked levels. Connect the corners with short lines so it looks like a clean border, not a sketch. Inside the frame, add one small 5-petal flower at the center and 2 tiny flowers near the upper corners. Finish by adding a dot line along the bottom diamond edge.
Use light pressure for the frame lines, then go thicker only on the flowers.
Don’t draw the frame too large. A big frame takes longer to keep straight and tidy.
17. Thumb-to-Wrist Vine With Two Petal Layers
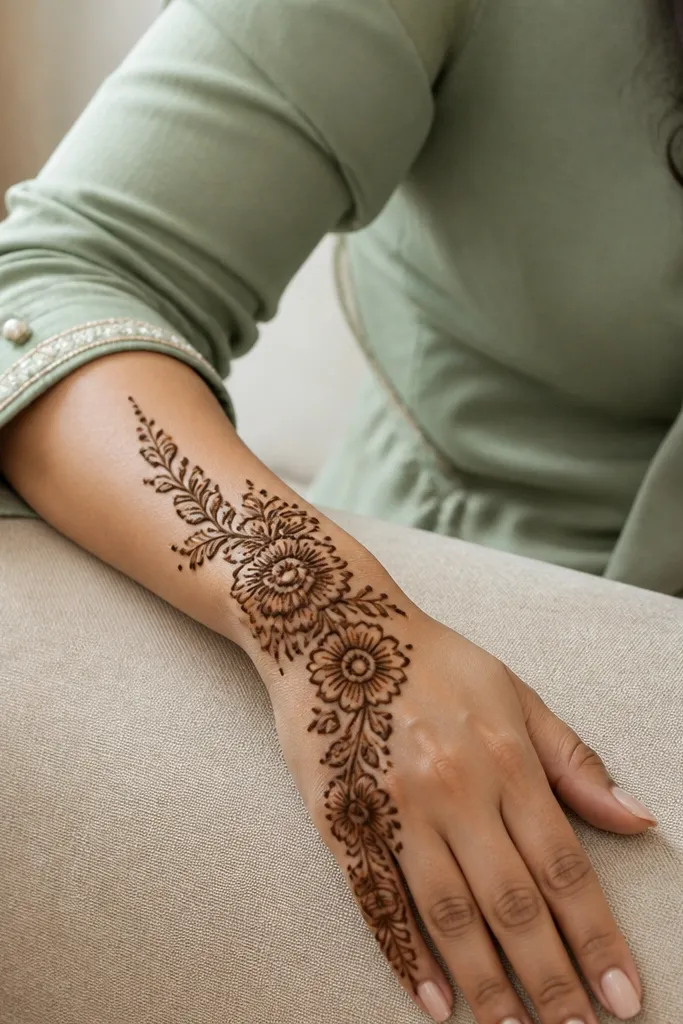
This one flatters the front hand because it uses the thumb-to-wrist diagonal as your design path. The vine draws the eye upward, and two-layer petal blossoms look layered and expensive without heavy filling. You get a strong floral touch that still feels simple because you only need a few blossoms. It’s great for people who want their mehndi to look deliberate but don’t want to cover every finger.
Start near the thumb side of the hand and draw a diagonal vine line toward the center of the wrist. Pipe two-layer blossoms at the mid-point: an outer ring of 6-7 petals and an inner ring of 4-5 smaller petals around a dot. Add 3-4 small leaf teardrops along the vine on both sides. Finish with tiny dot accents near the wrist to make the end look complete.
If your diagonal vine wobbles, keep the blossoms larger — they stabilize the composition in photos.
Don’t place blossoms too close to the thumb crease — it smears when you move.
18. Marigold Sprigs On Top Hand
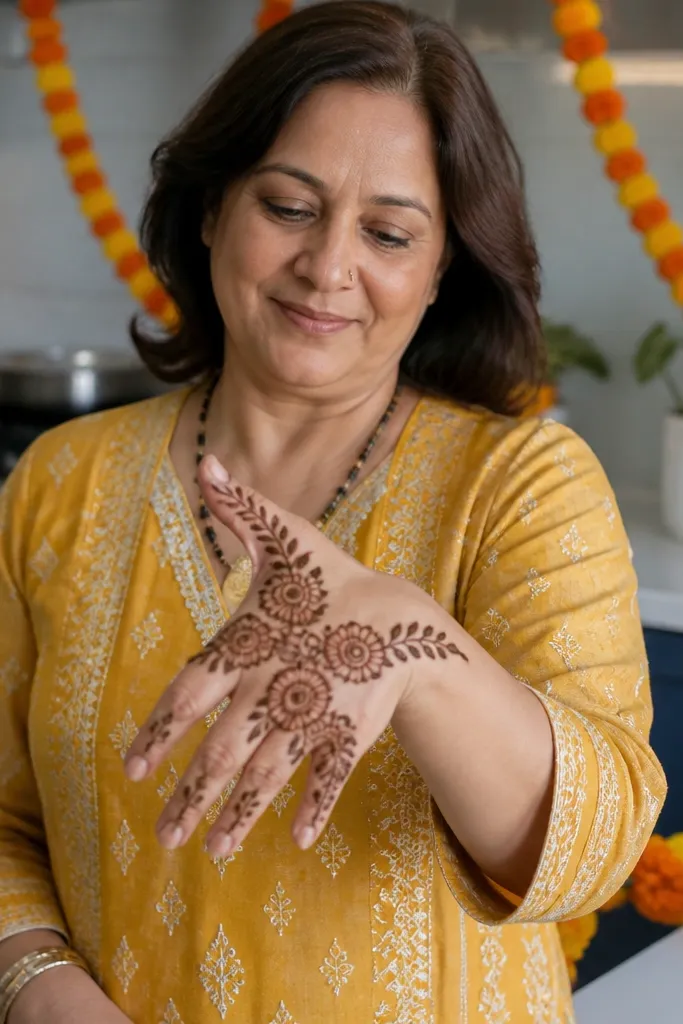
Marigold sprigs give you a clear festival look with minimal work. The petals are simple loops, and you can make each sprig in under a minute once you get the rhythm. This design is clean on the front hand because the sprigs spread outward in a controlled pattern. It’s especially good for short sessions because you’re not trying to fill the entire top — you’re placing three strong floral accents.
Pro tipLoop petals should touch lightly but not overlap. That prevents thick clumps after drying.
Mark three points on the top hand: one near the center, one closer to the wrist, and one toward the upper side. At each point, pipe a marigold sprig using 8-10 small loop petals around a center dot. Connect each sprig to a simple thin line, then add 2-3 tiny leaf teardrops along the connector lines. Finish with a few dot sparks around the outer sprigs.
AvoidDon’t add extra connector lines between sprigs. One connector per sprig keeps it airy.
19. Circular Lotus Chain Over Fingers
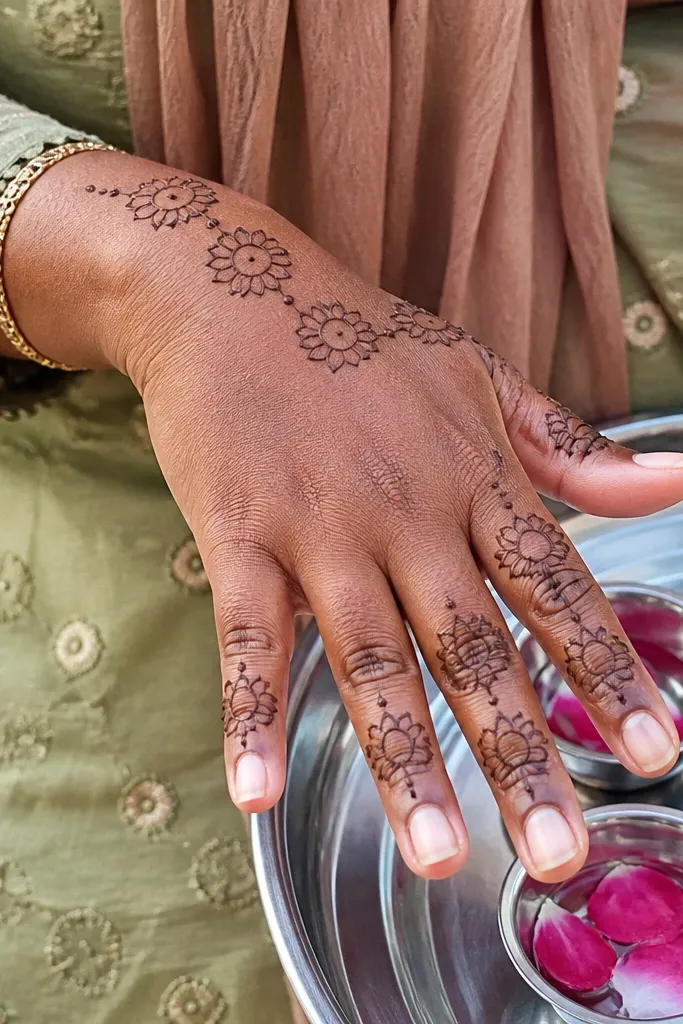
A lotus chain gives you a floral touch that still feels simple because each lotus is a tiny repeat. The design runs toward the finger bases, which makes your front-hand look fuller in photos without requiring full finger coverage. It’s a smart option for evenings when you want quick impact but you also need it to stay neat at the fingers. This pattern looks best when your lines are thin and your petals are consistent.
Pro tipFor neat finger edges, keep each lotus slightly higher than the one before it.
Draw a curved guide line from the wrist toward the bases of the fingers. Pipe 6-7 tiny lotus shapes along the curve, each lotus made of 5 petals around a dot center. Keep the spacing between lotuses consistent so the chain looks deliberate. Add one small leaf teardrop between every other lotus to give the floral touch extra lift.
AvoidDon’t let the chain cross the finger knuckles. That area smears if you flex your hand.
20. Rosebud Side Scroll With Dots
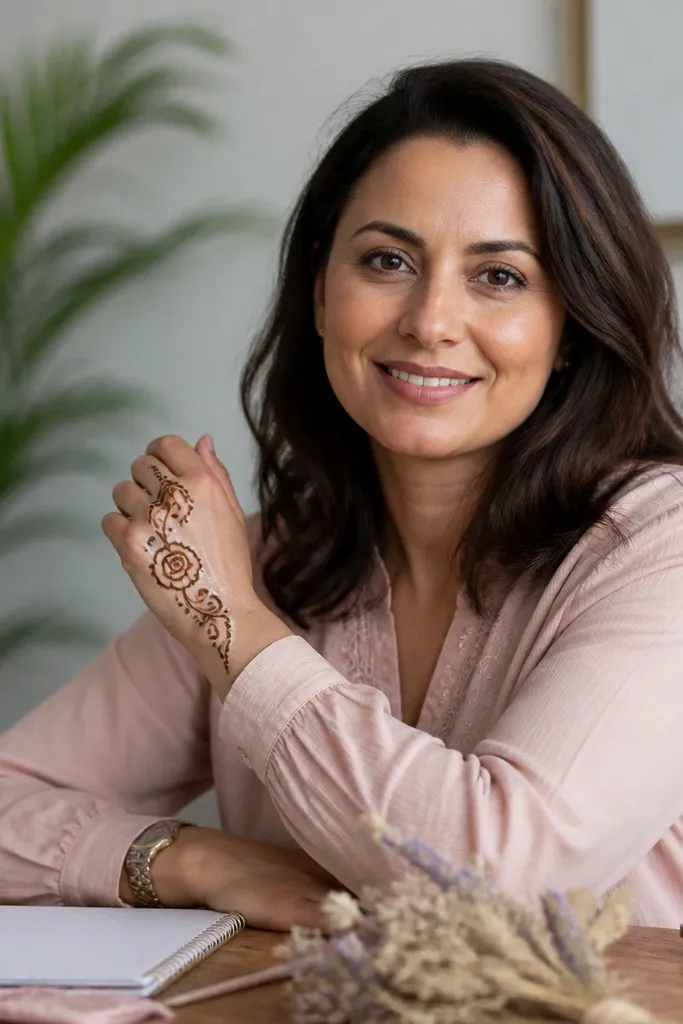
Side scrolls look fancy because they create motion, but they’re simple to do with one repeating vine curve. Place a rosebud at the top of the scroll, then add small dot accents to keep the gaps from looking empty. This design is ideal for front-hand mehndi because it doesn’t crowd the center of the hand. Floral touches show up clearly at the top, and the dots make it look festive without heavy fill.
Pro tipKeep your scroll line thin. The rosebud should be the thickest element.
Start at the wrist and pipe a scrolling vine that curves toward the top of the hand, staying close to one side. At the top, pipe a rosebud using a teardrop loop pattern with 6-7 petals around a dot. Along the scroll, add 3-4 tiny leaf teardrops spaced evenly. Finish with 10-12 small dot accents around the scroll line, focusing on the outer curve.
AvoidDon’t put dots inside every gap — concentrate dots near the outer curve for a cleaner look.
21. Citrus Peel Segments With Leaf Tips
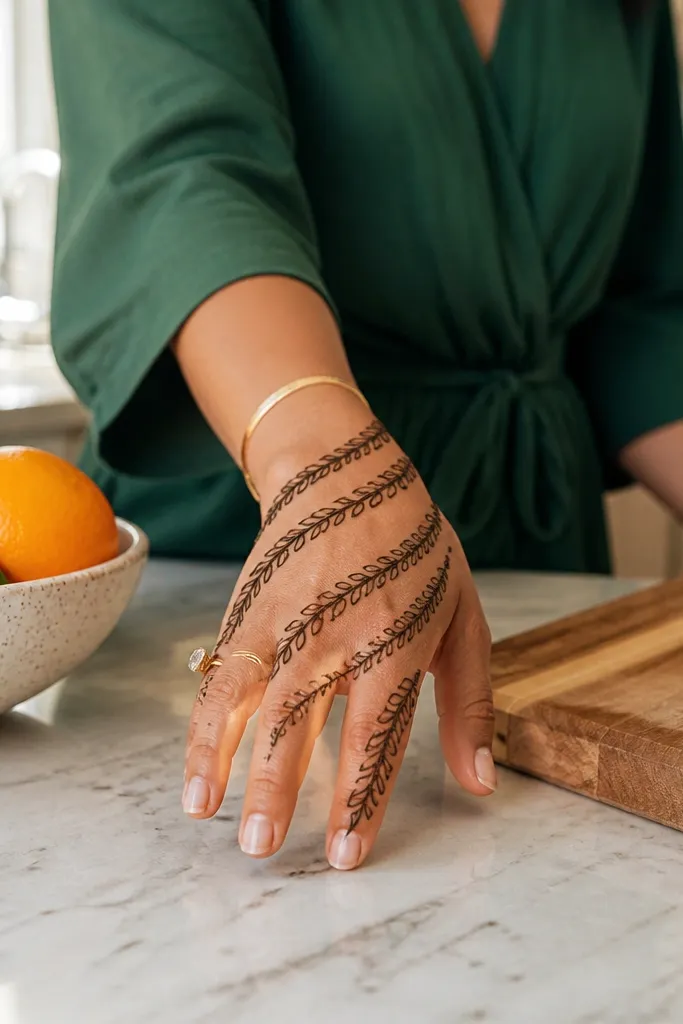
Citrus peel segments look seasonal and fresh even in black henna. This design uses segmented curved lines that create “peel” texture, then adds leaf tips to make it floral. It’s photogenic because the segments create a striped glow effect on the top hand. You keep it simple by drawing 5-7 segments only, leaving open space so the hand doesn’t look crowded.
Pro tipMake segment gaps slightly wider than you think. They close a bit as henna dries.
Draw a curved border line across the top hand near the wrist area. Inside the border, pipe 5-7 curved segments that run parallel, like slices, each separated by a narrow gap. Add a small leaf teardrop at the end of every second segment, pointing upward. Finish with a few dots at the border corners to frame the pattern.
AvoidDon’t thicken every segment. If all lines are the same weight, the pattern turns into a dark block.
22. Bells At Wrist With Floral Ribbons
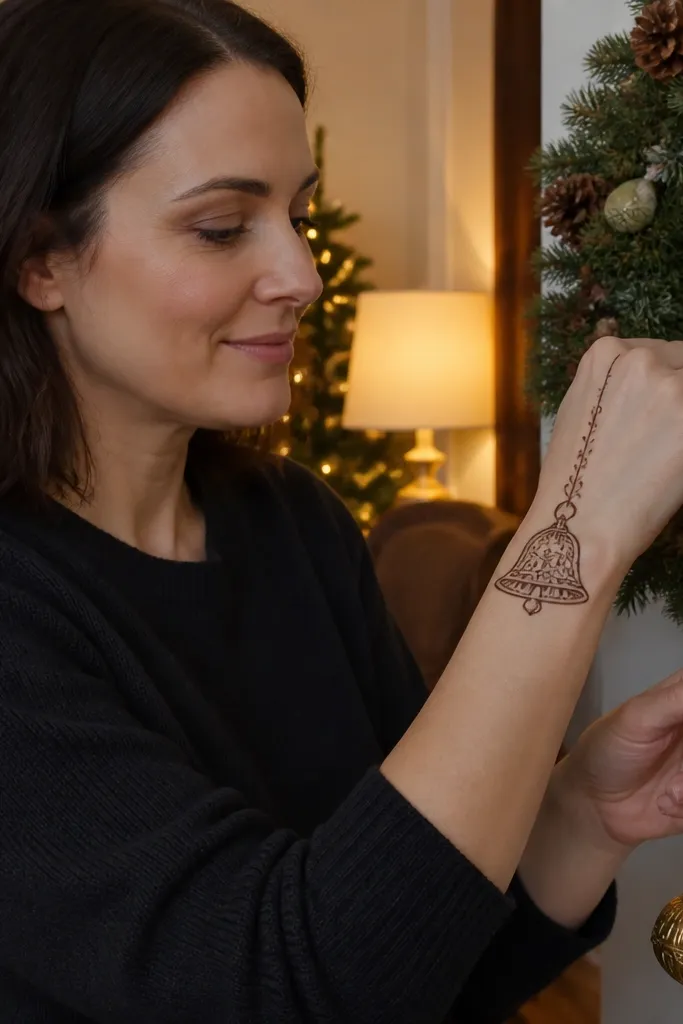
Bell motifs feel holiday-ready and they’re fast because you’re repeating a simple shape. This design places two bells at the wrist, then adds thin ribbon lines that end in tiny floral touches. It’s clean and symmetrical enough for a quick session, but it still looks festive in photos. Floral touches prevent the bells from looking too “plain” and keep the overall vibe warm.
Draw two small bell shapes side by side on the wrist using an upside-down teardrop outline and a tiny top cap line. Connect the bells with a thin ribbon line that curves upward toward the center of the top hand. At the center ribbon, add a small 5-petal flower. Add two tiny leaf teardrops on each side of the flower where the ribbon bends.
Bell outlines should be single-line, not filled. It speeds drying and keeps the edges crisp.
Don’t add extra bell decorations. Two bells plus one center flower is enough for a clean look.
23. Mehndi Fan Leaves With Two Petal Stars
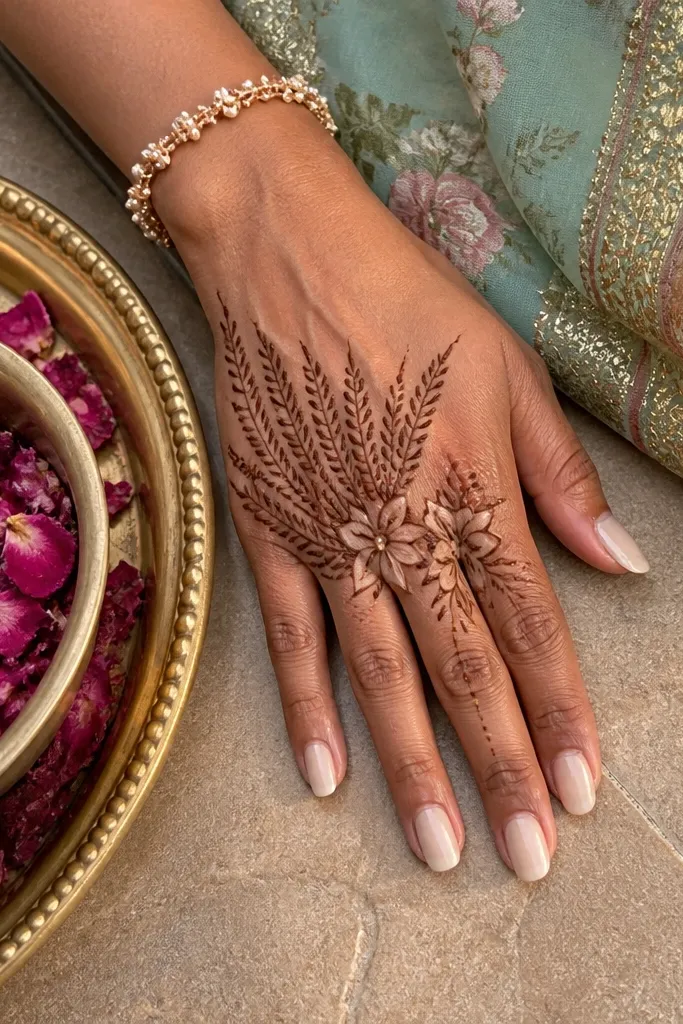
A fan of leaves is one of the quickest ways to create a full front-hand look because it spreads across the top hand like a brush stroke. Add two petal stars near the center to make it themed and more “event-ready.” The leaves give floral touches, while the stars add a decorative seasonal vibe. This design stays lightweight and dries fast because it avoids large filled areas.
From the wrist center, draw a curved baseline. Pipe 8-10 leaf teardrops fanning upward along the baseline, with the largest leaves near the wrist and smaller ones toward the center. In the middle of the fan, add two small stars made from 5-6 petal points around a dot. Finish by adding one thin vine curl linking the stars to the fan.
If your fan looks uneven, fix it by making the leaf tips all the same angle.
Don’t place the stars too low. They should sit above the densest leaf area.
24. Mini Floral Lace Corners On Top Hand
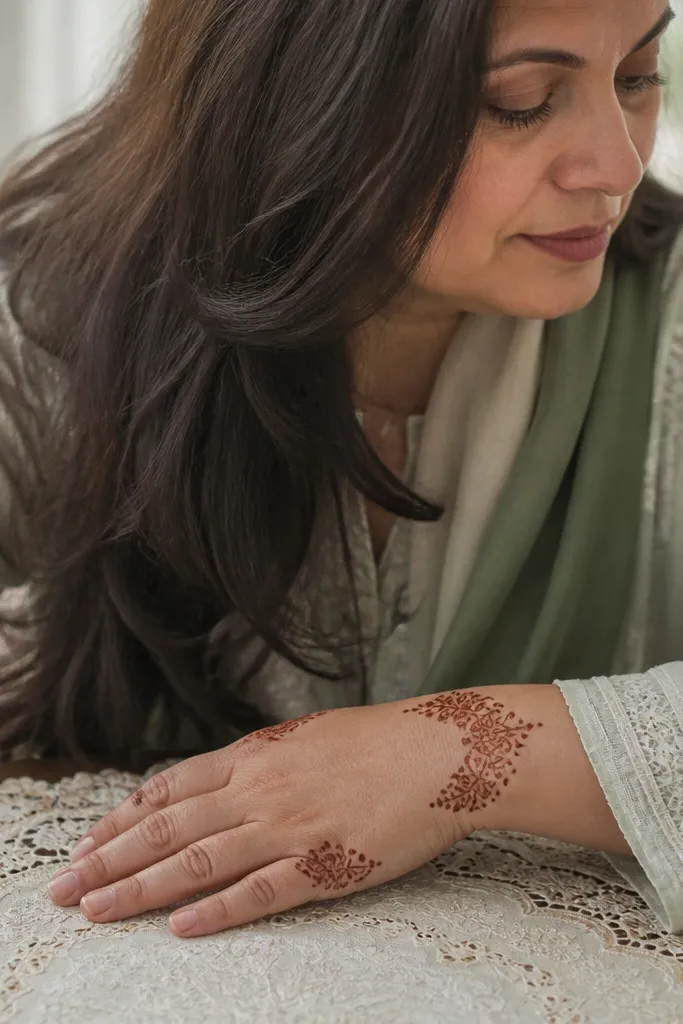
This uses a lace-corner approach without doing full lace. You get that delicate look from small repeating corner motifs, and floral touches appear as tiny flowers to keep the design pretty. It’s a good pick when you want a “fancy” photo but you only have 30 minutes. The corners also help hide minor cone mistakes because the pattern is distributed.
Pro tipKeep corner diamonds small — they look lace-like and dry faster.
Draw two small corner frames on the top hand: one near the wrist side and one toward the upper side of the hand. Each frame is made from 3-4 small diamond steps connected by short lines. Inside each frame, add a tiny 5-petal flower and 2-3 dot sparkles. Connect the two frames with a thin curved line so the hand looks cohesive.
AvoidDon’t try to lace the whole top hand. Two corners are enough for a clean look.
25. Tropical Leaf Arc With Hibiscus Dot Centers
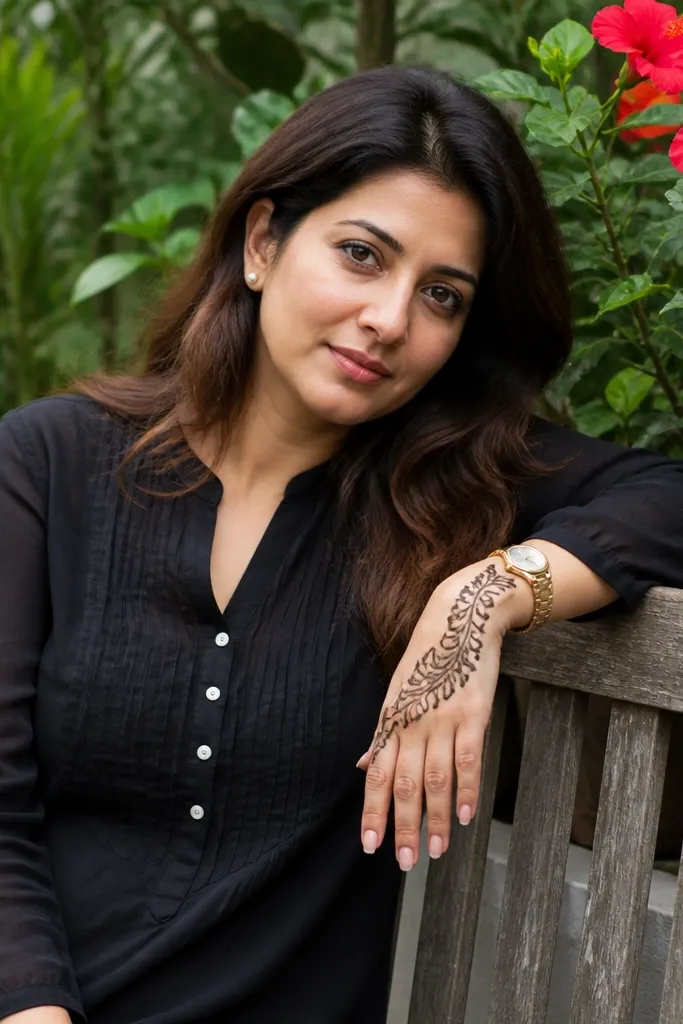
Tropical leaf arcs look seasonal and fun, and they still fit the “simple front hand” goal because you only need one sweeping arc. Tiny hibiscus-like flowers with dot centers add floral detail without requiring full petal fills. This design reads bright in photos because the leaf shapes create contrast and direction. It’s also fast: draw the arc, repeat the leaf, place three flowers, done.
Pro tipMake the hibiscus petals slightly wider than the leaves so they pop.
Pipe a curved arc from wrist toward the top center of the hand. Along one side of the arc, add 7-9 tropical leaf teardrops with pointed tips. At three points along the arc, place a hibiscus flower using 5 rounded petals around a dot center. Finish with 2 small leaf teardrops near the wrist end to anchor the arc.
AvoidDon’t overcrowd the arc with too many flowers. Three is the sweet spot for a 30-minute design.
26. Holiday Starburst With Floral Border Line
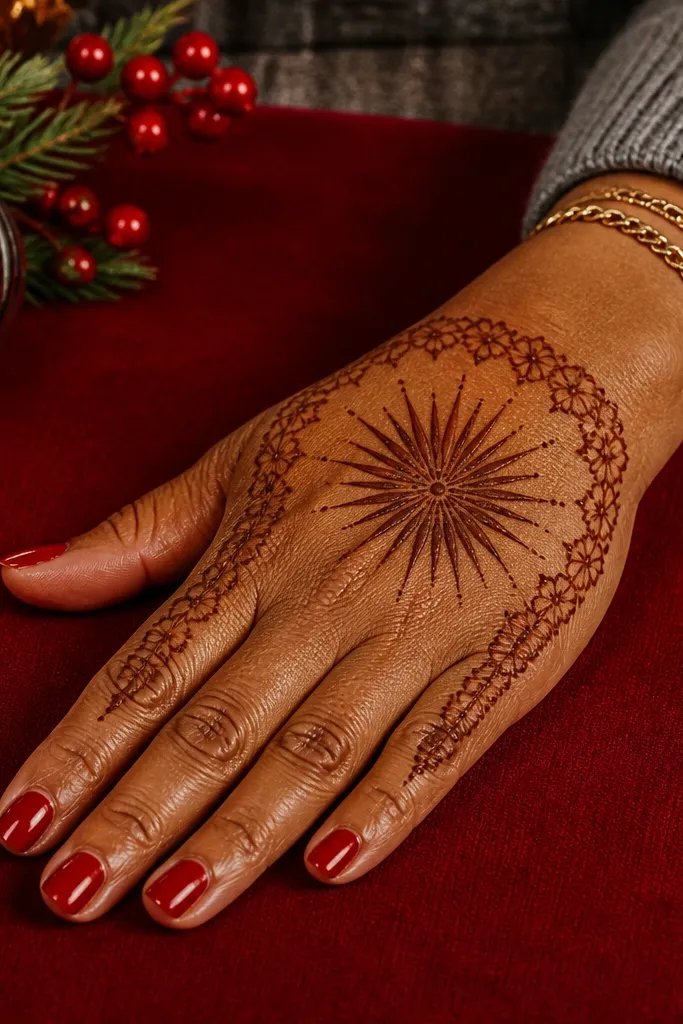
Starburst centers look like fireworks, which makes them perfect for holiday energy without heavy work. The floral border line gives the design a soft finish so it doesn’t look too harsh. This is a strong 30-minute option because the starburst is a single focal you can build quickly, and the border line is just repeated small petals. It’s photogenic because the center draws attention instantly.
Start with a small dot at the top center of the hand. Pipe 8 star arms radiating out using thin lines, then add 1-2 small teardrop points at the end of each arm. Place a thin floral border line near the wrist by piping 6-8 small petals along a short curve. Add a few dots between border petals to make it look finished.
Use thinner lines for the star arms than for the border petals.
Don’t fill the whole starburst — keep it line-based so it stays airy after drying.
27. Succulent Pair With Tiny Flower Tips
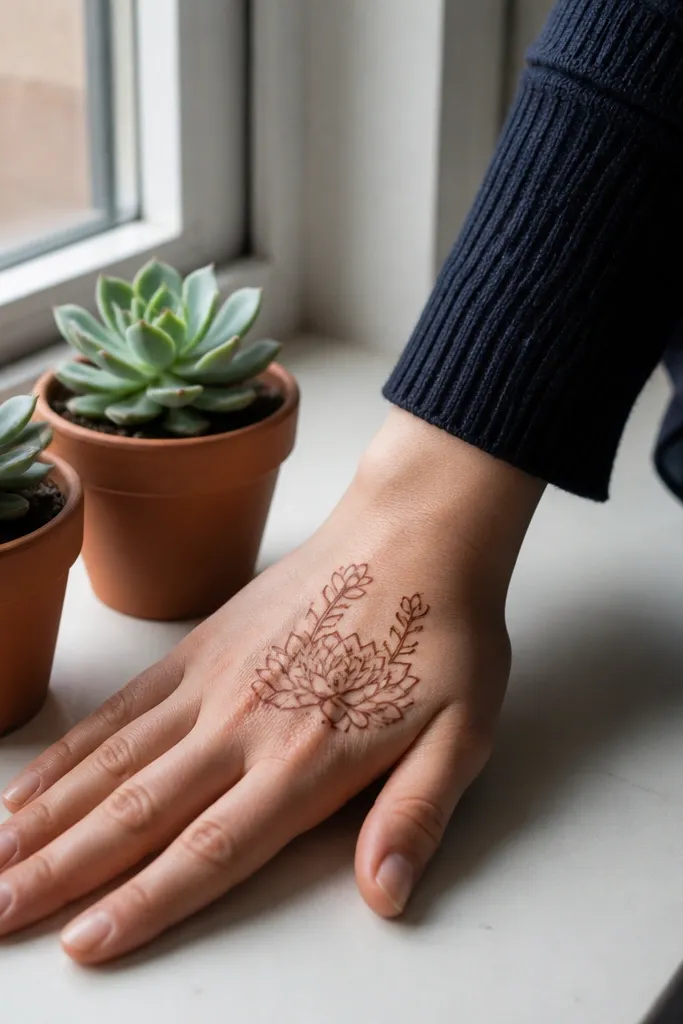
Succulents look modern and seasonal, and they’re simple because you can draw them with stacked leaf shapes. This design puts two succulent clusters on the top hand and adds tiny flower tips so the floral touch is still present. It’s clean and minimal, which makes it great for people who hate dense mehndi. The pair placement also creates balance, so even with quick work it looks structured.
Draw two small succulent clusters on the top hand, one near the center and one slightly toward the wrist. For each cluster, pipe 6-7 stacked leaf teardrops fanning upward from a small base line. Add a tiny flower at the top of each cluster using 5 petals around a dot. Finish by connecting the two clusters with a thin curved line and 3-4 dot accents.
Keep succulent leaves narrow. Narrow leaves look more like succulents and take less time to draw.
Don’t thicken the base — thick bases make the clusters look like blobs.
28. Bamboo Stem With Leaf Switchbacks
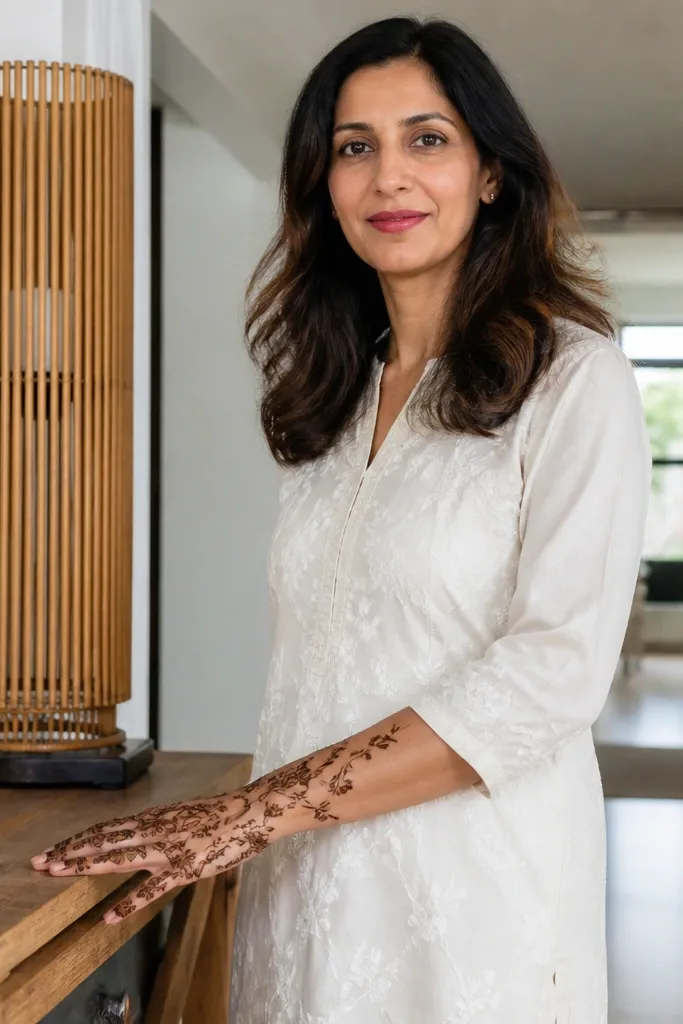
Bamboo stems are a clean seasonal theme for warm weather, and the leaf switchbacks make it look decorative without complexity. You get a vertical structure that flatters the front hand, and the floral touch comes from small leaf teardrops that repeat like a pattern. This design is fast because you draw one stem and then repeat the same leaf placement. It also looks neat in photos because the leaves are aligned along a single direction.
Pipe a straight vertical stem from the wrist toward the middle of the hand. On both sides of the stem, add 6-8 leaf switchbacks using teardrops that point outward, alternating left-right placement. At the top of the stem, add a small 5-petal flower and a dot center. Finish by adding 2-3 tiny dots near the wrist stem start.
Mark leaf positions with light dots first so placement stays even.
Don’t cross switchback leaves over the stem — keep them on their side for a clean look.
29. Mehndi Dome Floral Over Wrist
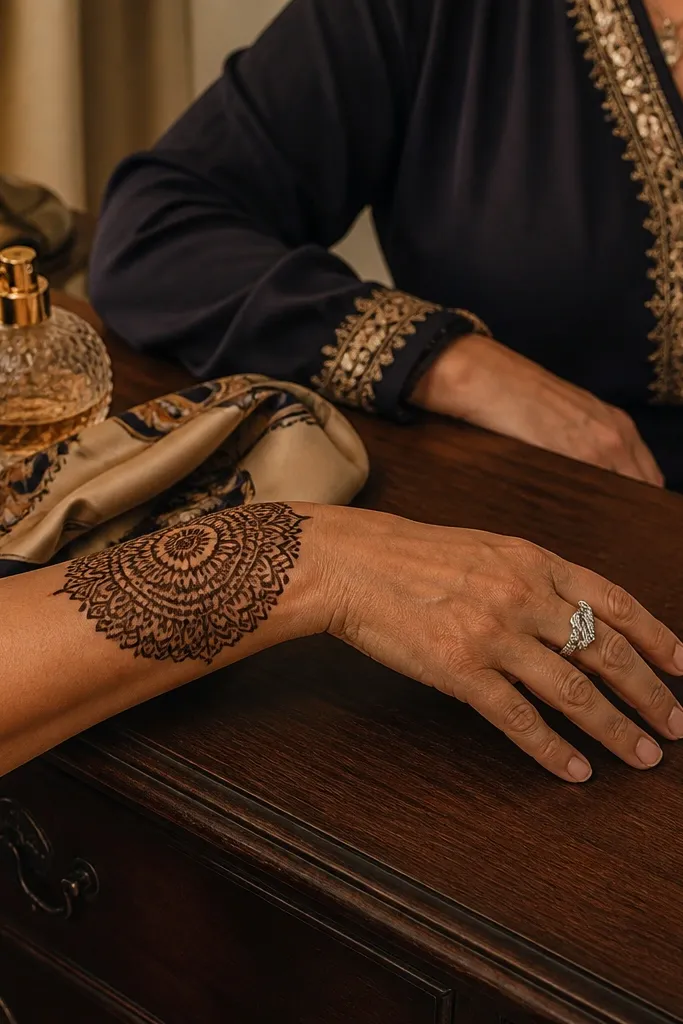
A dome over the wrist is one of the most flattering quick layouts because it creates a strong top edge and hides finger spacing issues. Floral touches inside the dome make it look complete, even if you don’t extend into the fingers much. This design is very time-friendly because you’re repeating petals within a boundary. It also looks neat on photos because the dome shape frames the hand.
Draw a dome boundary over the wrist using two curved lines meeting at top center and ending at both wrist sides. Inside the dome, pipe 8-10 petals arranged like a scallop, starting near the bottom boundary and moving upward. Add a small dot center at the dome top, then place 3 tiny leaf teardrops near the bottom corners to balance it. Let it dry before you move your hand.
Keep petal tips aligned toward the dome center so it looks symmetrical.
Don’t extend the dome past the wrist crease — it makes the design harder to keep sharp.
30. Cherry Blossom Two Bloom Line
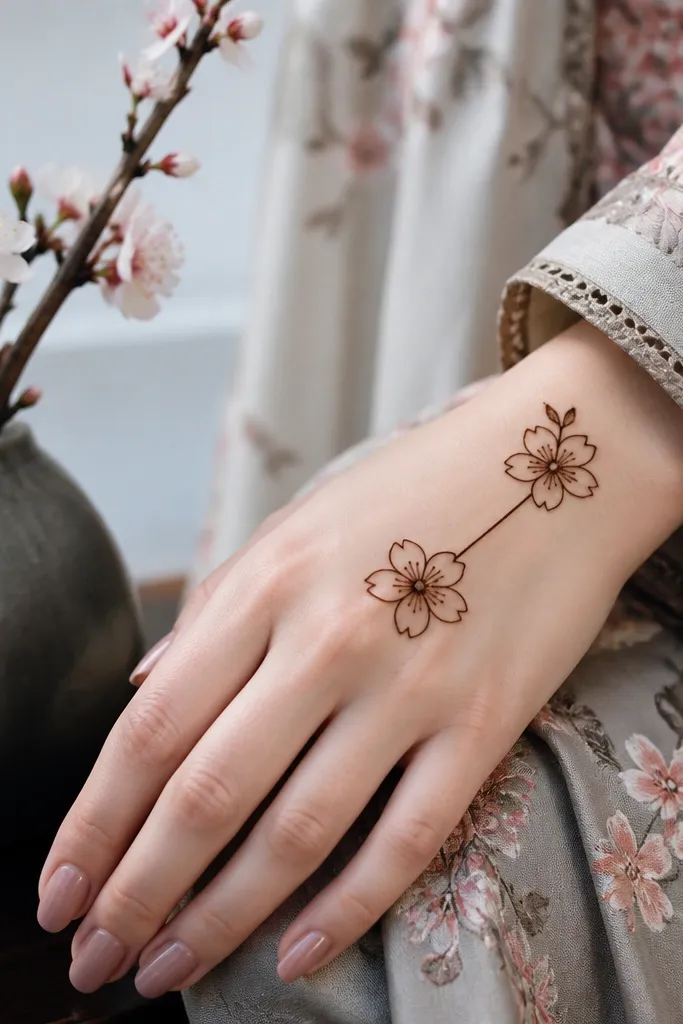
Cherry blossom looks delicate and seasonal, and it’s fast because each bloom is a simple cluster of petals around a dot. This design uses two blooms connected by a thin line, so the composition looks clean even with minimal coverage. Floral touches are obvious, but the open space keeps it modern and photo-friendly. It’s also beginner-friendly because you don’t need to fill large areas.
Pro tipKeep petal gaps visible. The gaps are what make blossoms look airy.
Draw a thin curved line from the wrist toward the middle of the top hand. Place one cherry blossom bloom at the center and one smaller bloom closer to the wrist. For each bloom, pipe 5-6 small petals around a dot center, then add 2-3 tiny dots near the petals. Finish by adding a short leaf teardrop under the larger bloom.
AvoidDon’t make the petals too large — large petals take longer and blur faster.



