
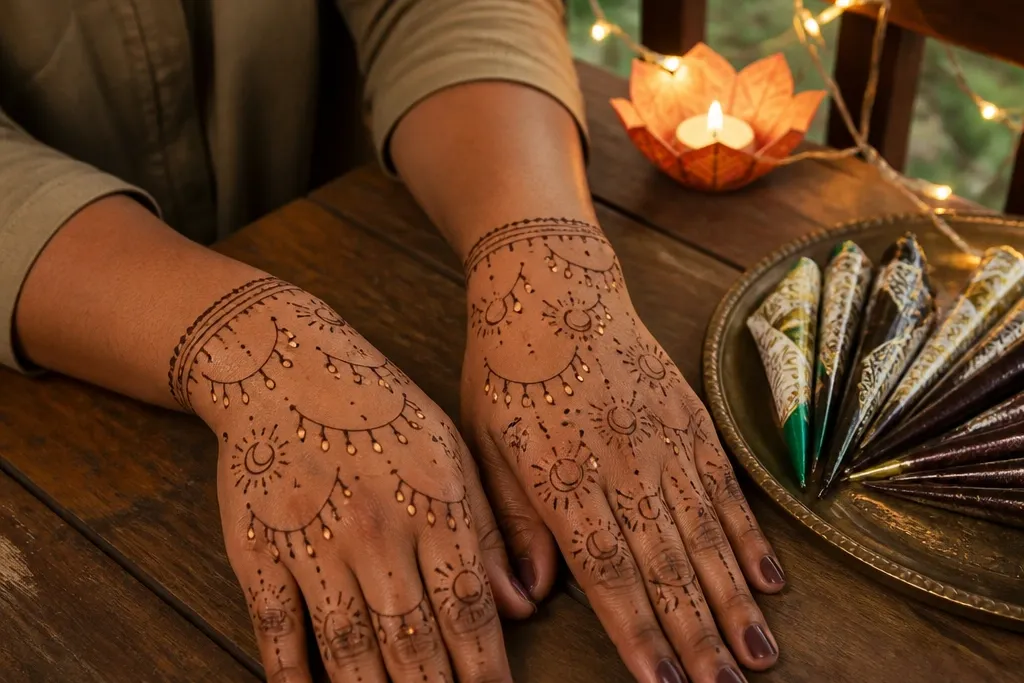
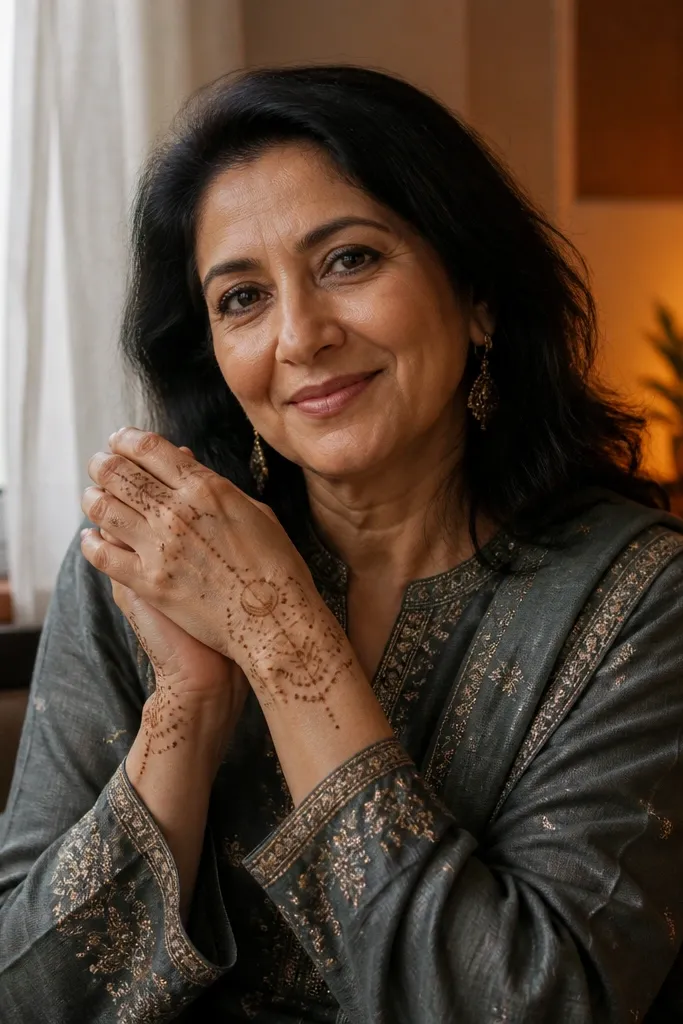
1. String Lights Half-Moon on Back of Hand
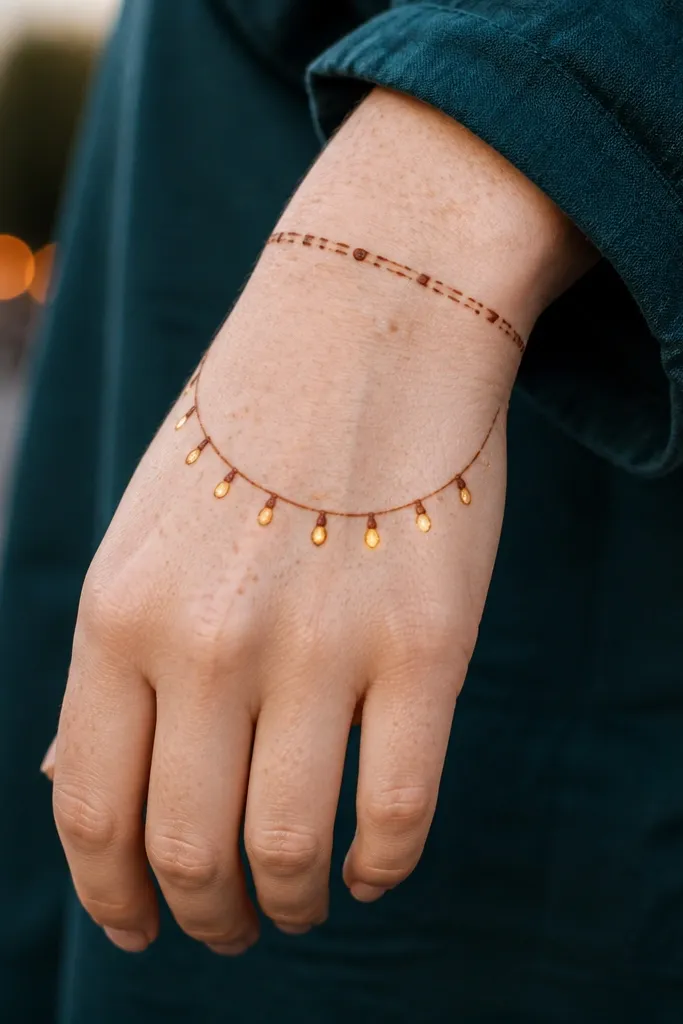
This one looks like a neat photo prop because the light string creates a clear curve across the back of your hand. You keep it simple by using only outlines plus tiny bulb dots, then you let the wrist band finish the frame. The half-moon arc is forgiving — even if your lines aren’t perfect, the overall curve reads clean. It’s a great choice for dinners, festive evenings, or any day you want mehndi that still feels light. Plan for about 50 minutes with a thin cone and steady dots.
Start by drawing a thin wrist band around the wrist, leaving a small gap at the center. Then draw a half-moon arc from the outer wrist up toward the inner knuckle area, keeping the line light and even. Add tiny bulb dots along the arc — one dot per “bulb” — and connect each dot with a short curved line. Finish by placing 3 small sparkle dots near the center of the arc.
If your cone tip is too wide, pinch it slightly after loading so dot edges stay sharp.
Don’t fill the whole back of the hand — the design needs air between the arc and skin.
2. Burlap Lanterns: Minimal Lantern Cluster
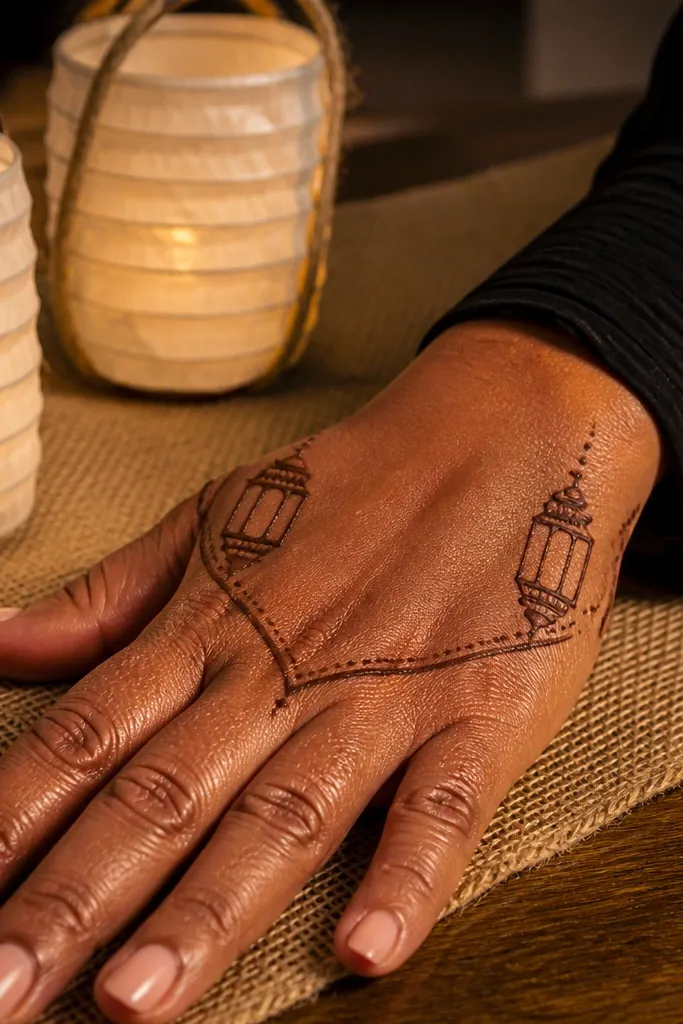
Begin with a thin border on the base of the fingers, stopping at the first knuckle line. Draw two vertical lantern outlines on the back of the hand — one slightly higher than the other — with a small rounded top and a narrow base. Add 3-4 dot “sparks” inside each lantern and a tiny curved handle line above them. Finish with a narrow wrist band and one extra dot cluster on the outer edge.
Lantern shapes look fancy even when you keep them minimal. This design uses two lantern outlines as anchors, then adds a few dots and a thin border so the theme stays readable. The trick is proportion: lanterns should be small enough to sit in the center, not stretch across the whole hand. It’s perfect when you want something themed but not heavy. You’ll get a clean, symmetrical look without filling the palm.
AvoidSkip thick lines in the lantern frames — they make the lantern shape look bulky.
Pro tipLightly sketch lantern outlines with a mehndi pencil or eyeliner first if your hand shakes.
3. Festival Confetti Dots on Fingers
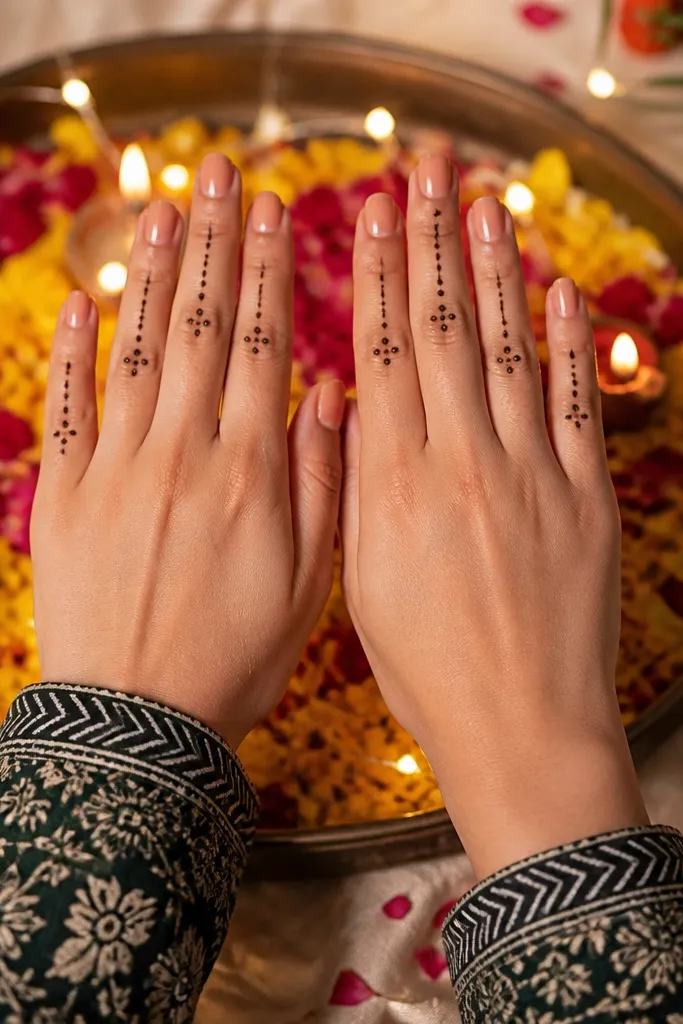
Start with a thin wrist band and a light line across the finger bases. On each finger, place a cluster of 5-7 dots near the center of the finger, then add 2 short dash lines above the cluster. Repeat the same spacing on all fingers so the look stays consistent. Finish by adding a small dot at the tip of the ring finger for a clear anchor.
Confetti mehndi is one of the best “simple but photogenic” themes because dots catch light and look crisp on camera. This is not random dotting — the dots are grouped into mini clusters that sit at the same height on each finger. You also add short dash lines to connect the clusters so it reads as a pattern. It works for quick events because it doesn’t require big curved fills. Expect 35-45 minutes.
AvoidDon’t spread dots all over — stick to two heights per finger so it stays themed.
Pro tipUse dot spacing like a ruler: keep the gaps the same width on every finger.
4. Diya Flame Borders on Back of Hand
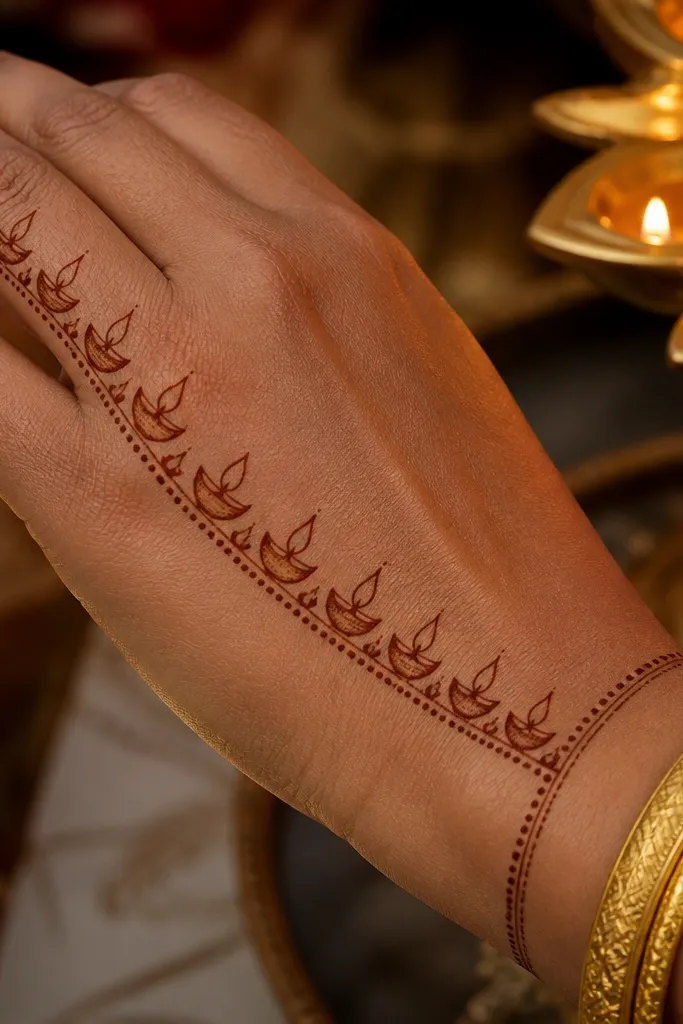
Draw a thin wrist band first, then make a vertical guide line down the outer edge of the back of the hand. Starting near the wrist, draw small diya flame shapes one after another along the outer edge, pointing upward. Keep each flame the same size by counting 6-8 flames in the border. Add 3 small dot sparks near the middle of the border to finish.
Diya flames look delicate when you treat them like a border, not a full fill. This design wraps a flame pattern along the outer edge of the back of the hand, with a wrist band that locks the composition in place. The flame tips are thin points, so the pattern looks airy and elegant without heavy shading. It’s a great match for festivals, pooja nights, and temple visits. The build is quick because you repeat the same flame outline.
AvoidDon’t add large fills inside the flames — border-only keeps it clean.
Pro tipIf your flames look uneven, keep the base line straight and only vary the top point slightly.
5. Starry Night Tiny Stars with Crescent
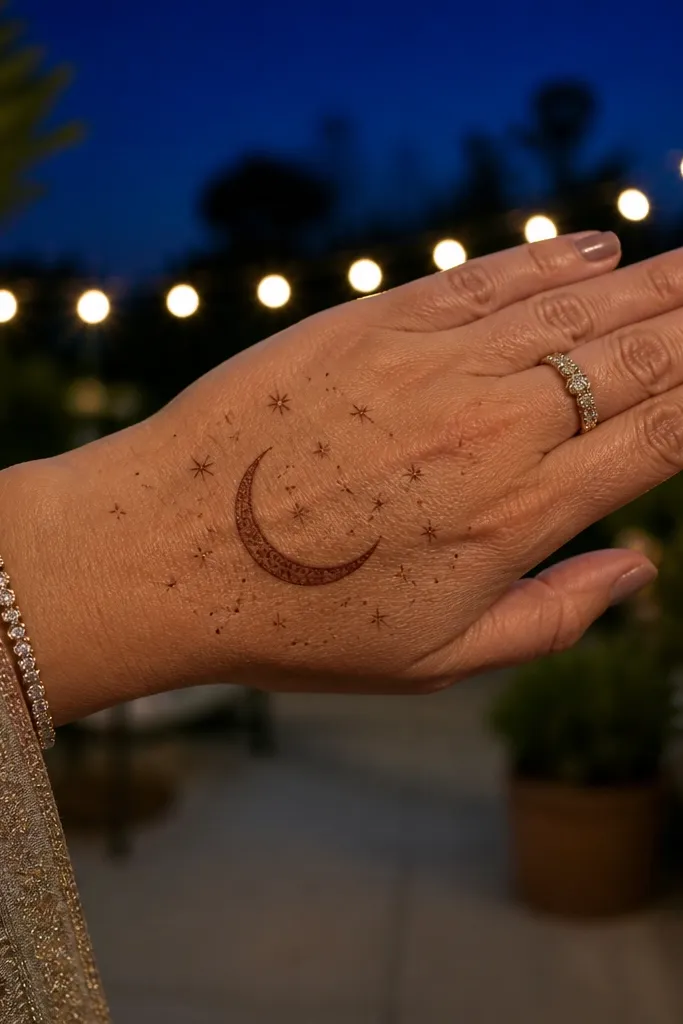
This design reads like a sky theme even though it’s simple. The crescent gives you a strong shape, and tiny stars add sparkle without heavy work. It’s photogenic because the crescent arc creates a smooth curve, while the stars add visual texture. You can place it on the back of the hand only, leaving the rest negative space. It’s a smart pick for evening events and anyone who likes minimal but themed mehndi.
Start with a thin wrist line, not a full band, so the crescent feels light. Draw a crescent arc across the back of the hand, with one end slightly higher near the pinky side. Add 7-10 tiny stars around the crescent — use dot stars (one dot with 3 short lines) or simple 5-dot stars. Finish with a small star cluster at the center of the hand.
Make stars smaller near the ends of the crescent so the center stays the focal point.
Don’t place stars too close to each other — crowding makes the pattern look messy.
6. Rangoli Corner Squares
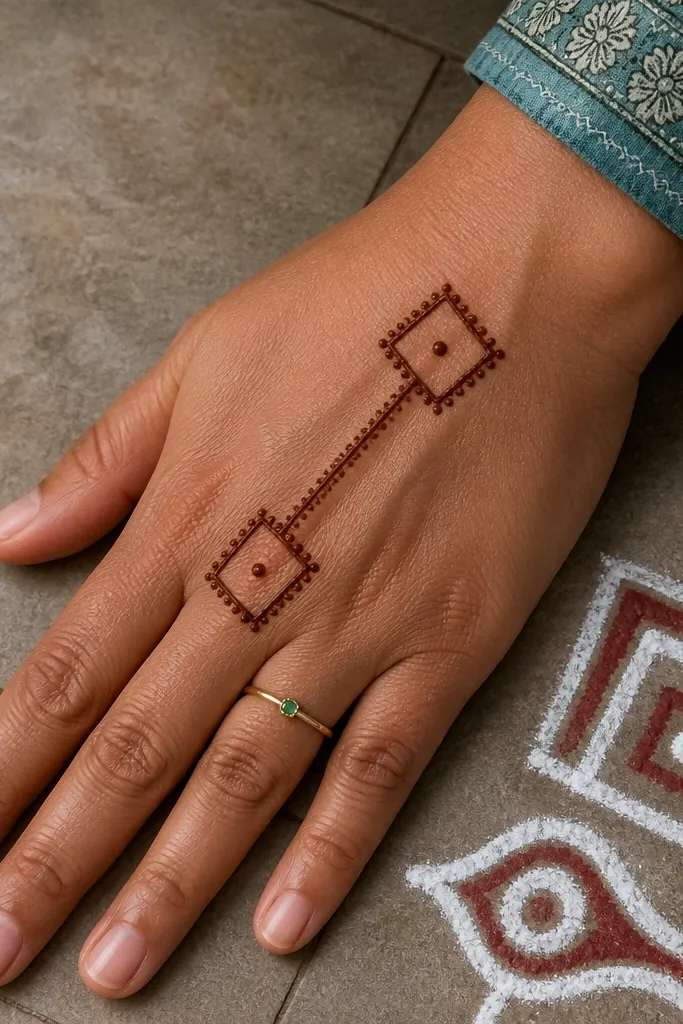
Rangoli corner squares are a clean theme because squares give you structure and symmetry. This design uses two corner squares on the back of the hand and a dot center inside each square so it stays simple. You also add a thin diagonal line between them to make the pattern look intentional. It works well for people who want mehndi that looks “designed” without filling the palm. Time: about 45-60 minutes depending on how steady your lines are.
Draw a thin wrist band and then place a small square near the outer edge of the back of the hand. Add a second square near the inner edge, keeping both squares the same size. Add a dot in the center of each square, then draw 4-6 tiny dot triangles along the sides. Connect the squares with a thin diagonal line and add 3 sparkle dots near the diagonal.
Use a straight-edge tool for the square corners if your lines curve too much.
Skip thick outlines on squares — thick borders make the design heavy and less rangoli-like.
7. Paisley Mini Trail on Fingers
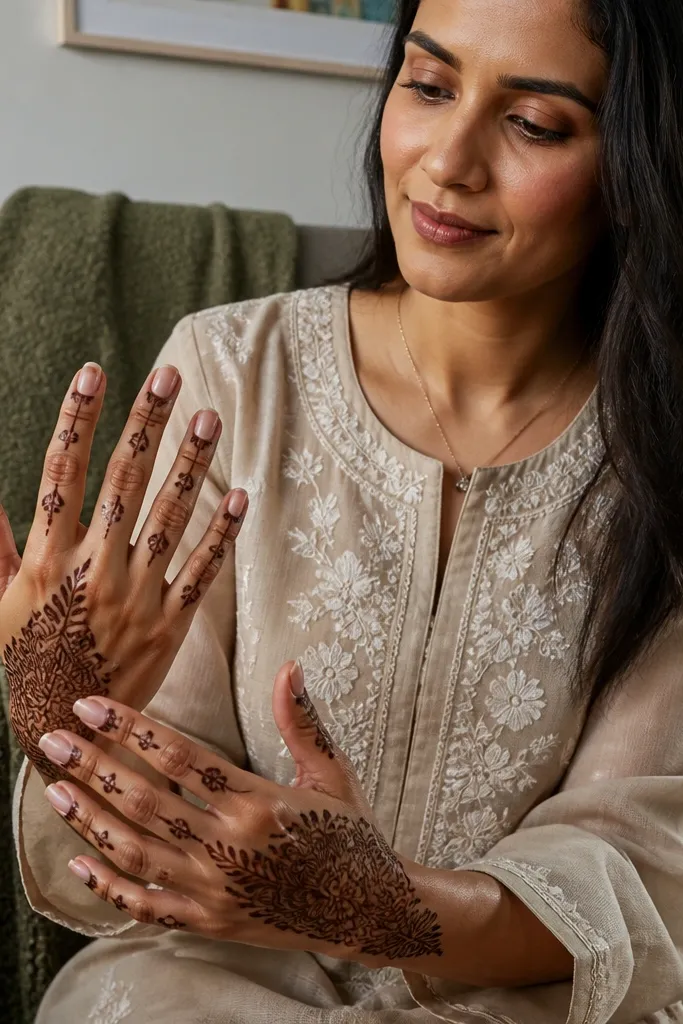
A mini paisley trail looks elegant because paisley has built-in curves that read clearly even with minimal filling. The trick here is to keep one paisley per finger and connect them with a thin line across the finger bases. You get a themed look without doing big palm patterns. This one is great for bridesmaids, casual celebrations, or anyone who wants finger-focused mehndi that photographs well. Expect around 50 minutes.
Start with a thin line across the finger bases, stopping before the thumb side. On each finger, draw one small paisley outline near the middle of the finger, keeping the top point slightly toward the nail. Add a tiny dot inside each paisley and one short dash along the paisley curve. Finish with a wrist band that matches the finger base line thickness.
Keep paisley size consistent by measuring against your middle finger width.
Don’t add multiple paisleys per finger — it stops looking simple fast.
8. Mehndi Garland Loop on Wrist
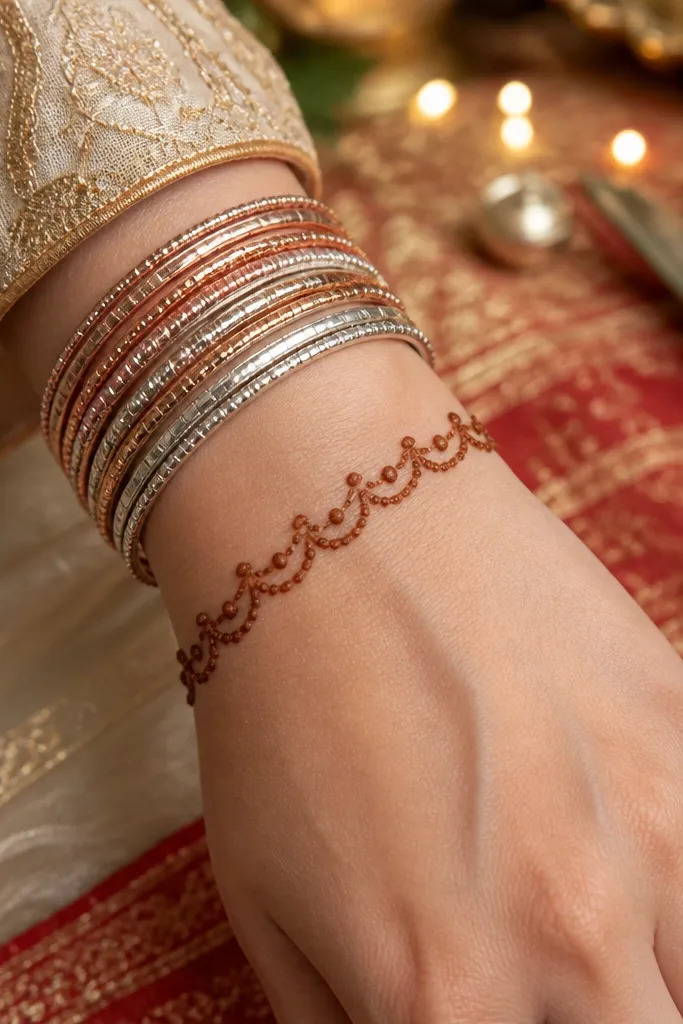
Draw a thin wrist band first. Next, create a repeating loop chain above the band: each loop is a teardrop oval with a small opening at the top. Place a dot inside every other loop so the pattern rhythm is clear. Finish by adding a thin line from the wrist band toward the index finger base, stopping short of the knuckle.
Garland loops are the fastest way to make simple mehndi look festive. This design keeps everything around the wrist so you avoid long palm work. The loops repeat like a chain, and the dots inside each loop create a bright, clean texture. It’s ideal when you want the mehndi to peek out from bangles. You can also scale it up or down based on wrist size without changing the pattern.
AvoidDon’t overfill the loops with dots everywhere; alternate loops keep it crisp.
Pro tipIf loops collapse, slow down and keep loop height consistent — the repetition is the whole look.
9. Temple Bell Outline with Spark Dot Base
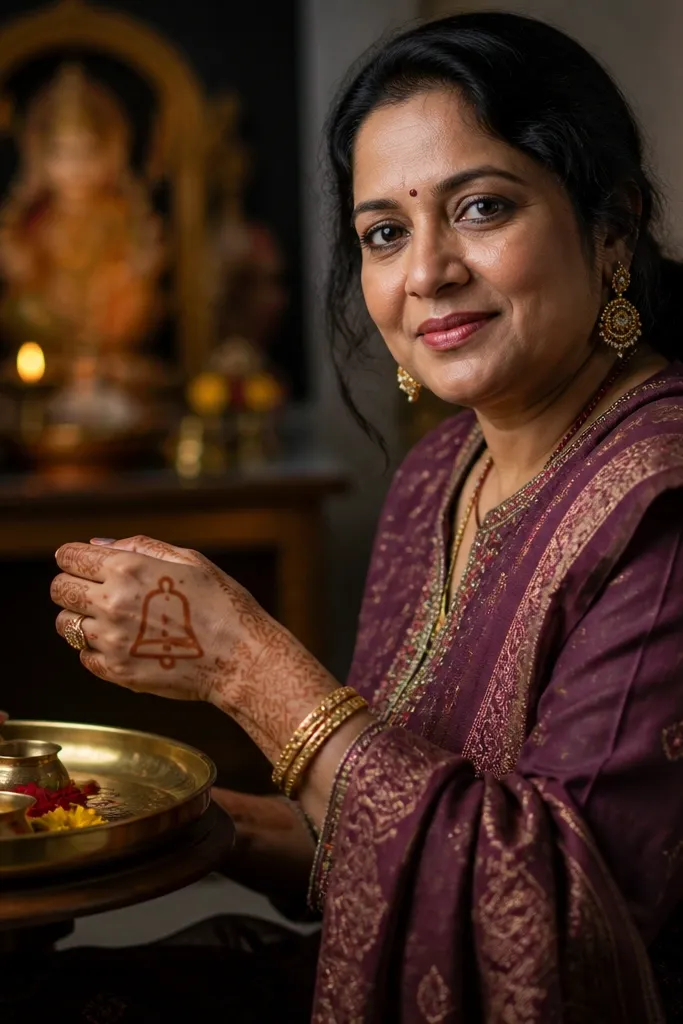
A temple bell outline gives you a strong vertical shape that looks intentional even when the design is small. You draw only the outline and a dot base, so it stays light and doesn’t blur. The bell shape also looks great with bangles because it sits in the open space between wrist and knuckles. This is perfect for pooja season when you want something symbolic but not heavy. Time: about 45-60 minutes.
Start with a narrow wrist band. Draw one bell outline in the center of the back of the hand: wider at the bottom, narrower at the top, with a small semicircle clapper line. Add 6-8 dots along the bottom edge like a spark fringe. Finish with two short curved lines near the bell sides to frame it.
Keep the bell clapper line thin — thick clappers make the bell look like a blob.
Skip shading inside the bell; outline plus dot base is the clean look.
10. Lotus Corner Panel with Side Leaves
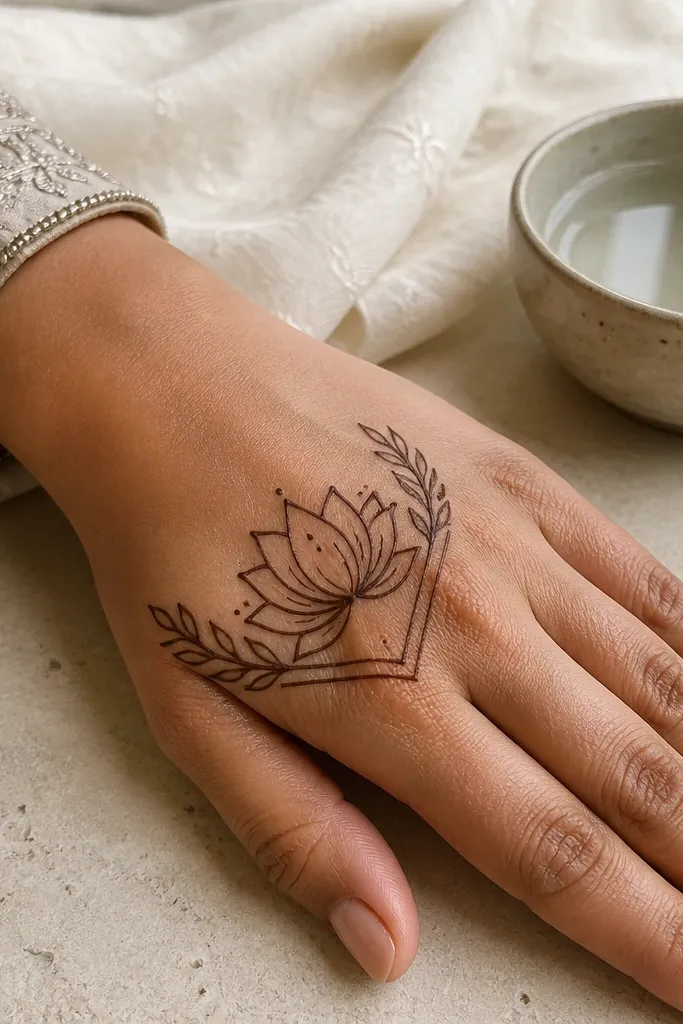
Draw a thin wrist band and then a small diagonal guide line toward the outer side of the back of the hand. Create a mini lotus: draw 6-8 petal teardrops around a center dot. Add two thin side leaves, one on each side of the lotus, with short vein lines inside. Finish by adding a dot sparkle near the lotus center and one tiny petal near the wrist edge.
Lotus designs look complex, but a corner panel lotus stays simple and still photographs beautifully. Place the lotus slightly off-center so it creates a focal point, then add two side leaf strokes to frame it. The lotus petals are drawn as small teardrops or comma shapes, no shading needed. This design works for both hands — you just mirror it. It’s a solid choice when you want a themed floral look without doing full palm coverage.
AvoidDon’t place the lotus dead center — corner placement gives it a more designed look.
Pro tipMake petals slightly larger at the bottom of the lotus so the shape looks grounded.
11. Mandala Dot Wheel on Back of Hand
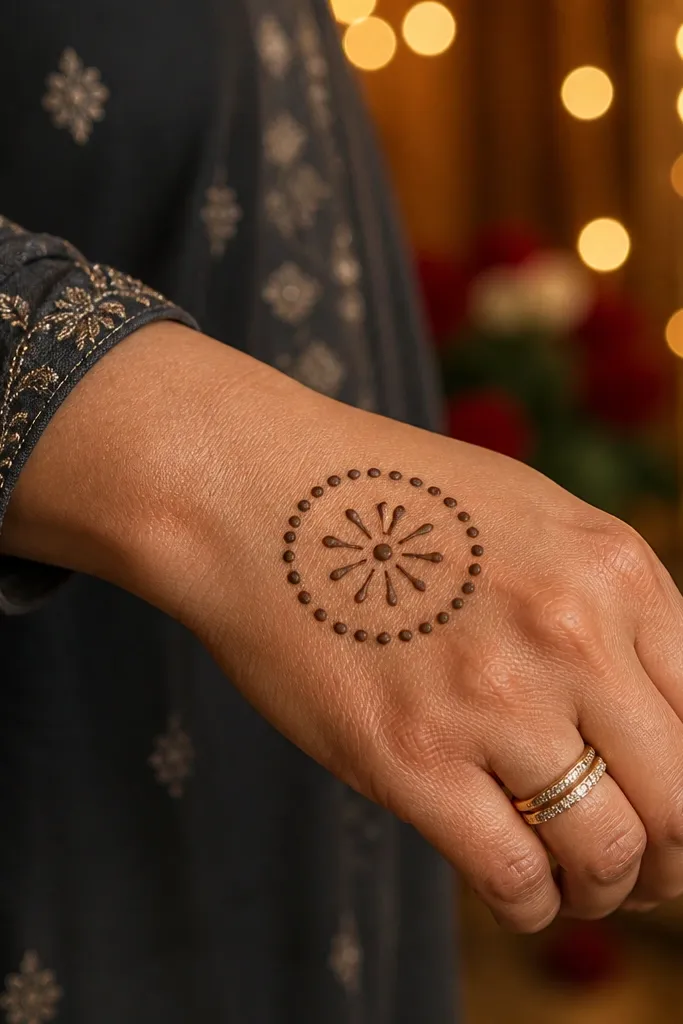
Start with a thin wrist band. Draw a medium circle on the back of the hand using light pressure first, then go over it once. Inside the circle, place a center dot. Add a ring of 10-12 dots around the circle and then add 6 short petal lines sticking outward like tiny blades. Finish with 3 sparkle dots near the outer edge of the circle.
A dot wheel mandala is minimal but still reads as a pattern because circles naturally organize the eye. This version uses one clean circle, a ring of small dots, and a few short petal lines. You keep the rest of the hand open so the design doesn’t blur. It’s perfect for events where you want something neat that still looks artsy. Skill level is beginner-friendly if you can place dots evenly.
AvoidDon’t add lots of extra rings; one circle and one dot ring is enough.
Pro tipPractice the circle once on paper — a smooth circle makes the whole design look intentional.
12. Gota Border: Thin Square Lattice on Wrist
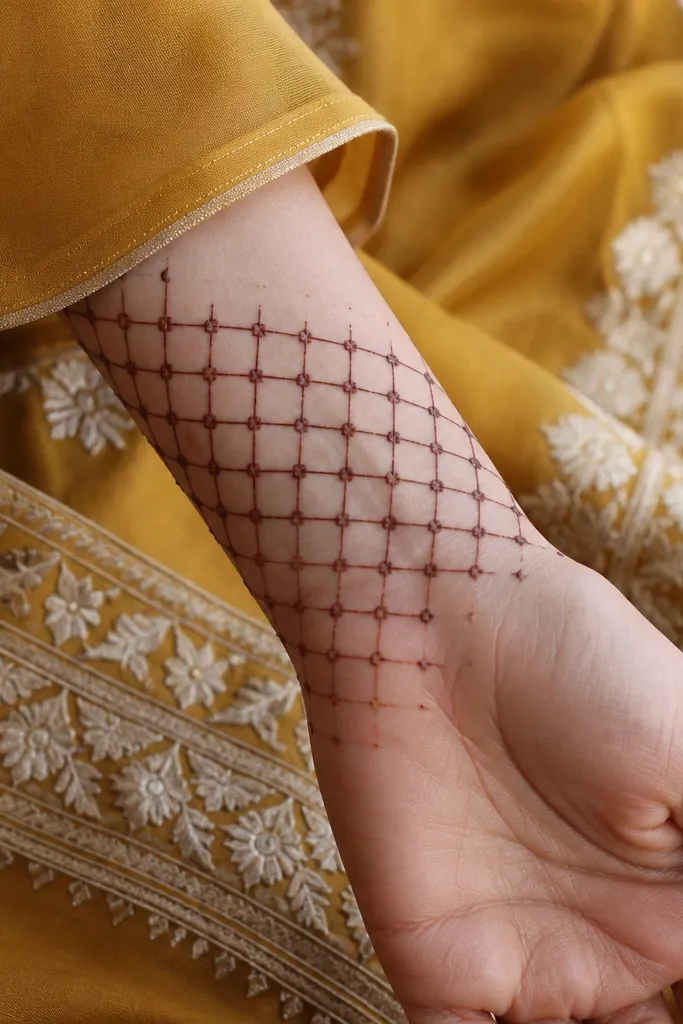
If you like the look of decorative borders on outfits, this lattice does the same thing for mehndi. It’s simple because it’s only a grid, not a full fill. The photogenic part is the crisp geometry: squares catch contrast against skin. You place it on the wrist and let it fade into negative space toward the hand. It pairs well with both traditional and modern outfits. Time: around 40-55 minutes.
Draw a thin wrist band. Above it, sketch a rectangle grid area about 3-4 cm wide using light straight lines. Fill the grid by drawing small squares: every square is just a loop outline, not a shaded box. Add a tiny dot at each grid intersection for extra texture. Finish with a single thin line from the grid toward the thumb side.
Use fewer lines and make squares slightly larger — tiny squares look messy when mehndi spreads.
Don’t overfill the grid with dots on every edge; intersections are enough.
13. Peacock Tail Tip on Outer Hand
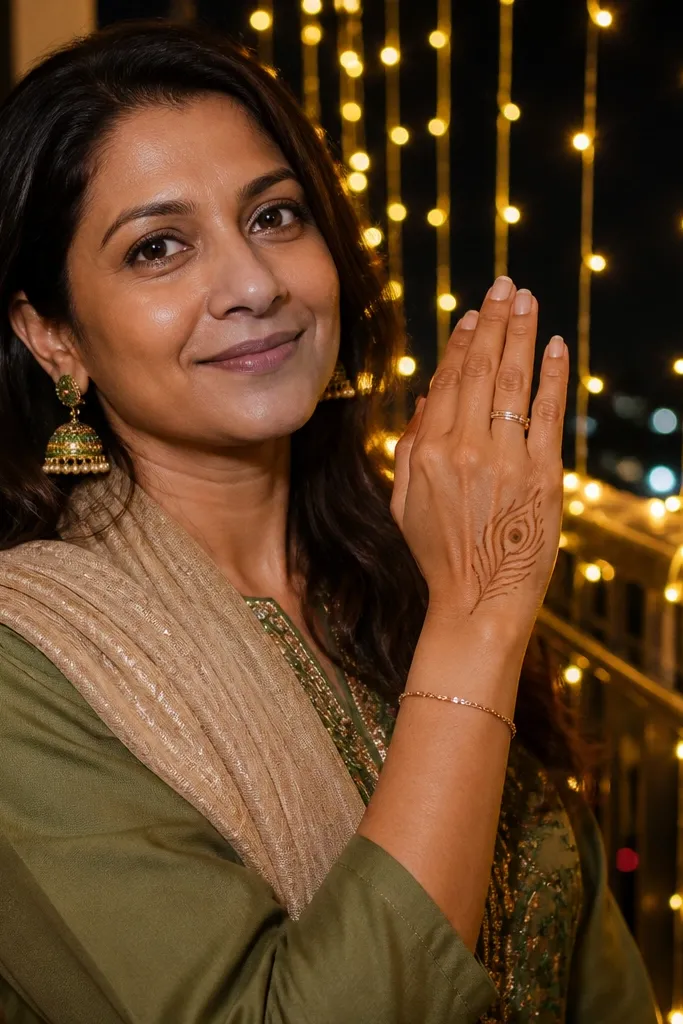
Start with a wrist band and a thin guide line along the outer edge of the back of the hand. Draw three fan feathers in a curve: each feather is a slender teardrop blade that fans outward. On the center feather, place a dot eye and add 4-5 surrounding small dots like a mini halo. Finish by adding 2 short leaf strokes under the fan for balance.
Peacock designs can look heavy, but a tail tip version stays simple and still looks dramatic. You draw only the outer fan feathers and place a dot eye motif near the center feather. The negative space makes the feathers look airy, and the eye dot adds instant focus. This one suits festive wear and looks great when your hand is lifted for photos. It’s a good option when you want a themed statement without full palm work.
AvoidSkip shading inside feathers; outline plus dots keeps it photogenic.
Pro tipKeep feathers the same width at the base so the fan looks symmetrical.
14. Rosebud Center with Mini Petal Ring
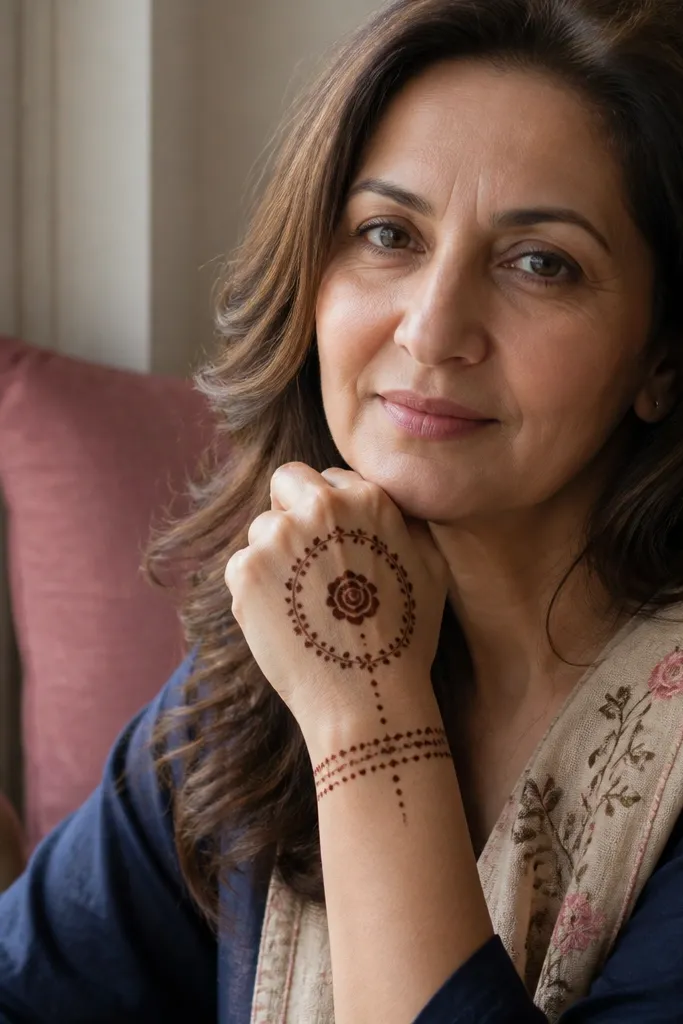
Begin with a thin wrist band. Draw a small rosebud in the center of the back of the hand using 6-8 comma-shaped petals around a center dot. Then add a ring of 10-12 tiny petal strokes around the rosebud, all the same direction. Add 3 tiny sparkle dots near one side of the ring. Finish with a short curved line connecting the ring edge to the wrist band.
This rosebud design gives you a floral anchor without turning into a full floral collage. The center rosebud is small and defined, then you add a thin ring of mini petals around it. The wrist band frames the whole piece so it looks complete. It’s best for people who want “simple floral but not boring.” Photogenic factor is the petal ring — it creates a halo effect even with minimal work.
AvoidDon’t make petals too big — oversized petals make the design look crowded.
Pro tipMake the rosebud slightly lower than center so the ring reads as a halo.
15. Henna Sunburst Lines with Dot Rays
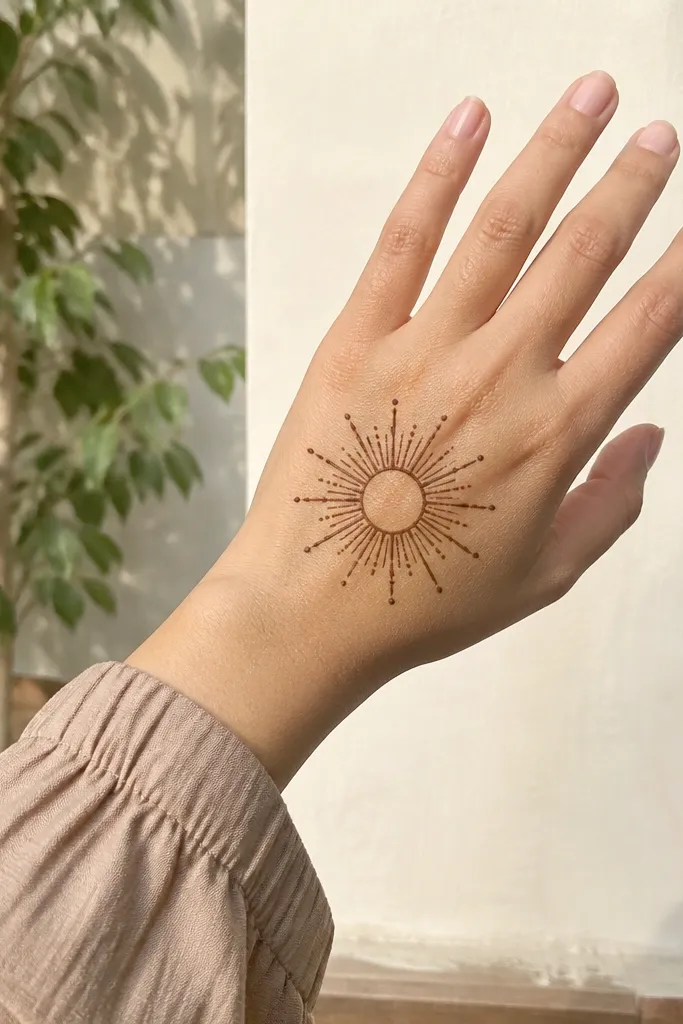
Sunburst mehndi looks clean because it’s built from lines — and lines always look sharp in dried mehndi. This design uses one sun center, thin rays, and dot tips so it feels themed without heavy fills. Put it on the back of the hand so the rays spread naturally. It’s a good choice for daytime festive events because it reads bright even though it’s monochrome. Time: about 45-60 minutes.
Start with a thin wrist band. Draw a small circle in the center of the back of the hand and fill it with one dot. Create 10-12 thin rays radiating outward from the circle, keeping them evenly spaced. Add a dot at the tip of every other ray instead of all of them. Finish with 2-3 tiny dots near the wrist edge to balance the composition.
Use lighter pressure for rays, then reinforce the center circle once it’s dry enough not to smear.
Avoid thick rays; they blur at the tips and ruin the sunburst look.
16. Bangle-Friendly Crescent Border with Dashes
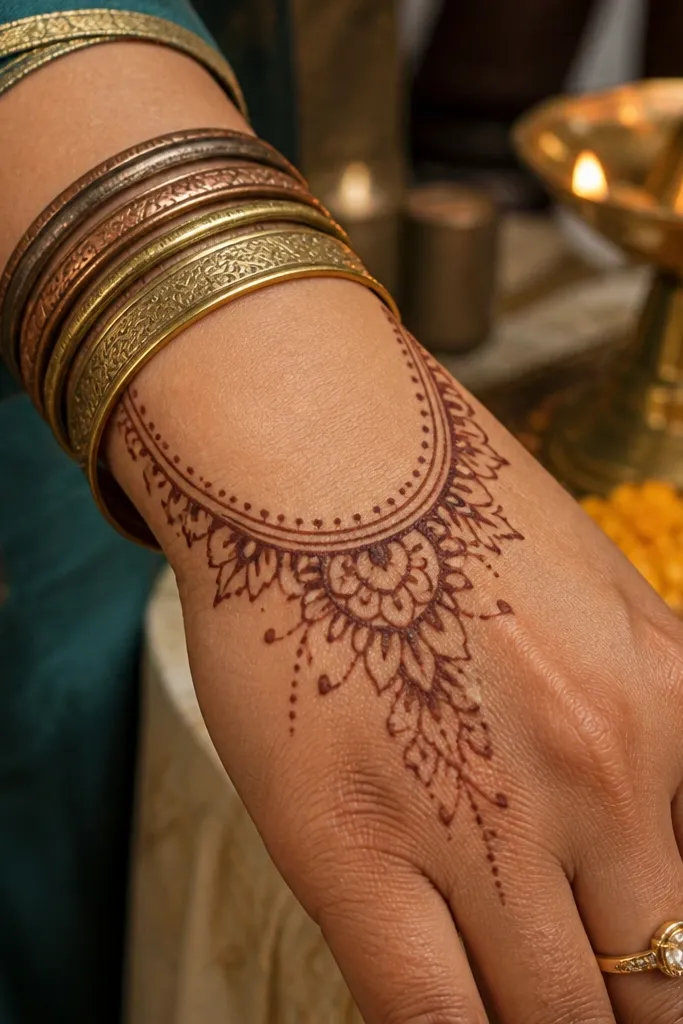
Draw a narrow wrist band first. On the back of the hand, draw one crescent curve that runs from the outer side toward the thumb side, leaving space above it. Add 6-8 dashes along the crescent line, alternating long and short. Finish by adding a tiny dot cluster at the inner end of the crescent.
This is a practical design for people who wear bangles because it sits right where bangles hit and still looks neat. The crescent border is clean and minimal, and the dash marks add texture without turning it into lace. It’s also easy to mirror on both hands. The best part: you can stop after the border and it still looks complete thanks to the wrist band. Great for short sessions and last-minute events.
AvoidDon’t add extra filler in the negative space; the border and dashes are the entire look.
Pro tipMark the crescent endpoints first with two dots; then connect them with a smooth arc.
17. Minimal Butterfly on Outer Fingers
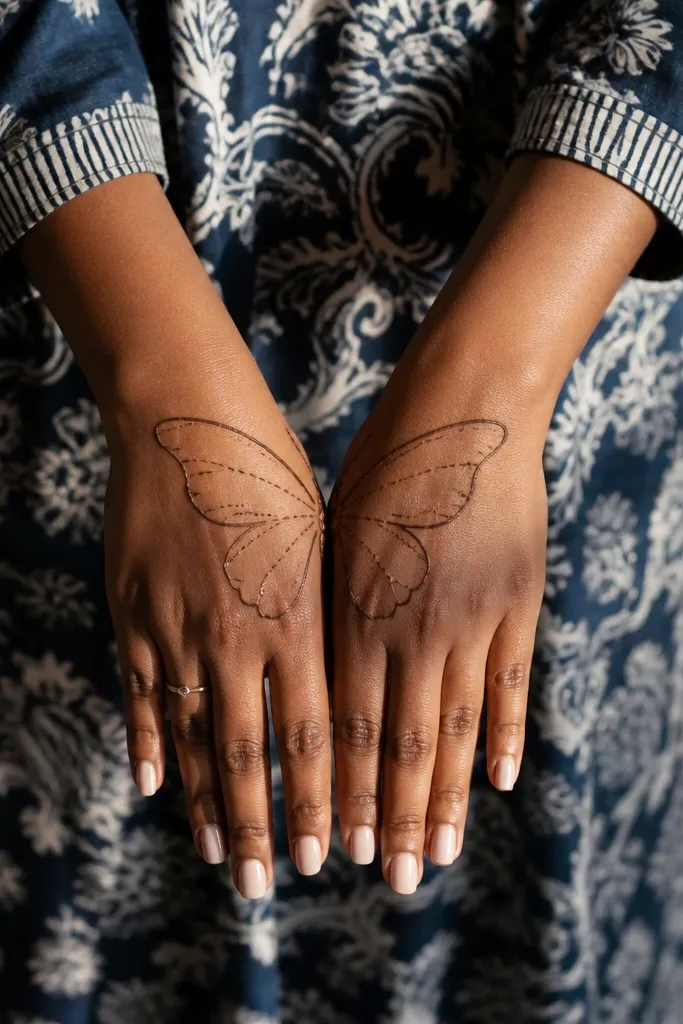
Butterflies look delicate and themed, but this version stays simple by placing the wings only on the outer fingers. You draw the wing outlines with an inner dashed line and add a dot body — that’s it. The design photographs well because the wings sit where fingers curve in photos. It’s also beginner-friendly because you repeat the same wing shape twice. Time: 50-65 minutes depending on symmetry.
Start with a thin wrist band and a thin line at the base of the outer fingers. On the ring and pinky fingers, draw one butterfly wing outline each — wing is a teardrop with a notch at the center. Add 3-4 dots along the inner wing line for texture. Connect the two wings with a short curved line near the knuckle and add a tiny dot body in the middle.
Keep wings slightly smaller on the pinky side so the design feels natural, not mirrored too hard.
Skip extra butterflies — one pair is enough for a clean simple look.
18. Star Chain Along Finger Bases
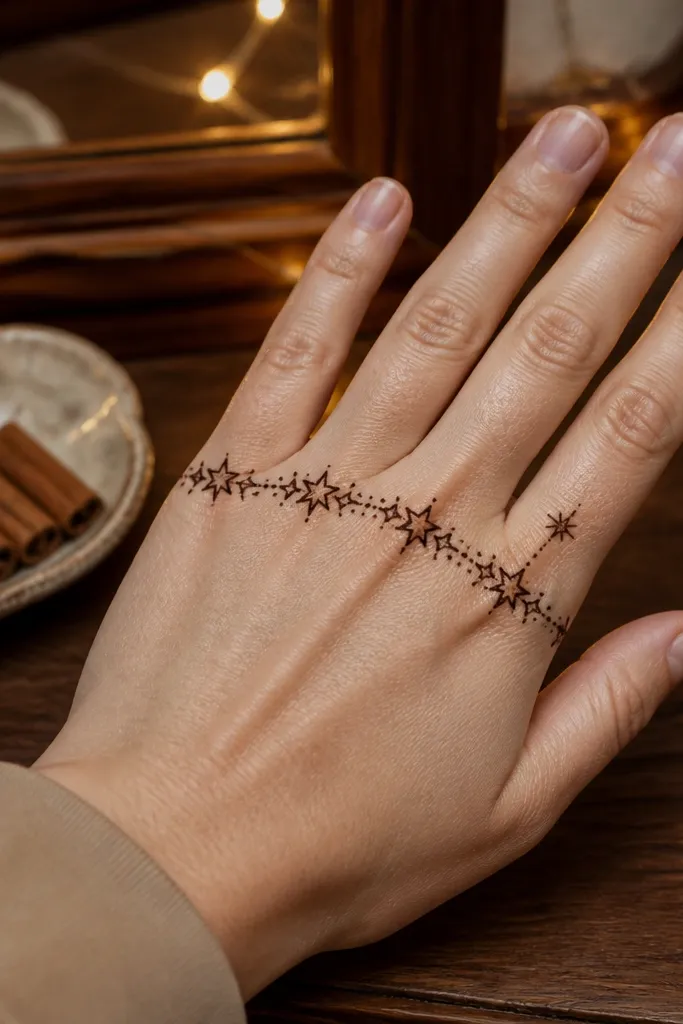
Draw a thin wrist band, then draw a straight guide line across each finger base. Create a small star at the center of the index finger base first, then repeat the star shape along the bases of the middle, ring, and pinky fingers. Add 1 dot sparkle near the outer edge of each star. Finish by placing one larger sparkle dot on the ring finger and a tiny dot near the thumb base.
A star chain is a clean themed pattern that looks like jewelry. You keep it simple by placing stars along the finger bases, then adding a single extra sparkle on the ring finger. This style is photogenic because stars create high-contrast points that show up well even with minimal mehndi. It’s also fast: once you get the star shape right, you repeat it. This is a great choice for short sessions where you still want a “designed” look.
AvoidDon’t make stars too close together; leave a small gap so the chain reads clearly.
Pro tipUse a consistent star size by keeping the star points equal length — it prevents a lopsided chain.
19. Mehndi Candle Flame with Side Spark
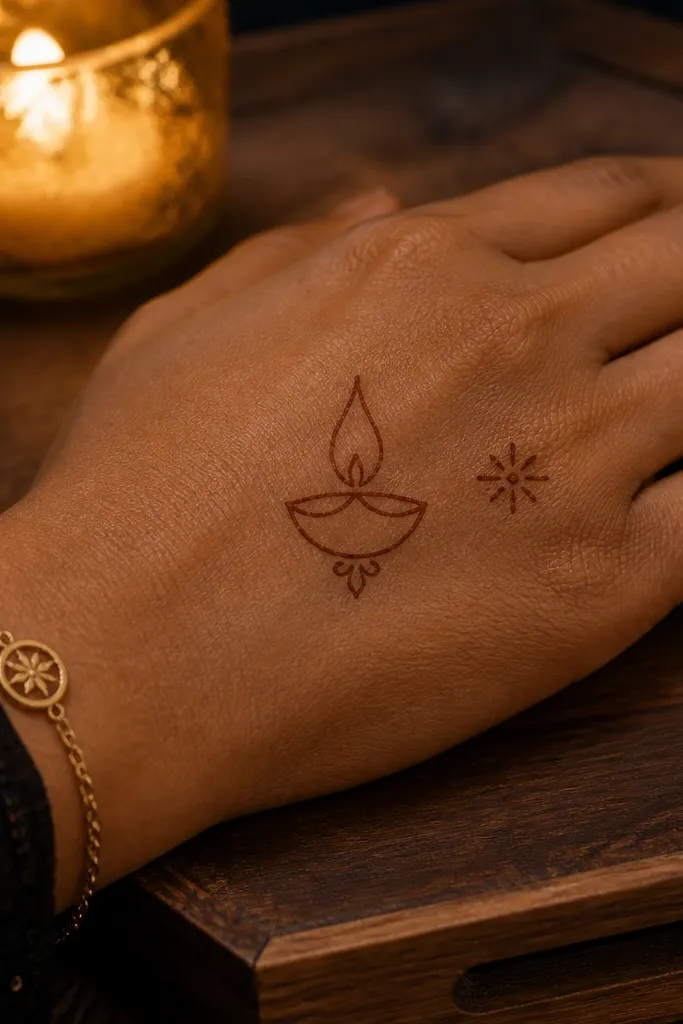
Start with a thin wrist band. Draw a simple candle body in the center of the back of the hand — a rounded rectangle with a slightly wider base. Add a flame on top using a teardrop shape with a tiny inner line. Place 1 sparkle dot cluster of 3 dots on one side of the candle and add 2 short dash lines near the bottom.
This design uses one candle outline as the centerpiece, then adds one side sparkle so it stays themed and clean. Candle shapes look good even in minimal linework because the silhouette tells the story. The single sparkle prevents the design from feeling empty without turning into clutter. It’s ideal for evening events and gives a neat, centered look on the back of the hand. Time: about 45-55 minutes.
AvoidAvoid extra flames or extra candles; one candle is what keeps it simple.
Pro tipKeep flame height consistent with candle width so the silhouette reads instantly.
20. Lantern String with Triple Knot Center
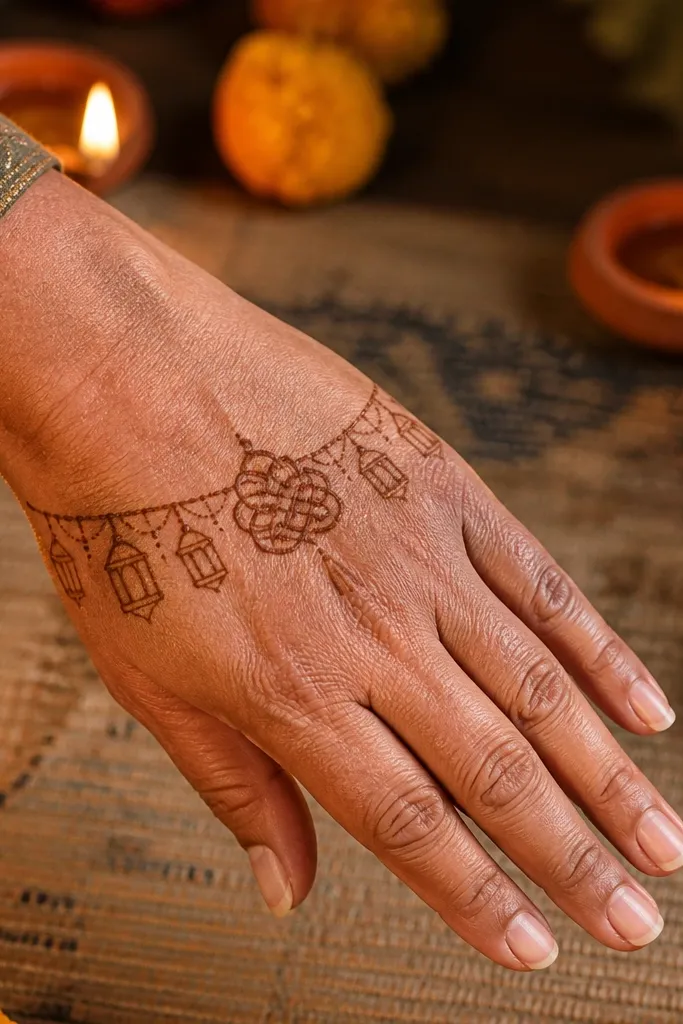
This is the “themed but structured” option. You draw a lantern string across the top of the hand, then anchor the design with a triple-knot center motif. The knots give you a focal point, and the lanterns stay small so you don’t need heavy filling. It looks great for celebrations because it reads like festive decor. Expect 55-70 minutes if you keep knot lines neat.
Begin with a wrist band and a thin curved guide line across the top of the back of the hand. Draw 4-5 small lantern outlines along the curve, each one connected to the next with a short line. In the center, draw a triple-knot: three small loop knots stacked horizontally with a tiny dot in the middle. Finish by adding 5 sparkle dots around the central knots, leaving skin gaps between clusters.
Do the lanterns first, then place knots — it helps you keep spacing balanced.
Don’t overfill lantern interiors; tiny outlines with dots are enough.



