
1. Wrist Band + Thumb-Side Crescent Fan
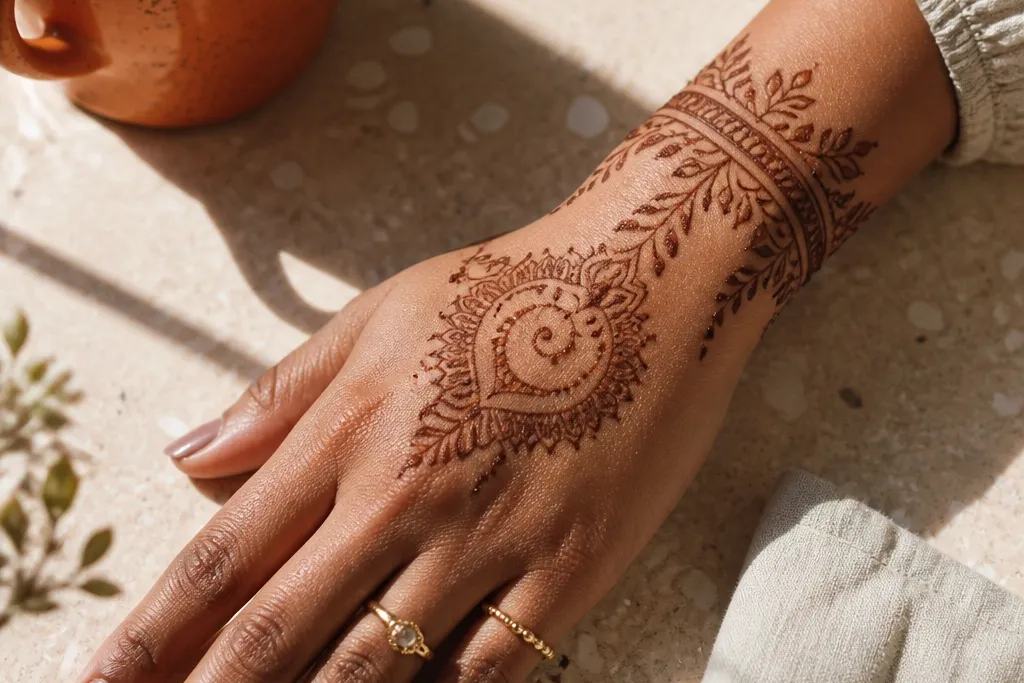
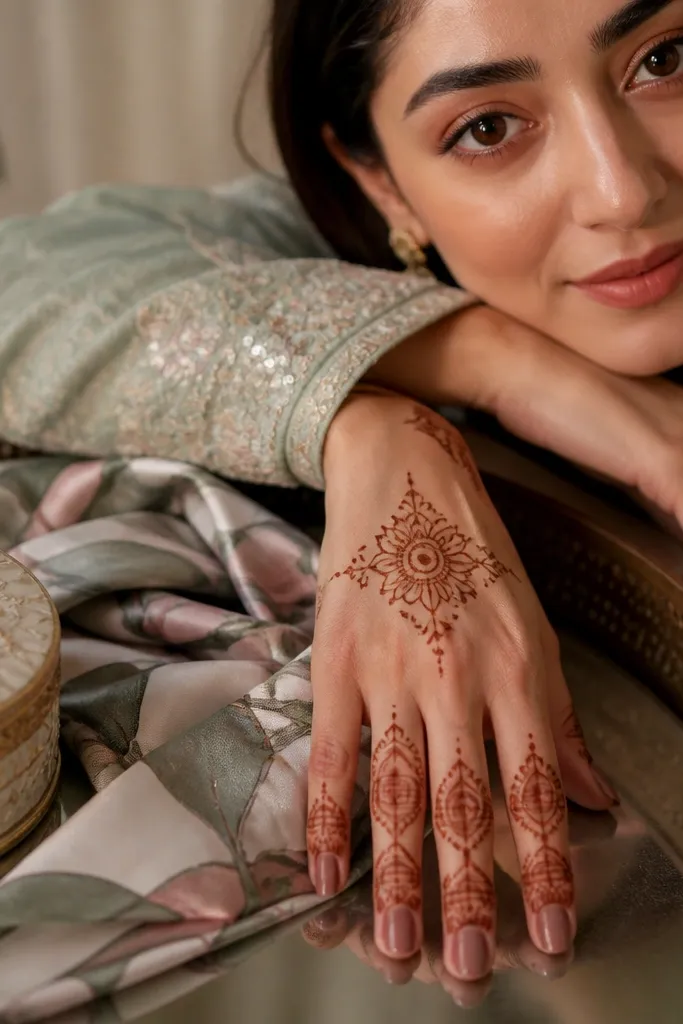
This layout is clean, balanced, and surprisingly easy to redo for every season. The thick wrist band gives you a strong base, while the thumb-side crescent fan creates a soft shape that wraps the hand without crowding the center. It’s photogenic because the fan points toward the knuckles, so the design reads even at a distance. It also fades nicely since the band stays darker longer than the open middle.
Start by drawing a solid wrist band from the center back of the wrist to both sides, leaving a small gap where your bracelet line will sit. Then sketch a crescent fan on the thumb side: one curved spine line with 5-7 short leaf teardrops branching from it. Add a tiny dot grid at the crescent base to connect it visually to the wrist band. Finish with 2 thin lines at the knuckle area that point inward like a subtle frame.
Keep the crescent fan slightly off-center toward the thumb so your camera view doesn’t flatten the shape.
Don’t fill the middle of the fan with dense dots — it turns into a dark smear.
2. Center Medallion with Knuckle Arches
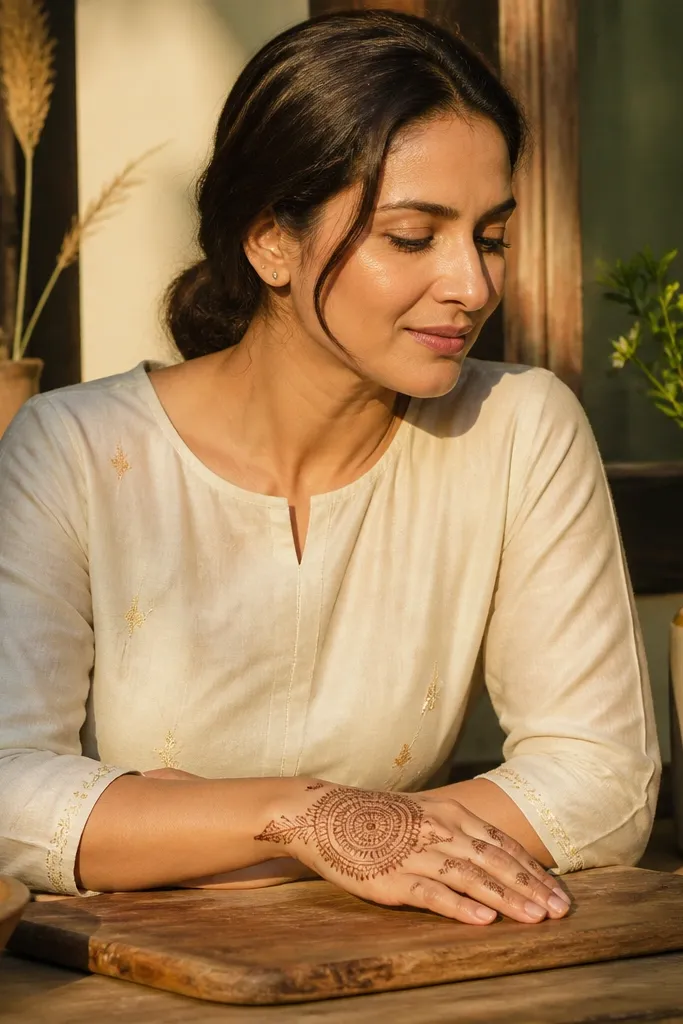
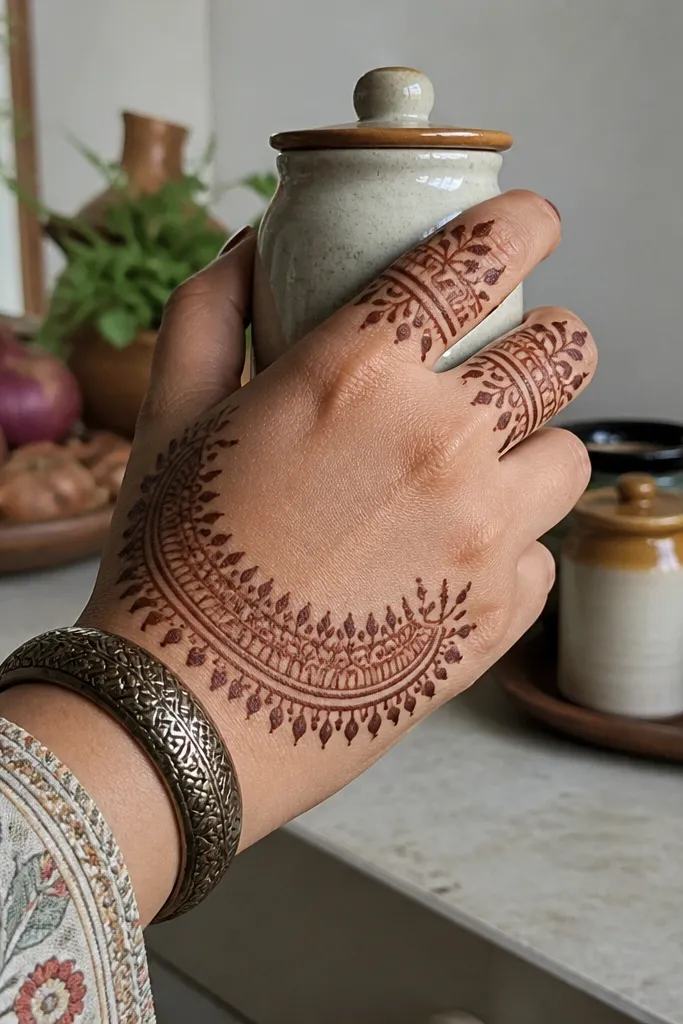
A center medallion makes your back hand look styled even when you only have time for one block of work. This design keeps the densest area in the middle and uses arched lines to “rest” the eye at the knuckles. It’s also great for year-round back hand mehndi designs because it works with both minimal outfits and heavy sleeves — the center motif stays the star. If your stain fades, the medallion outline still holds the look.
Draw a medium oval medallion on the back of the hand, centered between the thumb-side and pinky-side. Add a thin border around the medallion first, then fill with a light lattice or small scallops so it stains evenly. Next, create three knuckle arches: one over each knuckle row, made from a curved line with tiny dots at both ends. Connect the medallion to the wrist with two short vertical chains that stop before the fingers.
Use small scallops instead of big petals in the medallion so the stain develops evenly.
Don’t extend the knuckle arches all the way to the finger tips — it makes the hand look crowded.
3. Vertical Vine Columns (Two-Column Back Hand)
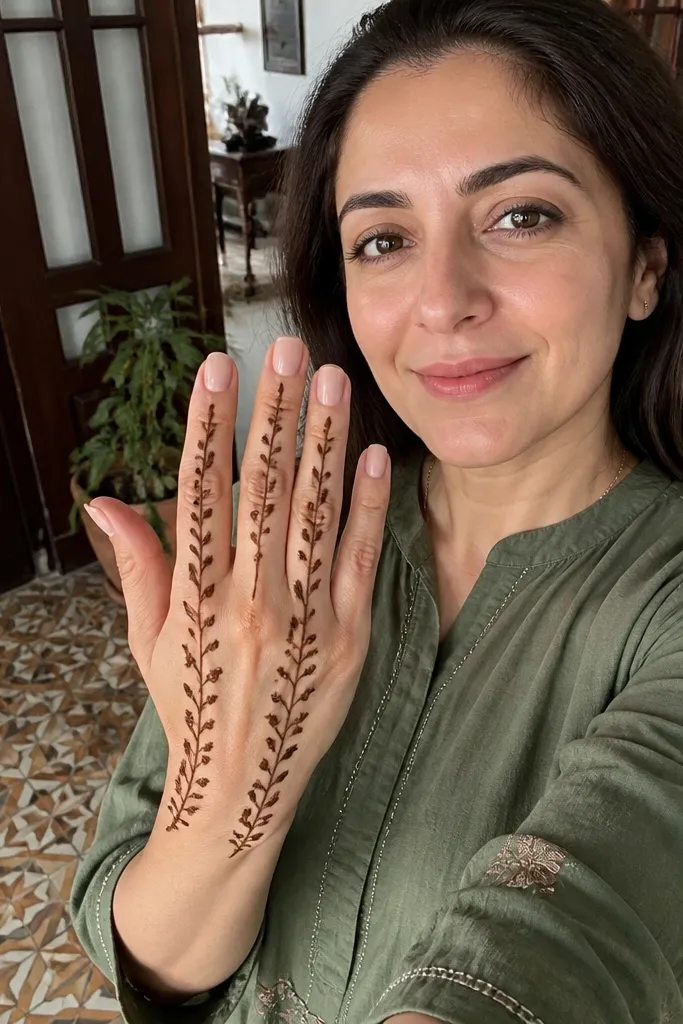
If you like mehndi that looks airy but still detailed, this is the one. Two vertical vine columns guide the eye upward and make fingers look longer in photos. The tiny leaf clusters keep it interesting without turning into a full back-hand block. This pattern is also forgiving for beginners because the symmetry is simple: two columns, mirrored leaf sizes, and consistent spacing.
Pro tipKeep leaf teardrops the same size across both columns so the design reads intentional.
Start at the wrist with two thin vertical stems placed slightly apart, about one knuckle width from each side of the center. Add leaf teardrops along each stem, keeping gaps so skin shows between leaf clusters. Then connect the tops of the columns with a short curved vine loop that sits below the back of the fingers. Finish by adding 1-2 small dot sprays near the leaf clusters to give texture without filling the whole hand.
AvoidAvoid thick stems with lots of dots — the vines merge into a dark stripe.
4. Thumb-to-Center Arch with Micro Dots
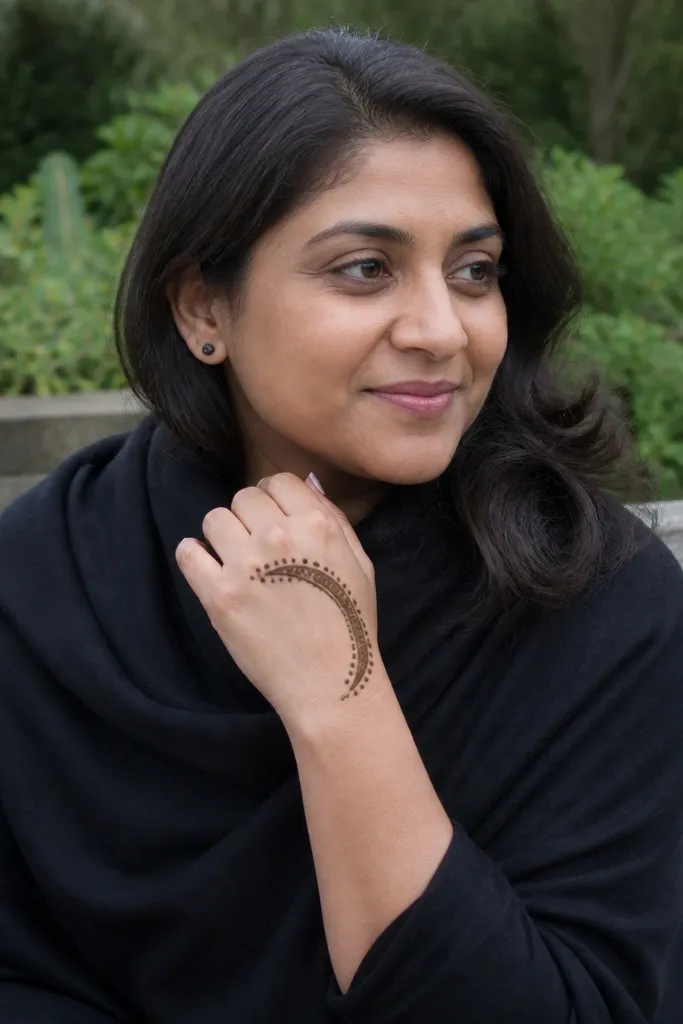
This design is a go-to for year-round back hand mehndi designs because it looks delicate without being fragile. A single sweeping arch creates motion across the back of the hand, while micro dots add sparkle-like texture. It’s ideal if you want a pattern that still looks good after partial fading because the dots and linework remain readable. The arch also complements rings and bangles since it naturally frames the hand.
Pro tipUse dot clusters of 5-7 dots each, spaced evenly, instead of one long dotted trail.
Draw a long arch starting near the thumb-side knuckle and curving toward the center back of the hand, ending near the wrist line. Outline the arch with a thin line, then place micro dots along the inner edge in small clusters. Add a small secondary curve at the wrist to connect the arch to a simple wrist band. Finally, add 2-3 short curved lines over the knuckles that echo the arch shape.
AvoidDon’t overdo the micro dots — too many makes the stain look dusty.
5. Open Lattice Back with Wrist Crown
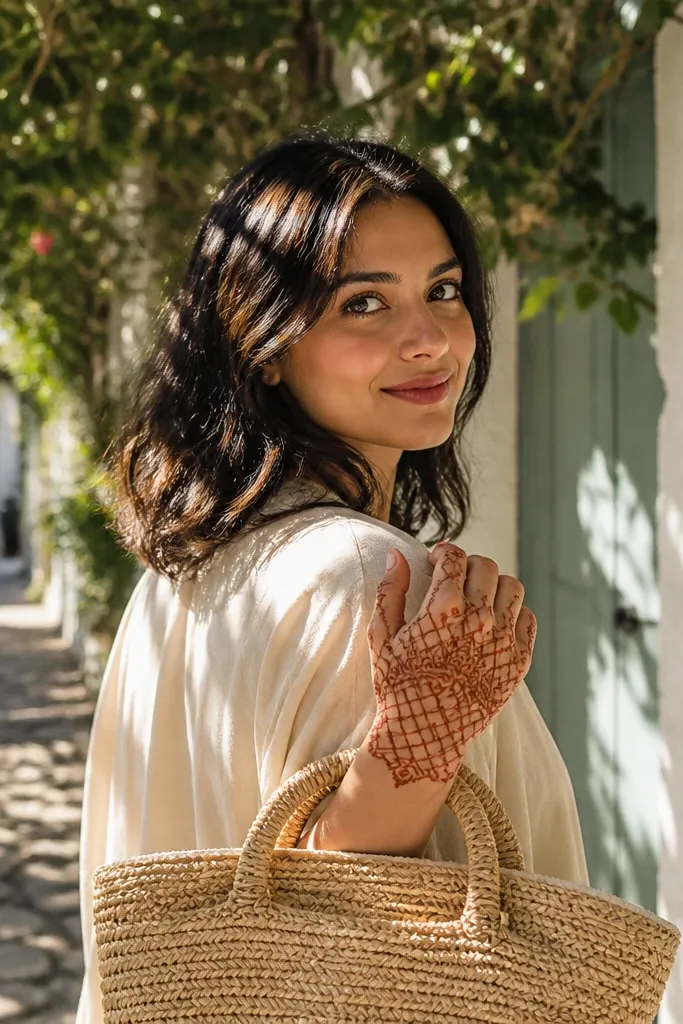
Open lattice is one of the cleanest ways to keep a back hand looking “done” without filling every inch. The lattice creates a net effect that photographs well because it has light and dark contrast. Pair it with a crown at the wrist and you get a finished look that still feels airy. This is a strong choice for summer because the open spaces keep the design looking light, not heavy.
Start with a crown at the wrist: draw 3-5 small arches across the wrist band, each arch separated by a visible skin gap. Then map a lattice rectangle on the back of the hand, leaving clear margins on both sides. Draw vertical lines first, then cross them with diagonal lines to make small diamond cells. Add a few thicker corner dots at the rectangle edges to anchor the lattice so it doesn’t look like random scribbles.
Keep lattice cell sizes consistent — irregular cell spacing makes the pattern look accidental.
Don’t close every diamond — fully filled lattice turns into a flat dark patch.
6. Half-Back Geometric Frame (Square Corners)

Geometric frames look sharp in photos and they don’t require heavy fill. This half-back frame focuses density at the corners and lets the center stay open, so you get a modern look that works year-round. It also makes the design easy to match with watches and bracelets because the frame naturally sits parallel to wrist lines. When the stain fades, the corner points still hold the structure.
Draw a rectangular frame on the back of the hand, but only cover the top half of the hand area — leave the lower palm-side area mostly empty. Place square corner blocks at the frame corners using small box outlines with dot centers. Fill the side edges with straight lines and short tick marks instead of curves. Add a tiny diagonal chain connecting the top corners to the knuckle area for a clean finish.
Use straight lines with a steady hand by sketching lightly first, then tracing the final line.
Don’t curve the frame — curved geometry reads sloppy and loses the crisp look.
7. Pinky-Side Rosette Trail

If you like floral mehndi but don’t want full-hand blooms, this is a smart compromise. The rosette trail starts near the pinky-side and moves inward with repeating flower units of the same size. It looks intentional because the trail has a clear direction, and the open center keeps it lightweight. This pattern also photographs well on ring fingers since the trail naturally frames that area.
Pro tipMake the first rosette slightly larger than the rest so the design has a clear starting point.
Start at the wrist with a thin band that stops slightly before the center. Then draw the first rosette near the pinky-side knuckle: a small circle outline with 6-8 petal teardrops around it. Continue inward with 3 more rosettes, each one slightly smaller as you approach the center. Connect each rosette with a short vine line and small dot clusters to keep the trail continuous.
AvoidDon’t add extra side flowers off the trail — it breaks the direction and makes it busy.
8. Wrist-to-Fingers Chain Link Pattern
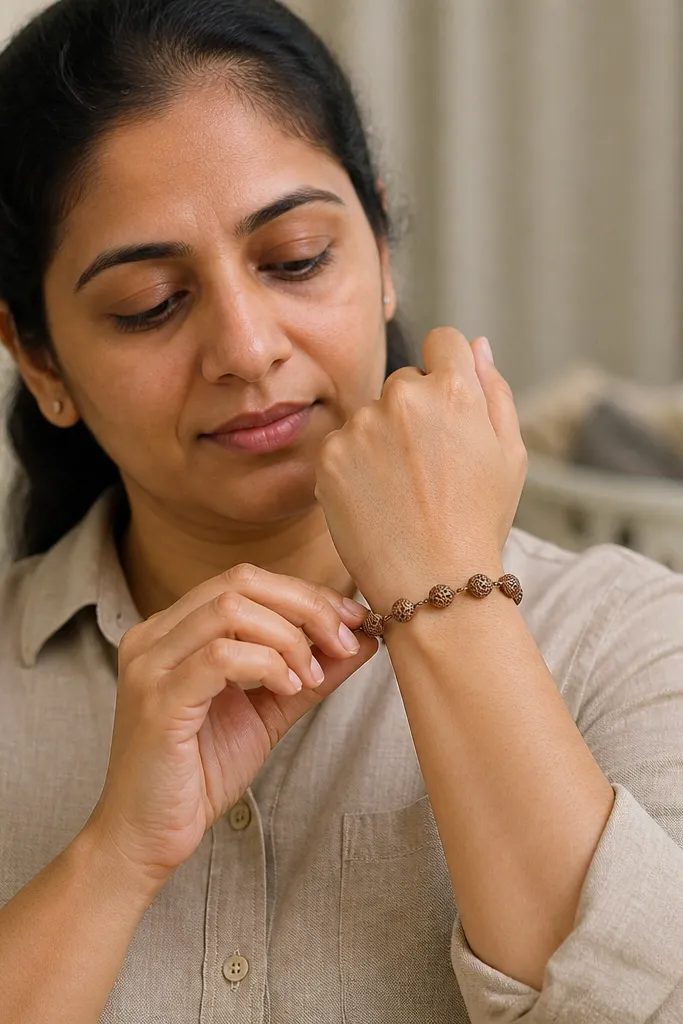
Chain links look clean, modern, and they stay readable as the stain fades. The key is spacing: each link has breathing room so the pattern doesn’t become a dark line. This design is also fast enough for a last-minute event without losing that “trend” look people notice in photos. It works year-round because it’s not tied to one seasonal motif — it’s geometry that reads well in any outfit.
Pro tipKeep link thickness consistent — thicker links create uneven staining and ugly pooling.
Draw a wrist band with two parallel lines, then add a row of linked oval loops starting at the center of the wrist. Make each link about the width of two mehndi lines, then repeat the pattern upward toward the knuckles. At the top, add a small break in the chain and replace it with 3 short upward ticks to simulate a flourish. Finish by adding 1-2 tiny dots between selected links to keep the texture lively.
AvoidAvoid fully connecting every link edge — leave slight gaps so skin shows.
9. Back Hand Paisley Stack (Three Teardrops)
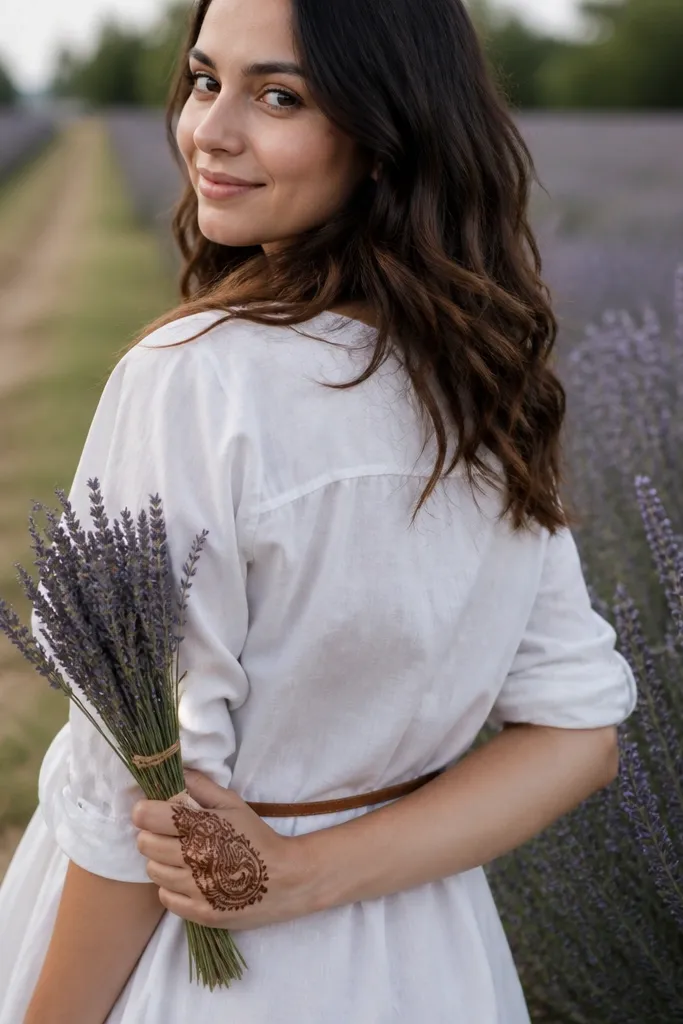
Paisley stacks give you a strong vertical look without spreading across the whole hand. Three teardrops create a clear shape hierarchy: larger in the center, smaller on the sides. This works great for year-round back hand mehndi designs because it reads like a single statement piece, not scattered decoration. Even with uneven fading, the paisley outline stays crisp and still looks intentional.
Sketch three vertical paisley teardrops on the back of the hand — one centered and two smaller ones on either side. Outline each paisley with a bold outer curve, then add inner curls that stop halfway down the teardrop. At the wrist, draw a thin band and add 2-3 small dot clusters directly under the bottom of the side paisleys. Finish with 2 short curved lines across the knuckles that echo the paisley curves.
Stop inner curls at mid-teardrop — it prevents the center from turning into a single dark mass.
Don’t make all three paisleys the same size — the stacked look disappears.
10. Knuckle Fans with Open Center
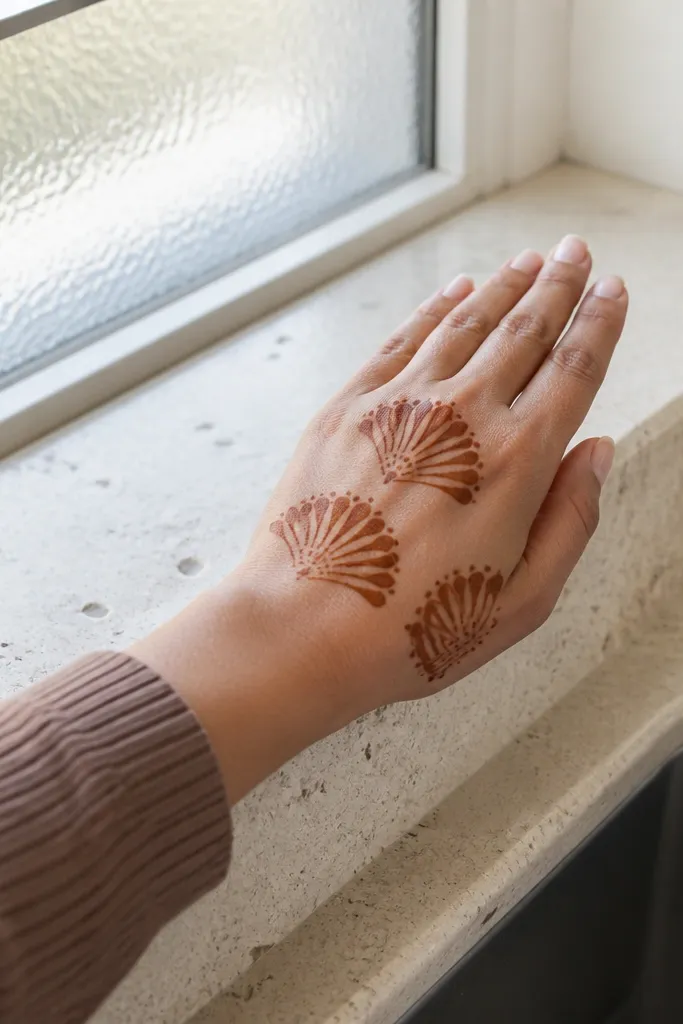
This is the “looks done in 20 minutes” layout because the work concentrates on the knuckle area. Three fan shapes create a soft, elegant rhythm, while the open center keeps the design light. It’s perfect when you want year-round back hand mehndi designs that don’t clash with big rings or thick bangles. The fans also remain visible after washing because they’re high on the hand where friction is lower.
Start with 3 small anchor dots where each knuckle row sits on the back of the hand. From each anchor, draw a half-oval fan: one outer curved line and 5-6 fine inner lines that radiate upward. Keep the center area blank and don’t add filler vines there. Add a simple wrist band with a single row of tiny dots. Finish by connecting the fans with two short curved lines that stop near the center blank space.
Use 5 inner rays per fan for a balanced look — 7 makes it too busy in photos.
Avoid filling the blank center with stray dots — it breaks the clean open effect.
11. Botanical Wrist Crown + Back Sprays
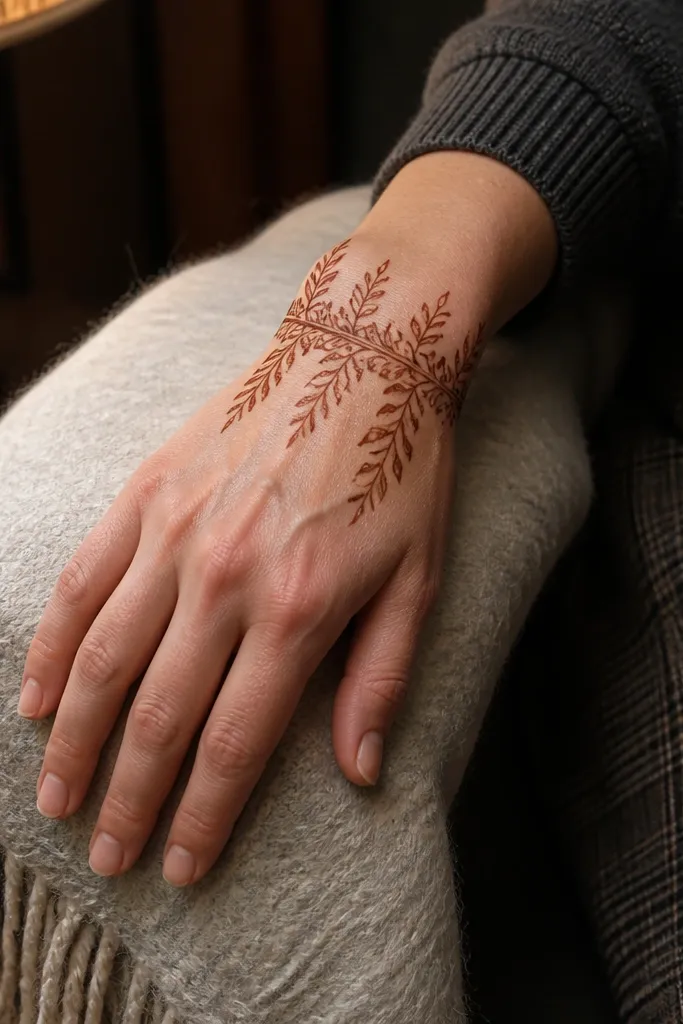
Botanical sprays give you the most “aesthetic movement” without needing full flowers. The wrist crown acts like a foundation, then leaf sprays climb into the back of the hand in uneven lengths for a natural look. This is a strong year-round back hand mehndi designs pick because it can read minimal in winter layers and still looks light under summer sleeves. The leaf texture also stains well because you’re working with thin lines.
Pro tipVary spray length by one leaf each — it looks natural and avoids mirror-perfect stiffness.
Draw a wrist crown made of 4-6 small arch segments, each arch containing a tiny dot at its peak. From each crown segment, extend a leaf spray upward: a thin spine line with 3-4 leaf teardrops on it. Keep sprays on the thumb side and center side stronger, and keep the pinky side lighter with only one or two leaves. Add 6-8 tiny buds (small dot-then-line shapes) around the spray ends for a finished botanical feel.
AvoidDon’t thicken the leaf spines — thick lines darken and hide the leaf shape.
12. Circular Back Hand Halo with Side Spark

A circular halo is a clean trick for making back hand designs look intentional. It gives you a defined boundary around the center, so the design doesn’t sprawl. The side spark motif adds interest without covering the whole hand, which matters for year-round back hand mehndi designs because you’ll be repeating these patterns and want consistent coverage. It’s also great for photographs because circles catch attention fast.
Pro tipMake the halo slightly wider than tall — it looks better on the back of a hand and in photos.
Draw a smooth circle or slightly oval halo on the back of the hand around the center area, leaving about a finger-width margin from the wrist. Outline the halo with a bold line, then add tiny inner scallops or micro dots along only the top half of the circle. On the thumb side, add a small spark motif: a short starburst made of 5 thin lines with a dot at the center. Connect the spark to the halo with a short curved line so it feels attached, not random.
AvoidDon’t place the halo too low near the knuckles — it compresses the circle and looks cramped.
13. Dual Border Bracelet Effect (Wrist + Lower Back)
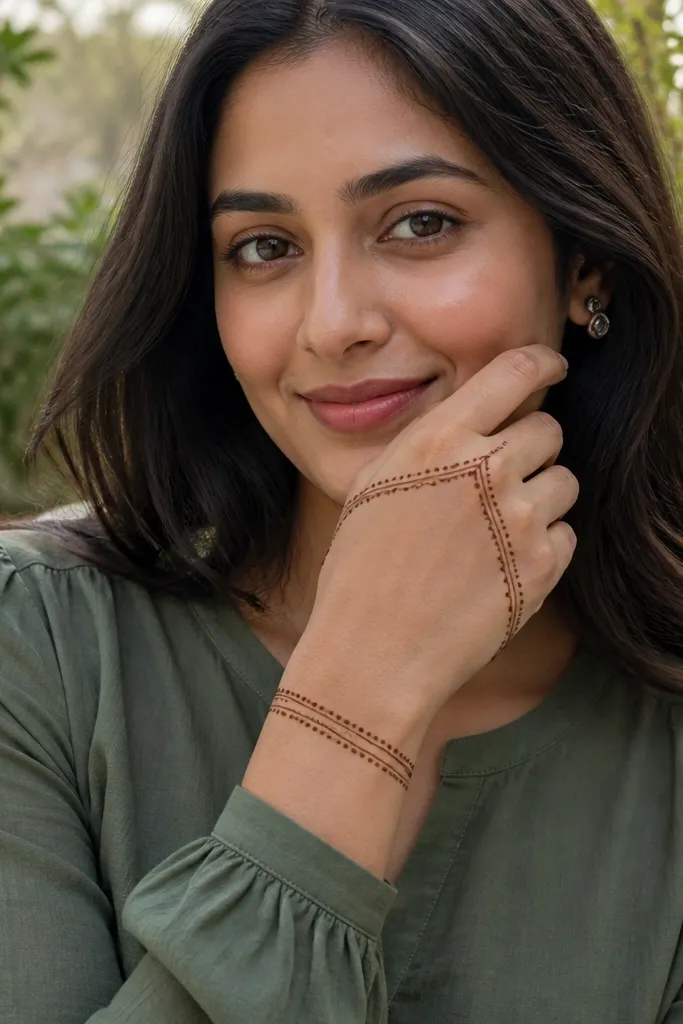
This design mimics jewelry, so it looks good even when you keep everything else minimal. Two border lines — one at the wrist and one across the lower back of the hand — create a layered look that frames the middle. Small dot fillers keep it aesthetic without turning into heavy fill. It’s a great pick for year-round back hand mehndi designs because it stays classy for work and festive for parties.
Start with a wrist band drawn as two parallel lines with a row of dots between them. Then add a second border across the lower back of the hand, curving slightly upward at the ends toward the knuckles. Fill the space between borders with small repeating motifs like 3-dot triangles or tiny leaf sprigs, keeping them sparse. Finish by adding 1-2 vertical connector lines from the lower border up toward the center, stopping before the medallion area would start.
Keep the lower border thinner than the wrist band so the wrist stays the focal point.
Don’t fill the entire area between borders — the jewelry effect disappears.
14. Seasonal-Ready Minimal: Micro Flowers Across Back

This is the most reliable “year-round” option because it doesn’t rely on one big motif. Micro flowers spread across the back of the hand look airy, modern, and easy to scale up or down. It’s also forgiving for uneven stain — if some dots fade, the overall pattern still reads as flowers. This works especially well with short sleeves and watch stacks where you want the design to peek out, not dominate.
Mark 6 placement points across the back of the hand: three on the thumb-to-center side and three toward pinky-to-center. At each point, draw a tiny flower rosette with 5 petals and a dot center. Connect every second flower with a short connector line and a small dot at the connector midpoint. Add a subtle wrist band using a single row of tiny dots, then stop — no heavy filling on top.
Use identical petal size for every micro flower so the spacing looks intentional.
Avoid random placements far from the main points — it makes the design look unfinished.
15. Starburst Center with Side Petal Frames
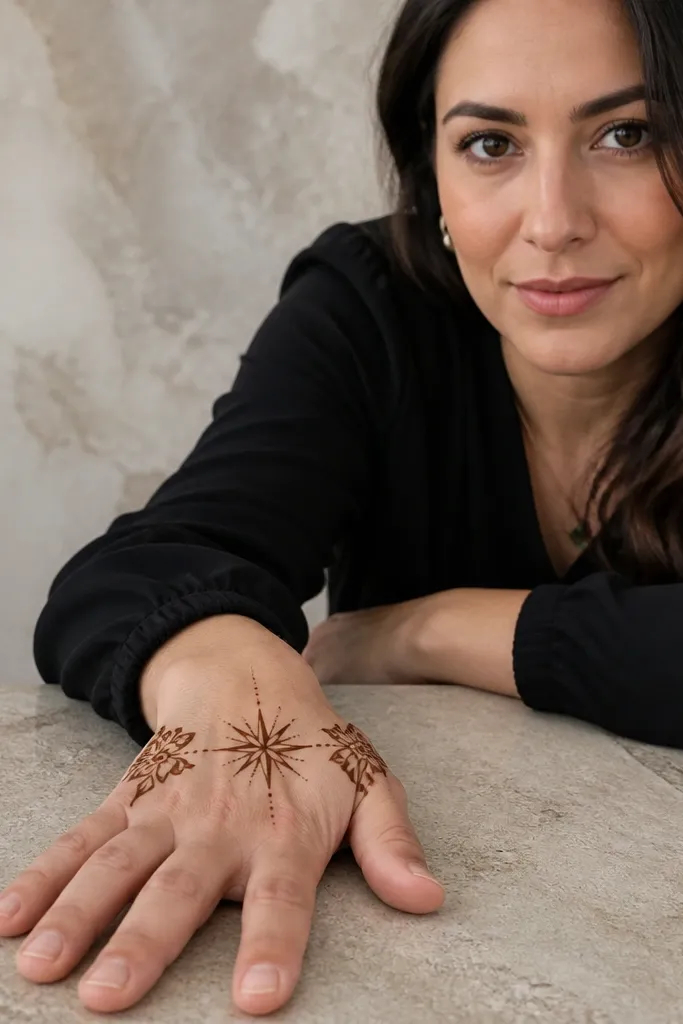
A starburst center gives you instant visual impact, and the side petal frames keep it balanced. This pattern is ideal when you want something trendy-looking but still structured enough to apply quickly. The center starburst draws attention to the center back of the hand where photos focus, while the side frames keep the edges from looking empty. It also fades in a friendly way because the star lines stay visible even when the dots lighten.
Pro tipMake star points thin and slightly curved — straight thick points look blunt on skin.
Start by drawing a small dot cluster in the center of the back of the hand, then outline a starburst around it with 8-10 thin points. Add inner starburst lines so the star isn’t just an outline — keep them short so they don’t crowd. Next, create two side frames: on each side of the star, draw a vertical row of 3-4 petal shapes facing inward. Finish with a thin wrist band and a few tiny dots near where the frames begin.
AvoidDon’t overfill the starburst center — too much dark ink pools and kills the star shape.



