
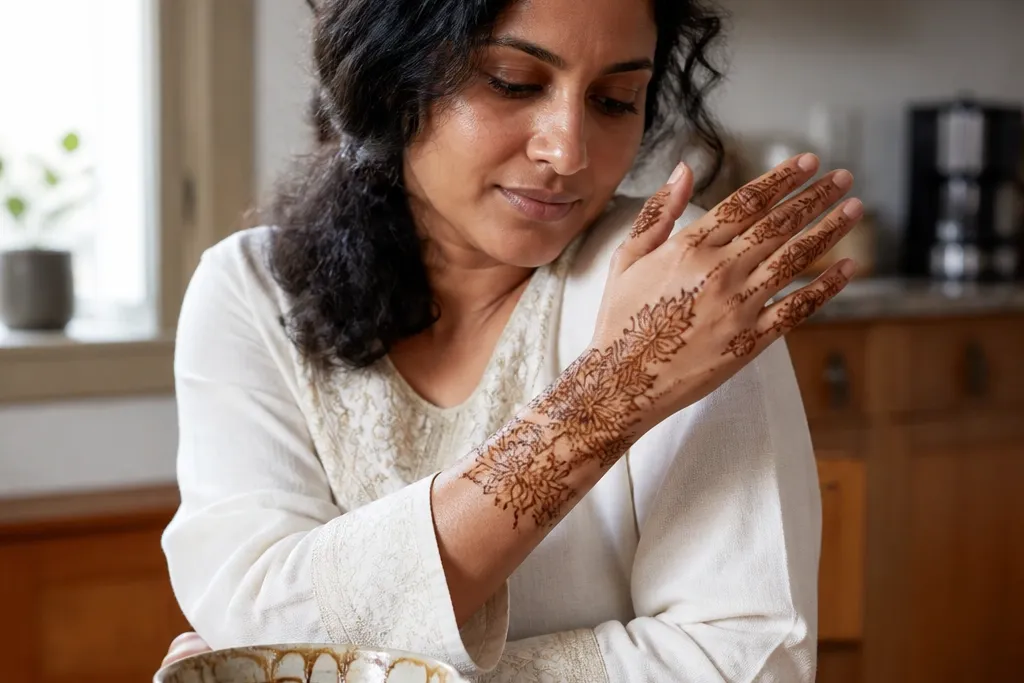

1. Wrist-to-Midfinger Lotus Spine
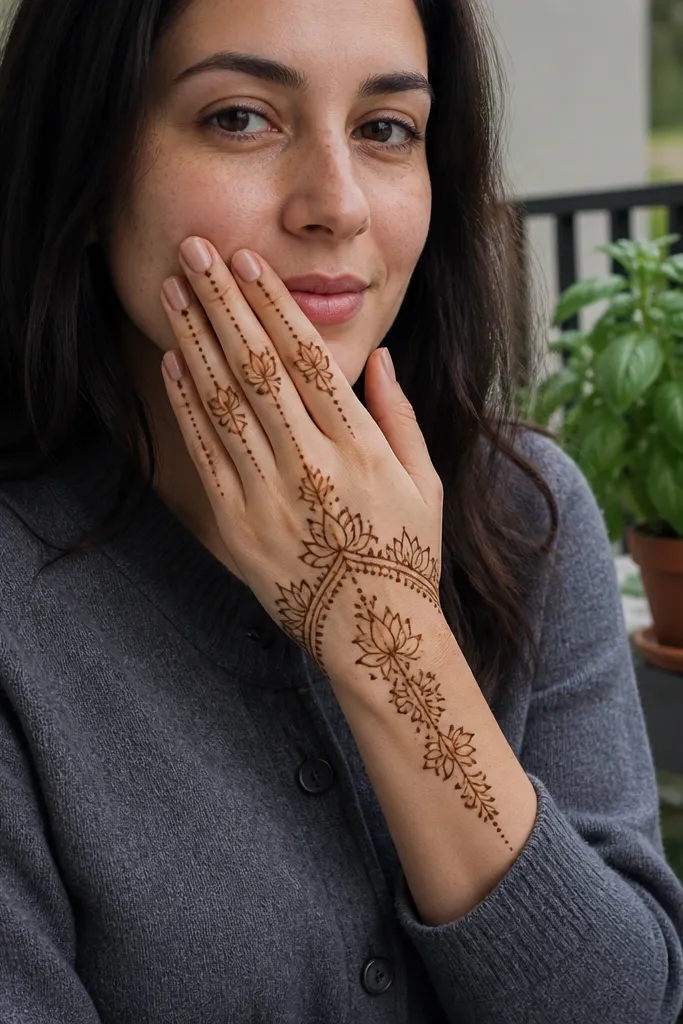
Start by drawing a straight guideline from the wrist center up to the midfinger area. At the wrist, outline a small lotus bud and continue the spine upward with three repeating petal shapes, one per finger lane. Then add side arches that mirror each other on the left and right, landing between index-middle and ring-little spaces. Fill only the lotus petals and arch interiors with thin dots and light vine lines, leaving the finger roots crisp. Finish with tiny leaf veins along the center spine and a few micro-dots near the knuckle edges.
This design is built for that “full back hand” look without crowding the knuckles. The center lotus spine creates a strong vertical rhythm, while side arches land in the spaces between fingers so the pattern looks even from every angle. It’s a good pick for year-round full back hand mehndi designs because it stays neat with short sleeve coverage and still reads clearly in close-up photos. The lotus motif also gives you a natural place to add shading — keep it light so the line work stays sharp.
AvoidDon’t fill the finger roots; leaving them open makes the whole hand look more balanced.
Pro tipUse the cone tip lightly — if your lines get thick here, the spine loses its “clean lane” look.
2. Peacock Feather Back Frame
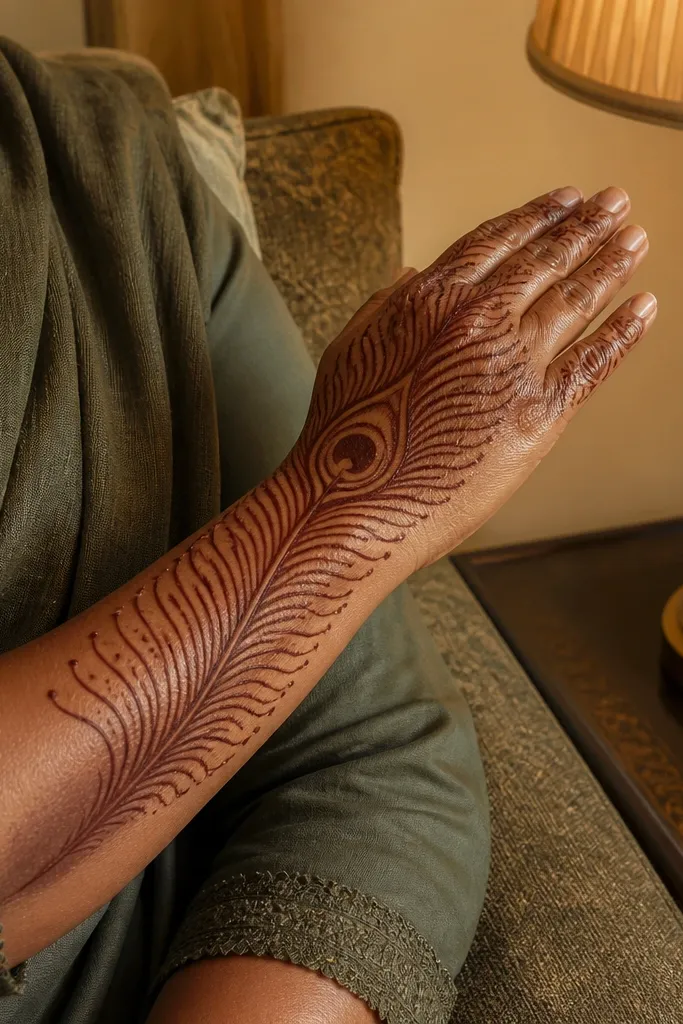
If you want a back-hand design that looks styled, this one gives motion across the top of the hand. The peacock feather frame hugs the back from wrist to finger bases, then breaks into feather bar lines that skim the knuckle area. It’s photogenic because the feather ribs create texture without needing heavy shading. This also works well for year-round full back hand mehndi designs because it looks intentional even when the stain fades — the ribs stay visible longer than large filled blocks.
Draw a curved frame starting at the wrist outer edge and sweeping toward the base of the index and middle finger. Add feather “ribs” inside the frame — start thick at the base, then taper each rib as it reaches toward the finger roots. Build a second inner frame with smaller curves so the design has depth without getting messy. Add small dot clusters at the intersections where ribs meet arches between fingers. Finally, add a thin chain border around the wrist and stop at the back of the hand for a clean, full-but-not overcrowded effect.
Keep feather ribs spaced evenly; irregular spacing is what makes the pattern look rushed.
Avoid big filled feathers — ribs look better than solid blocks on the back of the hand.
3. Double Arch Knuckle Net
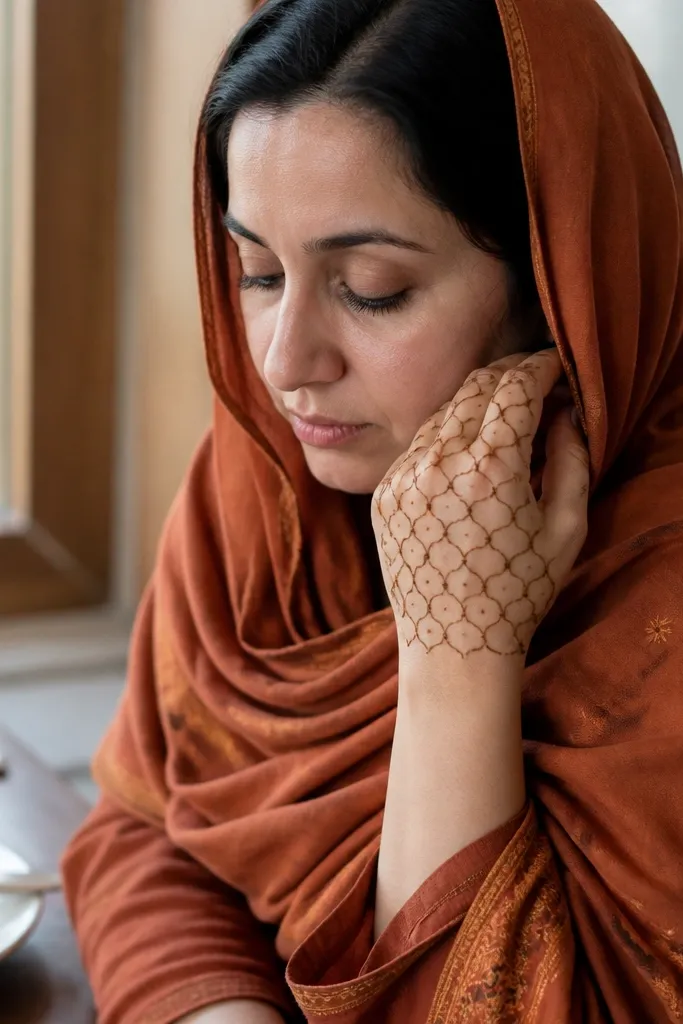
This layout is for people who want full back hand coverage but hate designs that swallow the knuckles. Two arch lanes create a “net” effect over the knuckle area, so the back of the hand looks full while finger joints stay readable. The net is made with small repeated arcs and dots, which stains well and looks crisp even if your paste dries faster on some fingers. For year-round full back hand mehndi designs, this one is strong because it stays consistent across different hand sizes.
Start at the wrist with two parallel curved lines that rise toward the knuckle area, one slightly closer to the thumb side. Connect these arches with small repeated semicircles across the back, leaving small gaps at each finger root. Add a thin dot row along the top edge of the net so the pattern has a defined boundary. Fill each net cell lightly with 2-3 dots, not full shading. Finish by adding a small vine swirl at the wrist center and a single micro-flower on the middle finger lane.
If your net cells look uneven, use a quick guide by marking finger roots lightly with a dot before outlining arcs.
Don’t overfill the net; full shading makes the knuckles look heavy and blurry.
4. Rangoli Diamond Bands
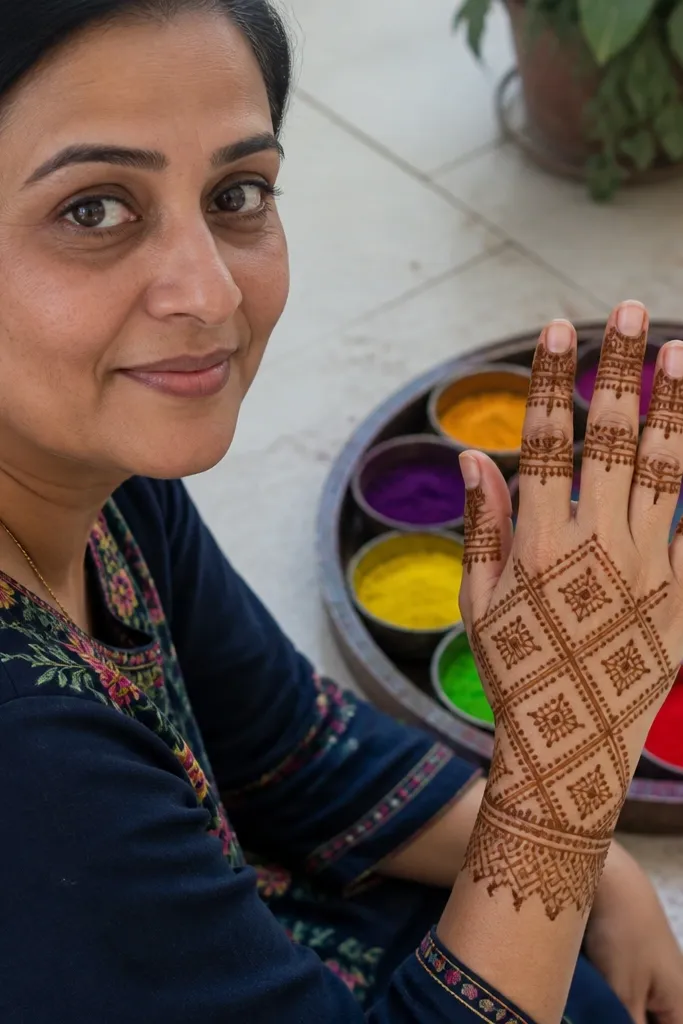
Sketch a wrist border made of 3-4 small diamonds connected by dots. From the border, draw diagonal lines that move toward each finger base, then intersect to form diamond cells in three main bands. Keep the center band slightly larger so the hand looks anchored. Add tiny dot fillers inside every other diamond cell for texture. Finish with a thin lattice line that wraps around the finger bases and ends before the fingertips.
Diamond bands give a clean, geometric full back hand look that works year-round. The design uses rangoli-style diagonals so the pattern spreads evenly across the back of the hand instead of piling up on one side. It’s especially good for short sleeves because the wrist border looks finished and the diagonals continue into finger framing. The diamond structure also makes it easier to keep symmetry — you’re repeating a shape with intention.
AvoidAvoid random diamond sizes; pick one main diamond size and repeat it consistently.
Pro tipUse a ruler-flat cone pressure for diamonds — consistent line weight makes the geometry look intentional.
5. Full Back Hand Scrollwork Vines
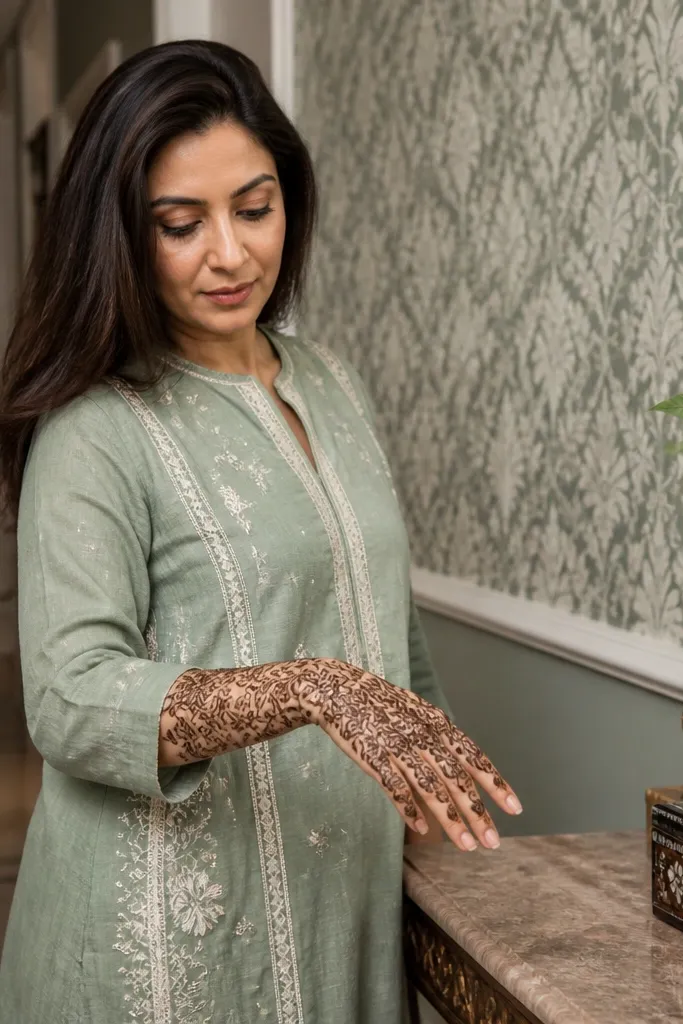
Start with a center vine line from wrist to midfinger, then draw two side vines that mirror it. Add scroll loops at regular intervals along each vine, making sure loops land between fingers instead of directly on top of knuckles. Connect the loops with short cross-links so the vines form a continuous mesh. Fill loop interiors with light dot shading and tiny teardrops, keeping the fill lighter near the finger roots. Finish with a wrist chain border and a few final micro-leaf veins on the center vine.
This is a full back hand design that looks busy in a controlled way. Scrollwork vines fill the back of the hand while leaving finger roots and center lanes lighter, so it doesn’t turn into one dark block. It’s a great choice for year-round full back hand mehndi designs because it can handle different event types — daily wear, festivals, and photos all work. The key visual is how the vines overlap in layers: first the outline, then fine dots in the overlaps.
AvoidDon’t start filling before the outline dries; overlapping lines blur fast on the back of the hand.
Pro tipWork in sections: outline one third of the hand, then fill that section before moving on.
6. Starburst Finger Bands + Back Frame

Draw a border frame across the back of the hand: start from the wrist outer edge, arc over the back, and return to the wrist inner edge. On each finger base, add a mini starburst — a small circle with 6-8 short rays. Then draw finger bands as two parallel curved lines around each finger, connecting them to the starburst at the base. Fill the band interiors with a mix of dots and tiny leaf shapes. Finish by adding a thin diagonal vine line from wrist center to the starburst on the middle finger.
This design is full hand energy without full hand clutter. Each finger has a band that starts at the base and ends mid-length, and those bands connect to a back frame border that wraps the top of the hand. The starburst accents at finger bases make the pattern look crisp and celebratory, even when the rest is light. For year-round full back hand mehndi designs, it’s a reliable option because the finger bands keep the look “complete” from wrist to fingertips.
AvoidAvoid one thick band on every finger; vary fill density slightly so it doesn’t look flat.
Pro tipKeep the starburst rays short; long rays make the base look crowded and messy.
7. Sunburst Wrist Mandala Back
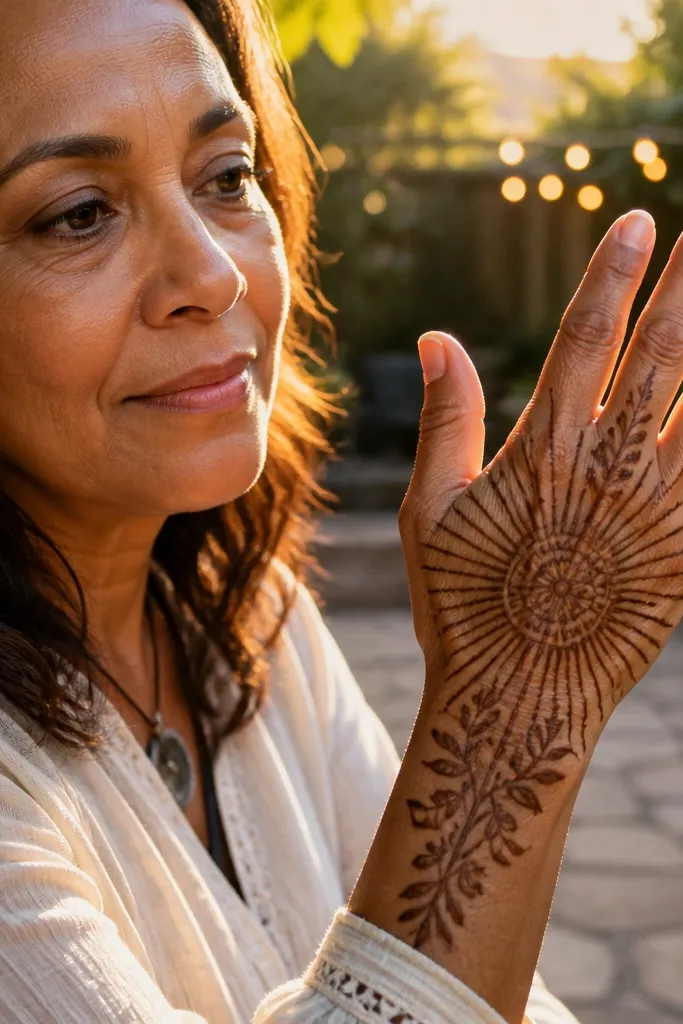
Start at the wrist center with a small mandala circle — outline 6-8 petals around a dot center. From each petal tip, draw a short sunburst ray that angles toward the finger roots. Then convert every other ray into a leaf cluster: a teardrop leaf with a small dot at its base. Continue leaf clusters across the back in three lanes, leaving the finger roots lighter. Finish with a thin dotted border around the wrist and a few micro-dots along the highest leaf tips.
A wrist mandala makes a full back hand design feel intentional instantly. The sunburst rays spread outward and then transition into leaf clusters across the back, so the pattern looks like it’s growing from one point. This works beautifully for year-round full back hand mehndi designs because wrist focus stays visible even when the stain fades on fingers. The back-of-hand leaf clusters also create a softer look compared to hard geometry.
AvoidDon’t add heavy shading in the wrist mandala; line work reads better on smaller spaces.
Pro tipIf your mandala looks lopsided, count petals out loud: 8 petals is easier to keep symmetrical than 7 or 9.
8. Henna Lace Border + Finger Tip Framing

Outline a lace border along the back-hand perimeter: wrist outer edge to finger base to outer edge again. Use small repeating U-shapes and dots to build the border, keeping gaps so it looks airy. Inside the border, draw a light center vine line and two side arcs, but don’t fill them fully. Frame each finger tip with two thin arcs that mirror each other, then connect the arcs to the nearest side arc with one small leaf. Finish with a dotted line across the wrist to link the border ends.
This one gives a delicate, high-aesthetic full back hand look. A lace border runs around the back hand edges, while finger tips get framed with thin arcs that stop before the tips become too dark. It’s photogenic because the border creates a clean silhouette, and the finger framing makes the hand look longer. For year-round full back hand mehndi designs, lace borders are a solid choice when you want something pretty without turning heavy.
AvoidAvoid thick outlines on the perimeter — thick lace looks like a sticker instead of a border.
Pro tipKeep lace spacing consistent by using the same dot size for every U-shape connector.
9. Knotwork Ribbon Across the Back
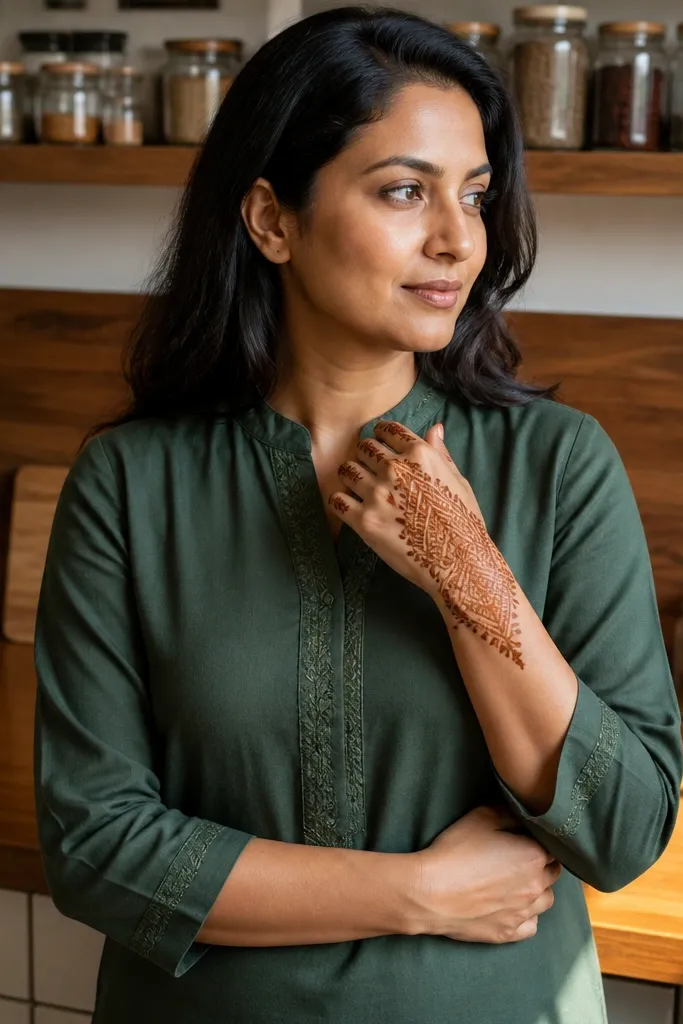
Knotwork ribbons are a strong option when you want full back hand coverage that still looks modern. The ribbon crosses the back in a diagonal flow, then breaks into smaller knots that sit between fingers. It’s photogenic because the negative space around knots makes the design look crisp, not packed. For year-round full back hand mehndi designs, this style works even on hands with shorter fingers because the diagonal flow elongates the visual.
Draw a diagonal ribbon line from the wrist inner edge toward the base of the ring or middle finger. Build knot blocks along the diagonal by outlining two overlapping loops and connecting them with a small center dot. Mirror a second ribbon on the opposite side using smaller knots so the design feels full without being identical. Add thin filler lines between knot blocks — use short curved strokes and tiny teardrops. Finish with a wrist border of 3-4 connected arcs and a light vine that runs along the diagonal’s midpoint.
Use fewer knots, but make each knot clean; messy knots ruin the whole “graphic” look.
Avoid filling every space between knots — the design needs breathing room.
10. Full Back Hand Banyan Leaf Lattice
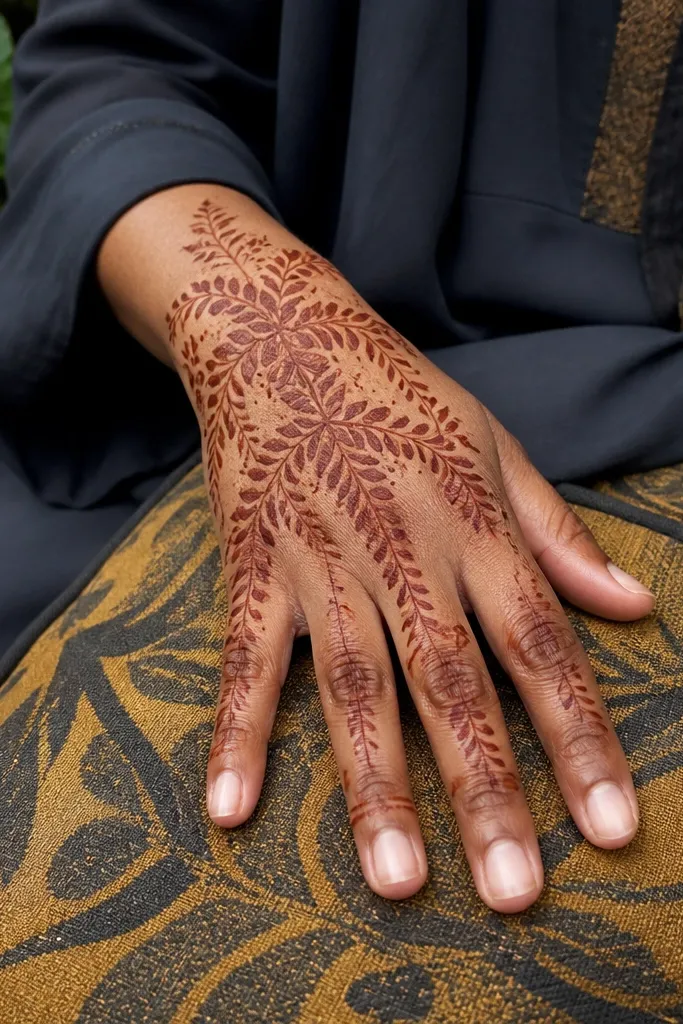
Start with a center branching line from wrist to midfinger, then split into two branches toward index and ring finger lanes. On each branch, draw repeating banyan leaf pairs — two teardrops with a shared stem line. Connect leaves between branches with thin cross lines so they form a lattice grid. Fill leaf interiors with 2-3 inner strokes and a dot at the base of each leaf. Finish by adding a wrist vine border and a few extra leaf clusters near the thumb side for balance.
This is a full back hand design that looks lush without turning into a solid fill. Banyan leaf clusters create a natural branching pattern across the back, and the lattice lines between clusters keep it structured. It’s a great year-round full back hand mehndi design for people who like botanical motifs, but want a neat, repeatable layout. The leaf shape also gives you a built-in shading plan — use dots and thin inner strokes instead of heavy black fill.
AvoidDon’t over-darken leaf interiors; thin inner strokes stain cleaner than thick fills.
Pro tipKeep leaf pairs consistent in size; one leaf that’s too big makes the lattice look uneven.
11. Temple Border + Back Palm Bands
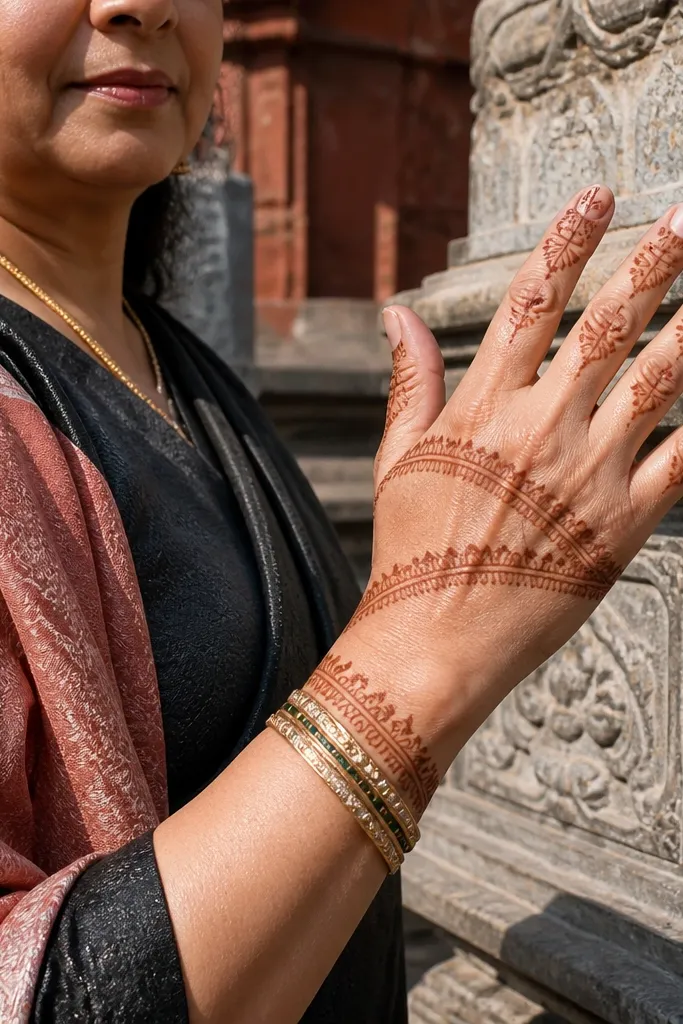
Draw a temple border along the back perimeter using small arches stacked in a repeating pattern. Then create two to three horizontal bands across the back, each band made of parallel curved lines with dot connectors. Add a small motif at the center of each band — a tiny flower or teardrop cluster. Connect band ends to the nearest finger base with short diagonal lines. Finish by adding a wrist chain border and tiny dot sparkles around the center motif.
This design borrows temple border energy but keeps it readable on the back of the hand. A temple-style border outlines the top edges, then palm-style bands sweep across the back and connect to finger base motifs. It’s full coverage without the heavy look because the bands are thin and the border does the heavy visual lifting. For year-round full back hand mehndi designs, this is a strong pick when you want something traditional but still clean and modern.
AvoidAvoid thick band outlines; thin bands keep the design airy and photogenic.
Pro tipUse 3 bands, not 4 — 4 makes the back look cramped and reduces contrast.
12. Full Hand Chain Link Finger Grid
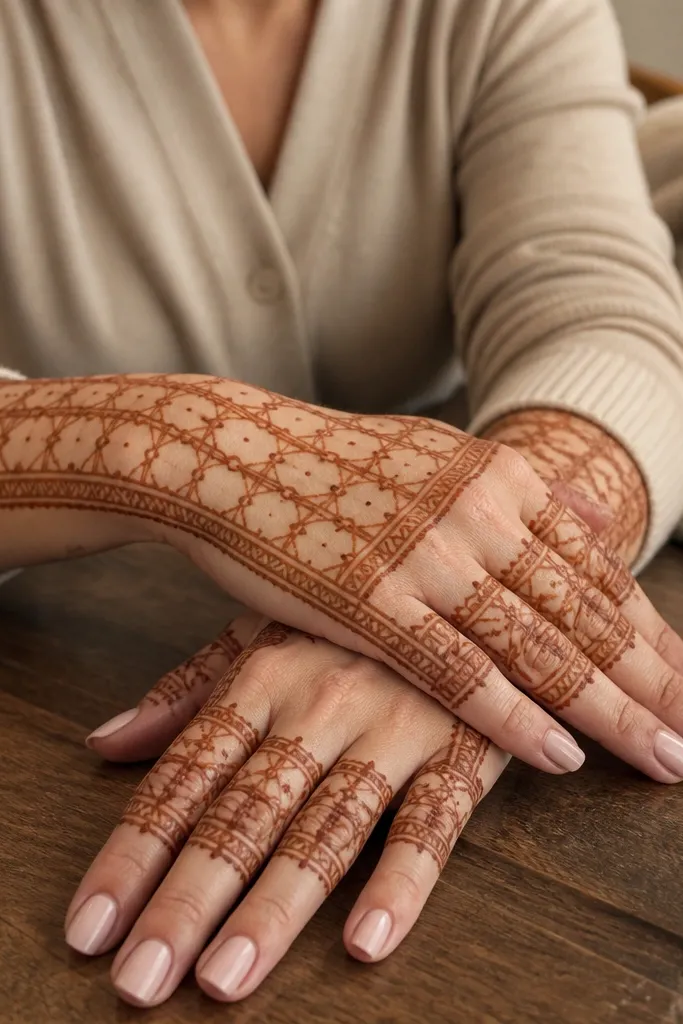
Begin with a back border that outlines the perimeter from wrist to finger bases. On each finger, draw a small chain link grid: two parallel lines around the finger base with oval links connecting them. Connect adjacent fingers by extending one or two chain link rows across the gaps between fingers. Fill the back center with a lighter vine that stops at the grid area. Finish with dots along the border corners and a wrist motif that matches the border style.
This one is for full hand coverage that still looks structured. Chain link grids at the finger bases create a “connected” look across the hand, while a back border frames everything. It’s visually striking because the chain links create uniform texture that photographs well. For year-round full back hand mehndi designs, it works because you can repeat the same grid logic on any hand size — the pattern scales nicely.
AvoidDon’t extend the grid too far down the finger; stop at mid-length for a flattering full hand balance.
Pro tipKeep chain link ovals the same width; if links vary, the grid loses its clean look.
13. Mandala Corner Clusters on Back
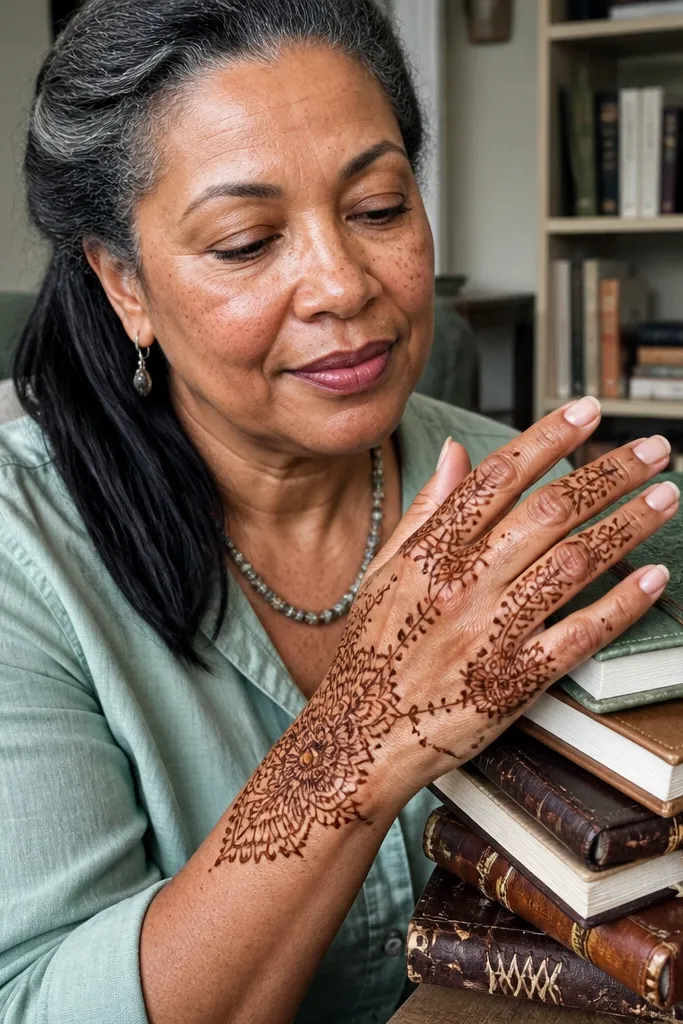
Draw a light center spine line from wrist to midfinger. Place a mandala cluster at the wrist outer corner and another at the thumb-side corner, each made of 6-7 petals around a dot center. Fill the gaps between fingers with small corner clusters: tiny 3-petal flowers connected by dots. Connect clusters to the center spine using thin vine lines that curve around knuckles. Finish by adding a light dotted border around the back edges and a small wrist chain at the bottom.
This design is a smart way to get full back hand coverage without filling the whole surface like a solid stamp. Mandala clusters sit in the corners and in the spaces between fingers, then connect with thin vine lines. It looks aesthetic because the clusters create focal points while the vine connections keep the hand from looking empty. For year-round full back hand mehndi designs, this approach hides uneven stain areas — if one cluster fades, the vine still holds the structure.
AvoidAvoid placing clusters directly on knuckle peaks; place them slightly beside so joints stay readable.
Pro tipUse smaller mandalas on the finger gaps than on the wrist corners; it keeps the design from becoming heavy.
14. Diagonal Rose Buds + Back Net
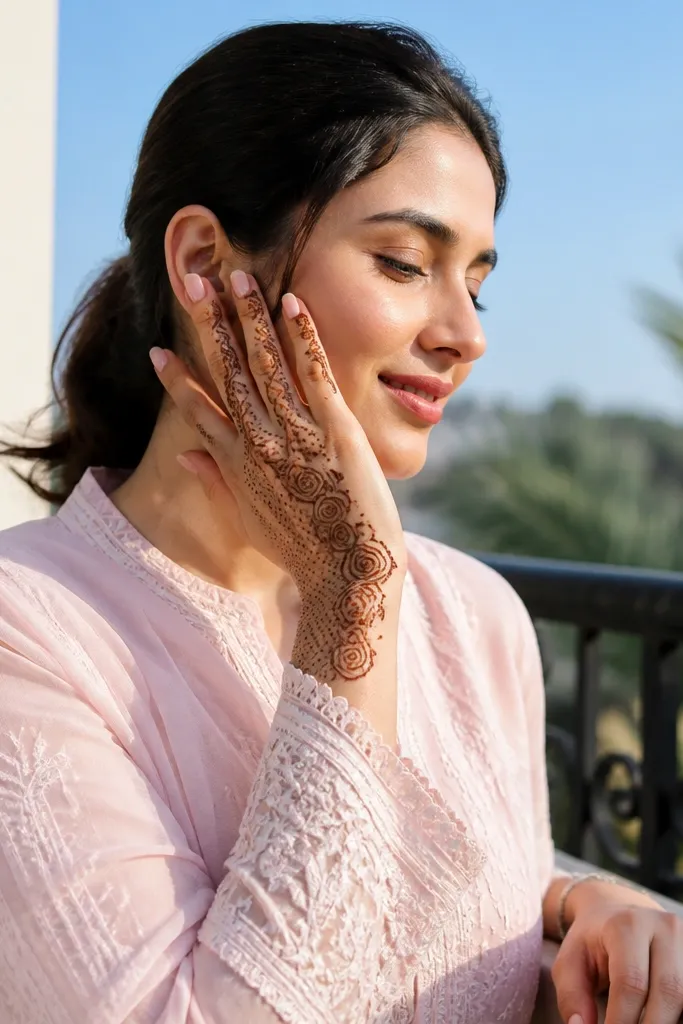
Start with a diagonal guideline from wrist center to the base of the middle or ring finger. Draw rose buds along the diagonal — each bud is a small circle with layered teardrop petals around it. Connect buds with short curved arcs so they form a continuous path. Fill the spaces between arcs with a light net: small intersecting lines and 1-2 dots per cell. Finish with a thin border around the back perimeter and tiny leaf accents near the wrist.
Diagonal rose buds give you that “full but not boring” look, and the net pattern keeps it airy. The buds sit in a diagonal line across the back, then the spaces between buds get filled with tiny net dots and short arcs. It’s photogenic because the diagonal flow pulls attention toward the fingertips, making the hand look longer. For year-round full back hand mehndi designs, this is a great everyday-to-event transition style.
AvoidDon’t make the diagonal buds identical size down the whole hand; vary slightly for a more natural look.
Pro tipIf the net looks too busy, reduce it to every other space and leave the rest as clean negative gaps.
15. Full Back Hand Sunflower Burst
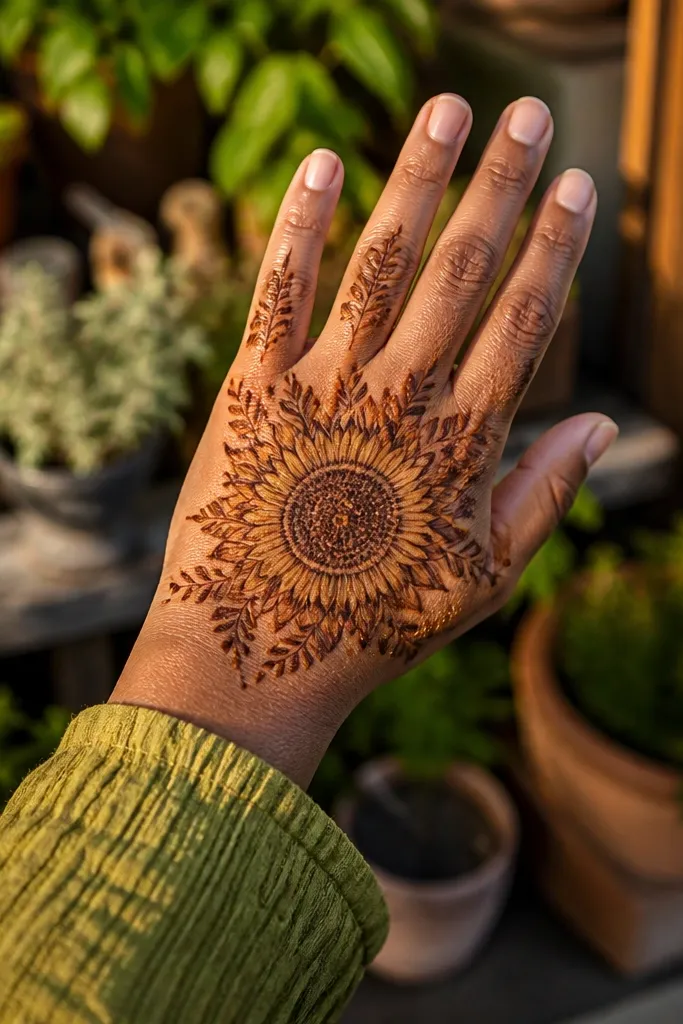
Outline a small sunflower center near the middle of the back hand. Add 10-12 petals around it using teardrop shapes, then extend each petal into a thin outer arc that reaches toward finger bases. Create three petal bands across the back by repeating the petal-to-arc idea in left, center, and right lanes. Fill the sunflower center with dense dots, then keep petal fills light with inner strokes. Finish with small leaf clusters near the wrist outer edge and a dotted wrist border.
A sunflower burst makes full back hand mehndi look bold without getting messy. The center sunflower sits near the center of the back of the hand, then petals radiate outward into finger lane arcs. Petal bands give you a clear fill structure, and the outer leaf accents keep it from looking like a single flat flower. This is a strong year-round full back hand mehndi design because it stays cheerful and readable even when the stain is lighter on some fingers.
AvoidAvoid heavy fill in every petal — the center needs contrast, not the entire design.
Pro tipKeep petals slightly separated; touching petals can merge into a dark blob on the back.



