
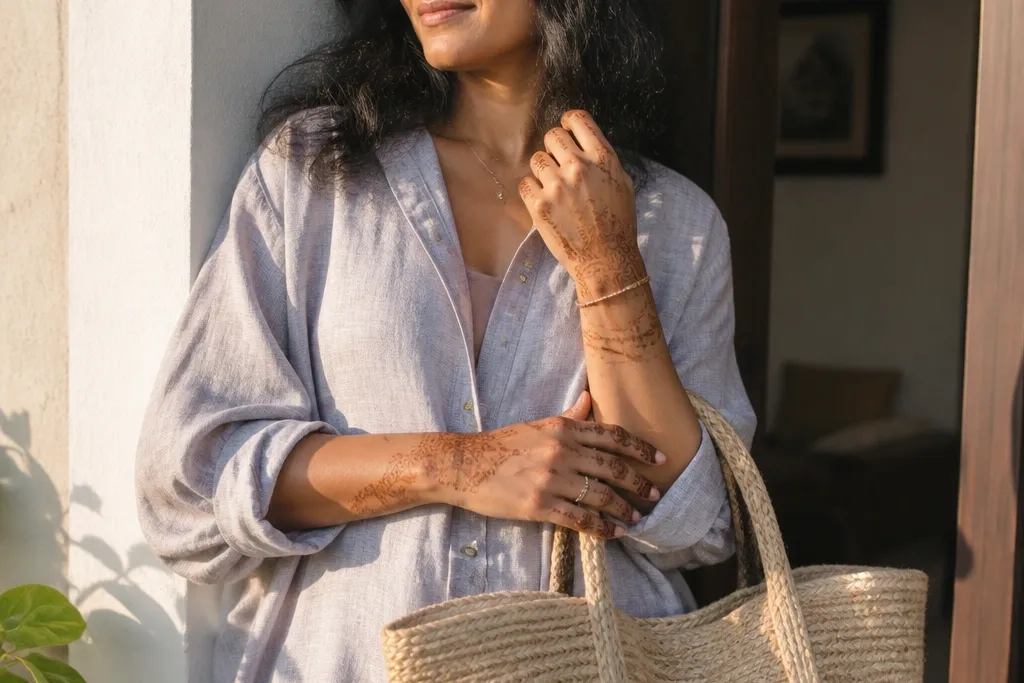

1. Thumb-Flower Crescent with Wrist Border
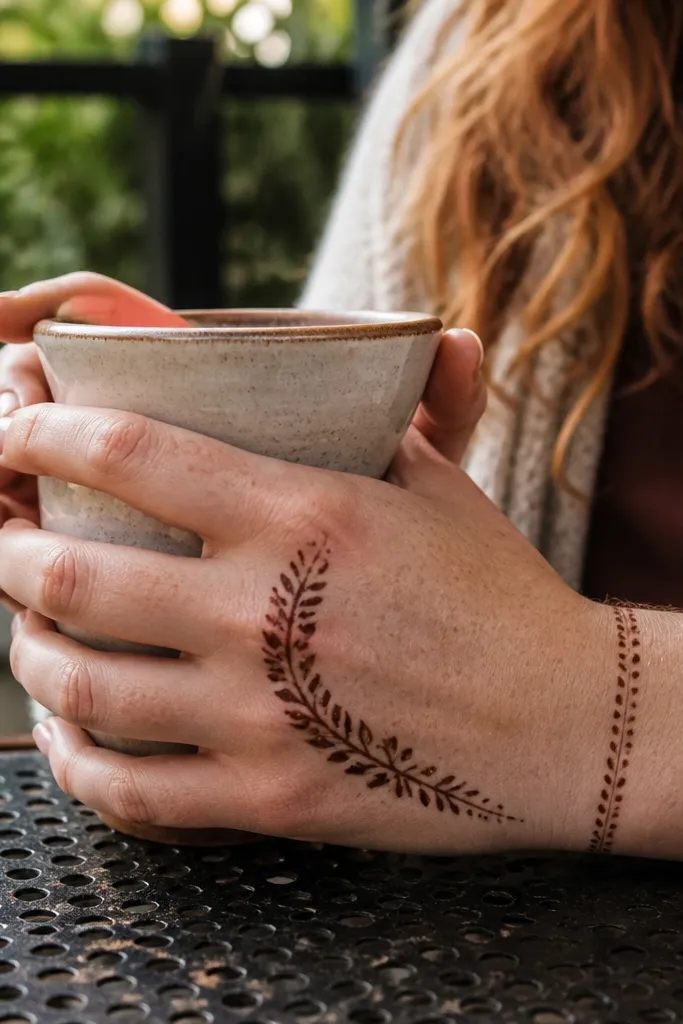
This design looks airy but finished because the main flower sits near the thumb and the crescent shape guides the eye across the hand. You get that “dreamy” airy look without covering the whole hand, so it works for everyday wear. The thin wrist border makes the pattern feel intentional instead of random. It also photographs well because the crescent creates a natural curve that shows up clearly in close shots. Skill level is beginner-friendly, and it takes about 20-30 minutes once you’re practiced with the cone.
Pro tipKeep your vine line thinner than your flower petals so the flower stays the focal point.
Start by drawing a small teardrop petal flower near the thumb crease, with 5-6 petals. Add a thin vine line that curves from the flower toward the center of the back of the hand, then mirror the curve on the other side for balance. Finish with a simple horizontal wrist border — one continuous line — and add 3 tiny dots spaced evenly above the border for sparkle.
AvoidDon’t thicken the vine line — it makes the pattern heavy and harder to read.
2. Center Palm Teardrop with Two Side Leaves
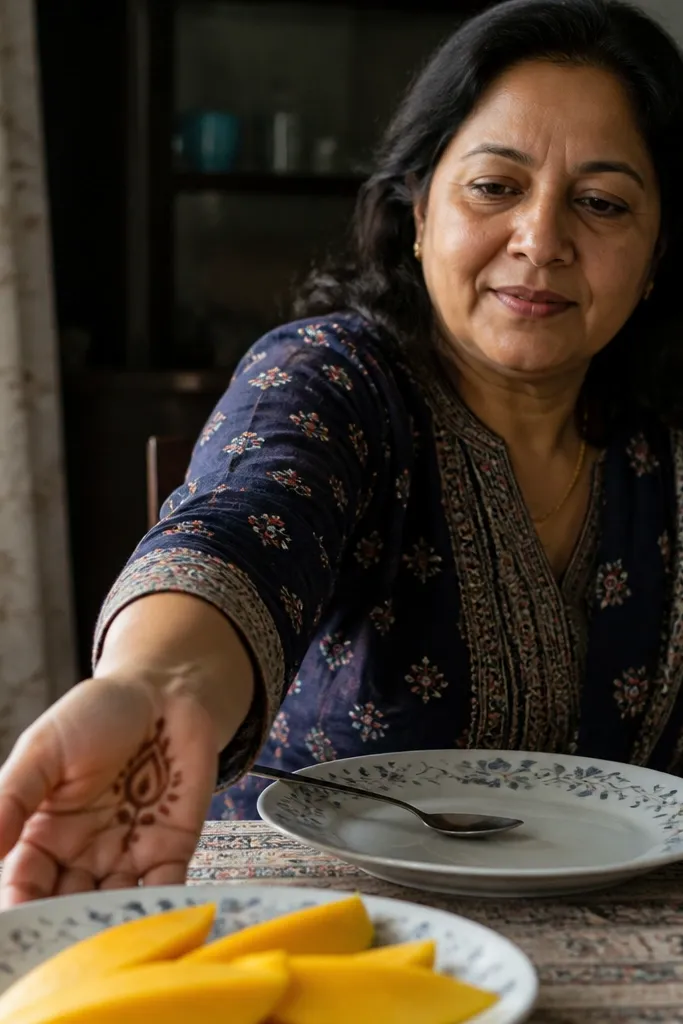
A center teardrop is the fastest way to make your hand look “designed” without filling every space. The teardrop naturally creates a focal point, and the two side leaves give it structure so it doesn’t look like a lone doodle. This is a great option for short events because it still looks strong even if the stain fades slightly around the edges. The design also works on different hand sizes because the teardrop scales well. Expect 15-25 minutes for a clean version.
Draw one vertical teardrop in the center of the palm area, starting thin at the top and widening slightly at the base. On each side, add two simple leaf shapes pointing toward the teardrop — keep them smaller than the teardrop. Add a thin outline around the teardrop base with 4-5 tiny dots to make the bottom look grounded. Let the lines dry completely before you wash.
Use a slightly wider cone tip just for the teardrop base so it looks fuller after staining.
Skip extra filler dots inside the teardrop — they blur and look messy.
3. Back-of-Hand Vertical Vine with Micro Buds
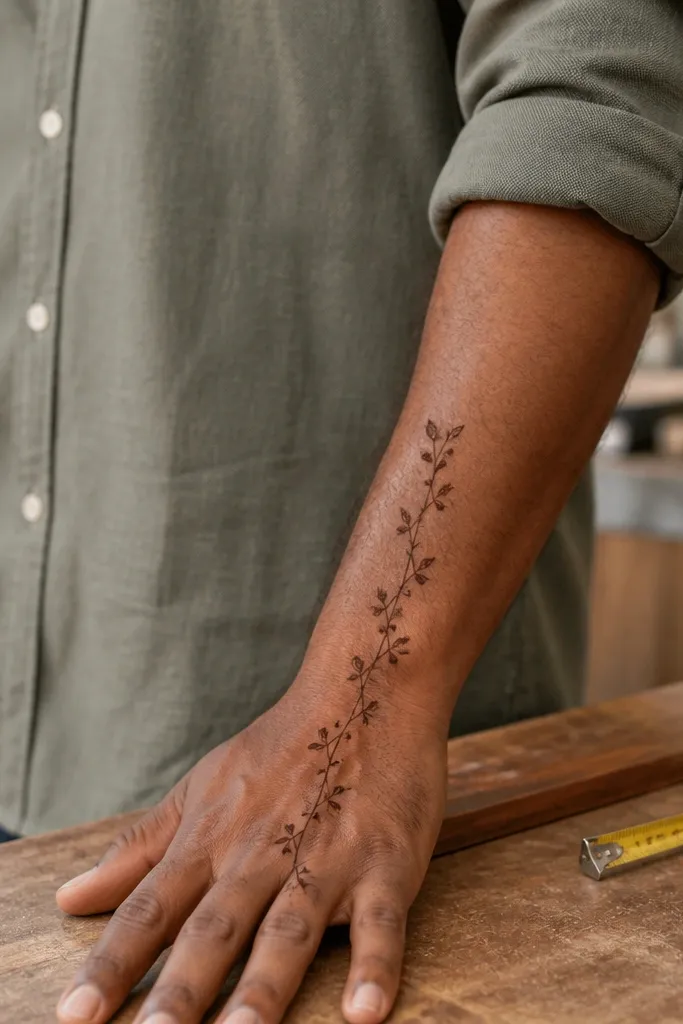
Vertical vines give you height and elegance without needing heavy coverage. This design is photogenic because the line rhythm is clear: bud, leaf, bud, leaf. It also hides small imperfections since the micro motifs break up any uneven paste lines. It’s wearable for casual days because it stays mostly on the back of the hand. Time is around 20-35 minutes depending on how many buds you add.
Start at the wrist with a thin vertical line running toward the knuckles. Place small bud dots along the line every 1-1.5 cm, then attach a tiny leaf on alternate sides. Stop around the mid-knuckle area and add a single leaf cluster near the top, using 3 leaves arranged like a fan. Finish with a light wrist underline — not a thick band.
Keep the vine line unbroken; if you lift the cone halfway, the line break shows after drying.
Don’t add large flowers — the whole point is that the buds stay small and delicate.
4. Wrist-to-Knuckle Ladder Bands
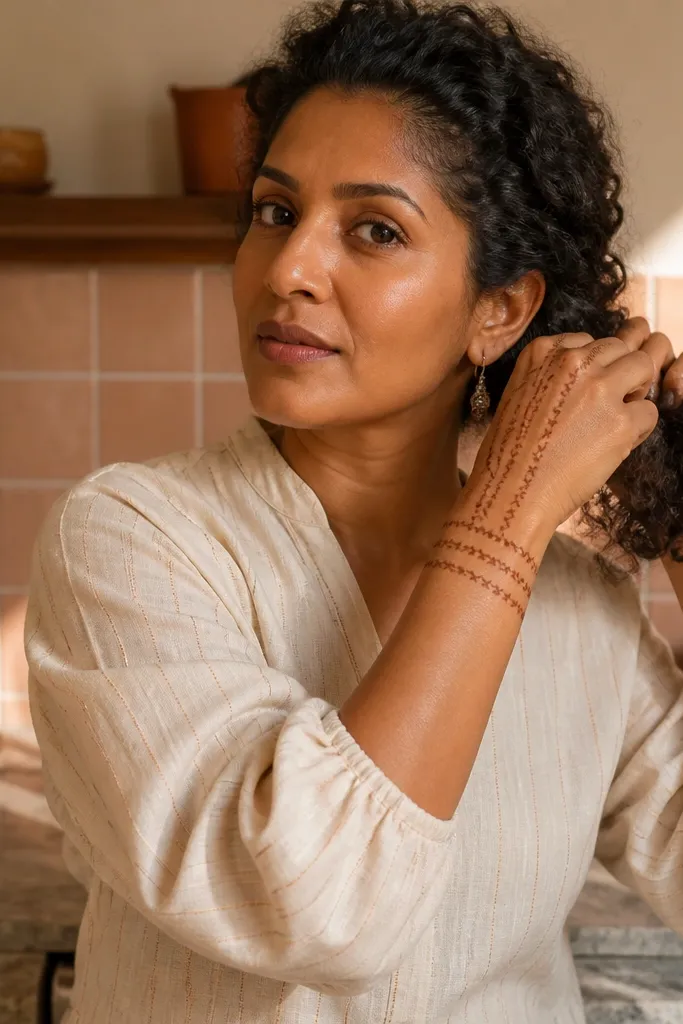
This one is deceptively pretty. Three stacked ladder bands make the hand look styled even if you’re only using simple shapes, and the tiny cross marks add a soft sparkle effect. It’s great for beginners because you’re repeating the same spacing rule. It also works for year-round wear because it doesn’t scream one season — it reads clean and modern in photos. Build time is about 15-25 minutes.
Draw a thin curved wrist band across the wrist line. From that band, create two more parallel bands moving upward toward the knuckles, leaving equal spacing between them. Add small cross marks (like plus signs with short strokes) on each band at intervals, keeping them tiny and evenly spaced. Connect the top band to the knuckle area with one short curved line so it doesn’t float.
Use a ruler or tape guide for the first band so spacing stays even across the other two.
Don’t make the bands too wide — wide bands look like smudged blocks when they fade.
5. Minimal Lotus at Thumb Base
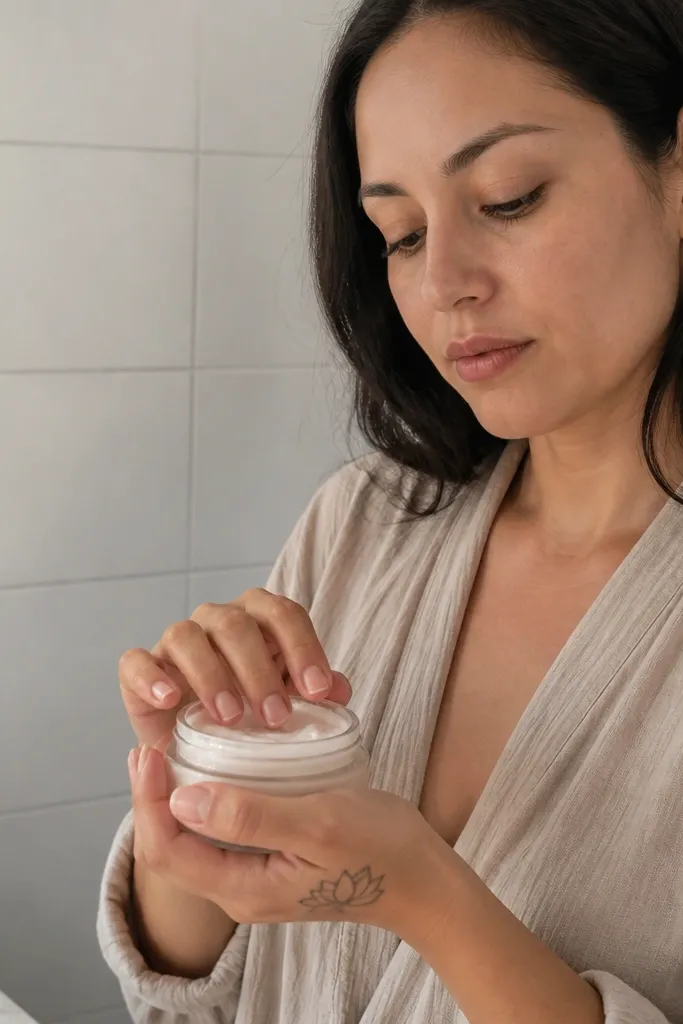
A minimal lotus at the thumb base gives you a “hand jewelry” look without covering the whole palm. The lotus shape is easy to recognize even with simple petals, and it frames the thumb nicely. This design is perfect for quick events because it still looks balanced if one edge fades. It’s also comfortable for everyday wear since the motifs are concentrated near the thumb and wrist. Expect 20-30 minutes.
Start by drawing a tiny center circle, then add 6-7 petal teardrops around it, all the same size. Place two small leaves on either side of the lotus, angled toward the center of the palm. Add a short dotted trail of 4-5 dots leading from the lotus down toward the wrist line. Finish with a thin wrist curve line underneath the dotted trail.
Keep the petal edges slightly rounded — sharp petal points can look harsh in mehndi.
Don’t add multiple flowers — one lotus plus light leaves is the whole look.
6. Single Rosebud on Back of Hand

One rosebud is a strong way to make simple mehndi look romantic. The key is restraint: keep the bloom small, then give it a thin stem that stops before the wrist. The tiny dots around the bud create that dreamy, soft texture without heavy filling. This works for both casual and formal outfits because it reads delicate rather than busy. Time is around 20-30 minutes.
Pro tipLet the petal lines overlap lightly at the center so the bud looks layered after staining.
Sketch a small oval bud near the center of the back of the hand, slightly above the middle. Add 4-5 rounded petal strokes around the oval, leaving gaps between petals. Draw a short stem line downward toward the wrist, and add three tiny dots near the stem bend. Optional: add one tiny leaf at the stem midpoint.
AvoidAvoid filling the bud with dots — it turns into a dark blob instead of a rose shape.
7. Geometric Diamond Grid on Fingers
This design is for when you want simple mehndi that still looks modern and sharp. Diamonds create a grid effect that photographs well because each shape has a clear outline. You don’t need heavy vine work — just consistent diamond spacing along the finger lines. It suits engagement photos and festive events where you want clean, geometric beauty. Time is about 25-40 minutes depending on how many fingers you decorate.
Start by drawing a thin line along the side of each finger near the nail base, then stop before the knuckle. Add small diamond shapes between fingers, keeping each diamond the same size and rotating them all the same way. Connect the diamond chain with tiny dot points at each corner intersection. Finish with a thin horizontal line across the top of the palm near the finger bases.
Use one diamond size and repeat it — inconsistent sizes are what make grids look messy.
Don’t overfill every finger space; leave breathing room so the diamonds stay crisp.
8. Palm Dot Mandala Micro-Ring
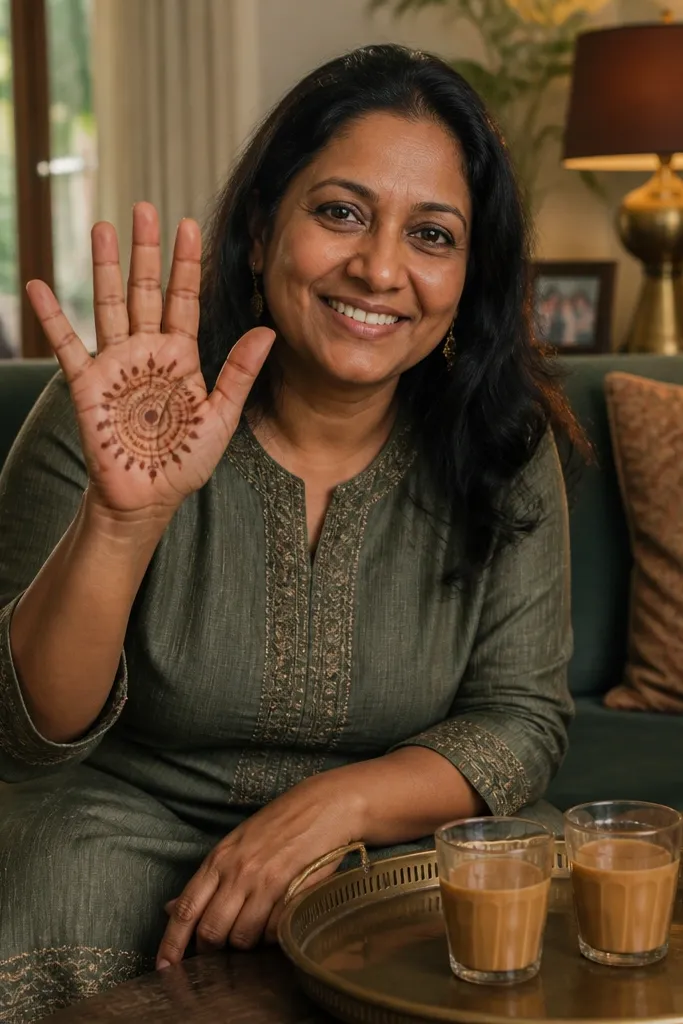
A micro-ring mandala keeps things simple but still looks “patterned.” The dot ring gives you that dreamy texture, and the few outer teardrops add dimension without turning into a full mandala. This is great for year-round wear because it looks delicate even when the stain fades a bit. The palm center focus also makes it flattering in photos. Plan for 20-35 minutes.
Pro tipMake your dots slightly larger than your teardrops so the ring stands out after washing.
Draw a small circle of dots in the center of the palm, using 18-24 dots evenly spaced. Add 6-8 tiny teardrops around the outside of the dot circle, each teardrop pointing outward. Add one thin curved line connecting two opposite teardrops to make the ring feel “held.” Finish with 3-4 dots at the teardrop tips for extra definition.
AvoidSkip thick outlines around the dot ring — it makes the design look like a stamp.
9. Wrist Chain Links with Tiny Bells
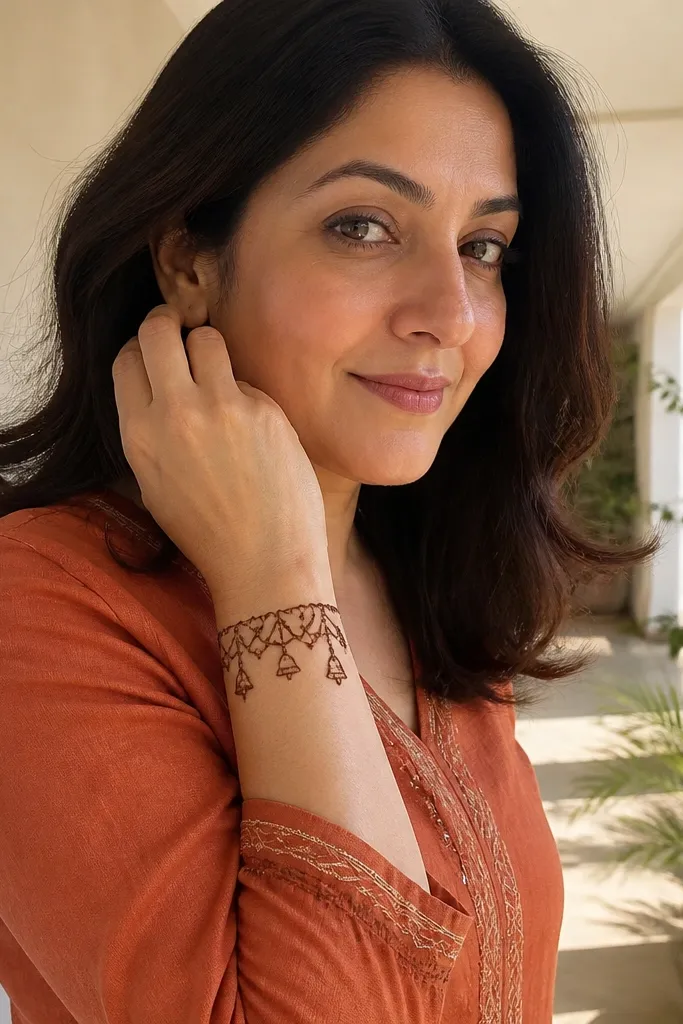
Chain links around the wrist look like jewelry and they’re surprisingly easy to do cleanly. The tiny bell-like shapes add a soft festive touch without going full heavy work. This design is perfect for events where you want the mehndi to show when your sleeves move back. It also photographs well because the wrist line is a strong horizontal element. Time is about 15-25 minutes.
Start with a continuous chain-link band around the wrist using small ovals connected side-by-side. At the center of the band, draw 3 tiny bell shapes hanging down — each bell has a small top dot and a curved base. Add two more bell shapes on either side, smaller than the center one. Finish by reinforcing the band line with a second pass only if the first pass is too thin.
Keep the chain links the same width; if one link is thicker, the whole band looks uneven.
Don’t extend the chain too far onto the hand — it stops being a wrist look.
10. Back-Hand Butterfly Trio

A butterfly trio gives you movement in a simple pattern. Each butterfly is small, so the design stays wearable and not overwhelming. The dot trails between butterflies make it look dreamy and airy in photos. This works especially well for spring events, but it also reads cute year-round because the shapes are light and spaced. Expect 25-40 minutes depending on how detailed you make the wings.
Pro tipMake the middle butterfly slightly larger so the eye lands there first.
Draw three small butterfly bodies in a diagonal line from lower wrist toward the knuckles. For each butterfly, outline two wings using curved teardrop shapes, then add 2-3 inner lines across each wing. Connect butterflies with a short dotted line between wing tips. Finish with one tiny leaf near the top butterfly to keep the composition anchored.
AvoidDon’t outline every wing detail heavily — too many lines make it look like tangled lace.
11. Finger Tip Crescent with Side Dots

This is a tiny design that still looks intentional. Crescents at finger tips read like mini hand jewelry, and the side dots add sparkle without filling the whole finger. It’s perfect when you want a neat look for daily wear, and it’s also great as a topper over a minimal base pattern. The stain usually holds up well because the motifs are compact. Time is about 10-20 minutes.
Pro tipLet the crescent ends taper — blunt ends look messy after drying.
On each visible finger, draw a small crescent near the nail base on the outer side. Add two tiny dots on each side of the crescent, spaced evenly like a small bracket. Repeat the same crescent size across fingers for consistency. Optional: add one thin line connecting the crescent to the finger side with a single stroke.
AvoidDon’t place crescents too close to the nail edge; they smudge more there.
12. Palm Vine Frame Around Teardrop
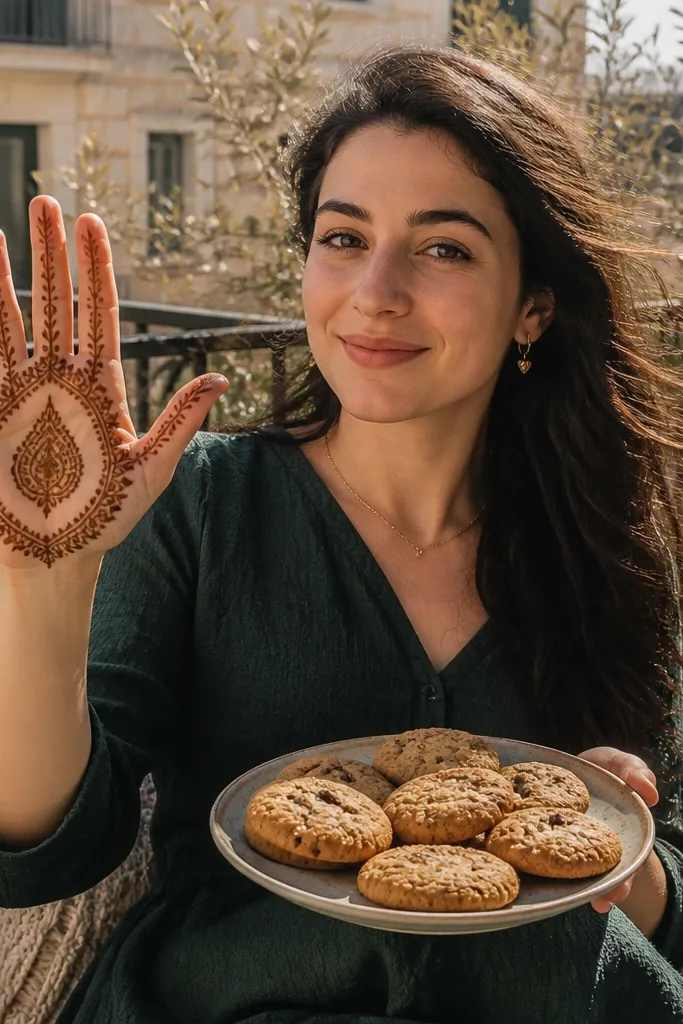
This design adds structure to the classic teardrop by framing it with a thin vine border. The vine makes the palm look complete, while the leaves in the corners prevent it from looking empty. It’s still “simple” because you’re doing one repeat pattern — leaf corners — instead of filling the whole hand. It’s a strong pick for weddings and festive dinners when you want a clean, photogenic palm. Time is around 30-45 minutes.
Pro tipSketch lightly with the cone first using a thin line, then reinforce only the final frame edges.
Draw a center teardrop in the palm, then lightly sketch a rectangular-ish frame around it using a vine line that follows the palm shape. Add one small leaf at each corner of the frame, keeping each leaf the same size. Connect the frame to the teardrop base with two thin curved lines. Finish by adding three tiny dots between the teardrop and frame lines.
AvoidAvoid thick frame lines — they look heavy and blur into the palm area.
13. Wrist Bowtie with Two Hanging Dots
Bowtie motifs look cute and polished because the shape is bold even when the design is minimal. The two hanging dots make it feel playful and dreamy without adding extra clutter. This works for short events, birthdays, and casual outfits where you want a simple hand detail. It also photographs well because it sits on a strong horizontal wrist spot. Plan for 10-20 minutes.
Pro tipMake the bow loops slightly asymmetric on purpose — perfect symmetry can look sterile in mehndi.
Draw a small bowtie at the center of the wrist using two mirrored loops. Add a thin line down the middle to connect the loops, then place two tiny dots hanging from the bowtie center — one slightly above the other. Add a short curved underline beneath the bowtie with a single stroke. Let it dry fully before washing.
AvoidDon’t add extra flourishes around the bowtie — it ruins the minimal charm.
14. Back-Hand Sunburst with Five Rays

A sunburst is one of the simplest ways to create a focal point that still looks artistic. Five rays keep it clean, and the tiny dots around the center add that dreamy sparkle effect. This design works for daytime events and also for holiday looks where you want something cheerful but not heavy. It’s beginner-friendly and quick. Time is about 15-25 minutes.
Pro tipUse the same ray angle spacing; uneven rays look crooked after staining.
Draw a small circle at the center of the back of the hand. Add five thin rays radiating outward, keeping each ray equal length and equal thickness. Place 6-8 tiny dots around the circle edge, leaving gaps between dots. Finish with one short curved line near the wrist to anchor the burst in place.
AvoidDon’t shade the center circle — filled centers turn into dark blotches.
15. Half-Moon Palm Border with Dot Steps
This is a clean, modern design that frames the palm without covering the whole area. The half-moon border gives you a strong line, and the dot steps inside add texture that looks great in photos. It’s also forgiving if your lines aren’t perfectly steady because the dots break up any minor wobble. This design is perfect for day-to-night wear and quick touch-ups. Time is about 20-35 minutes.
Draw a half-moon border across the lower palm area, with the curve following the palm base. Inside the half-moon, add 4-5 dot steps stacked like a staircase, each step slightly larger toward the top. Add a tiny leaf at the left and right ends of the half-moon border. Finish with a thin line connecting the border ends to the wrist crease.
Keep dot steps the same spacing from the border so it reads as one shape, not scattered dots.
Avoid using long continuous lines inside the half-moon; they blur more than dots.
16. Diagonal Corner Vine with Micro Flowers
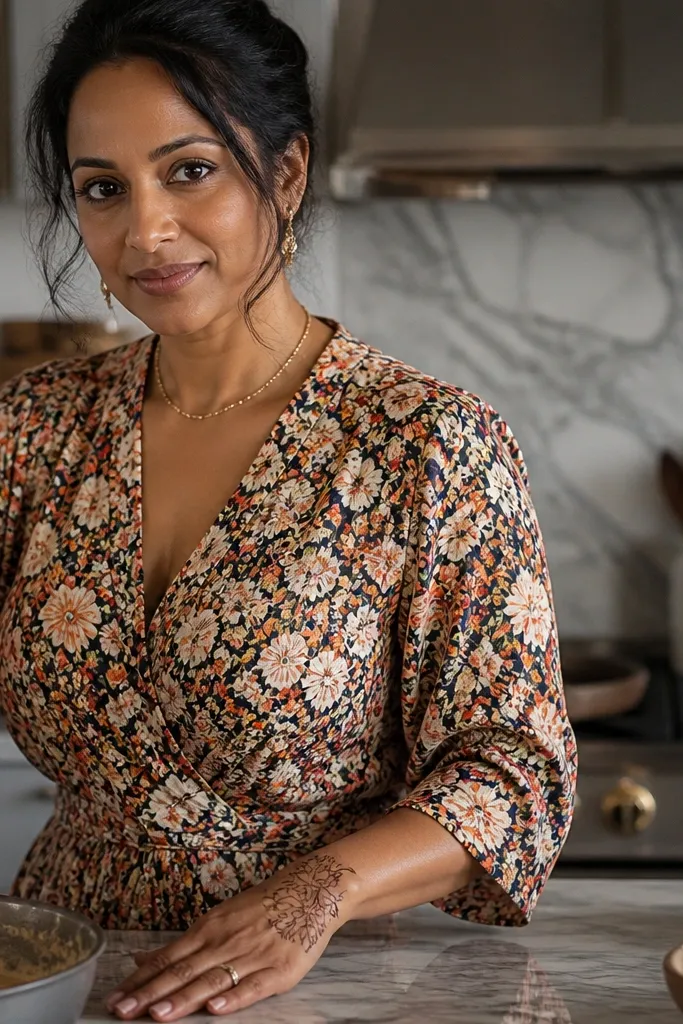
Diagonal corner vines look styled because they create a dynamic flow across the hand. You only need a small vine section plus micro flowers, so it stays simple and wearable. The corner placement makes it flattering in many hand poses, especially when you’re holding something or resting your hand on a table. This is a good pick for festivals when you want something pretty but not full coverage. Time is around 25-40 minutes.
Start at the lower corner near the wrist side and draw a diagonal vine line upward toward the center of the back of the hand. Add 2-3 micro flowers along the vine, each with 5 petals and a tiny dot center. Place two tiny leaves on the opposite side of the vine for balance. Finish by adding a small dotted border line near the top end of the vine.
Make the first flower slightly smaller than the next two so the diagonal path feels like it’s building.
Don’t crowd the corner — leave at least one “empty” space between flowers.
17. Knuckle Dot Caps with Thin Side Bands

Dot caps at the knuckles make the hand look neat and curated even with minimal work. The thin side bands give structure, and the dot caps add that dreamy sparkle effect. This design is great for people who want mehndi that doesn’t touch the palm much. It also looks good in photos because the knuckle area is where hands show detail when you gesture. Time is about 20-35 minutes.
Draw a thin vertical line along the side of each finger from near the mid-finger down toward the knuckle, leaving gaps between fingers. At each knuckle, draw a small dot cap — a row of 3-5 dots forming a short curve. Connect adjacent dot caps with one thin line on the back of the hand if you want extra cohesion. Finish with a single short wrist line.
Keep dot caps in the same curve height so your hand looks symmetrical in photos.
Avoid thick bands on fingers — they crack and darken unevenly.
18. Wrist Mandala Stripe with Three Teardrop Peaks

This design gives you a mini mandala feel without doing a full circle. Three teardrop peaks make the wrist look sculpted, and the tiny dots along the top edge add dreamy texture. It’s perfect for year-round wear because it’s compact and doesn’t fight with bracelets. The stripe also looks good when you’re wearing sleeves — it peeks out and still reads clearly. Time is about 15-25 minutes.
Pro tipMake the middle teardrop peak slightly taller for a stronger focal point.
Draw a horizontal stripe across the wrist with a thin outline and a slightly thicker middle line. Add three teardrop peaks centered on the stripe, spaced evenly, with the points touching above the stripe. Add 6-8 tiny dots along the top of the stripe between the teardrops. Finish by underlining the stripe with a single thin line for definition.
AvoidDon’t add extra side motifs — the stripe should stay clean to look premium.
19. Palm Center Star with Leaf Border
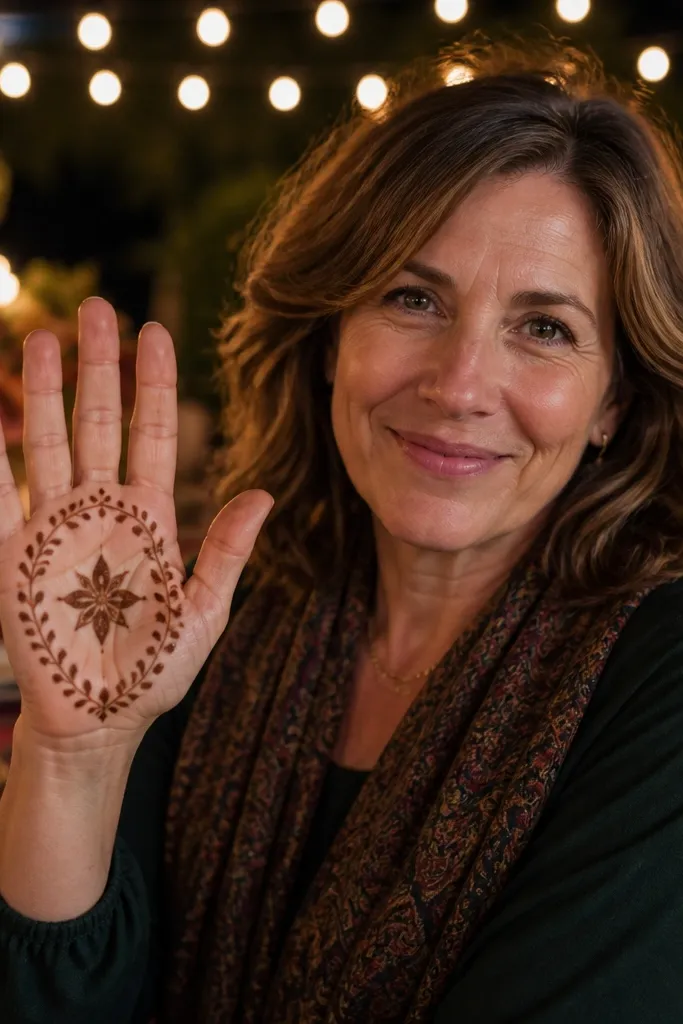
A star in the palm center is bold but still simple when you keep it clean. Pairing it with a leaf border makes the design look balanced and dreamy, not childish. This also hides uneven stain because the leaf border gives the eye more edges to follow. It’s a great choice for festive days when you want something graphic and pretty. Time is around 25-40 minutes.
Pro tipKeep star lines straight and crisp; wobbly star points look messy after drying.
Draw a small star in the palm center using 5 points, each point formed by straight cone lines that meet neatly. Add a thin leaf border around the star with 6 leaves — three on top, three on the bottom — each leaf angled outward. Connect leaf bases with a thin curved line so the border feels unified. Finish with a tiny dot at each star point tip to sharpen the shape.
AvoidAvoid shading inside the star — it turns into a dark patch.
20. Back-Hand Paisley Half Motif
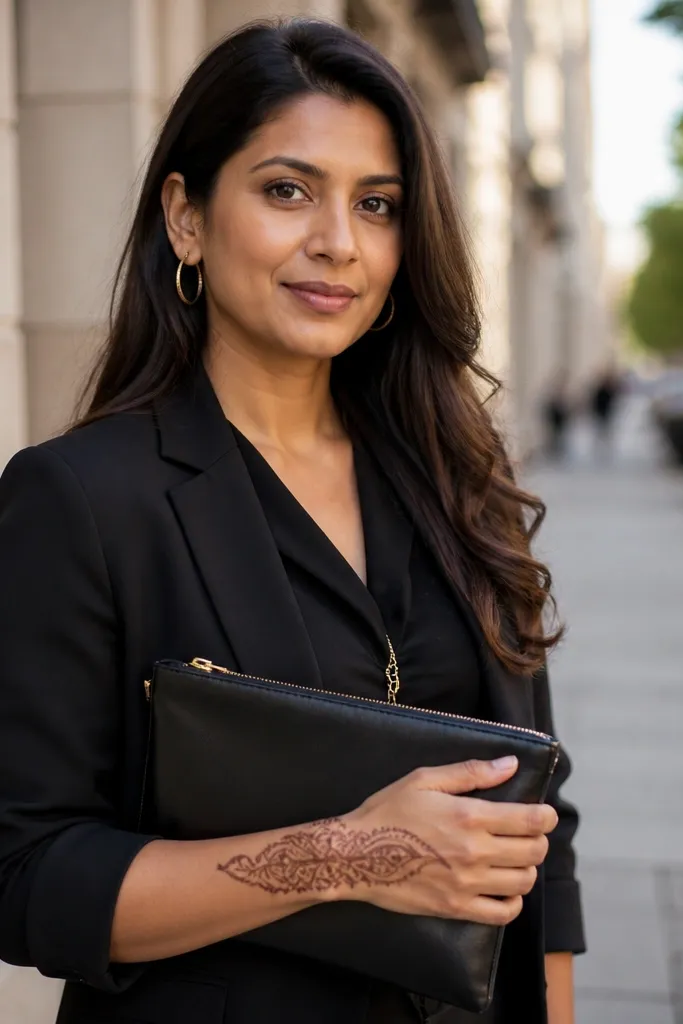
Paisley looks fancy even in a half motif, which is why it’s such a good simple design. You’re only doing one main shape plus a few curls, so it stays doable and doesn’t overwhelm your hand. The half placement on the back of the hand creates a natural “frame” effect and looks great in motion. This is a strong year-round option because paisley reads classic, not seasonal. Time is about 25-40 minutes.
Draw a half paisley shape starting near the center of the back of the hand, with the wide end near the wrist. Add a thin inner swirl line inside the paisley, leaving gaps so it doesn’t fill in. At the top curl end, add two tiny comma curls facing outward. Finish with a dotted line trailing from the paisley base toward the wrist crease.
Keep the paisley inner swirl thinner than the outer outline so it stays readable after washing.
Don’t close the paisley with a thick loop; it can smear into a blob.
21. Minimal Mehndi Frame Around Palm Edge

A minimal palm frame makes your hand look “done” without needing full coverage. The frame line defines the palm shape, and tiny leaf corners add a soft ornamental feel. This is one of the best designs for year-round wear because it works under rings and bracelets without fighting for attention. It also photographs well because the frame creates a clean border. Time is about 30-45 minutes depending on how neat you draw the corners.
Start at the wrist crease and draw a thin line along the palm edge, following the natural curve toward the thumb side. Continue around the palm edge up to the finger base area, leaving small gaps between the line segments if needed for control. At each corner where the frame changes direction, add one small leaf — 4 leaves total. Finish with three tiny dots spaced evenly along the longest side of the frame.
Use short strokes for the frame line and connect them after; long strokes wobble more.
Avoid making the frame too thick — thick frames look muddy when the stain fades.
22. Two-Tone Look with Dotted Vine and Leaf Outlines
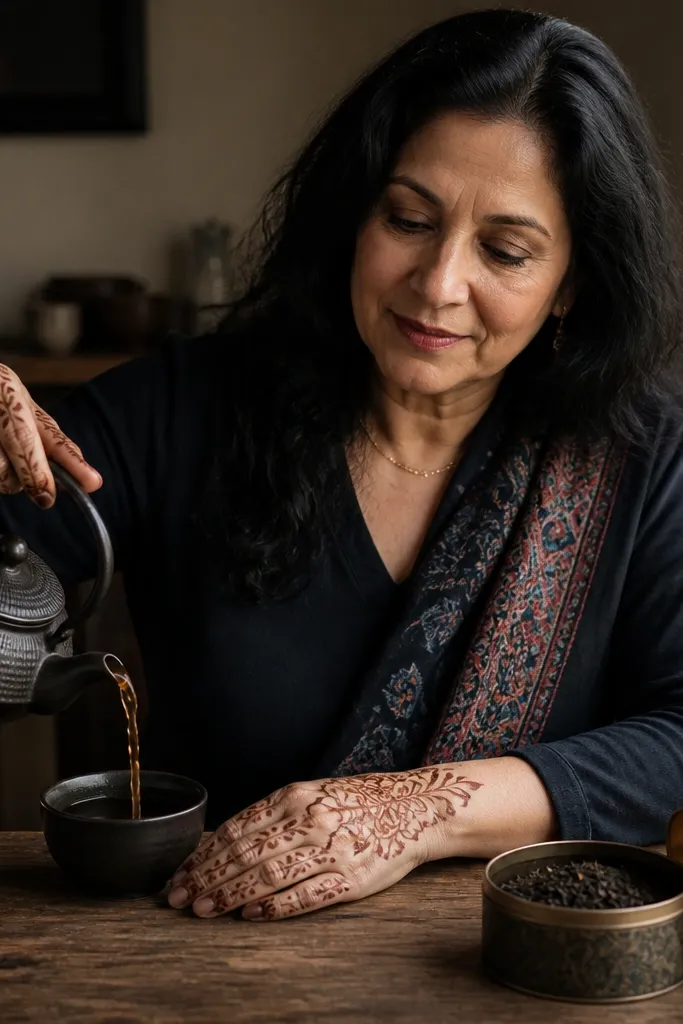
This design is about contrast: dotted vines look airy, while outlined leaves look crisp. You get a dreamy, layered look without heavy filling because the leaf outlines do the work. It’s also a smart choice if you want a design that still looks good even if the vine line fades slightly. The leaf outlines keep the pattern readable and photogenic. Time is about 25-35 minutes.
Pro tipOutline leaves in a single confident pass; double lines make them look too dark and heavy.
Draw a dotted vine line from the wrist toward the middle of the back of the hand using evenly spaced dots connected lightly. Add 4-6 leaves along the vine, but only outline them — don’t fill the leaf centers. Connect the leaves with tiny curved lines between dot groups to keep the rhythm. Finish with a small wrist underline and 2-3 extra dots near the vine end.
AvoidDon’t fill the leaves — filled leaves turn the design into a flat dark mass.
23. Ring-Finger Chain with Three Pendant Dots

If you want mehndi that looks made for rings, this one is a winner. The chain pattern sits along the ring finger and the three pendant dots pull the eye toward the center of the finger. It stays simple but still looks styled because the chain has consistent links. This is great for engagement season and holiday dinners when you want a clean, classy look. Time is about 15-25 minutes.
Draw a thin chain line along the side of the ring finger, using small oval links connected in a straight path. Place three pendant dots underneath the chain in a vertical line, with the middle dot slightly larger. Add one tiny leaf or curl at the bottom of the pendant line to keep it from looking like a random dot stack. Finish with a short wrist line if you want the finger to match the rest of the hand.
Keep the chain links tight — wide gaps make the finger look bare in photos.
Avoid placing the pendant dots too close together; separate them so each dot reads clearly.
24. Wrist Dots Spiral with One Teardrop Stop

A dot spiral is one of the easiest ways to get that dreamy, soft texture without doing complex lines. The single teardrop stop gives the spiral a clear ending so it looks intentional instead of unfinished. This design is perfect for minimalists who still want something pretty on their hands. It also works well year-round because it doesn’t rely on flowers or holiday symbols. Time is about 15-25 minutes.
Pro tipPress the cone slightly less for dot spirals so dots stay rounded, not stretched.
Draw a small dot spiral on the wrist area, starting near the wrist center and wrapping outward in 2-3 turns. Keep dot spacing even so the spiral looks smooth. At the spiral end, add one teardrop motif pointing upward. Add a thin underline beneath the spiral with one short stroke to anchor the composition.
AvoidDon’t add extra motifs around the spiral — the teardrop end is the focal point.
25. Back-Hand Crescent Frame with Three Leaf Clusters
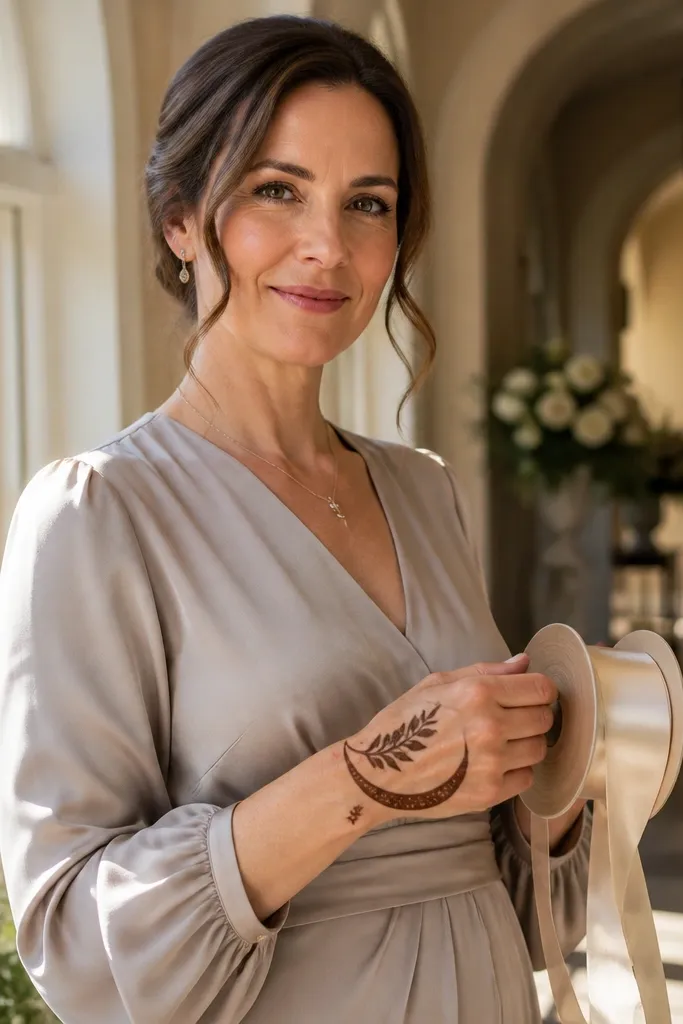
This one creates a “frame within a frame” look. The crescent outline gives you a clean border, while three leaf clusters fill the inside strategically so the hand looks styled without heavy coverage. It’s photogenic because the crescent curves show up clearly and the leaf clusters add texture. This works for weddings and festive events when you want something simpler than full bridal mehndi. Time is about 30-45 minutes.
On the back of the hand, draw a large crescent outline from near the wrist toward the knuckle area, leaving the bottom open. Inside the crescent, place three leaf clusters in a triangle arrangement — one near the center and two near the sides. Keep each leaf cluster to 3 leaves so it stays simple. Finish by adding a thin dotted line along the crescent border on the top half only.
Make the center leaf cluster slightly larger so the design doesn’t feel lopsided in photos.
Don’t fill every gap inside the crescent — empty space is what makes it look airy.



