
1. Masking Tape Calendar Strip
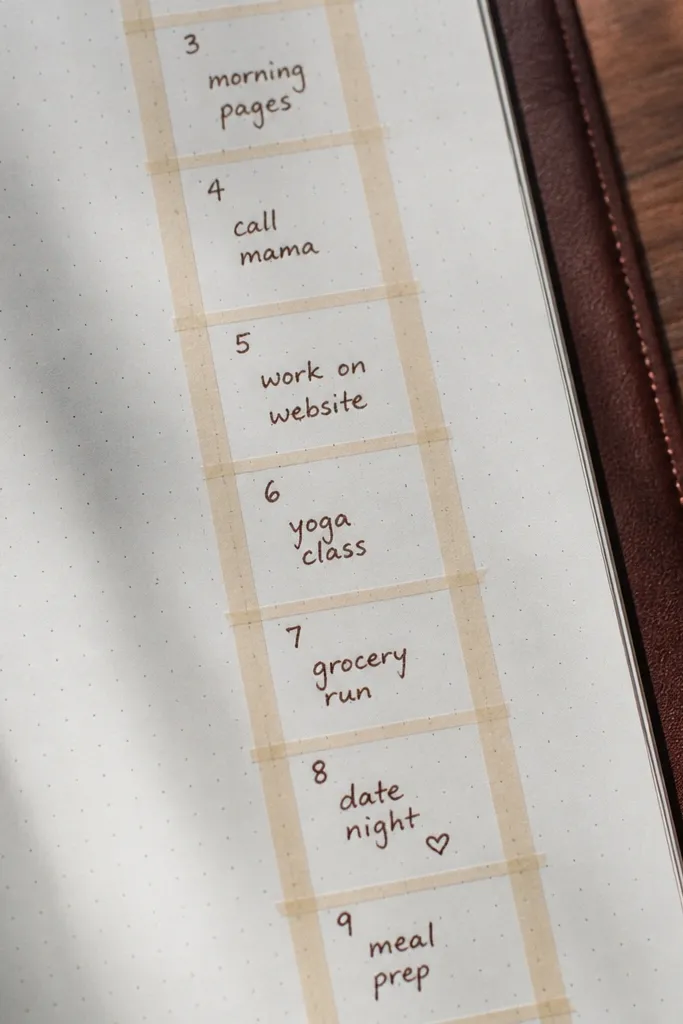
This layout looks sharp because the tape creates clean boundaries before you write anything. You’re basically building a mini calendar column, then filling it with short notes that still read visually. It’s fast because you only need a few date squares and one sentence per day. The taped edges also make the page look intentional in photos, even if your handwriting isn’t perfect. Use it in a weekly journal so each page becomes a neat record you can flip through.
Start by tearing or cutting 3 strips of masking tape and placing them vertically on cream paper, leaving a small gap between each strip. Add a ruler line under each strip and write 5-7 date boxes across the width using a fine black pen. Fill each box with a single phrase like “walk,” “call,” “meal,” or “watched.” Finish by adding one color dot per strip using a gel pen to make the page pop.
Press the tape down with a credit card edge so the lines stay crisp when you write.
Don’t stretch the tape while placing it or you’ll get wavy edges that ruin the clean look.
2. Doodle Weather Icons Row
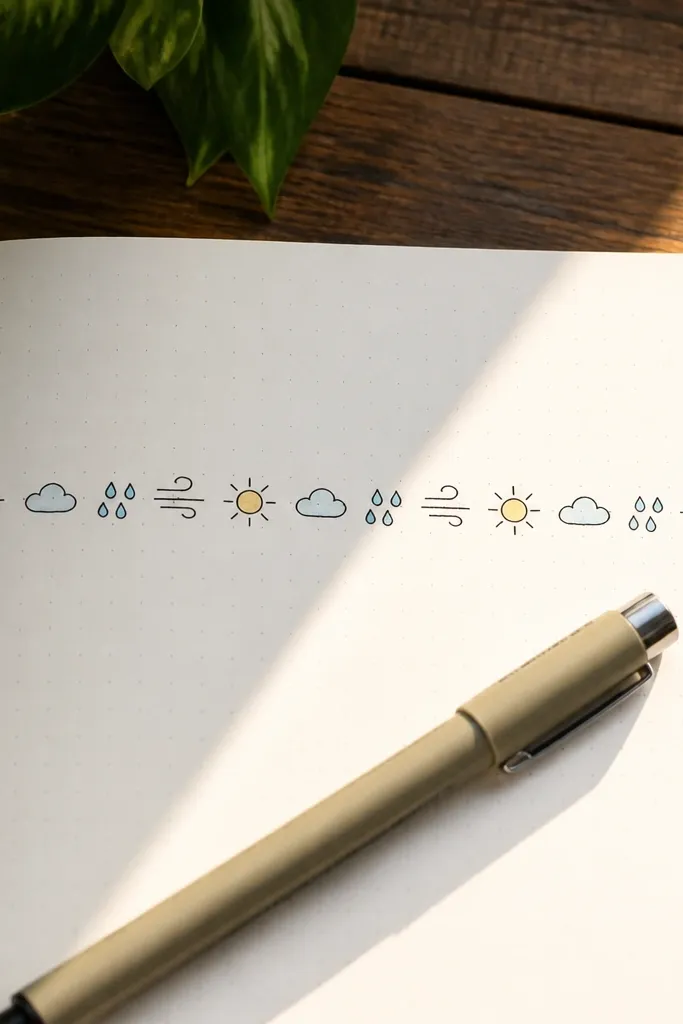
A row of tiny weather icons turns a journal page into something you can scan instantly. It’s photogenic because the icons create a repeating pattern, and the labels keep it useful. You don’t need fancy art — stick to three or four icon types like sun, cloud, raindrops, and wind lines. This works well for mornings when you have energy for quick notes but not a full page. The result feels playful, clean, and consistent across weeks.
Draw a horizontal baseline with a ruler. Sketch 7 small icon boxes along the line, each about 1 cm wide, and fill them with one weather doodle. Under each icon, write a two-word note like “fresh air” or “indoors.” Use a second color for the doodles (gray, blue, or muted yellow) and keep the text black for contrast.
Pro tipUse a pencil first for the icon boxes, then ink over the pencil so spacing stays even.
AvoidDon’t mix too many icon styles on one page or the pattern stops looking intentional.
3. Monochrome Bold Shape Page
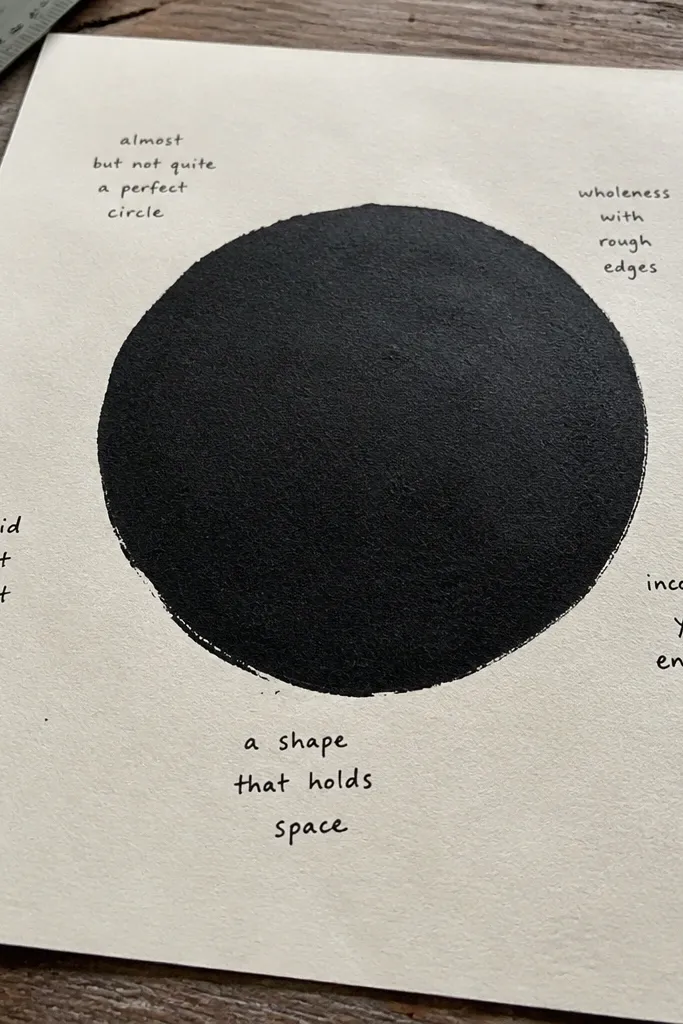
If you want dramatic photos without complicated art, do one oversized shape. This idea looks like modern graphic design: one big circle, triangle, or blob in black (or near-black) with small handwritten captions around it. It forces you to compress your thoughts into short phrases, which makes it easier to finish. The page looks clean and high-contrast, even when your writing is minimal. It’s also a great reset when you feel scattered — the shape gives structure.
Pick one shape (circle, triangle, or rounded blob) and draw it large using a compass, a bowl tracing method, or freehand with sketchy light lines. Ink over the outline with a thick black marker or fineliner. Inside the shape, write 3 short prompts in a stacked layout, like “today I noticed,” “one small win,” and “tomorrow I want.” Around the shape, add 2 tiny captions in a lighter gray pen to balance the composition.
Use a thicker tip marker for the outline and a thinner pen for captions so the hierarchy reads instantly.
Don’t add extra shapes — one big form is what keeps it photogenic.
4. Stitch-Line Page Border
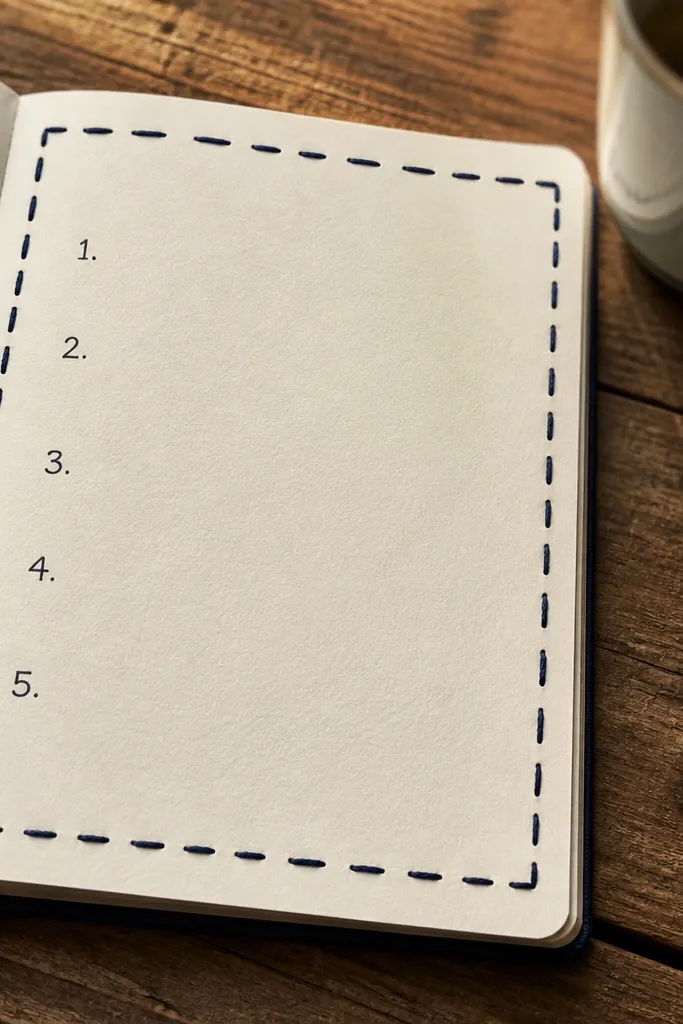
A stitched border makes a basic page look handmade in a single move. You get that cozy craft vibe without needing a sewing machine, and it photographs well because it frames the content. This layout works for any prompt — gratitude, plans, or a memory note — because the border holds everything together. Keep the center text minimal so the border stays the star. It’s also great for turning plain notebook pages into “decor” you’ll want to show.
Draw a light rectangle border about 1 cm from the page edges using a pencil. Then add faux stitches: create small loops along each side by drawing tiny “C” shapes connected by short lines. Fill the center with a simple layout: one heading and 5 bullet lines. Finish by going over the border with a black pen and erasing pencil marks once the ink is dry.
Pro tipPractice one side on scrap paper first so your stitch spacing matches across the whole border.
AvoidDon’t make the border too close to the edge or your writing will look cramped in photos.
5. Sticker Cutout Collage Quote
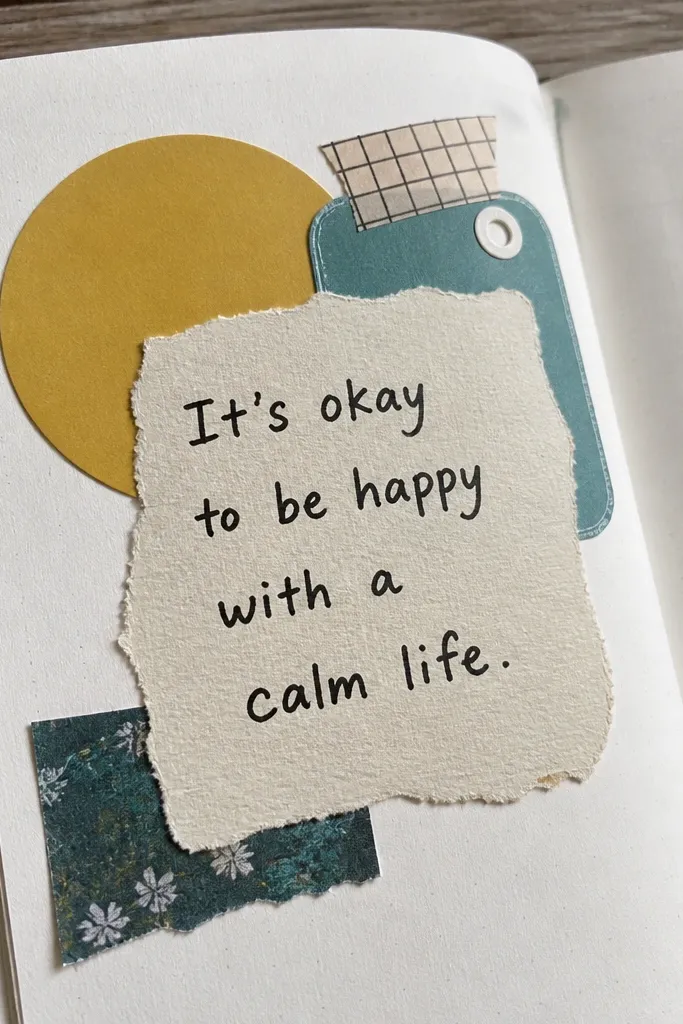
This is a quick way to make your journal look like a scrapbook page. Instead of pasting a whole sticker sheet, cut out a few shapes and arrange them like a collage around one central quote. It’s photogenic because the cut edges add texture, and the quote creates a focal point. This idea is best when you have one strong sentence you want to remember. You’ll finish fast because you’re selecting and placing, not drawing everything.
Choose 3-6 sticker shapes with different sizes and lay them out on the page before you glue anything. Cut out extra paper pieces from scrap (small circles, torn strips, or tiny stars). Arrange them around a center space and glue with a glue stick, pressing gently to flatten. Write a short quote or intention in the center using a black gel pen, then add 2-3 small dots in one accent color to tie it together.
Pro tipUse matte glue stick, not liquid glue, to avoid wrinkling thin stickers.
AvoidDon’t crowd the center — leave clear space for the quote or the page looks messy.
6. Washed Watercolor Top Stripe
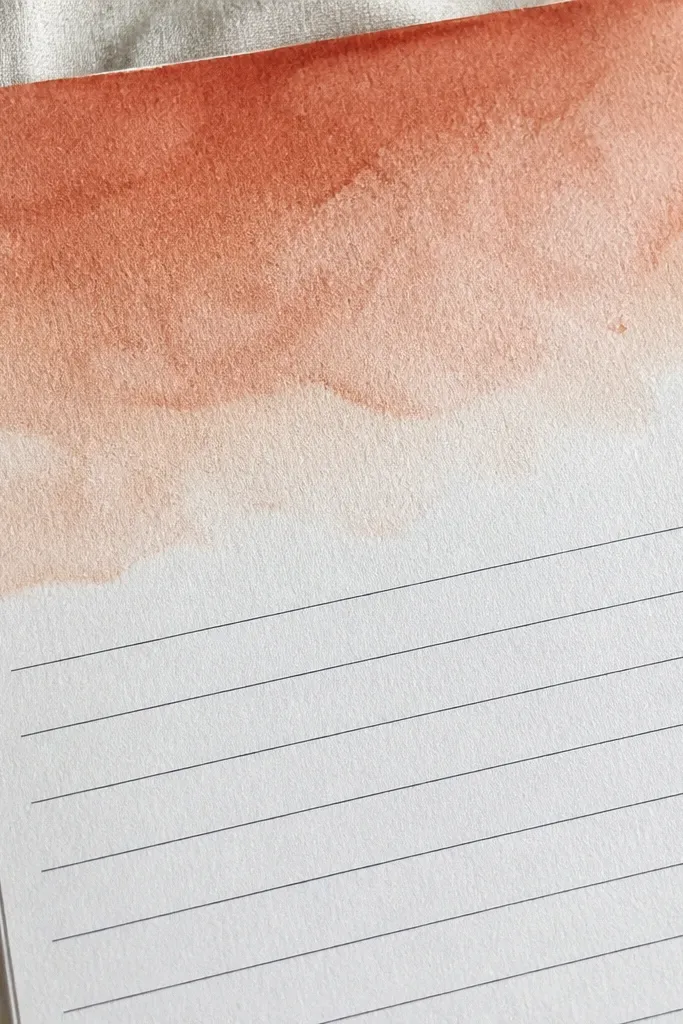
A watercolor wash stripe turns a plain page into a calm, aesthetic backdrop. The trick is to keep it to one area — a top band — so you don’t spend time painting the whole page. It photographs beautifully because the texture catches light and makes the handwriting look sharper below. This works for daily journals, weekly recaps, and mood tracking when you want your page to feel soft rather than busy. You can do it with basic supplies and still get a polished look.
Wet a strip across the top of the page lightly with clean water using a flat brush or your brush tip. Add diluted watercolor (or watercolor marker) and drag color left to right, keeping it thin so it dries quickly. Let it dry for 10 minutes, then write your title and 5 bullet notes underneath. Optional: add one small doodle in the same color near the left margin for balance.
Pro tipUse watercolor marker straight from the tip on wet paper for smoother gradients and faster drying.
AvoidDon’t paint over wet ink — write after the wash dries or your letters will blur.
7. Index Card Pocket Page
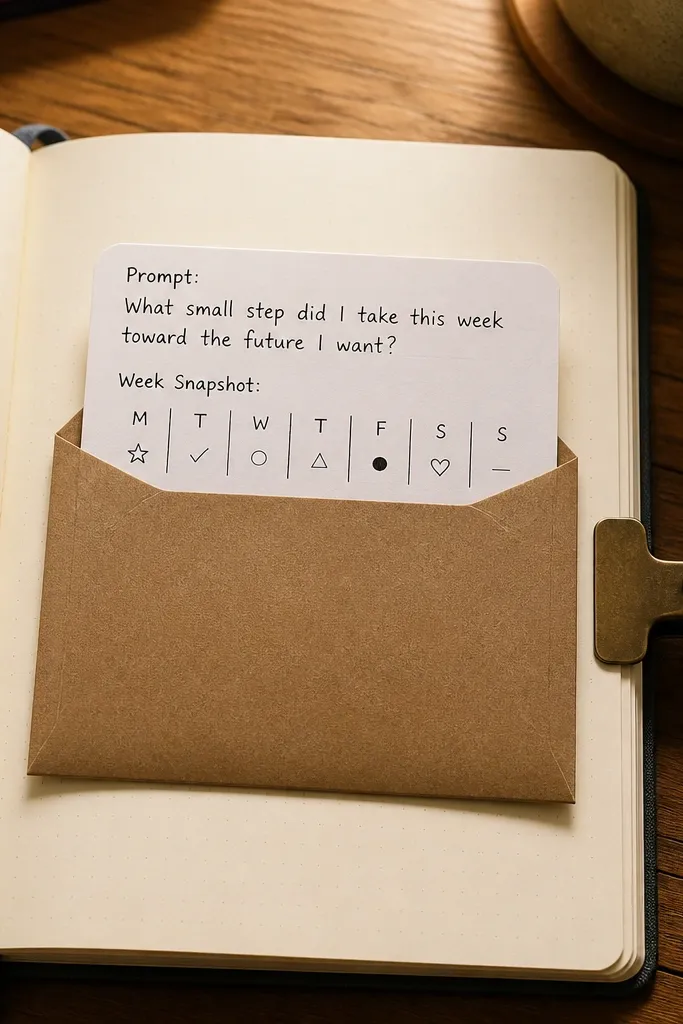
Pockets make journaling feel interactive, and the look is instantly photogenic. You’re creating a page that holds an index card with a prompt, mini list, or a “week snapshot.” It’s great for quick entries because you can swap cards without rewriting the whole page. The pocket also protects your writing and keeps edges neat. This is perfect for craft-room journals where you want your notes to feel like little artifacts.
Cut a rectangle of cardstock to fit your journal page — aim for about 10 cm by 7 cm. Fold two small tabs on the top and bottom edges of the cardstock so they can glue to the page. Glue the tabs to the inside of the pocket area on your page, then slide the index card in. Write a short header on the index card and add 3-5 lines using a fine pen.
Round the pocket corners with scissors so the paper looks softer and tears less.
Don’t make the pocket too tight; leave a 2-3 mm gap so the card slides in cleanly.
8. Dot Grid Habit Tracker With Icons
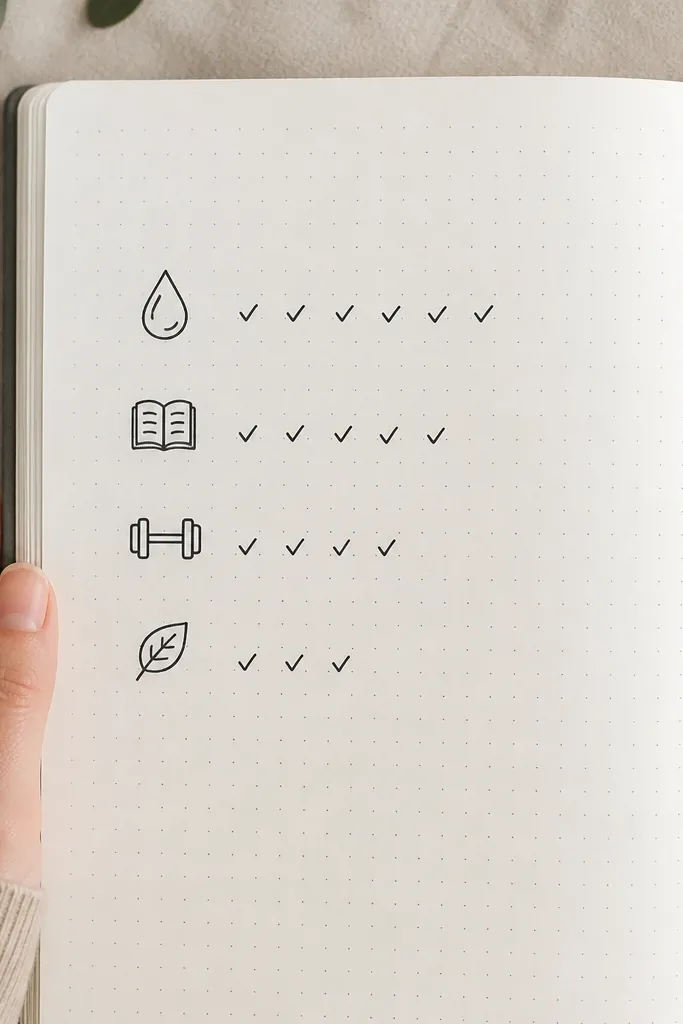
Dot grid pages already look organized, and adding icons makes them pretty. This habit tracker is fast because you’re marking with symbols instead of writing full sentences. Choose four habits and represent each with a tiny icon (water drop, book, dumbbell, leaf). The page stays photogenic because the dots make perfect alignment and the icons add color without clutter. It’s ideal for starting fresh weeks.
Use dot grid paper or draw a simple dot grid with a ruler and a dot marker. Make a table with 4 rows for habits and 7 columns for days. In the header row, label days with numbers. Fill each habit row by marking completion with a small icon in the corresponding day column, then add one sentence note in the margin: “best moment” or “hard part.”
Pro tipPick one accent color for icons and keep the rest black for a clean look in photos.
AvoidAvoid writing full paragraphs in the tracker cells — icons keep it quick.
9. Tape-Resist Color Block Words
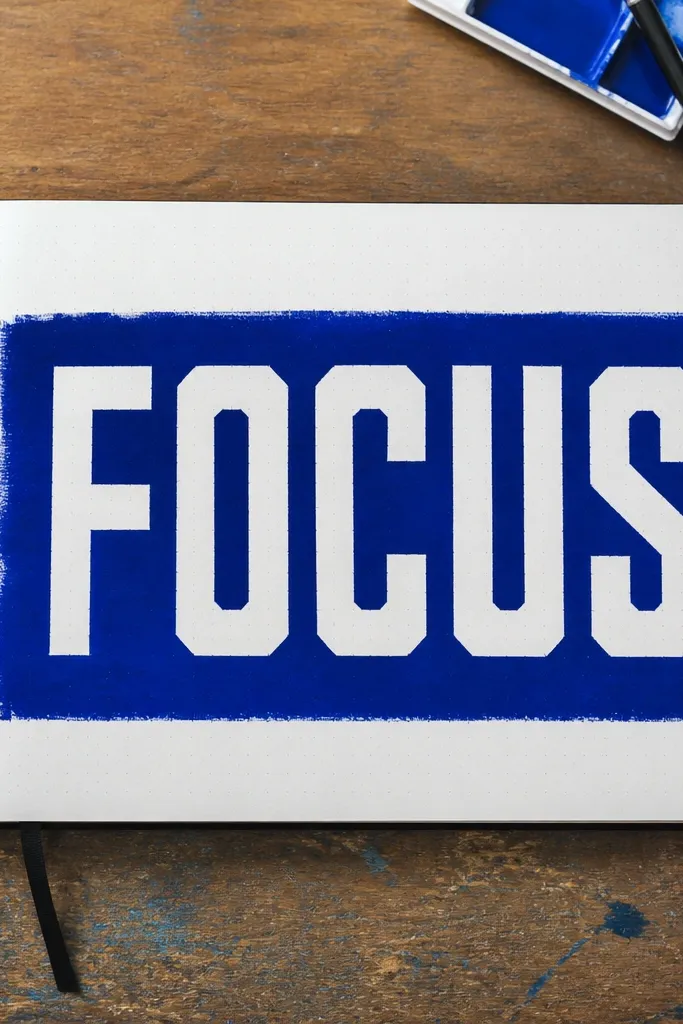
Tape-resist is one of those crafts that looks fancy but is simple. You create bold letter shapes using tape as a mask, then paint behind and peel the tape for sharp edges. The result is graphic, clean, and very Instagram-friendly because the color boundaries are crisp. Do it with one word only — like “CALM,” “FOCUS,” or “TODAY” — and pair it with a short note below. This is a great option when you want a statement page fast.
Write your one word lightly in pencil as a guide, then place washi tape strips to outline each letter shape. Paint over the taped areas with watercolor or diluted ink, covering the background around the letters. Let it dry completely, then peel the tape slowly from one corner to keep edges clean. Finish by writing 3 short bullet notes under the word in black pen.
Pro tipUse thinner washi tape for tighter letter corners and cleaner peel results.
AvoidDon’t move the tape after painting starts or you’ll get smudgy boundaries.
10. One-Line Per Day Skyline
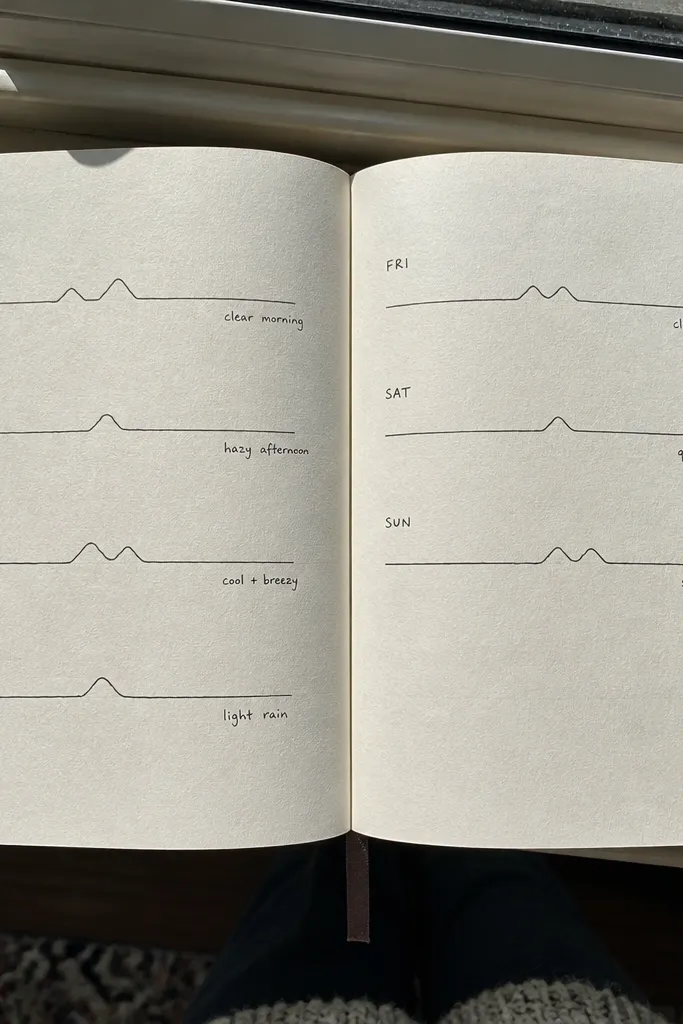
This idea creates a visual record without needing detailed drawing. Each day gets one skyline line — a simple horizon with 2-3 peaks — and you write a tiny caption next to it. Over a week, the page turns into a mini “story” you can see instantly in photos. It’s fast because each line is small and repetitive. It also works for travel-style journals when you want mood and place cues without writing paragraphs.
Draw a baseline across the page about 2 cm above the bottom margin. For each day, make one skyline shape above the baseline using a black fineliner — keep it to three peaks max. Add the date in small text under each skyline. Color one peak per day with a single accent color so the week looks coordinated.
Keep skyline heights different on purpose — variation makes it look designed, not copied.
Don’t over-detail the buildings or it stops being quick.
11. Rainbow Margin Mood Scale
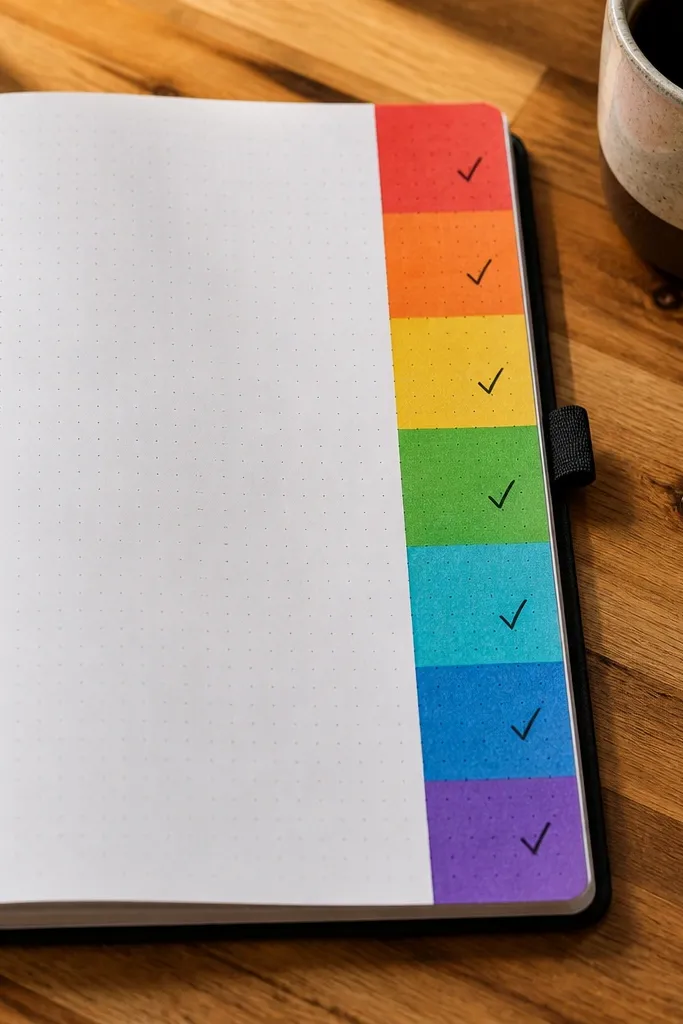
Mood tracking looks better when it’s visual, not just numbers. This margin scale uses a small rainbow bar and lets you mark one point per day. The page stays photogenic because the color is confined to the side, and the rest of the page can stay clean for writing. It’s quick because you only need one checkmark and one short label. Use it for daily journaling when you want honesty without long entries.
Draw a vertical bar along the left margin and divide it into 7 sections with a ruler. Color each section with one gradient step using colored pencils or markers, from muted red to muted green. For each day on the main page, write the date and place a checkmark aligned with your mood section. Add one sentence below your checkmark explaining the mood in plain words.
Pro tipUse colored pencils if you want softer, less streaky color in photos.
AvoidDon’t use neon colors — they look harsh and cheap on paper.
12. Three-Frame Life Snapshot
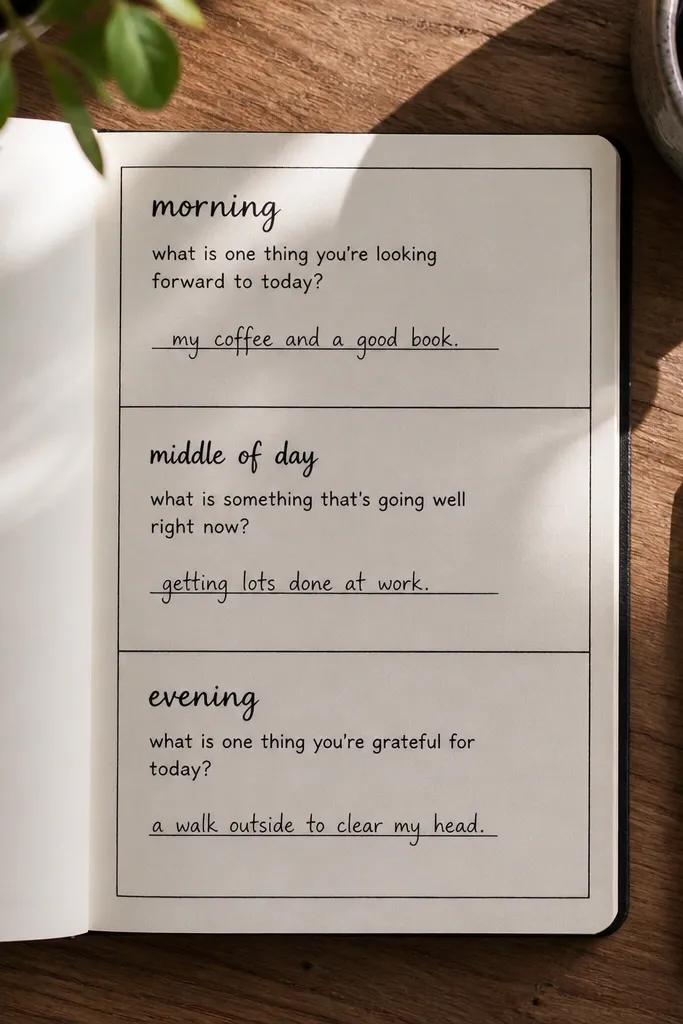
Three frames force clarity. It’s a layout that gives you structure for one page without turning into a long essay. Each frame has a different prompt, like “morning,” “middle of day,” and “evening,” or “problem,” “help,” and “result.” The page is photogenic because the frames create a clean grid and each frame can have a different accent color. This is a strong choice for busy weeks where you still want a record.
Draw a rectangle grid with 3 equal vertical frames on your page using a ruler. In each frame, write a prompt title at the top. Fill the frame with 2 short lines and one tiny doodle that matches the vibe (a sun for morning, a phone icon for a call, a star for a win). Color the doodles only — keep the text black.
Use a ruler for the frame lines, then add a thick black outline to one frame for a focal point.
Don’t add extra frames — three is what keeps it fast.
13. Coffee Stain Typography Header
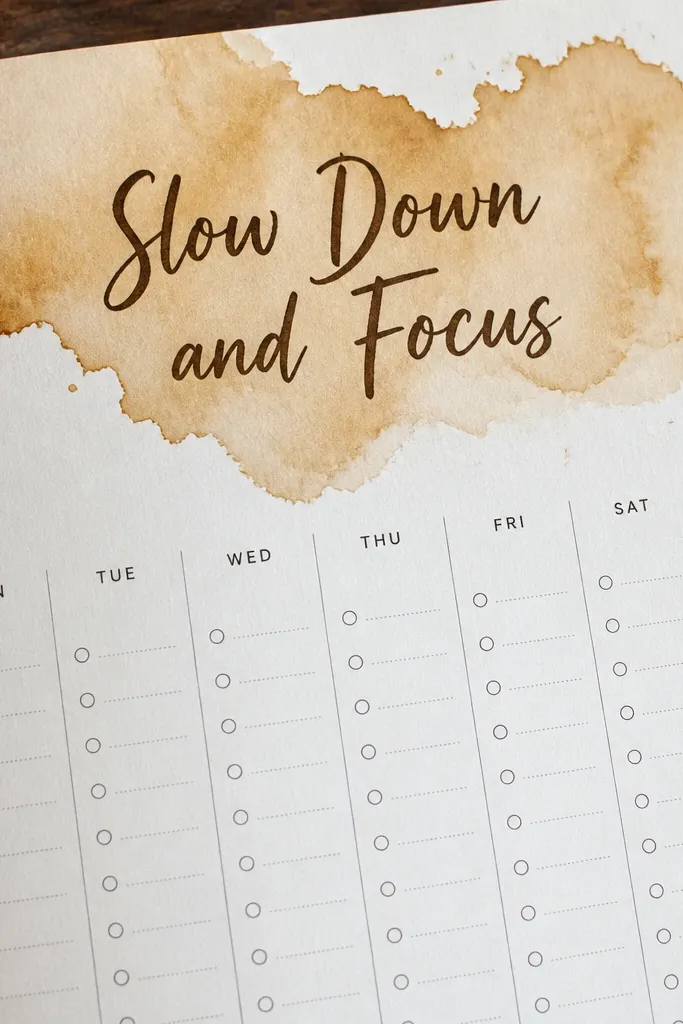
You get instant warmth on the page with a coffee-stain header. The texture looks vintage and soft, and it makes your handwriting pop without needing decorative tools. This works best for weekly planning pages, because you can put the week theme in big handwriting under the stain. It’s also surprisingly easy: you’re not painting complicated shapes, just creating a light stain wash. The finished page looks cozy and intentional in photos.
Brew coffee and dilute it with equal parts water so it soaks lightly. Use a brush to paint a broad horizontal oval or rectangle at the top of the page, leaving edges softer. Let it dry fully, then write your title in bold black pen right below the stain. Add 4 bullet lines for the week plan or a short gratitude list underneath.
Test the dilution on scrap paper first so the stain isn’t too dark for your ink.
Don’t use glossy paper; coffee beads up and looks uneven.
14. Pressed Leaf Corner Bookmark Page
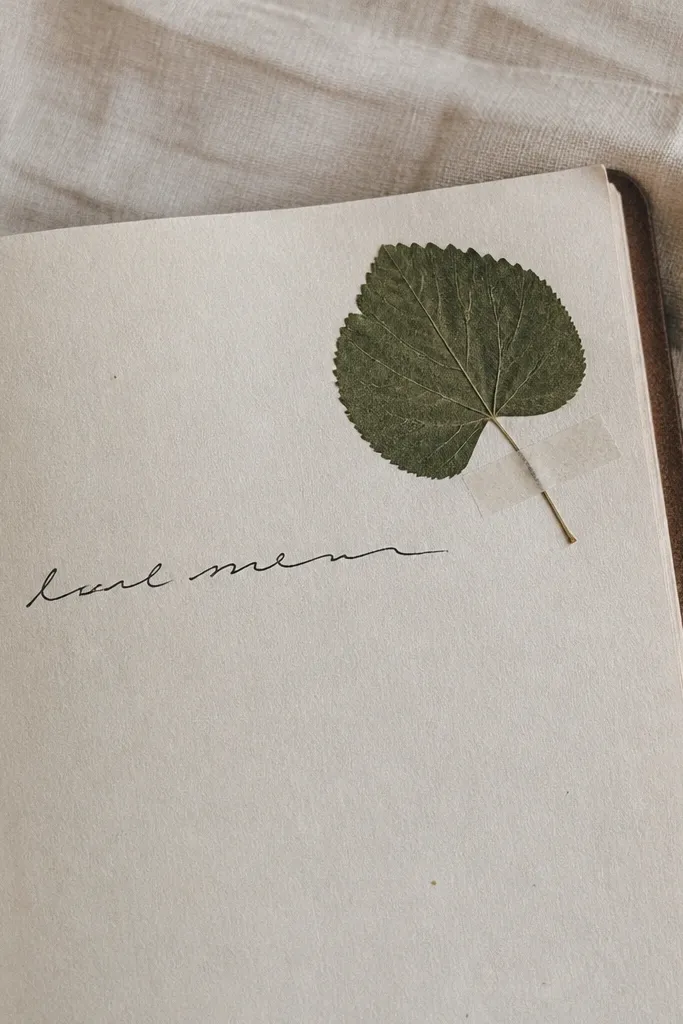
This is a decor-forward idea that also functions like a bookmark. You press a small leaf or flower, glue it in the corner, and write a short line beside it. The look is delicate and natural, and the corner placement keeps the page from getting crowded. It’s quick because the “work” is done by the pressed item — you only add one sentence. Use it as a divider page between sections in your journal.
Press a leaf flat ahead of time with paper and a heavy book for 1-2 weeks. Glue the dried leaf to the corner of the page using a thin layer of glue stick or archival glue. Write a short phrase along the margin using a fine pen, keeping it to 6-10 words. Finish by adding one tiny dot pattern near the leaf stem to tie it in.
Seal the leaf with a thin clear tape strip over it if your journal gets handled a lot.
Don’t glue fresh plant material; it will smear and discolor the page.
15. Washed Ink Splash With Clean Quote
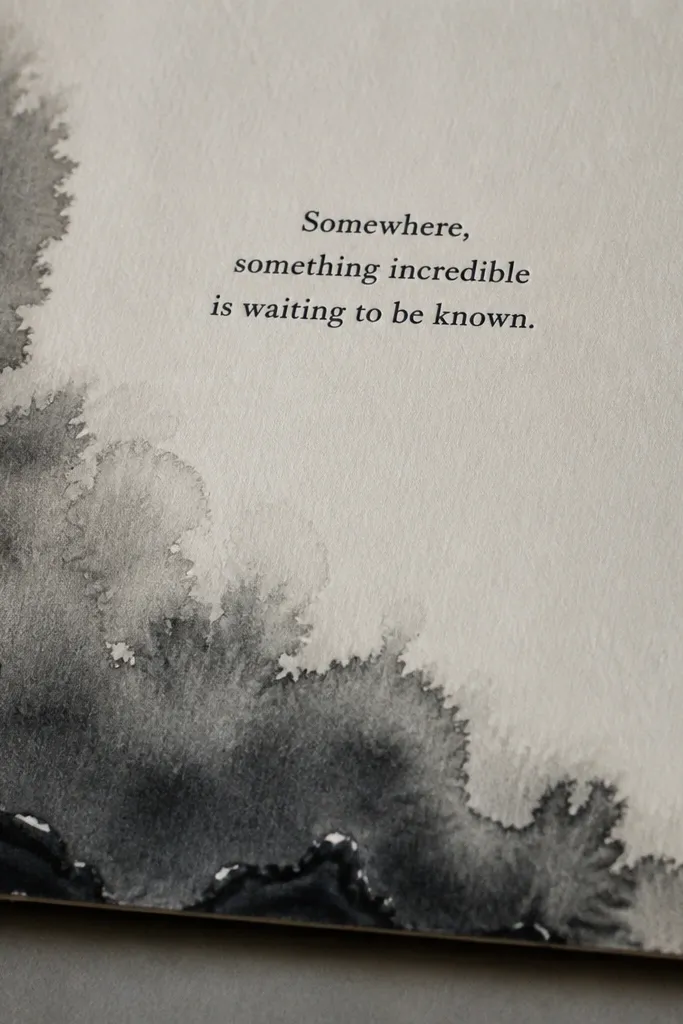
Ink splashes add energy without clutter when you keep them in one corner. This layout looks clean because the quote area stays blank and organized, while the splash provides texture. It’s a strong choice for a “weekly intention” page or a page where you want one line to carry the whole entry. The photo looks artsy, but the actual journaling is simple: a quote block and a few bullets. You get a finished page fast.
Choose one corner and drip diluted black ink or diluted watercolor using a brush tip. Tilt the page slightly so the splash spreads naturally, then set it aside flat to dry. In the center, write a quote or intention in 3-5 lines using a black gel pen. Under the quote, add 3 bullet points with short phrases.
Use a scrap piece of paper under your page while splashing to protect your table.
Don’t splash near the text block or it will muddy the handwriting.
16. Ruler-Perfect Checklist With Numbered Squares
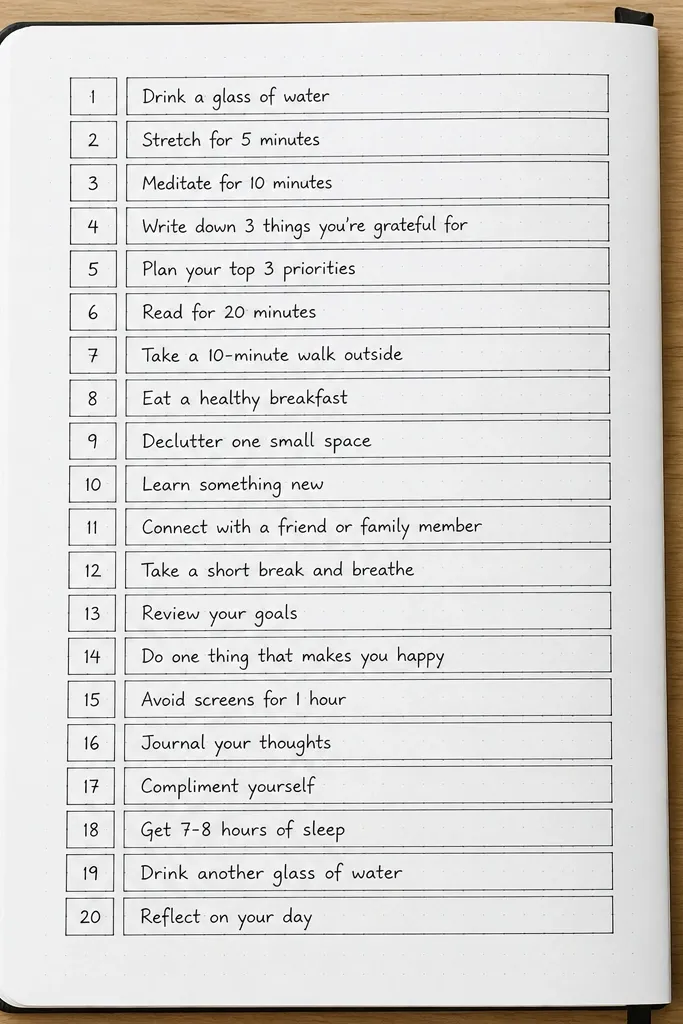
A checklist page looks tidy and satisfying because the boxes create structure. Numbered squares make it feel designed, and the layout stays readable in photos. This is the fastest option for “I don’t know what to write” days because you can list tasks, reminders, or self-checks. Keep each item short — one line — so you finish within the timer. It’s also a good way to document progress without long journaling.
Draw a single column of 8 numbered squares using a ruler, each about 2 cm wide. Write the numbers in the top-left corner of each square. Fill the boxes with one-line prompts like “reply,” “tidy,” “stretch,” and “plan.” Use an accent color to fill the square number or underline the prompt text, then add a final empty square labeled “next.”
Use a fine black pen for boxes and a felt-tip for the accent so lines stay crisp.
Don’t make the boxes too small or the page turns cramped and hard to read.
17. Tape Frame Photo-Style Title Page
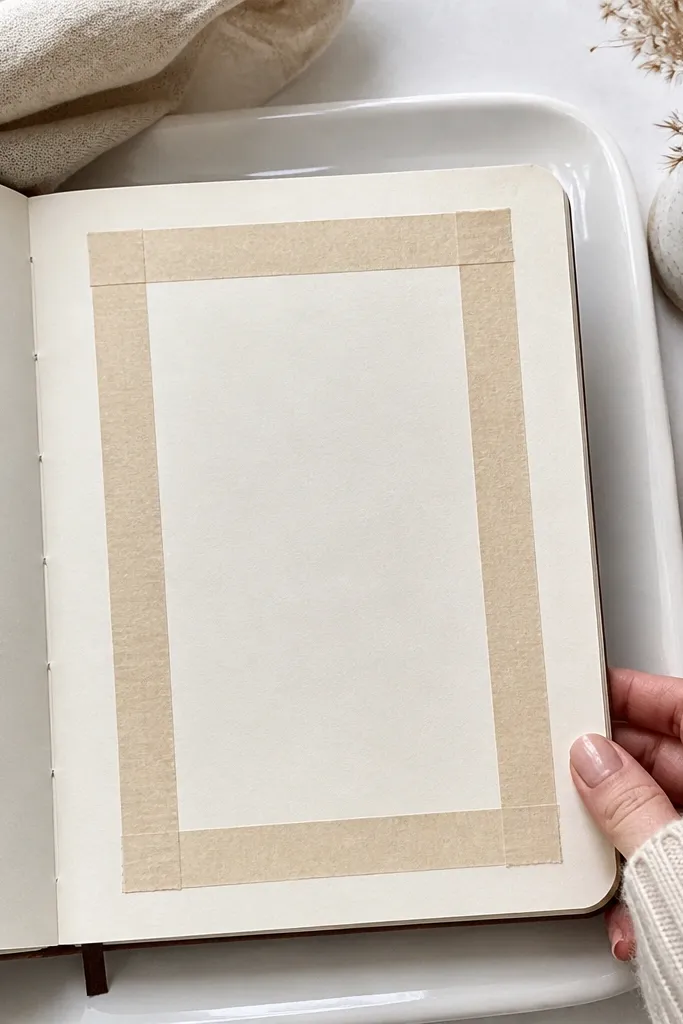
This layout mimics a photo frame, which is why it looks good in a flat-lay photo. The tape rectangle gives you instant borders, and the bold title in the middle reads like a poster. It’s great for monthly themes, travel entries, or any time you want the journal to look more like decor. You write less, but it still feels complete because the frame does the heavy lifting visually. The end result is clean enough to display on a coffee table.
Cut or tear washi tape into four sides and place them as a rectangle with even spacing. Leave a margin of 1-2 cm between tape and page edges so it looks balanced. Write a big title inside the frame in black pen, then add 4 short lines underneath, still inside the tape border. Finish with one tiny icon doodle next to the last line to tie the page together.
Measure the rectangle width so your title has consistent breathing room across pages.
Don’t angle the tape corners randomly — straight edges look more intentional.
18. Index Card Folded Map Layout
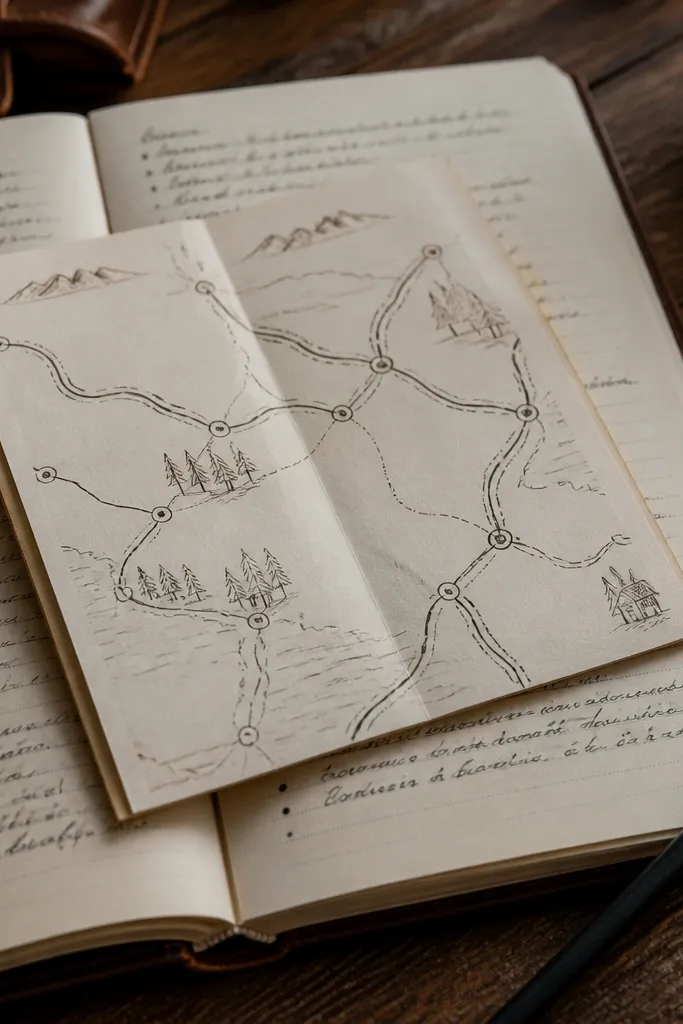
A folded map layout makes your journal feel like a mini artifact. You’re drawing route lines and labeling stops with short notes, which keeps it quick. The look is photogenic because the folded card creates a strong shape and the line work looks crisp. Use it for a day plan, a “walk route,” or a theme like “places I want to revisit.” It’s ideal when you want your journaling to look playful rather than purely reflective.
Fold an index card in half and crease it sharply, then glue the folded card to your journal page so it opens like a tiny booklet. On the top section, draw a simple route line with a black pen and add 3-5 labeled stops. On the inside, write one sentence per stop that describes what you want to remember. Color the route line with one accent color and keep the labels black.
Use a straightedge for route lines so the map look stays clean.
Don’t write long paragraphs on the map; short labels keep the visual style intact.
19. Page With Washi Tape Corner Triangles
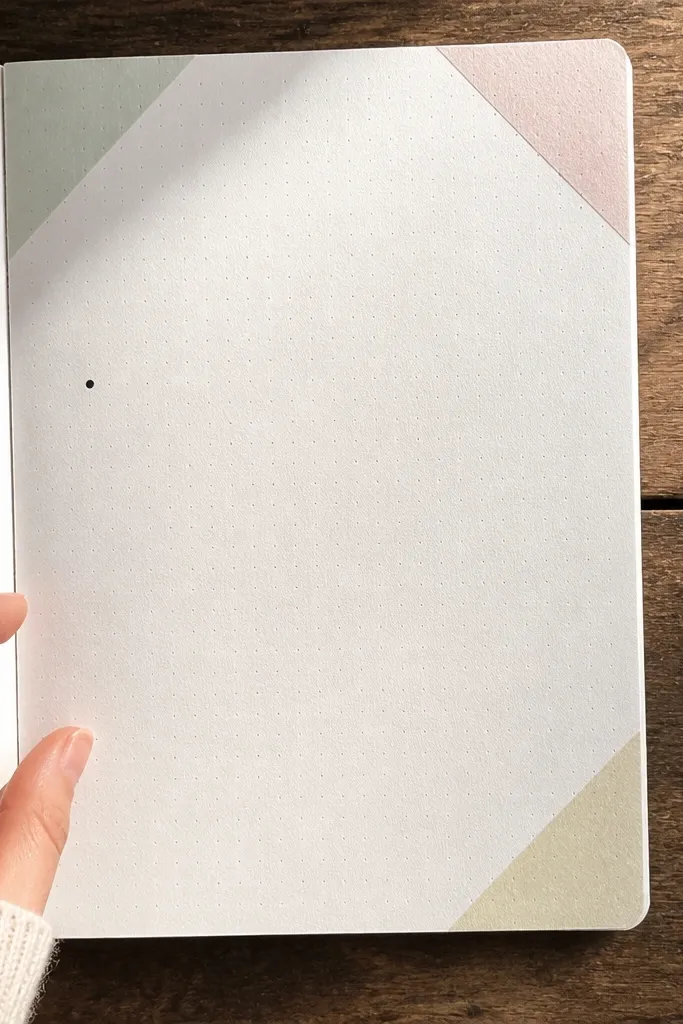
Corner triangles are a small design trick that makes a page look styled without taking over. You place three tape triangles at the corners, then write in the clean center. The triangles guide the eye and create a balanced composition for photos. This idea is fast because you’re repeating the same tape action and only adding short text. It works well for daily check-ins, gratitude, or a “what I’m learning” page.
Tear or cut washi tape into triangle shapes by folding tape over a ruler edge and trimming. Place one triangle in each corner, keeping them the same size. Draw a faint border line in the center if you want extra structure, then write a heading and 4 lines of prompts. Use one accent color for underlines or bullet dots to match the tape palette.
Stick the tape lightly first, then press firmly once the triangles look even.
Avoid mixing too many tape patterns on one page; 1-2 patterns look cleaner.
20. Black Pen Scribble Background With White Space
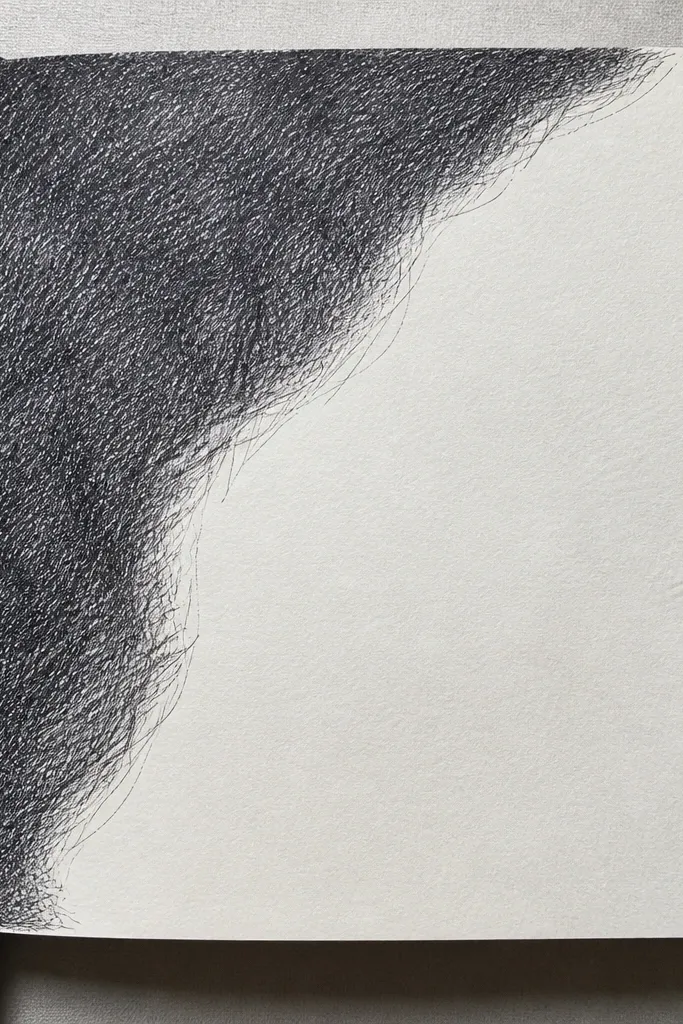
Scribble shading gives you that moody, artsy background while keeping the text readable. The key is to keep the scribbles behind the writing and leave a clear white area for your list. This is a good option when you want a journal page that looks like a print — textured but controlled. It’s fast because scribbles are quick and forgiving. You get an aesthetic page even if your handwriting is simple.
Use a black fineliner to draw loose scribble clusters in the upper half of the page, leaving a clear rectangle in the middle for text. Lightly shade around the text area but don’t cross into your writing space. Write a short list of 5 items in the clean rectangle. Add one underlined word in a lighter gray pen for emphasis and finish with a small date stamp in the corner.
Pro tipKeep scribbles lighter than you think; heavy scribbles make text look muddy.
AvoidDon’t cover the whole page — white space is what keeps it photogenic.



