
1. Linen Wrap Journal with Contrast Edge Tape
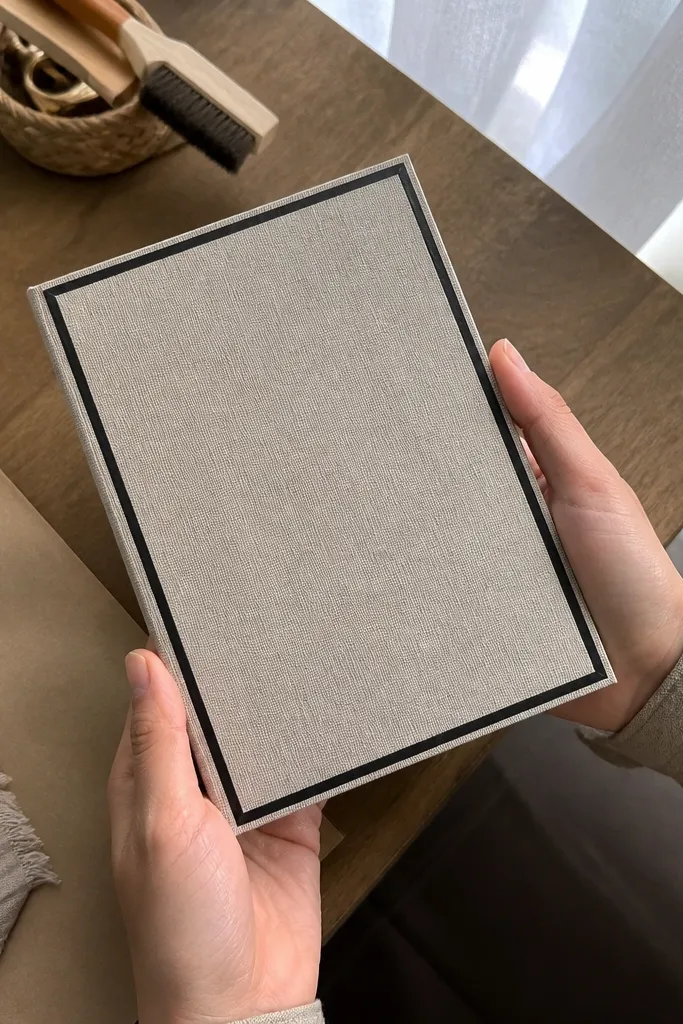
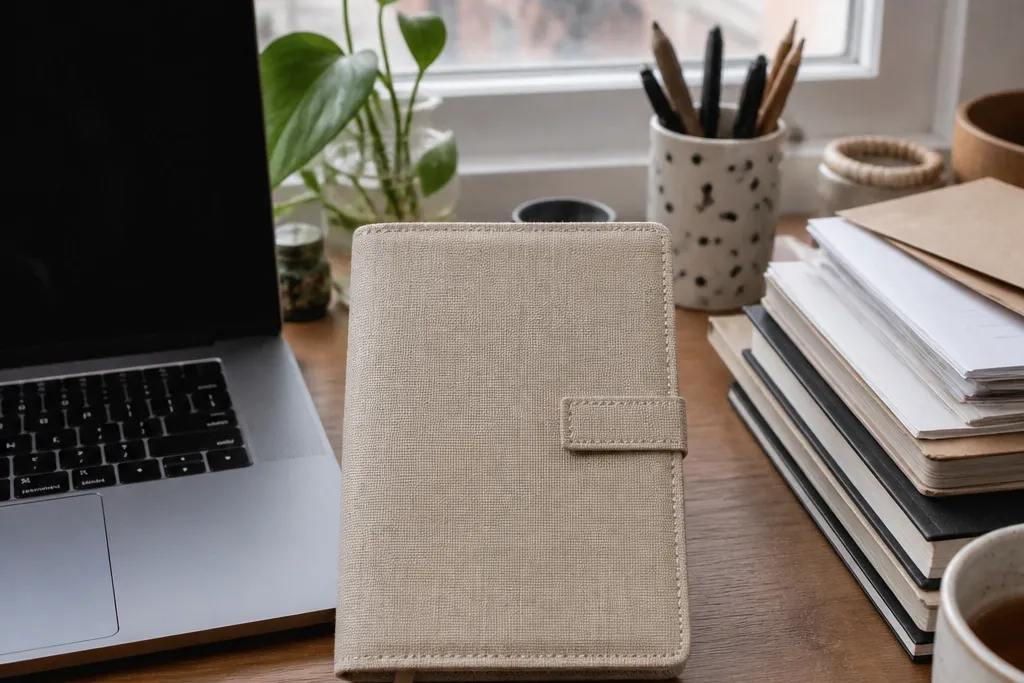
This one looks expensive because linen has a natural grain that catches light without glare. The contrast edge tape gives you a crisp frame that reads “designed,” even when the journal is small. It also solves a common small-space issue: linen wraps hide sloppy cut lines better than smooth paper covers. Use a soft elastic strap that matches the tape color so the closure blends into the overall look. This is a beginner-friendly project that takes about an afternoon and ends with a clean, shelf-ready shape.
Cut a journal cover panel from bookboard or thick chipboard to your target size (A5 is 148x210mm, B6 is 125x176mm). Wrap linen around the board, pulling it tight and folding neatly at the corners; glue the inside edges with PVA or bookbinding glue. Before closing, add a thin strip of bookbinding linen tape along the outer edge to create that contrast border. Finally, attach an elastic band to the inside cover using two small pieces of tape or glue anchors, then press under a heavy book for 30-60 minutes.
Burnish the linen with a bone folder after wrapping so the fabric lies flat and looks smooth in photos.
Don’t glue fabric directly to paper-only cardboard — it peels at the corners.
2. Faux Leather Zipper Mini Journal (No Bulk Binding)
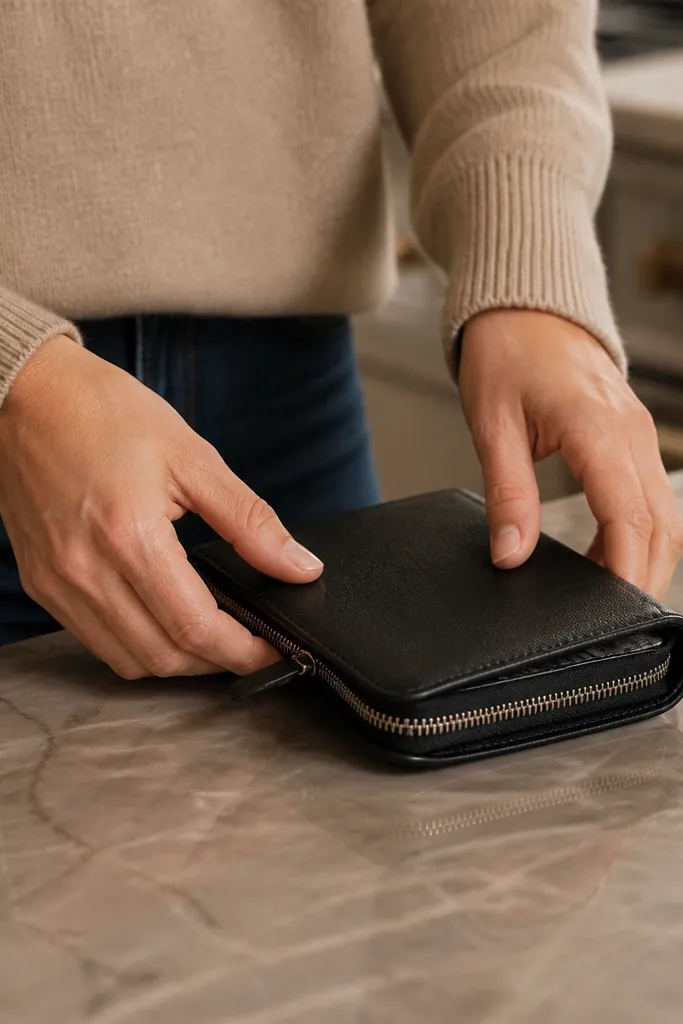
A zipper makes any small journal instantly look “kit-ready” and photo-friendly. This design avoids bulky zipper pouches by using a wrap-style cover and a slim page block, so it stays compact in a drawer. The faux leather gives that smooth, dark look that stands out on light desks and counters. Add a thin fabric lining so the zipper teeth don’t scratch the edges of your pages. Skill level is easy, but the finish depends on clean straight seams and careful glue timing.
Choose a mini size like B6 (fits in most bags) and build a slim page block using folded sheets or a simple glued stack. Cut faux leather slightly larger than the board, then wrap it around the board with a neat inside fold. Stitch or glue the zipper tape to the cover edges first on the outside, then reinforce from inside with fabric tape. Line the inside with a thin cotton scrap, trim flush, and press the whole thing flat under weights while the glue cures.
Use a zipper foot or just go slow with a needle — if you hand-sew, keep stitches spaced evenly so the line reads straight.
Don’t attach the zipper over thick chipboard — it makes the cover warp when opened.
3. Watercolor Wash Cover with Clear Matte Lamination
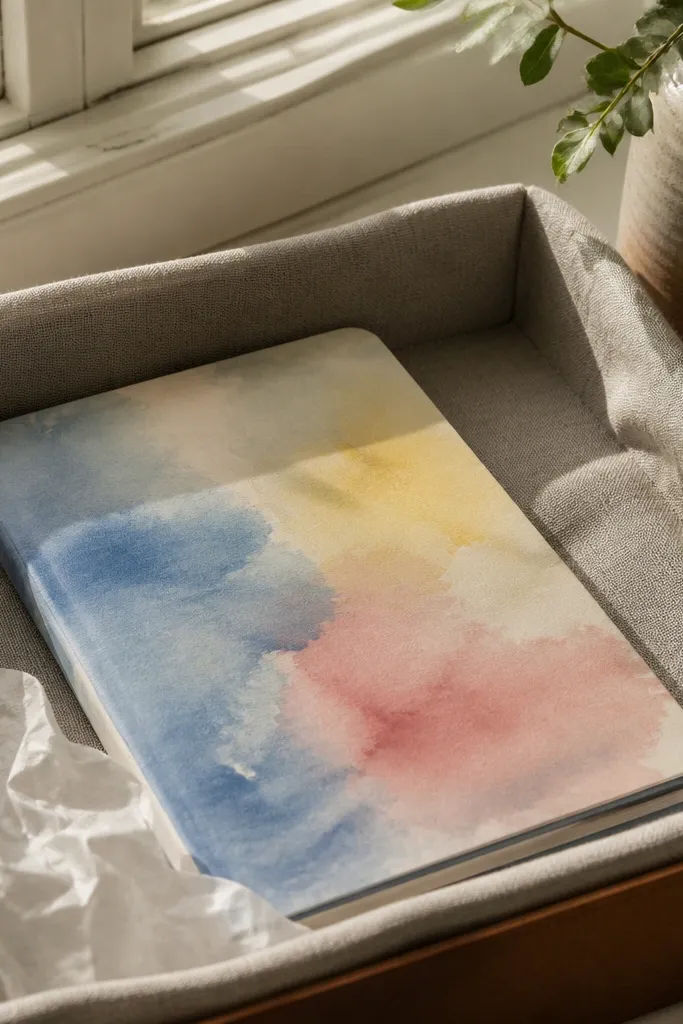
This is for the “pretty cover that doesn’t get ruined” crowd. Watercolor washes look gorgeous, but they smear if you handle them or store the journal in a bag. Clear matte lamination fixes that problem while keeping the paper-like look, not a shiny plastic shine. The result is a journal cover that looks airy and artistic without being fragile. It takes a little planning with drying time, but the build is straightforward and the finish is very photogenic.
Paint a watercolor wash on heavier paper sized to your cover, then let it dry completely (at least a few hours, longer if it’s thick). Mount the painted panel onto a thin board using a thin layer of PVA so you don’t soak the watercolor. Apply clear matte lamination film using a smoothing tool, trimming edges with a sharp craft knife. Add a simple closure: a satin ribbon tied through two small holes or a hidden elastic band inside the back cover.
Use pigment-based watercolor or acrylic ink for stronger color that holds up under lamination.
Don’t rush the drying — trapped moisture makes lamination bubble.
4. Vintage Book Page Cover with Linen Spine Wrap
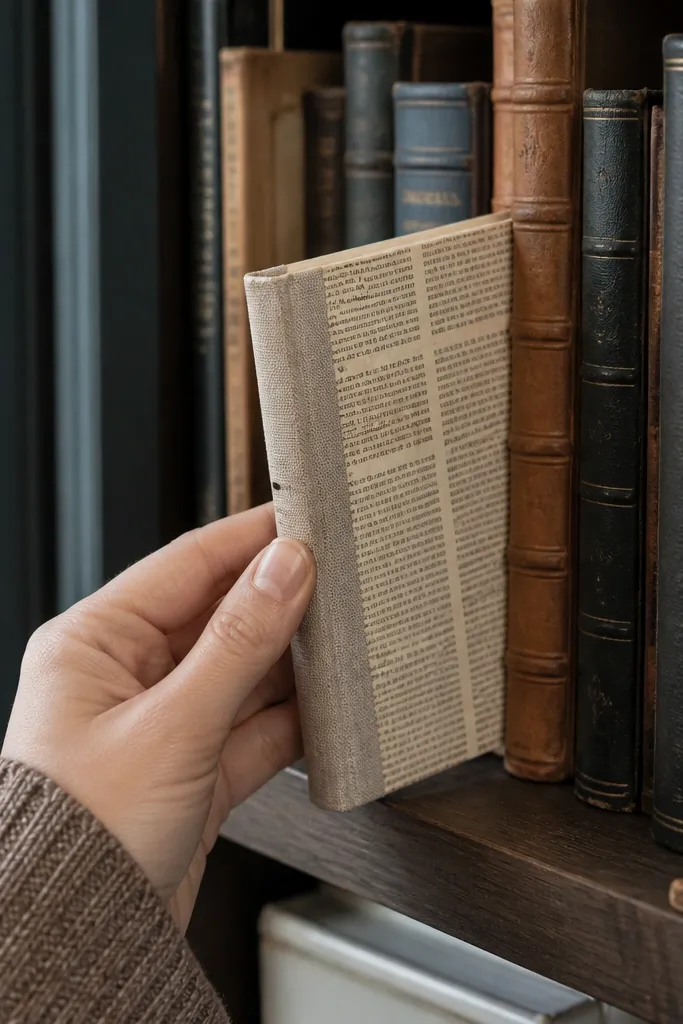
Cut a cover base from thin board and choose a book page size that wraps without stretching. Brush a thin coat of matte medium or PVA on the board, lay the book page down, and smooth from center outward. Wrap linen around the spine area so it overlaps onto the front and back covers by a couple millimeters. Add a dark elastic band closure on the outside back cover, then press under a heavy book to flatten the paper.
Old book pages look instantly collectible, and linen on the spine keeps the piece from looking messy. The linen spine is the key visual trick: it frames the binding and gives you a clean, modern contrast. This journal also hides small imperfections in paper alignment, which is great in a DIY setting. It’s perfect for people who love collage textures but want the final result to look like a real journal, not a scrapbook. Expect about 2-3 hours including drying and pressing.
AvoidDon’t soak the page with glue — it turns brittle and ripples.
Pro tipUse a craft knife to trim the paper edges after glue sets — it gives you a sharp border instead of fuzzy seams.
5. Cardstock Folded-Signature Journal with Diagonal Band
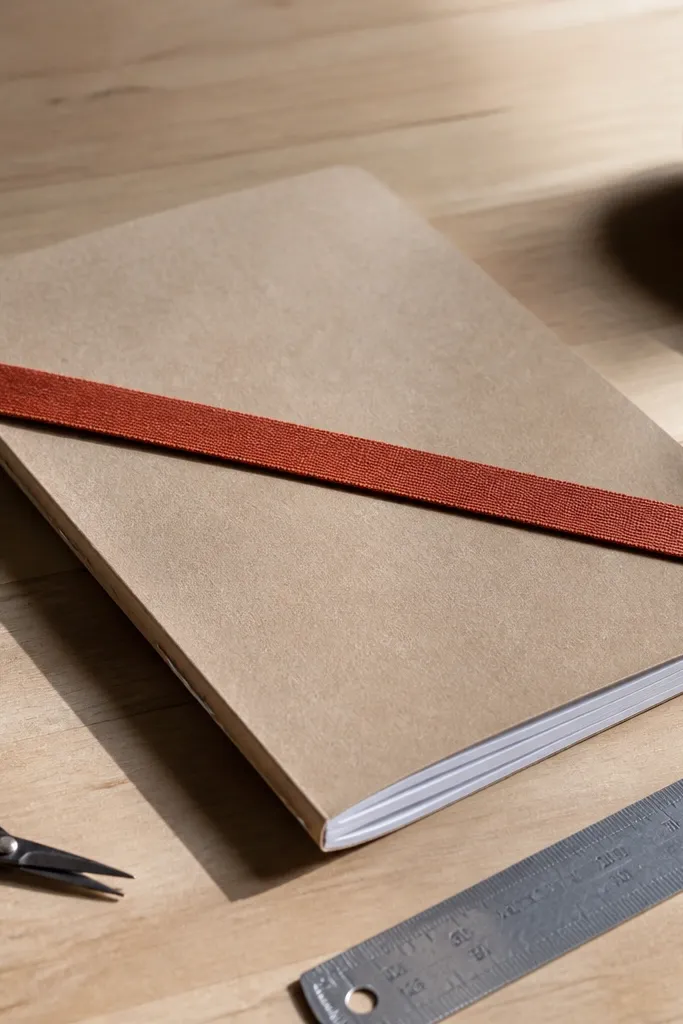
If you want minimal supplies and a crisp look, folded signatures are the win. A diagonal fabric band makes the journal look styled, even when the cover is plain cardstock. This is one of the best “small-space” formats because it stays thin and stacks neatly. It’s also great for travel notes: the diagonal band closure holds everything shut without a bulky clasp. Build time is about an hour once you have paper cut to size.
Cut cardstock to your cover size and fold it to create a front and back panel, then reinforce the spine with thin bookbinding tape. Prepare your page block by folding several sheets into signatures and stacking them so folds line up. Sew or stitch through the spine using a simple saddle stitch; then glue the spine hinge to the cover. Add the diagonal fabric band by marking two points on the inside cover, gluing fabric ends, and trimming the band so it sits flat.
Measure the diagonal band with a scrap first — a 2-3mm shift changes how it looks in photos.
Don’t use thick, glossy cardstock on the spine — it cracks when you open the journal.
6. Thick Paper Cover with Embossed Monogram Press
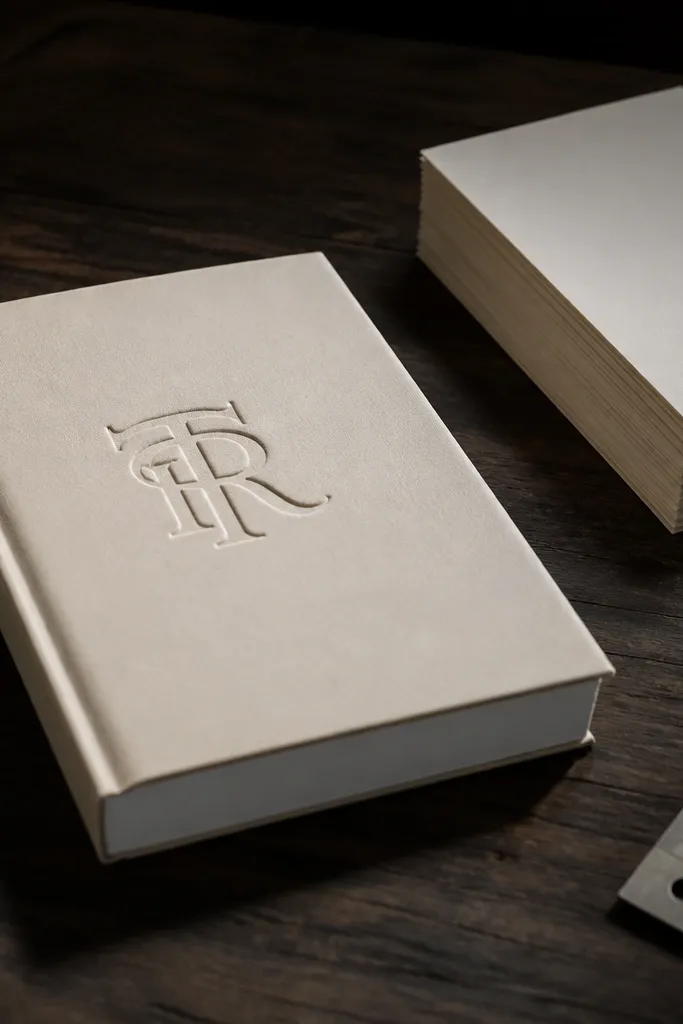
Cut a cover from heavy cardstock or thin chipboard, then wrap with a smooth paper layer like drawing paper or bookcloth. Place the monogram template where you want it and emboss using a stylus or embossing tool with steady pressure. Seal the cover with a matte acrylic spray if needed, then create a page block using stitched signatures or a glued stack. Tie the closure with twine through two small holes punched near the top edge, then knot and trim ends neatly.
Embossing makes small journals look custom because it adds shadow and texture without adding bulk. A monogram press gives you a focal point that reads neat and intentional. Thick paper or thin chipboard under the cover helps the emboss hold its shape. This idea also photographs well under side light because the raised detail catches highlights. Skill level is medium only because embossing takes patience; the rest is simple assembly.
AvoidDon’t emboss on paper that’s too thin — it tears before you get a clean raised edge.
Pro tipUse side light when photographing — embossing looks flat under straight overhead lighting.
7. Patchwork Fabric Cover with Visible Stitch Lines
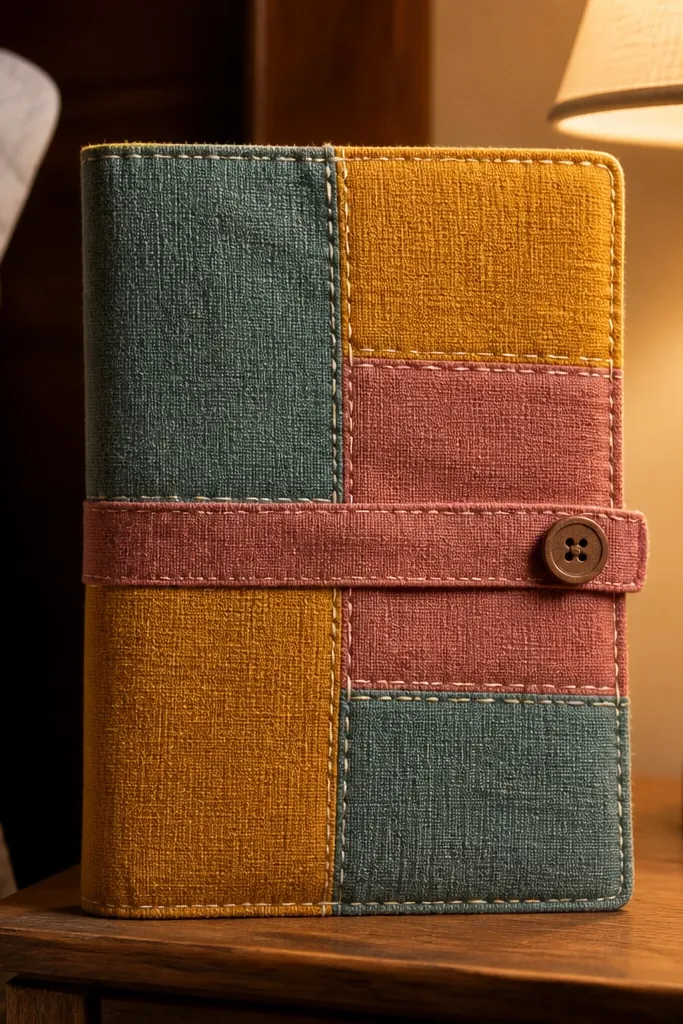
Cut fabric squares into a cover layout, then sew them into panels while keeping seams pressed flat. Wrap the finished patchwork panel onto a cover board, aligning the patchwork edges to the board edges. Add a fabric tie closure by sewing or gluing a narrow strip inside the back cover seam. Finish the inside edges with bookbinding tape so the stitching doesn’t fray and the journal looks clean when opened.
Patchwork gives you color depth and a handmade look that fills the frame, even for a small journal. Visible stitch lines are the aesthetic detail — they read like a design choice instead of a repair. This works especially well in small spaces because you get a “statement object” that doesn’t need size to look complete. Choose fabrics with a similar weight so the cover stays smooth when you wrap. This is a great option if you already have scrap fabric and want something that looks intentional, not random.
AvoidDon’t mix stretchy knit fabric with crisp quilting cotton — it warps the cover shape.
Pro tipPress seams with a warm iron through parchment paper so the cover surface stays flat.
8. Clear Acrylic Cover with Colored Paper Backing
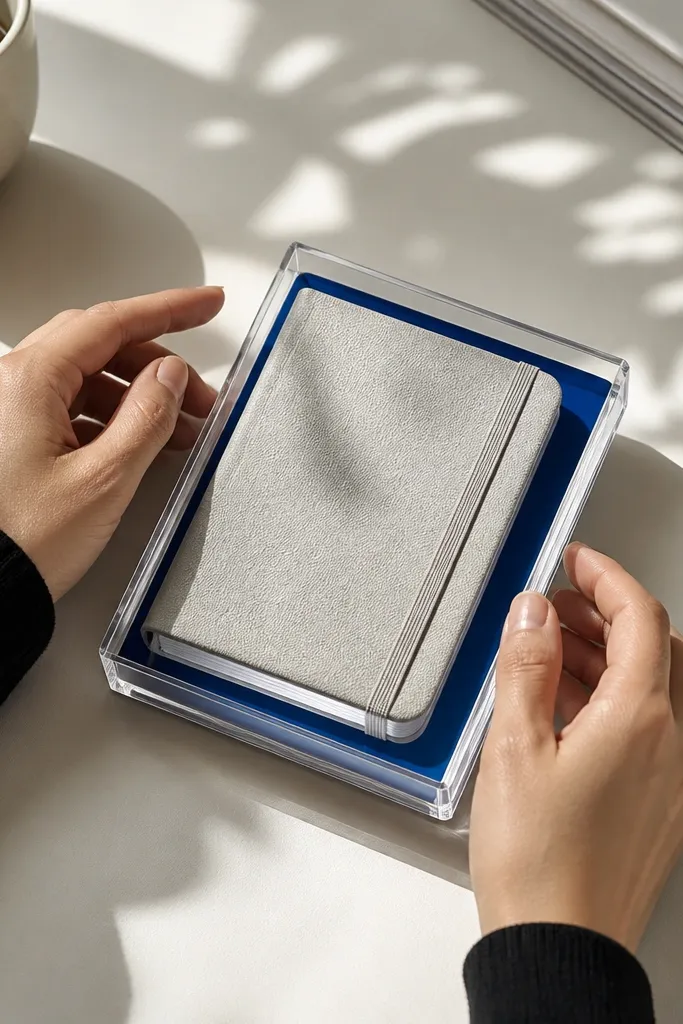
A clear cover makes the journal feel modern and layered, which reads great in photos. Put a colored paper backing inside and you get a consistent color block without printing or heavy decoration on the cover itself. The look is clean, minimal, and still interesting because you can see the page edges and backing color through the acrylic. This idea is best for people who like a crisp, gallery-like aesthetic. It’s simple to build but you need careful trimming and handling.
Cut a clear acrylic sheet slightly larger than your cover size, then sand edges lightly with fine grit to remove sharpness. Make a backing panel from colored cardstock and glue or insert it behind the acrylic cover. Build a slim page block and attach it to the back with bookbinding tape along the spine. Add a closure: a white elastic band anchored with small fabric tabs so it doesn’t scratch the acrylic.
Use double-sided craft tape for temporary alignment before final fastening — acrylic shifts easily.
Don’t use super glue on clear acrylic — it can fog and leave cloudy spots.
9. Coated Kraft Paper Cover with Wax Seal Closure
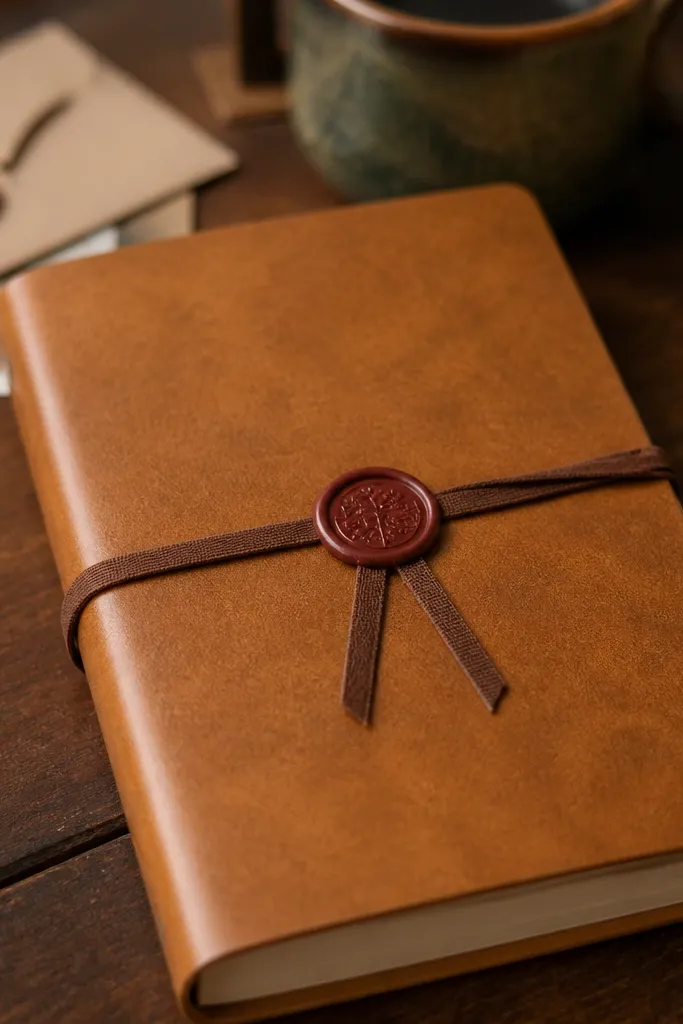
Cut kraft paper to cover size and coat it with a thin matte acrylic medium or a paper-safe sealant, then let it dry fully. Mount it to thin board so it stays rigid and doesn’t curl. Punch two holes at the top edge, thread a cream ribbon through, and tie a knot inside the back cover. Melt wax onto a small metal or silicone stamp base over the ribbon knot area, then press gently and let it cool before trimming ribbon ends.
Kraft paper looks warm and grounded, and a wax seal makes it feel like a letter you’re allowed to write inside. The coated finish keeps kraft from soaking up oils from your hands, which is what usually ruins the look. Wax seals add a dark focal point without needing extra decoration all over the cover. This is a great pick for small desks because it doesn’t compete with everything else — it just looks good. Build time is about 1-2 hours if you keep your page block simple.
AvoidDon’t place wax directly on unsealed paper — it stains and spreads.
Pro tipUse a matte sealant — gloss wax + glossy coating can look too shiny in photos.
10. Green Marble-Effect Cover with Contact Paper Lamination
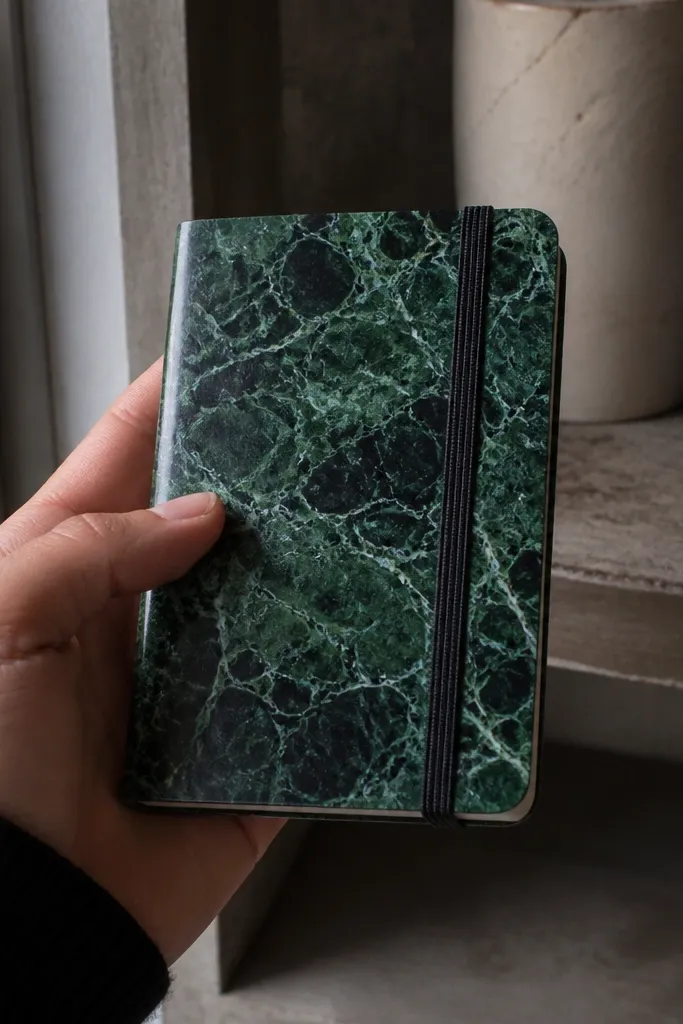
Cut your cover board to size and wrap it with marble-effect contact paper, smoothing firmly with a plastic scraper. Trim the edges with a sharp knife and fold contact paper into the inside edges, securing with double-sided tape. Make a page block that stays thin and attach it to the cover spine with cloth tape. Add an elastic strap by anchoring two small fabric loops on the inside back cover.
Marble-effect contact paper makes a small journal look like a store-bought object. The pattern is visually busy, so keep the rest minimal: a simple elastic strap and clean edges. This cover also hides minor DIY imperfections because the pattern breaks up visual lines. Choose deep green, black, or forest tones for a moody look that photographs well. This build is fast and very repeatable if you’re making more than one journal for different uses.
AvoidDon’t stretch the contact paper — it distorts the pattern and makes edges lift.
Pro tipWarm the contact paper slightly with your hands to reduce wrinkles before you smooth it down.
11. Monochrome Photo Strip Cover with Caption Panel
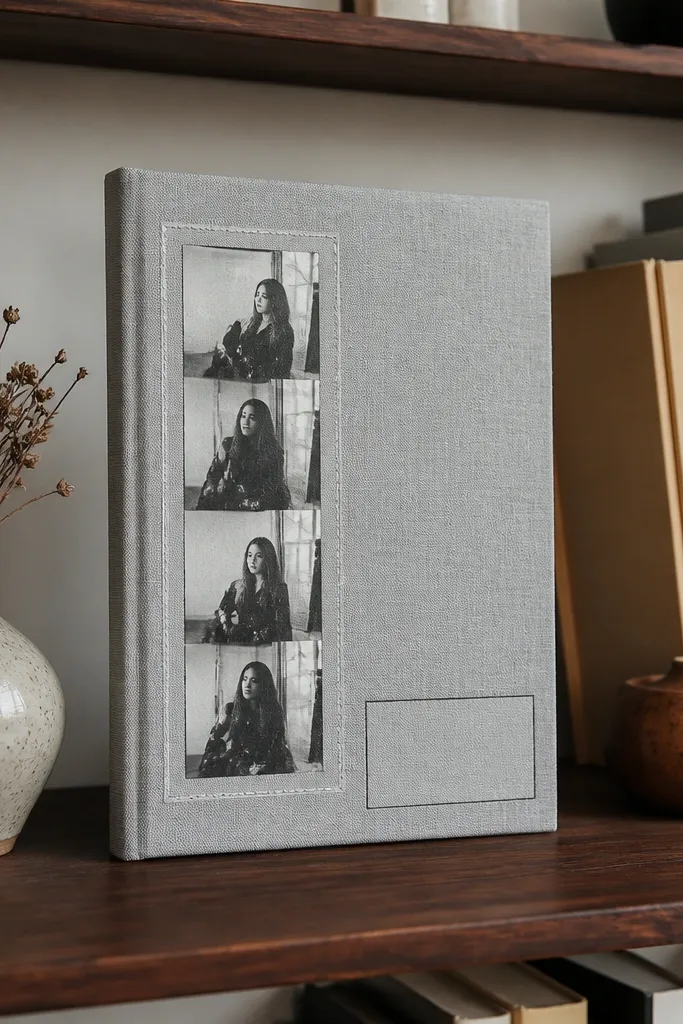
A photo strip cover gives you instant story and strong visual structure, even when the journal is tiny. Keep it monochrome so it looks cohesive rather than cluttered, then add a small caption panel for a clean graphic element. This is excellent if you want your journal to look like decor on the shelf, not like a random notebook. The design works especially well with printed film strips or photocopied images. Build time is about 2 hours with drying and trimming.
Print your photos in black and white, then cut them into narrow strips with even spacing. Create a cover base from board and cover it in matte paper or bookcloth. Lay the photo strips on the front in a straight grid, then seal with a thin matte medium so they don’t smear. Add a small caption panel at the side or bottom using a contrasting paper color, then attach a black elastic closure on the back.
Use a ruler and cut with the same blade angle every time — straight strips look designed, crooked ones look messy.
Don’t use glossy photo paper — glare ruins the photo strip look in daylight.
12. Embroidery Thread Bookmark Wrap for a Matching Set
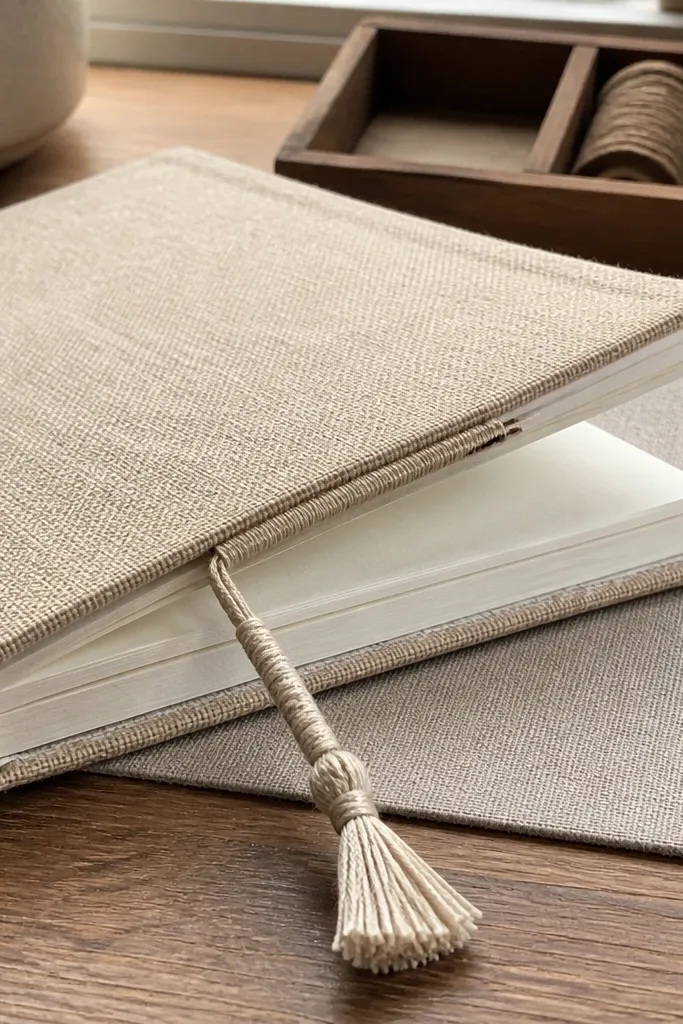
Cut two lengths of embroidery thread in a matching palette and braid or twist them into a tight bundle. Sew or knot the bundle to a small fabric strip that you glue to the inside front cover edge. Wrap thread ends around a small needle or pin to keep them neat while gluing. Finally, trim the bookmark ends evenly and add a small thread tie around the journal spine if you want a matching look.
This idea is about making your journal look styled even when the cover is simple. A thread bookmark wrap gives you a colorful detail that frames the pages and adds motion when you open it. The trick is to match thread color to cover fabric or paper, not to throw in random shades. It also solves a small-space annoyance: bookmark bulk that flops around in a bag. You can make this as a finishing upgrade to several existing journals. It’s quick and very photogenic.
AvoidDon’t glue thread directly to glossy covers — it pops off when you open the journal.
Pro tipUse 6-strand embroidery thread and keep tension even — loose thread looks sloppy fast.
13. Washed Denim Cover with Button-Tab Closure
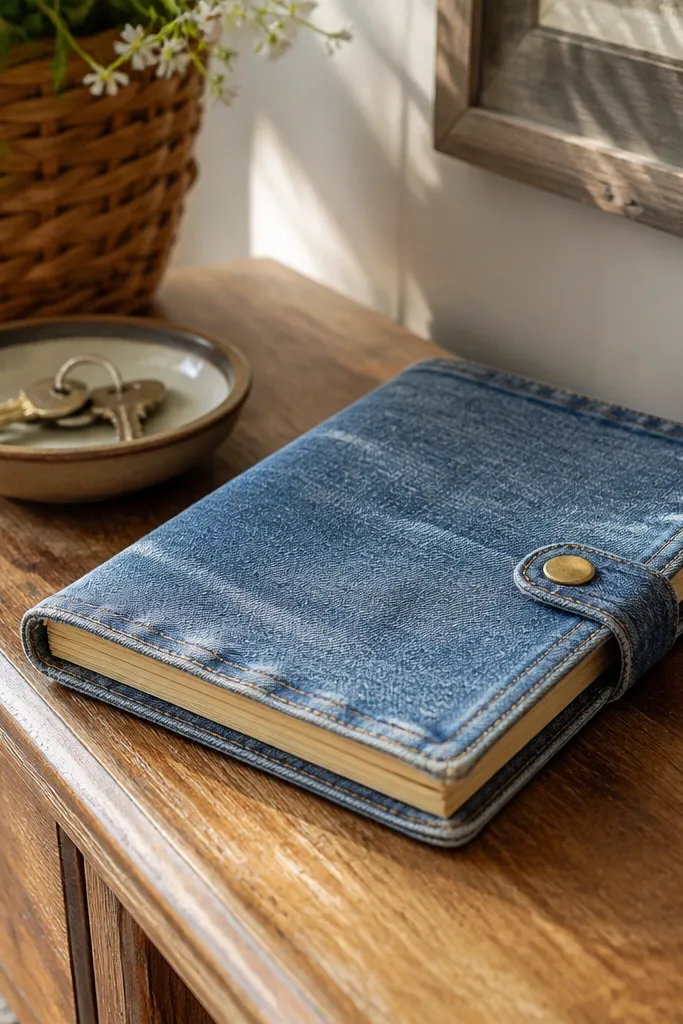
Denim has a lived-in texture that looks great up close and from across the room. A button-tab closure adds a classic, hardware look without making the journal thick. The cover also resists minor scuffs better than paper, which matters in small spaces where things get moved around. Keep the rest minimal: clean spine, tidy corners, and one hardware accent. This build looks best with dark denim and a warm neutral thread or tan tab.
Cut denim larger than your cover board, then wrap it tightly and fold corners neatly with glue. Reinforce the spine area with a strip of fusible interfacing or thin craft felt so it doesn’t stretch out of shape. Make a tab from the same denim or a tan scrap and attach it inside the front cover. Sew a brass button to the front panel and align it with a corresponding button hole or stitched loop on the tab.
Use a zipper or edge foot on a sewing machine for cleaner stitching — hand sewing works too, just go slower.
Don’t skip spine reinforcement — denim stretches and the cover looks wavy.
14. Folded Map Cover with Brass Eyelet Closure
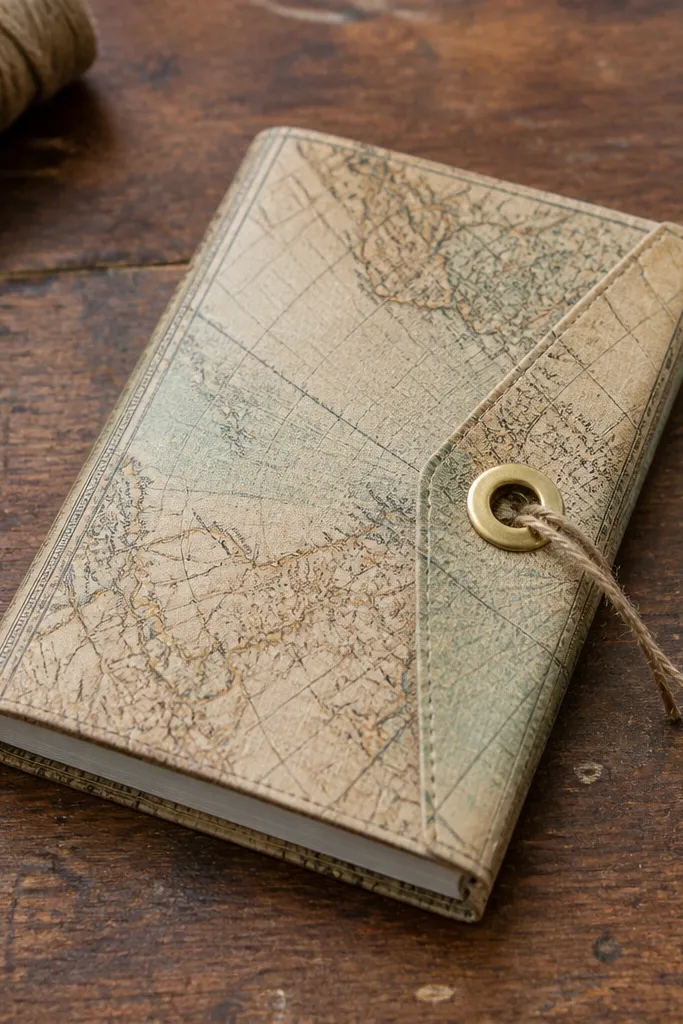
Choose a map print and cut it to cover size, leaving an extra margin for wrapping. Seal the map with a matte medium before attaching to board so it stays crisp; let it dry fully. Wrap and mount onto thin board, then punch a hole near the top edge for a brass eyelet. Install the eyelet using an eyelet setter tool, then thread ribbon through and tie a tight bow on the outside.
Vintage map prints look instantly aesthetic because they have lines, borders, and typography that read like design. The brass eyelet adds a small metallic detail that catches light and makes the journal feel like a real object. This project is perfect for small spaces because the cover is flat, the closure is simple, and the whole thing sits neatly on a shelf. Use a matte seal on top so the ink doesn’t rub off. The build is easy if you use thin board and don’t over-glue the paper.
AvoidDon’t use glossy Mod Podge — it creates glare and makes map text harder to read.
Pro tipPick a map with a limited color palette for a calmer look on small shelves.
15. Mini Corkboard Cover with Fabric Pin Tacks
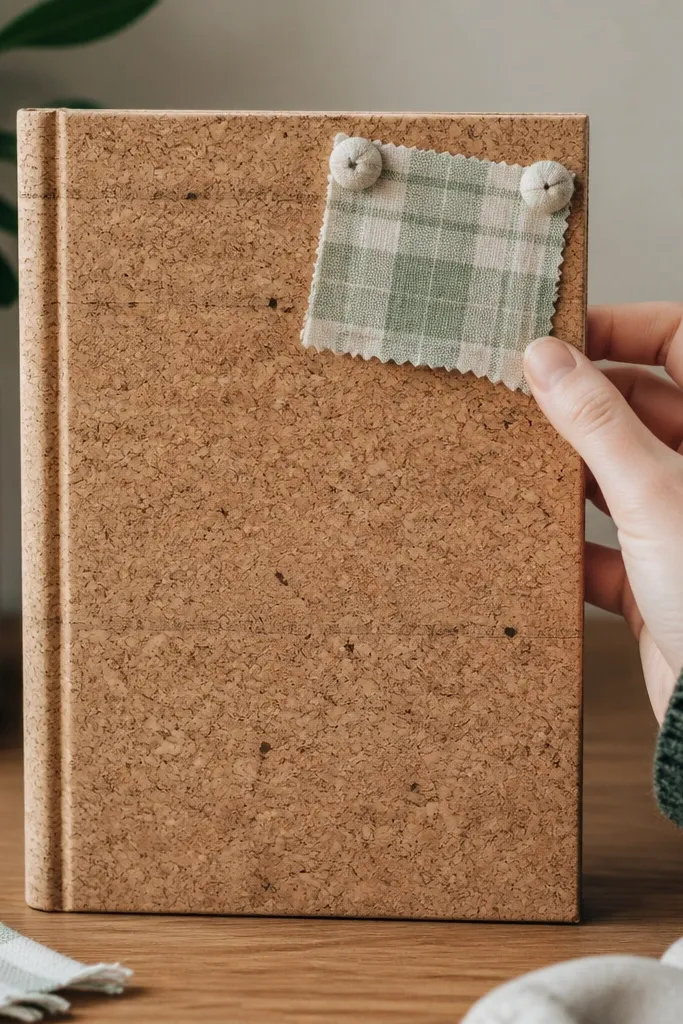
Cut cork sheet to your cover size and glue it to thin board using contact cement or a strong craft adhesive. Cover the spine area with thin fabric tape so the cork doesn’t crack when you open the journal. Attach an elastic strap to the inside back cover for closure. For the pin detail, install a small fabric-covered pin tack on the front and secure it through the cork, then add a tiny tag or label you can swap later.
Corkboard is a textural cover material that looks great in DIY decor photos and makes the journal feel interactive. You can pin a small fabric tag on the cover or use pin tacks to hold a note, without adding a thick ornament. The texture also hides minor cover imperfections better than smooth materials. This works best if you keep the journal cover mostly plain and let the pinned detail be the focal point. Build time is about 2 hours and the result looks like a functional desk accessory.
AvoidDon’t bend cork around sharp corners without scoring — it splits.
Pro tipSeal the cork with a matte clear sealer if it sheds dust — it keeps your hands and pages clean.



