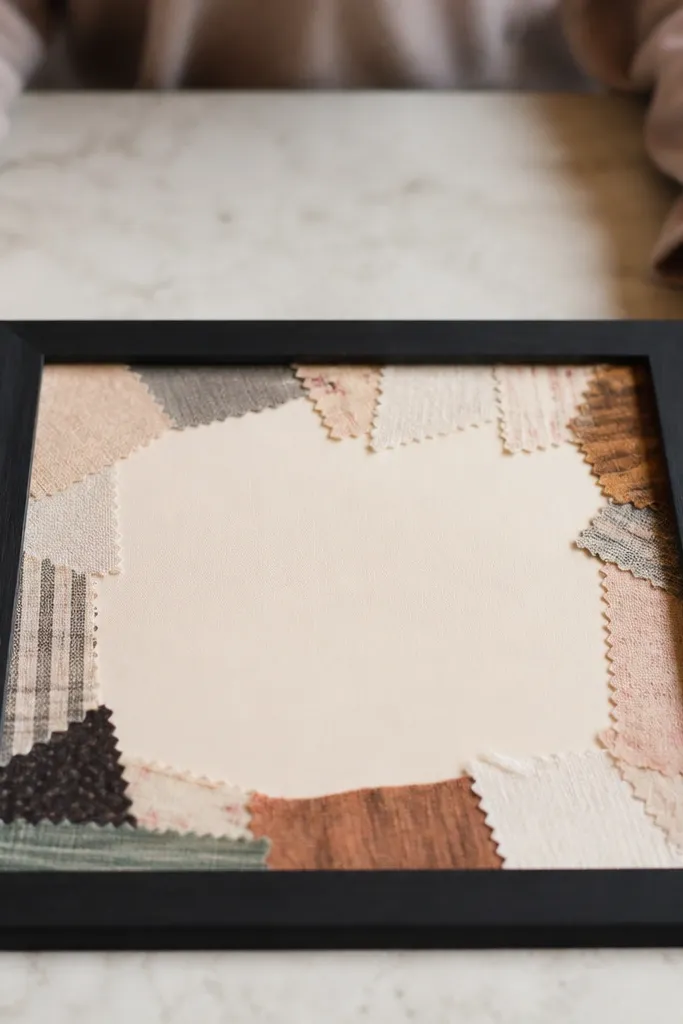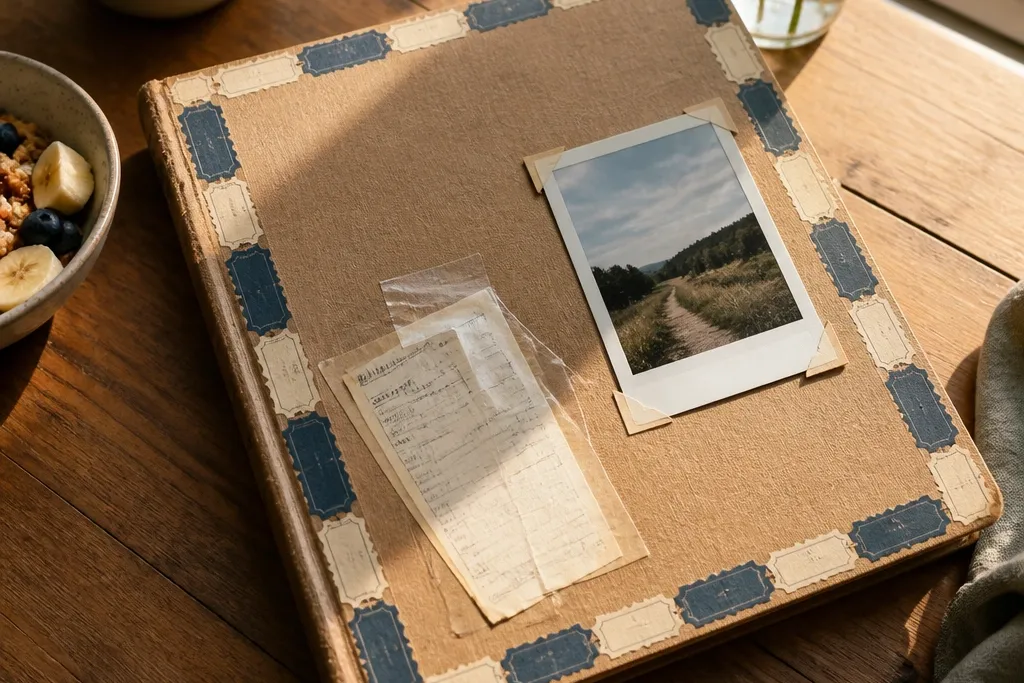

1. Ticket Stub Shadow Box Page
A shadow box page makes boyfriend scrapbook ideas look expensive without buying anything fancy. You’re using the natural texture of ticket stubs and receipts — they already have typography and dates, so your page reads like a real memory. The dark frame gives contrast, which makes the stubs pop in photos and keeps the page from looking flat. This is beginner-friendly because you only need one cutout photo and a few stacked layers; the rest is just arranging. It also works great for events you can’t summarize in a long letter, like a movie night, a concert, or a random afternoon you both loved.
Start with a 12x12 cardstock base in cream or light gray. Cut a rectangle “frame” from black or dark brown cardstock leaving a 1/2 inch border, then glue it centered. Layer ticket stubs and one small photo behind the frame opening using tape runner so you can adjust placement before it’s permanent. Finish by adding a strip of washi tape across the top edge of the stubs like a label, then write a short date line under the photo with a fine-tip pen.
Pro tipPress stubs flat under a book for 30 minutes before gluing so they don’t curl.
AvoidAvoid covering the printed dates and text — those details are the whole visual hook.
2. Map Lines Around a Favorite Place
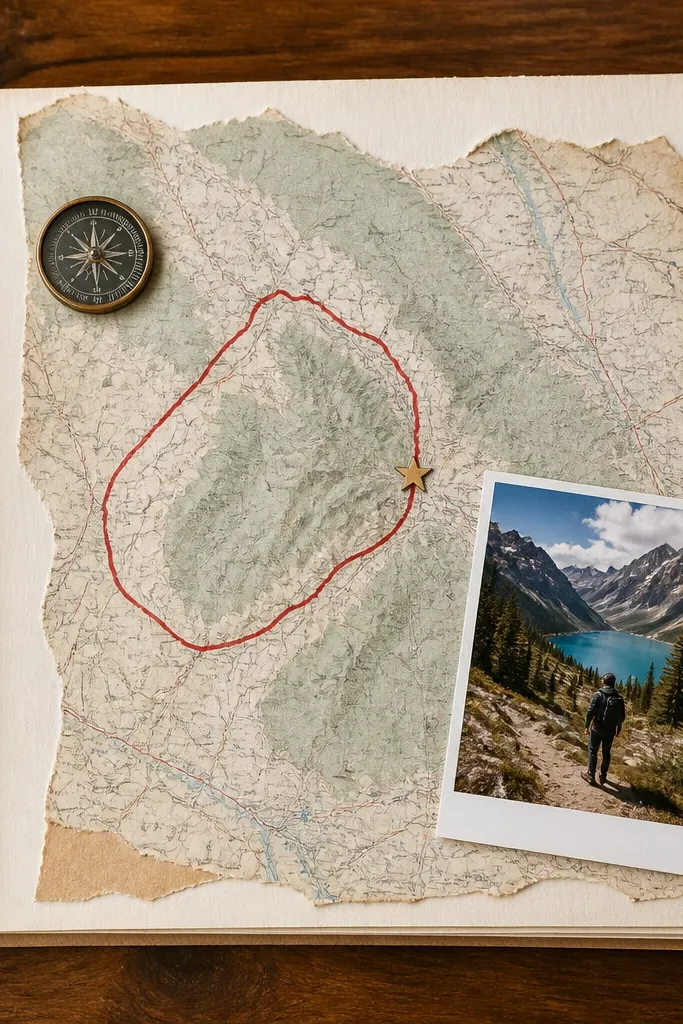
This page idea turns “we went somewhere” into a visually clear story. A map background gives you instant texture and direction, and the line work makes the page feel designed even if you’re using scraps. You’re not trying to recreate a perfect cartography look; you’re emphasizing one spot with a bold line and a simple label. It’s beginner-friendly because the layout is basically: map, one photo, one route line, one caption. It looks great in photos because the map patterns create depth behind the focal point.
Print or cut a map section onto your 12x12 base, trimming edges so they don’t overhang. Place a small photo of the place near the center bottom, then draw a thick curved route line from the page edge toward the photo using a black marker. Add a label strip in white or kraft paper with the place name and a date. Seal the map edges with a thin layer of glue stick so the paper doesn’t lift, then run a tape runner around the label strip for a crisp finish.
Use a ruler for the label strip — straight text instantly makes scrapbook pages look cleaner.
Skip thin, light-gray routes; they disappear in photos.
3. Old Card Flip-Book Love Notes
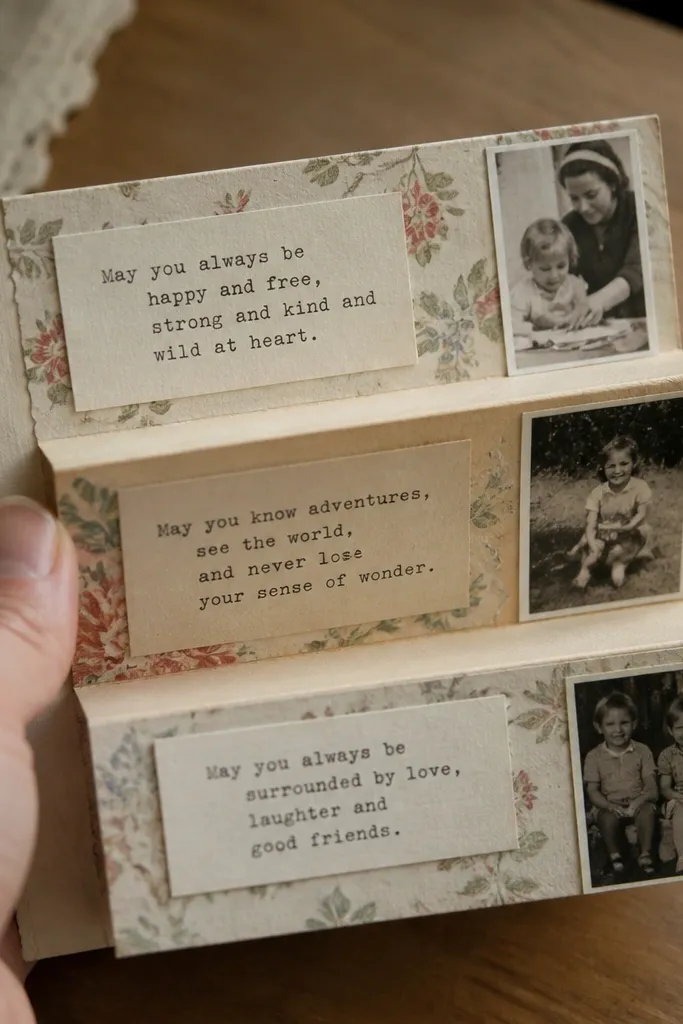
A flip-book page gives you movement, which reads as “thoughtful” in a single glance. Using panels cut from old greeting cards or stationery is also the easiest way to upcycle while keeping the paper pretty. Each fold creates a clean, photo-friendly edge and lets you hide small notes without cluttering your layout. This works especially well for beginner-friendly boyfriend scrapbook ideas because you can write short lines instead of full paragraphs. It also fits pages that need a “surprise” element — like a spot you can open and re-read.
Cut cardstock or the front panels from old cards into 2 inch wide strips (you want 6-8 panels for a 12x12 page). Score folds every 2 inches to make an accordion. Glue or tape the accordion to one side of the page so it flips open like a book, then attach a small photo at the top as the header. Write one short note per panel with a fine-tip pen, keeping each line under 8 words. Finish by adding a belly band strip of paper around the closed accordion so it stays tidy.
Pro tipUse a glue stick on paper folds and tape on the page — glue alone can make accordion pages warp.
AvoidAvoid long notes; small panels look best with short, punchy lines.
4. Polaroid-Style Collage With Real Film Frame
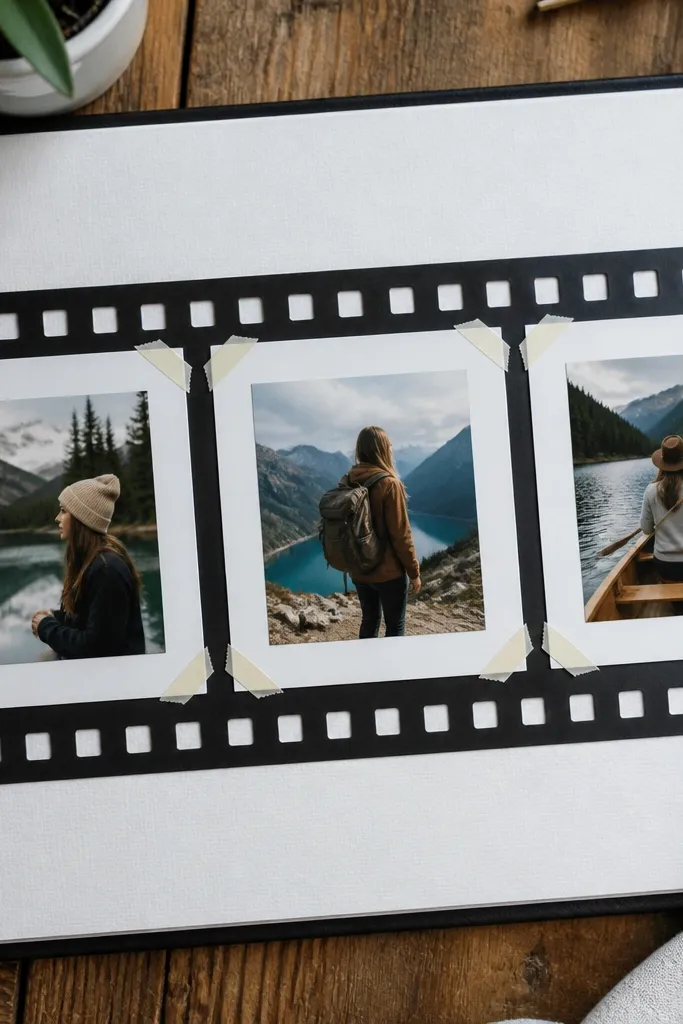
Polaroid-style collages photograph well because the white border creates a consistent look. You can fake it without printing fancy templates by using thick cardstock or foam tape for the border. This idea is perfect when you have multiple small photos but they don’t tell a story on their own. The page becomes a “set,” and the repeated frame makes everything look intentional. It’s beginner-friendly because you’re repeating the same shape — measure once and cut the rest.
Choose a light neutral base like off-white cardstock. Cut three white rectangles (3.5x4.5 inches for each “photo” window) and add a 1/2 inch border around each window using a craft knife and metal ruler. Layer each photo inside its border, then glue the borders to the base with tape runner. Use a thin strip of patterned paper as a bottom banner and write a date or event name on it. Add tiny labels under each photo with a fine-tip pen and keep them aligned.
Use foam tape behind only one photo for a subtle 3D pop without making the whole page lumpy.
Avoid mixing too many border sizes; one size makes the page look designed.
5. Burlap and Button Mini Memory Pocket
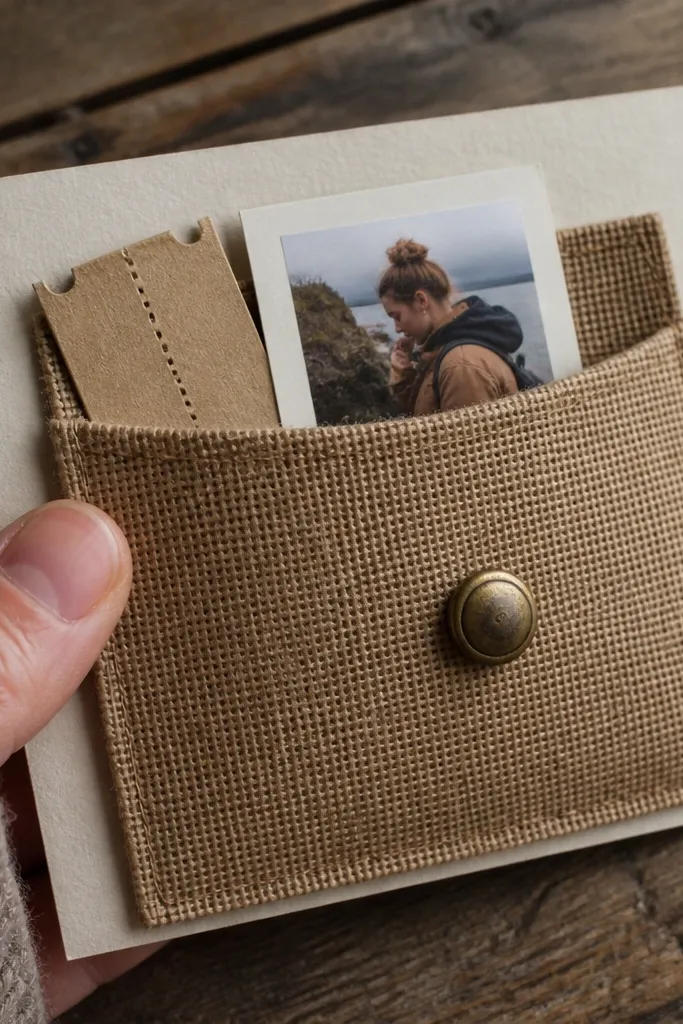
If you want a boyfriend scrapbook page that looks tactile, burlap wins. The texture reads clearly in photos, and the button closure makes it feel like a real keepsake. This idea works well when you have one small item — a ticket, a note, or a mini photo you want to keep safe. It’s beginner-friendly because a pocket is a simple rectangle with folded edges and a button — no complicated machinery. You also get a clean “pull-out” moment that makes the page feel interactive.
Cut a burlap rectangle about 6x8 inches and fold the bottom edge up 1 inch, then fold the sides in 1/2 inch. Glue the folds with fabric glue or a strong craft glue, then add a ribbon or small strip of cardstock at the top as a sturdier edge. Create a small photo card that slides into the pocket, and stitch or glue a button at the top front. Add a matching loop using thin twine or a narrow strip of paper so it snaps closed.
Pro tipPress burlap flat under a heavy book so your pocket edges don’t look wavy.
AvoidDon’t use hot glue on burlap — it can soak through and leave shiny spots.
6. Receipt Strips Date Timeline
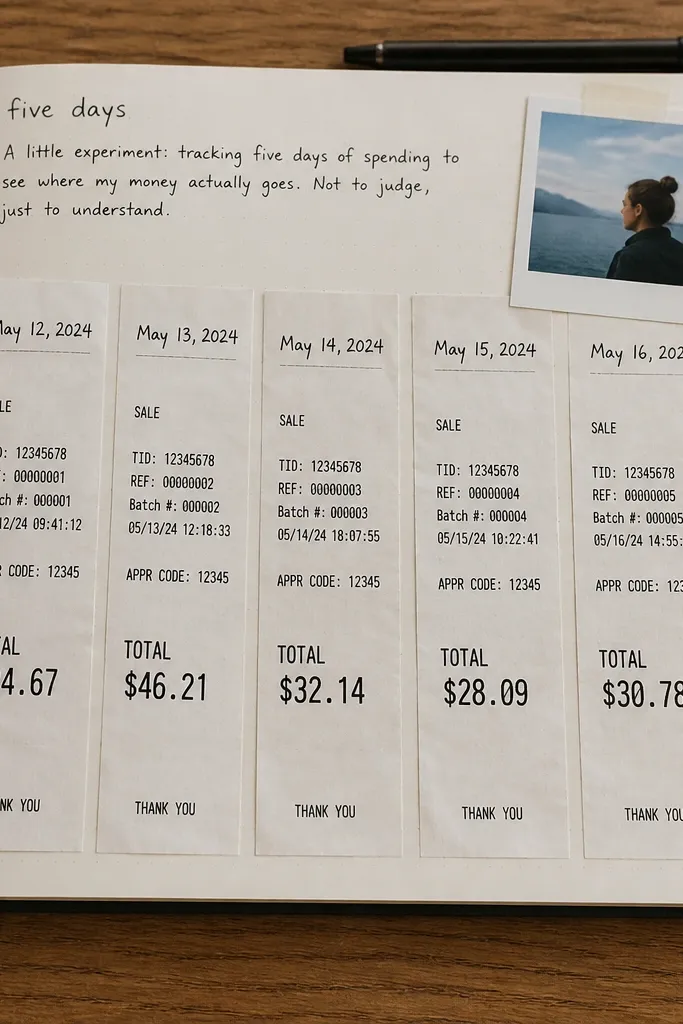
A timeline page makes boyfriend scrapbook ideas feel organized, not random. Receipts are already formatted with dates and totals, so you can turn them into a visual list without writing a lot. The aesthetic comes from repeating the same strip width and keeping your handwriting consistent. This is beginner-friendly because you don’t need fancy design skills — you’re just stacking and aligning strips. It’s also great for “month recap” pages when you want to show progress, like dinners, games, or weekly coffee runs.
Cut receipt strips into equal widths (around 1 inch) and trim them so they’re all the same length. Arrange them vertically centered on a 12x12 base, leaving 1/4 inch gaps between strips. Glue each strip down with tape runner for a clean edge. Add small icon stickers or hand-drawn mini symbols (a star, a fork, a controller) next to each date line. Finish by writing a short sentence across the bottom banner like “Best little habits: ” and leaving space for one extra note.
Use a black gel pen for dates so the text stays readable against busy receipt print.
Avoid uneven strip lengths; mismatched heights make the page feel messy fast.
7. Sticker Sheet Cutout Title Page
This is the “fast but pretty” page when you want beginner-friendly boyfriend scrapbook ideas that still look sharp. You’re building a title with cut sticker elements — letters, icons, and little shapes — then anchoring it with one photo. The look comes from repetition: same color family, same sticker style, and a simple background. It’s photogenic because bold type sits right in the center and the background stays calm. Use it for a theme like “Our Summer,” “Night Out,” or “Favorite Things.”
Pick a single sticker sheet (or a few sticker packs that match) and choose one main color family. Cut out letter stickers or icon stickers and test the layout on a scrap first. Tape your background paper down to the 12x12 base, then glue the sticker title in a straight line across the top. Place one photo in the center and add a small caption strip under it. Seal the sticker edges with a light spray adhesive if the stickers lift, then protect the page in a page protector.
Limit sticker colors to two — one for letters and one for accents.
Don’t scatter stickers everywhere; keep the cluster tight around the title and photo.
8. Hand-Cut Heart Window With Photo Behind
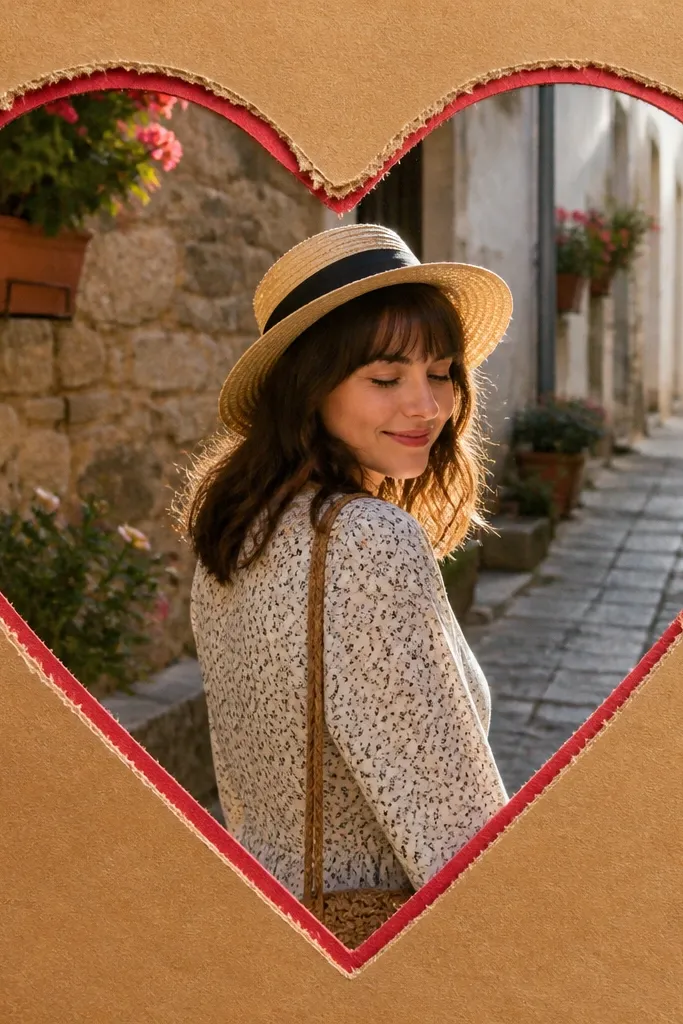
Heart windows look sweet without being childish, because the window shape creates clean geometry. You’re cutting a heart out of patterned or kraft paper and placing a photo behind it, so the heart becomes a frame. This idea is beginner-friendly because it’s one cut, one placement, and one caption. It’s also very photogenic: the eye goes straight to the heart and the photo inside. Use it for anniversaries, “firsts,” or any memory you want to feel more intimate.
Cut a heart shape stencil from cardstock (or draw one with a template) and trace it onto your top layer paper. Cut the heart out carefully with a craft knife and metal ruler so edges are crisp. Glue the top layer onto a 12x12 base leaving the heart opening. Tape a photo behind the opening so it shows through the heart. Add a short handwritten caption under the heart with a fine-tip pen and a thin strip of washi tape on the sides.
Practice the cut on scrap first — clean edges make the whole page look intentional.
Don’t use flimsy paper for the top layer; it will tear around the cut.
9. Magazine Cutout Frame With Faux Matting
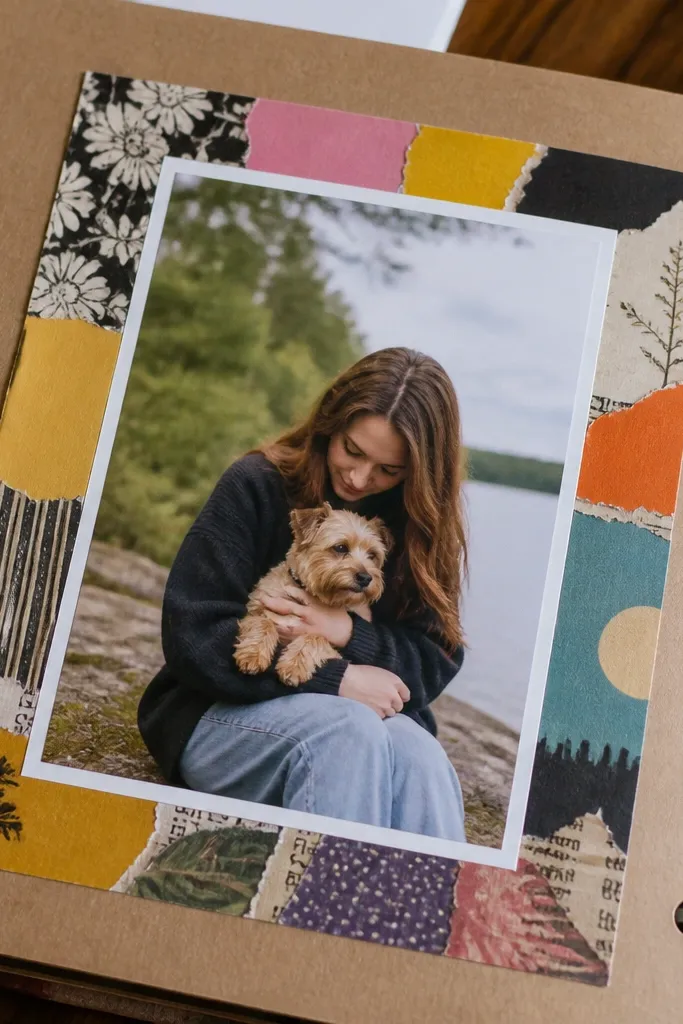
This page turns random magazine scraps into a cohesive design using one big frame. Faux matting — a thin border around the photo — makes it look like a real picture you’d hang. The magazine cutouts add color and texture, but the mat keeps the photo readable. It’s beginner-friendly because you’re not building a complex collage; you’re sticking to one rectangle frame shape. It photographs beautifully because the layered mat creates depth and the frame catches light.
Cut a cream mat rectangle (about 8x10 inches) and center it on a 12x12 base. Cut a slightly larger frame opening in another paper layer (like patterned magazine pages) so it wraps around the mat edges. Glue the magazine frame layer around the mat, then attach the photo behind the mat opening. Add small cutout labels around the frame corners — one word each — and keep them short. Finish with a light layer of clear glue or tape only on the edges to prevent peeling.
Pro tipUse matte glue or a tape runner on magazine paper so it doesn’t wrinkle when it dries.
AvoidAvoid using glossy magazine scraps directly under a photo — glare makes the text hard to read.
10. Photo Corner Tabs and Mini Quote Strip
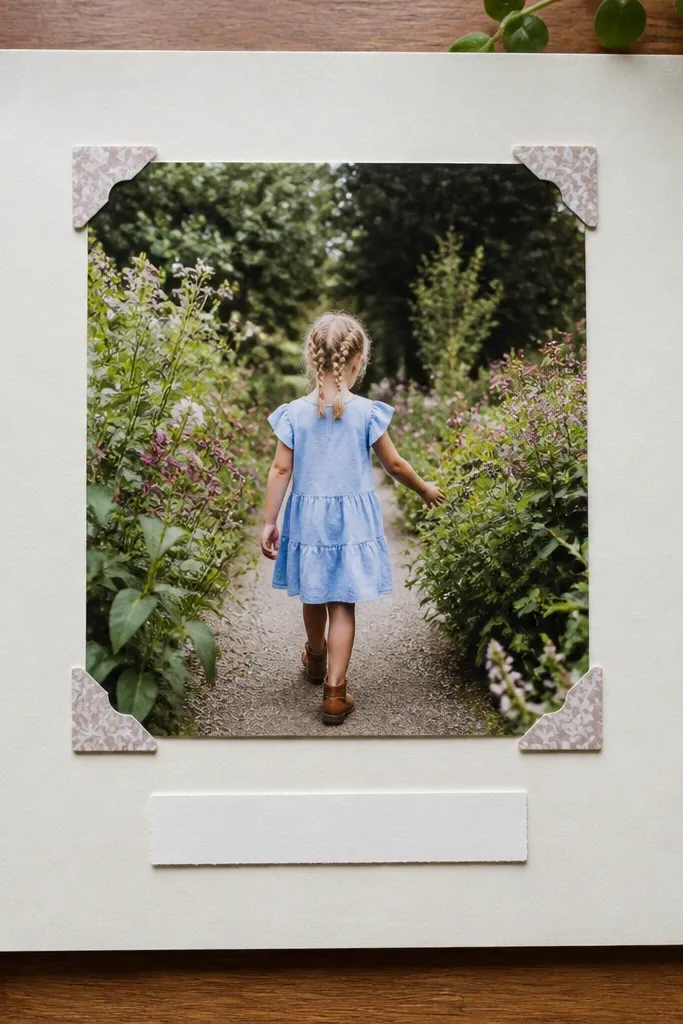
Corner tabs create a clean, modern look without needing fancy tools. Instead of gluing the whole photo down, you mount it with small strips at the corners, leaving a neat edge that looks intentional. The quote strip gives the page a clear message and keeps it from feeling like “just pictures.” This is beginner-friendly because it’s forgiving: even if your corners aren’t perfect, the tabs hide the mess. It also works for pages where the photo is the main star.
Cut a narrow quote strip about 1 inch tall from cardstock and write a short line in black pen. Place the quote strip near the bottom center and tape it down. Position your photo slightly above the quote, then cut four small tabs from cardstock or washi tape backing (about 1/2 inch wide). Tape or glue one tab at each corner, pressing firmly so the photo edges sit flat. Add a thin border line around the photo using a ruler and pen for extra structure.
Pro tipUse a ruler and lightly pencil guide marks first so your tabs land evenly.
AvoidAvoid putting tabs too close to photo edges; it makes the corners look bulky.
11. Fabric Scrap Banner Across the Middle
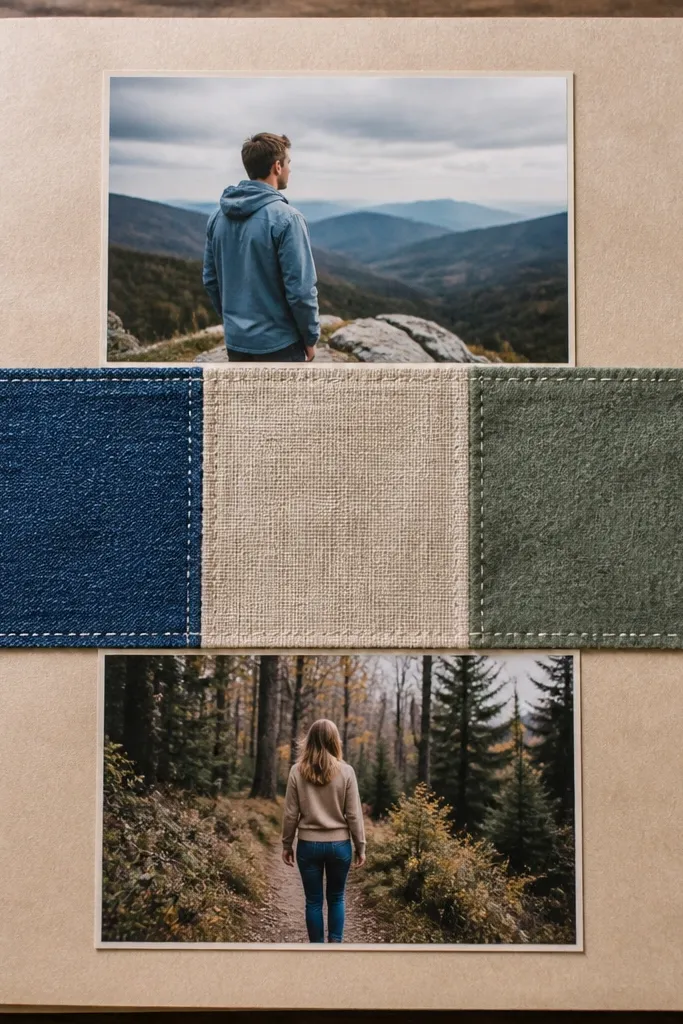
A fabric banner is a strong aesthetic move because it adds texture without visual clutter. Mix two or three fabric scraps — denim, flannel, or a solid cotton — and keep them in one direction across the page. This is great for beginner-friendly boyfriend scrapbook ideas when you want to make the page feel personal but don’t have many supplies. The photo stays readable because the banner is a single band, not scattered bits. It’s also a good fit for “everyday” memories like weekends, road trips, or small wins.
Cut fabric scraps into strips that fit the width of your page about 1.5-2 inches tall. Sew or glue the strips together into one long banner, then trim the ends straight. Glue the banner across the center of a 12x12 base, then place a photo slightly above or below it. Add a small caption label on the banner using a strip of cardstock. Seal loose fabric edges with fabric glue so the banner stays flat in a page protector.
Pre-wash fabric scraps to remove shrink — pages stay flat longer.
Don’t use stretchy knit scraps; they ripple under glue.
12. Star Map Coordinates Page
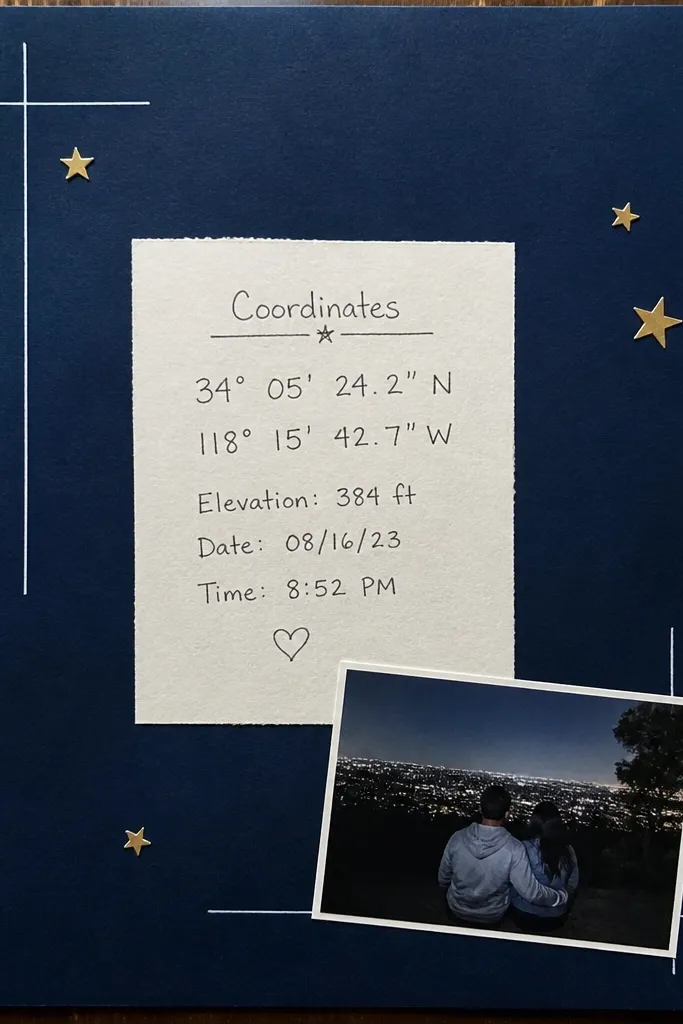
Coordinates pages look nerdy-cute and romantic at the same time. You get a clean typographic layout with a few star accents, and it reads like a meaningful gift even if you only have one photo. This is beginner-friendly because it’s mostly writing and sticker placement. It photographs well because the text is high-contrast and the stars add sparkle without needing glitter. Use it for where you met, where you had your first trip, or where you want to go next.
Choose a dark base color like navy or deep charcoal cardstock. Cut a small lighter rectangle (about 6x3 inches) for the coordinates block and glue it near the top center. Write the coordinates in neat lines with a fine-tip pen. Add star stickers or punch small star shapes from gold paper and place them around the coordinates. Place one photo near the bottom and add a short caption like “We kept coming back to this feeling.”
Use a white gel pen for coordinates so it stays crisp on dark paper.
Avoid glitter glue — it sheds and smears in page protectors.
13. Cereal Box Cutout Collage Title
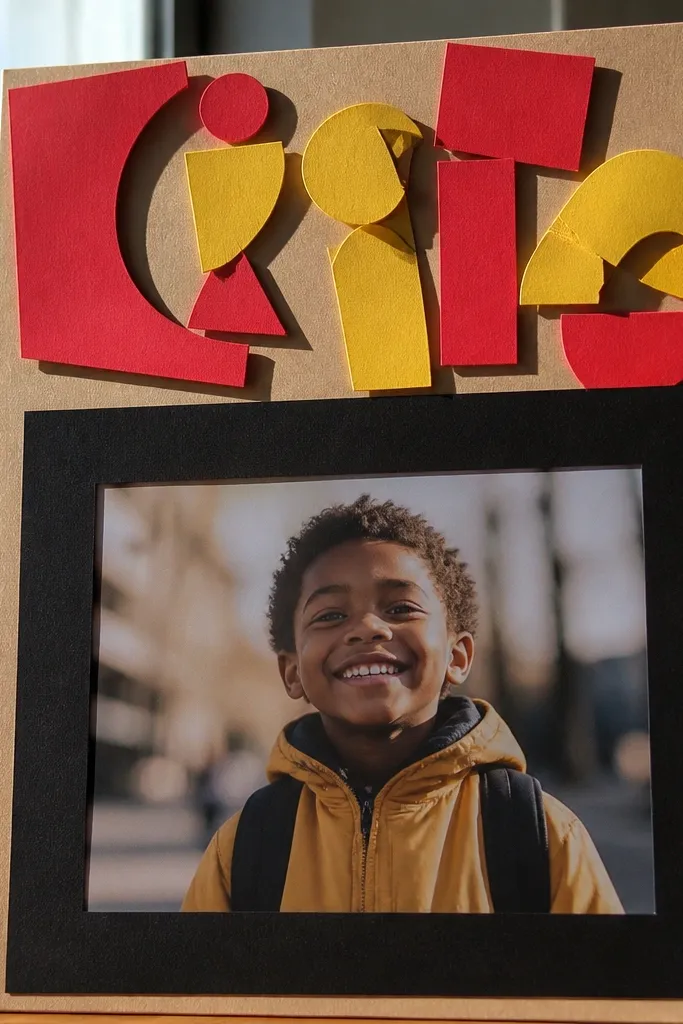
Upcycled packaging gives you graphic print that looks instantly designed. Cereal box typography is bold, and you can cut the letters out to build a title that looks like a poster. Pair it with one photo and a simple border, and the page stays readable. This is beginner-friendly because the packaging does the heavy lifting — you’re not drawing everything from scratch. It’s photogenic because the colors are loud and the composition is centered.
Flatten the cereal box and cut out a few letter chunks or logo pieces. Arrange them on a 12x12 base in a title line, then glue in place once you like the spacing. Add a solid color background behind the title if the packaging is too busy (kraft or light gray works). Place one photo under the title and add a thin cardstock mat around it. Finish with a short date line in a single color pen so the page doesn’t look chaotic.
Pro tipCut letters with a craft knife and straight edge for clean edges; packaging tears look sloppy.
AvoidAvoid using three different packaging types on one page — it looks random instead of intentional.
14. Polka Dot Washi Frame With Date Stamp
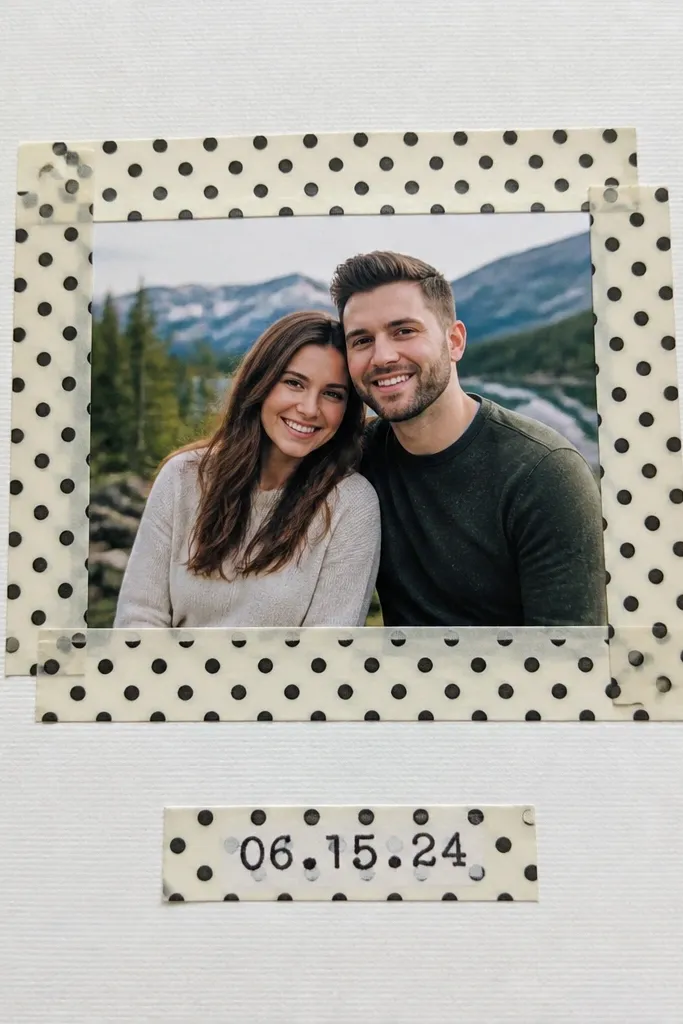
Washi tape frames are the easiest way to make beginner-friendly boyfriend scrapbook ideas look “finished.” Pick one washi tape pattern for the frame and one solid paper for the background. The frame creates a boundary so the photo doesn’t float, and the date label gives it context. This looks good in photos because washi adds color without blocking the photo. It’s also quick, which means you can do multiple pages without burning out.
Cut a 12x12 base from cardstock and place your photo in the center. Measure a rectangle around the photo leaving 1 inch margins on each side. Lay washi tape strips along the top and bottom first, then side strips, overlapping slightly at corners for a clean box. Add a date label strip near the bottom with a printed date or handwritten one. Seal the tape ends with a tiny dot of glue so they don’t lift.
Use a tape runner under the photo, not glue — it keeps the photo flatter.
Avoid mixing multiple washi patterns in the frame; one pattern is what keeps it crisp.
15. Layered "Best Day" Banner With Kraft Edges
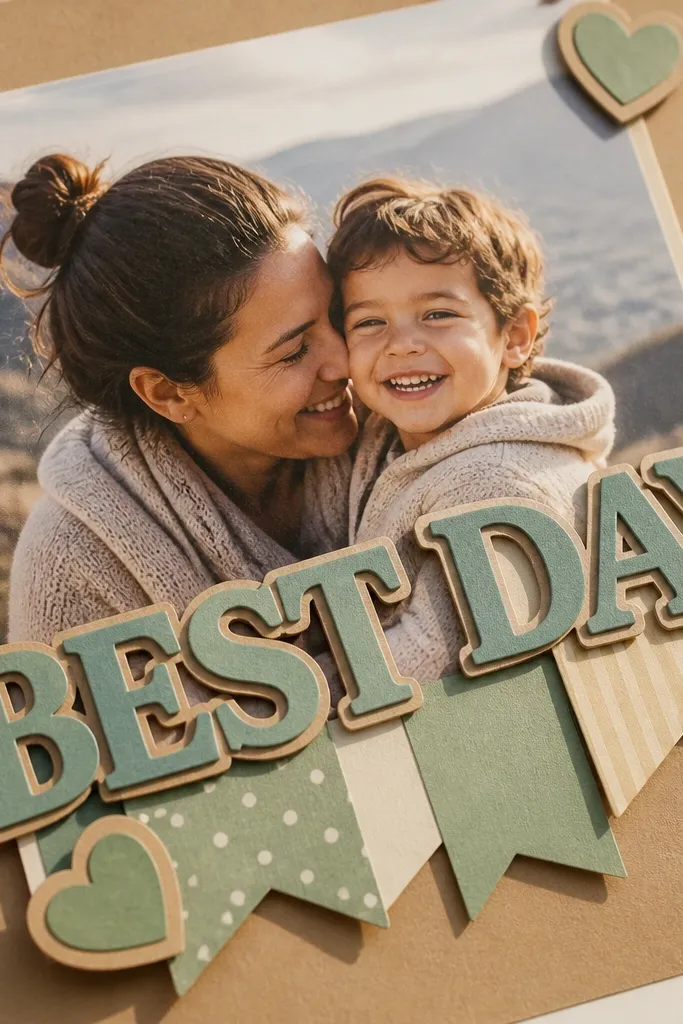
This page is pure visual satisfaction: layered banner letters with kraft edges look warm and intentional. The kraft border adds a steady, neutral tone so your colors don’t clash. It’s beginner-friendly because you’re repeating one banner shape and one font style (handwritten or sticker letters). This works best for a single highlight memory — like a date night, a hike, or a holiday. In photos, the banner pulls attention right away, and the photo below keeps the meaning clear.
Cut two banner layers from cardstock: one thicker kraft layer and one thinner colored layer. Glue the colored layer on top of the kraft layer, then cut out or apply “Best Day” letters across the top banner. Place the banner across the upper third of a 12x12 base, then center a photo under it. Add two small label strips on either side of the photo for date and location. Finish by distressing only the kraft edges lightly with scissors if you want more texture.
Pro tipIf you use sticker letters, press them down with a ruler edge to prevent lifting.
AvoidDon’t put the banner too close to the top edge; leave at least 1 inch for a clean look.
16. Stamped Bottle Cap Circle Page
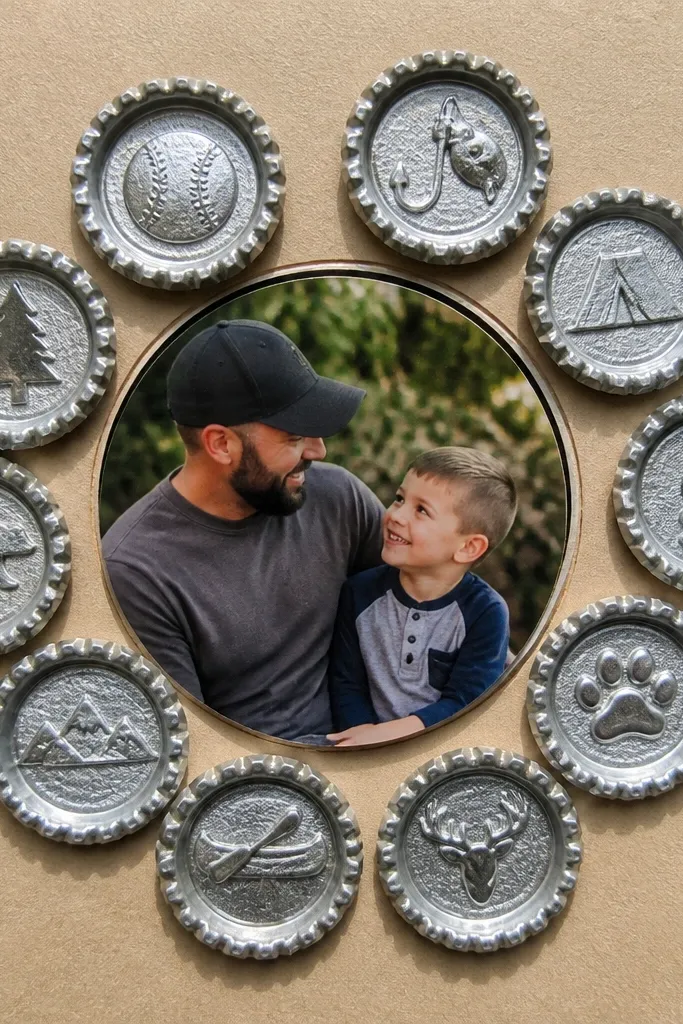
This idea turns small metallic scraps into a strong focal point. Bottle cap-style circles — made from real bottle caps or punched cardstock circles painted metallic — add a punch of shine that looks great in direct light. You get a crisp circular layout, which makes the page easier to assemble for beginners. Pair it with one photo and a short note, and the page feels like a “real project,” not a quick craft. It’s especially good for sports games, road trips, or any memory tied to a favorite drink.
Paint cardstock circles with metallic paint or foil stickers if you don’t want to use actual bottle caps. Arrange 3-5 circles around a central photo area on a 12x12 base, then glue them down. Add a thin ring border drawn in marker around the photo to connect the circles visually. Write a short caption on a banner strip at the bottom. If using real bottle caps, roughen the back with sandpaper and glue with strong craft adhesive so it bonds securely.
Pro tipKeep metallic circles slightly smaller than your photo so they don’t overpower the image.
AvoidAvoid heavy glue blobs on shiny accents — they dry uneven and look lumpy.
17. Frame-Within-a-Frame With Scrapbook Mats
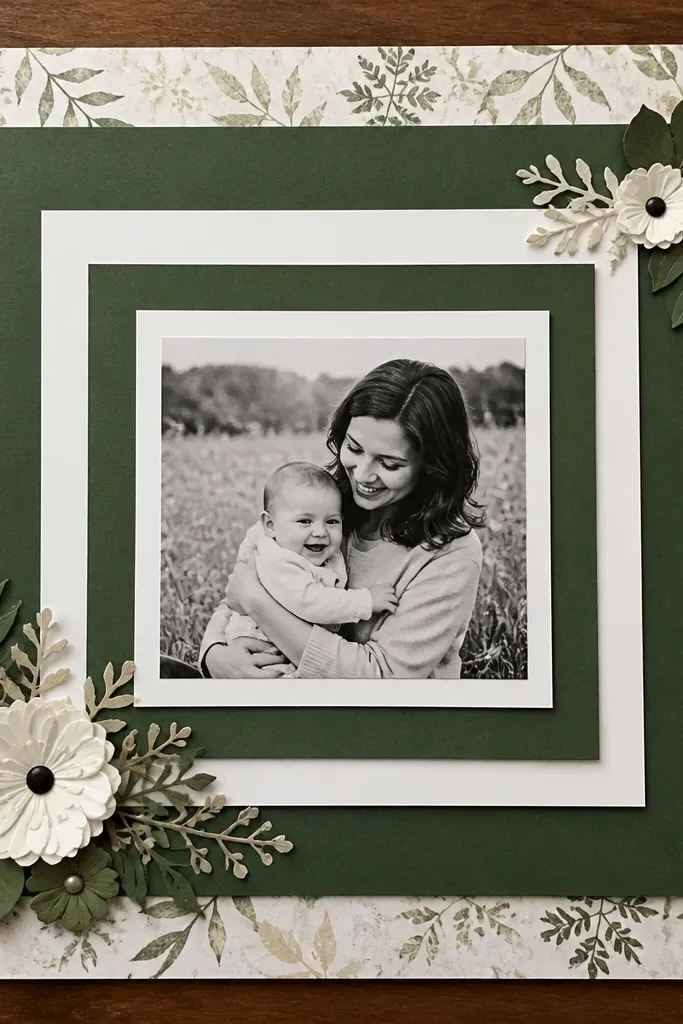
Frame-within-a-frame pages look clean and high-end because they create depth without adding clutter. You’re using layered mats, which is a beginner-friendly technique because it’s mostly straight cuts. The look is photogenic because the inner photo sits in a clear window, while the outer frame adds color contrast. This works for almost any photo type — selfies, group shots, or landscape memories. It’s also a good choice when you want the page to feel calm and classy rather than busy.
Cut an inner mat from solid cardstock (about 4x6 inches) and an outer mat from patterned paper (about 5x7 inches). Center the photo behind the inner mat so it shows evenly. Glue the inner mat to your 12x12 base, then glue the outer mat around it like a picture frame. Add a small handwritten caption strip below the outer frame. Finish by drawing a thin border line around the outer frame using a ruler for alignment.
Pro tipUse the same color family for both mats — it keeps the page cohesive.
AvoidAvoid uneven mat margins; measure the inner window so your photo doesn’t look skewed.
18. Scratch-Off Date Night List Page
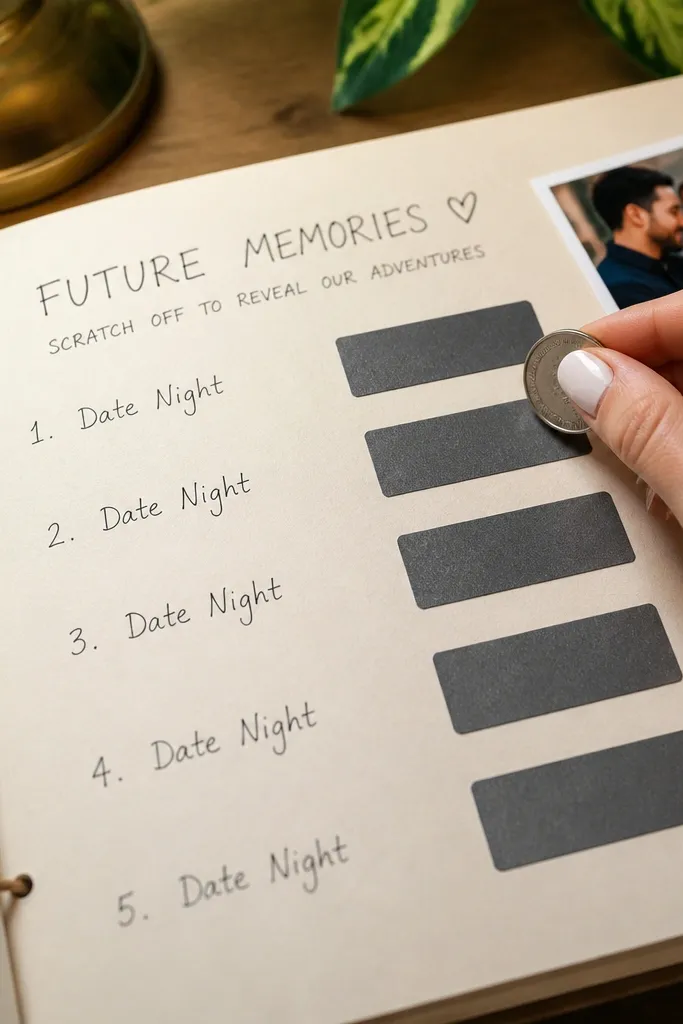
A scratch-off page adds a fun, interactive layer that reads well in photos. You’re making a “future memories” list, so the page isn’t only about the past — it creates something to look forward to. This is beginner-friendly because you’re using simple materials and a straightforward layout: list, scratch area, and one photo. The visual impact comes from the clean blocks and the contrast between the covered area and the text underneath. It’s perfect for long-distance relationships or when you want a gift that keeps paying off.
Write 8-12 short date ideas on cardstock strips and glue them in a neat grid on a 12x12 base. Cover one strip area with a scratch-off coating made for crafts, or use a scratch-off sticker sheet you can peel and place. Place a photo at the top center and add a title like “Next Dates” in bold marker. Add a small note at the bottom about when to start. Let the scratch coating dry fully before putting the page in a protector.
Pro tipKeep date ideas short — 2-4 words each — so the list stays readable.
AvoidAvoid covering the entire page; the list needs open space to look intentional.
19. Mini Scrapbook Poster Page With Corner Tape
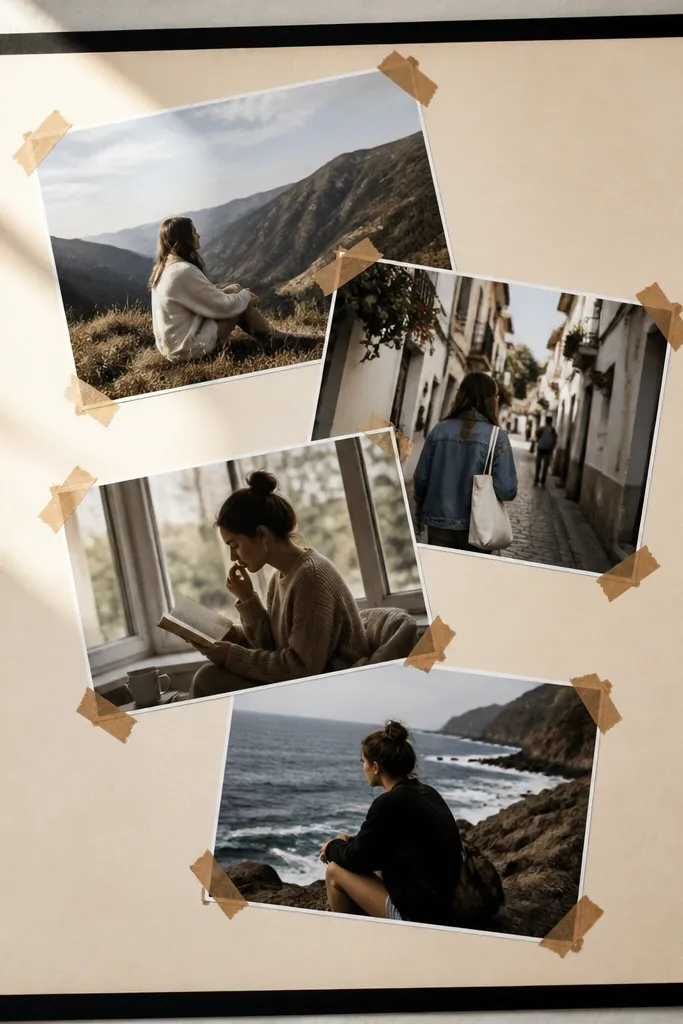
Poster-style pages look bold and modern, and they’re great for beginner-friendly boyfriend scrapbook ideas when you have several photos from one day. The trick is to keep the collage tight and use tape corners so edges look deliberate. This style is photogenic because the layout has a strong diagonal or stacked structure. It also helps you use imperfect photos — the layered look hides slight size differences. Choose one theme color for the background and you’ll get a cohesive result quickly.
Pick a background color and cut it to 12x12. Arrange 3-5 photo prints in a stacked poster layout with one photo slightly larger. Use double-sided tape or photo corners to attach only the corners, leaving the center edges slightly lifted for dimension. Add a banner strip at the top with a short title in marker. Finish by adding two small sticker accents and a date line in the bottom corner.
Pro tipUse one consistent photo size direction (all portrait or all landscape) to keep the poster from looking chaotic.
AvoidAvoid gluing every edge flat; the corner-tape effect is what makes it look cool.
20. Hand-Drawn Doodle Border Around a Photo
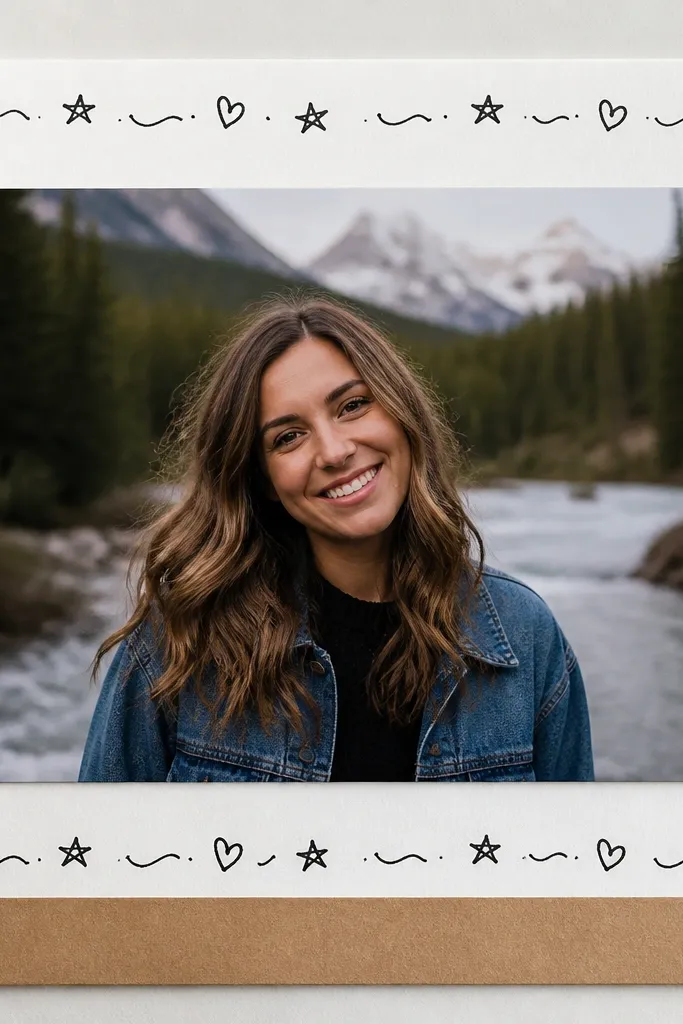
Doodle borders make pages feel personal without needing lots of supplies. The look comes from a consistent border pattern — tiny hearts, stars, lightning bolts, or simple lines — drawn around one photo. This is beginner-friendly because you can start with pencil guides and commit with a fine black pen. It also photographs well since the border frames the photo and gives the page a clear edge. Use it when you want the page to match a specific memory vibe like playful, cozy, or adventurous.
Choose a simple background and place one photo in the center. Lightly pencil a rectangle border around the photo at about 1/2 inch away from the edges. Draw a repeating doodle pattern along the border — keep it consistent in size. Trace the doodles with a fine-tip black pen, then erase pencil lines. Add a small caption strip under the photo with a single sentence.
Pro tipUse a ruler for the border box, not for the doodles — the doodles should look human, not printed.
AvoidAvoid doodles inside the photo — they distract from the memory.
21. Upcycled Fabric Tassel Bookmark Page
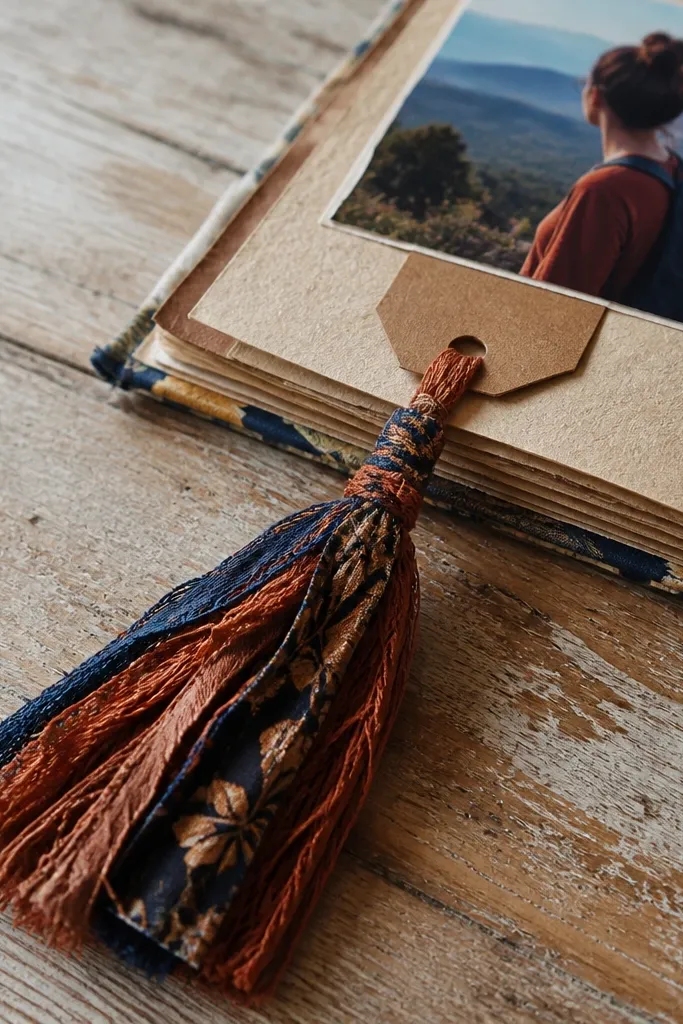
A tassel bookmark page gives you a functional keepsake and a clean aesthetic. The tassel adds movement and texture, and it’s easy to photograph because it hangs slightly off the page. This is beginner-friendly boyfriend scrapbook ideas in the most literal sense: you make something he can use while still keeping the scrapbook theme. It’s best for pages that need a “take this out” element — like a bookmark tied to a letter or a photo card. It also uses fabric scraps perfectly, so you don’t need to buy new materials.
Cut fabric scraps into strips about 1 inch wide and 6-7 inches long. Glue or tie a small bundle at one end with twine, then trim the ends evenly. Attach the tassel to the top or side of a 12x12 base with double-sided tape and a small cardstock reinforcement patch. Glue a photo card near the bottom and add a label like “For the next time you read this.” Put the page in a page protector carefully so the tassel doesn’t snag.
Use a scrap strip as a backing patch so tape bonds better to fabric.
Avoid super long tassels; they catch on protectors and get bent.
22. Washer Tape Sticker Date Labels
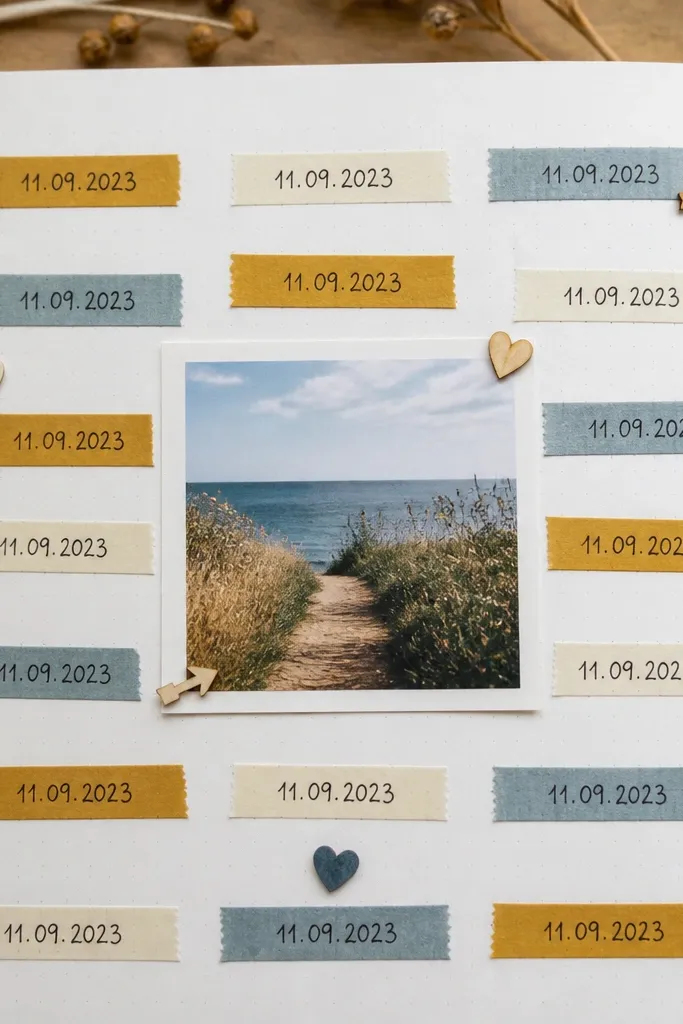
Small date labels are the easiest way to make a scrapbook look curated. You’re turning simple handwriting into a repeated design element by using washi tape strips as mini frames. This is beginner-friendly because you can do it with scraps and a pen in under an hour, and it works on any page theme. It’s photogenic because the labels create a neat rhythm around your photo. Use it for “memory highlights” pages where you want multiple short moments on one layout.
Cut washi tape strips into 1-1.5 inch lengths and stick them lightly onto scrap paper first. Write the date or short label on the tape strip with a fine-tip pen, then cut a neat rectangle if needed and press it onto your page. Arrange 4-8 labels around a central photo, spacing them evenly with a ruler. Add one larger caption strip at the bottom for context. Seal the labels with a thin matte adhesive if your pen smudges.
Write on the tape right after cutting — older tape edges can lift and smear ink.
Don’t place labels on busy patterned areas; choose a calmer background behind them.
23. Seed Paper Promise Page
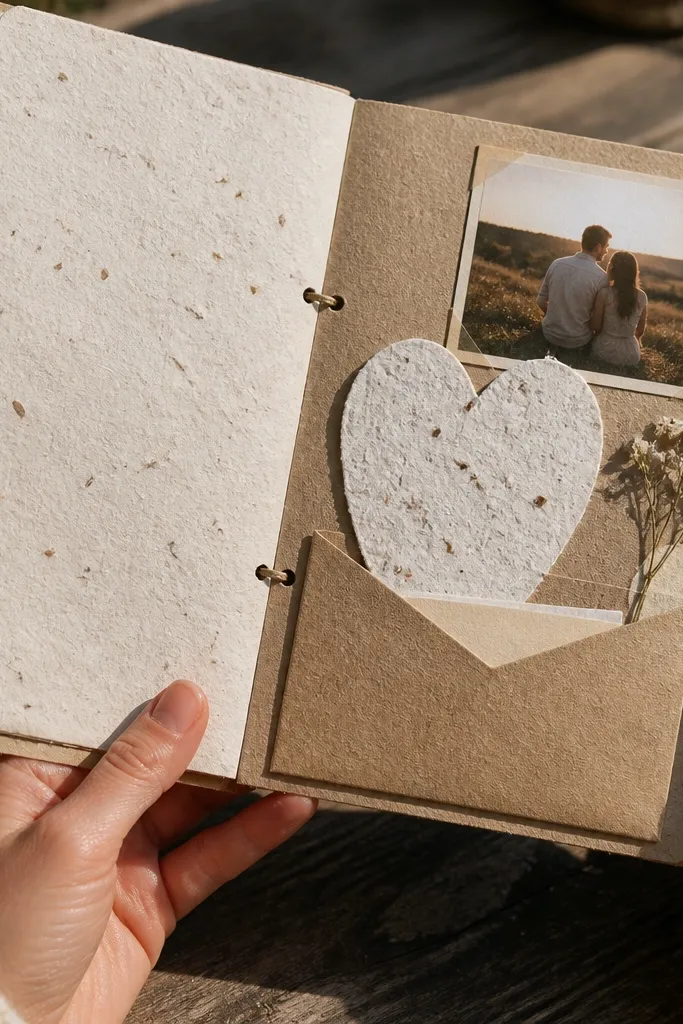
Seed paper and promise text create a page that feels meaningful without being complicated. You’re making a pocket for a tiny note, and the seed paper element adds a nice story hook. This is beginner-friendly because the “craft” part is simple: pocket + note + one photo. It also looks great because kraft paper is neutral and seed paper has a natural speckled texture. Use it for future plans, like “next spring trip” or “we’ll try again,” when you want the page to feel hopeful.
Cut a kraft cardstock pocket about 5x7 inches with a 1/2 inch top flap. Glue the pocket to a 12x12 base, then add a small photo near the top corner. Write one promise on a small note card and slide it into the pocket. Add a seed paper square or a small seed packet tag near the note with tape runner. Finish by labeling the pocket with a short title like “Plant this.”
Use a sharp craft knife to cut the pocket flap — dull blades crush kraft paper edges.
Avoid wet adhesives near seed paper — it can warp and wrinkle.
24. Foam Tape City Skyline Layer Page
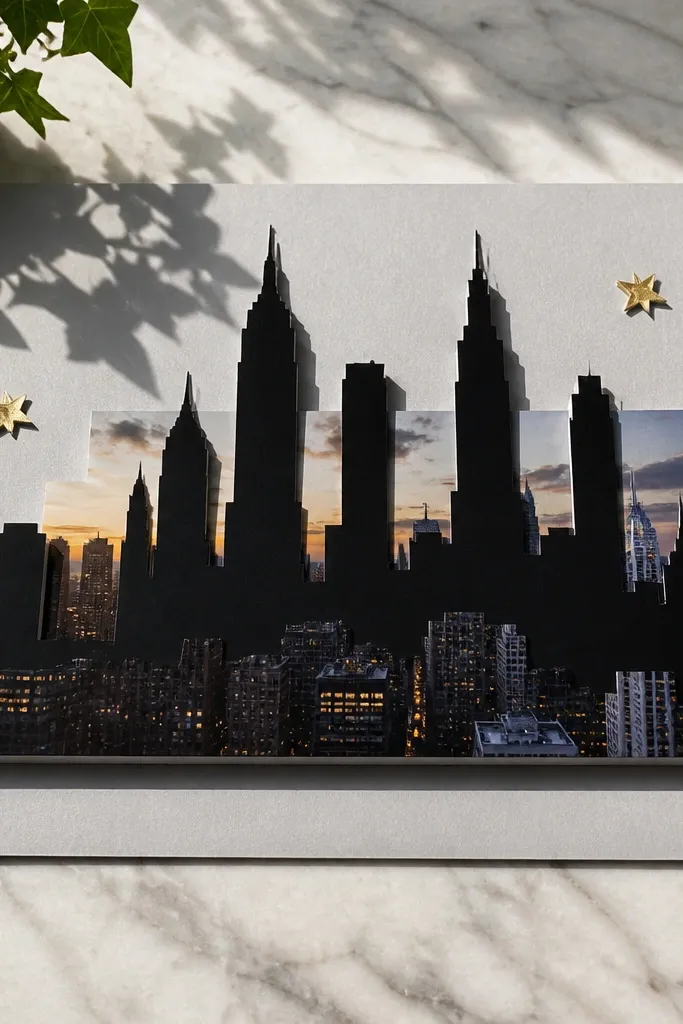
A skyline silhouette gives you a strong visual theme and makes the page look like a poster. Layer it over a photo using foam tape so it casts a slight shadow — that depth looks great in photos. This is beginner-friendly because the silhouette can be cut from black cardstock using a printed template you trace. It’s a smart choice when you have a travel memory or a place he loves. The look feels modern, and the layered depth keeps it from looking flat.
Print or trace a skyline silhouette onto black cardstock and cut it out. Place your photo on a 12x12 base, then center the skyline above it. Add foam tape strips behind the skyline so it lifts 1/4 inch. Write a short city name label on a small kraft strip and glue it under the skyline. Add one thin line of journaling on the bottom like a date and a one-sentence memory.
Pro tipKeep foam tape only under the skyline — don’t lift the photo or the page will feel uneven in protectors.
AvoidAvoid tiny silhouettes; small cutouts blur in photos.
25. Sticker Icon "Things I Love" Grid
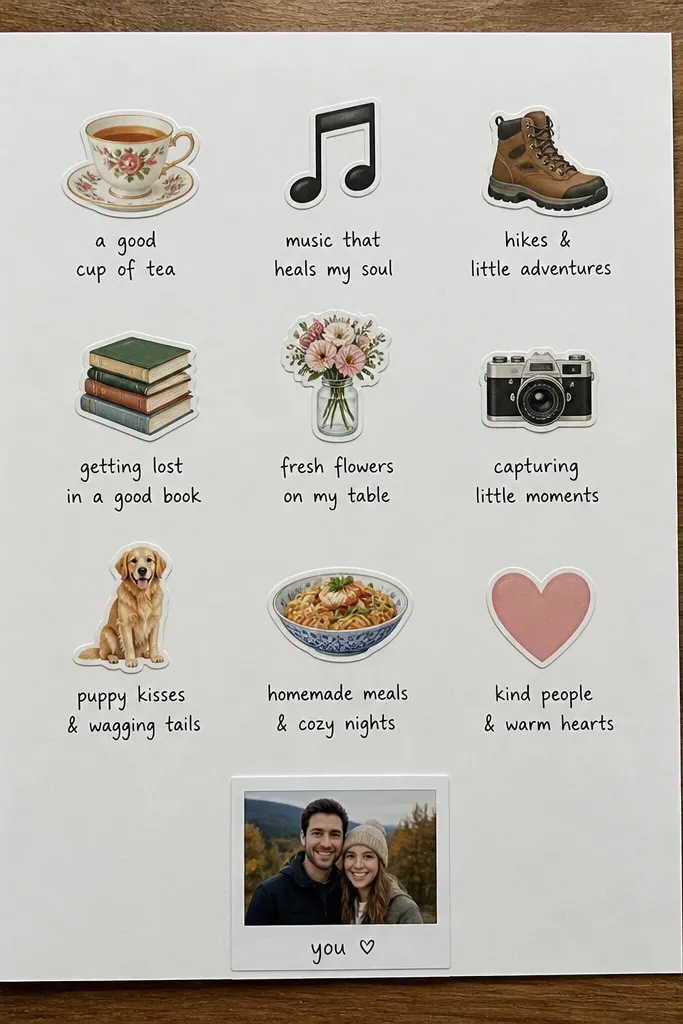
A “things I love” grid is clean and readable, which matters when you’re trying to make beginner-friendly boyfriend scrapbook ideas look good fast. You’re using icon stickers as mini categories, then writing one short phrase under each. The grid structure makes the page feel organized and photo-ready. It also works well when you have a mix of memories and can’t decide on one story line. It’s photogenic because the eye can scan quickly — icons, words, then the photo anchor.
Choose a sticker sheet with icons that match one theme color family. Draw a simple 3x3 grid on a 12x12 base using pencil and a ruler, then glue stickers into each cell. Write one short phrase under each icon with a fine-tip pen, keeping each phrase under 5 words. Place one photo centered in the middle behind or above the grid, depending on layout. Add a title strip at the top with the words “Things I Love About You” in marker or sticker letters.
Use a consistent handwriting size for every cell — it’s the difference between cute and messy.
Avoid full paragraphs in the grid; long text ruins the clean look.