
1. Paper Bag + Black Washi Frame Cover
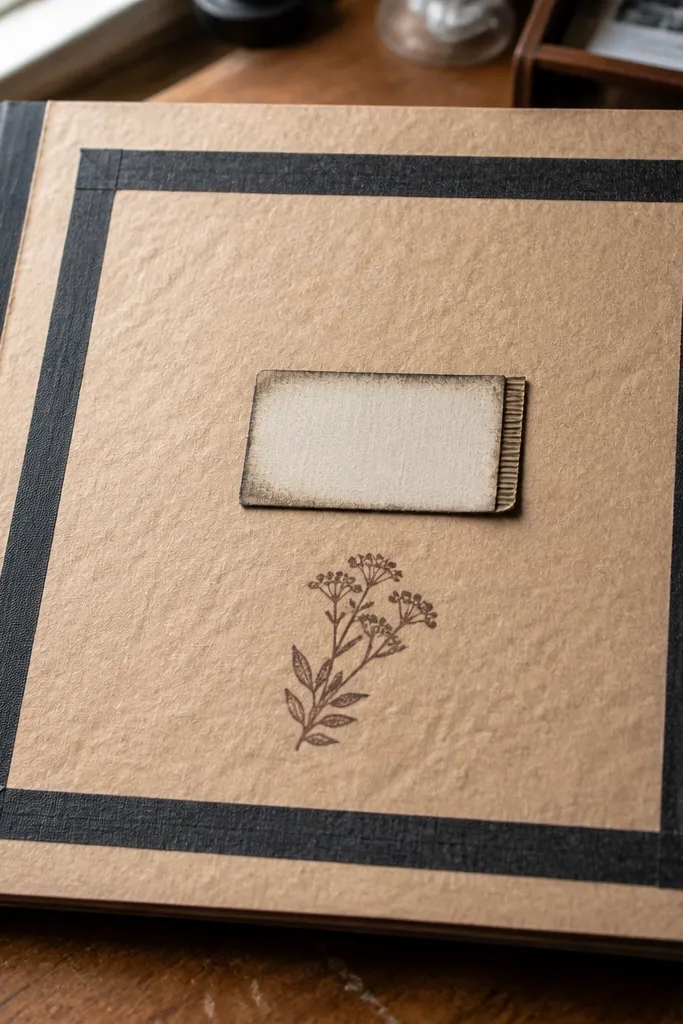
This one looks expensive because the paper bag texture is already dramatic, and the black washi tape makes it feel designed instead of random. You’re basically building a “gallery mat” around your scrapbook. The center can be as simple as a small label cut from a cereal box or an old shipping tag. Add one inked detail — like a date stamp or a tiny star — and it photographs with that clean, graphic contrast. Skill level is beginner-friendly, and the time stays under two hours because you’re not doing complicated construction.
Start by cutting a base from doubled cereal-box cardboard to your scrapbook cover size. Tear a sheet of paper bag material slightly larger than the base, then glue it down with a thin, even layer of matte Mod Podge. Make a border by laying black washi tape strips along all four edges, trimming the corners with a craft knife. Finish by adding a small title patch in the center using glue stick first, then seal over it lightly with matte sealer.
Press the tape down with a ruler edge so it’s sharp, not bubbly.
Don’t flood glue over the paper bag — it warps and makes the texture look muddy.
2. Old Book Page Sunburst with Faux Label Title
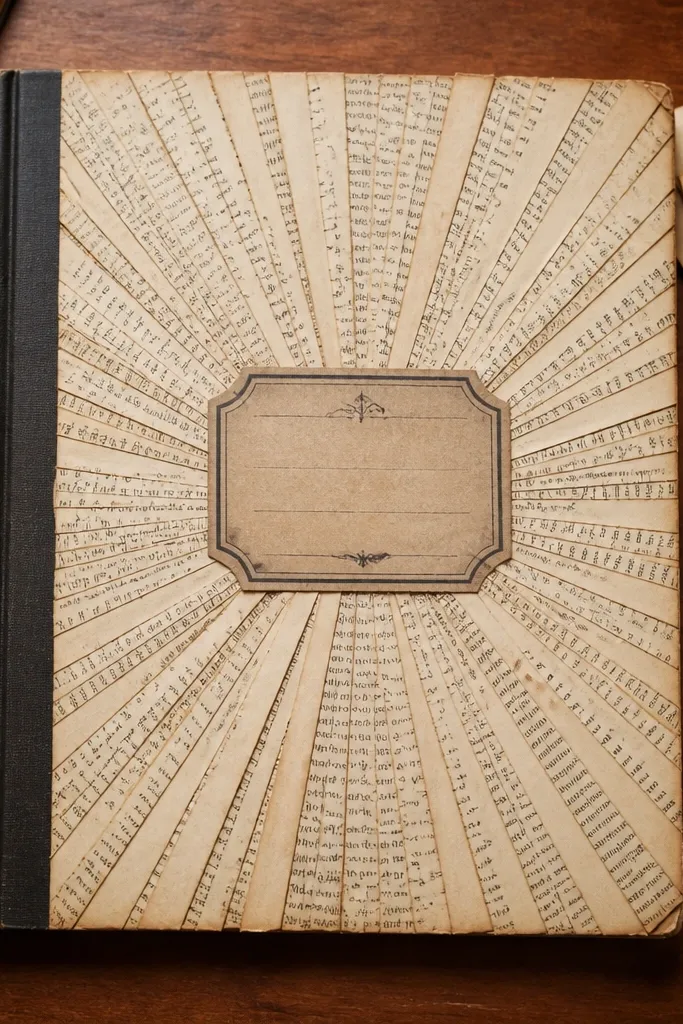
This cover is gorgeous because the sunburst pattern gives instant movement, and book pages add that soft vintage tone without needing fancy supplies. Use one page color family — cream pages or darker ones — so it looks cohesive. The faux label title makes the page feel like a real printed cover, not a collage. It’s a great match for travel journals, reading logs, or memory books where you want the cover to feel story-like. It takes a little longer because you’re cutting wedges, but it’s still very doable in an afternoon.
Cut a stiff base and cover it with a single sheet of book paper, then seal lightly with matte Mod Podge. For the sunburst, cut 12-18 wedge shapes from book pages, all roughly the same width at the center, then fan them out from the middle like a half-open fan. Glue the wedges one at a time, keeping the tips aligned at the center point. Add a label title cut from cardstock or a manila folder strip, then outline it with a fine black pen before sealing the whole cover.
Use a paper trimmer for consistent wedge widths; uneven wedges show in close-up photos.
Skip glossy seal on book pages — it can create glare that kills the vintage look.
3. Fabric Scrap Wrap with Button Corner Detail
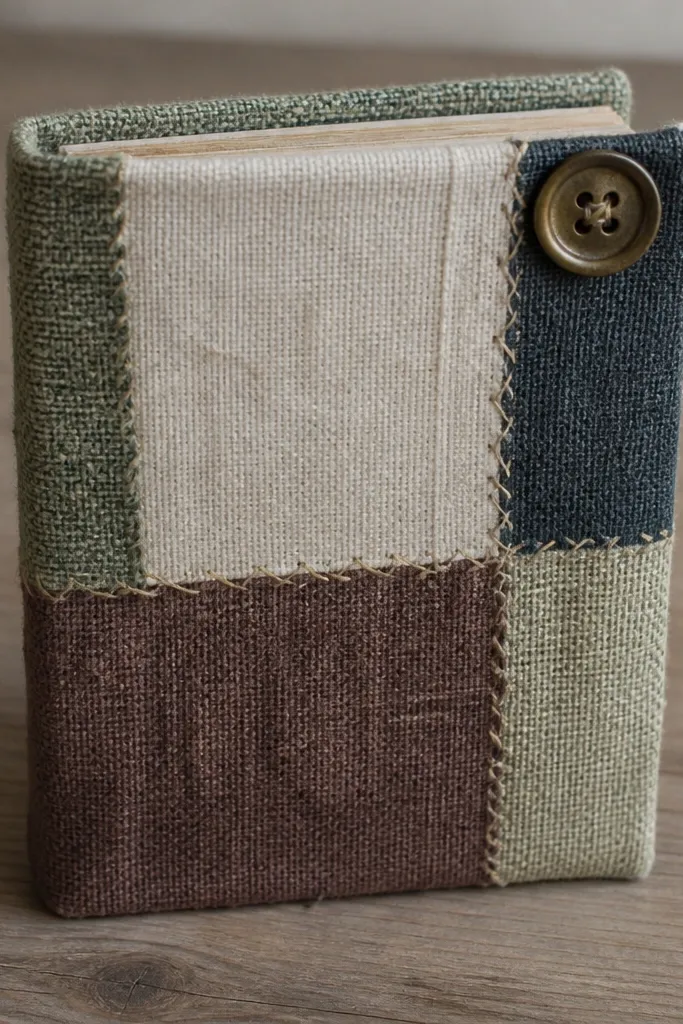
Cut a cardboard base and apply double-sided tape or glue to the front edge area. Lay your fabric wrong-side up, center the base, then pull the fabric tight and fold the edges to the back like wrapping a gift. Trim excess fabric close to the folds, then glue down the last flaps. Add the button by gluing it on top of the fabric corner and stitching it with thread around the button hole if you want extra durability. Seal around the button area carefully with a matte fabric-safe sealer so it doesn’t soak.
Fabric makes scrapbook covers feel high-end fast because the texture reads instantly in photos. This idea looks clean even with scraps because you wrap the front and keep the edges crisp. A single button at the corner adds a little “collector” charm without clutter. It suits keepsake scrapbooks, holiday memory books, and anything that deserves a softer, cozy tone. The build is straightforward: fabric wraps are forgiving, but your edge finishing has to be neat.
AvoidDon’t use thick hot glue blobs on fabric edges — they create lumps that show when the book opens.
Pro tipLightly iron the fabric before wrapping so wrinkles don’t lock in under glue.
4. Thrifted Postcard Collage with Clear Tape Hinges
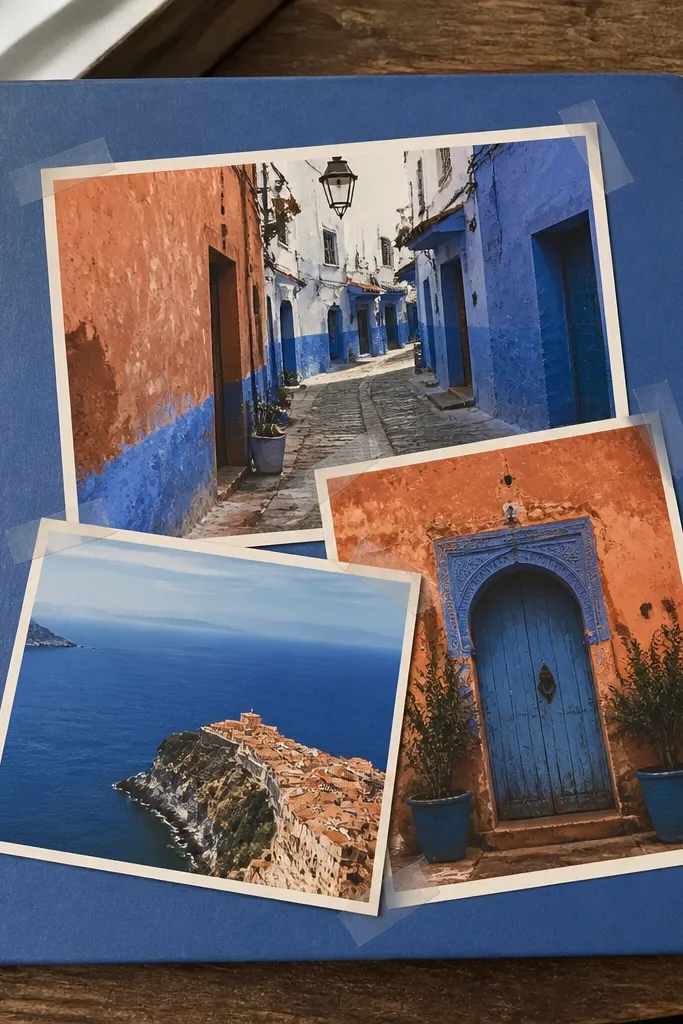
This cover is photogenic because postcards already have strong color blocks and readable textures. The trick is how you layer them: clear tape hinges let some pieces sit slightly raised, so the cover has dimension. It also looks tidy because the tape placement is controlled, not messy glue smears. Choose 3 postcards max so the design stays sharp and not chaotic. Great for travel memory books, art journaling, and year-in-review scrapbooks.
Cover your base with a solid color paper (black, navy, or deep green look best) and seal it. Cut postcard pieces so two sit flat and one sits slightly above, then position them without glue first. Tape the raised piece on with clear tape hinges: one small strip at the top edge and press it down, then fold the hinge. Glue the corners of the flat postcards only, then seal over the top with matte Mod Podge, avoiding the hinge tape so it stays clean.
Use a craft knife to trim postcard edges so they don’t look ragged under sealing.
Don’t stack more than three postcard layers — the cover gets thick and hard to open.
5. Scrapbook Cover with Denim Pocket + Leather Strap Loop
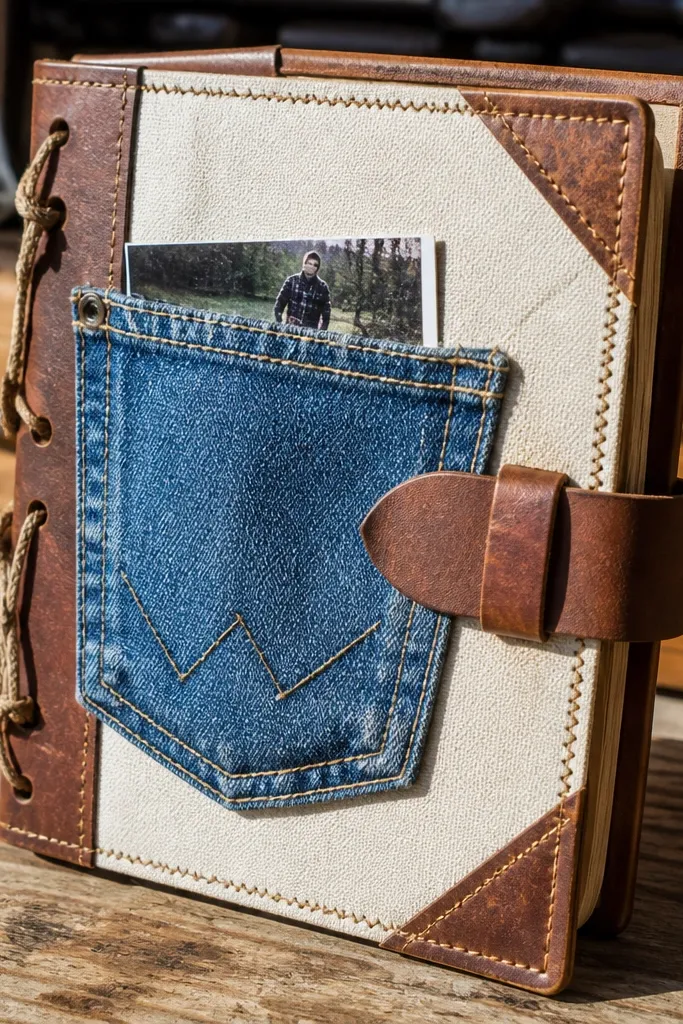
Cut a base and cover it with a neutral cardstock or fabric panel so denim pops. Trim a denim pocket from an old jeans leg, keeping the pocket opening intact and the edges clean. Glue the pocket down with fabric glue or hot glue around the perimeter, then add a faux “belt” look by attaching a strip of leather or faux leather along one side. Punch two small holes in the leather strip and thread it to form a loop, then glue the ends behind the pocket. Seal the surrounding paper areas with matte Mod Podge, leaving the denim untouched if you want the texture to stay dry.
Denim pocket covers look instantly cool because denim has visible weave texture, and pockets create an obvious focal point. A leather strap loop makes it feel like a real product, not craft-store DIY. This is best for people who like practical covers — you can hide a bookmark, receipts, or a tiny photo card inside the pocket. It also photographs well because denim catches light differently than paper. Time is moderate because you’re trimming a pocket and attaching hardware-style details.
AvoidDon’t glue over denim seams with too much glue — it stiffens the fabric and looks lumpy.
Pro tipIf you’re using faux leather, scuff it lightly with sandpaper so glue grips.
6. Watercolor Wash Background with Stamped Date Strip
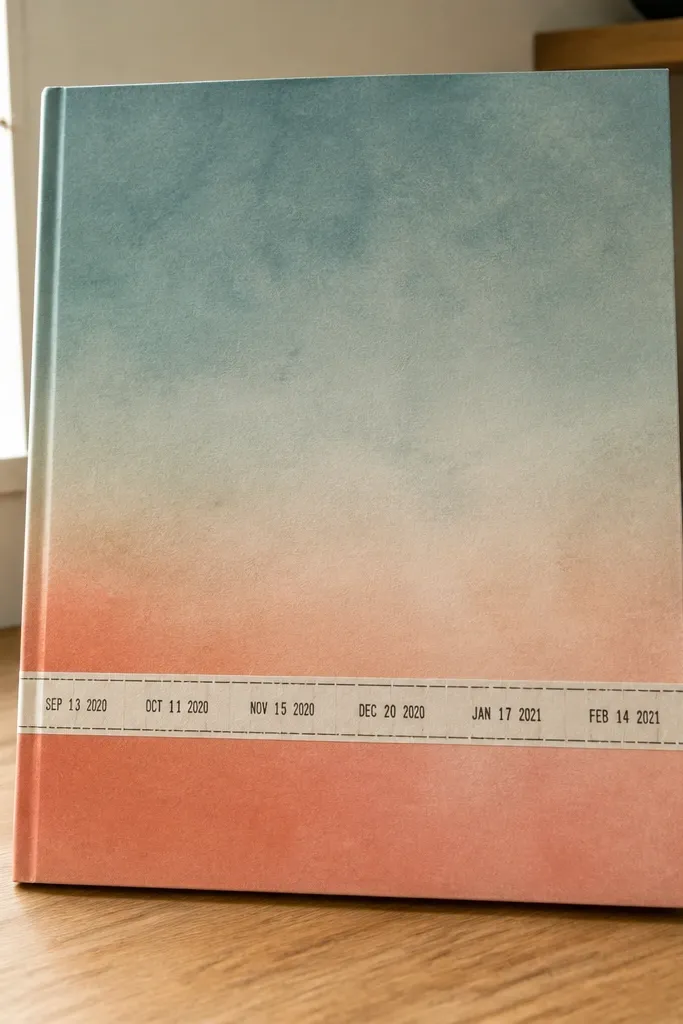
Prime your base with white gesso or thick white craft paint so the wash doesn’t soak unevenly. Apply a diluted watercolor wash using a sponge or foam brush in two colors, letting edges blend while staying light. Once dry, stamp or hand-write a date strip along the bottom using black ink and a small rectangle guide. Add a thin border line in a matching color and seal with matte sealer. For extra pop, lightly dry-brush white paint around the edges of the strip.
This cover looks gorgeous because watercolor washes create smooth color gradients, and a stamped date strip gives it structure. You get a clean, artsy vibe without needing expensive paints. The date strip is the anchor — it makes the cover feel like a real scrapbook product with a theme. Keep the palette to two colors plus white — it stays photogenic and not muddy. It’s beginner-friendly if you use craft paints and a foam brush for controlled splatters.
AvoidDon’t seal until fully dry — wet watercolor under Mod Podge turns patchy.
Pro tipSpray a light mist of water on the wash edge to get a cleaner blend instead of hard lines.
7. Lace Trim Border with Kraft Paper Center Window
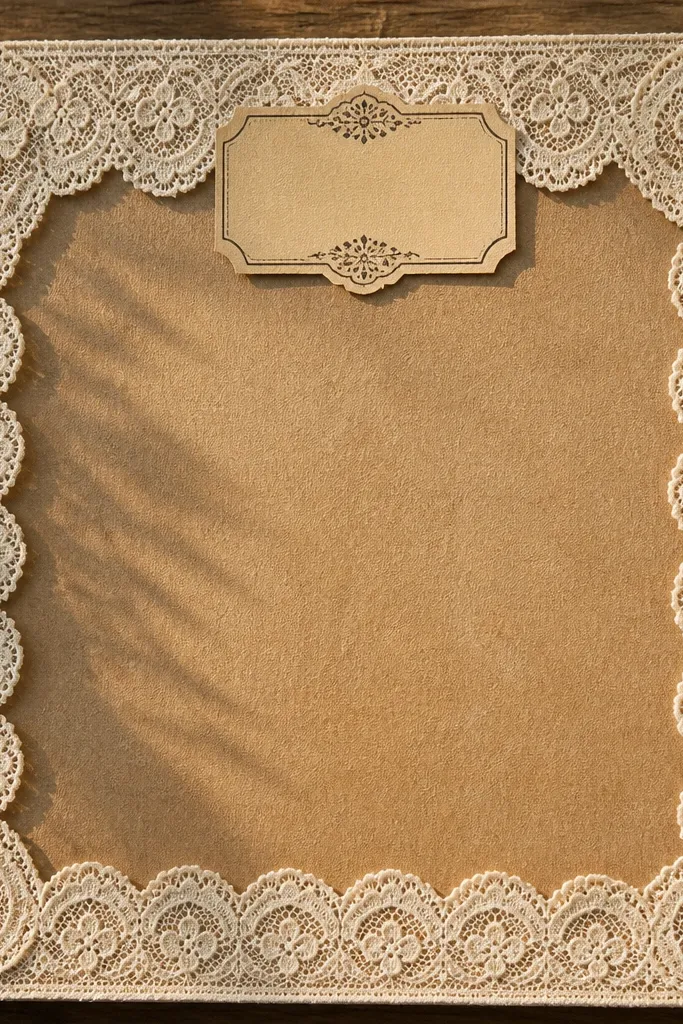
This idea looks expensive because lace trim brings a delicate border effect, and kraft paper gives you that warm, grounded center. The “window” layout keeps the design focused: lace around the outside, kraft in the middle, and one small title label on top. It’s great for baby books, wedding planning binders, or any sentimental scrapbook where you want soft texture without busy patterns. Skill level is easy. The main work is cutting and aligning the lace so it sits evenly.
Cover the base with a dark cardstock or painted paper panel so the kraft center stands out. Cut a kraft paper rectangle slightly smaller than the front and glue it in the middle. Lay lace trim along the outer edge, starting at the top center, and tape it in place before gluing. Trim lace at corners with a sharp scissor so it meets cleanly. Add a small title rectangle cut from cream cardstock, glue it on, then seal lightly with matte Mod Podge around the label edges.
Use double-sided tape to hold lace while you glue — it prevents drift.
Don’t use thick glue directly under lace — it seeps and makes hard spots.
8. Monochrome Sticker Cluster with Faux Stitched Frame
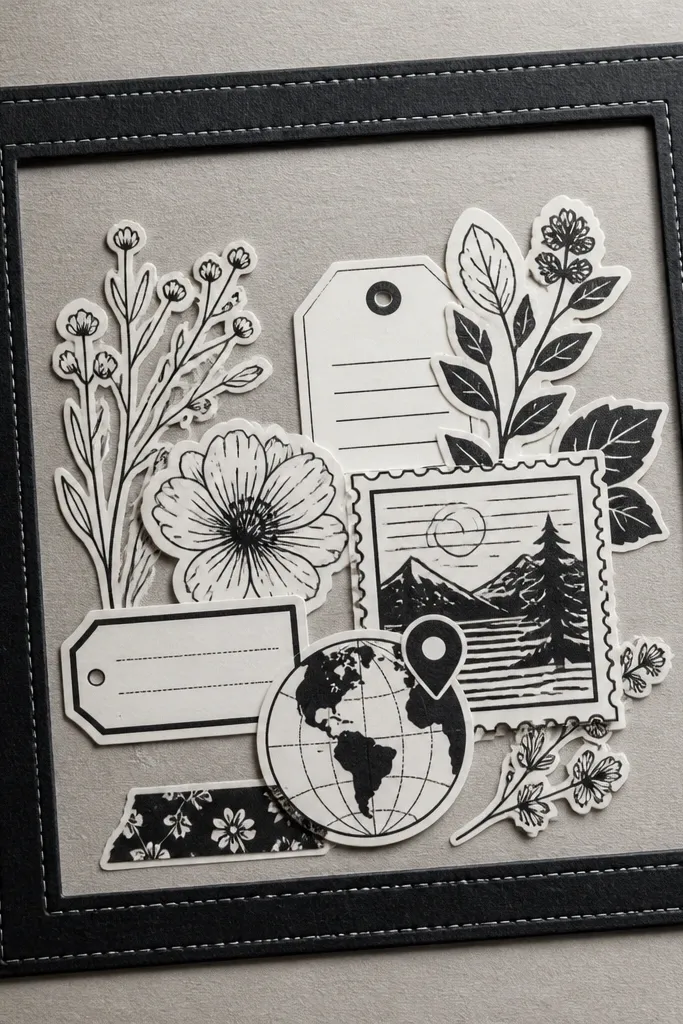
Monochrome looks clean on camera, and sticker clusters are one of the fastest ways to get a gorgeous cover without painting. The faux stitched frame adds structure so the stickers don’t look like random decoration. Pick stickers with one theme — florals, travel icons, or handwritten labels — and keep the colors to black, white, and one gray tone. This cover suits planners, habit trackers, and scrapbooks where you want a crisp, modern look. It’s quick but still looks intentional because the frame is drawn and measured.
Cover the base with matte white or light gray cardstock. Place a rectangle frame around the edges using a pencil guide, then draw a dashed “stitch” line with a fine black pen. Build a sticker cluster in the center: arrange 6-10 stickers, then pick the best layout before removing any backing. Press them down firmly, then add a small handwritten title on a label strip. Seal with matte spray or matte Mod Podge, keeping spray light so stickers don’t wrinkle.
Use a ruler to keep the dashed frame evenly spaced; it’s what makes it look designed.
Don’t pick mixed color stickers — monochrome only works when the palette stays tight.
9. Magazine Cutout Chevron Pattern on the Spine Side
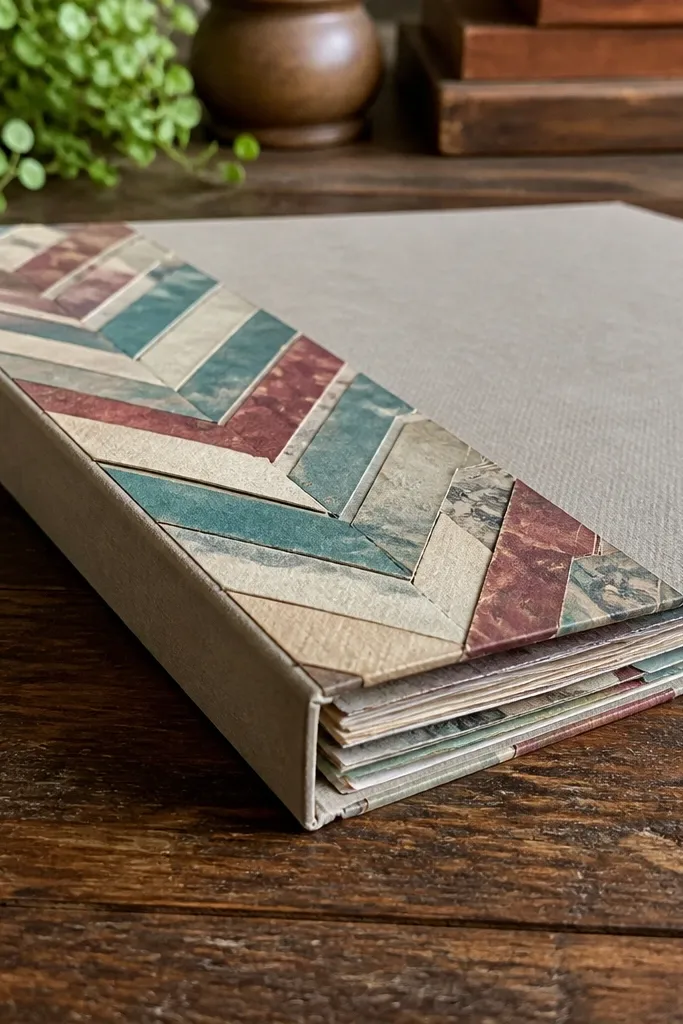
This cover looks striking because chevrons create a strong visual rhythm, and magazine cutouts add real color variety without you painting anything. The part that makes it scrapbook-worthy is placing the chevron pattern slightly toward the spine side so it feels like a design element, not a wallpaper. You also get a practical benefit: the pattern hides minor edge imperfections. This works well for spiral-bound or hinge-style scrapbooks where the spine area is visible. It’s moderate skill because you need clean cuts and alignment.
Cover the base with a solid paper that matches one of the chevron colors. Cut magazine strips into triangles sized to form a consistent chevron pattern, making sure the narrow ends align. Arrange the chevrons in dry layout first, then glue in rows starting from the bottom. Keep the chevrons away from the spine by 1-2 cm so they don’t catch when the book opens. Seal once dry, then add a small title strip at the top center using cardstock.
Cut triangles using a paper trimmer for even angles — crooked chevrons show instantly.
Don’t glue chevrons directly over the spine hinge area — it will buckle when opened.
10. Washed Paint Chip Color Block with Tiny Photo Window
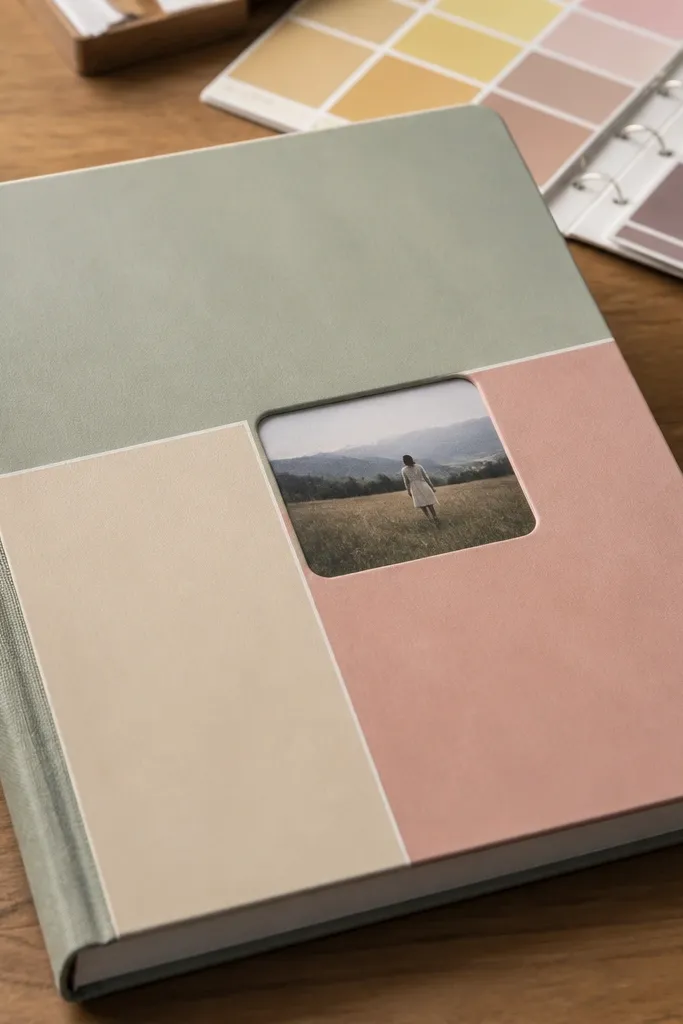
Paint chips look gorgeous because they already have clean typography and bold color fields. This idea uses color-blocking to create a modern cover, then adds a tiny photo window so it feels personal. The photo window keeps the cover from looking like a craft project and gives it that scrapbook “moment.” Use two to four paint chip colors max and keep them in a grid. It’s quick, cheap, and looks crisp in bright light.
Cut your base and cover it with a solid neutral background (white or light gray). Cut paint chips into rectangles and arrange them in a simple grid, leaving a centered space for the photo window. Glue the rectangles down, then cut a window opening in the center using a craft knife. Place a small printed photo behind a thin cardstock frame, then glue the frame edges to the base. Seal lightly so paper doesn’t bubble; leave the photo window clear by sealing only around the frame.
Back the photo with a thin cardstock sheet so it doesn’t wrinkle when you glue the frame.
Don’t choose colors that are too close — low contrast looks flat and boring.
11. Gel Pen Scribble + Clear Sticker Overlays
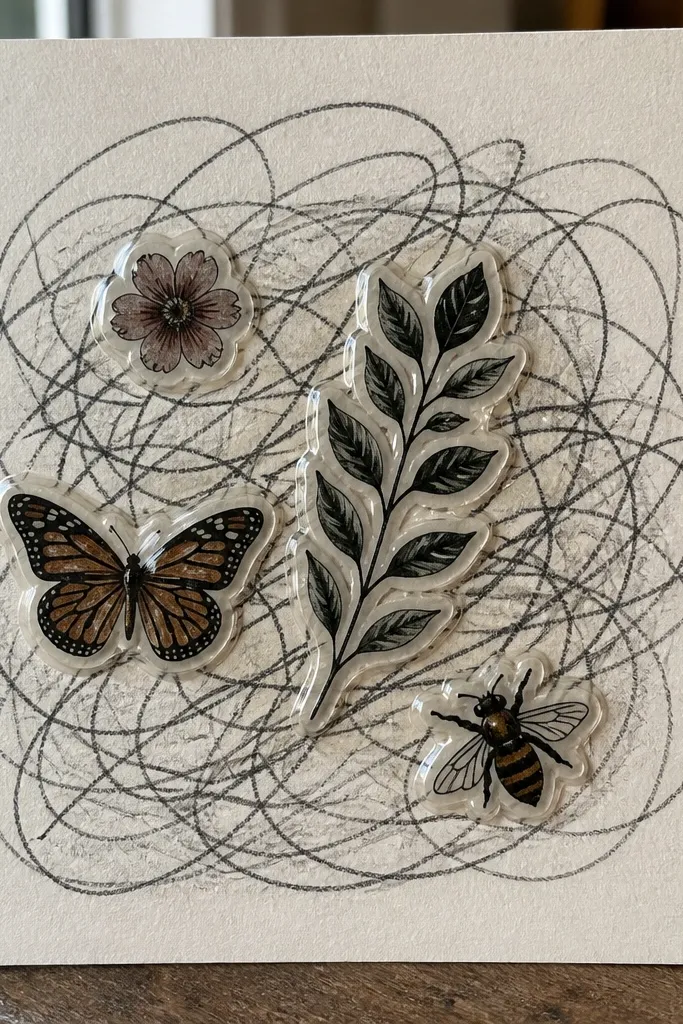
This cover is photogenic because it blends hand-drawn texture with glossy-ish highlights from clear stickers. The scribbles make it feel personal, while clear overlays keep the design clean and layered. It’s a good option when you don’t have many printed photos yet; the cover can carry the personality. Keep the scribble style controlled: one direction, one thickness, one color. The clear overlays add depth without clutter.
Start with a smooth white base and sketch a loose scribble path around the center using a black gel pen. Let your ink dry fully. Place clear stickers (or clear label stickers) over the scribbles in a small cluster, then press firmly. Add one small matte title label on top using a different font style or handwriting. Seal with matte sealer over the paper areas only; if your stickers are glossy, use a very light coat so they don’t lose their shine.
Use a scrap paper sheet under your hand so you don’t smear ink while drawing.
Don’t cover wet gel ink with Mod Podge — it smears and turns gray.
12. Ticket Stub Border with Corner Washi Strips
Cover the base with a light neutral sheet so the ticket colors pop. Cut ticket stubs into matching heights for top and bottom borders, then trim sides so the border looks even. Glue the border first, then add a small title label in the center. Use washi tape at each corner like tiny hinges to tie the border together. Seal carefully with matte Mod Podge so the ticket edges don’t lift.
Ticket stubs look great because they already have dates, typography, and varied paper tones. Build a border instead of a full collage — it keeps the center open and makes your cover readable. Corner washi strips add a little framing flourish, and the whole thing looks like a themed scrapbook you’d pay for. This works for concert journals, museum trips, and anything where receipts are part of the story. It’s easy and takes about an hour if you’re cutting neatly.
AvoidDon’t glue tickets flat edge-to-edge with thick glue — you’ll get bumps that show through the seal.
Pro tipSave one longer stub for the bottom border — it anchors the composition.
13. Thick Yarn Top Edge for a Soft Spine Look
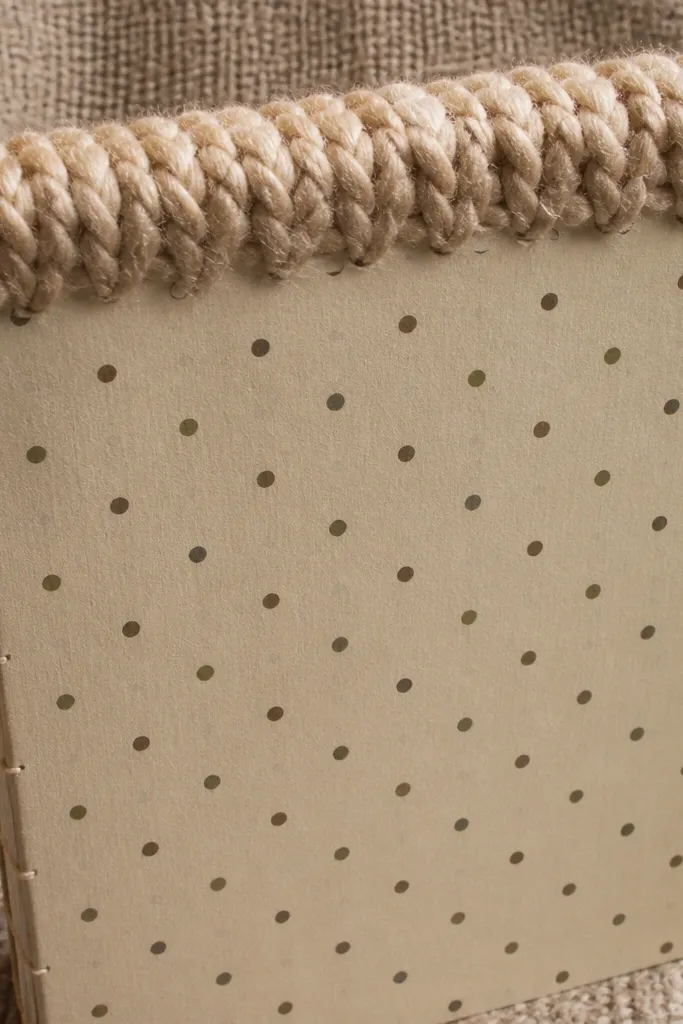
Yarn instantly makes a cover feel cozy and tactile, and a top-edge yarn trim gives a clean “soft spine” effect without covering the whole front. Pair it with a simple printed background so the texture becomes the star. This idea is great for winter journals, family scrapbooks, and any cover that needs warmth. It’s beginner-friendly because you’re mostly attaching one trim line and adding one focal label. The photo appeal is strong because yarn creates highlights and shadow lines.
Cover the base with patterned scrapbook paper or a solid color that matches your yarn. Mark a straight line 1-2 cm down from the top edge, then glue along that line using a hot glue gun or strong craft adhesive. Lay yarn along the line, pressing it in place, and trim the ends neatly at the sides. Add a centered title label below the yarn, then seal around the paper area only so the yarn stays flexible. Let dry flat before closing the book cover.
Use thicker yarn (like 3-5 mm) so the texture shows even in small cover photos.
Don’t skip letting glue cool — hot glue can soak into paper and leave dark patches.
14. Stenciled Leaf Border with Hand-Cut Center Tag
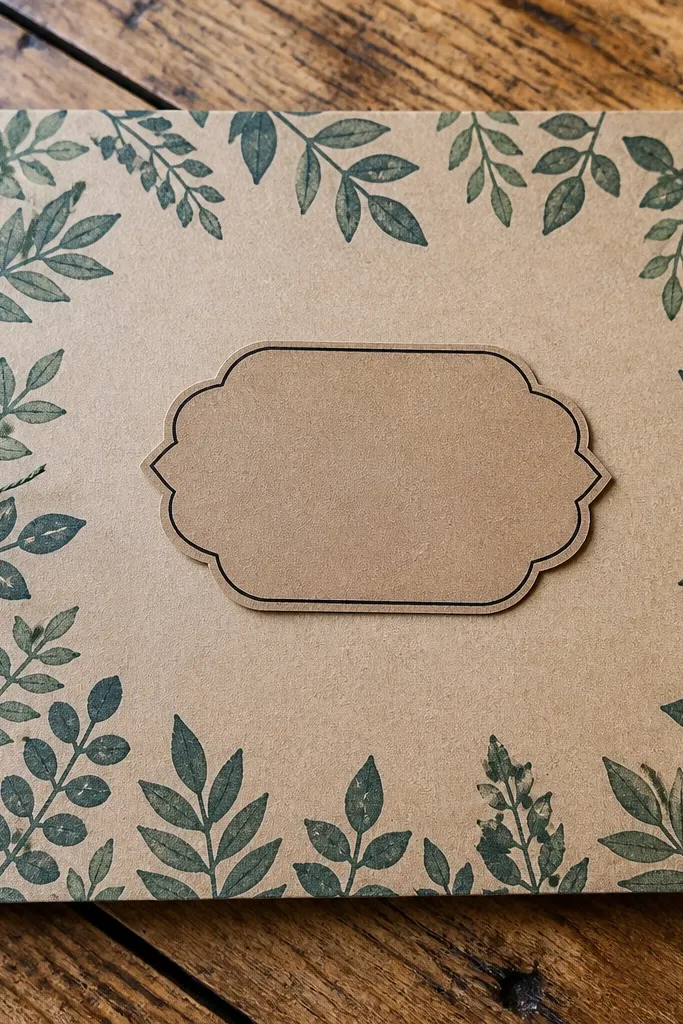
A stenciled leaf border looks polished because the pattern is consistent, and the center tag keeps the design from feeling busy. This cover works when you want something pretty but not overly decorative. The center tag is where you add your title or year, and it’s easy to swap once you decide on a theme. Use one green tone plus black or dark brown so the whole cover stays cohesive. Skill level is beginner, and it’s a great craft when you have a stencil or can make one.
Prime the base with cream craft paint so the stencil lays evenly. Place a leaf stencil along the edges and use a small foam brush to apply green paint in thin layers, letting each layer dry 5-10 minutes. Cut a kraft tag shape for the center using a rectangle with rounded bottom corners, then glue it down. Write your title and year on the tag using a fine pen. Seal with matte sealer, and avoid painting over the tag so the ink stays crisp.
Tape the stencil down with painter’s tape so it doesn’t slip and blur.
Don’t use too much paint — thick stencil paint smears and looks messy.
15. Map Coordinates Cover with Threaded Button Map Pin
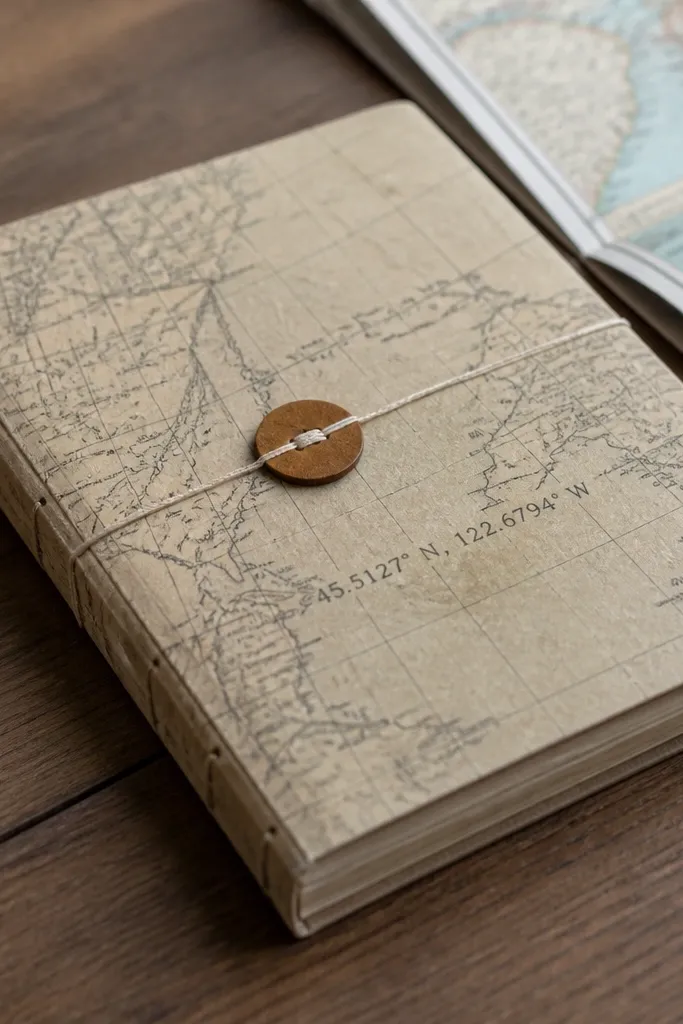
This cover looks gorgeous because maps give you instant detail, and coordinates add a clean, purposeful vibe. The button map pin makes it interactive, and it creates a strong focal point for photos. It suits travel scrapbooks, road trip journals, and anyone who saves places they’ve been. It’s also a smart budget move because maps are easy to find in old atlases and free printouts. Expect about 90 minutes for cutting, pinning, and sealing.
Cover the base with a map page section, then trim edges cleanly. Add a printed coordinates strip in the center by cutting text from a printed source or writing it neatly with a black marker. For the map pin, glue a small button in the exact spot you want, then thread embroidery floss from the back to the front through two holes and tie a knot under the base. Secure the thread with a dab of glue under the button so it doesn’t pull loose. Seal lightly around the button and map text with matte Mod Podge.
Use a small button (like 12-18 mm) so it stays proportional to the cover.
Don’t put the button too close to the edge — it will catch and lift over time.
16. Monogram Cutout from Cardstock with Foil-Edge Tape
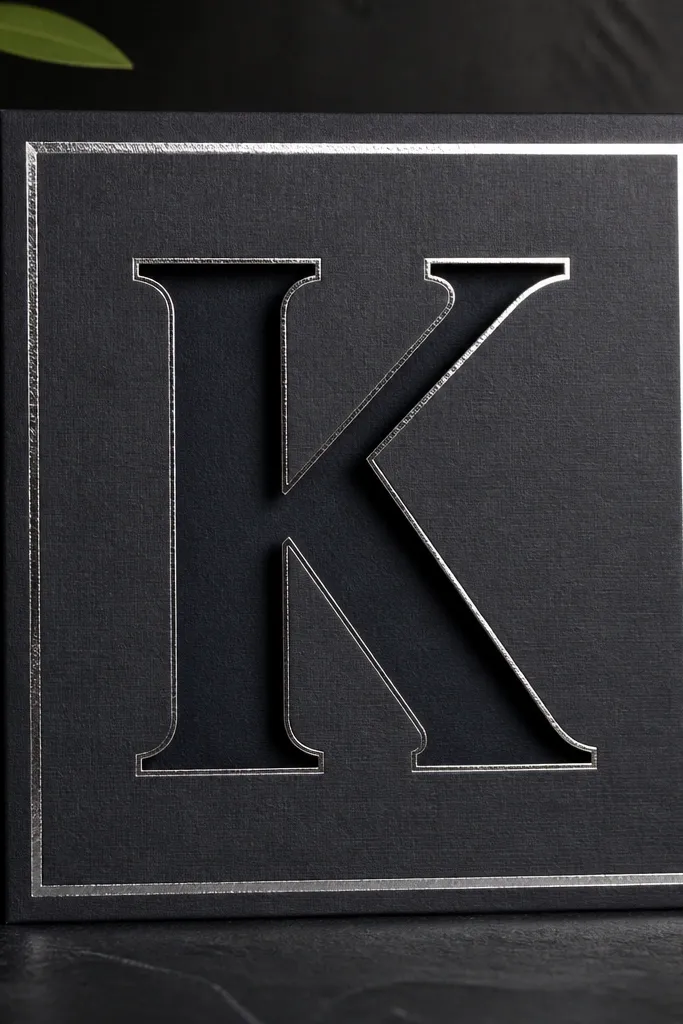
Cover the base with dark cardstock or paint so the monogram pops. Cut a monogram shape from thick cardstock and glue it on top, leaving a small border of background showing. Apply foil-edge tape along the outer border of the cover, trimming corners with a craft knife for clean angles. Add a thin line under the monogram using a metallic paint pen or gold marker. Seal with matte sealer to protect paper, but keep the foil tape edges lightly sealed only if they’re lifting-prone.
A monogram cutout looks crisp because it’s graphic and centered, and foil-edge tape adds a high-contrast shine that reads well in photos. You’re turning a simple base into something that looks like a custom stationery cover. This is a strong choice for personal scrapbooks where you want a clean identity: initials, year, or a short word. It’s not fussy, but it looks intentional because the monogram has sharp edges and the border is uniform. Skill level is easy if you’re comfortable cutting straight lines.
AvoidDon’t use flimsy paper for the monogram — it bends and looks cheap fast.
Pro tipTrace your letter shape from a printed font and cut it with a new blade for clean edges.
17. Scrapbook Cover with Layered Photo Corners and Washi Hinges
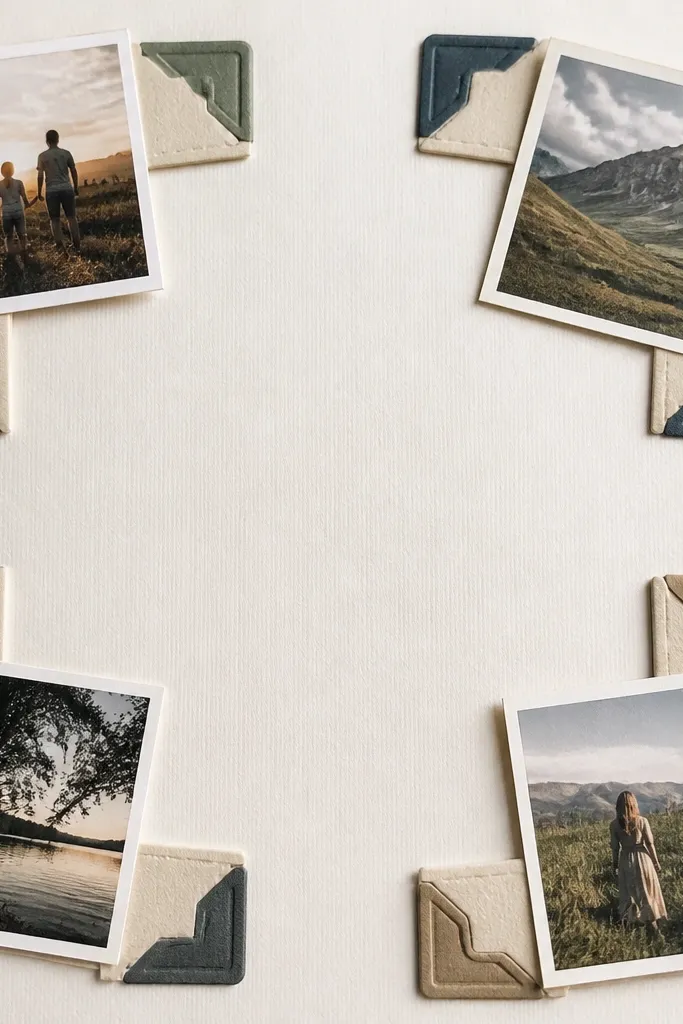
Cover the base with a plain cream or light gray cardstock. Cut two photo corner overlays from cardstock, leaving a small pocket edge that holds a small photo print. Attach each corner overlay with washi tape hinges on the top edge only, then glue the bottom edge so it lies flat. Place your small photos behind the corners and add a centered title strip above or below. Seal over the paper parts with matte Mod Podge, keeping the hinge tape area dry so it stays flexible.
This one looks gorgeous because it gives the front a “preview” feel — like photos are ready to be swapped or highlighted. Layered photo corners create depth without adding bulk across the whole surface. Washi hinges keep the edges tidy and allow you to switch small photo cards later. It’s a great budget option when you don’t have a full set of prints yet. The look is clean and modern because the layout is controlled: one background, one photo corner pair, one title strip.
AvoidDon’t seal hinge tape with wet glue — it will stiffen and peel.
Pro tipUse cardstock for the corners that’s at least 160-200 gsm so it holds its shape.
18. Ink-Dipped Twine Border with Minimal Center Title
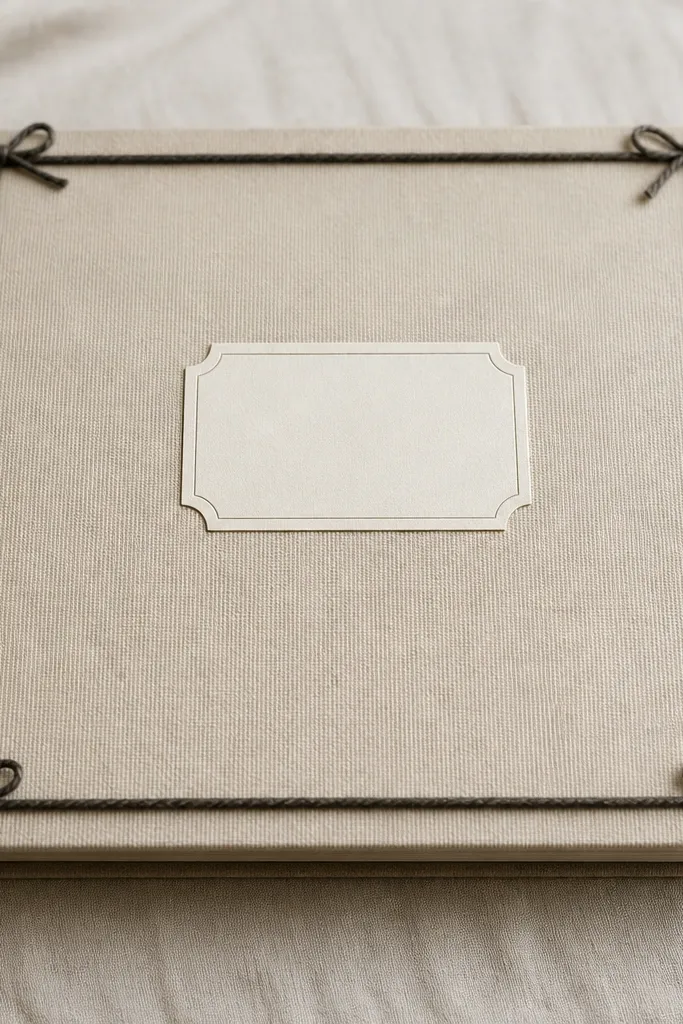
Twine borders look good because they add texture around the edges, and minimal center design keeps the cover readable. The trick is ink-dipping the twine so it matches your theme instead of looking random beige. You get a clean, graphic frame with a handmade feel. This suits modern scrapbook styles, especially for black-and-white photo sets. It’s quick too: most of the time is drying and sealing, not building.
Cover the base with white cardstock or thick paper. Dip twine into diluted black ink or acrylic paint, then lay it flat to dry until it’s not tacky. Glue twine along the outer edges with a thin line of craft glue, pressing it into place with tweezers. Add a minimal title in the center using a stencil or fine marker. Seal lightly with matte sealer only after the twine is fully dry so the ink doesn’t smear.
Use thin twine (about 2-3 mm) so it sits flat and doesn’t create thick ridges.
Don’t glue wet twine — it will bleed color and warp the paper.
19. Layered Tissue Paper Florals with Matte Finish
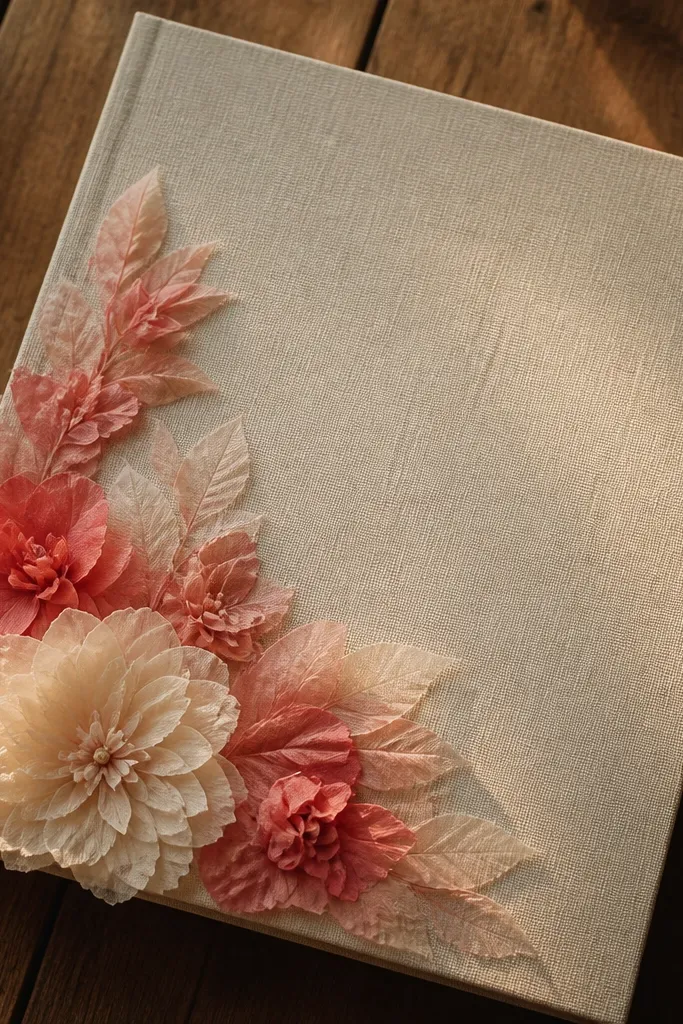
Cut your tissue paper into small squares, then layer 3-5 squares per flower. Twist the center of each petal bundle and pinch outward to form a fan shape, then fluff to create volume. Glue the flower cluster onto a base covered with solid cardstock or subtle pattern paper. Add a small center circle made from cardstock and a thin outline with a marker so the flower reads clearly. Seal with matte Mod Podge using a light hand around the flower edges so you don’t soak and collapse it.
Tissue paper florals look gorgeous because they’re airy, soft, and full of color variation without needing fancy tools. A clustered floral in one corner gives you a strong aesthetic focal point while keeping the rest of the cover calm. This is a great budget scrapbook cover idea when you have leftover tissue paper from gift bags or craft stores. The matte finish matters here — it keeps the colors from looking glossy and patchy. Skill level is medium only because you’re shaping petals, but it’s still very approachable.
AvoidDon’t over-glue the center — it squashes the tissue and kills the airy look.
Pro tipBuild flowers in 3 sizes (small, medium, small) so the corner cluster looks intentional.
20. Clear Plastic Folder Sheet Over Collage Background
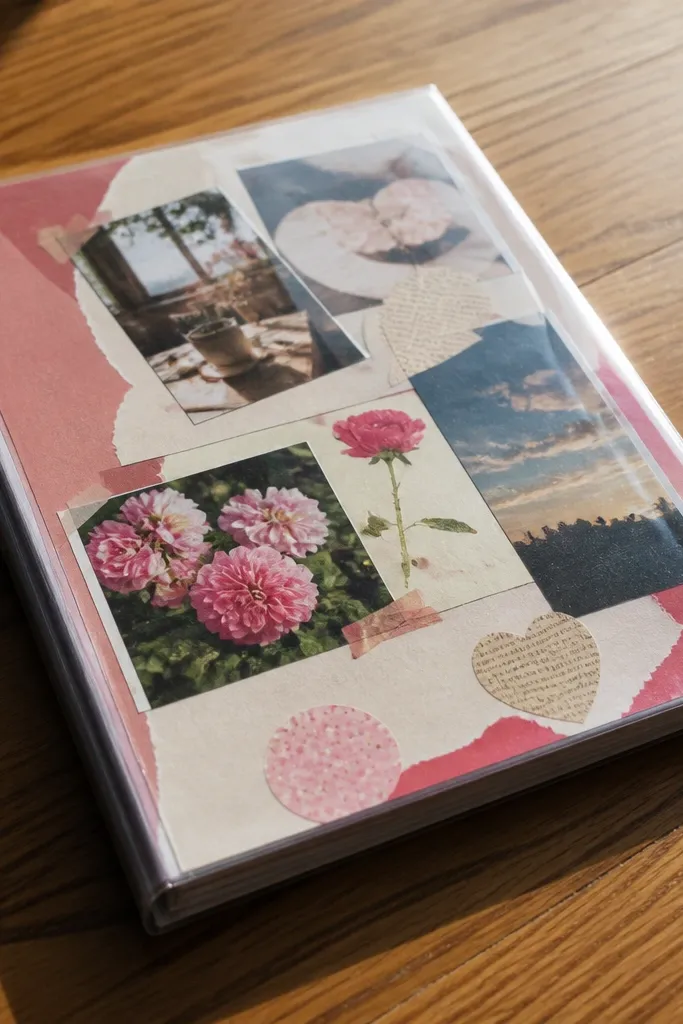
This one looks like a finished product because clear plastic gives you a smooth, protected surface that also makes colors pop. You build the collage on paper first, then trap it under a clear sheet so it stays flat. It’s perfect if you want photogenic layers without worrying about edges peeling. Use it for scrapbook covers that will get handled a lot, like kids' yearbooks or event scrapbooks. It’s straightforward and uses materials most people already have.
Cut a base and cover it with patterned paper or solid cardstock. Glue your collage elements on top — cutouts, labels, or small photos — then let it dry flat. Cut a clear plastic folder sheet to size, leaving a tiny border so it doesn’t overlap the edges. Glue the plastic down only around the perimeter with double-sided tape or corner glue points so it doesn’t bubble. Add a title label at the top and seal around the paper edges only, not across the plastic.
Use a metal ruler and craft knife for a straight plastic edge; jagged edges show fast in pictures.
Don’t glue plastic across the middle — it creates ripples and trapped bubbles.



