
1. Upcycled Denim Pocket Quote Wall
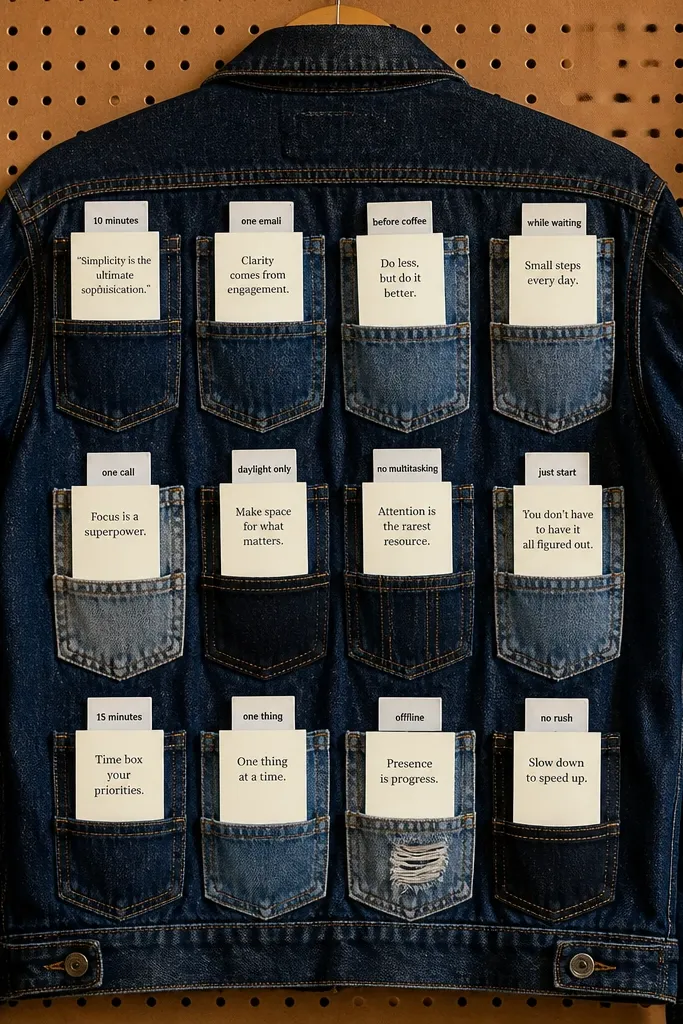
This board turns motivation into something you can physically reach for. Denim pockets add structure, and each pocket holds one quote card plus a tiny constraint sticker like “10 minutes” or “one email.” The look is instantly photogenic because denim texture holds light and the pockets create neat vertical rhythm. It’s also practical: you can swap quote cards when your goals change without remaking the whole board. This fits best in a hallway, laundry room, or home office where you pass by daily.
Cut a backing panel from cork sheet, foam board, or thick cardboard and wrap it with denim fabric using spray adhesive or strong fabric glue. Add pockets in a straight grid, spacing them evenly, then stitch or glue along the pocket edges so they don’t sag. Create quote cards in white cardstock, each with one big phrase and one small action line under it, then slide them into the pockets. Finish by sealing the edges with clear fabric tape so the board looks crisp and stays durable.
Pro tipUse a label maker for the tiny constraint line so the font stays consistent across all pockets.
AvoidDon’t use quotes longer than two lines per pocket — they get visually crowded fast.
2. Brown Paper Bag Quote Grid With Stamp Edges
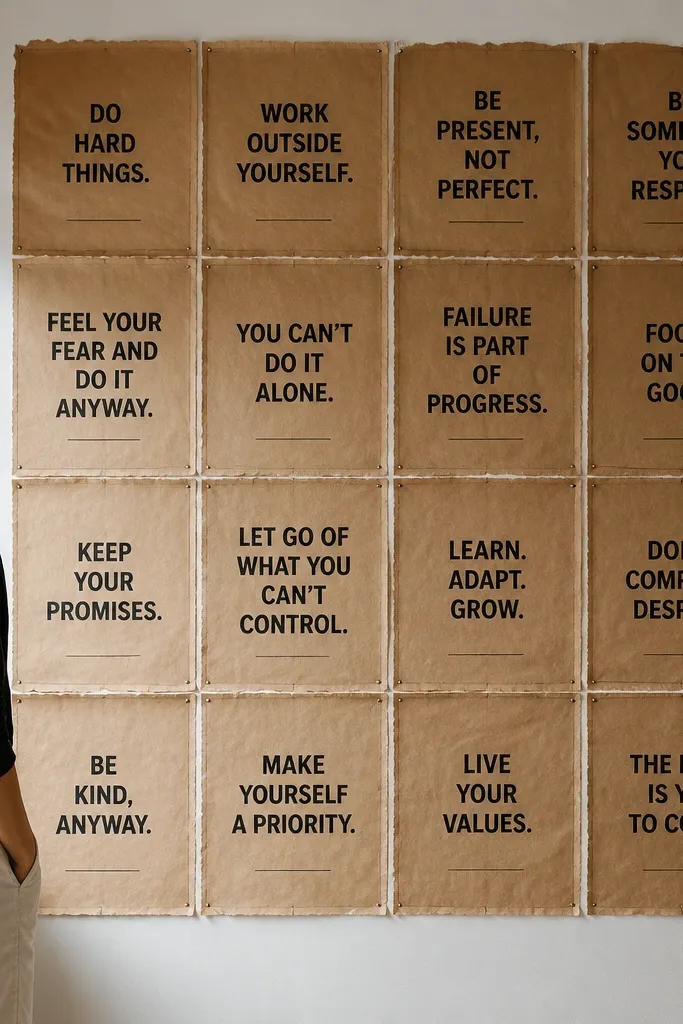
If you want a warm, aesthetic board that still feels disciplined, this one nails it. Brown paper bags give you natural texture and a matte surface that makes black ink look sharp. The stamp-style edges keep everything looking intentional instead of haphazard. Put one quote per square and add a constraint line under it, so the message stays executable. This style works great for desk backdrops, small studio walls, and renters who want a bold look without heavy construction.
Cut brown paper bags into equal squares, like 6x6 inches, and press them under a book for 30 minutes so they flatten. Arrange squares on a backing board and trace the layout, then glue each square down with a thin layer of matte decoupage medium. Write quotes with a fine black paint marker or stamp ink pad, then add a small constraint line in smaller text. Seal everything with a light coat of matte sealer so the ink doesn’t smudge.
Pro tipUse painter’s tape to keep square borders straight before you glue — it makes the whole grid look professionally aligned.
AvoidSkip glossy sealers; they reflect light and make photos look washed out.
3. Book Spine Quote Ribbon Board
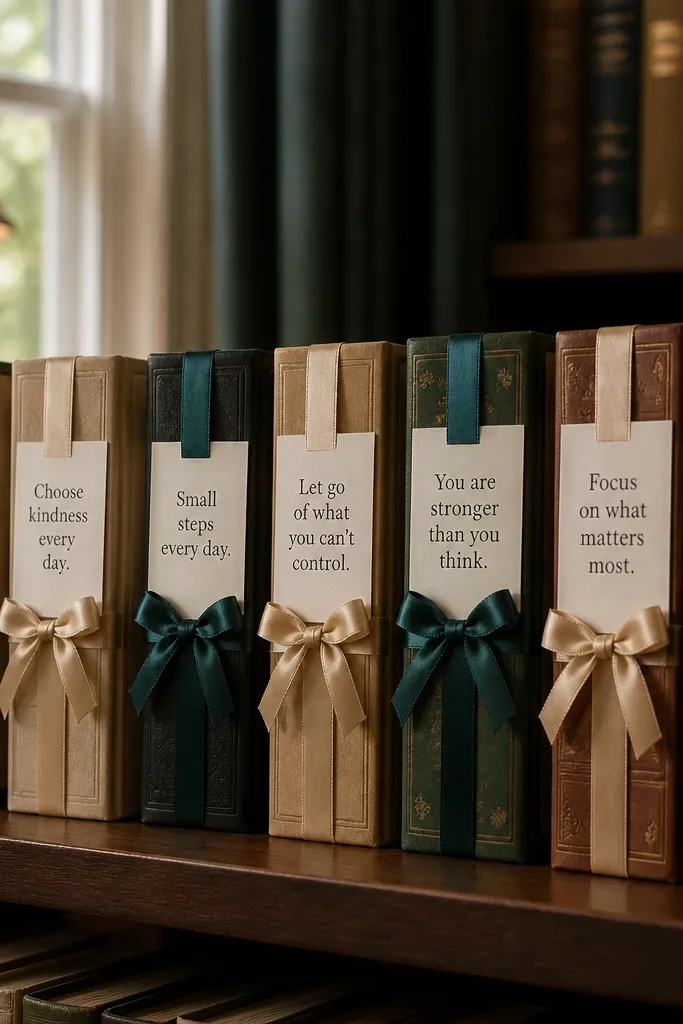
This board looks like your goals have a “shelf life,” which is exactly what keeps motivation from fading. Reused book spines give you a consistent strip format, and ribbon lets you attach quotes without permanent damage. You can tie a quote ribbon across each spine and slide in a small action card behind it. The result is clean, vertical, and easy to photograph because the lines are straight and the materials stack neatly. It suits small spaces, entryways, and anyone who likes a calm, organized aesthetic.
Collect book spines or cut old book covers into 2-inch-wide strips, then mount them onto a cork board or wood slat board with glue. Cut ribbon lengths about 10-12 inches and tie them horizontally or diagonally over each spine. Write one quote on thick cardstock and fold the card slightly so it slides under the ribbon. Finish by adding a tiny action tag like “Mon-Wed-Fri” in the bottom corner of each card.
Choose one ribbon width, like 3/8 inch, and one knot style so the board looks cohesive in photos.
Don’t mix too many ribbon colors; the board stops reading as a single theme.
4. Magazine Cutout Quote Collage With One-Color Rule
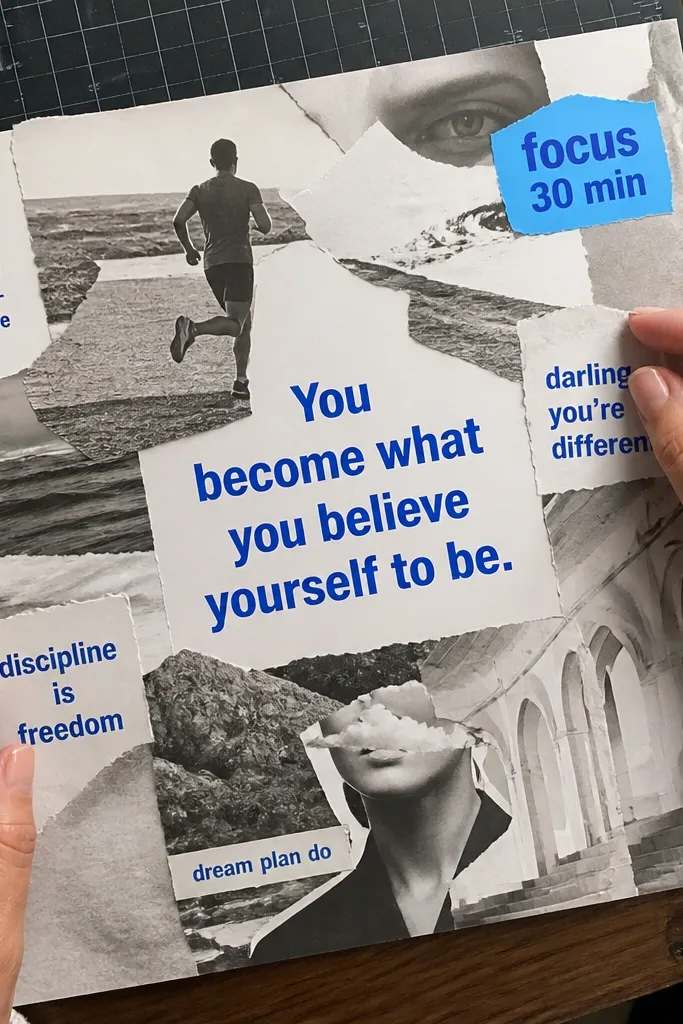
This is the “I need energy” board, but controlled. You cut magazine headlines or photos and layer them behind one-color quote text so the quote stays the hero. The one-color rule keeps it from turning into random clutter, which is what makes most collage boards look messy on camera. Add a constraint sticker in a contrasting color for an instant action cue. This works well for goals that need big motivation, like launching a project or getting consistent with a habit.
Pick one accent color from the magazines, then choose a quote font color that matches it. Cut 8-12 magazine pieces and arrange them on a board without glue first to find a clean composition. Glue layers with matte decoupage, starting with the background pieces and working forward. Add the quote text on top using thick marker or print-and-cut letters, then seal lightly with matte medium.
Pro tipUse the same font weight for every quote line — even if you cut different magazine images, the typography ties it together.
AvoidDon’t add more than one font style; two styles make collages look chaotic.
5. Cork Board Quote Tacks on a Diagonal Path
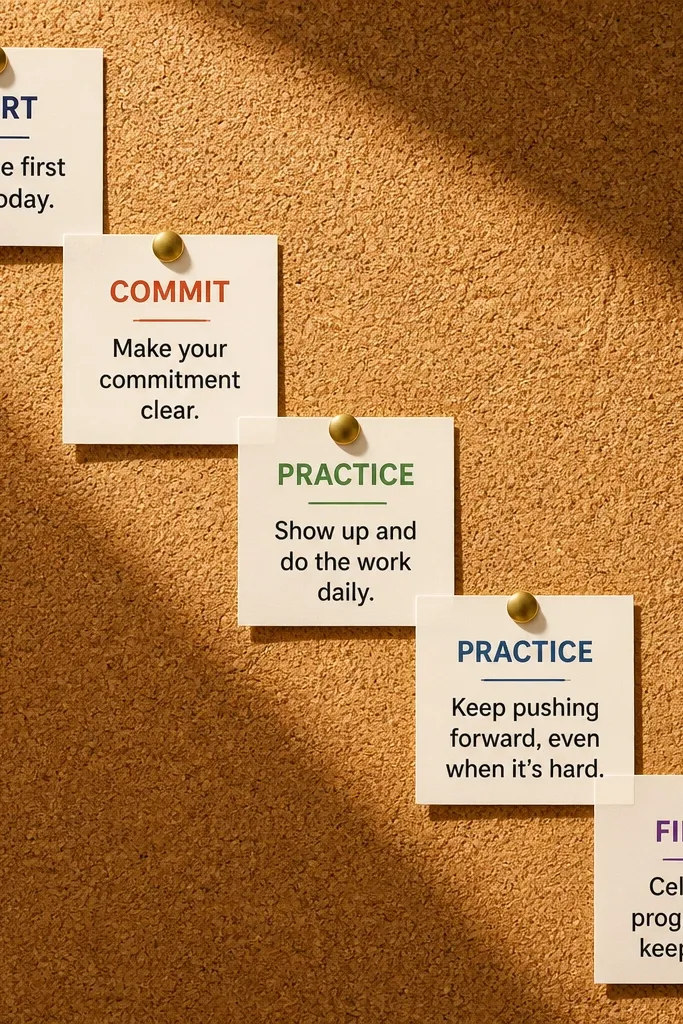
A diagonal path makes your eyes move in order, which is great for motivation that needs steps. This board uses pinned cards and tacks so the look is crisp and structured. Each quote card can represent a stage: start, commit, practice, finish. The diagonal layout creates a strong “journey” feel without being cheesy, and it photographs cleanly because the cards align. It’s ideal for a home office, craft room, or bedroom wall where you want one clear visual route.
Cut quote cards from thick paper in two sizes, like 4x6 inches for the main quote and 3x6 inches for the constraint line. Draw a diagonal guide on your cork board using pencil so your spacing stays even. Pin cards with push pins, then add one small photo or icon under each main quote. Finish by tying a thin twine line between the cards if you want an extra step-like visual.
Keep the diagonal line within a 6-inch width band so it looks intentional, not scattered.
Don’t use too many colors on the cards; stick to black text plus one accent color.
6. Paint Swatch Quote Strips on Pegboard
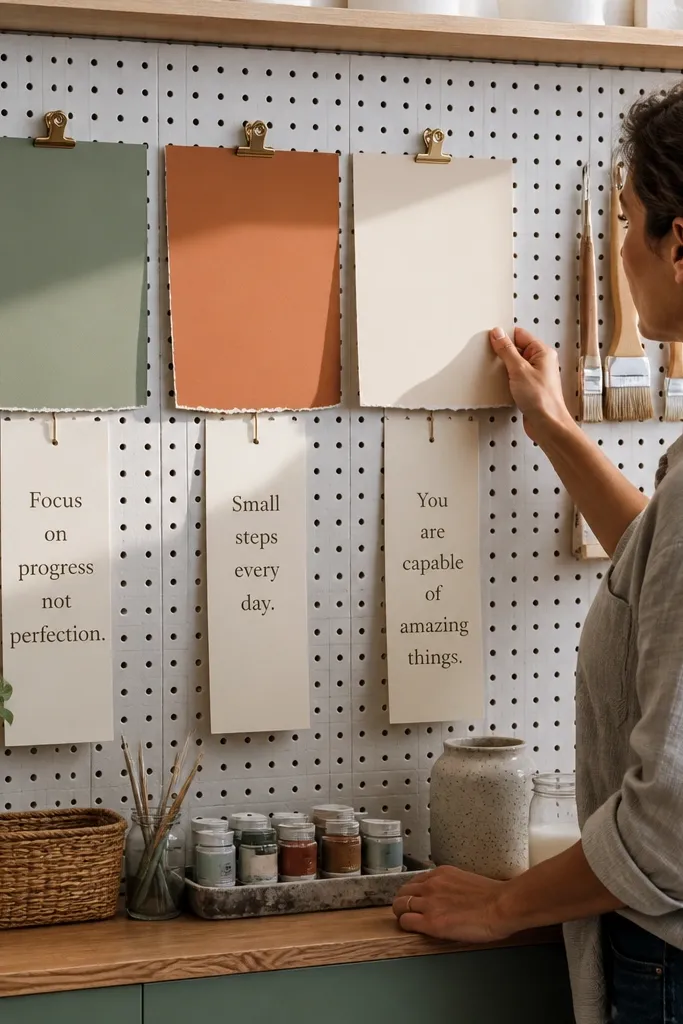
Pegboard gives you a “maker” look and makes quote placement feel like a project. Paint swatches add color discipline because they’re already designed in clean blocks, and you can assign each goal stage to a swatch shade. The quote strips hang neatly, so the board stays tidy and photogenic. This is a strong pick if you like color-coding your goals. It’s also great for renters since you can mount pegboard with simple hooks.
Use a small pegboard panel, then add paint swatches by drilling tiny holes or using strong adhesive strips. Cut cardstock strips about 2x6 inches and write one quote per strip with a marker. Attach strips using mini binder clips or small clothespins so you can swap them later. Add a small constraint label under each quote strip like “5 days/week.”
Pro tipUse the same swatch layout order every time (light to dark) so the board always looks balanced.
AvoidAvoid thick glue blobs on swatches; they warp and catch light in photos.
7. Faux Tile Quote Board With Contact Paper
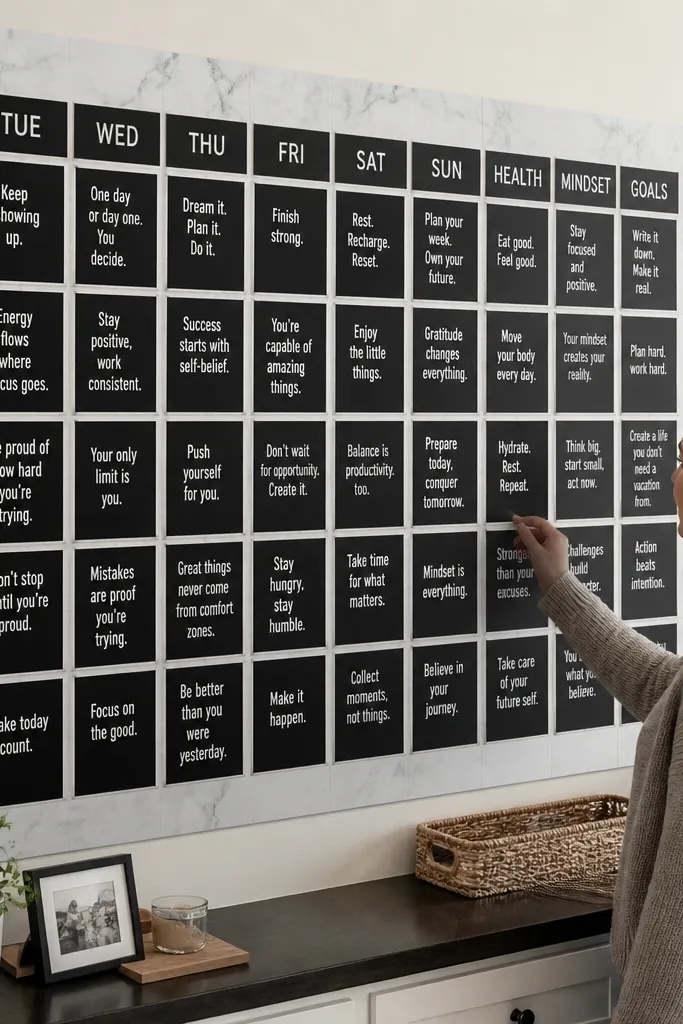
This one makes quotes look architectural. Contact paper tiles create a uniform grid, and black quote squares pop with clean contrast. The “tile” look is perfect for motivation because it feels orderly and repeatable, like a checklist you can’t ignore. You can make each quote square correspond to a category: health, money, creative work, relationships. It photographs well because the grid gives the camera a clear structure.
Cut contact paper into equal squares, like 4x4 inches, and place them on a backing board with double-sided adhesive. Add quote squares by printing or writing directly on sticker paper, then press them onto the contact tiles. Create category labels in small text on the bottom of each tile. Seal the board with a thin layer of clear laminate if you want extra durability.
Pro tipUse a ruler and a craft knife on a cutting mat; crooked tiles make the whole board look DIY in a bad way.
AvoidDon’t use thin paper for quotes — it curls on contact paper edges.
8. Wood Slice Quote Medallions
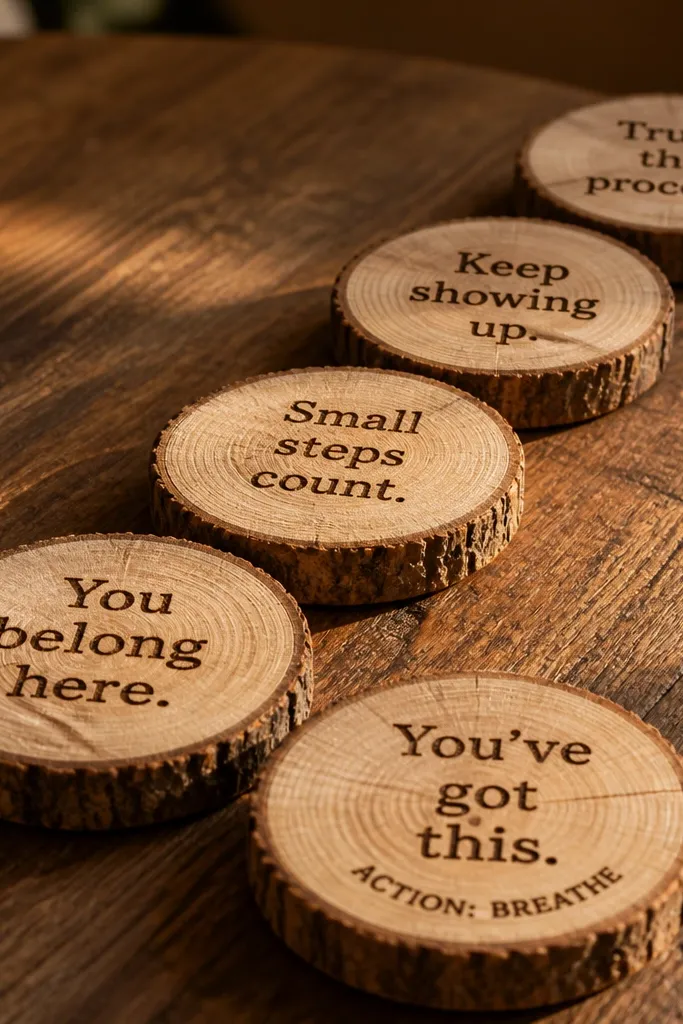
Wood slices make quotes feel grounded, and the circular shapes look great in photos. Each medallion can carry one line of motivation, plus a tiny action note on the back or edge. The natural grain gives you texture without needing extra decoration. This board works best when you keep the quote lines short and bold so the handwriting stays readable. It fits living rooms, bedside walls, and entry tables.
Sand small wood slices lightly and wipe dust off. Paint a thin matte base coat if you want consistent contrast, then write quotes with a fine paint pen. Arrange slices on a board in a staggered pattern, like 2 rows with slight overlap. Mount using strong craft glue and finish with a matte clear coat so ink doesn’t rub off.
Pro tipChoose one handwriting size and keep letters tall; small handwriting disappears on textured wood.
AvoidDon’t leave wood unsealed; moisture and fingerprints ruin the quote quickly.
9. Sticky Note Quote Ladder
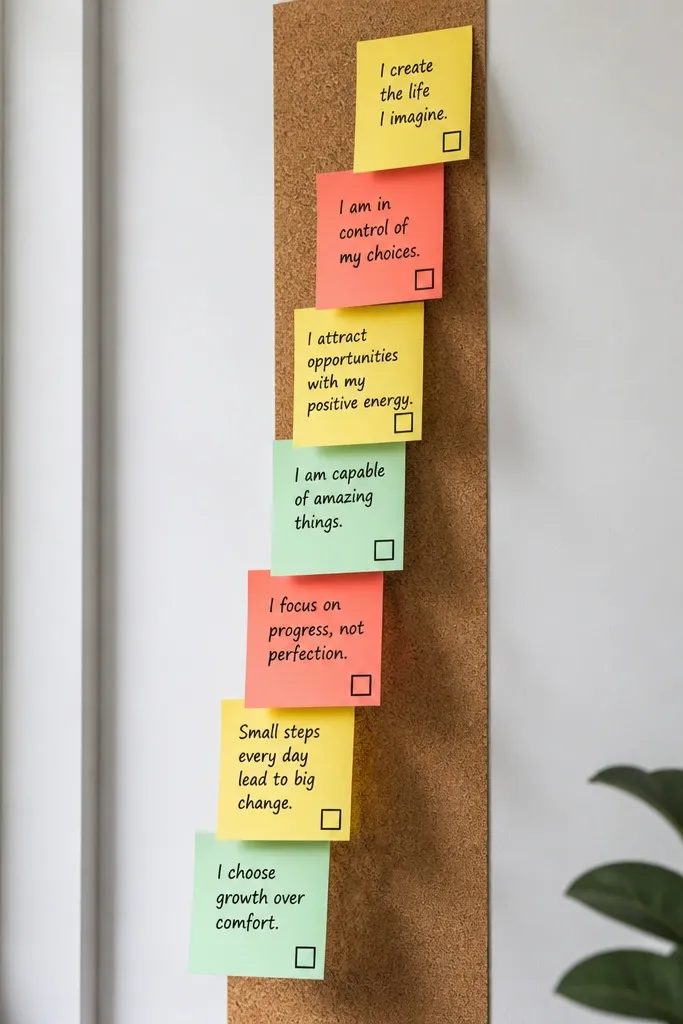
If you want motivation that changes daily, sticky notes are the fastest option. This “ladder” arrangement makes your next action obvious because each sticky note sits slightly above the last, creating a climb. You write one quote per note and add a tiny check box in the corner. The look is clean when you keep one color per goal category and use consistent spacing. It’s perfect for desks and kitchen boards where you’ll see it constantly.
Grab sticky notes in 3 colors and decide what each color means, like blue for work, green for health, yellow for life admin. Arrange them on a poster board in a ladder pattern, with the bottom note closest to the viewer. Write one short quote per note plus a check box on the lower right. Fix notes with removable tape so you can swap them without tearing the board.
Pro tipUse the same pen for every note, like a black gel pen, to keep the handwriting style consistent.
AvoidDon’t crowd the sticky note with more than 6 words; it stops reading as a quick cue.
10. Polaroid Frame Quote Swap Board
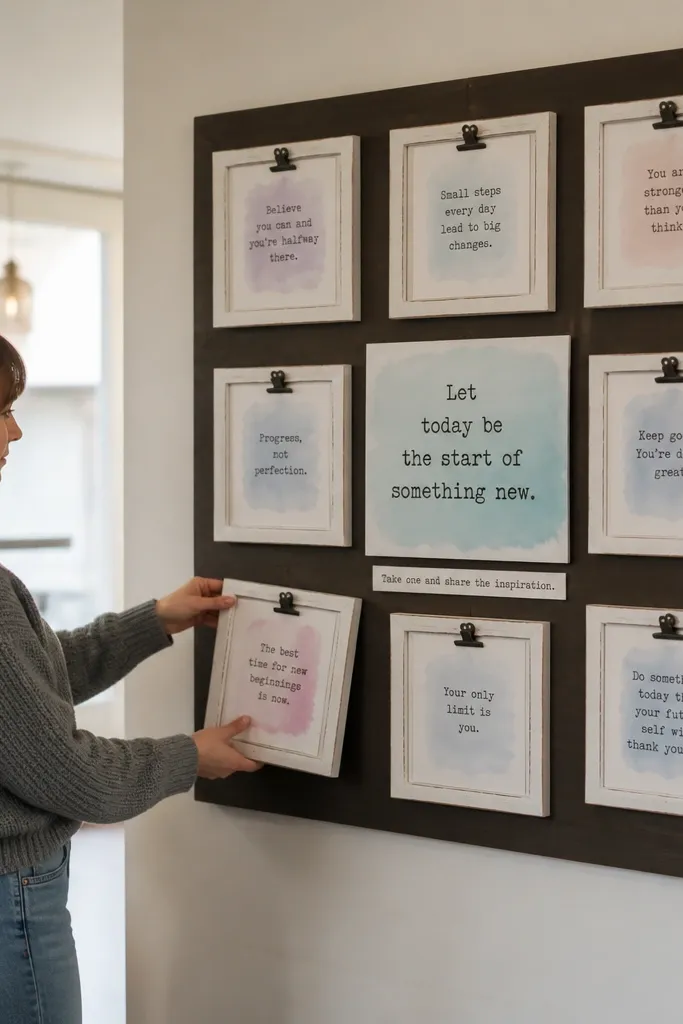
This board makes motivation feel personal without needing real photos. Mini frames give you that gallery look, and quote cards slide in so you can update them when your goals shift. The visual advantage is framing: each quote gets a border, so it stays readable from a distance and looks intentional in pictures. Use one frame for a “direction” quote and another frame for an “action” quote under it. This works best in bedrooms, studios, and hallways where you want a clean, curated wall.
Mount 6-10 mini frames onto a backing board or directly onto a wall. Print quote cards on thick matte paper, then cut to fit each frame opening. Add a small constraint label under each quote card like “2 hours max” using a different font size. Slide cards in and keep frames aligned with a level so the wall looks straight.
Print on matte paper and avoid glossy — quotes glare in daylight photos.
Don’t pick frames with wildly different styles; match finishes like all black or all brass.
11. Fabric Scrap Quote Banner Across a Wall
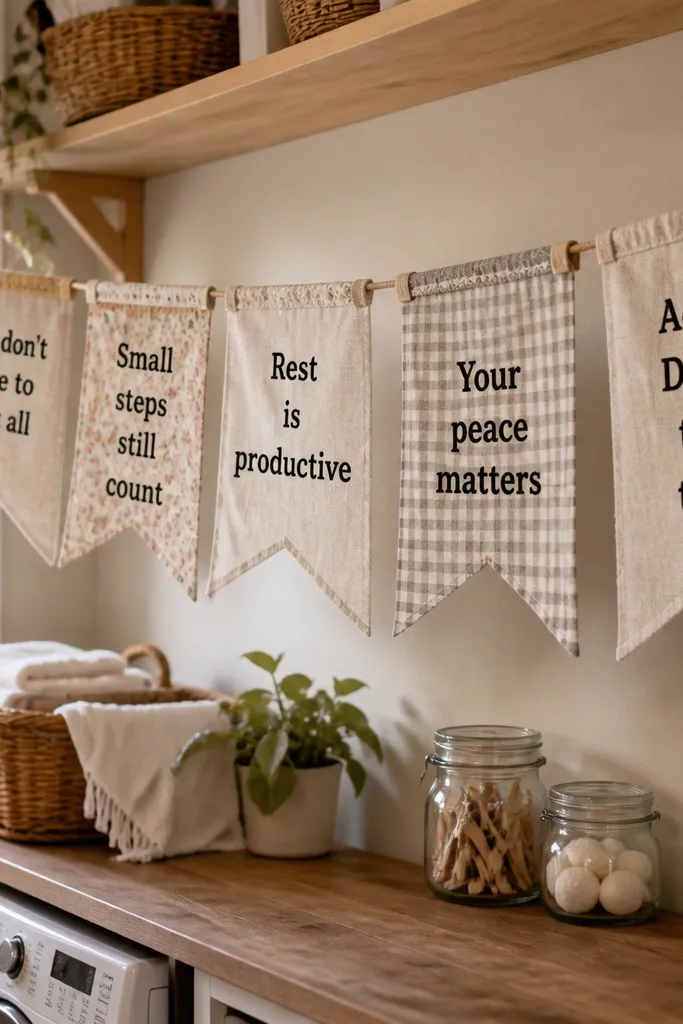
A fabric banner turns quotes into a soft, cozy visual statement. Using fabric scraps adds texture and makes the board look warm even when the quotes are simple. The photogenic trick is the contrast: bold letters on light fabric panels so the message reads instantly. Add one action line per banner segment so the motivation stays grounded. This works great above a desk, along a bed wall, or in a craft room where you want a relaxed but purposeful vibe.
Cut fabric scraps into triangles or rectangles, like 6x8 inches, and trim edges evenly with pinking shears if you want a clean finish. Lay out pieces in a color order, then sew or glue on a backing strip for stability. Write quotes with fabric paint or permanent fabric marker, then let them dry flat. Tie or clip the banner onto a string line stretched between two hooks.
Use fabric paint with a stencil for crisp letters; freehand looks messy on small panels.
Avoid thin fabric that shows through; it makes the quote look faint.
12. Seed Packet Quote Labels for Future You
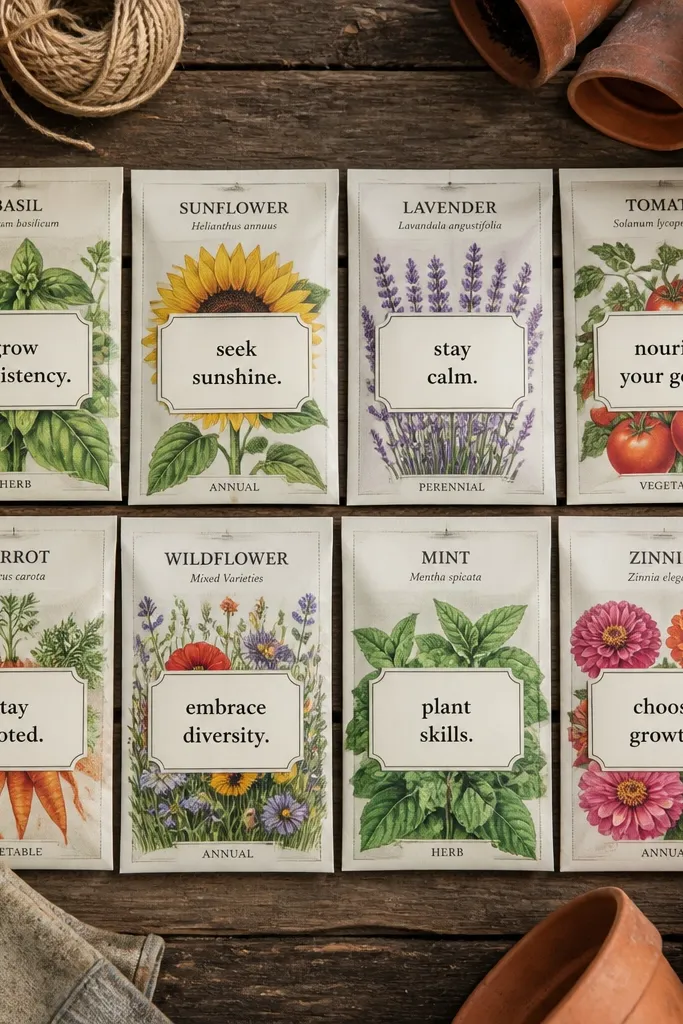
This is a “future proof” quote board that looks adorable and stays motivating. Seed packets are already formatted, so you just add quote labels that tell you what to grow — habits, projects, skills. The aesthetic is clean because packet shapes create uniform repetition, and labels give you sharp typography. Put the action and constraint on the label so you don’t need more than one line to move. This fits kitchen walls, shelves, and small spaces where you want something cute but structured.
Collect empty seed packets or buy small refill packs and keep the packaging. Print quote labels on waterproof label paper, then cut into matching label sizes. Write one quote per packet plus a constraint like “one page” or “15 minutes.” Arrange packets in rows on a board or inside a shallow shadow box, then secure with hot glue dots at the corners.
Pro tipUse waterproof ink pens on label paper so the text doesn’t smear when you handle the board.
AvoidDon’t use long paragraphs on labels; seed packets read best with one strong line.
13. Wallpaper Remnant Quote Frames
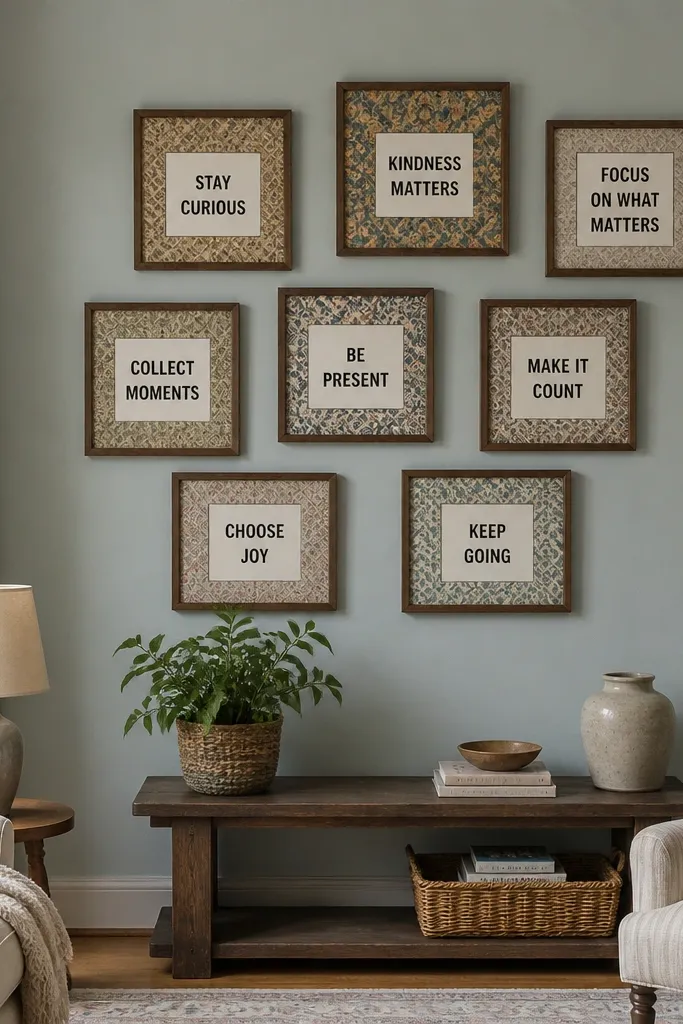
Wallpaper remnants give you instant pattern without hunting for matching decor. This board uses small framed wallpaper panels, each with a quote printed on top, so every quote gets its own “stage.” The photogenic advantage is depth: patterns add dimension behind the typography. Keep the quotes short and bold so they don’t fight the wallpaper. This is excellent for a living room feature wall or a bedroom corner where you want personality without clutter.
Cut wallpaper remnants into rectangles sized for small frames, like 5x7 inches. Insert the wallpaper into frames and mount them in a grid or staggered layout. Print quotes on white cardstock and glue to a thin backing so they sit centered. Add a tiny action label in the bottom corner of each quote card using a contrasting color ink.
Use frames with the same inner mat color so the typography stays consistent across patterns.
Don’t choose quotes in the same color as busy wallpaper; black or deep navy reads best.
14. Sheet Music Quote Collage With Black Tape Borders
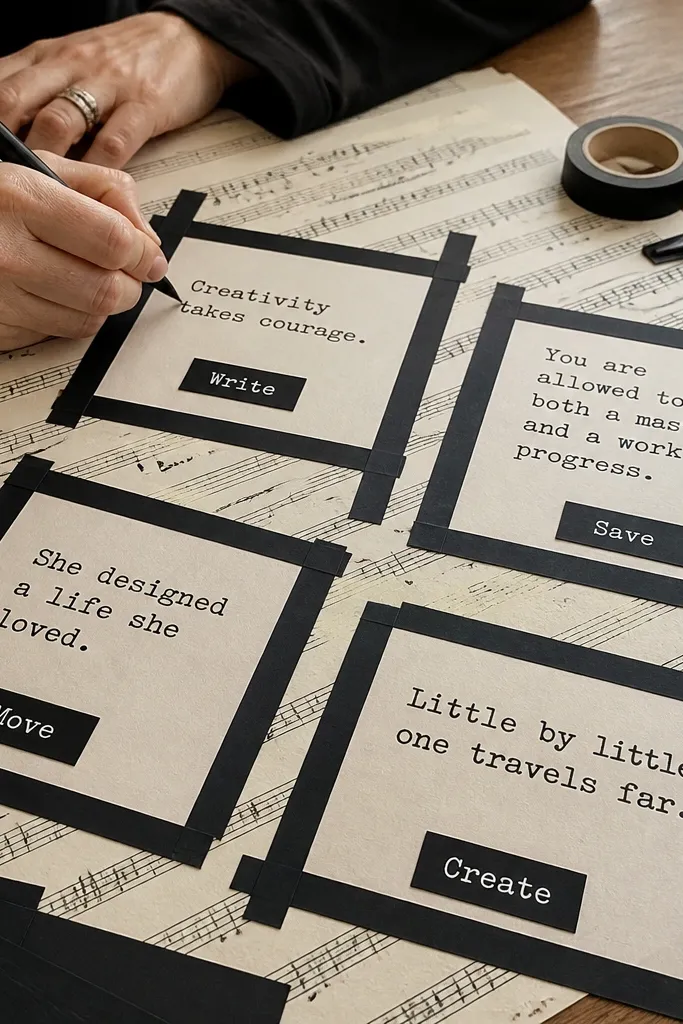
Sheet music brings instant texture and a “focus” vibe, but the board still looks modern when you control the layout. Black tape borders create clean boundaries between quote blocks and keep the collage from looking random. Put one quote per block and add a one-word action under it like “Write,” “Save,” or “Move.” The look is high-contrast and camera-friendly because the tape creates strong edges. This works for creative goals, study spaces, and anyone who likes a slightly artsy aesthetic.
Cut sheet music pages into blocks and arrange on a backing board, leaving space for quote blocks. Add black tape strips to define each section before you glue anything, then glue the sheet music in place. Write quotes on thick white paper and trim to fit inside the taped borders. Seal with matte medium so the tape edges don’t peel.
Use a straightedge to press tape down hard — tape edges that lift show up in photos.
Don’t use too many font sizes; one bold size plus one small action line keeps it readable.
15. Glass Jar Quote Wall With Label Stickers
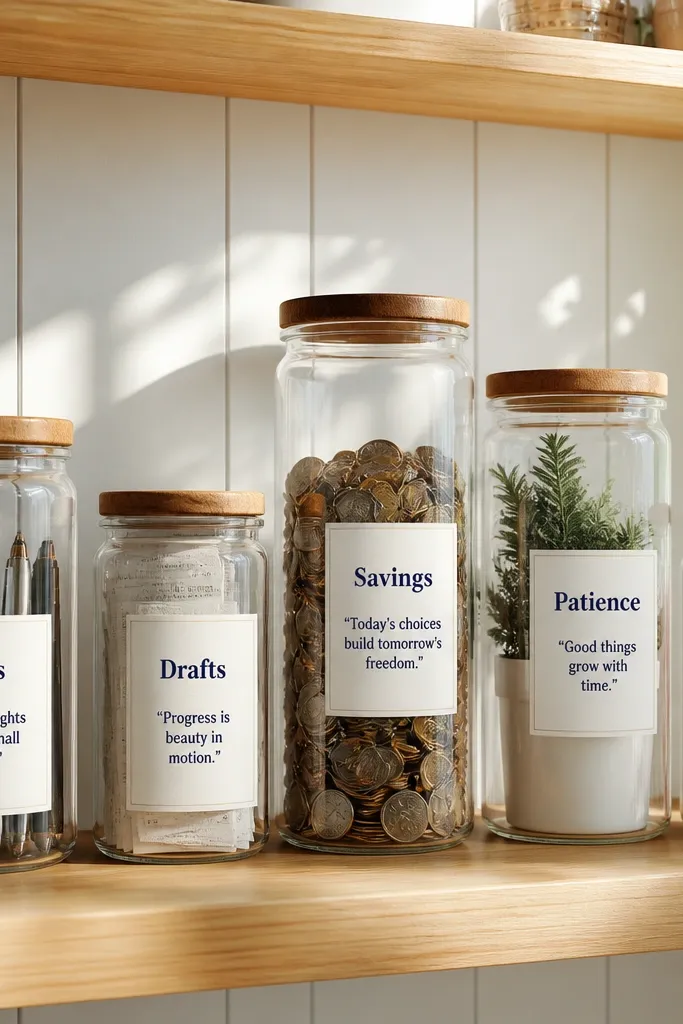
This board turns quotes into something you can measure. Glass jars look clean and modern, and label stickers give you sharp typography without handwritten mess. Each jar can represent a goal bucket, like “Ideas,” “Drafts,” “Savings,” with a quote label that reminds you what to do with that bucket. The look is photogenic because glass catches light and labels stay crisp. It’s best for shelves, entry tables, and craft nooks where you want motivation that also organizes.
Mount jars on a board using jar brackets or sturdy adhesive strips rated for glass. Print quote labels on thick label paper and apply them cleanly with a smoothing tool. Add one jar per goal category and keep the label text to one main quote plus one constraint line. Finish by adding a small icon on each label, like a pencil for drafts, to improve scan speed.
Pro tipApply labels in a shaded area so you can see alignment lines without glare.
AvoidDon’t overcrowd jar labels; one main quote reads best on a small surface.
16. Lego-Style Quote Bricks From Cardboard
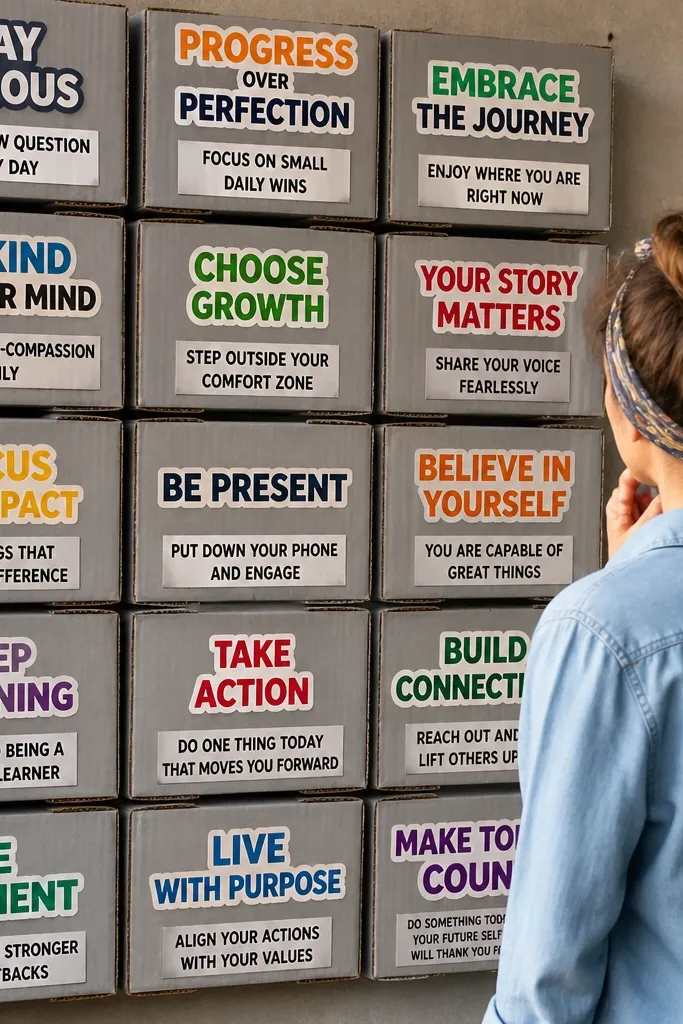
This is a playful board that still feels organized. Cardboard “bricks” create a grid feel, and quote stickers add boldness without messy handwriting. The best part is scale: you can make each brick a specific action step, so motivation becomes a sequence you can build. It photographs well because the brick shapes create repeating patterns. This suits kids-at-heart adults, desks, and creative studios.
Cut cardboard into brick shapes, like 2x4 inches, and add small tabs so the bricks sit flat in a grid. Cover bricks with matte craft paper in one or two colors, then apply quote stickers on top. Arrange bricks into a word path or a simple block layout, like “FOCUS” across the top. Glue bricks lightly so you can swap individual steps later.
Pro tipUse a cutting guide so every brick has the same height; uneven bricks make the whole board look sloppy.
AvoidAvoid shiny paper on bricks; it reflects light and kills readability.
17. Tin Can Quote Holders With Twine Quotes
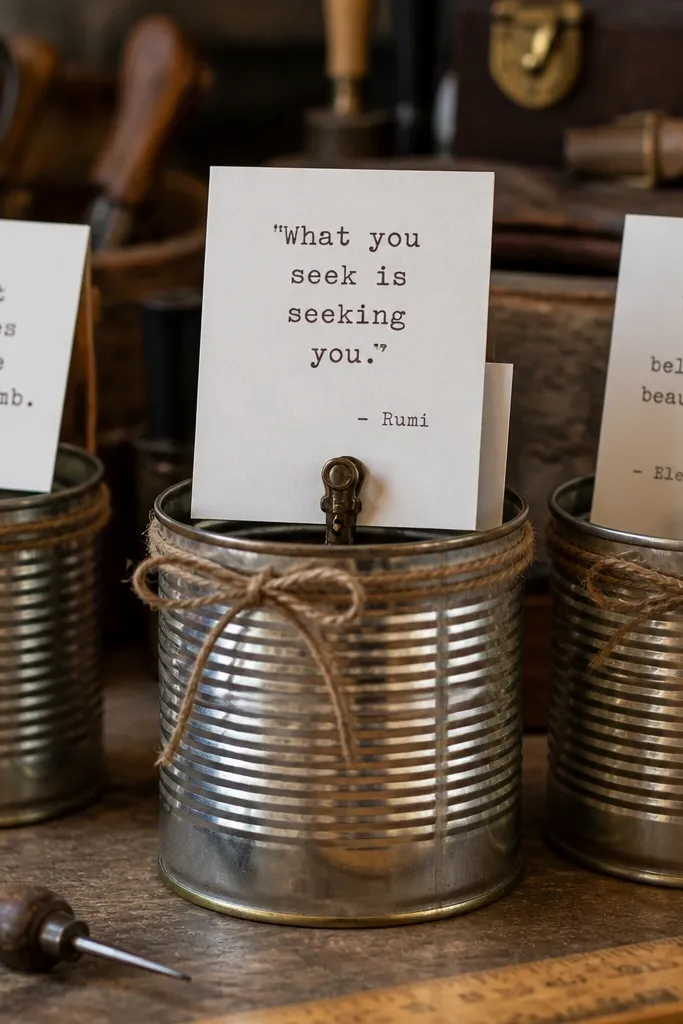
Tin cans bring an industrial look, and twine adds a warm handmade touch. This board uses quote cards inside cans or clipped to twine, so you get clean vertical storage plus motivation in one place. Each quote card can be swapped without tools, which keeps the board feeling fresh. The look is strong for photos because you get repeated shapes and visible texture. It’s great for entryways, laundry rooms, and craft corners where you want function with style.
Clean and dry small tin cans, then spray paint them matte in one color family like warm gray or black. Punch two holes near the top edge and tie twine to create a hanging line or clip path. Write quotes on thick cardstock, then insert cards into the cans or clip them to the twine. Mount cans to a backing board or directly to a wall with screws and anchors if needed.
Pro tipUse matte spray paint and let it cure 24 hours before adding labels so it doesn’t scratch off.
AvoidDon’t use glossy paint; it creates glare in indoor photos.
18. Receipt Paper Quote Roll On a Spool
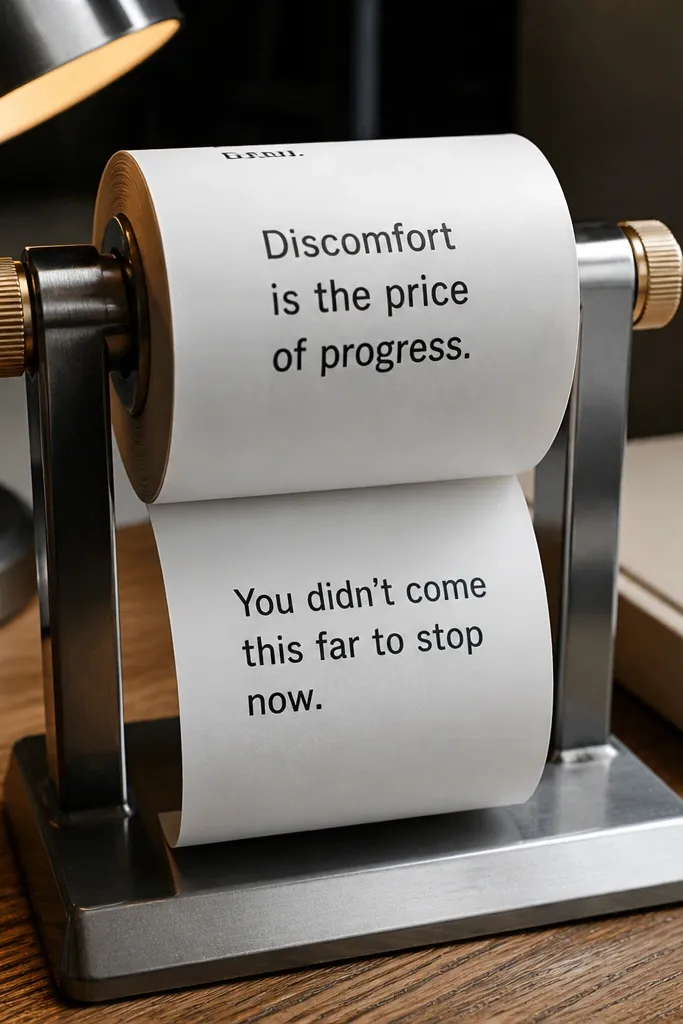
If you want a board that feels like action, this one uses receipt paper to make motivation look “earned.” The thin paper is easy to print or write on, and the spool format is visually satisfying in close-ups. You can wind the quote roll to reveal the next line, turning your motivation into a simple reveal. The aesthetic is minimal and modern because the spool is one focal shape. This fits desk setups where you want something small but powerful.
Wrap receipt paper or kraft paper strip around a wooden spool or dowel with tape. Print or write one quote per 6-inch section, keeping each quote to 1-2 lines. Secure the first section with tape so it doesn’t unwind. Mount the spool on a board or shelf, then add a small label on the side with the goal category.
Pro tipUse a ruler to keep quote sections aligned so the roll looks straight in photos.
AvoidDon’t use watery markers; they bleed and make the quote look messy.
19. Ribbon Bookmark Quote Ladder
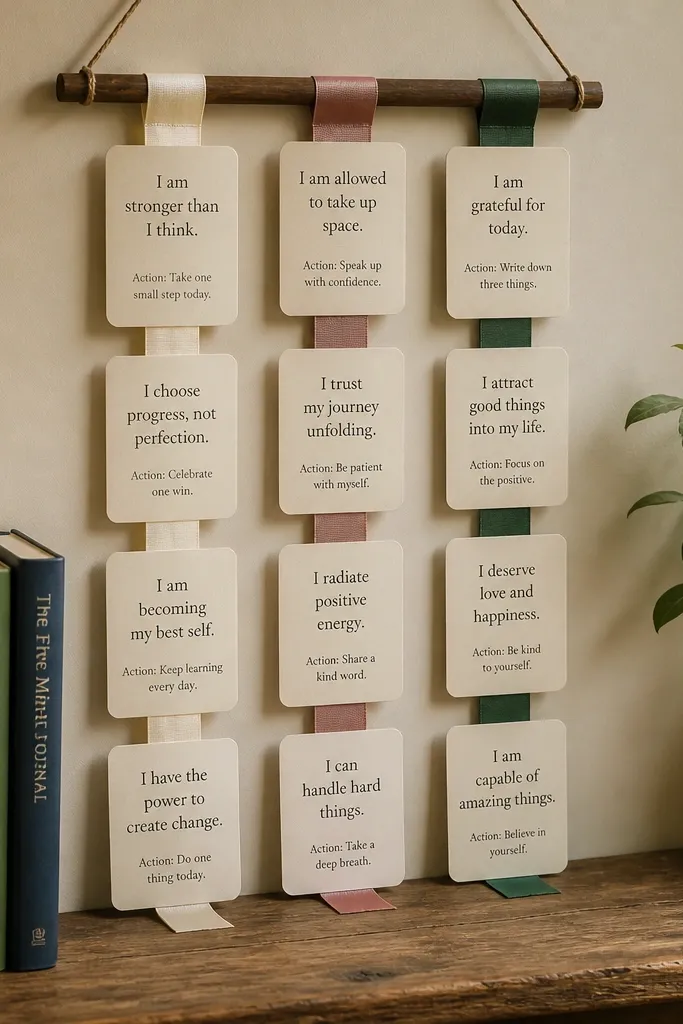
This board looks like a reading ritual, which is perfect for motivation that needs consistency. Ribbon bookmarks hang from a wooden bar, and each ribbon carries one quote plus a short action line. The movement of ribbons makes photos feel alive, and the repeated vertical lines make it easy to scan. Keep the quote cards matte so they don’t glare. This works best in bedrooms, near bookshelves, and anyone building a learning habit.
Mount a slim wooden dowel or bar on a wall using two hooks. Cut ribbon lengths to about 10-12 inches and tie each ribbon to a ring or directly to the bar. Write quotes on small matte cardstock rectangles and punch a hole for each ribbon knot. Add one constraint line under each quote, like “15 pages max,” then arrange ribbons from shortest to longest for visual order.
Use one ribbon texture family, like satin or grosgrain, so the board looks cohesive.
Avoid mixing too many ribbon widths; it makes the ladder look uneven.
20. Neon Highlighter Quote Strip Board
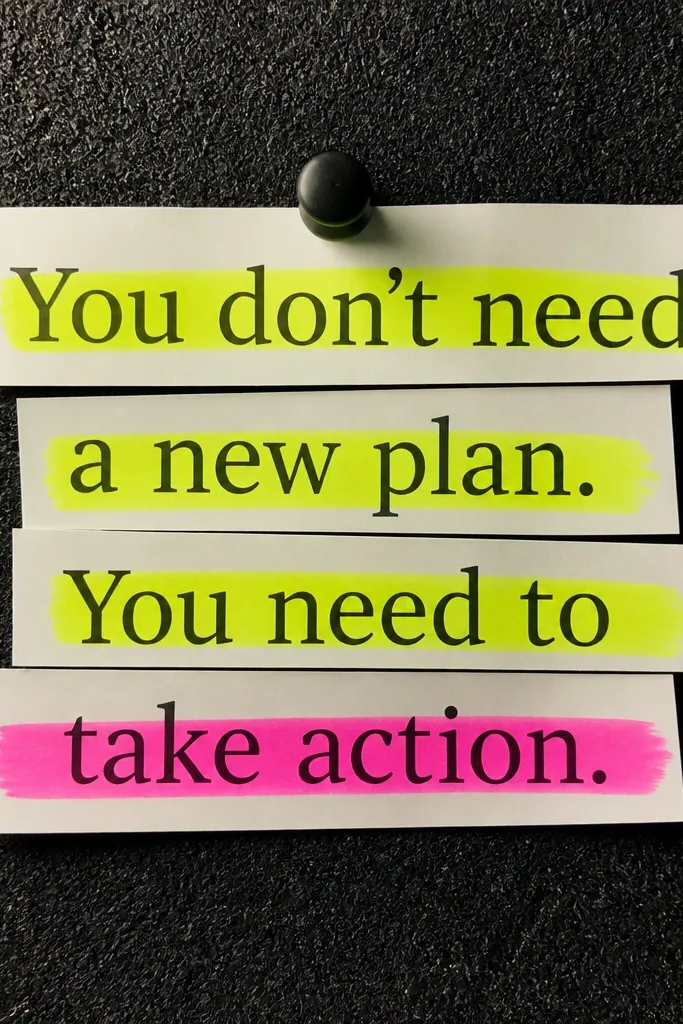
This is the “I need focus right now” aesthetic. A dark backing makes neon highlighter marks pop, and quote strips look bold without extra decoration. Use neon only for highlights and keep the main quote in white or light gray so it stays readable. The high-contrast look photographs extremely well in daylight and under warm lamps. This fits study areas, gym bags setups, and any space where you want instant visual punch.
Use a dark matte backing board, like black foam core. Cut quote strips from white cardstock and write your main quote in thick marker. Highlight specific words with neon highlighter tape or neon marker in narrow bands. Add one small constraint sticker in the corner of each strip, then arrange strips in a stacked layout with consistent gaps.
Pro tipKeep highlight bands under 1 inch wide so the quote stays readable at a glance.
AvoidDon’t fill the whole board with neon; it turns into noise.
21. Shadow Box Quote Steps
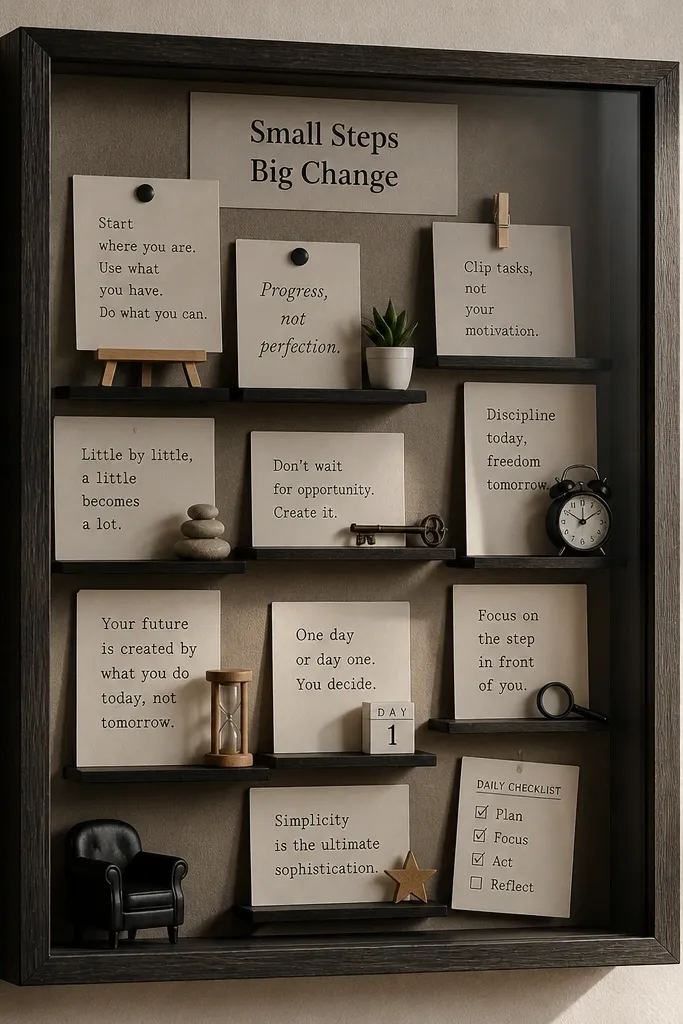
A shadow box makes motivation feel physical. You stack quote cards on different depth levels so the board has dimension, and the camera loves that layered look. Each step card can hold a quote and an action prop, like a tiny clothespin for “clip tasks” or a miniature checklist. The board stays clean because everything sits behind glass or clear plastic. It’s ideal for shelves and walls where you want a premium look without complicated hardware.
Buy or repurpose a small shadow box and remove any old backing. Print quote cards and cut them to fit, then mount them on foam tape so they sit at different depths. Add one small action prop per step and secure with hot glue dots. Seal the setup under the clear cover and arrange the step order from top to bottom.
Pro tipUse foam tape thickness of about 1/8 inch so layers are visible without looking bulky.
AvoidDon’t overcrowd the box; 3-5 steps reads best and stays photogenic.
22. Clay Tag Quote Board With Twine Corners
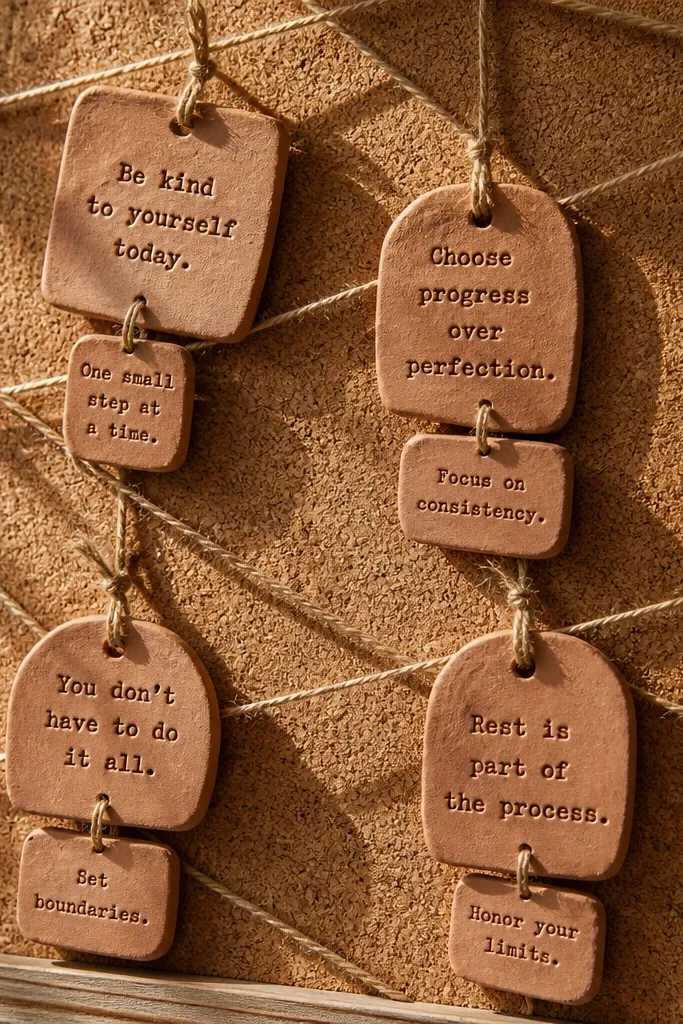
Clay tags add a handmade, tactile feel that makes quotes look like keepsakes. The tags sit at angles on twine, so they catch light and create a soft, aesthetic look. You can write your direction quote on one tag and your constraint on a smaller tag beneath it. This board works for people who like calm motivation and visual warmth. It fits bedrooms, reading nooks, and calm workspaces.
Make small clay tags or use air-dry clay blanks, about 2x3 inches. Let them dry fully, then paint with a matte white base and write quotes with a fine paint pen. Punch a hole in each tag and tie tags to a backing board using twine at the corners. Add one larger tag and one smaller tag per goal, then arrange in a balanced grid.
Sand clay lightly before painting so the ink sits cleanly.
Don’t skip a matte seal; unsealed clay scuffs and smears handwriting.
23. Contact Paper Marble Quote Panels
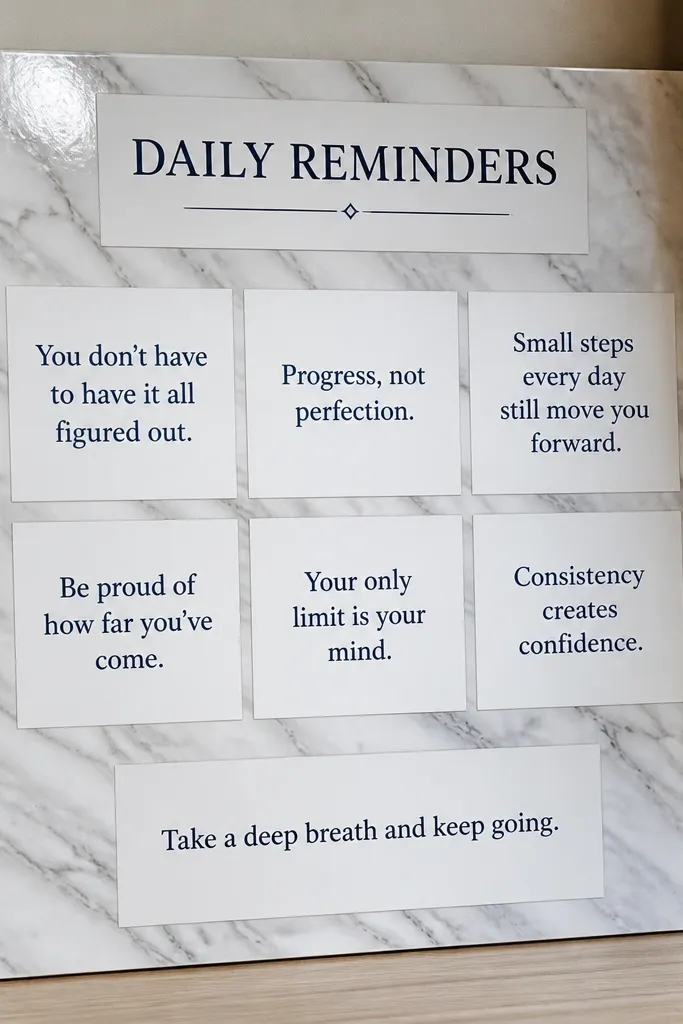
Marble-style contact paper makes cheap materials look expensive, and that’s the whole point for an aesthetic motivation board. The pattern gives you movement, while quote blocks keep it readable. Keep your typography color consistent — black or deep navy — and place quotes in clean rectangles. This board is great for anyone who wants motivation to look sleek and modern. It suits small wall sections, desks, and photo-friendly corners.
Cut marble-style contact paper into panels, like 8x10 inches, and mount them onto a backing board. Add quote blocks by applying sticker paper rectangles on top, then press firmly for clean edges. Write one main quote per panel and a tiny constraint line in smaller text at the bottom. Seal the contact edges with clear tape to prevent lifting over time.
Cut contact paper with a fresh blade so edges look sharp, not jagged.
Don’t place thin fonts over busy marble — you’ll lose readability.
24. Laminated Quote Checklist Cards on Binder Rings
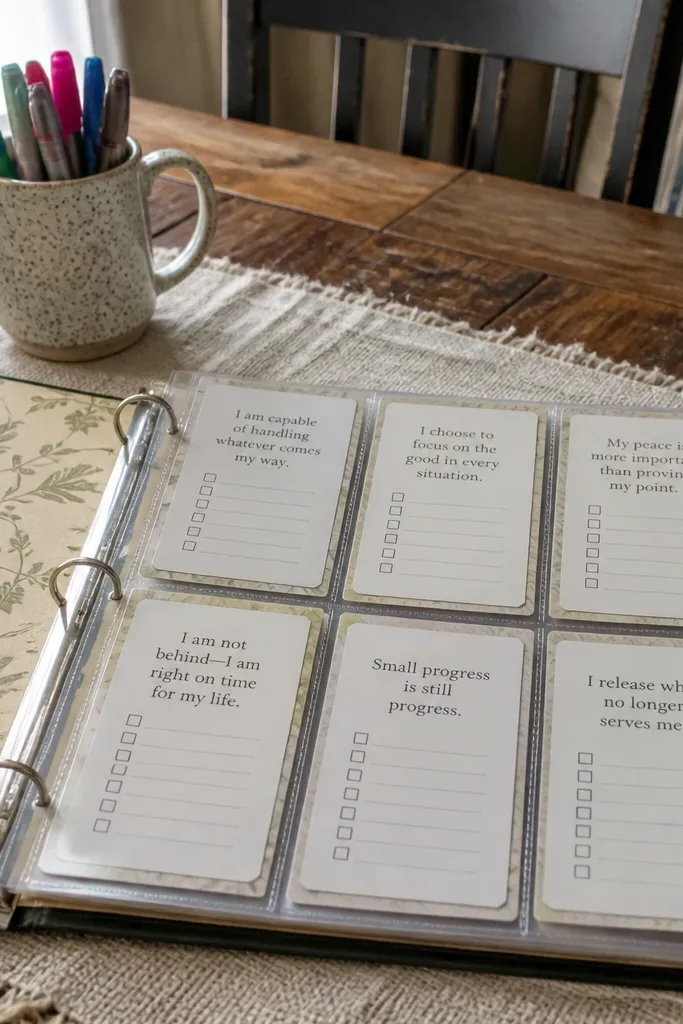
This is a motivation board that behaves like a tool. Laminated quote cards stay crisp and dry-erase friendly, so you can check off actions daily and keep the quote visible. Binder rings let the board expand as goals change, which keeps it from becoming a dead poster. The look is clean because the cards align and the rings create a tidy structure. It’s best for desks, kitchen counters, and work-from-home setups.
Print quote cards on thick paper and add a checkbox section under the action line. Laminate them using standard laminating pouches, then punch holes and add binder rings. Write each day’s top constraint on a small dry-erase strip at the top of the ring set. Arrange cards in order of priority so the first card reads as your daily command.
Pro tipUse a dry-erase marker in a single color like dark blue so the board stays visually consistent.
AvoidDon’t laminate over wet ink; it smears and ruins the clean look.
25. Blackboard Paint Quote Door Hinge Board
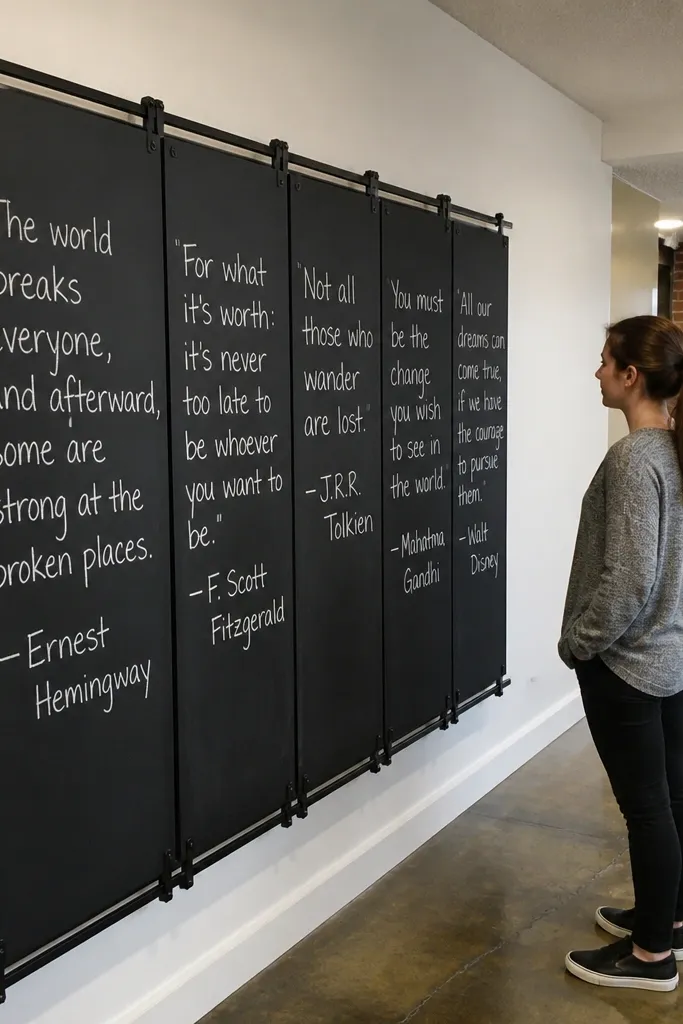
This is a vision board you can update without peeling anything off the wall. The blackboard paint gives you that matte, chalky look that photographs cleanly under daylight, and the hinged clips make swapping quotes fast. You get a built-in “progress” feel because every new quote sits at the same angle along the hinge line. It fixes the common problem where vision boards get messy — chalk stays put, and paper cards stay organized. It fits a hallway, bedroom door, or office entry where you actually pass it every day. Skill level is beginner, and it takes about 60-90 minutes total including drying time.
Pick a door-sized panel you can mount flat, like a 12x16 inch plywood rectangle, and lightly sand it (120 grit) so paint grips. Paint 2 thin coats of blackboard paint, letting each coat dry to a uniform matte finish, then cure the surface by rubbing chalk across it and wiping clean. Screw two small metal hinge brackets along the top edge (about 1.5 inches apart) and attach a line of mini binder clips or spring clips that open toward you. Add quote cards sized 3x5 inches, punch a 1/4 inch hole near the top, and clip them into place along the hinge line. Finish by sealing the edges with clear matte spray so chips don’t show on the corners.
Pro tipUse 3x5 cards on a stiff cardstock so they don’t warp when you clip them and swap them often.
AvoidDon’t use thick paint coats — they dry glossy and chalk won’t stick evenly.
26. Clear Acrylic Quote Strips With Hidden Washi Tabs
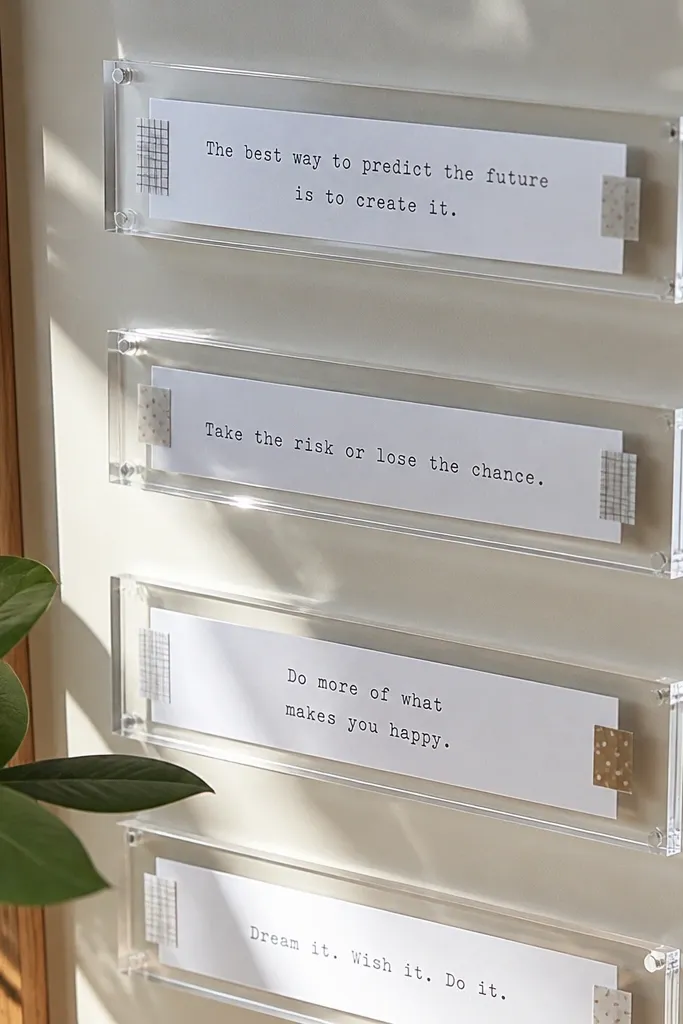
This one looks like floating typography. Clear acrylic strips catch light and make the quote cards look layered, while the hidden washi tabs keep the paper from sliding and keep the photos crisp. It solves the “my board looks cluttered” problem because you’re using straight, narrow strips instead of lots of separate frames. You can update quotes by swapping just the paper strip, not the whole setup. This suits desks, reading nooks, and small wall spaces where you want something clean and modern. It’s a mid-beginner project that takes around 2 hours including cutting and arranging.
Cut 5-7 acrylic strips from a clear sheet, aiming for 1 inch wide by 10-12 inches long, and sand the cut edges lightly with fine grit so they don’t feel sharp. Drill two tiny holes near each end of the acrylic strips (about 1/2 inch from the edge) and mount them with standoff screws or small wall standoffs so they sit off the wall. Cut quote paper strips to 3/4 inch wide by 9-10 inches long, then fold a 1/4 inch washi tab behind each strip at both ends. Slide the paper strip under the washi tabs so the text sits centered and straight. Mount the acrylic strips in a staggered pattern so each one catches light, then wipe the acrylic with microfiber to remove fingerprints.
Stick washi tabs only on the back of the paper strip — front-facing washi shows texture that can look messy on camera.
Don’t skip edge sanding — sharp acrylic edges chip and can cut fingers during swaps.
27. Dried Flower Press Quote Cards in a Floating Frame
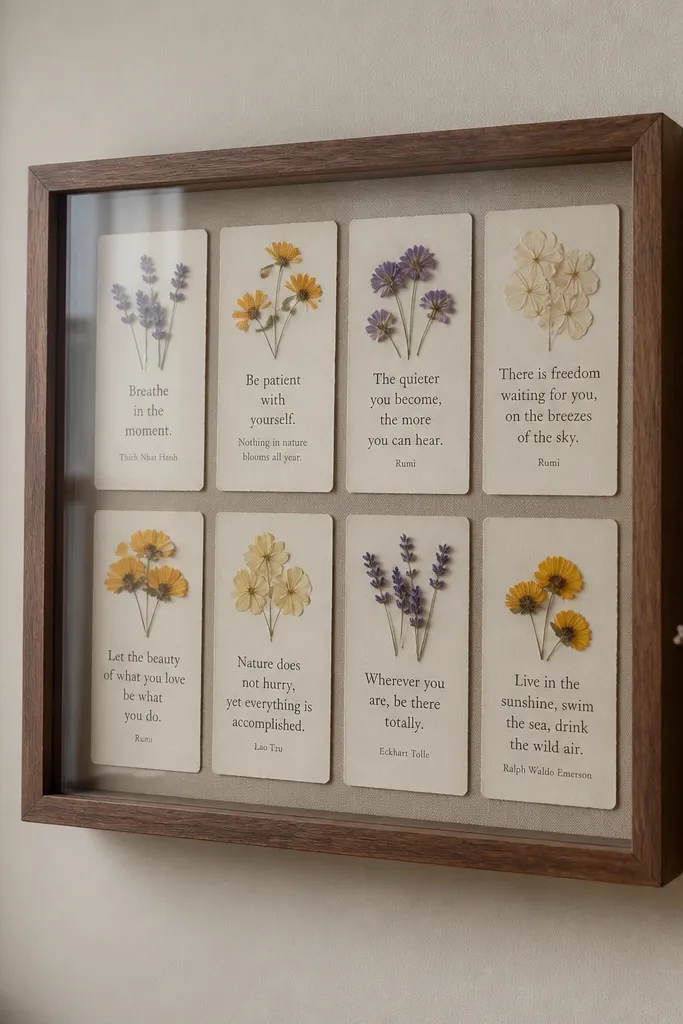
It’s a vision board that feels grounded and pretty, with quotes that look like they belong in a museum frame. The pressed flowers add texture and color while the quote stays readable because you control the layout on the card. This fixes the “pretty but hard to read” problem that happens with collage boards — you’re placing the quote on a clean card, then surrounding it with botanical accents. It also keeps your motivation visible without feeling loud or busy. This works in a bedroom, craft room, or bathroom where you want calm energy. Skill level is beginner, and it takes about a weekend because you need pressing time.
Press small flowers and leaves ahead of time using parchment paper and a heavy book for 3-7 days, until flat and dry. Cut cardstock quote cards to 4x6 inches, and choose one quote per card using a simple font in black ink so it stays legible. Arrange pressed pieces lightly on the lower half of the card and seal them with a thin layer of clear craft glue or a matte gel medium, keeping glue off the text area. Let each card dry flat, then place it in a floating frame with a clear front so the flowers sit a little off the glass. Use spacers inside the frame if needed so the card doesn’t touch the glass and smudge the pressed petals.
Pro tipPress for longer than you think — slightly crisp flowers photograph better and don’t curl when you frame them.
AvoidDon’t use wet-looking glue near the writing — it can smear ink and create glare spots.
28. Stitch-Line Quote Hoop Art With Embroidery Thread
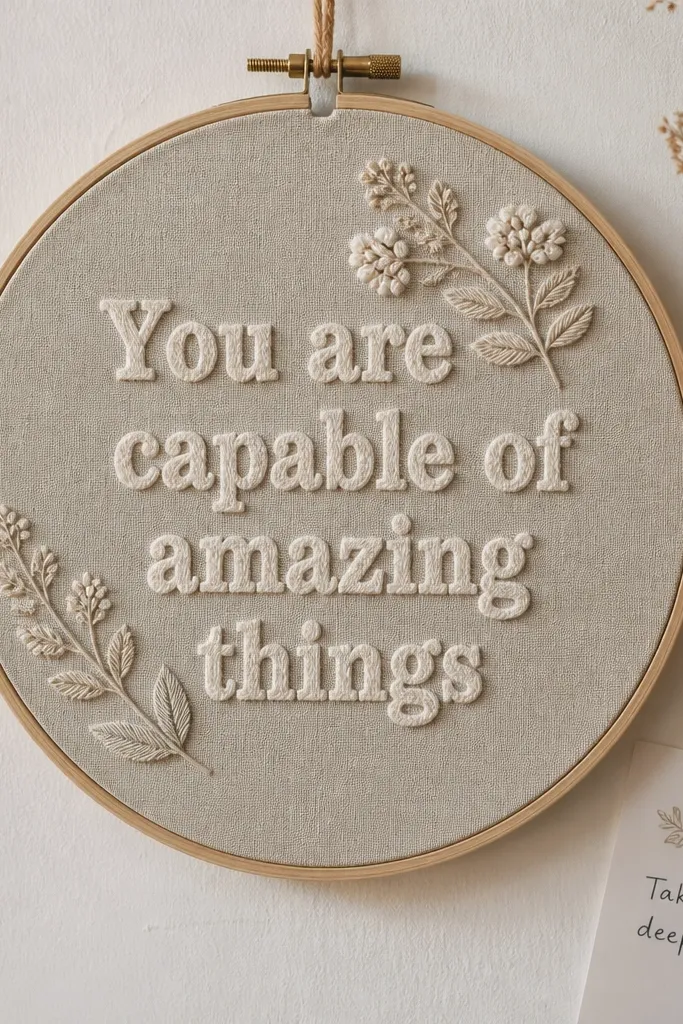
Thread-stitched quotes look bold, textured, and impossible to ignore. The photo payoff is real because the raised thread catches light and makes the quote feel intentional, not pasted-on. It fixes the problem where paper boards fade, peel, or look wrinkled over time. You also get a “slow motivation” effect because stitching forces you to place each word carefully. This fits a wall near your desk or reading chair, and it looks great in a set of 2-3 hoops. Skill level is beginner to intermediate, and each hoop takes about 2-4 hours depending on how many words you stitch.
Stretch a piece of linen or cotton fabric over a 6-8 inch embroidery hoop and tighten until it feels drum-smooth. Transfer your quote lightly with pencil, then stitch the letters using backstitch or split stitch so the text stays readable. Use 2 strands of embroidery floss in one color for the quote, like off-white on black fabric or mustard on natural fabric, and keep stitches consistent in size (about 1/8 inch apart). Tie off the thread on the back and trim clean. Mount the hoop by tightening the screw cap, then add a simple hanging ribbon so the quote hangs flat.
Choose a fabric with tight weave — loose weave makes letters look fuzzy in photos and when you read from a distance.
Don’t overstuff stitches — thick thread piles make letters look blobby and harder to read.
29. Fold-Out Quote Timeline Book Pages on a Wall Ledge
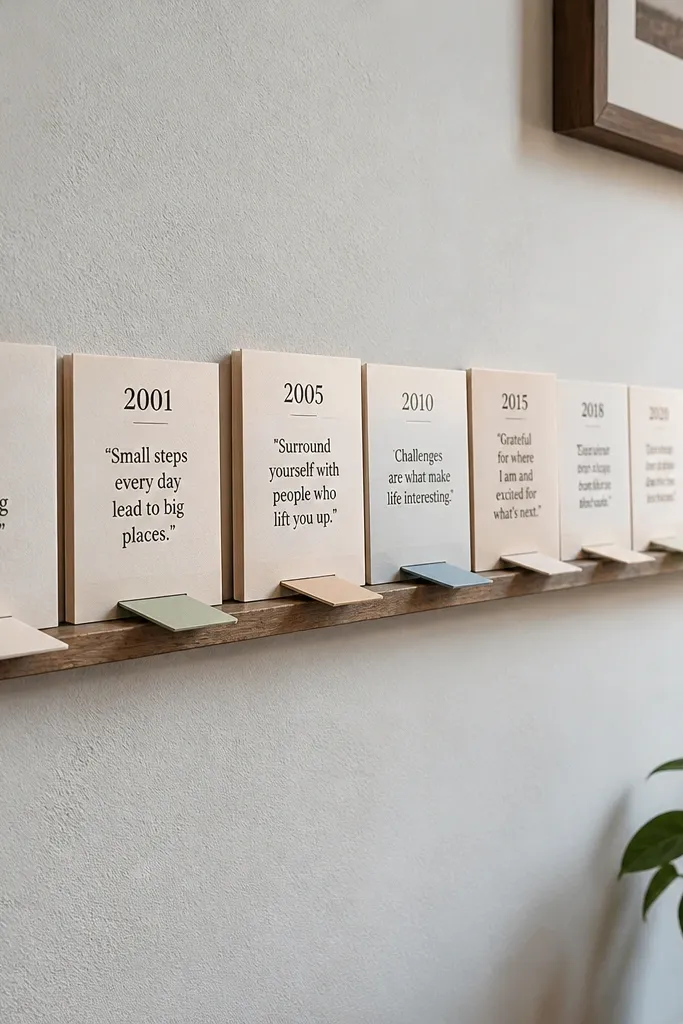
This vision board gives you a timeline without using a single calendar sticker. Book pages look layered and photogenic, and the folded quote tabs create a clean “read from left to right” path. It solves the issue where static boards don’t show movement — you get a sense of direction because each page folds out and reveals the next quote. The look is warm and tactile, not glossy, so it photographs well in natural light. It’s great for a living room wall, entryway shelf, or beside a bookshelf. Skill level is beginner, and it takes about 2-3 hours including glue drying.
Use a thrifted hardcover book or a stack of thick craft paper cut to book-page size, like 8.5x11 inches folded in half. Create 6-10 quote panels, each about 4x8 inches when folded, and write or print one quote per panel in black ink. Fold each panel so it opens like a small card, then glue the spine edge to a long wall ledge board using a thin line of bookbinding glue. Build a ledge from 1x6 pine cut to 24 inches long, sand edges, and paint or stain it to match your room. Attach the ledge to the wall with two studs if possible, then angle the book panels so the quotes face outward at a readable tilt.
Pro tipUse a ruler and score folds with a craft knife — crisp folds keep the quotes from looking wavy in photos.
AvoidDon’t glue the full panel flat to the ledge — leave a small gap at the fold so it actually opens.
30. Heat-Set Vinyl Quote Tiles on a Pegboard Grid
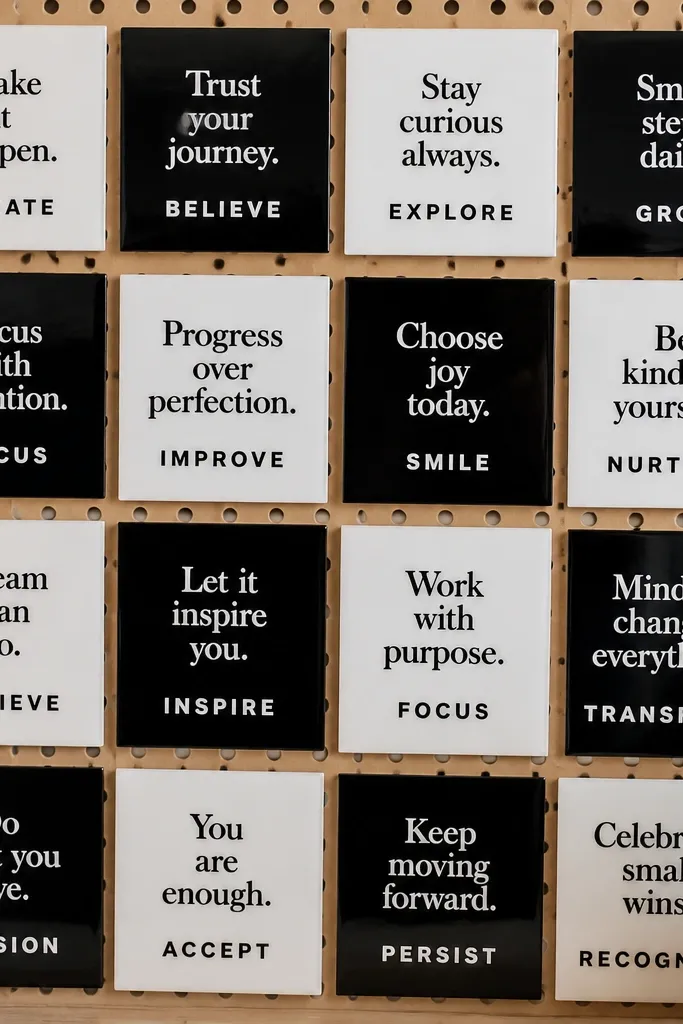
This is a quote board that stays sharp and doesn’t peel like paper. Heat-set vinyl gives you clean edges, strong contrast, and a “sign” look that reads from across the room. It fixes the common board problem where ink smears or paper curls with humidity. The pegboard grid makes it modular — you can rearrange tiles as your goals change. It suits a craft room, laundry area, or office where you want functional organization with motivation. Skill level is beginner if you have basic heat-transfer tools, and it takes about 2 hours for layout and pressing.
Cut pegboard to fit a wall section, like 18x24 inches, and mount it level with wall anchors or into studs. Cut small vinyl tiles from heat-set vinyl sheets, aiming for 4x4 inch squares, then weed the letters so only the quote remains. Press each tile onto a thin backing board like 1/8 inch craft plywood or directly onto coated pegboard if compatible, using a heat press or household iron with parchment paper. Apply firm, even pressure — about 20-30 seconds per tile — and let it cool before peeling transfer film. Arrange the tiles in a simple grid or diagonal, and add one thin border tile so the board looks intentional in photos.
Pro tipUse a single font size for all tiles and keep line breaks consistent — it makes the grid look designed, not random.
AvoidDon’t press vinyl without parchment — direct contact can scorch and leave shiny marks.



