
1. Swaddle Fabric Cover Album with Ribbon Spine
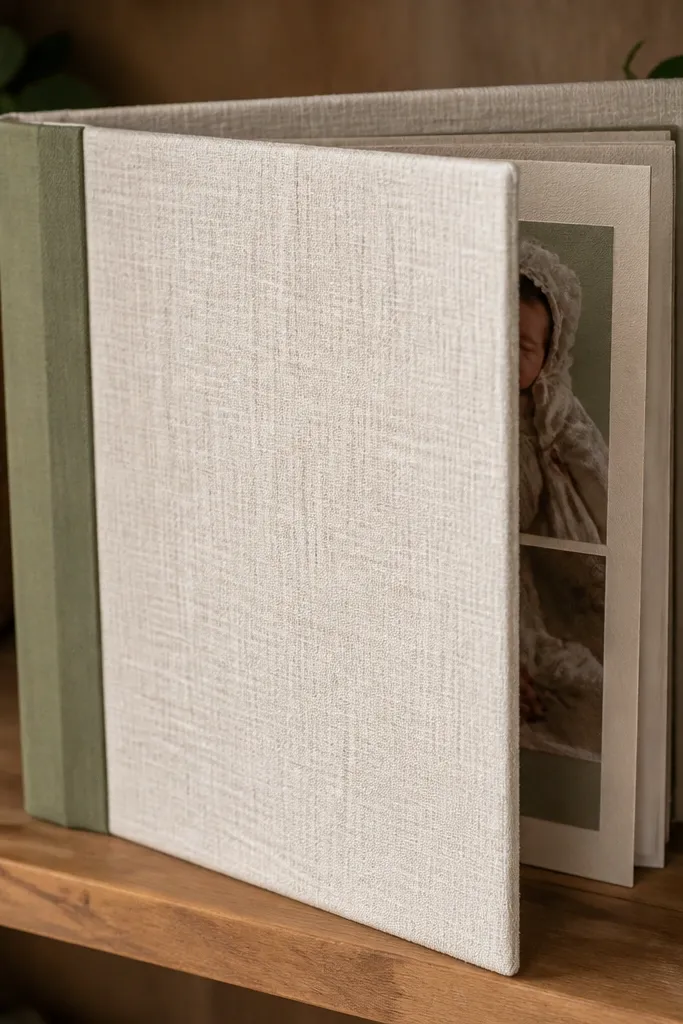
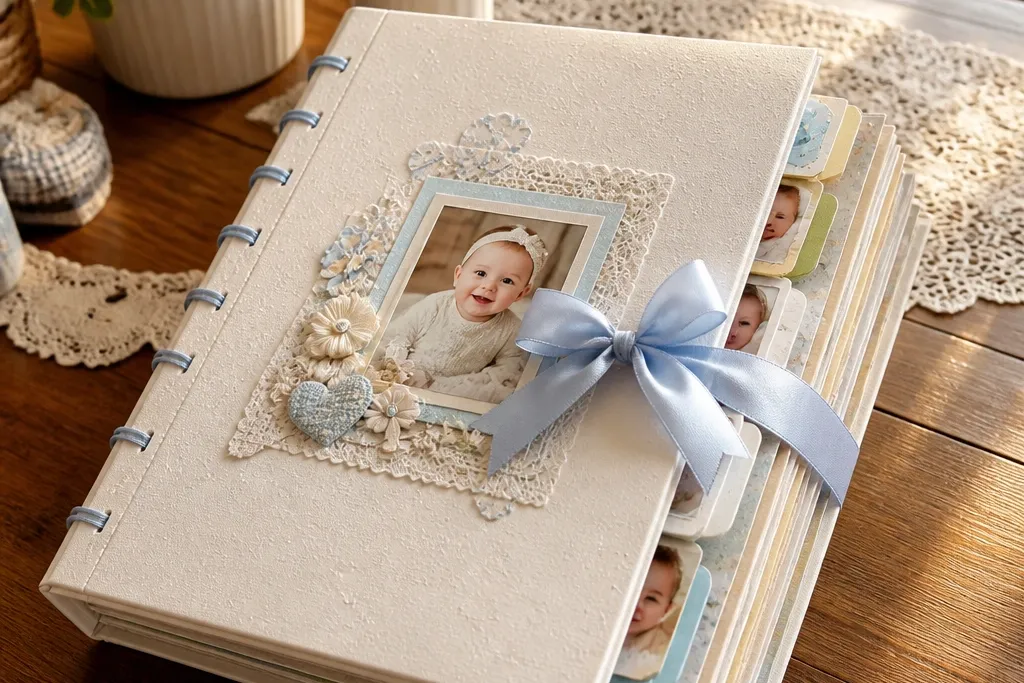
A fabric-covered cover instantly makes a baby scrapbook gift feel expensive, even when the rest is budget. This idea works because fabric has a soft texture that reads well in photos and it hides minor paper flaws. Use a swaddle-like fabric (gauze, flannel, or jersey knit) and cover a rigid cardstock base so the album lays flat. Add a ribbon spine so the binding looks intentional, not like “craft store glue.” This is best for 5x7 albums and for newborn gift timing since it feels cozy and gentle.
Start by cutting a cover base from 110 lb cardstock to 5x7 with a 1/2 inch spine allowance (about 1/2 inch wide strip for the hinge area). Cut fabric 1 inch larger on all sides, then glue the fabric to the cardstock using a thin layer of matte medium or tacky glue. Wrap corners tightly and trim excess so edges don’t bunch. Add a ribbon down the spine and glue it only along the spine area so the cover still opens smoothly. Finish by adding a simple title label on the front using a bold block font on kraft cardstock.
Use fabric scraps with visible weave (gauze or flannel) — they photograph better than smooth satin.
Don’t glue fabric all the way to the album edge; it will buckle when you open it.
2. Acrylic Window Page for One Big Photo

This page style makes a single photo look like a “keepsake display,” and it’s one of the easiest ways to get that polished, gift-ready look. The clear window adds depth, which helps the photo pop even under warm indoor lighting. Put one photo behind an acetate or clear plastic frame and decorate only the border so the composition stays clean. It’s great when you have only a few good pictures and want the album to look full anyway. Keep the decoration minimal — the window is the focal point.
Cut a rectangle window from 110 lb cardstock to fit your photo size (for a 4x6 photo, cut a window about 4.1x6.1 inches so it sits comfortably). Back the window opening with a piece of clear acetate or a sheet from a clear binder pocket — trim neatly. Glue the photo to another cardstock layer, then place it behind the window using tape around the edges. Add a label strip at the bottom with the baby’s first name and month/year using black ink. Seal the page surface with a light matte finish spray so glare doesn’t smear in photos.
If your clear plastic shows glare, tilt the label strip at a slight angle (5-10 degrees) to break reflections.
Avoid busy patterned borders; the window already creates visual focus.
3. Pocket Page from Cereal Box + Photo Tag
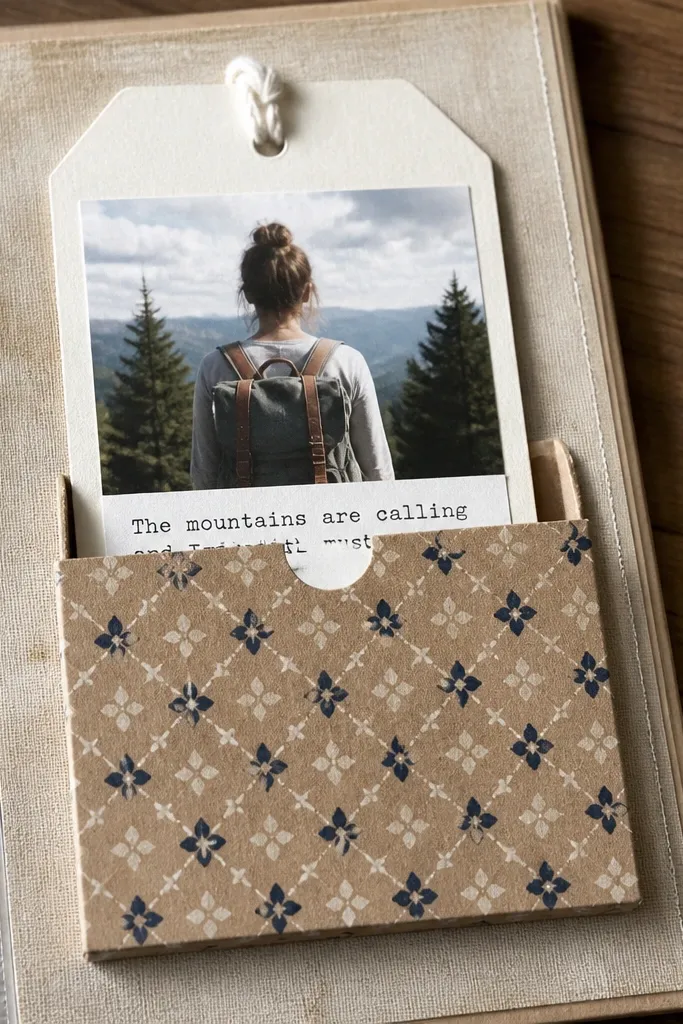
This is a budget baby scrapbook idea that looks clever instead of cheap. A pocket made from a cereal box (covered in patterned paper) gives you instant storage for a photo tag, ultrasound note, or a tiny typed message. The pocket creates a strong photo composition: you get a flat page plus a raised element. It also solves the “what do I put on this page?” problem because tags are easy to swap. This works well for albums that include paperwork, like hospital bracelets photos or scan printouts.
Pro tipUse two layers of cereal box for the pocket opening flap so it doesn’t crease under repeated handling.
Cut a pocket shape from cereal box cardboard: 4.5 inches wide by 3.5 inches tall, with a 0.5 inch flap on top. Cover it with patterned paper using glue, then reinforce the pocket edges with clear tape on the inside. Glue the pocket to a cardstock base page, leaving the flap free. Make a tag from cardstock sized about 3x4 inches, punch a hole at the top, and thread twine through. Add a small photo to the tag and write a date on the back so it stays meaningful even if photos get rearranged.
AvoidDon’t use thin craft paper on the pocket — it collapses and looks flimsy in photos.
4. Accordion Milestone Strip with 8 Mini Panels
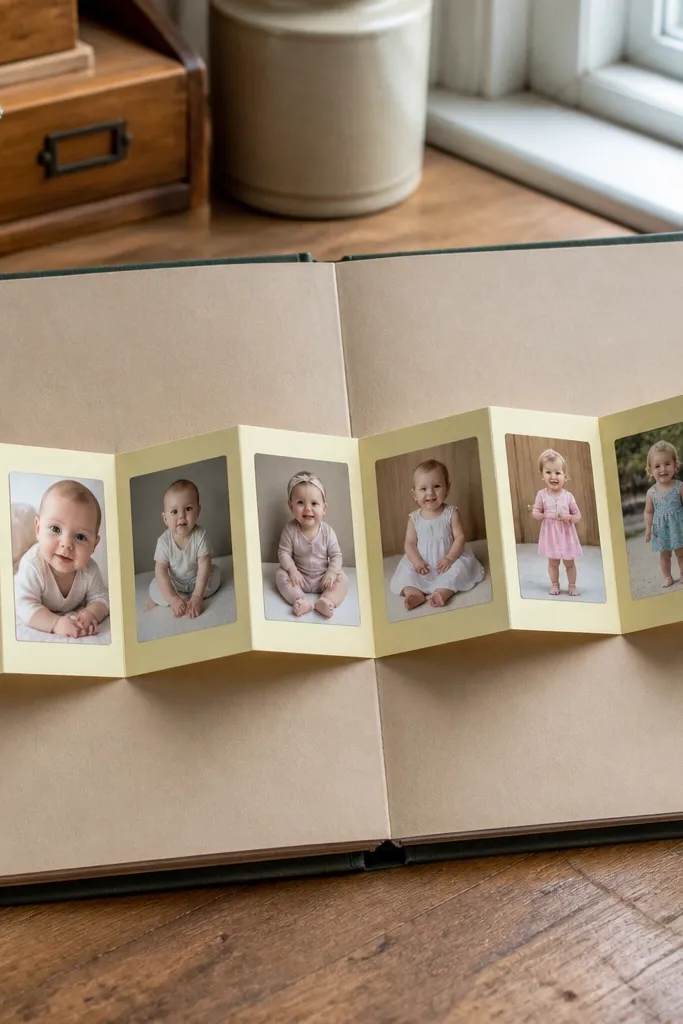
An accordion milestone strip gives you motion and a clean “story” without needing lots of decoration. Each panel can hold a small photo and one short line like “First smile” or “Crawling,” which keeps the page readable and photogenic. The trick is spacing: if each panel is consistent, the whole strip looks intentional. This is perfect for parents who want milestones but don’t want a long essay page. It also photographs well because the folded panels create visible layers.
Pro tipChoose one color for labels across all panels (black or navy) so the album looks cohesive.
Cut a cardstock strip about 10 inches long by 3.5 inches wide. Score it into 8 panels by folding at 1.25-inch intervals (for 8 equal sections). Use a bone folder for crisp folds so the strip lays flat when closed. Glue the accordion strip to a scrapbook page base only along the top edge so it opens freely. Add photos to each panel and write one milestone label per panel using a fine-tip white gel pen on darker cardstock or black ink on light cardstock.
AvoidDon’t glue the accordion along the sides; you’ll trap the folds and it won’t open.
5. Sticker-Resist Color Block Pages
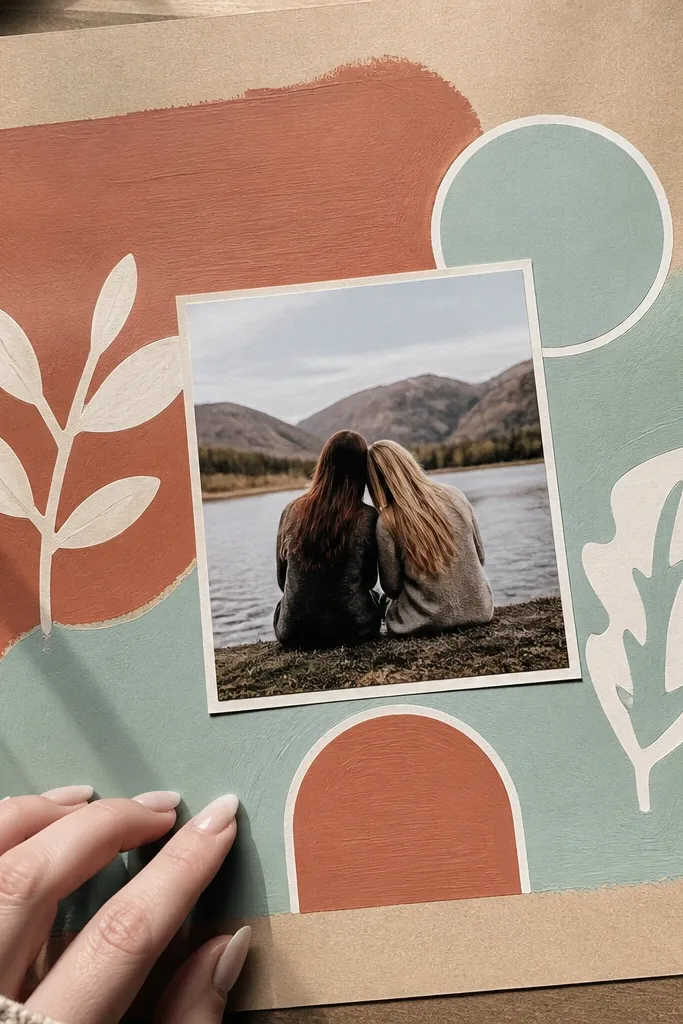
This idea turns cheap craft supplies into a clean, modern look. You use sticker shapes as a resist, then paint or ink around them, creating crisp edges that look like a designed pattern. Pair one photo with two big color blocks and keep text minimal. It’s a win for budget baby scrapbook ideas because you can use scraps of paint, ink pads, and sticker cutouts you already own. The result is highly photogenic because the color blocks create strong contrast against white cardstock.
Pro tipUse a matte ink pad for less shine; glossy paint can look slick under phone cameras.
Cut a page base from 8x8 cardstock and decide your photo size (for example, 3.5x5 inches). Place sticker shapes (stars, circles, or scallops) where you want “white” or “unpainted” areas. Dab ink or paint around the stickers with a sponge — keep edges clean. Remove stickers to reveal crisp shapes. Glue your photo onto the finished color-block area and add a thin label strip with the baby’s name and a single date.
AvoidDon’t overwork the paint — multiple layers blur edges and kill the resist effect.
6. Thread-Stamped Heart Page
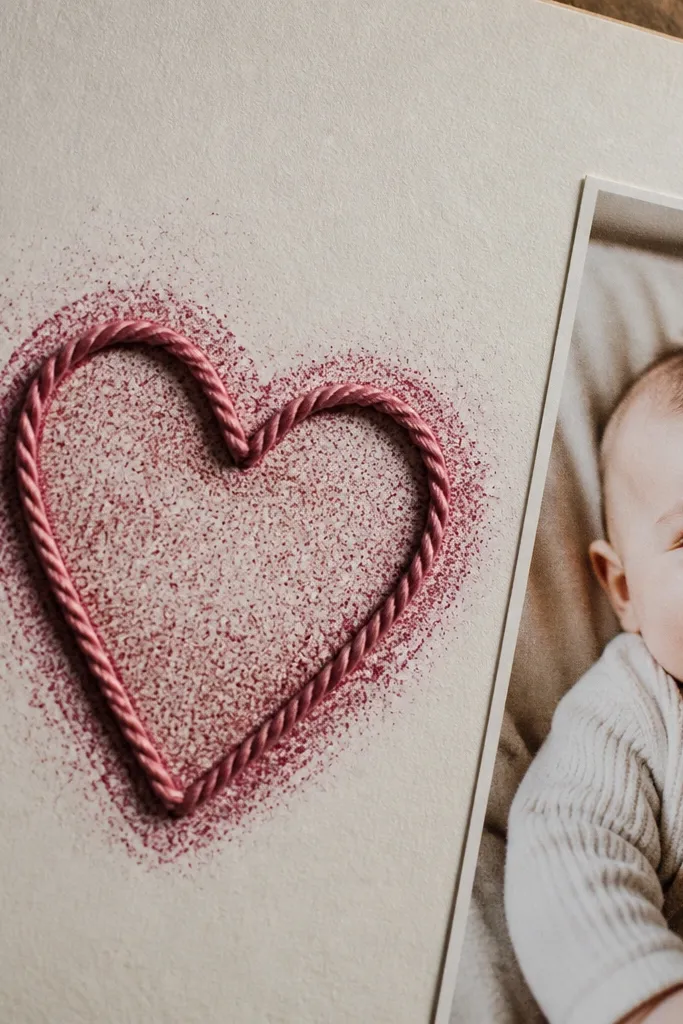
Thread stamping looks hand-crafted and classy, and it’s surprisingly budget-friendly. You create a heart shape by wrapping thread around a simple adhesive outline, then press it onto inked paper or cardstock. The texture catches light, so it looks great even in simple lighting. This page works for milestone moments like “First Valentine” or “First birthday,” but it also works for any sweet photo because the heart is always readable. It’s best for people who want a tactile page that looks more thoughtful than stickers.
Pro tipUse thicker embroidery thread (not craft string) so the texture shows clearly in photos.
Draw a heart outline lightly in pencil on cardstock and trace over it with a permanent glue pen or thin glue line. Lay thread along the glue path in a neat loop pattern, then let it dry fully. Ink another piece of cardstock lightly with a sponge so it’s not streaky. Press the dry thread heart onto the inked surface or stamp it by pressing gently with a flat tool. Place your photo in the center area and add a small date label under it.
AvoidDon’t use wet glue without drying; it will soak into paper and flatten the thread look.
7. Die-Cut Jar Label with Twine Closure
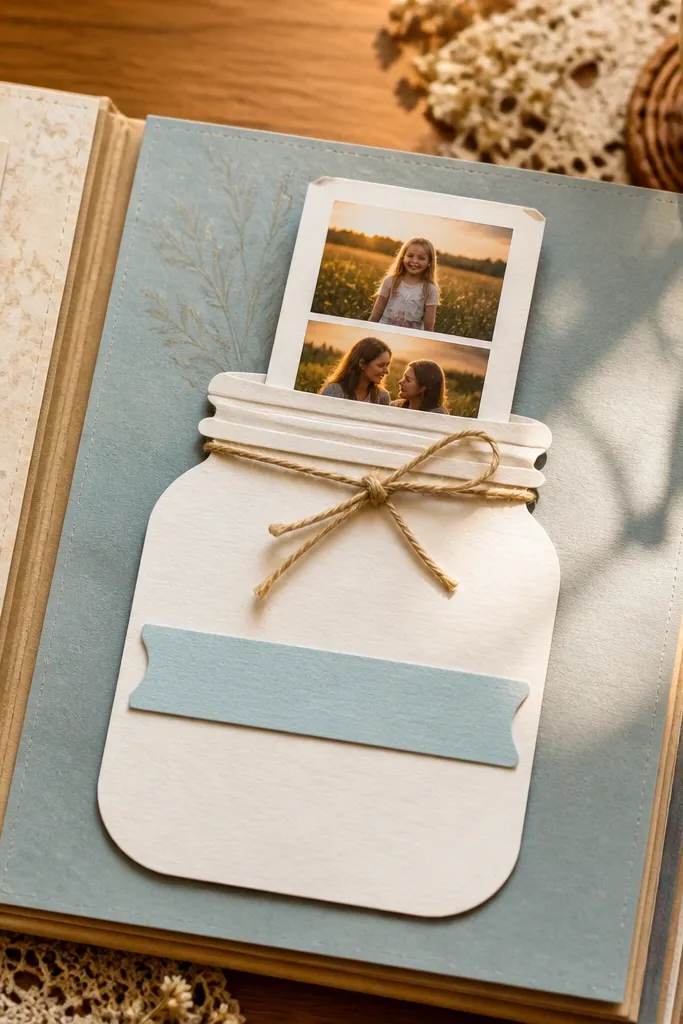
Jar labels look adorable on baby albums, and the twine closure makes it feel like a real keepsake. You’re building a pocket or flip flap shaped like a jar, then tying it shut so it photographs like a mini package. This is great for holding a short letter, a tiny photo strip, or a note about a special day. The “jar” theme also helps you organize memories by category (firsts, favorites, visits). It’s visually strong because the jar silhouette is a clear shape with clean edges.
Pro tipUse kraft cardstock for the jar and a contrasting patterned paper for the label stripe — it reads well on camera.
Create a jar outline on cardstock (use a jar template or trace a jar lid shape and adjust to a rectangle body). Cut two jar pieces and glue the back jar slightly offset to create a border. Attach the front jar to a page pocket base so the jar flap opens. Punch a hole at the top of the jar flap and tie twine through it, then secure the knot with a tiny glue dot. Inside the pocket, slide a small folded note and a photo strip, then close with the twine.
AvoidSkip glitter glue here; it sheds and looks messy in close-up photos.
8. Foil Dotted Nameplate with Black Photo Mat
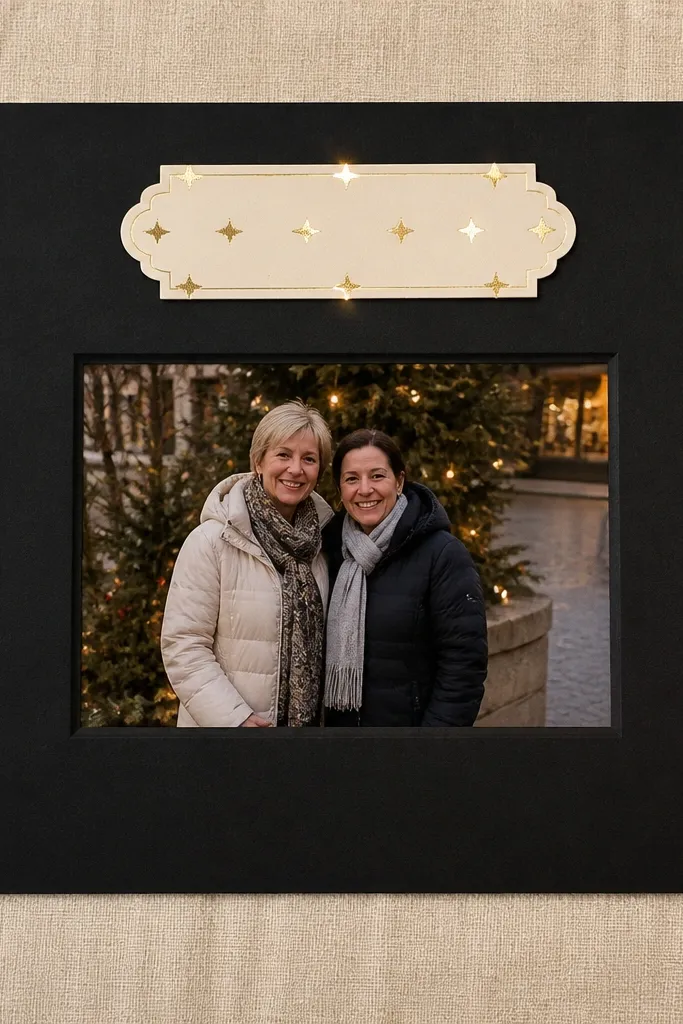
If you want baby scrapbook pages that look “designed” without paying for die cuts, this is the move. A black photo mat makes even a simple phone photo look sharper, and foil dots add a clean, celebratory sparkle. Keep the page composition tight: one black mat, one nameplate, and one small label line. This is perfect for parents who want a modern look rather than a pastel overload. The nameplate is what makes it gift-worthy because it anchors the page.
Cut a black cardstock mat slightly larger than your photo (about 1/8 inch border on each side). Create a nameplate strip from gold foil paper or foil cardstock about 2 inches tall and 4-5 inches wide. Add dotted accents using a hole punch or a dot marker — press dots lightly so they don’t tear. Glue the nameplate above the photo mat and add a single line of text like “Born” with the date. Finish by sealing with matte spray so the foil doesn’t glare.
If foil paper wrinkles, run it under a heavy book for 10 minutes before cutting.
Don’t add more than one metallic element per page; two finishes start fighting in photos.
9. Fabric Tab Page with Velcro Closure
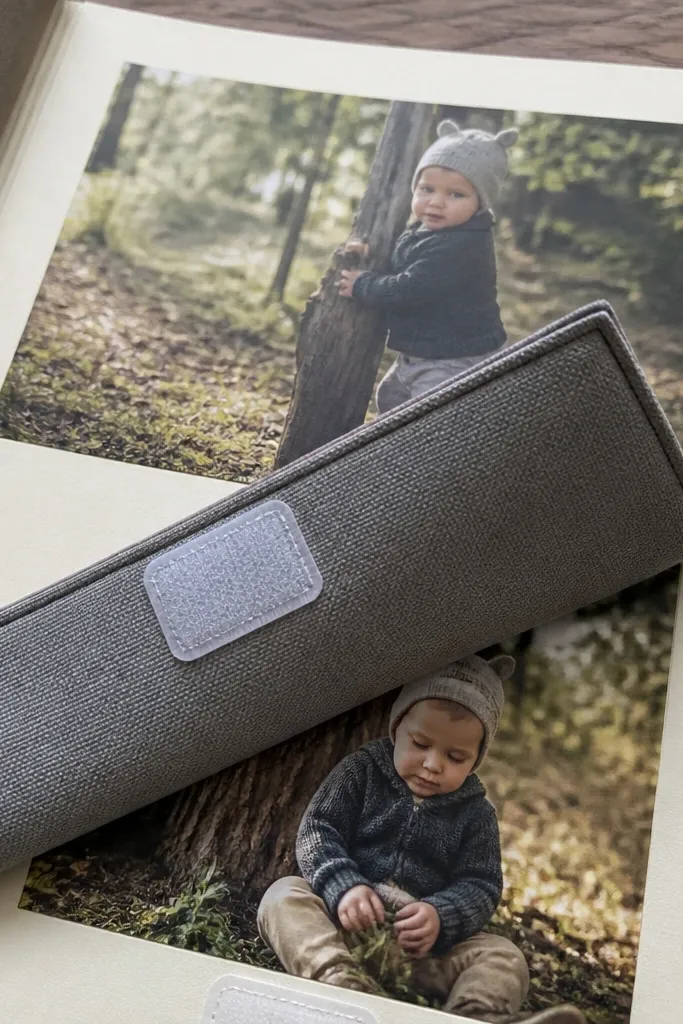
Velcro closures are a cheat code for interactive scrapbook pages that still look neat. A fabric tab gives you a tactile pull point, and the flap hides a second photo or a short note. This keeps pages from looking flat and makes the album fun for the recipient to open. It’s especially good for grandparents because it adds an easy “where’s the next memory?” moment. The fabric tab also makes the page feel soft and baby-appropriate.
Cut a fabric tab about 1 inch wide by 2.5 inches tall. Glue or sew it to the top edge of a scrapbook page base so one side is anchored. Cut a small flap from cardstock sized to cover a photo area, then attach the flap to the page with a thin hinge strip (paper tape works). Add tiny squares of hook-and-loop velcro: one on the tab end and one on the flap. Place a photo under the flap and add a label on the page base so it still reads when closed.
Use micro velcro pads for a flatter look; big velcro bumps show in photos.
Don’t place velcro where it rubs fabric edges; it creates lint and frays the tab.
10. Lace Edge Photo Border from Table Runner Scrap
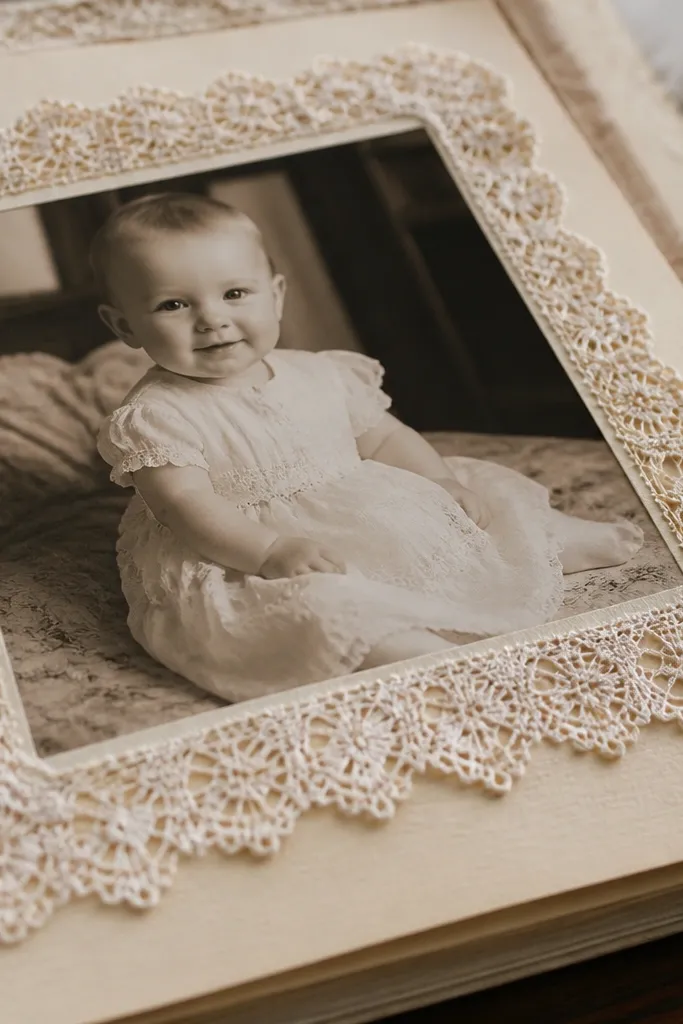
Lace edges make baby scrapbook pages feel delicate and gift-ready without spending on fancy embellishments. The key is to use lace as a border, not as a random decoration. A lace-trimmed photo frame creates a clear visual boundary, and it photographs beautifully because the pattern creates texture. This works best with black-and-white or sepia photos, but it also looks good with bright color photos if your base cardstock is cream or kraft. It’s a strong option for first birthday or baptism-style gifts.
Cut a photo mat from cream cardstock sized 0.25 inch larger than your photo. Trim lace to the mat width and glue lace along the top and sides, leaving the bottom edge clean. Add a thin strip of patterned paper behind the photo to add color without clutter. Glue the photo to the mat and mount it to a page base using foam squares or cardstock tabs. Add a small label strip under the photo with the date and a short phrase like “First Birthday.”
Press lace flat under a book before cutting so the edges don’t curl on camera.
Don’t use lace across the entire page; it can overwhelm and look busy.
11. Crinkle Paper Confetti Corner with Hidden Note
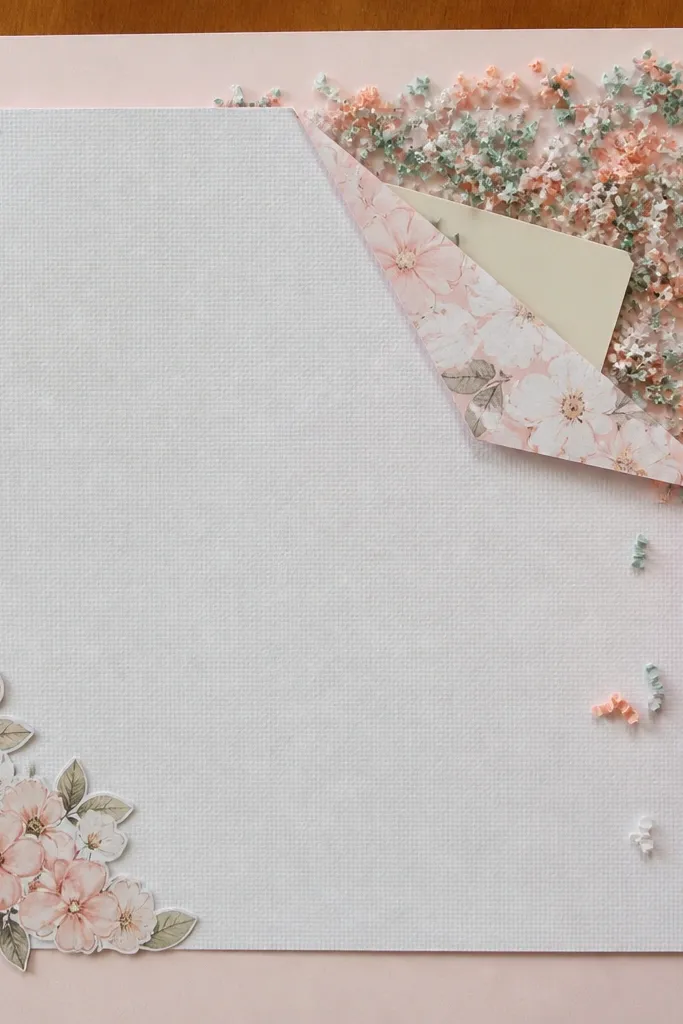
Confetti corners add instant “celebration energy” and they look great in overhead photos. The trick is to keep confetti in one controlled corner so the page stays readable. You also get a hidden note pocket — write a short message for the parent, or add a hospital-to-home timeline. Budget baby scrapbook ideas often fail because they’re all decoration and no function; this one has both. The crinkle texture catches light and makes the page pop even with simple photos.
Tear or cut small squares of tissue paper or crepe paper, then crinkle them lightly between fingers. Create a corner pocket by cutting a small triangle flap from cardstock and gluing it on two sides, leaving the top open. Glue your crinkle confetti into the visible corner using a thin line of glue and press gently so it holds. Tuck a folded note into the pocket and add a small label on the page base like “Saved message.” Mount the whole thing onto a page base so it stays flat.
Use tissue paper colors that match your photo tones (navy + cream + one accent) so the confetti doesn’t look random.
Avoid large confetti pieces; thick bits cast shadows and make the page look messy.
12. Baby Bootie Cutout from Old Cardstock Stack
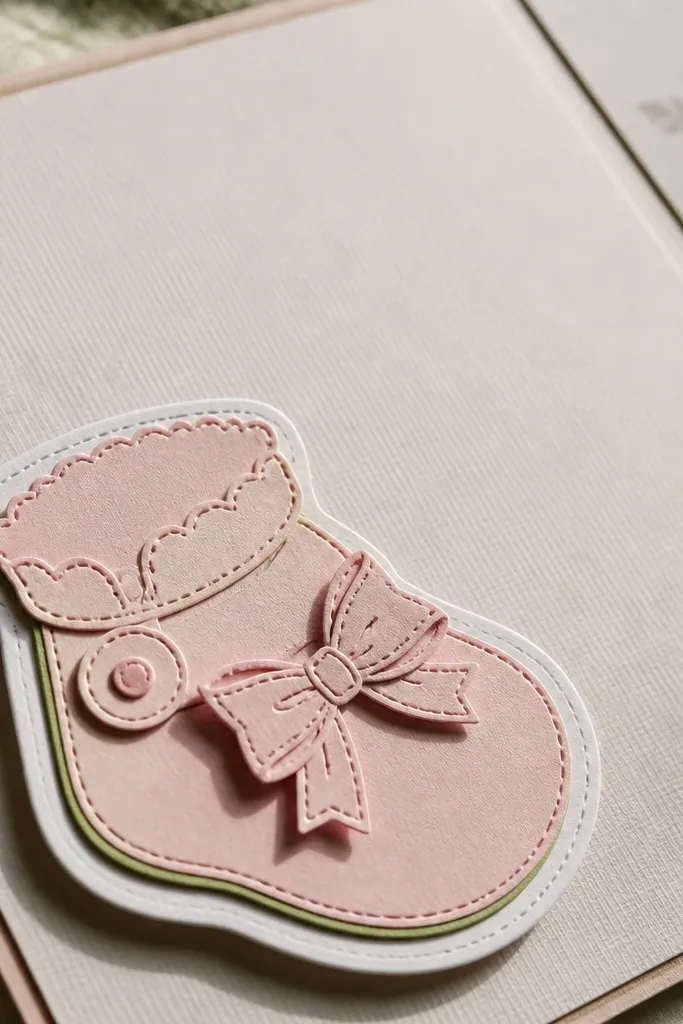
A bootie cutout is instantly baby-themed, and layered cardstock makes it look dimensional without buying 3D embellishments. This idea works because the silhouette is recognizable even at small sizes, and the layers create a shadow that reads on phone photos. Use it as a focal element in one corner, then let the rest of the page stay simple. It’s a good choice when you have one standout photo you want to frame with a clear theme. Keep colors consistent with your album palette so it doesn’t look like random craft scraps.
Pro tipUse 110 lb cardstock for the top layer so the silhouette stays crisp and doesn’t droop.
Trace or print a bootie shape onto cardstock and cut one base layer plus two smaller offset layers in contrasting colors. Glue the layers so they step outward, creating a shadow border effect. Add a photo beneath the bootie cutout, slightly offset so it looks like the bootie is “holding” the image. Mount everything onto a page base with a plain mat border. Write a short caption on a label strip next to the bootie, like “Wearing size 1.”
AvoidDon’t stack more than three layers; extra thickness makes corners lift and snag in albums.
13. Polaroid-Style Photo Layering with Paper Clips

This is the easiest photogenic page you can build without fancy tools. Layer two or three cut cardstock mats behind a photo, then add a tiny paper clip as a faux binder clip. The layered edges create depth, and the paper clip adds a metallic highlight that reads well in photos. It works for multiple photos per page because you can repeat the same mat sizes. It’s also great when you want the album to look playful and giftable rather than overly scrapbook-y.
Cut a base mat from white cardstock sized about 3.75x5.25 inches for a 3x4 photo. Cut a second mat in patterned paper about 3.5x5 inches and glue behind the photo so it peeks out. Add a third thin strip mat on the bottom in kraft or black cardstock. Attach the photo stack to the page with double-sided tape. Clip a small silver paper clip onto the top edge area and glue just the ends so it looks secured but still slightly raised.
Use matte patterned paper under the photo; glossy patterns reflect light and wash out the photo.
Don’t place paper clips where they cover faces; the metal highlights steal attention.
14. 3-Photo Vertical Strip with Washi Tape Hinges
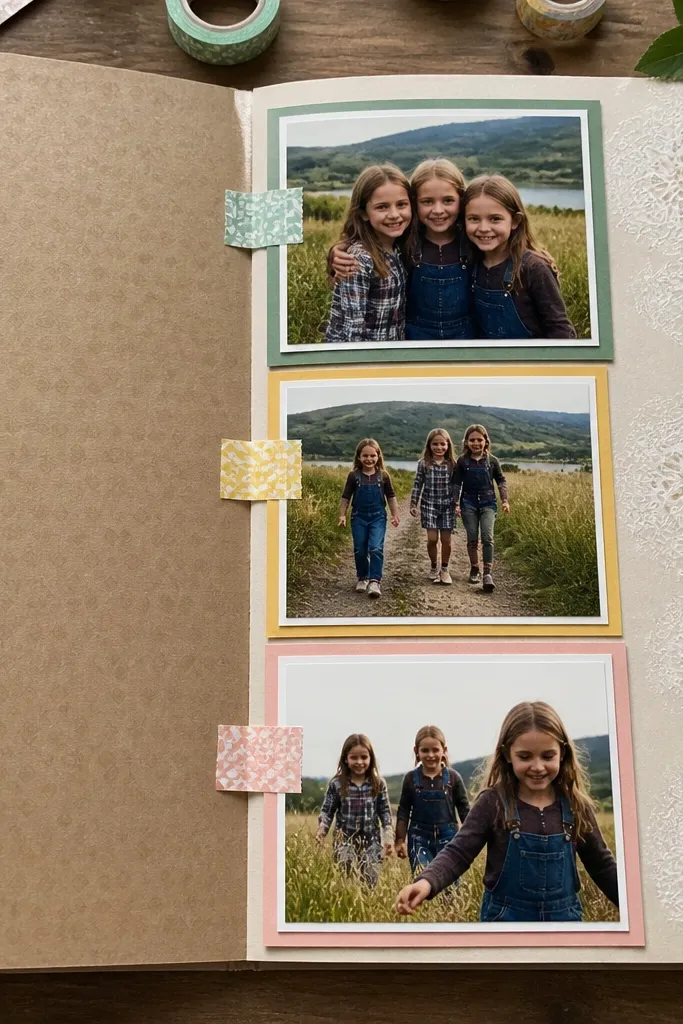
A vertical photo strip makes the album feel “organized,” and it looks sharp in a flip-through. Washi tape hinges are cheap, flexible, and they look intentional when you keep tape placement consistent. Put three photos in one column, each slightly different size, then connect them with tape so they look like a mini flip. This solves a common budget problem: you want more photos without making every page bulky. It also gives the recipient an interactive moment.
Pro tipPick one washi tape pattern and repeat it across the whole album so it becomes your visual signature.
Choose your strip width — for an 8x8 page, plan for about 3.5 inches wide photo area. Cut three photos to the same height (or trim them to match) and mount them on cardstock backing strips. Position them vertically with small gaps between so you can see the hinge tape. Use washi tape across the back edges as hinges so each photo can lift slightly. Add a label strip across the top with month/year and a short phrase like “Little changes.”
AvoidAvoid thick foam under all three photos — it makes the strip too chunky to flip.
15. Color-Matched Page Matrices for Every Month
This is how you make budget baby scrapbook ideas look cohesive across many pages. You create a consistent “matrix” layout: one centered photo, surrounded by small color blocks that match a month theme. Even if your photos vary in lighting, the color blocks keep the page looking designed. It’s a win for gifts because parents can flip through and instantly recognize which month each memory belongs to. The grid also gives you built-in space for tiny labels without clutter.
Pro tipLimit yourself to two patterns (solid cardstock and one patterned paper) so the grid stays clean in photos.
Pick 6-8 colors for the album palette and assign them to months (example: cream, blush, dusty blue, sage, navy, gold). Cut a page base to 8x8 and draw a simple grid with pencil: keep the photo area clear in the center. Cut small rectangles from cardstock scraps and glue them around the photo area in a consistent pattern. Add month labels on two adjacent blocks using a white gel pen or black marker. Seal the page with matte medium if you used paint or ink on any scraps.
AvoidDon’t add extra stickers on top of the grid; it kills the uniform look.
16. Handwritten Letter Fold-Out Page
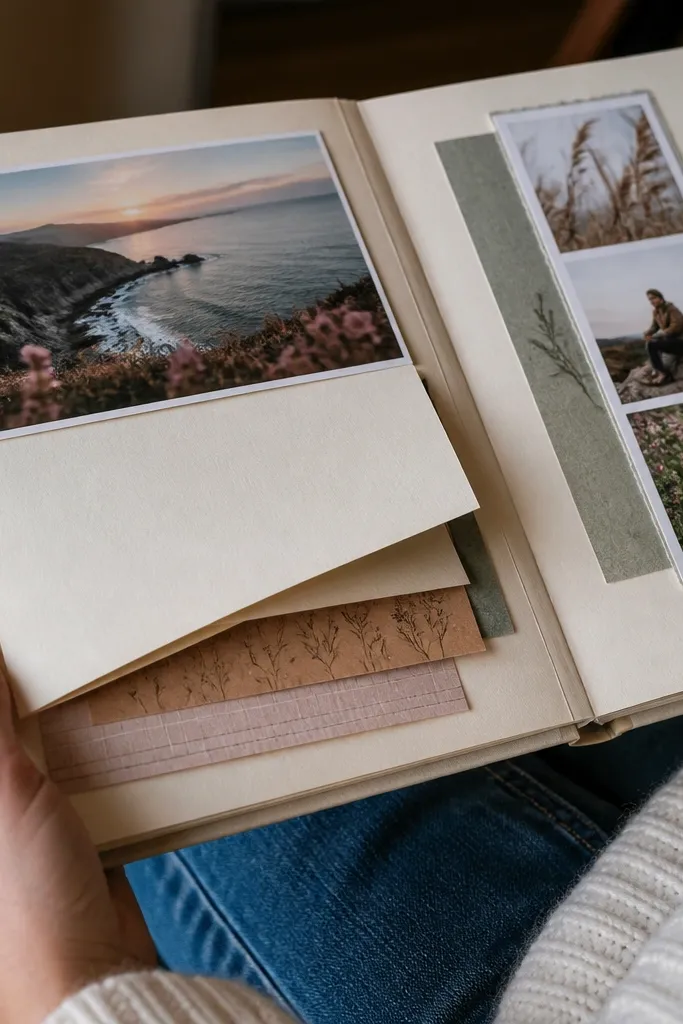
A fold-out letter page makes your scrapbook gift feel personal without needing fancy embellishments. You hide a short note inside — a message to the baby, or what the family wants them to remember. The fold-out creates a strong photo moment because it opens up and shows layers. It’s also a practical solution when you want to include more words but still keep pages photogenic. Keep the letter short: 3-5 lines, big enough to read in a quick glance.
Cut a fold-out panel from 110 lb cardstock sized about 4 inches tall and 6 inches wide, then score it in half. Create a pocket or hinge by gluing one side of the scored panel to the scrapbook page base with a narrow strip of tape. Add a small photo on the outer flap and write a title like “A Note for You.” On the inside, write the message with a black fine-tip pen and underline headings with a colored marker. Finish by adding a small ribbon loop or paper belly band to keep it closed for gifting.
Use pencil first for the letter placement so lines stay straight and readable.
Don’t use markers that bleed; thin pen ink reads cleaner on folded paper.
17. Gold Starburst Photo Frame from Packaging
Starburst frames make photos look like they’re meant for a celebration, and they’re easy to build from packaging. You can cut a starburst shape from a cereal box wrapper or gold foil food packaging, then glue it behind a photo mat. The look is graphic and bright, which is why it photographs so well. This is a strong option for “firsts” pages like first steps or first birthday. Keep the rest of the page minimal so the starburst doesn’t compete with the photo.
Find a foil or metallic packaging panel and iron it flat on low heat with a cloth barrier. Trace a starburst template or use a printed pattern, then cut one large frame and one smaller backing mat. Glue the metallic starburst to the backing mat, then center your photo behind the opening. Add a clean label strip at the top using cardstock and black ink. Seal the metallic edges with a thin clear tape line so they don’t peel inside the album.
Cut starbursts with sharp scissors or a craft knife so the points don’t look ragged.
Avoid thick glue on foil; it creates bumps that show through in photos.
18. Map-Print Scrapbook Page with Compass Sticker Label
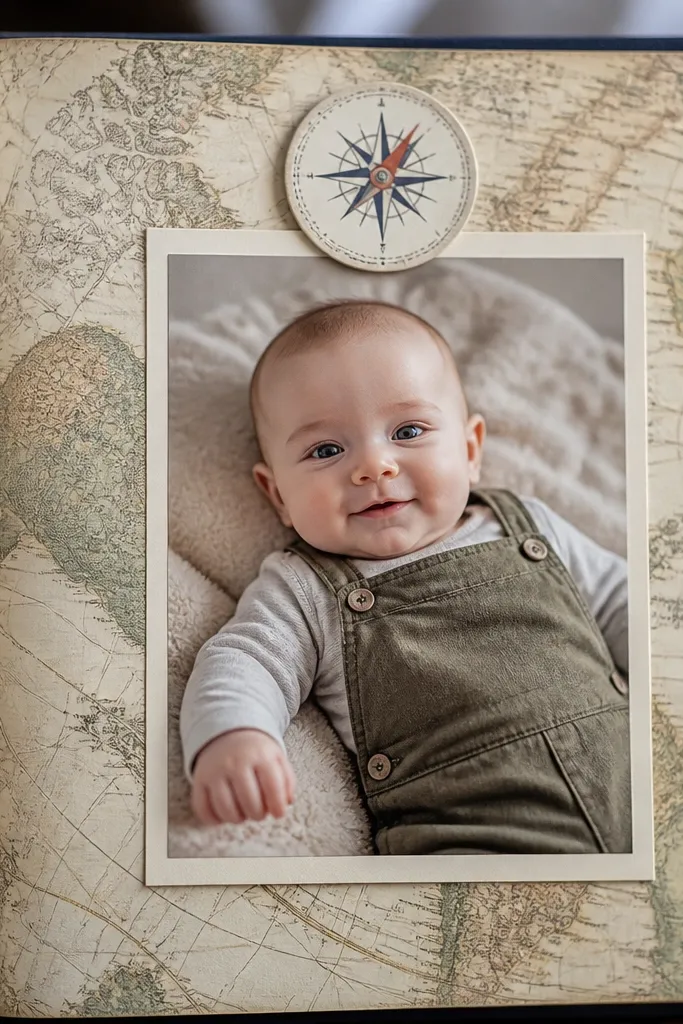
Map-style pages look grown-up and trendy, which makes a baby scrapbook gift feel modern instead of overly themed. The key is to use the map print as a background and keep one photo centered with a simple label. Add a compass sticker label or DIY compass circle cutout to frame the photo location like “Hospital” or “First Home.” This works best when you have a location photo or a shot that includes a street sign or room view. It’s also a budget-friendly way to use patterned scraps that feel “too adult” for baby themes.
Choose a map-print scrap paper and cut it to fit your page base with a 1/8 inch border. Place your photo in the center and trace a simple circle or compass ring using a template. Cut the compass ring from cream cardstock and glue it over the photo edge area so it frames the photo without covering faces. Add a small label underneath with location and date. Finish by adding one thin washi tape strip along one side to tie the page into the rest of the album.
Use a cream label and black ink so the map doesn’t steal attention from the photo.
Don’t add multiple stickers; one compass label is enough.
19. Kraft Paper Belly Band with Photo Strip
Belly bands are a simple way to make a page look like it has a “secret.” A kraft belly band holds a photo strip, so you get a clean, photogenic bundle instead of loose photos. Kraft also photographs well because it adds warm contrast and keeps colors from going flat. This is perfect for budget baby scrapbook ideas when you want to include several photos but keep the page from getting bulky. The band also protects the photo strip from smudging during gifting and shipping.
Cut a kraft paper strip about 9 inches long by 1.75 inches wide for an 8x8 page. Glue the strip to the back of the page as a band so it wraps around the front and holds the photo strip in place. Create a photo strip from three photos mounted on cardstock, sized so the strip fits inside the band opening. Slide the strip under the band and add a small label on top like “First Month.” If you want it to stay closed, add a small paper fastener or a dot of glue at the band end only.
Use a paper scoring tool to crease the band edges so it wraps smoothly and stays flat.
Skip thick embellishments on the band; they make it hard to close and photograph.
20. Scrapbook "Receipt" Tag with Foil Date Stamp
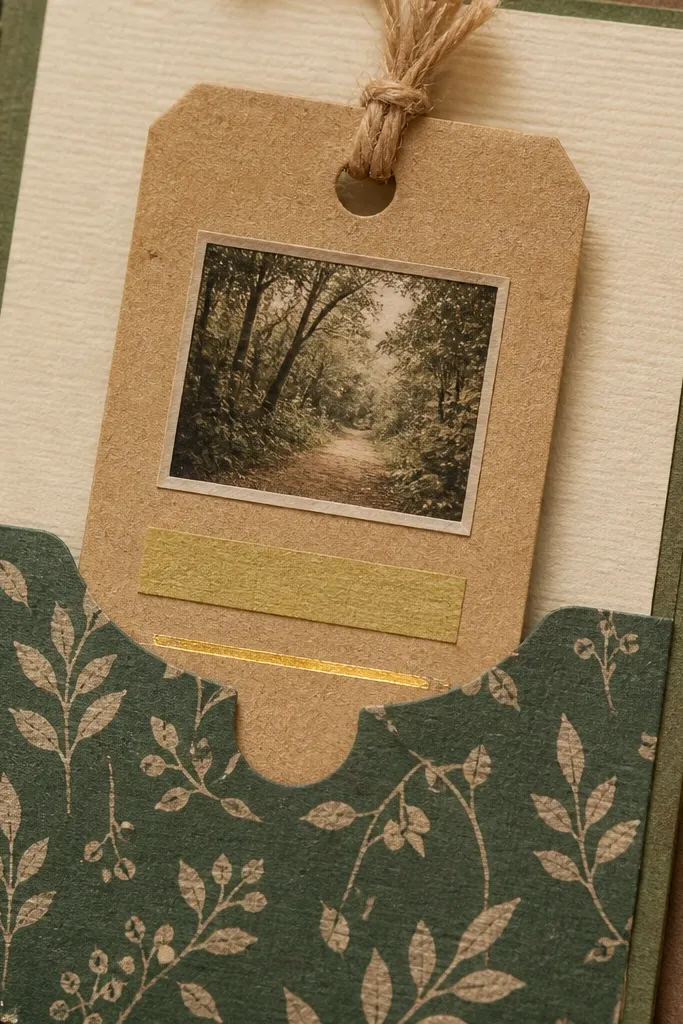
Receipt-style tags look quirky in the best way, and they add a structured, handwritten feel to baby memories. This idea uses a tag format that’s easy to fill: a date, a tiny photo, and one short line. The foil date stamp makes it look intentional and celebratory without lots of craft supplies. It’s great for hospital-to-home timelines, visits, or everyday milestones like “First bath.” The page stays photogenic because the tag has clear edges and a strong block layout.
Cut a rectangle tag from cardstock sized about 3x5 inches and round the corners. Add faux receipt lines using a fine black marker and a few small dash marks along the sides. Create a date label using gold foil paper: cut a small rectangle and write the date in black ink. Glue a small photo strip at the bottom of the tag, then attach the tag to the page using a pocket or two brads. If using a pocket, glue it to the page base and tuck the tag inside so it stays neat.
Use a ruler for the receipt lines — straight lines make the whole tag look designed.
Don’t crowd the tag with too many fonts; one clean handwriting style is enough.



