
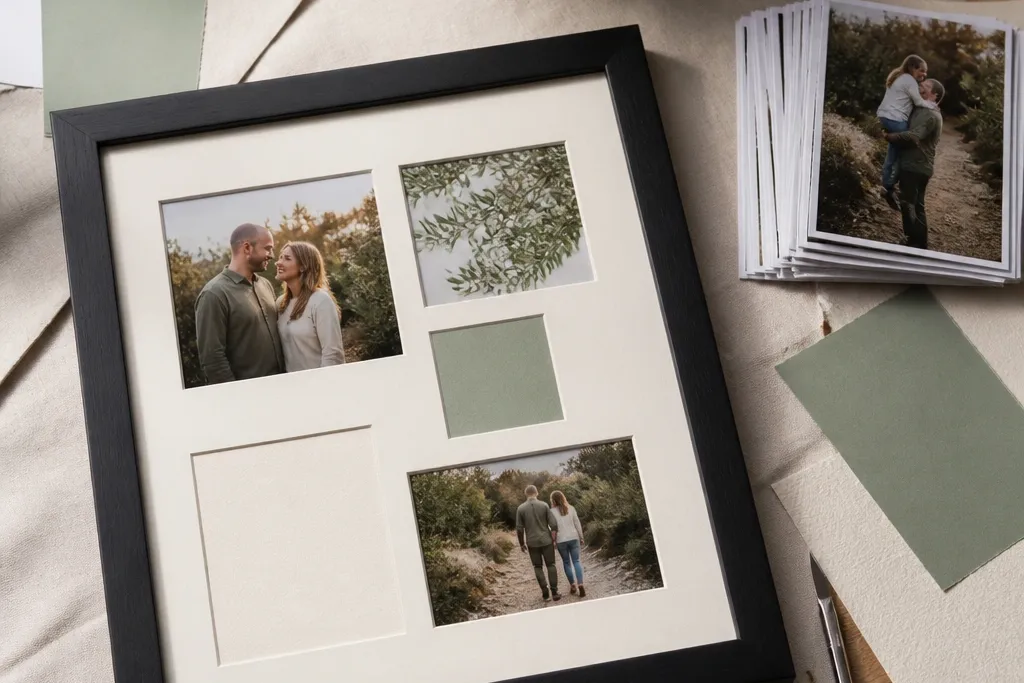

1. Charcoal Molding Shadow Frame
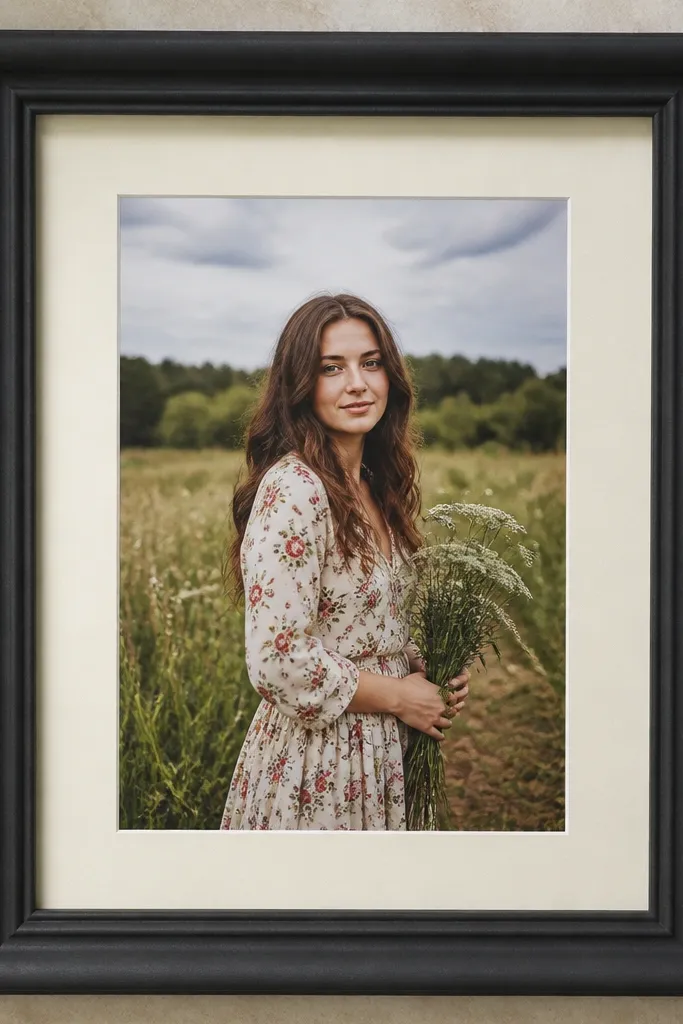
This frame makes your photo pop because the molding creates a real shadow line instead of relying on printed borders. Use charcoal paint so it reads modern, then keep the mat cream so skin tones and bright highlights stay warm. The look is sharp in overhead photos because the raised edge gives the page a clean silhouette. It’s great for travel snapshots, family portraits, and any photo with strong light direction. Skill level is beginner-friendly if you can cut straight lines and glue flat, and the build time is about one evening for one page.
Cut two lengths of wood molding to match your photo’s width and height, then dry-fit them on top of cream cardstock. Glue the molding to the cardstock with wood glue or strong craft adhesive, and let it cure flat under a book for 30-60 minutes. Cut a window mat from another piece of cardstock so the photo sits back about 1/8 inch from the molding edge, then glue the photo to the mat. Finish by sealing the molding with matte clear spray so glare doesn’t wash out the frame in photos.
Sand the molding edges lightly before painting so the charcoal coat looks even, not patchy.
Skipping a matte finish — shiny paint looks great in person and turns into glare in pictures.
2. Book Page Window Frame with Ink Edges

This is a photo-first frame that looks vintage without turning the whole page brown. The trick is keeping the window area clean and letting only the outer edge carry the ink stain. It photographs beautifully because the text texture sits behind the frame border, while the photo stays the sharp focal point. It works best for black-and-white photos, handwritten captions, and memories with a story. Skill level is easy — you’re cutting and distressing paper, not building wood.
Choose a sheet of old book pages or sheet music, then cut a rectangle window so your photo fits with a 1/4 inch border around it. Lightly distress the outer edges with sandpaper, then rub dark ink or diluted black acrylic around the frame edges only. Mount the frame on a solid cardstock backing, and glue your photo to a second mat so it sits slightly inside the window. Add a matte medium spray or thin coat of decoupage on the outer frame so the paper texture doesn’t scuff.
Use a ruler and craft knife for the window. Freehand windows look uneven once the page is photographed.
Letting ink bleed into the window area — it makes the photo look hazy.
3. Reclaimed Drawer Pull Frame Corner Accents
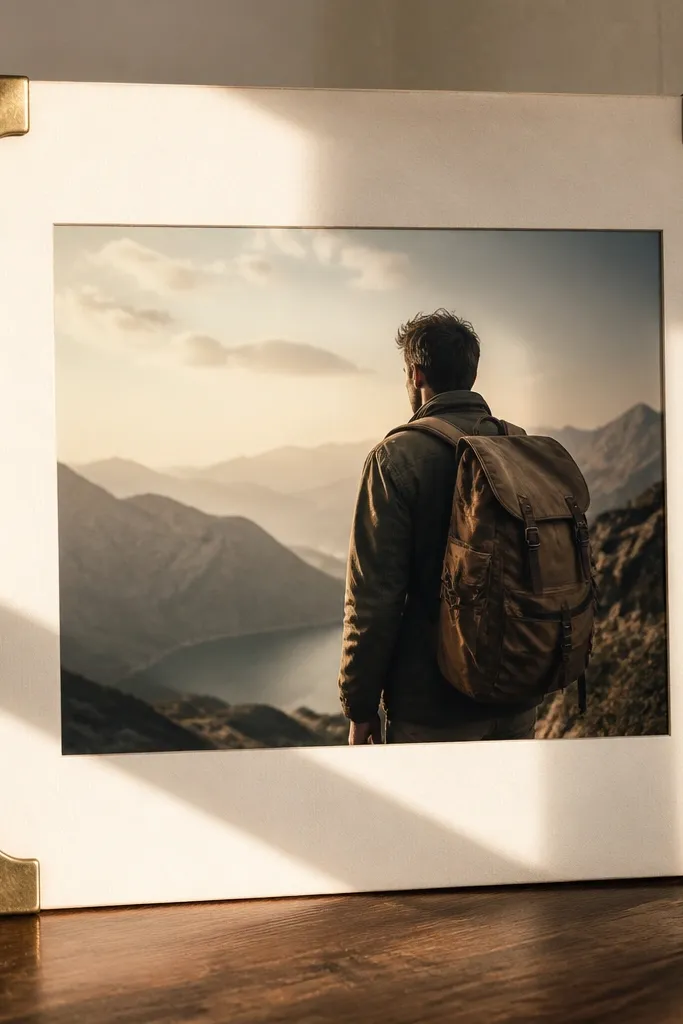
This one looks expensive because it uses hardware as “corner jewelry” instead of flat decorations. You keep the photo in the center, then add metal corner accents that create a strong geometric outline. The shine is controlled, so the corners catch light while the rest stays matte. It’s perfect for formal photos, graduation pages, and any layout that needs structure. This is a medium-skill project because you’ll measure placement carefully and attach metal securely.
Cut a simple frame mat from cardstock (about 1/2 inch border) and place it on your page. Cut or break drawer pull pieces into four small corner sections, then test them dry on the corners to match your frame edges. Mark placement lightly, drill tiny pilot holes if needed, and attach using epoxy or heavy-duty glue made for metal. Seal the metal with clear matte if it’s too reflective, then glue the photo mat behind the cardstock so the metal corners sit slightly above the surface.
If your metal corners wobble, add a thin layer of cardboard behind each corner before gluing.
Using superglue directly on dusty metal — it peels when the page flexes.
4. Thrifted Frame Cut-Down Mini Border
Cut-down thrifted frames give you a real, finished border look without hunting for perfect new molding. The best results come from using only a portion — like the top and sides — so the page feels layered instead of boxed in. Paint the frame piece in a single solid color like white or sage for a clean aesthetic. This is ideal for small photos, journaling cards, and pages where you want a “designed” look. It’s beginner-friendly if you can cut and sand the old frame edges.
Find a thrifted wooden frame with a style you like, then remove the glass and backing. Cut the frame so you get two side lengths and two top/bottom lengths with clean edges, then sand the cut spots. Paint with primer + acrylic, and let it dry fully before assembly. Mount the frame around your photo window on cardstock, and glue the photo to a mat that sits just behind the frame so you see a thin shadow gap.
Pro tipSave the old frame’s hardware as extra embellishments — two small nails look great as tiny photo pins.
AvoidKeeping the old finish untouched when it’s glossy — it makes the border fight the photo.
5. Corrugated Cardboard Wave Frame
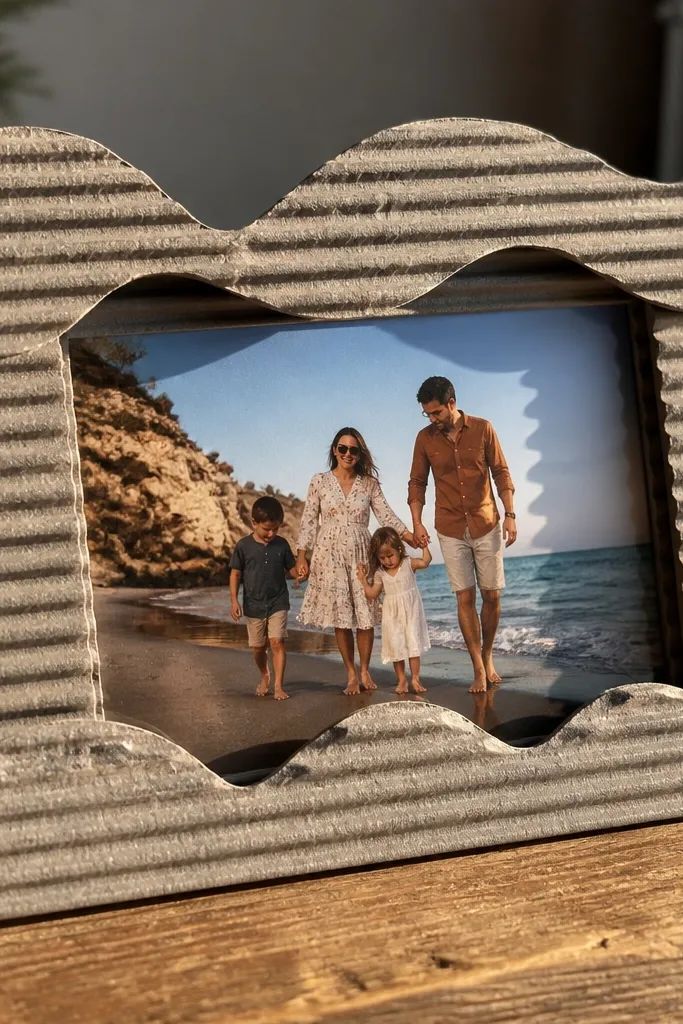
Corrugated cardboard gives you a sculptural border that looks handmade in the best way. The waves create motion, and the texture shows up clearly in photos even under harsh light. Use a neutral base color so the texture reads as detail, not clutter. This works great for summer memories, beach trips, and any photo with water or movement. It’s easy, cheap, and fast, with a clean look once sealed.
Cut corrugated cardboard into a wave strip around your photo, leaving 1/2 inch of border space. Glue the wave strip onto a cardstock backing using hot glue or thick craft glue, then press flat until set. Cover the corrugated with a thin layer of gesso or matte medium, and let it dry completely so it doesn’t look fuzzy. Add a matte paint wash or solid acrylic color, then mount your photo with foam tape or a cardboard spacer for a slight raised feel.
Pro tipSeal both sides of the corrugated. One-sided sealing warps the frame.
AvoidSkipping sealing — unsealed cardboard drinks ink and looks rough.
6. Washed Denim Border with Stitch Lines
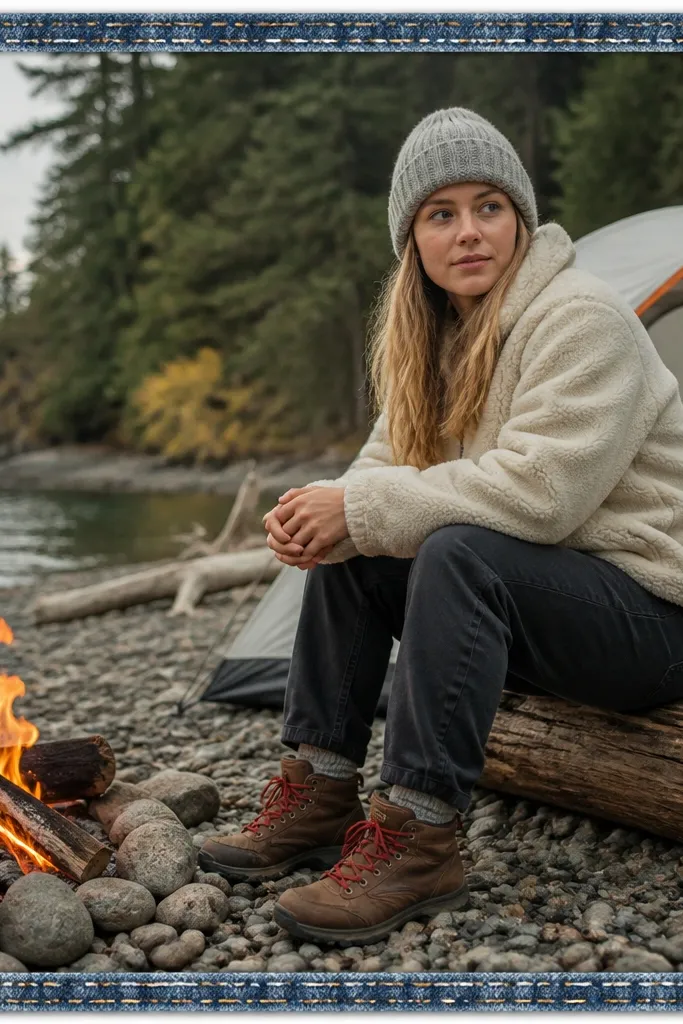
Fabric frames look soft and photogenic, and denim reads instantly styled. The key is using stitch lines as your design — they guide the eye and add rhythm without extra embellishment. Keep the denim border narrow (about 1/2 inch) so your photo stays dominant. This is perfect for camping, road trips, and casual family pictures. Skill level is beginner, but you need steady cutting and a clean glue method.
Cut denim strips slightly longer than your photo edges, then fold the strip ends under so raw edges don’t show. Glue the denim to cardstock backing using fabric glue or strong craft adhesive, and press with weight while curing. Create faux stitch lines with a black fine-tip marker or paint pen, matching the denim’s natural seam spacing. Mount your photo on a mat with thin foam tape so the denim border stands out and doesn’t crush when the album closes.
Pro tipUse a thin foam tape layer, not thick — thick foam makes the page too bulky.
AvoidUsing glossy fabric glue that smears — it catches light and looks messy on camera.
7. Leaf Press Frame with Vein Pattern Mat
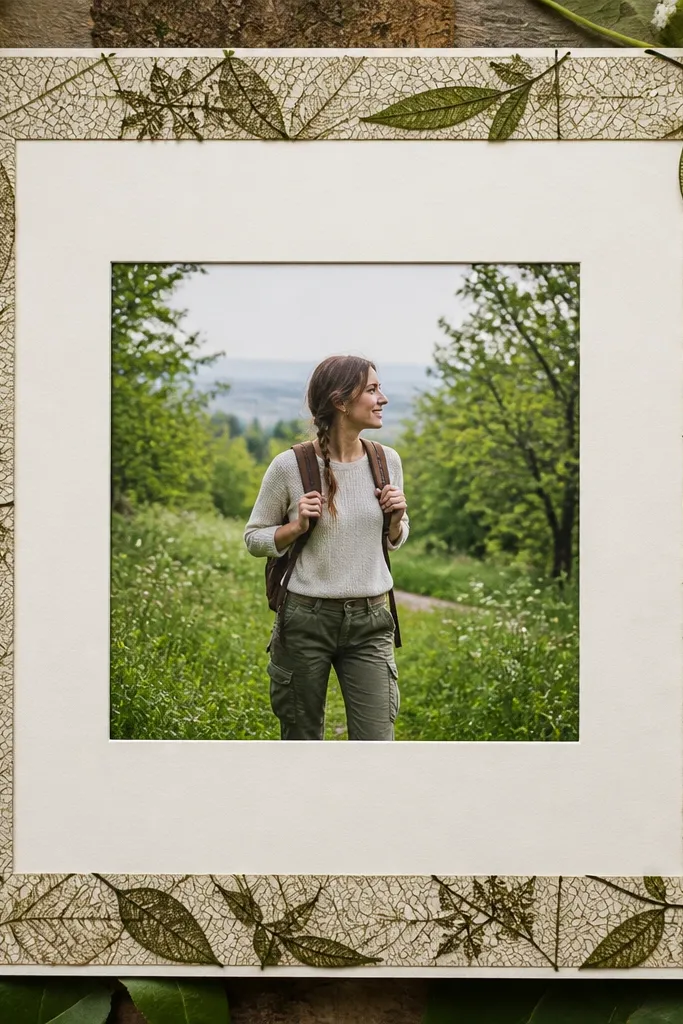
Pressed leaf veins give you an organic frame that still looks crisp and intentional. The trick is to use the veins as the texture, not the whole page. Build a mat where the border area has leaf texture, while the photo area stays clean. This looks gorgeous with botanical photos, wedding details, and nature shots. Skill level is intermediate only because timing matters for drying, but the build is still straightforward.
Press leaves between parchment and heavy books for 1-2 weeks, then choose the flattest ones. Cut a cardstock mat window, and glue leaf pieces along the border using matte decoupage medium. Seal the leaf border with another thin coat so the veins don’t lift. Mount your photo to a second mat that sits slightly recessed, then attach the finished leaf frame to the scrapbook page backing.
Pro tipUse small leaves for a tight border. Big leaves look cool but blur the frame edge in photos.
AvoidOverloading glue. Too much medium turns the veins dark and muddy.
8. Dried Flower Petal Frame with Clear Gel Top Coat

Petal borders look dreamy in person, but they photograph best when you control shine and thickness. Use petals only in a narrow strip and apply a clear gel top coat so the colors stay saturated and the texture doesn’t shed. The photo sits in the center, clean and crisp, while the border acts like a soft halo. This works for spring photos, baby milestones, and soft-toned portrait sessions. Skill level is medium because you’re layering fragile pieces.
Sort petals by color and size, then cut a narrow cardstock border strip with a window for your photo. Glue petals onto the border strip in a single layer first, then add a second layer only where you need coverage. Let it dry under a sheet of wax paper and a book so petals don’t shift. Brush a clear gel medium over the whole border and let it cure fully before mounting the photo.
Pro tipTrim petals with small scissors so the border edge stays straight instead of wiggly.
AvoidBuilding a thick petal layer. Thick texture looks lumpy and casts harsh shadows.
9. Map Paper Frame with Burnished Corners

Map paper frames are instantly “travel scrapbook” but you can keep them modern by using clean burnished corners instead of heavy distressing. The border looks crisp, and the map lines add visual interest without cluttering the photo. Use a neutral backing so the map ink doesn’t overpower your images. This works for city trips, road trips, and any photo with geography or landmarks. Skill level is easy — cut, ink, and burnish.
Cut map paper into a frame border with a 1/2 inch outer width, then trim a window to the photo size. Burnish the corners with a bone folder or the back of a spoon so they look smooth. Ink the outer edge lightly with a matching tone (sepia or gray) to unify the map colors. Mount the photo on a mat, then glue the map frame on top, keeping the photo recessed so the border casts a tiny shadow.
Pro tipUse a gray ink instead of black. Black can look heavy next to map typography.
AvoidUsing glossy mod podge on the border — it creates glare lines.
10. Heat-Set Foil Tape Frame Lines
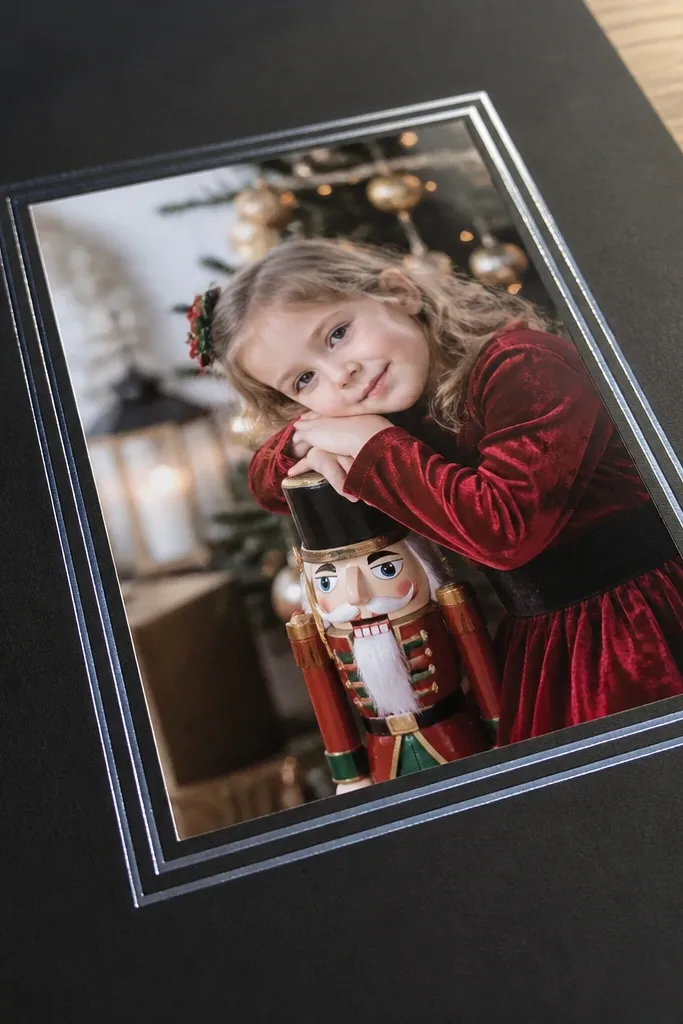
If you want a high-end look fast, foil tape lines deliver it. The frame reads like jewelry because the metallic edge is thin, controlled, and reflective without being bulky. Black cardstock makes the foil pop and keeps the photo readable. This is great for holiday photos, party pages, and any layout that needs crisp contrast. Skill level is beginner, and it’s quick if you use a cutting guide.
Cut black cardstock and place your photo where you want it, then draw a faint rectangle guide with pencil. Apply foil tape along the guide lines, pressing firmly so corners stick cleanly. If your tape requires heat, use a low heat setting and short passes over the tape only. Mount your photo on a mat that sits slightly back, then glue the frame tape border over the edges so it looks intentional.
Pro tipBurnish corners with a plastic ruler edge. Metal tools can scratch foil.
AvoidOverlapping tape at corners. Overlap makes a thick seam that looks sloppy on camera.
11. Popsicle Stick Geometric Frame
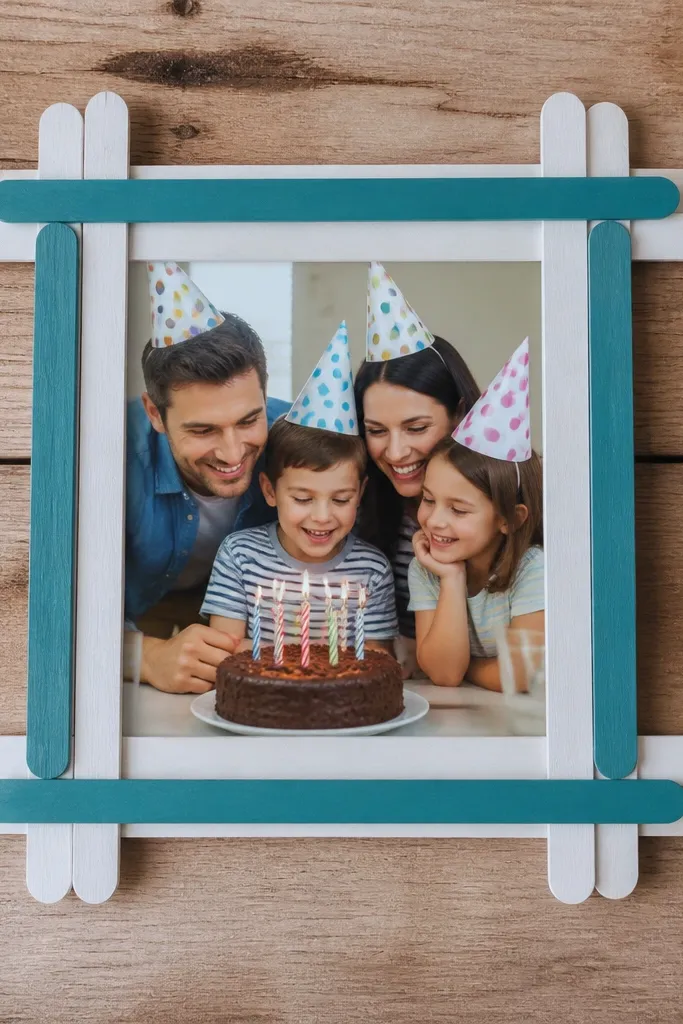
This frame is graphic and clean, which makes it perfect for modern scrapbook pages. Popsicle sticks give you a consistent thickness, so the border looks uniform. Paint or stain the sticks to match the photo — I’d go for white + a single accent color like teal. It’s photogenic because the geometry creates clear lines and depth. Skill level is easy, and it takes about an hour including drying.
Cut popsicle sticks into segments that match your photo edges, then lay them on a flat surface to plan the pattern. Glue them into a rectangle frame on cardstock backing using wood glue or hot glue. Add a second inner rectangle using thinner stick pieces for a double-line effect. Paint the frame, then seal with matte spray. Mount your photo recessed with foam tape so the sticks cast a subtle shadow.
Pro tipUse a square jig made from scrap cardstock to keep your rectangle angles 90 degrees.
AvoidSkipping sealing. Raw wood edges darken and look uneven after glue dries.
12. Washed Wood Scrap Frame with Clear Coat
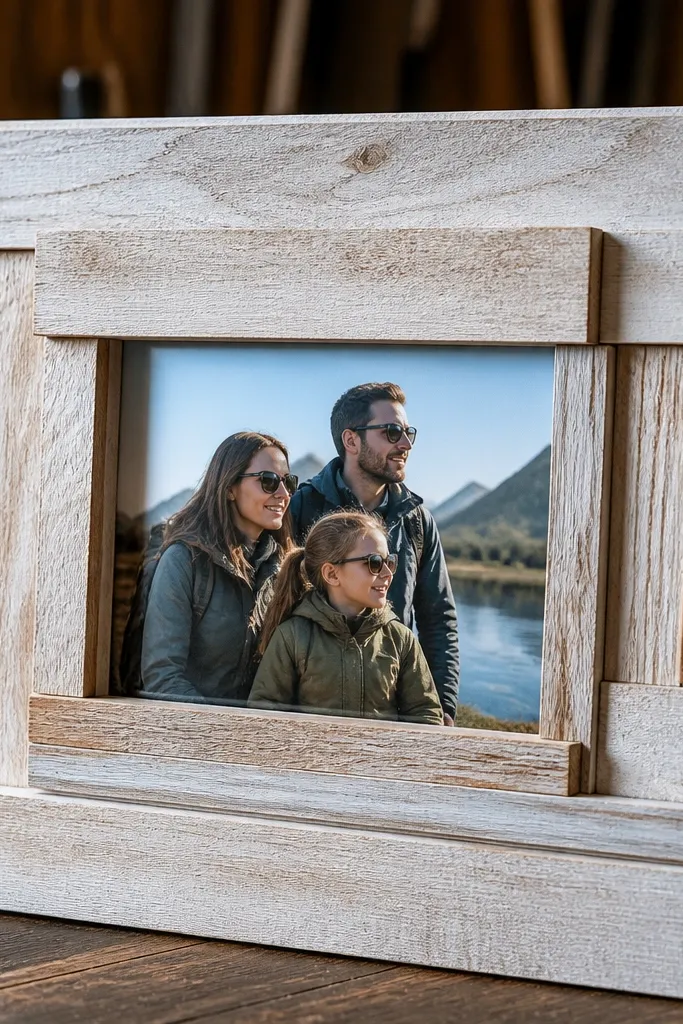
Wood scrap frames have a warm, handcrafted look that photographs well because the grain catches light. The washed finish keeps it airy instead of heavy, so it works with bright photos and colorful pages. Layered pieces create depth without needing complex tools. This is good for family memories, outdoor shots, and pages that need texture. Skill level is beginner if you can cut small pieces and glue straight.
Cut several thin strips of wood scrap to build a layered border, leaving a 1/2 inch outer frame width. Sand the strips lightly, then wipe with a light stain or diluted paint wash. Glue strips around the photo window on cardstock, alternating slightly different lengths for a natural layered edge. Seal with matte clear coat to lock in the washed look, then mount the photo on a recessed mat so the wood border stands out.
Pro tipUse painter’s tape to hold corners while the glue sets. It prevents drift and keeps the border square.
AvoidUsing thick glue blobs — they squeeze out and create bumps visible on camera.
13. Polaroid-Style Frame with Layered Mat Tabs
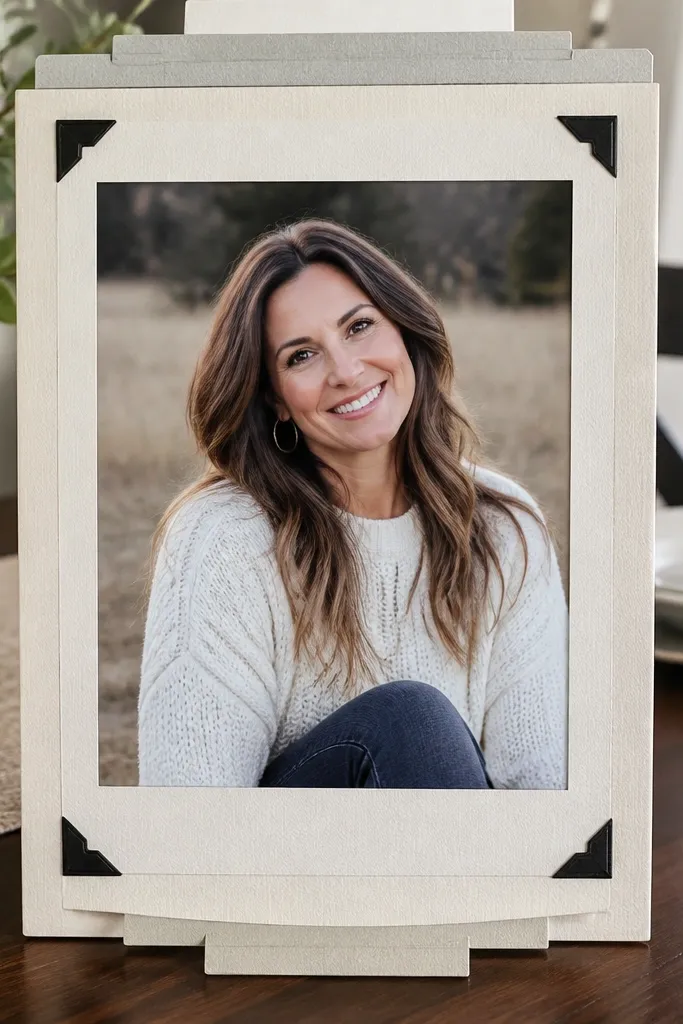
This frame looks like a real print because it uses a thick mat and small “tab” layers. The photo sits slightly elevated, and the top and bottom tabs add a graphic pause that looks good in album photos. Keep it monochrome for a clean aesthetic: white mat, light gray shadow, black photo corners. Works for portraits and any photo you want to feel like a keepsake. Skill level is easy — it’s mostly paper cutting and careful stacking.
Cut a base cardstock mat sized for your photo plus border, then cut a second mat layer slightly smaller. Create small tab shapes at the top and bottom by adding 1/2 inch wide extensions. Glue the bottom layer first, then attach the photo to the center, and finally glue the top tab layer. Add a thin strip of gray cardstock behind the photo edges if you want a subtle shadow effect.
Score the mat folds lightly if you’re adding tabs that wrap. Cleaner edges look more “real” in photos.
Making the tabs too thick. Thick tabs make the page look bulky when stored.
14. Stencil Spray Frame with Masked Photo Window

Stencil frames look modern and intentional because you control the pattern density. A masked photo window keeps spray from drifting into the image area, which is where most DIY attempts fail. Choose one stencil and stick to one color family: matte black on cream, or muted teal on white. This frame is photogenic because the pattern creates micro-contrast around the photo. Skill level is beginner if you have painter’s tape and can spray lightly.
Tape a stencil over a cardstock mat that has a photo window cut out, leaving the window exposed. Spray in light passes from side-to-side, building color slowly so the pattern stays crisp. Remove the stencil carefully while the paint is still dry enough not to smear. Mount your photo on a recessed mat with foam tape so the stencil area stays the focus.
Use low-tack tape on the photo window edges. High-tack tape tears cardstock fibers.
Spraying too close. Overspray bleeds under the stencil and ruins the clean border.
15. Rope Wrapped Micro Frame
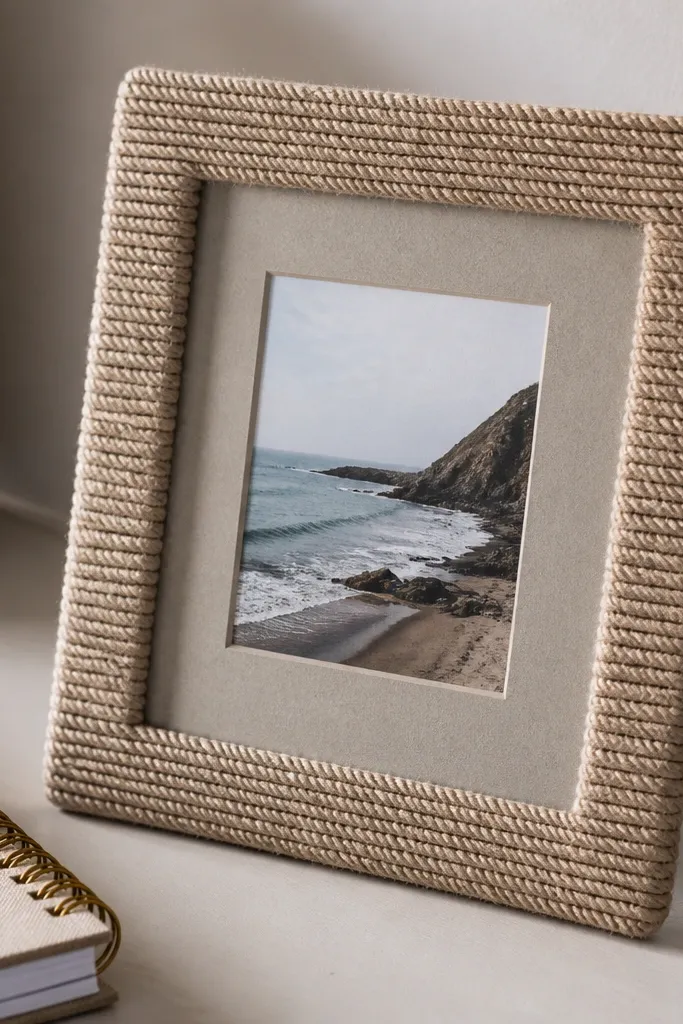
Rope micro frames give a nautical-textured look without going full beach cliché. Keep the rope tight and narrow so it reads like a deliberate design element. The texture shows clearly in photos, especially if you use a soft cream or warm gray background. This works for coastline trips, cabins, and any memory with a “slow weekend” vibe. Skill level is easy to medium because you’re wrapping and gluing in straight lines.
Cut a photo window mat from cardstock, then glue thin rope along the border perimeter with hot glue or strong craft adhesive. Wrap the rope in a single layer and trim ends cleanly at corners. Add a thin coat of matte clear spray to protect the rope fibers. Mount your photo recessed with foam tape so the rope casts a small shadow line.
Coil the rope first so it relaxes. Curled rope makes corners twist.
Using thick hot glue. It creates lumps that look like blobs in close-ups.
16. Fabric Ribbon Bow Frame Corners

This frame is sweet and structured because the bows sit only at the corners. The photo stays centered and clean, while the ribbon adds motion and softness. Use a single ribbon color that matches your photo’s palette — dusty rose, muted navy, or soft ivory. It photographs well because bows create a visual triangle around the photo edges. Skill level is beginner, and it’s quick if you pre-cut and pre-tie the bows.
Cut a simple cardstock frame mat with a 1/2 inch border and a photo window. Tie four small bows from ribbon, then trim tails to equal length. Glue the bow bases to the corners of the mat, keeping the knot behind the photo window area. Mount the photo recessed with foam tape so the bows don’t flatten when you close the album.
Pro tipUse a fabric glue dot under each knot so the bow sits flat and won’t lift later.
AvoidPutting bows too close to the photo edge — they can block the image.
17. Monochrome Tissue Paper Frame with Hard Edges

Tissue paper can look messy unless you control the shape. This frame keeps hard edges by building tissue in a tight border strip and sealing it so it holds form. Pick one monochrome color so the texture adds depth without fighting your photo. It’s photogenic because the tissue diffuses light and makes bright photos look softer. Great for portraits, dreamy outdoor shots, and pages with gentle color palettes. Skill level is medium because sealing matters.
Cut a cardstock border strip with a 1/2 inch width and a photo window mat underneath. Tear tissue paper into small pieces and layer them within the strip area, gluing with matte decoupage medium. Build up to full coverage, then seal again with one more thin coat. After it dries completely, mount the photo on a recessed mat so the tissue border reads as a soft frame.
Use tissue in tiny pieces. Large pieces create visible seams and uneven texture.
Skipping a final sealing coat. Unsealed tissue dents and looks uneven under flash.
18. Vintage Film Strip Frame

Film strip frames are graphic and instantly nostalgic, but you can keep the look clean by using it as a border, not a background. The perforation holes create a repeating pattern that reads well in photos. Use dark cardstock so the film strip feels like a real strip. This works for event pages, concerts, and any photo set you want to feel like a mini reel. Skill level is easy if you can measure and cut straight.
Print or trace film strip perforation patterns onto cardstock, then cut a border strip that wraps around your photo. Add a matte black or deep gray base, then apply lighter gray perforation details. Glue the film strip border around your photo window so the perforations sit evenly. Mount the photo slightly recessed using foam tape for a shadow gap.
Keep the film strip thickness consistent. Uneven strip thickness looks off in album photos.
Using glossy paper for the film strip. Gloss creates glare that hides the perforations.
19. Stitched Paper Frame with Sewing Thread
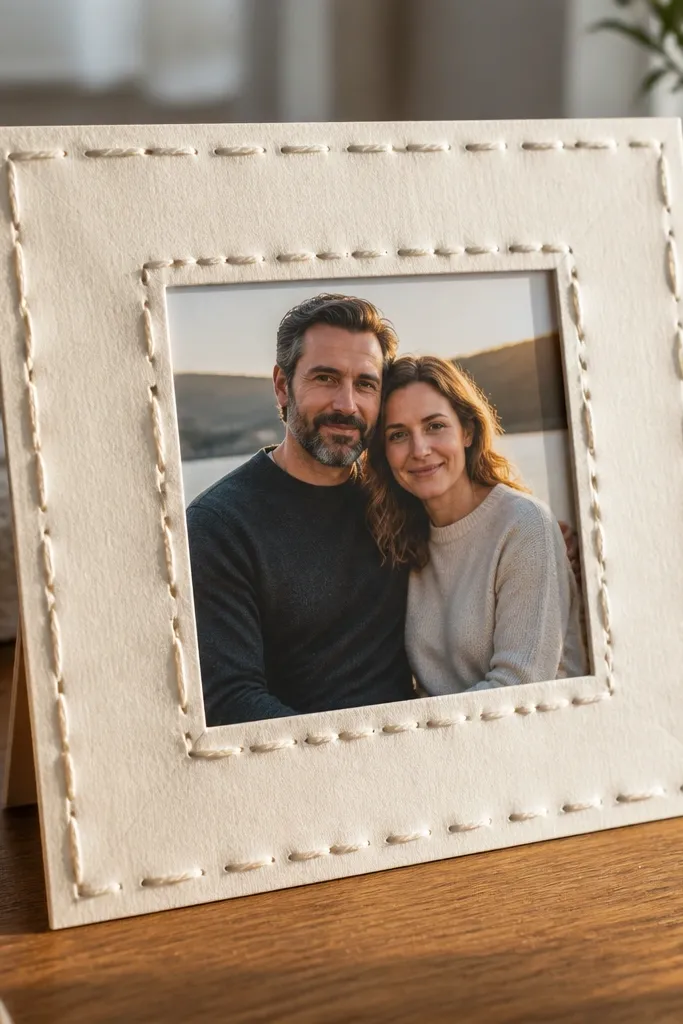
Stitching turns a flat frame into something tactile, and it photographs better than most stick-on trims. You get a strong border without adding bulk because the thread sits on the surface. Use thick white or cream thread for contrast, and keep the stitching regular so it looks intentional. Works for scrapbook pages with handmade vibes, baby books, and any layout that needs a gentle, crafted feel. Skill level is intermediate because you’ll punch holes carefully.
Cut a cardstock mat with a photo window and a border width of about 1/2 inch. Use a paper piercer to mark stitch holes along the inner edge at 1/4 inch spacing. Thread a needle with craft thread, then stitch through the mat, pulling tight but not warping the cardstock. Tie off neatly on the back, then mount the photo recessed with foam tape so the stitching stays visible.
Pro tipUse a cutting mat and a ruler guide for hole spacing. Consistency makes it look store-bought.
AvoidPulling thread too tight. Tight stitching bows the mat and shows in photos.
20. Spray-Painted Bottle Cap Frame Dots
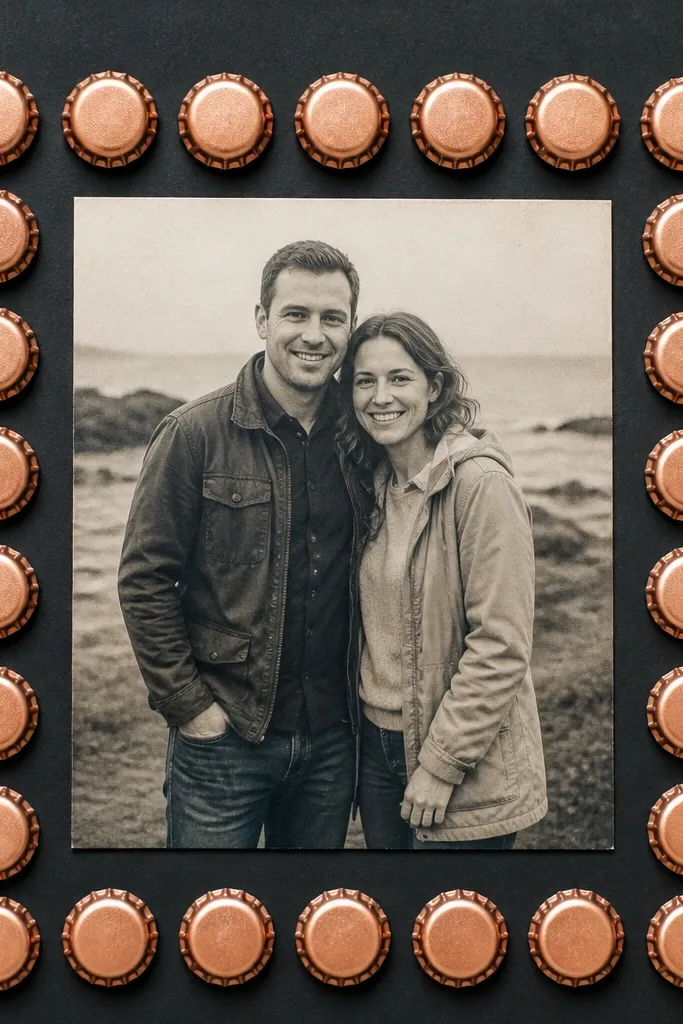
This frame uses bottle cap cutouts as tiny “studs” to create a playful, high-contrast border. The look is modern because the studs form a clean rectangle, not a scattered mess. Paint the caps in one metallic color like copper and keep the background muted so the border doesn’t overwhelm the photo. It’s photogenic because the studs catch specular highlights. Great for party pages, bright vacations, and pages with strong color photos. Skill level is medium because you’ll cut and glue small pieces.
Save bottle caps, remove labels, and spray paint the inside and top with metallic paint. Cut a cardstock frame mat with a photo window, then arrange bottle cap dots along the border in a tight grid. Glue the caps using epoxy or a strong craft adhesive, then let it cure fully. Mount your photo recessed with foam tape so the caps cast a crisp shadow line.
Keep dot size consistent. Mix-and-match cap sizes makes the frame look accidental.
Trying to glue caps with flimsy glue. They pop off when the album flexes.
21. Matte Color Block Frame with Torn Paper Edge

Color block frames look clean and graphic, and a torn edge keeps them handmade instead of corporate. Use two matte cardstock colors — one for the outer border and one for the torn layer — so the tear line shows clearly in photos. Keep it simple: one color block background, one torn edge band, one photo. This works well for modern portraits and bold travel shots. Skill level is beginner because you’re tearing by hand and cutting straight mats.
Cut a base cardstock rectangle for the photo area and border, then cut a second strip of cardstock that will become the torn edge band. Tear the strip edge so it’s uneven but controlled, then glue it onto the outer border area. Cut a window mat so the photo fits cleanly and stays centered. Mount the photo recessed with foam tape and seal the whole page with a matte finish if your adhesives look shiny.
Pro tipTear against a ruler for a straight tear direction, then let the edge be irregular on the border line.
AvoidUsing glossy cardstock for the color block. Gloss makes the torn edge look shiny and messy.
22. Pressed Tea Bag Frame with Sepia Wash
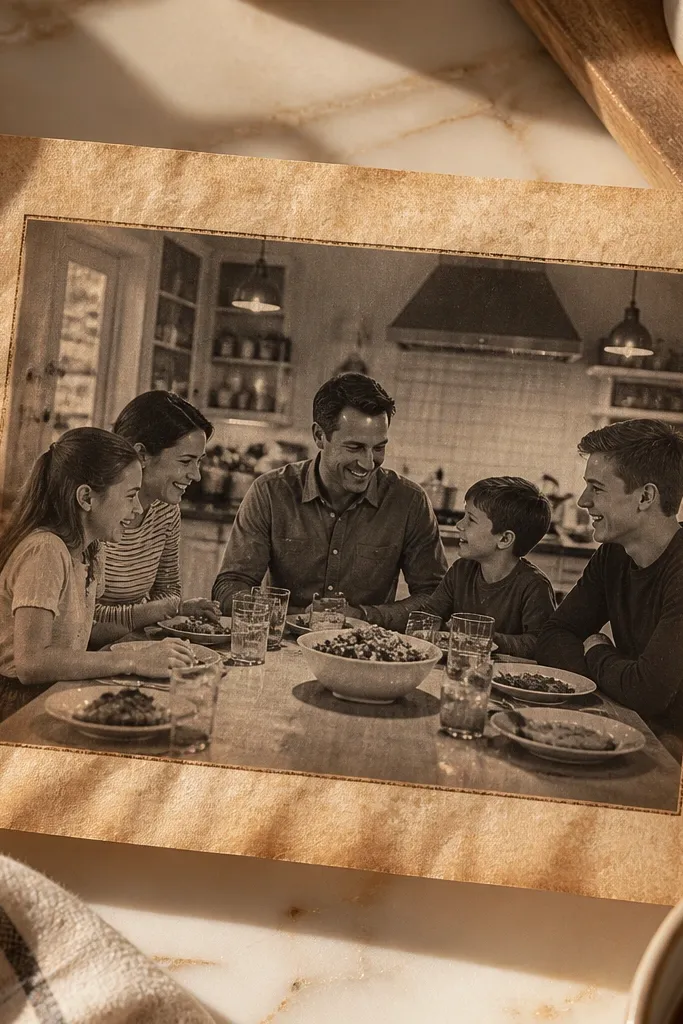
Tea bag paper gives you a thin, papery texture that looks old-school without heavy distress. The frame border is subtle, which makes it perfect for photos that already have a lot going on. Sepia wash keeps it cohesive and makes the photo feel warmer. This works well for cozy interiors, family dinners, and black-and-white portraits. Skill level is medium because you need to press and dry the tea bag paper without tearing.
Cut tea bag paper or tea-stained paper into a frame border strip with a photo window mat underneath. If using tea bag material, rinse gently, press flat between paper towels, then let it dry completely. Apply a light sepia wash with a sponge on the outer edges only, then seal with matte medium. Mount the photo recessed so the tea paper doesn’t sit directly against the photo surface and smear.
Pro tipHandle tea paper with tweezers. It tears from fingerprints faster than cardstock.
AvoidSoaking too long. Over-soaked tea paper gets brittle and cracks around corners.
23. Chicken Wire Mini Frame with Photo Backing
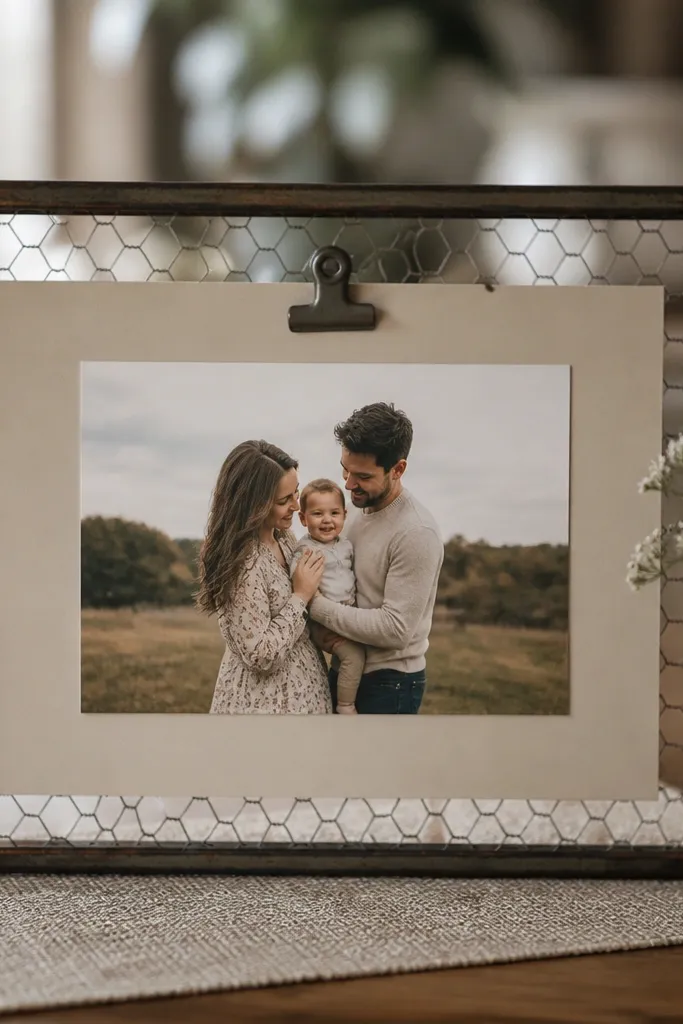
Chicken wire makes a strong industrial frame that still looks cute when it’s mini. The wire grid creates a pattern that photographs well because it adds texture without covering the photo. Keep the wire behind the photo, then use a clean mat so the photo stays crisp. This works great for garden photos, farmhouse decor themes, and any page that needs structure. Skill level is medium because you’ll cut wire safely and attach it securely.
Cut a chicken wire rectangle slightly larger than your photo window, then fold edges inward with pliers. Back the wire with cardstock so it doesn’t snag paper, and glue the cardstock to the wire perimeter. Create a photo window mat that frames the wire edge, then mount the photo on foam tape so it sits in front of the wire. Seal the wire lightly with matte clear spray to prevent rust transfer.
Pro tipWear gloves when cutting wire. Even small wire edges can slice skin.
AvoidLeaving sharp wire ends exposed. They catch on page protectors and tear sleeves.
24. Washed Gesso Frame with Dry-Brush Texture

Dry-brushed gesso texture looks artistic but still clean when you keep it in a narrow border. The matte finish reduces glare, and the subtle texture adds depth without pulling focus from the photo. Use white-on-cream or off-white-on-tan to keep it airy. This works for pastel photos, soft portraits, and pages where you want a gallery wall feel. Skill level is beginner to intermediate depending on your patience with drying layers.
Build a simple cardstock or thin wood frame base first, then apply a thin layer of gesso over the border area. Let it dry, then dry-brush a slightly different off-white or light gray across raised areas. Lightly sand after drying for a smooth texture highlight. Mount your photo recessed with foam tape so the dry-brush texture stays visible around the edges.
Pro tipDry-brush with almost no paint on the brush. The look comes from faint texture, not thick coverage.
AvoidApplying gesso too thick. Thick gesso cracks and looks uneven on camera.
25. Origami Corner Fold Frame
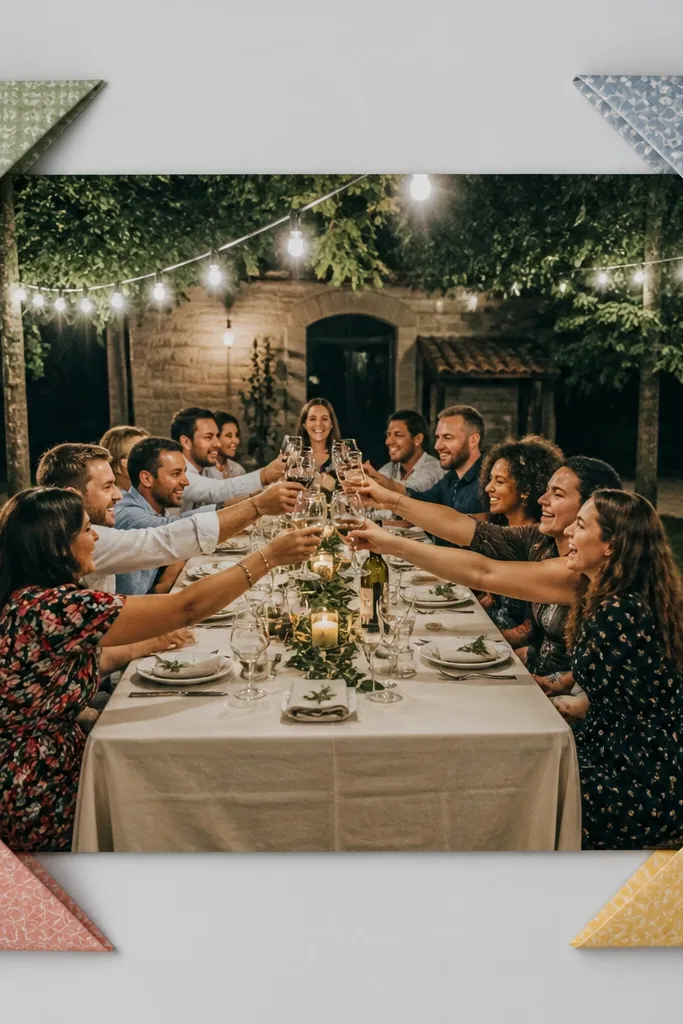
Origami corner folds create a playful frame that looks crisp and intentional. You’re not folding the whole page, just the corners, so the photo stays flat while the border pops. Use patterned paper for the folds, but keep the backing solid so it doesn’t look busy. This works for event photos, scrapbooks with a modern Japanese paper vibe, and pages where you want a geometric border. Skill level is medium because corners must be sharp and aligned.
Cut a cardstock mat with a photo window and measure 1/2 inch corner zones. Fold small triangles at each corner using a bone folder so the crease is sharp, then glue the folded corners to the mat. Add a tiny hinge strip of tape on the back so the fold stays stable. Mount the photo recessed slightly so the folded corners sit above it and cast a soft shadow.
Pro tipPress creases hard with a bone folder for 20-30 seconds per corner.
AvoidUsing thick paper that won’t crease cleanly — it makes corners look bulky.
26. Vintage Lace Trim Frame Edge
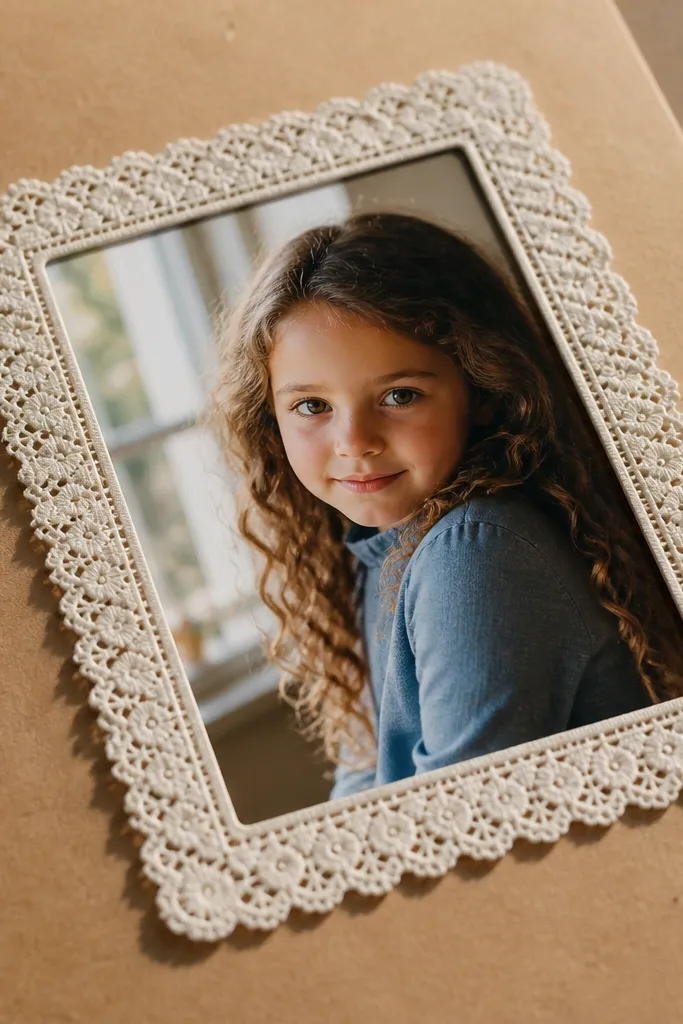
Lace trim looks gorgeous when it’s used like a border, not a full background. The best look comes from pairing lace with a matte base and keeping the lace edge straight. Use off-white lace on kraft or cream cardstock, and keep the photo slightly recessed so the lace floats. This works for weddings, baby showers, and soft portrait pages. Skill level is easy — measuring and gluing are the only real work.
Cut a cardstock mat with a 1/2 inch border and a photo window. Measure and trim lace strips to match top, bottom, and sides, then glue lace to the outer border with fabric glue. Let it dry flat under weight so lace doesn’t curl. Mount the photo recessed with foam tape, then seal lightly with matte medium so lace doesn’t snag or fray.
Pro tipTest lace placement with the photo in place first. Lace can shift when glued.
AvoidOverlapping lace ends in the corners — it reads as a bump in photos.
27. Rubber Stamp Pattern Frame
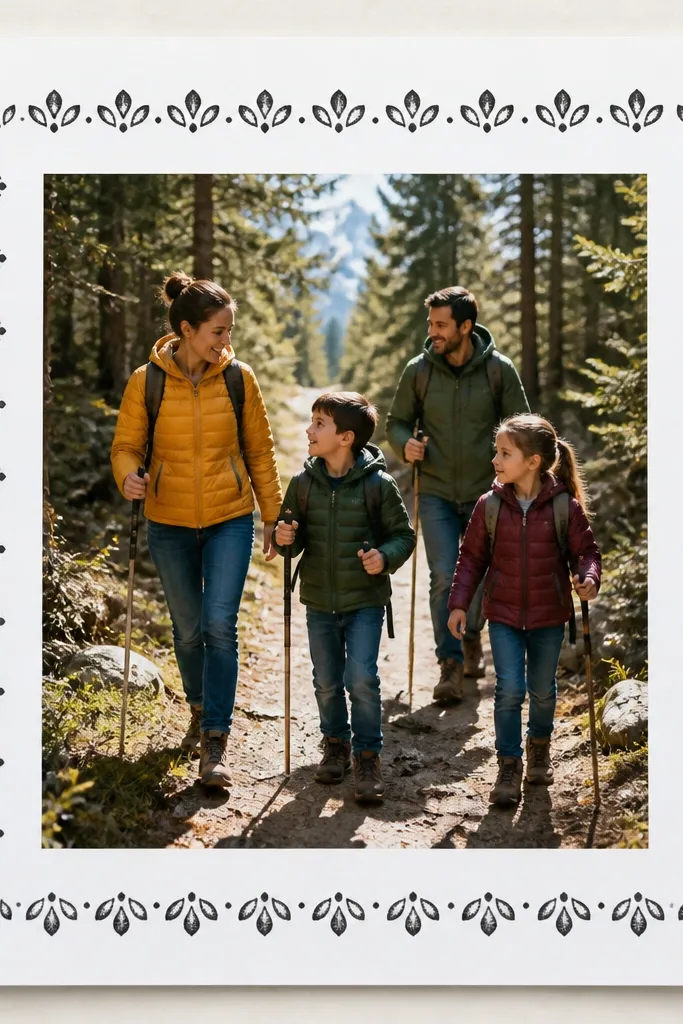
Stamp frames look clean and handmade, but the design needs restraint. A single ink color around the outer border keeps it cohesive and lets the photo stay sharp. Use a repeating stamp pattern in a thin ring, not a full coverage field, so the page doesn’t turn into wallpaper. This works for journaling-heavy layouts and photos with lots of detail. Skill level is beginner if you have a stamp and ink pad.
Cut a mat with a window and border width around 1/2 inch. Stamp a pattern along the border edges using light pressure, re-inking as needed for consistent color. Mask the photo window with painter’s tape while stamping to avoid accidental marks. Mount the photo recessed with foam tape so the stamped border reads as a frame, not a background.
Pro tipUse a stamp position guide made from scrap cardstock so each stamp hits the same line.
AvoidPressing too hard. It blurs stamp edges and looks cheap in close photos.
28. Scrapbook Index Card Frame with Tabbed Label
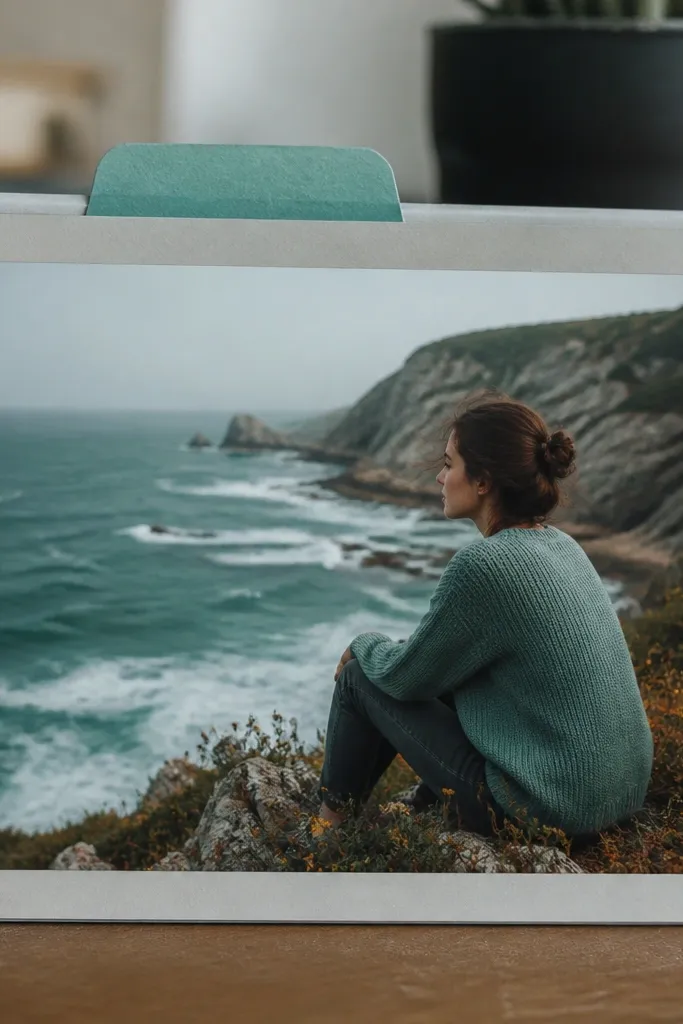
Index card frames look organized and photogenic because they mimic a real file label system. The tab label adds a clear visual anchor, and the clean paper edges keep the page from looking cluttered. Use a matte white or light gray index card style base, then add a small colored tab that matches your photo. This works for documenting trips, recipes, and step-by-step memories. Skill level is beginner and the build is quick.
Cut a cardstock index-card frame base with a photo window and a 1/2 inch border. Create a tab at the top by cutting a rectangle extension and rounding its corners, then glue it centered above the photo. Add a typed or handwritten label strip on the tab using a fine black pen. Mount the photo recessed with foam tape and place a thin gray mat behind the photo to mimic a print border.
Pro tipUse a black gel pen for labels. It stays dark on matte paper in photos.
AvoidUsing marker on glossy paper. It smears and creates thick lines.
29. Cork Sheet Frame with Stamped Title Border

Cork frames have a natural texture that looks premium without extra embellishments. The cork also holds pins, so you can add small paper clips or micro tags later. Keep it to a thin border so the page stays light. This works for travel notes, wedding plans, and scrap pages where you want a tactile feel. Skill level is easy if you can cut cork cleanly with a sharp blade.
Cut cork sheet into a rectangle border about 1/2 inch wide with a photo window opening. Seal cork with matte clear spray so it doesn’t shed crumbs. Stamp or stencil a title strip on a thin cardstock band, then glue it to the top of the cork frame. Mount your photo recessed with foam tape so the cork texture stays visible and the photo doesn’t press against it.
Cut cork on a cutting mat and replace blades often. Dull blades tear cork edges.
Skipping sealing. Unsealed cork sheds and ruins page protectors.
30. Foam Sticker Frame with Matte Acrylic Wash
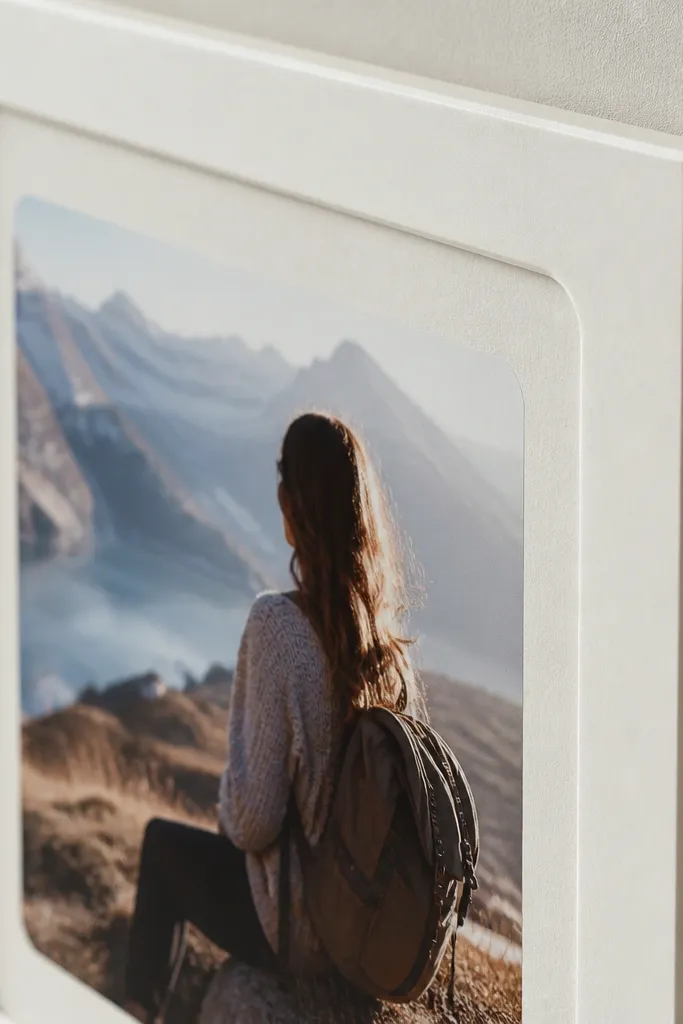
Foam frames look dimensional without heavy tools, and the acrylic wash makes them look intentional instead of plastic. You get a raised border that reads well in side lighting, which makes photos look layered. This is great for scrapbook pages with bright colors because the wash tones down the foam and keeps it from looking too stark. Skill level is beginner to medium depending on how neat you are with painting.
Use thin craft foam to cut a rectangle frame with a photo window. Glue foam frame to cardstock backing, then apply a diluted matte acrylic wash over the foam to unify the tone. Let it dry, then lightly sand if you get rough spots. Mount the photo recessed with foam tape so you see a shadow gap between photo and frame.
Use diluted acrylic, not straight paint. Straight paint fills foam texture and looks blotchy.
Skipping sanding after wash. Rough foam edges show as jagged lines in close photos.



