
1. Cork Tile Cozy Board with Fabric-Backed Clips
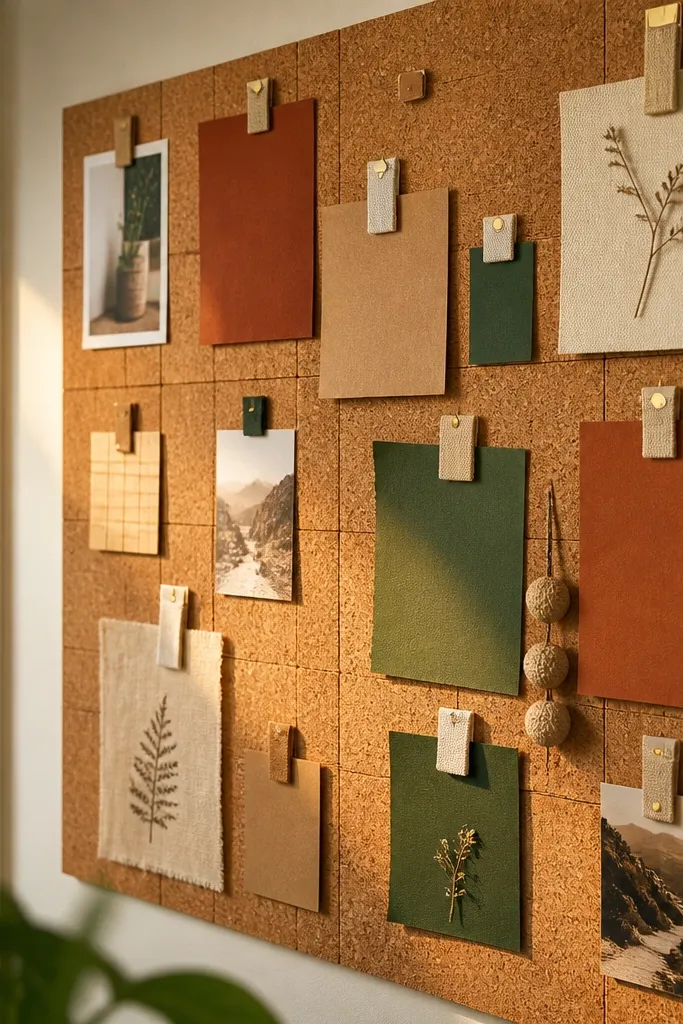
This is the cozy board that looks good even when you’re mid-update. Cork gives you a natural warm texture, and the fabric-backed clips keep everything soft instead of looking like office supplies. Use kraft paper, terracotta cardstock, and a few deep green accents so the board stays warm, not neon. It’s great for goals you’ll swap in and out because you can pull a card without tearing anything, and the pinned layers create depth in photos.
Pro tipSpray your cork edges with a matte sealant so they don’t shed crumbs while you work.
Cut cork sheet into a grid that fits your wall space (for example 2 tiles side by side, each about 12x16 in). Cover the edges with bias tape or thin strip fabric glued down with fabric glue. Then pin your printed images onto kraft paper first, and clip them to the cork using small binder clips wrapped in fabric. Finish by adding two or three handwritten labels on matte paper and pinning them like tabs.
AvoidDon’t pin full-size prints directly to cork; they look flat and messy compared to paper-backed layers.
2. Book Page + Linen Sandwich Board
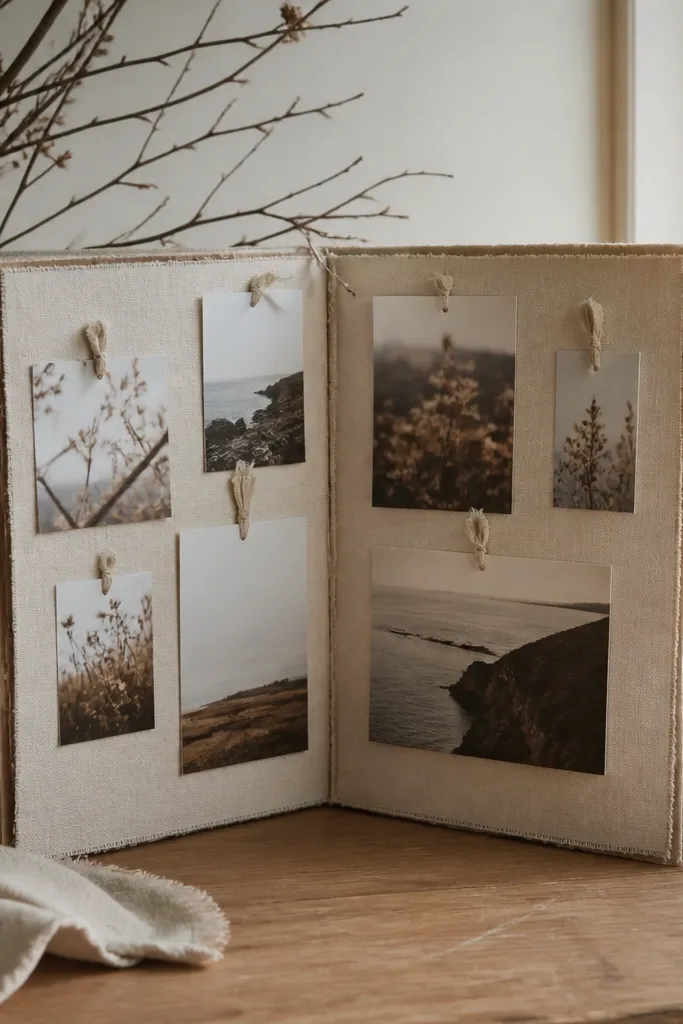
If your vision board always looks too “printed,” this one fixes it by mixing paper age with fabric softness. The book pages bring a muted, cozy tone, and linen adds a tactile surface that reads warm in daylight. You’ll also get natural color variation because old pages aren’t uniform. This setup works well for calm goals: home routines, reading lists, slow mornings, and personal style.
Pro tipUse torn edges instead of scissors for the paper shapes; the board looks softer and more intentional.
Cover a foam board with linen fabric using spray adhesive, pulling fabric tight and trimming edges cleanly. Tear book pages into irregular shapes, then place them as a background layer under a thin sheet of clear matte medium or a light glue wash. Add your photos and text on top using small corners of glue so edges don’t lift. Seal the whole board with a light matte coat over the paper only, keeping the linen untouched where you want softness.
AvoidDon’t over-glue the linen — heavy glue makes it shiny and kills the cozy texture.
3. Shadowbox Vision Board with Upcycled Drawer Pull Hardware
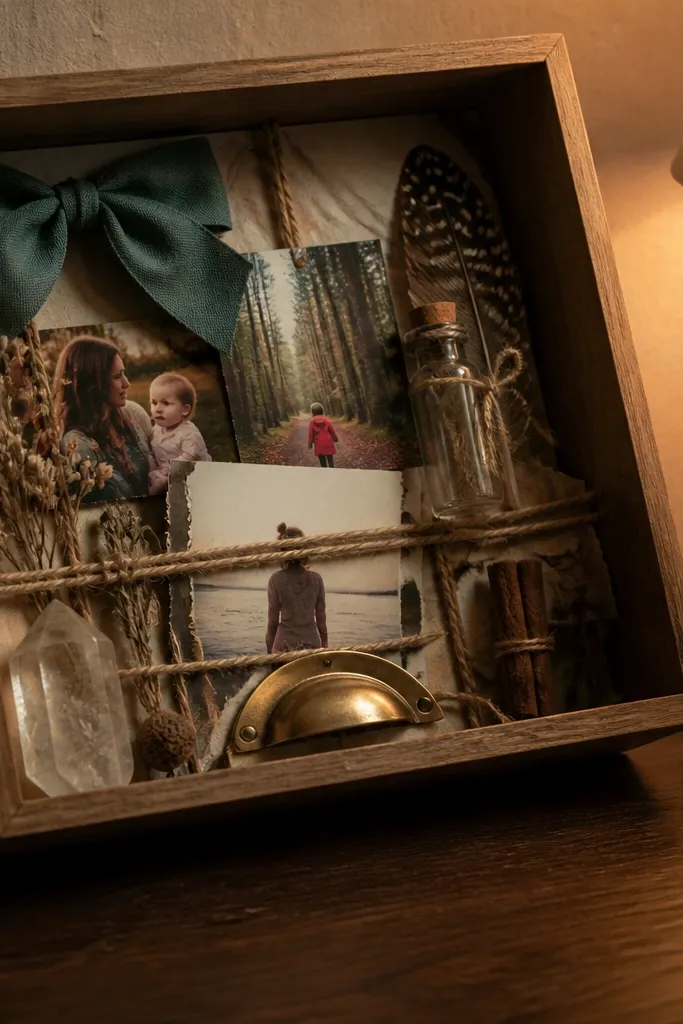
This board looks dreamy because it has real depth. A shadowbox lets you build a little world: flat images, tiny fabric bows, and small objects tied in twine. The upcycled drawer pull adds a warm metal accent that catches light without looking like store-bought decor. It’s ideal if you like specific, tangible goals like a capsule wardrobe, travel themes, or a home shelf aesthetic.
Pro tipUse thin foam squares under photos so objects don’t flatten against the glass.
Pick a shadowbox frame with at least 2 in depth. Sand and paint an old drawer pull in matte bronze or dark brass, then screw or glue it to the frame backing. Layer your background card (cream or oatmeal) first, then build a mid-layer with photos on thicker cardstock. Add a top layer of small items like a piece of fabric, a thread-wrapped button, or a mini charm, and secure everything with hot glue dots.
AvoidDon’t crowd the shadowbox; leave 1/2 in space between layers so it reads clean.
4. Macramé Corner Vision Board on a Dowels-and-Jars Frame
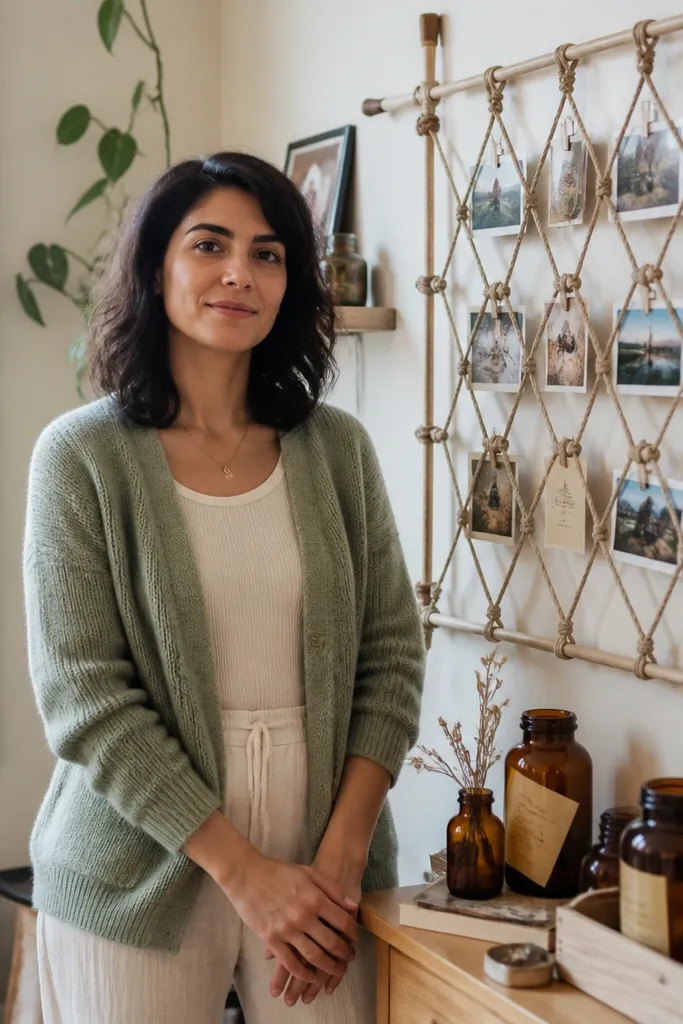
This gives you that cozy, cottage look without needing a lot of wall space. The macramé creates a soft lattice that frames your images, and the jars add warm clutter in a controlled way. It’s perfect for small goals: scent notes, skincare routines, hobby plans, and “slow home” ideas. In photos, the dangling texture makes the board feel dimensional and inviting.
Pro tipKeep card sizes consistent (2x3 in or 3x4 in) so spacing stays airy.
Mount two dowels across a corner or a single wall strip, then hang macramé cords between them. Clip small image cards onto the cords with clothespins painted in warm white or clay. Add two tiny jars along the bottom dowel for rolled notes, ribbon scraps, or dried herb sprigs. Finish by tying a short loop of twine at the top so the whole corner looks intentional and tidy.
AvoidDon’t hang heavy objects directly from thin cords; it droops and looks sloppy.
5. Yarn-Wrapped Frame Vision Board with Photo Edges
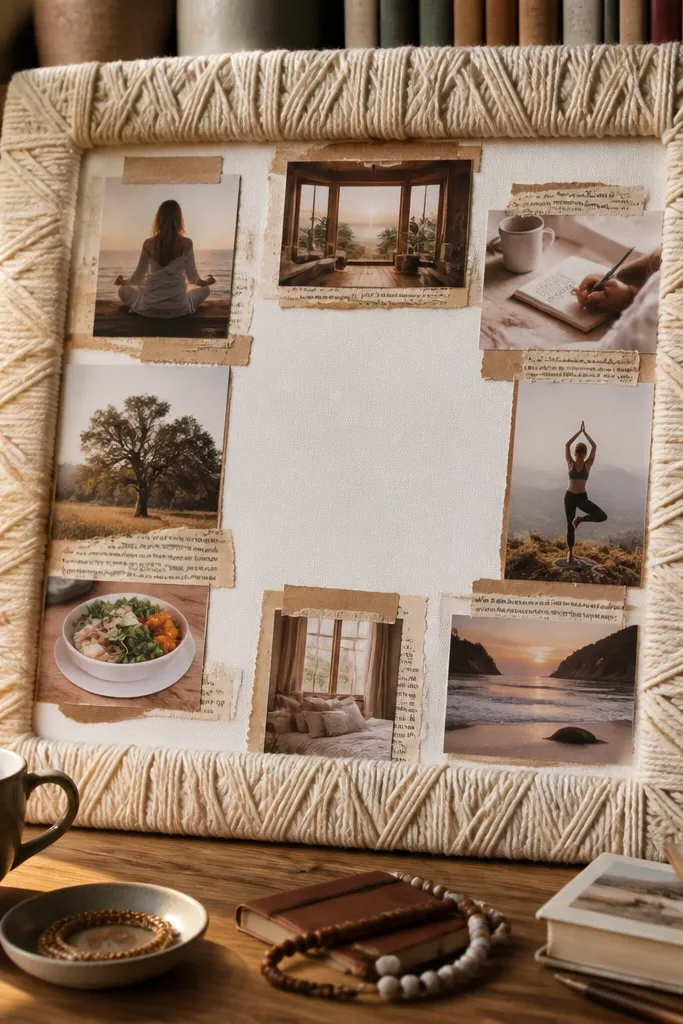
A yarn-wrapped frame instantly makes a vision board look cozy because it adds warmth you can see and feel. Instead of covering the whole board with yarn, wrap just the frame and keep the center clean. Then border your photos with torn book paper or kraft strips so everything ties together. This is a good choice for desk boards or small wall pieces where you want cozy vibes without a huge commitment.
Pro tipUse a yarn that’s thick enough to hide frame edges; thin yarn makes gaps show.
Choose a small picture frame or shadow frame with a flat backing. Wrap the frame edges with chunky yarn, gluing the ends as you go, and trim any frays with scissors. Cover the backing with matte kraft paper, then add photos in a grid using photo corners or glue dots. Border each photo with a strip of torn book page so the edges look soft rather than sharp.
AvoidDon’t glue yarn over glossy paint; it can peel and snag fabric later.
6. Felt Flower Vision Board with Layered Petal Cutouts
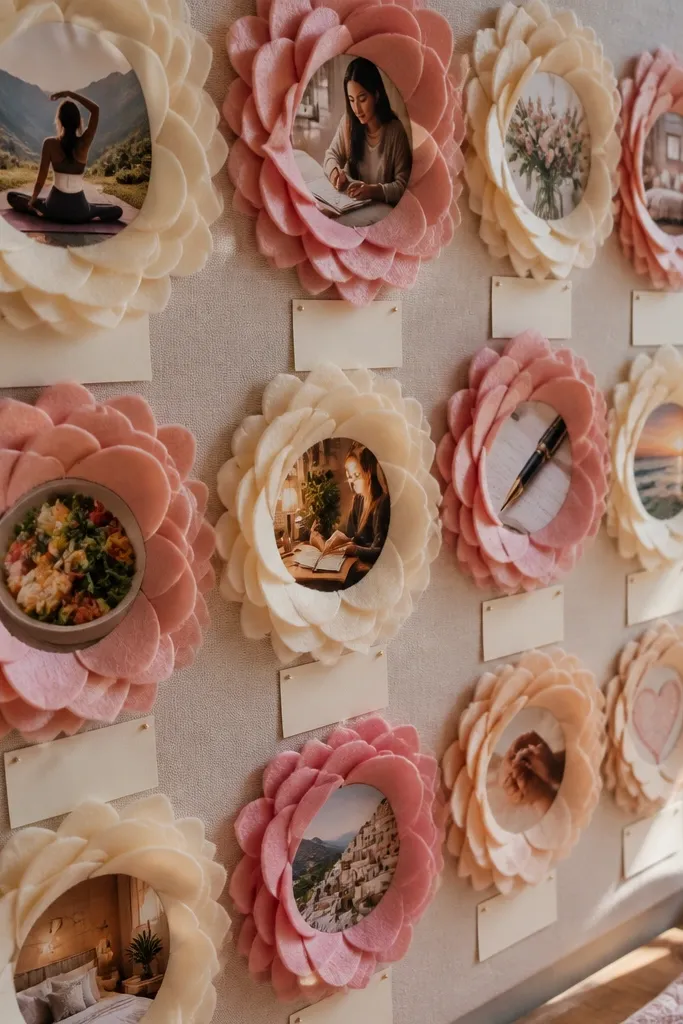
This board looks dreamy because it has a focal point you can see from across the room. Felt petals create a soft halo around your goals, and you can build flowers in a few color tones that match your palette. It’s especially good for “self-care” and “home mood” boards because the materials feel gentle and warm. The layered look photographs well because shadows fall naturally between petals.
Pro tipUse a fabric glue that dries clear and matte; shiny glue looks wet in photos.
Cut felt circles and petal shapes in 3 sizes (cream, rust, and deep green). Arrange them as a flower cluster and pin or glue your base card behind them. Place your main photo in the center on a matte cardstock square, then glue petals around it. Add small handwritten captions on tiny felt tabs and glue them like labels.
AvoidDon’t stack too many petals; 2-3 layers look intentional, while 6+ layers look bulky.
7. Tea Stain Gradient Vision Board with Coffee-Cured Paper
This is one of the coziest looks because the background has real warmth from stains, not just colored cardstock. A tea stain gradient gives you depth while keeping everything soft and muted. Your photos sit on top like they belong in a scrapbook from a slow weekend. This works best when your images have warm tones or natural textures like wood, fabric, and candles.
Brew black tea (or coffee) and cool it. Lightly brush or dab the paper in bands from light to dark, then let it dry flat under a book. Cut stained paper into rectangles that act as your background panels. Pin or glue photos onto the panels, then add a few stamped or handwritten lines for structure.
Use watercolor paper for staining; it holds texture and doesn’t warp as much.
Don’t soak the paper; puddles create blotches that look messy instead of dreamy.
8. Polaroid-Style Vision Board with Fabric Tape Hinges
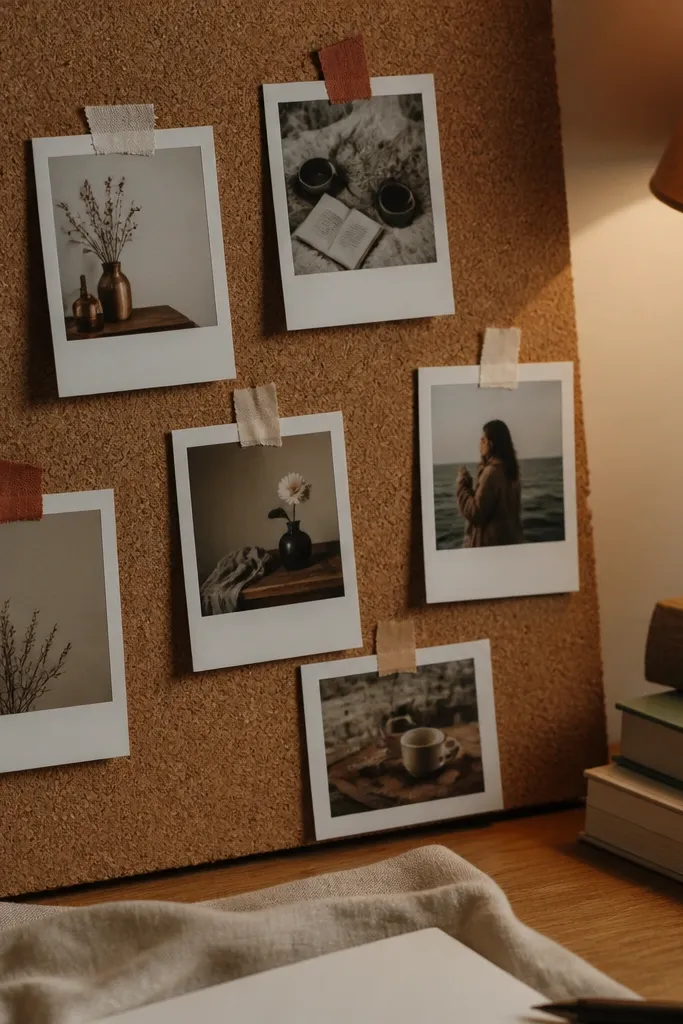
If your board feels stiff, this one adds movement. Fabric tape hinges let photos lift slightly, and that tiny dimension reads cozy and handmade. Keep the look consistent with polaroid-style white borders and warm tape colors like oatmeal, clay, or olive. It’s perfect for goals you want to revisit because you can swap images without tearing tape off the base.
Pro tipPress the tape hinges down firmly with a ruler so edges stay crisp.
Cover your base board with matte cream cardstock or fabric. Print or cut your photo squares with white borders (use 4x6 in photos cut to 3.5x5.5 in with a 0.5 in border). Attach each photo with two small fabric tape strips like hinges — one on the top edge, one on the bottom edge. Add a handwritten date or one-word label on each photo border.
AvoidDon’t use glossy washi tape; it reflects light and ruins the cozy feel.
9. Closet-Door Vision Board with Ribbon Lacing and Tags
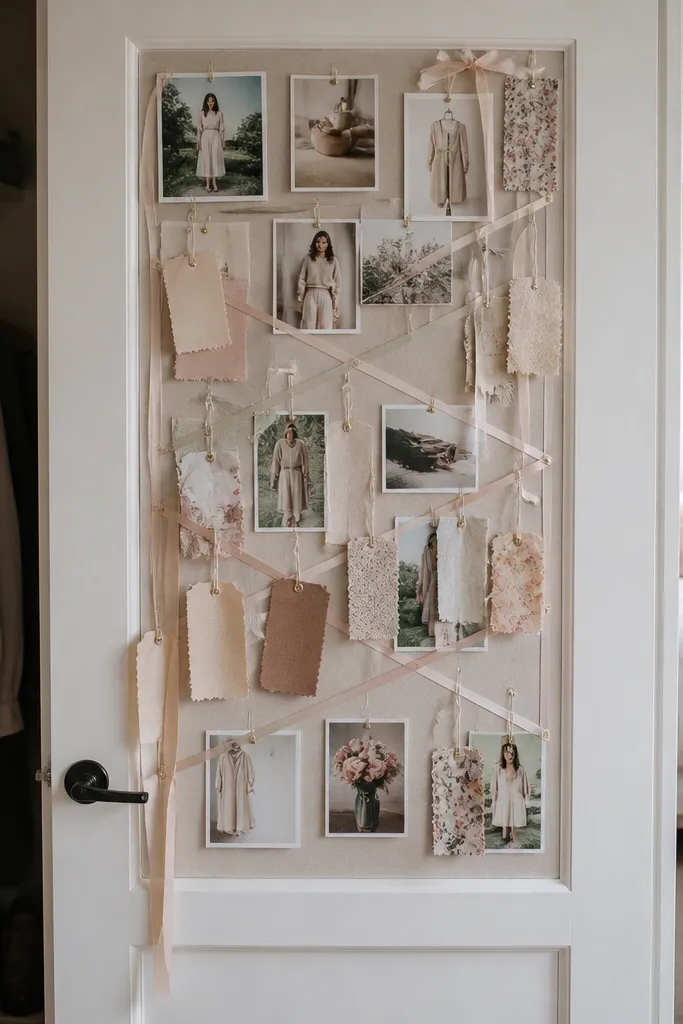
This one is dreamy because it uses the space you already see every day. A closet-door board makes your goals feel like part of your routine, and ribbon lacing keeps the layout airy. Use tags made from clothing labels, thrifted fabric scraps, or paper cut to tag shapes. It’s great for capsule wardrobe goals, scent goals, and “morning checklist” ideas.
Mount a lightweight board or cork panel to the closet door with strong adhesive strips or screws. Punch evenly spaced holes along the perimeter and lace ribbon through them like a grid. Attach your images to ribbon points using fabric tags or small clothespins. Finish with 5-10 tags that each have one short handwritten line, like “Sunday reset” or “tea + book.”
Use one ribbon color for the grid, then let the tags bring the palette variation.
Don’t overcrowd the ribbon grid; keep empty space around the center so it photographs clean.
10. Upcycled Map Scrap Board with Linen Pinned Corners

Map scraps look dreamy when you treat them like texture, not wallpaper. The paper is already patterned and historical, and linen pinned corners soften the edges so the board feels cozy instead of busy. This is perfect for travel goals, home location dreams, or “move in a new direction” themes. It photographs well because maps have natural contrast and your photos become the calm layer.
Cut map scraps into irregular chunks and glue them onto a light base like cream cardstock. Layer a few strips of thin linen behind photo corners so the corners look soft and fabric-like. Place your photos and anchor them with small linen-backed clips or tacks. Add a simple title strip at the top using a torn map strip and handwritten ink.
Keep map text readable in only one area; too much readable text makes it chaotic.
Don’t glue the whole board with map scraps; leave quiet areas for photos to breathe.
11. Fabric Scrap Patchwork Vision Board with One Theme Color
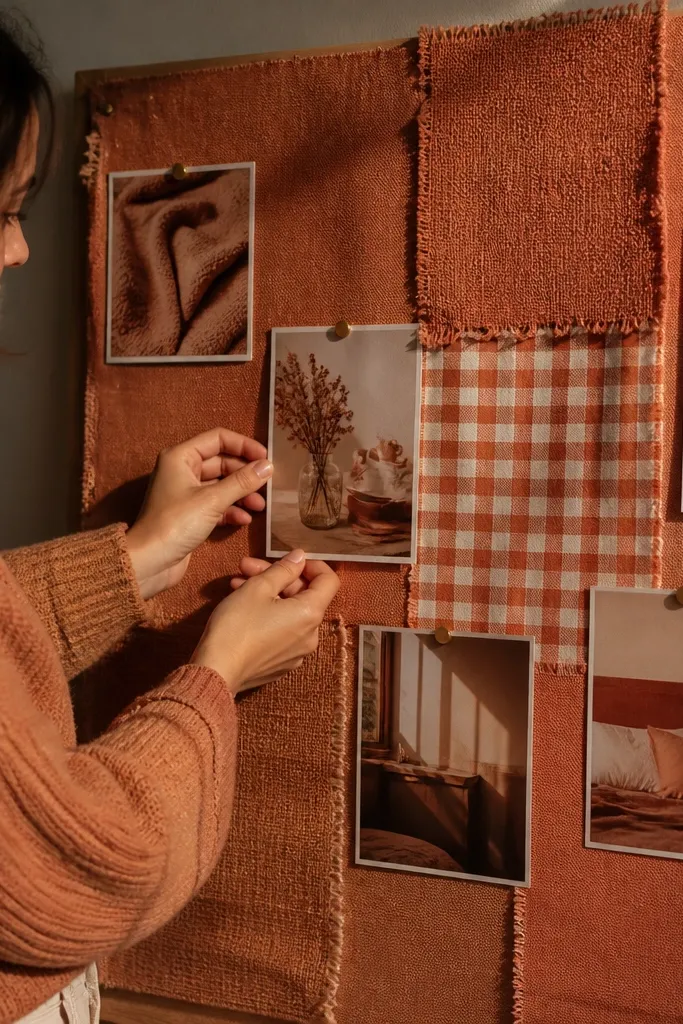
Patchwork makes a vision board feel cozy because it looks like something made by hand over time. The trick is to pick one theme color and repeat it in small amounts across different fabrics. That keeps the board cohesive even when you use thrifted scraps. It works best for style goals, “home texture” boards, and mood boards that want to look warm at any time of day.
Choose 10-18 fabric scraps in similar weights, plus one theme color in 2-3 different fabrics. Back your board with a thin layer of batting or felt so seams don’t flatten. Sew or glue the patchwork pieces onto the base, leaving small gaps for texture. Place photos on top and anchor them with fabric tabs so edges look stitched, not pasted.
Use fabric scraps with visible weave (linen, cotton twill) so the texture shows in photos.
Don’t mix slippery satin and fuzzy fleece in the same patchwork; the shine-to-matte contrast looks uneven.
12. Gouache Color Block Board with Torn Paper Edges
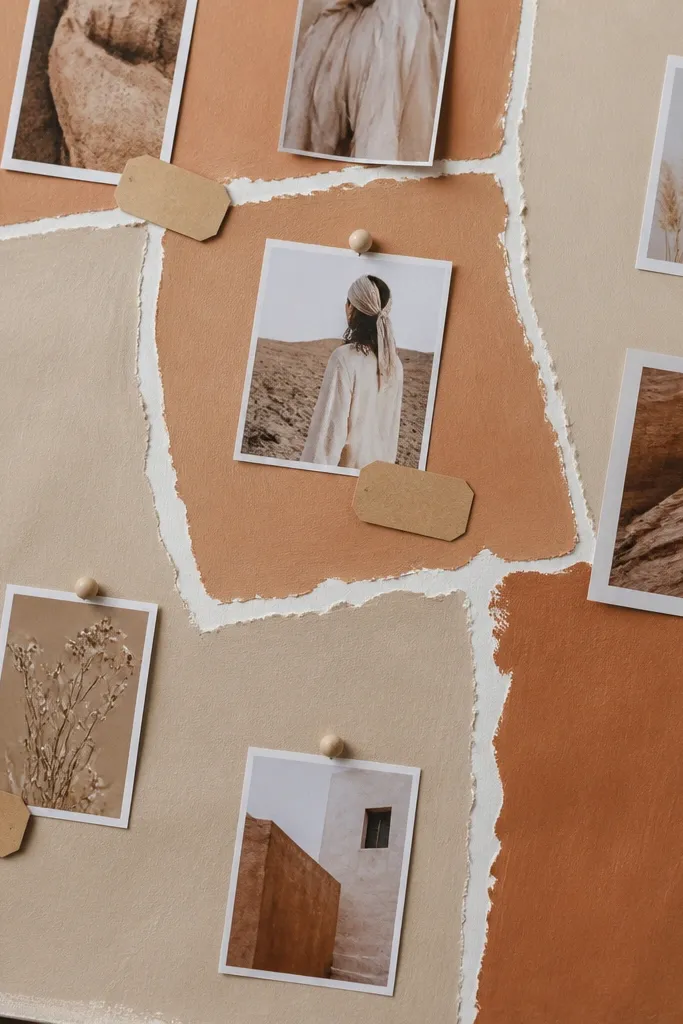
If you want dreamy without clutter, color blocks do it. Gouache has a matte, chalky finish that looks cozy under indoor light, and torn paper edges keep it from looking too graphic. Build a simple layout with 3-5 blocks in warm tones, then place photos like they’re pinned into scenery. This is great for “seasonal goals” and “aesthetic direction” boards because the background stays consistent while photos change.
Pro tipLet gouache dry fully between layers; rushing makes edges bleed.
Prime a foam board with gesso so paint grips. Tape off 3-5 color blocks and paint them with gouache in warm shades like cream, clay, muted olive, and cocoa. While paint is slightly tacky, tear narrow paper strips and press them along block edges for a soft border. Glue photos onto matte cardstock and place them on top using small glue dots.
AvoidDon’t use glossy acrylic paint; it reflects and kills the cozy matte look.
13. Pressed Herb and Candle Label Vision Board
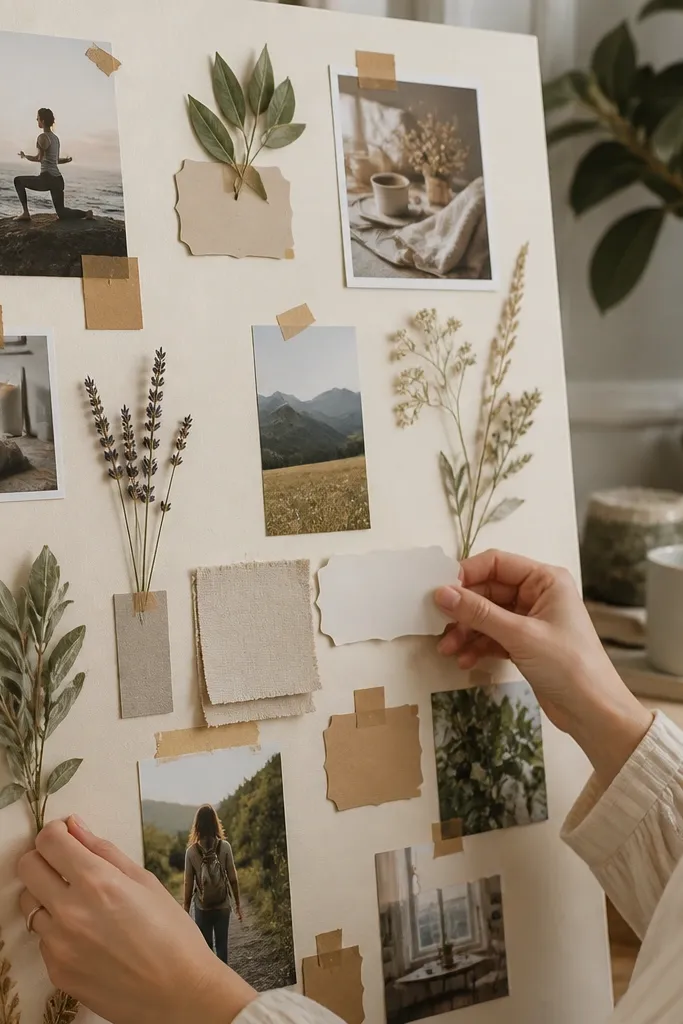
This board is cozy because it smells like the idea of home, even if the herbs are just visual. Pressed herbs add delicate shapes, and candle labels bring warm typography you can repurpose. It’s perfect for “slow evenings,” self-care routines, and sensory goals. The look is dreamy because tiny botanical textures sit around photos like a soft frame.
Pro tipUse tweezers to place herbs, then wait 10 minutes before touching anything so they don’t shift.
Press herbs between book pages for several days so they flatten. Cut a cream base and arrange your photos in the center. Add pressed herbs around the photos and secure them with a thin layer of matte medium or clear archival glue. Repurpose candle labels as small strips of text under each photo, then seal everything with a light matte spray over paper only.
AvoidDon’t pile herbs too thick; layered leaves curl and look messy.
14. Washed Denim Pocket Board with Mini Clips
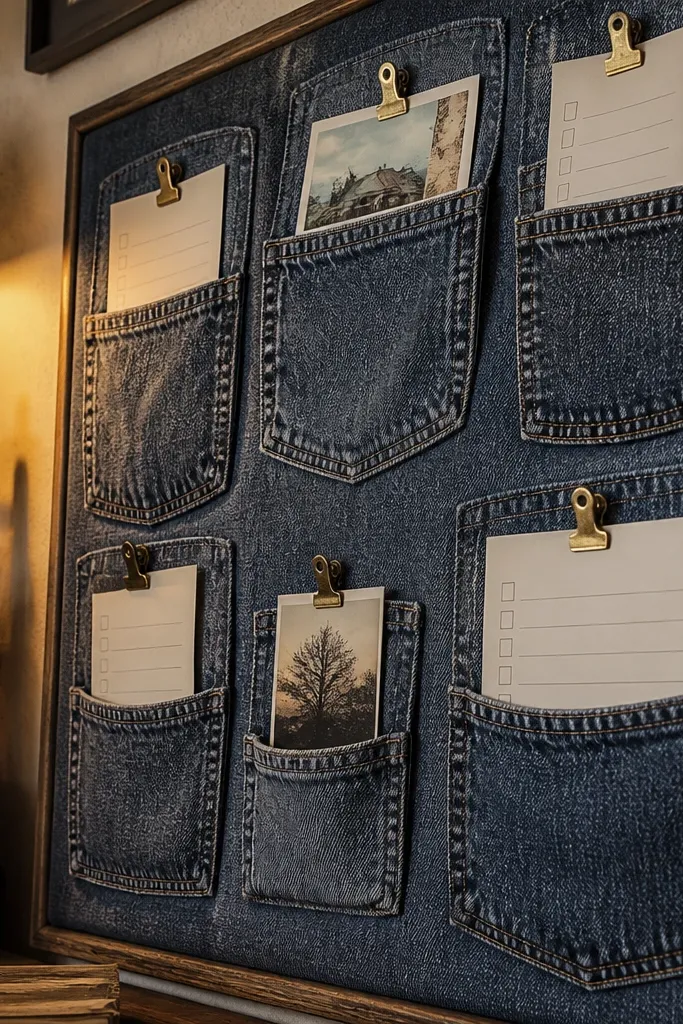
Denim reads cozy instantly because it has weight and visible stitching. A pocket board lets you hide notes, stash small photos, and keep the layout neat. Mini clips add a handmade touch and make swaps easy. This is best for goals tied to routines and habits since you can slide checklist cards into pockets and pull them out to update.
Pro tipUse denim thread and a simple running stitch if you want the seams to look intentional on the front.
Cut pockets from thrifted jeans or use one large denim panel. Stitch or glue pockets onto a fabric-covered base board so edges are secure. Add mini binder clips or clothespins to hold the top layer cards on display. Place your main photo on a matte card backing and tuck it partly into a pocket for a layered look.
AvoidDon’t use flimsy denim; pockets sag and make the board look tired.
15. Shadow Grid Board with Clothespin Photo Corners
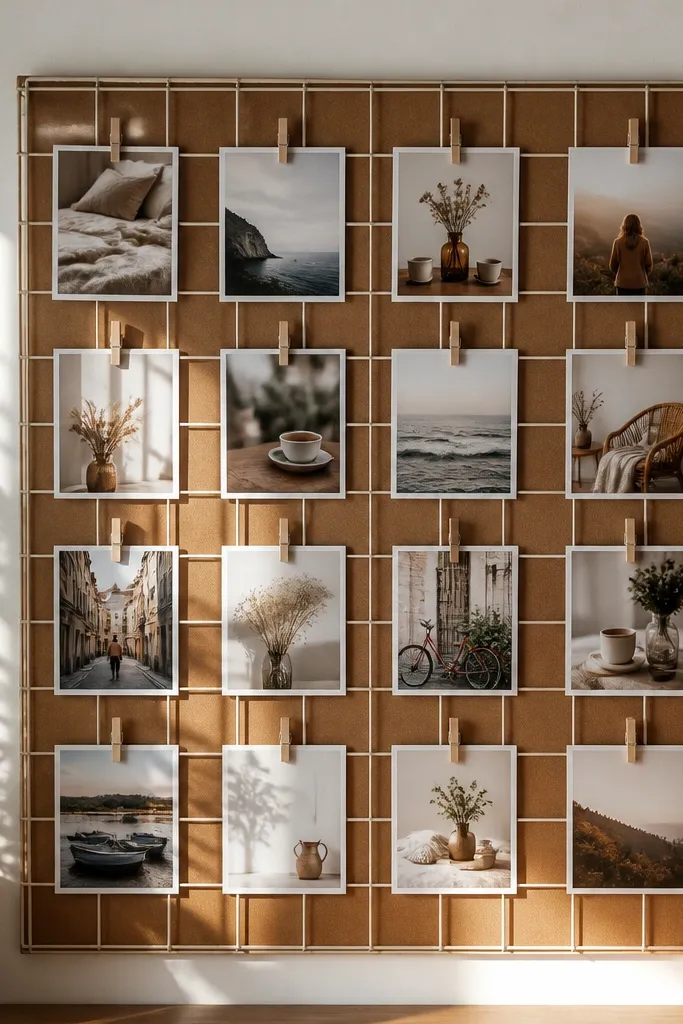
This board looks dreamy because it stays organized while still feeling handmade. A grid layout creates clean spacing, and clothespin corners add cozy texture without covering the whole board. Use muted neutrals for the grid lines and warm card stock for photos. It’s a strong choice when you want lots of images but hate clutter.
Pro tipKeep the grid line spacing consistent (like 3.5 in) so the board looks designed.
Cover a board with warm neutral paper and draw a grid using a light pencil. Add small hooks or pushpins at grid intersections. Attach photos with clothespin corners so each image has a slight lift and shadow. Finish by adding one larger handwritten quote block at the top using torn paper strips.
AvoidDon’t place photos at random angles; straight corners look more cozy than chaotic corners.
16. Ribbon Bow Corner Vision Board with Satin-Edge Labels
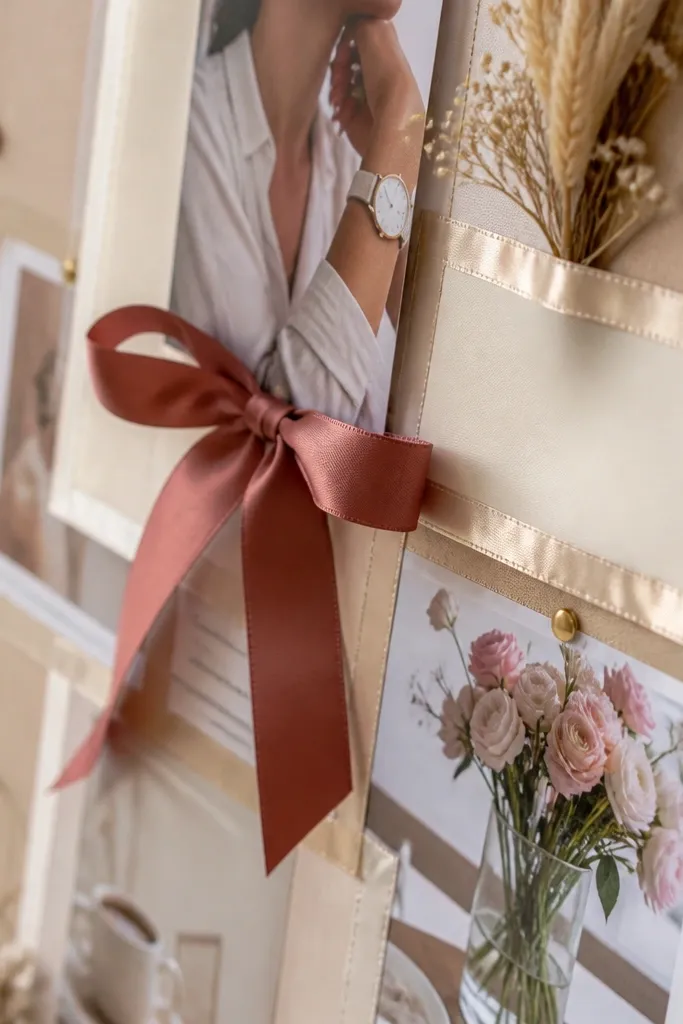
A ribbon bow corner makes your board feel like decor, not a craft project. The satin-edge labels add a soft highlight, and the corner placement keeps the rest of the board breathable. This idea works for feminine cozy goals like fragrance notes, skincare routines, and “soft life” style ideas. Photos look dreamy because the bow and labels frame them instead of competing with them.
Cover a board with matte cream cardstock. Create a ribbon bow and glue it to one top corner, then add two small label strips under it. Make labels by cutting cardstock into rectangles and wrapping the edges with thin satin ribbon, then glue the ribbon ends on the back. Place your main photos in the center and attach smaller ones around the labels using glue dots.
Choose ribbon thickness around 1/8 in so it reads delicate in photos.
Don’t use thick glossy ribbon; it looks shiny and less cozy under light.
17. Cinnamon Stick Scent Board with Paper Lattice
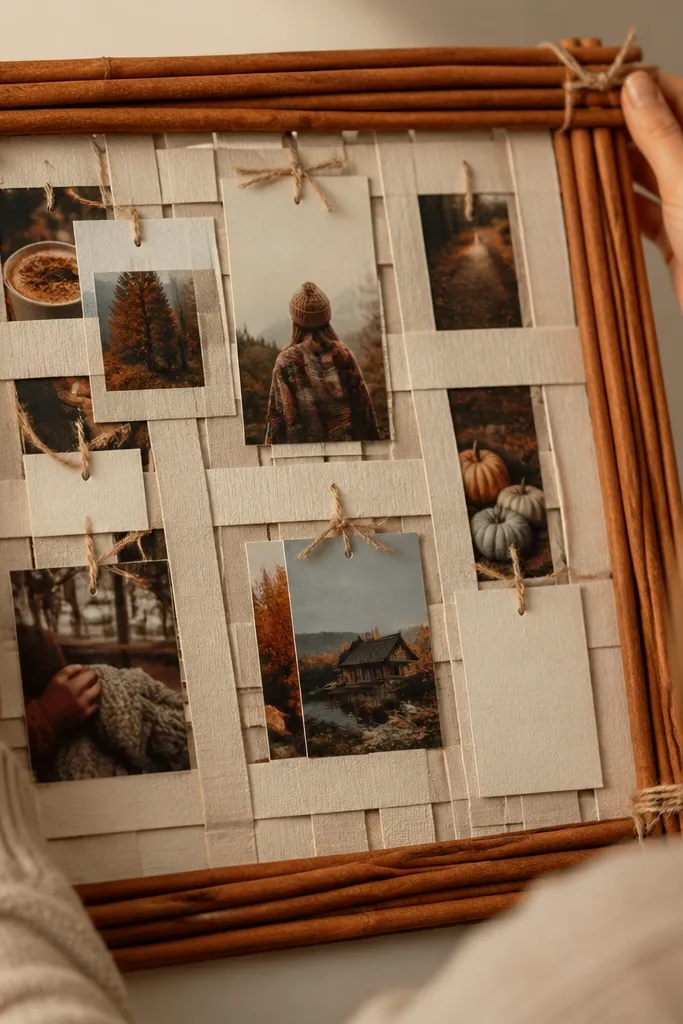
This is the cozy board that feels like a warm season. Cinnamon sticks bring a natural brown tone and a strong visual line, and the paper lattice keeps it structured. It works well for fall and winter goals, but you can keep it neutral by using oatmeal paper and cream photos. The board looks dreamy because the lattice creates repeating shadows and the cinnamon sticks act like visual anchors.
Cut oatmeal paper strips and glue them into a lattice grid on a cream base board. Place cinnamon sticks across two or three lattice lines, securing ends with hot glue on the back side. Add photos on small matte cardstock squares and tape or glue them at lattice intersections. Finish by attaching a small handwritten “scent note” card near the cinnamon sticks.
Seal cinnamon sticks with a light matte spray on the outside so they don’t leave oily marks on paper.
Don’t glue cinnamon sticks directly to glossy paper; stains show.
18. Thrift Frame Corkboard Overlay with Hand-Torn Quote Strips
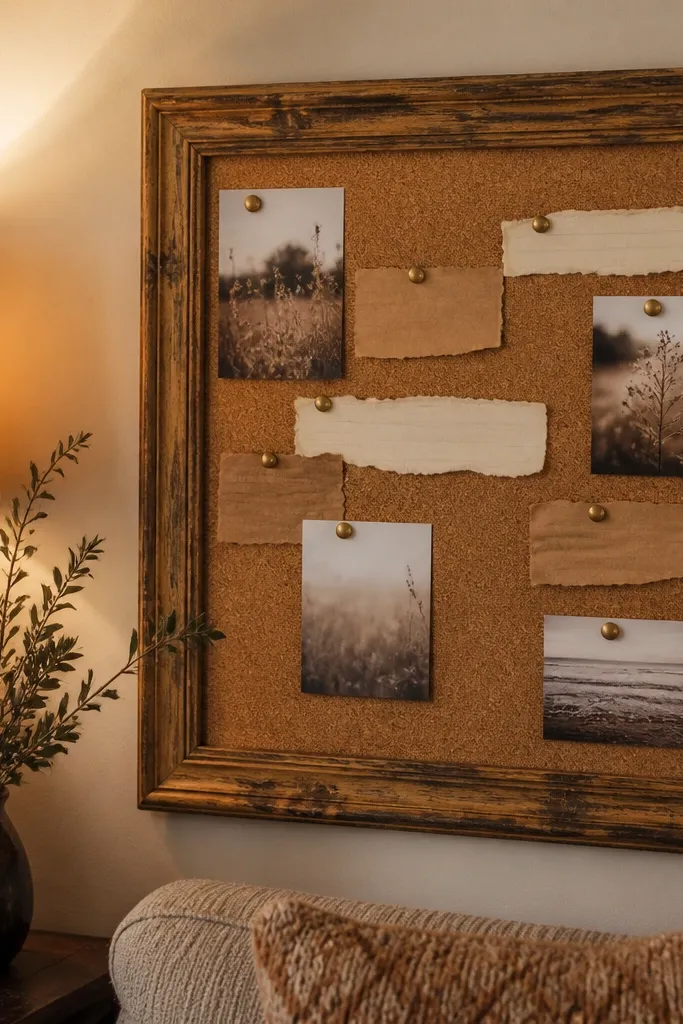
This idea makes your vision board look like real wall art. Using a thrift frame instantly gives it a finished edge, while cork inside keeps the cozy texture. Hand-torn quote strips add softness and make the board feel personal without adding clutter. It’s a good fit for living rooms, hallways, and any space where you want goals to look decorative.
Pro tipUse 1-2 font styles only (handwriting + stamped text) so the board stays calm.
Remove backing from a thrift frame and replace it with cork sheet sized to fit. Glue cork to the frame backing and trim edges cleanly. Add your images on matte kraft paper and pin them with small cork tacks. Tear quote strips by hand, ink them with a fine marker, and pin them near the images like captions.
AvoidDon’t crowd every inch with pins; leave large cork areas visible for a cozy breathing space.
19. Polka Dot Tea Towel Board with Tucked Photo Pockets
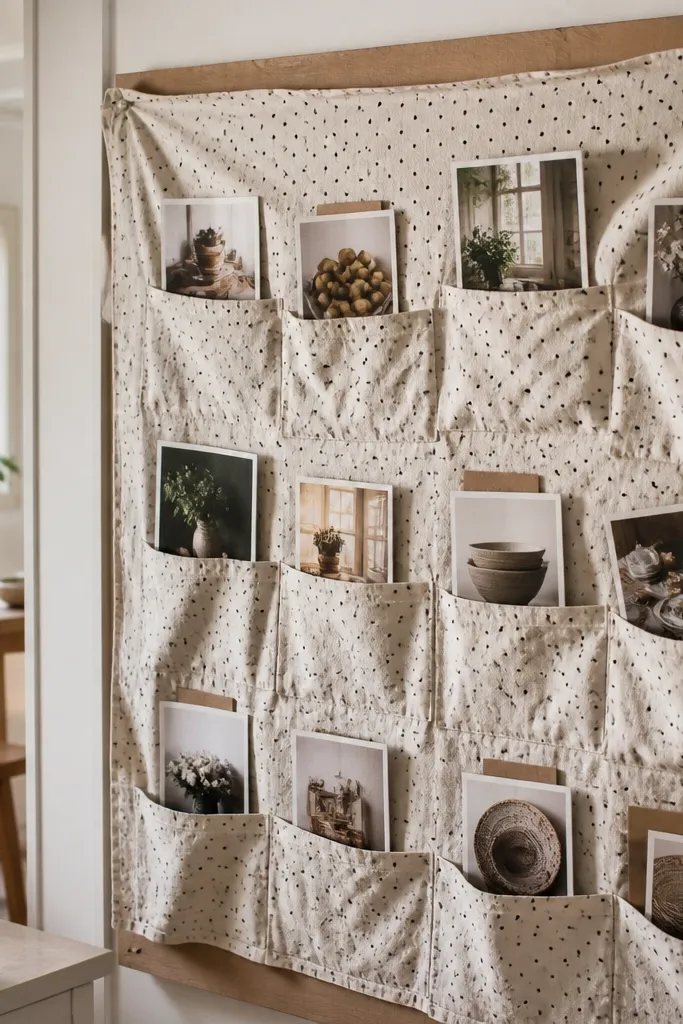
Tea towels look cozy because they’re already styled fabric with a lived-in feel. A polka dot pattern gives you consistent visual rhythm, and tucked photo pockets keep the board neat. This works for kitchen-adjacent goals like meal planning, pantry themes, and cozy hosting ideas. It also photographs well because folds create natural shadows.
Pro tipPress the tea towel with a low iron before mounting so the pattern looks crisp.
Find a tea towel in warm colors like cream with rust or olive dots. Mount it over a foam board using fabric adhesive, smoothing wrinkles away from your main photo area. Fold narrow strips of fabric to make pockets and stitch or glue them in place. Slide photos into pockets and label the top with small handwritten tags.
AvoidDon’t iron high heat on printed towels; colors can fade and look uneven.
20. Upcycled Receipt and Ticket Stub Collage with Kraft Borders
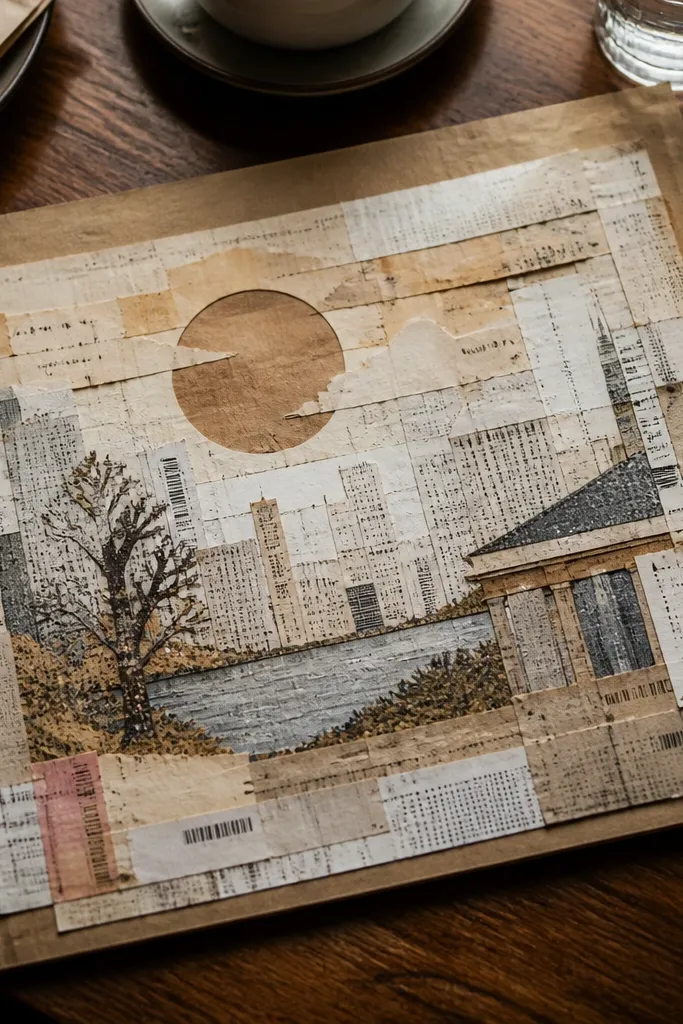
This board is dreamy because it turns scraps into a story-like texture. Receipts and ticket stubs have real typography and small layout details that look good in close-ups, and kraft borders keep it from turning into a chaotic pile. It’s great for “life moments” goals, memory goals, and travel-in-your-head boards. The key is to use the scraps as a frame and background, not as the main visual.
Pro tipUse a ruler for the kraft border width (about 3/4 in) so it looks designed.
Cut kraft cardstock into rectangles sized for your photo areas (like 5x7 in). Layer receipt and ticket stubs behind the rectangles as a background collage, then glue them down lightly. Place a single main photo in the center of each kraft rectangle and glue it with photo corners. Add one handwritten date line or location line in the margin using a fine-tip pen.
AvoidDon’t mix too many scrap types; pick receipts + tickets only so the palette stays cohesive.
21. Brown Paper Bag Layer Board with String Tie Corners
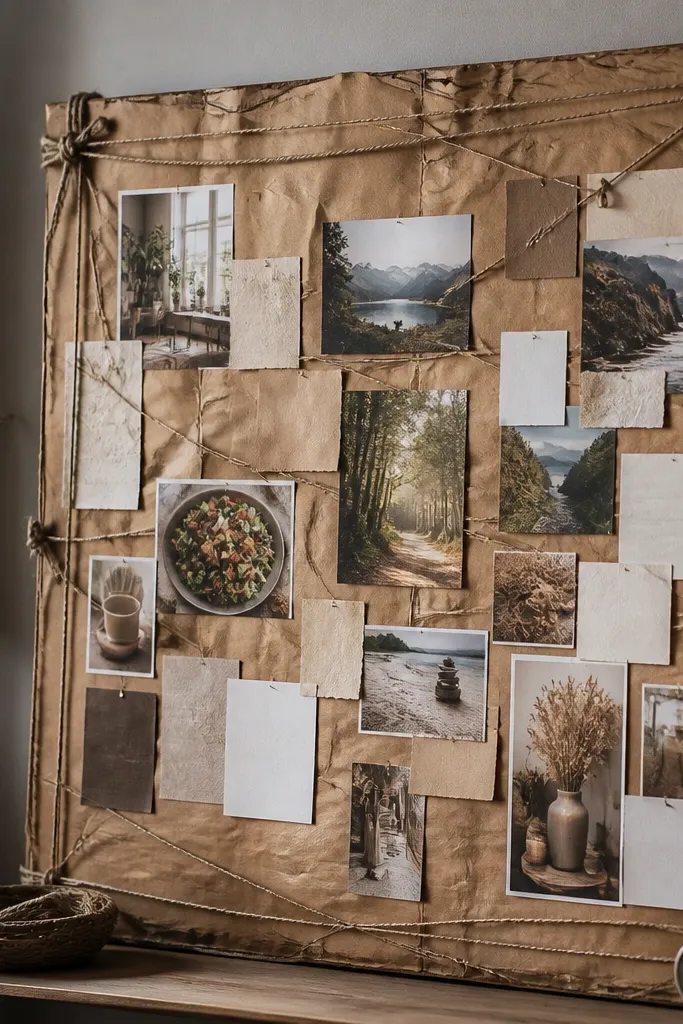
Brown paper bag layers look cozy because they have that warm, matte craft feel. String tie corners add a rustic detail that reads handmade, and layering gives you depth without needing expensive materials. This is perfect for cozy goals that feel grounded: home organization, small rituals, and slow weekends. It also hides imperfect cuts because the bag texture forgives rough edges.
Pro tipLightly crumple the paper bag panels before cutting; it adds natural texture and hides straight-edge lines.
Cut brown paper bag panels into 3 sizes and stack them as layered frames around a central photo on matte cardstock. Tie thin twine around the corners where the layers meet, using small loops and knots on the back if possible. Glue the center photo first, then attach the bag layers around it with a thin glue line. Add a small label strip at the bottom using torn paper and handwriting.
AvoidDon’t over-tighten the string; it warps the paper and makes the whole board look uneven.
22. Terracotta Tile Mood Board with Mini Tile Photo Clusters
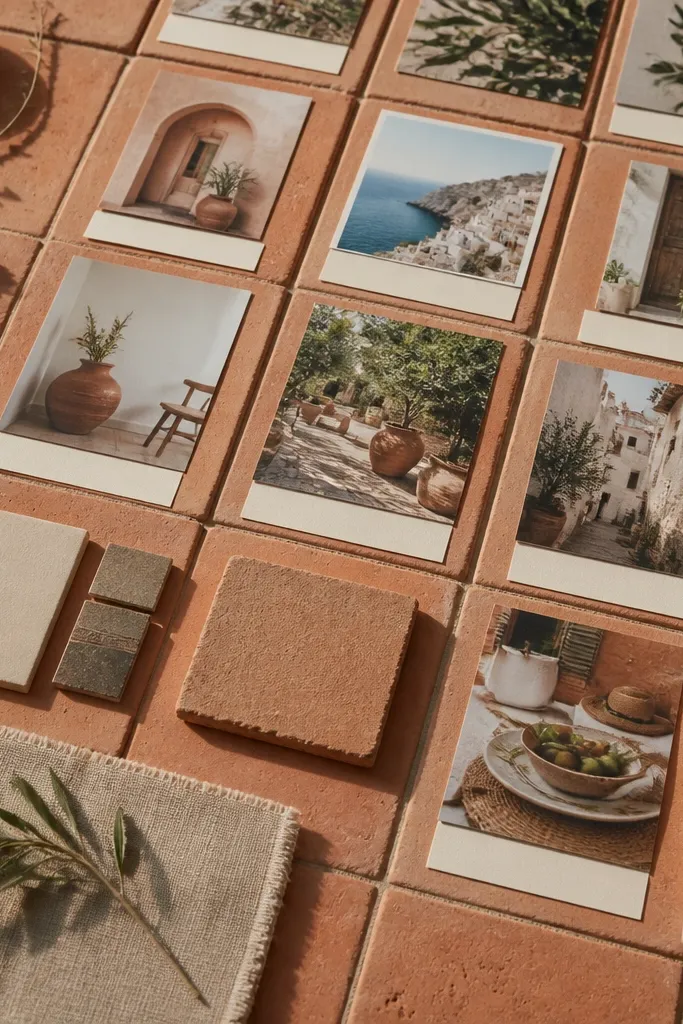
Terracotta tiles add instant warmth and a handmade, Mediterranean vibe that photographs beautifully. Instead of covering the whole board, you use a tile base and then cluster photos on top with consistent spacing. Add tiny labels in cream cardstock so the board reads cozy and structured. This is a strong pick for home decor goals, “warm kitchen” ideas, and style boards that need a grounding color.
Pro tipKeep your photo cluster sizes consistent so the board looks intentional, not scattered.
Use small terracotta square tiles mounted on a board or a tile-backed cork panel. Seal tiles with a matte sealant so glue doesn’t stain porous surfaces. Cluster photos on matte cream cardstock and attach them with removable adhesive dots or small cork tacks if the base is cork-backed. Add 3-5 label strips in a single handwriting style and place them near the clusters.
AvoidDon’t use glossy stickers on tile; they reflect and look out of place.
23. Pressed Flower + Wax Seal Letter Board
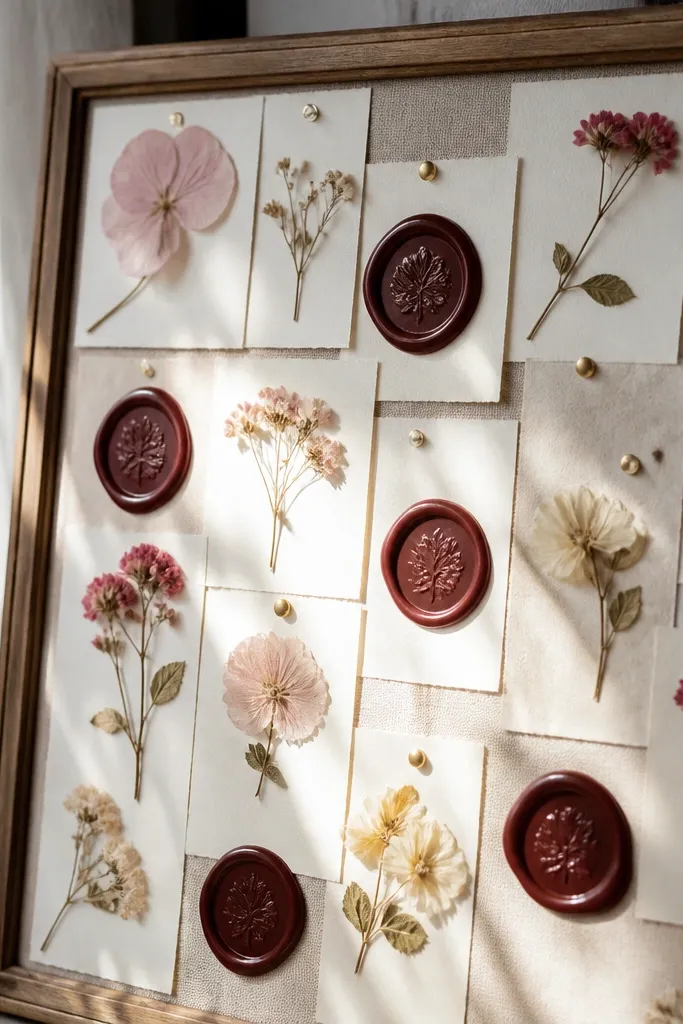
This board looks dreamy because it mixes soft botanicals with crisp, high-contrast wax seals. The result feels old-paper romantic, but the layout stays clean and readable. You get a vision board that doubles as a gentle decor piece — the cards look like letters, not random cutouts. Materials are easy to source and the build is forgiving, since wax and paper hide small imperfections. It suits a bedroom, reading nook, or entryway where you want calm visuals instead of bright clutter. Time is usually 2 to 3 hours including drying and sealing.
Pro tipPress wax seals on a silicone mat so the wax releases cleanly and you don’t mar the surface. Use gel medium instead of hot glue on flowers so petals don’t curl.
Cut a cork or foam board to 12 x 16 inches. Stretch a thin layer of clear craft plastic or acetate over the top area where you’ll place pressed flowers, then tape the edges on the back so the surface stays smooth. Arrange pressed flowers (use flat, dry ones) in a loose cluster, then glue them down with a tiny dot of gel medium or tacky glue placed only at stems. Write short goals on cream cardstock and punch small holes at the corners, then tie each card to the board with thin twine. Melt a small amount of wax onto a metal spoon or wax seal applicator and press onto the twine knot or card corner for a sealed look, letting wax fully cool before you move the board.
AvoidDon’t skip drying pressed flowers completely — damp petals turn translucent and lose their shape.
24. Macaron-Color Diner Menu Board with Clip-on Dividers
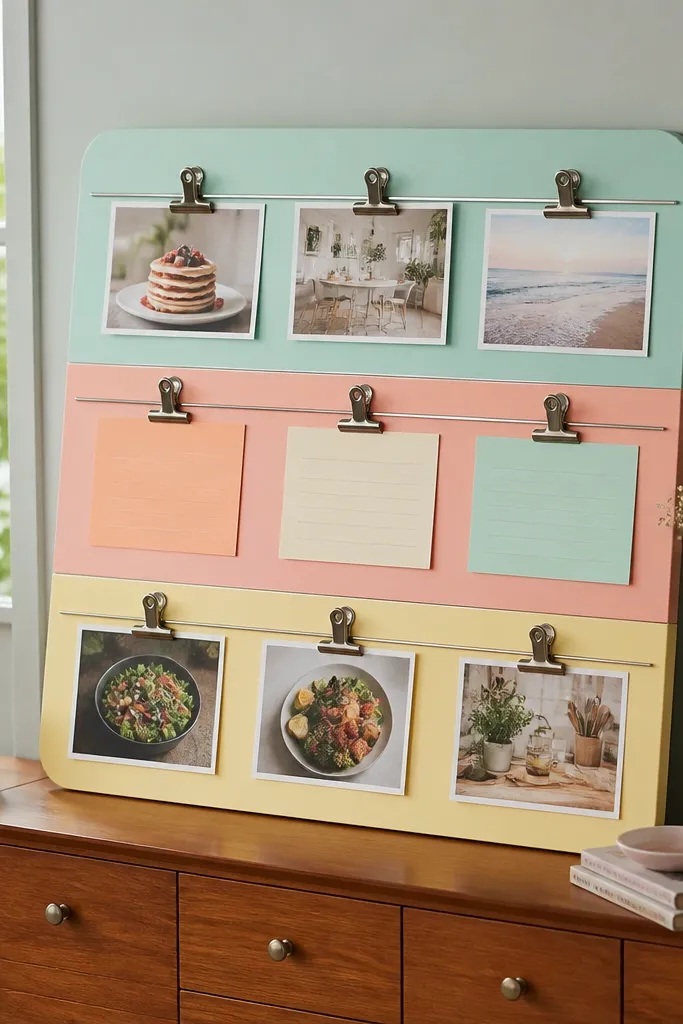
This one reads like a tiny, cozy diner menu, which is why it’s automatically photogenic. The dreamy part is the pastel color blocking plus the slightly playful typography vibe from printed strips. Instead of pinning everything flat, you’re building a board with “sections” you can swap — so your vision board stays current without looking messy. It fixes the common problem of vision boards becoming a stuck collage. You need basic printing and a few hardware pieces, and the finish stays neat because clip-on dividers keep edges aligned. It works in kitchens, craft rooms, and college dorms where you want something cute that still organizes your ideas.
Grab a board backing like a 16 x 20 inch foam core or painted wood panel, and cover it with matte pastel wrapping paper or a solid-color cardstock sheet. Print menu-style strips on thick paper: 4 to 6 short lines per strip, each strip about 2.5 inches wide and 6 to 8 inches long. Color-code sections using 3 pastel shades and leave a 1 inch gap between columns so the layout breathes. Attach small binder clips or mini spring clips along the board in a vertical row for each color section, then clip each menu strip to its divider line. Finish by adding a thin header strip at the top for each section name, using the same font size across all headers for a tidy, dreamy look.
Print on 110 lb cardstock and round the strip corners with a corner punch — it makes everything look finished in photos. Spray a light coat of matte fixative over the board paper to reduce glare.
Don’t cram strips edge-to-edge — the clean spacing is what keeps it looking dreamy instead of chaotic.
25. Layered Bookcloth Curtain Rod Mood Board
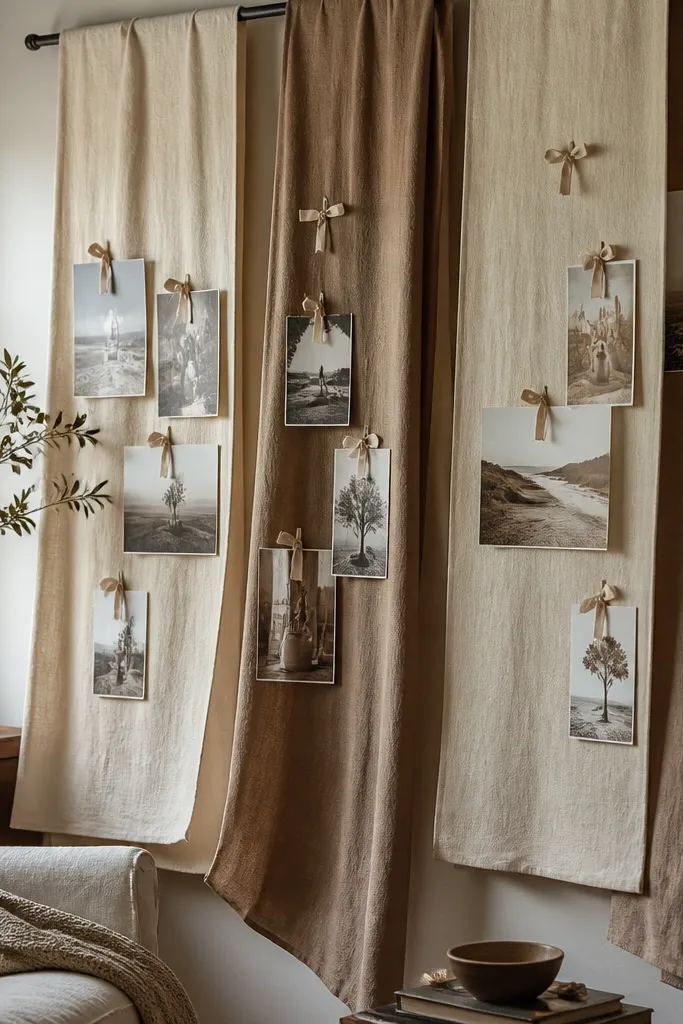
This board is dreamy because it creates motion and depth — even when it’s still, the layered fabric looks soft and dimensional. You’re building a vertical mood board that feels like a tiny gallery wall made from textiles. It fixes the flat-collage issue where everything looks like it’s lying on top of the background. The texture matters here: bookcloth or linen-like fabric catches light gently, and the hanging tags make it look curated without needing fancy frames. Skill level is beginner-friendly, and the build takes about 1.5 to 2.5 hours. It suits a hallway, bedroom wall, or rental-friendly setup where you want impact without heavy mounting.
Mount a small curtain rod or tension rod horizontally at about eye level, using the wall brackets or tension hardware that came with it. Cut 6 to 10 fabric strips from bookcloth, canvas, or linen — aim for widths of 2.5 to 3 inches and lengths of 10 to 14 inches, varying lengths by 1 to 2 inches. Hem or heat-seal the strip edges so they don’t fray, then slide each strip onto the rod using fabric loops made from narrow ribbon or by tying simple knots at the strip tops. Create tag cards from thick paper, cut to about 3 x 5 inches, and punch two holes. Tie tags to the rod with thin twine so each tag hangs near its matching fabric strip, then pin one or two small photos to the fabric using fabric-safe clips or straight pins with cork backing.
Use color families that match your room lighting: warm cream + dusty rose + cocoa for cozy, cool gray + periwinkle for airy. Add a strip of matte clear tape on the back of photo clips to stop paper edges from lifting.
Don’t use slippery satin fabrics — they twist and tangle on the rod, which ruins the clean layered look.



