
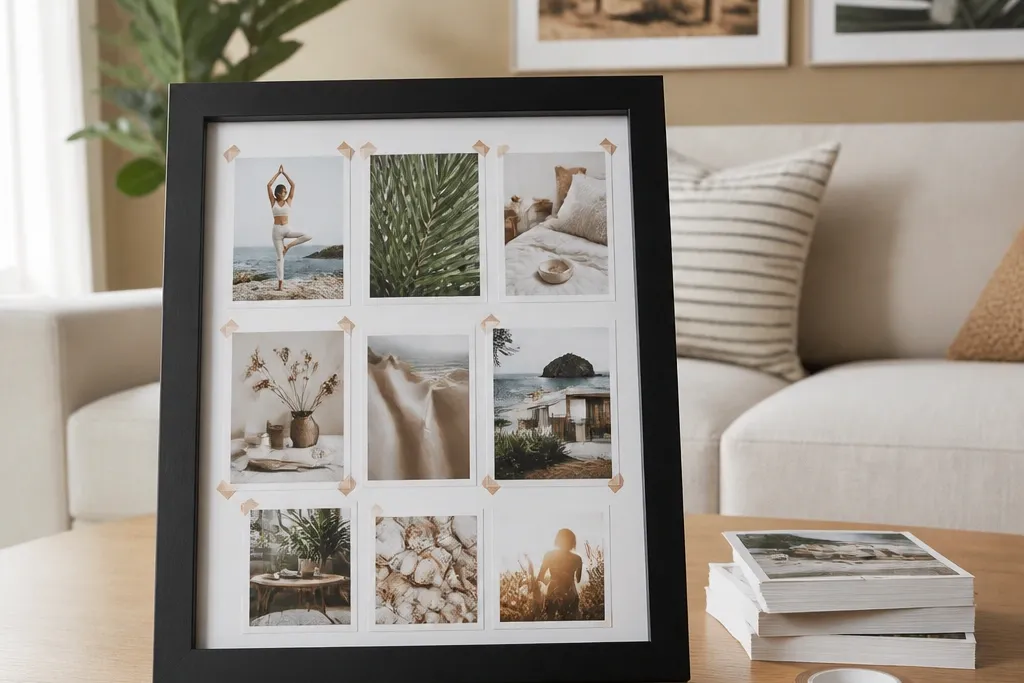

1. Framed Glass Swaps with Magnetic Photo Strips
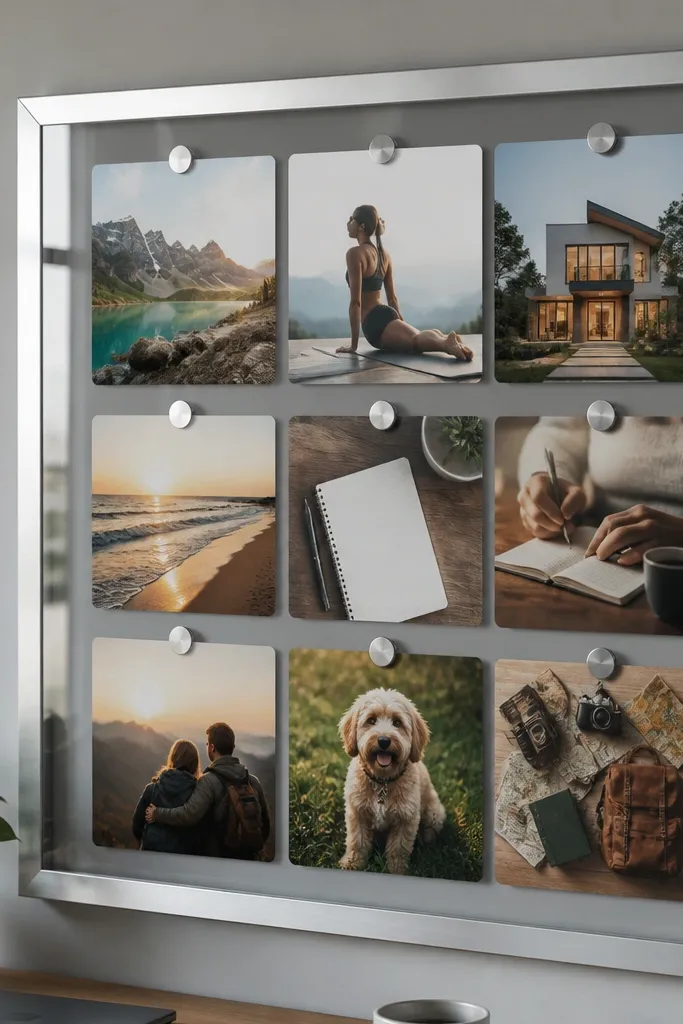
This is the cleanest way to keep a vision board looking intentional without constant re-taping. A framed glass panel lets you arrange thick photo cards behind the glass with magnets, so nothing droops, and the whole board stays flat. The look is crisp because glass gives you a polished, gallery feel, and the magnetic strips create neat, uniform spacing. It works for manifesting routines because you can swap cards when your goal changes, without damaging paper edges. Skill level is beginner — you just need a frame, a backing, and magnets.
Start with a shallow picture frame with glass and remove the backing. Cut or trim a sheet of thin metal or magnetic backing to fit the inside dimensions, then place it behind the glass. Add small magnetic strips or magnet corners to the backs of your photos and cards, then slide them into your layout. Finish by placing the glass back in the frame and tightening the tabs or screws so it sits snugly.
Use matte photo paper and magnet corners so glare stays lower and the cards look sharper.
Don’t use strong liquid adhesives on the back of photos — it makes swaps messy and can warp thin prints.
2. Cork Board with Clip-on Goals and Fabric Tabs
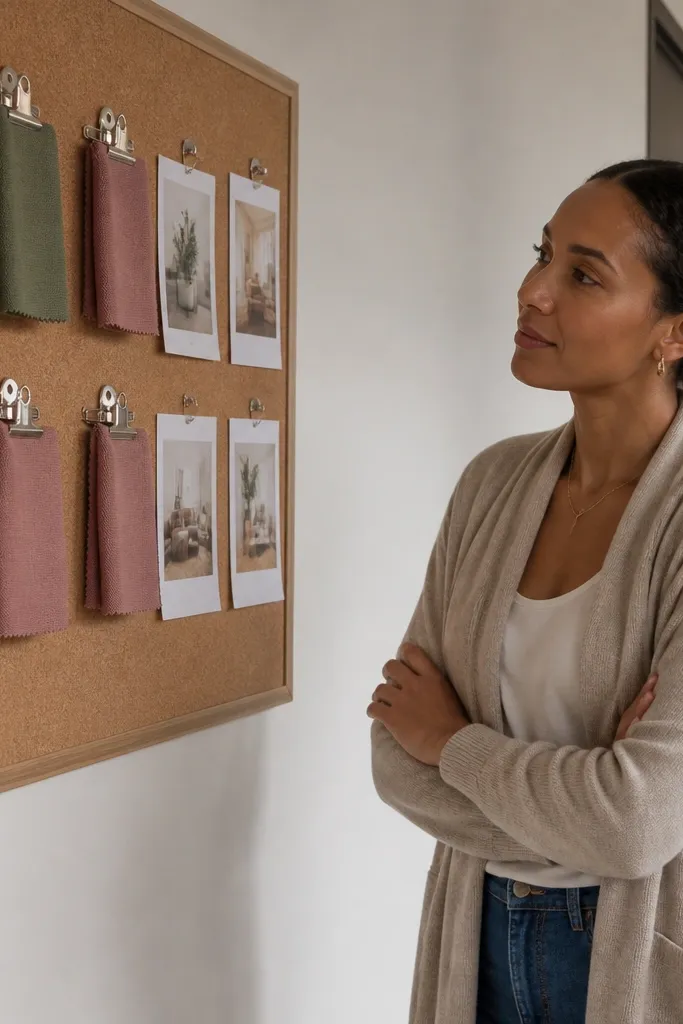
Cork boards are the definition of low-maintenance because they hold pins, clips, and fabric easily. This version looks good because fabric tabs add texture and color without adding bulk, and clips keep edges clean. It’s ideal for manifesting goals you want to see daily, like a study routine, fitness targets, or a career direction. You can update with fabric swatches that you pin once and photos you clip in and out. The board stays photogenic because cork gives natural speckled warmth that makes prints pop.
Buy a cork board and mount it to a wall or sturdy backing board so it stays flat. Create fabric tabs by cutting strips of cotton or linen, folding the top edge, and sewing or stapling a small pocket for a pin or pushpin. Print your photos on cardstock, then use binder clips or mini clothespins to attach them to the cork. Arrange in zones: headline at eye level, then supporting images under it, then one “daily” tab at the bottom.
Seal magazine cutouts with a matte craft spray so cork pins don’t snag and colors stay steady.
Don’t overcrowd — if every item is pinned at once, the board stops reading fast.
3. Magnetic Sheet Board with Washi Border Frames
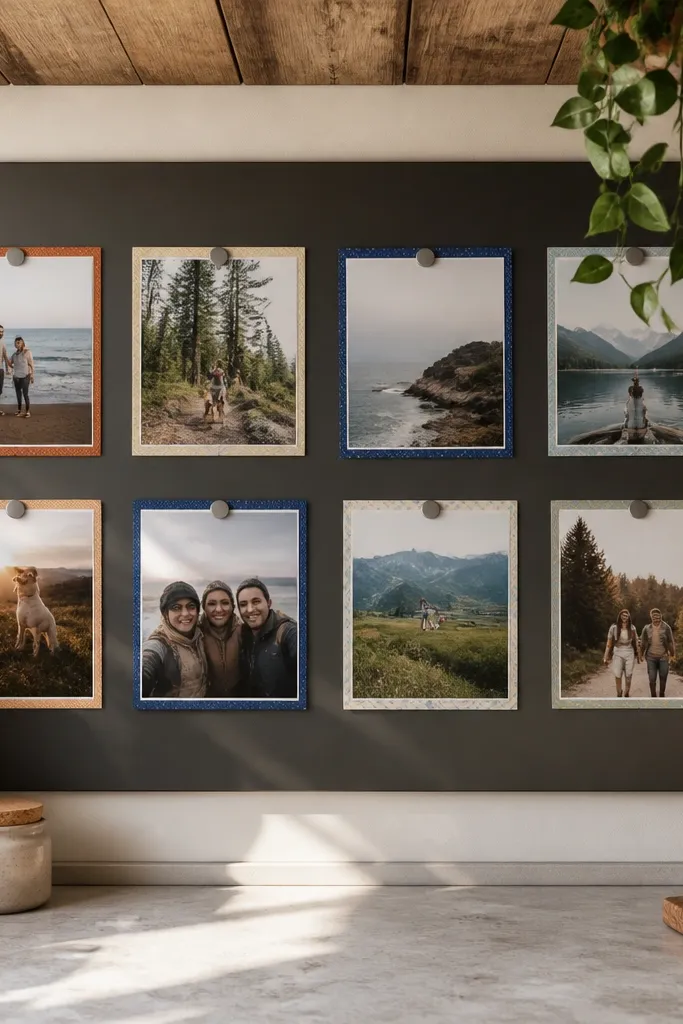
A magnetic sheet board is low-maintenance because you can move pieces instantly and nothing tears. The washi border frames are what make it look styled instead of random. You get that “designed” look because each photo has a consistent margin, and the magnet holds it without curling. This works especially well if you like changing your message weekly or monthly. You can also add tiny metal labels for words like “practice,” “send,” or “apply” so the board feels like a plan, not just pictures.
Cut a magnetic sheet to your preferred board size and mount it on foam board or a wood panel for stability. Print photos on thicker paper and punch small holes only if you want to add ribbon magnets; otherwise use magnetic dots. Apply washi tape around each photo as a frame, leaving a clean border. Place magnets on the back, then arrange the photos in a grid with consistent spacing.
Pick one washi tape style with the same thickness and tone so the borders look intentional.
Avoid glossy washi tape — it reflects light and makes photos look washed out.
4. Upcycled Drawer Front Vision Board
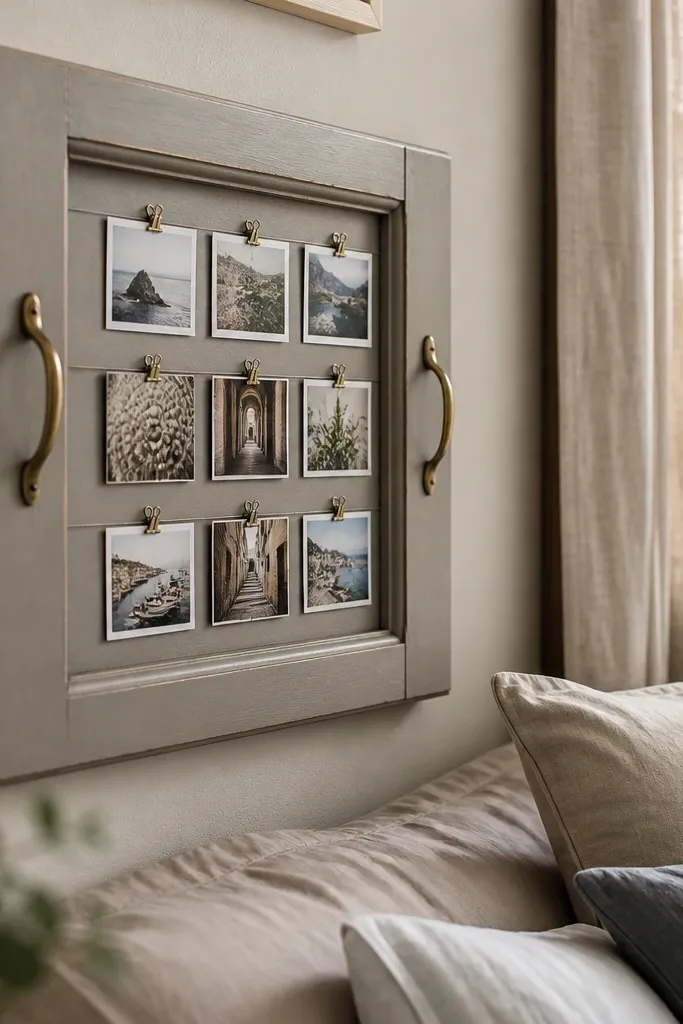
This turns something you already have — a drawer front — into a vision board that looks like decor. The beauty is in the shape and hardware: curved pulls, wood grain, and raised panels make the board feel designed even with minimal pieces. You can paint the drawer front in a matte color that matches your room, then add a clear cover or clip system so photos stay protected. It’s great for manifesting in a space that doesn’t want a cork board look, like a bedroom dresser wall or a home office. It also updates easily because you’re swapping cards on a single front panel.
Sand the drawer front lightly, then clean it so paint sticks. Paint with matte furniture paint and let it cure fully, then seal with a clear matte topcoat. Add a clear sheet protector over the front, or attach small binder clips to hold photos in place. Arrange your headline photo centered, then add 3-6 supporting cards around it, using the drawer’s panel lines to guide spacing.
Use a bold matte color like deep olive or chalky black so the photos look richer.
Don’t skip sanding — shiny varnish makes paint peel and ruins the finish.
5. Photo Ledge with Sliced Scrap Wood Clips
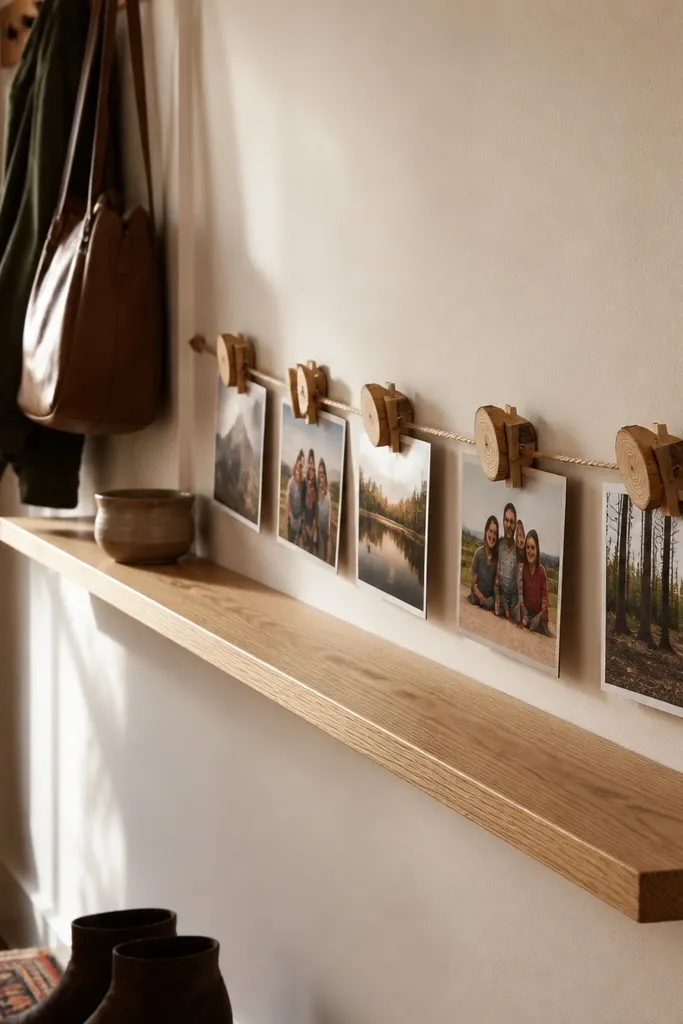
If you want a vision board that’s pretty from every angle, a photo ledge is hard to beat. The sliced scrap wood clips bring a handmade look without fragile paper corners. This idea is low-maintenance because you’re not constantly re-taping; you swap photos by clipping them in seconds. It’s also great for small spaces since it doesn’t need a full board — just a slim ledge and a few prints. The visual style is airy and warm, and it photographs well because the photos sit above the surface instead of flat against it.
Find a narrow shelf or build one from scrap wood, then mount it level. Make or buy wooden clothespins, then paint or stain them to match your room palette. Print photos on cardstock and punch small holes if needed for clips, or clip directly onto the edge. Arrange the headline in the center and keep supporting images in a gentle arc so it looks intentional, not cluttered.
Use a single string of tiny fairy lights only if you keep the brightness low — it can wash out prints otherwise.
Don’t use thin paper — clips create creases and make photos look tired fast.
6. Reclaimed Pegboard with Label Tabs and Hooked Frames
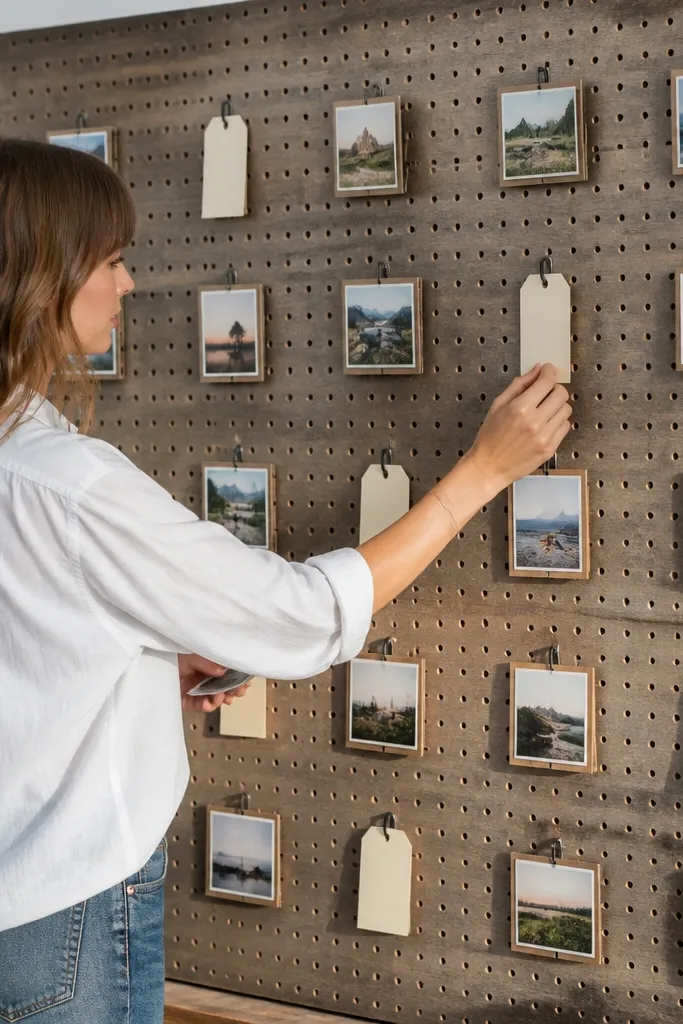
Cut or buy a pegboard panel and mount it securely to the wall. Add small hooks and frame hangers where you want your layout, then paint the pegboard if you want a specific palette. Print photos and cut label tabs from cardstock or thin wood, then insert them into small clip hooks or tuck them behind frame edges. Build the board in layers: headline frame first, then supporting frames, then action labels at the bottom row.
Pegboard is visually strong because it creates a grid, and that grid makes your vision board look organized even when you swap items. Hooked mini frames keep photos flat and protected, while label tabs add typography that reads instantly. This is great for manifesting goals tied to action, like “daily practice” or “send applications,” because you can hang progress cues. It’s low-maintenance because you can rearrange hooks and frames without damaging anything. Plus, pegboard hardware adds that industrial-cute look that photographs cleanly.
AvoidDon’t hang heavy frames directly by the paper backing — mount photos inside a stiff sleeve or frame.
Pro tipUse matte label paper and a black fine-tip pen so the text stays sharp on camera.
7. Fabric Wall Panel with Velcro Swappable Cards
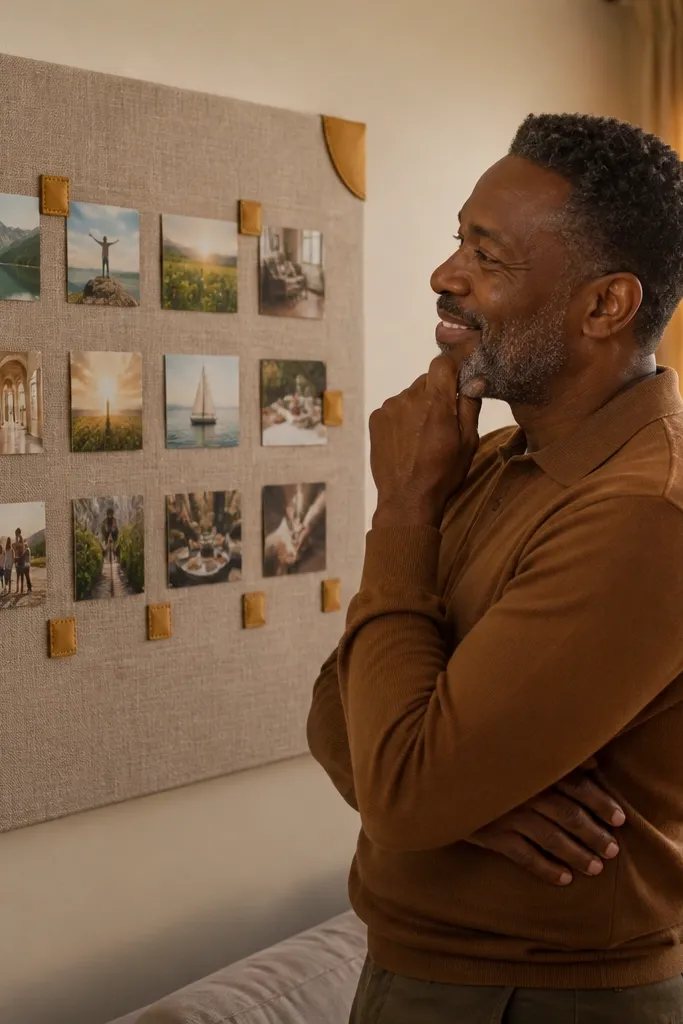
Stretch fabric over a foam board or a wooden backing panel, pulling tight and stapling at the back. Add Velcro squares to the fabric in a grid pattern, then attach matching Velcro to the back of your cardstock cards. Print photos and quotes on thick paper, then mount them as cards that press onto the Velcro. Arrange the biggest card at the center, then build outward with smaller cards so the board reads in a glance.
A fabric panel looks cozy and intentional, and it’s genuinely low-maintenance because Velcro makes swaps clean. The fabric hides small imperfections and softens the whole board’s look, so your photos feel less “paper collage” and more decor. This works well if you like a calm, warm mood for manifesting — like a self-care routine or a creative practice. It also handles humid rooms better than plain paper setups because the fabric surface doesn’t warp. You can keep a consistent layout while updating content anytime.
AvoidAvoid fuzzy fabric like thick boucle — it grabs Velcro loops and makes removal messy.
Pro tipUse Velcro strips instead of dots for larger cards so corners don’t lift.
8. Magnetized Clipboard Vision Board with Corner Notes
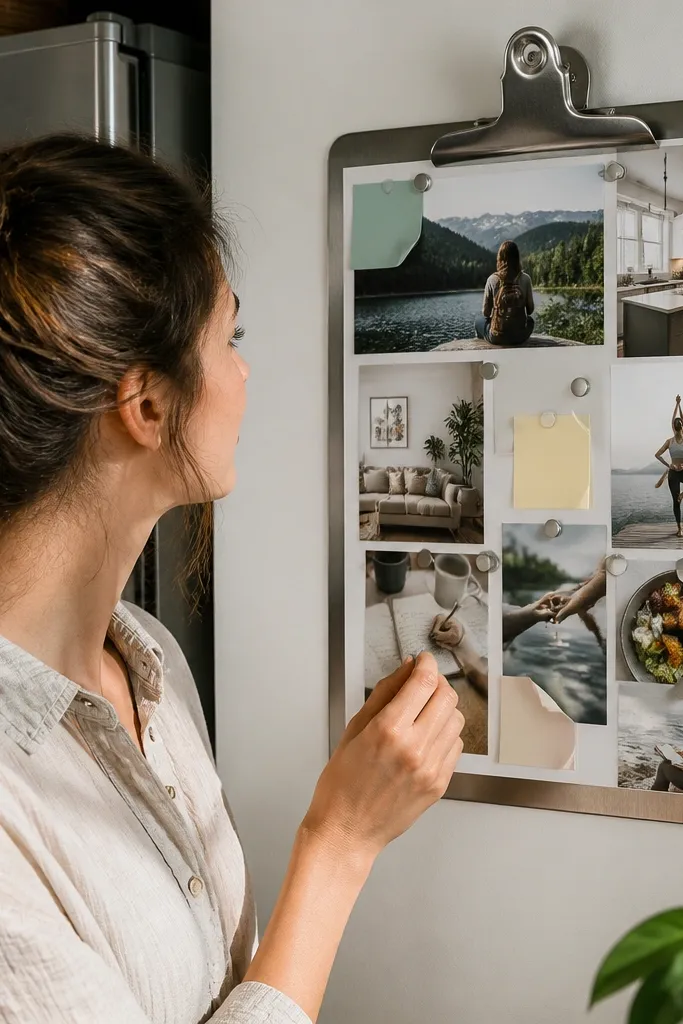
Buy a sturdy clipboard with a flat backing, then clean it and attach a sheet of magnet-friendly material if needed. Print one main headline card and keep it clipped at the top or center. Add small magnets to the backs of photo cards and corner note cards, then place them around the headline. Lock the layout by keeping the heaviest items near the clipboard’s center so it stays balanced on the wall.
A clipboard board is a smart upgrade for anyone who wants a vision board that changes often. The clip keeps your main page secure, and magnets let you add or remove supporting cards without tearing anything. It looks clean because the clipboard edge creates a defined border, and the corner notes give it a “planner” vibe. This is perfect for manifesting goals that need check-ins, like habit tracking or a monthly money plan. It’s also quick to set up and easy to store when you don’t want it on display.
AvoidDon’t use tiny magnets for large prints — they detach and the board looks sloppy.
Pro tipUse thick cardstock for the main headline so it doesn’t sag under the clipboard clip.
9. Tin Can Photo Holders on a Rope Line
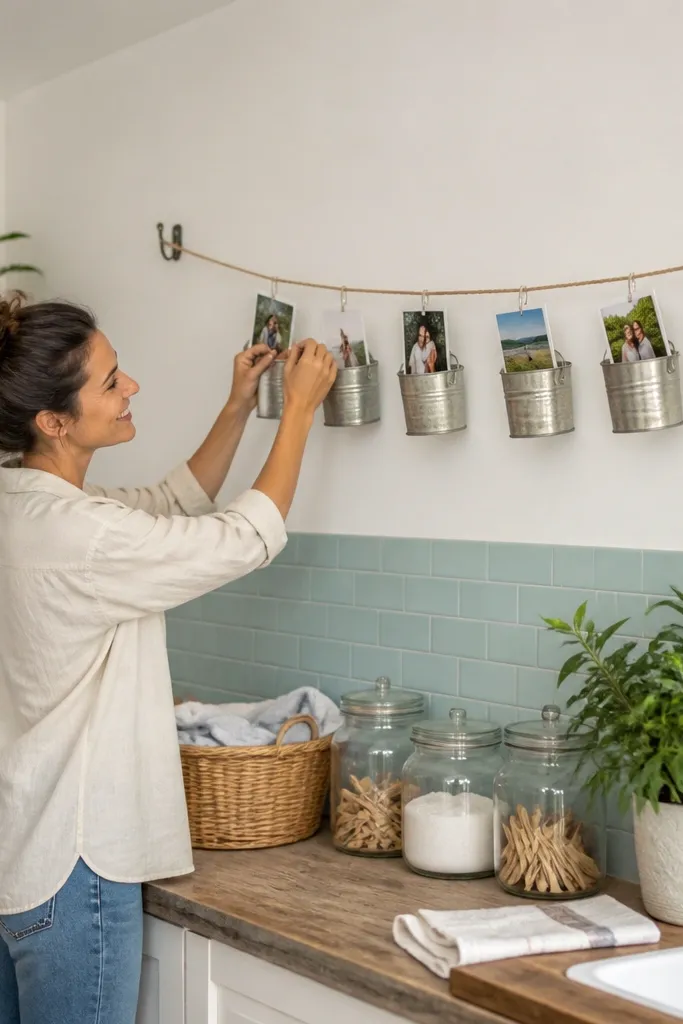
Paint or leave small tin cans matte, then poke holes near the top for rope attachment. Stretch a rope line between two wall anchors, then tie each can along the rope so you have spacing for photos. Clip mini photos to the rope or to the can rim using small clothespins. Build the board with one “theme” photo center, then add 6-10 smaller photos around it in a gentle arc.
This is a low-maintenance vision board idea that looks playful and very aesthetic. The rope line creates a natural rhythm, and the tin can holders add texture and depth without expensive materials. Photos stay protected because they’re clipped and angled, not taped flat. It’s great for manifesting themes like travel goals, learning goals, or mood-based intentions where you want variety. Update is easy: swap out mini prints and keep the same rope layout.
AvoidDon’t use shiny spray paint — it reflects room light and makes the board harder to photograph.
Pro tipUse matte photo paper and angle the clips slightly upward so the photos catch less glare.
10. Magazine-Cut Collage Sealed on Matte Foam
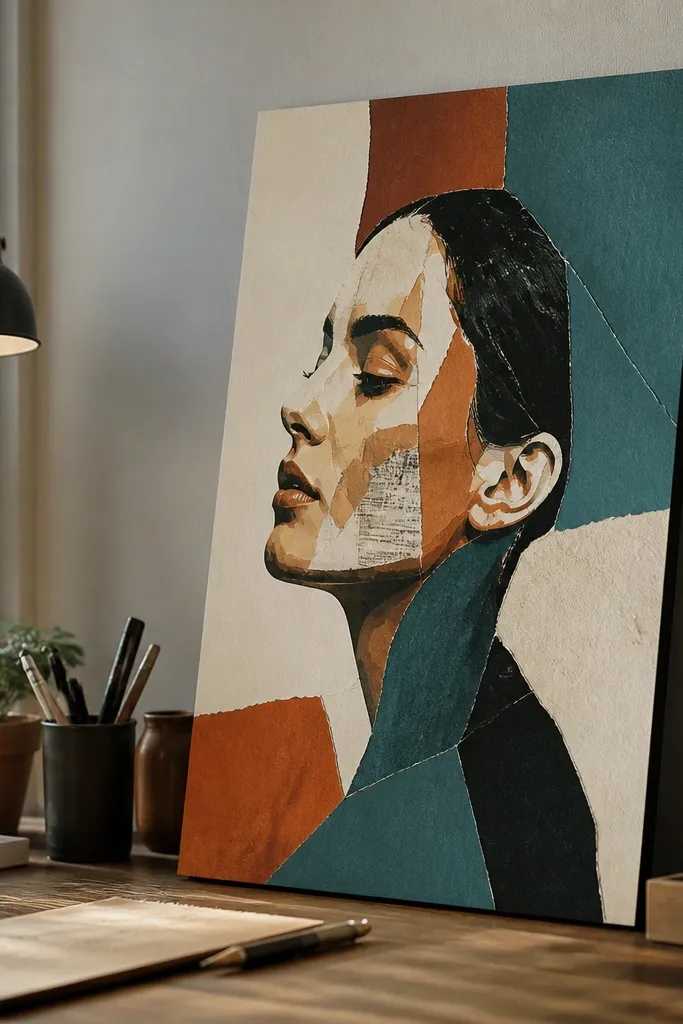
If you love the look of magazine collages, this version stays crisp because you seal it and mount it on a matte surface. Matte foam board prevents warping, and sealing keeps cut edges from lifting over time. The look is dramatic because you can layer torn paper shapes and keep strong color blocks. This works for manifesting big themes like identity shifts, lifestyle upgrades, or creative direction where visuals matter more than schedules. It’s beginner-friendly, but you need a steady hand and the right sealant.
Cut matte foam board to your size and lightly plan your layout on top before gluing. Tear or cut magazine pieces into bold shapes, then adhere them with a thin layer of matte gel medium or foam-safe glue. Once everything is dry, spray or brush a clear matte sealant over the entire surface in thin coats. Finish with a frame or a simple wall mount so the edges stay protected.
Seal in two thin coats instead of one thick coat to avoid sticky patches.
Avoid glossy sealant — it kills the look of torn edges and adds glare.
11. Layered Shadow Box with Rotating Message Cards
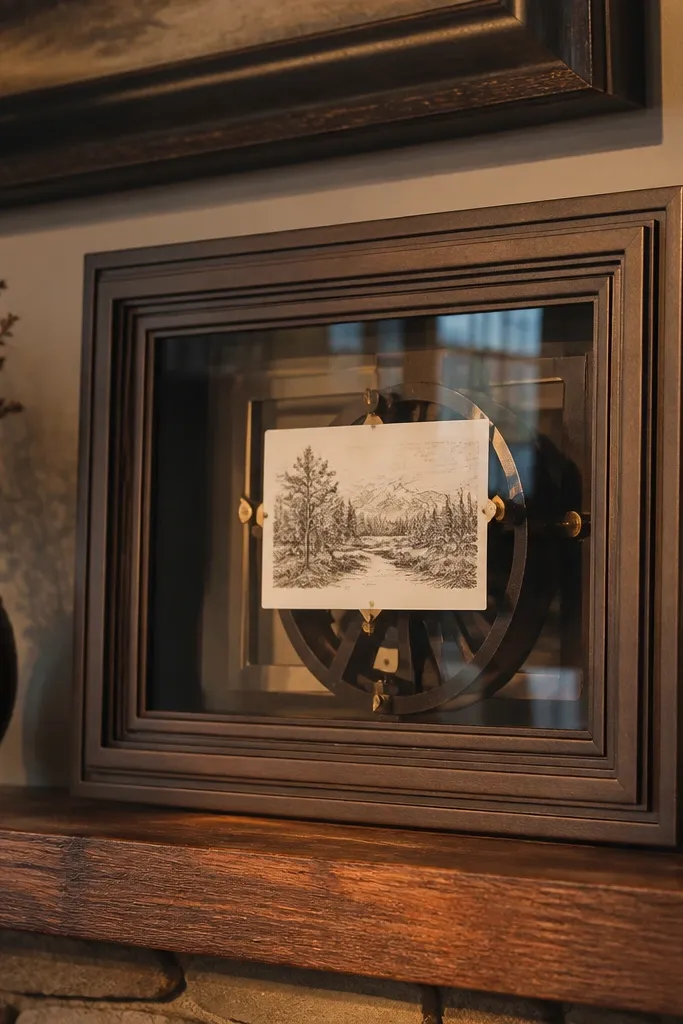
Shadow boxes look high-end even when you keep the build simple. The layered depth makes your vision feel dimensional, and adding a rotating card system keeps it low-maintenance. You can place one message card behind glass and rotate it when your intention changes, without touching the rest of the collage. This works especially well for manifesting a personal mantra, a “why,” and a few supporting symbols like keys, books, or a color swatch. The glass keeps everything clean and photogenic.
Buy a small shadow box with glass and deep backing. Build layers by attaching a background paper sheet, then foam mounting your main images so they float. For rotating cards, add a small slot behind one layer using a thin plastic pocket or folded cardstock track. Insert your message cards into the pocket and secure the frame so it stays flat on the wall.
Use foam mounting tape for depth — it looks better than thick glue blobs.
Don’t add too many layers — shadow boxes look best with 3-5 main elements.
12. Wood Pallet Slat Board with Mini Pegs
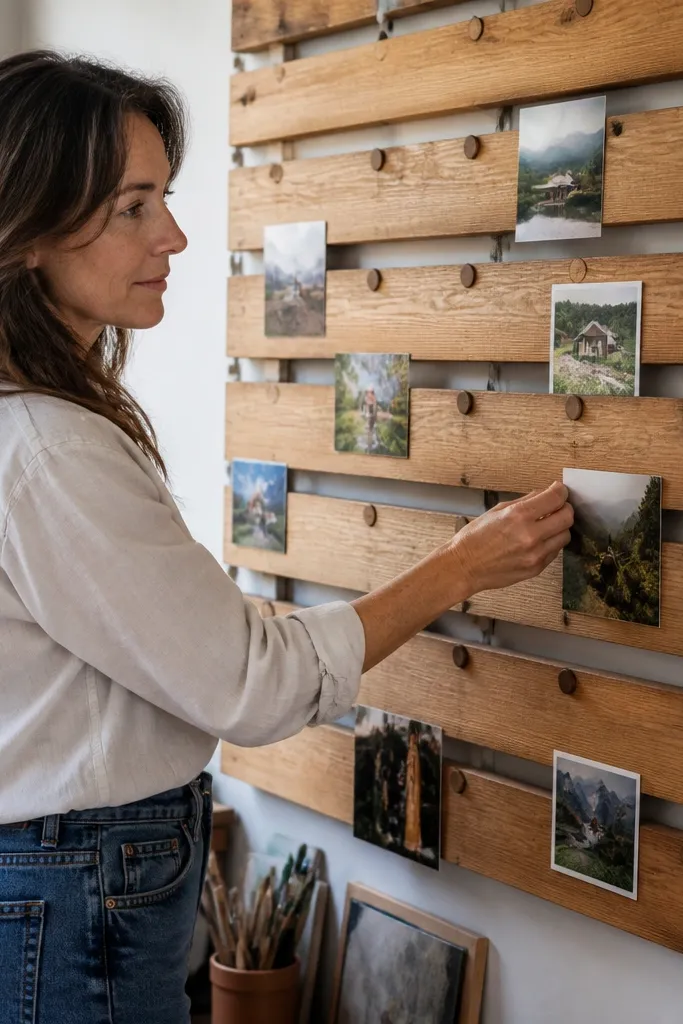
A slat board is a vision board that looks like decor, not craft storage. The horizontal wood lines make photos feel anchored, and mini pegs create repeatable spacing for a tidy look. This is low-maintenance because you swap cards by pulling them off pegs — no tape residue, no curled corners. It’s especially good for manifesting long-term goals where you want a stable structure, like a career track or a home improvement plan. If you like warm aesthetics, pallet wood grain gives you that instantly.
Cut down pallet slats or buy similar scrap wood and sand smooth, then wipe off dust. Mount slats to a backing board, then add two rows of mini pegs or small binder clips for cards. Print photos on thick paper and attach small card tabs so they hang neatly from pegs. Arrange your layout by placing the biggest card on the center slat, then cluster supporting cards in two smaller groups on either side.
Seal the wood with a matte clear coat so it doesn’t grab oils from your hands.
Don’t leave rough splinters — sand and seal before you hang anything.
13. Watercolor Wash Background with Photo Corner Mounts
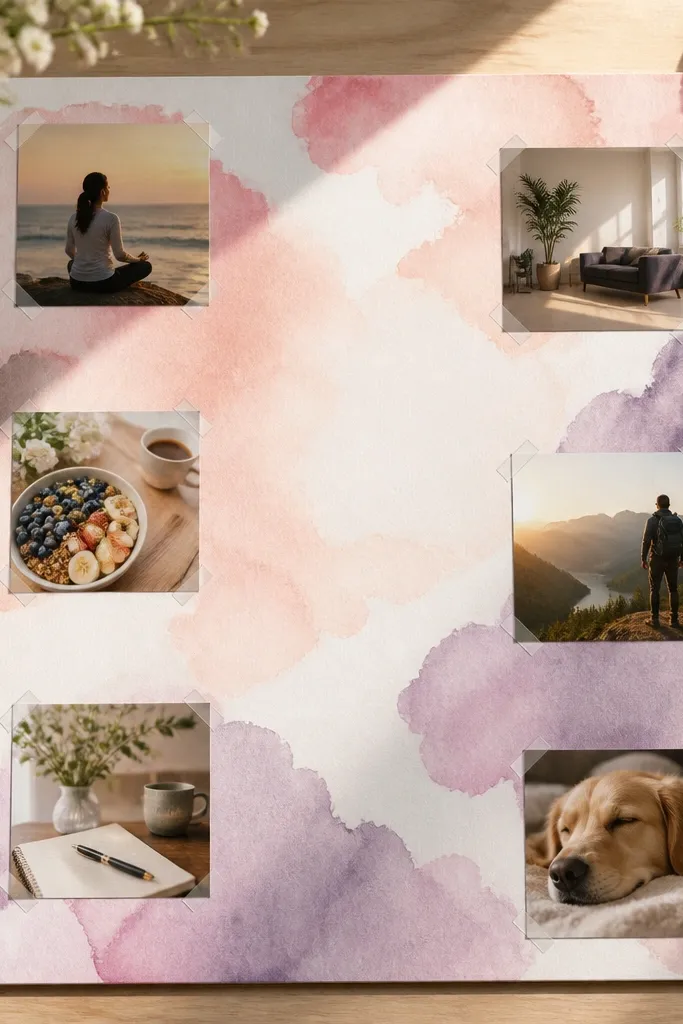
Paint a large watercolor wash on thick paper or watercolor card stock, then let it dry completely. Mount the wash to a foam board backing so it stays flat. Print and cut your photos, then use corner adhesive squares or small photo corners to attach them only at the corners. Build a simple layout with one main image and 4-8 smaller images spaced around it with consistent margins.
This one looks airy and soft, and it stays low-maintenance because you mount photos only at the corners. A watercolor wash background gives you color that feels intentional, and corner mounts keep the photos flat. It’s great for manifesting emotional goals — confidence, calm, creative flow — because the background sets mood without adding clutter. You can update photos frequently since corner mounts are clean to remove and don’t soak paper. The final look is photogenic because the background has gentle gradients and the photos are framed by negative space.
AvoidDon’t glue the full back of photos — removal will tear edges and ruin future swaps.
Pro tipStick to a limited palette like sand + terracotta + olive so the wash doesn’t turn muddy.
14. Upcycled Frame + Clear Plastic Sheet Overlay for Dry-Erase Goals
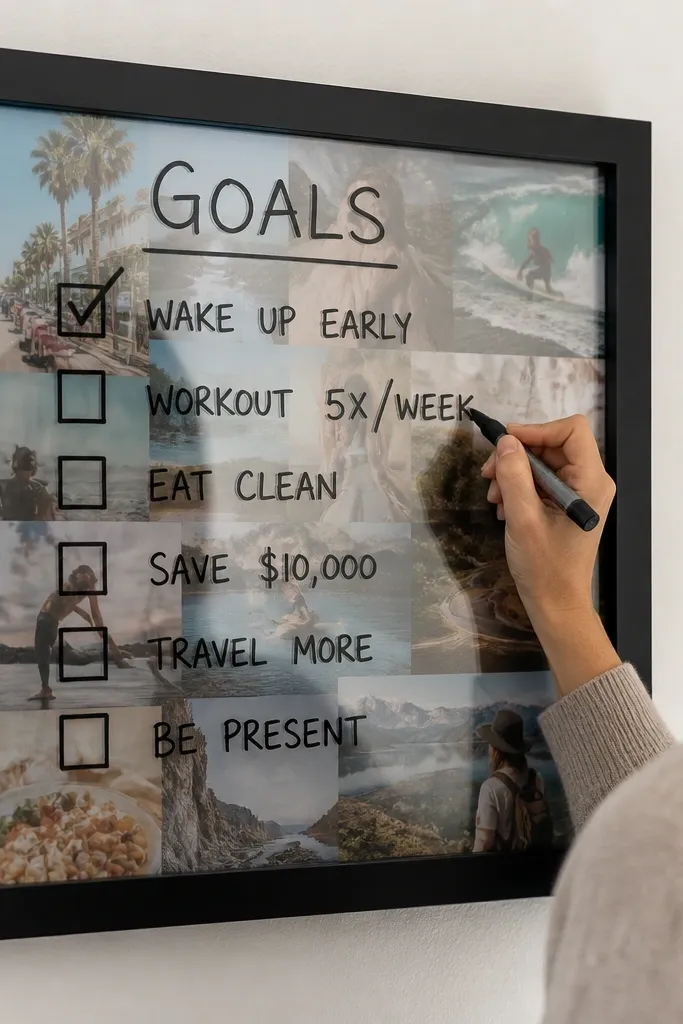
This is the low-maintenance vision board for people who like words and actions, not just pictures. A clear plastic overlay lets you write goals with dry-erase markers, then wipe clean in seconds. Put photos under the plastic, and the dry-erase layer gives you a clean, modern look that stays updated without reprinting. It’s perfect for manifesting routines because you can track daily intentions like “one outreach,” “stretch 5 minutes,” or “draft the email.” The glass-like surface is also easy to keep clean, so it looks good in photos.
Find an old frame with a flat backing and clean it well. Cut clear plastic sheet to fit the inside, then attach it behind the frame so it sits taut. Add printed photos under the plastic on the backing, then write goals directly on the plastic with dry-erase markers. Use stencils for consistent icons or hand-lettered headers, then wipe and rewrite as your goals shift.
Use a plastic sheet that’s labeled safe for dry erase so it won’t ghost or smear.
Don’t use permanent markers — they stain and ruin the overlay.
15. Pegboard Mini Grid with Polaroid-Style Print Strips
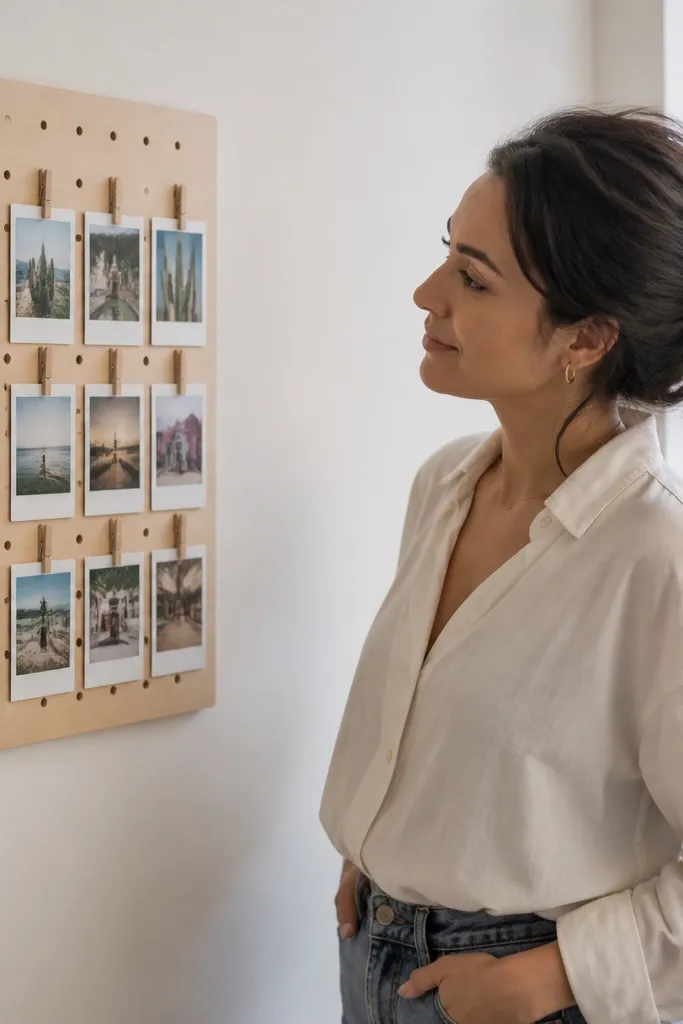
Create a small pegboard grid on a flat board, then mount it where you want your inspiration wall. Print your photos with white borders and cut them into consistent sizes, like 2x3 inch cards with a 0.25 inch margin. Use mini binder clips or clothespins attached to the pegboard grid to hold each strip in place. Start with a central column of 3 prints, then add two side columns until the grid feels balanced.
This idea nails the “photos that look curated” look using a pegboard mini grid. Polaroid-style print strips give you instant variety, and clipping them into a grid makes the whole thing feel intentional. It’s low-maintenance because you can swap prints without disturbing the rest of the layout. This suits people who want a vision board that keeps changing with inspiration, but still looks organized. The pegboard structure also adds a textured background that makes your prints pop in daylight.
AvoidAvoid mixed print sizes — it makes the board messy fast.
Pro tipKeep all photo sizes identical — the grid looks designed instead of random.
16. Terracotta Clay Tile Board with Threaded String Clips
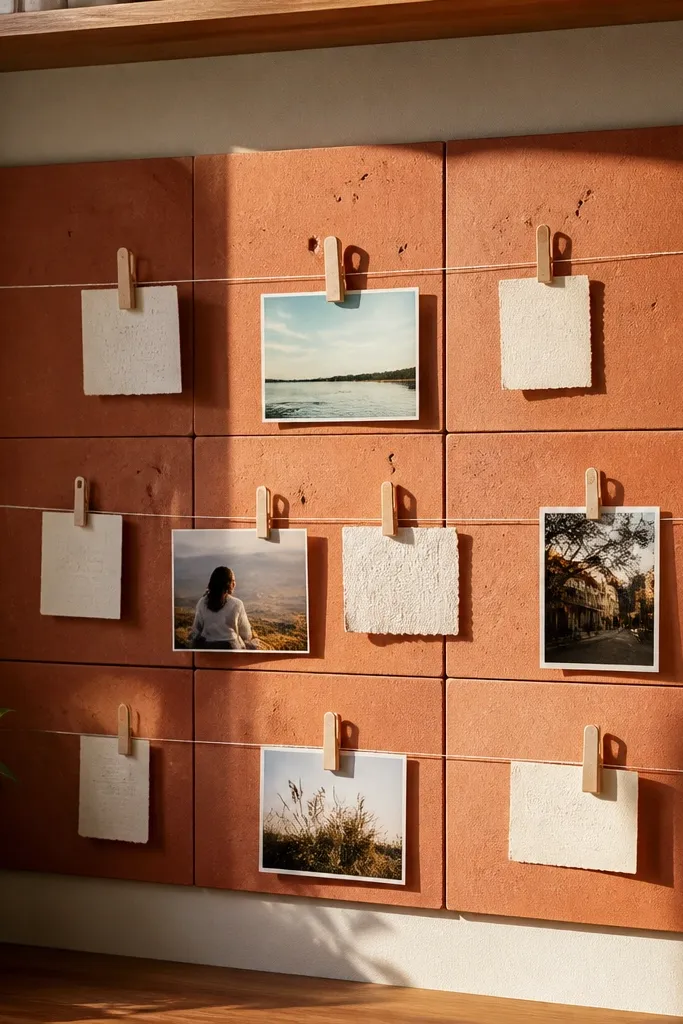
Mount a set of terracotta tiles to a backing board using tile adhesive or a strong mounting board system. Seal the tiles with a matte clear sealer so they’re easier to clean. Stretch thin string between two anchor points above the tile surface, then tie small loops for clips. Attach printed cards with clothespins or small binder clips, keeping one headline card centered and the rest in a balanced scatter.
Clay tile brings a warm, earthy color that makes photos look richer without changing them. Threaded string clips create a clean line-based layout, and you can hang small cards without tape residue. This is low-maintenance because you can move clips along the string to rearrange your board. It works well for manifesting themes like home comfort, cozy routines, or a grounded lifestyle goal. The look is photogenic because tile textures catch light and make the whole board feel handmade.
AvoidDon’t place wet glue directly on tile surfaces — it can leave residue you’ll see in photos.
Pro tipUse cream or off-white cards on terracotta so the contrast stays strong.
17. Shoe Box Organizer Vision Board with Stackable Lids
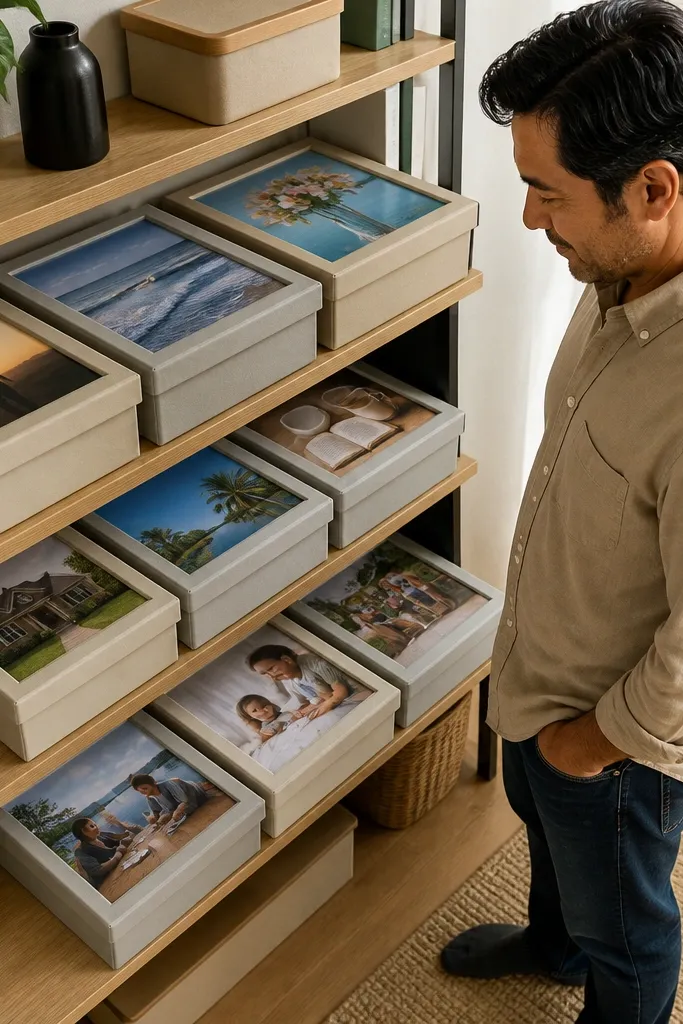
Clean and paint shoe box lids matte in 2-3 coordinating colors. Print category cards and photos, then attach them with corner mounts or double-sided tape on the lid surface. Add labels using a black pen or a label maker, placed at the same location on every lid. Stack the lids vertically on a shelf or lean them against a wall so the front faces are visible.
This is a low-maintenance vision board for people who want organization more than wall space. Shoe box lids become mini display panels, and you can stack or swap them when your goals change. The aesthetic is graphic because each lid creates a consistent rectangle, and labels make the board read like a plan. It’s great for manifesting multiple goals at once — like health, money, and creative projects — because each lid can be a category. Plus, it’s easy to store when you don’t want clutter on the wall.
AvoidDon’t glue everything flat — lids need to be removable for updates.
Pro tipChoose one font style for labels and keep the label size identical across lids.
18. Yarn-Wrapped Frame with Hanging Intent Tags
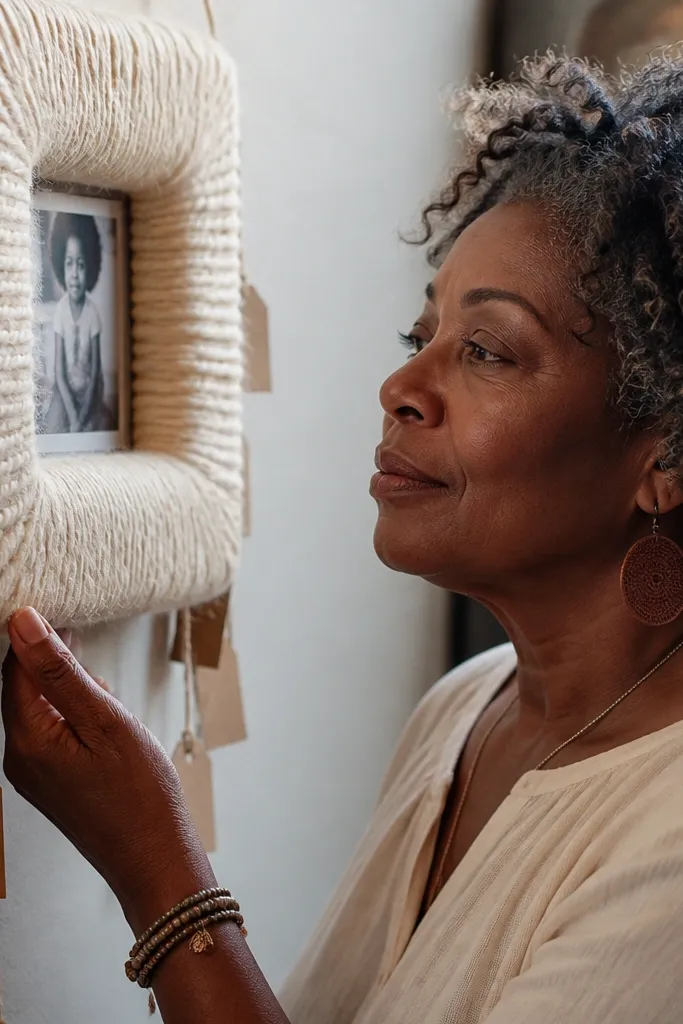
Wrap a wooden frame with yarn tightly, knotting at the back and trimming ends. Cut intent tags from cardstock, then punch holes at the top corners. Thread thin twine through the tag holes and attach the twine to small hooks or nails on the frame. Add 1-2 photo cards clipped at the center if you want visuals, but keep the focus on tags for the cleanest look.
A yarn-wrapped frame makes your vision board look soft and intentional, not like a collage that’s falling apart. Hanging intent tags are low-maintenance because you can add, remove, and reorder tags without touching photos. It’s visually striking because the yarn texture creates a warm border that makes the tags stand out. This is a great choice for manifesting habits and identity statements you want to see daily, like “show up,” “rest,” or “ask for help.” It also photographs well because the yarn texture adds depth even in simple lighting.
AvoidAvoid flimsy tags — thin paper bends and the board looks untidy.
Pro tipUse thick yarn and keep tag strings the same length so the layout looks designed.
19. Clear Sticker Label Board with Pressed Botanical Corners
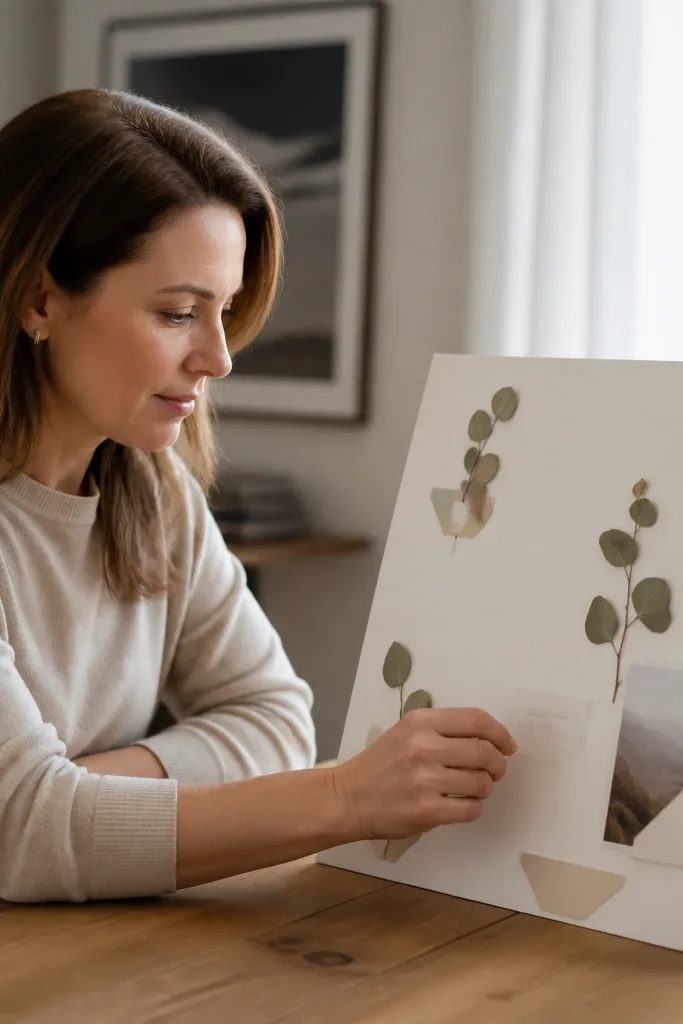
This is for manifesting calm and focus with a clean, minimal aesthetic. Pressed botanicals add a natural look, and clear sticker labels keep your words crisp and easy to swap. The low-maintenance part is the mounting: you place botanicals in corner pockets or use corner adhesive so they don’t shift. It’s photogenic because clear labels catch light and the botanicals provide subtle texture without clutter. This works well for goals like breathing routines, reading targets, or creative prompts.
Make a base using matte cardstock or a foam board panel. Press small botanicals between book pages for a few days, then trim them to fit corner spots. Use corner pockets made from clear plastic sticker sheets or tiny corner adhesive squares to hold botanicals in place. Print short goal words on label paper, cut into strips, and apply as clear overlays so you can replace them later.
Press botanicals longer than you think — the flatter they are, the better they look under clear labels.
Don’t use wet botanicals — they stain and can ruin the label adhesive.
20. Kitchen Pegboard Spice Rack Vision Board
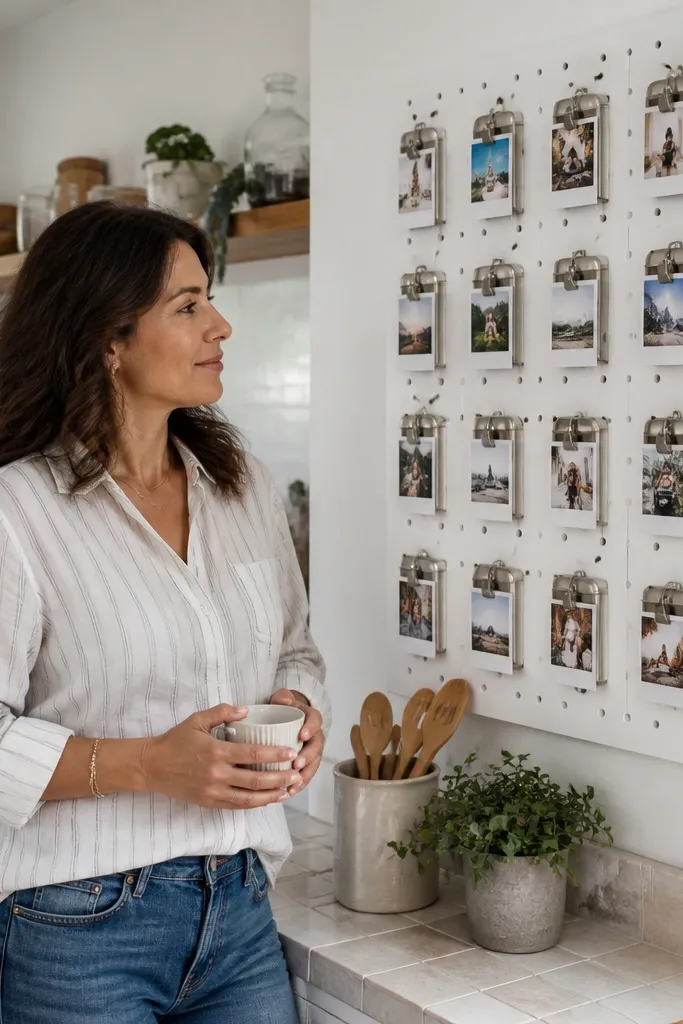
Mount a pegboard panel and add small spice rack holders or mini can organizers to the pegs. Print cards on cardstock, cut them to fit the holders, and add a consistent label strip at the top of each card. Place a few photo swatches behind the label area so the holders still look styled. Arrange the top row as your “big goals” and the bottom row as your “daily cues.”
This idea turns a kitchen-style pegboard into a vision board that feels practical and visually tidy. Small holders keep your cards from sliding around, and the repeated container shapes make the layout look designed. It’s low-maintenance because you can swap cards without re-laying the whole board. This works well for manifesting goals that need action steps, like meal planning, budget categories, or study habits, since you can label each holder clearly. It also looks great in photos because the holders create uniform blocks of color and shape.
AvoidAvoid writing with thick markers — it smears in holders and looks messy fast.
Pro tipUse two color families for card backgrounds so the board reads cohesive.



