
1. Ticket Stub Timeline Strip
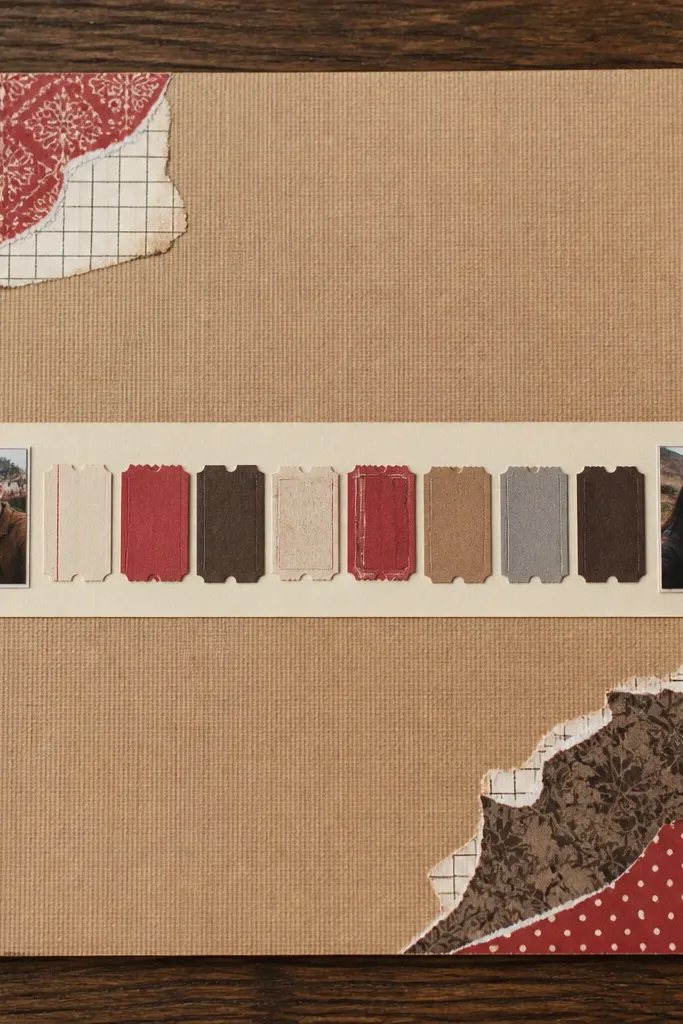
This layout turns messy ticket stubs into a clean timeline that reads fast. You get that satisfying “row of moments” look, and it’s easy to photograph because the stubs create natural texture and color bands. Use one wide date strip as the anchor, then tuck small photos at the start and end of the row so the page has a beginning and a finish. It’s a good fit for trips, concerts, or any month where you kept paper receipts but never used them.
Cut a strip of sturdy paper (about 6 inches long and 1.25 inches tall) for the date band. Trim ticket stubs to align their tops, then glue them along the band so the dates are readable. Add two small photos (around 2x3 inches) — one at the left edge and one at the right — and cover the photo corners with matte washi tape to lock them down. Finish by writing the couple’s short caption across the bottom of the stubs in black gel pen.
Pro tipRound the corners of the ticket stubs with a 1/8-inch corner rounder so the whole row looks intentionally designed.
AvoidDon’t stack stubs in random heights — keep their top edges aligned or the page looks crooked.
2. Fold-Out Map Date Reveal
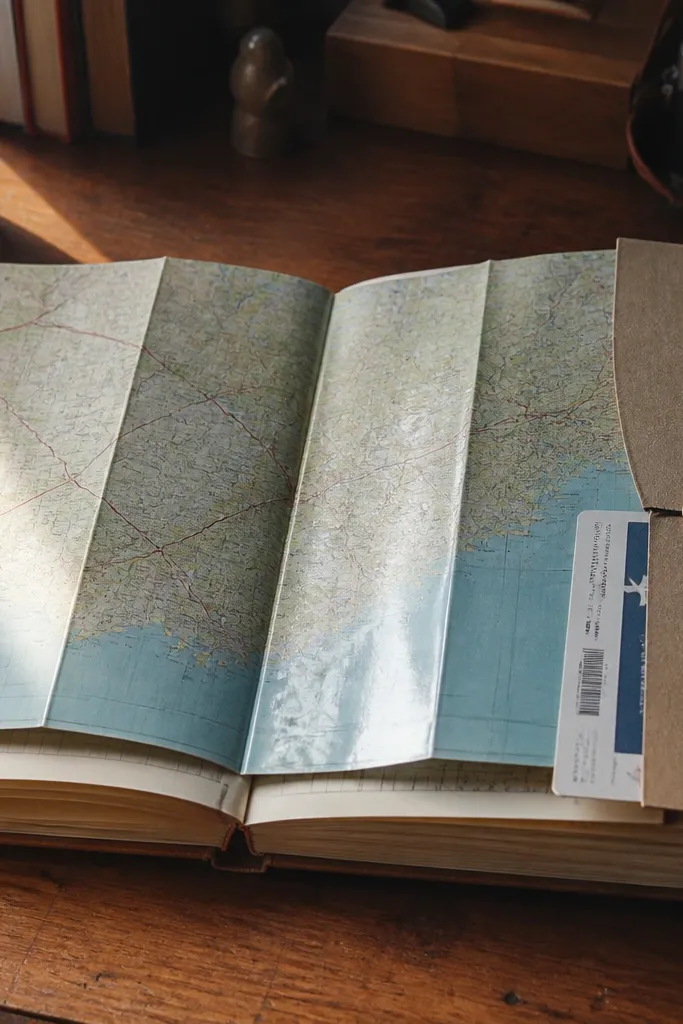
A map fold-out gives you movement and surprise, which makes scrapbook pages feel more “kept” than “pasted.” The map lines add visual structure, so even simple photos look styled. Write the date on the outside so the page looks finished even when it’s closed. This is great for road trips, airports, and “we drove here” weekends where you have a route but not enough photos for a full spread.
Cut a map rectangle to about 4x6 inches and fold it in half. Glue one photo (about 3x4 inches) to the inside panel, leaving a small border so map lines still show. On the outside fold, write the date in thick marker and add a short location phrase. Attach the folded map to the scrapbook page using two small hinges made from washi tape on the left and right edges.
Pro tipUse a paper scoring tool or the back of a butter knife to make the fold crisp so it opens flat.
AvoidAvoid covering the fold with thick glue — it makes the opening bulky and the page won’t lie flat.
3. Scrapbook Photo Corner Flip-Ins
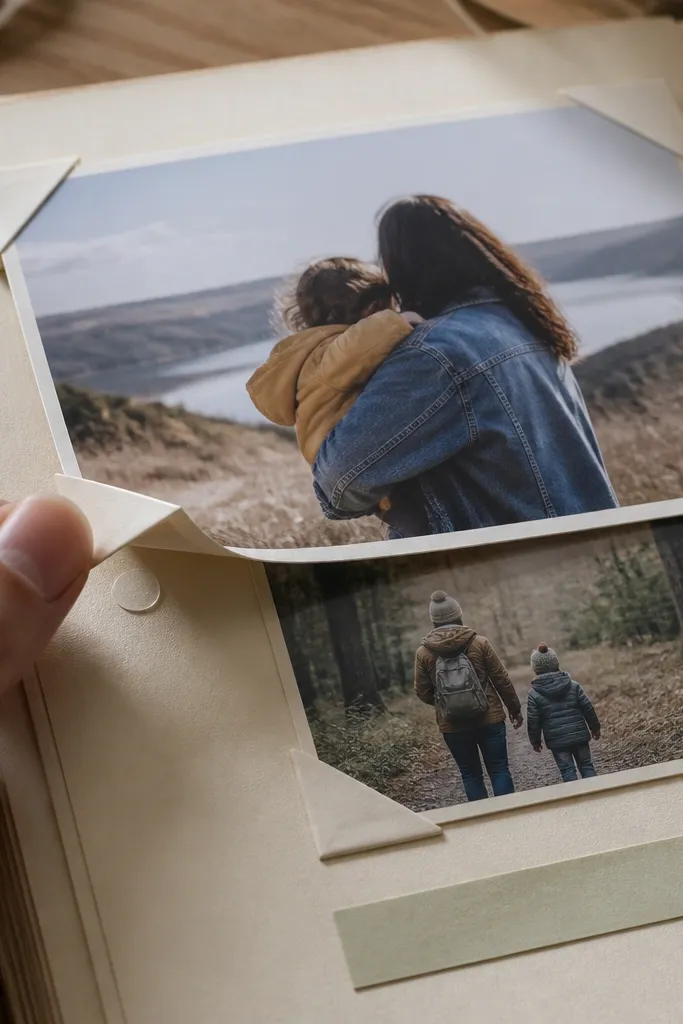
Flip-ins make quick and easy couples scrapbook ideas feel interactive without complicated tools. You get depth because the photos sit slightly above the page, and the triangular corners look neat and photogenic. The page still stays simple: one main photo, one supporting photo, and a caption strip. This works well for engagement, anniversaries, and any time you want to show two angles from the same moment.
Cut two small photo squares (around 2.5x2.5 inches) and trim a main photo to about 4x5 inches. Cut two triangles from a contrasting scrap paper (about 2 inches on each side) and glue each triangle only at the base so it can lift. Tuck one small photo under each triangle and glue the triangle base to the scrapbook page corners. Add a thin caption strip under the main photo and write the date with a fine black pen.
Use double-sided tape on the photo backs so the photos don’t wrinkle when you lift the corners.
Don’t glue the entire triangle — if it’s fully stuck down, it stops being a flip-in.
4. Upcycled Fabric Edge Frame
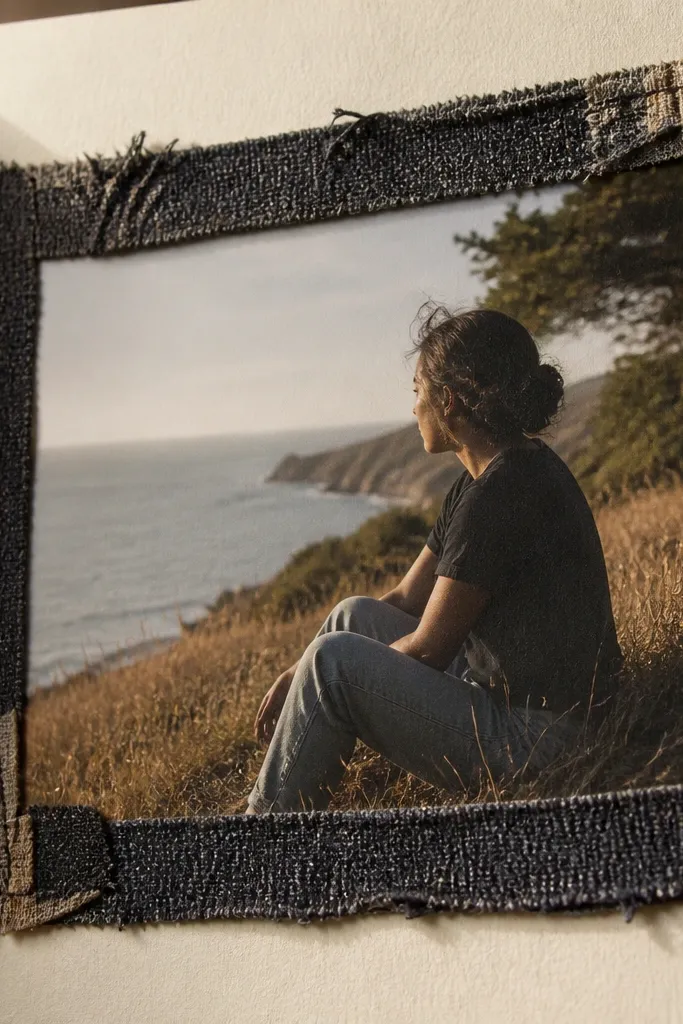
Fabric edging makes scrapbook pages look soft and styled, even if your photos are plain. It also covers uneven paper edges from trimming scraps, which is a sneaky way to make DIY look polished. The photo sits inside a neat “frame,” so the page photographs with clear separation and no clutter. This idea is perfect for cozy dates, winter weekends, or any page where you have a fabric scrap that matches your photo colors.
Cut a photo mat from cardboard or thick paper (about 1/8-inch larger than the photo on all sides). Glue the fabric scrap to the mat edges first, then trim the fabric flush with the back side. Mount the photo to the center using a glue stick, then add a thin strip of washi tape at the top edge as a hinge to attach the mat to the scrapbook page. Write the date on a narrow paper band and place it along the bottom of the mat.
Pro tipPress the fabric with a warm iron on low through a scrap of parchment to remove puckers before gluing.
AvoidSkip stretchy knits — they distort when glued and the frame looks wavy.
5. Old Book Page Monogram Title
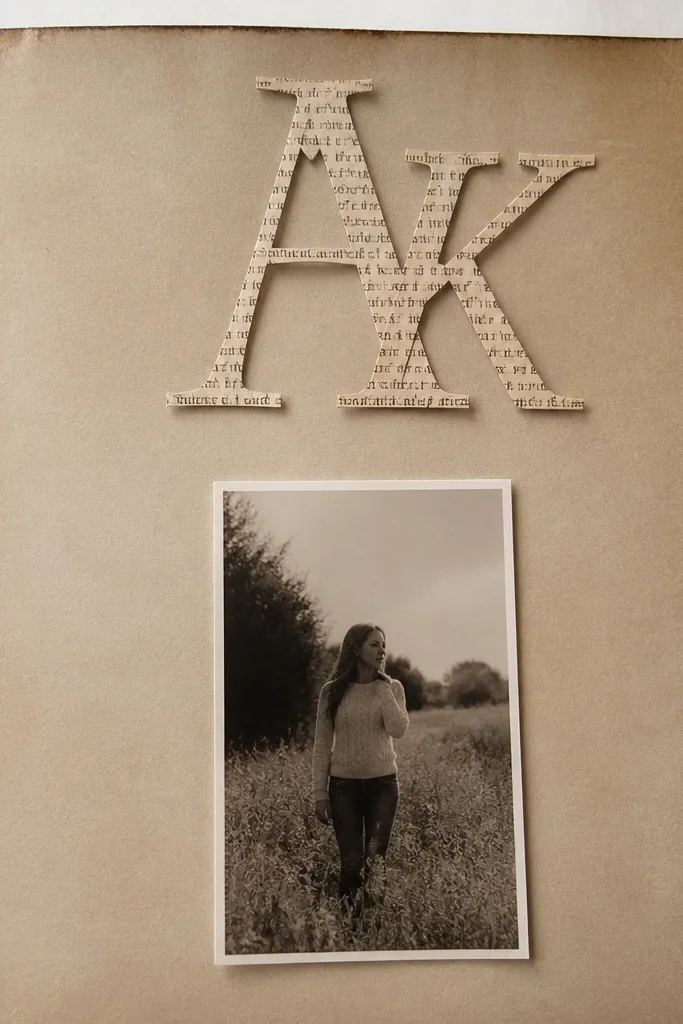
A monogram title gives you that graphic, gallery-like look while using upcycled paper fast. It makes the page look intentional even if you only have one photo. The printed book text provides subtle texture, and the letter shape creates a clear focal point. This is a strong choice for cover pages, first-year milestones, or any page that needs a bold title without a lot of extra items.
Print or trace the couple’s shared initial onto scrap book paper, then cut it out cleanly with a craft knife. Glue the letter onto a solid cardstock background so it reads clearly, then place one photo centered below it (about 4x5 inches). Add a date strip at the bottom using a contrasting paper color. Seal the edges with a light brush of matte medium if the book paper frays easily.
Pro tipUse a craft knife with a new blade for thin letters — it keeps the edges crisp on camera.
AvoidDon’t glue the monogram directly onto glossy photo paper — it lifts and bubbles.
6. Washi Tape Hinged Photo Pocket
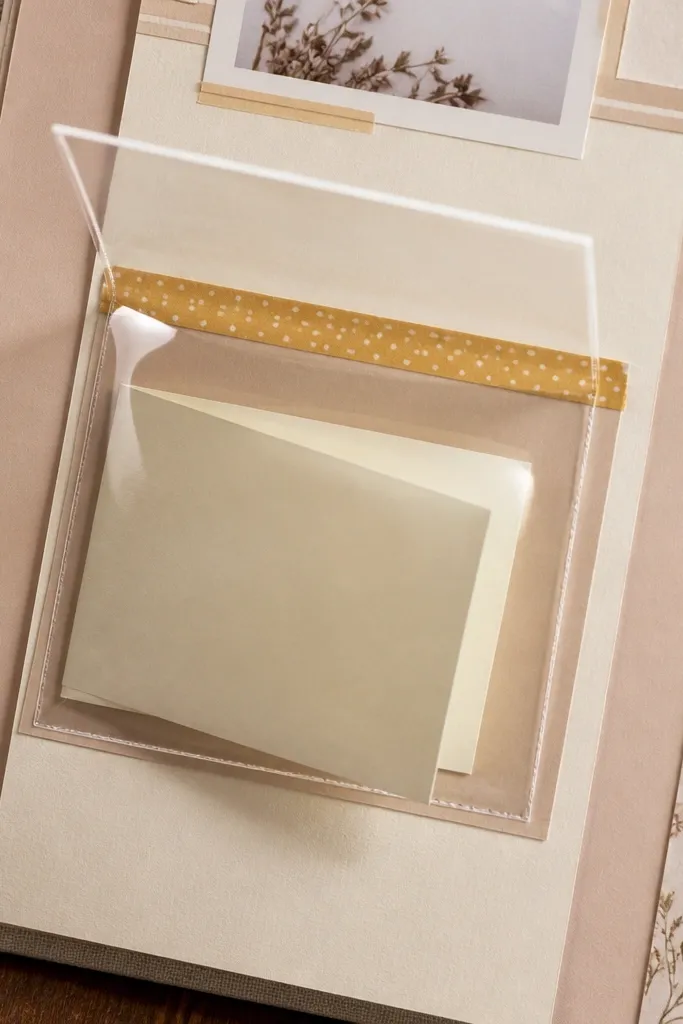
This turns your scrapbook page into a storage spot without making it bulky. The pocket holds an extra photo or a folded note, and the washi tape hinge makes it open neatly. It’s also easy to keep tidy because you’re not gluing individual scraps in awkward layers. Use this for dates where you have a small stack of items like cards, mini prints, or a short message you want to keep.
Cut a pocket from clear acetate or plastic sleeve material sized about 3.5x4.5 inches. Glue the pocket sides to the scrapbook page using double-sided tape, leaving the top open. Add a photo inside the pocket and tuck a folded ticket or note behind it so it peeks out. Create a washi tape hinge at the top edge if the pocket feels stiff — use two small strips so it opens without ripping.
Pro tipChoose matte washi tape on top of acetate so reflections don’t wash out the photo in pictures.
AvoidAvoid thick foam tape under pockets — it makes the page look lumpy when closed.
7. Cereal Box Photo Mat Confetti
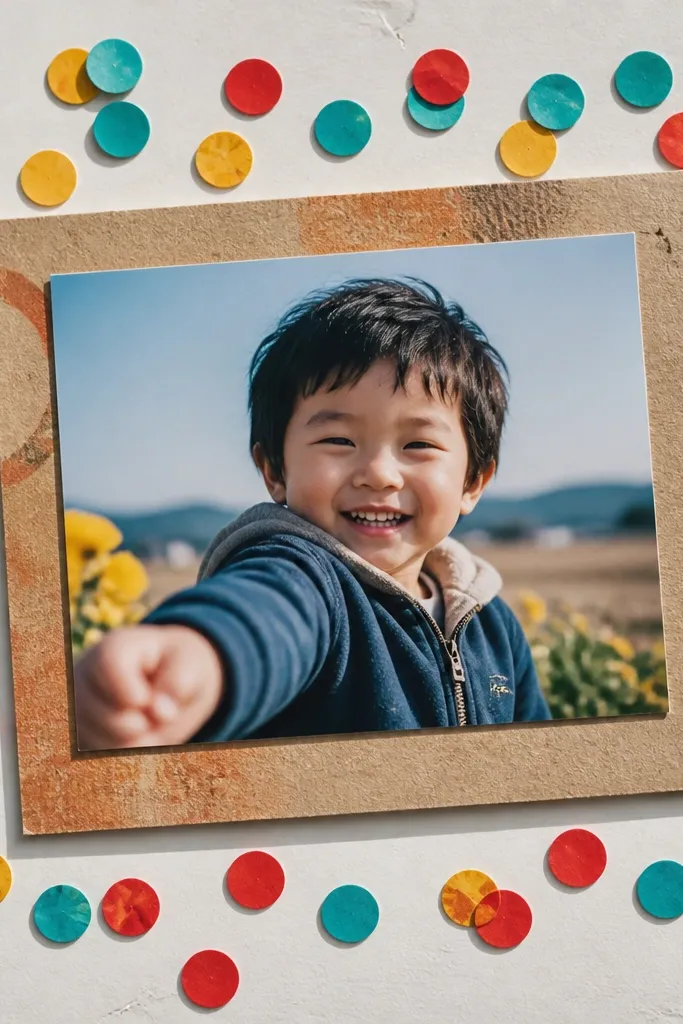
This is the “fast but cute” option that still looks designed. The cereal box cardboard gives you thickness so the page holds shape, while the confetti dots create a playful motion around the photo. It’s perfect for quick and easy couples scrapbook ideas when you have a single standout photo and want the page to feel alive. The look works across styles because the confetti colors come from your existing packaging.
Cut a cardboard photo mat from a cereal box panel sized about 4.25x5.5 inches. Punch or cut small confetti circles from colored packaging scraps and glue them around the photo opening area. Mount the photo in the center using a glue stick, then add a thin paper border strip around the mat edges. Attach the whole mat to the page with four small tabs of double-sided tape so it lies flat.
Pro tipUse a 1/4-inch circle punch for consistent dots that look intentional instead of messy.
AvoidDon’t flood glue on cardboard — it warps and the mat pulls away from the page.
8. Polaroid-Style Stacked Photo Frames
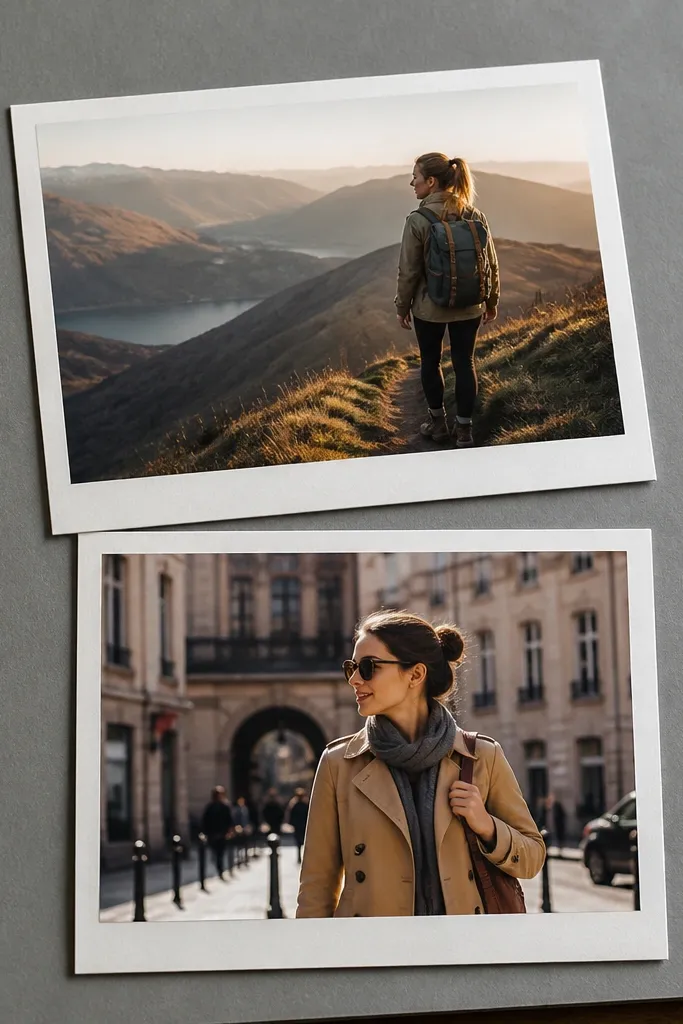
Stacked photo frames look like you bought the prints, even when you cut them yourself. The trick is spacing: a small offset and consistent paper borders make it look intentional. Use two photos so you get variety without over-stuffing. This layout photographs well because the white border creates a clean edge and reduces glare from phone prints.
Print or cut two photos and trim them to about 3x4 inches each. Cut matching white cardstock borders around each photo (about 0.5 inches on the left and top, slightly more on the bottom). Glue the bottom photo first, then layer the second photo on top with a small offset (about 0.25 inches). Write the date and location on a narrow strip at the bottom edge of the top photo border.
Pro tipUse a matte photo paper or matte tape on the photo corners to keep reflections down.
AvoidSkip uneven offsets — if the layers drift, the whole stack looks accidental.
9. Scrapbook Love Notes Ticket Tabs
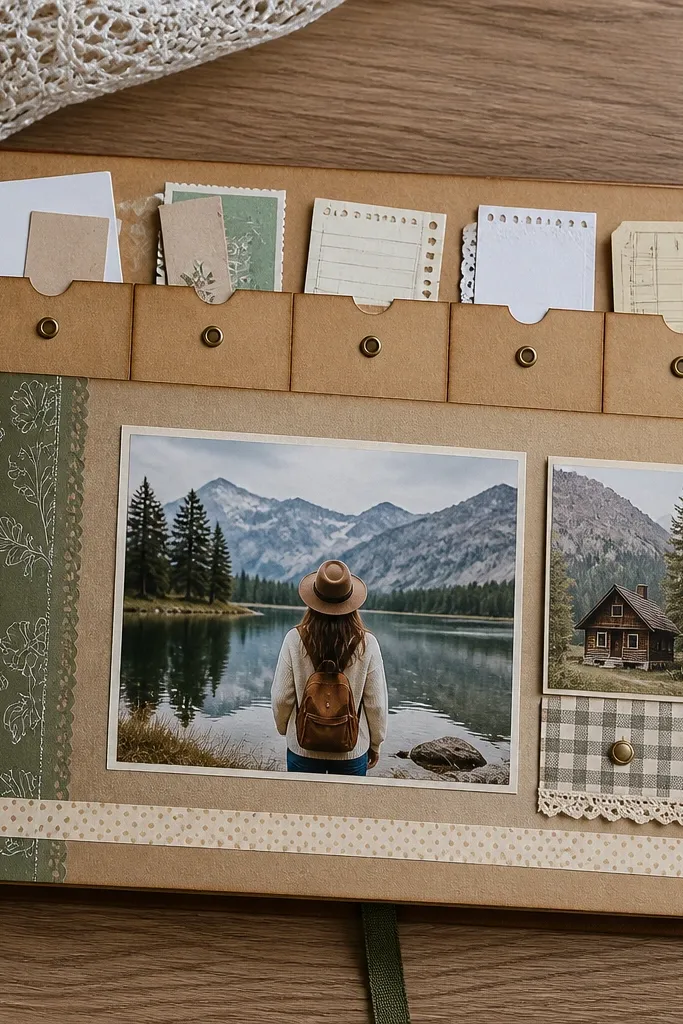
Tabbed note cards make your scrapbook feel like a conversation, not a photo dump. You get a neat row of mini keepsakes that are easy to read and easy to add over time. The tabs also hide messy edges from cutting paper and let you swap notes later. This is perfect for anniversaries where you keep short messages, or for any page where you want captions that feel personal without writing long paragraphs.
Cut three small cards from cardstock about 2.5x3.5 inches. Cut three matching tabs from thinner paper about 0.75 inches wide and glue them to the top backs of the cards. On the scrapbook page, glue three vertical strips of washi tape in a row, leaving openings for the tabs. Slide each note card into a tape tab slot and decorate with a small stamped heart or simple doodle.
Pro tipWrite the date on the tab, not the card, so the row looks organized at a glance.
AvoidDon’t use thick glue on the tab edges — it makes sliding in and out stiff.
10. Sticker-Over-Photo Label System

This idea uses labels like a mini poster — clean, graphic, and fast. Stickers and label strips add color blocks that frame your photo instead of covering it randomly. It’s a good choice for quick and easy couples scrapbook ideas when you want personality but you don’t have time for delicate cutouts. The key is to keep your labels consistent: same font style, same placement, and one label per photo.
Pick one photo and trim it to about 4x5 inches. Cut a label strip from patterned paper about 1 inch tall and place it across the bottom of the photo. Add two small sticker accents near the top corners, then write a short caption on the label with a fine-tip marker. Mount the photo onto cardstock and attach it to the page with a thin border of tape so the edges look even.
Pro tipChoose label strips with matte finish so the marker doesn’t smear and photos don’t glare.
AvoidDon’t stack stickers — use flat stickers only so the page stays smooth.
11. Café Receipt Date Stamp Band
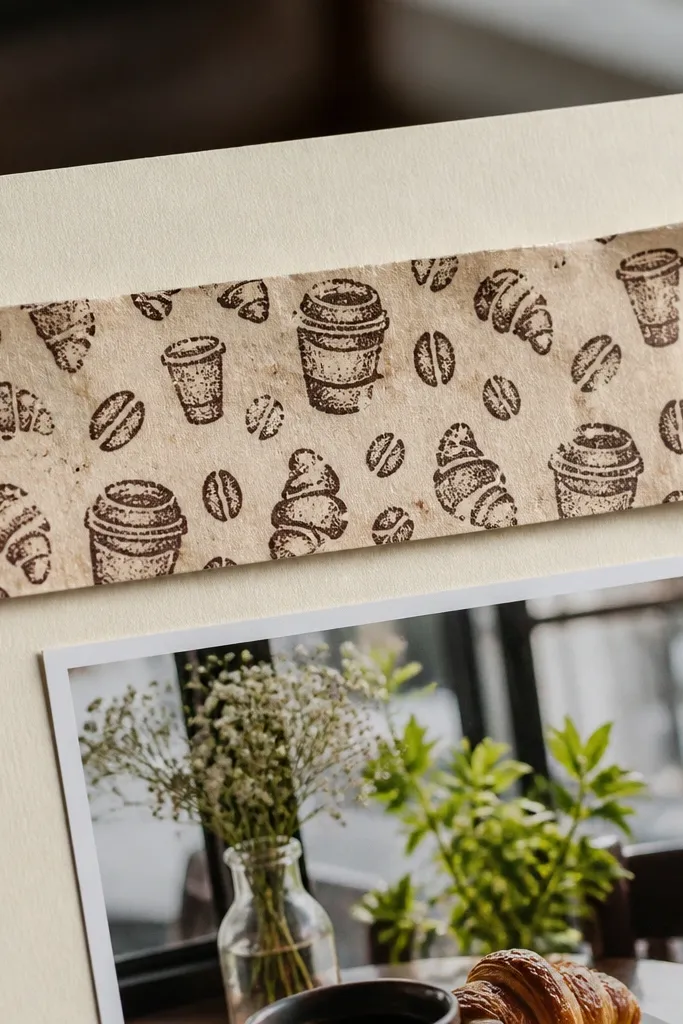
Receipts are long and narrow, which makes them perfect for a horizontal date band. This creates a clean header that makes the page look finished quickly, even if your photo is small. The paper texture also adds depth without extra crafting steps. It’s a great match for date nights, coffee runs, and any time your keepsakes are mostly paper slips.
Cut a receipt strip to about 7 inches long and 1.25 inches tall. Lightly flatten it under a heavy book so it lays straight. Glue the receipt strip horizontally across the page, then center a single photo (about 3.5x4.5 inches) below it. Add a short caption in one line and seal the receipt edges with a thin layer of matte glue to prevent curling.
Pro tipTear the receipt ends instead of cutting — it gives a softer, more natural edge for photos.
AvoidDon’t glue receipts while they’re curled — press them flat first or they’ll lift later.
12. Scrap Fabric Flower Cluster Corner
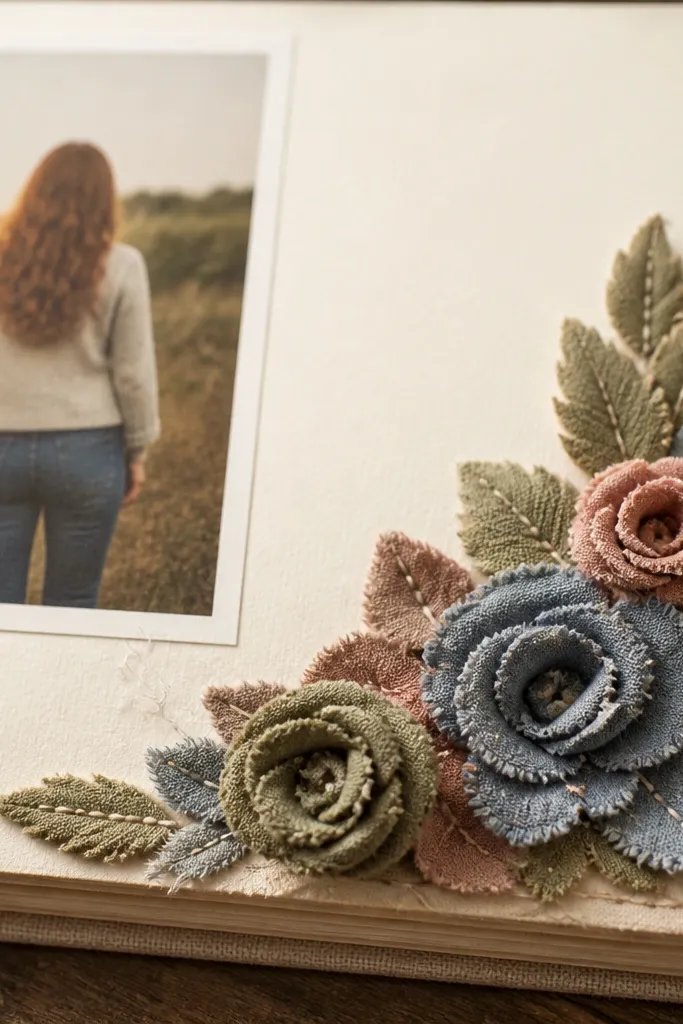
A fabric flower cluster adds texture where your eye already lands: corners. It frames the photos without taking over the whole page, which keeps the layout quick and readable. Use small fabric scraps or even old T-shirt pieces, and keep the cluster tight. This is best for pages with one photo strip or a small vertical photo, where you want a decorative corner instead of a full theme.
Cut three small fabric circles (about 1.25 inches) and layer them, then stitch or glue down the centers. Add a tiny paper leaf or folded scrap triangle behind the cluster for shape. Mount a small photo strip (about 2x5 inches) near the opposite corner so the composition balances. Glue the fabric cluster to the page corner and add a date label under the photo strip.
Use fabric glue and hold pressure with clothespins for 10 minutes so the layers don’t slide.
Avoid bulky yarn knots — they cast shadows and make the page look uneven in pictures.
13. Photo + Quote Cutout Banner
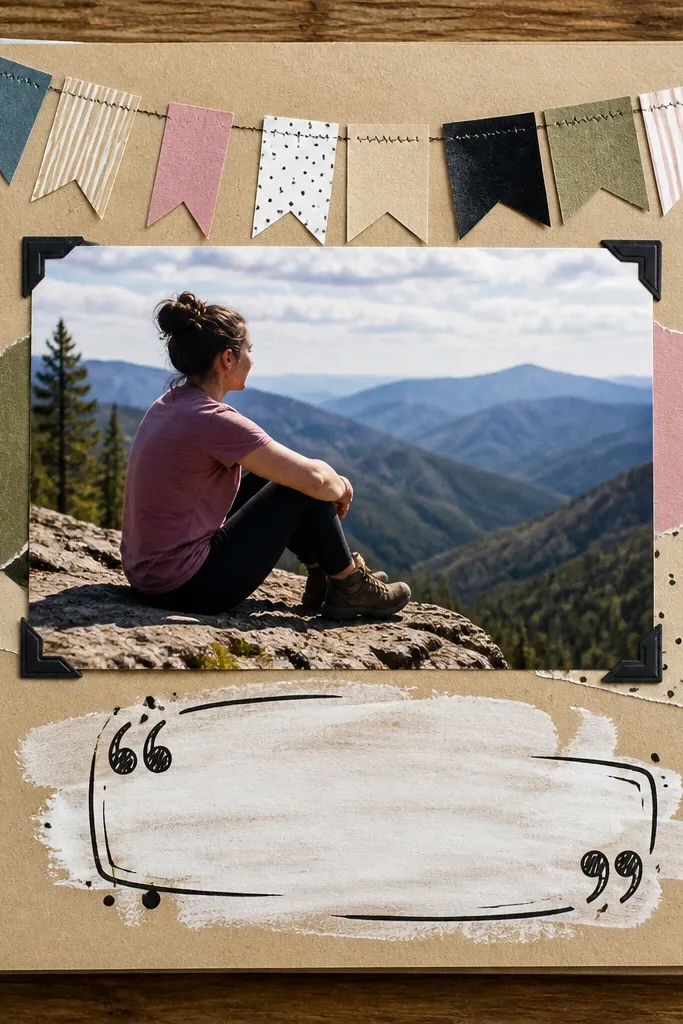
A cutout banner gives you a clear title area and makes the page feel like a designed print. You don’t need fancy lettering — simple bold marker on a banner looks sharp and reads well. Place it across the top so the photo remains the main body. This works for anniversaries and milestones where you want a short quote or promise line without writing a full paragraph.
Cut banner pieces from cardstock in a contrasting color, about 1.75 inches tall and long enough to span the page width. Cut small notches or triangle ends so the banner looks decorative. Glue the banner across the top edge of the photo area and write the quote on it with a thick black marker. Mount the photo below the banner and add a date in small text at the bottom right.
Use a ruler to keep the banner straight — slanted banners make the whole page look rushed.
Don’t pick a font color that matches the photo — if the banner blends in, the page loses its focal point.
14. Clear Window Date Card
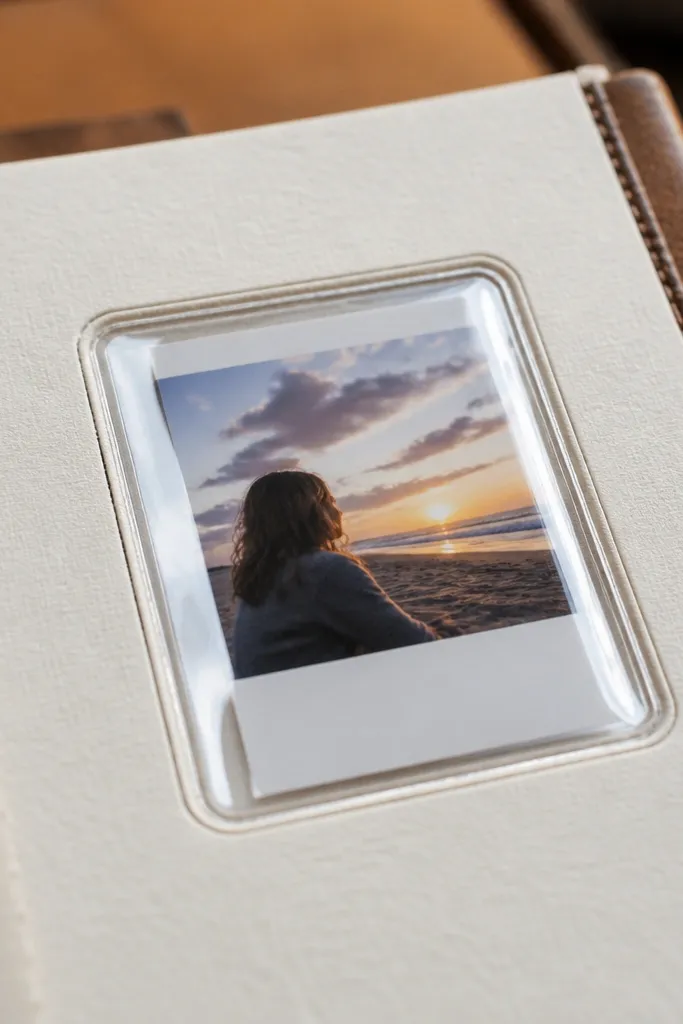
A clear window card is a clean, modern look that still feels handmade. It lets you show a small photo or printed date inside a neat frame, and it photographs well because the window creates a glassy border effect. This is a strong option for quick and easy couples scrapbook ideas when you want something that looks “designed” without a lot of cutting. It also protects the printed label from smudging.
Cut a cardstock card about 3.5x5 inches and punch a rectangle window in the center (about 2x3 inches). Cut clear plastic from a sheet protector or clear packaging and glue it behind the window with tape along the edges. Add a small printed date card behind the plastic, then glue a small photo at the bottom of the cardstock frame. Attach the finished window card to a scrapbook page using two tape tabs at the sides.
Use matte tape for the window edges so they don’t reflect light strongly in photos.
Avoid oversized windows — if the frame is too thin, it warps and looks flimsy.
15. Magazine Cutout Background Block
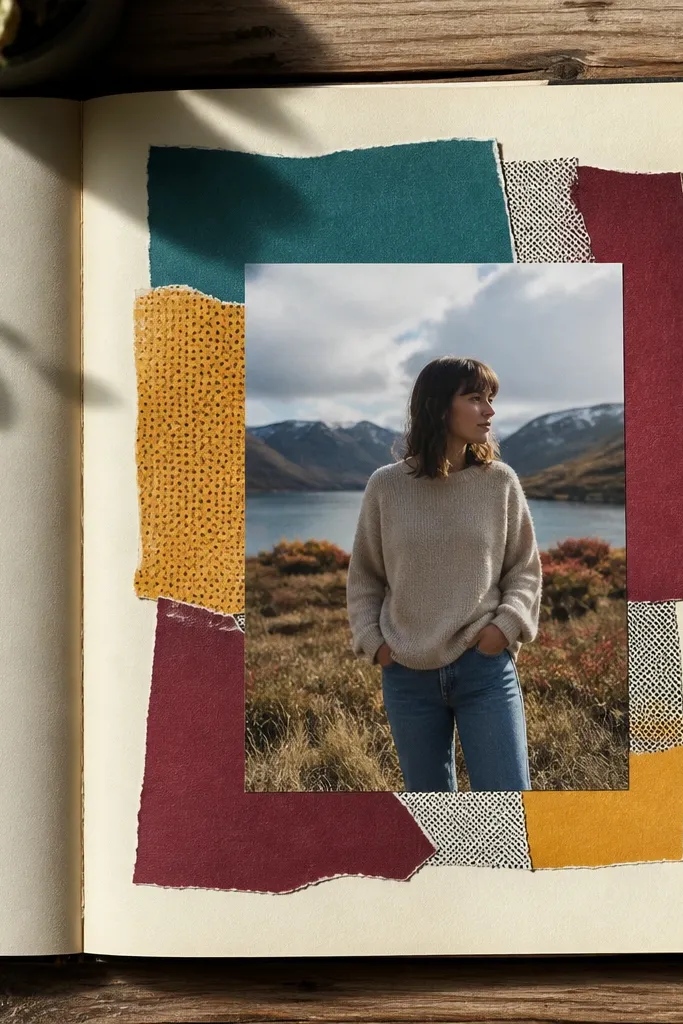
This one uses upcycled magazine paper as a background block, so your page has instant color without painting or complex layering. The trick is to keep the block behind the photo only, which makes the page look intentional instead of chaotic. The magazine text and patterns add depth that’s easy to photograph. Use it for pages where your photo is simple and needs a stronger backdrop.
Cut a magazine background block to about 4.75x6.5 inches and trim the edges straight with a paper trimmer. Glue the block onto the scrapbook page first. Add a photo centered on top (about 4x5 inches) and place a date strip across the bottom edge of the photo. Finish by sealing the magazine edges with a thin matte medium so they don’t curl.
Pro tipChoose magazine pages with one dominant color — it keeps the page from looking busy.
AvoidDon’t cover the entire page with magazine scraps — the background block needs breathing space.
16. Hand-Drawn Route Line + Pins
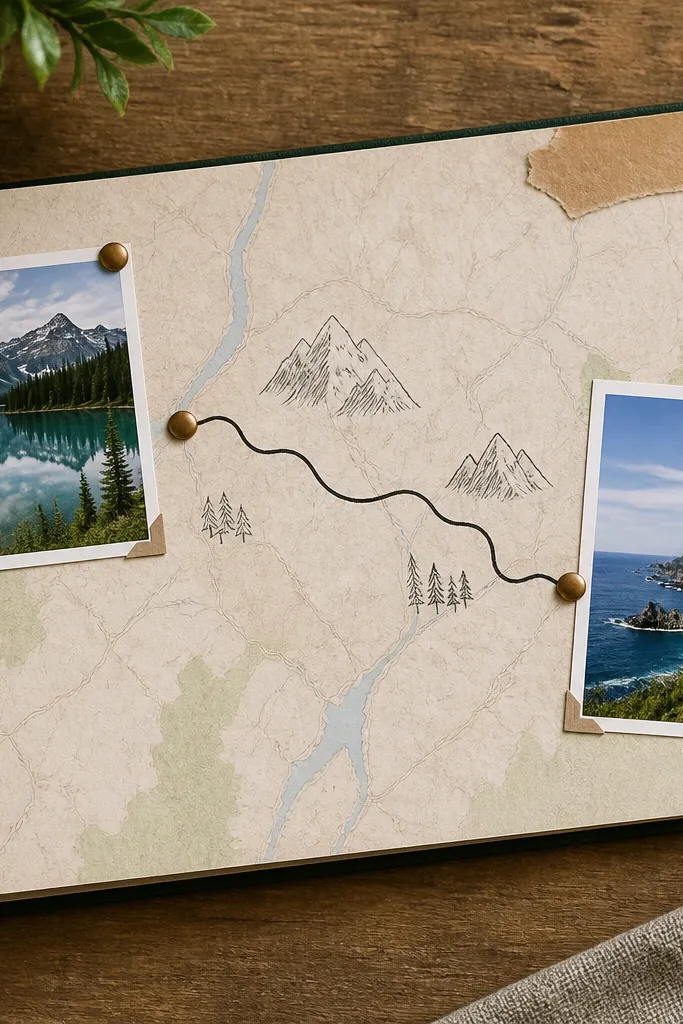
A hand-drawn route line is one of the quickest ways to make a scrapbook page feel like a story. It turns two photos into endpoints and makes the page look cohesive even when the photos are different lighting. You can use map paper or plain cardstock, and the line gives you structure. This is great for couples who took one memorable journey and want the scrapbook to show the “where” clearly.
Pick a base paper and draw a simple route line with a fine marker using a gentle curve. Place a small photo at each end of the line (about 2.5x3.5 inches). Add tiny dot markers or small paper circles on the route line to represent stops. Label each photo with a short place name and date, then attach the page to your scrapbook with double-sided tape on the edges only.
Use a ruler for the start and end points, then freehand the middle — it keeps the route from looking wobbly.
Avoid long, straight lines across the page — they look stiff unless you have a map-style layout.
17. Washed-Out Photo Border with Paper Mat

This gives you that clean, airy look that still feels warm. The white or cream paper mat softens the photo edges and hides small print imperfections from phone prints. It’s also fast because you’re repeating one mat size across multiple pages. This is perfect for quick and easy couples scrapbook ideas when you want a consistent style and your photos vary in brightness.
Trim your photo to a consistent size (3.5x4.5 inches). Cut a paper mat from cream cardstock with a 0.5-inch border on all sides. Lightly rub a pencil eraser along the mat edge to create a subtle worn look if you want texture. Glue the photo to the mat, then attach the mat to the page with four tape tabs. Write the date in the top right corner of the page, not on the mat, so it stays readable.
Pro tipUse matte cream cardstock, not bright white — it reduces harsh contrast in photos.
AvoidDon’t glue mats with wet glue — it can ripple the mat edge.
18. Scrap Paper Date Stamp Using Cardboard Roller
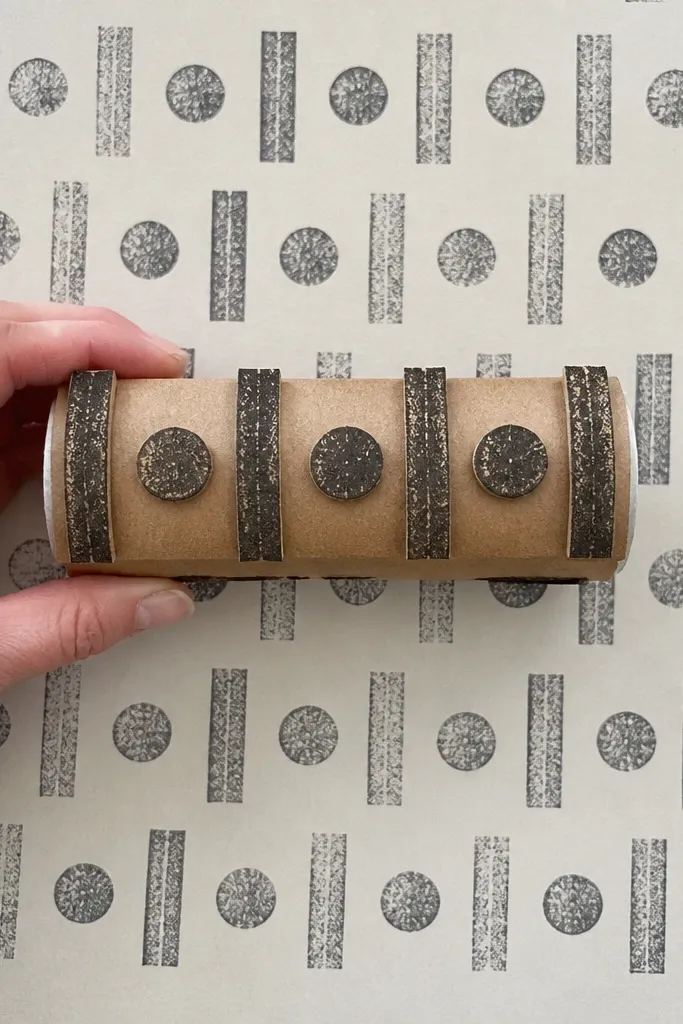
Stamp patterns make pages look like a set, even when you’re only using one photo. You can create a custom date pattern using scraps, and it adds texture without taking forever. This works best on pages with one strong photo and a calm layout, because the stamp pattern provides the background interest. It’s a good choice for wedding prep, engagement timelines, or any period where you want the scrapbook to feel cohesive.
Cut a small rectangle from cardboard and carve a few simple marks using a craft knife to form a mini stamp. Mix acrylic paint with a little water so it spreads smoothly. Stamp a light pattern in one corner area of the page, then let it dry fully. Place one photo centered, add a date label band at the bottom, and write a short caption over the photo mat.
Pro tipTest the stamp on scrap paper first — too much paint makes blobs that smear later.
AvoidDon’t stamp over glossy photo areas — it transfers and looks messy.
19. Overlay Frame with Old Greeting Card Paper
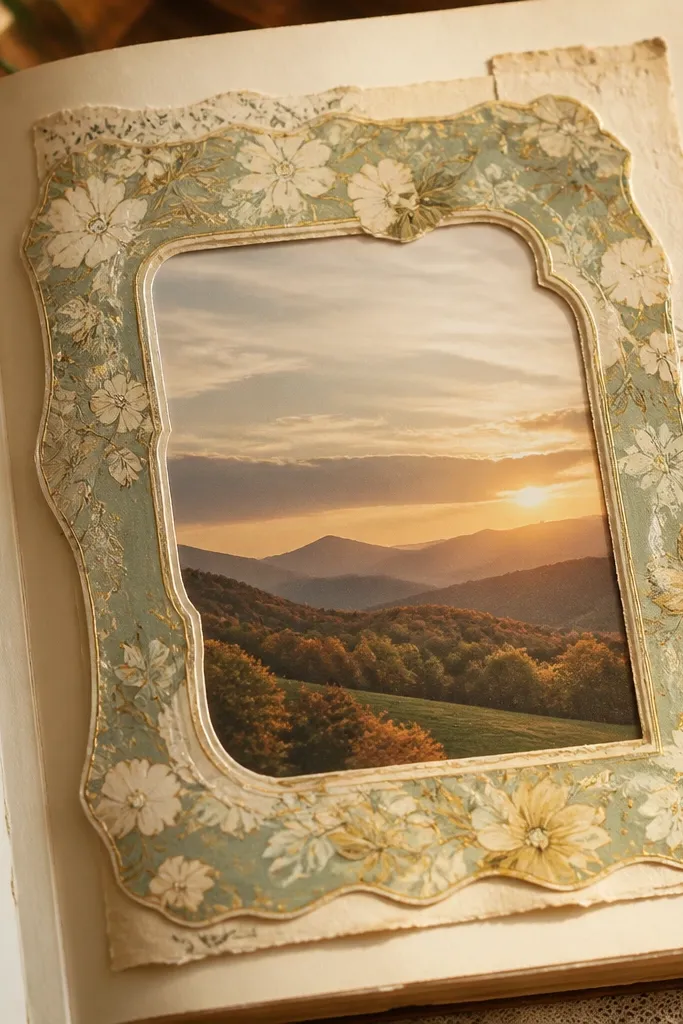
Greeting card paper is already decorative, so you get a high-end look with low effort. The overlay frame means your photo sits in the center with a clean border that pops in photos. This is a great option when you have a few card scraps from holidays or anniversaries that you don’t want to throw away. It’s also ideal for quick and easy couples scrapbook ideas because you can repeat the same frame size for multiple pages.
Pick a greeting card panel and cut a rectangle frame with an inner opening sized to your photo (for example, a 4x5 inch photo needs a 4.25x5.25 inch outer frame). Cut clean edges with a trimmer. Glue the frame to the scrapbook page first, then mount the photo behind or directly onto the frame opening. Add a small date sticker or handwritten date in the bottom corner of the frame.
Pro tipUse a thin craft glue so the card paper doesn’t bubble or warp around the edges.
AvoidDon’t use frames with heavy glitter — it sheds and looks messy on camera.
20. Corner Pocket for Mini Polaroid Notes
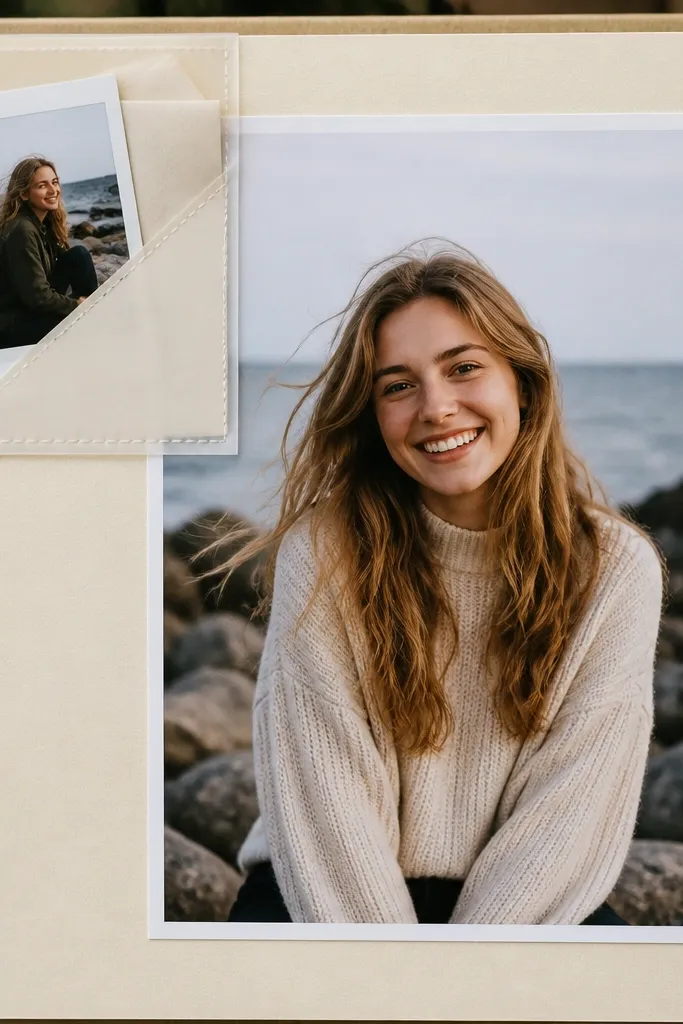
Corner pockets are a fast way to add function and cuteness. You can slide in a mini photo, a short note, or a tiny ticket without committing to gluing everything down. The corner placement keeps the page balanced and leaves the center clean for your main photo. This works for couples scrapbooks because it makes the page feel like it’s holding extras, not just displaying photos.
Cut a pocket from a clear plastic sheet protector or acetate about 3x4 inches. Trim one edge into a slight tab shape so it’s easy to pull open. Glue the pocket to the corner of the scrapbook page, leaving the top open. Add a mini photo (about 2x2.5 inches) inside and tuck a folded note behind it. Place your main photo centered on the page and add a date caption near it.
Pro tipUse a matte label on the pocket tab so it looks intentional when you pull it out.
AvoidDon’t overfill the pocket — if it bulges, the page won’t lie flat.



