
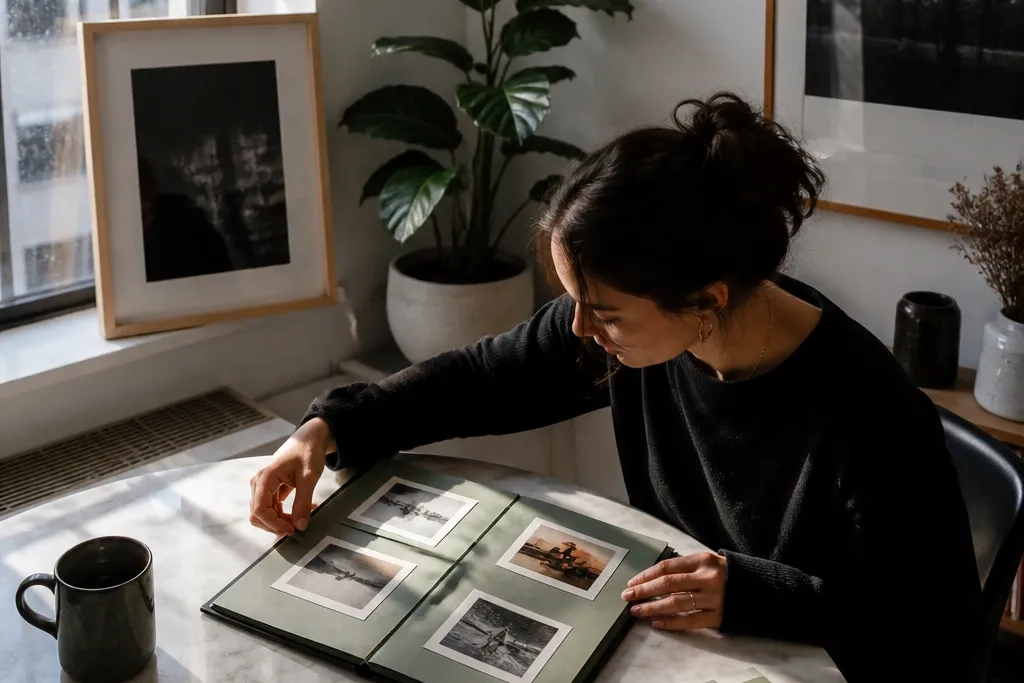
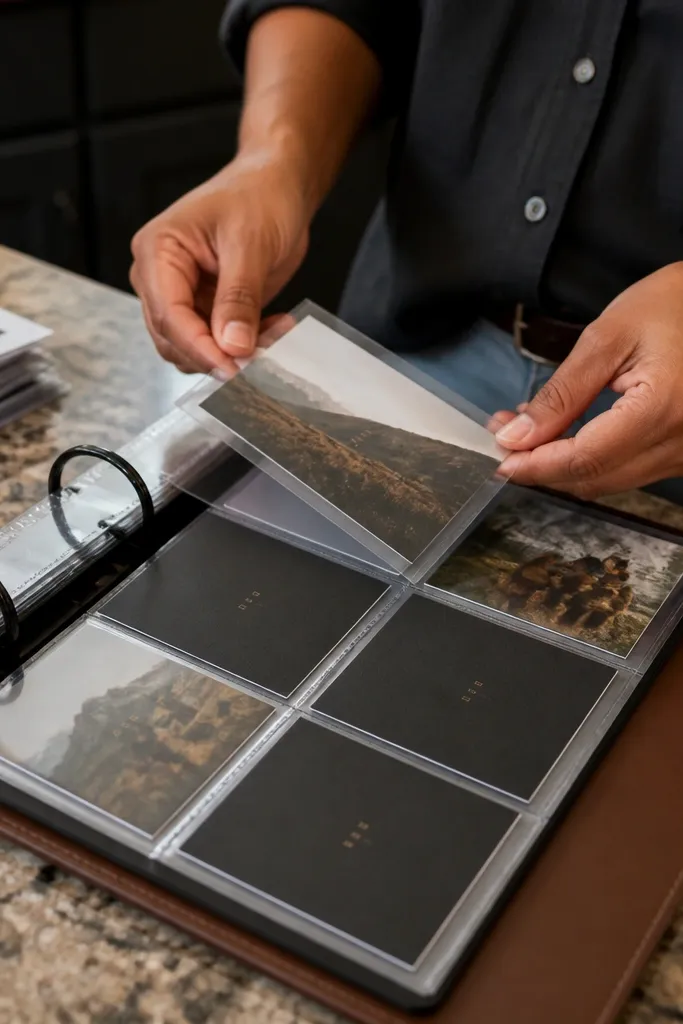
1. Framed Ticket-Window Collage Wall
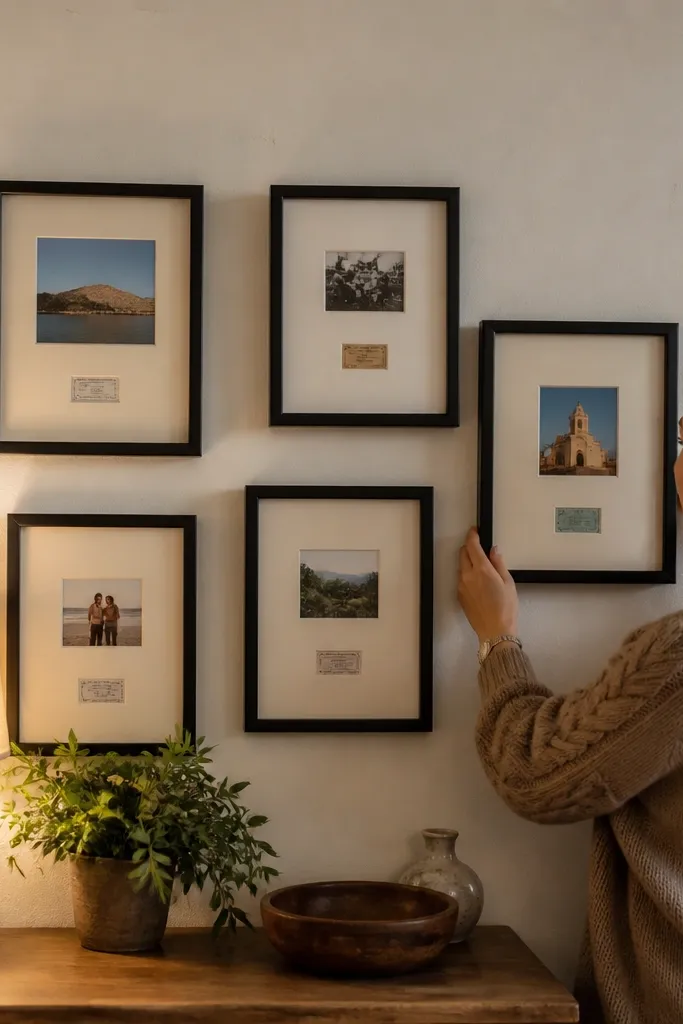
This is the scrapbook look that reads like art, not storage. You’re using frame glass to flatten the whole page, and that instantly makes photos look sharper because glare is controlled by the glass and matte backing. The “ticket window” part comes from cutting photo mats with a small opening so stubs and micro-objects sit around the images. It’s renter-friendly because frames can be hung with removable adhesive hooks rated for your frame weight or with command strips on the back frame hardware. Plan for 30-60 minutes per frame if you pre-cut your backing and mats.
Start by choosing frames with a removable backing (look for ones that have clips, not glued MDF backs). Cut acid-free paper mats to fit the inside opening and leave a 1/2 inch border around each photo. Arrange photos, ticket stubs, and small memorabilia on the mat, then secure items with photo-safe tape or small dots of removable adhesive on the back only. Insert the mat into the frame, add a clear sleeve if you want extra protection, and close the back. Hang using removable hooks placed on the wall studs when possible for better hold.
Pro tipUse black paper behind bright photos; it makes colors pop and it photographs cleanly under daylight.
AvoidAvoid putting glossy paper directly under frame glass — it creates glare bands in photos.
2. Binder Scrapbook With Clear Sleeve Index
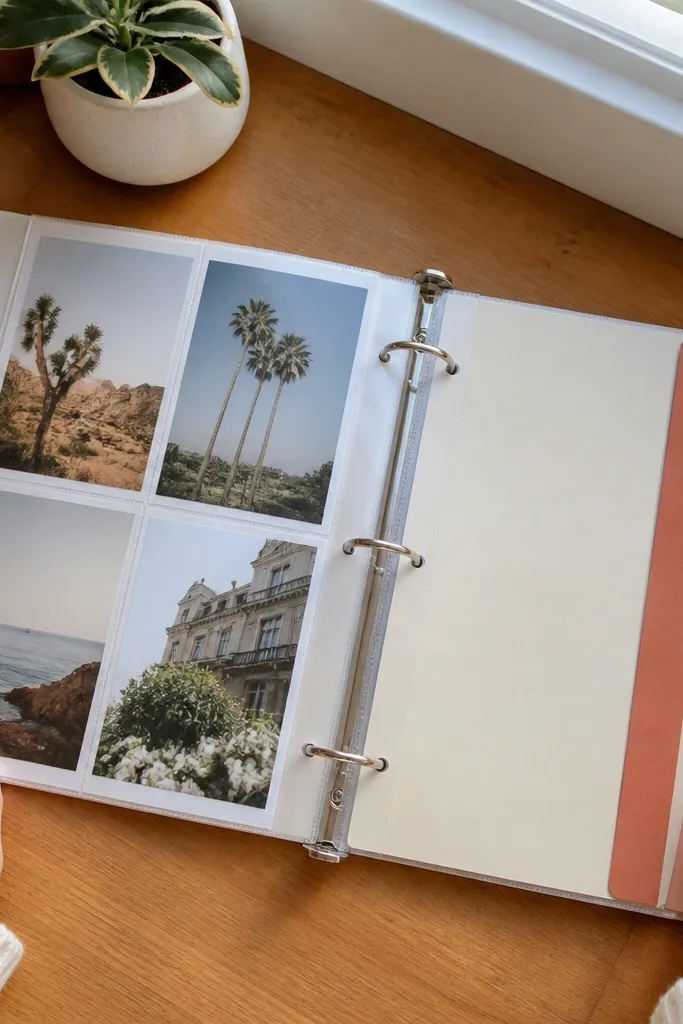
If you want renter-friendly photo scrapbook ideas you can update without rebuilding, a binder system is the smartest visual move. Clear sleeves let you slide photos in and out, which keeps your layout tidy and prevents sticky mess. The index labels give the pages a styled, magazine-like rhythm, especially when your labels match the same font style and color. It also protects your photos from scuffs and fingerprints, so the scrapbook still looks good when you re-open it months later. Skill level is beginner-friendly, and the build time is about 2-3 hours for a first set of pages.
Buy a 2-inch or 3-inch binder with refillable clear sheet protectors. Cut your page backgrounds from cardstock and punch alignment holes so they fit inside the sleeve area without bending. Insert one background sheet per sleeve, then place photos in the sleeve windows or behind the clear plastic using photo corners. Add small caption strips on the side (1 inch wide) so they read like an index. When the binder is full, wrap the outside spine with a strip of matching paper so it looks intentional, not temporary.
Use a single caption style: date in small type, then one short phrase in larger type.
Don’t rely on glue to reposition photos inside sleeves — it makes future swaps messy.
3. Clothespin Photo Strip on a Mini Rail
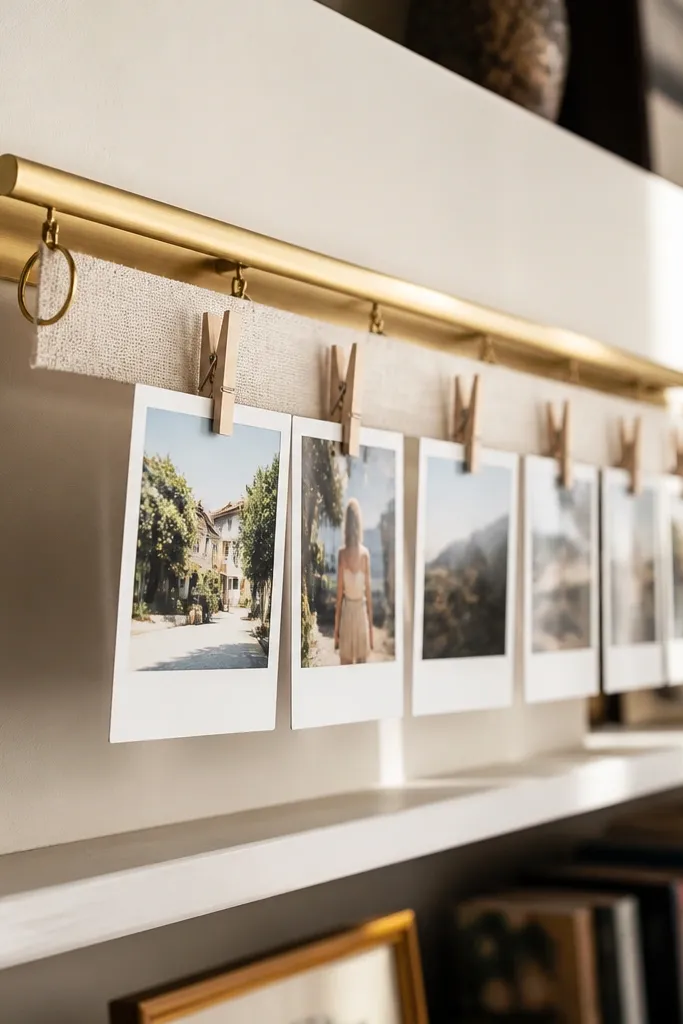
This idea looks airy and modern, and it solves the “scrapbook feels bulky” problem. You’re turning small photos into a curated strip, with clothespins adding a craft texture that photographs well. Because it’s a rail you mount with removable hardware, it’s renter-friendly and easy to change seasonally. The look is clean when you keep photo sizes consistent and use one background color strip behind every photo. It’s best for a hallway, bedroom corner, or a rental-friendly entry shelf where you can swap images without stress.
Pick a mini wood or metal rail and decide on spacing: aim for 2-1/2 to 3 inches between clothespins. Mount the rail using removable wall anchors or adhesive mounting strips that match your surface type. Print photos as uniform strips (for example, 3x4 inches or 4x6 inches cut down) and trim them so the edges line up. Clip photos onto cardstock strips or directly with photo clothespins, then add a thin border paper behind each photo for a consistent frame. Finish by adding a small themed label card at one end.
Back each photo with matte cardstock, not photo paper — it cuts glare and keeps the strip looking soft.
Avoid mixing photo sizes randomly; the visual chaos makes the strip look messy in pictures.
4. Kraft Paper Accordion Memory Timeline
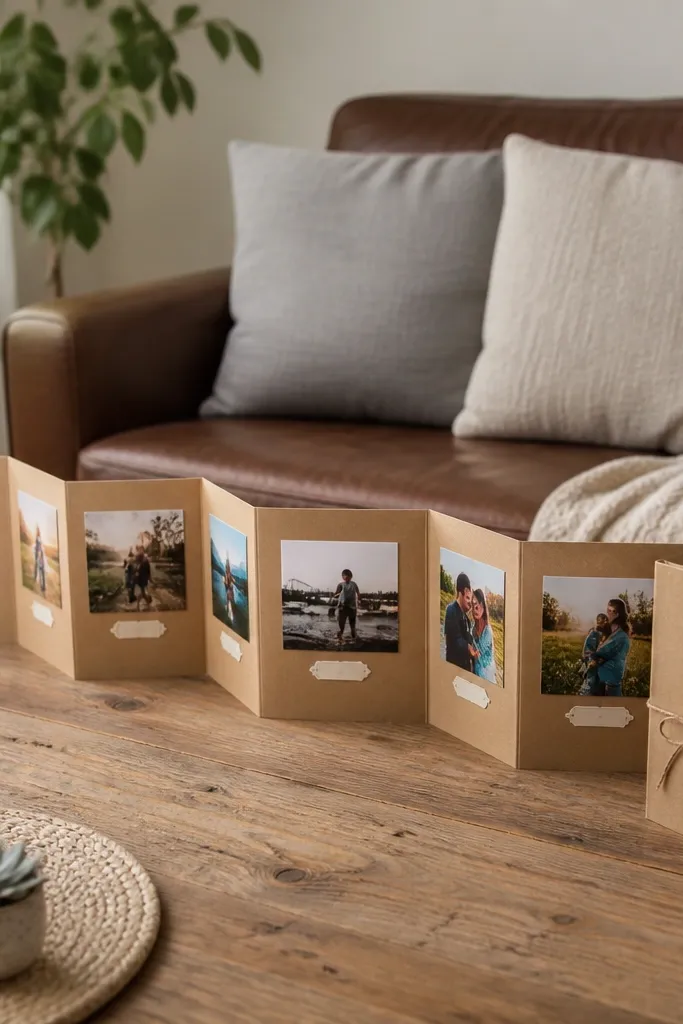
An accordion timeline turns photos into a story you can flip, and it photographs like a designer notebook. Kraft paper gives warm contrast, and the folded structure makes each section feel intentional. This is renter-friendly because it’s a standalone piece you can place on a coffee table or shelf without hanging anything. The best look comes from uniform photo sizes and consistent spacing, so every fold reads like a panel. Expect about 3-4 hours for a first version, mostly from careful measuring.
Cut kraft paper to your panel size and score it evenly so folds are crisp (use a ruler and bone folder if you have one). Plan 8-12 panels, each with a photo area and a caption strip. Fold the accordion, then lay it flat and mark photo placement lightly in pencil. Attach photos with corner pockets made from cardstock or photo corners so you can adjust without tearing. Once the photos are set, write dates in a consistent spot on each panel and add small stickers or stamped icons only after everything aligns.
Pro tipUse a black gel pen for dates; it stays readable and looks sharp against kraft in photos.
AvoidSkip heavy embellishments across fold lines; bulky bits crack and lift when you open it.
5. Thrift Frame + Removable Pocket Grid
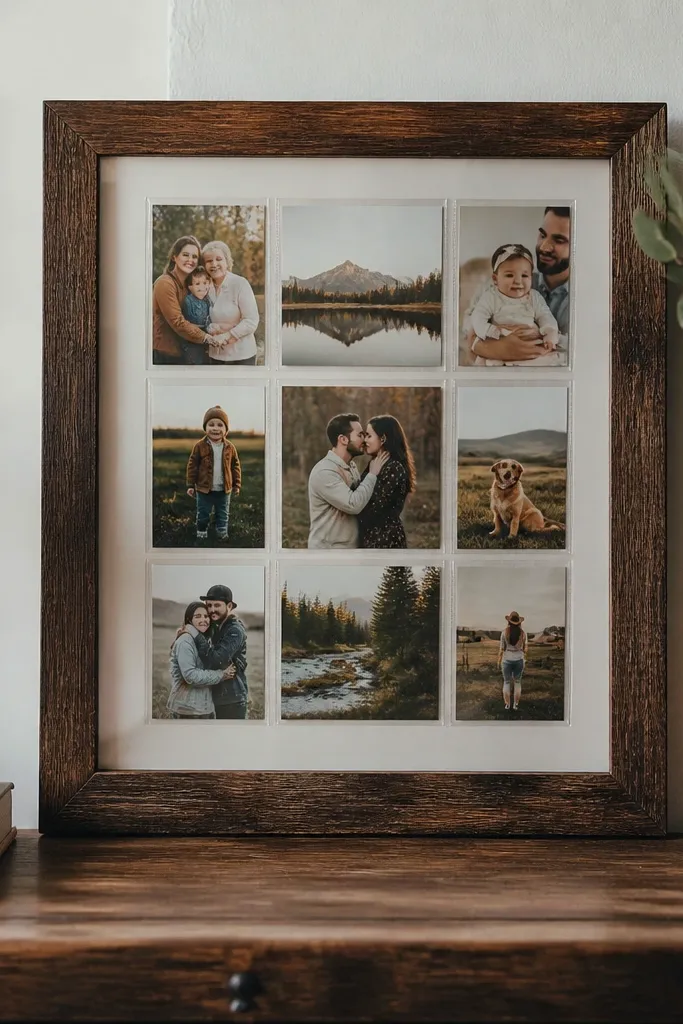
This is a scrapbook idea that looks neat from across the room. You’re using a thrifted frame as a display container and filling it with a pocket grid so photos don’t curl or float. Pockets also make it easy to swap images without removing everything — you just slide photos in and out. The photogenic part is the consistent grid and the cream borders that keep each photo separated. It’s renter-friendly because you can place it on a shelf, or hang it with removable hooks if you use a light frame.
Remove the backing from a thrift frame and measure the inner space. Cut cardstock grid dividers to create pocket sections and glue them only to the backing, not to the frame glass. Make mini pockets from clear page protector sheets or thin acetate sleeves, sized so photos slide in without catching. Attach pockets to the backing with a glue stick along the top edge only. Place a photo-safe backing sheet behind the pockets, then reassemble the frame and add hanging hardware.
Keep pocket widths within 2-1/2 inches so your photos don’t look crowded.
Don’t use thick plastic that warps in heat; it bends and makes pockets hard to slide.
6. Scrapbook Shadowbox With Foam Tape Layering
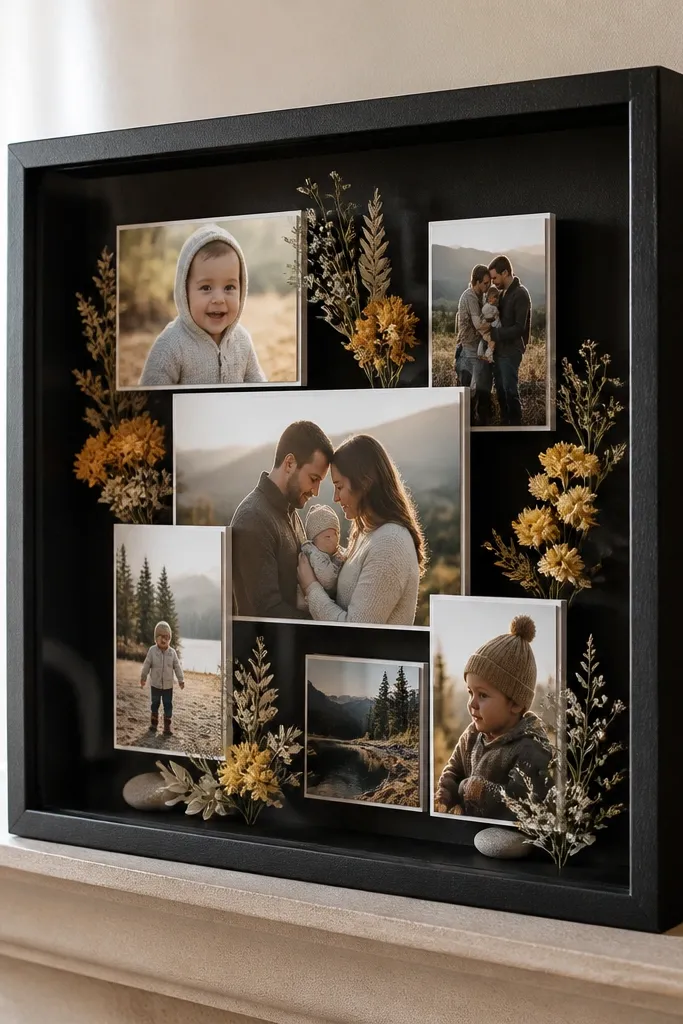
Layered shadowbox scrapbooks look expensive because depth catches light. You’re building a 3D collage where photos sit on different planes, and that creates a sculptural look even with simple materials. It’s also renter-friendly because the finished piece stands alone, and the only “fixing” is inside the box. Use this for meaningful items like pressed leaves, ticket stubs, or fabric scraps alongside photos. If you want photogenic results, keep the palette tight and let negative space breathe around the photos.
Choose a small shadowbox frame with a backing you can remove and a depth of at least 1 inch. Cut a background sheet and decide the top photo layer first so you can build downward. Use foam tape to raise the photo corners and flat items, starting with the back layer and working forward. Secure photos with photo corners or thin glue dots on the back of corners only. Finish by placing any fragile items behind a protective sheet if the box has glass, then close the backing and add a hanger rated for the box weight.
Dry the pressed items completely before sealing; damp pieces discolor and ruin the color look.
Avoid stacking heavy items on foam tape — the layer can bow and photos won’t sit flat.
7. Photo Corner Tape + Matte Border System
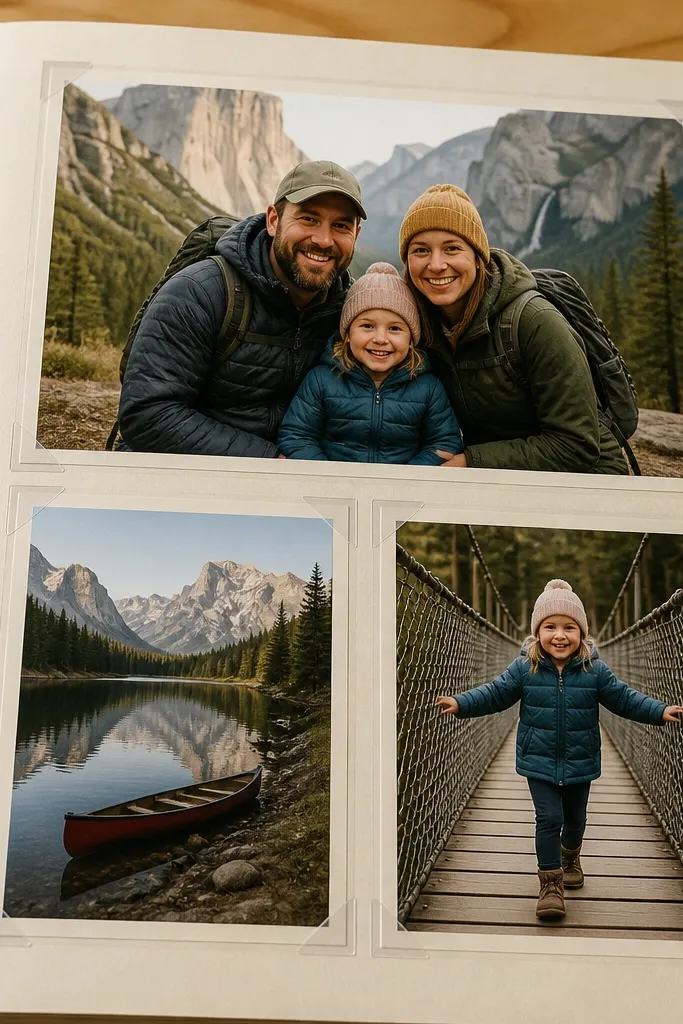
This is the “every page looks styled” mounting method. Instead of gluing photos flat, you use photo corners plus a matte border so each image has a clean frame. It’s renter-friendly because it avoids permanent adhesives on your photos, and the whole page stays easy to edit later. The aesthetic comes from consistency: same border width, same corner placement, and one paper color that matches your theme. Skill level is beginner, and you can make a full 8x10 page in about 45-60 minutes.
Cut a base page from matte cardstock, then measure a consistent border width (for example, 3/4 inch around each photo). Print photos slightly larger than the photo opening and trim so edges are even. Place photo corners at each corner and press firmly, then check spacing with a ruler before you commit any tape. Add a title strip at the top using a 1-inch wide paper strip and a date line at the bottom. Seal the page in a clear sleeve if you plan to store it in a binder.
Pro tipUse photo corners designed for inkjet/printed photos so they don’t leave edges or lift over time.
AvoidSkip double-sided tape directly on photo paper — it can create a sticky edge that shows through sleeves.
8. Fabric Scrap Photo Mat With Heat-Safe Iron-On
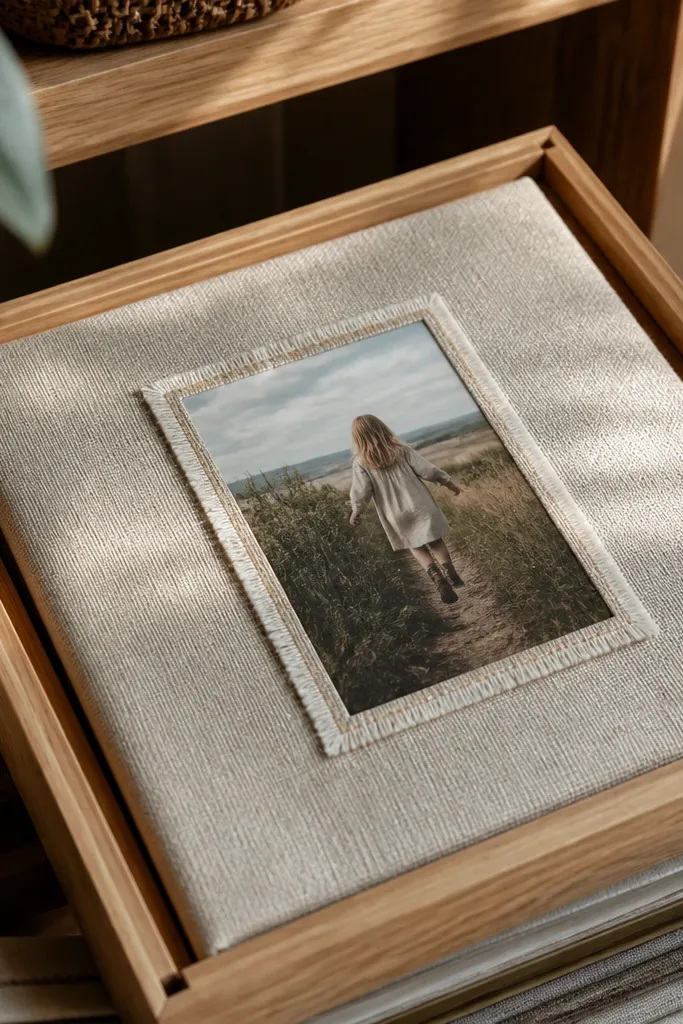
Fabric-backed pages bring texture that looks great in photos, especially with soft window light. The look is cozy and intentional without needing heavy craft supplies. This is renter-friendly because you’re building a removable mat you can store in sleeves or place inside frames, not altering walls. The key is using heat-safe iron-on interfacing so the fabric stays flat and photos don’t ripple. Time is about 2 hours for one standout page, mostly from careful cutting and pressing.
Choose cotton fabric scraps in 2-3 colors and cut them into blocks that fit your photo mat size. Iron heat-safe fusible interfacing onto the back of the fabric so it becomes stable and flat. Cut a base mat from cardstock, then adhere the fabric block to the cardstock using fabric-safe bonding (follow the interfacing instructions). Attach photos with photo corners or a thin layer of photo-safe adhesive on the back of the fabric mat, not on the photo front. Finish by adding a clean stitched-looking border using a fabric marker or a narrow paper frame.
Pro tipPress fabric with a pressing cloth so you don’t shine the fabric and ruin the matte look in photos.
AvoidDon’t use stretchy knit scraps; they distort under heat and make the layout look wavy.
9. Removable Wall Pocket Grid Using Command Hooks
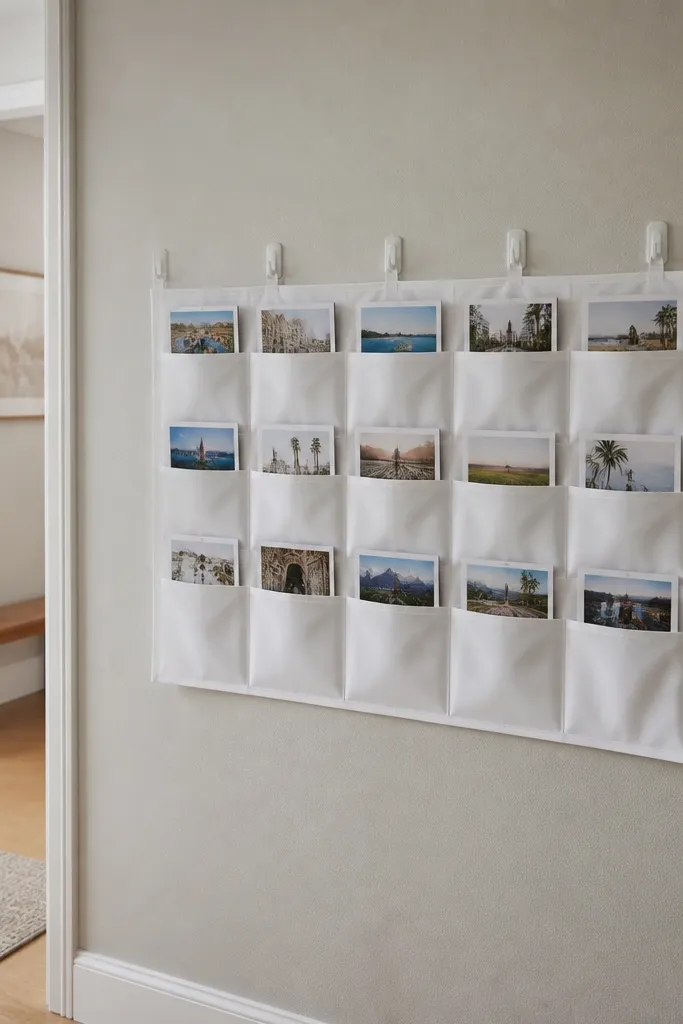
This turns your scrapbook into a rotating display, which looks amazing in rental homes where you want change without damage. You mount a lightweight pocket organizer using command hooks or adhesive strips, then slide photos into the pockets. The aesthetic is clean and uniform because each pocket has the same shape and spacing. It also protects photos from dust and fingerprints. Use it in a kitchen nook, bedroom wall, or entry area where you can swap photos every few weeks.
Buy a clear plastic pocket organizer or make pockets from clear sleeves attached to a backing board. Choose pocket sizes that match your photo prints, like 4x6 inches cut down or 3x4 inches. Mount the organizer with removable adhesive hooks placed at the top corners and one in the middle for support. Slide photos into pockets with matte card behind them so edges are consistent. Label each pocket with a short date strip using small cardstock rectangles.
Use matte photo paper or add a matte spray to prints if your prints are glossy; glare ruins the look.
Avoid overloading pockets; heavy photos make the organizer bow and the grid looks crooked.
10. Origami-Style Photo Tabs on a Page Spine
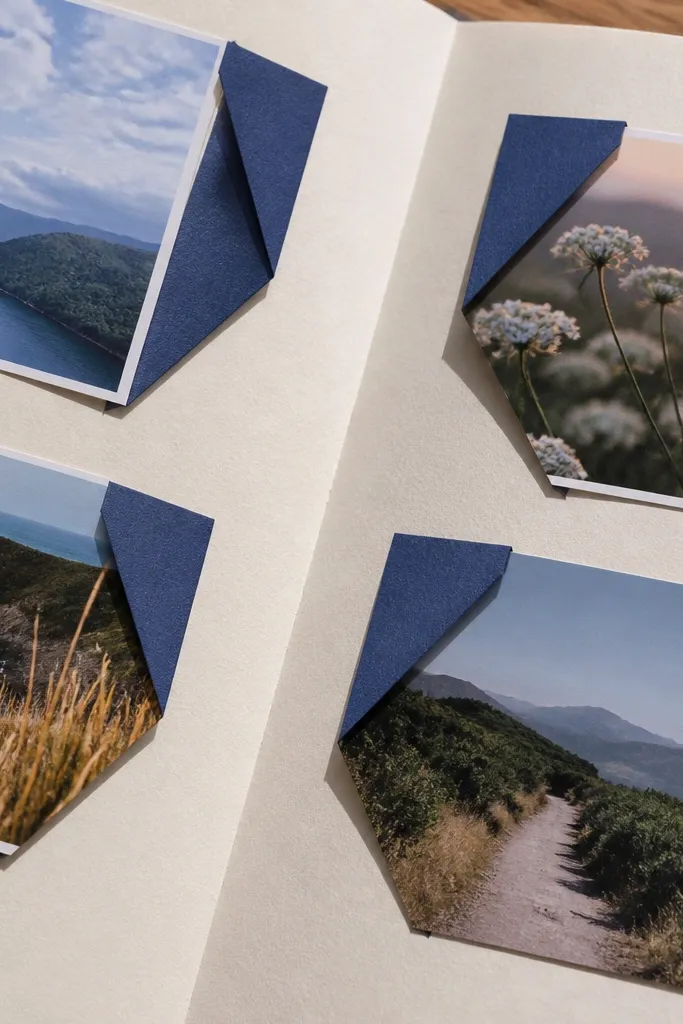
Photo tabs are a photogenic trick because they create shadows and depth without needing a 3D shadowbox. You fold paper tabs behind specific photos so each one pops up slightly like a little flag. It’s renter-friendly because it’s all paper mechanics on a flat page, no permanent mounting on walls. The look is playful but still organized when you keep the tab sizes consistent and align the tab edges. This takes about 2 hours for a single page with 6-8 tab photos.
Cut a sturdy base page and map where each photo will sit. Cut tab paper pieces that are the same width as your photo edges, and fold them so they stand up behind the photo. Attach each photo to the tab with photo corners or a small strip of photo-safe tape along the tab’s top edge. Place tabs into your layout so they line up along a spine line. Once everything is aligned, reinforce the base behind the tabs with a second cardstock layer for stability.
Pro tipUse 160-200 gsm cardstock for tabs; it folds cleanly and holds shape.
AvoidDon’t make tabs too tall; they catch light glare and look messy in pictures.
11. Mini Polaroid-Style Frames From Scrapbook Paper
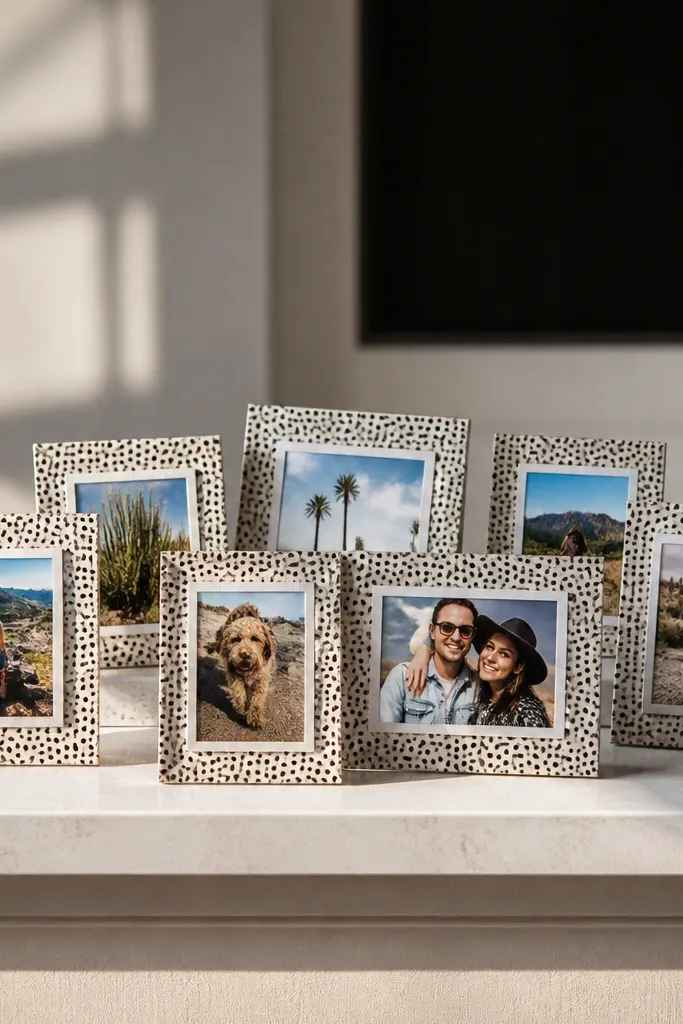
This idea gives you the Polaroid vibe without bulky albums. You’re making mini faux Polaroid frames from scrapbook paper and mounting photos with a slight offset so each one looks like a collectible. The aesthetic is bright and photogenic because patterned paper brings color and the white mat area frames each image. It’s renter-friendly because the final piece can be stored in a binder or placed on a shelf, and nothing sticks to walls. It’s also fast: one sheet of frames can produce 12-16 photo placements.
Pick one patterned paper and one solid paper that complements it. Cut your mini frame mats (for example, 4x3 inches with a 2x2 inch photo opening) and keep the mat thickness consistent. Print or trim photos to fit the opening, then mount them with photo corners. Arrange frames in a grid on a base board so the spacing is even. Seal the whole page in a clear sleeve or place it into a frame.
Pro tipUse one pattern per page; mixing patterns across the whole layout makes it look busy.
AvoidAvoid trimming photos too tight; leave the photo opening a few millimeters so the mat frames cleanly.
12. Clear Acrylic Photo Labels on Cardboard Backing
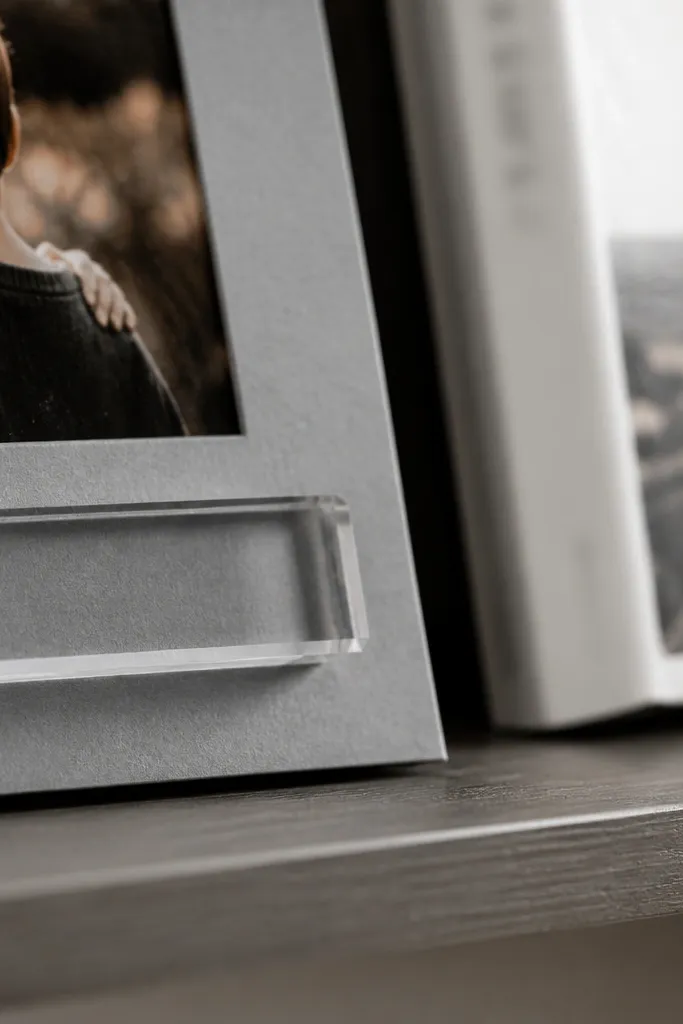
Clear label tabs make captions look intentional and modern, which is rare in DIY scrapbooks. You get legibility without covering the photo, and the transparent look keeps the page from feeling heavy. This is renter-friendly because it’s a standalone board that can sit on a shelf or inside a frame. For photogenic results, keep captions short and align label placement in a single row. The whole style reads clean and graphic, especially if you use black cardstock and white labels.
Cut a backing board from cardstock and place photos in a grid or two-column layout. Make label tabs from clear plastic sheet or clear sleeve material, then cut small holes or slots for a thin paper strip caption. Write captions in black marker on the paper strips, then insert into the clear tabs. Position tabs above each photo and secure the tab bottoms with small adhesive dots on the backing only. Finish by sealing the board in a clear protective cover if you plan to handle it often.
Use a ruler to keep label heights identical; tiny inconsistencies show up in photos.
Don’t use thick clear plastic that scratches easily; it turns into glare and scuffs.
13. Stamped Date + Photo Pair Grid on Black Paper
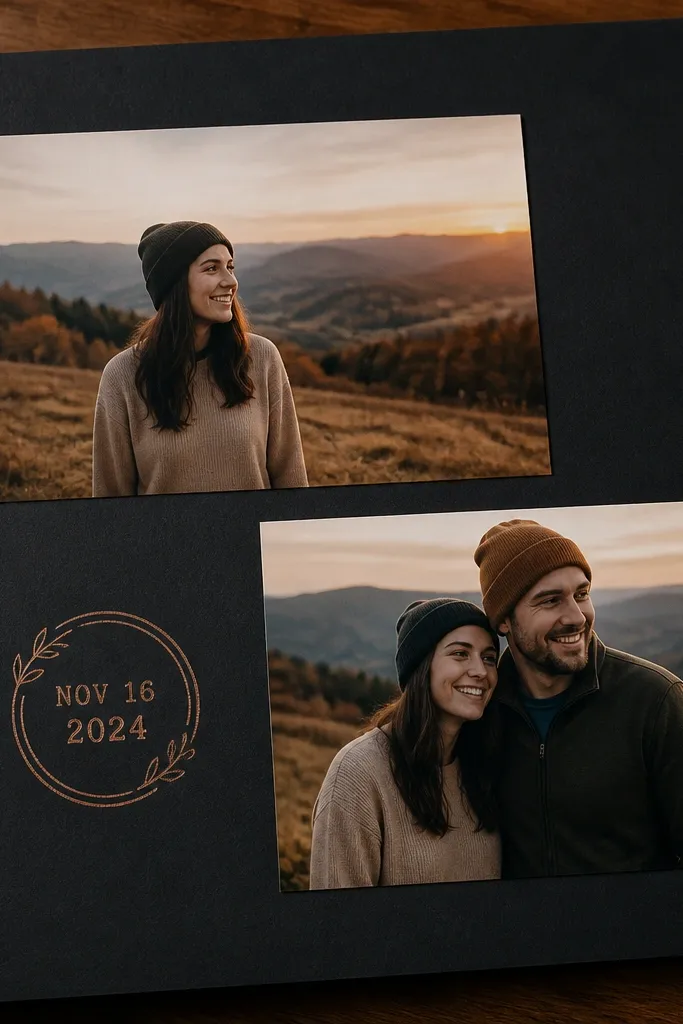
Black paper makes everything look designed, especially printed photos with warm tones. The stamped date adds a real craft detail without adding bulk, and the grid layout keeps the page readable. This is renter-friendly because you’re building a flat page that can be stored in a binder sleeve or framed. You’ll get a cohesive look quickly because the black background unifies the whole design. Plan about 60-90 minutes for one grid page.
Cut black cardstock to a consistent size like 8x10 inches. Choose a simple grid layout with equal spacing between photos, such as 2 columns x 2 rows. Print photos and add a thin white paper border behind each one by matting with white cardstock scraps. Stamp dates at the same height under each photo using archival ink. Seal the page in a clear sleeve to protect from smudging and to keep it photo-ready.
Stamp first, then place photos — it prevents crooked stamps after you commit to placement.
Avoid pigment inks that smear — they look messy on black paper once you touch the page.
14. Fabric Washi Tape Border Frames
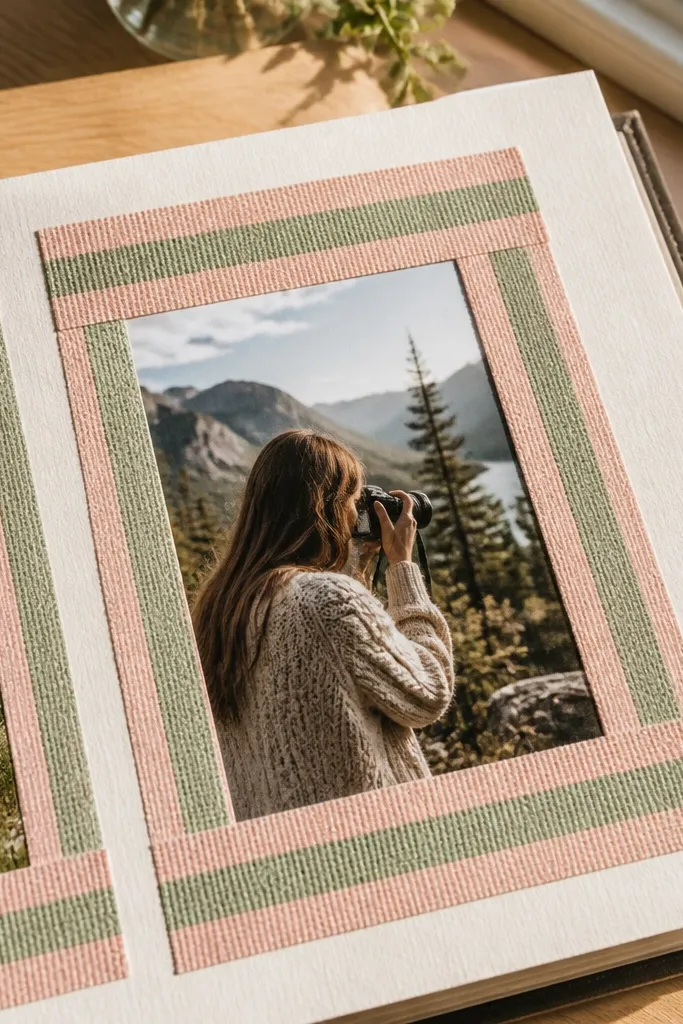
A tape border is one of the fastest ways to make photos look styled without covering them. Fabric-style washi tape gives texture, and repeating the same pattern around each photo makes the layout look curated. This is renter-friendly because tape is removable if you use low-tack tape on paper, and the photos stay safe in sleeves. The photogenic factor is strong: tapes create crisp edges and block glare when they frame photos. This takes about 45-75 minutes for a page with 6 photos.
Cut a base sheet of cardstock and plan your photo sizes, keeping them all the same height for a clean look. Use photo corners to place photos first, then measure tape strips that match the border thickness you want (like 1/4 inch). Apply tape around each photo, leaving the corners aligned so the border looks intentional. Add a single tape band at the top as a title strip. After the layout is set, protect it in a clear sleeve or frame it with a mat.
Press tape down with a flat tool like a plastic ruler so edges don’t lift and catch light.
Skip tape directly on photos; stick to paper borders so you don’t leave residue.
15. Polished Scrapbook Page With Faux Matting Using Cardstock Layers

Faux matting makes DIY pages look like they came from a print shop. You stack cardstock layers behind photos: a base layer in neutral, a thinner accent strip in one color, then the photo sits with a clean edge. It’s renter-friendly because you can store these pages flat in sleeves and you’re not using permanent adhesives. The look is sleek and photogenic because the layered edges create a crisp frame that holds up under camera glare. This is best for 5-8 photos on a single page.
Cut a base page from cardstock and decide your accent color strip width (for example, 1/4 inch). Cut photo mats slightly larger than your photos so you see the accent strip evenly. Layer materials: base mat first, then accent strip, then photo attached with photo corners. Arrange all photos before you attach anything permanently; once aligned, press corners and reinforce edges. Put the finished page in a clear sleeve to keep layers flat and clean.
Pro tipUse one accent color across the entire page — it looks intentional and reads clearly in photos.
AvoidDon’t use multiple accent colors on the same page; it makes the matting look random.
16. Sticker-Resist Photo Collage on Matte Cardstock
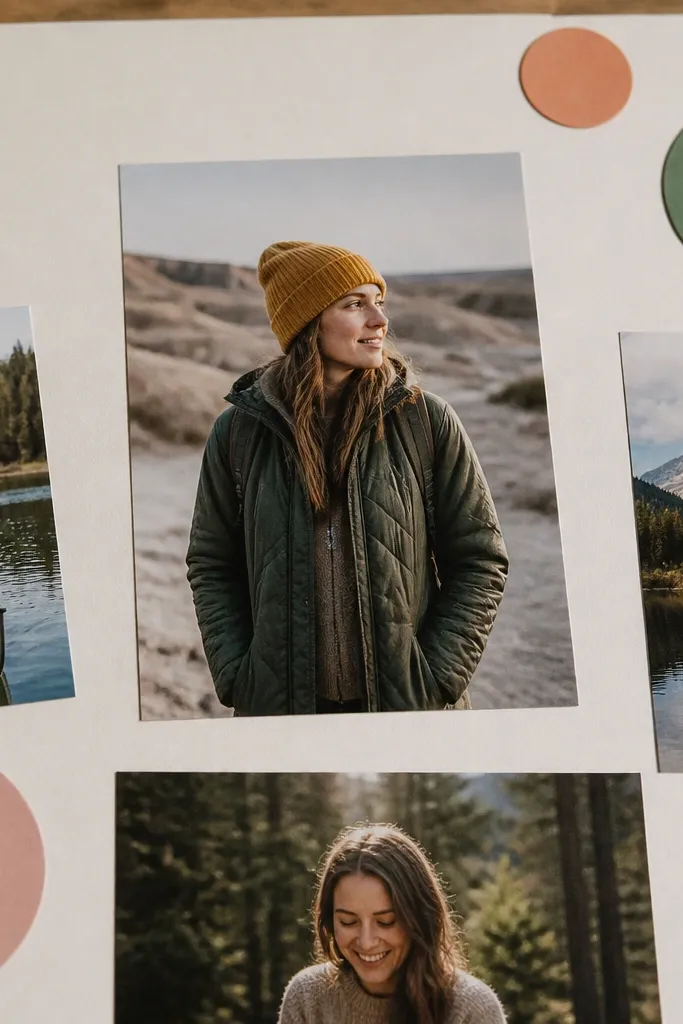
This is a controlled collage style that still looks clean. Instead of covering everything, you place photos and then add a few big, bold sticker shapes around them — think circles, stars, or simple icons that match your color palette. The sticker-resist effect comes from leaving areas plain so photos stay the focus. It’s renter-friendly because it’s flat, easy to store, and you can keep the sticker placement consistent across pages. The photogenic part is contrast: matte cardstock plus a few glossy stickers creates light-catching points without glare everywhere.
Choose matte cardstock as your base and pick one sticker set with consistent color. Place photos first and leave at least 1 inch of negative space around each photo. Add stickers only in the margins or corners, not over faces or key details. If you want a “sticker resist” look, layer one sticker on top of another with slight offset so you get depth while staying clean. Seal everything in a clear sleeve to prevent stickers from peeling and to keep the surface smudge-free.
Use small foam dots only for one sticker per page; too many makes it look cluttered.
Skip covering the photo edges with stickers; it blurs the border and ruins the crisp look.
17. Seasonal Window-Frame Photo Grid With Replaceable Backing
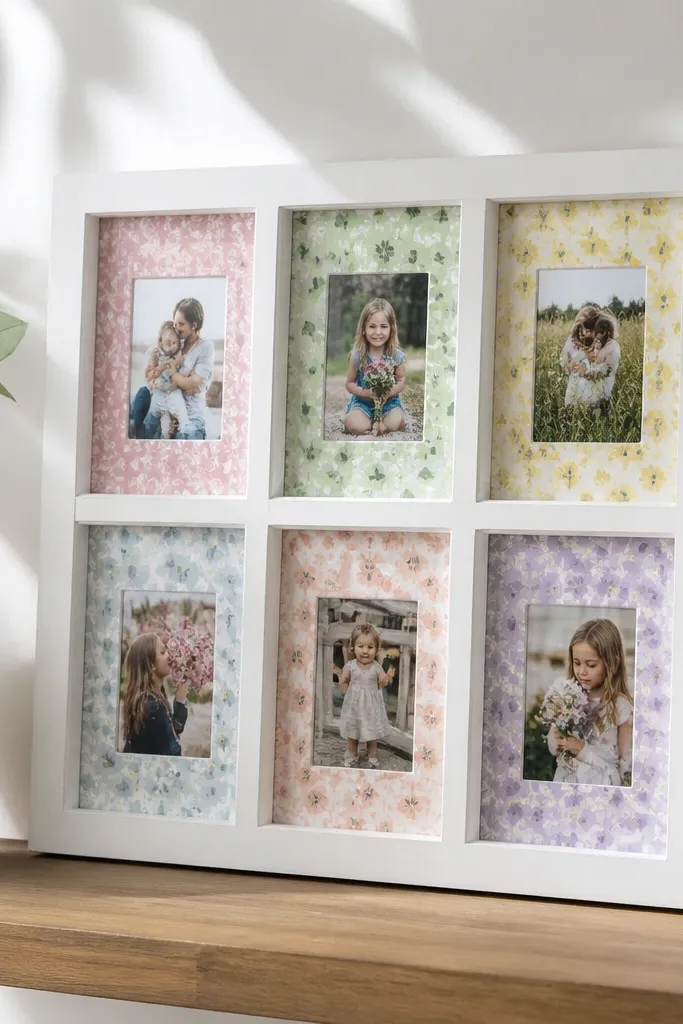
Window-style frames scream “renter-friendly display” because they’re designed to hold paper inserts, not permanent mounts. You can swap backing cards seasonally, which keeps your scrapbook from feeling like a one-time project. The aesthetic is strong because the frame creates consistent lines and the photos sit behind a structured grid. Use this for holiday photos, monthly updates, or travel sequences. Build time is about 2-3 hours once you have the frame, mostly from cutting insert panels.
Find a window-style frame with removable back panels or a slot system for inserts. Cut a backing grid from cardstock or foam board and size it to the frame interior. Cut photo openings or photo placement rectangles so photos sit evenly behind the glass or clear panel. Attach photos with photo corners so you can swap them later. Insert the backing into the frame and close it securely, then hang with removable hooks based on frame weight.
Use the same mat color for every insert panel so swaps still look cohesive.
Avoid frames with sealed glass you can’t clean — dust and fingerprints show up instantly.
18. Scrapbook Dice-Style Captions on a Side Strip
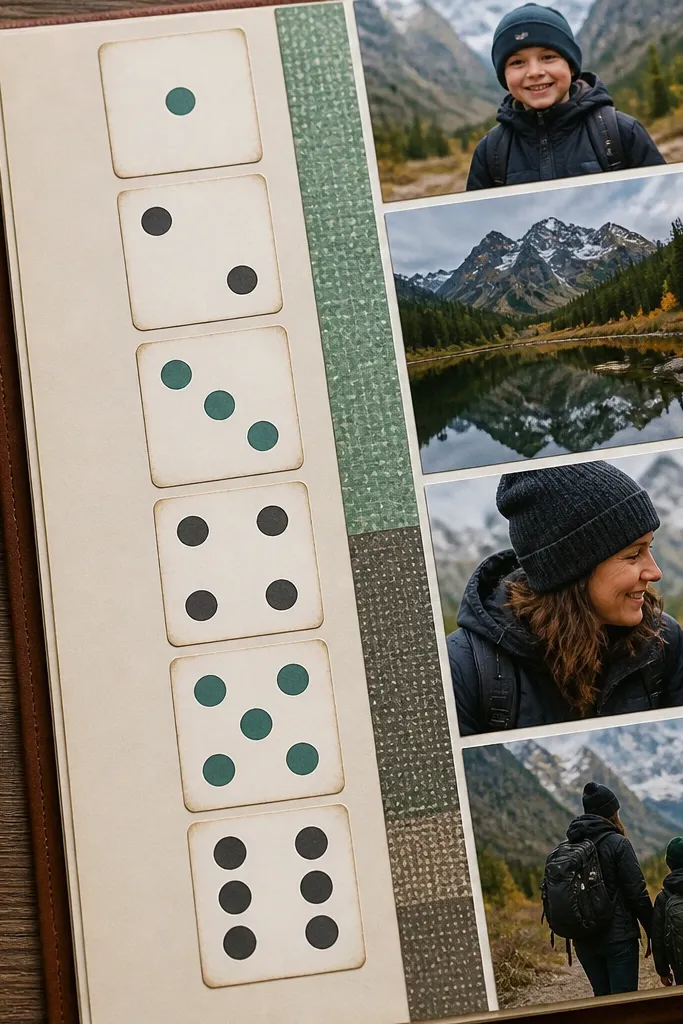
This is a caption system that looks playful and organized. Instead of writing long paragraphs, you use small square labels like a dice face pattern — same size, same spacing, and easy to read. The look is photogenic because the labels create a graphic sidebar that balances photos. It’s renter-friendly because it’s flat, sleeve-friendly, and doesn’t require wall mounting. This works best when you have multiple photos and want a consistent story structure.
Create a base page and decide your sidebar width (about 1-1/2 inches). Cut square label pieces from cardstock and punch consistent squares with a template or hole punch. Write short captions on each square using a single pen color, then arrange label numbers or dice-like dot patterns if you want a theme. Place photos in the main area, then align each photo with one label square in the sidebar using a light pencil guide. Attach labels with small adhesive dots on the corners and seal the page in a clear sleeve.
Pro tipKeep captions under 3 words so the squares stay clean and readable.
AvoidDon’t cram long captions into squares; it makes the whole page look busy.
19. Photo and Fabric Thread 'Stitch Lines' Layout
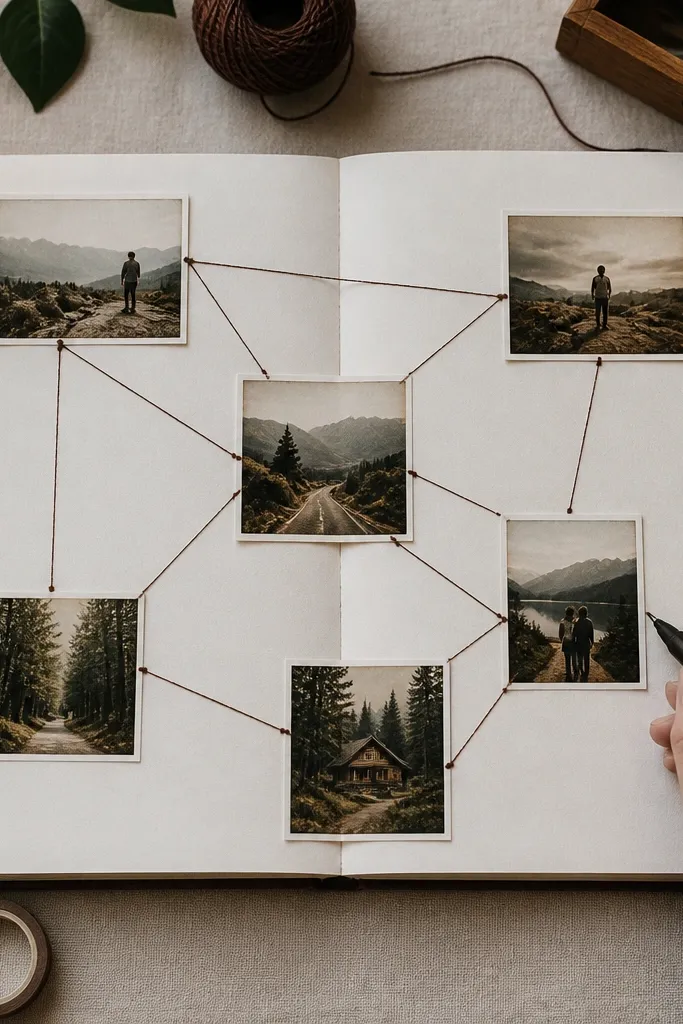
Stitch-line layouts look handcrafted without requiring sewing skills on fabric. You draw or trace straight stitch lines between photos using a thread-like marker or thin string glued only along paper edges. The result is graphic movement across the page, which photographs well because it creates crisp lines and shadows. This is renter-friendly because it’s flat and storeable, and you avoid bulky materials. Use it when you want a cleaner, modern scrapbook look with a handmade edge.
Cut a base cardstock page and map your photo positions in a simple grid or diagonal. Use a ruler to draw stitch-line paths between photos, keeping lines straight and evenly spaced. Attach thin string along the drawn lines using glue on the paper only, or use a fine marker that matches the thread color you want. Press string into place and let it dry flat under a book for 20-30 minutes. Add a small fabric scrap corner element near one photo to reinforce the stitched theme.
Pro tipIf you use string, choose cotton crochet thread; it lies flatter than craft twine.
AvoidAvoid thick glue blobs on the line — they create lumps that show up in photos.
20. Clear Sleeve Flipbook on a Ring Binder Spine
This is a photo scrapbook format that feels interactive and still stays tidy. Clear sleeves let you create flip pages without bulky album thickness, and the ring binder spine is renter-friendly because you can move it or store it easily. The aesthetic is clean because every page shares the same sleeve shape, and photos stay protected. It also keeps your layout photogenic because you can arrange photos to flip in a sequence, like a mini slideshow you can photograph. Build time is about 2-4 hours depending on how many pages you make.
Use a ring binder and add clear page sleeves that open like a book flap. Cut your backing pages from cardstock to fit behind the sleeves and keep a consistent border. Place photos on the backing so they align with the sleeve opening, then secure corners with photo corners. Create a simple sequence layout, like 1 photo per page or 2 photos per page with a centered caption strip. Once the first stack is aligned, add title and date labels on the first and last pages so the flipbook looks complete.
Use the same photo orientation for the whole flipbook so the flip motion looks smooth.
Don’t overstuff sleeves; too many photos make the binder bulge and the pages look crooked.
21. Resin-Look Epoxy Sticker Labels on Scrapbook Paper
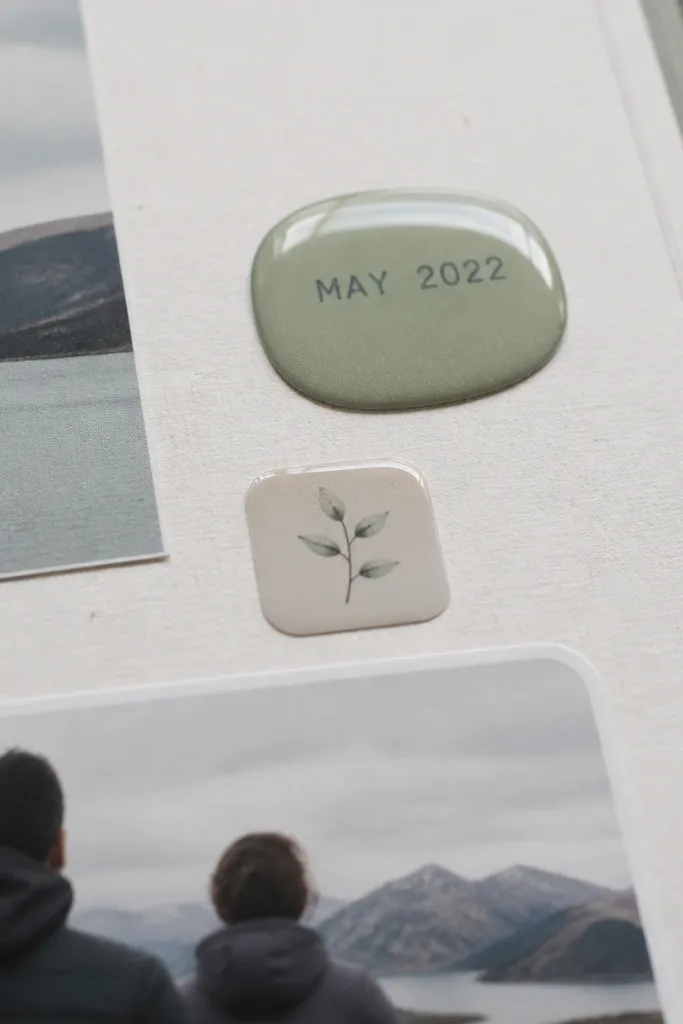
Glossy label dots add a “printed product” vibe while staying DIY. You’re making small resin-look labels that you place next to photos as dates, locations, or short notes. The photogenic trick is that only the labels shine, not the whole page, so you avoid glare chaos. This is renter-friendly because it’s a flat page you can store in sleeves and it doesn’t require wall mounting or bulky frames. Skill level is moderate because you need patience for drying and coating, but the look is worth it for standout pages.
Cut a base page and place photos first using photo corners and matte borders. Create label shapes on cardstock or sticker paper by cutting small circles or rectangles and writing short text. Use an epoxy doming product in tiny amounts on each label so it forms a smooth glossy surface; follow the product cure time exactly. Let the labels fully cure before handling the page. Attach the finished glossy labels to the paper with double-sided tape on the back only, then seal the page in a clear sleeve.
Do labels on a scrap board with parchment underneath so excess doesn’t stick and you get clean edges.
Don’t rush curing — soft labels smear and ruin the crisp look.
22. Photo Tiles on a Magnetic Board Insert
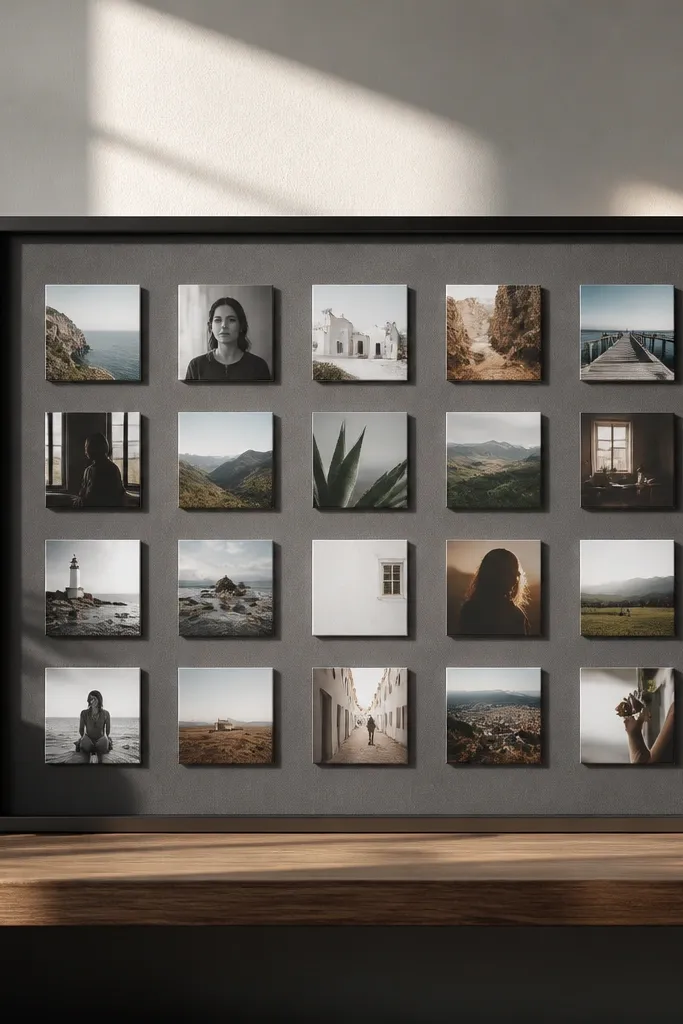
Magnetic photo tiles are a renter-friendly way to keep everything changeable without tape. You build a magnetic board insert that holds small photo tiles, then mount the board using removable hardware or keep it on a shelf. The look is modern and grid-structured, and it photographs cleanly because each tile has a defined edge. This works great for “month by month” photo updates or for displaying travel sequences. Build time is 1-2 hours for a simple grid once you have the magnetic sheet.
Buy a magnetic sheet or magnetic board and cut it to a size that fits your chosen frame or shelf display. Make photo tiles by mounting photos onto thin cardstock squares or foam-safe paper mounts. Attach small magnetic squares behind each tile so they stick evenly. Arrange tiles in a grid with consistent spacing and add a caption strip above the grid using removable adhesive. If you want a framed look, place the magnetic insert inside a display frame with a back panel and keep it easy to remove.
Pro tipUse matte cardstock for tiles; glossy tiles reflect light and look hazy in photos.
AvoidAvoid cheap magnets that create uneven spacing; the tiles wobble and the grid looks sloppy.
23. Book Page Fold-Out With Hidden Photo Pocket
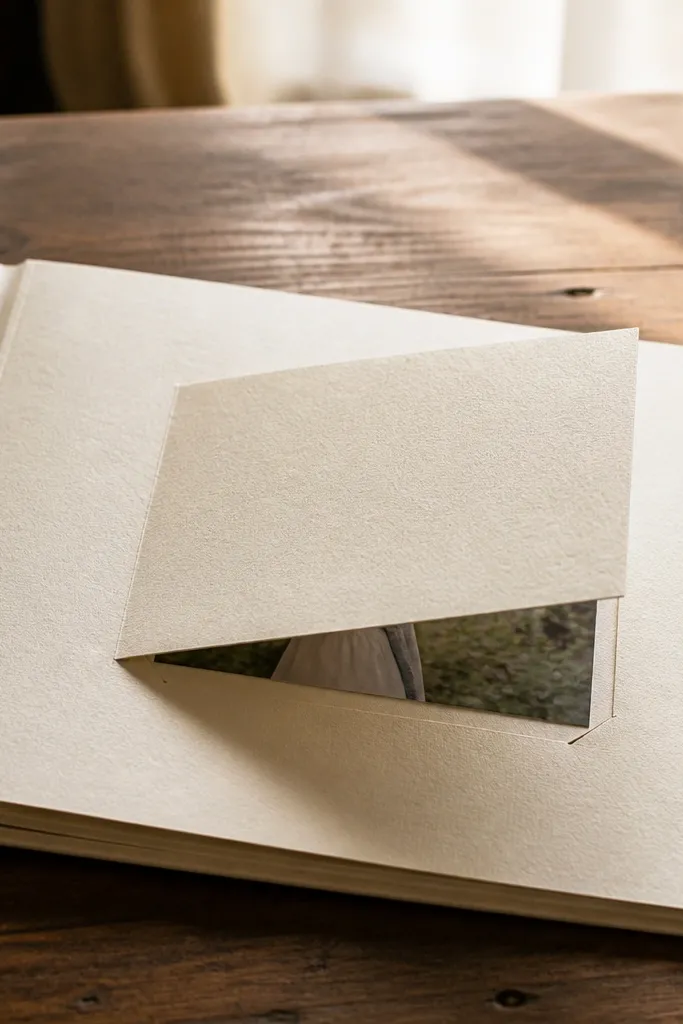
Fold-out pages make your scrapbook feel like a secret, but the look stays clean when the pocket is hidden behind a simple cover flap. This format is renter-friendly because it stays flat and doesn’t require wall hardware. It’s also perfect for keeping one favorite photo protected while still showing a styled layout around it. The photogenic appeal comes from the visible cover design and the crisp fold line. Time is about 2 hours for a single fold-out page with one hidden pocket.
Cut a base page from cardstock and create a fold line that divides the page into a cover flap and a pocket area. Make a photo pocket from clear sleeves or cardstock pocket layers sized to your photo. Attach the pocket to the inside of the fold so it opens upward without sagging. Decorate the cover flap with a photo mat border and a short title strip. Test the fold with the photo inside before gluing everything down, then seal the page in a clear sleeve if you want it extra protected.
Use a bone folder to sharpen the fold — it keeps the cover flap looking crisp in photos.
Don’t glue the pocket edges where the fold bends; it will tear or warp.
24. Painted Paper Backdrop With Photo Cutout Windows
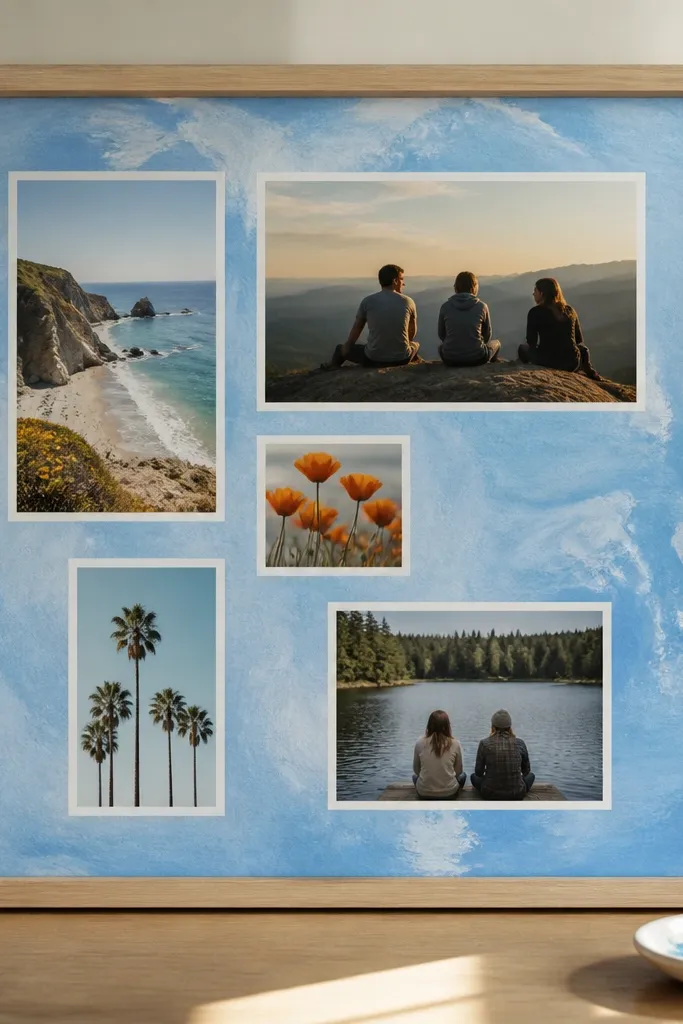
Window cutouts turn photos into “art prints” because the photo sits inside a frame cut from the painted paper. You get a custom background that looks like a designed poster, not a typical scrapbook page. This is renter-friendly because it’s a flat sheet you can store or frame, and you can control mess by painting on paper you own. Use limited colors so the background doesn’t fight the photos. Build time is about 2-3 hours including paint drying.
Paint a cardstock sheet with matte acrylic in 1-2 colors, using a sponge or brush for texture while keeping it even. Let it dry fully. Cut clean photo windows with a craft knife and ruler, leaving a narrow border around each opening. Place photos behind the windows and secure with photo corners or tape on the back side only. Add a title strip along one edge and seal the final sheet in a clear sleeve or frame it with a mat to protect the paint.
Pro tipUse matte paint and avoid wet paint near photo placement; glossy paint shows glare and smudges.
AvoidDon’t cut windows before the paint dries — edges tear and the border looks rough.
25. Layered Denim-Cover Frame Mat With Photo Inserts
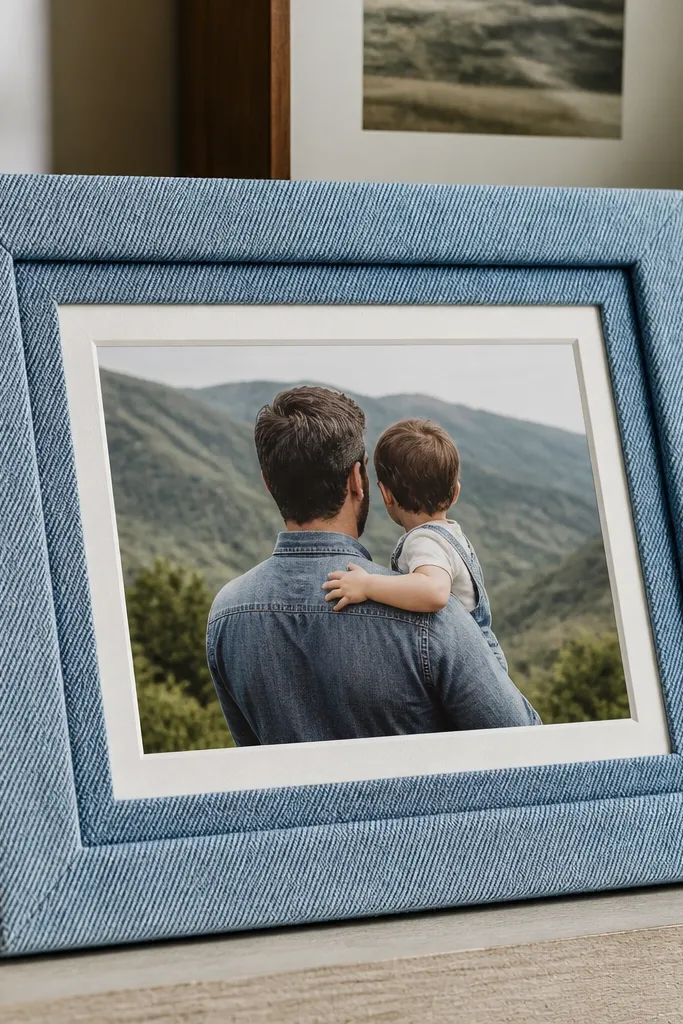
Denim mats make your photos look like they belong in a styled memory box. You’re covering a backing mat with denim fabric, then adding photo inserts with a clean border so the texture frames the images. This is renter-friendly because it’s inside a frame or sleeve; no permanent changes to your walls. The look is especially photogenic in warm light because denim texture adds depth without being shiny. Time is about 2-3 hours for one frame mat, depending on trimming and alignment.
Cut denim fabric to cover a frame backing panel and iron a fusible interfacing to keep it flat. Glue the fabric to the backing using fabric-safe adhesive and wrap edges neatly. Cut photo openings or placement rectangles and mount photos with photo corners so you can swap them later. Add a narrow paper border on top of the denim at the photo edges for a crisp frame. Place the mat into a frame with glass or a clear cover and hang it with removable hooks.
Use light denim for photos with cool tones; it brightens the overall look without adding glare.
Avoid thick denim seams where photos sit; they create bumps that show under frame glass.



