

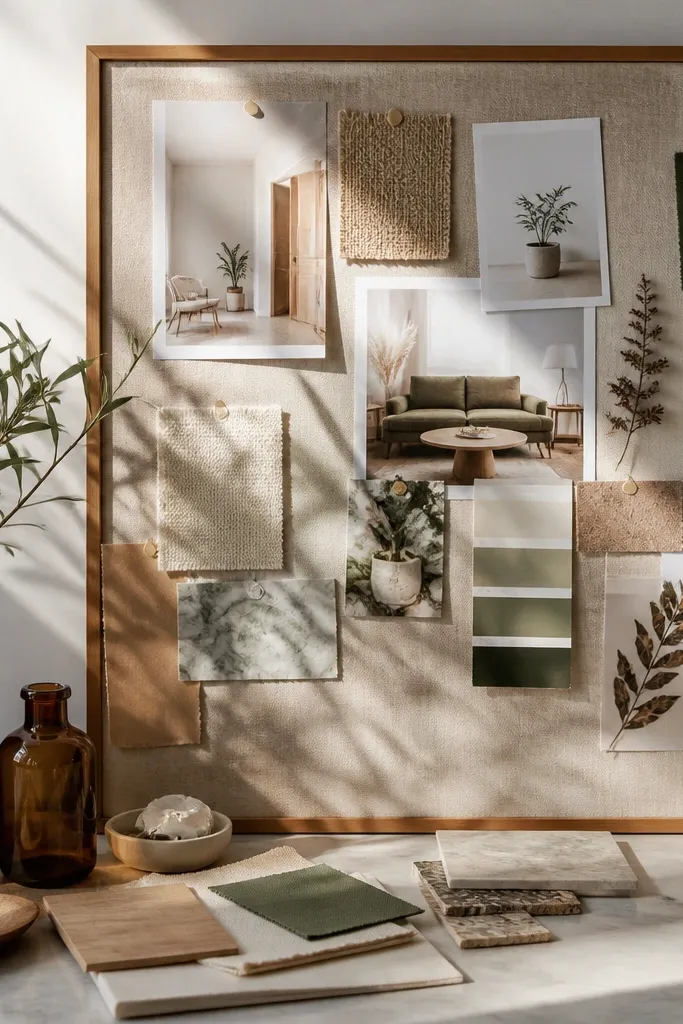
1. Command-Strip Fabric Pinboard With a Clean Grid
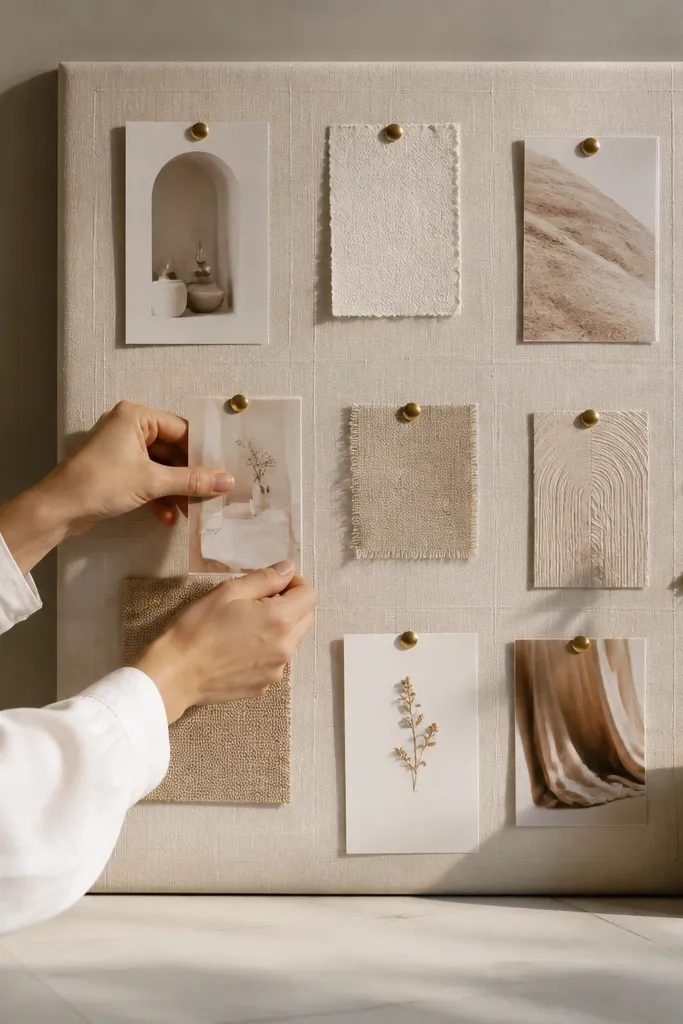
This is the version that looks like you paid for it, not like you made it at midnight. Fabric gives you a soft, matte surface that photographs well and hides small imperfections in paper edges. A simple grid layout keeps your career goals from blending together when you add updates. It’s also renter-friendly because you’re mounting a lightweight base with removable hooks, not drilling. Expect 2-3 hours for the first build and 15 minutes for future swaps.
Start by buying a thin foam board or canvas panel cut to your space, around 18x24 inches. Stretch linen-look fabric over it and staple or tape the back so the front stays smooth, then add a pencil grid with 1-inch spacing. Mount the finished board using 4-6 Command strips rated for medium weight, placing one near each corner and one centered on the long sides. Finish by pinning 6-10 printed images and writing labels on small cardstock rectangles, then cover with a matte sheet only if glare is a problem.
Use binder clips instead of paper clips for the labels — they look cleaner and hold tighter.
Don’t use shiny gift-wrap paper behind labels; it reflects light and makes the board harder to read.
2. Binder Ring Career Board With Page Tabs
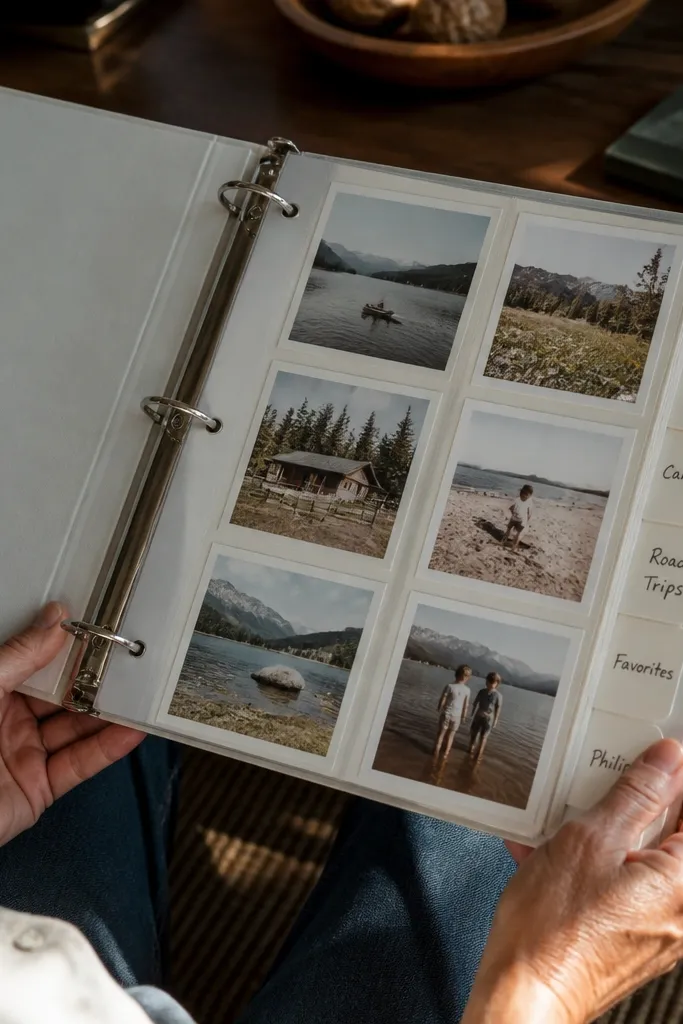
If you move a lot, this is the smartest visual system. A binder lets you rearrange goals without tearing anything, and it stays flat so your photos don’t warp. Tabs make it instantly scannable: roles, skills, portfolio proof, and next actions. The look is clean because page protectors keep edges crisp and the ring hardware adds a purposeful design element. It suits desks, shelves, and small apartments where wall space is limited.
Buy a 1.5-inch or 2-inch three-ring binder and matching clear page protectors. Create 4 sections with tabbed dividers and print your images in consistent sizes, like 4x6 or 3x5. Slide each set into page protectors and add printed labels on the bottom right of each page. Finally, tuck a “weekly action” card into the front pocket so you can update without reprinting everything.
Pro tipMake your labels with one font and one size, then vary only the color highlight for priorities.
AvoidSkip full-bleed pictures that touch the edge of protectors; they curl slightly and look messy.
3. Magnetic Sheet on a Rolling Cart Shelf
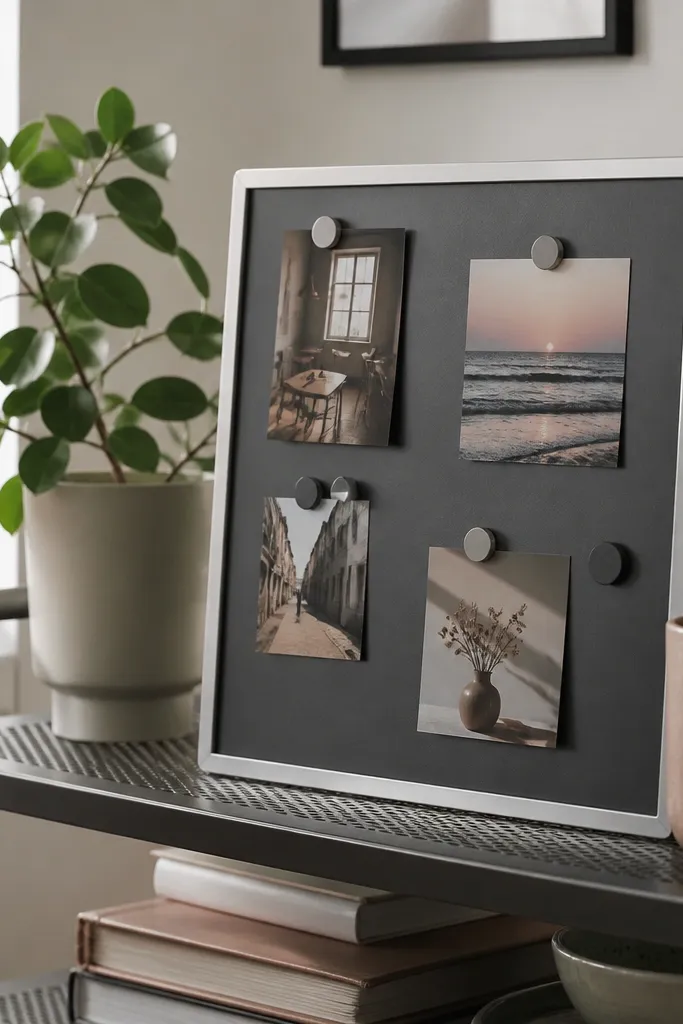
This one gives you a board that moves with you. A magnetic sheet on a rolling cart keeps everything visible, and you can roll it to different lighting during the day. It’s also one of the easiest renter-friendly options because you’re not mounting to walls. The aesthetic is industrial-clean: metal + matte photos + bold labels. It’s great for studios, dorms, and anywhere you want your career goals in sight while you work.
Find a rolling cart with a shelf you can dedicate, then cut a thin magnetic sheet to fit, typically 12x18 inches. Clean the shelf, place the magnetic sheet on top, and use small magnets or magnetic photo corners to attach prints. Create a layout with 1 anchor column for “target role” and a second column for “proof” items. Add a weekly rotation by swapping one magnet set each week.
Use round magnets for photos and small square magnets for paper labels so edges don’t tug.
Don’t use heavy fridge magnets; they distort the look and can bend thin photo prints.
4. Tension Rod Photo Line With Mini Clothespins
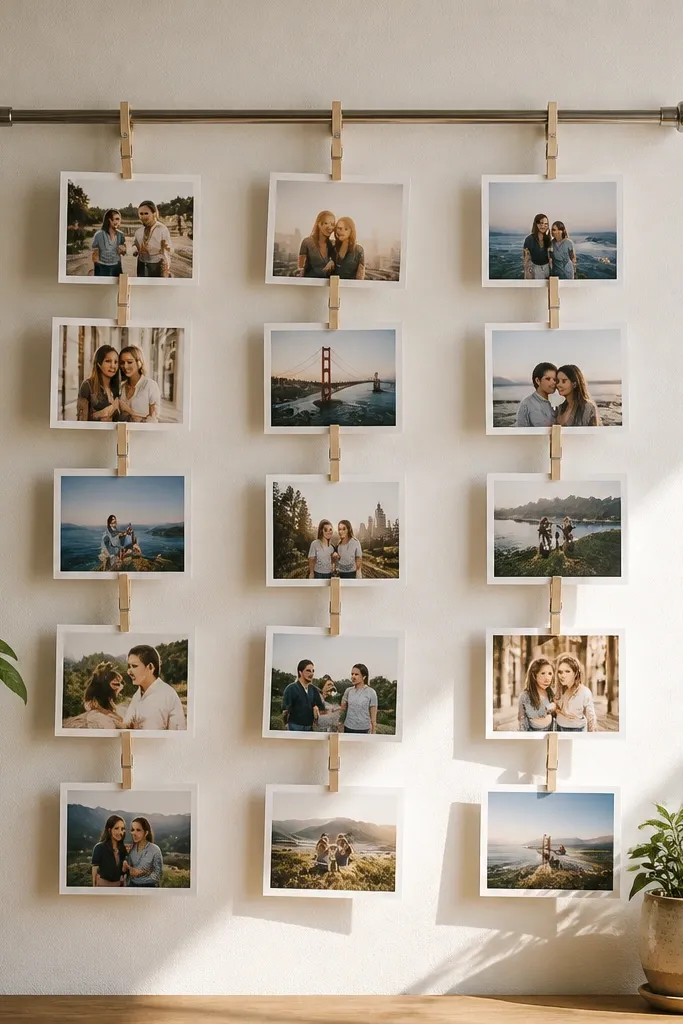
This is for renters who want a board that looks airy and stylish. A tension rod creates a clean “gallery line” without wall damage, and mini clothespins keep everything quick to swap. The vertical layout makes it easy to track a career path from goal to skill to action. It also photographs beautifully because there’s negative space around the images. Put it in a nook near your desk for daily visibility.
Measure your window frame or closet width and choose a tension rod that fits snugly, like 24-48 inches. Hang the rod at eye level, then clip 6-12 photos in a consistent size using mini clothespins. Add labels on small matte cardstock strips, clipped with the same style pins. Finish by spacing photos evenly, then tuck a single “next action” card at the bottom using a clip that matches the rest.
Pro tipPick clothespins in black or natural wood and stick to one finish so the line looks intentional.
AvoidDon’t mix pin sizes; it makes the board look random even if your images are great.
5. Floating Frame Collage Using Removable Adhesive Corners
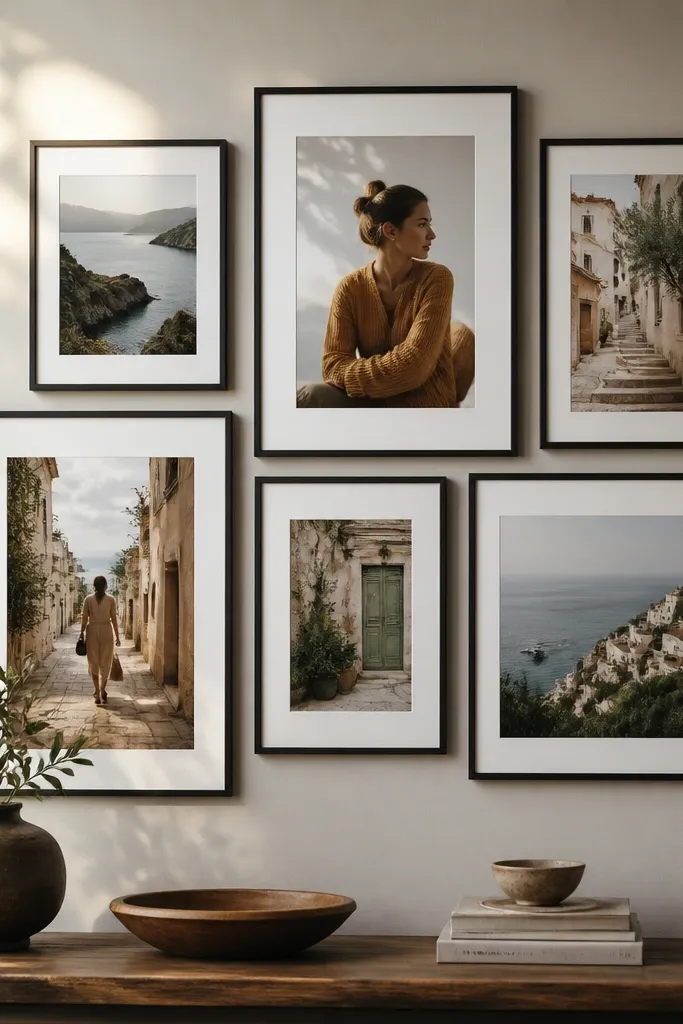
This gives you a gallery look that still works for renters. Instead of gluing down prints, you use removable adhesive corners so you can swap images later. A frame keeps everything aligned, and the glass or acrylic front makes it look polished. It’s ideal when you want your career goals to look like decor, not craft. Place it above a desk or on a hallway wall where you’ll actually see it.
Choose a flat frame with a backing that holds paper, like 11x14 or 16x20 inches. Print images in two sizes and plan a layout with masking tape on the backing, then remove tape and attach with removable adhesive photo corners. Add a small text block for labels using a single printed type style, then place everything behind the glass. Mount the frame with removable wall strips rated for the frame’s weight.
Use matte paper prints inside the frame; glossy photos create glare that hides your labels.
Don’t overcrowd the frame; if everything touches, the labels stop reading.
6. Wall Calendar Turned Career Tracker With Repurpose Clips
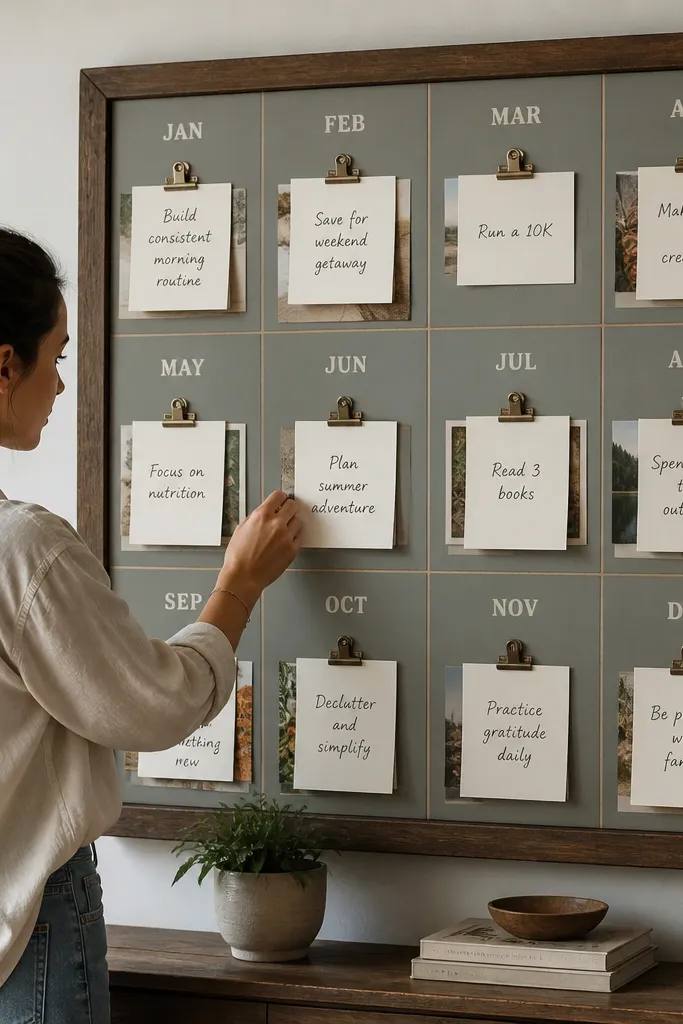
A vision board that doesn’t change stays decorative. Turning a cheap wall calendar board into a career tracker makes it functional and still good-looking. You get monthly structure for deadlines, portfolio submissions, or certifications without clutter. Clip-on cards keep your design modular, and the calendar grid adds order to your images. This works especially well for people who need deadlines to act.
Buy a blank or low-cost calendar board and remove any loose pieces. Cover the board with a matte paper sheet or contact paper in a solid color, then outline monthly blocks with a ruler and pencil. Attach a strip of small metal clips or binder-style clips along one edge for cards. Create 8-12 clipped cards with images and short labels, then update one block each week with a new action card.
Pro tipUse one color per month for your action labels so you can scan quickly.
AvoidSkip wet-ink markers on plastic-coated boards; they smear and look messy.
7. Scrapbook Page Vision Board in a Clear Photo Box
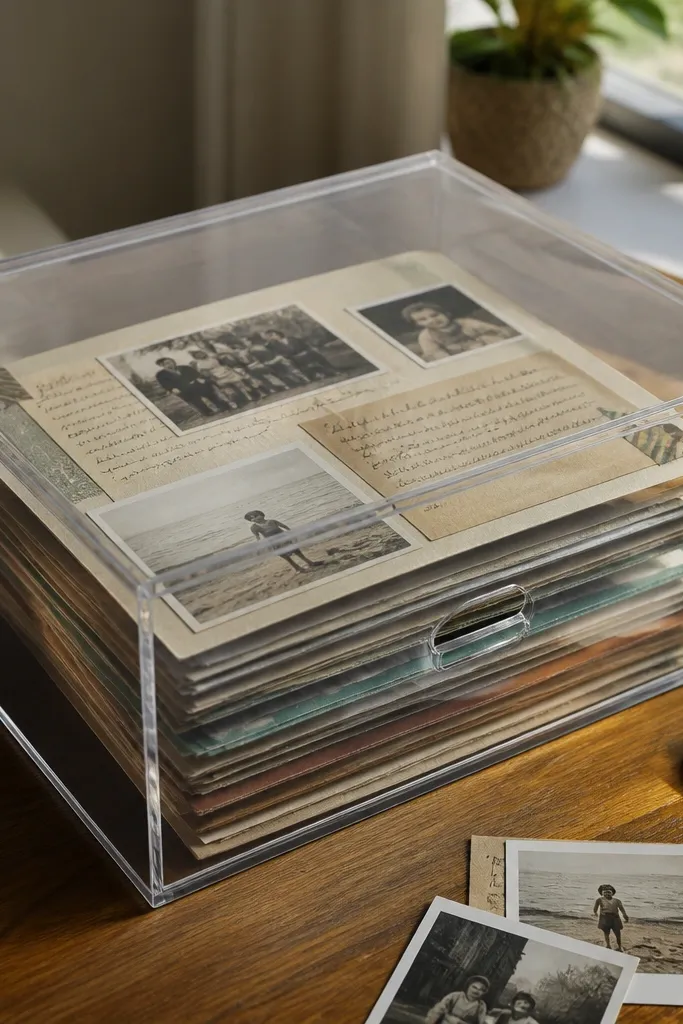
This is a renter-safe choice when you don’t want anything permanently on walls. A clear photo box looks neat on a shelf, and it lets you flip through your career story like a mini magazine. Scrapbook pages give you texture and layering, but the clear storage keeps it tidy when you aren’t displaying it. It’s photogenic because you can photograph the pages straight down, with shadows that look intentional. Great for people who like to review goals in the evening.
Get a clear plastic photo box with a lid and enough room for 8.5x11 pages. Make 6-10 scrapbook-style pages using matte cardstock backgrounds and printed photos, keeping labels consistent in the same corner. Use photo tape or glue dots on the back only so the front stays flat. Store each page in a page protector inside the box, then display the open box on your desk when you want it in view.
Pro tipAdd a small elastic band around the box pages so they don’t shift inside the protector.
AvoidAvoid thick embellishments that create bulges; they make pages harder to slide into protectors.
8. Pegboard With Removable Hooks and Color-Coded Goals
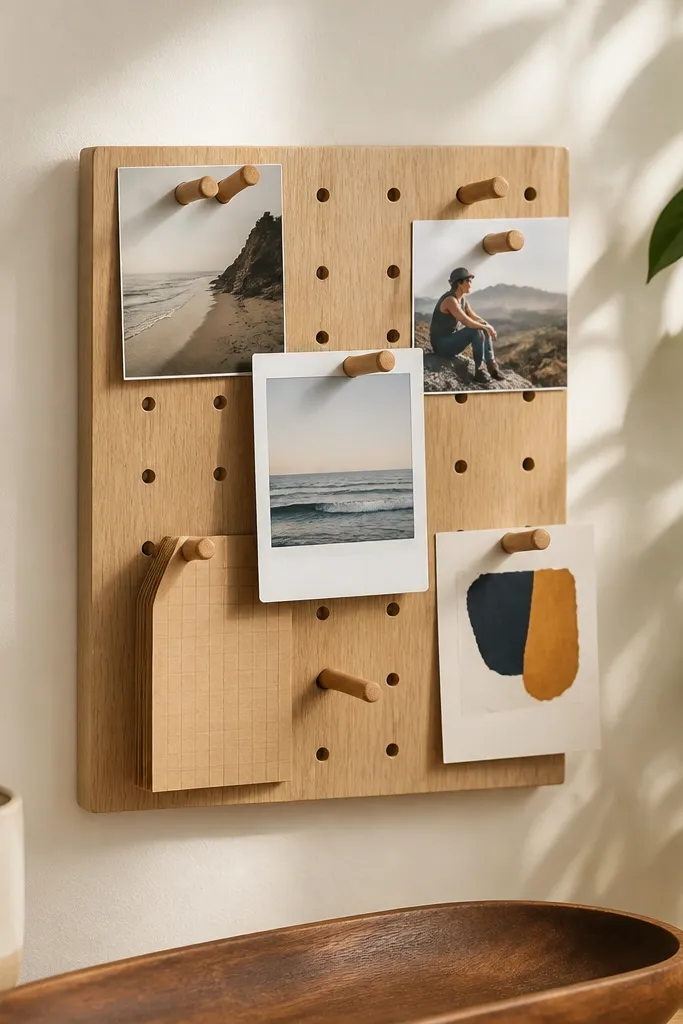
Pegboard makes your career goals look organized and technical, in a good way. With removable hooks, you can move images without re-gluing anything, and the grid pattern makes the whole board feel designed. Color-coded goal cards keep your board readable from across the room. This works best in a home office corner where you want your vision and your workflow to visually match. It’s a strong option for renters because you can mount with hardware designed for non-drill installation.
Buy a small pegboard panel, 12x18 to 24x36 inches, and mounting strips or hooks made for your wall type. Mount the pegboard level, then add removable hooks in a grid pattern. Attach printed photos with small binder clips to keep them easy to swap. Create color-coded cards by using 3 cardstock colors and one label style, then hang them by category using hooks sized to your cards.
Use clear acrylic mini label holders if you want the board to look extra polished.
Don’t hang heavy frames on a pegboard panel — keep it to lightweight prints and cards.
9. Upcycled Jewelry Organizer With Career Micro-Goals
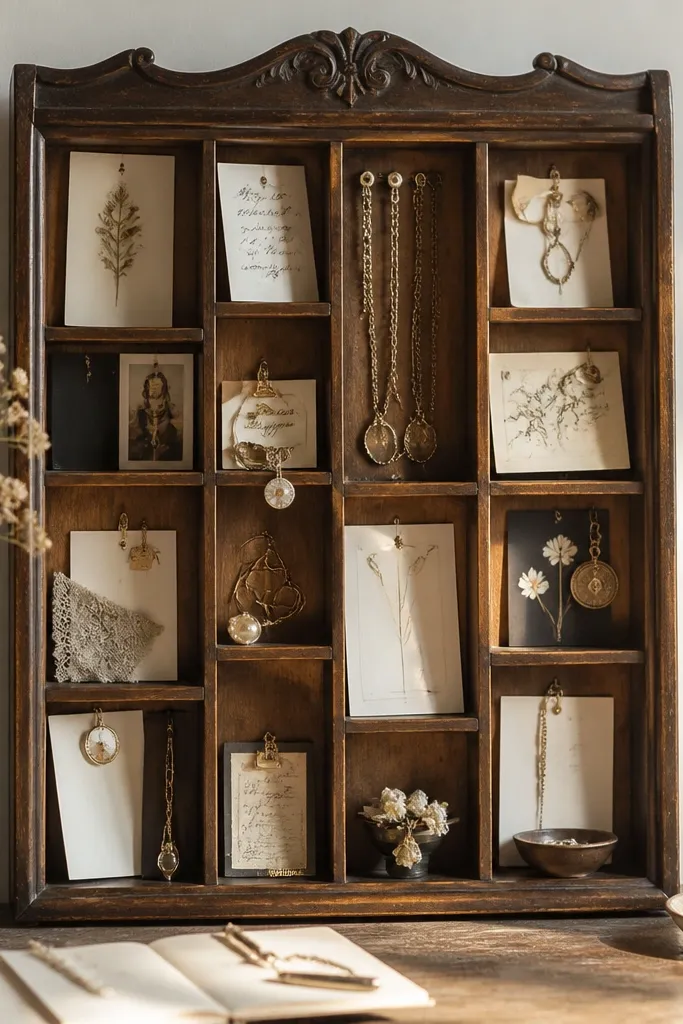
This is the “tiny but powerful” board for people who like micro-steps. Jewelry organizers already have compartments, so your career goals get sorted without you drawing a grid. The look is neat, and the compartments create a clean visual rhythm. It’s also a great solution if you don’t want big posters — it fits on a dresser, shelf, or desk tray. Use it for actions like “write 2 outreach emails” or “draft portfolio case study outline.”
Find a vintage or cheap jewelry organizer with multiple sections and a flat backing. Clean it, then line compartments with matte paper so prints don’t snag. Add photos using mini binder clips or glue dots on the back edge only, keeping the front flat. Write micro-goals on small cardstock and tuck them into compartments, then add one “weekly focus” card at the top or center.
Pro tipChoose organizer colors that match your palette, like black, natural wood, or brushed silver.
AvoidSkip glossy paper liners; they reflect light and make the cards harder to read.
10. Wallpaper Sample Vision Board With Layered Cutouts
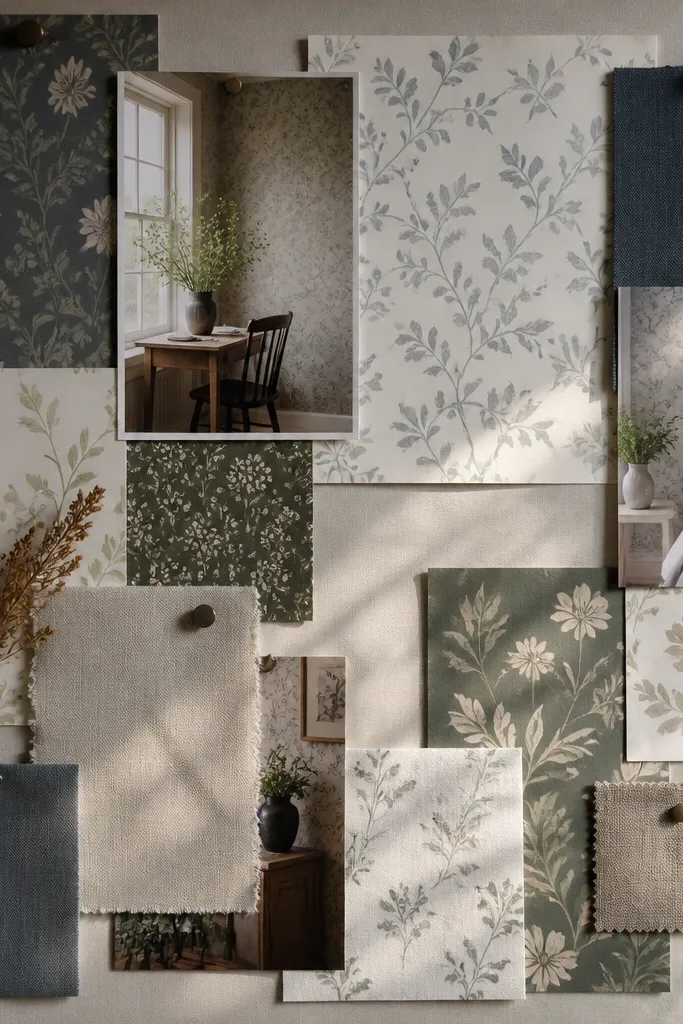
Wallpaper samples look designer because they already have patterns and color depth. Cut them into consistent rectangles, then layer your career photos and label strips on top for a collage that still looks intentional. This is one of the easiest ways to get visual richness without buying large prints. It’s renter-friendly because you can mount the finished collage with removable strips and swap pieces later. Great for people who want their vision board to feel like decor, not paperwork.
Collect 6-12 wallpaper samples and cut them into matching sizes, like 4x6 or 5x7 inches. Arrange them on a backing board and mark your layout, then glue photos to the wallpaper with photo-safe adhesive. Add labels using matte cardstock and keep text size consistent across the board. Mount the whole collage to a lightweight backing like foam board, then attach to the wall using removable picture strips.
Pro tipPick one pattern as the background and keep the rest solid or subtle to avoid visual noise.
AvoidDon’t mix too many loud patterns; three max per board keeps it readable.
11. Cork Tile Board With Removable Frame and Label Stickers
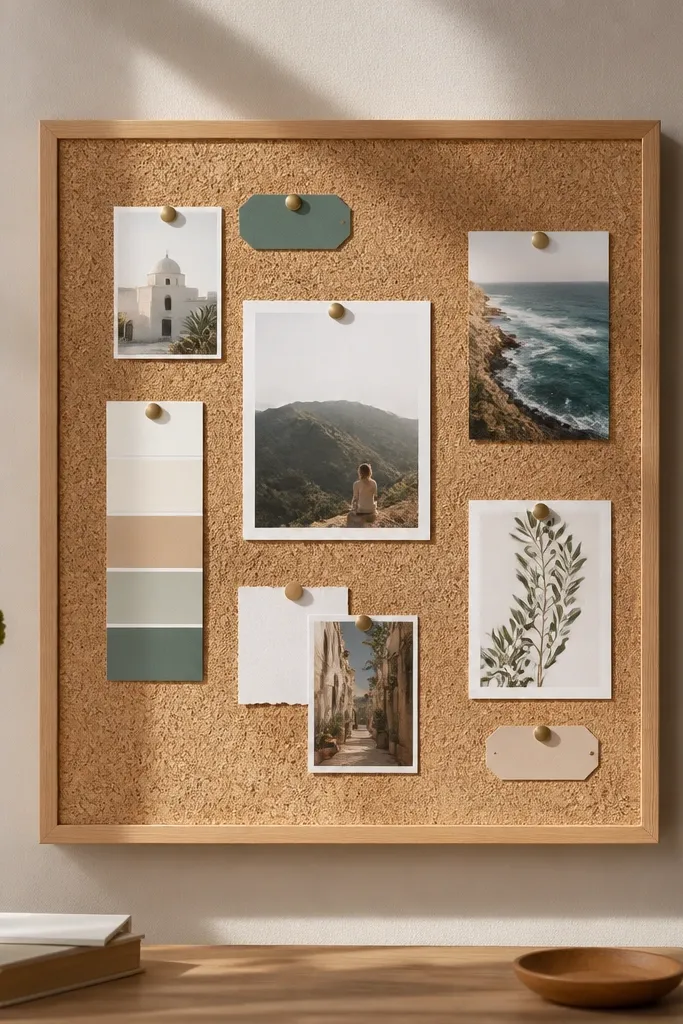
Cork is a dream for vision boards because it grips paper and looks warm. Use cork tiles inside a frame so the edges look clean, and pin your images with straight, uniform push pins. Label stickers or printed label strips make the board feel crisp instead of messy. This format is great for swapping because you can move pins without tearing anything. It works well in kitchens, hallways, and desks where you want quick visibility.
Buy cork tiles that fit into a frame, or cut cork sheet to size, like 12x24 or 18x24 inches. Place cork into a thin frame backing and secure it so it lies flat. Pin 8-14 images with straight push pins, then add label strips beneath each photo using a consistent alignment. Mount the frame with removable strips and keep the pins short so they don’t scratch the glass.
Pro tipUse black push pins for a cleaner look than mixed pin colors.
AvoidAvoid over-pin density; if everything is pinned at once, the text becomes unreadable.
12. Linen Folder Vision Board With Pockets for Proof

This is an aesthetic, low-effort system that still feels like a vision board. A linen folder with pockets lets you store proof items — printed portfolio snippets, certification info, job titles — and pull them out when you review. It looks soft and intentional on a shelf, and the pockets keep everything from turning into loose paper. It’s a good fit for renters who want something functional without wall mounting. Use it like a “career desk book.”
Buy or make a linen-look folder with inside pockets, ideally 9x12 or 11x14 size. Print images and labels in consistent sizes, then tuck each set into a pocket sleeve. Add one front pocket for your weekly action card and one back pocket for your longer-term target. Keep the labels printed on matte cardstock so they don’t slide around inside the folder.
Use photo corners or tabs on the pocket items so you can flip them out quickly without crumpling.
Don’t use glossy slip pockets; they catch light and make labels hard to read.
13. Yarn-Wrapped Mason Jar String Banner With Mini Cards
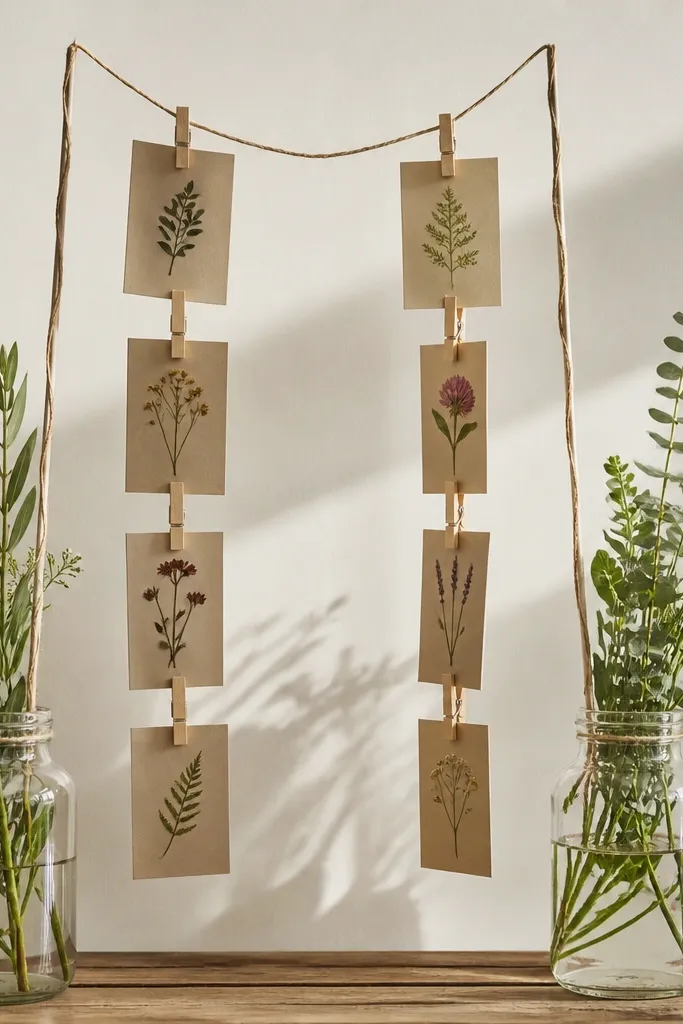
This one looks craft-cute but still polished. Mason jars hold the tension of the string, and yarn-wrapping makes it look warm and intentional. Clip mini cards with printed images and short labels so your board updates without mess. It also gives you a vertical “timeline” feel, which helps career goals feel like steps instead of a random wish list. Great for renters because it sits on a console, shelf, or desk without wall damage.
Wrap two mason jars with yarn until they look cohesive, then hot-glue or tie the yarn end securely. Stretch string between the jars and clip small card holders along the line using clothespins or mini binder clips. Print 8-10 mini cards at a consistent size, like 3x4 inches, and add labels on the bottom edge. Arrange the cards in order from target role to skill proof to weekly action, then tighten the string so it stays straight.
Pro tipUse matte tape to secure label edges so they don’t curl when handled.
AvoidAvoid stretchy string; it sags and makes the whole banner look sloppy.
14. Upcycled Window Frame With Removable Fabric Clips
A window frame makes your vision board look like decor, period. Stretch a thin neutral fabric across the frame and clip your images and labels directly onto it. The wood adds texture, and the fabric gives you a soft surface that hides uneven edges. This is one of the best renter-friendly “statement pieces” because you can mount with removable hooks or keep it freestanding on a chair or dresser. It fits well in living rooms and bedrooms where you want the board to be part of the room.
Find a shallow window frame and clean it so dust doesn’t stick to fabric. Stretch a neutral fabric across the back and staple it evenly, then add small metal clip hooks along the inside lip. Print images and labels on matte paper, then clip them using small binder clips or fabric clips. Mount using removable picture strips if it’s light, or lean it safely against a wall with a non-slip mat underneath.
Pro tipKeep clips the same metal finish to avoid a mismatched “garage sale” look.
AvoidDon’t use heavy cardstock behind thin fabric; it warps and makes the fabric look pulled unevenly.
15. Heat Transfer Vinyl Career Labels on Matte Board
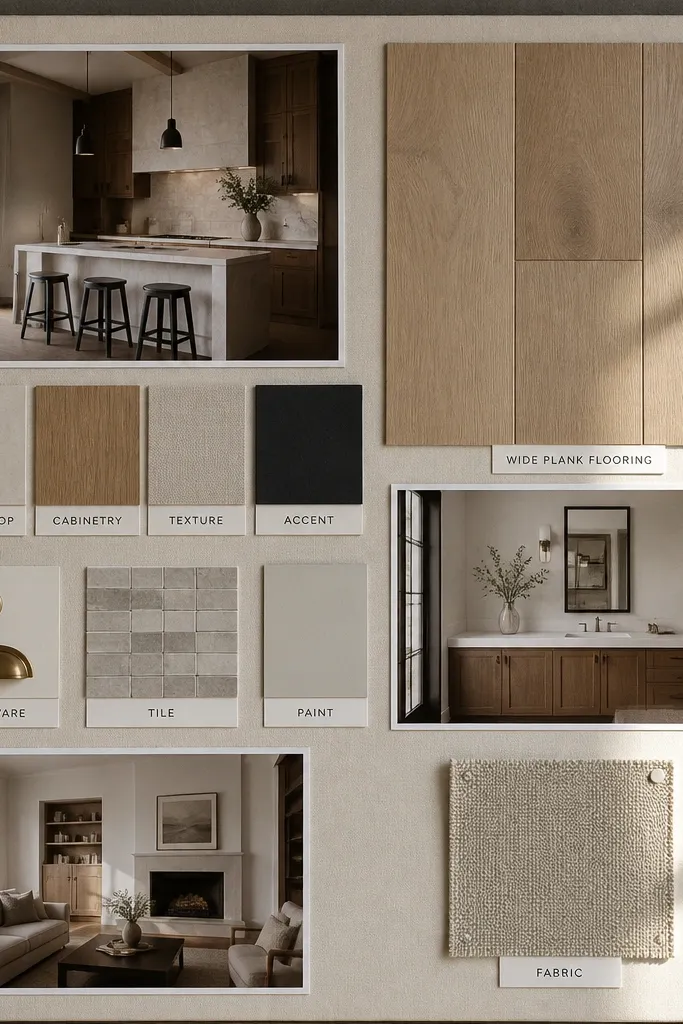
This is for people who want their board to look clean and professional, not handmade. Heat transfer vinyl labels have sharp edges and consistent type, so your vision board reads clearly from across the room. Pair it with matte board so the labels don’t reflect. The look is modern and crisp, and it’s great for a “target role + skills + action” layout. You’ll spend more time on the label design than on assembly, but the result looks high-end.
Get a matte board like foam core or a thin matte panel and cut it to 18x24 inches. Use a vinyl cutting machine or pre-cut vinyl sheets to make labels in one font size system, then press using a heat press or iron with a protective parchment sheet. Arrange 6-12 photos in a grid and attach them with removable photo corners. Place vinyl labels consistently under each photo, then mount the board with removable strips rated for the panel weight.
Test the heat setting on scrap vinyl so letters don’t lift at the corners.
Skip glossy board — vinyl can look washed out under glare.
16. Painted Cardboard Shadow Box With Swap Pages
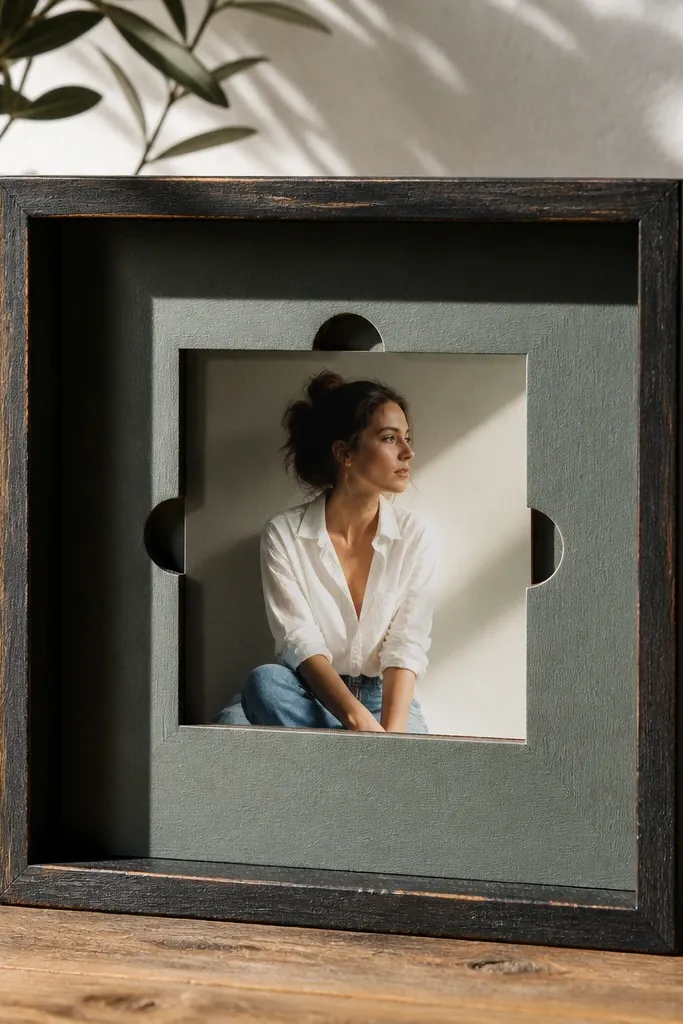
Shadow boxes give you depth, and depth makes a vision board feel intentional on camera. You can paint the backing to match your palette, then slide swap pages in and out like a mini exhibit. This keeps your board from aging badly because you’re not permanently gluing everything. It’s also light enough for renters if you keep the frame small. Put it on a shelf or hang it with removable hardware for a gallery effect.
Cut a lightweight shadow box frame, or build one from thick cardboard and a clear front sheet, like 12x16 inches. Paint the backing with matte acrylic and let it dry fully. Create insert pages on cardstock that fit inside the shadow box depth, then attach photos with removable corners on the insert page. Add one “target role” insert at the top and one “next action” insert at the bottom, then mount the shadow box using removable picture strips.
Pro tipUse a single matte paint color for the backing and let photos provide the contrast.
AvoidDon’t use thick foam inserts that push against the clear front; it creates pressure marks.
17. Pegboard Desk Stand With Clip-On Goal Cards
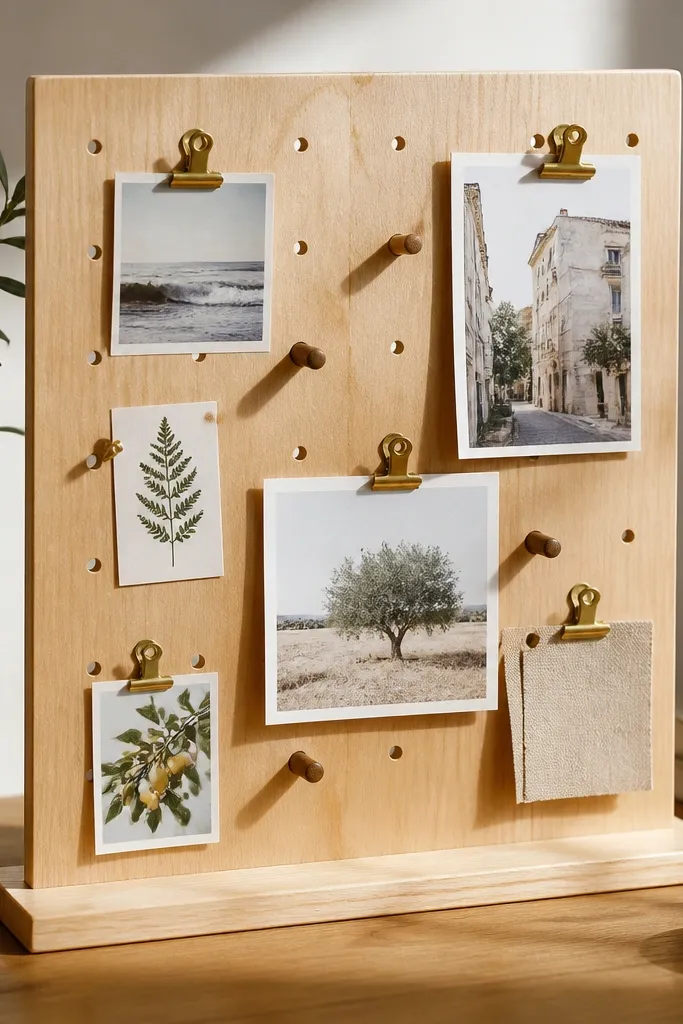
If you want your vision board in your workspace without wall mounting, a desk pegboard stand is perfect. It looks tidy because the holes create a built-in grid, and clip-on cards stay replaceable. This format is also great for “daily action” because you can pin one card in the most visible spot. It’s visually clean, and it’s easy to photograph from your desk angle. Works for renters with limited wall space or strict landlords.
Buy a small pegboard desk stand or build one from a pegboard panel with a stable base. Attach removable hooks or small clips to the peg holes, then clip printed photos and labels onto those hooks. Keep your layout to 3 zones: top for target role, middle for skills, bottom for weekly action. Use matte cardstock for labels and print photos in consistent sizes so the board looks designed, not random.
Pro tipAdd a small tray at the base for replacement cards so you can swap in under 2 minutes.
AvoidDon’t leave hooks empty; empty space looks unfinished unless you plan it.
18. Fabric Scrap Patchwork Board With Removable Velcro Strips
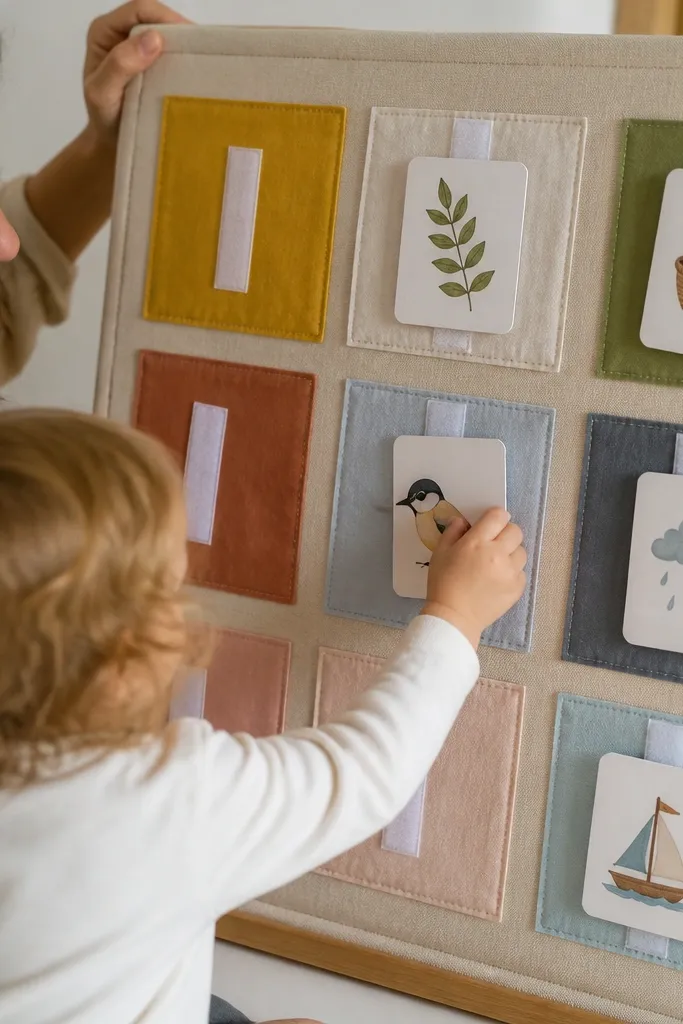
Patchwork fabric creates a warm, textured board that looks handmade in a good way. The key is using Velcro strips so your photos don’t get stuck with permanent adhesives. Each patch becomes a “category” area, which makes your career goals easier to interpret. This is ideal for renters because it mounts lightly and swaps cleanly. Also, fabric hides paper corners and makes the whole board look cohesive even if your prints aren’t identical sizes.
Pick a backing board size like 18x24 inches and cover it with fabric scraps arranged in a grid, keeping patches about 4-6 inches wide. Glue or staple fabric to the backing so the surface is flat. Add Velcro hook patches to the fabric and loop strips to the backs of your photo cards, or use Velcro dots for smaller pieces. Mount the board with removable strips, then arrange your categories using consistent label placement on each patch.
Use one neutral thread color and keep stitch lines straight so the patchwork looks intentional.
Don’t mix too many fabric types; too much texture can make the labels feel lost.
19. Resin-Coated Photo Strips on a Magnetic Rail
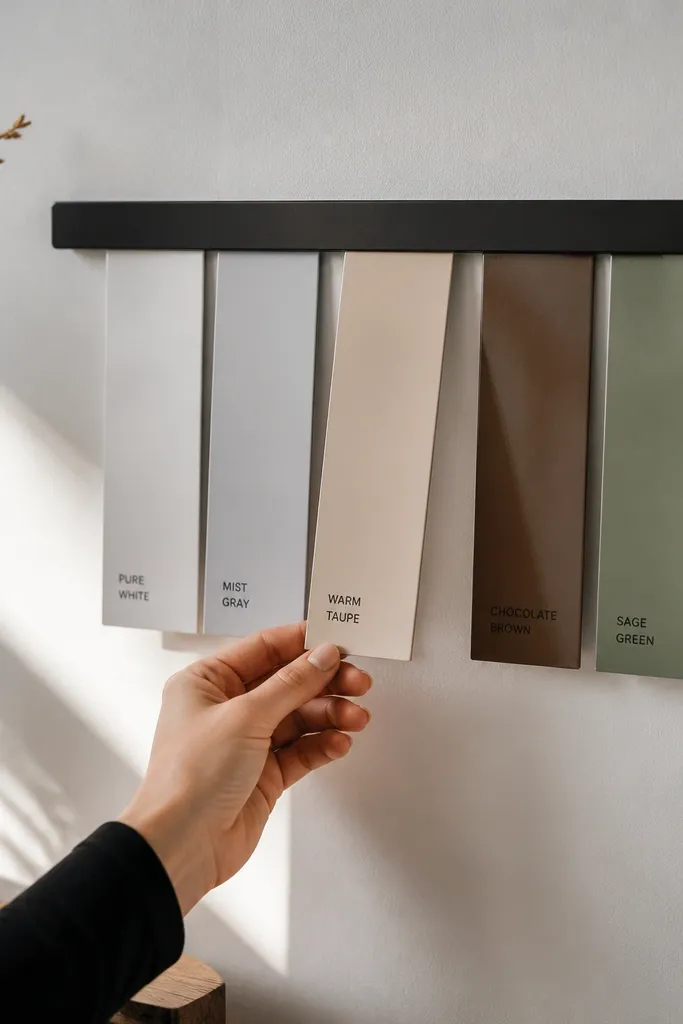
This is a “clean tech” look for your career vision board. Magnetic rails hold thin photo strips in a straight line, and resin-coated strips give a smooth finish that catches light without glare when you use matte resin or a satin finish. It’s renter-friendly because you mount a lightweight rail with removable hardware. The aesthetic is minimal, and the layout makes your goals look like a system. Best for small spaces where you want one strong visual instead of a big collage.
Buy a magnetic rail system made for lightweight photos, then mount it with removable picture hardware rated for rail weight. Cut photo strips to a consistent width, like 2.5-3 inches, and coat them with a thin resin layer if you’re using satin/matte finish products. Attach the strips to magnets using small magnetic tabs so the strip edges stay straight. Add labels on each strip with printed matte tape or vinyl, then slide the strips onto the rail in order from goal to skills to action.
Pro tipKeep resin layers thin and level; thick coats look uneven and cloudy.
AvoidSkip glossy finishes; they reflect overhead lights and hide text.
20. Window Cling Vision Board for Temporary Wall Goals

For renters who want zero damage, window cling boards are the easiest way to create a daily career reminder. You get a framed look from the window edges, and the glass lighting makes photos pop. Use clings for your main visuals and swap them as your goals evolve. It’s also ideal for people who worry about wall paint or deposits. The board stays visible during the day and looks dramatic in natural light.
Print your photos on matte photo paper and cut them to consistent sizes, like 4x6 and 2x4 for labels. Use reusable window cling sheets or cling vinyl backing and press your prints onto the cling material. Arrange them on the window in a structured grid: top for target role, middle for skills, bottom for weekly action. Clean the window with a dry microfiber first so clings stick cleanly, then remove and replace without residue.
Pro tipUse matte paper and keep label text short so it stays readable through distance and glare.
AvoidDon’t stack clings too tightly; they create bubbles that look sloppy.



