
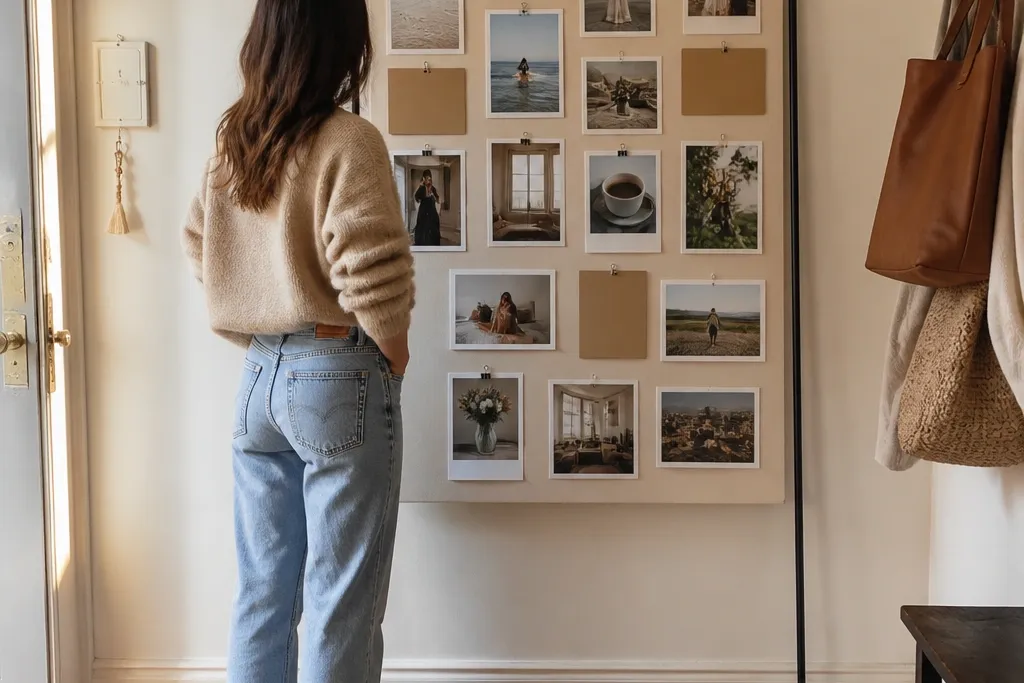
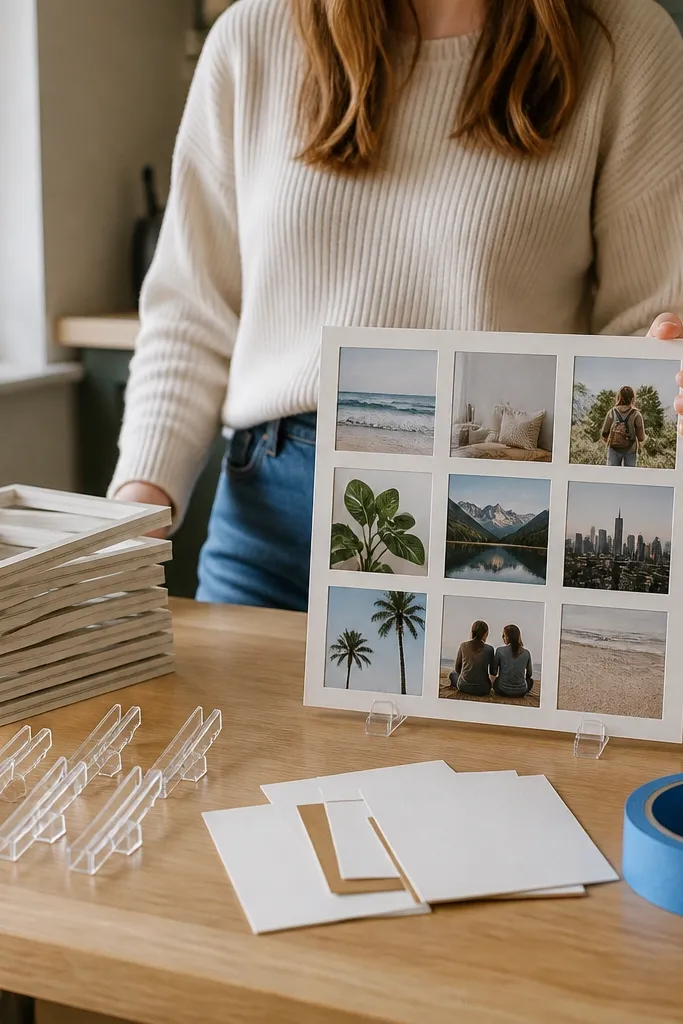
1. Clip-on Photo Grid from a Repurposed Clipboard
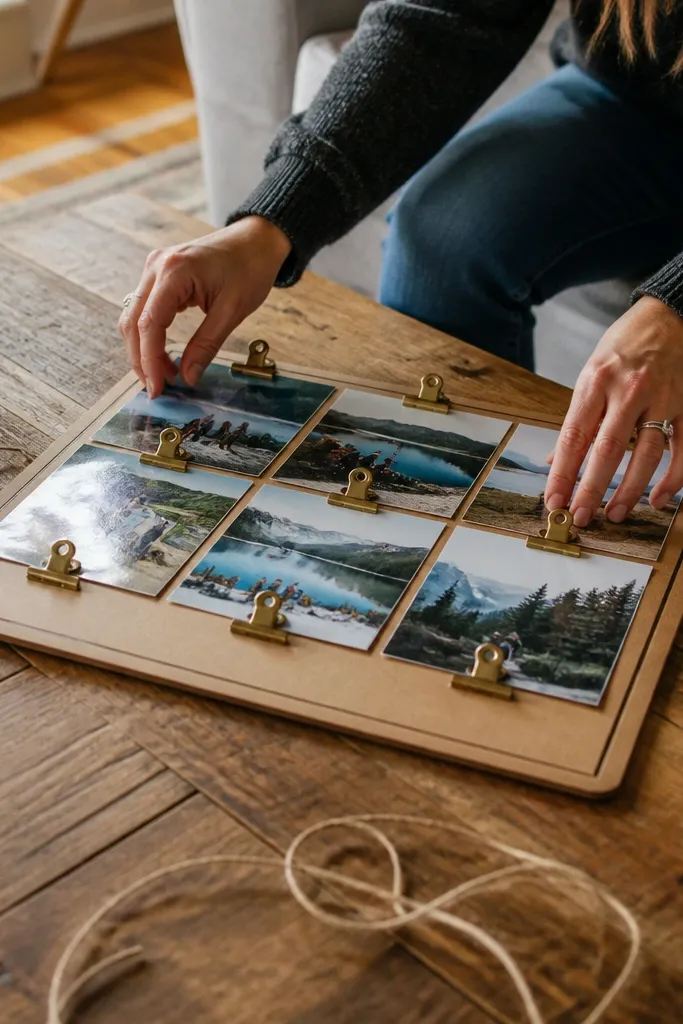
This layout is fast because the clipboard already gives you a rigid backing and a built-in structure. Clip-on display also looks clean in pictures since your edges stay straight, and you can swap photos without re-taping anything. Use kraft paper as the background so the clipped photos pop without glare. Add tiny caption tags in one color to keep the board readable but not cluttered. It’s best for beginners and for anyone who wants a board they can store flat between seasons.
Pro tipIf your clipboard surface is glossy, lightly scuff it with a dry paper towel so tape grips better.
Cut a piece of kraft paper to fit the clipboard backing and tape the corners down with removable tape. Print or cut 12 images, then trim them so each one has a 1/2-inch border of matching matte paper behind it. Use mini binder clips to clip each photo in a 3x4 grid, spacing them evenly by eye with the clipboard’s top and bottom margins. Finally, add 12 small labels using a single pen color and clip them to the bottom edge of each photo.
AvoidDon’t overlap photos — overlapping makes the grid look messy fast.
2. Tension-Rod Fabric Vision Board with Stitched Photo Pockets
A fabric board instantly looks softer and more styled than paper-only boards. The tension rod means zero wall damage, and the pocket format keeps images protected and aligned. Use thick cotton or canvas so the board holds shape and doesn’t sag in photos. This is one of the best options for renters because you can slide it down and remove it in minutes. The stitched pockets also make it feel like a designed organizer, not a bunch of taped prints.
Pro tipUse iron-on interfacing behind the pockets so the fabric stays flat when you insert photos.
Sew or hand-stitch small rectangular pockets onto a 24x36-inch fabric panel, leaving a 1-inch margin around the edges. Space pockets into a 3x4 grid so each pocket is about 7x5 inches (adjust for your photo sizes). Hang the panel from a tension rod using clothespins or a simple rod sleeve, then insert photos into the pockets. Add short labels on a separate strip of fabric pinned under the rod so you can swap them later.
AvoidAvoid thin jersey fabric — it stretches and makes the grid look crooked.
3. Magnetic Metal Drawer Back Board
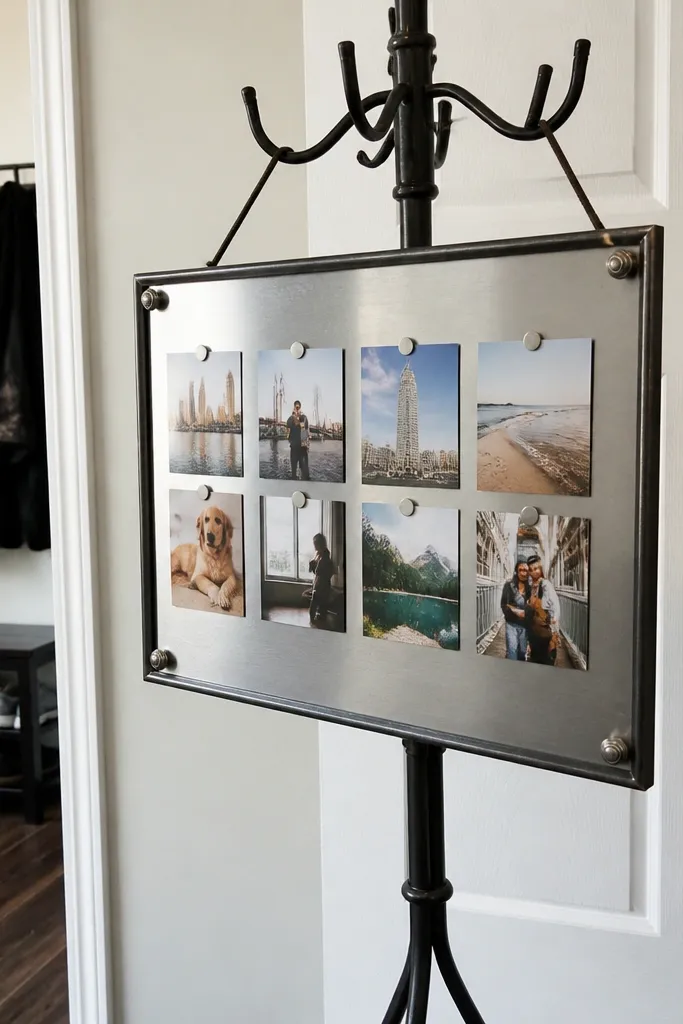
If you have any metal piece lying around, this is the fastest way to make a clean, editable board. Magnets keep your photos perfectly flat, so your pictures look crisp and aligned. A drawer back also gives you a built-in border and a sturdy shape for hanging on a door hook or stand. This layout looks especially good with black-and-white photos plus one accent color. It’s also great for planners who update their board weekly.
Find a flat metal panel (like the back of an old dresser drawer) and clean it so magnets grip. Cut matte cardstock to size and place it behind the metal edges if you want a color background. Print photos in 2-inch by 3-inch or 3-inch by 4-inch sizes, then attach small magnets to the back corners of each photo using removable adhesive dots. Arrange photos in a grid on the metal surface and add small magnetic label strips beneath the images.
Use rare-earth magnets with a thin profile so they don’t warp your photos or show too much bulk.
Don’t use heavy photo paper with weak magnets — it will tilt and ruin alignment.
4. Wallpaper Sample Strip Board with Fabric Tabs
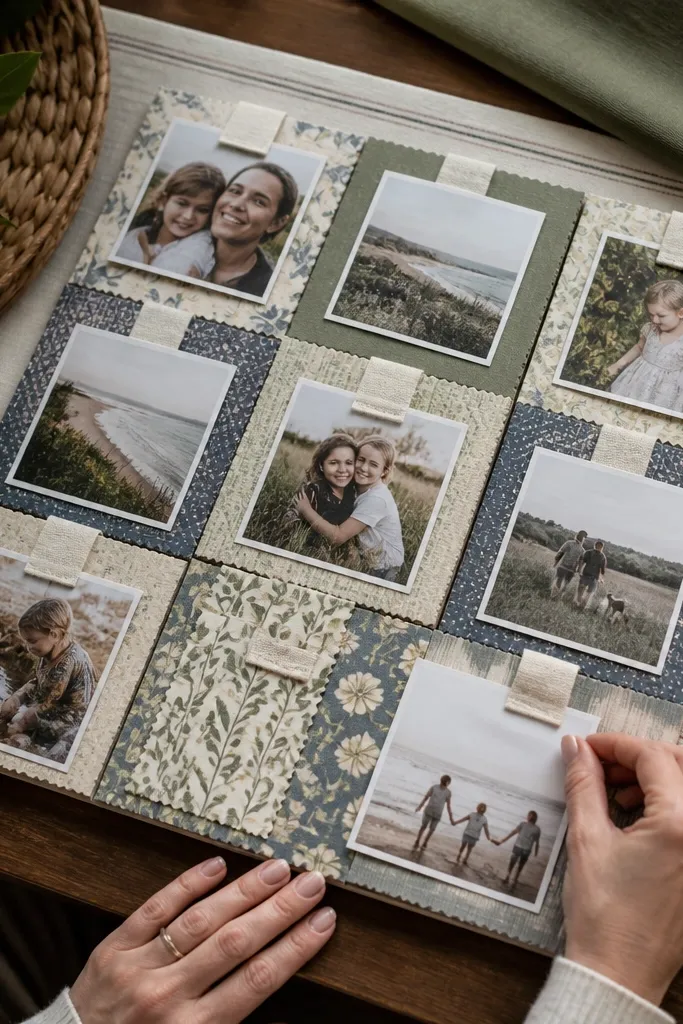
Wallpaper samples look intentional because they already have pattern and a finished edge. This board uses short strips as a decorative grid, then you attach photos with fabric tabs for easy swapping. It’s photogenic because each panel has texture, and the tabs create a neat, layered look. Choose one wallpaper type for the whole board to keep it cohesive. This is great for renters because wallpaper samples are flat, removable, and easy to store.
Pro tipMatch tab color to your accent color in the photos, like rust fabric for warm tones.
Cut wallpaper strips into equal rectangles, like 8x6 inches, and arrange them in a 3x4 grid on a backing board. Tape a strip of scrap fabric along each strip’s top edge so it forms a tab you can tuck photos into. Place a matte paper layer behind each photo to keep colors from fighting the pattern. Attach a removable backing to the wall using poster strips placed only at the corners.
AvoidAvoid mixing multiple wallpapers — it makes the board look busy instead of designed.
5. Old Frame + Removable Window Film Photo Panel
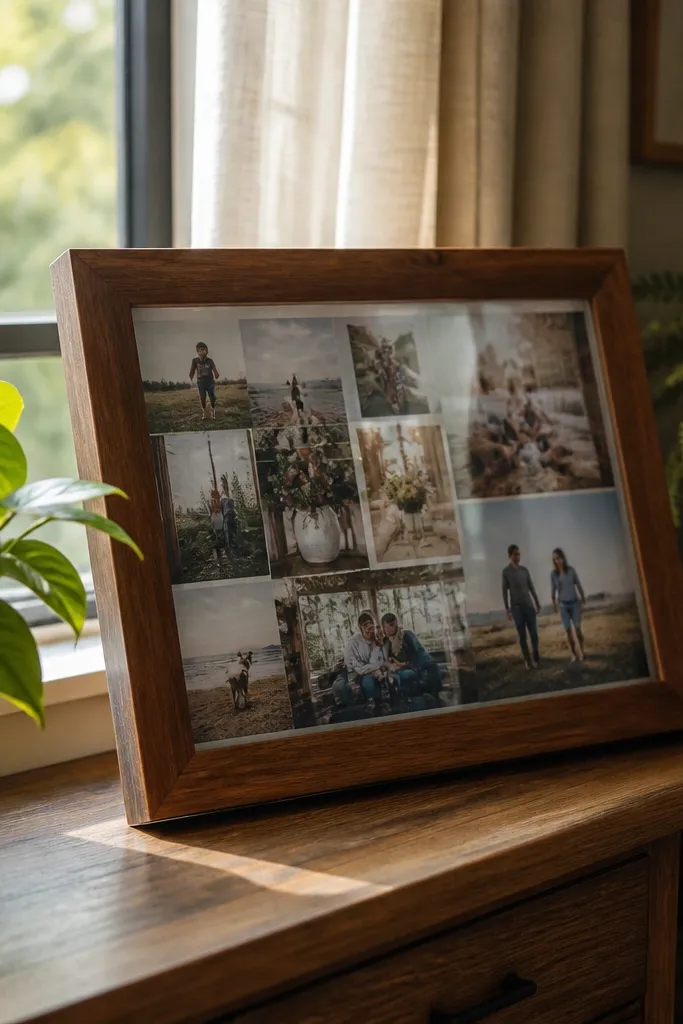
A thrifted frame makes the whole layout look finished even if the inside is DIY. Use removable window film or static cling film as the photo-holding layer so you don’t glue prints to anything permanent. The film also gives a slight sheen that can make photos pop under daylight. This is a good choice when you want a wall piece but your landlord says no tape, no holes, or no permanent adhesive. Keep the frame light and hang it with a command-style hanging method.
Remove any old backing from the frame and clean the inside edges. Cut a sheet of static cling film to size and lay it flat against the frame backing. Place printed photos in your 3x4 grid, then press each photo gently onto the film surface. Add thin paper strips for labels and tape them to the back of the film so the front stays clean.
Warm the film slightly with a hair dryer before laying it in the frame for a smoother surface.
Don’t use heavy glossy prints — they slide on cling film and ruin the grid.
6. Cork Offcut Board with Pushpins and Photo Mats
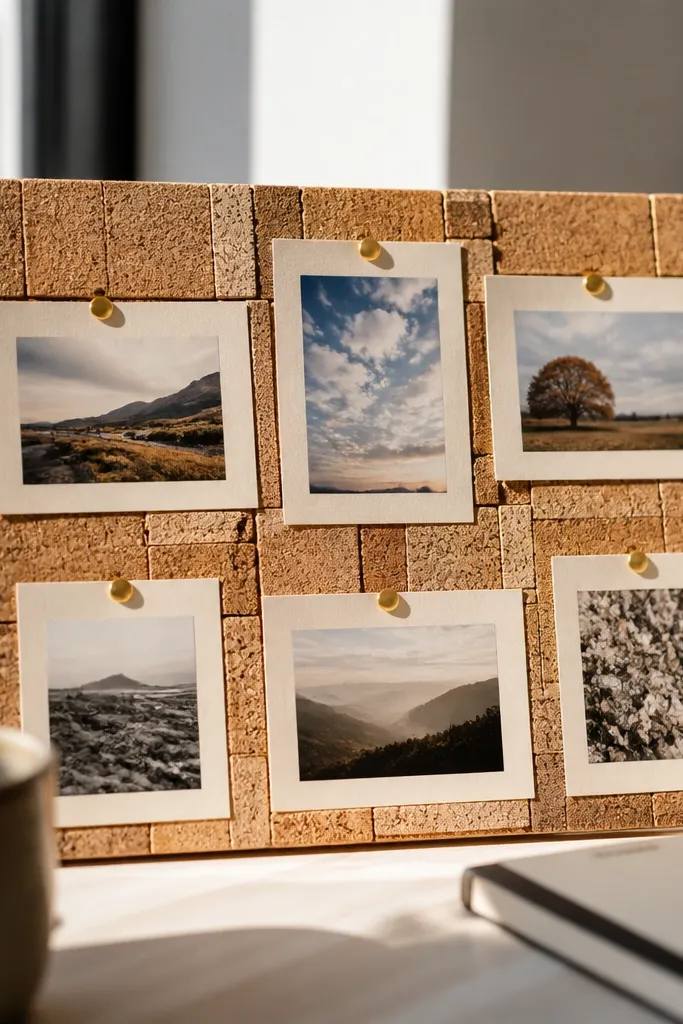
Cork is one of the best renter-friendly materials because it’s forgiving and you can pin and repin without damage. Photo mats make it look like a gallery wall, even when you’re only using DIY prints. The key is to keep the mat color consistent and use the same pin color across the board. Cork also photographs well because it has a natural texture that hides minor imperfections. It works for goals, routines, and hobby boards since you can swap items anytime.
Pro tipChoose one pin color like black or brass so the board looks intentional instead of random.
Cut cork offcuts into a 24x32-inch panel, then sand the edges lightly so they don’t shed. Use matte cardstock mats behind each photo, trimming a 1-inch border around every image. Pin photos and mats using small cork pushpins, arranging them in a 3x4 grid. Mount the cork panel using removable wall hooks designed for lightweight boards or a picture-hanging rail.
AvoidAvoid pinning directly through full-bleed photos — the holes show and tear the print.
7. Repurposed Book Cover Vision Board with Elastic Photo Bands
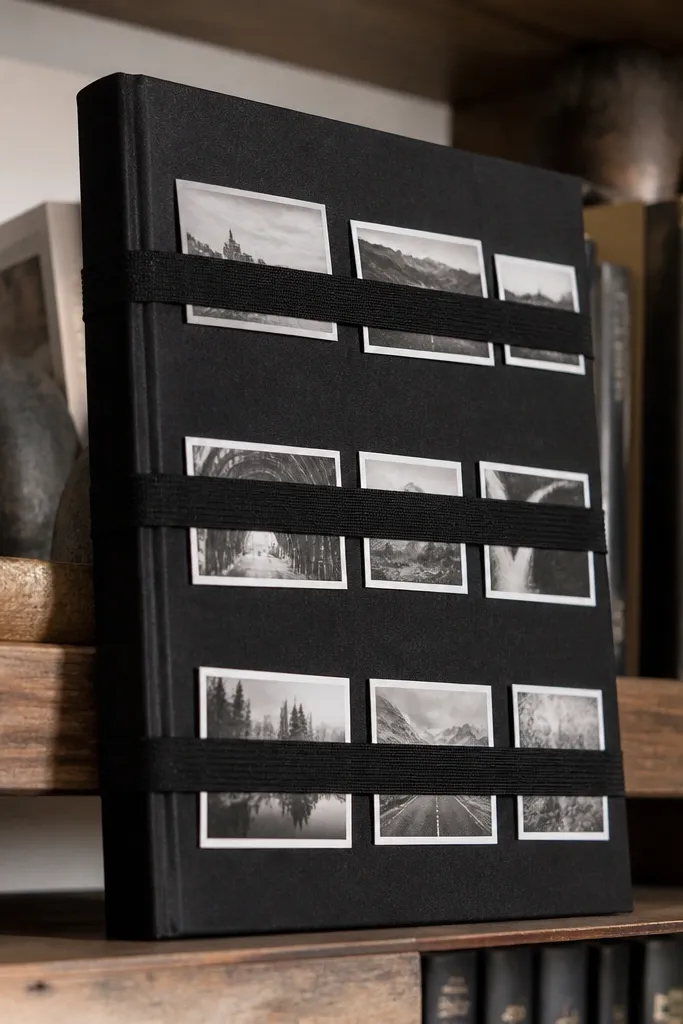
This is a stealthy, portable board that looks good on a shelf and doesn’t scream “craft project.” A sturdy book cover gives you a neat frame, and elastic bands keep your photos aligned without glue. The elastic also makes swapping quick, which matters if you’re updating goals. Use a monochrome cover (black, cream, or deep green) so your photos lead the look. This works well for tiny spaces like dorm rooms, apartments, and desks.
Pro tipUse wide elastic bands (about 1/2-inch) so they hold the card edges flat in photos.
Cover an old hardback book with a clean paper or fabric wrap using removable adhesive spray on the outside only. Measure the inside front cover area and cut 12 photo cards to fit within a consistent margin. Sew or attach small elastic loops across the cover in a grid pattern, spacing them evenly. Slide each photo card under the elastic and add a single label strip at the bottom for the theme.
AvoidDon’t use stretchy thread-only bands — they sag and your grid looks uneven.
8. Removable Layered Border Board with Matte Paper Frames
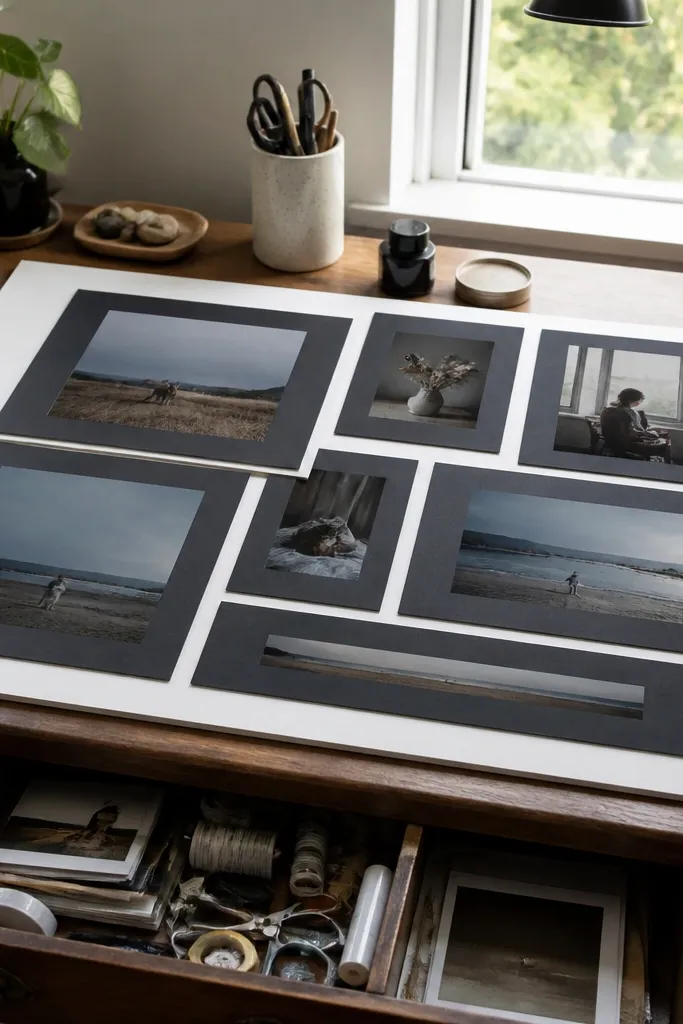
Layered paper frames make a vision board look like a design layout, not a stack of prints. The trick is to use matte paper borders in one color and consistent thickness so everything lines up visually. You can mount the whole thing on a foam board or cardboard backing with poster strips. This approach is photogenic because the borders create a clean rhythm. It’s also renter-friendly: swapping images means replacing just the inner photo card, not redoing the whole board.
Pro tipUse a craft knife with a fresh blade so the frame edges look sharp in close-up photos.
Cut a backing board to 24x36 inches, then cover it with matte kraft paper. Cut 12 window frames from thick cardstock, each leaving a 1-inch border around a photo opening. Place frames on the backing in a 3x4 grid and tape only the corners so the photos can be swapped. Insert photos under each frame using small strips of removable tape on the back edge.
AvoidAvoid mixed border widths — it breaks the clean grid look.
9. Yarn-Wrapped Pegboard with Photo Clips
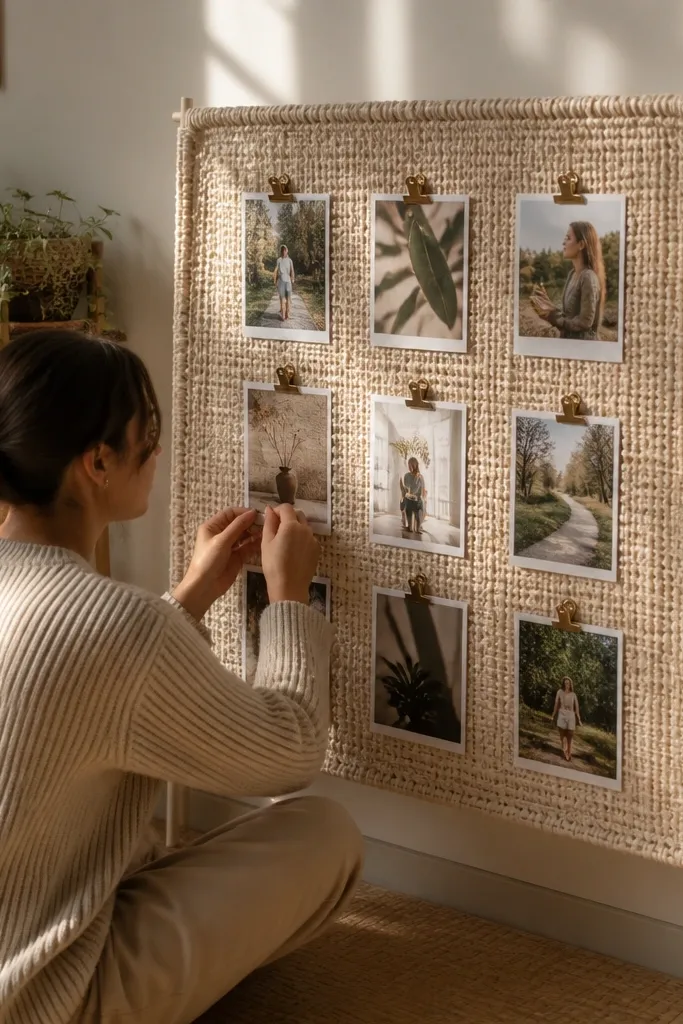
Pegboards look architectural, and wrapping them in yarn makes them warmer and softer in photos. You get a built-in grid of holes, so alignment is easy, and clips let you swap images without tape. This is a great renter option because you can hang it from a door hook or a wall rail with minimal contact. The yarn hides the pegboard hardware and makes the board feel intentional. It also adds color texture without needing a lot of materials.
Pro tipUse a hot glue gun for edge anchoring only — too much glue on the face makes yarn look lumpy.
Cut or buy a small pegboard panel, then wrap the face with yarn in horizontal bands using craft glue along the edges only. Install small photo clips into the pegboard holes where you want images to sit, keeping a 3x4 spacing. Add matte photo cards sized to fit inside the clip range. Clip photos in, then add handwritten labels on thin cardstock strips pinned or clipped beside each image.
AvoidDon’t stretch yarn tight — it warps the pegboard surface and makes clips misalign.
10. Removable Floating Shelf + Mini Cardboard Goals
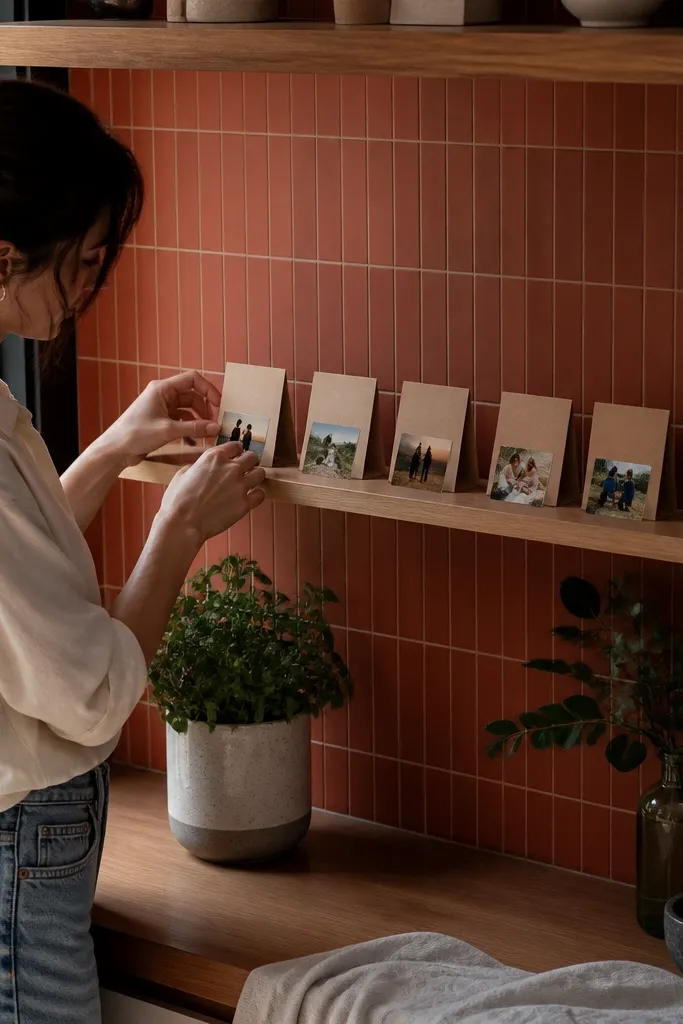
If you want a vision board that looks good even when photos aren’t wall-mounted, this shelf approach works. It uses a small shelf as the “stage,” then you place mini goal cards with photos and text. This looks clean because the shelf creates a natural border and keeps items at one height. It’s ideal for renters who can use furniture-style display but can’t mount large boards. The board becomes a daily visual cue, not a wall project.
Pro tipMake all labels the same font style — even one consistent handwriting style reads more “designed.”
Pick a small removable shelf (about 16-20 inches wide) and assemble it with the included bracket system. Create 12 mini cards from thick cardboard, each about 3.5x5 inches, with a photo square at the top and a short label beneath. Arrange cards in three columns, alternating photo colors for balance. Add a single accent object or small tray at the far side so the layout looks styled, not random.
AvoidAvoid mixing card sizes — it ruins the grid rhythm.
11. Fabric Ribbon Wall with Clip Strings (Portable Look)
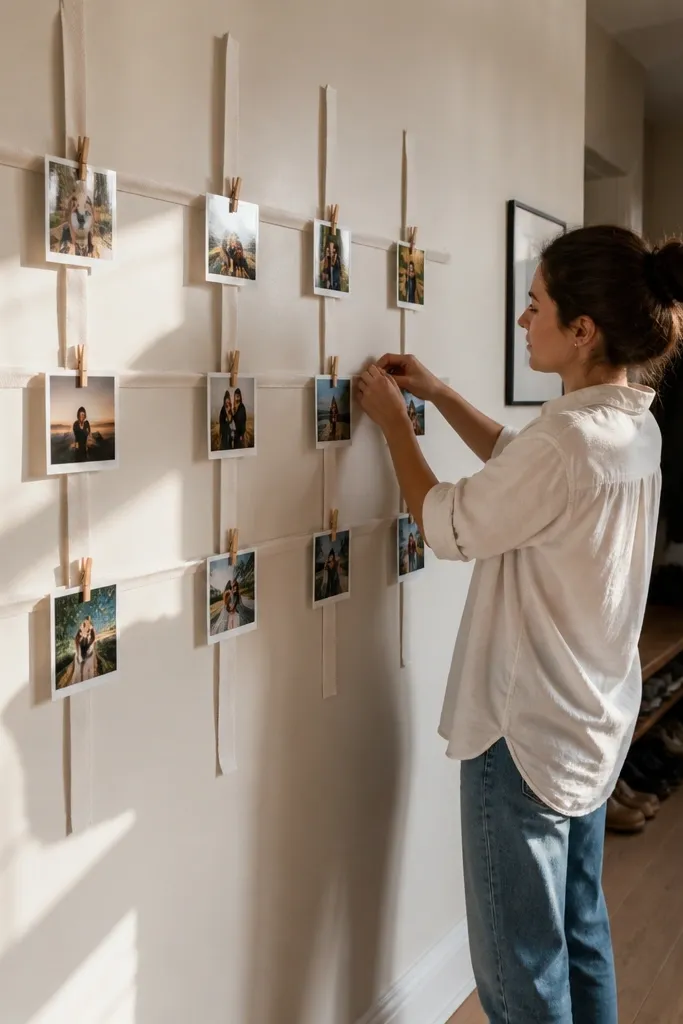
This setup gives you a gallery-line look without drilling. Ribbon strings create horizontal and vertical guides so your photos sit evenly. Clothespins add a charming aesthetic and make swapping easy, which is perfect if your goals change. It’s photogenic because the ribbon has texture and your photos hang with natural spacing. Use it on a standing board or a tension-rod frame to keep it renter-safe.
Make a backing from foam board or a large piece of cardboard and cover it with matte fabric or kraft paper. Stretch ribbon strings across the backing in a 3x4 grid pattern and tie them in place at the edges. Clip photos onto the ribbon using mini clothespins, keeping the bottom edges aligned. Add small label strips pinned behind the photos so text doesn’t cover the image area.
Use satin ribbon sparingly; matte ribbon looks better in daylight photos.
Don’t use too many ribbon colors — one color keeps the look cohesive.
12. Upcycled Window Frame Vision Board with Removable Clips
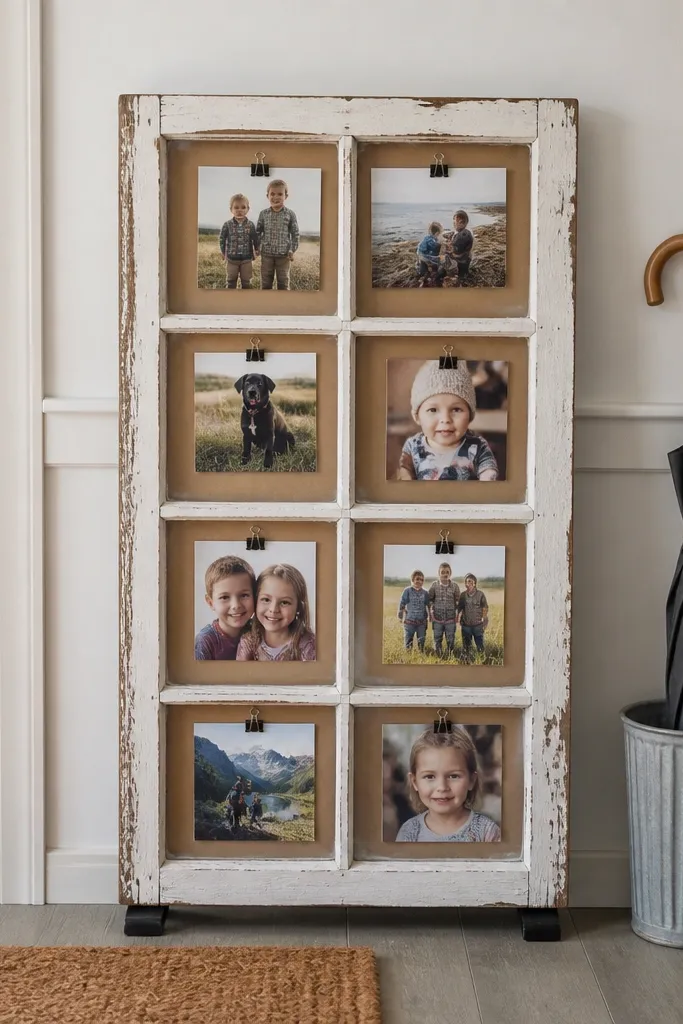
A window frame instantly makes a DIY vision board look like decor. The grid inside the frame gives you natural divisions, so you’re not guessing alignment. Use removable clips or mini binder clips to attach photos to the frame backing without glue. This is a strong option for renters because you can hang it with a single hook or lean it on a shelf. It also photographs well because the frame adds depth and shadow lines.
Pro tipIf the frame is heavy, add a second hanging point for safety and better leveling.
Clean a thrifted or upcycled window frame and remove any loose glass. Cut backing paper to fit the frame and tape it inside with removable tape. Place photos into the frame compartments, then clip them to a thin ribbon or mesh strip attached to the backing. Add labels using small strips of matte paper tucked behind each photo edge.
AvoidAvoid clipping photos too close to the frame edge — it looks cramped and uneven.
13. Matte Contact Paper Collage Board with Peel-Swap Pockets
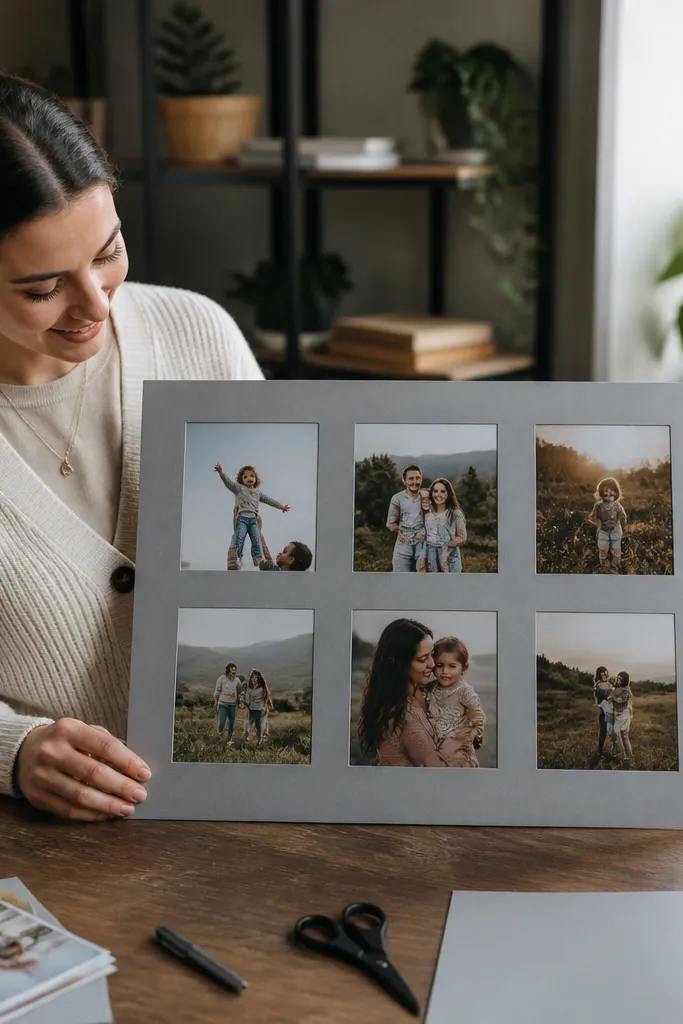
If you want a crisp, modern board that still lets you swap images, peel-swap pockets are the move. Matte contact paper reduces glare, and the pocket edges create clean separation between photos. This approach looks sleek in photos because the layout has consistent spacing and a uniform finish. It’s renter-friendly when used on a removable backing board that you can store flat. Great for people who like a clean, minimal aesthetic.
Cut a backing board and cover it with matte contact paper, smoothing from the center outward. Cut 12 pocket-sized rectangles from matching contact paper and seal three sides to form pockets. Press the sealed pockets onto the backing in a 3x4 grid, leaving the top open for swapping. Slide photos into each pocket and add a small label strip at the bottom of each pocket opening.
Use a metal ruler and craft knife for straight pocket edges.
Don’t use glossy contact paper — reflections make the board look washed out.
14. Cereal-Box Cardboard Vision Board with Color-Blocked Layout
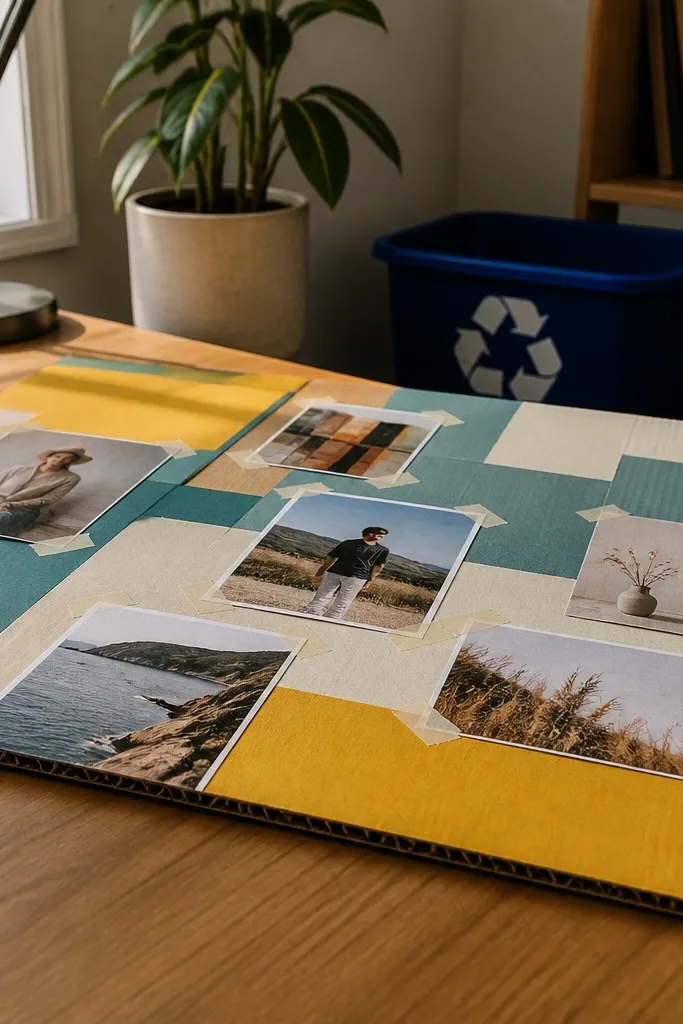
This is the budget-friendly look that still looks designed. Color-blocking using cereal-box cardboard gives you strong shapes and a graphic vibe without expensive supplies. The board is lightweight, easy to replace, and perfect when you want something you won’t worry about. It’s also great for renters because you can mount it with poster strips at corners and remove it later. Keep the palette tight: two neutrals plus one accent color.
Pro tipSeal the cardboard with a thin layer of matte Mod Podge on the surface if it feels flimsy.
Flatten cardboard and cut a 24x36-inch base. Cut 12 photo squares and glue them onto matte paper backing so the edges look clean. Create color blocks using the printed sides of cereal boxes, cutting rectangles to frame each photo square. Mount the board using poster strips at four corners, then add handwritten goals on small strips placed under each photo.
AvoidAvoid too many different box patterns — it looks chaotic instead of graphic.
15. Removable Shadow Box with Layered Prints
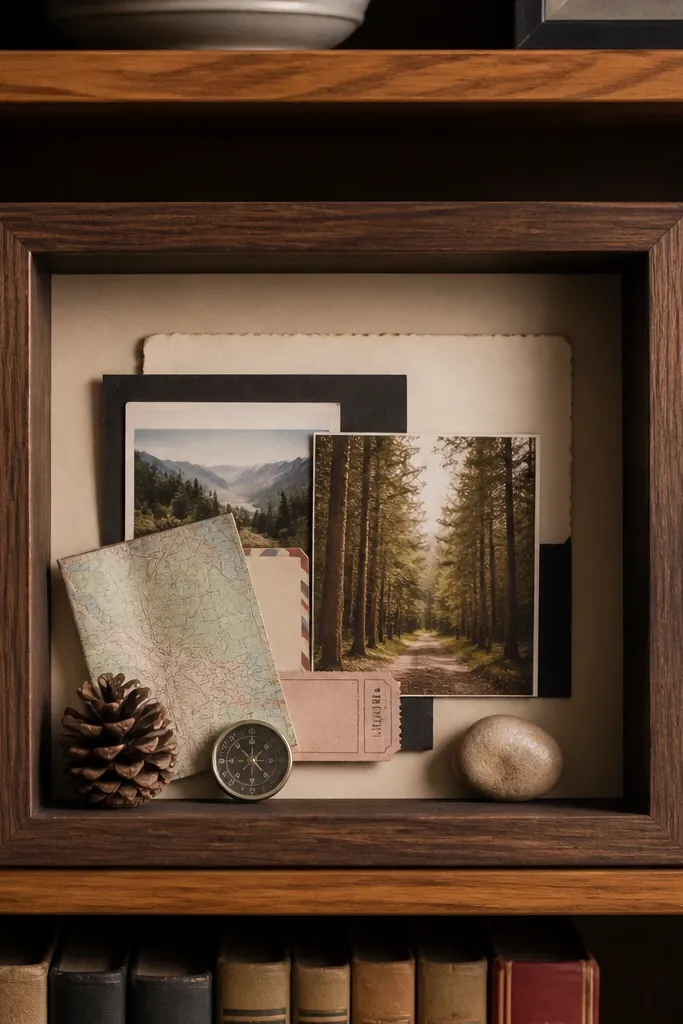
Shadow boxes make your vision board look dimensional, which reads “intentional” in photos. You can build a mini board in one box using layered prints, small objects, and paper labels. This is ideal for renters because it’s self-contained and easy to hang or place on a desk. Choose a shallow depth box so everything stays visible and flat enough for quick assembly. It also helps if you struggle to commit to one big board format.
Pro tipUse photo corners or tiny binder clips inside the box so you can swap prints later.
Choose a shallow shadow box about 10x12 inches. Cut a matte background panel inside and place three to five photo prints on it in a tight cluster. Layer additional cutouts behind the main photos using cardstock spacers so they cast subtle depth. Add labels on thin paper tags and secure them with removable tape on the back edges.
AvoidDon’t overcrowd — cramped boxes look messy instead of styled.
16. Photo + Fabric Scraps Board with Removable Pinning
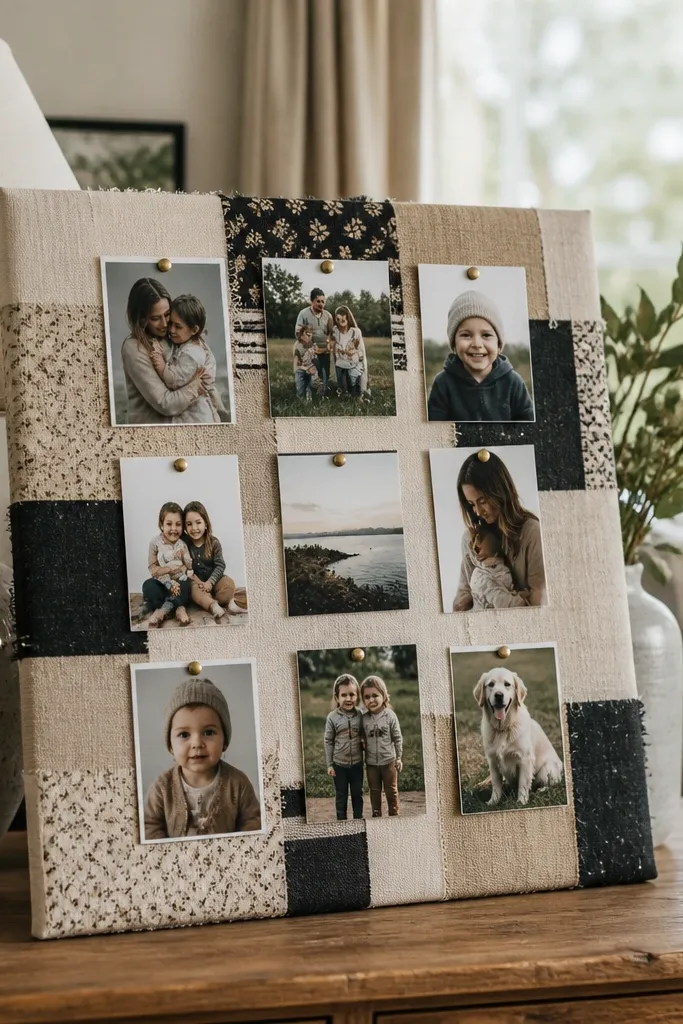
This board adds texture without needing fancy materials. Fabric scraps create a patchwork background that looks warm and photogenic, while pinning keeps photos aligned and swap-ready. Use one fabric family — like cotton solids in cream, tan, and black — so it doesn’t turn into random scraps. This is a strong option for renters with limited wall access because you can store it flat. It also hides tiny mistakes in cutting and taping.
Pro tipUse fabric scraps with the same texture weight so the board looks uniform.
Cover a backing board with a base fabric layer and pin or glue fabric scraps in a grid-friendly pattern. Place 12 photos on top and mark where each one will sit. Pin photos using small straight pins through the photo corners into the backing fabric, then add label strips underneath each photo. Mount the board with a removable hanging method designed for fabric-backed items.
AvoidAvoid slippery satin scraps — they shift under pins and photos drift.
17. Removable Chalkboard Paint on Cardboard Goal Board
Chalkboard-style boards are clean and interactive, and they photograph better than you’d think because the matte surface absorbs glare. Use cardboard as your base, paint it with chalkboard paint, then add photos with magnets or clips. The board gives you space for short, high-contrast goals that you can rewrite quickly. This is great when you want text to be the star and photos to support it. Renters like it because you can move it around without wall mounting.
Pro tipUse a white chalk marker for the labels so they read clearly in daylight photos.
Cut cardboard to size and seal it with primer or a thin layer of matte sealant so it doesn’t warp. Paint with chalkboard paint in two thin coats and let it cure fully according to the can. Once dry, attach a few small magnets to the back of photos or clip them using binder clips. Write goals in short phrases using chalk and keep the photo grid in 3x4 spacing.
AvoidDon’t paint too thick — it cracks and looks uneven.
18. Wallpaper + String Lights Board with Battery Clip
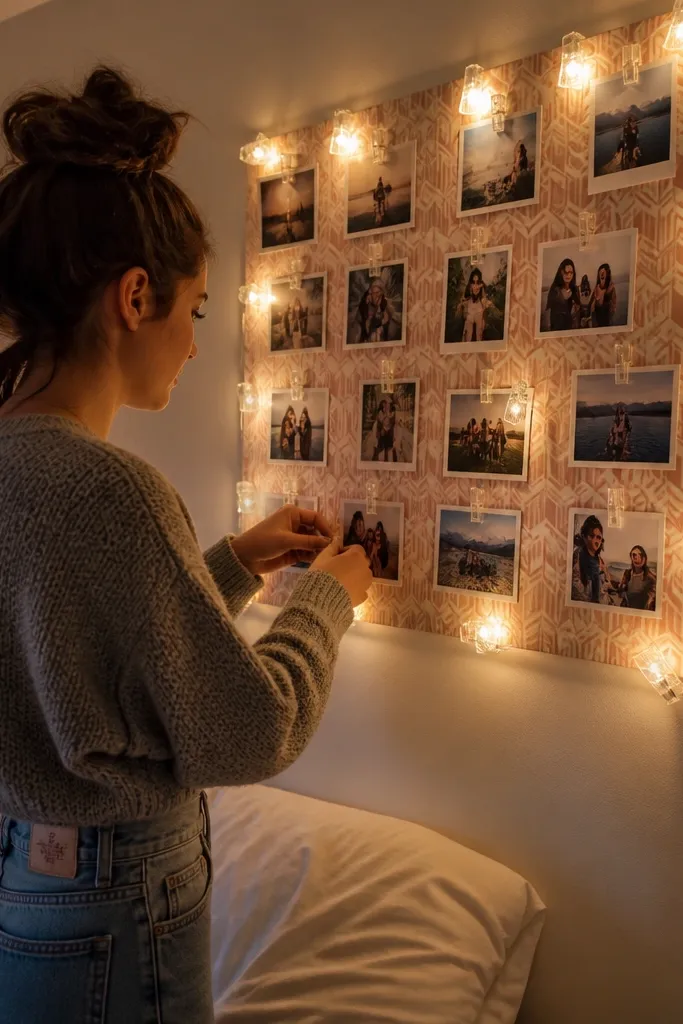
String lights make a board look like decor, not a project, and that matters for aesthetics. This layout uses wallpaper as a patterned background plus a photo grid so your lights frame the content. Use battery-powered lights with a clip pack so you don’t need an outlet. It looks especially good in evening photos because the warm light creates a cozy glow around your goals. Renters can mount the board on a stand or removable adhesive corners.
Mount wallpaper sample paper to a rigid backing board and trim edges clean. Place 12 photos in a 3x4 grid and secure them with removable tape strips at the back corners. Wrap battery string lights around the outer border only, using small clips to hold the wire in place. Add label tags at the bottom of each photo and keep all labels in one color for cohesion.
Choose warm white lights and keep the wire spacing consistent so it reads tidy.
Don’t place lights over photos — it creates hotspots and glare.
19. Cork + Paint Swatch Border for a Designer Look
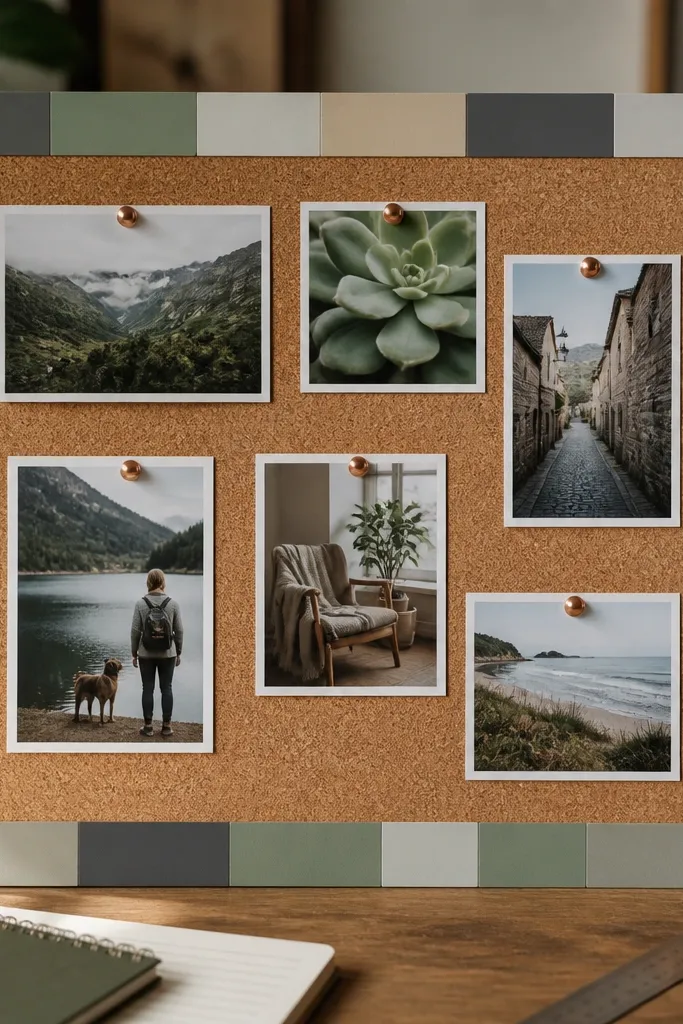
Paint swatches add a designer border without buying a bunch of supplies. The cork center is functional for pinning and swapping, while the swatch frame makes the board look styled. Keep your swatches in one brand or one palette family so the border looks intentional. This is a strong renter-friendly choice because you can mount the whole panel with removable hooks and remove it cleanly later. It also photographs well because the border creates structure around the photos.
Pro tipUse thin pushpins and pin at the same height on each photo to keep the grid even.
Cut cork into a 20x30-inch panel and sand edges. Create a frame by cutting paint swatches into strips and gluing or taping them to a backing board around the cork. Pin photos and small printed goals into the cork using pushpins, arranging them in a 3x4 grid. Mount with removable hooks placed at the top corners so the board stays level.
AvoidAvoid using too many swatch colors — it makes the border compete with the photos.
20. Removable Window Cling Photo Board on Glass Cabinet
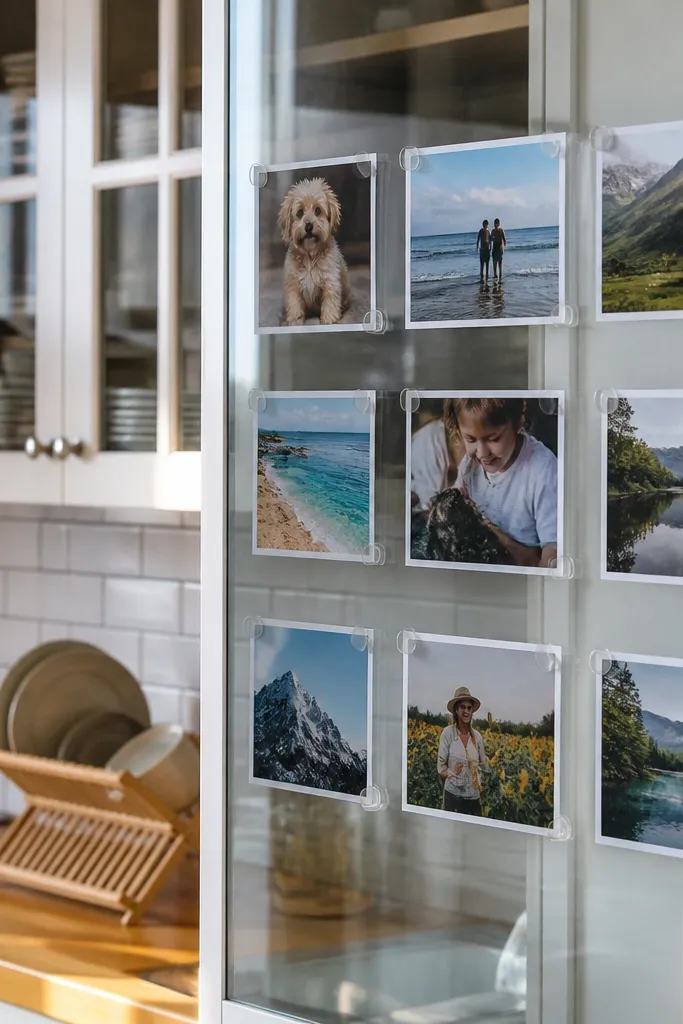
Glass cabinet surfaces let you build a vision board that doesn’t touch the wall. Static cling photo holders keep prints in place and let you rearrange quickly. The look is clean and modern because the background stays uniform and reflective. This is best in kitchens, entry cabinets, or anywhere you already have glass. It’s also renter-friendly because you’re using the cabinet surface, not the wall.
Clean the glass thoroughly so clings stick without lifting. Choose 12 small photo prints and mount them onto static cling sheets or use cling pockets. Arrange them in a 3x4 grid with equal spacing, then press along the edges to seal. Add a small strip of label text on a cling strip at the bottom so each photo has a short caption.
Use a microfiber cloth for final wipe — fingerprints show in photos.
Don’t overcrowd near cabinet hinges — clings lift if surfaces curve.
21. Upcycled Cardboard Mat Board with Tape-Hinge Photos
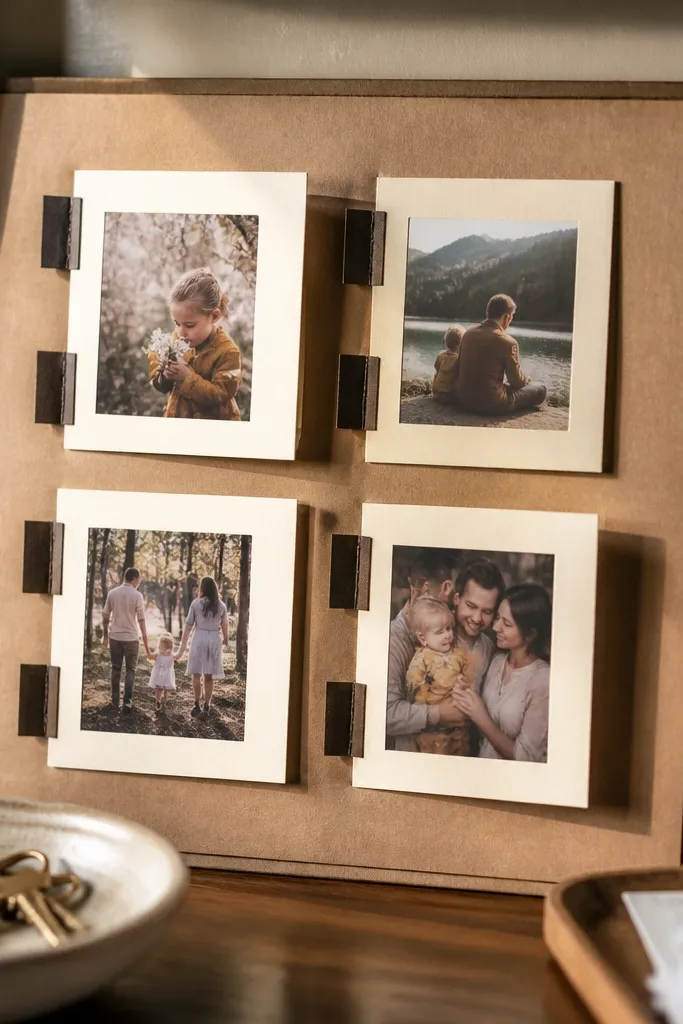
This layout is about clean edges and easy swapping without complicated hardware. Tape-hinges let photos swing into place, so you can change them without tearing or re-taping large areas. Cardboard mats make it look crisp and gallery-like. It’s renter-friendly because the board is lightweight and can be mounted with corner strips or set on a shelf. It also photographs well because the photo mats create consistent spacing.
Pro tipUse painter’s tape for hinges — it peels off cleaner than clear tape.
Cut a 24x36-inch backing from thick cardboard and cover it with matte wrapping paper. Cut 12 photo mats from cardstock with an opening window sized for your prints. Attach each mat to the backing using tape only along the top edge so it stays flat. Create a tape-hinge on the back of each photo and attach the hinge to the mat so the photo folds down and stays in place.
AvoidAvoid taping the photo edges directly — it creates visible sticky spots.
22. Removable Floor-Lean Board with Oversized Headlines
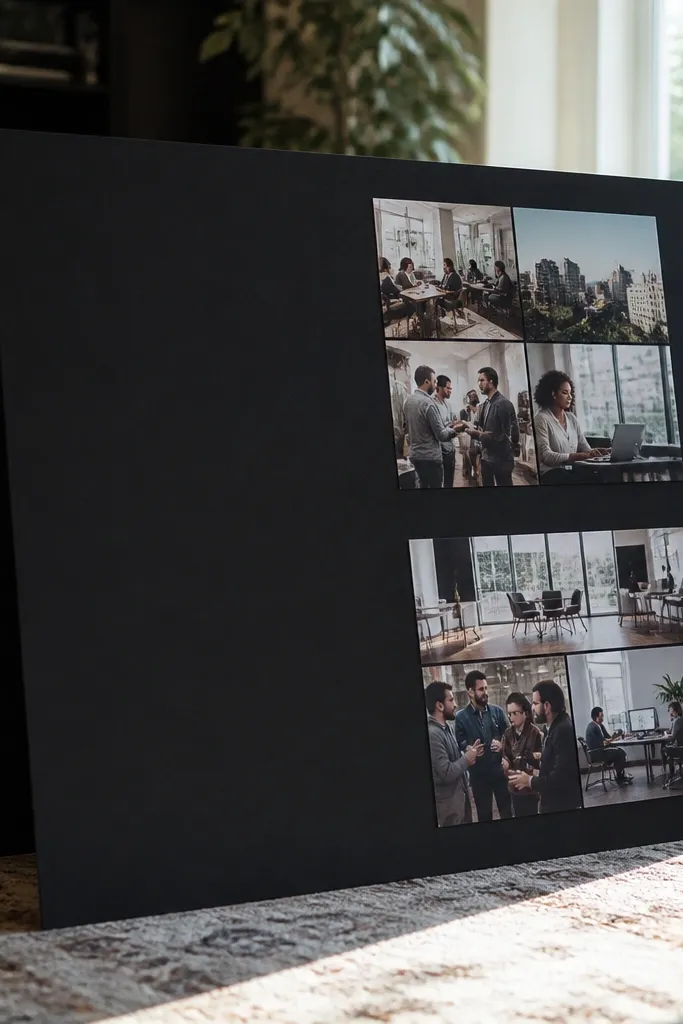
This is the fastest “stunning” look because oversized typography reads instantly in photos. Instead of a tight grid, you build one bold headline block plus two photo clusters. Lean boards also avoid wall mounting issues completely, which is a big win for renters. Use matte paper and thick cardstock text so the layout looks intentional even from a distance. Great if you want your vision board to double as decor.
Pro tipKeep headline letters at least 3 inches tall so they stay readable in phone photos.
Cut a foam board or thick cardboard into a 24x36-inch rectangle and cover it with matte craft paper. Add one large headline using cut vinyl or hand-cut cardstock letters, placed at the top center. Arrange 8 photos in two clusters below, then label each cluster with 2-3 short lines on narrow strips. Lean the board against a wall using a simple board stand or a stack of books at the base covered with fabric.
AvoidAvoid tiny text — it disappears and makes the board look unfinished.
23. Book Spine Vision Board with Ribbon Index Cards
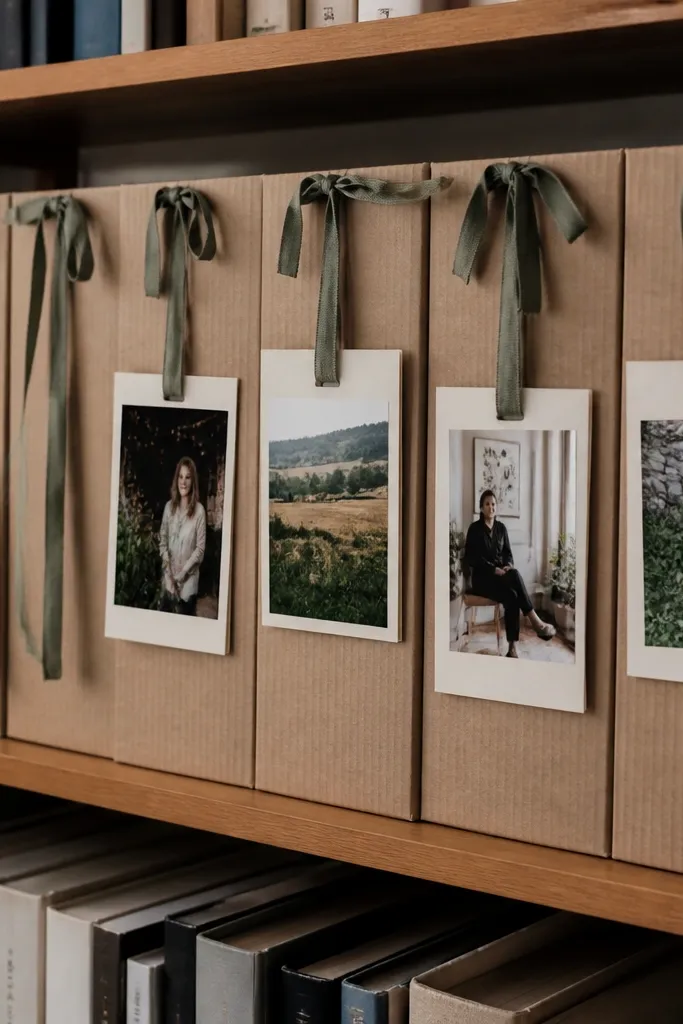
Book-spine style boards look clever and clean, and they hide clutter by organizing everything into “sections.” You create vertical spines from cardboard strips, then hang photo index cards from ribbons. This format is renter-friendly because it’s a standalone piece — no wall damage. It’s also photogenic because the vertical structure creates a strong visual rhythm. Use one spine color family and one ribbon color to keep it cohesive.
Cut 6-8 cardboard spine strips and attach them to a backing board vertically, spacing them evenly. Cover the spines in matte paper in one color family. Cut 12 index cards and attach photos to the top half of each card with a consistent border. Punch two holes near the top of each card and hang them from ribbon loops anchored to the spines, then write short labels on the card bottom.
Use flat ribbon, not twill, so cards hang without twisting.
Avoid uneven spine spacing — it makes the whole board look off fast.
24. Removable Fabric Cover Board with Zipper Photo Sleeves
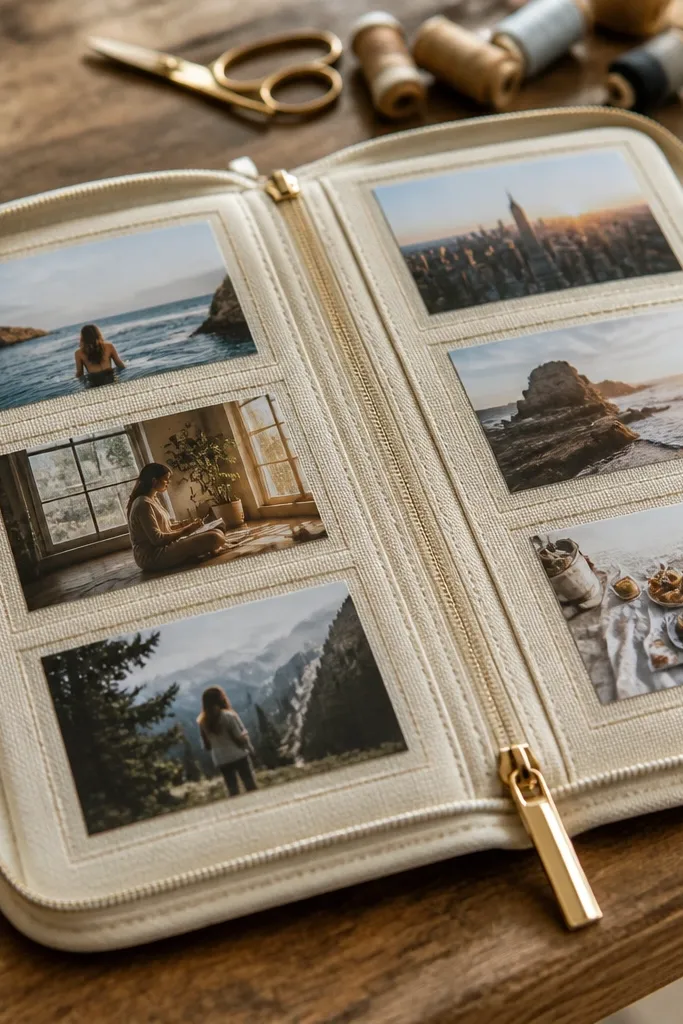
Zipper sleeves make this board feel like a premium organizer and they photograph cleanly because the openings frame each photo. The fabric cover hides the backing and gives a finished look, even if the board is handmade. This is a strong choice for renters who want a reusable system for changing goals. Keep the zipper track straight and the fabric wrinkle-free so it looks sharp in close-ups. It’s also great for people who hate sticky residue.
Cover a foam board with fabric using removable adhesive or double-sided fabric tape on the edges only. Sew 12 small zipper sleeves onto a separate fabric strip, then attach the strip to the board in a 3x4 grid. Insert photos into each sleeve and zip closed. Mount or stand the board using a freestanding display method or removable hooks at the top corners.
Use a zipper foot or sew slowly to keep the zipper lines straight.
Don’t use thin zippers — they snag and the photo edges look messy.
25. Upcycled Frame + Paper Tassel Caption Board
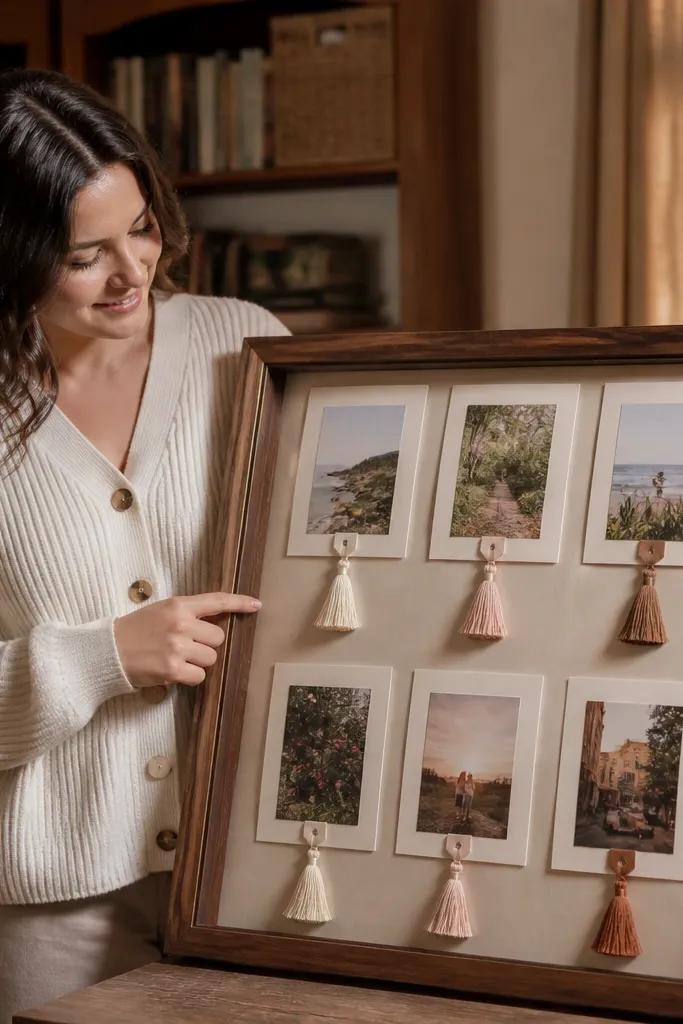
This board adds movement and texture without using bulky supplies. The frame makes it look styled, and paper tassels give each photo a distinct label without covering the image. It’s photogenic because tassels catch light and add a playful, crafted detail. This is a good choice when you want a vision board that looks cute and intentional in a bedroom or entry space. Renters can hang it with a single hook and swap photos by removing the backing.
Pro tipTrim tassels to equal lengths so the label look stays consistent.
Use a shallow thrifted frame and remove the backing. Cut a matte paper backing and arrange 12 photos in a 3x4 grid. Attach photos to the backing with small removable tape squares so you can lift them later. For labels, cut 12 short strips of paper, fold into tassels, and tape the top to the back of each photo so tassels hang downward.
AvoidDon’t attach tassels to the front surface — it smears glue and looks sloppy.
26. Matte Photo Tiles on Removable Shelf Ledges
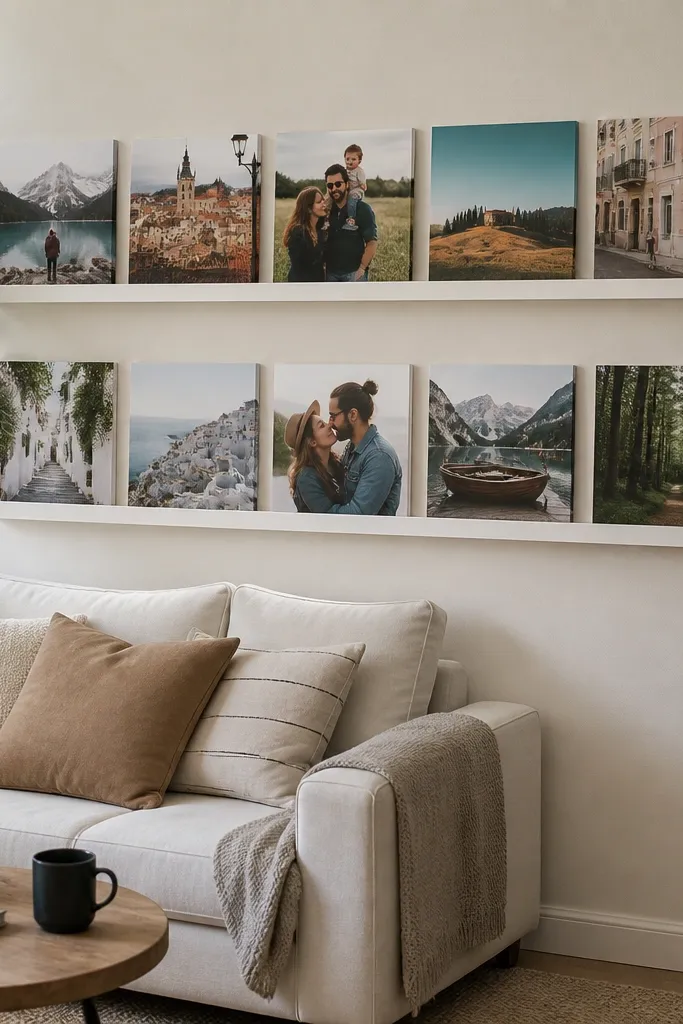
Photo tiles on a ledge read like a styled display because the shelf creates a clean baseline. Matte tiles prevent glare, and the consistent spacing makes the layout look architectural. This works for renters who can use shelving but can’t mount large boards. It’s also quick to update because you can swap tiles one by one. Choose a neutral shelf and keep your tile borders consistent for the best look.
Pro tipUse foam dots instead of tape — they keep tiles aligned and remove cleanly.
Cut 12 photo tiles from thick cardstock, each about 4x6 inches, and add a matte border behind the photo. Place tiles on a ledge shelf in a 3x4 grid, using small foam dots under corners to keep them from sliding. Add labels on a single strip of paper under each tile, using one handwriting style. If you need stability, use removable museum putty on the back corners of each tile.
AvoidAvoid glossy tile paper — reflections ruin the clean look.
27. Removable Poster Strip Board on a Rolling Cart
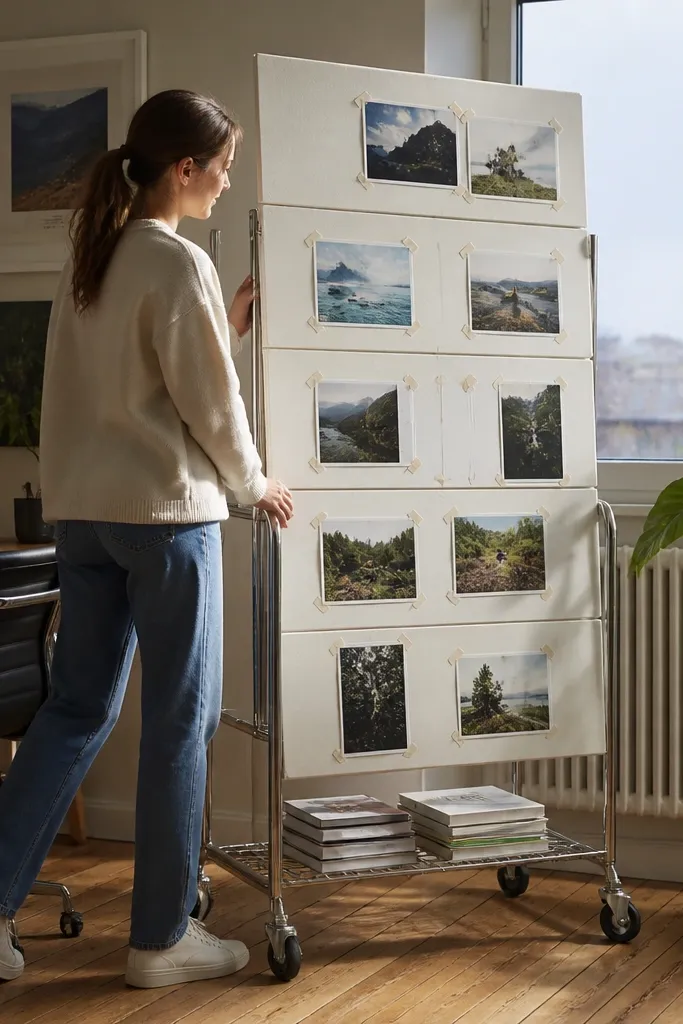
A rolling cart turns your vision board into a movable workspace, and that’s a renter-friendly aesthetic win. You can build a panel that sits on the cart surface or hangs from it, then move it to the best light for photos. Poster strips hold the panel without heavy adhesive, and you can rearrange everything in minutes. This format is ideal for people who want their goals close to where they study or craft. It also keeps the board from feeling like a permanent wall commitment.
Cover a 24x36-inch foam board with matte paper and place 12 photos in a 3x4 grid. Attach the board to the cart using poster strips at the top and bottom edges only. Add label strips under each photo using a single accent color pen. Keep the cart tidy by adding one small tray for swap prints so you can update without rummaging.
Choose a cart with a flat top — slanted surfaces make boards wobble in photos.
Don’t use strong adhesive at corners — it peels paint off metal carts.
28. Kraft Paper Tape-Line Board with Photo Corner Mounts
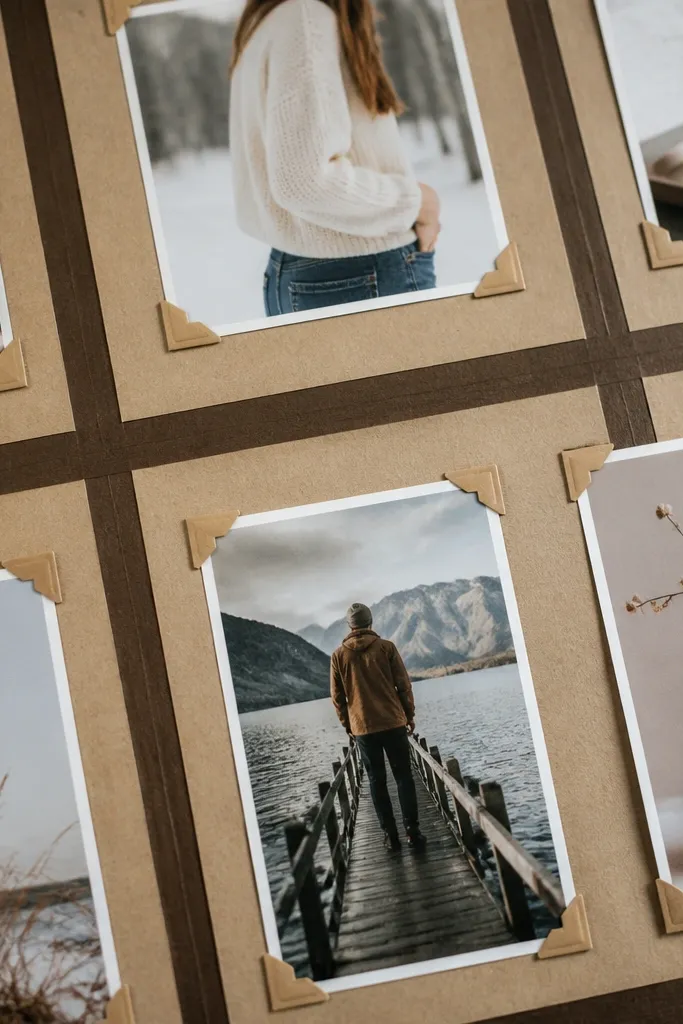
Tape-line layouts look graphic and intentional because the grid lines are part of the design. Kraft paper keeps it warm, and black or dark brown tape makes the grid crisp in photos. Corner mounts let you lift and replace photos without damaging them. This is a great renter option because you can mount it with corner strips and remove it cleanly. It also takes less than 30 minutes if your photos are already printed.
Cover a backing board with kraft paper and smooth it flat. Mark a 3x4 grid with light pencil lines, then apply tape strips along the grid lines to create visible borders. Mount each photo in the center using small corner tape dots so the photo edges stay clean. Add short labels on thin strips placed along the grid border so they read like part of the design.
Use measuring tape and a ruler for grid spacing — it makes the result look pro.
Avoid crooked grid lines — they make the whole board feel rushed.
29. Upcycled Tile Board with String and Mini Photo Pins
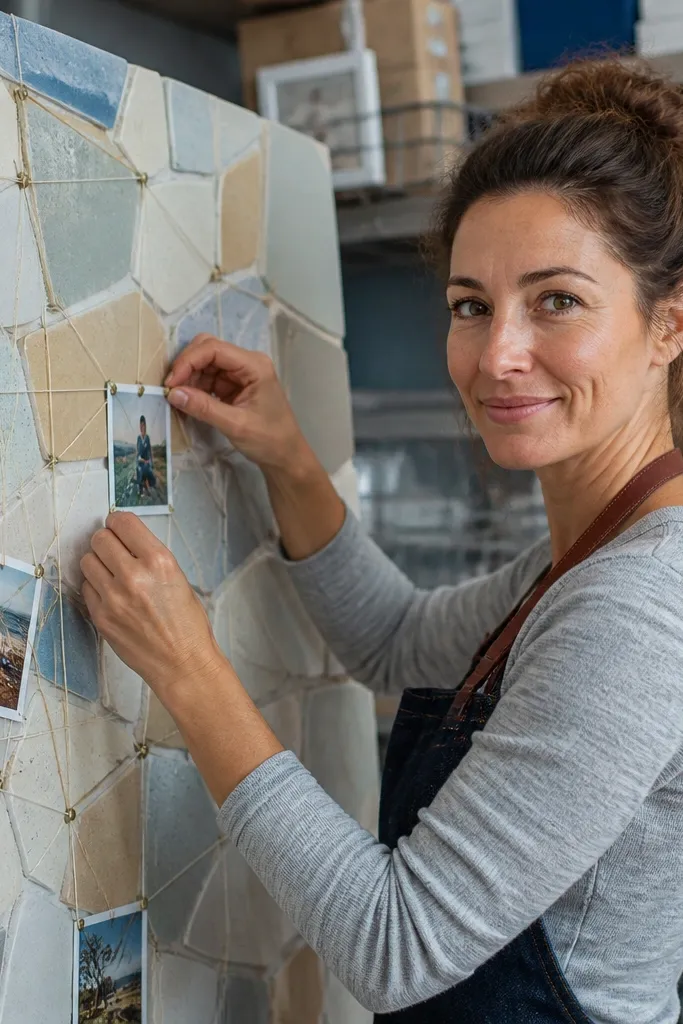
Tile boards add texture and structure, and the string line method keeps spacing consistent. This layout looks like a mood wall but stays renter-friendly because you build it on a standalone board. Mini photo pins hold prints securely and let you swap quickly. It’s photogenic because tiles create natural highlights and the string lines create a clean geometric look. Perfect for kitchens, hallways, and craft corners where you want a statement piece without drilling.
Glue small square tiles or tile-pattern craft tiles onto a foam board backing in a grid-friendly arrangement. Wrap thin string across the board in horizontal and vertical lines, anchoring at the edges with removable hooks or tied knots. Pin photos to the string using mini clothespins or small pushpins into the string anchors. Add labels on small paper tags and tie them next to the photo pins so the text stays aligned.
Seal the board surface with matte clear spray so tiles don’t look dusty in photos.
Don’t use thick rope — it makes the layout look heavy and messy.
30. Removable Layered Photo Banner on a Door Hook
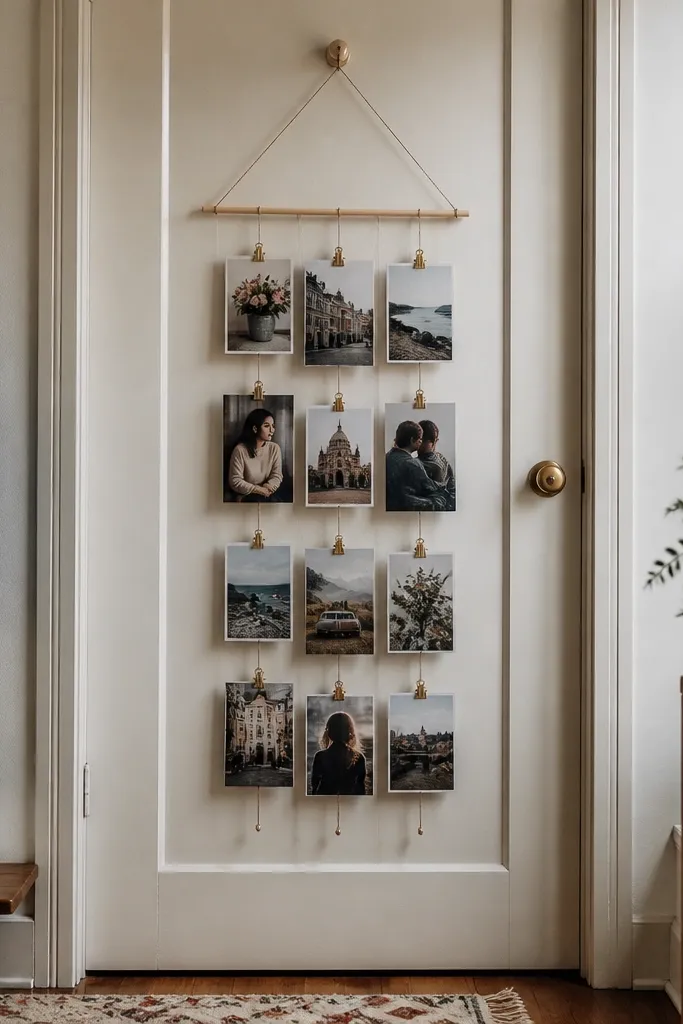
A door-hung banner keeps your vision board visible without wall mounting, and it looks cute in photos because it has a vertical flow. Layered cards create depth, and the consistent spacing makes it feel designed. Use a single ribbon or dowel across the top and attach photos with small clamps. This is a renter-friendly option for small apartments where wall space is limited. It also lets you adjust the layout as you go — you can add or remove cards without remaking the whole thing.
Pro tipUse heavier paper for cards so they don’t curl and look wavy in photos.
Attach a short ribbon or dowel across the top of a door using a door hook system. Cut 12 photo cards and add a 1/2-inch matte border behind each photo. Layer each card by placing it slightly offset on the ribbon line, then clip it in place with mini clothespins. Add a label tag under each card using a strip of cardstock tied with string.
AvoidAvoid flimsy paper — it makes the banner look droopy.



