
1. Cereal-Box Window Frame Page
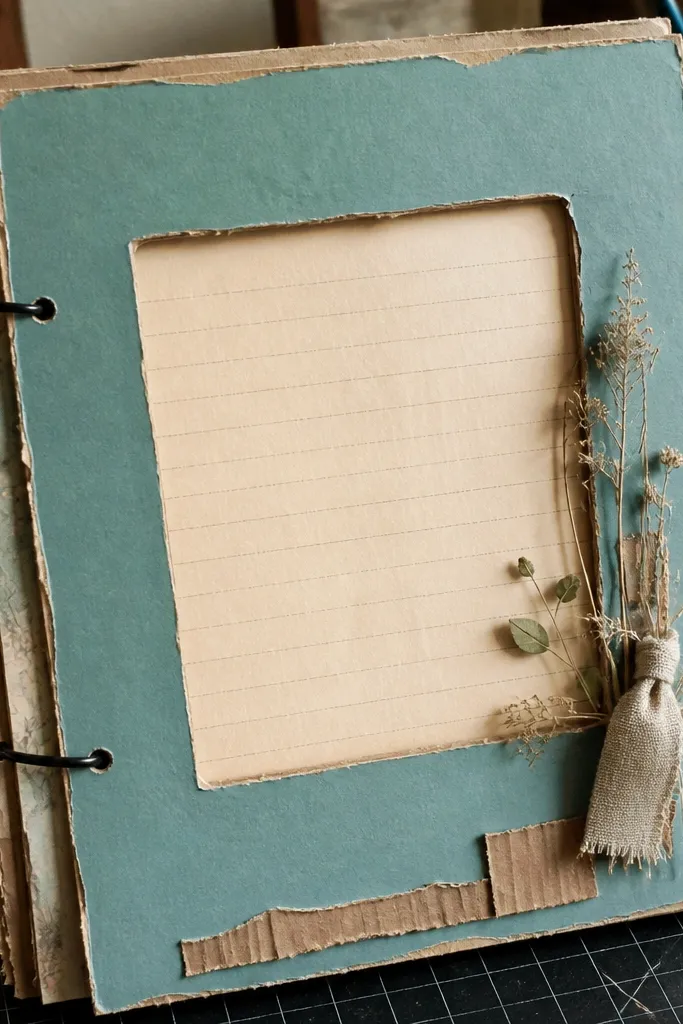
This layout is cute because it looks architectural, not busy. The cereal-box cardstock gives you a sturdy frame that stands up on small pages, and the window opening lets your photo or journaling card sit like a little display. Pick a single color theme by painting or coloring the frame one shade — think muted teal, warm sand, or terracotta — then keep the inside simple. It’s a great option for a tight album because the frame already does the heavy lifting visually, so you don’t need lots of extra embellishments.
Cut a rectangle mat from cereal-box cardstock to fit your page size, leaving a 1/2 inch border all around. Mark a smaller rectangle inside, then cut out the window using a craft knife and a cutting mat. Paint or ink the frame, let it dry, then glue the mat to your scrapbook page. Add a photo or journaling card behind the window and secure it with tape tabs on the sides.
Pro tipBurnish the frame edges with a bone folder after painting so it stays crisp in photos.
AvoidDon’t use flimsy printer paper for the frame — it warps and ruins the clean window look.
2. Envelope Pocket With Ticket Drop
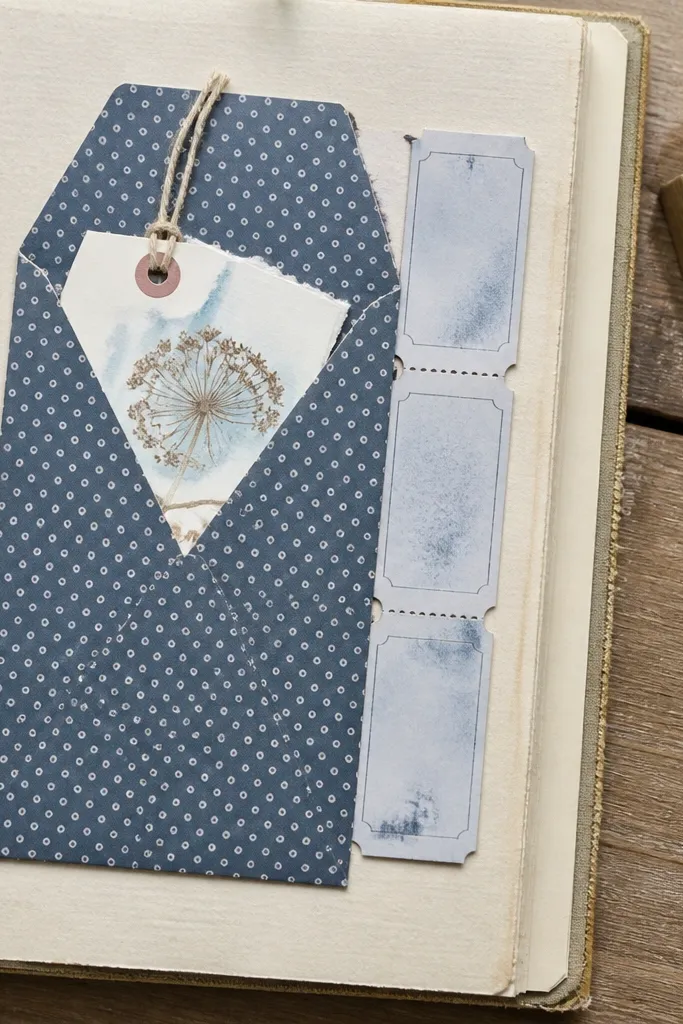
This is one of the most reliable small-space cute scrapbook ideas because it adds storage and cuteness at the same time. The envelope pocket creates a clear shape on the page, and the ticket strip adds vertical interest without taking up more width. When you choose an envelope with a readable color pattern or a simple solid tone, the pocket becomes the focal point. It also solves the problem of adding journaling without covering your photo — the ticket can hold a short note or a mini photo.
Cut an envelope piece to the pocket size, aiming for about 3 to 3.5 inches tall for a 6x8 album. Fold the pocket edges so the top opening is crisp, then glue along the sides and bottom only. Make a ticket strip from scrap paper about 1 inch wide and 4 to 5 inches long, and punch tiny holes or add faux perforations with a pen. Slip the ticket into the pocket so it peeks out by 1 to 1.5 inches.
Pro tipUse a glue stick on the edges first, then reinforce with a thin layer of matte gel on top for extra hold.
AvoidDon’t glue the top edge — you need that opening or the pocket won’t feel functional.
3. Book-Page Corners With Photo Staple Look

Book pages give soft texture that reads “designed” even when you use tiny pieces. This layout uses torn book-page corners as a frame accent, then anchors one photo with a faux staple effect using a marker or tiny brads. The corner shapes add movement without cluttering the center, which is exactly what small-space cute scrapbook ideas need. If your scraps are mostly printed text, this is the easiest way to make them look intentional instead of random.
Tear two small triangles or L-shapes from an old book page, leaving rough edges. Place them in opposite corners of your page and trace their outline lightly. Glue them down using a thin coat of white glue or matte medium, then let dry under a book for flatness. Add a photo strip or single photo in the center and secure it with two faux staples drawn with a black pen or placed with small brads.
Seal torn book paper with a light mist of water and smooth with tissue before gluing if it curls.
Don’t place corners too close to the photo edge — leave at least 1/4 inch so it doesn’t look cramped.
4. Matte Washi Border With One Big Label
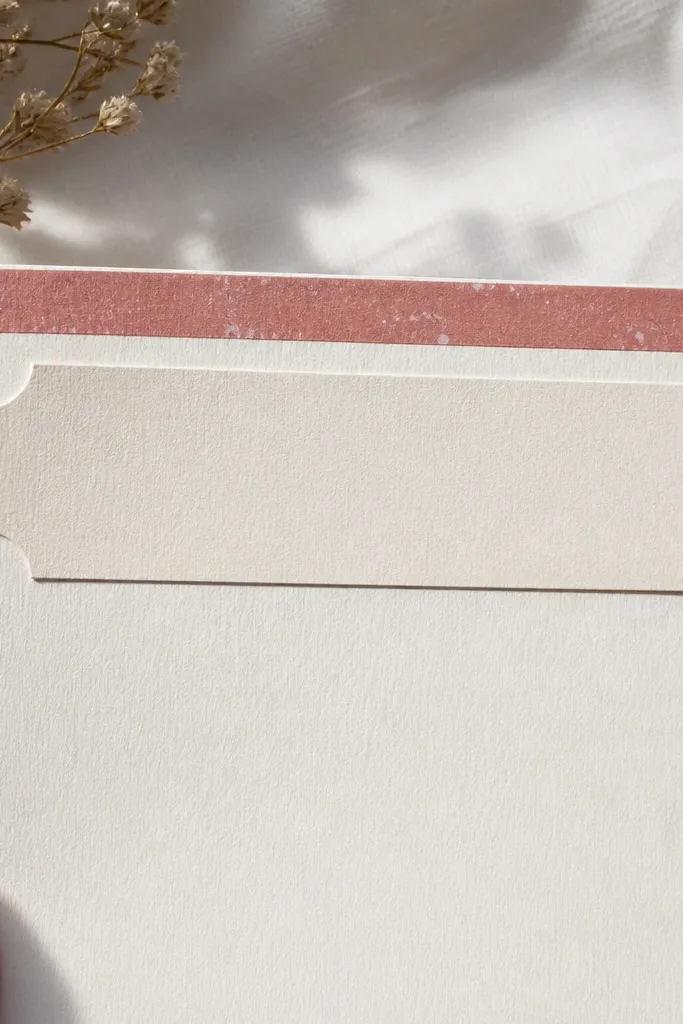
This one is cute because it’s controlled. A washitape border gives you a color line that reads instantly in photos, and a single big label strip becomes the headline so the page doesn’t feel like a collage. You can use leftover washi from planners or craft boxes, and you only need enough for a border — no heavy coverage. The result looks clean and “finished” even with minimal embellishments.
Pick one washi tape pattern and cut border strips to match your page width, using a ruler for straight edges. Apply a top and bottom border, leaving 1 inch of blank space between them. Create a label strip from cardstock about 2 inches tall, then write your title or date with a fine-tip pen. Glue the label strip in the center between the borders and add a small photo under it.
Pro tipUse a matte glue or tape runner under the label so the edges don’t lift and catch light.
AvoidAvoid using multiple washi patterns — two is the max before the page starts looking chaotic.
5. Mini Fold-Out Accordion for Journaling
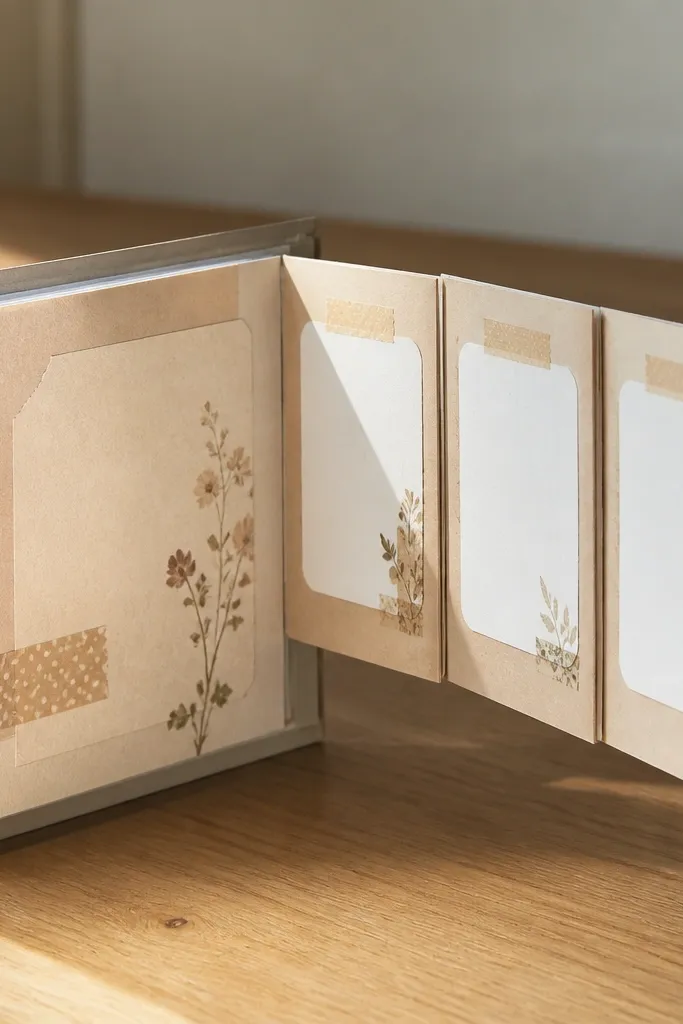
Accordion folds look cute because they create a hidden surprise. This layout keeps the main page clean while storing several short lines of journaling or mini photos inside the fold. In a small album, this matters because you can add content without adding bulk to the front. The accordion also gives you a vertical element that photographs well, especially if you keep the outside frame simple and let the folds do the work.
Cut a strip of cardstock about 6 inches long and 2 inches tall, then score it into 3 equal panels. Fold it accordion-style, then glue the accordion to the inside edge of a side pocket or directly to your page with the first panel anchored. Build a small tab cover from scrap paper and decorate it with a printed label or stamped circle. Close the album and burnish the fold so it opens flat.
Use lighter-weight cardstock for the accordion panels so it opens smoothly without cracking.
Don’t glue all panels down — only anchor the first panel or you lose the fold action.
6. Square Photo Layer With Rounded Scrap Frame

A square photo layer reads modern and cute, and the rounded scrap frame keeps it soft. This layout works well when you have a few small scraps in different colors because the frame can be made from one printed scrap plus one solid scrap backing. The photo sits cleanly in the middle, while the frame adds texture without covering everything. It’s a great choice for small-space cute scrapbook ideas because the page looks balanced even if you only have one photo.
Cut a square photo mat from cardstock, leaving a 1/2 inch border around the photo. Cut a second frame layer from scrap paper and round the corners with scissors or a corner punch. Layer the rounded frame behind the photo mat so it shows evenly. Glue the stack down, then add a small journaling strip at the bottom.
If your frame paper is thin, back it with a cereal-box scrap for crisp edges.
Avoid uneven corner rounding — it makes the whole page look sloppy in close photos.
7. Paper Bag Mini Pocket With Fabric Tie
Paper bag pockets look adorable because they bring real texture and a built-in fold. This is a small-space cute scrapbook idea that adds a “gift bag” vibe without needing a large pocket or bulky embellishments. The fabric tie gives you a clear focal point, and it helps the pocket stay closed for photos. Use neutral kraft and one dyed fabric strip for a clean color story.
Cut a small paper bag panel from a kraft paper bag, about 4 inches tall and 3 inches wide. Fold the sides inward, then glue only the sides and bottom to create a pocket. Punch two small holes near the top and thread a narrow fabric strip like a ribbon tie. Decorate the front with a tiny label cut from scrap paper and glue it centered.
Sand the bag edges lightly with fine grit if they feel rough to the touch.
Don’t use thick ribbon — it adds bulk and makes the page harder to close in small albums.
8. Rolled Edge Strip With Button Center
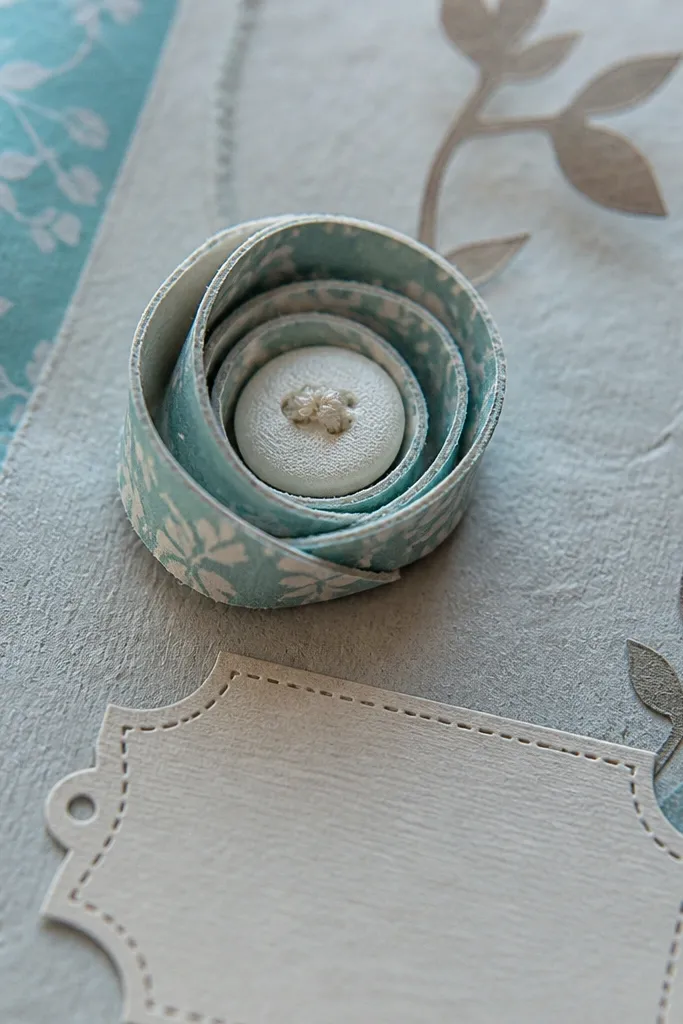
This layout is cute because it uses one sculptural element. A rolled edge strip looks like a flower bud or coil, and placing a button in the center makes it feel handmade. It’s great for small spaces because it stays compact — you get dimension without covering the whole page. If your scraps are narrow strips from wrapping paper or old cards, this turns them into something standout.
Cut a strip of patterned paper about 1/2 inch wide and 5 to 6 inches long. Start rolling it tightly from one end and secure the end with a dab of glue. Place the roll slightly off-center on your page and glue it down. Add a small button on top of the roll with a strong craft glue, then add a thin journaling line beside it.
Use a toothpick to spread glue inside the roll so it doesn’t squeeze out and make lumps.
Don’t pick a too-large button — it overwhelms the small roll and looks heavy.
9. Ink-Stained Shaker Window With Clear Film
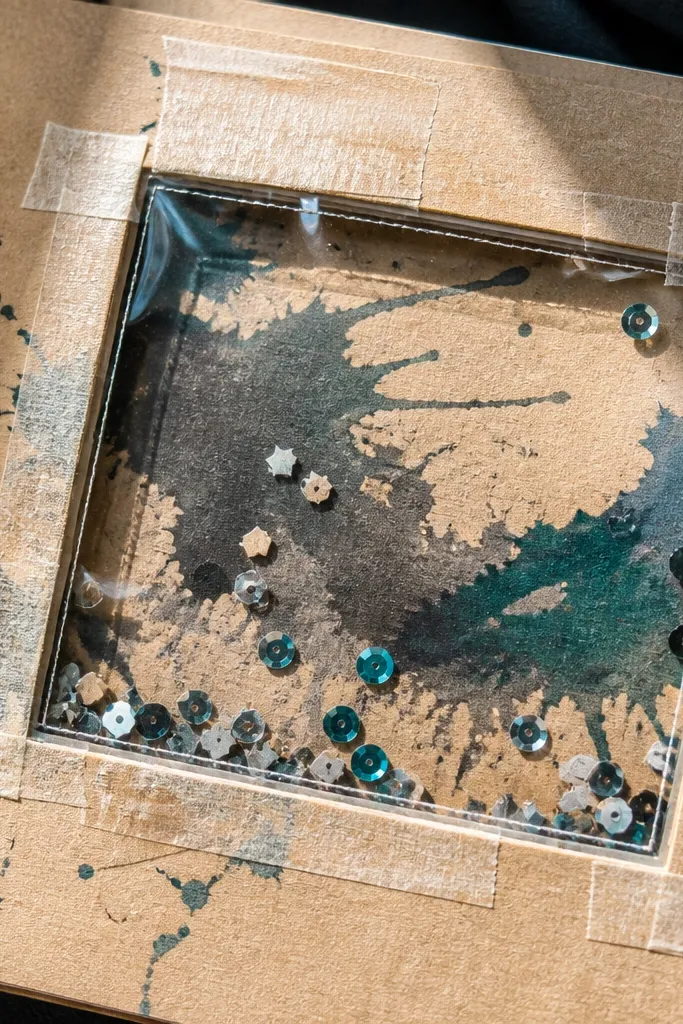
Shaker windows look fun and photogenic, and you can keep them small enough for tight albums. The key is using ink splashes on paper behind the window, then limiting the “stuff” inside so it doesn’t look messy. This is one of the best small-space cute scrapbook ideas when you want motion without using a full page of stickers. Keep the shaker about the size of a postcard corner so it fits neatly.
Cut a window opening in cardstock, then make a backing layer with ink-splashed scrap paper. Cut clear plastic film to cover the opening and set it behind the cardstock window. Create a thin frame using foam tape around the opening and press the film in place. Add a small amount of confetti or punched shapes, then seal the top with more foam tape and press flat.
Use opaque ink splatters, not watery ones, so the confetti shows clearly through the film.
Don’t overfill the shaker — it turns into a noisy blob in photos.
10. Vertical Photo Strip With Glossy Sticker Numbers
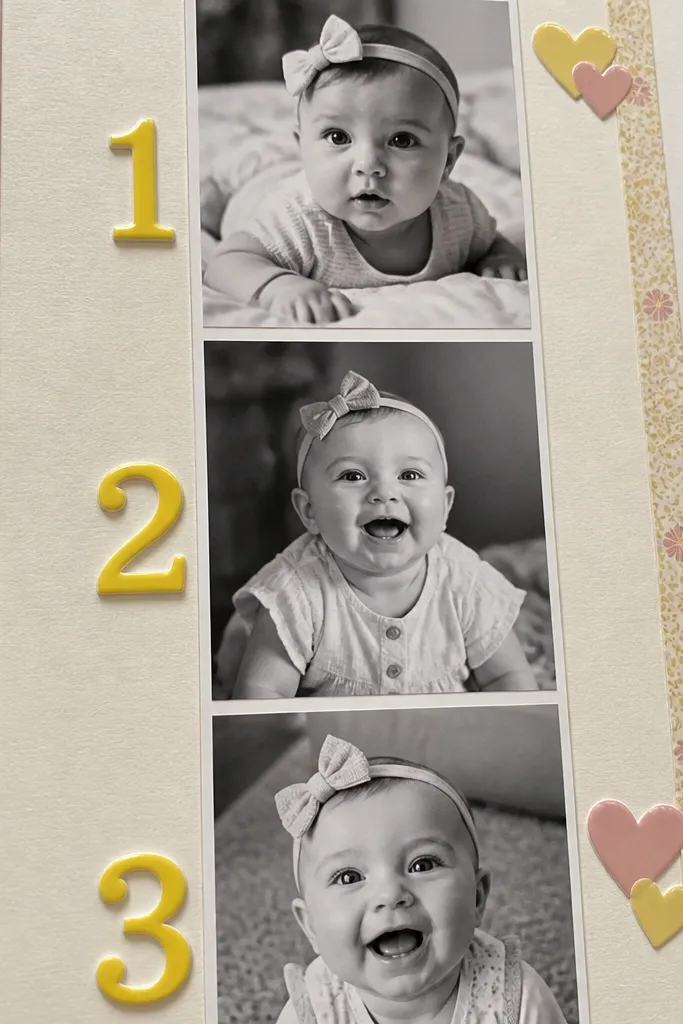
This layout is cute because it reads like a mini timeline. A vertical photo strip creates a strong line, and glossy number stickers add instant personality. If you’re reusing scraps, use one consistent photo size and let the numbers do the decoration. It’s perfect for small-space cute scrapbook ideas when you want to document several moments without building a complicated collage.
Trim three small photos to match height, about 2.5 to 3 inches tall each. Arrange them vertically with a 1/4 inch gap, then glue them onto a plain cardstock page. Add number stickers or hand-lettered numbers on small scrap rectangles above each photo. Finish by adding a thin journaling strip at the bottom.
Pro tipChoose one number style and repeat it — consistency makes the page look designed.
AvoidSkip tiny, mismatched fonts — the numbers should be readable in a quick photo.
11. Torn Label Banner Across the Middle
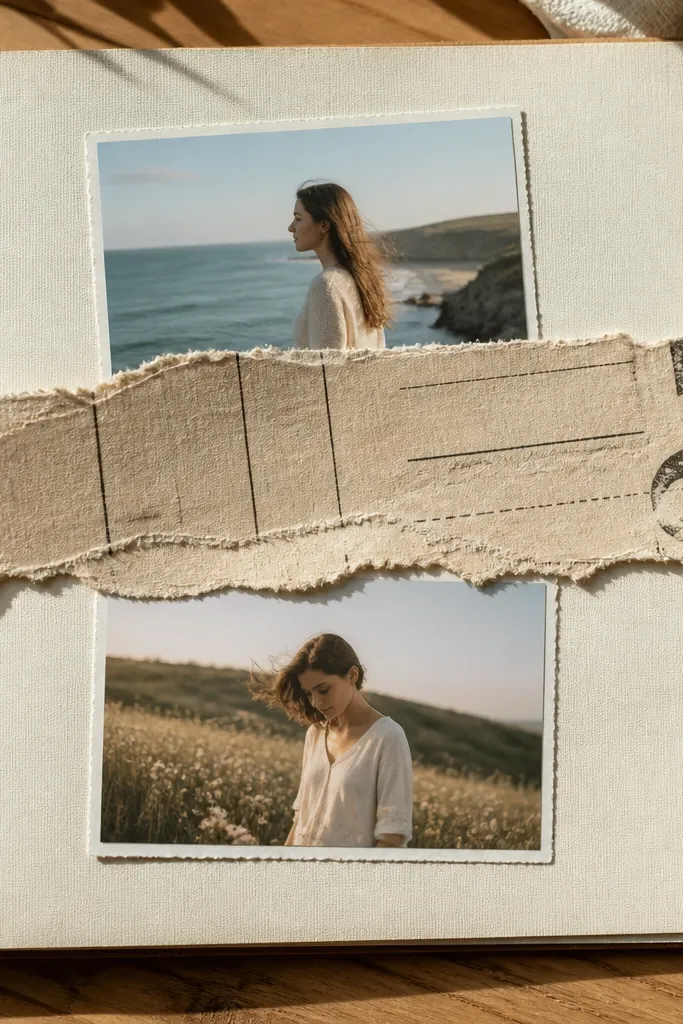
Torn label banners look cute because they add softness and movement. You’re using one banner element across the page, so the layout stays simple even in a small album. This works especially well when you have printed scraps from receipts, old packaging, or magazine labels — the text already gives you visual interest. Keep the banner narrow and let the photo or journaling sit below it.
Cut a long strip of scrap paper about 1.5 inches tall and 6 to 7 inches long depending on your page. Tear along the edges to create a rough top and bottom, then place it across the middle of the page. Glue it down and trim the ends flush. Add a photo or journaling card under the banner, then write a short title inside the banner using a pen.
Pro tipIf the paper is glossy, lightly scuff it with a sanding block so ink and pen hold better.
AvoidDon’t make the banner too tall — it eats the page and crowds the center.
12. Washable Crayon Wax Resist Background
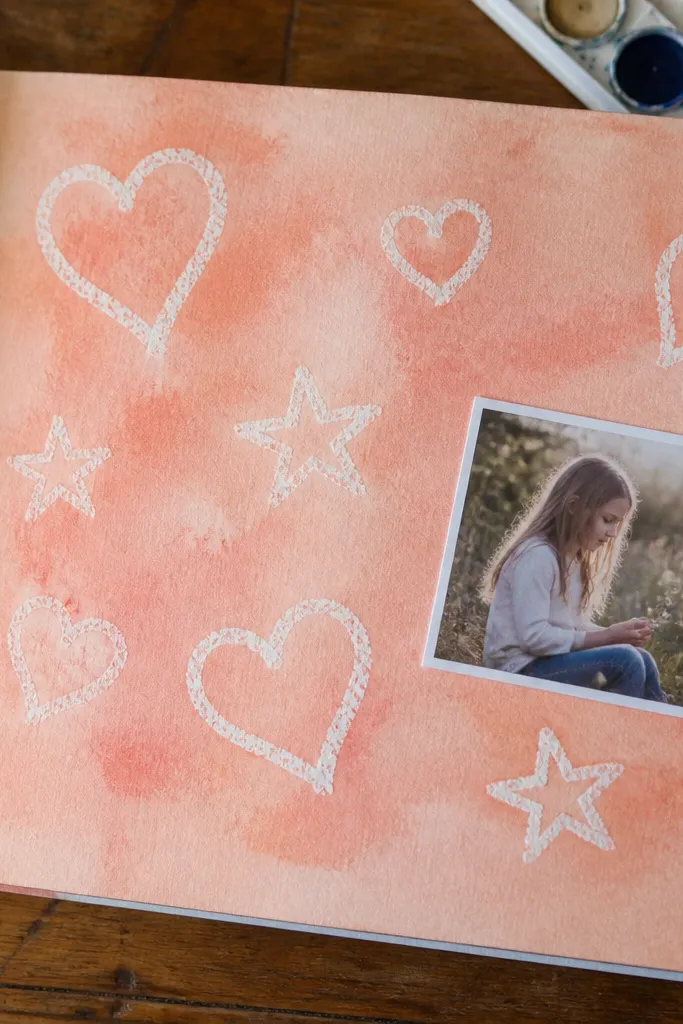
Wax resist backgrounds look artsy and cute without needing expensive supplies. The idea is simple: draw shapes with a crayon, then paint over them so the shapes resist the color. It gives you a custom background that makes every scrap you add look more intentional. In small-space cute scrapbook ideas, this matters because the background can carry the design even if the embellishments are minimal.
Draw shapes or doodles lightly with a white or colored crayon directly on your scrapbook paper. Paint over the top with diluted watercolor or ink using a flat brush. Let it dry completely, then add small cutouts on top like a label or a photo. Seal with a light matte spray or gel medium so the paint doesn’t smudge.
Use a thick enough paint layer to keep the resist edges crisp, not patchy.
Don’t use super watery paint — it bleeds and blurs the resist lines.
13. Circle Punch Confetti Frame Around One Photo

A circle confetti frame is cute because it creates a clear border without looking heavy. You only need one photo, and the circles do the decorating around it. This layout is great for small spaces because it’s compact and it frames your image tightly, which makes photos look cleaner. Use two or three paper colors max so the ring stays cohesive in pictures.
Punch 1/4 to 1/3 inch circles from scrap paper in 2-3 colors. Glue circles in a ring around your photo, keeping gaps consistent. Add a thin cardstock mat behind the photo if you want more contrast. Finish by adding a small journaling line on one side of the ring.
Dry-fit the circle ring before gluing so you get an even circle, not an oval.
Don’t use more than three circle colors — it turns into visual noise fast.
14. Twine Bow Corner With Mini Photo Tag
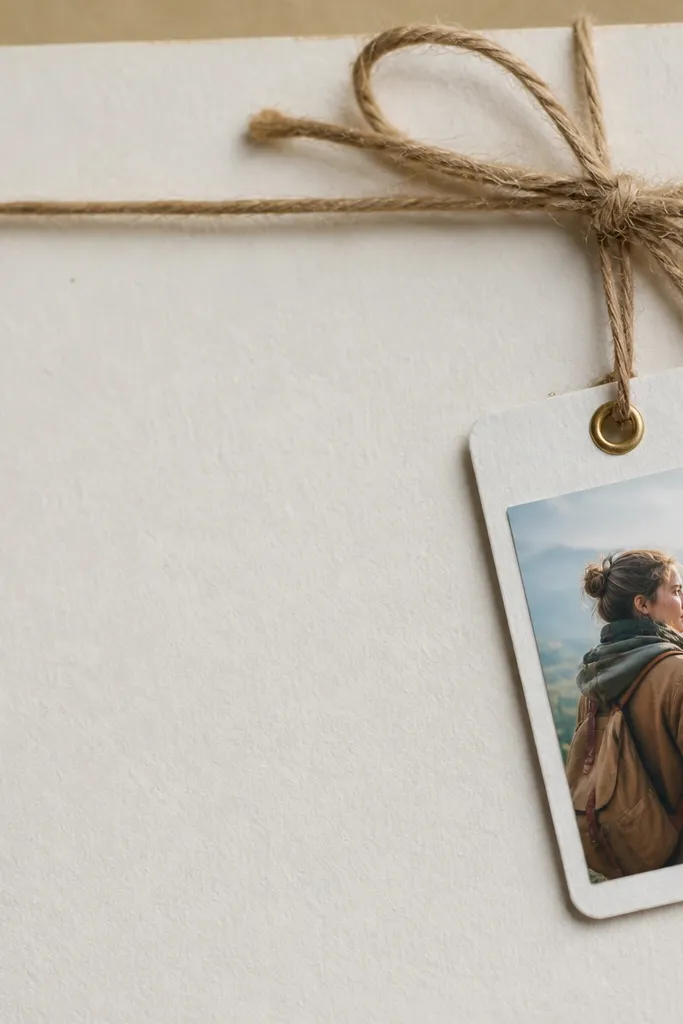
This idea is cute because it adds a gift-like detail in one corner, and corners always photograph well in small layouts. The twine bow creates texture and a clear focal point, while the mini photo tag gives you a functional element you can swap later. Keep the rest of the page plain so the bow stays crisp. It’s a strong choice for small-space cute scrapbook ideas when you want “handmade” without a full theme overhaul.
Cut a small tag from cardstock about 2.5 inches tall and round the corners. Punch a hole at the top and thread twine through it. Glue the tag to the page near the corner, then tie the twine into a small bow on top of the tag hole. Add a tiny label on the tag and attach a mini photo with tape tabs.
Pro tipUse matte tape on the back of the photo so it doesn’t shine under indoor light.
AvoidDon’t glue the twine directly — it can pull fibers loose when the page flexes.
15. Ripped Polaroid Frame Using Old Cardstock

Polaroid-style frames are cute and readable, and the ripped edge version makes it look intentional instead of store-bought. This layout uses a thick scrap frame so it stands out on small pages. You can reuse old greeting cards or packaging cardstock for the frame, then tear the edges for that raw, artsy look. It works well when you have one hero photo and want the rest of the page to stay minimal.
Cut a polaroid frame from cardstock, sized so the photo sits with about a 1/4 inch border. Tear the outer edges of the frame for a rough edge look, then ink the torn edges with a matching marker or distress ink. Glue the frame to your page and add your photo with photo corners or tape. Finish with a short date line under the photo area.
Ink the torn edges with a sponge dabber, not a brush, for cleaner coverage.
Don’t leave the frame uninked — torn edges look pale and unfinished in photos.
16. Magazine Strip Side Spine With Title Cutout
A magazine strip spine is cute because it brings pattern in a controlled vertical line. You get a strong design element without covering the whole page. This layout uses one vertical strip on the side, plus a title cutout for personality. It’s ideal for small-space cute scrapbook ideas because it turns random printed scraps into a clear structure.
Cut a vertical strip from a magazine or catalog about 1.5 to 2 inches wide and the full page height minus a small margin. Glue it to the left or right edge of your page. Cut a title from another scrap using scissors, then glue it near the top of the strip or in the blank space beside it. Add one photo block centered in the remaining area.
Use a white gel pen to add small highlights on dark magazine text for legibility.
Don’t stack multiple patterned strips — one spine strip is enough.
17. Foam Tape Shadow Box for Tiny Keepsakes
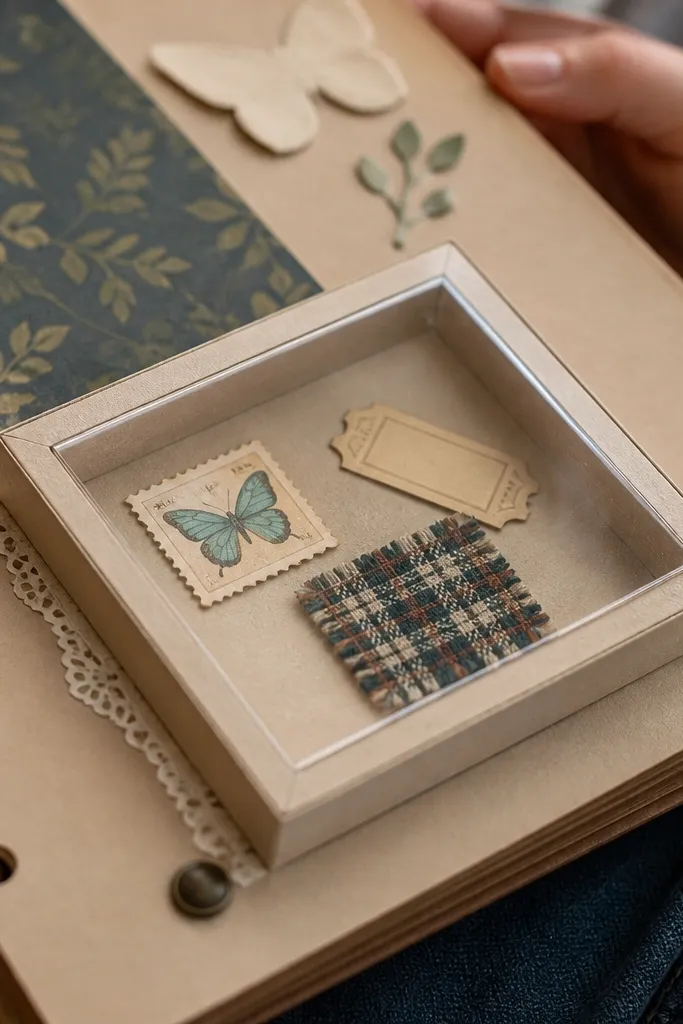
Shadow boxes are the best way to make scraps look expensive in a small album. You keep the main page flat, then pop tiny keepsakes into a defined window using foam tape. This layout is cute because it creates depth, and depth reads well even when your page is small. Use tiny items like ticket stubs, a postage stamp, a small fabric square, or a dried flower fragment sealed in clear tape.
Cut a rectangle window from cardstock and glue it to your page, leaving the opening area defined. Add a backing layer behind the window using patterned paper. Stick foam tape around the inner edges of the window, then place your keepsakes on the backing. Seal with a clear acetate sheet if you want protection, then glue the acetate edges to the window frame.
Pro tipPress each layer under a heavy book for 10 minutes so the foam edges stay sharp.
AvoidDon’t use thick items that push the acetate out — the bubble ruins the photo look.
18. Corner Date Stamp With Hand-Lettered Arrow
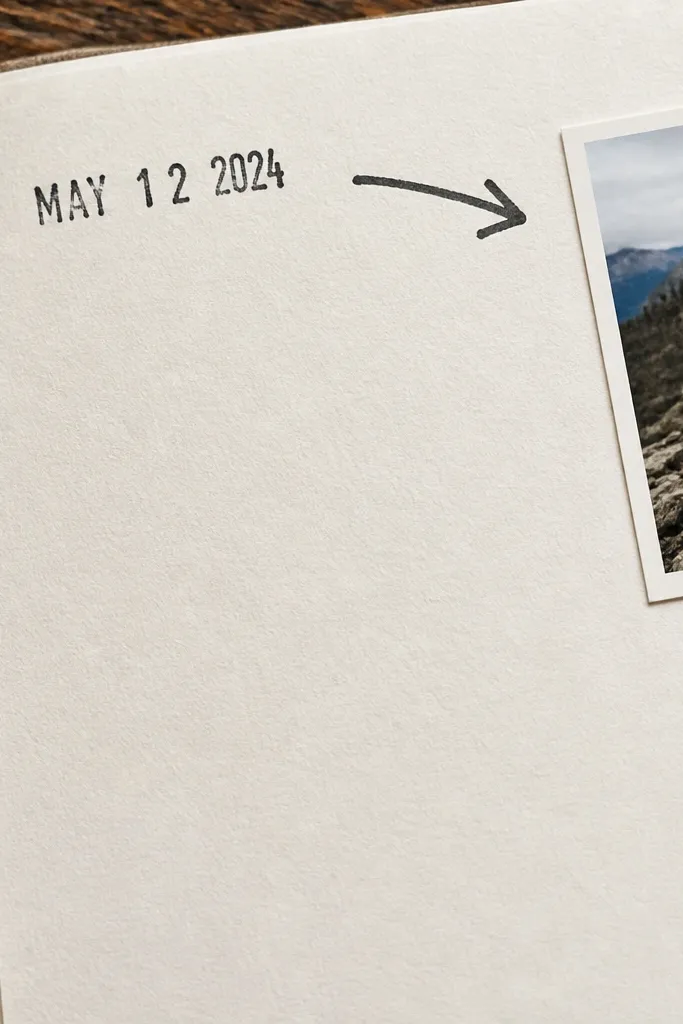
This layout is cute because it’s minimal but still tells a story. A date stamp in a corner keeps the page organized, and a hand-drawn arrow points the eye to the photo. It’s a great use for small-space cute scrapbook ideas when you want to journal without covering everything. The look is clean, and it’s easy to repeat across multiple pages so your album feels consistent.
Stamp or write a date in one corner using black archival ink. Draw a simple arrow from the date toward a photo placed in the center or slightly off-center. Use a fine-liner pen for the arrow, then add a small label under the photo. Glue a thin strip of scrap paper beneath the arrow tail to make the line feel intentional.
Pro tipTest your pen on scrap first so the ink doesn’t bleed into textured paper.
AvoidSkip thick markers — they look messy and smear in close-ups.
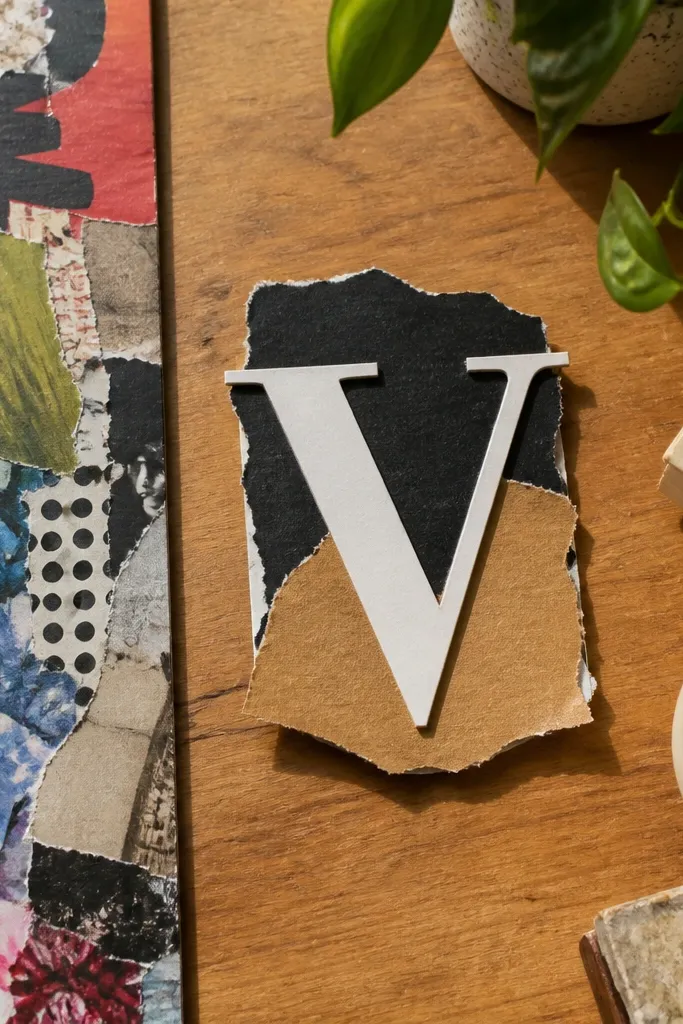
19. Serif Cutout Title With Torn Edge Backing

This is a typography-forward layout that looks cute because the title feels layered. The torn edge backing makes the title pop without needing lots of stickers. Use scrap paper with a pattern or a faded print behind the torn shape, then layer a clean title cutout on top. It’s excellent when you have a small photo and want the page to feel designed around words.
Cut a torn backing shape from patterned scrap, about 3 inches wide. Glue it onto the page where you want the title to sit. Cut your title from thick paper or printed cardstock, then ink the edges if needed. Glue the title centered on the torn backing and add a small photo or journaling card below.
Use a ruler to keep the title straight — torn edges are forgiving, text isn’t.
Don’t place a large photo and a large title together — choose one hero at a time.
20. Stitched Paper Path Using Thread and Glue Dots
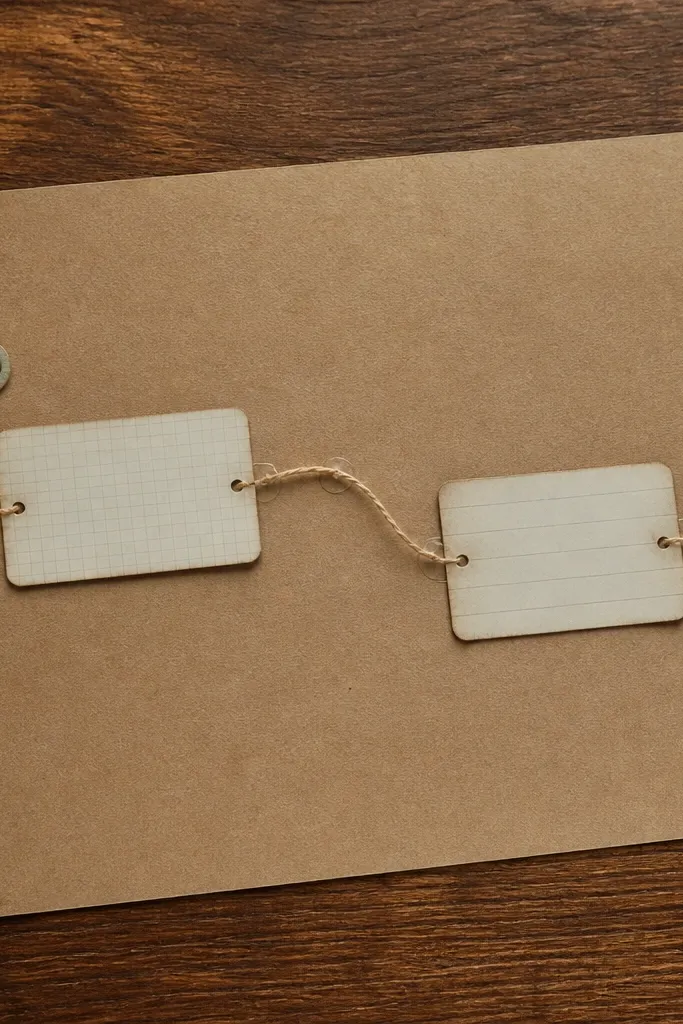
Stitched lines look charming and hand-made, even when you keep them simple. This layout creates a “paper path” that guides the eye across the page, so the page feels cohesive. You can stitch around a small photo or across a journaling block, then add a couple of tiny labels at the ends. It’s a strong small-space cute scrapbook idea because the texture is subtle but obvious in photos.
Draw a curved line on your page with a pencil, then poke holes along it using an awl or needle. Thread a thin embroidery thread through the holes, then secure each end with a tiny dab of glue on the back. Create a small photo or journaling card near the curve and glue it down so the stitched line appears to lead to it. Tie off the thread ends neatly and trim excess.
Use a needle threader if you’re working with thin thread — it saves time and frustration.
Don’t pull the thread too tight — it can wrinkle the paper and warp the page.
21. Washed Watercolor Wash With One Foil Heart
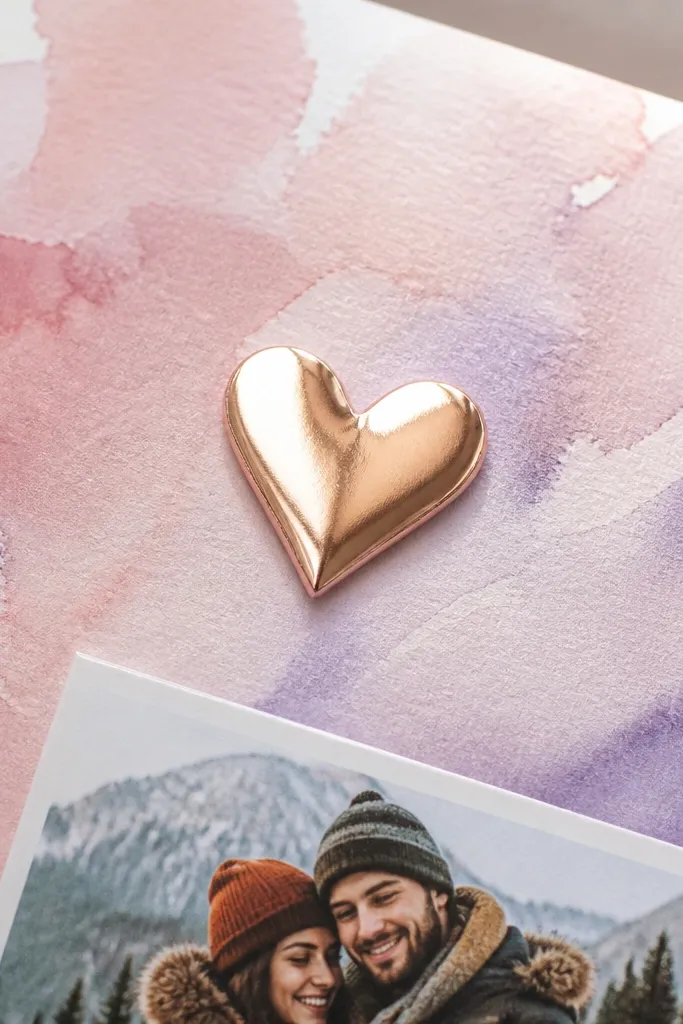
A watercolor wash background looks cute because it adds color gradients that hide small scrap gaps. Keep the design simple: one soft wash, one strong shape like a heart, and one photo. Foil hearts add sparkle in photos without needing multiple embellishments. This is a solid choice if your scraps are mostly small and you want the background to unify everything.
Paint a light watercolor wash across most of the page, leaving margins clean. Let it dry fully, then cut or draw a heart shape on foil paper and glue it in the center or top third. Add a photo under the heart using tape so it stays flat. Finish with a small journaling line in a contrasting pen color.
Pro tipUse a black or dark brown pen for journaling on light washes so it stays readable.
AvoidDon’t add too many extra shapes — one foil accent is enough.
22. Punched Border Strip With Polka Dot Edge
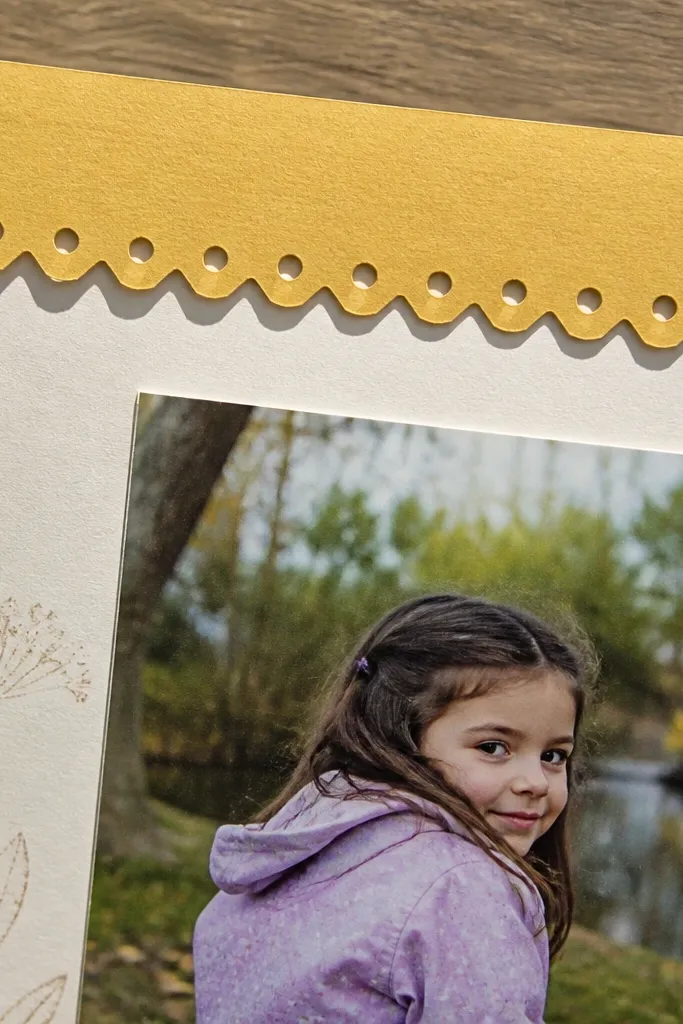
A punched border strip gives you a cute, graphic edge that makes the page look finished. It’s also a smart way to use scrap paper efficiently: you can punch holes along the edge of a leftover strip and turn it into a design element. This layout works well for small-space cute scrapbook ideas because the border adds interest without crowding the center. It pairs beautifully with one photo and a short journaling label.
Cut a narrow strip of scrap paper about 1 inch tall and the width of your page minus margins. Punch holes along the strip edge using a small circle punch or a guided hole pattern. Glue the strip along the top or bottom of your page, then place a photo in the remaining open area. Add a small label beside the photo for the date or caption.
Keep hole spacing consistent by marking a light guide line first.
Don’t punch directly on your final page — punch on a strip so you can replace it if it goes wrong.
23. Fabric Scraps Frame With Heat-Set Glue Sticking
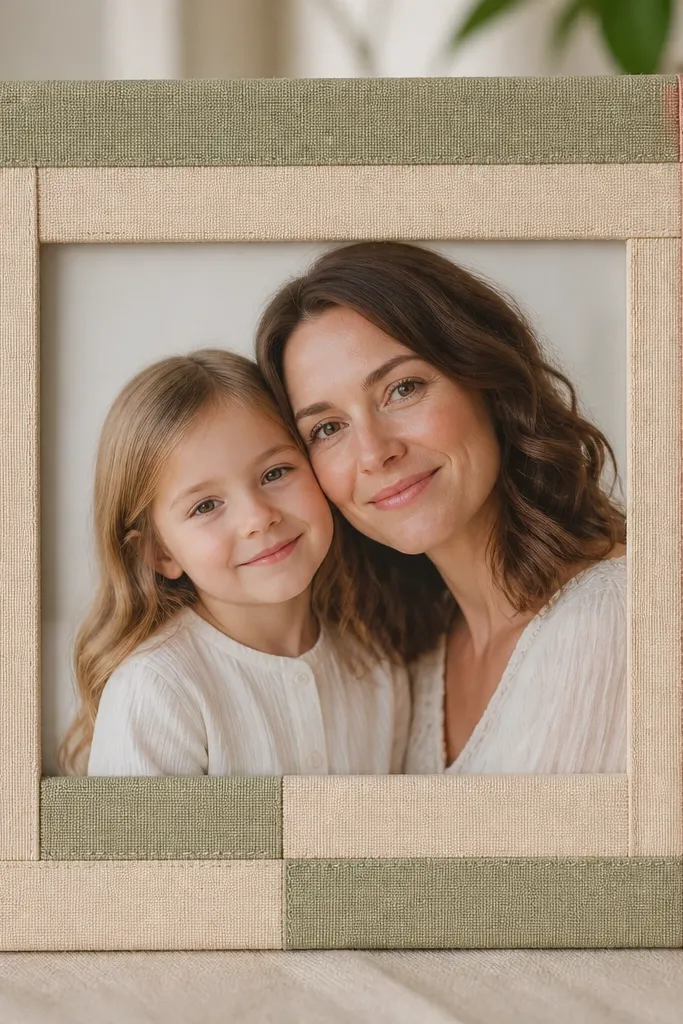
Fabric frames are cute because they add a tactile edge that paper-only pages don’t have. This layout uses thin fabric strips as a border around a photo, keeping the center open and clean. It’s perfect for small-space cute scrapbook ideas because fabric can be narrow and still read as intentional. Choose one fabric color family — denim blues with cream paper, or dusty rose with tan — then keep the rest minimal.
Cut fabric strips about 1/4 to 1/2 inch wide and press them flat. Use a fabric glue or heat-set adhesive (like iron-on interfacing backing) so the fabric won’t fray and lift. Place the fabric strips around a photo frame area on your page and glue down the ends first, then smooth each strip. Add the photo on top with tape tabs so it stays flat.
Pro tipTrim fabric edges clean with pinking shears for less fray and a sharper look.
AvoidDon’t use fuzzy, thick fabric — it makes the page bulkier and harder to close.
24. Stamping on Scrap Envelopes for a Unified Theme
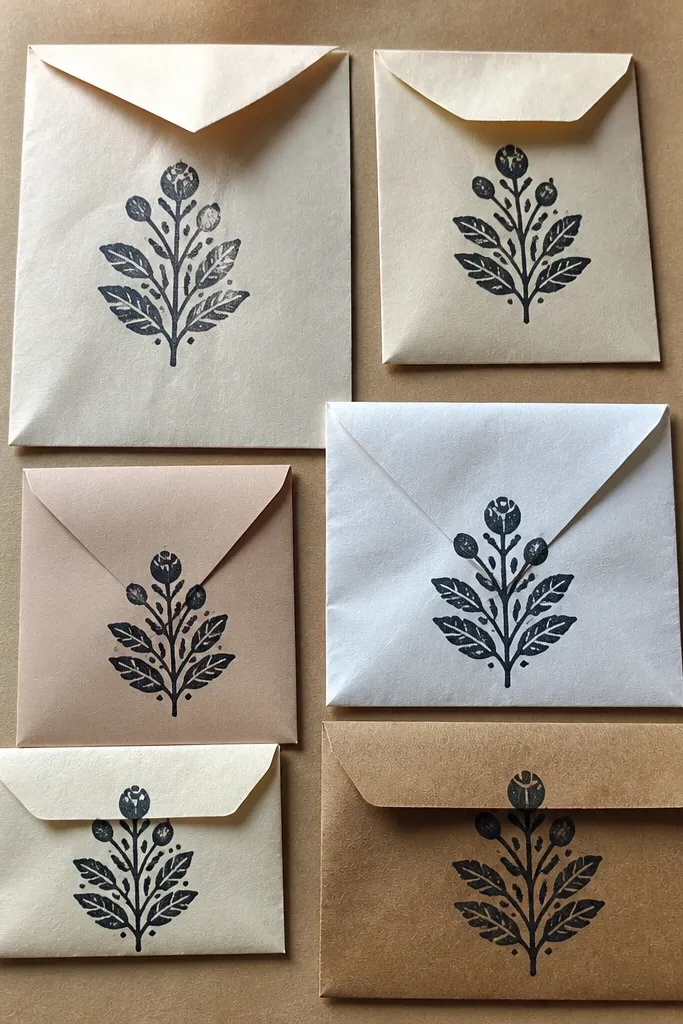
This layout is cute because it unifies random paper scraps with one repeated stamp pattern. Instead of trying to match every scrapbook paper, you make the scraps match by stamping them the same way. Envelopes are great because they already have texture and a slight sheen, and the stamping gives structure. Use one stamp shape and one ink color so the page looks cohesive and not like a pile of leftovers.
Cut envelope scraps into photo mats or small banners. Stamp them with one ink color in a consistent pattern, then let dry. Layer one stamped mat behind a photo and add a smaller stamped scrap as a caption strip. Glue everything down with a thin tape runner to avoid buckling.
Pro tipChoose archival ink so stamping doesn’t smear when you glue near it.
AvoidDon’t mix multiple stamp styles — one stamp shape keeps the page readable.
25. Pocket + Tag Set With Color-Coded Thread Loops
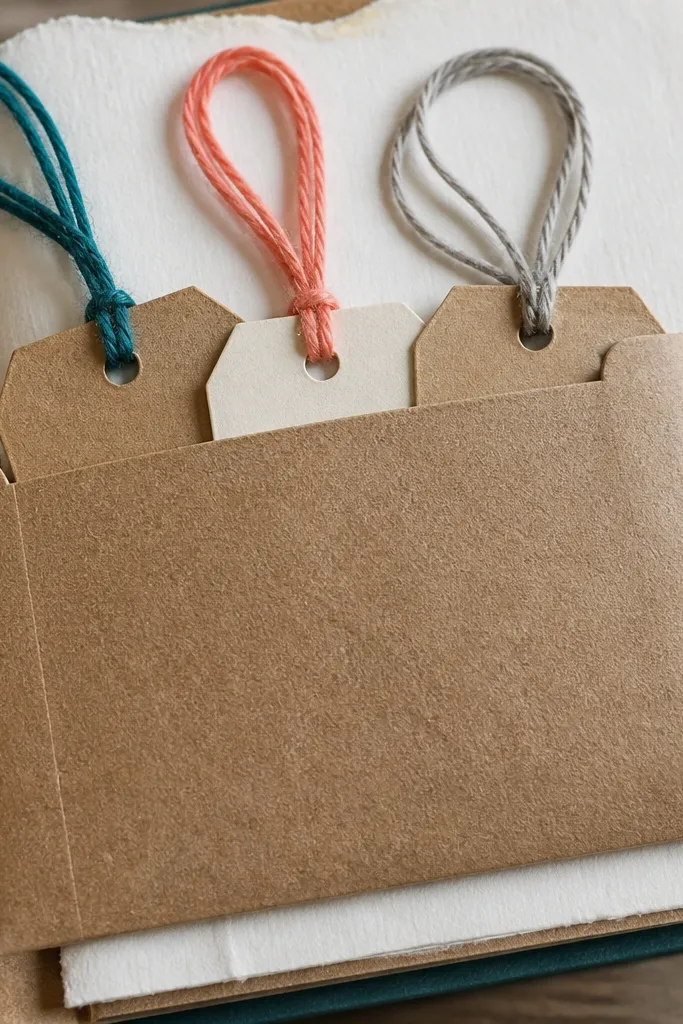
This is cute because it looks organized and interactive. A pocket holds multiple tags, and the thread loops give each tag a quick visual cue. In small-space cute scrapbook ideas, this matters because you want the page to look neat even when you add extra journaling. You only need a few tags, and you can reuse the same pocket shape across multiple pages.
Create a pocket from scrap cardstock or an envelope piece, about 3 inches wide. Add a top opening and glue only the sides and bottom. Make two or three tags from cardstock and punch a hole at the top of each tag. Thread different colored embroidery floss through the holes and tie small knots, then slide the tags into the pocket.
Pro tipUse short thread loops so tags don’t snag and lift the page in photos.
AvoidDon’t use bulky knots — they can make the pocket look lumpy.
26. Sticker-Style Frames From Laminated Scrap Paper
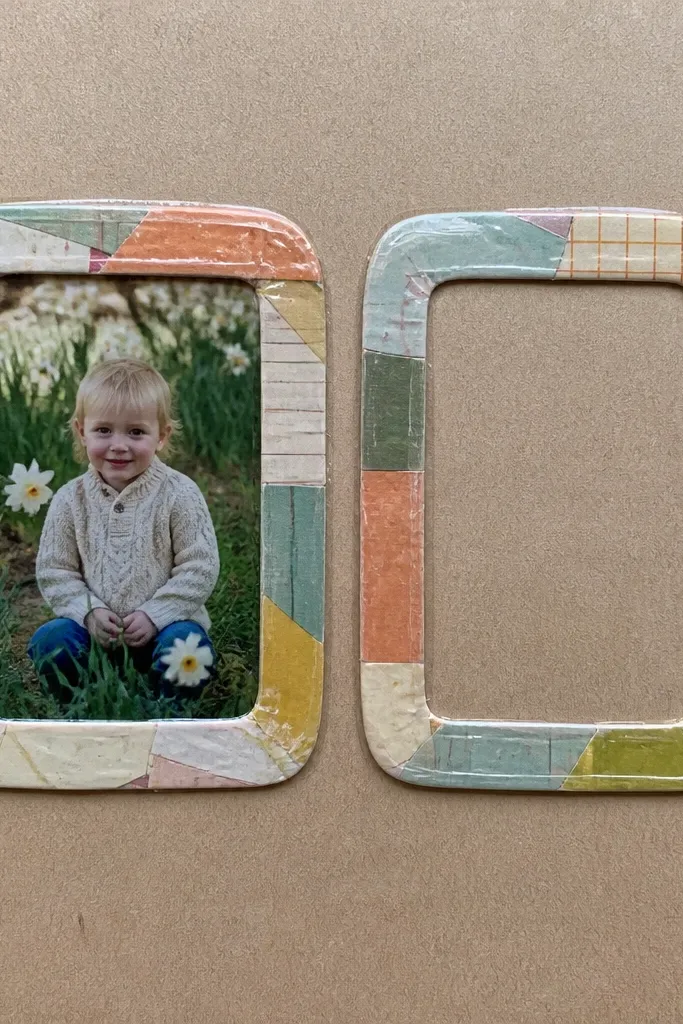
Sticker-style frames look cute because they have a clean outline and a slightly glossy finish that pops in pictures. You can make them from scraps by laminating thin paper with clear tape or a laminating sheet, then cutting a frame shape. This layout works when you want a clean focal point but you don’t want to buy new sticker packs. It also helps thin scraps survive handling.
Cut a scrap rectangle and laminate it with clear self-adhesive laminating film or multiple layers of clear tape. Cut out a smaller inner rectangle to make a frame, then round corners for a sticker vibe. Glue the frame to your page and place a photo behind it using tape tabs. Add a small journaling label under the frame.
Trim the laminate edges tightly so they don’t peel and catch light weirdly.
Don’t laminate textured fabric scraps — it creates uneven thickness.
27. Postage Stamp Strip With Washi Hinges
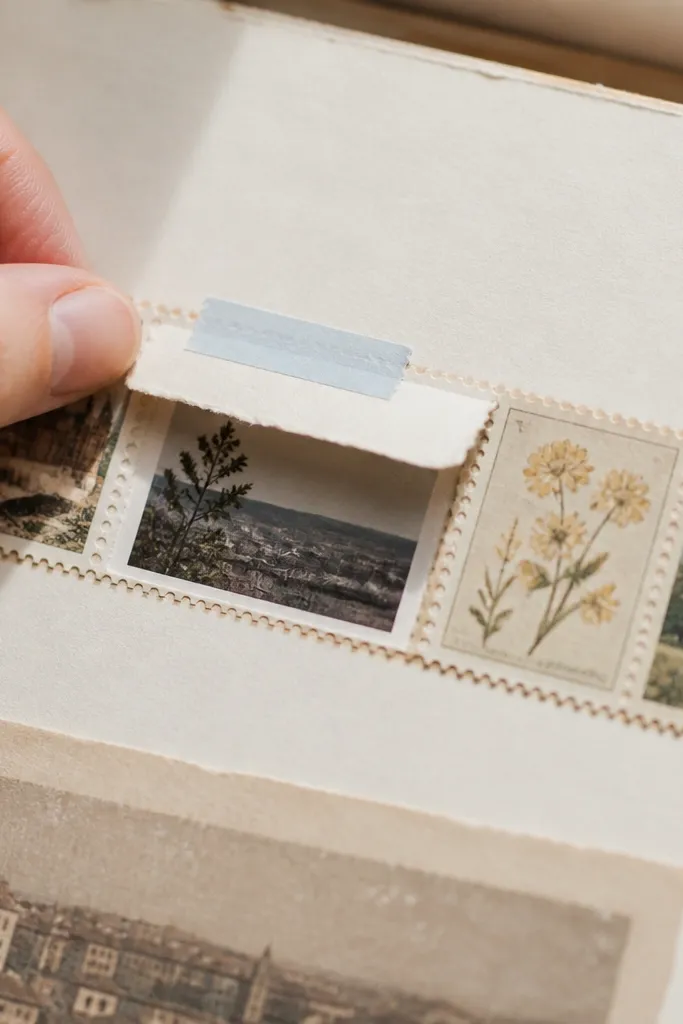
This layout is cute because it looks like a tiny mail moment. A postage stamp strip gives a graphic line, and washi hinges make it interactive, like a little flap. It’s perfect for small-space cute scrapbook ideas because you get a focal element that also hides journaling or a mini photo inside the flap. Use stamps from old mail or print stamp images on scrap paper — then unify them with one ink outline.
Cut a stamp strip from scrap paper, about 1 inch tall and 4-5 inches long, using scissors or a craft knife. Glue it to one side of a small cardstock flap, then hinge the flap to your page with a strip of washi tape. Add a hidden journaling card behind the flap and secure it with a small tape tab. Decorate the outside with a hand-drawn cancellation mark.
Use a black gel pen for cancellation marks so they stay crisp after gluing.
Don’t hinge with thick tape — it makes the flap stiff and lifts the page.
28. Color-Block Side Panel With One Photo Window

Color-blocking is cute because it looks bold and intentional, even when your materials are scraps. This layout uses one side panel as the design, then a photo window that stays clean. It’s ideal for small-space cute scrapbook ideas because the strong geometry reduces the need for extra decoration. Pick two colors only — one for the panel and one for the photo mat — and keep the rest plain.
Cut a side panel strip from colored cardstock about 2 inches wide for a 6x8 page. Glue it to the left or right edge, then cut a photo window in the remaining space using a mat you can layer behind. Place your photo behind the window and glue the window frame down. Add a thin label strip at the top of the page in the second color.
Use a cutting ruler for straight panel edges — it’s what makes it look designed.
Avoid three-color panels — small pages get busy fast.
29. Tissue Paper Flower Stamp Background
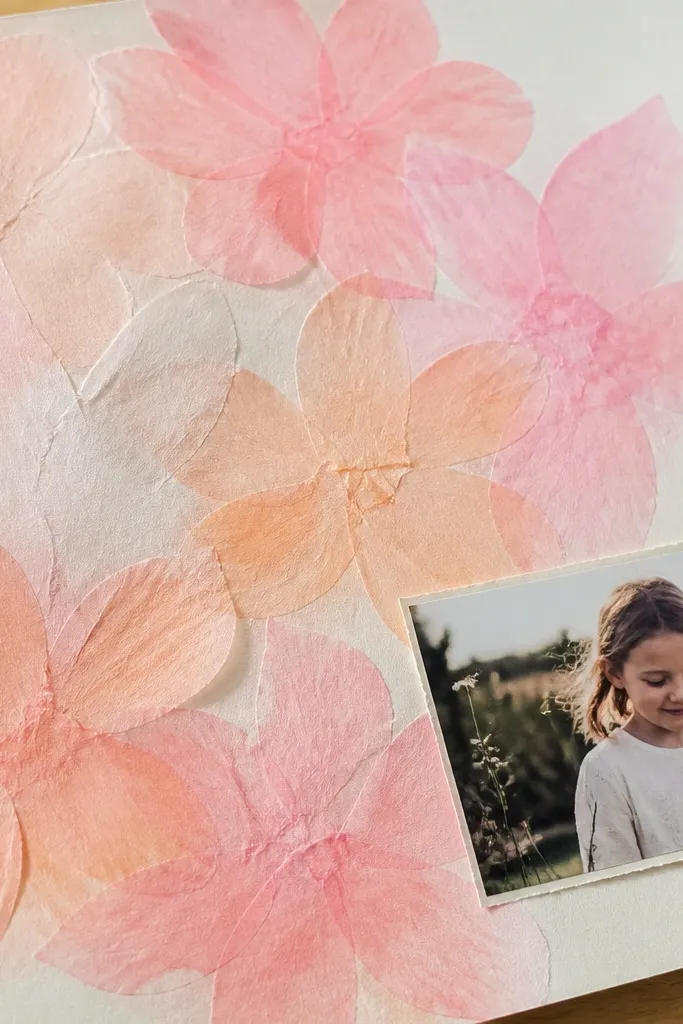
Soft tissue paper shapes look cute because they create a dreamy texture without needing layered die-cuts. This layout uses tissue paper as a background element, then keeps your main photo and journaling simple. It’s a great small-space cute scrapbook idea when you want color softness and you don’t have a lot of embellishments. The tissue also hides small imperfections in your base paper.
Crumple tissue paper lightly, then flatten it so it still has texture. Tear or cut small flower-like shapes and place them on your page in a cluster. Dab matte medium over the tissue edges to secure them, then let dry completely. Add a single photo in the open middle and write a short caption with a fine pen.
Pro tipUse tissue in light layers and seal with matte medium — it prevents smearing and lifting.
AvoidDon’t over-wet tissue with glue — it tears and becomes muddy.
30. Reused Greeting Card Frame With Photo Corner Tabs
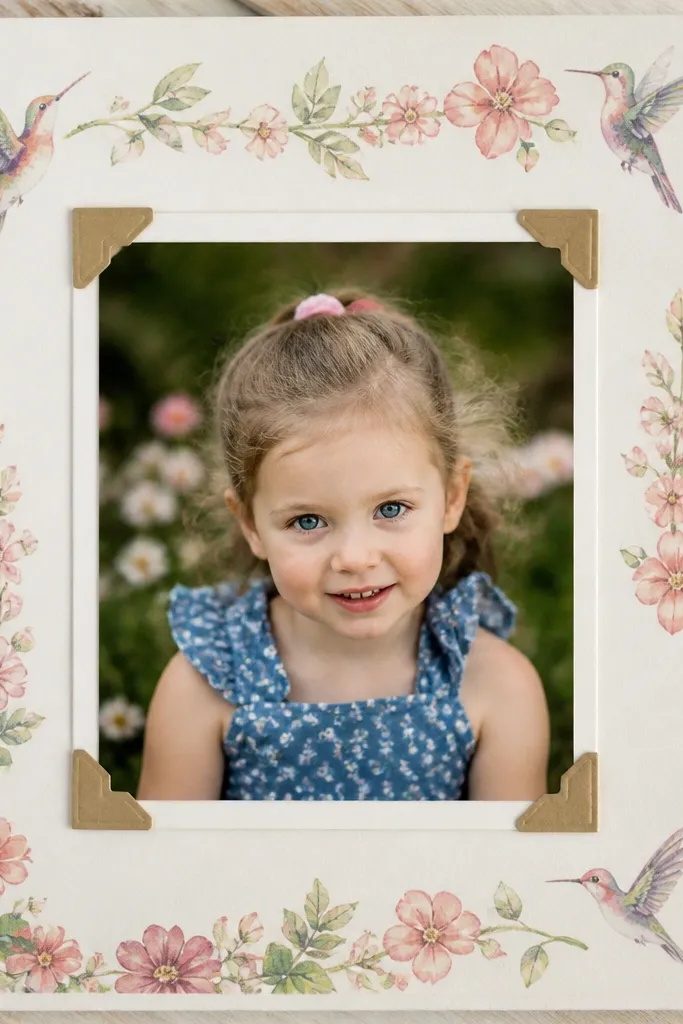
Greeting cards have printed designs that already look finished, which makes them perfect for small-space cute scrapbook ideas. This layout uses the card art as a frame, then anchors your photo with corner tabs so it stays neat and removable. You get a polished look without having to design a whole background from scratch. Keep the frame size small so the card art doesn’t overpower your page.
Cut a frame shape from the front of a greeting card, leaving an inner opening for a photo. Trim the frame so it fits your page with a margin of about 1/4 to 1/2 inch. Glue the frame to your scrapbook page using a thin layer of matte medium. Place your photo behind the opening and secure it with photo corner tabs made from scrap cardstock.
Pro tipIf the greeting card paper is glossy, lightly sand it so glue sticks better.
AvoidDon’t use too much glue under the frame — it can warp the printed paper.



