
1. Pocket Denim Friendship Mini Album
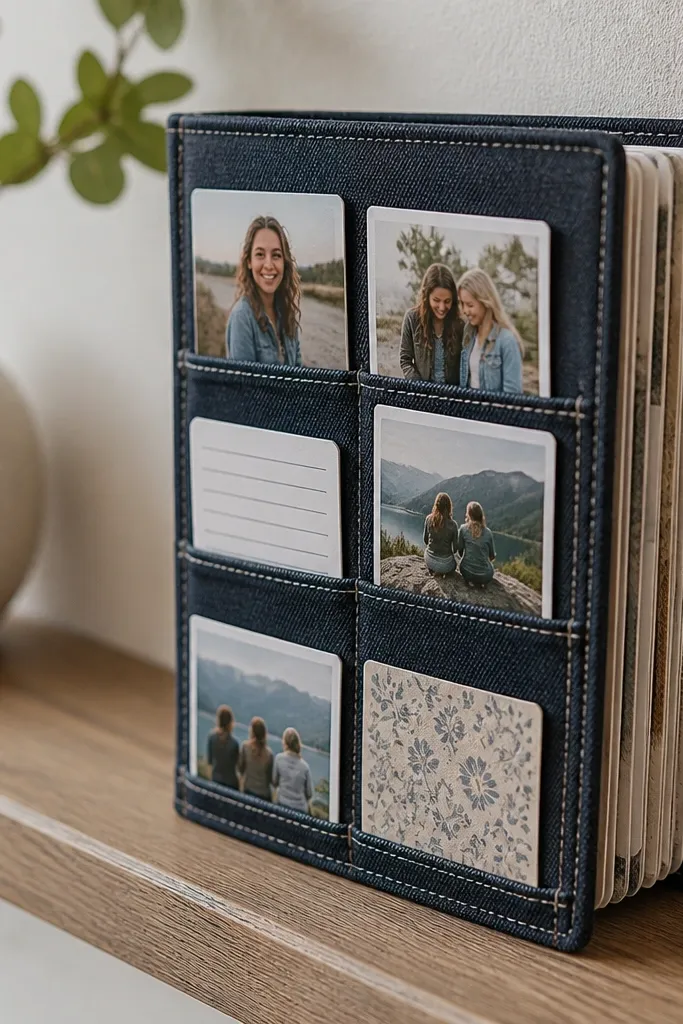
This is the kind of friendship scrapbook that looks styled even when your photos are imperfect. A denim cover stays flat, feels sturdy, and gives you built-in “page pockets” that make small-space storage easy. Each pocket holds a 2x3 photo plus one journaling card, so you get a tidy display instead of loose inserts. The look is casual-cute — topstitch lines create structure, and the pocket openings frame your images like little windows. Skill level is beginner-friendly if you can sew a straight line; otherwise, you can use fabric glue for the pockets and keep it simple. Plan for about 2-3 hours for the first one, plus 30 minutes to trim pages and write captions.
Start with a denim panel or old jeans leg cut to about 7.5 x 5.5 inches, then fold it into a cover with the seam as the spine. Cut two to four pocket openings from leftover denim, keeping each pocket at least 3.5 inches wide so a 2x3 photo slides in cleanly. Glue or sew pockets onto the inside cover, then add a simple paper backing behind each pocket so the photo doesn’t snag. Make a 6-page insert set from cardstock (about 7 x 5 inches) and slip one insert sheet behind each pocket for a layered look. Finish by adding a button-and-loop closure or a small magnetic snap at the top edge.
Pro tipDo a test slide with your 2x3 prints before you glue pockets down so you don’t end up with photos that scrape the opening.
AvoidDon’t use stiff cardboard without rounding the corners — it makes the pocket inserts fight the cover.
2. Cereal-Box Scrapbook Frame Wall Grid
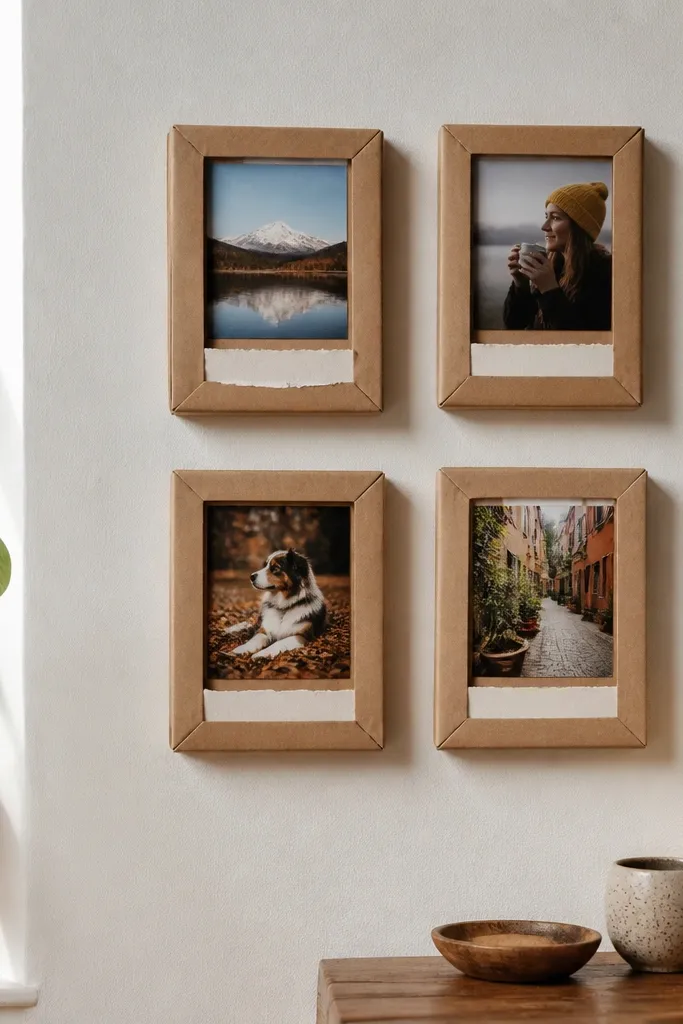
If your space is too small for a full album, a wall grid fixes that immediately. This project turns recycled cereal boxes into four mini frames, each holding a 3x4 photo with a tiny journaling strip. The cardboard gives you crisp edges and a matte surface that looks clean, not flimsy. Because the frames are separate, you can rotate photos without rebuilding the whole thing. It’s also very photogenic: the repeated frame shapes create a designed pattern on a plain wall. You’ll need patience with cutting, but the actual build is straightforward and stays under 2 hours.
Cut four frame backers from cereal-box cardboard, each around 6 x 6 inches, and cut a window opening for a 3x4 photo (about 3.25 x 4.25 inches). Cover the frames with kraft paper or patterned scrapbook paper using glue stick, then add a thin strip of contrasting paper behind the photo window as a “mat” layer. Attach a photo backing sheet using double-sided tape along the sides, leaving the top edge accessible for swapping. Add a small journaling strip under the photo window (about 6 x 1 inch) and write in one line plus the date. Finally, glue or staple a small hanging tab made from scrap cardboard to the back of each frame and arrange them as a 2x2 grid.
Use a metal ruler and craft knife for the window openings so all four frames match — this is what makes the grid look intentional.
Don’t skip the mat strip behind the photo — without it, the photo feels like it’s floating on cardboard.
3. File-Folder Accordion Friendship Timeline
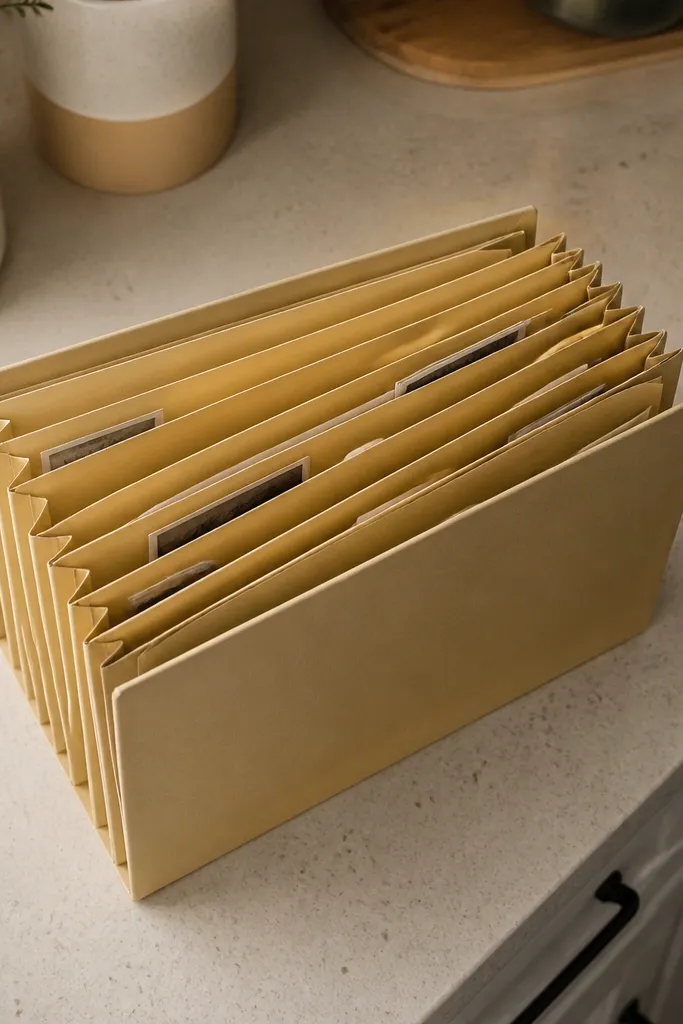
This one is perfect when your friendship story has clear milestones but you don’t have the room for a bulky book. An accordion timeline stays compact when closed, then opens like a fan to display multiple moments. File folders are great because they’re already thick enough to hold shape, and the edges give you natural “page” divisions. The look is neat and graphic — each panel has a photo, a date tab, and one short line of text. Skill level is beginner. Build time is about 1.5 to 2 hours, and you can add panels later without ruining the layout.
Start with a manila file folder and cut a rectangle about 10 x 8 inches, then score fold lines to create 6 panels at about 1.5 inches wide each (leave a clean spine edge). Fold carefully so the accordion opens flat, then trim panel edges so they line up. Cut 6 photo windows sized for 4x6 prints trimmed down or for 3x4 photos; glue photos onto the panel backs or mount them with tape corners. Make date tabs from colored cardstock about 2 x 1 inch and place one at the top of each panel. Finish by covering the outside with matching patterned paper and adding a belly band closure made from ribbon or scrap fabric.
Pro tipScore your fold lines twice — first lightly, then press harder with a bone folder so it folds crisp instead of cracking.
AvoidDon’t glue photos directly over thick seams — mount them on thin cardstock first so they sit flat.
4. Polaroid-Style Photo + Lace Mini Window Book
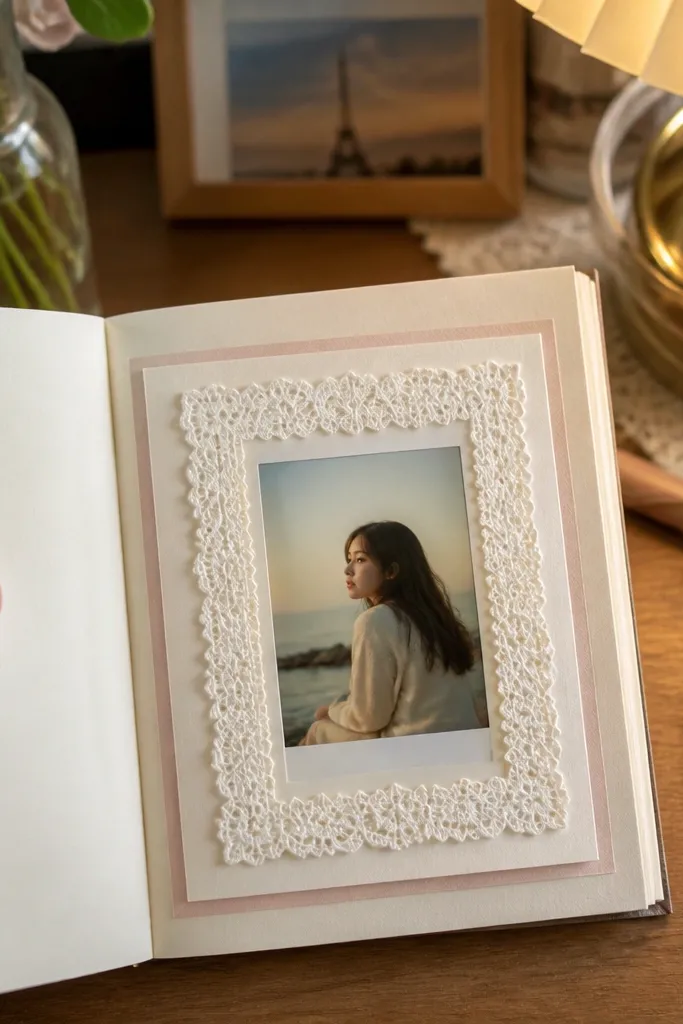
This is a small-space friendship scrapbook idea that looks cute on a desk and fancy on a shelf. You’ll build a mini book with a lace-trimmed window that frames one photo per page, like a tiny display case. The lace adds texture and soft contrast to crisp cardstock, which makes your photos pop even with basic printing. Each page is a single photo layer plus a journaling strip, so it stays uncluttered. It’s also a good choice for friends who like romantic or soft aesthetics. Plan about 2 hours for a 5-page mini.
Cut cardstock covers to about 5 x 7 inches and fold to create a small booklet with a simple hinge made from thin paper tape. Create five pages from 4.5 x 6.5 inch cardstock and cut a window opening on the front cover only sized for a 3.5 x 4.5 inch photo mat. Add lace trim along the window edge using fabric glue, then attach a photo mat behind the window with double-sided tape. Inside pages: glue a 3x4 photo centered and add a journaling strip about 4.5 x 1 inch under it. Bind by taping the spine with fabric tape and finishing with a small ribbon tie closure.
Pro tipChoose lace with a straight edge and trim it so the pattern lines stay even across the window — that symmetry is what makes it look polished.
AvoidDon’t use too-thick lace — it warps the cover window and makes the booklet close unevenly.
5. Scrapbook Keychain Memory Cards
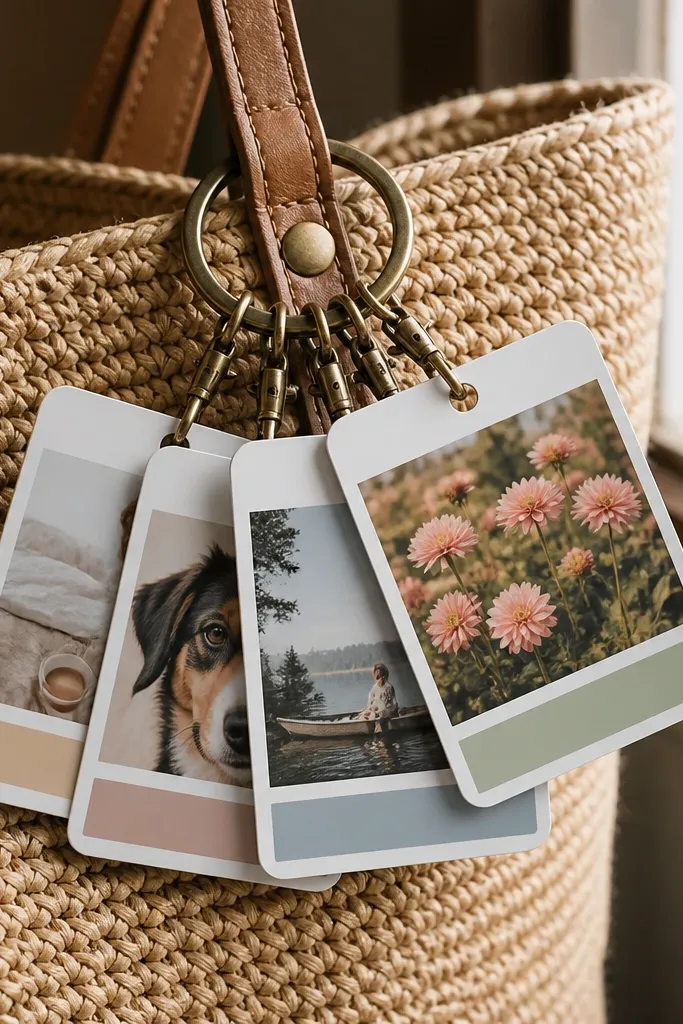
This is the best option when you want friendship scrapbook ideas that travel and take zero shelf space. Each memory card is small, photo-forward, and made to clip onto a keyring or bag loop. The look is clean because you control the card size and use the same layout each time. You’ll get instant visual payoff: every card is like a mini poster with a photo, a color border, and one line of text. Skill level is beginner. Total build time is about 45 minutes for a set of 8 cards.
Cut cardstock into 2.5 x 3.5 inch rectangles and round the corners with a punch or scissors. Print or trim photos to fit a 2 x 2.75 inch window, then mount them with a thin border margin of 1/8 to 1/4 inch. Add a colored strip at the bottom for one-line captions and date. Seal each card with a small piece of clear packing tape on the front and back, then punch a hole at the top center. Thread cards onto a keyring with small jump rings so they flip easily.
Use a consistent border color (like cream cardstock plus red strip) so the set looks like one design, not random cards.
Don’t overstuff captions — if the text wraps, the cards look messy and harder to read.
6. Upcycled Tea Tin Friendship Photo Vault
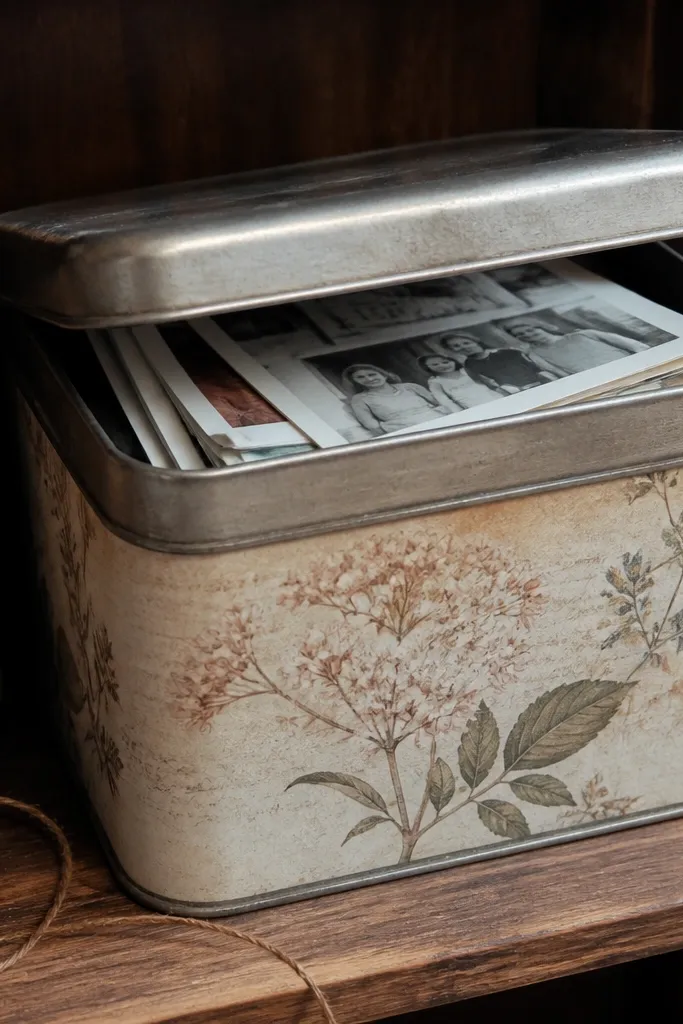
If you want small-space friendship scrapbook ideas that look like decor, this tea tin is a strong pick. The tin hides your photos and keeps them protected, while the outside becomes the aesthetic piece. Inside, you’ll store photo slips and journaling notes in layers so you can pull one out at a time. It’s also a practical fix for people who hate loose papers. The look is graphic and clean if you wrap the tin in patterned paper and add a ribbon pull. Build time is about 1.5 hours for one tin with 10 photo slips.
Clean and dry an empty tea tin, then wrap it with patterned scrapbook paper using matte Mod Podge or decoupage glue. Cut a ribbon pull tab about 6 inches long and glue it to the inside lid so it’s easy to open. Make 10 photo slips by cutting cardstock strips about 2.75 x 6 inches and folding each to hold a 2x3 photo. Add a thin journaling band on each slip with one line and the date. Stack slips in the tin, then finish the lid with a clear tape edge seal so paper doesn’t peel.
Pro tipAdd a sheet of thin felt under the slips so photos glide instead of scraping metal.
AvoidDon’t use glossy paper on the lid — fingerprints show and it looks less “finished” under indoor light.
7. Thrifted Frame + Washi Tape Photo Strip Pages
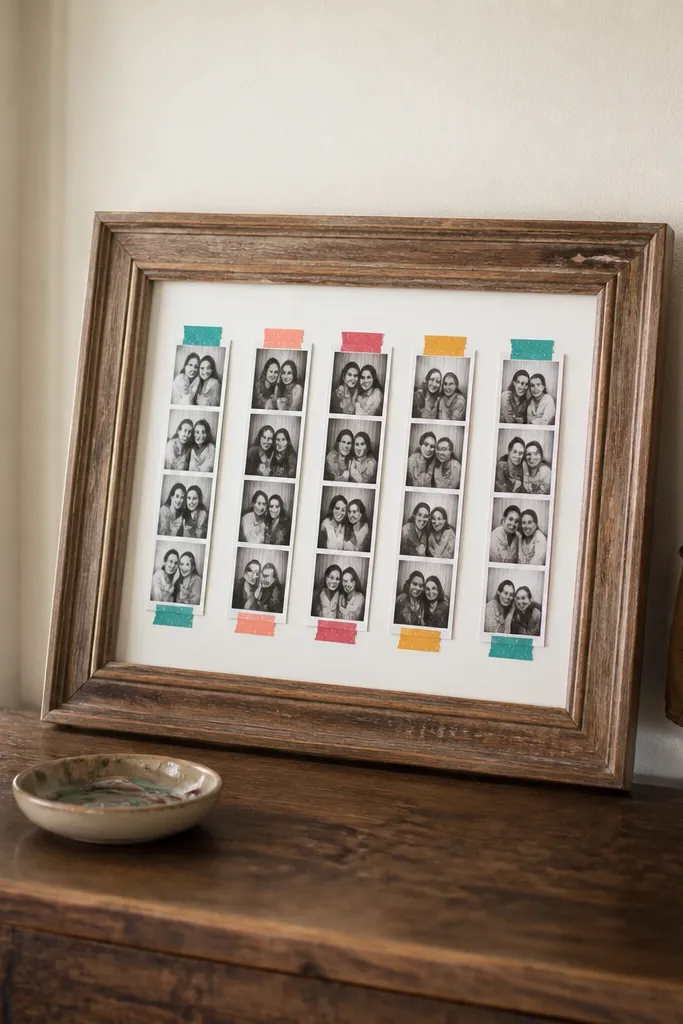
This is a scrapbook look without the bulk: a thrifted frame where the “pages” are photo strips held by washi tape. The frame makes it automatically display-ready in small spaces, and you can swap strips for new memories without redoing everything. Washi tape gives you color, texture, and clean edges, and it’s forgiving if you reposition. The result is photogenic because each strip looks like a styled caption board. Skill level is beginner. Plan around 60-90 minutes.
Pick a small frame with a removable backing and glass, around 8x10 inches. Remove the backing and cut a paper base to fit, then cover it with neutral cardstock. Print a set of 3x4 photos trimmed into 2.5 x 3.5 strips, then arrange them in a grid or one long horizontal strip. Tape each photo to the paper base using washi tape corners, leaving space for captions. Add handwritten date captions on small strips and tape them under the photos. Reassemble the frame and tighten the backing so nothing shifts.
Pro tipUse two washi tape patterns max — one for photo corners and one for caption strips — so the frame looks intentional.
AvoidDon’t tape directly over glossy photos without matte finish — tape edges glare under light.
8. Scrapbook Mason Jar Photo Tags
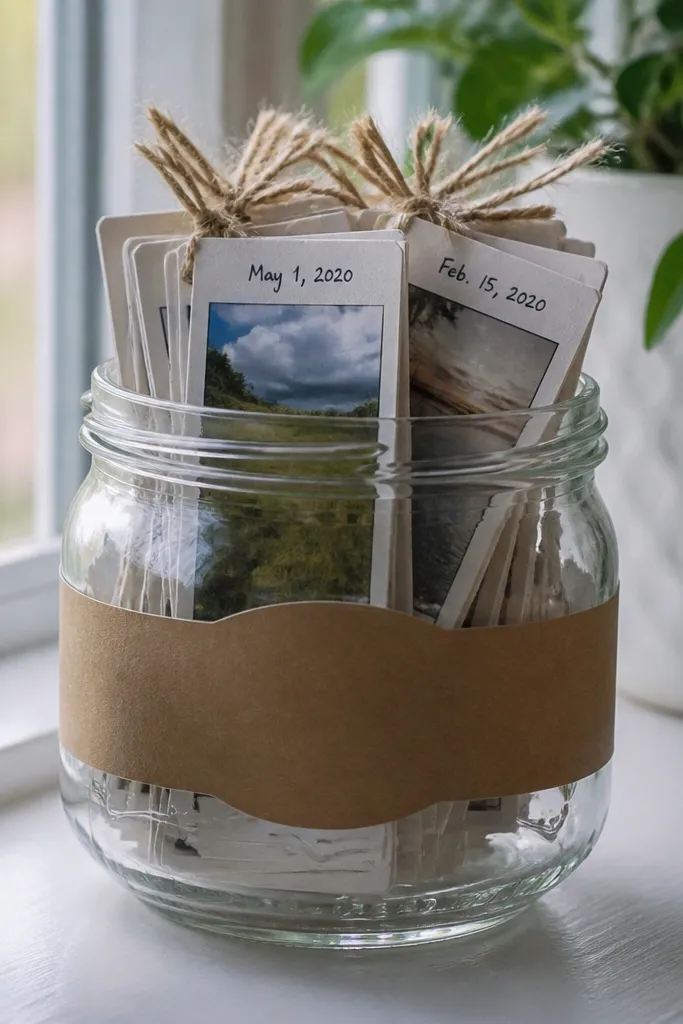
This turns friendship scrapbook ideas into something you can reach for daily. Instead of a book, you store small photo-tag cards in a jar and pull one when you want a memory. The look is charming and tidy because tags are uniform in size, and the jar label ties the set together. It’s also good for small spaces because it uses vertical space and stays organized. Each tag has a photo, a tiny caption, and a date on the back. Build time is about 1 to 1.5 hours for 12 tags.
Choose a small mason jar and cut tag cards from cardstock to about 2.5 x 3.5 inches, then punch a hole near the top. Print 2x3 photos and trim to 2 x 2.75 inches, then mount on the front with a 1/8 inch border. Write one line caption on the bottom front and date on the back. Fold a thin ribbon loop through the tag hole and tie it to the jar lid or hang tags on a string inside the jar. Decorate the jar with a label made from kraft paper and a short friendship title using a fine-tip marker.
Seal tags with a quick layer of clear tape on the photo side only — it keeps smudges off without making the whole card glossy.
Don’t mix tag sizes — the jar looks messy fast when cards vary.
9. Mini Shadowbox Friendship Moments
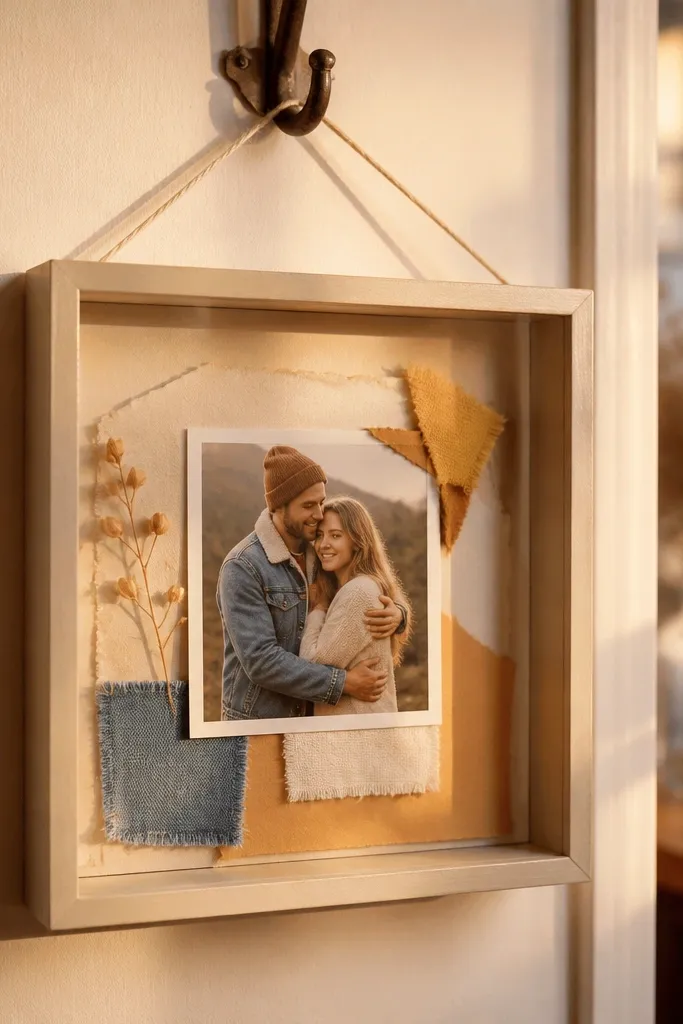
Shadowboxes are one of the easiest ways to make scrapbook memories look like art. You’re building a shallow 3D display where photos sit on layered paper and small fabric bits create texture. This is perfect for small-space friendship scrapbook ideas because the finished piece hangs on a wall or sits on a shelf without opening anything. It also solves the “where do I put all these scraps” issue since the box is the storage and the display. Skill level is beginner with careful cutting. Expect about 2 hours for one shadowbox with 6 elements.
Grab a small shadowbox frame with a depth of at least 1 inch. Cut a background panel from cardstock or fabric to fit the back, then glue it in place. Layer 3x4 photos onto thin cardstock mats so each photo sits at a different height. Add one fabric scrap, lace, or ribbon behind or beside the photos, then stitch or glue it down. Write a short caption on a narrow paper strip and place it near the bottom of the composition. Finish by sealing with clear glue where needed and closing the shadowbox backing securely.
Pro tipUse foam tape under photos for height — even 1/8 inch of lift makes the display look intentional.
AvoidDon’t glue everything flat — a flat shadowbox looks like a collage, not a scrapbook object.
10. Washed-Out Map Paper Friendship Page Borders
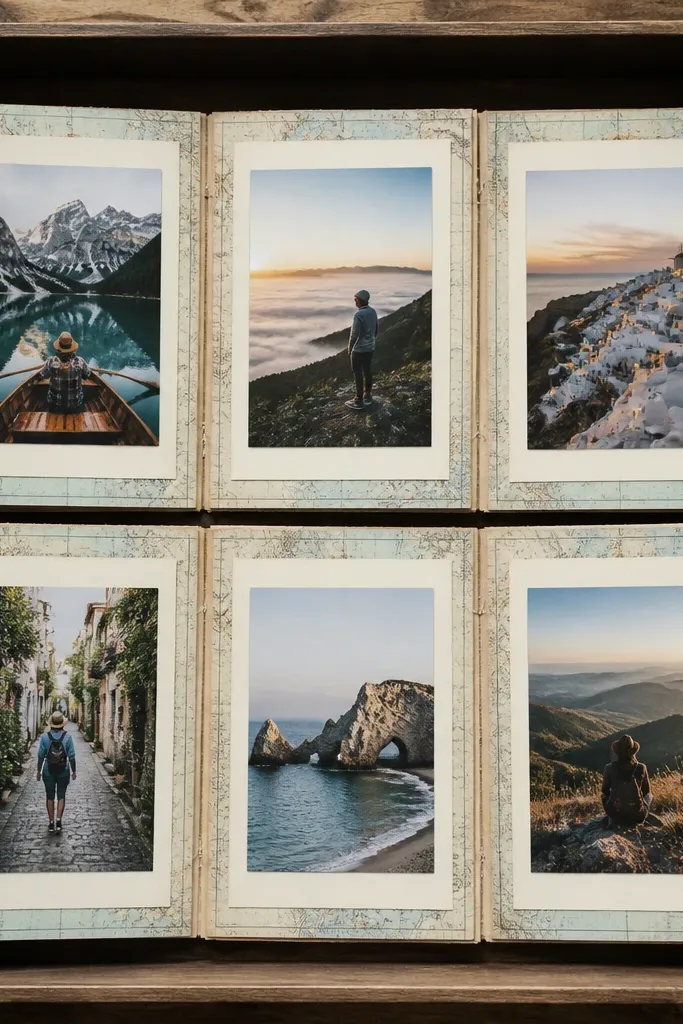
This is a page style that makes small-space friendship scrapbook ideas look designed without adding bulk. Map paper borders are visually interesting but still simple, so your photos stay the focus. You’ll build a mini 6-page booklet using one border style repeated on every page. The look is travel-and-friendship coded without needing fancy supplies. Skill level is beginner. Time is about 1.5 hours for a mini set, plus drying time.
Cut six pages from cardstock to 5 x 7 inches and fold them into a small booklet with a simple spine made from thin fabric tape. Choose one map sheet and cut border strips about 1 inch wide, then distress the edges with scissors or sandpaper for a soft look. Glue map borders around the photo area, leaving a center opening for a 3x4 photo. Mount the photo and add a caption strip about 4.5 x 1 inch beneath it. Repeat the border pattern on every page so the mini booklet looks cohesive.
Pro tipDistress lightly — tearing too aggressively makes the borders look uneven in photos.
AvoidDon’t cover the whole page with map — it competes with the photo and makes the booklet feel busy.
11. Folded Recipe Card Friendship Scrapbook Set
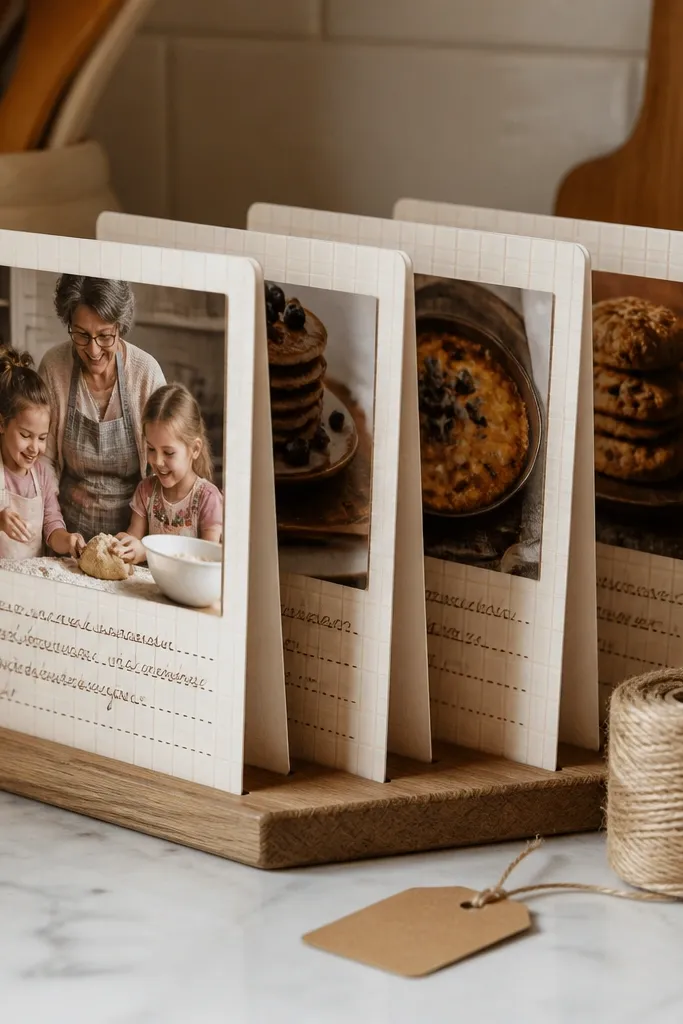
Recipe-card scrapbooks look adorable on counters and shelves, and they’re perfect for small-space friendship scrapbook ideas. Each card holds one photo and one memory line, so you get a series instead of a thick album. The format is structured, which keeps your layouts clean and readable. It also pairs well with upcycling because you can use thrifted recipe boxes or cut down old file paper. Skill level is beginner. Build time is about 1-2 hours for a set of 10 cards.
Cut cardstock into 4 x 6 inch rectangles and fold each in half to create a card with a clean crease. Print photos trimmed to fit about 3 x 3.5 inches, then glue to the top half of each card. Add one line caption on the bottom half using a fine black marker, and include the date on the back. Punch two holes along the side and bind into a small recipe box or use a small binder ring. Decorate the edges with a strip of patterned paper so the set looks consistent.
Use a black marker for captions and a colored marker for dates so the text hierarchy is clear.
Don’t use busy patterns behind photos — keep the background plain so the card reads fast.
12. Scrap Fabric Scrapbook Coasters with Photo Tags
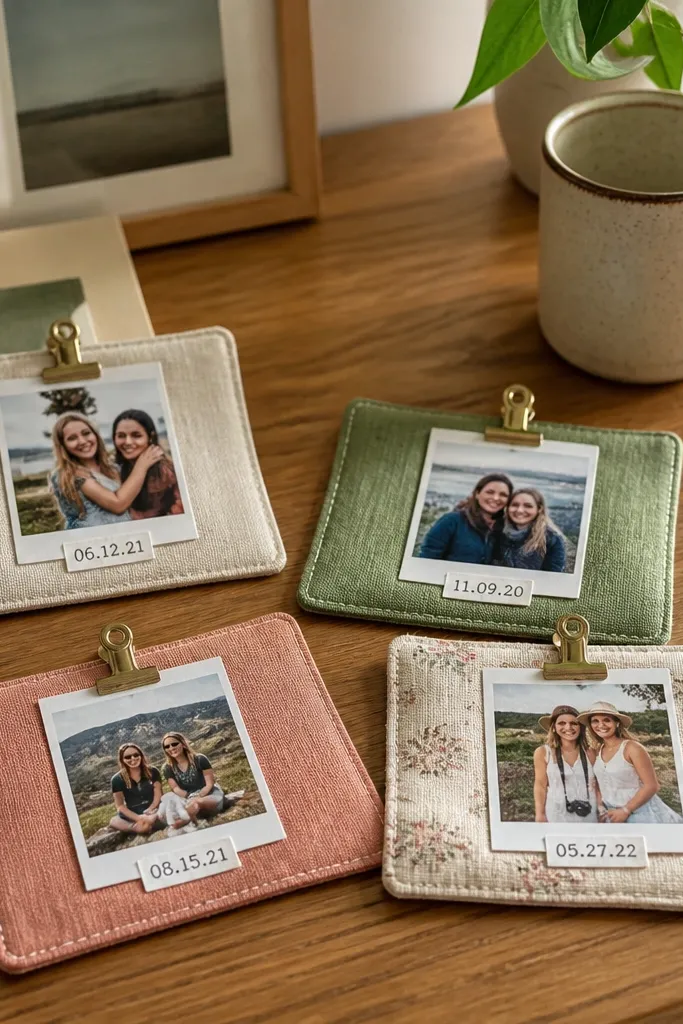
This turns tiny friendship memories into everyday objects, and it looks great in small spaces because coasters are already “displayed.” Each coaster holds a clip-on photo tag, so you get a rotating scrapbook feel without building a book. The fabric adds softness and texture, and the stitched edges make the set look intentional. It’s also a smart upcycling move if you have mismatched scraps. Skill level is intermediate-light if you’re comfortable with basic stitching; fabric glue works too. Plan about 2 hours for 6 coasters.
Cut fabric squares about 4.5 x 4.5 inches and back each with a thin felt layer for structure. Stitch around the edges with a simple straight stitch or glue the layers together and press with a heavy book for 30 minutes. Make photo tags from cardstock about 1.75 x 2.75 inches and punch a hole at one corner. Clip the tag to the coaster using a mini clothespin or small binder clip. Write a date on the back of the tag and add one tiny symbol or doodle on the front.
Pro tipUse one fabric style as the base (like denim or solid cotton) and vary only the tag colors so the set looks cohesive.
AvoidDon’t use slippery satin scraps — tags slide and look sloppy.
13. Old Book Page Friendship Accordion Bookmark Album
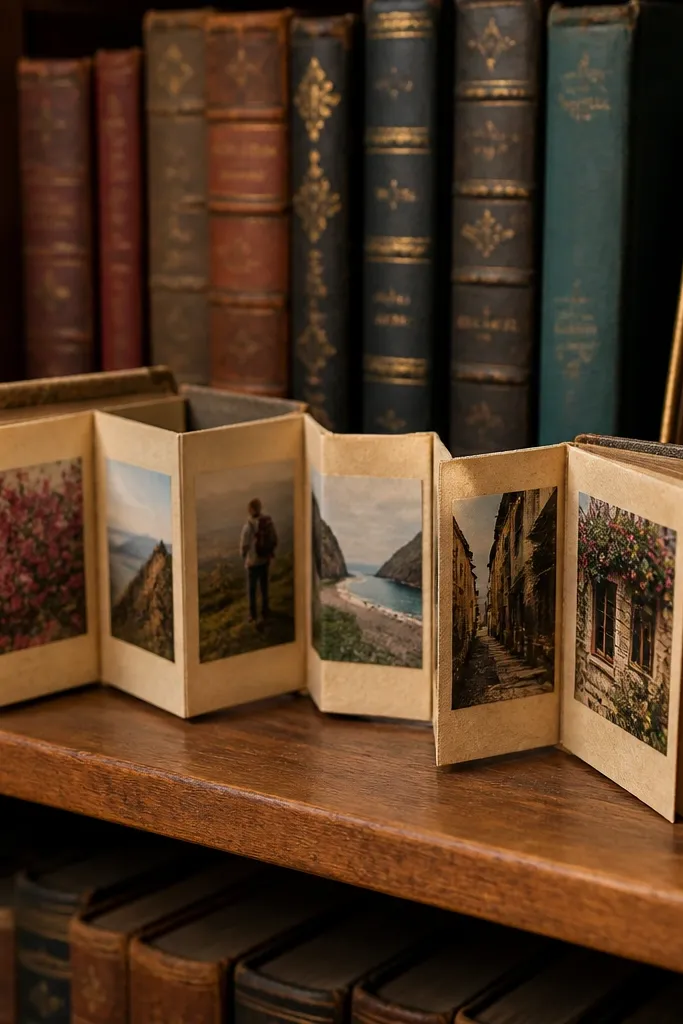
This is an aesthetic scrapbook format that lives in a book, not on a shelf. You’re making an accordion mini that sits inside a bookmark cover, so the friendship scrapbook is compact and always ready. Old book pages look gorgeous under warm indoor light, and the accordion structure lets you show multiple photos without a bulky album. It’s ideal for reading buddies and small desks. Build time is about 1 hour for a 6-photo mini. Skill level is beginner — it’s all paper folding and gluing.
Cut a bookmark cover from thick paper at about 2.5 x 8 inches and fold a small tuck at the top to hold the accordion. Make an accordion strip from thin cardstock, sized to hold 6 photo tabs, with folds every 1 inch. Glue photo tabs (2 x 1.75 inches) onto the accordion peaks so they show when opened. Attach the accordion to the inside of the bookmark cover with a thin strip of paper tape along one side. Add a ribbon loop at the top for closure and decoration.
Pro tipUse matte glue stick for paper — it dries flat and avoids warping pages.
AvoidDon’t over-glue the accordion folds — thick glue makes it stiff and hard to open.
14. Scrapbook Popsicle Stick Photo Mini Frame
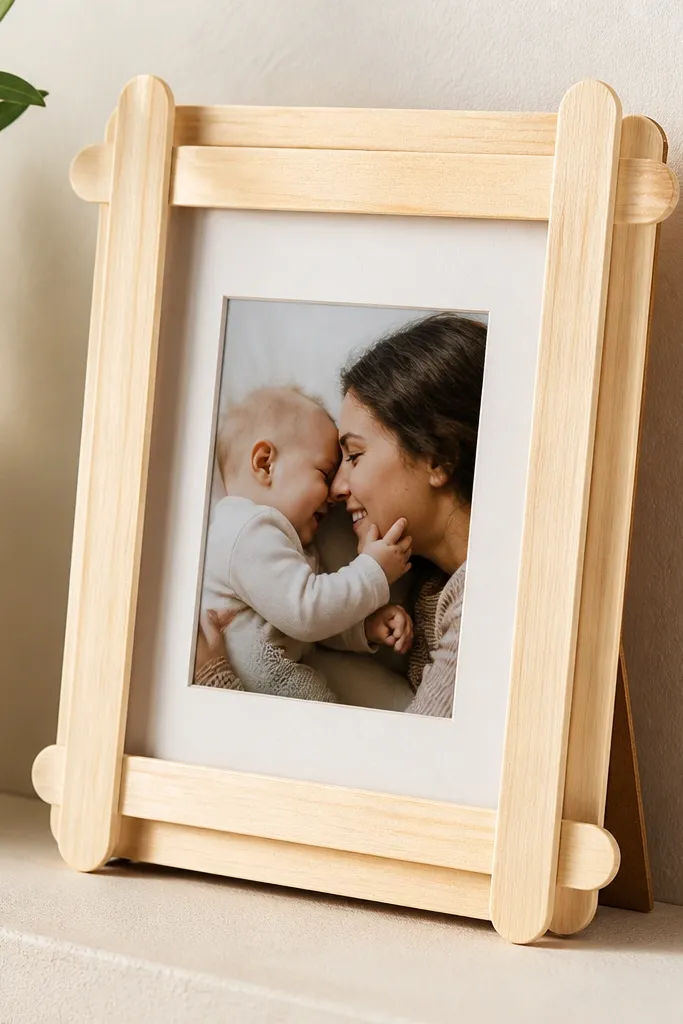
This looks surprisingly polished for such cheap materials. A popsicle-stick frame gives you crisp lines and a handmade texture that photographs well, especially with a neutral photo mat. You can mount one frame per memory, then group them on a shelf or wall ledge. For small-space friendship scrapbook ideas, this is nice because each frame is compact and displayable without opening anything. Skill level is beginner. Time is about 30-45 minutes per frame.
Arrange popsicle sticks into a square or rectangle, like 4 x 6 inches, and glue them into a frame. Sand lightly if edges are rough, then paint or stain with acrylic craft paint in a single color (cream, black, or terracotta). Cut a photo mat from cardstock with a window for a 3x4 photo and glue it inside the frame. Add the photo with tape corners so it can be swapped. Glue a ribbon loop to the back for hanging or place a tiny easel stand by adding a small folded cardboard piece.
Pro tipPaint the sticks before assembling — it looks cleaner and covers glue spots better.
AvoidDon’t use thick hot glue strings — they show through in close-up photos.
15. Bottle Cap Friendship Photo Micro Collage
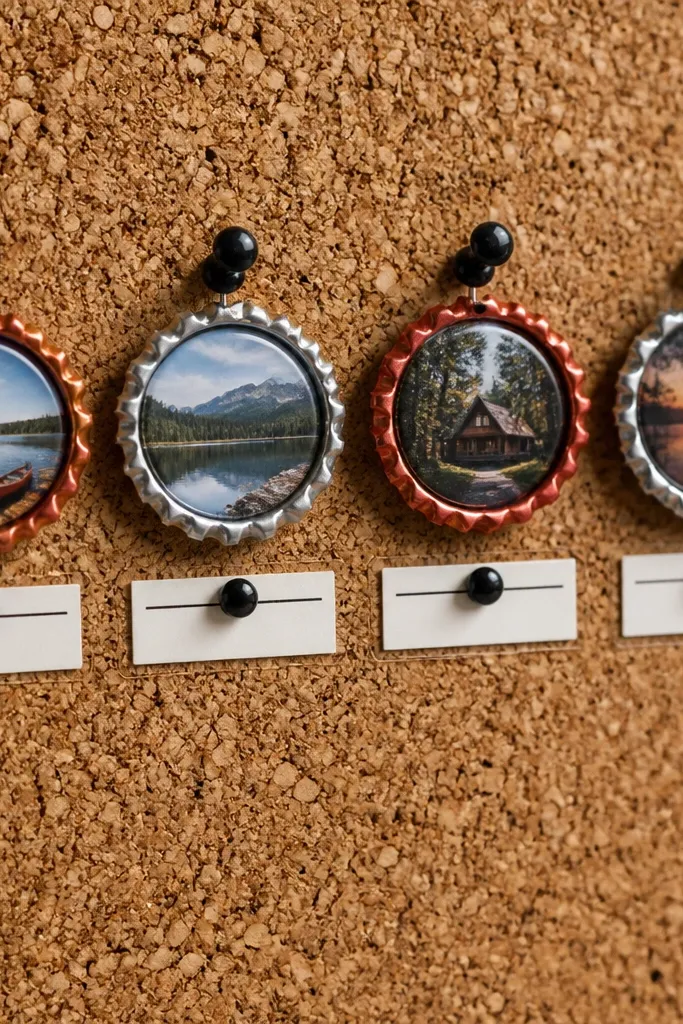
Bottle caps turn tiny memories into a full aesthetic set. You’re making micro collages that look like collectible pins, and they fit small spaces because you can line them up on a cork board or store in a small box. The look is graphic: bold circular caps plus a tiny photo and one short caption strip. It’s a fun option for friends who love quirky style. Skill level is beginner. Time is about 1 hour for 12 caps.
Clean bottle caps and prepare mini photo circles by trimming photos to about 1.25 inches wide. Print or cut a thin cardstock backing circle to keep the photo from curling. Glue the photo to the center, then seal with clear craft resin or a glossy clear sealant so the surface stays smooth. Add a tiny label strip around the edge using paper and glue, keeping it short. Attach a magnet sheet to the back or glue a pin backing so you can display them on a small metal board.
Pro tipKeep captions to a single word or abbreviation — tiny text reads better at this size.
AvoidDon’t skip sealing — unsealed photos fade and look dull against the shiny cap.
16. Mini Zine Friendship Page Flip Book
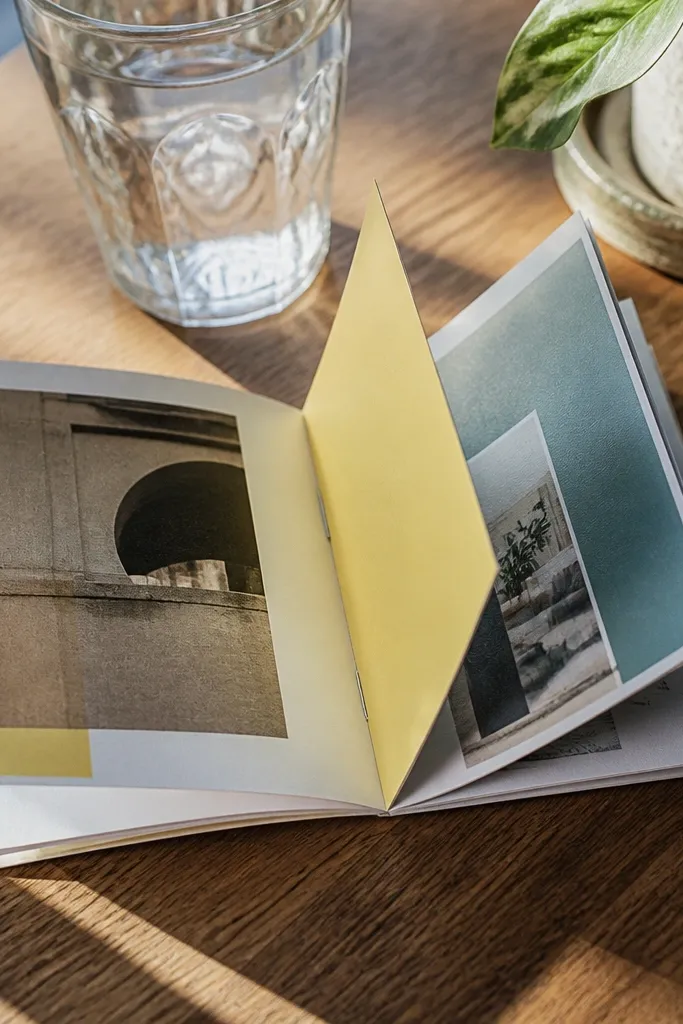
A flip book is one of the most photogenic scrapbook formats in a small space because the viewer can see the story instantly. This mini zine uses photo-heavy pages with simple color blocks, so it looks modern and clean. It’s also fast: you can complete a zine in an evening and make a second one later if you want. The structure is simple — folded sheets stapled in the center — which keeps it compact. Skill level is beginner. Time is about 60-90 minutes for a 12-page zine.
Cut 6 sheets of paper or cardstock to 5 x 7 inches, then fold each in half to make 12 pages total. Arrange them into a stack and staple along the fold using two staples for stability. Create a consistent layout: one 3x4 photo per page or a photo split across two pages with a color block divider. Add a single caption line and a tiny date in the same corner each time. Cover the front and back with thicker cardstock and add a ribbon tie if you want it to stay closed.
Pro tipUse one thick accent color block on every page to give the zine a unified look in photos.
AvoidDon’t use thin printer paper for the cover — it bends and makes the zine look cheap.
17. Kraft Paper Wrapped Photo Parcel Mini Album
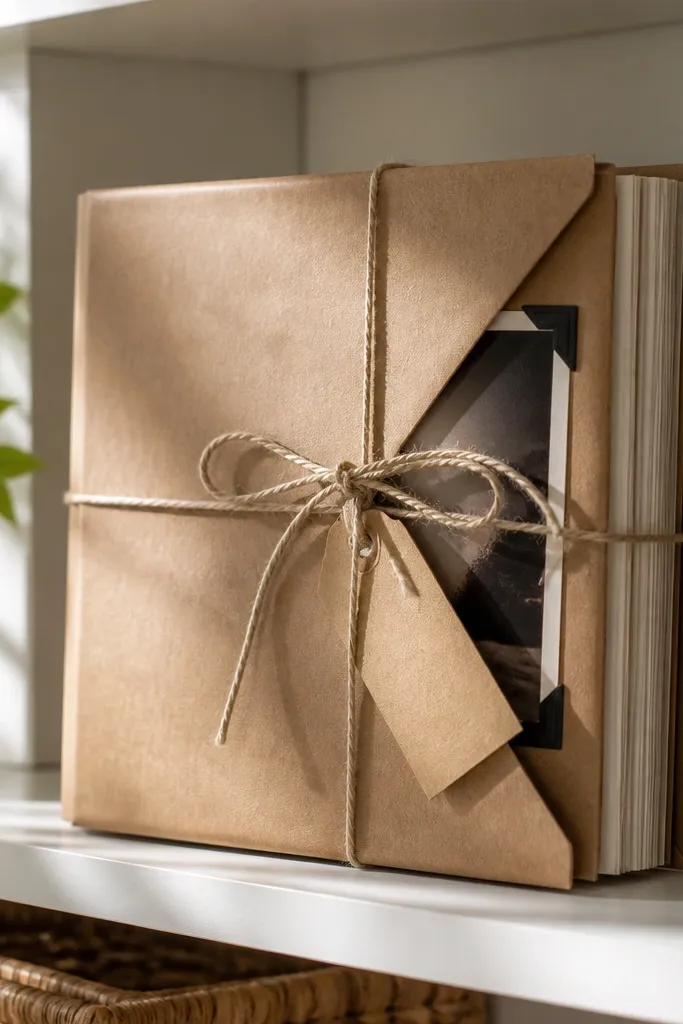
This looks like a gift you made for your friend, and it’s perfect for small-space friendship scrapbook ideas because it stores flat. The kraft paper wrap creates that rustic, styled look, while the twine tie keeps everything neat. Inside, you’ll use small photo corners and journaling tags so you can swap pages without dismantling the whole album. It’s also a good choice if you have a lot of small scraps and want them to look intentional. Skill level is beginner. Time is about 2 hours for a 8-page mini parcel.
Cut a base board about 6 x 8 inches from cardboard, then cover it in kraft paper and wrap the edges underneath. Create 8 page sheets from cardstock around 5.5 x 7.5 inches and punch two holes near the top for string binding. Add photo corners by gluing only the photo edges so you get a layered “corner” look instead of full-coverage glue. Add one journaling tag per page that slides into a small slit you cut on the side. Thread twine through the holes to bind, then tie a bow on the outside wrap.
Pro tipUse a craft knife to cut the photo-corner slits cleanly — rough cuts show through kraft paper.
AvoidDon’t overfill pages — with kraft wrap, too many elements makes the parcel look bulky.
18. Scrapbook Sticker Label Album on a Pegboard
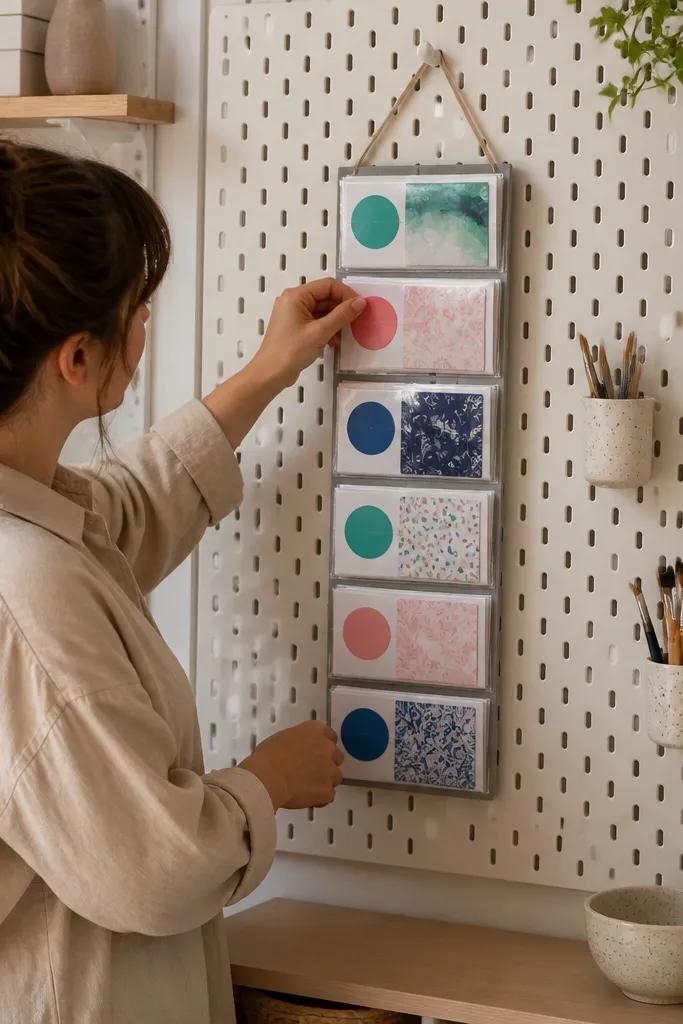
Pegboards are a cheat code for small spaces: you get vertical display and easy swapping. This project uses pocket cards and sticker labels so you can hang mini scrapbook pages like a gallery. The aesthetic is bold and organized because each pocket has the same size and the same label placement. It also encourages you to keep memories current without a big rebuild. Skill level is beginner. Time is about 1.5 hours for 12 pockets and labels.
Cut a small pegboard section or use a mini board, then add 12 binder clips or mini clothespins. Make pocket cards from cardstock: cut rectangles about 3 x 4.5 inches and fold them to create a pocket, then tape the sides. Print 2x3 photos and mount them on the top of each pocket card, leaving room for a label strip. Add sticker-style label strips using colored paper cut to 1 x 3 inches and write a short word like “Laughs” or “Trips.” Clip pockets onto the pegboard in a grid pattern, then add a small title card at the top.
Pro tipKeep label text short and consistent font — the grid looks clean when everything aligns.
AvoidDon’t use different pocket sizes — mixed pockets look chaotic on a pegboard.
19. Polaroid Strip Garland for Desk Shelf
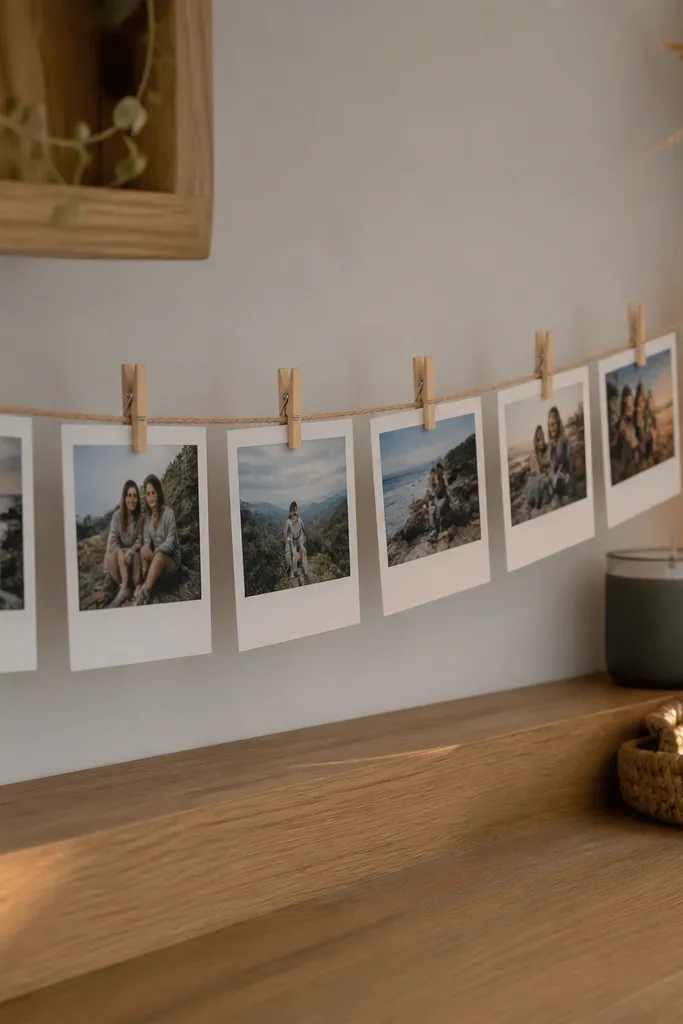
A photo strip garland is scrapbook-style storytelling without taking shelf space. You string small photo cards along twine and clip them in place, so you can swap memories seasonally. The look is airy and photogenic because each photo has a little border and a consistent spacing rhythm. It works great for small-space friendship scrapbook ideas on desks, shelves, or above a lamp. Skill level is beginner. Time is about 45-75 minutes for 10 clips.
Cut cardstock into 2.75 x 3.75 inch cards and round corners. Print photos to fit a 2.25 x 2.75 inch window, then mount and add a tiny caption strip at the bottom. Punch two holes near the top corners of each card and thread them onto twine spaced about 1.25 inches apart. Use mini clothespins to clip cards so you can swap them later. Tie the garland ends around a small branch or a picture-frame hook for a stable display.
Pro tipUse the same twine thickness and keep card spacing consistent — it’s the spacing that makes it look designed.
AvoidDon’t mix glossy and matte prints — glare creates uneven shine in photos.
20. Scrapbook Accordion Wall Hanger with Fabric Clips
This is a wall-friendly friendship scrapbook that stays compact and looks like decor. You hang a folded accordion strip and clip in photo panels, so you can add new memories without making a whole new album. The accordion structure makes the layout look crisp and graphic, and fabric clips add a charming handmade detail. For small spaces, it’s great because it uses wall height and keeps your desk clear. Skill level is beginner. Time is about 1.5 hours.
Cut a long cardstock strip about 10 x 24 inches and score folds every 2 inches to create 12 panels, then accordion-fold it. Cover both sides with patterned paper or leave one side neutral for contrast. Make 12 photo panels by cutting cardstock squares sized to fit one accordion panel, like 3.5 x 3.5 inches, and mount 2.5 x 2.5 inch photos. Clip photo panels onto the accordion using fabric clips attached to the panel edges. Hang the accordion by tying ribbon to the top fold and securing with a pushpin or small nail on the wall.
Use one fabric clip color across all panels so the hanger looks cohesive in photos.
Don’t use heavy cardstock for the accordion — it pulls away from the wall and sags.
21. Magazine Cutout Friendship Collage Pages in a Mini Binder
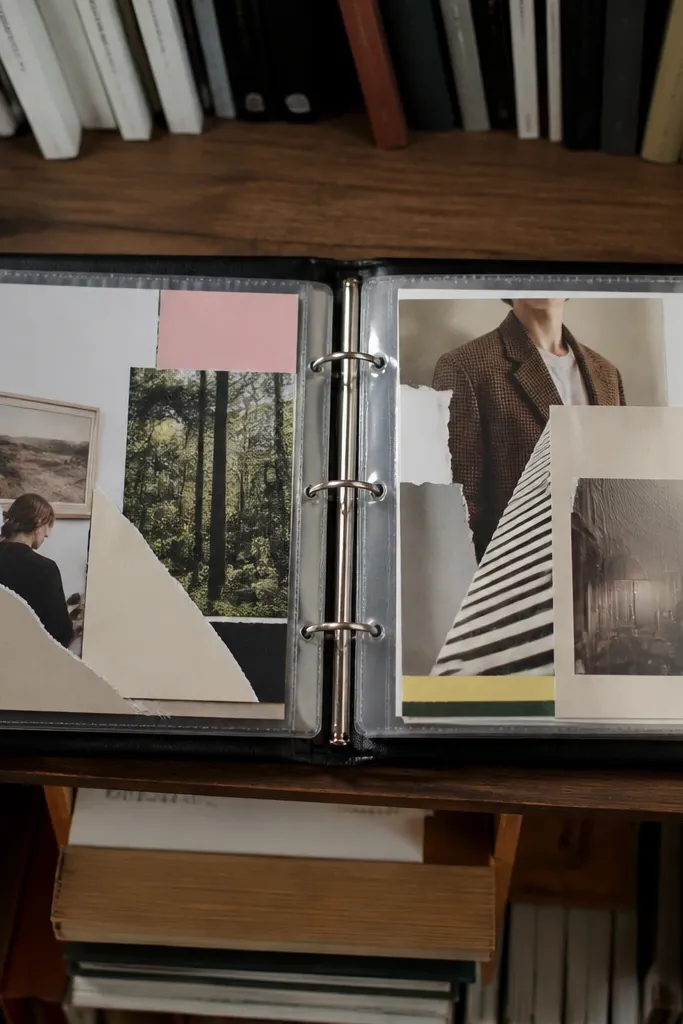
This is the easiest way to get a high-aesthetic scrapbook look without printing a ton of photos. Magazine cutouts give you color blocks, typography, and texture in seconds, and plastic sleeves keep everything protected. Use a mini 3-ring binder that fits on a shelf and holds sleeve pages, so the scrapbook stays compact. The look is bold and photogenic because each sleeve page has layered collage elements plus one main photo. Skill level is beginner. Time is about 2 hours for 10 sleeve pages.
Get a mini 3-ring binder (around 6 x 8 inches) and plastic page protectors sized for 3-ring inserts. Cut collage paper pieces from magazines and glue them onto cardstock backing, leaving a clear spot for a photo. Add one 3x4 photo centered and layer cutouts around it with a single color theme (choose either warm tones or cool tones). Insert each finished page into a sleeve protector. Add a title page at the front with a thick cardstock cover and a simple label sticker.
Pro tipChoose one magazine style for the set — either lots of bold type or mostly photos — so your binder doesn’t feel mixed.
AvoidDon’t glue cutouts directly under the sleeve edges — trim them so they don’t catch and lift.
22. Scrapbook Postcard Flip Album from Old Greeting Cards
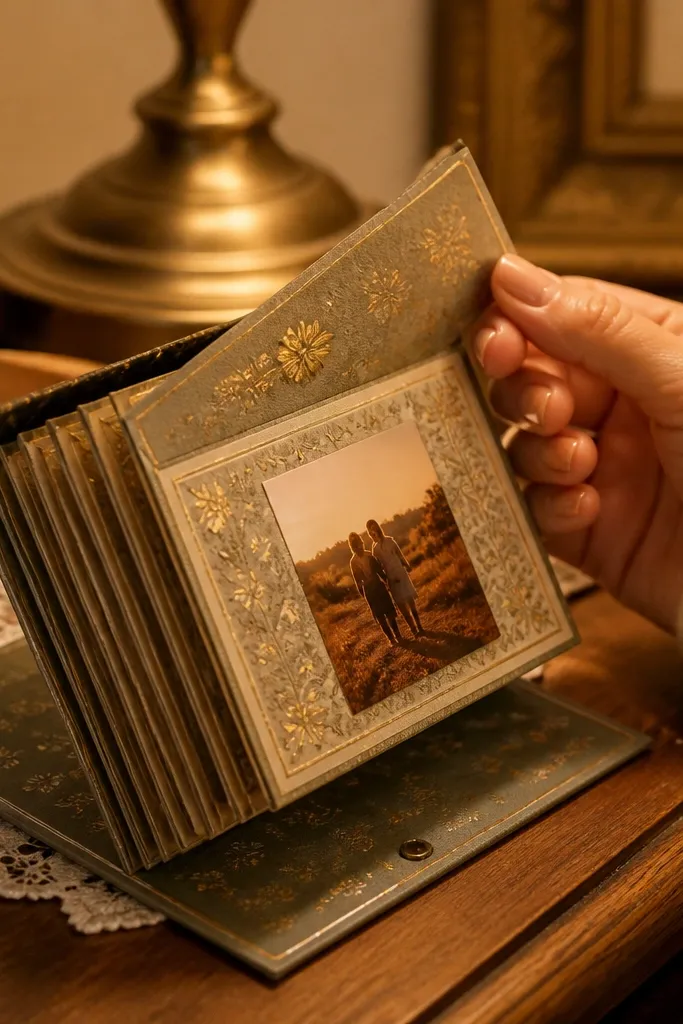
Old greeting cards are already designed for stiff paper, which makes them perfect for small-space friendship scrapbook ideas. You’ll turn them into a postcard flip album where each card page flips open like a mini letter. The look is instantly aesthetic because greeting cards often have patterns, foil details, or neat borders already built in. Each page can hold a 3x4 photo plus a short handwritten note, and the whole album stays compact. Skill level is beginner. Time is about 1.5 hours for 6 cards.
Collect 6 greeting cards with sturdy paper and cut off any envelopes if needed. Trim them to a consistent size, like 4.5 x 6 inches, then arrange them in a stack. Create a spine by aligning the folds and taping the hinge with cloth tape or strong paper tape. Add postcard-style photos by mounting a 3x4 print on the front of each card page and adding a stamped-looking border using a small sticker or paper frame. Write a short note inside each card and close the flips with a small belly band made from ribbon.
Pro tipUse the original greeting card art as your background layer, then keep photo placement centered for a clean look.
AvoidDon’t mix card sizes — the flip album will look lopsided on a shelf.
23. Mini Scrapbook Coasters with Photo Corners
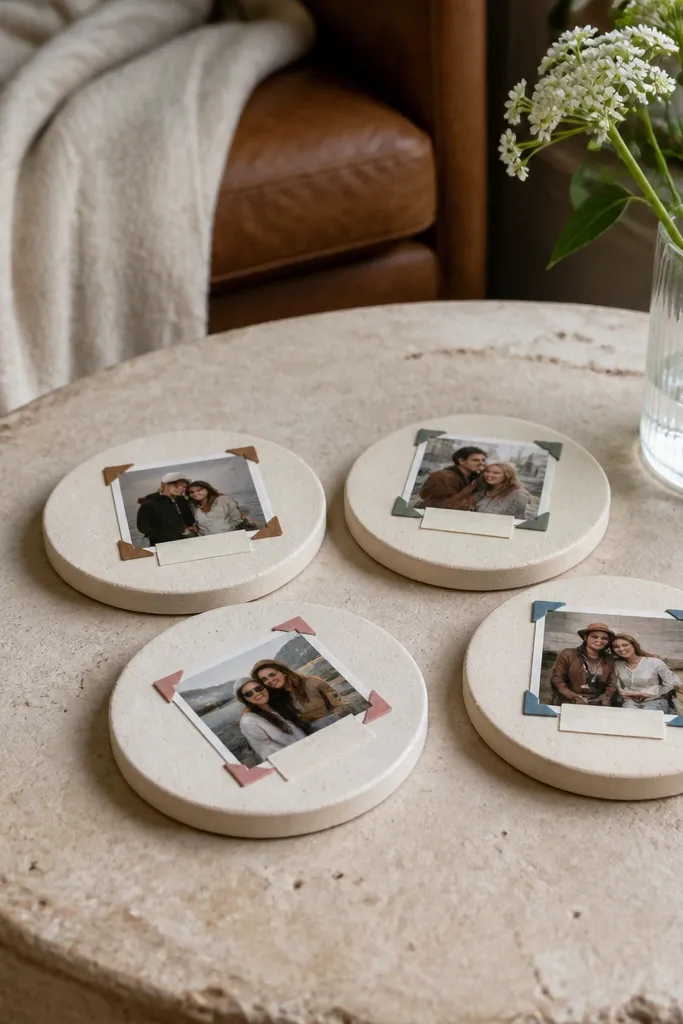
If you like the idea of coasters but want a more scrapbook-like look, this version uses photo corners and small date labels. Coasters are small, flat, and easy to keep in view, so your friendship memories stay “on display” without a wall. The photo corners create a scrapbook effect without covering the whole surface, which keeps the look airy and photogenic. This is a great format for small-space friendship scrapbook ideas because it turns everyday items into a mini gallery. Skill level is beginner. Build time is about 2 hours for a set of 4.
Cut 4 coaster bases from thick felt or foam board to about 4 inches square. Cover each base with patterned scrap fabric or paper, then seal edges with fabric glue or Mod Podge. Print 2x3 photos and trim to 1.5 x 1.5 inch squares, then glue each photo in a corner with photo-corner placement. Add a tiny date label strip about 1 inch long near the opposite corner using a thin marker. Seal the whole coaster with a clear matte finish spray or Mod Podge so it wipes clean.
Pro tipUse matte finish on the photos so glare doesn’t ruin the look in indoor light.
AvoidDon’t place photos in the exact same corner on all coasters — alternating corners looks more designed.
24. Scrapbook Photo Transfer on Wood Slice Display
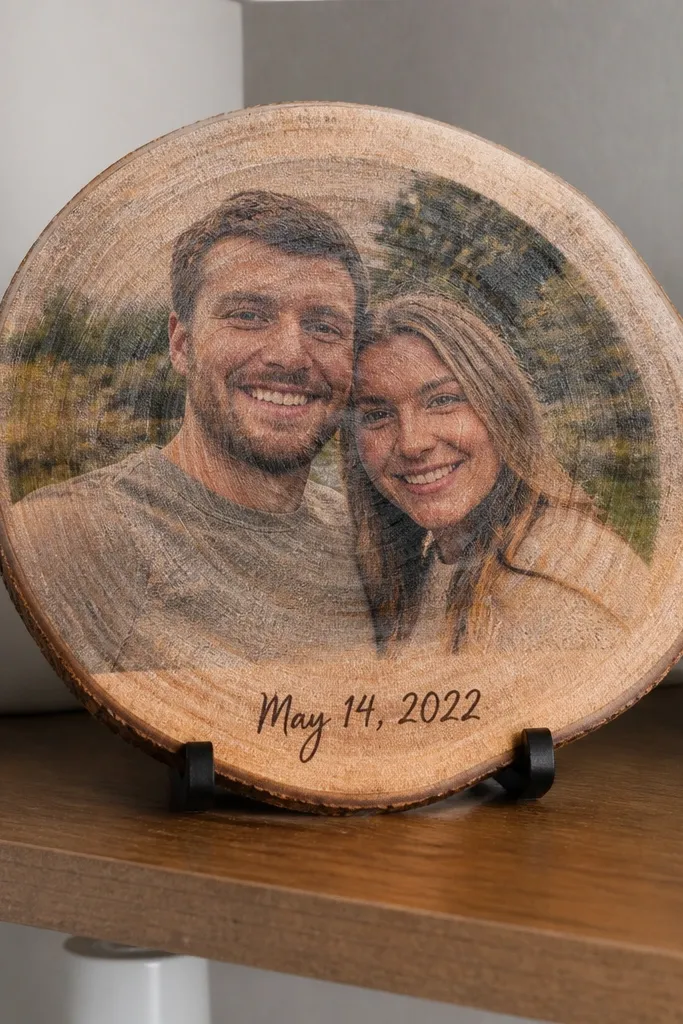
Wood slices make friendship scrapbook ideas look like handcrafted keepsakes, and they’re perfect for tiny shelves. You’ll turn a small round wood slice into a one-photo display with a handwritten date, then make a set that lines up like a gallery. The texture of wood adds warmth to photos, and the matte surface keeps the look calm and readable. This is a better choice than paper when you want something that survives being handled. Skill level is intermediate because photo transfer needs care, but the final look is worth it. Time is about 2-3 hours including drying for a set of 4.
Sand wood slices lightly and wipe dust away. Choose printed photos with laser toner for best transfer and trim them to fit the slice, about 2 inches across. Apply a photo transfer medium according to the product instructions, then press the photo in place and let it sit for the stated time. Soak and rub off the paper layer carefully until the image remains. Seal the slice with a clear matte sealer, then write a date with a fine-tip paint pen and add a small hanging loop at the top if you want it displayed on a string.
Test the transfer medium on one scrap wood piece first — small differences in paper thickness change results.
Don’t use inkjet photos — they blur during transfer and look smeared on wood.
25. Mini Scrapbook Page-in-a-Clip Folder
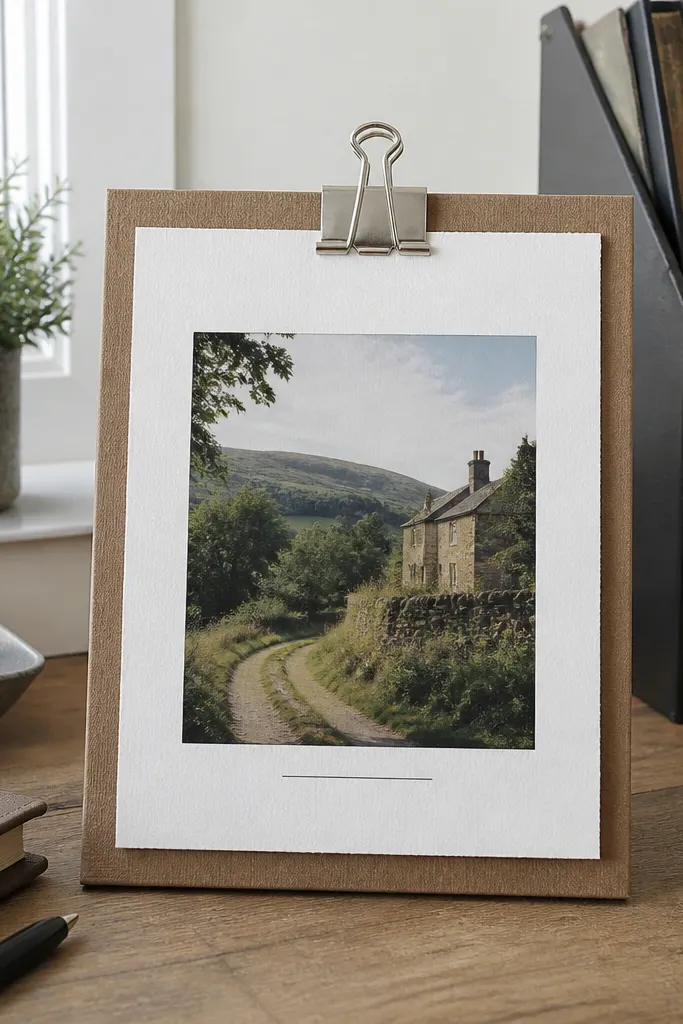
This format is ridiculously practical for small-space friendship scrapbook ideas because it keeps each memory page stable and easy to swap. You build a mini folder from file paper or cardstock, then slide in one scrapbook page secured with a binder clip. The look is clean and minimal, so your photos and one caption line feel intentional instead of buried. It also means you can store multiple folders in a drawer without creasing pages. Skill level is beginner. Time is about 45-60 minutes for 6 folders.
Cut cardstock into small folder shapes, about 5.5 x 7.5 inches, and fold to create a pocket. Make one 5 x 7 inch scrapbook page per folder with a 3x4 photo centered and a caption strip at the bottom. Slide the page into the folder pocket and secure it with a small binder clip attached to the outside flap. Add a label strip on the front of the folder using colored paper and write the month or event name. Repeat until you have a set, then store them upright in a small box so the labels face out.
Pro tipUse a consistent caption strip color across all folders so the set looks like one designed collection.
AvoidDon’t make the folder pocket too tight — pages should slide in without bending corners.



