
1. Book-Page Collage Board in a Single Frame
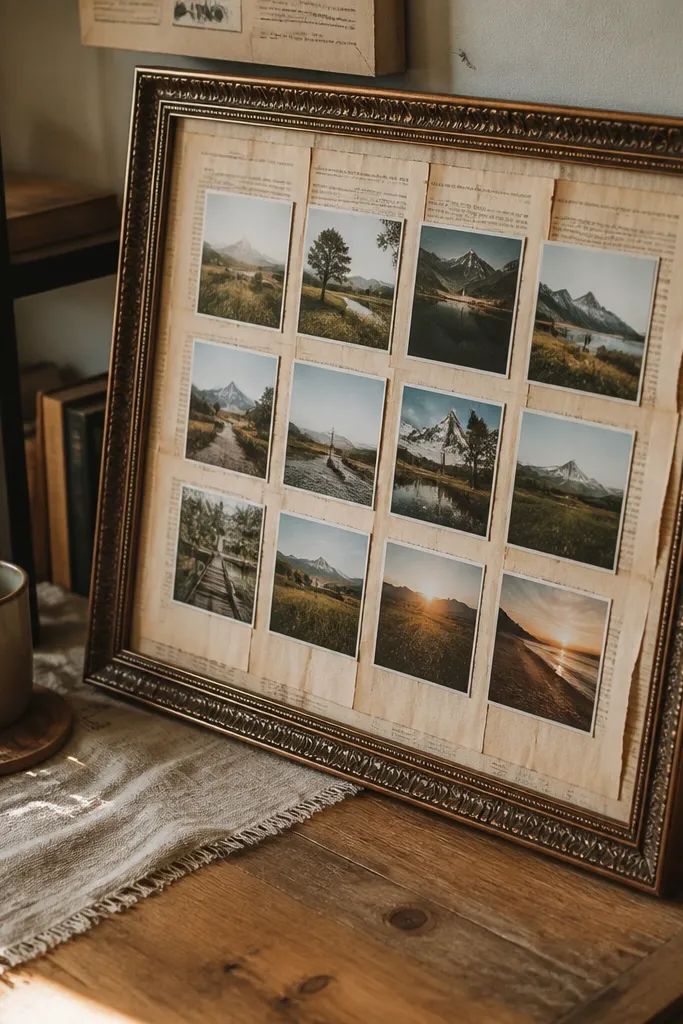
This one looks dreamy because the background is already textured, so your photos don’t look stuck on top of plain paper. Use book pages for a soft, warm tone, then add small photos in a grid with consistent spacing so the whole thing reads neat. The frame makes it feel finished even in a narrow hallway or above a desk. It’s also very swap-friendly: you can slide photos under paper tabs instead of gluing them down. Build it once, then keep updating it as your style shifts.
Start with a thrifted picture frame and remove the glass if it has any glare. Cut book pages to the frame opening and glue them to a backing board, leaving a 1 cm border all around. Tuck each photo under a small paper tab made from the same book paper, then align the top edges so they form clean rows. Finish by adding a thin strip of craft paper along the back to lock the tabs in place, then reattach the backing and hang.
Use a ruler and tape the photo positions first; tiny misalignments show up fast in frame photos.
Don’t glue photos directly to book pages — the paper fibers grab glue and make later changes messy.
2. Fabric Panel Vision Board on a Tension Rod
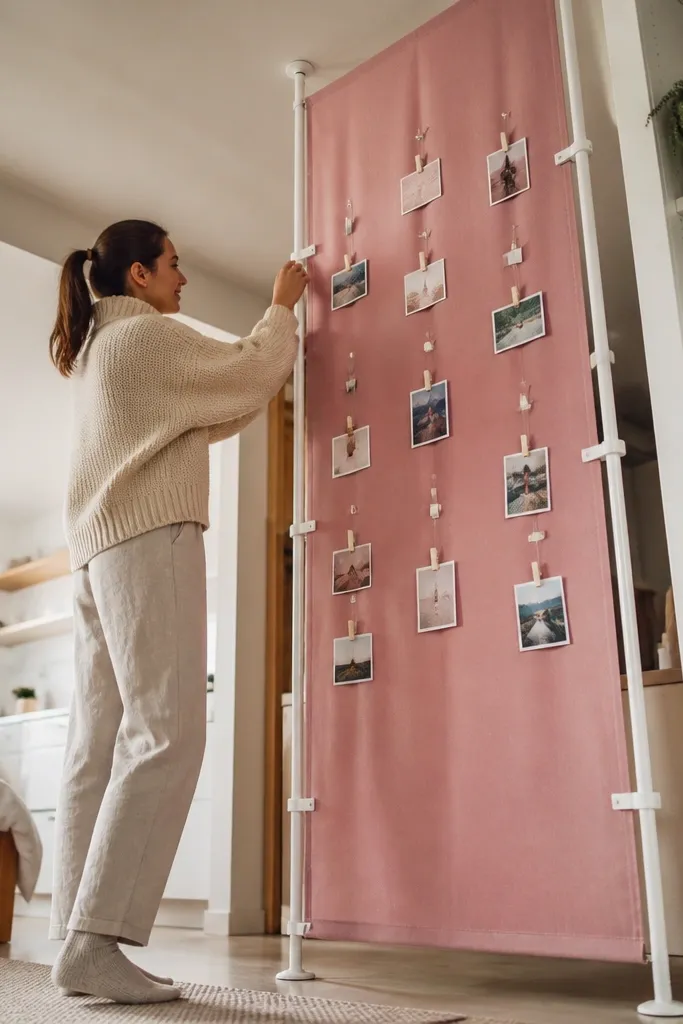
Measure the width of your wall space and choose a tension rod that fits snugly. Cut fabric to that width plus 6-8 cm for turn-under hems, then hem the sides so it drapes straight. Mount the rod at eye level and clip a thin line of photo clips or mini binder clips in a grid pattern. Add a few larger “anchor” cards in the center, then fill around them with smaller photo strips.
A tension-rod fabric board wins in small spaces because it’s tall, light, and doesn’t require permanent wall damage. The fabric texture softens the whole look, so your board feels cozy in daylight photos. Clip strips of photos and small cards along the fabric, keeping the spacing consistent for a clean gallery rhythm. This setup also makes it easy to swap images weekly without tearing anything. It’s ideal for renters, studio apartments, and anyone with a narrow wall that needs height.
AvoidSkip thick, shiny satin — it catches light and makes photos glare in pictures.
Pro tipPick fabric in off-white or warm gray; bright white fabric creates harsh contrast that looks less dreamy.
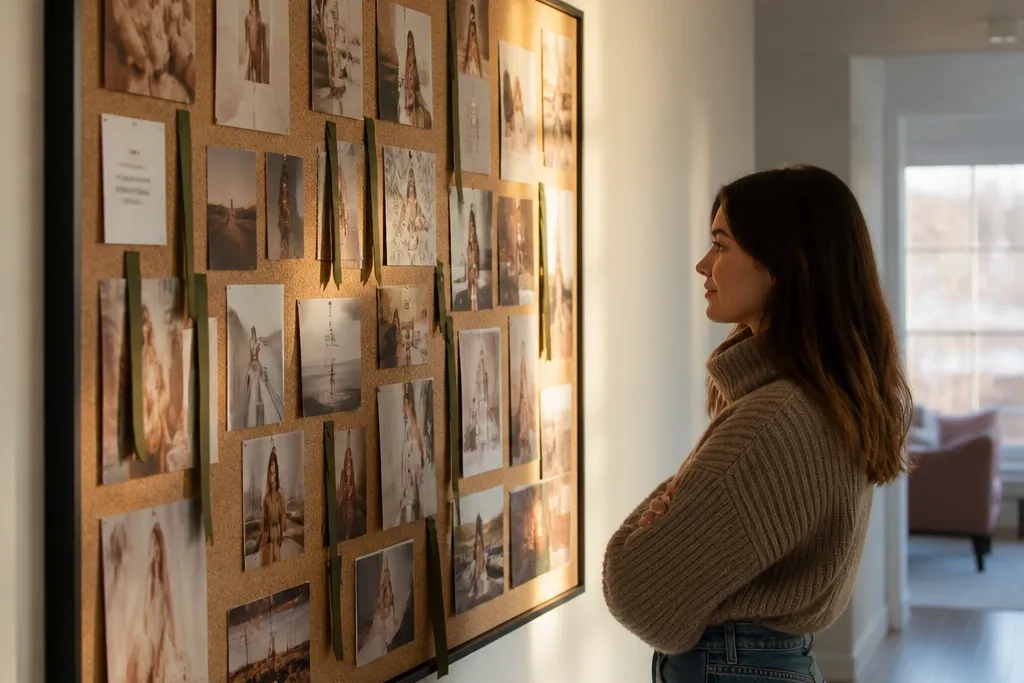
3. Corkboard Frame with Photo Strip Corners
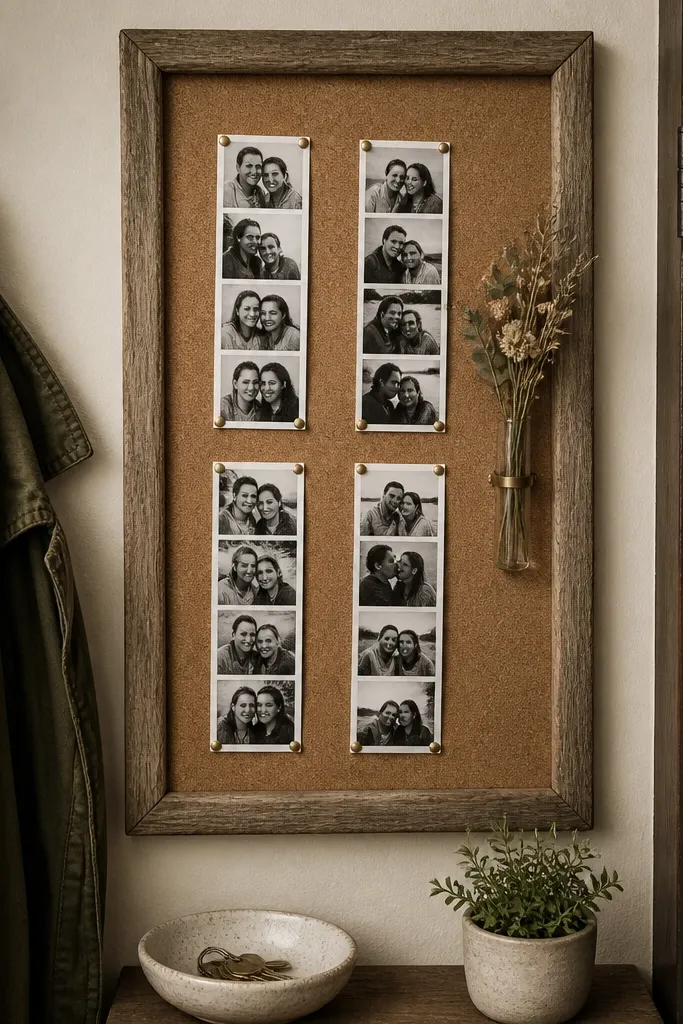
Buy cork sheet or use an old cork insert, then trim it to fit inside a shallow frame. Remove any glossy backing, then sand the cork lightly for a smoother pin grip. Pin photos by only the top corners first, then adjust until the alignment looks even from across the room. Add a thin border strip of paper or fabric along the cork edge to hide raw edges before you close the frame.
Cork gives you an instant pinboard look, but the frame makes it feel like a design object instead of a tacky office board. Photo strips look especially good here because you can pin them at consistent corners, keeping edges crisp. Use a limited palette and add one or two small physical elements like a mini dried bouquet or fabric swatch, pinned cleanly. It reads dreamy because cork has a warm, matte surface that absorbs glare. This is a strong choice if you want to update often without rebuilding.
AvoidDon’t pin every photo flat — leave a little stagger so it looks layered, not stamped.
Pro tipUse small brass push pins for a warmer look; they photograph better than silver plastic pins.
4. Pegboard Vision Board with Painted Hooks and Mini Clips
Cut or purchase a pegboard panel sized for your wall spot, then paint it with matte chalk paint. Mark a simple grid with pencil and install hooks at even intervals. Use mini binder clips or clothespins to hang photo cards and small swatches from the hooks. Finish by adding two small objects on the pegboard ledge using removable adhesive putty so you can rearrange later.
Pegboard is great for small spaces when you keep it minimal and intentional. The grid structure makes it automatically tidy, and painted hooks add a designer touch that looks good in photos. Clip photos along hooks in vertical lines so your board pulls the eye upward. Add a couple of tiny shelves or ledges for layered objects, like a small candle jar or a folded fabric swatch. This gives you depth without needing a big board footprint.
AvoidAvoid overcrowding the pegboard — empty space is what makes the photos look dreamy.
Pro tipKeep hook spacing consistent at 3-4 cm so the whole thing looks “designed” rather than random.
5. Shadow-Box Vision Board with Fabric Backing
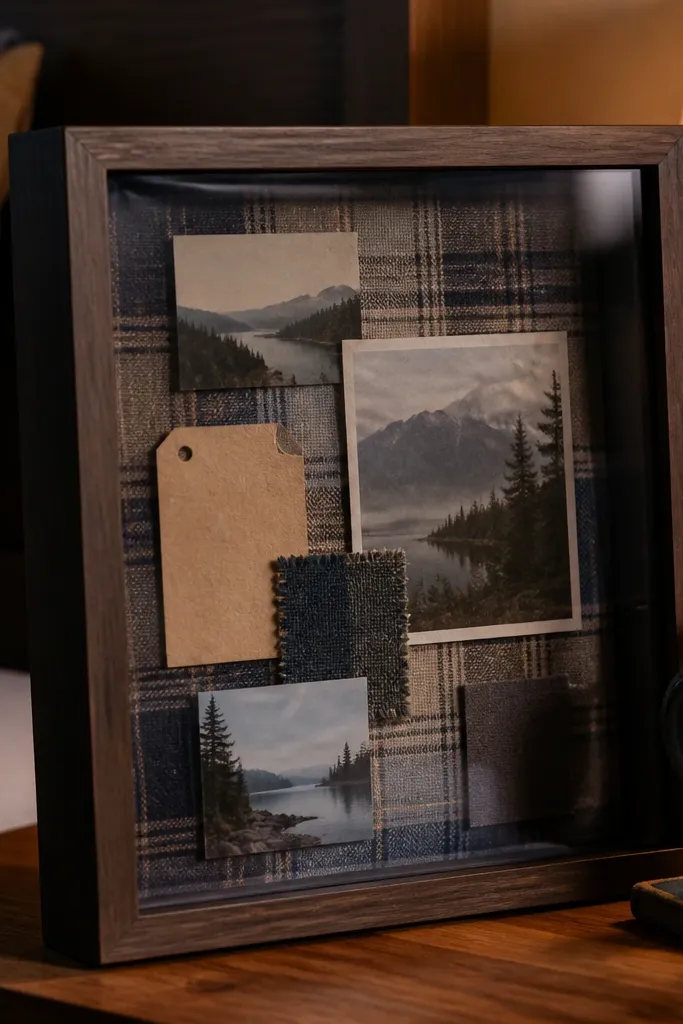
Shadow boxes look dreamy because they create depth without clutter. Fabric backing softens the background and gives photos a cozy tone, especially if you use denim, linen, or a muted plaid. Layer small cutouts, ticket stubs, and mini fabric swatches at different depths so the board feels like a scene. This is perfect for small spaces because one box can hold a surprising amount of visual ideas without taking up a wide wall area. It also photographs beautifully from slightly angled viewpoints.
Pick a small shadow box (around 8x10 inches) and remove any glossy insert if present. Cut fabric to fit the backing with a slight wrap so it covers edges cleanly. Place photos first, then add dimensional elements like fabric scraps or paper cutouts using double-sided foam tape. Seal fragile paper with a matte clear spray before gluing so it won’t curl.
Add one thicker “top layer” element made from heavier cardstock so the box has a focal point.
Don’t use glossy photo paper directly on fabric — it shows glare more easily.
6. Mini Gallery Wall Using Clip-On Photo Strips
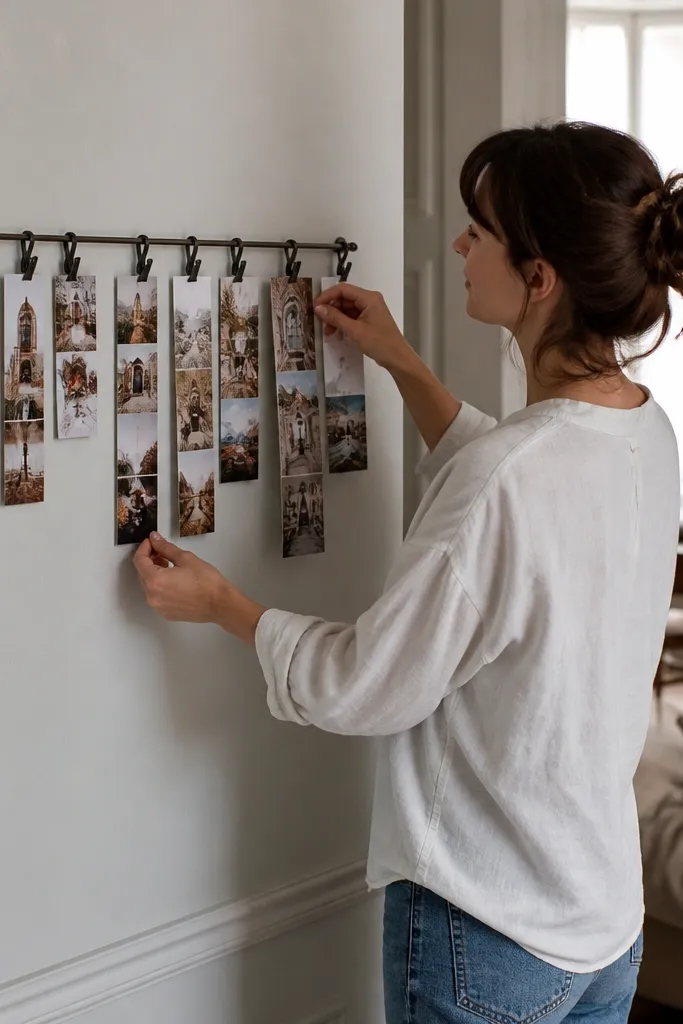
Install two small wall hooks and stretch a thin wire between them at the top and bottom. Cut photo strips to the same width (like 2.5 inches) so they align visually. Use small binder clips to attach photos and add one or two small cards behind them for depth. Keep the layout in a gentle curve by staggering heights by 1-2 inches, then tighten the clips so nothing slides.
This is one of the easiest ways to get a dreamy look in a small space because it creates movement and layering. Clip-on strips let you vary photo sizes while keeping the layout cohesive. Use thin wire or a picture-hanging rail so the whole thing stays compact, but still reads like a gallery wall. The look is romantic and airy because the negative space shows through. It’s a great choice for a narrow entryway, above a dresser, or beside a bed where you want visual calm.
AvoidSkip thick matboard behind every photo — it makes the wall feel heavy.
Pro tipUse black or warm brown clips; they blend with framed decor and look good on camera.
7. Removable Sticker Frame Board on a Clean Wall
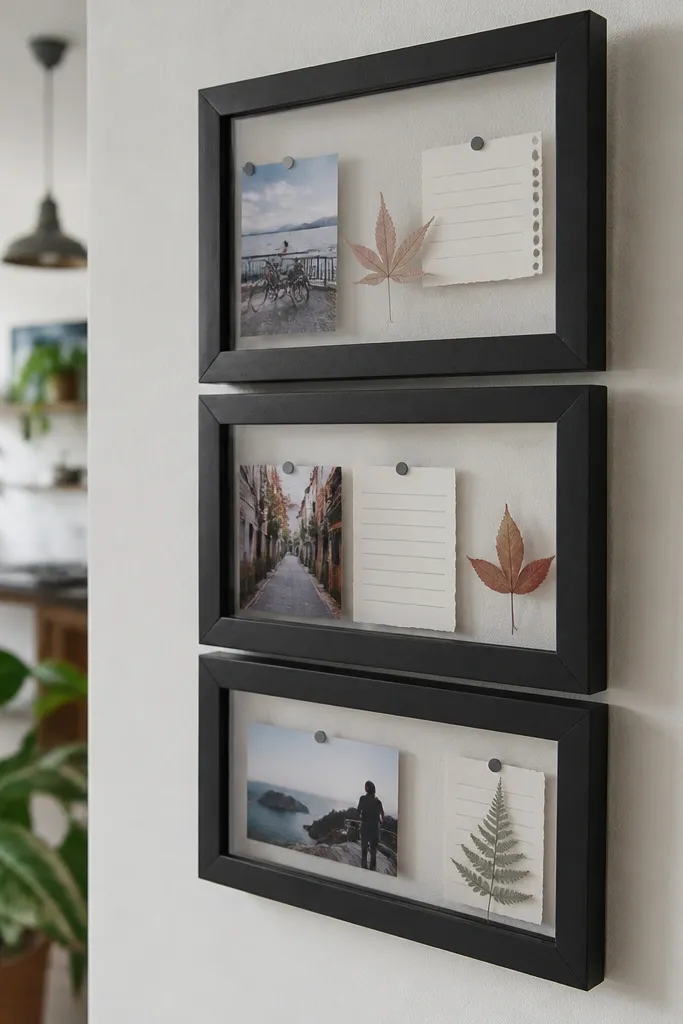
Clean the wall with rubbing alcohol and let it dry fully. Apply removable frame hooks or adhesive strips at the corners, then press frames into place. Insert photos and small cards, using thin cardstock backing to prevent bending. For consistency, keep all frames within one height band and leave a small 1-2 inch gap between them.
If you want the look of a vision board without drilling, removable frames give you instant structure. The frames create clean boundaries, so photos don’t look messy even when you change them. Add handwritten notes on small cards to guide your future choices, but keep the text minimal so it stays visual. This works best on a smooth wall where adhesive holds well. It’s perfect for renters and anyone who wants a quick dreamy refresh.
AvoidDon’t place frames too close together — the gaps are what make it feel airy.
Pro tipUse a single font style for notes (like a white gel pen) so the board looks intentional.
8. Wood Slat Vision Board with Twine Lines
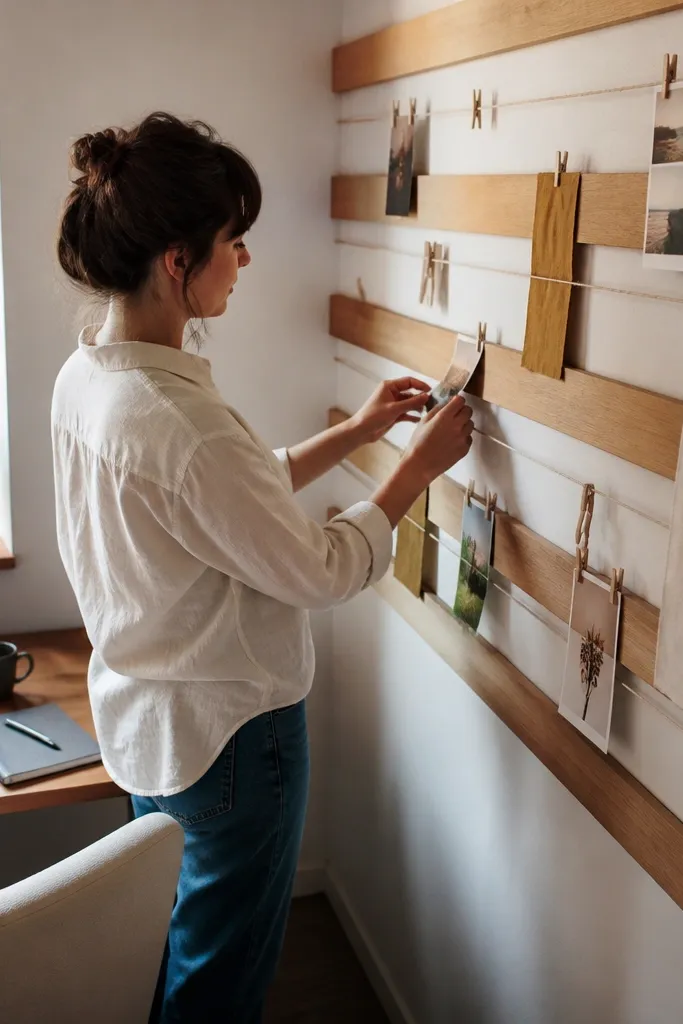
Create a slat panel by arranging thin wood strips vertically or horizontally, then screw or mount them to a backing board for stability. Paint or stain the slats in a single tone and let it dry fully. Wrap twine across the slats at two or three levels, tying tight knots. Clip photos and swatches onto the twine, then add two anchor pieces centered on the top and middle lines.
Wood slats add warmth fast, and twine lines create that airy, lived-in dreamy vibe. You get a strong horizontal rhythm even in a small space, so the board doesn’t sprawl. Attach photos with mini clothespins and mix in fabric strips so it feels more like a mood scene than a scrapbook. This setup also lets you keep your board updated without ripping anything. It’s ideal for a bedroom wall, reading nook, or small craft corner.
AvoidAvoid mixing too many wood tones — keep it one stain so the photos feel cohesive.
Pro tipUse jute twine for a softer look; string made for gift wrapping looks too shiny.
9. Linen-Covered Foam Board with Layered Photo Tabs
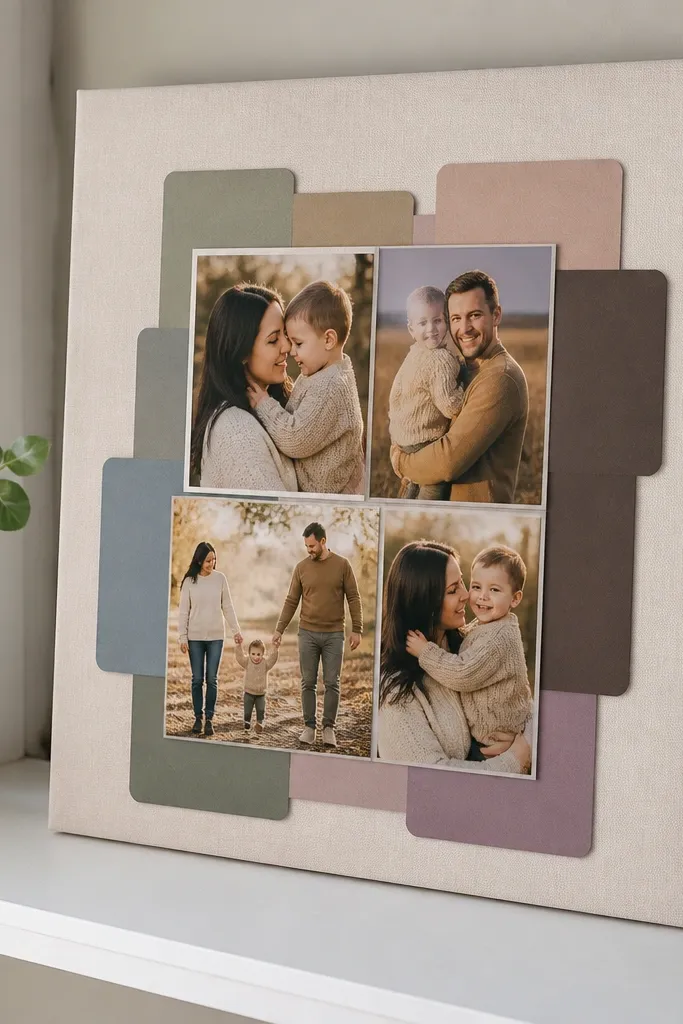
This is a clean, photo-friendly option because the surface is matte and soft, which reduces glare. Linen also hides small imperfections in the board underneath, so it looks polished even if you’re using thrifted materials. The layered photo tabs give you depth while keeping everything flat enough for small walls. You can swap images by lifting the tabs instead of ungluing. It fits well in tight spaces like a small apartment office or a narrow kitchen wall.
Cover foam board with linen fabric using spray adhesive, smoothing wrinkles as you go. Trim the edges with a sharp craft knife for a neat border. Cut small strips of cardstock as tabs and glue tabs to the board so photos slide under them. Arrange photos in a staggered grid, then press each photo in place and label the back with small pencil marks for easy swaps later.
Mist a little matte clear spray on glossy photo prints before you tab them in; it cuts shine in photos.
Don’t stretch the fabric too tight — it can warp the foam and make the board look wavy.
10. Vintage Frame Grid with Replaceable Cards
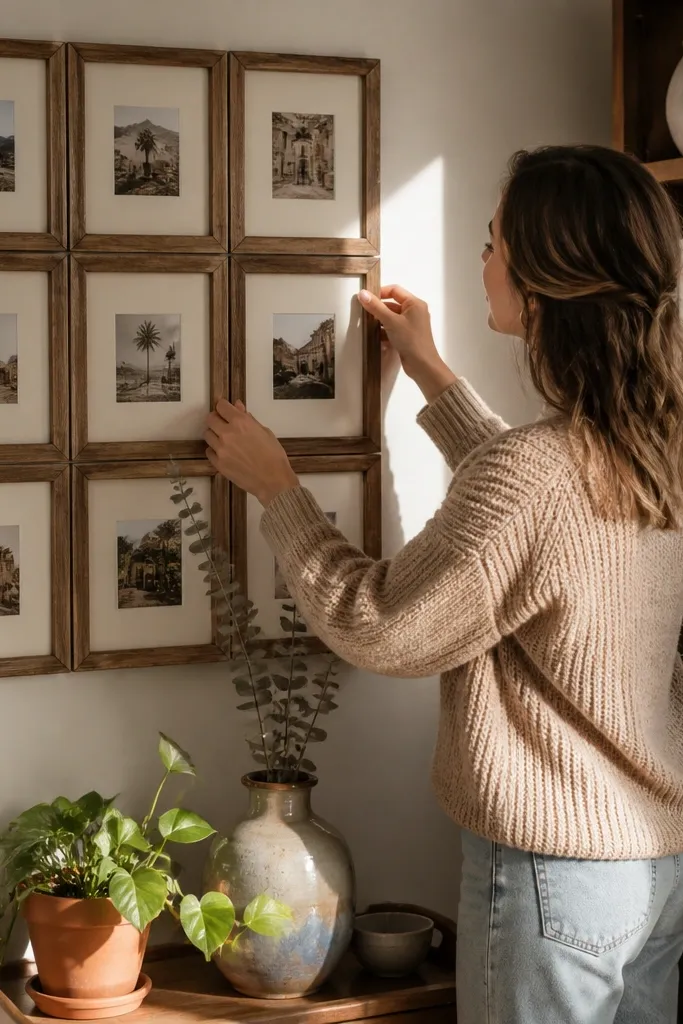
A frame grid makes a small vision board look intentional because each photo has its own boundary. Vintage frames add character, and the replaceable cards keep it functional. Choose frames in one finish — either all brushed gold, all black, or all weathered wood — so it doesn’t look chaotic. This layout is great when you want lots of small ideas without making one big messy board. It also reads dreamy because the frames create a gallery rhythm.
Find 4-9 small frames from thrift stores and remove the glass to reduce glare. Cut cardstock cards to fit each frame opening and use them as backing for photos. Arrange the frames in a grid on the floor first, then mark mounting points on the wall. Insert photos into the cardstock cards with removable tape so you can swap without removing the whole frame.
Use one consistent photo size per frame; it makes the grid look designed even with different images.
Don’t mix frames with wildly different depths — thick frames cast shadows that can make the board look uneven.
11. Corner Shelf Vision Board with Mini Prints and Objects
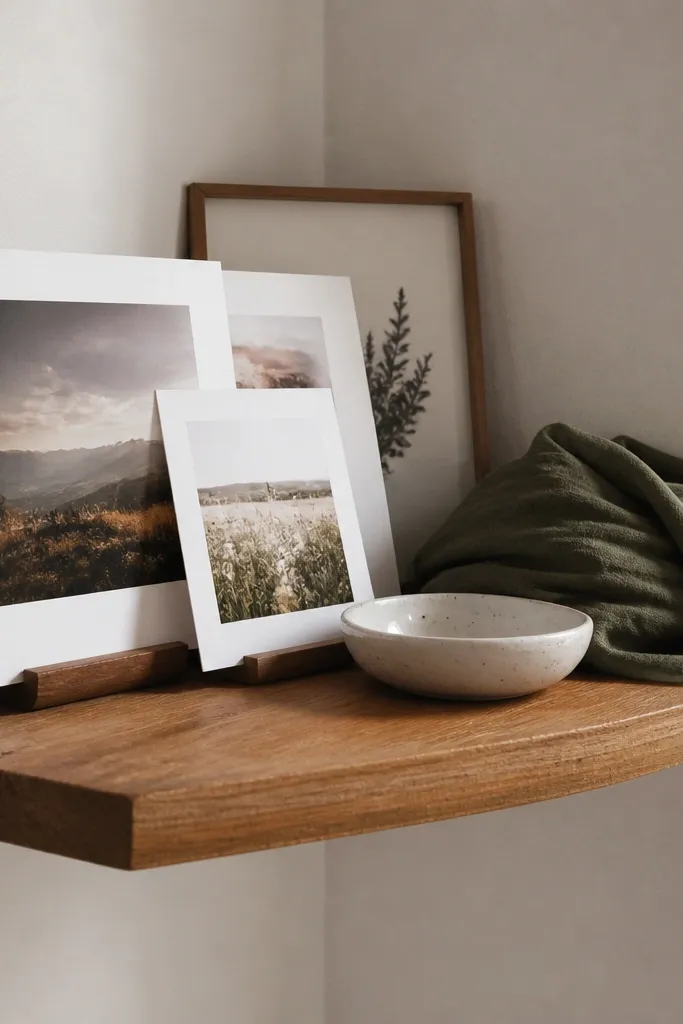
Pick a small corner shelf with at least two levels. Print photos as mini cards (like 4x6 inches or smaller) and mount them on cardstock so they stand up. Arrange three layers: back leaning cards, mid-layer objects, and front small cards. Use museum gel or removable putty to keep objects from sliding, then adjust until the top layer has one clear focal print.
If your space is too tight for a wall board, a corner shelf gives you the dreamy look with almost no footprint. Lean mini prints against small stands, then add one or two objects like a ceramic dish or a folded scarf to create depth. The layered arrangement reads like a styled photo set, not a storage shelf. Keep prints in a consistent size so the corner looks calm. This is ideal for small bedrooms, studio apartments, and desks that need visual inspiration without clutter.
AvoidDon’t add too many objects — three layers max looks styled instead of crowded.
Pro tipChoose a single matte finish for prints; glossy prints reflect the room lights.
12. Wire Mesh Board with Fabric Clips and Color Blocks
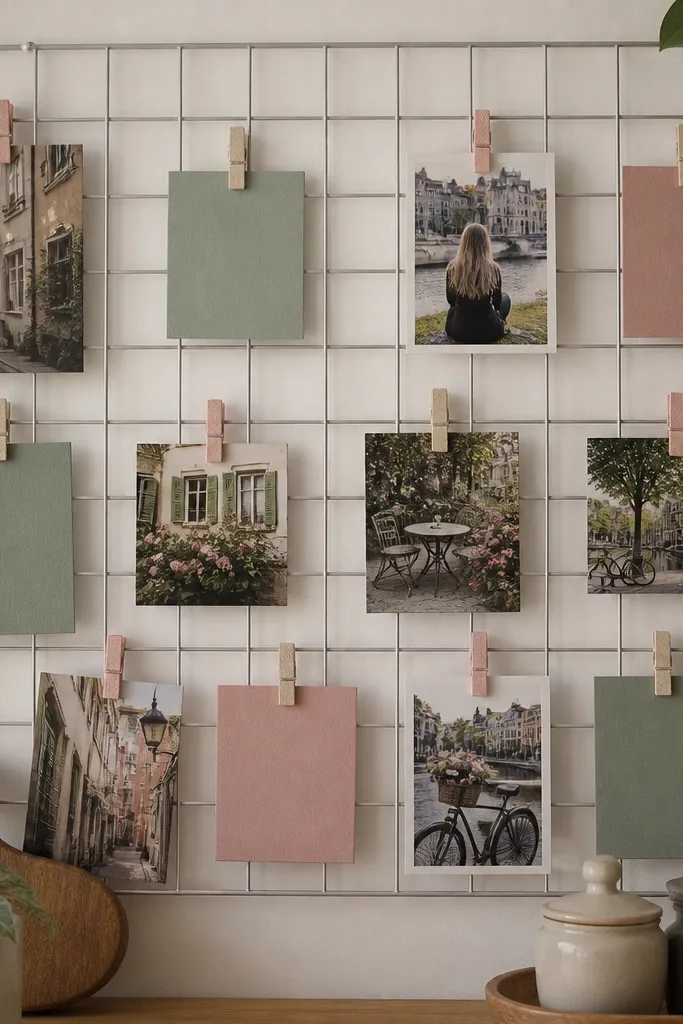
Mount a small wire mesh panel on a frame or directly to the wall using sturdy anchors. Paint the frame in matte white or soft black so it doesn’t compete with your photos. Cut fabric-backed color blocks from felt or cotton scraps and attach them with clips. Hang photos in alternating sizes and keep the top row for anchor images, then fill the rest with smaller cards.
Wire mesh makes your vision board feel airy, and fabric clips add softness that looks great in photos. Color blocks between photos stop the board from looking like a random collage. This is a strong choice for small spaces because it’s visually light while still holding a lot of ideas. If you like a modern dreamy look, this gives you structure without a heavy frame. It also lets you rearrange quickly when your tastes shift.
Pro tipUse felt color blocks in muted tones; neon felt can dominate the whole board.
13. Drawer Pulls and Ribbon Photo Lines
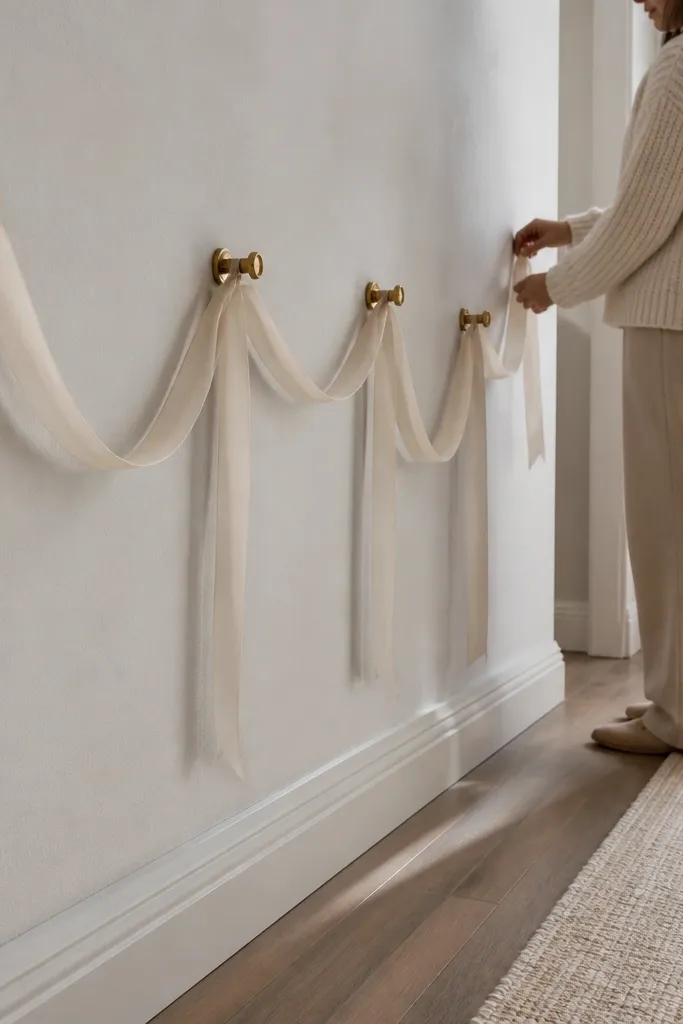
Mount a series of small drawer pulls on a narrow wall strip, spacing them 6-8 cm apart. Tie ribbon between the pulls at two or three heights to form photo lines. Attach photos with small clips or ribbon loops so the edges look clean. Add a few cut paper shapes behind photos to create depth without adding bulk.
This one looks clever and aesthetic because it turns hardware into a design element. Drawer pulls create a strong vertical rhythm, and ribbon photo lines keep everything soft and lightweight. It’s dreamy because ribbons add movement and texture, not because it’s “busy.” Use it where you have a small blank wall section and want a custom look without buying a whole board. It’s also easy to rearrange as you swap photos.
AvoidDon’t use thick scrapbook stickers as photo backing — they create uneven edges that look sloppy.
Pro tipUse satin ribbon in matte finish, not glossy — glossy ribbon can flash highlights in photos.
14. Wall Calendar Pages Vision Board (Upcycled)
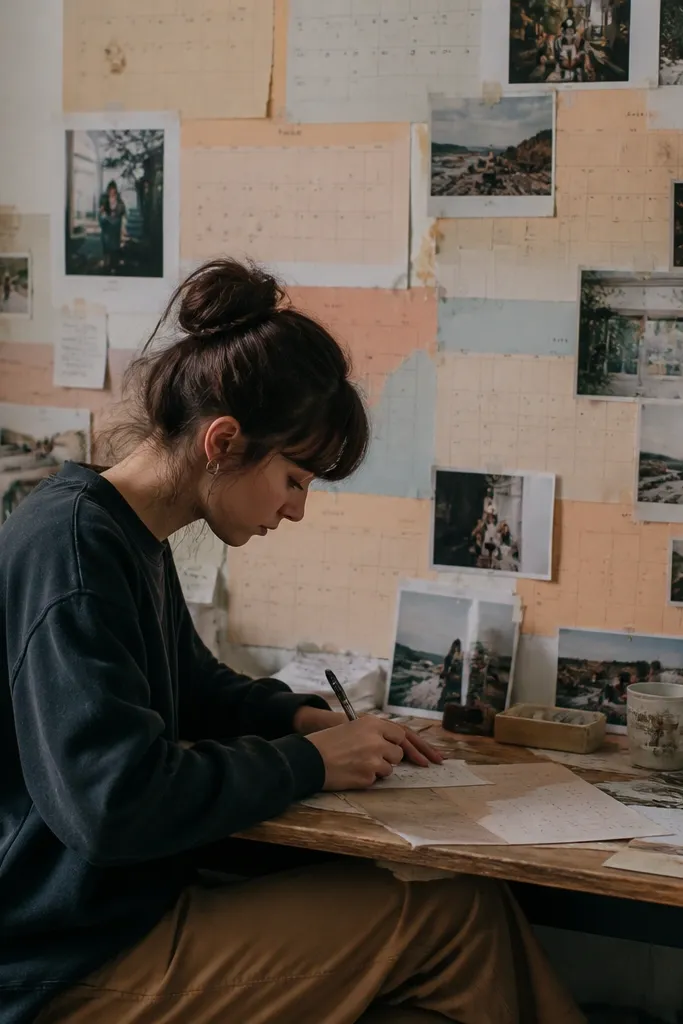
Old calendar pages already have color and typography, so they give you a dreamy background without extra work. The look is charming and lived-in, especially when you tear edges instead of cutting straight. Use calendar pages as layers behind your photos, then add small notes for what you want to feel, not just what you want to buy. This is a great fit for small spaces because you can build it on foam board or inside a frame. It also encourages you to keep updating while reusing materials.
Flatten old calendar pages under a heavy book for a day if they curled. Cut them to the size of your backing board, leaving torn edges visible. Glue the calendar layer down, then layer photos on top with removable tape tabs. Finish by sealing the whole board with a matte clear spray to keep paper from getting scuffed.
Pick only one month’s color palette per board so it stays coherent.
Skip covering the entire board with calendar print — a little blank space keeps it dreamy.
15. Mason Jar Photo Holders on a Board
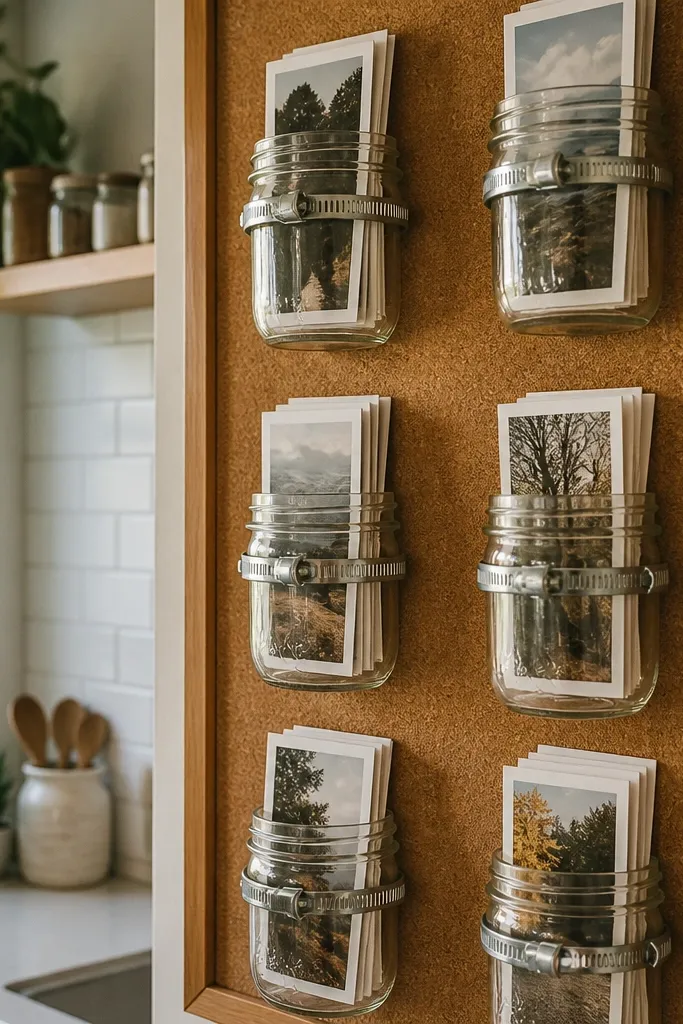
Attach a piece of plywood or foam board to a wall or place it on a shelf. Hot glue or screw small jar lids or jar bases to the board in a tidy row. Print photos as folded cards and tuck them inside. Add one small sign card at the center using cardstock and a marker, then adjust jar spacing so the center reads first.
Mason jars look cute and functional, and they make your vision board feel like a mini collection. Fold photo cards and slide them into the jars so you can swap without tearing. The glass catches light softly, which makes images feel more “scene” than flat collage. In small spaces, jars help you store ideas vertically instead of spreading them across a big board. It’s especially good for a shelf or desk corner where you can photograph it easily.
AvoidDon’t use overly clear glass jars with bright reflections — choose standard mason jars or frosted-look jars.
Pro tipUse small paint swatches in the jars too; they add color rhythm when you photograph the board.
16. Pegboard + Fabric Backdrop for a Soft Look
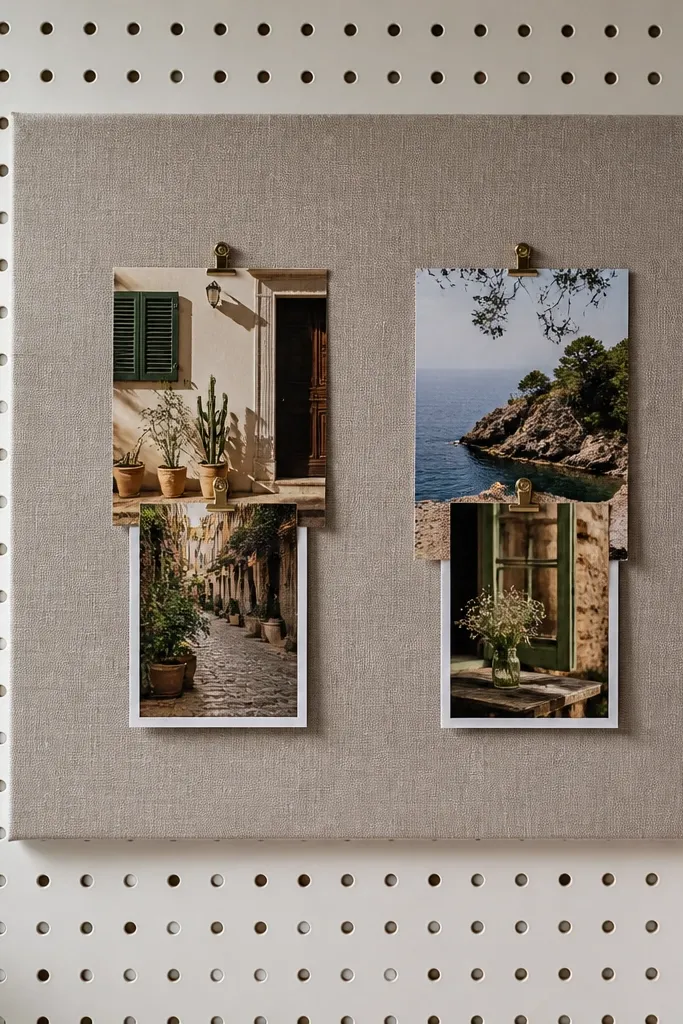
Pegboard can look harsh, so the fabric backdrop makes it dreamy. The idea is to keep the pegboard grid visible but soften it with a muted fabric behind the images. Clip photos and cards directly to the fabric with small fasteners so the edges look tidy. This is a smart option for small spaces because you get structure and softness without building a big framed board. It also photographs well because the fabric background reduces glare.
Mount pegboard to the wall or a backing board, then cut fabric to cover the area behind the clips. Fasten fabric to the pegboard using small staples or removable adhesive strips. Place photos and cards where you want them, then clip them to the fabric using mini clips that attach to the pegboard. Paint any visible hardware to match the fabric tone so the whole board looks cohesive.
Choose fabric with a subtle weave; plain smooth fabric can look flat in photos.
Avoid bright patterned fabric — it competes with photos and makes the board feel noisy.
17. Polaroid-Style Photo Board on a Cork Roll
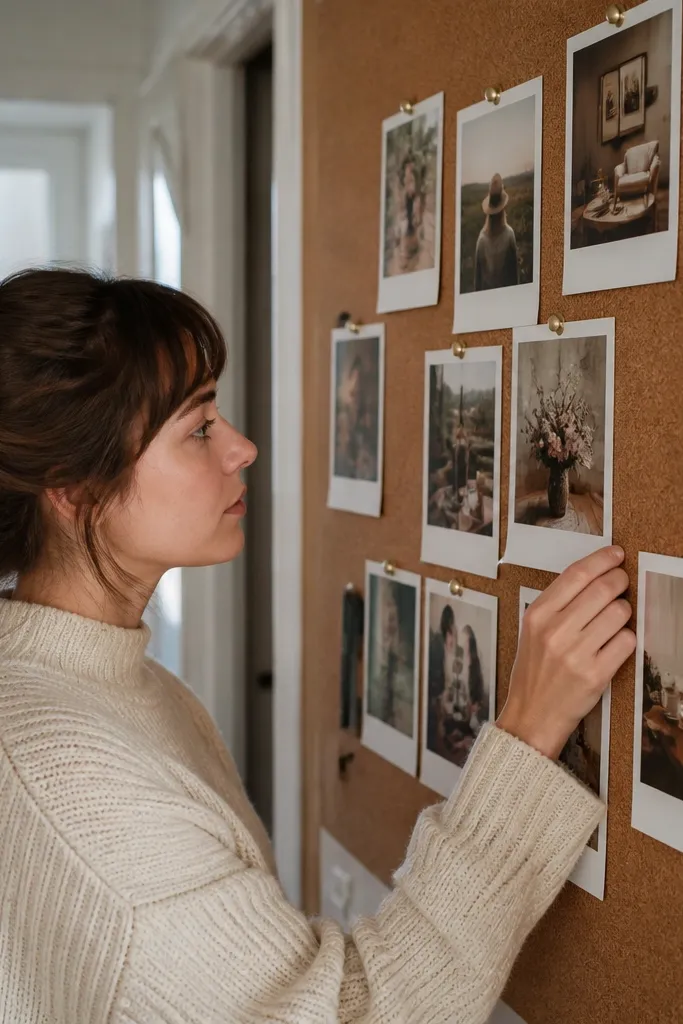
A cork roll gives you a soft, warm surface that feels more “design” than standard cork squares. Polaroid-style frames look dreamy and camera-friendly because they add white space around each image. Pin them in a tight cluster with consistent margins so it reads intentional. This setup works well for small spaces because cork rolls can be trimmed to any size and wrapped around a frame. It’s also easy to update — swap pinned photos as your mood changes.
Cut cork roll to your desired dimensions and wrap it around a lightweight backing board for stability. Create polaroid-style frames by printing or mounting photos on thick cardstock with a white border. Pin each polaroid at the corners using small pins, starting with the center photo first. Add a few smaller cards around the cluster and keep margins consistent for a clean look.
Use a tiny paper template for the border size so every polaroid has the same white frame width.
Don’t mix border sizes — inconsistent margins make the cluster look messy.
18. Upcycled Window Panel Vision Board
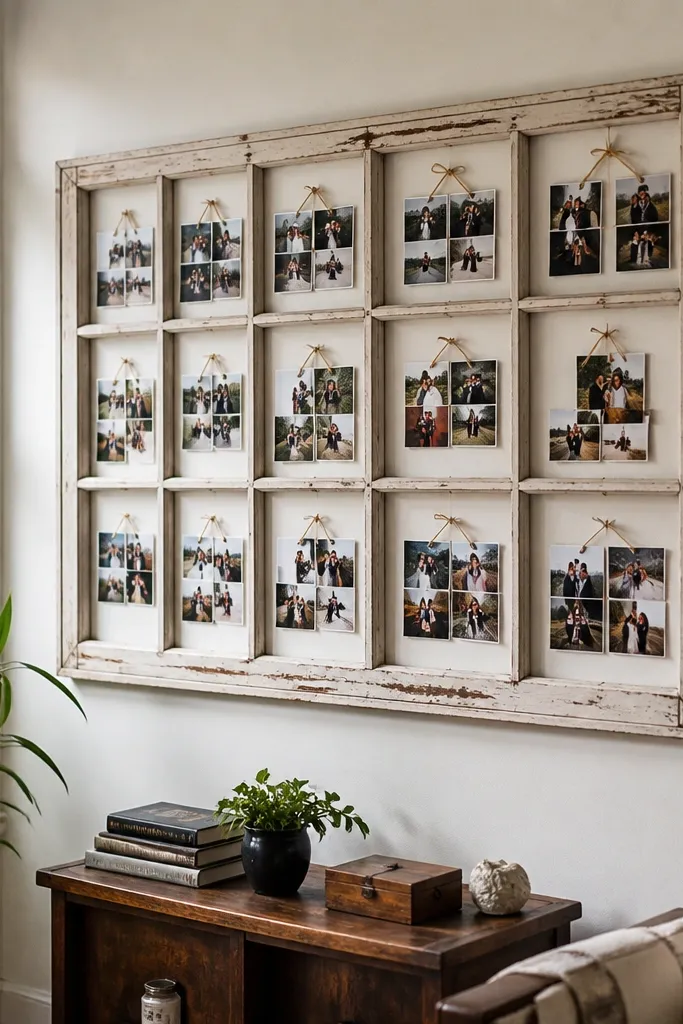
Clean and prep the window panel, then sand any rough edges. Remove any loose hardware that blocks hanging photos. Tie ribbons across each pane and clip photos to the ribbons with mini clips. Add one or two larger photos in the center panes, then fill smaller panes with cutouts and textures like fabric scraps or dried leaves.
Old window panels make vision boards look instantly aesthetic because the frame already has shape and charm. Hang photos behind the panes using ribbon or thin twine so each pane holds a mini collection. The “grid within a grid” look reads dreamy in photos and gives you natural separation. This is best for small spaces where you want one statement piece rather than a large board. It also hides clutter because the window structure visually organizes everything.
AvoidAvoid using heavy objects in the panes — the window panel can warp or pull away from the wall.
Pro tipUse matte spray on glossy photo prints before hanging behind glass to reduce glare.
19. Layered Stair-Step Vision Board on a Small Tray
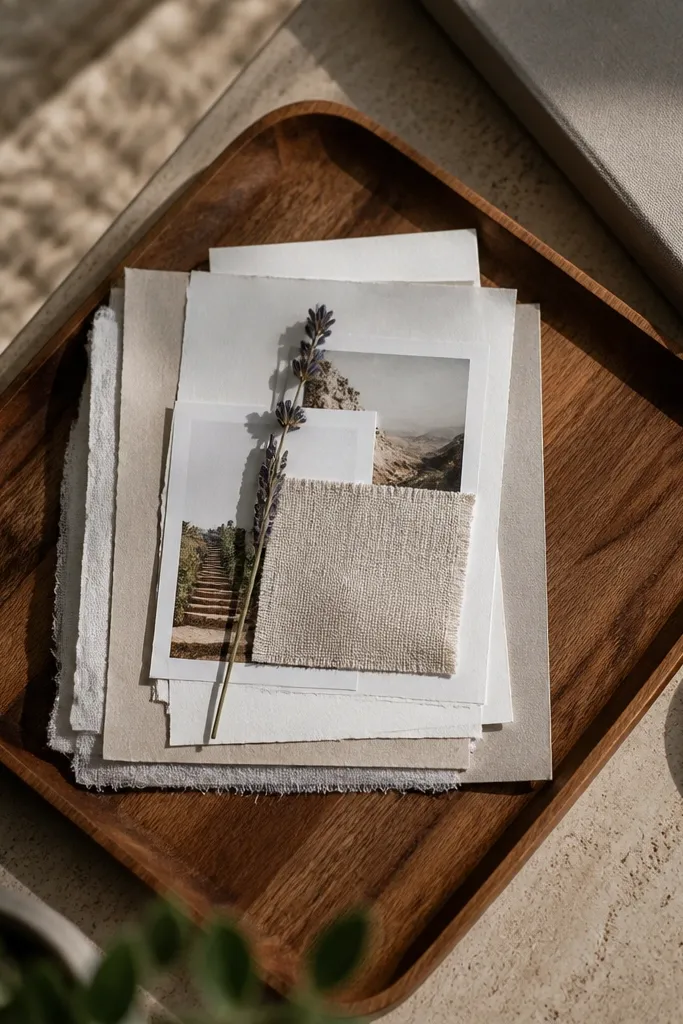
A small tray board is the easiest way to get a dreamy look without committing to a wall. The stair-step stack creates depth and makes everything look styled for photos. Use matte paper textures and a few physical pieces like a dried flower or a fabric swatch to make it feel dimensional. This is perfect for a coffee table, shelf, or bedside area where you want inspiration that looks good when you take pictures. It also makes swapping painless because you’re just rearranging stacks.
Choose a shallow tray and paint or cover it with a matte fabric or paper liner. Cut photos into consistent card sizes and mount them on cardstock for stiffness. Build a stair-step stack: place the longest card at the back, then shorter cards forward by about 1-2 cm each. Finish with two small texture pieces on top so the focal area sits in the center.
Use one color of marker for labels on the back of cards so the front stays clean.
Skip shiny liners — they reflect overhead light and make the tray look less dreamy.
20. Color-Blocked Paper Vision Board with Minimal Photos
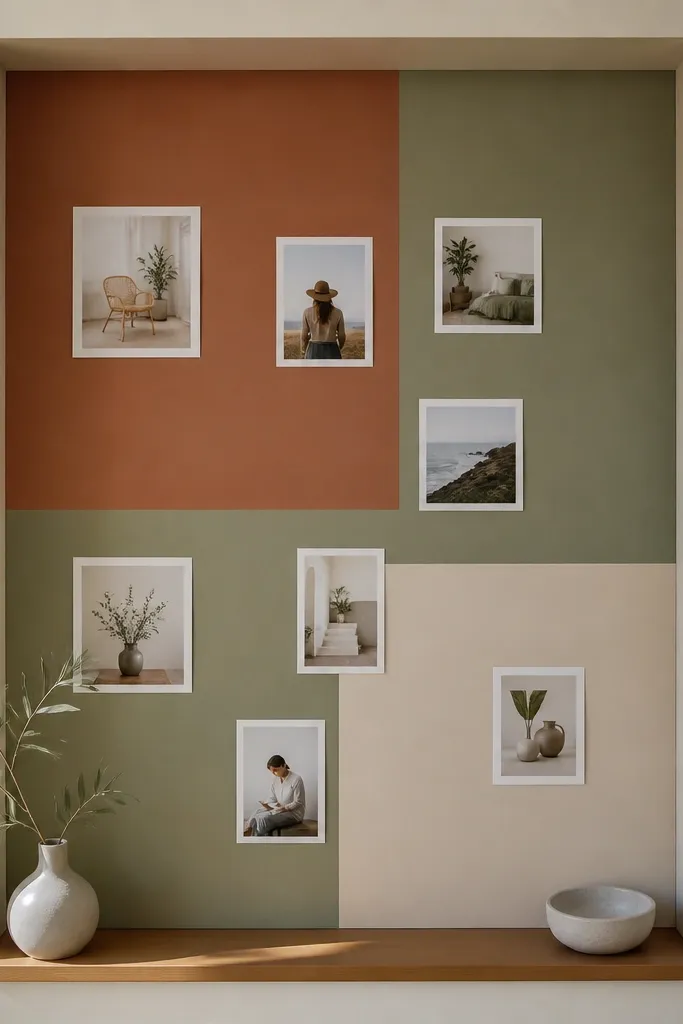
Dreamy doesn’t have to mean packed. Color-blocked paper gives you a modern, calm look that photographs beautifully, even in tiny spaces. Use large blocks in muted tones and place only a few photos — think 6-10 images — so the board breathes. The result is clean, intentional, and easy to update. This is a great option if your current clippings make your space feel chaotic. It also works well for people who like a minimalist aesthetic.
Cut backing paper or foam board and choose 3 muted colors plus one neutral. Tape or glue color blocks first, leaving a consistent margin around the edges. Place photos on top using double-sided tape dots so you can remove and swap. Add one handwritten word or short phrase on a small card in the corner of the board, then seal with matte spray if you’re using paper.
Keep color blocks at least 3 inches wide so they read as blocks in photos, not scraps.
Don’t add lots of tiny photos — small clutter kills the dreamy, airy effect.
21. Mirror-Backed Vision Board for Soft Light Glow
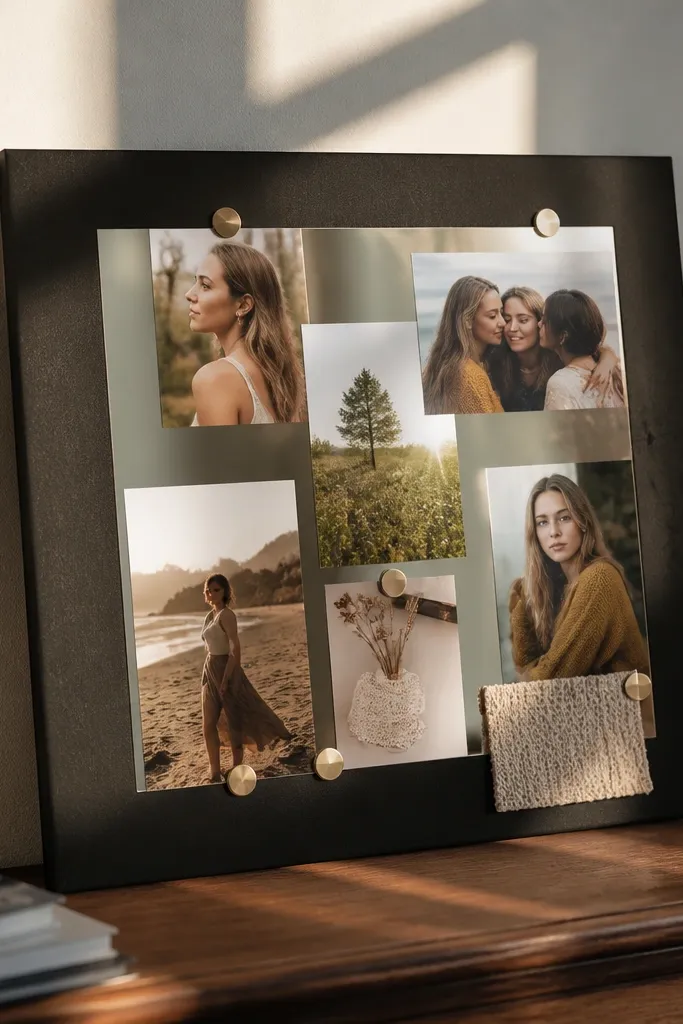
Use a small frame or backing board and attach a mirror sheet to the back with protective adhesive. Cover the edges with matte paper or fabric so the mirror doesn’t look unfinished. Arrange photos with matte tape so they sit slightly off the mirror surface on foam dots for depth. Add a few laminated matte cutouts to keep reflections under control, then hang at a height where daylight hits softly.
A mirror-backed board can look dreamy because it adds soft light bounce and makes the photos feel brighter without heavy styling. The key is to keep it matte around the mirror so you don’t get harsh reflections. Use a small board size — this is a feature, not a full mirror wall. Place a few photo clusters and add matte paper cutouts to reduce glare. This works well for small bathrooms, entry nooks, and bedrooms where you want light and inspiration.
AvoidAvoid glossy photo prints on mirror — they amplify glare and ruin the dreamy look.
Pro tipAim for indirect light placement — direct sun can blow out the mirror reflections in photos.
22. Floating Photo Shelf Vision Board with Rotating Cards
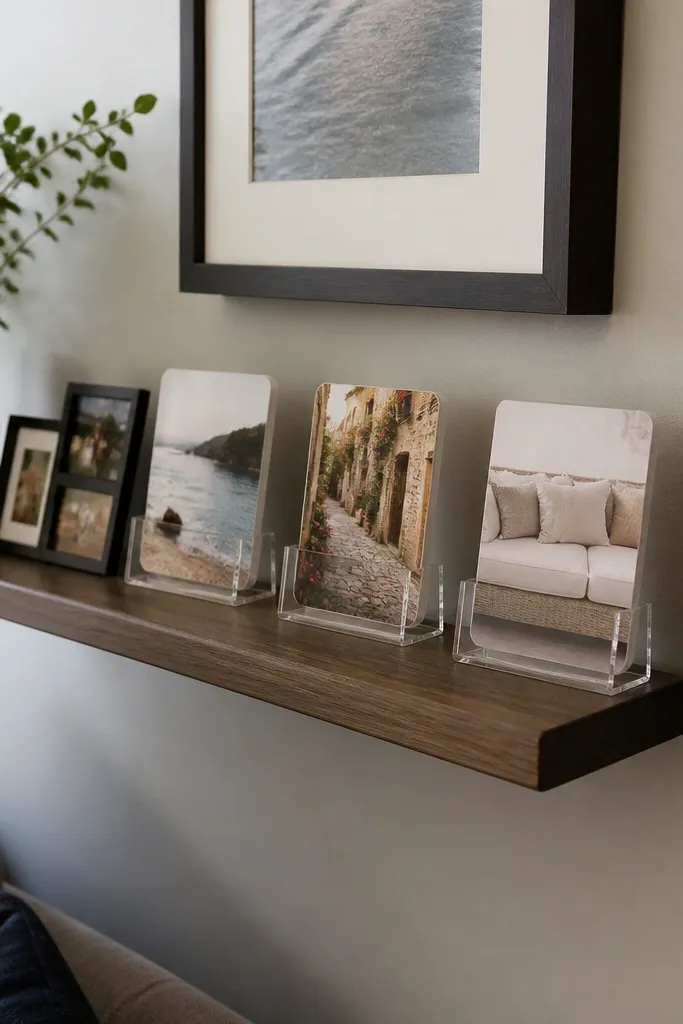
Install a floating shelf sized to your space, then line it with matte paper or fabric. Mount photos on cardstock and place them in small stands or holders so they can be rotated. Create two levels: back cards and front cards, then add one small object that matches your color palette. Adjust the layout so the center card sits slightly higher than the others for a focal point.
A floating shelf is a great small-space solution because it keeps your board at eye level without a big wall panel. The shelf also creates a clean line for styling, so photos look like part of your decor. Rotate cards monthly by using mini stands or clear acrylic holders so updates take minutes. This is ideal if you like a tidy look with just enough texture. It also photographs well because the shelf gives you a stable background.
AvoidDon’t pack the shelf tight — leave a 1-2 inch gap between major cards.
Pro tipUse clear acrylic holders with rounded edges; sharp corners show in photos and look cluttered.
23. Fabric Scrap Border Board with Center Photo Cluster
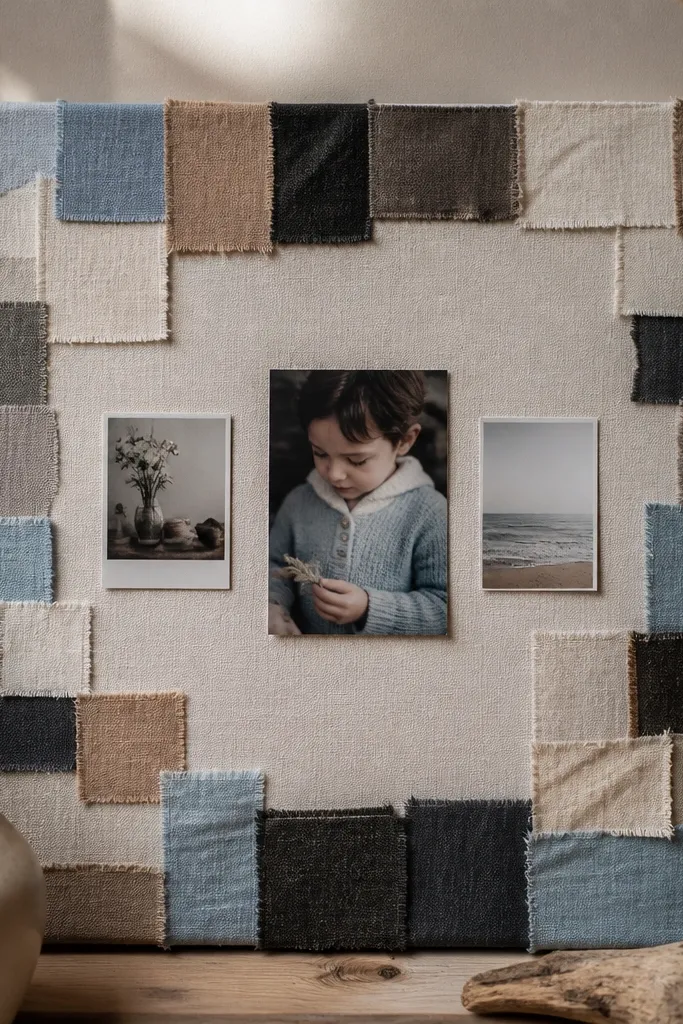
Cover a foam board with a neutral base fabric or matte paper. Cut fabric scraps into strips and glue them around the edges like a patchwork border, keeping widths consistent (about 2 cm each). Build your center cluster with 6-8 photos, layered slightly using foam tape under corners. Finish by trimming any uneven edges and adding a matte clear spray if you used paper and want durability.
This board looks dreamy because the border does the work. Fabric scraps create a soft frame around a clean center photo cluster, so your photos feel curated even when the materials are upcycled. Keep the center area calm with fewer images, then let the border add texture. In small spaces, texture at the edges reads more intentional than scattering it everywhere. It’s a good choice for bedrooms and hallways where you want a gentle, cozy vibe.
AvoidAvoid mixing thick knits with stiff canvas — the uneven textures can look patchy in close photos.
Pro tipChoose scraps from only one family of tones (warm neutrals or cool grays) so the border stays cohesive.
24. Wall Calendar Strip Board with Tape Hinges
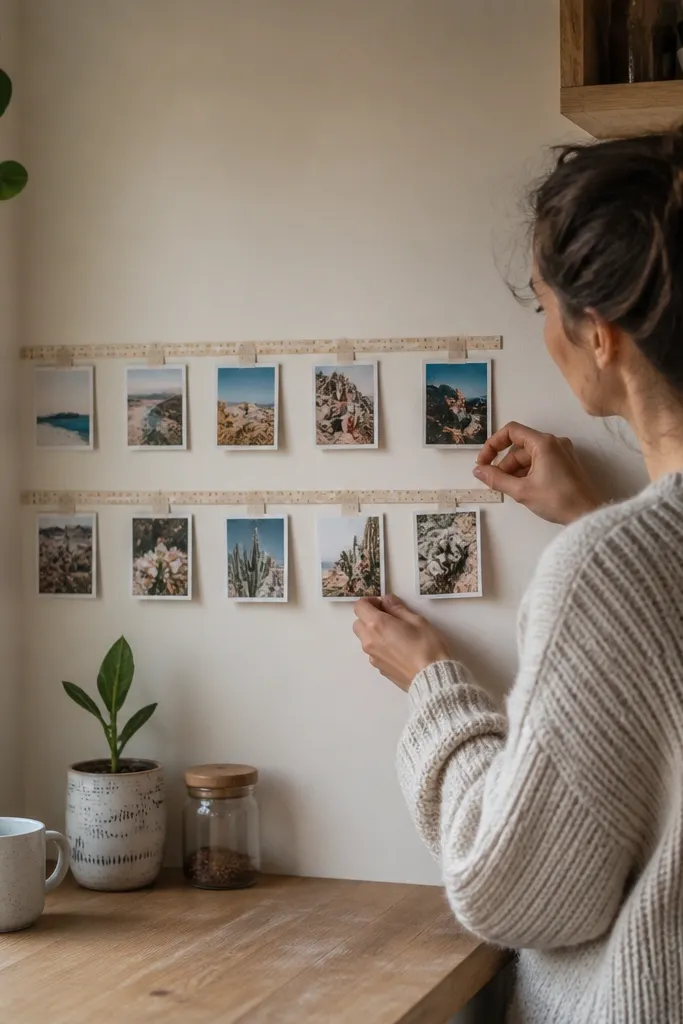
This idea looks great because it uses strips, not blocks. Calendar pages become a horizontal rhythm, and hinged photo cards make swaps feel clean and controlled. Tape hinges also let photos flip up slightly, adding depth without building a complex frame. It’s ideal for small spaces because strips take less width than full sheets while still filling the wall. The dreamy look comes from alignment and the warm paper textures from calendars.
Cut calendar pages into horizontal strips and glue them to a backing board, leaving a 1 cm border. Create hinged photo cards by attaching one edge of each card to the backing with painter’s tape. Place photos in a tidy row, then fold the hinges so cards sit at a slight angle. Add a small label card underneath the central photo strip so the whole board has a focal point.
Use painter’s tape for hinges; it releases cleanly when you swap photos later.
Don’t hinge every photo — keep only 4-6 hinged cards so the board doesn’t look cluttered.
25. Torn-Edge Collage Board with Matte Sealed Paper
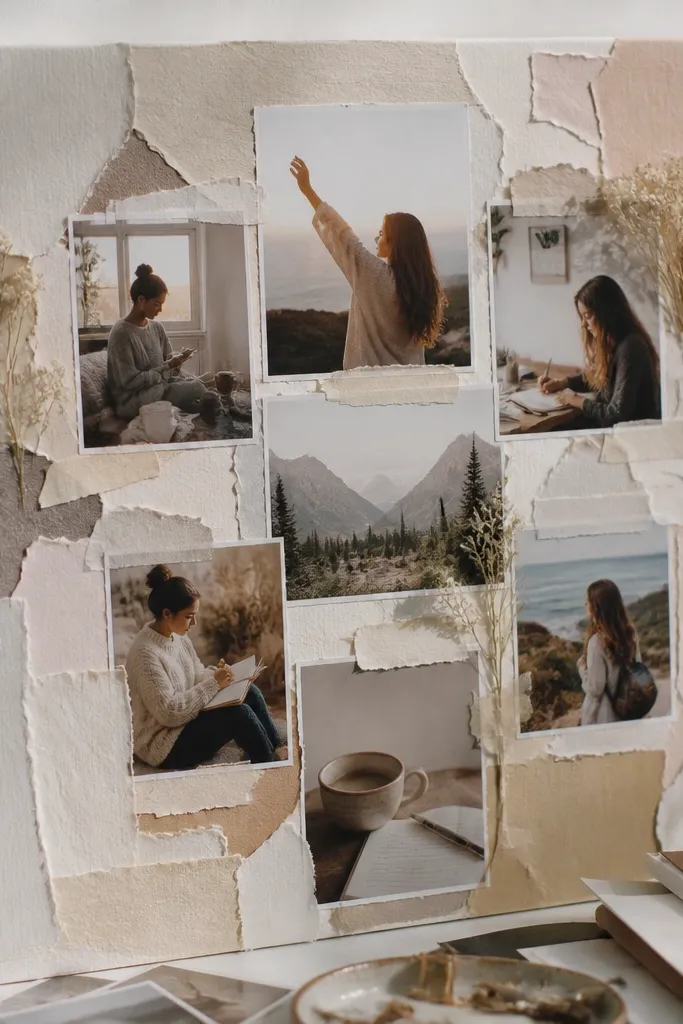
Cover foam board with a neutral base paper, then tear collage pieces by hand into uneven shapes. Layer torn paper behind photos first, then add photos on top using double-sided tape dots. Seal the finished surface with a thin matte clear spray in light passes, letting it dry between coats. Once dry, trim any stray edges and mount the board in a frame if you want a polished finish.
Torn-edge collage looks dreamy because it softens the cut lines and creates a gentle, handmade vibe. Matte sealing keeps the surface photo-friendly and prevents paper edges from lifting. This works especially well when you keep your layout structured: a center cluster and a few supporting pieces along the sides. It’s a good pick for small spaces because torn edges add texture without needing extra space. You can build it on a foam board or inside a frame for a finished look.
AvoidDon’t soak the paper with spray — too much liquid makes it warp and buckle.
Pro tipTear paper slowly so the edges stay delicate; rough tearing looks jagged in photos.
26. Shadow-Box Letter Tiles Vision Board
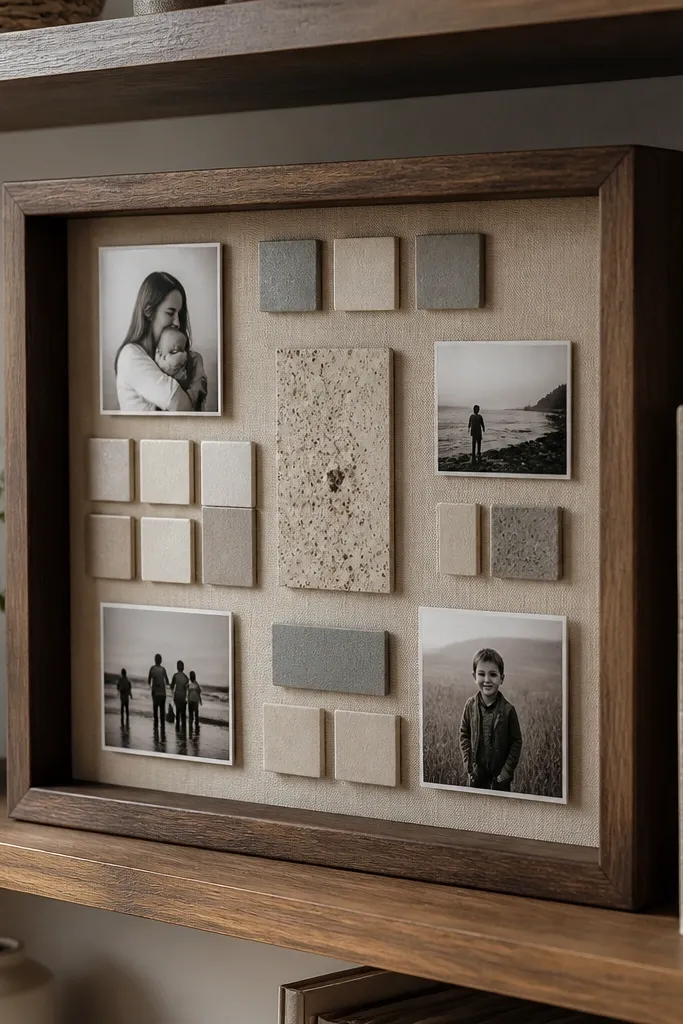
Letter tiles keep your vision board aesthetic because they add typography texture. In a small space, text blocks prevent the board from turning into only photos, which can feel flat. Use a shadow box so the tiles and photos sit at different depths, giving it a styled, collected look. This is great for people who want their board to reflect a mood or mantra as much as aesthetics. It photographs beautifully because the grid layout stays crisp.
Use a small shadow box and paint the backing matte in a neutral tone. Cut letter tiles from thick cardstock and paint or marker them in a consistent style. Place photos in a simple grid pattern, then add letter tiles around them using foam tape so they pop forward. Finish by sealing paper cutouts with matte spray, then close the shadow box and hang.
Keep the letter tiles to one or two fonts and one color so the board stays calm.
Avoid mixing too many sizes of letter tiles — variation helps, chaos doesn’t.
27. Upcycled Postcard Magnet Board in a Frame
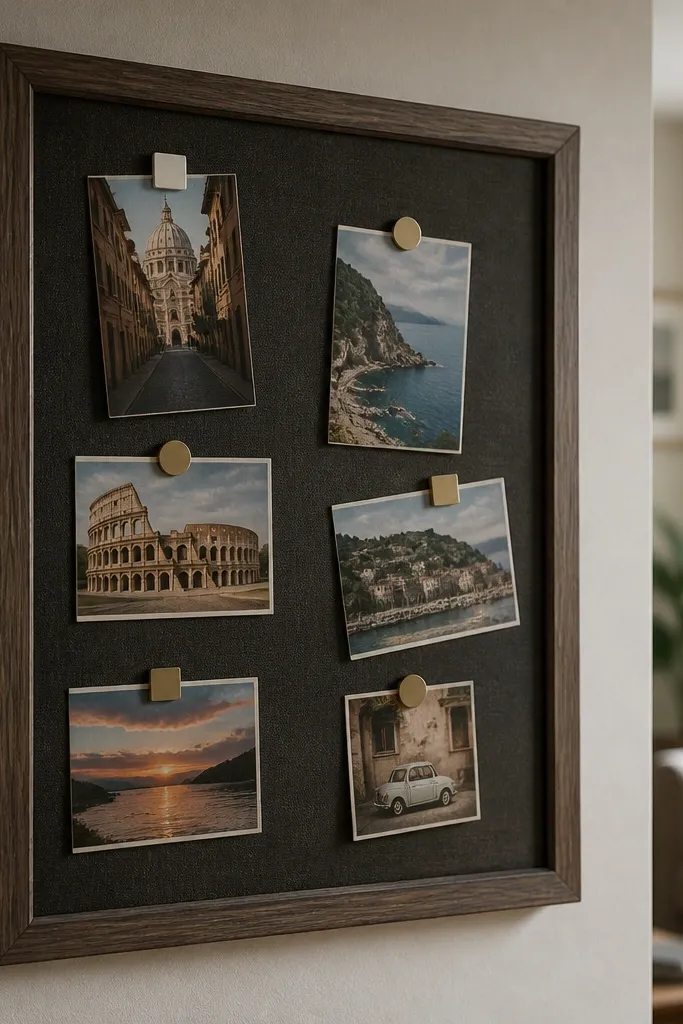
Magnet boards look clean and organized, and postcards add instant aesthetic because they’re designed to be visual. Put the magnet board inside a frame so it looks like decor, not office supplies. You can swap postcards anytime without mess, which keeps your dreamy look updated. This works well in small spaces where you want a compact board with lots of image variety. It also lets you mix postcards, small prints, and ticket stubs without gluing.
Cut a thin magnetic sheet to fit inside a shallow frame backing. Cover the backing with neutral fabric or paper so the magnet sheet edges look tidy. Attach postcards with small magnets or magnetic tape corners, keeping consistent gaps between pieces. Arrange postcards by theme in clusters, then add one or two larger cards at the center for hierarchy.
Use small magnets for postcards; big magnets can warp paper and look bulky.
Skip glossy postcards — they reflect in photos, especially near windows.
28. Color-Matched Washi Tape Photo Corners
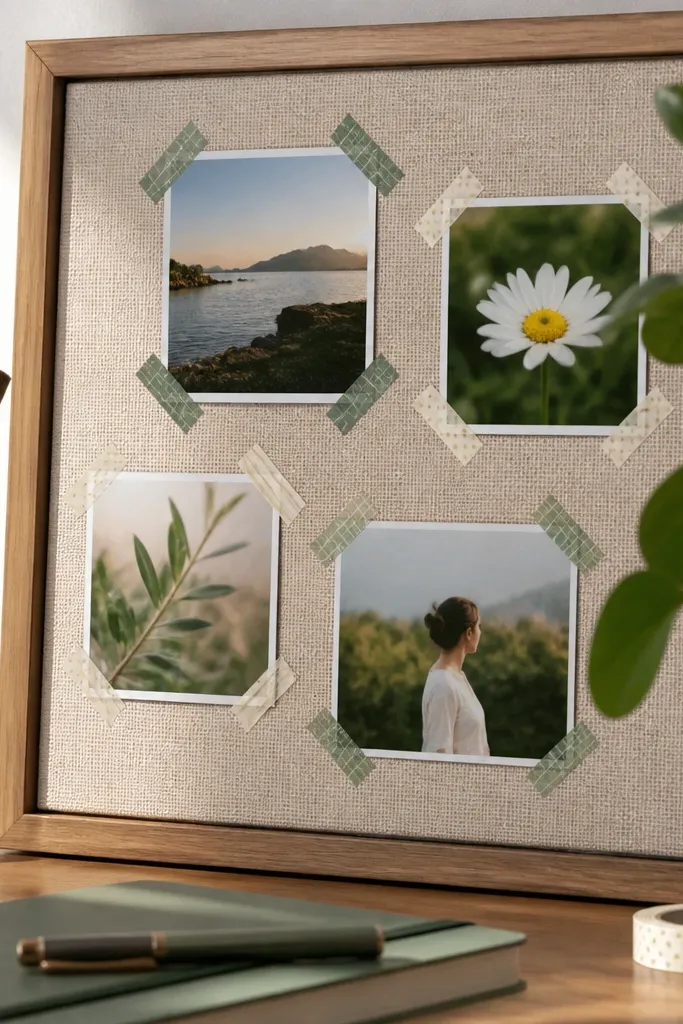
Washi tape corners make your vision board look intentionally styled because they frame each photo edge. It’s a small-space win because tape adds detail without adding bulk. Use one or two washi tape patterns and stick to a tight color palette so it doesn’t turn into clutter. The board stays swap-friendly because tape can be removed with minimal damage. This style is perfect for tiny boards on a shelf, inside a frame, or mounted above a desk.
Choose a cork sheet or foam board base and cover it with neutral paper if needed. Cut photos to consistent sizes and place them where you want the layout. Apply washi tape only to the corners of each photo, then press down firmly so the edges stay flat. Add one strip of tape as a border line around the whole board for a finished look.
Press tape corners with a ruler edge so they adhere without wrinkles.
Don’t tape over photo edges too much — thick tape stacks show in close-up photos.
29. Mini Fabric Pocket Board with Photo Pull-Tabs
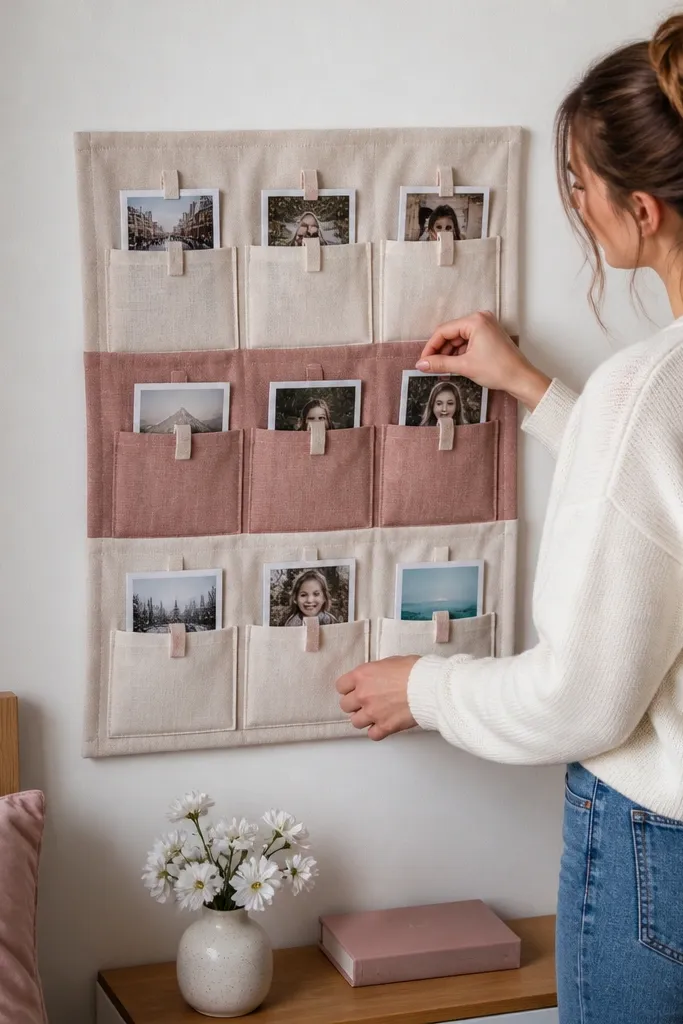
Sew or glue fabric pockets onto a backing panel in a grid, leaving enough space between pockets for hand access. Cut small photo cards and slide them into pockets, then add a pull-tab made from ribbon or fabric strip at the top. Arrange a center cluster of larger cards with smaller pockets around it. Mount the panel in a frame or directly to the wall using removable adhesive strips if you’re renting.
Pocket boards look dreamy because they create order. The photos sit neatly inside pockets, so you don’t see messy overlaps, and the board stays clean in photos. Pull-tabs make it easy to swap images without disturbing the whole layout. Use muted fabric for pockets and keep pocket sizes consistent so everything aligns. This is excellent for small spaces because it holds many ideas vertically and keeps the surface uncluttered.
AvoidSkip flimsy pocket fabric — thin fabric collapses and makes pockets look uneven.
Pro tipUse ribbon tabs in one color across all pockets for a cohesive look.
30. Mirrorless "Glass" Look Using Clear Adhesive Film
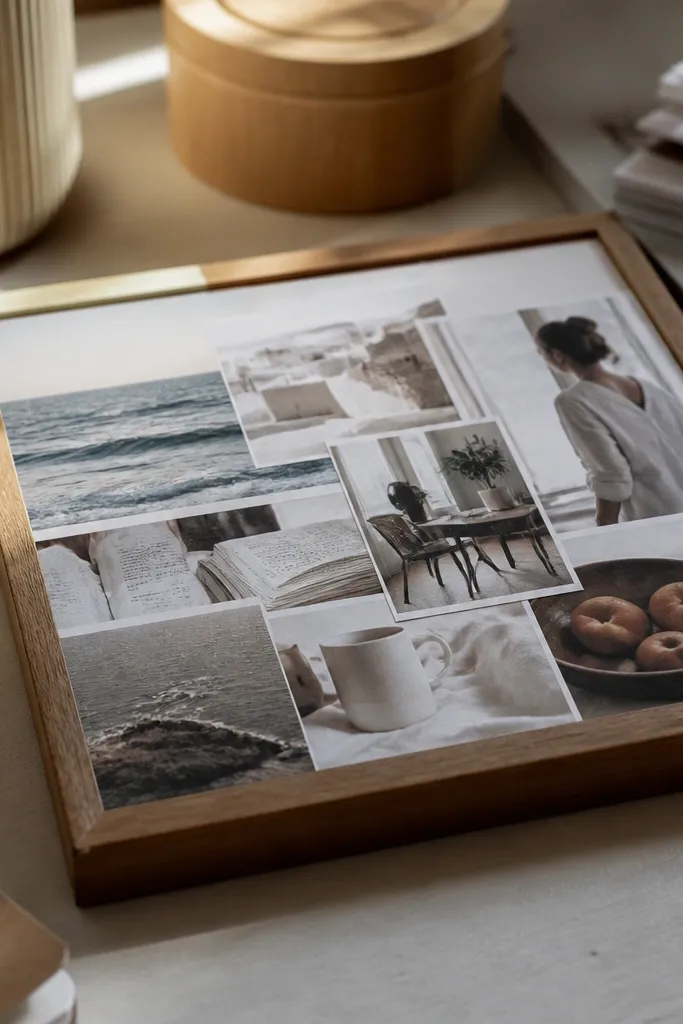
This gives you a glassy, dreamy look without using an actual mirror or real glass sheet that can glare. Clear adhesive film creates a smooth, finished surface over layered photos, which helps your board look polished in pictures. Keep the layers matte underneath so the film doesn’t reflect harsh highlights. This is a smart option for small spaces because it makes the board feel sleek and compact. It also protects paper from smudges.
Create your layout on a backing board with matte paper and photo layers using foam tape for depth. Once the layout is final, cut clear adhesive film to the exact size and apply it slowly from one edge, smoothing as you go. Trim the film at the edges cleanly with a craft knife. Seal the edges with a thin strip of matte tape so it doesn’t peel.
Use a microfiber cloth to smooth the film after application to avoid visible streaks.
Don’t put film over glossy photos — the surface turns reflections into a glare mess.



