
1. Candy-Stripe First Date Ticket Pocket Page
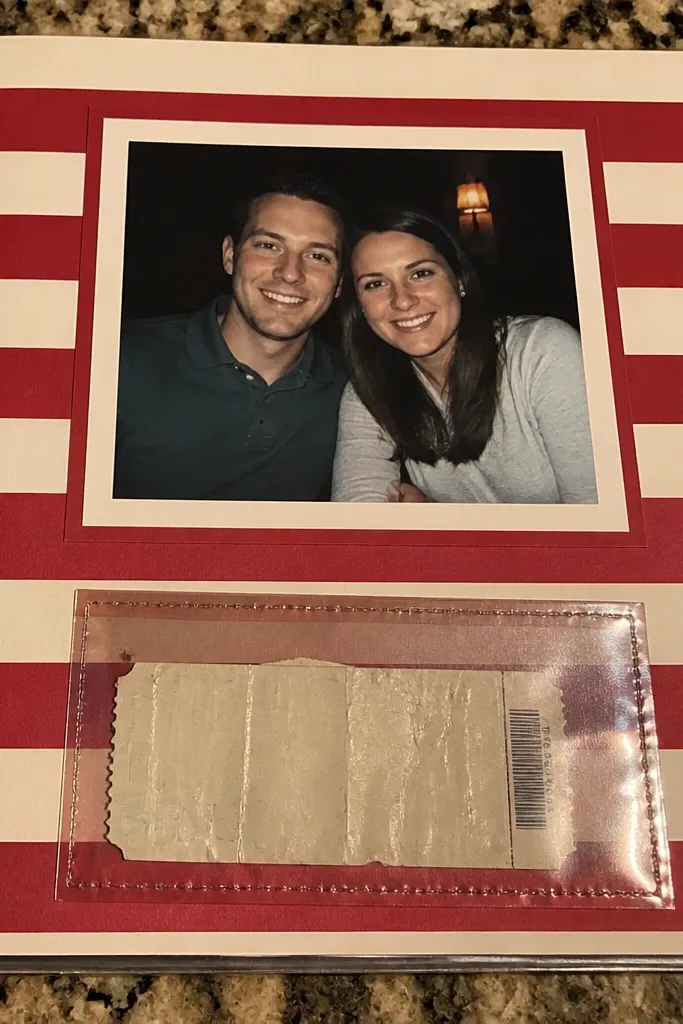
This page is sweet because it creates a clear “moment container.” The candy-stripe background gives you instant romance, while the ticket pocket makes the memory feel collectible instead of pasted flat. You’ll get a strong focal point for photos: one photo in the center mat, then the pocket below for a real ticket, a printed stub, or a handwritten note. The look reads cohesive because the stripes repeat and the pocket shape repeats across the page. Skill level is easy — it’s mostly cutting and gluing with clean edges.
Cut a page base from sturdy cardboard or thick scrapbook paper. Make a candy-stripe strip background by layering alternating red and cream paper bands, then glue them behind your photo mat area. Create the ticket pocket by folding a rectangle of patterned paper into a pocket sleeve, leaving the top open, and attach it with glue only on the sides and bottom. Add a short date strip above the pocket and place the hero photo centered.
Pro tipUse a bone folder on the pocket fold so the opening stays crisp when you slide a ticket in and out.
AvoidDon’t cover the pocket opening with embellishments — it looks messy and makes the page harder to use.
2. Kraft + Gold Letterpress Love Notes Wallet
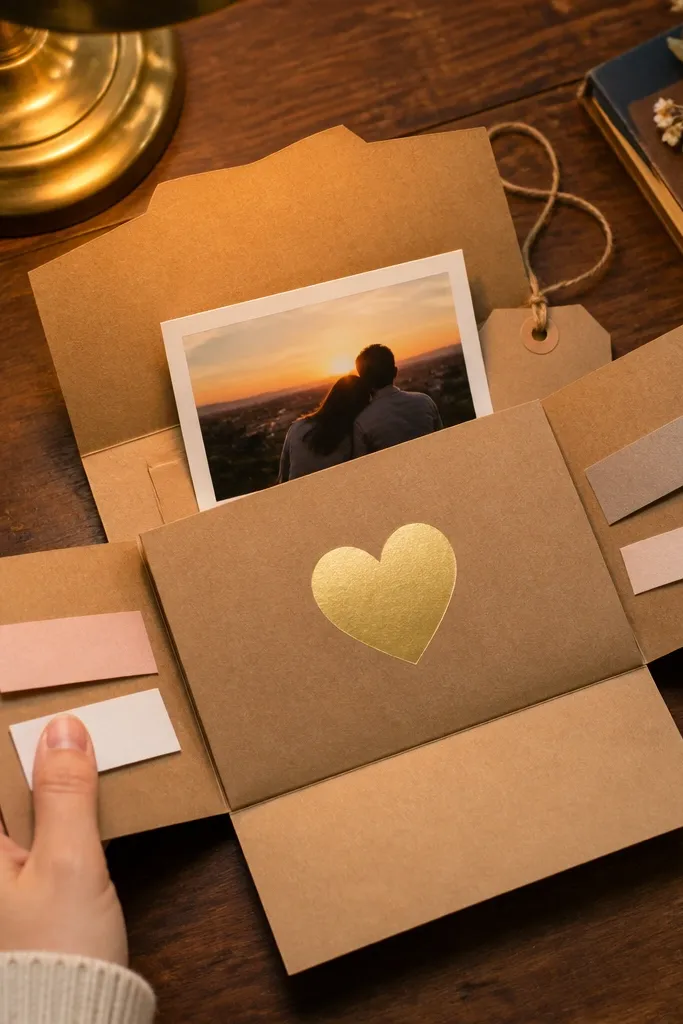
This one looks expensive without needing fancy tools. Kraft paper gives warm texture, and a gold label makes the page feel like a curated set of letters. The wallet format is practical too: it stores several mini notes, message strips, or small photos you want to rotate later. A gold heart label ties everything together so the theme doesn’t drift. It’s great for anniversaries, long-distance love updates, and “we wrote to each other” stories.
Cut two identical kraft rectangles for the outer wallet and one thinner rectangle for the inner flap. Score a fold line about 1 inch from the edge so the wallet closes neatly, then glue the inner flap to form a pocket. Add a gold heart label using metallic cardstock or a gold foil-look sticker, and place it centered above the pocket opening. Make 3-5 small note cards, then slide them into the pocket.
Lightly sand the kraft edges after trimming so they look smooth instead of jagged.
Avoid thick layers behind the flap — thick closures bulge and ruin the flat scrapbook look.
3. Matchbook Memories Collage Page
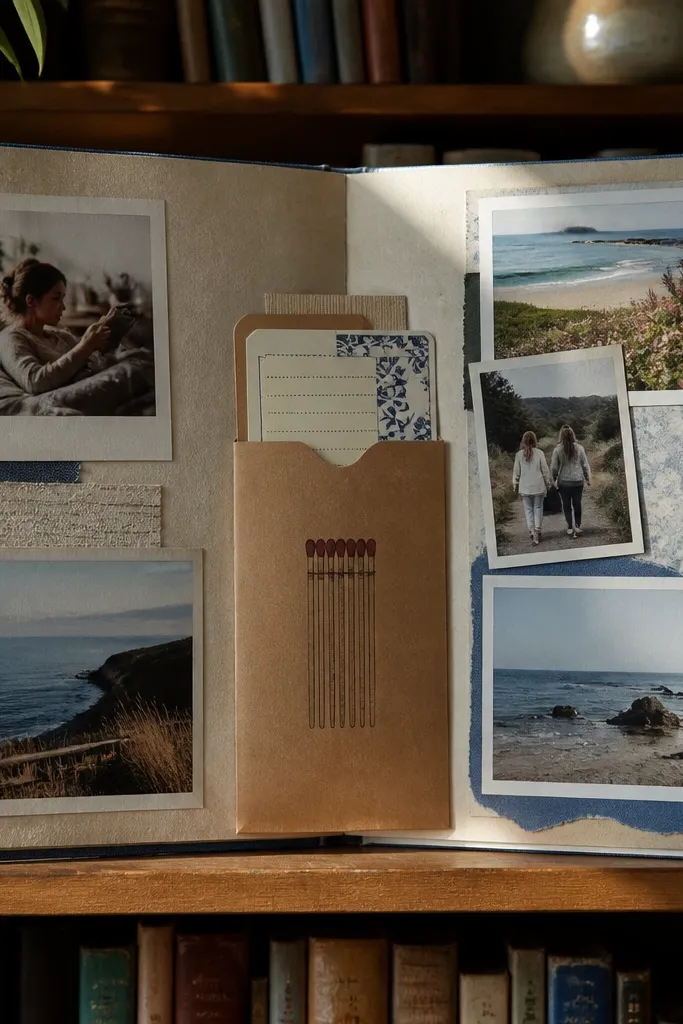
This page turns everyday packaging into a romantic keepsake. Matchbook shapes already suggest “small moments,” so your scrapbook page feels themed without extra explanation. You’ll use the matchbook as a vertical pocket for journaling cards, and you can place photos around it like a collage. The look works because the matchbook creates a strong vertical anchor and the surrounding cut-paper layers add texture. It fits birthday memories, weekend trips, and “we met through friends” stories.
Build the matchbook pocket by cutting a tall rectangle of patterned paper, then folding side tabs inward like a book cover. Glue the bottom tab to form a pocket and keep the top slightly open for cards. Create a central photo mat behind or beside the matchbook so there’s an obvious hero image. Add two journaling cards that slide into the pocket, then glue small paper scraps as a border around the edges.
Use ink to darken the edges of the matchbook paper so it looks vintage instead of brand-new.
Don’t glue the pocket fully across the top — you need the opening to slide cards in.
4. Polaroid Frame With Washi Tape Date Bars
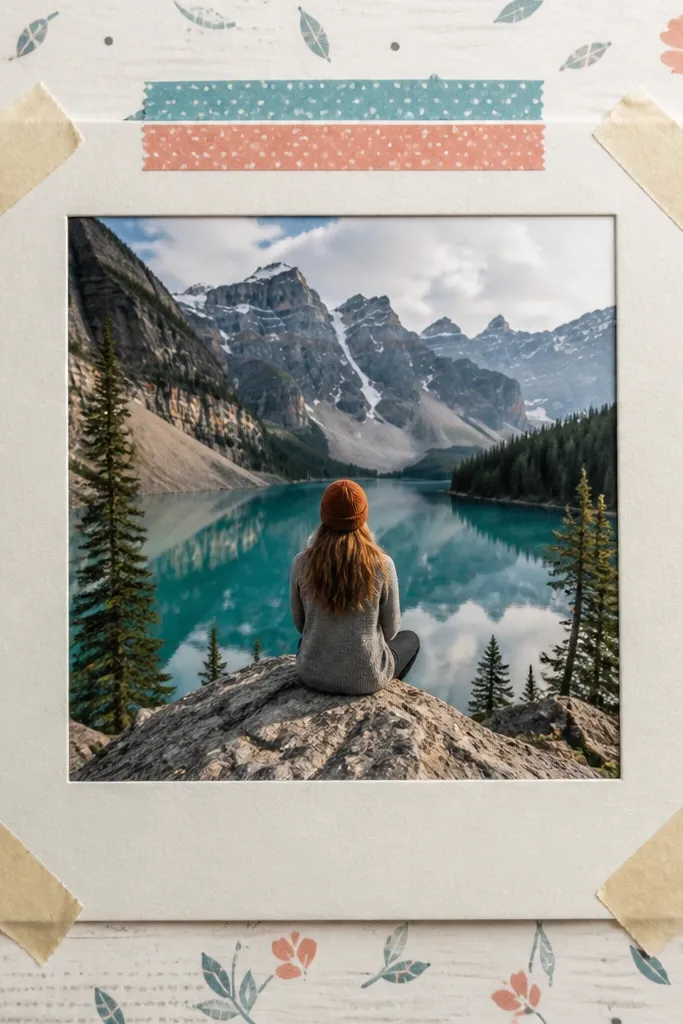
If you want pages that photograph cleanly, this is one of the best structures. The polaroid-style frame gives a consistent photo layout, and the washi tape date bars add color without clutter. You can repeat this layout across multiple pages so the scrapbook reads like a set. The tape also covers minor cut mistakes, which makes it forgiving. This theme works for weekly check-ins, relationship milestones, and “this month we did...” updates.
Cut a polaroid mat from thick white paper: 4x6 photo opening centered on a larger border. Add two or three washi tape strips across the top border area as date bars, then glue them down. Place the photo behind the opening using double-sided tape on the mat edges only. Add a tiny journaling strip at the bottom, then seal the tape edges with a thin layer of matte glue to prevent peeling.
Choose washi tape with one repeating pattern — too many patterns makes the frame look chaotic.
Skip glitter tape or glossy tape — glare in photos makes the page look messy.
5. Star Map Coordinates Page From Scrap Paper
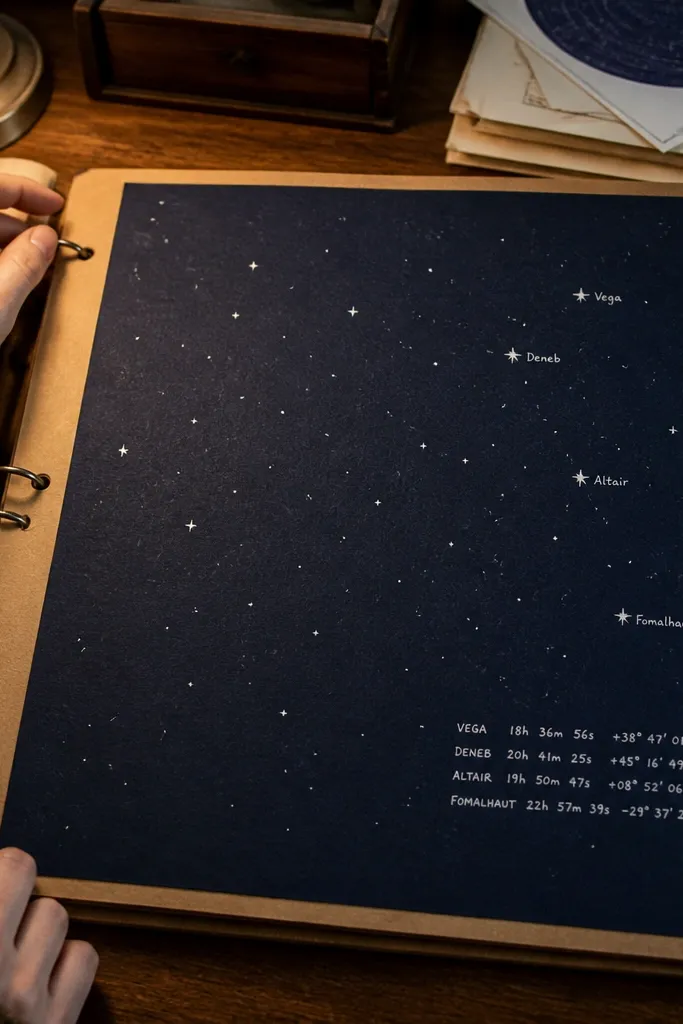
A star map theme looks instantly romantic and very “designed,” even when you build it from scraps. You get a dark background, small star dots, and a handwritten coordinate block that makes the page feel personal. This layout is striking because it uses contrast: dark sky behind bright stars and light journaling. It’s perfect for proposals, travel memories, and nights you remember clearly. The skill level is easy: you’re stamping dots, cutting simple shapes, and arranging a photo cluster.
Create a sky background by blending dark blue and black scrap paper or using matte cardstock in a gradient. Add stars by poking holes with a needle in the paper or sprinkling tiny punched circles using a hole punch. Layer a small photo cluster in the lower third and write coordinates on a light cardstock strip. Outline the coordinate strip with a thin line drawn in white gel pen, then glue everything down.
Pro tipMake star sizes vary — mix tiny dots with a few larger ones for realism.
AvoidDon’t use reflective foil stars — they catch light and look uneven in photos.
6. Book Page Romance With Framed Quote Strip
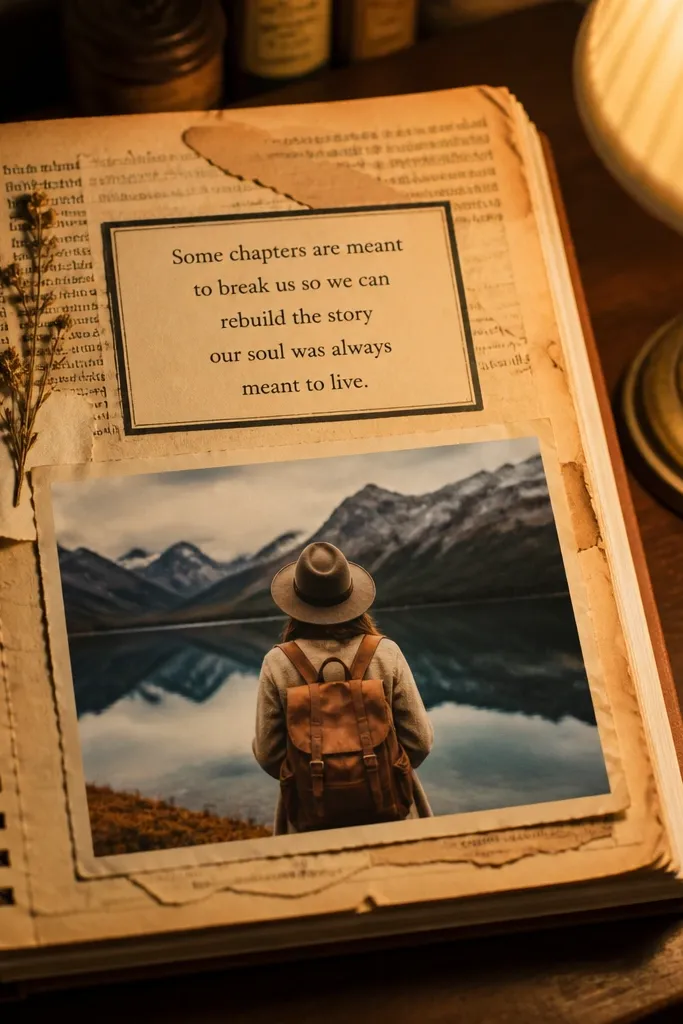
This is a page that looks literary and soft. Using book pages as the background gives instant texture, and a framed quote strip creates a clear focal point. It’s also great for long-distance relationships because you can print or write a short message and make it the center of attention. The frame makes the quote feel intentional instead of floating. You’ll spend more time trimming and aligning than building, and the result looks calm and photogenic.
Cut a background from an old book page, then back it with thicker paper so it doesn’t warp. Make a quote strip by printing or writing a short line on lighter cardstock, then frame it with a thin border strip around the edges. Add one small photo mat to one side, leaving the other side for the quote. Finish by gluing a small heart cutout near the bottom corner.
Pro tipLightly mist the book page with matte medium before gluing — it reduces tearing and keeps it flat.
AvoidDon’t glue the quote strip directly on wrinkled paper — flatness matters for how it looks on camera.
7. Fabric Scrap Heart Border Page
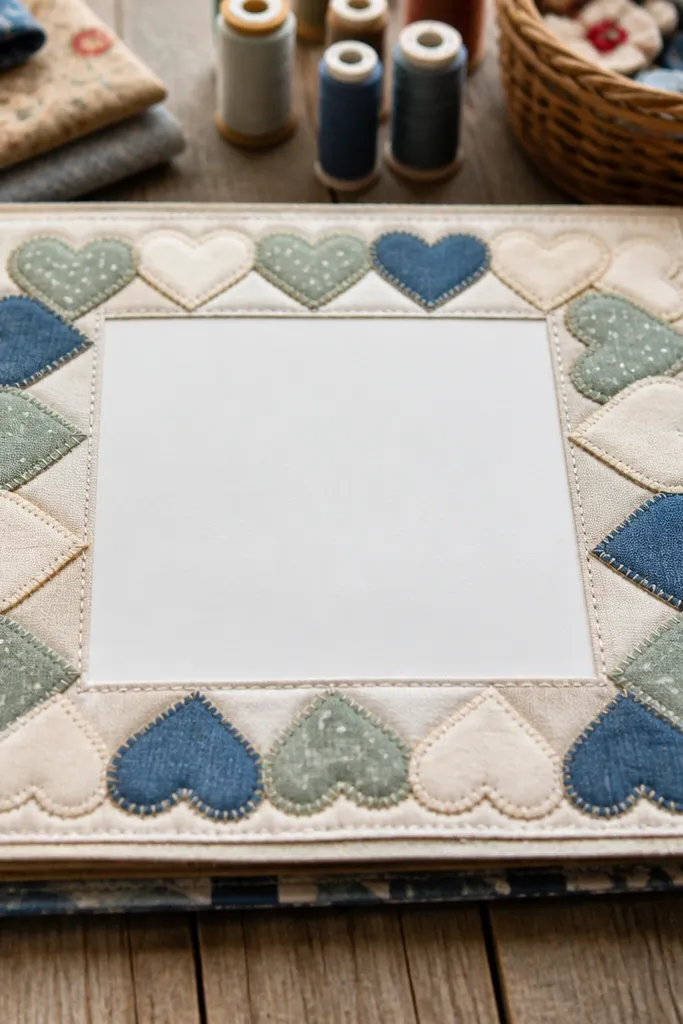
This page looks warm because fabric texture shows up in photos. A heart border gives you a clear theme shape without needing lots of stickers. You’ll make the hearts from fabric scraps, then create a neat frame around the page so the center stays clean for a photo. It’s perfect for cozy relationships, family love stories, and winter dates. The build is straightforward and takes about an hour once you have your scraps sorted.
Cut small fabric rectangles, then fold and sew or glue them into heart shapes using paper templates. Place the hearts along the page edges as a border, then glue them down with fabric glue or a flexible paper adhesive. Add a central photo mat and a journaling card sized to fit under the photo. Finish by trimming any fabric edges that creep beyond the mat so the border looks even.
Pro tipUse a thin iron-on stabilizer behind the fabric if your scraps fray — it keeps heart edges sharp.
AvoidDon’t use bulky seams in the border — thick spots cast shadows and look uneven.
8. Sticker-Map Road Trip Timeline Layout
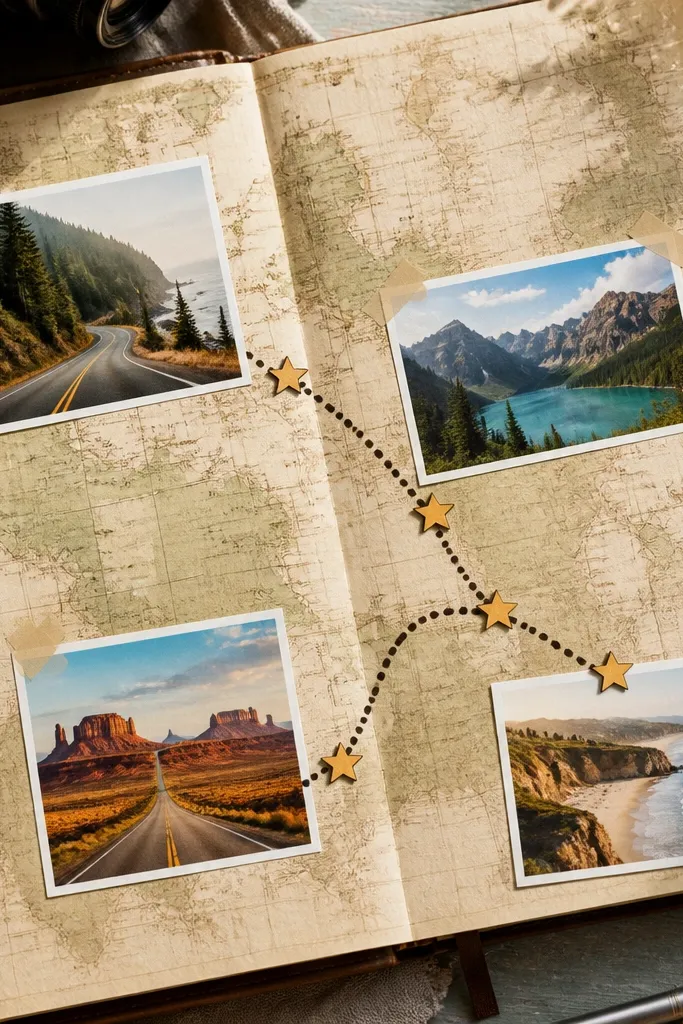
This layout turns travel memories into a clear story you can scan fast. The map-style background gives context, while the dotted route line shows progression. You add star stickers at stops, then place photos near each star so the page reads like a route you can follow. It looks great because the route is a single line that organizes everything. It’s ideal for road trips, moving in together, and “we drove there on a random weekend” memories.
Start with a background made from printed map paper or repurposed paper with a map pattern. Draw a route line using a fine black pen and add dots along it with a stencil or freehand. Mark stops with small star stickers or star cutouts, then glue mini photo squares next to each stop. Add a timeline strip at the bottom with three short dates and one sentence.
Use a single pen color for the route and dates — it keeps the page from looking like random sticker scatter.
Don’t cram five photos into one cluster — keep it to 3 stops for a clean look.
9. Ticket Stub and Lace Pocket Anniversary Page
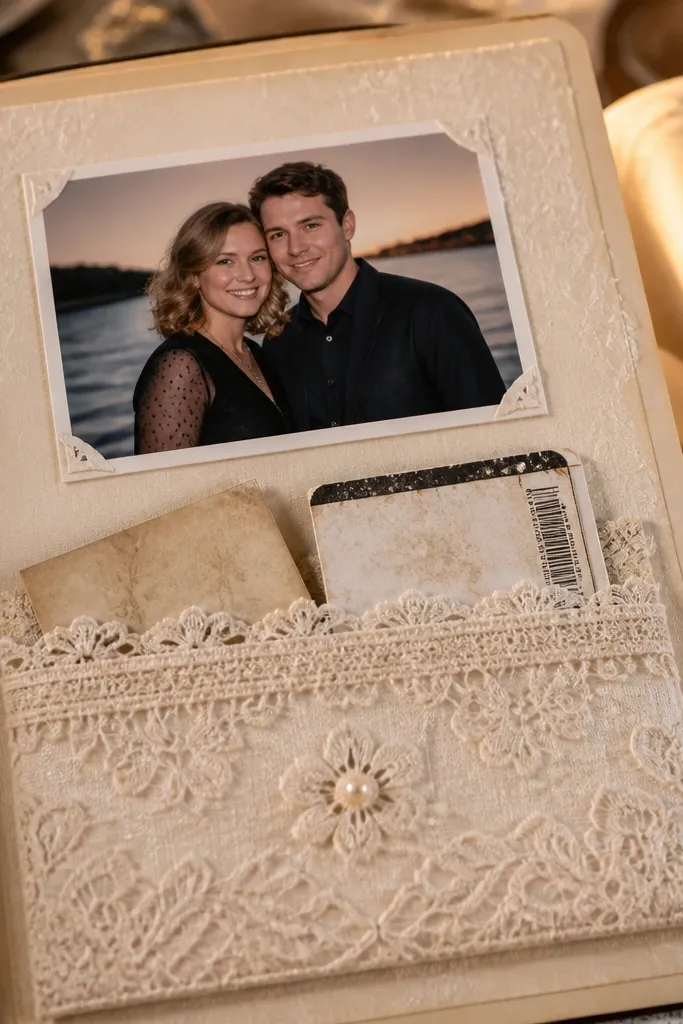
This page blends practicality with romance. A lace-edged pocket holds ticket stubs, small letters, or a folded anniversary card. The lace border frames the pocket and makes the whole page feel soft and intentional. The centered photo gives you a clear hero image, and the pocket adds a second layer of storytelling. It’s a strong pick for anniversaries, concerts, and date nights where you have physical proof.
Cut a pocket from patterned paper, leaving the top open, and glue it to the page slightly below center. Trim lace into a strip and glue it along the pocket edges, then add a narrow ribbon band as a “closure” detail if you want it. Place a photo mat above the pocket and glue it down flat. Add a small label at the top corner with the anniversary number and year.
If lace frays, seal the cut edge with a thin dab of clear matte glue.
Avoid thick ribbon bows — they warp pages and catch glare.
10. Photo Corner Frames With Rubber Stamp Hearts
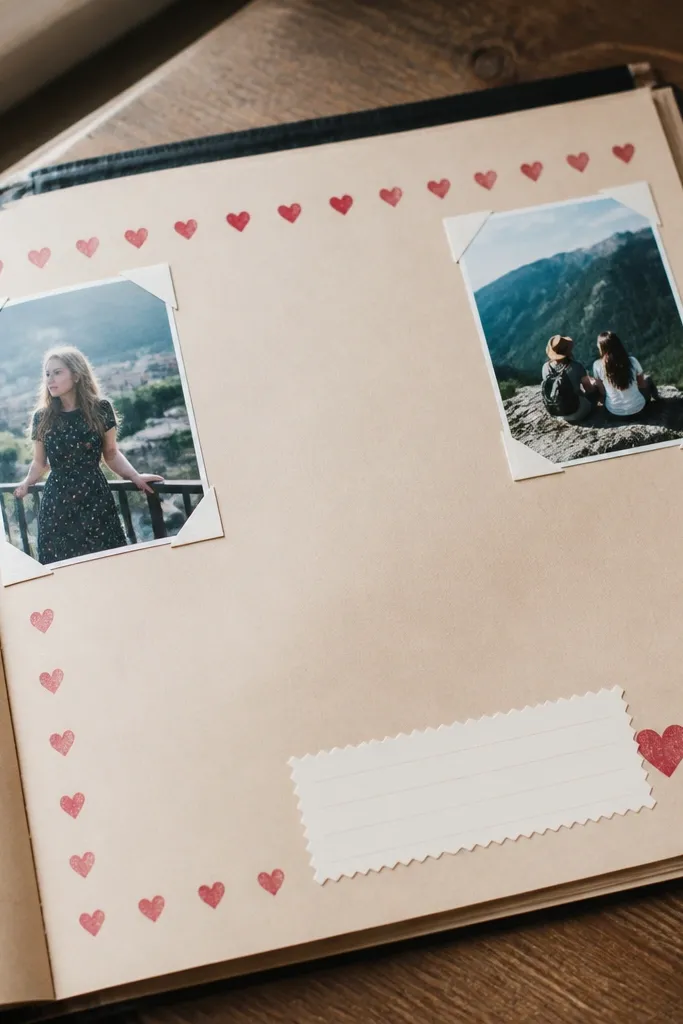
This theme is clean and graphic. Instead of covering the page with decorations, you frame photos using corner pieces and add small stamped hearts as accents. The stamped hearts create repetition, and repetition is what makes themed relationship scrapbook ideas look cohesive. Journaling stays readable because the center stays mostly open. This is best for minimalists who still want it to feel romantic on camera.
Cut corner frames from white or cream cardstock: small L-shaped pieces sized to fit each photo. Stamp hearts around the corners using a red or burgundy ink pad. Glue the corner frames first, then place the photo behind the open center and attach it with double-sided tape only on the back edges. Add a journaling block below the photos using a single strip of light cardstock.
Pro tipStamp on a scrap first to dial in ink coverage so the hearts don’t look blotchy.
AvoidDon’t over-stamp — 6-10 hearts on the page looks intentional; 30 looks like a mistake.
11. Monochrome Rose Petal Collage Page
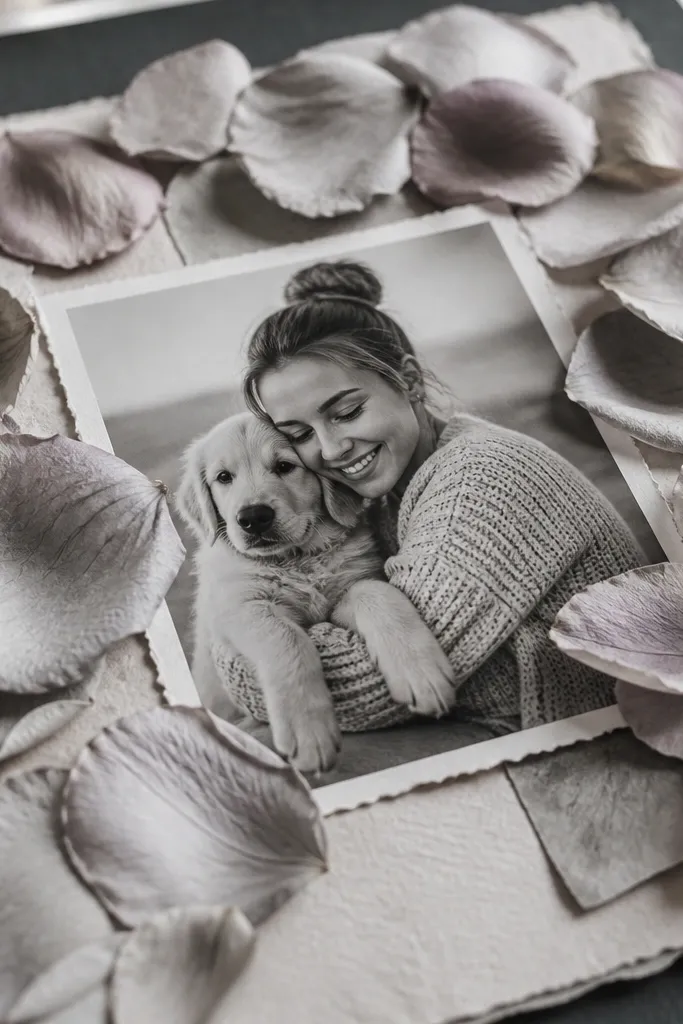
This page looks stunning because it uses one color family and a natural texture. A monochrome rose petal collage gives you soft edges and a dreamy feel without needing fancy stickers. The center photo anchors the design, while petal shapes around it create a halo effect. It’s a great choice when you want romantic but not cutesy. Build time is moderate because you’re shaping and layering, but the result is very photogenic.
Create a background using matte cardstock in off-black, charcoal, or deep brown. Press rose petals or use dried flower scraps, then cut them into petal-like shapes that match your color family. Arrange petals around a central photo mat and glue with a thin layer of matte adhesive. Add short journaling in black or deep brown ink on a small tag shape.
Use a matte medium instead of glossy glue so the petals don’t look shiny under light.
Don’t glue petals too thick — bulky layers lift and cast shadows across the photo.
12. Cinema Night Filmstrip With Countdown Numbers
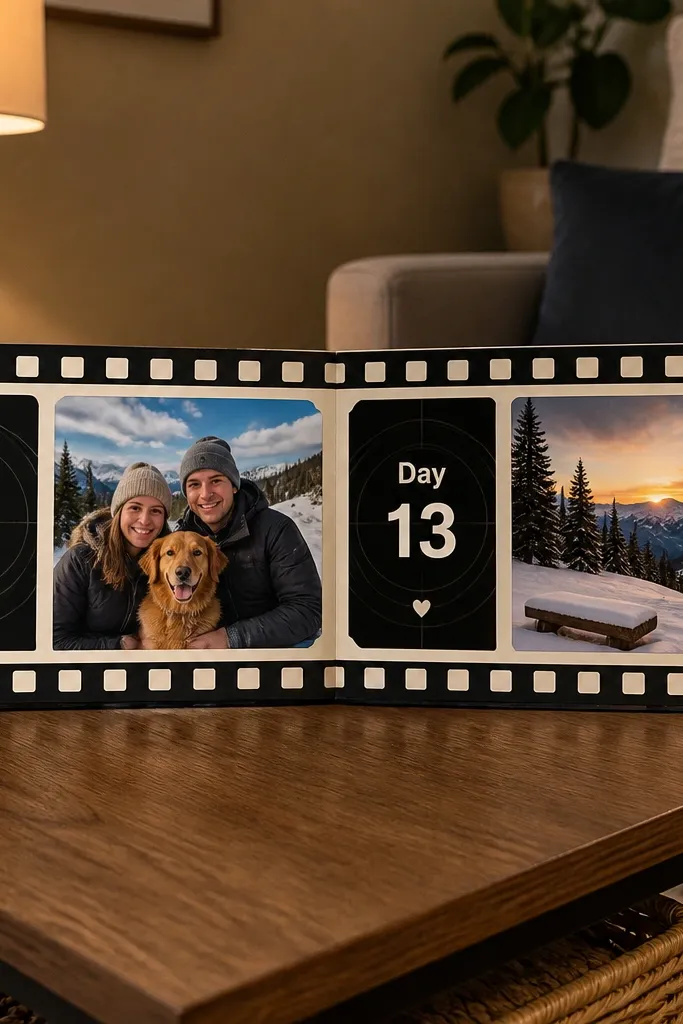
Filmstrip pages look fun and clean, and they’re instantly recognizable. The filmstrip motif gives you built-in repetition, so the page stays themed even if your memories vary. Put your two photos on the filmstrip and add countdown numbers for dates like “Day 12: We watched...” The look is graphic and modern, not overly decorated. This theme works for relationship milestones, movie nights, and “we fell for each other” chapters.
Cut a long filmstrip shape from black cardstock and punch or draw perforation holes along the sides. Add two or three photo windows by cutting rectangles or using photo stickers under the filmstrip. Write countdown numbers beneath or inside the frames using a white gel pen. Glue the filmstrip to a light background page and add a short caption tag at the bottom.
Pro tipUse a ruler for the perforation spacing so the filmstrip looks straight and crisp.
AvoidAvoid busy backgrounds — filmstrip pages need clean negative space to look good.
13. Matching Silhouette Cutouts On Shared Background
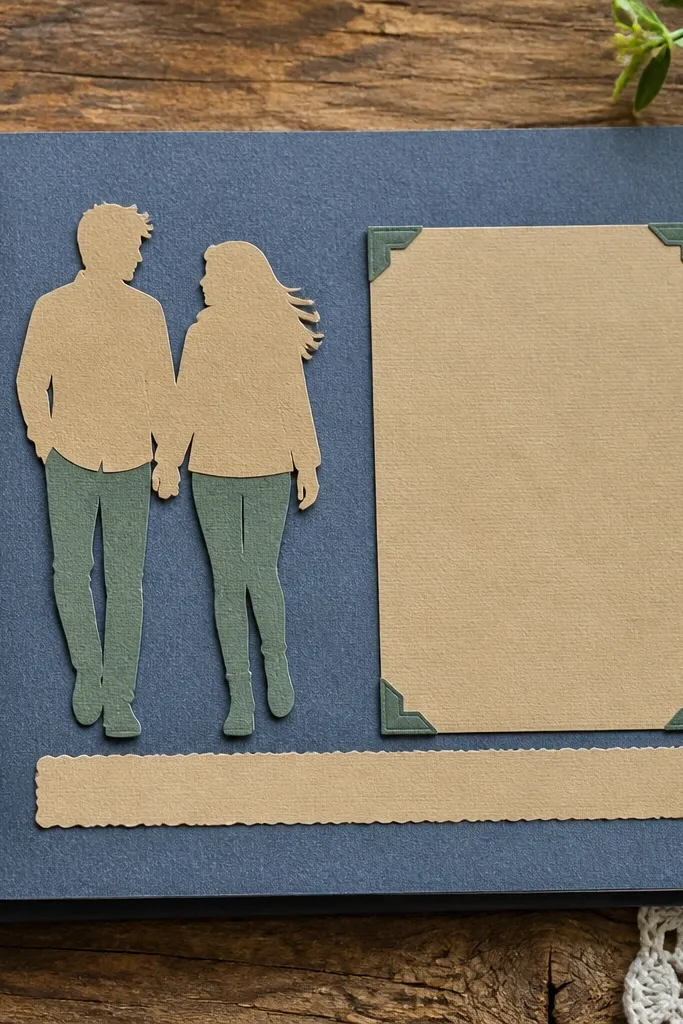
Silhouette pages are one of the most photogenic ways to show “together” without needing perfect photos. You can use printed silhouettes from photos or create simple cutouts from colored cardstock. The shared background makes it read as one scene, not two separate pieces. Add a small journaling strip and one larger photo or a date card, and you get a themed relationship scrapbook page that looks intentional. This works for engagement, moving in, and “we became a team” moments.
Choose a background color that contrasts with your silhouette paper, like deep navy background with cream silhouettes. Create two silhouettes from printed images or by tracing simple profiles onto cardstock, then cut them out cleanly. Position them facing each other with a small gap in the center, then glue them down. Add a date strip below and a small heart shape or coordinate marker near the gap.
Pro tipCut silhouettes with a sharp craft knife and replace the blade often for clean edges.
AvoidDon’t stretch silhouettes too wide — distorted shapes look off in close-up photos.
14. Pressed Flower Edge Frame With Date Label
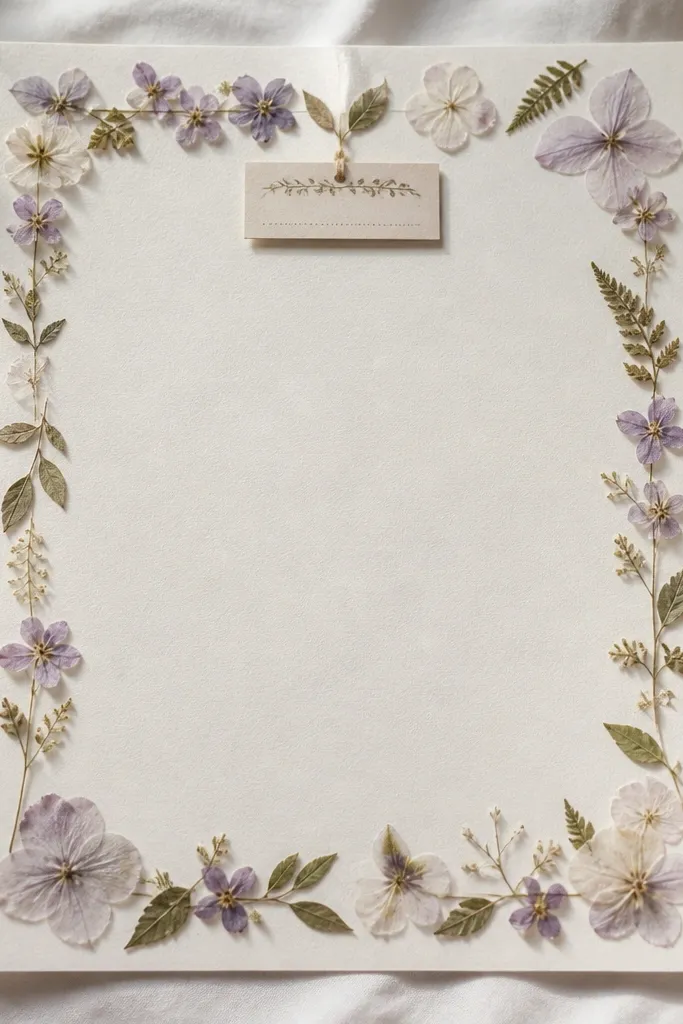
Pressed flower frames look delicate and romantic, and they make your page feel handmade in a good way. The key is keeping the flowers in a thin edge so the center stays readable and photo-friendly. You get a natural texture border, then a simple date label that ties the theme together. This is perfect for spring dates, weddings, and “we met in a garden” kind of memories. It’s also a great way to repurpose small flower bits from events.
Press small flowers between book pages for a few days, then trim them into small pieces if needed. Make a thin border by gluing flowers along the outer edge of your page, leaving the center clear for a photo mat. Add a date label using a small rectangle of cardstock and glue it near a top corner. Seal the flowers lightly with matte medium so they don’t lift.
Pro tipUse tweezers for placement; fingerprints show on delicate petals.
AvoidAvoid thick glue directly on petals — it soaks in and darkens them.
15. Cereal Box Sweetheart Collage Page
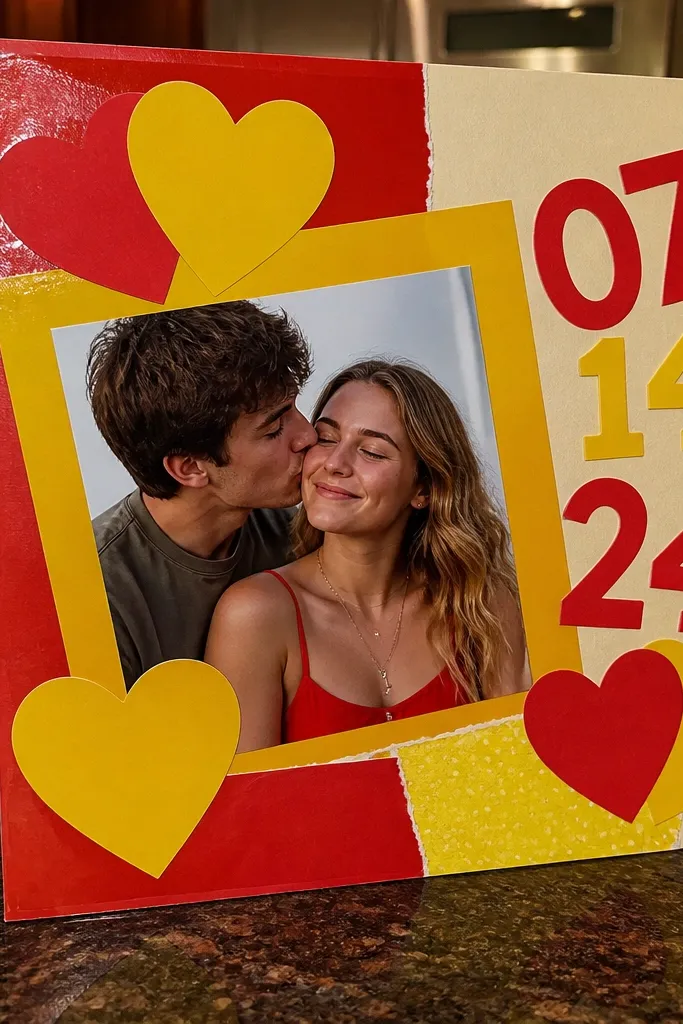
This page is fun because it turns trashy packaging into something cute and graphic. Cereal boxes already have bright colors and typography, so you can cut hearts, date numbers, and candy-like shapes to build a themed composition. The look is bold and photogenic if you keep the palette tight and place one hero photo in the center. It also works when you want a “playful love” vibe that still looks organized. Best for casual milestones and anniversary humor.
Flatten the cereal box cardboard and cut it into a background frame or a full base page. Choose one color family for the collage so it doesn’t look random, then cut heart shapes and small text scraps. Arrange the scraps around a central photo mat, then glue with a strong paper adhesive. Add a clean journaling strip using plain cardstock so the packaging text doesn’t compete.
Pro tipSeal the glossy printed areas with matte medium so the page doesn’t glare in photos.
AvoidDon’t use every color on the box — pick one main color and one accent.
16. Envelope-Flip Love Story Page
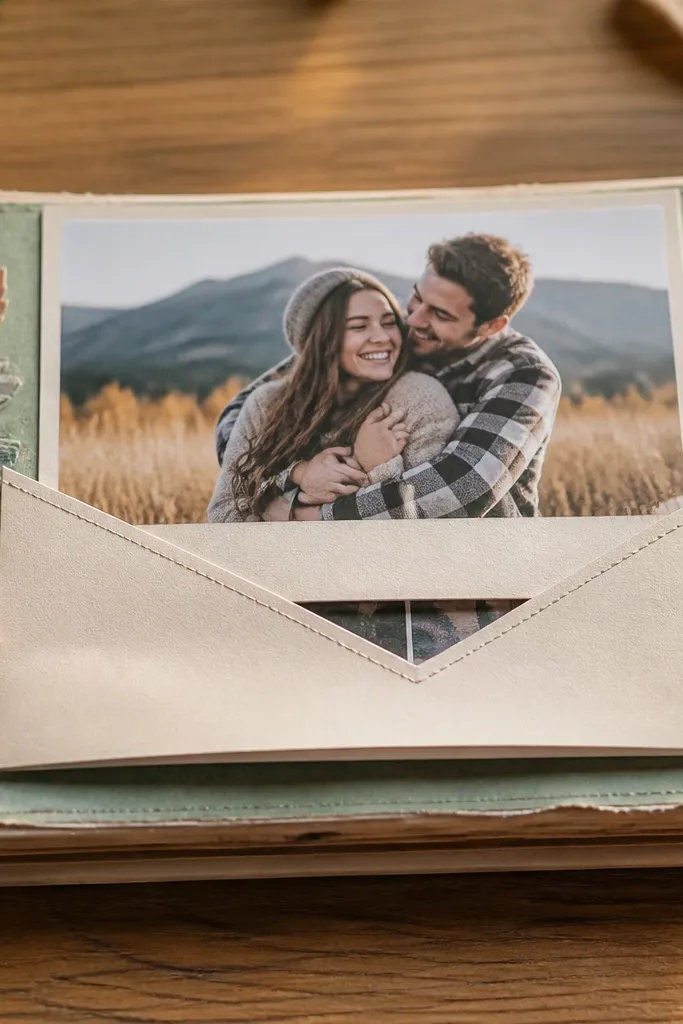
This is interactive, and interactive pages photograph better because they show dimension. An envelope-flip layout lets you tuck a note or mini photo set inside, while the outside stays clean with a single hero photo. The flip gives you a built-in reveal, which makes the scrapbook feel like a keepsake, not just a collage. It’s great for proposals, thank-you notes, and “letter to future us” prompts. Skill level is medium because you’re making folds that need to line up.
Cut an envelope shape from sturdy cardstock with a flap sized to close over the front. Score fold lines so the flap folds flat, then glue the sides and bottom to create a pocket. Decorate the front with a centered photo mat and one small label tag. Inside, add a folded letter and 2 mini photo strips that slide in easily without forcing.
Pro tipTest the flap fit with one mock closure before gluing the final decorations.
AvoidDon’t overstuff the envelope pocket — thick inserts make the flap pop open.
17. Tea Bag Tag Page With Layered Labels
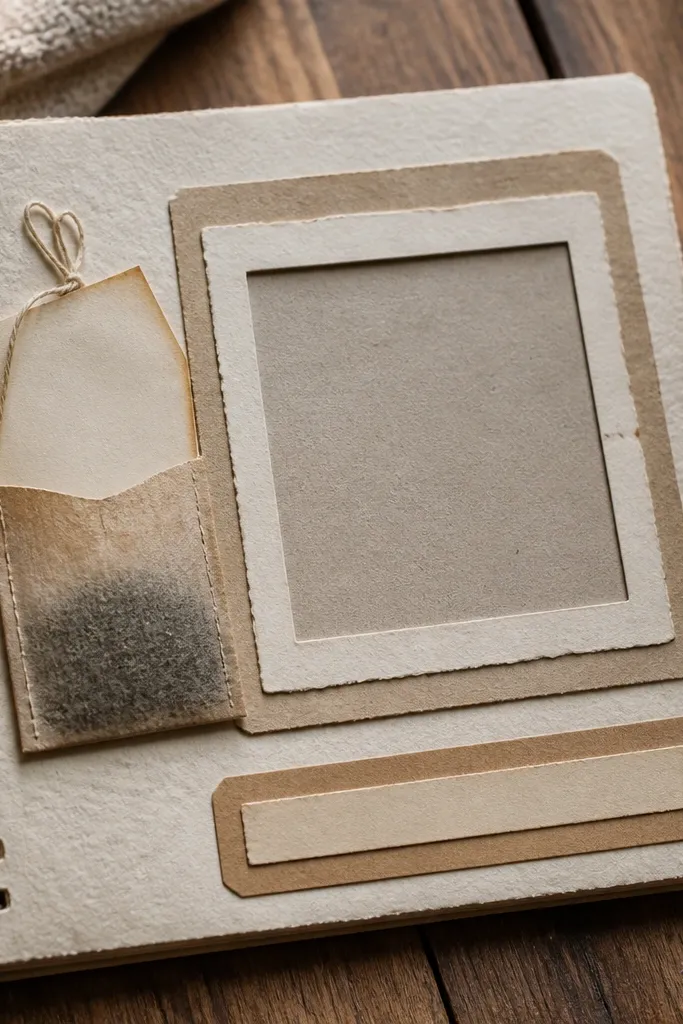
Tea bag paper is thick, textured, and naturally story-like. A tea bag tag page looks cozy and intimate because the pocket shape feels like a secret note. You’ll attach the tag like a bookmark, then place a photo mat on the page so the design stays balanced. It’s a great fit for slow love moments, long-distance routines, and “we talk every night” memories. The look is sweet without relying on lots of stickers.
Cut a tea-bag-sized tag from patterned paper or repurpose a tea bag wrapper, then reinforce it with thin cardstock behind. Punch a small hole at the top and thread a short ribbon or string to create a hanging tag detail. Place a photo mat on the page and glue the tag pocket or tab near the lower corner. Write a short message on a tiny label and stick it on the tag front.
Pro tipUse a matte spray or matte glue on shiny wrappers so they don’t reflect light.
AvoidAvoid slippery plastic-y wrappers — they won’t glue cleanly and peel later.
18. Overlap Heart Photo Mat With Red Thread Stitching
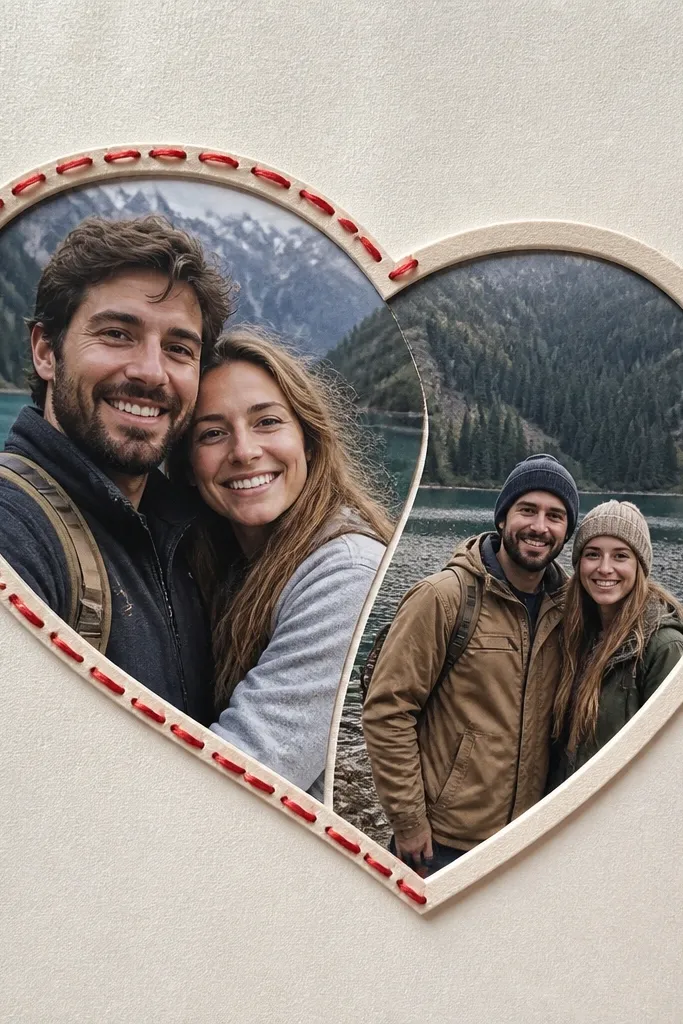
This page is sweet because the heart shape gives instant romance, and the red thread adds a handmade finish. Overlap photo mats let you show two moments in one frame, which is perfect for “first time + second time” stories. Thread stitching also hides small alignment mistakes — you can stitch over slightly crooked lines. It’s photogenic because you get contrast: white paper, a heart outline, and red thread. Skill level is beginner-friendly if you keep the stitching simple.
Cut a heart-shaped mat from thick white cardstock and outline it lightly with pencil. Layer a second heart-shaped cutout behind it to create the overlap effect, then glue the photo edges behind the top layer. Punch small holes along the heart outline using a template, then stitch with red thread using a simple running stitch. Add a small date tag in the corner and glue it down flat.
Pro tipKeep thread tension light so the mat doesn’t warp from pulling.
AvoidDon’t stitch too close to the edge — it can tear the paper when the scrapbook is handled.
19. Board Game Love Scoreboard Page
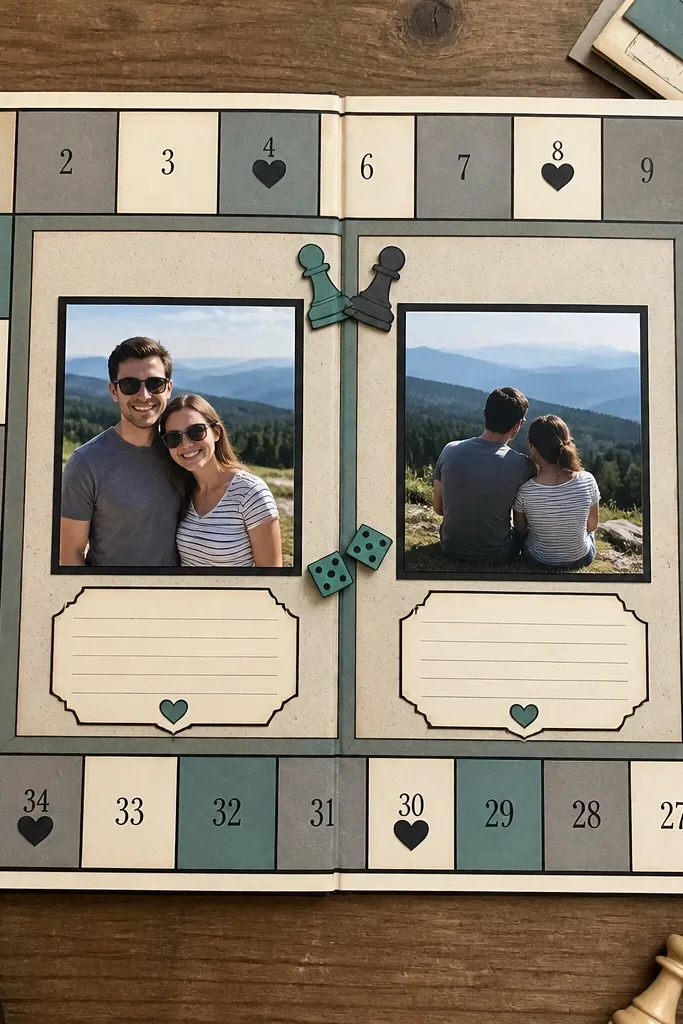
A scoreboard page is playful and very readable, which matters when you want sweet themed pages. You get a grid of numbered boxes that turns memories into “rounds” and makes the page look intentional. Use color blocks and tiny heart icons to tie it to romance without turning it into a sticker mess. This theme works for couples who like games, puzzles, or friendly challenges. It’s also great for “we kept score of good days” journaling.
Draw a grid on cardstock or use pre-cut grid paper, with 6-9 boxes sized for short captions. Color blocks using two main colors and one accent, then add small heart icons in the corners of boxes. Glue a couple photo in the center or top area and place your captions inside the grid boxes. Add a title strip at the top with a simple label like “Round 1” and date it on the side.
Pro tipUse a black gel pen for numbers and captions so the text stays crisp in photos.
AvoidAvoid tiny handwriting — if you can’t read it from a quick glance, it won’t photograph well.
20. Monogram Initials On Upcycled Cardboard Banner
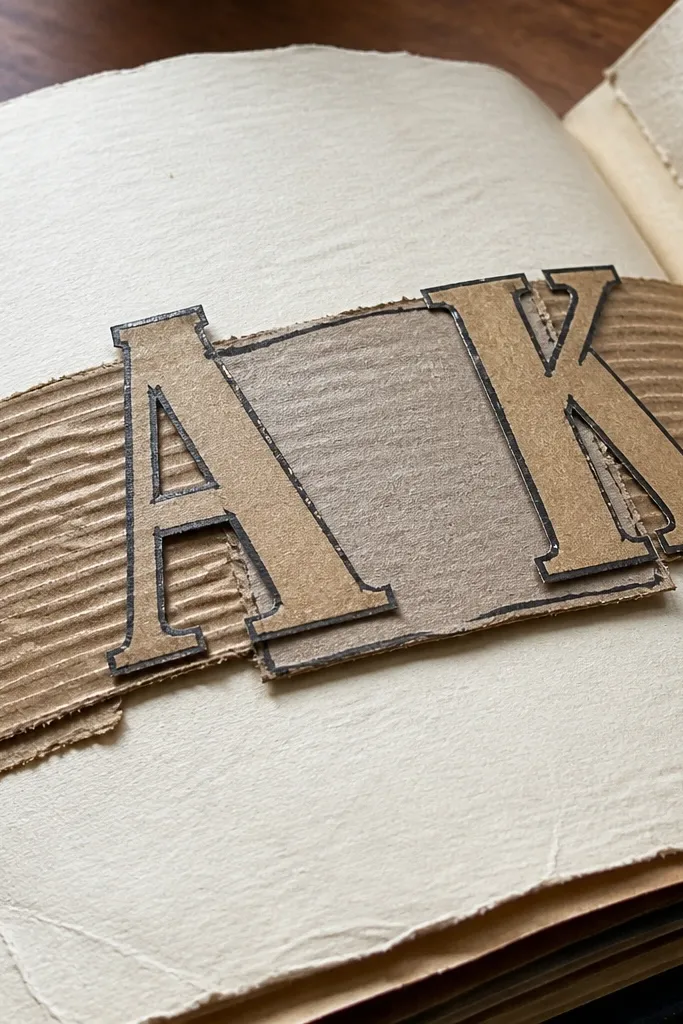
Monogram banners look classy and personal fast. Use upcycled cardboard so you get texture and strength, then cut big initials that frame the page. Add a stitched or outlined detail to make it feel handmade instead of flat. The banner structure is photogenic because it creates a horizontal line that balances a central photo. This theme works for anniversary years, wedding dates, and moving-in milestones.
Cut a long banner strip from cardboard and trim it into a gentle scallop or pointed ends. Cut your initials from thicker paper, then glue them onto the banner. Outline the initials with a pen or stitch holes along the edges and run thread through for a stitched look. Glue the banner across the top third of the scrapbook page and place a photo mat below it.
Pro tipSand the cardboard edges and seal with matte glue so they don’t shed dust on your hands.
AvoidDon’t use flimsy cardboard — thin pieces bend and look uneven under light.



