
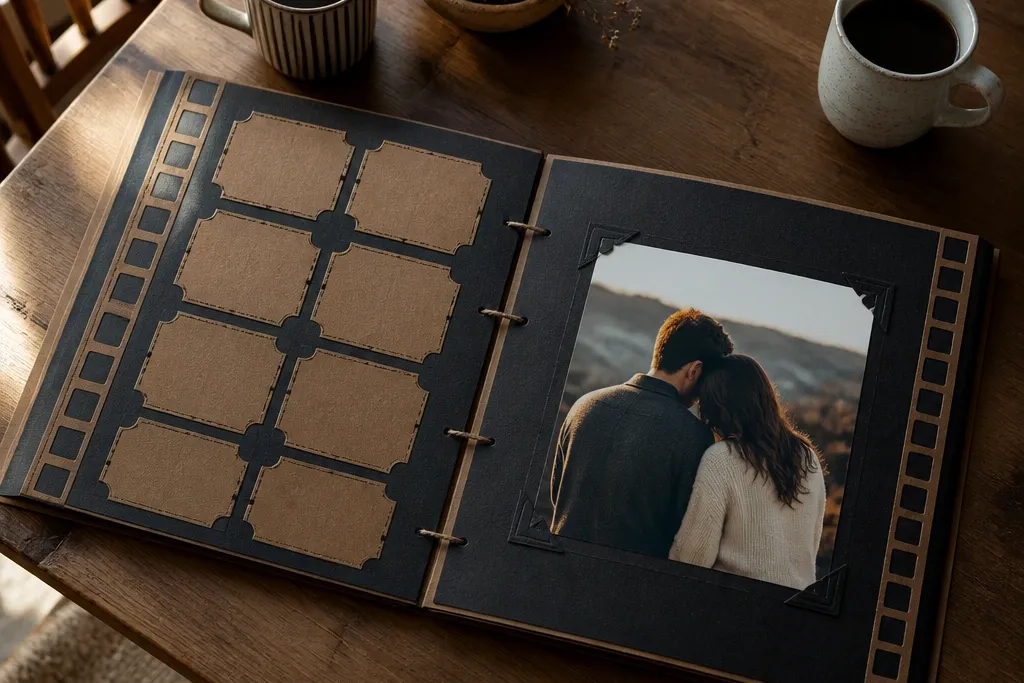

1. Ticket Stub Pocket Row with Matching Film-Strip Borders
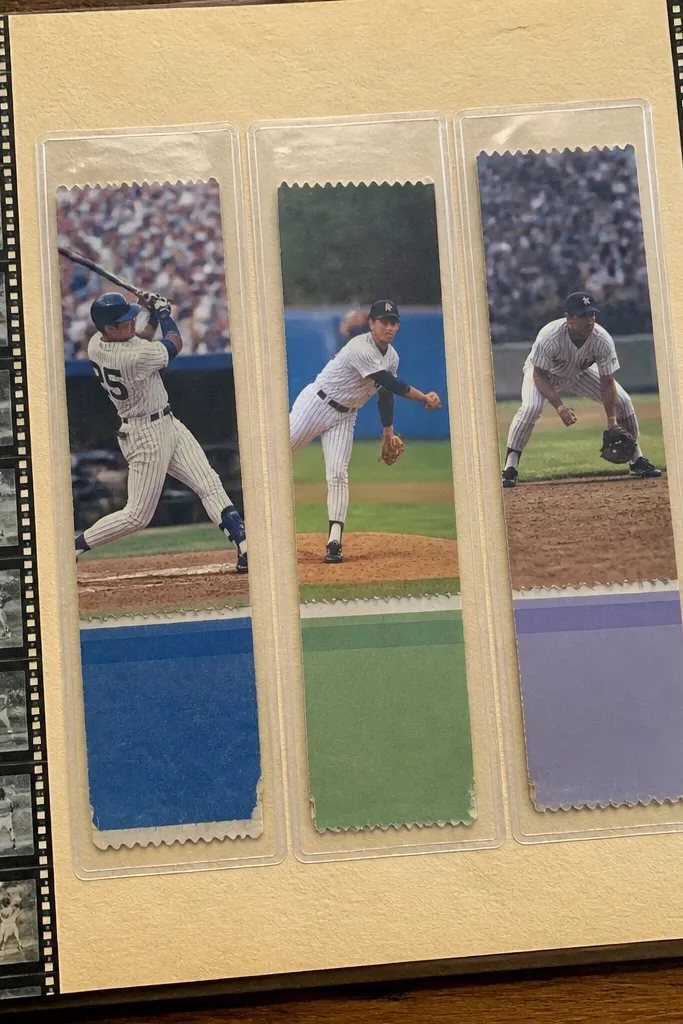
This page looks instantly put-together because the stubs create a vertical rhythm and the film-strip border ties everything together. It’s perfect for year-round couples scrapbook ideas because tickets happen in every season: movies in winter, festivals in summer, museum days in fall. Use one main photo per pocket row — even a phone snap — so the page doesn’t rely on having a full set of perfect pictures. The matte ticket paper plus layered cardstock pockets gives a soft, real-life texture that photographs well.
Start by cutting a base strip of 12x6 inch cardstock and scoring it so it folds into a page pocket panel. Measure your stubs and build 3 to 5 individual pockets from 4x6 inch scrap cardstock, leaving 1/8 inch between pockets for clean edges. Add a film-strip border by punching 1/4 inch circles along two sides of a narrow strip, then glue it behind the pocket panel like a frame. Finish by slipping each ticket into its pocket and adding a small photo beneath each one with a 1/8 inch margin.
Use double-sided tape on the pocket edges so the front stays flat and crisp in photos.
Don’t glue stubs directly to the page — the extra bulk warps the layout.
2. Fabric-Scrap Photo Matting on a Linen Background
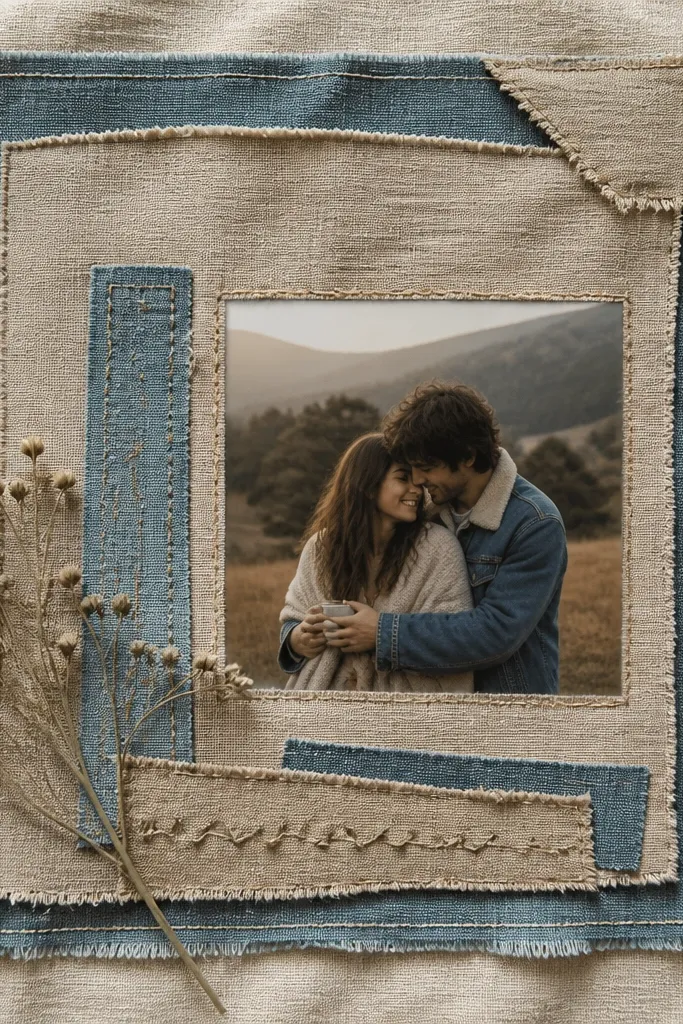
This is one of the cleanest ways to make a scrapbook page look expensive without buying new paper. Fabric scraps add depth and soften the hard edges of cardstock, so your photo sits in a cozy frame. It works year-round because you can pull fabric scraps from old shirts, napkins, or thrifted linens and match the season through color — not through buying new themed supplies. One photo is enough; the fabric matting does the heavy visual lifting.
Cut a background from 8.5x11 inch warm gray cardstock, then cover a rectangle area with a layer of linen-look paper or actual linen fabric using matte medium or fabric glue. Tear or cut fabric scraps into 1 to 2 inch strips and layer them diagonally under the photo opening. Build a photo mat from a 4x6 inch piece of cardstock, then glue it over the fabric edges so the seams disappear. Add a caption strip at the bottom using the same cardstock color as the mat.
Press the fabric down under a book for 20 minutes before attaching the photo mat.
Avoid glossy fabric; it creates glare that kills the look in daylight photos.
3. Pressed Herb Corner + Polaroid-Style Photo Block
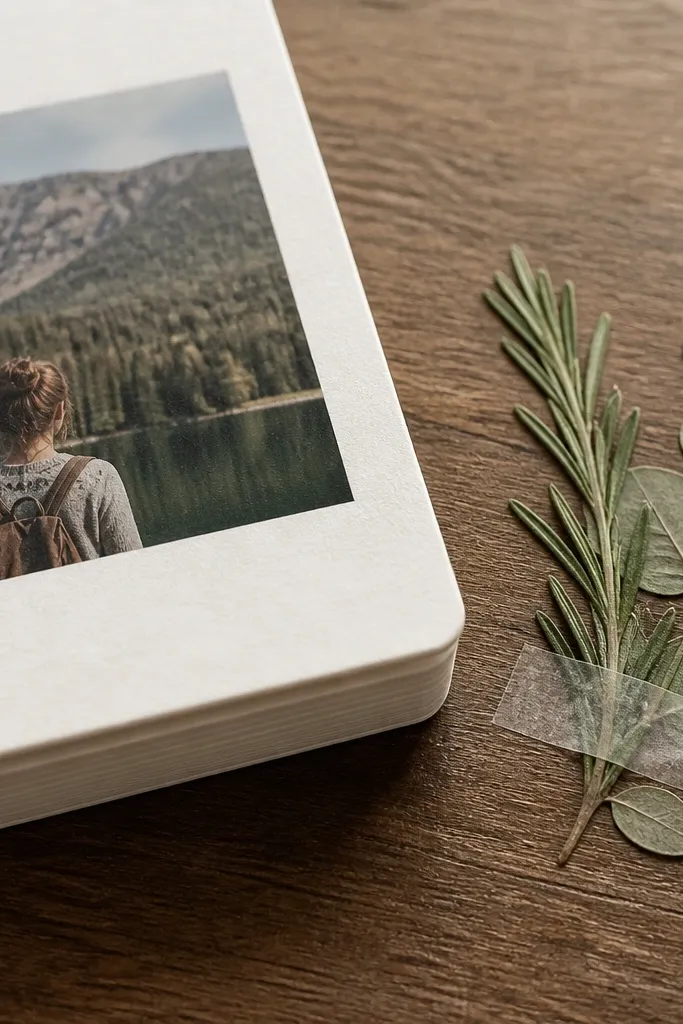
A pressed herb corner gives your page an organic, seasonal texture even when you don’t have new “event” photos. It’s also a great way to use grocery-store herbs or garden clippings you can press quickly. The polaroid-style block keeps the layout modern and photogenic, with thick edges that show up clearly in scans and phone pictures. This idea makes the page feel intentional without needing lots of embellishments.
Pro tipUse a clear label protector over pressed items so they don’t shed bits when you handle the book.
Press herbs between sheets of parchment for 2 to 4 days, then cut them into small pieces that fit the top-right or bottom-left corner of a 5x7 inch area. Cut a polaroid-style frame by making a 4x6 inch photo mat with a 1 inch white border and rounded corners. Glue the pressed herb with a thin layer of matte medium where you want it, then place it behind a clear adhesive label or a tiny scrap of vellum to protect it. Add the photo on foam squares or thick tape so it lifts slightly.
AvoidSkip fresh herbs — they turn brown and warp the page.
4. Old Map Fold-Out with Two Photos and a Route Label
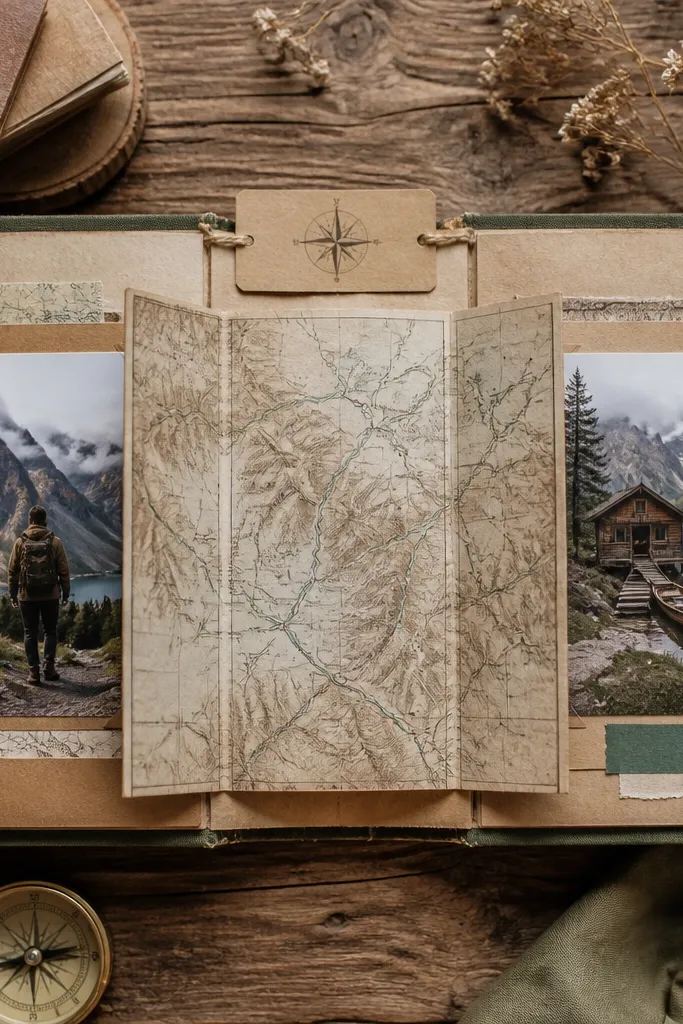
Maps look good year-round because the design is graphic and the color palette stays consistent. This spread gives you structure: a fold-out map panel plus two photo windows that feel like a travel documentary. Use it for dates, road trips, or even “we went nowhere special” days — the route label makes it personal and clean. It’s photogenic because the map texture fills space without needing a lot of extra stickers.
Pro tipSeal map paper with a thin coat of matte medium if it’s thin — it prevents tearing at the fold.
Cut a 6x10 inch panel from old map paper and score a fold in the middle so it opens like a book page. Create two 3x4 inch photo windows by cutting rectangles in a separate 6x10 inch cardstock backing panel. Glue the map panel to the backing so the windows align, then add the photos behind the openings with a 1/8 inch border. Write a route label on a strip of cardstock and glue it across the top fold.
AvoidDon’t use a map that’s too glossy; it reflects light and washes out the photos.
5. Receipt-to-Accordion Timeline in One Color Theme
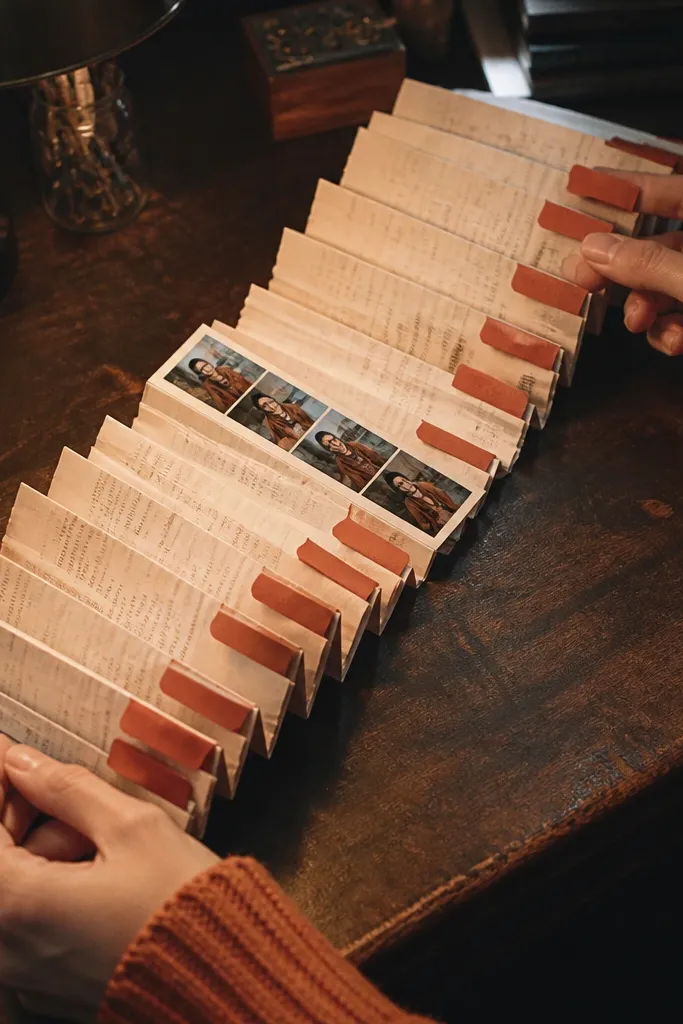
This is a smart “year-round couples scrapbook ideas” format because receipts exist every month, and the accordion structure makes the page fun to flip. The look is clean when you pick one accent color and keep it consistent in your labels. It also helps you tell a timeline without writing a lot; each receipt becomes a mini memory. The accordion adds motion and depth, which reads well in photos.
Pro tipUse a black micro pen for labels so the text stays crisp on receipt paper.
Collect 10 to 14 receipts and press them flat under a heavy book for an hour. Cut long strips of cardstock to match the accordion folds, then score every 1.5 inches so it opens like a fan. Glue receipts onto each accordion segment, leaving a small top margin for a label. Add one small photo per 2 to 3 segments, using photo corners or thin tape so the accordion still folds smoothly.
AvoidDon’t overstuff each accordion panel; it will stop folding flat.
6. Denim Pocket Page with Tiny Stitch-Style Captions
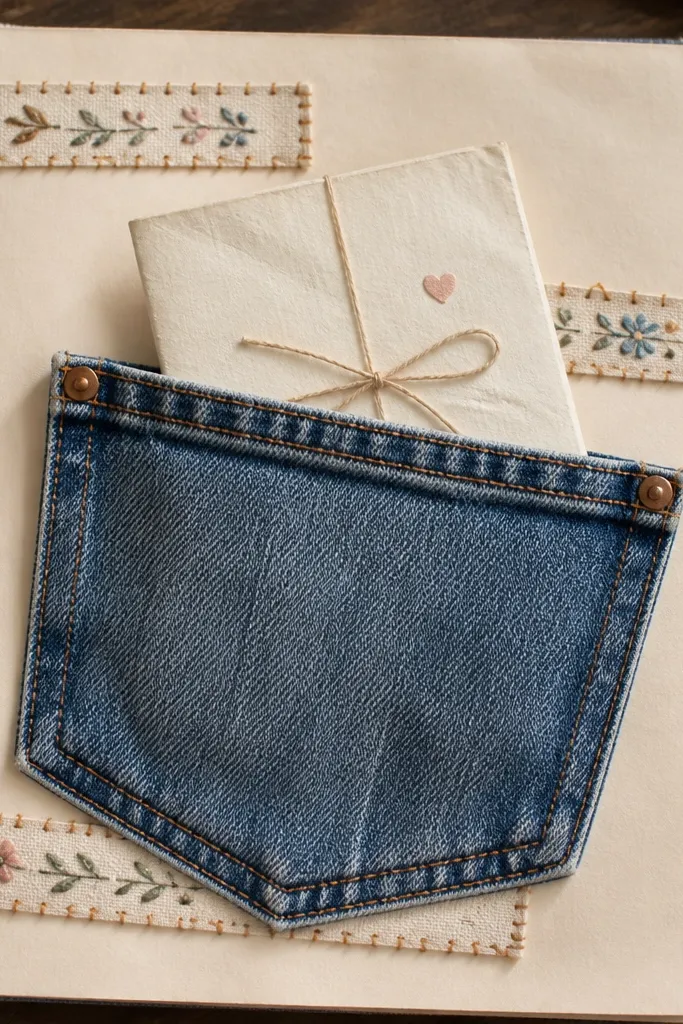
Denim looks great in scrapbooks because it has a built-in texture and it hides small uneven cuts. A pocket page is also functional: you can store a letter, a small print, or a folded grocery card. For couples scrapbooks, this page style screams casual and real — the kind of look that keeps readers leaning in. It works across seasons because denim doesn’t fight your palette; it anchors it.
Cut a denim rectangle about 8x10 inches and stitch or glue it to a cardstock page base slightly off-center. Create a fake pocket by trimming a pocket shape from denim scraps and adding a top seam line with fabric paint or a stitched-look marker. Add a centered 4x6 photo and glue it above the pocket opening. Write tiny captions on narrow strips (about 1/2 inch wide) and attach them with tape so they look like stitched tabs.
Rough up the denim edges with scissors so they look intentionally torn instead of blunt.
Avoid thick layers under the pocket; it makes the page bulkier than it needs to be.
7. Sticker-Resist Watercolor Wash with Photo Silhouette Frames
This is a clean, artsy spread that still fits year-round couples scrapbook ideas because you can match the wash color to any season. The sticker-resist technique makes crisp shapes without needing fancy tools. Use two photo silhouettes or one photo with a cut-out frame so the paint doesn’t overwhelm the story. It’s photogenic because the negative space from stickers creates contrast and makes the photo read instantly.
Tape small sticker shapes or cutouts onto watercolor paper where you want white space. Paint a wash using 2 colors max, keeping the edges slightly uneven for a handmade look. Let it dry completely, then remove stickers to reveal clean negative shapes. Add a photo frame by cutting a rectangle window in cardstock and layering it over the watercolor. Mount the photo behind the window with thin foam tape for lift.
Use a spray bottle to lightly mist the paper before painting if it’s buckling; it helps the wash blend smoothly.
Don’t use more than two paint colors or the background turns muddy.
8. Seasonal Color Swatch Grid with One Big Couples Photo
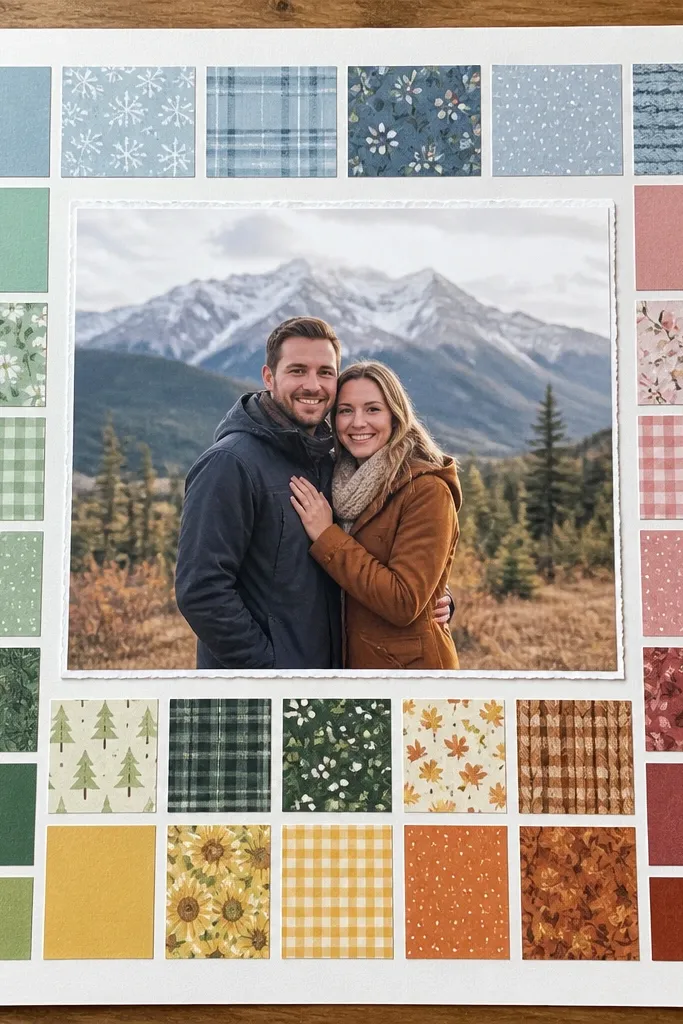
This spread is a design trick: it makes “year-round” feel intentional by organizing the whole year into colors, not dates. The grid is photogenic because it creates a strong pattern behind a single large photo. It works even if you only have one good couples photo from that season. You can keep swatches consistent with fabric scraps, paint samples, or printed paper swatches.
Cut a 9x9 inch grid area from cardstock and mark 3x3 or 4x4 squares with pencil. Collect 9 or 16 swatch pieces from fabric, paint chips, or patterned paper scraps. Glue each swatch into a square and label them with month abbreviations using a small font. Place your big photo in the remaining space or overlay it on top with a clear window frame cut from cardstock.
Choose swatches that share one undertone (warm or cool) so the grid looks cohesive.
Skip random colors; the grid looks best when the tones feel related.
9. Book Page Love Letter Strip with Folded Mini Envelope
A love letter strip gives you something text-forward without turning the page into a wall of writing. Using old book pages adds a vintage look that photographs well and holds up with matte finishes. The mini envelope makes it interactive, and couples scrapbooks feel more personal when there’s a place to store a note or a tiny print. This also works for year-round couples scrapbook ideas because you can write new letters any time.
Cut a 2.5x8 inch strip from an old book page and glue it horizontally across a cardstock base. Create a mini envelope from 6x6 inch scrap paper by folding corners and edges inward; glue only the bottom flap so it opens. Attach the envelope to the strip’s right side with two thin tape tabs. Add a short handwritten date line on the envelope front and mount a small 2x3 photo on the left side of the strip.
Use a ruler for the envelope folds; it keeps the shape crisp in photos.
Don’t use glossy ink on book pages; it smears and ruins the clean look.
10. Monochrome Magazine Cutout Collage with Date Tag
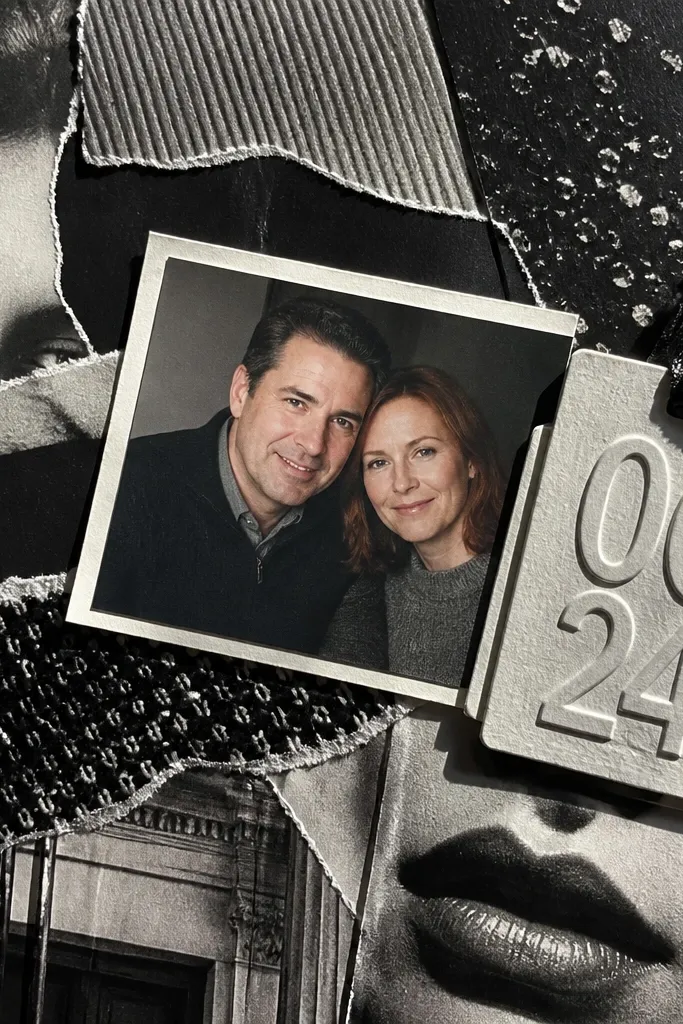
This collage format is a lifesaver when you don’t have great photos. Magazine cutouts give you shapes, typography, and texture, and keeping it monochrome makes it look designed instead of cluttered. Add one date tag and one photo — even if the photo is small — and the page still reads like a story. It’s a strong option for year-round couples scrapbook ideas because you can match the magazine’s vibe to any month.
Choose a monochrome magazine and cut 6 to 10 pieces: tiny headlines, photo frames, and graphic shapes. Arrange them on a 8.5x11 inch cardstock base in a diagonal or stacked cluster, leaving a clear photo spot. Add a date tag by cutting a 2x3 inch cardstock rectangle, rounding the corners, and punching a small hole. Glue cutouts first, then mount the photo last so you can adjust spacing without disturbing the collage.
Lightly sand rough paper edges so they blend and don’t look jagged on camera.
Avoid mixing multiple magazine styles; it turns into visual noise.
11. Coffee Sleeve Wrap Frame for a 4x6 Photo
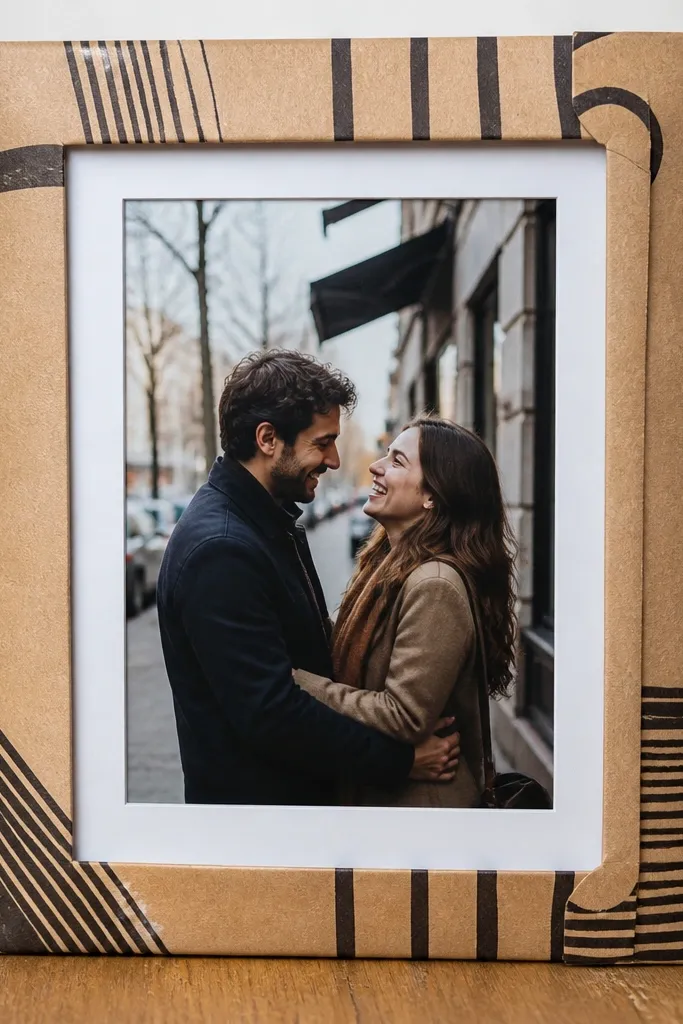
Coffee sleeves are underrated scrapbook material. They’re already sized, they have graphic typography, and they add a real-world texture that looks good in close-ups. Wrap a sleeve around a 4x6 photo mat to create a frame that feels modern and casual. This idea fits year-round couples scrapbook ideas because coffee shops and cafés happen every season, and the sleeve patterns give you instant variety.
Cut a 5x7 inch cardstock base and center a 4x6 photo mat on it. Wrap a coffee sleeve around the mat like a band and trim the ends so they meet cleanly. Glue the sleeve band behind the mat edges so the front looks smooth. Add a small caption strip under the photo using a matching cardstock color, then seal the sleeve with a thin matte medium coat to prevent peeling.
Use a craft knife to trim sleeve edges — scissors leave waves that show up on photos.
Don’t glue the sleeve directly to the photo; keep it on the mat so the photo sits flat.
12. Washed-Out Polka Dot Background with Fabric Bow Corner
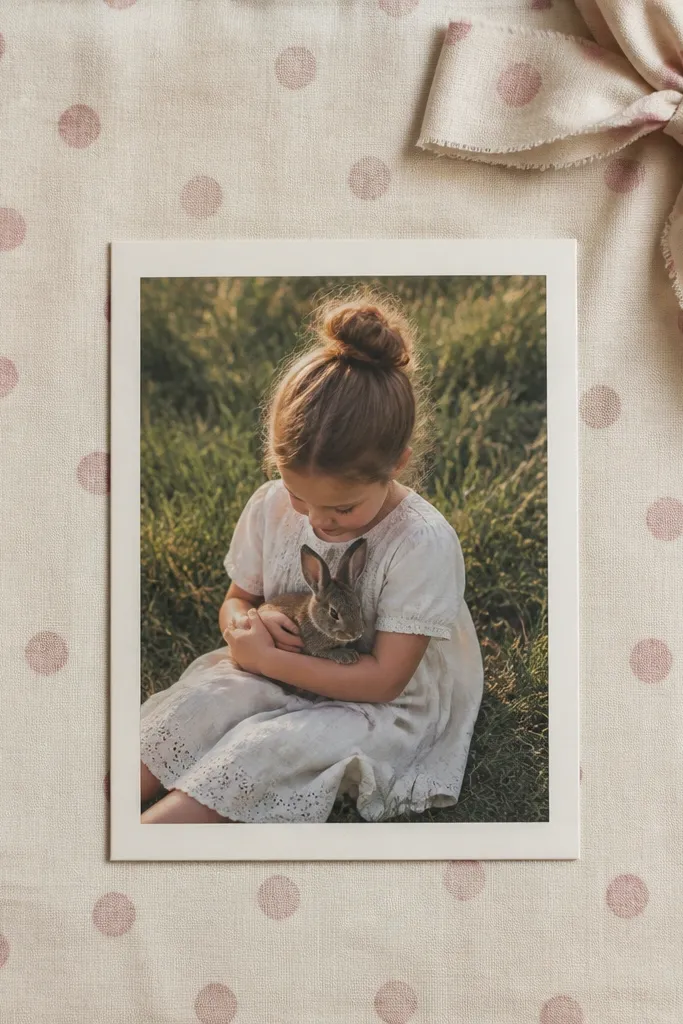
For couples scrapbooks, corners matter. This design uses a soft polka dot background and a fabric bow corner to create a cute, photogenic focal point without filling the whole page. It works year-round because the dots can match any color palette, and the fabric bow can be made from old ribbon or scrap fabric. The bow also helps you hide the end of tape or a small seam if you’re attaching a photo mat.
Pro tipUse watered-down ink so the dots stay airy and don’t overpower the photo.
Create a polka dot background by tapping a stamp or foam dabber lightly with watered-down paint or ink on 8.5x11 inch cardstock. Let it dry, then cut a 4x6 photo mat with rounded corners. Add a fabric bow by cutting two small strips (about 2x6 inches), folding into loops, and gluing them to a narrow center strip. Place the bow in the top-left corner and glue the photo mat slightly off-center so the bow frames it.
AvoidAvoid large dots; small spacing looks more scrapbook-y and less “craft project.”
13. Scrap Cardboard Heart Window with Layered Photo Mats

A heart window made from scrap cardboard gives you instant shape and dimension. It’s photogenic because the cutout creates a clean frame, and the layered mats add depth without needing embellishments. Use it for Valentine season, but it’s also great for anniversaries and random “we felt in love” moments. This page works year-round because the shape is simple and the colors come from your photo and paper palette.
Pro tipSeal raw cardboard with a thin matte medium so it doesn’t look fuzzy in photos.
Trace a heart shape onto a piece of thick scrap cardboard and cut it out carefully with a craft knife on a cutting mat. Paint or cover the cardboard heart window with patterned paper or leave it raw with a light sand for smooth edges. Build two photo mats: one 4x6 and one slightly smaller behind it, then stack them with thin foam tape. Glue the heart window over the top mat so the heart frames the photo center.
AvoidDon’t use thin craft foam for the window; it bows and warps the heart shape.
14. Glue-Pen Doodles on Vellum Over a Photo Stack
Vellum adds that soft, dreamy look without losing sharpness. Raised doodles made with a glue pen create texture that catches light, so the page looks dimensional in real photos and scans. This works for year-round couples scrapbook ideas because you can doodle anything: stars for winter, tiny flowers for spring, simple waves for summer. Keep it minimal: one photo stack and one vellum overlay is enough to make the page feel finished.
Cut a vellum sheet into a rectangle the size of your photo area plus 1/2 inch border. Draw doodles with a glue pen on the vellum, then let it dry fully until it feels firm. Place your main photo on the cardstock base, then add a smaller second photo behind or beside it for a stack effect. Glue the vellum overlay down only at the corners so it lifts slightly in the center.
Press vellum under a flat book overnight before doodling so it stays smooth.
Avoid heavy glue coverage; thick lines crack when you close the book.
15. Popsicle Stick Frame with Twine Hanger for a Mini Print
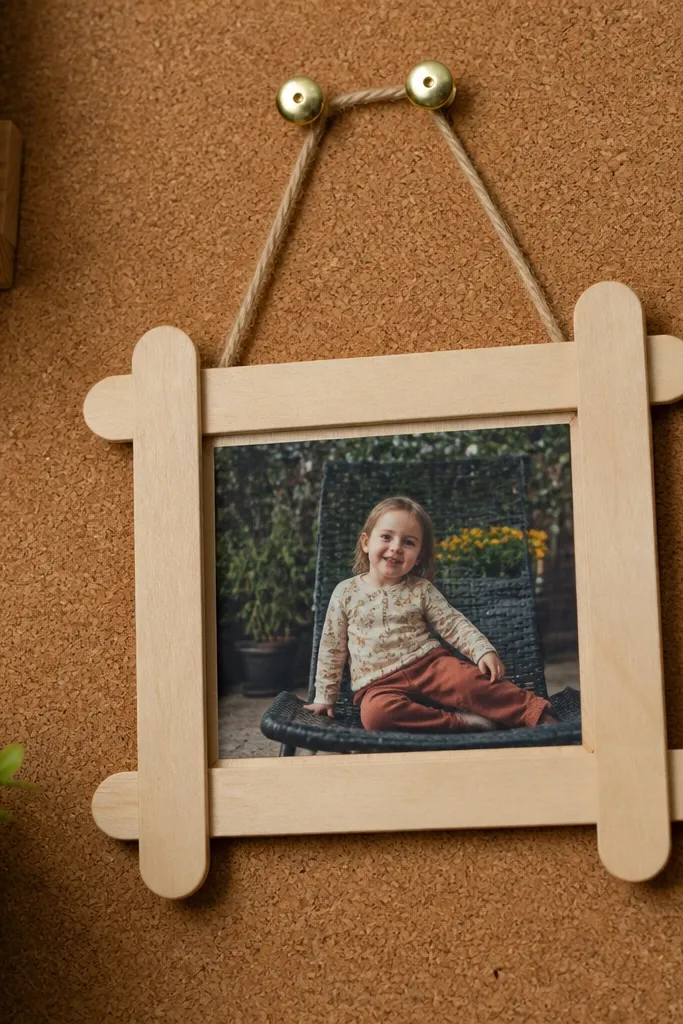
This is a fun, sculptural page that still reads clean. A popsicle-stick frame gives you a modern mini display, and twine makes it feel handmade and cozy. Use it when you have a single mini print from a photo booth, a tiny art print, or a small photo you want to feature. It looks great year-round because you can change the twine color to match the season or event.
Pro tipSand stick edges lightly so the frame looks intentional, not rough.
Cut two popsicle sticks to match your chosen frame size, like 3.5x5 inch, then glue them into a rectangle. Wrap twine around the top and tie it so the frame can be hung slightly above the page. Attach the frame to the scrapbook page with two small glue dots where the twine meets the base. Add a mini print behind the twine by taping it to the inside bottom of the frame and secure with a thin strip of tape on the back.
AvoidDon’t hang it too low; it should clear the next page’s edge when the book closes.
16. Washed Paper Bag Strips with Photo Corners and a Center Caption
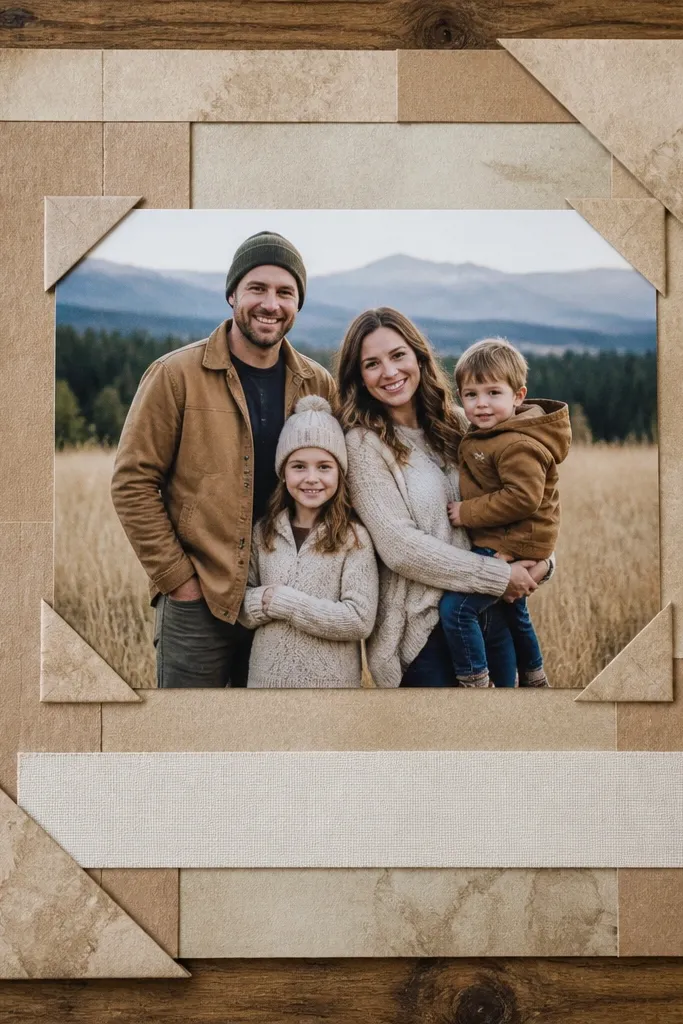
Paper bag textures are matte and forgiving, which makes them perfect for photogenic scrapbook backgrounds. This layout uses bag strips as layered corners around a photo, plus a centered caption strip that keeps the page readable. It’s a strong choice for year-round couples scrapbook ideas because you can dye or paint the bag strips in any season color and still keep the same layout structure. The bag also hides tiny paper imperfections better than many craft papers.
Cut strips from a clean paper grocery bag and lightly wash them with diluted acrylic paint in one accent color. Let them dry flat, then cut 2 to 4 corner pieces that will sit behind your photo. Mount the photo using photo corners or small tape tabs, then glue the bag corner pieces around it like a frame. Add a centered caption strip (about 1 inch tall) and write the date or a short line in a dark pen.
Use a foam brush for the wash so the texture stays visible.
Avoid soaking the bag too long; it turns mushy and tears.
17. Handmade Date Label Repeats with a Single Grid Photo Layout
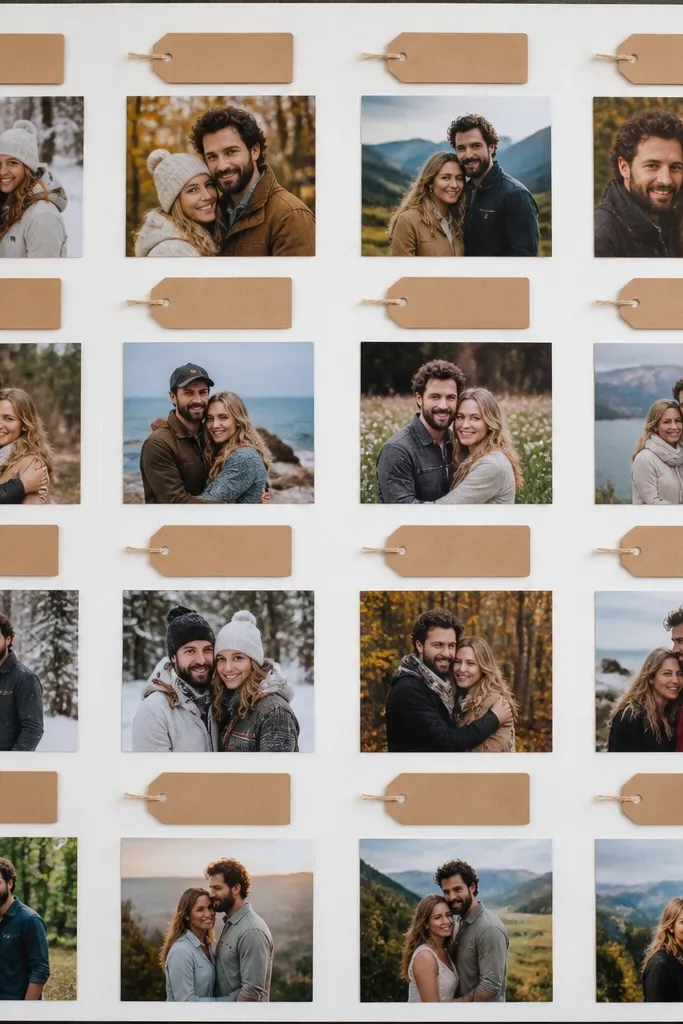
This is the “looks designed” approach when you want multiple photos but not clutter. The repeated date labels create a consistent pattern, while a simple grid keeps the page tidy. It’s perfect for year-round couples scrapbook ideas because you can reuse the same label template for every month and just swap the photos. Keep it to one photo size grid and one label style so the scrapbook reads like a coherent set.
Cut a page base and map a 2x3 or 3x3 photo grid using pencil marks. Create a label template from cardstock: 2x2 inch squares with a notch or rounded corners so they look consistent. Cut 4 to 6 labels and glue them above columns or rows, then write dates with a fine tip pen. Place your photos in the grid with thin tape, and add one small title line in the bottom margin.
Make labels first, then place photos; you’ll keep spacing even.
Don’t mix label shapes on the same page; it breaks the pattern.
18. Thrifted Lace Trim Frame with One Center Photo
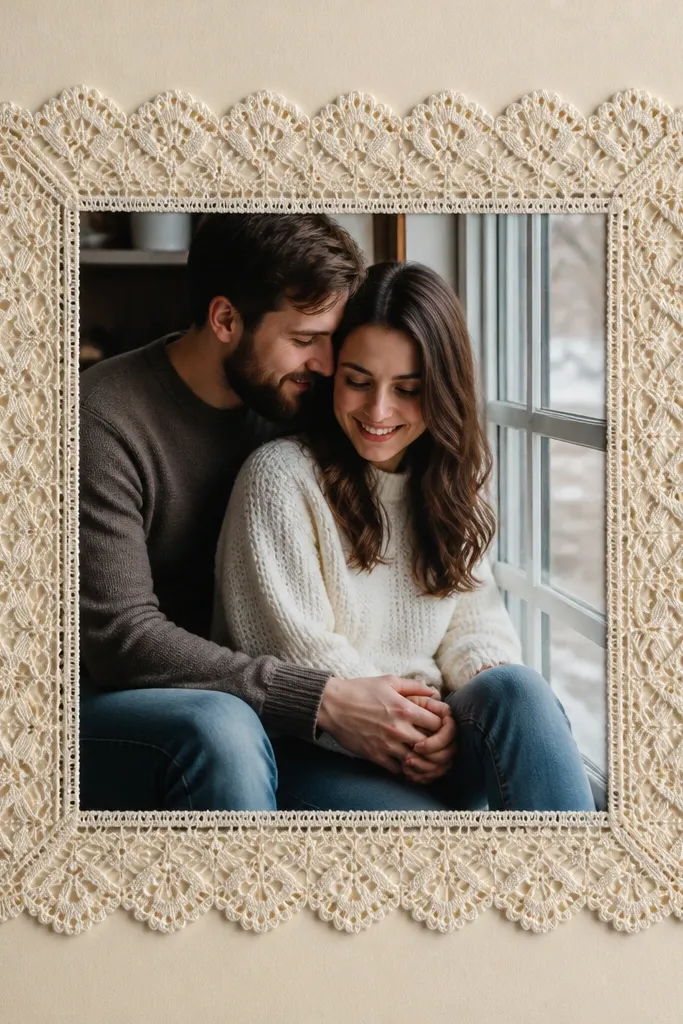
Lace trim looks romantic without turning into cliché when you use it as a clean frame. One center photo plus a lace border gives you a soft, high-contrast look against solid cardstock. This works year-round because lace is neutral — you can pair it with any color palette from your photos. The texture is visible in photos, and the page feels finished even with minimal writing.
Pro tipWash and dry lace first so it lies flat and doesn’t shrink later.
Choose a solid cardstock base and cut a rectangle opening for your photo, like 4x6 with 1/4 inch border. Lay lace trim around the opening and trim it to fit, leaving small gaps so it doesn’t bunch. Glue lace only at the back edges with fabric glue or a thin line of matte medium. Mount the photo behind the opening and add a narrow caption strip underneath using the same color as the cardstock.
AvoidAvoid thick glue blobs; they show through the lace in bright light.
19. Mini Polaroid Magnet Cards on the Page Spine
Magnet-style mini cards make the scrapbook feel interactive, and they photograph like a display wall. You’re not relying on a single big layout; instead, you get several small, tidy photo moments. This fits year-round couples scrapbook ideas because you can add new mini cards whenever you print photos or save small keepsakes. The look is cohesive when you use the same size card and the same photo mat style each time.
Pro tipCover magnet sheets with cardstock so they don’t shed metal dust onto your photos.
Cut several mini cards from cardstock, like 3x4 inches, and make a photo frame window on the front. Back each card with a small adhesive magnet sheet, then attach the opposite magnet strip to the scrapbook page spine area. Place the mini photo behind the window and secure it with a thin tape hinge at the back. Add a small date printed on label paper on the card bottom so each one reads clearly.
AvoidDon’t use strong magnets if the page is thin; they can warp it over time.
20. Citrus Slice Paper Confetti with Photo Backdrop
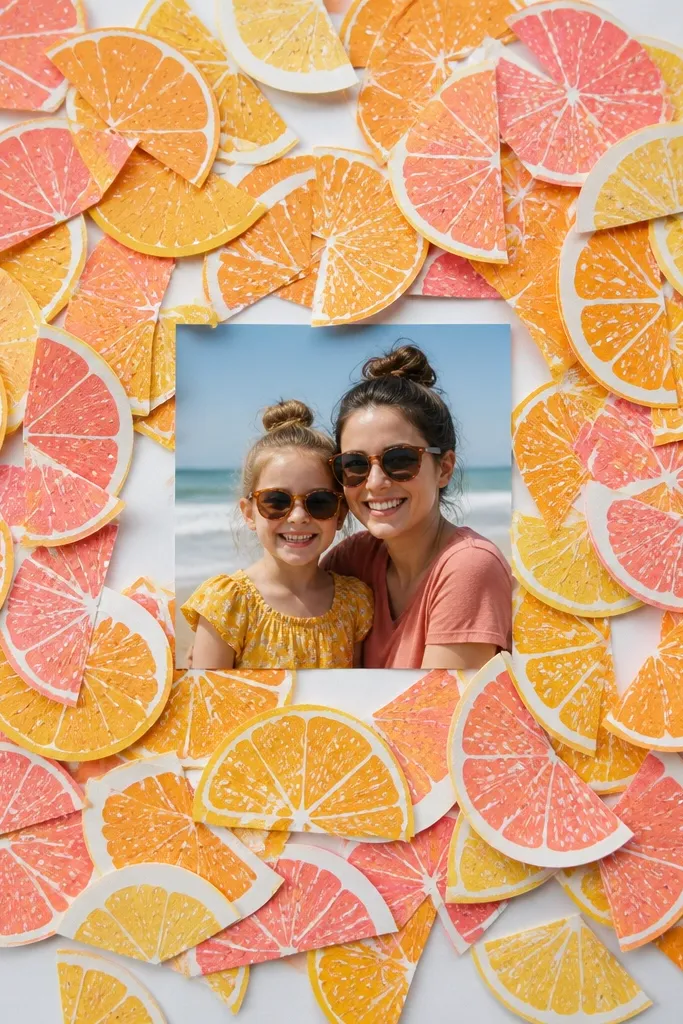
Paper citrus slices give you bright color without needing summer-only supplies. This spread looks lively because the confetti slices create a layered backdrop behind a single photo, and the cutout shapes are easy to style. It’s a great choice for year-round couples scrapbook ideas because you can switch the fruit theme: oranges for fall, lemons for spring, berries for winter. The design reads as seasonal even when the rest of your scrapbook is consistent.
Pro tipKeep slices varied in size (1/2 inch to 1 inch) so the background feels organic.
Cut citrus slices from cardstock using a template or freehand circles sliced into wedges. Color the slices with marker edges for depth and add a small “segment” line with a fine pen. Glue slices in a loose scatter behind your photo area on a solid base cardstock. Add the photo on top with thin foam tape so the confetti stays visible around the edges.
AvoidDon’t glue slices directly under the photo edges; it can make the photo look crooked.
21. Black Cardstock Skyline with White Photo Cutouts
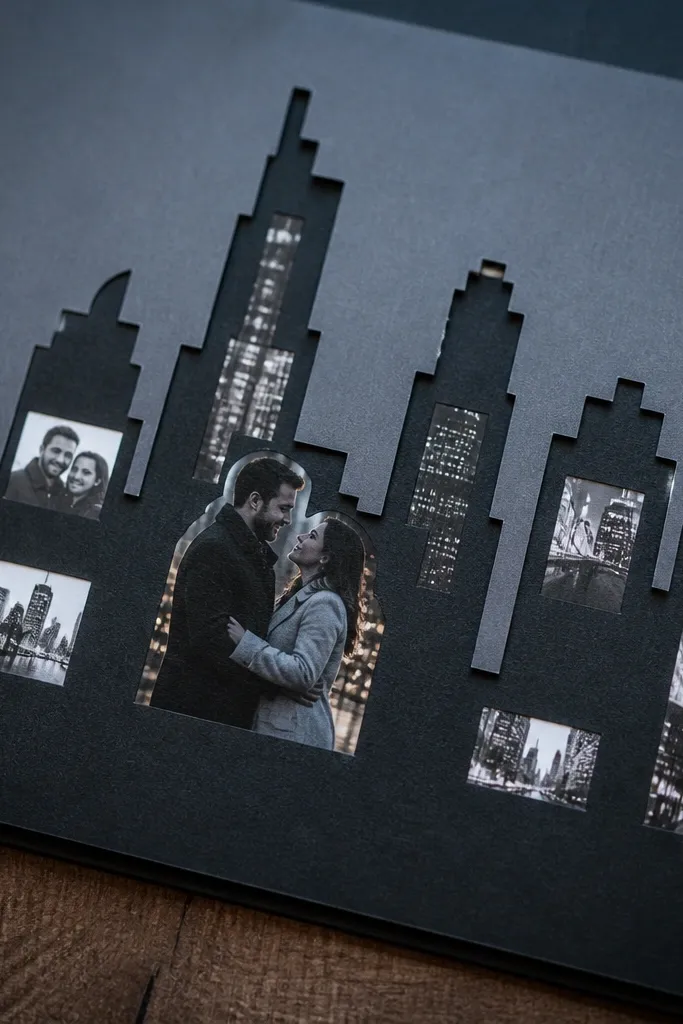
A black skyline silhouette makes any couple photo look dramatic, like a night memory. The trick is white photo cutouts with clean edges so the page stays modern and high-contrast. This works year-round because city silhouettes fit any season, and you can tint the skyline with subtle color wash if you want. It’s photogenic because the contrast makes the photos pop even in darker lighting.
Cut a skyline silhouette from black cardstock using a printed template or layered freehand shapes. Glue the skyline to a page base, then cut your photo into a white-matted rectangle using a craft knife. Layer the photo mat in front of the skyline so it looks like it’s framed by the city. Add a thin strip of caption text in a light color at the bottom for balance.
Use a white gel pen to add tiny “window” dots on the skyline for extra texture.
Avoid fuzzy photo edges; clean cuts are what make this design look intentional.
22. Grocery List Chalkboard Labels with Photo Strip
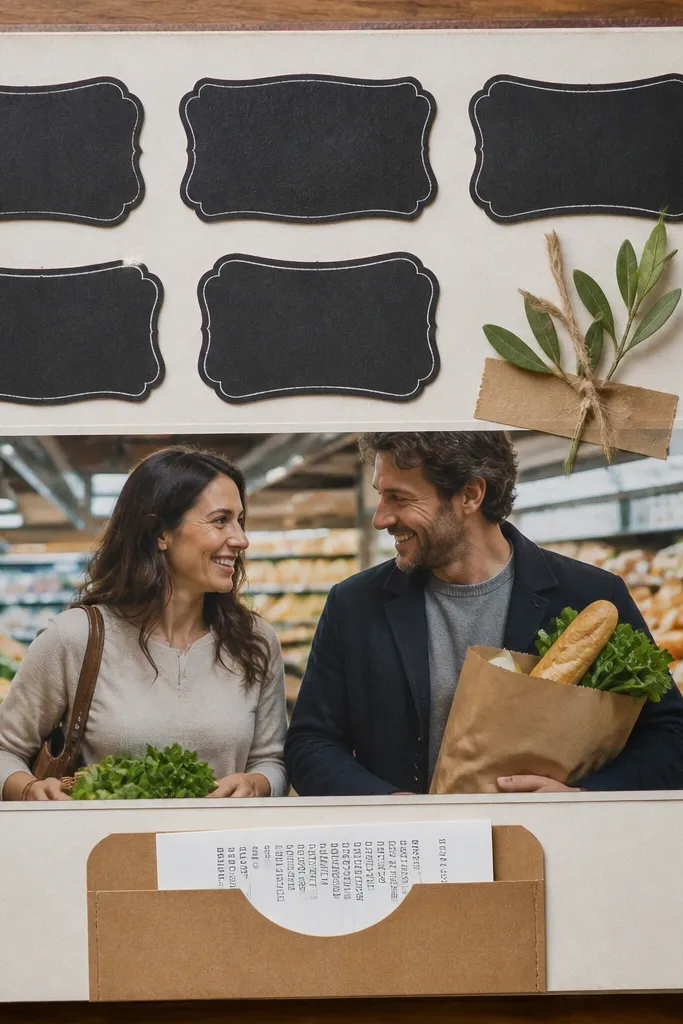
Chalkboard-style labels give you a cozy, homey scrapbook look that still photographs clean. Pair that with a horizontal photo strip and the page feels organized without being stiff. This is great for year-round couples scrapbook ideas because grocery trips and home days happen all year, and the label style stays the same while the content changes. The matte chalk effect reduces glare compared to glossy sticker sheets.
Cut a cardstock base and paint a rectangle label area with chalkboard paint or DIY chalkboard texture using dark matte paint. Let it cure fully, then write text with chalk or a chalk marker. Create a photo strip by mounting 3 photos in a row with 1/8 inch gaps, then glue the strip slightly above the label area. Add one longer caption line on the chalkboard label and date it.
Seal the rest of the page with matte medium if you used paint; it keeps everything looking consistent.
Don’t put chalk directly on bare glossy paper; it smears when you flip the book.
23. Map Coordinates Bookmark Page with Photo Pocket
A coordinates bookmark page makes your scrapbook feel like a keepsake, and it’s practical for year-round couples scrapbook ideas. You’re not adding extra clutter; you’re creating a functional element that stores a small photo or note. The coordinates look great because they’re neat and graphic, and the bookmark shape adds a vertical visual line. This works for any date location: home, beach, restaurant, or a street you walked during winter.
Pro tipUse a ruler to keep coordinate numbers aligned; uneven text looks messy in close-up photos.
Cut a bookmark strip from thick cardstock, around 2.5x7 inches, with a small notch at the top. Write coordinates on the front using a fine pen, then glue a thin strip of patterned paper behind the notch area for contrast. Create a small pocket on the main page base using a 3.5x4 inch cardstock rectangle folded into a pocket. Mount the bookmark strip to the side of the page so it tucks against the pocket opening, then slide a 2x3 photo or folded note into the pocket.
AvoidSkip thin paper bookmarks; they bend and ruin the clean shape.
24. Layered Leaf Collage with Vellum Vein Overlay
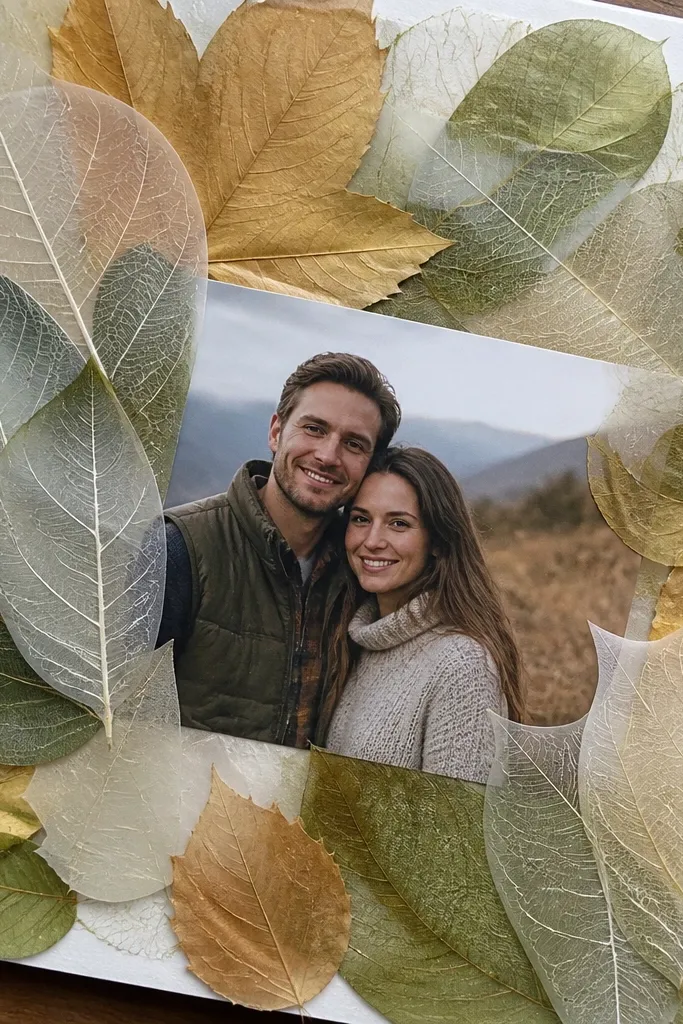
Leaf collages look stunning in scrapbooks because they bring natural shapes and delicate texture. Layered leaves plus a vellum vein overlay adds light-catching detail without making the page busy. It’s a strong choice for year-round couples scrapbook ideas because you can use different leaf colors and shapes across seasons while keeping the layout consistent. The page reads like art, but it’s still built from simple materials.
Collect flat leaves or use pressed leaf paper, then cut 3 to 7 leaf shapes from them in different sizes. Cut a vellum layer slightly larger than your photo area and lightly draw vein lines with a fine marker. Glue the pressed leaf shapes onto the cardstock base, then place the vellum vein layer over them like a translucent top. Add your photo on foam tape so it sits above the leaf texture, then add a small caption strip at the bottom.
Photograph the page in indirect light; leaf texture shows best without harsh glare.
Avoid wet leaves — they stain and warp under adhesive.
25. Thrifted Postcard Frame with Corner Tape Hinges
Postcards are built for scrapbook pages. They already have a border, a graphic layout, and a travel vibe that fits couples memories perfectly. Using corner tape hinges lets you slide a photo or note in and out, so the page stays interactive over time. This is a great year-round option because you can use postcards from any season and keep the same frame layout for every spread. It looks clean because the postcard border does the design work.
Choose a postcard size that matches your photo, then trim the postcard to create a frame opening window. Glue the postcard frame to a cardstock base, leaving the inside open. Mount your photo behind the opening using two corner tape hinges so the photo can be replaced later. Add a small date stamp or handwritten date on the postcard bottom edge, and reinforce the back with tape if the cardstock is thin.
If the postcard is glossy, scuff it lightly with fine sandpaper so tape sticks cleanly.
Don’t glue the photo all the way down; you lose the interactive “swap” effect.



