
1 Two-Shape Standing Deer
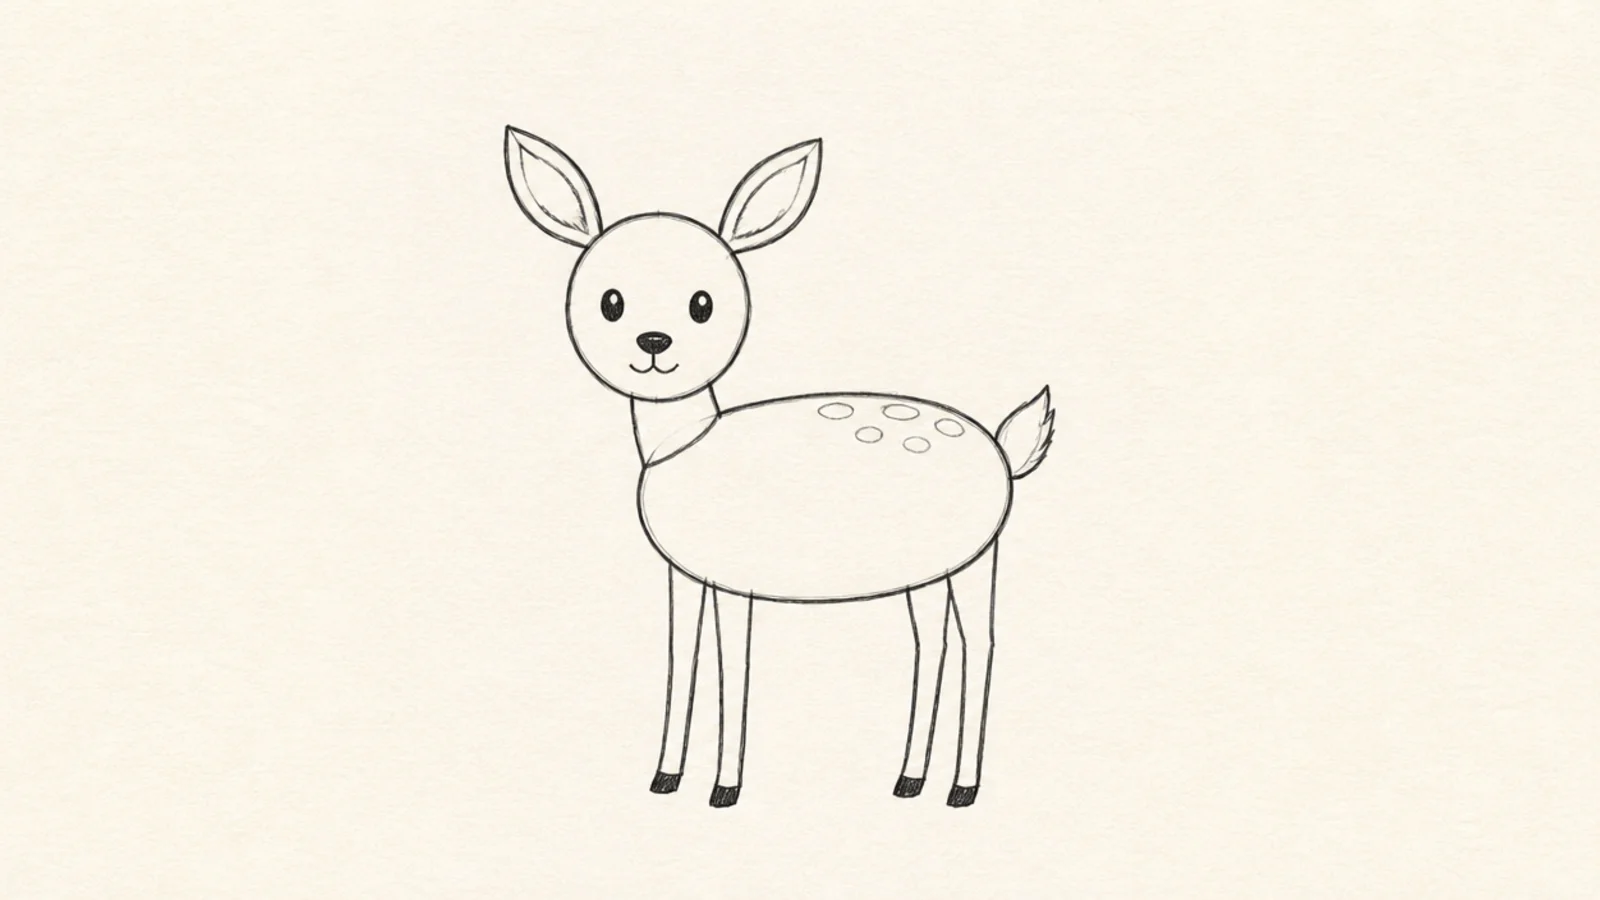
This is the simplest deer possible — one oval, one circle, and four sticks. It looks clean because there is nothing to overcomplicate. It is the perfect first attempt and the base for everything else on this list.
Step 1 draw a horizontal oval for the body. Step 2 add a circle head above and connect it with a short neck. Step 3 drop four thin straight legs and add two ears and a tiny tail.
Keep the head circle about half the width of the body oval so the proportions feel right.
Don’t draw the legs thick; deer legs are thin, so keep them slim lines.
2 Curled Sitting Fawn
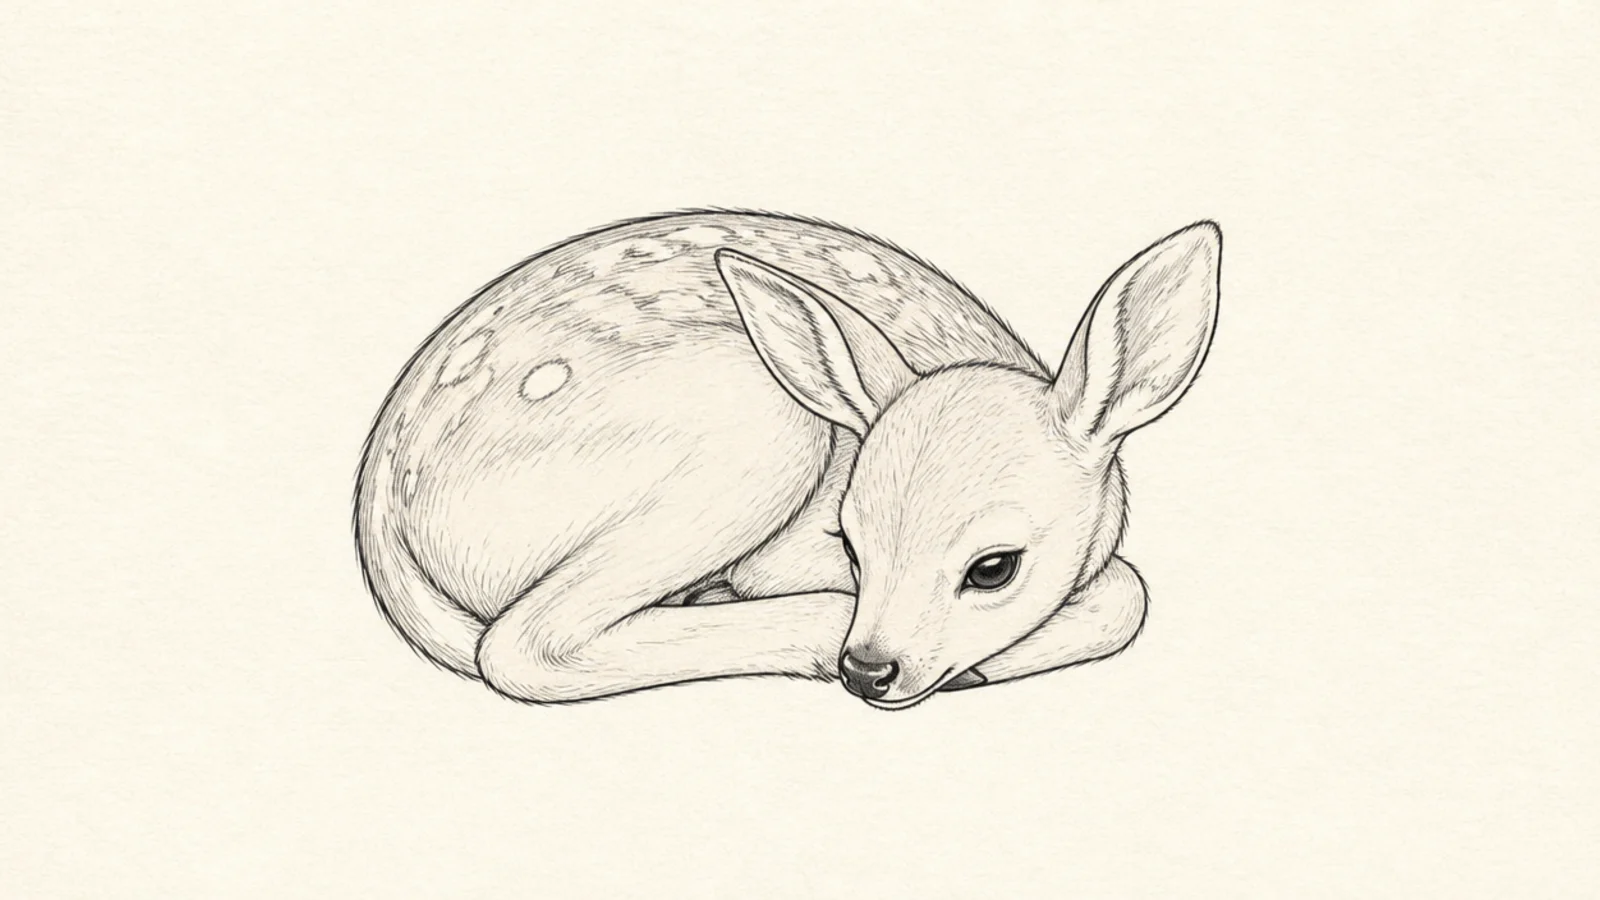
Step 1 draw a big rounded kidney-bean shape for the tucked body. Step 2 add the head resting on top at one end. Step 3 suggest the folded legs with a couple of curved lines and dot a few spots on the back.
A curled-up fawn hides all four legs, so there is almost nothing tricky to draw. The tucked pose is cozy and beginner-friendly. It teaches you to draw a deer as one soft rounded shape.
AvoidDon’t draw straight legs here; the whole charm is the tucked, curled shape.
Pro tipRest the chin low toward the front legs so the fawn looks calm and sleepy.
3 Front-Facing Deer Head
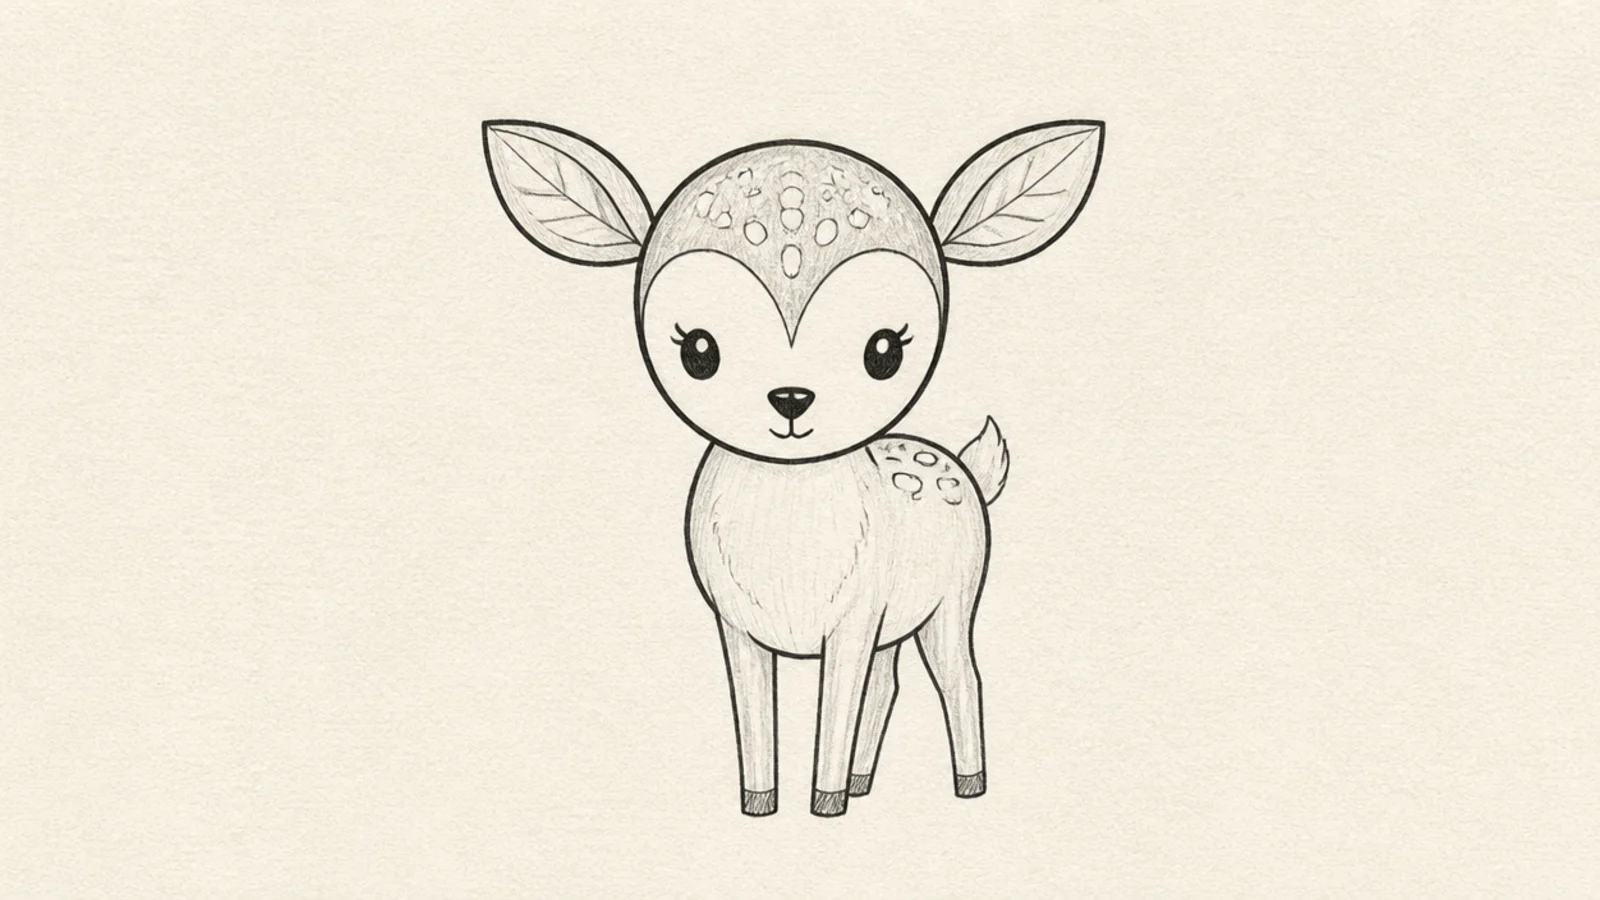
Step 1 draw a rounded heart or shield shape for the face, wider at the top. Step 2 add two big leaf-shaped ears out to the sides. Step 3 place two oval eyes, a small triangle nose, and a soft muzzle line.
A head-on deer face is basically a rounded heart shape with two ears and two eyes. Skipping the body makes this one of the easiest deer to draw. It is a great warm-up for portraits.
AvoidDon’t make the muzzle too long; a short soft nose looks gentler and easier.
Pro tipSet the eyes wide apart on the sides of the face, not close together in the middle.
4 Jelly-Bean Body Deer
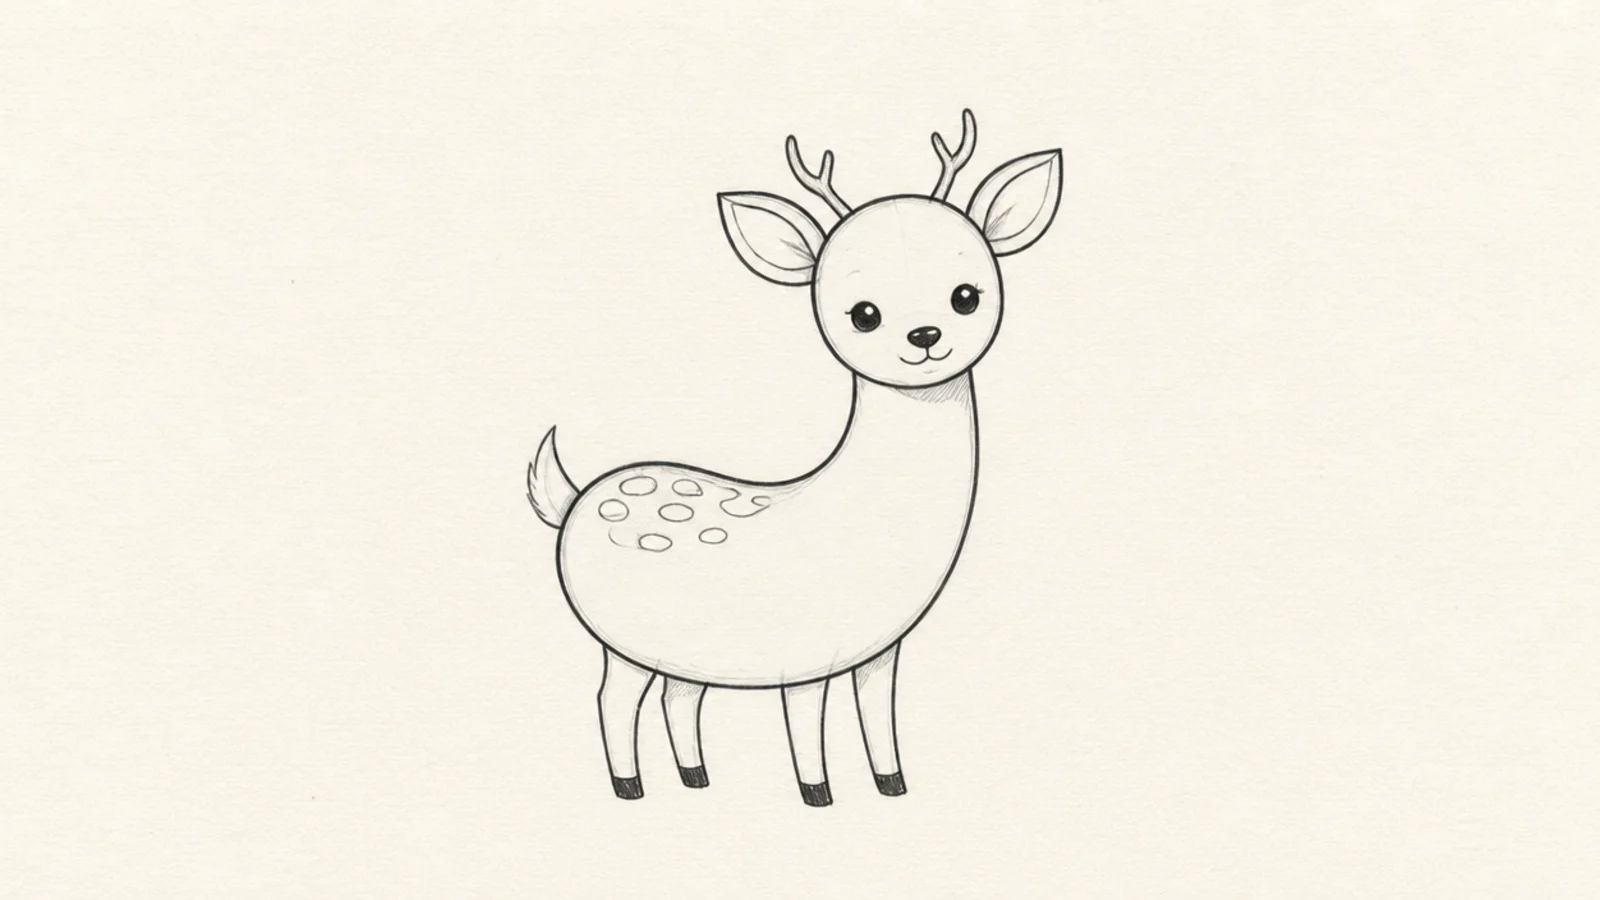
Drawing the whole body as one curved jelly-bean shape gives a soft, cartoony deer in seconds. The single sweeping outline is very forgiving. It is a friendly, huggable look.
Step 1 draw one curved bean shape that rises into the neck at the front. Step 2 add a small rounded head at the top of the rise. Step 3 add four short legs and two ears.
Let the back curve smoothly up into the neck in one line so it looks soft.
Don’t add hard angles; the appeal here is the smooth continuous curve.
5 Walking Deer Side View
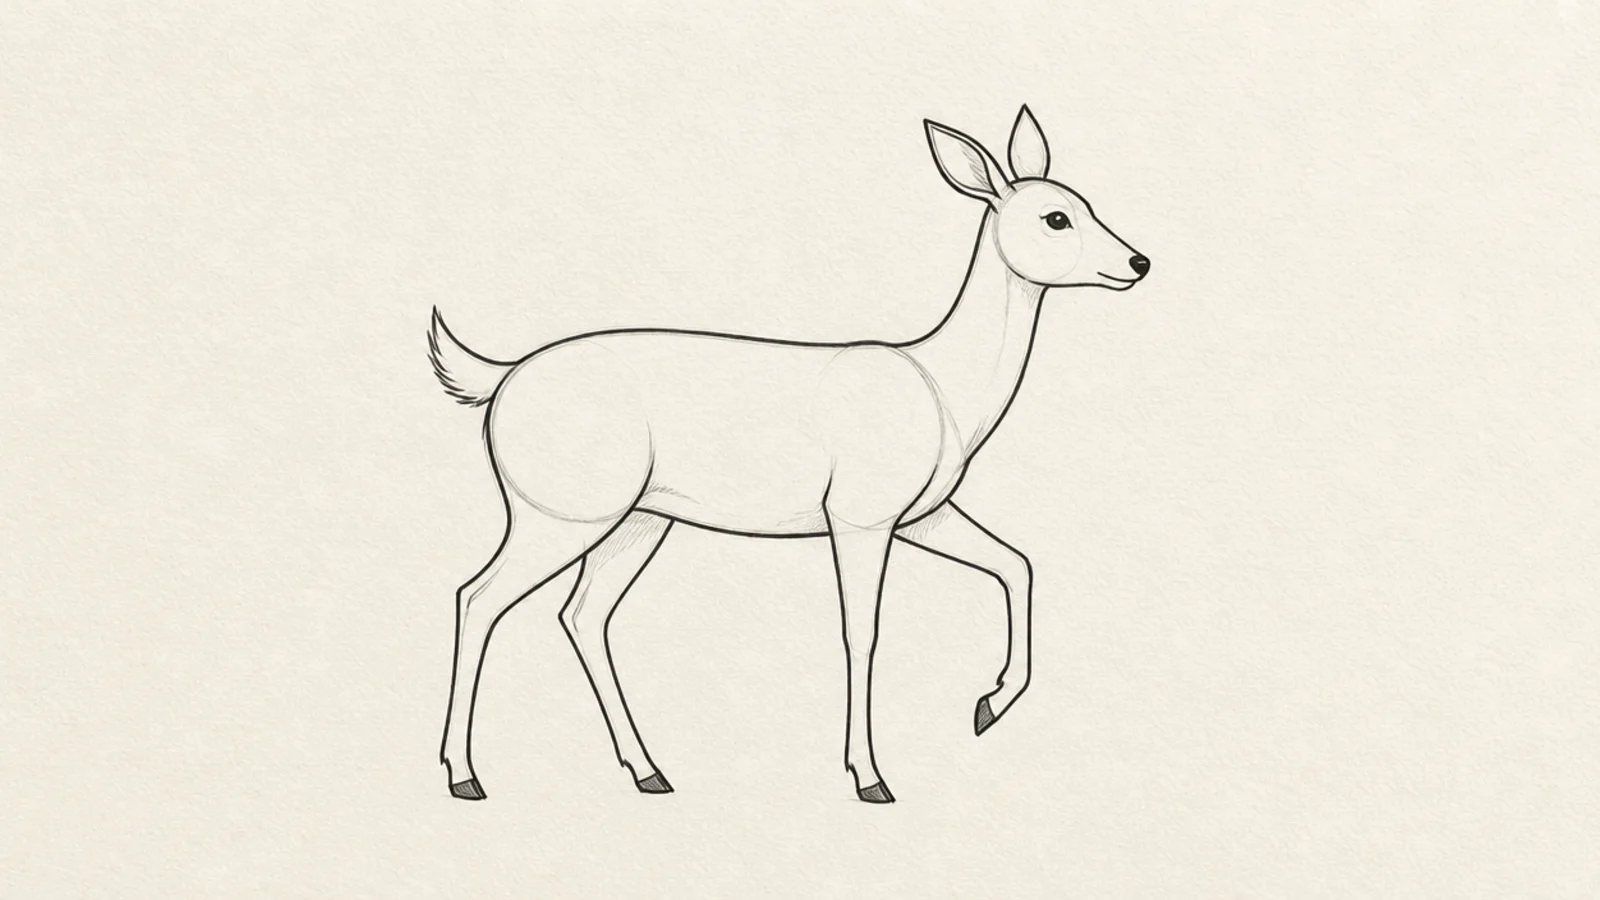
A side-view walking deer shows gentle movement by lifting just one leg. It is only a little harder than a standing deer. It teaches you to draw a pose that feels alive.
Step 1 draw the body oval and head as usual. Step 2 draw three legs planted and one front leg bent and lifted forward. Step 3 add the neck, ears, and a small raised tail.
Lift only one leg and keep the other three planted so the walk reads clearly.
Don’t lift two legs at once; one raised leg is enough to show walking.
6 Simple Standing Fawn
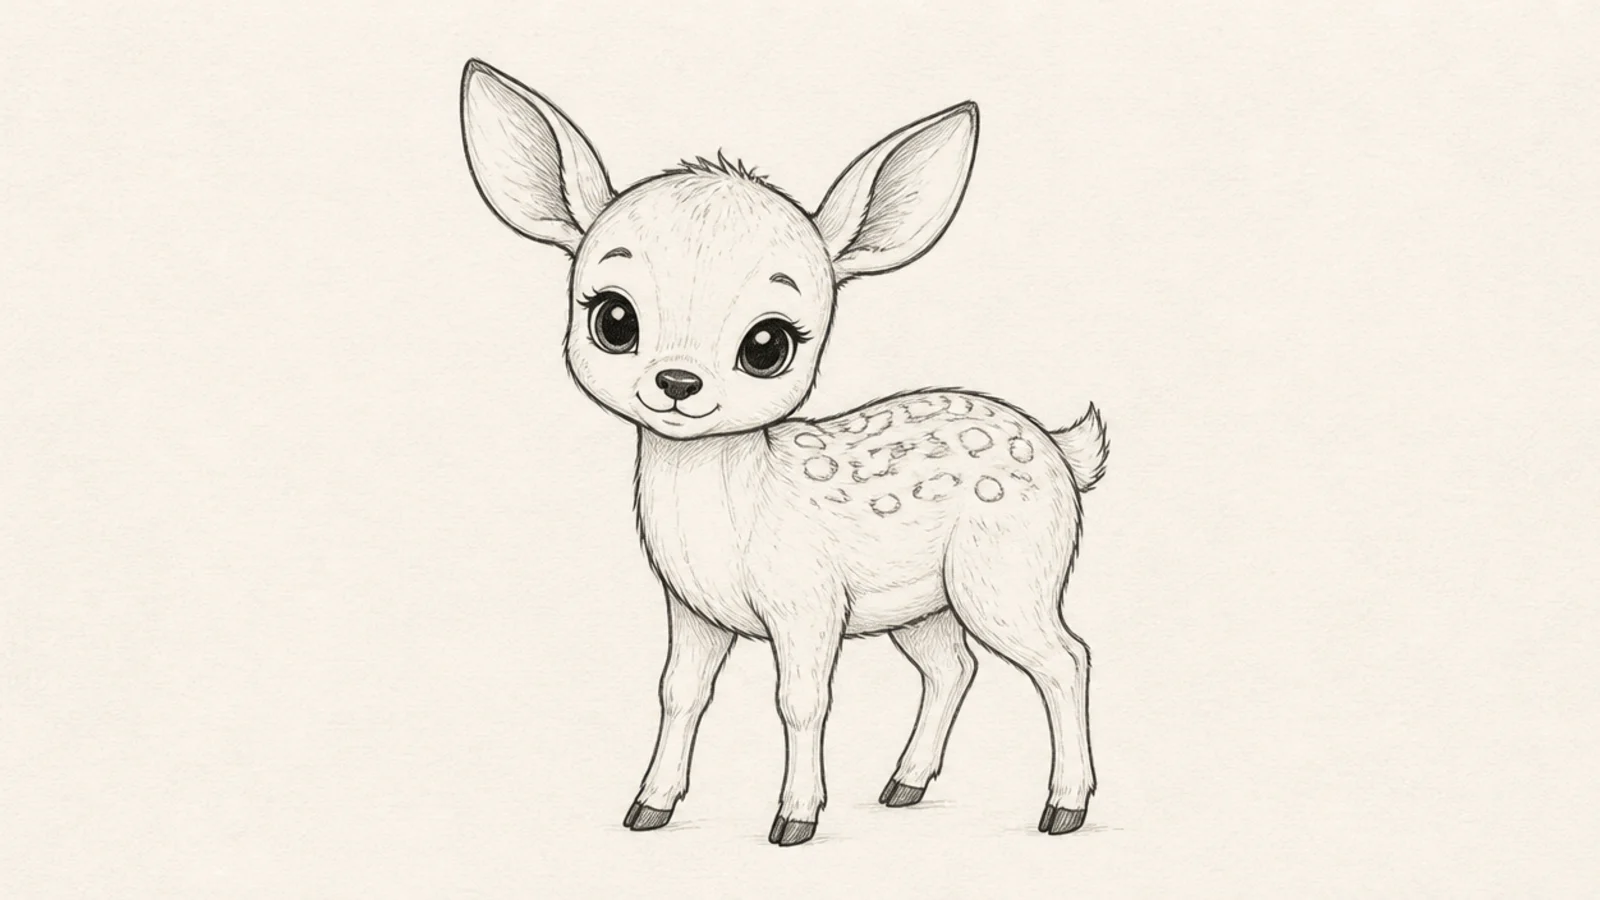
Step 1 draw a rounder body oval and a larger head. Step 2 add four short, slightly wobbly legs. Step 3 add big ears, a tiny tail, and a scatter of light spots on the back.
A standing fawn is a deer with shorter legs, a rounder body, and a bigger head. Those baby proportions are cute and easy. Spots finish the young look.
AvoidDon’t draw long adult legs; short legs make it look like a fawn.
Pro tipMake the head and eyes bigger relative to the body to read as a baby.
7 Simple Buck With Antlers
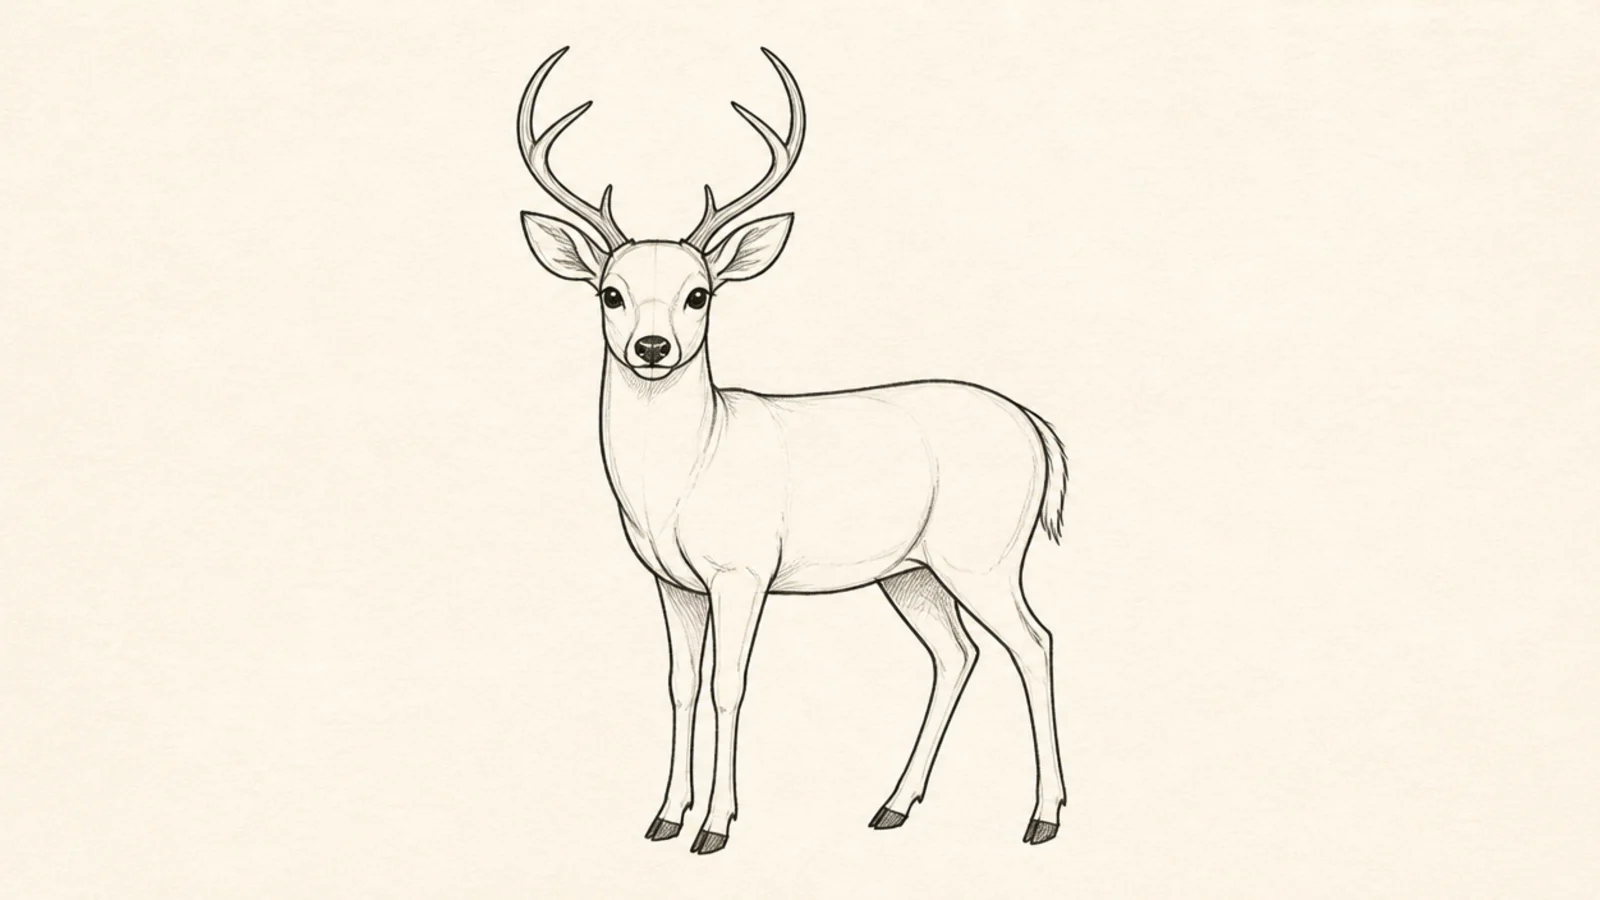
Step 1 draw a standing deer. Step 2 from the top of the head, draw two curved main antler beams sweeping up and back. Step 3 add two or three short forks branching off each beam.
Adding a simple branched antler pair turns a plain deer into a buck. The antlers are just two lines with a few forks. It teaches the basic antler shape without detail.
AvoidDon’t add too many points; three or four forks per side is plenty for an easy buck.
Pro tipSweep both antlers up and outward in a matching curve so they look balanced.
8 Gentle Standing Doe
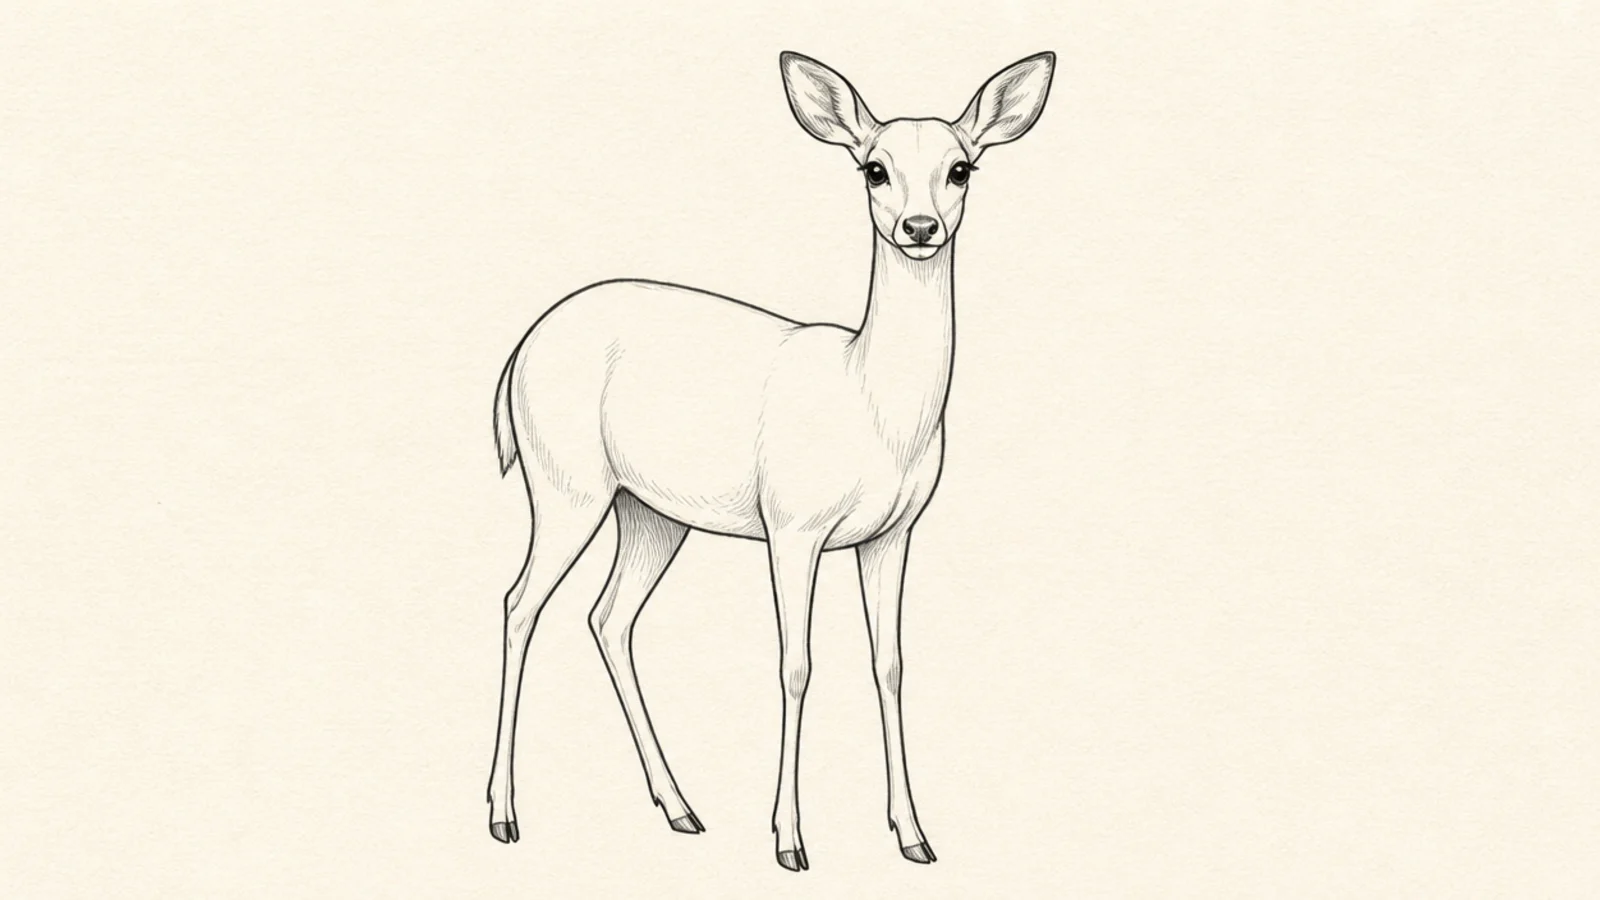
Step 1 draw a slim body oval and a small rounded head. Step 2 connect a long graceful neck. Step 3 add thin legs, two tall ears, and a short tail with no antlers.
A doe has no antlers, a slim neck, and tall alert ears, which makes her the easiest adult deer. The clean rounded head is quick to draw. She looks calm and elegant.
AvoidDon’t add antlers; a plain rounded head is what makes her read as a doe.
Pro tipGive the doe a longer, more slender neck than a buck for an elegant look.
9 Leaping Deer
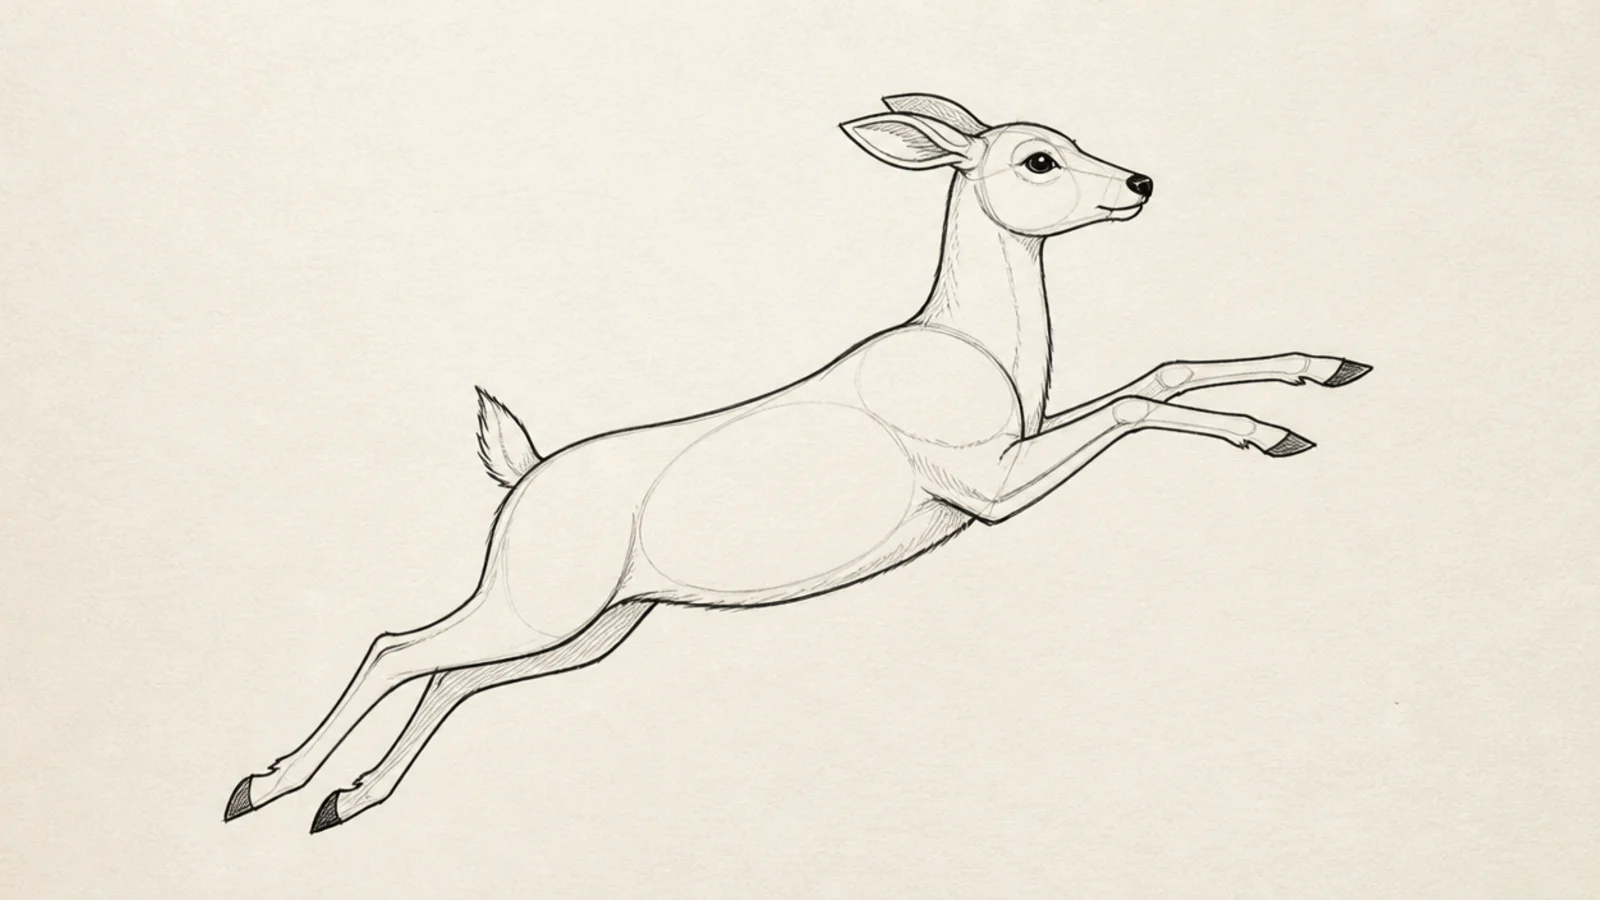
Step 1 tilt the body oval diagonally upward. Step 2 stretch the two front legs forward and the two back legs out behind. Step 3 add a lifted head, ears back, and a raised tail.
A leaping deer is dynamic but still simple — the body just tilts and the legs stretch out. It captures the energy deer are known for. It teaches an action pose from basic shapes.
AvoidDon’t keep the legs tucked; extended legs are what make a leap look like a leap.
Pro tipAngle the whole body upward and stretch the legs fully to sell the jump.
10 Grazing Deer
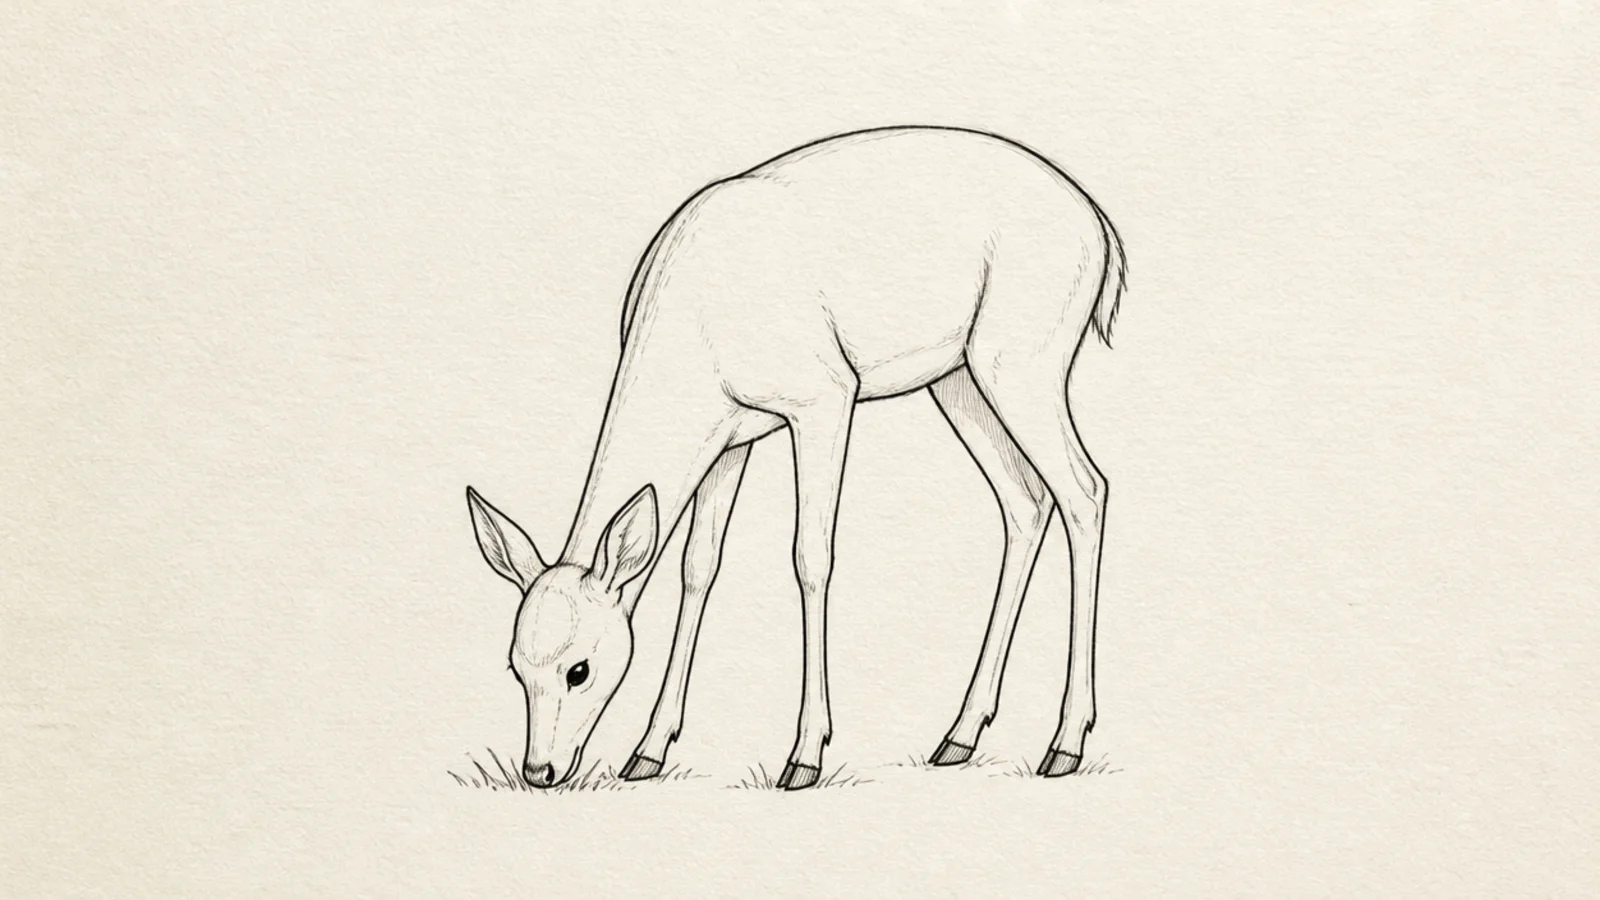
Step 1 draw the standing body and legs. Step 2 curve the neck downward so the head reaches the ground. Step 3 add a few short grass lines under the muzzle.
A grazing deer simply lowers its head to the ground, which is an easy change from the standing pose. The bent neck feels natural and peaceful. It teaches how head position changes mood.
AvoidDon’t leave the neck stiff and straight; a soft downward curve reads as grazing.
Pro tipCurve the neck in a smooth arc so the head reaches all the way down naturally.
11 Deer Silhouette
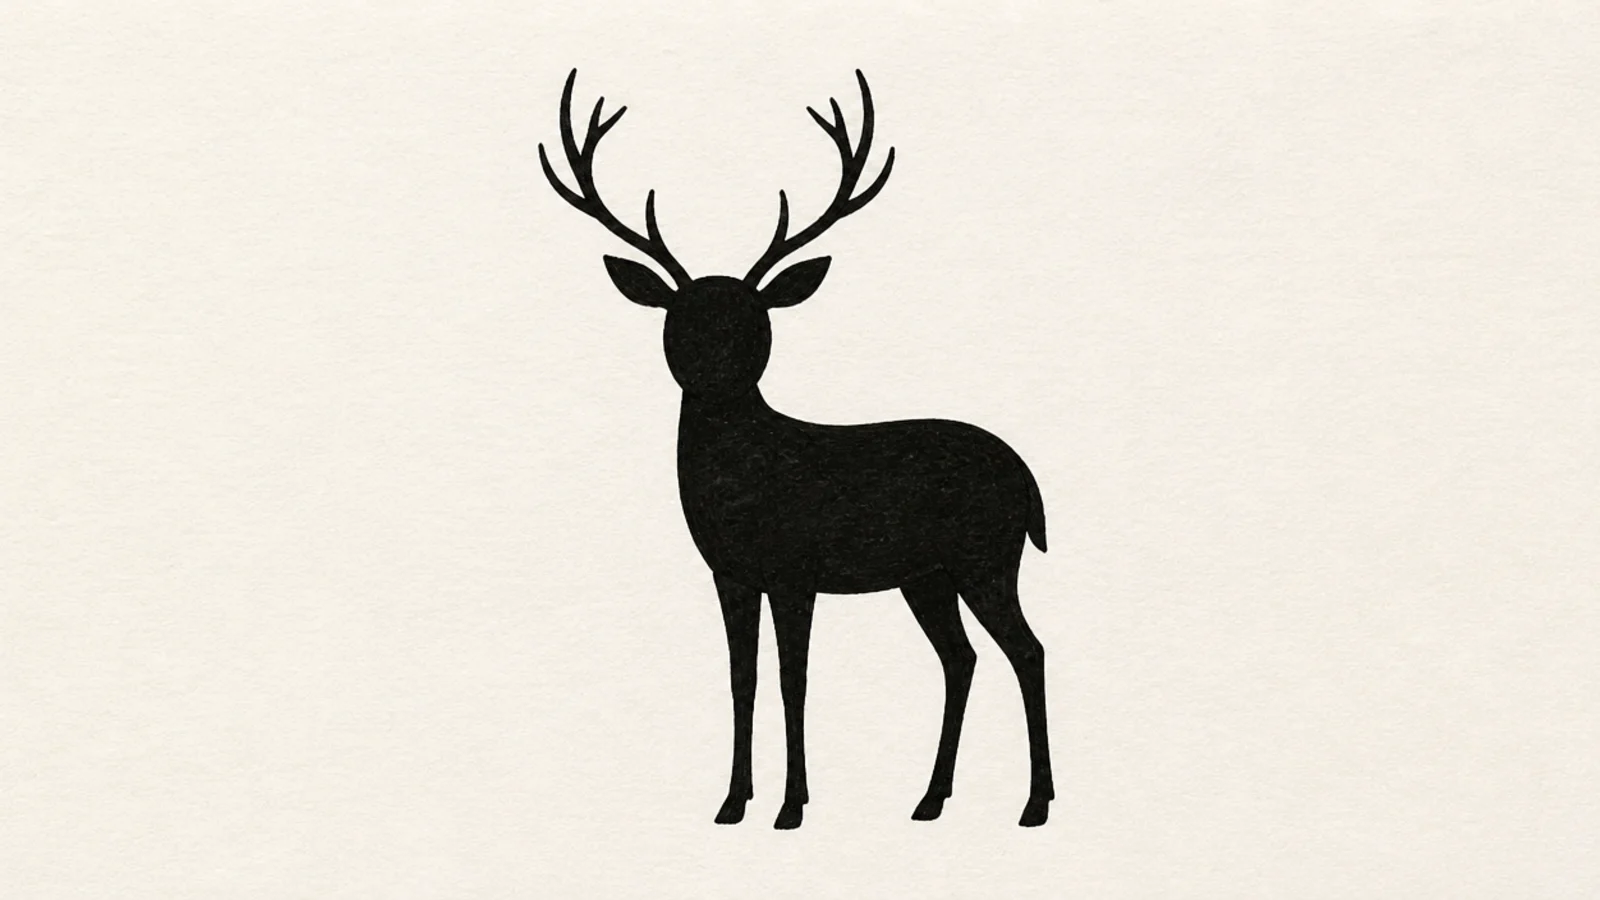
A solid filled silhouette is bold and forgiving because there is no interior detail to get wrong. The strong outline reads clearly. It looks graphic and modern.
Step 1 draw a clean deer outline including the antlers. Step 2 fill the whole shape solid black or one color. Step 3 keep the edges crisp, especially the antler tips and legs.
Make the outline crisp and the antlers clear, since the shape is the whole design.
Don’t add inside detail; a silhouette works as one flat solid shape.
12 Blocky Stick-Leg Deer
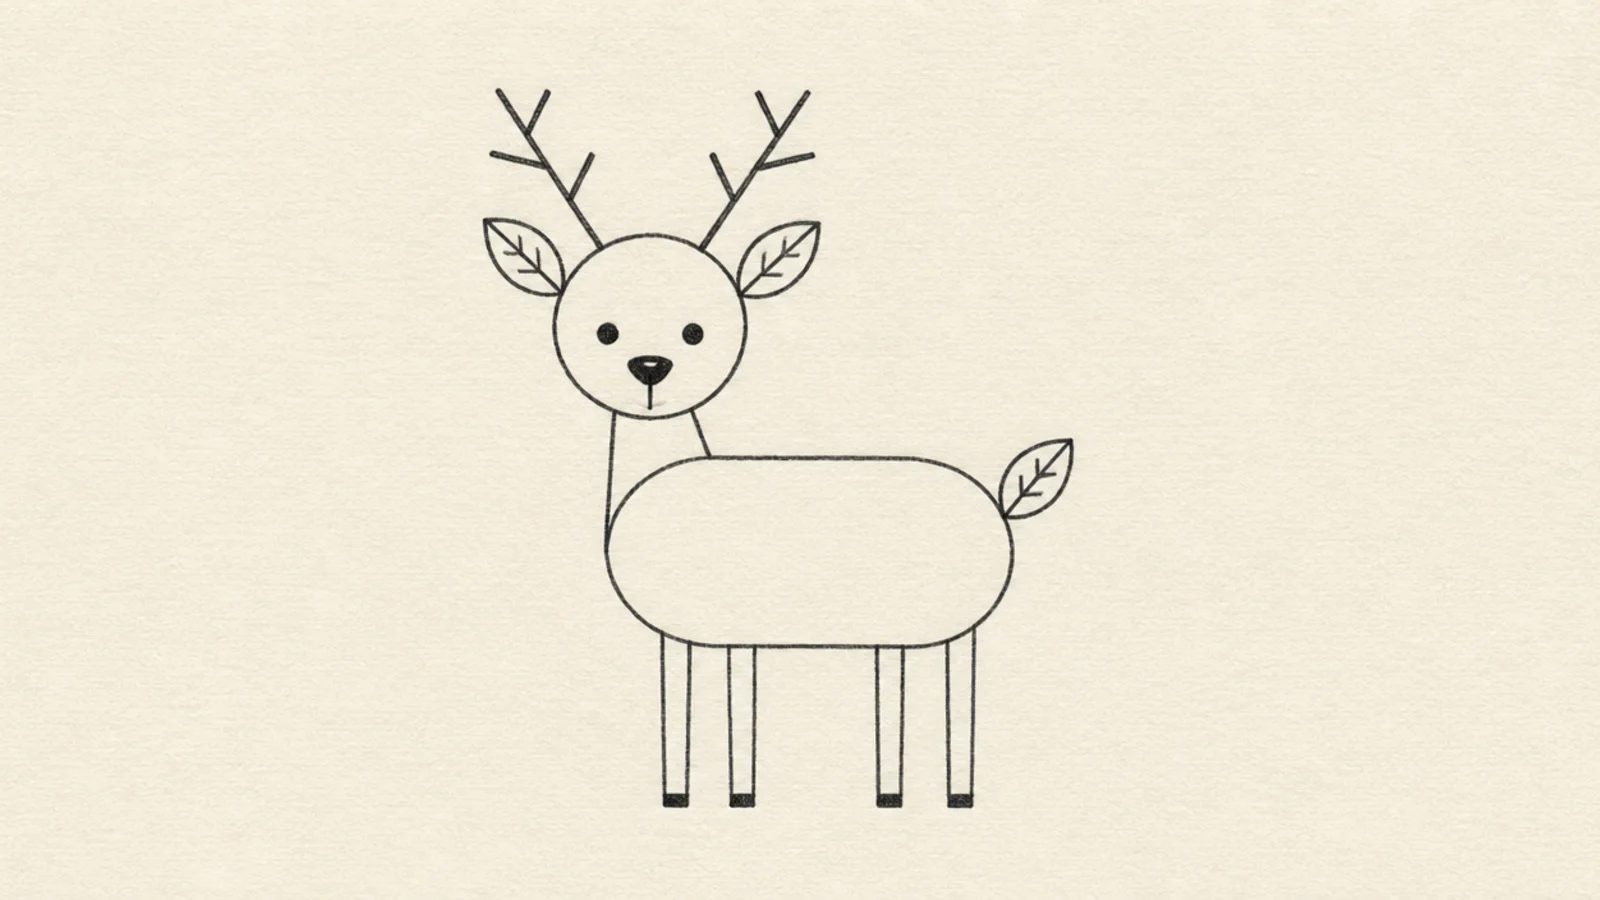
Building the deer from a rectangle body and straight stick legs is the most beginner-proof approach. Straight lines are easier to control than curves. It is a clean, almost diagram-like deer.
Step 1 draw a rounded rectangle for the body. Step 2 add four straight stick legs and a triangle head. Step 3 top the head with two ears and simple line antlers.
Use a ruler-straight feel for the legs so the blocky style looks intentional.
Don’t mix in wobbly curves; commit to the clean geometric look.
13 Red-Nose Holiday Deer
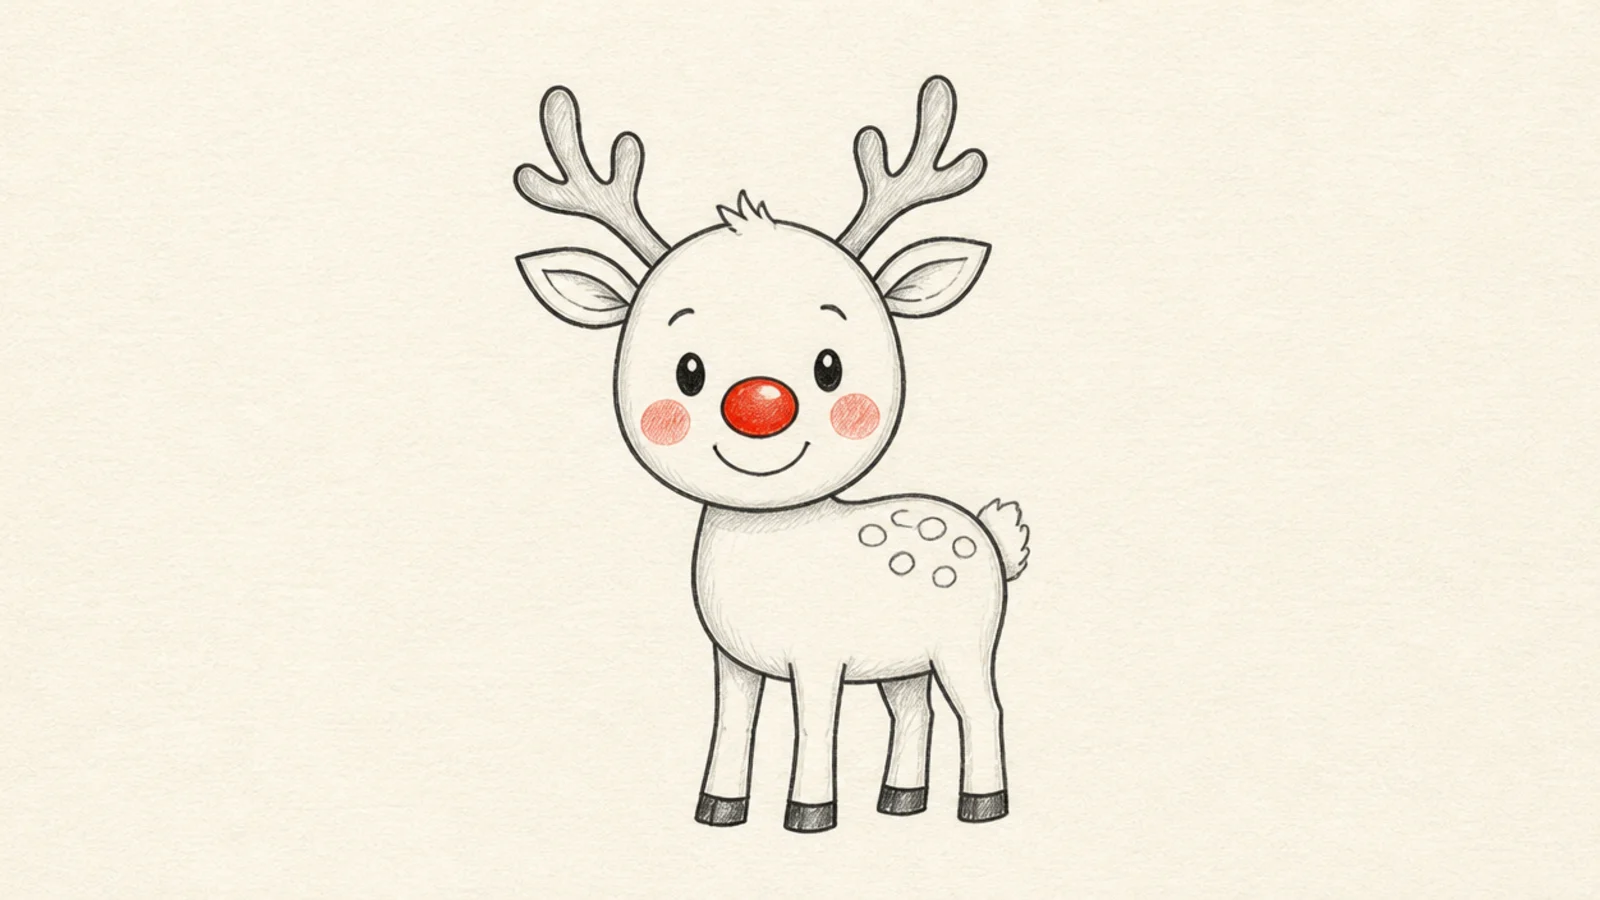
A round red nose turns any easy deer into a cheerful holiday reindeer. It is a tiny change with a big payoff. Perfect for cards and quick festive doodles.
Step 1 draw a simple cartoon deer. Step 2 add a big round nose on the muzzle and color it red. Step 3 add rounded cartoon antlers and rosy cheeks.
Make the nose a big round circle and keep the rest of the face simple and cute.
Don’t over-detail the body; the red nose should be the star.
14 Peeking Deer
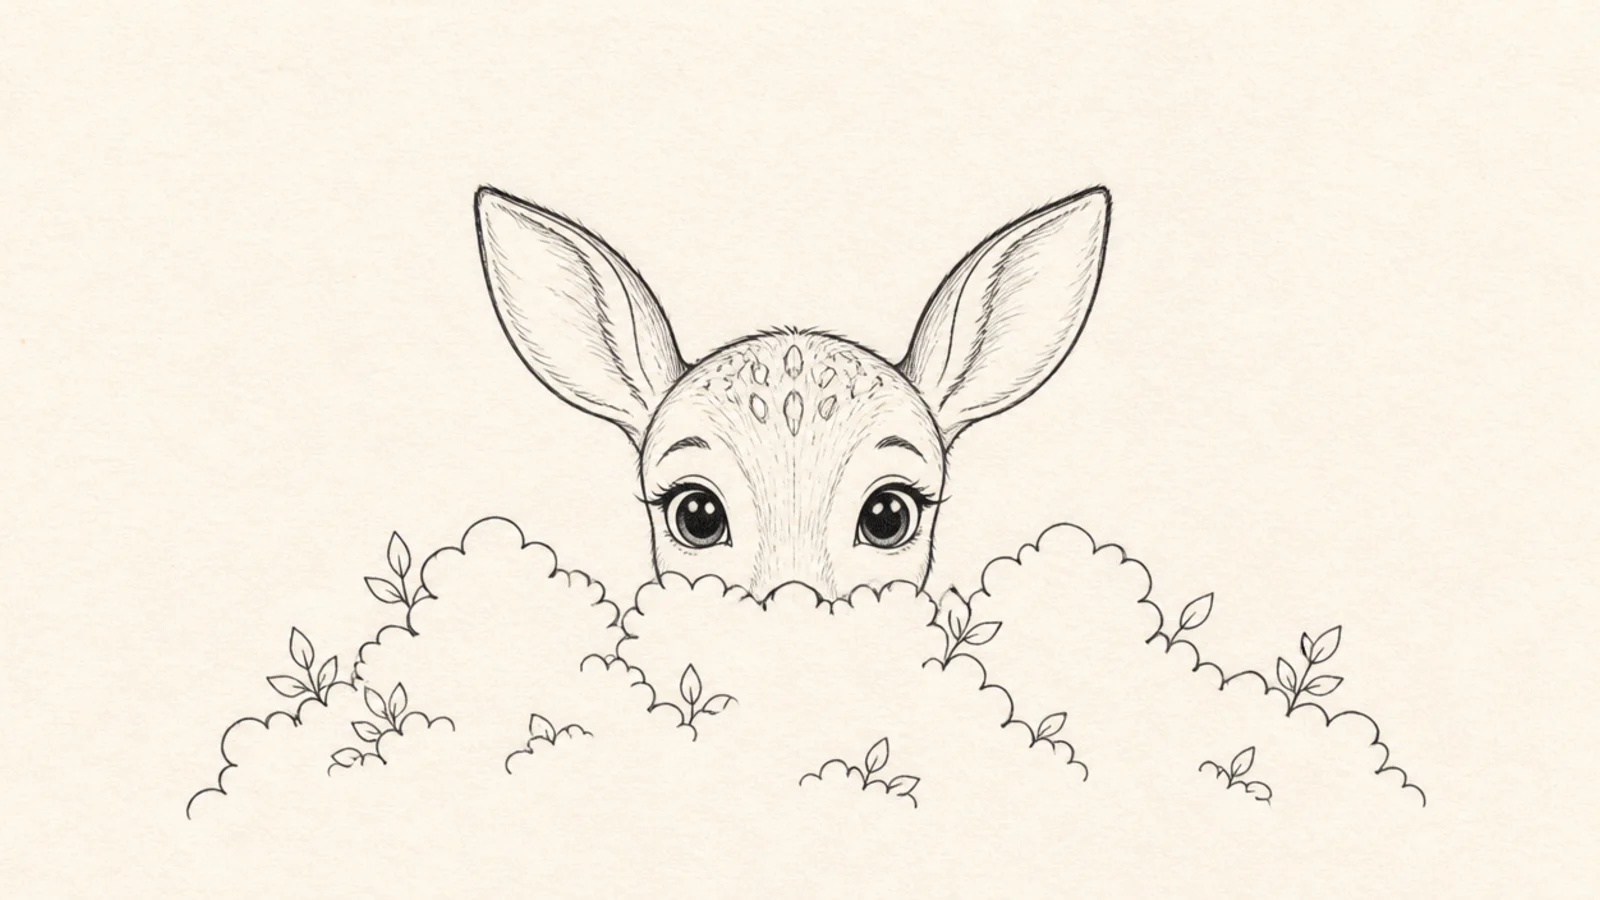
Step 1 draw a bumpy bush or grass line across the middle. Step 2 add a deer head and neck rising above it. Step 3 add two big ears and wide curious eyes peeking over the top.
A deer peeking from behind a bush hides most of the body, so you only draw the head and ears. Less body means less to draw. The shy pose is sweet and story-like.
AvoidDon’t draw the full body; the hidden lower half is the whole idea.
Pro tipLet the bush cover the legs and belly so you skip the hardest parts.
15 Resting Deer Lying Down
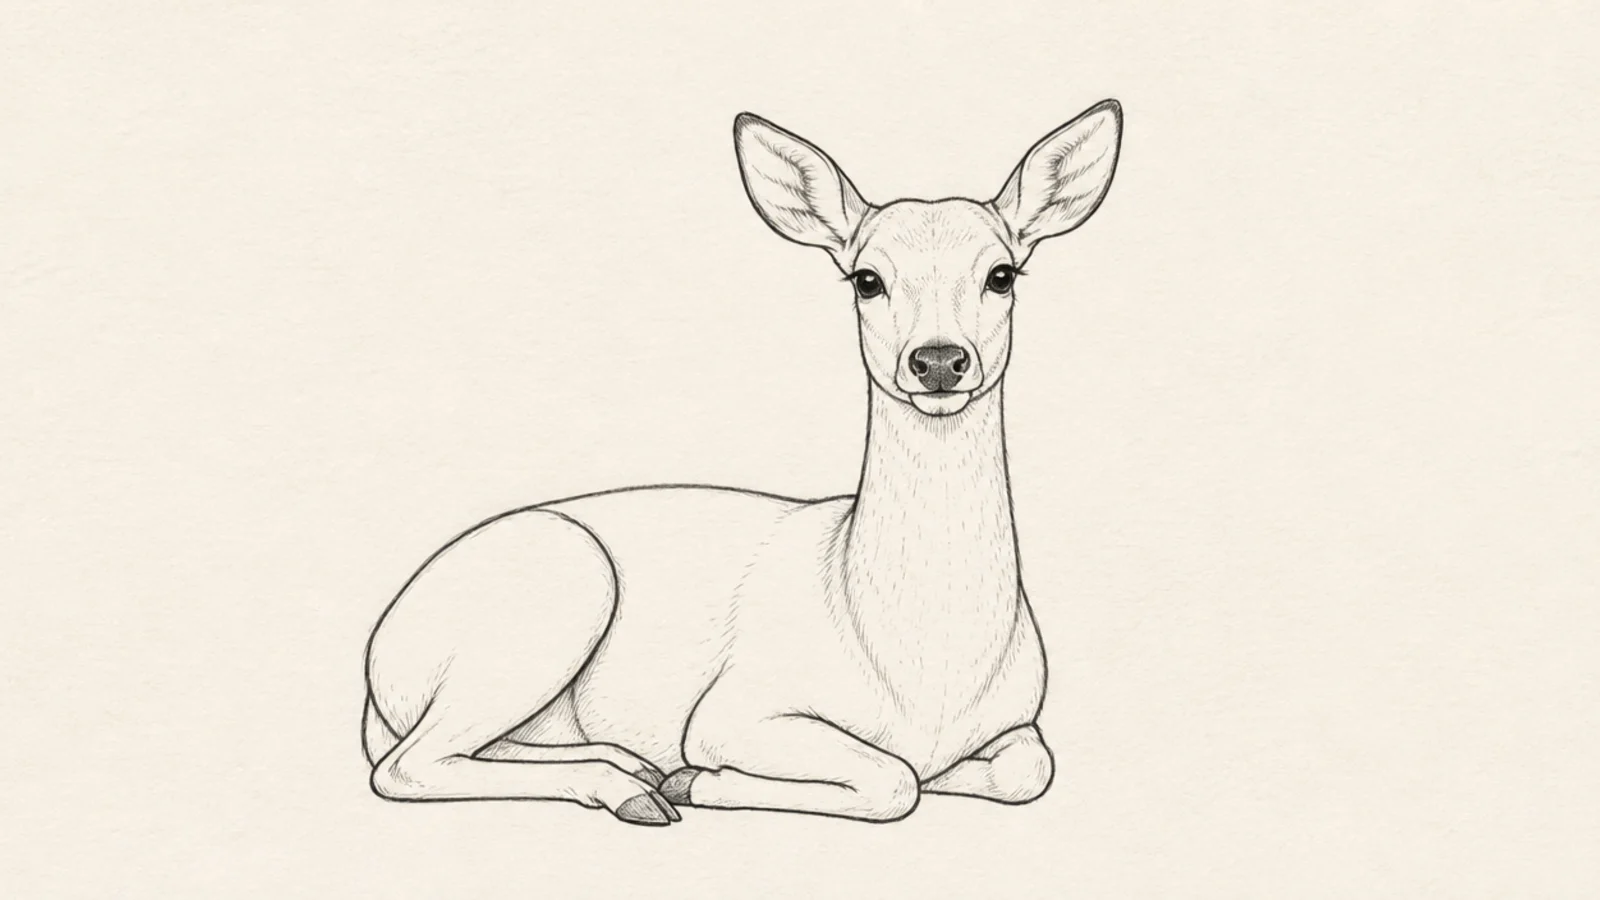
A lying-down deer folds its legs under, so you draw one settled rounded body instead of four standing legs. The restful pose is calm and simple. It teaches a compact, peaceful shape.
Step 1 draw an oval body settled low to the ground. Step 2 tuck the folded front legs out in front and the back legs beside the body. Step 3 add an upright head and neck and two alert ears.
Keep the body low and wide so the deer looks settled on the ground.
Don’t draw the legs straight down; folded legs make it read as resting.
16 Single-Line Deer
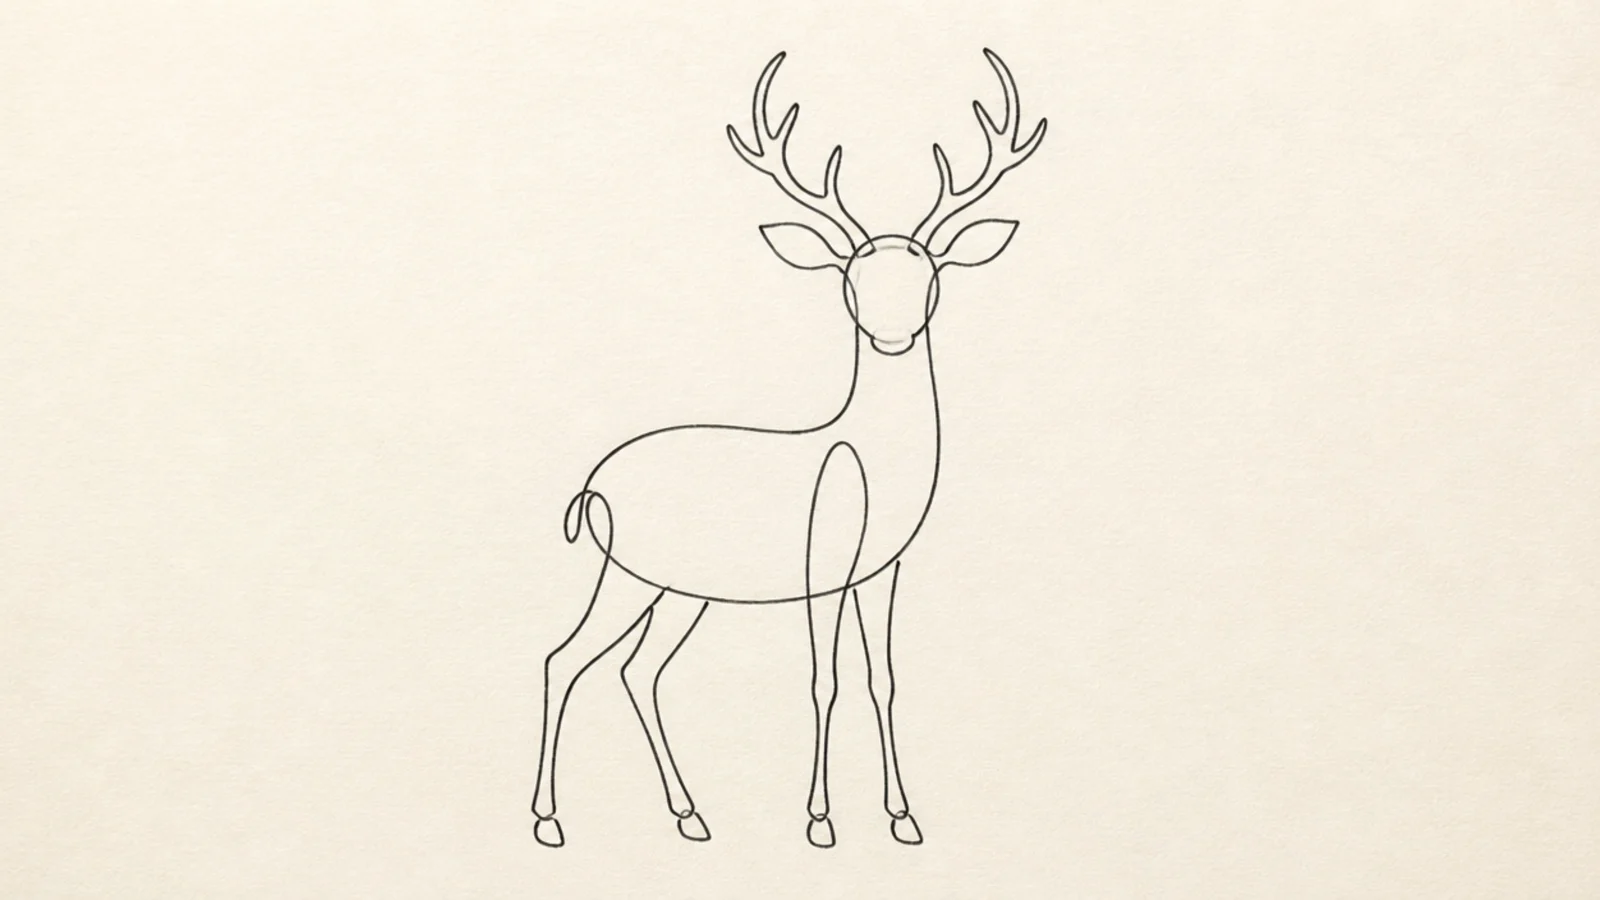
Step 1 start at the nose and draw up over the head and antlers in one stroke. Step 2 continue down the back, around the tail, and under the belly. Step 3 loop the legs and close back at the chest without lifting the pen.
A one-line deer looks modern and is secretly forgiving because a loose flowing line is the whole style. You draw the outline without lifting your pen. Perfect for a tidy journal or a tattoo-style sketch.
AvoidDon’t lift the pen to fix a wobble; the flowing imperfect line is the charm.
Pro tipDraw slowly but continuously so the single line looks confident and smooth.
17 Chibi Deer
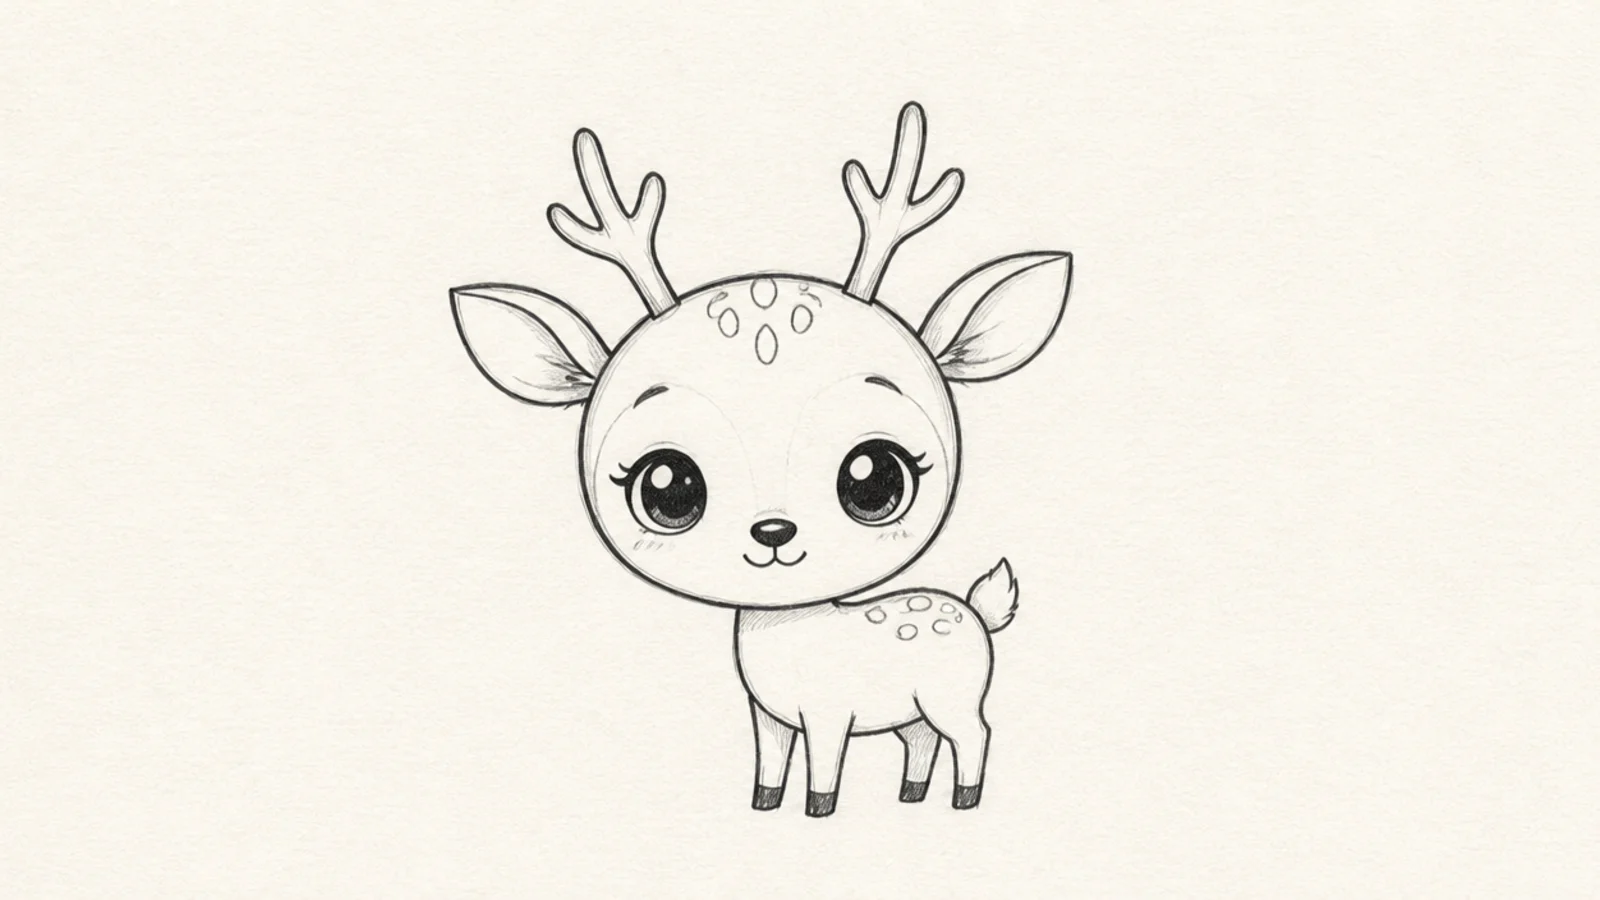
A chibi deer has a huge head, big sparkly eyes, and a tiny body, which is adorable and easy. The oversized head is the whole look. It is pure cuteness with few lines.
Step 1 draw a big round head, nearly as large as the body. Step 2 add two large shiny eyes and a tiny nose. Step 3 add a small stubby body, short legs, and little rounded antlers or ears.
Make the head almost as big as the body and the eyes large and glossy.
Don’t use realistic proportions; the oversized head is what makes it chibi.
18 Deer Looking Back
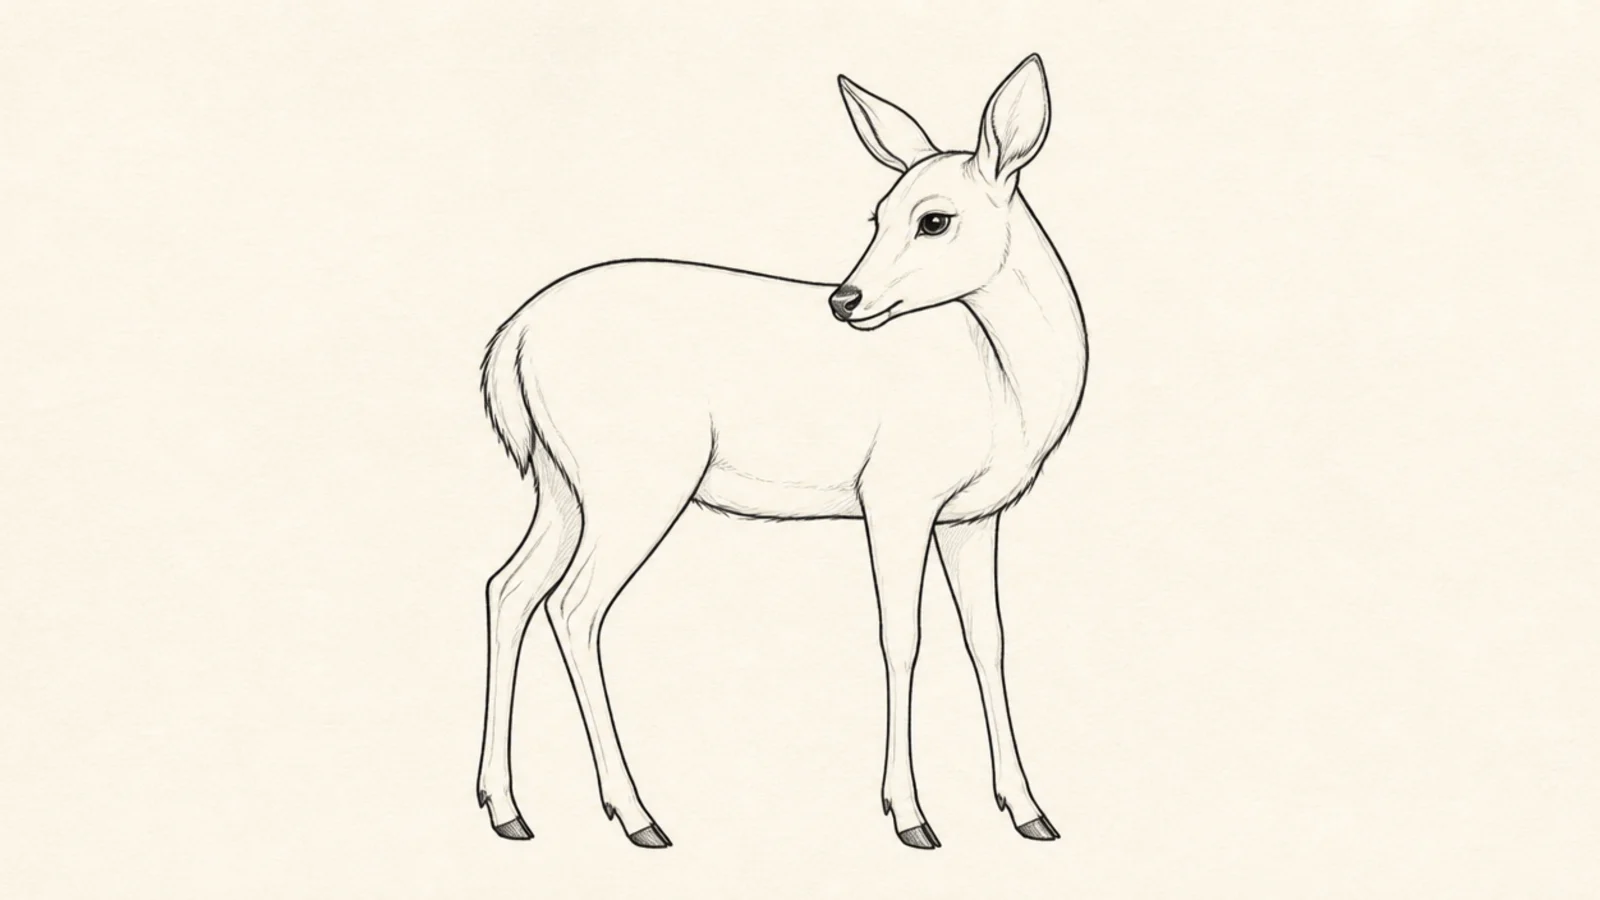
A deer glancing back over its shoulder adds personality with just a turned head. The body stays a simple side view. It teaches an expressive, alert pose.
Step 1 draw a standing side-view body. Step 2 curve the neck back so the head faces the tail end. Step 3 add ears perked up and eyes looking backward.
Twist only the neck and head; keep the body in a normal side stance.
Don’t turn the whole body; just the head looking back reads as alert.
19 Mom and Baby Deer
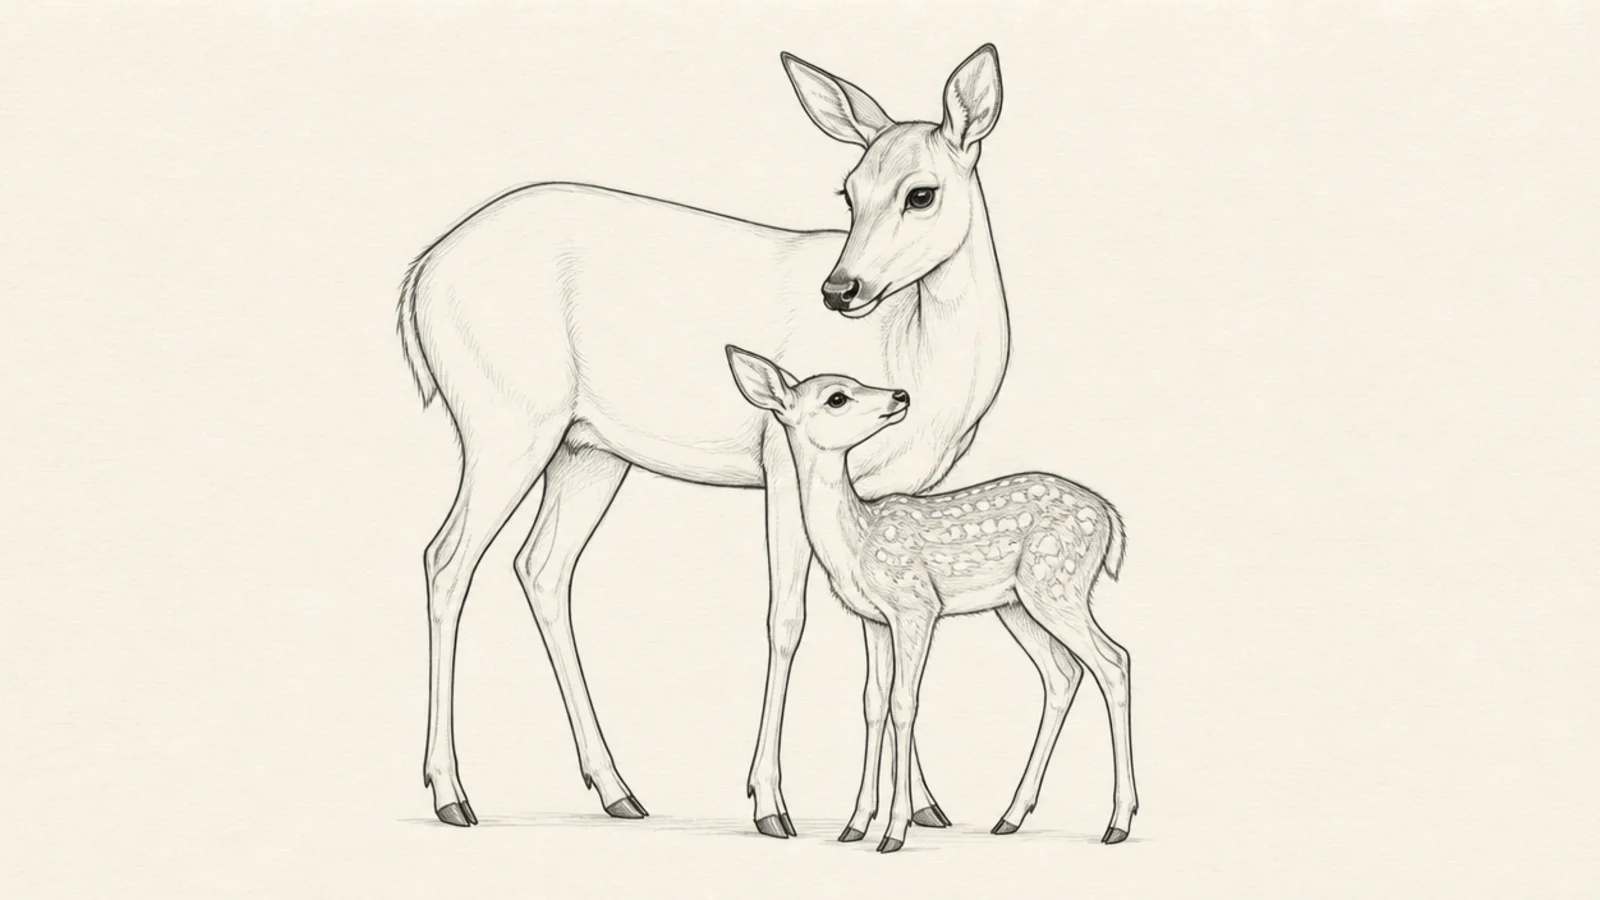
A doe standing beside a little fawn makes a tender pair that looks more finished than one deer. Drawing the same shape at two sizes is easy. It tells a sweet family story.
Step 1 draw a full-size doe. Step 2 draw a smaller fawn beside her using the same shapes scaled down. Step 3 add spots to the fawn and turn their heads slightly toward each other.
Make the fawn clearly smaller with a bigger head so the size difference reads as parent and baby.
Don’t make both deer the same size; the scale difference tells the story.
20 Deer in a Simple Scene
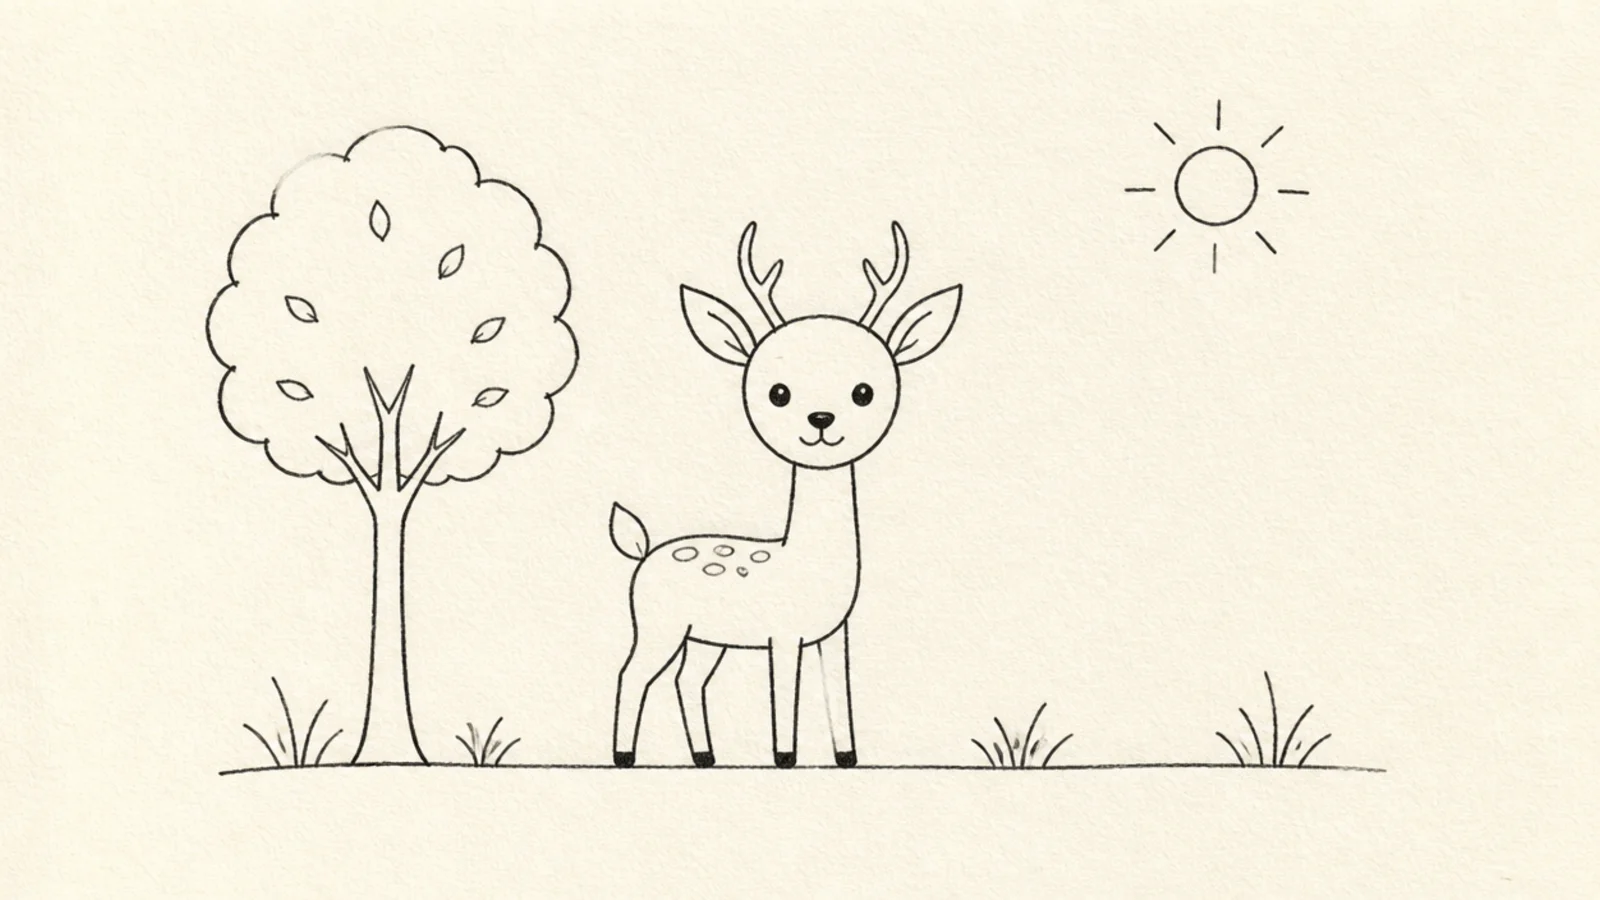
Step 1 draw a ground line and a simple deer standing on it. Step 2 add a round-topped tree to one side. Step 3 add a sun or a few birds in the sky and some grass tufts.
Placing a simple deer on a grass line with a tree and sun turns a floating animal into a whole little picture. The background is just a few easy shapes. It feels complete.
AvoidDon’t crowd the scene; a tree, a sun, and some grass are enough.
Pro tipKeep the background simple so the deer stays the main focus.
21 Geometric Triangle Deer
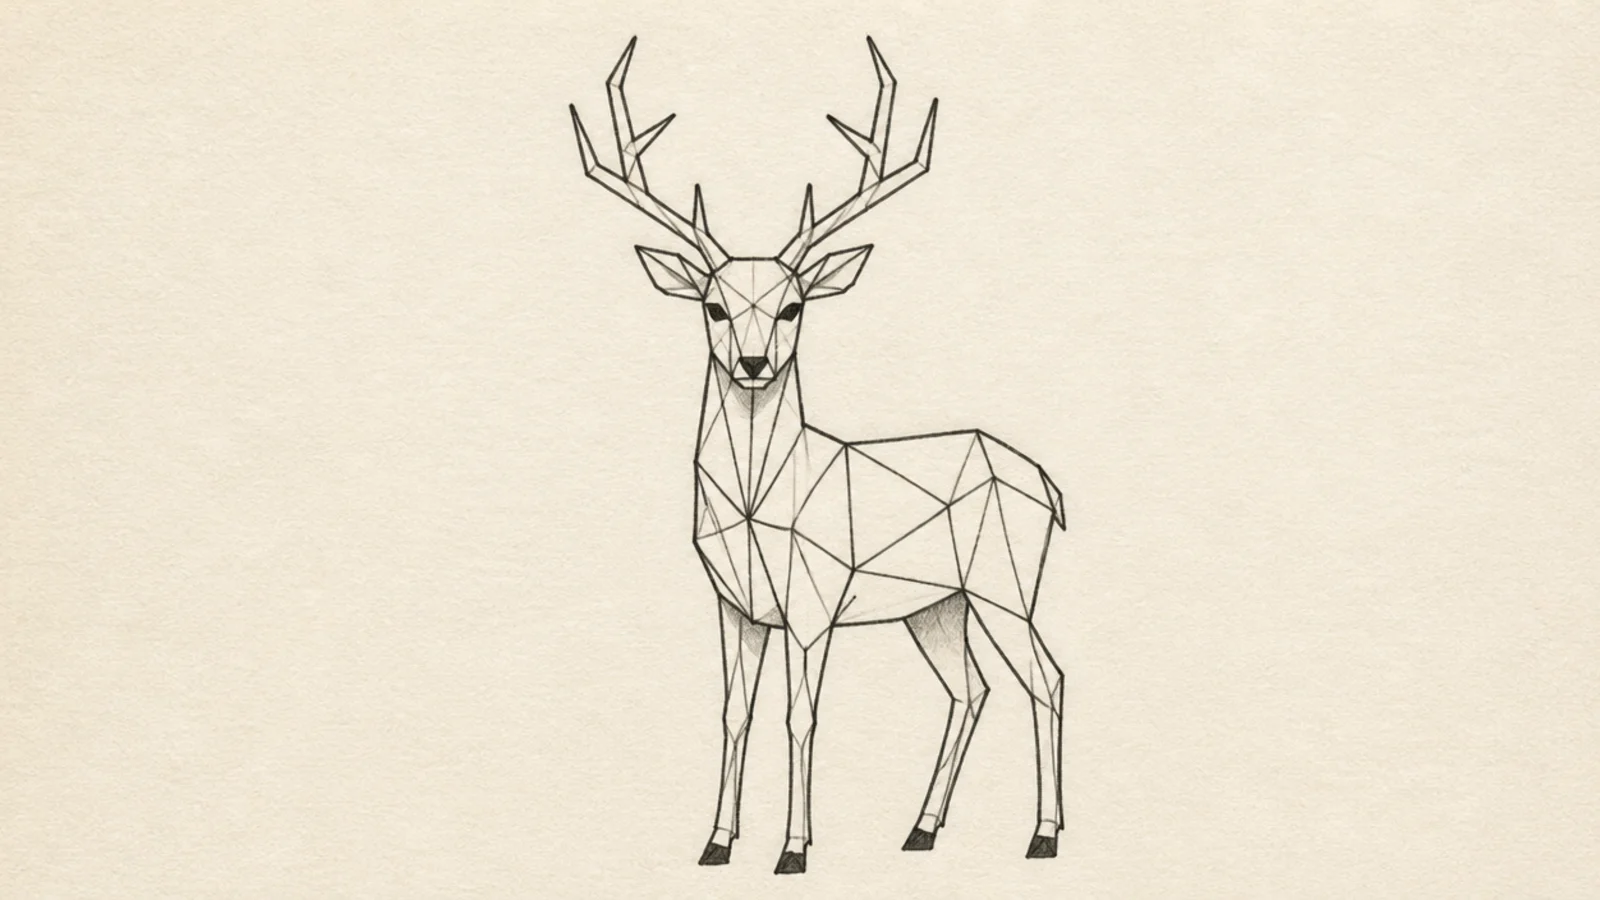
Building a deer from a few triangles gives a clean, modern, low-poly look. Angular shapes are easy to draw with straight strokes. It looks like stylish wall art.
Step 1 draw a triangle for the head and a larger angular shape for the body. Step 2 add straight-line legs and a triangular neck. Step 3 build the antlers from thin straight zigzag lines.
Use only straight lines and sharp corners so the geometric style stays consistent.
Don’t round the corners; crisp angles are the point of this look.
22 Boho Deer Head With Flowers
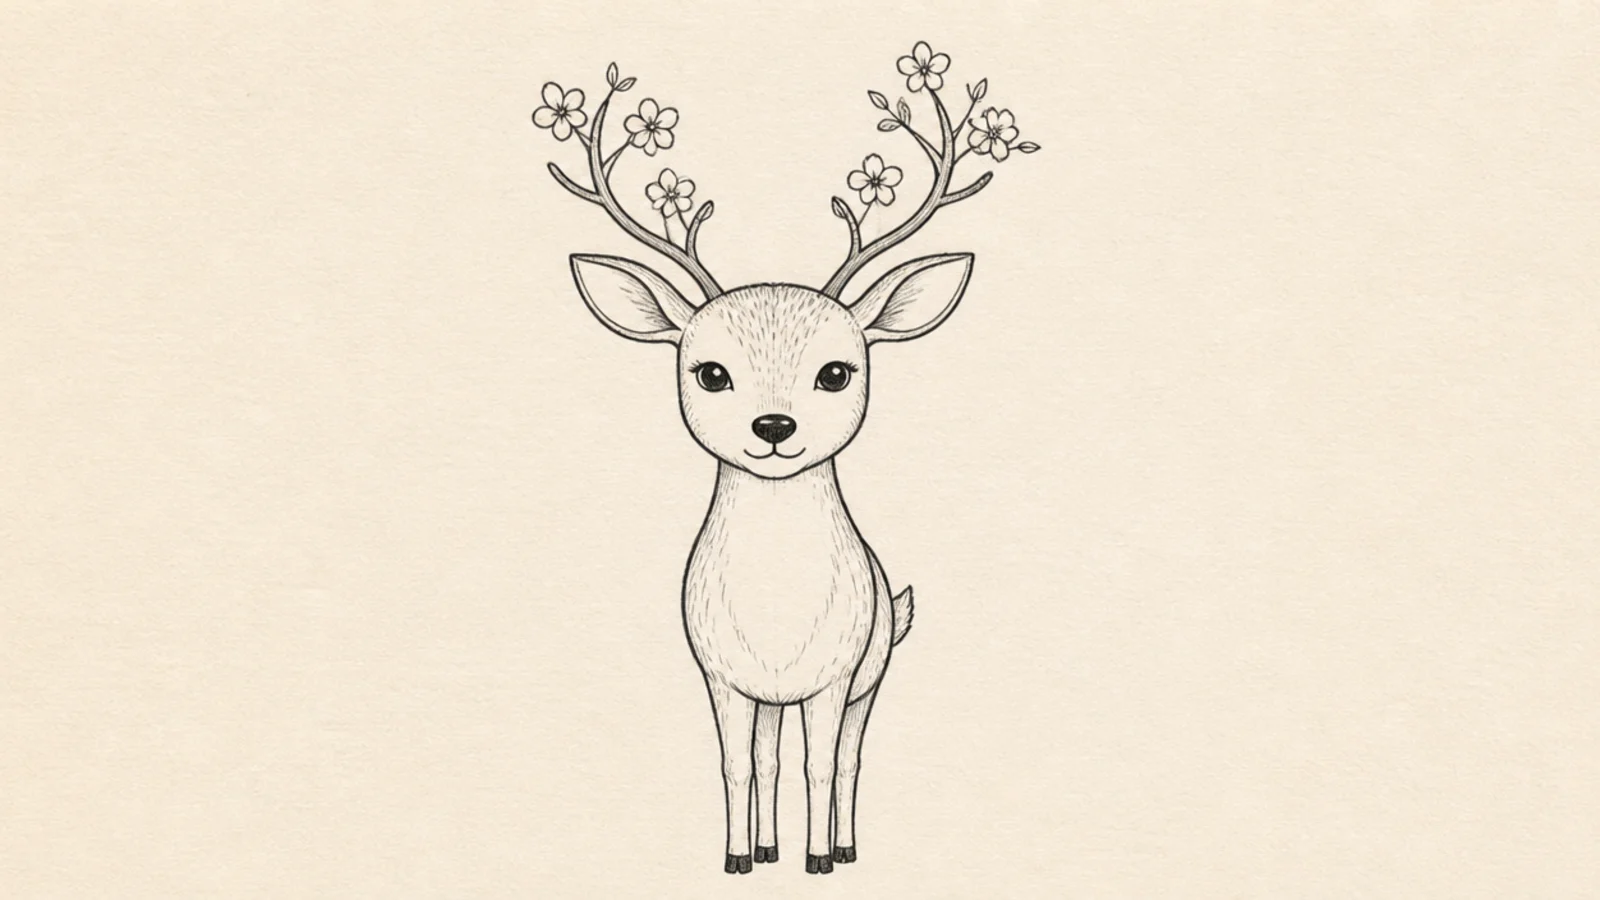
A simple deer head with a few little flowers nestled in the antlers gives a pretty boho look. The flowers are easy dots and petals. It feels decorative and giftable.
Step 1 draw a front-facing deer head with simple antlers. Step 2 add a few small five-petal flowers where the antlers branch. Step 3 add tiny leaves and dots to fill the gaps.
Cluster the flowers where the antlers fork so they sit naturally in the branches.
Don’t overload the antlers; a few small flowers look more elegant than many.
23 Spotted Fawn Close-Up
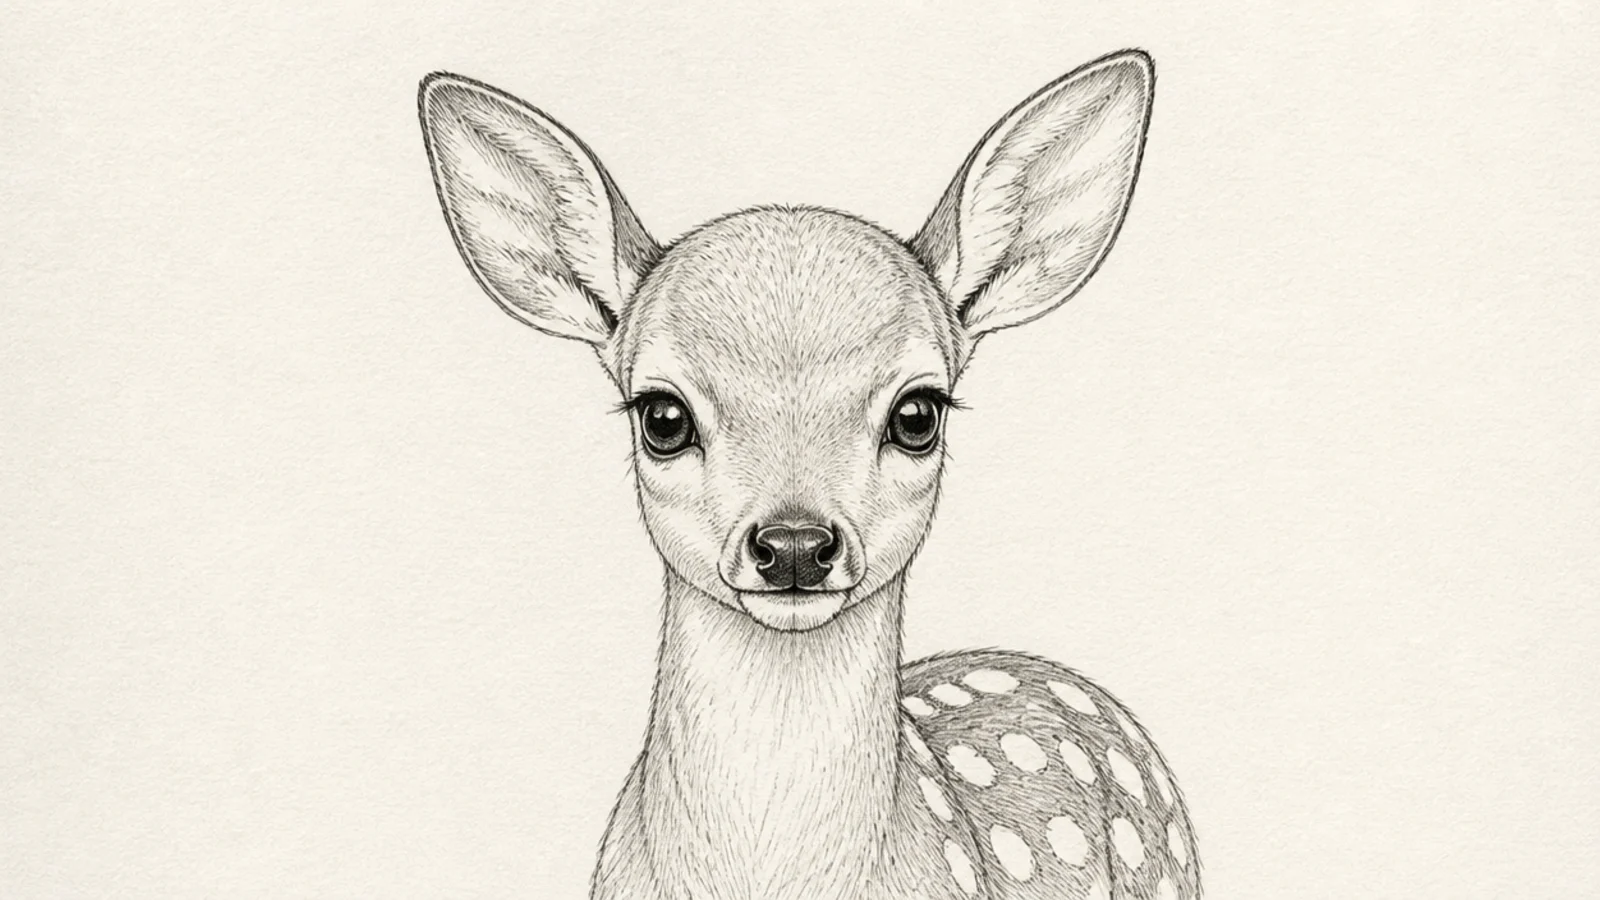
Step 1 draw the fawn’s head and upper neck large and close. Step 2 add big soft eyes, a small nose, and tall ears. Step 3 scatter rows of light spots down the neck and shoulders.
A close-up of a spotted fawn focuses on the cute head, neck, and spotted shoulders. Cropping in means less body to draw. The spots make it unmistakably a baby deer.
AvoidDon’t space the spots evenly like a grid; a soft scattered pattern looks real.
Pro tipLine the spots up in loose rows along the back for a natural fawn pattern.
24 Easy Deer Trio
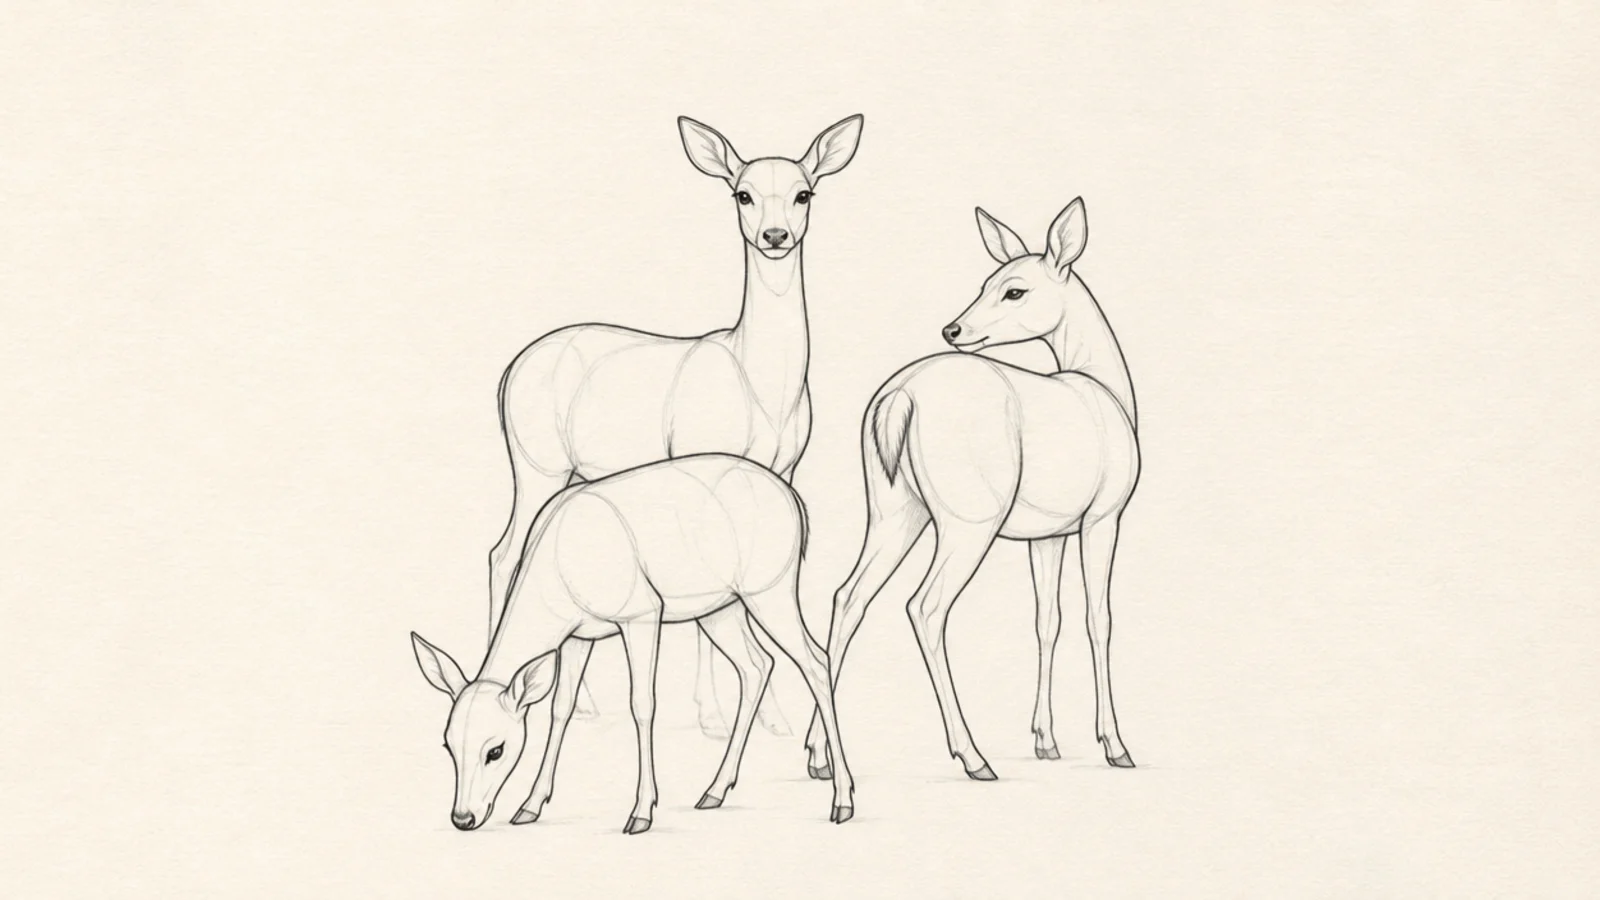
Three simple deer grouped together make a cheerful little herd that looks more finished than one. Repeating the same easy shape three times is quick. It is a lovely way to fill a page.
Step 1 draw three simple deer at slightly different heights and angles. Step 2 overlap them a little so they group naturally. Step 3 vary their poses — one grazing, one standing, one looking back.
Overlap the deer slightly and vary their poses so the group feels natural.
Don’t line them up identically; small differences make the herd look alive.
25 Sleeping Deer
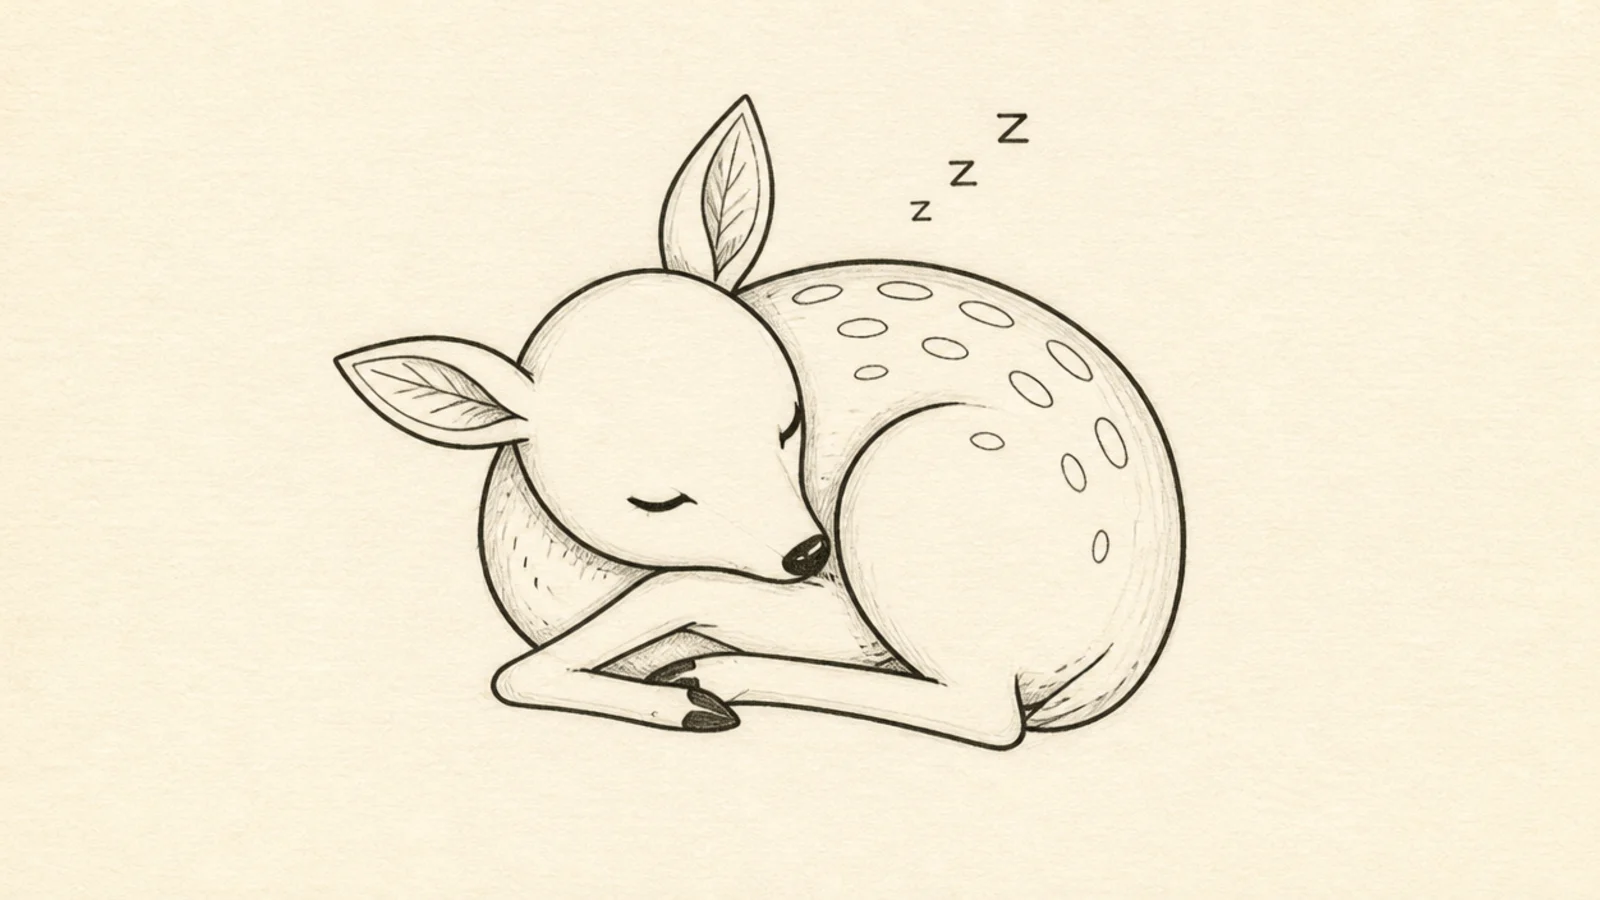
Step 1 draw a large rounded curled body. Step 2 rest the head back against the body with the muzzle tucked toward the tail. Step 3 draw the eyes as simple closed curves and add little floating sleep marks.
A sleeping deer curls into a soft round shape with its head tucked back, which is calm and very easy. The closed eyes and tucked pose are cozy. It is a peaceful way to close the list.
AvoidDon’t draw open eyes or standing legs; the tucked sleeping shape is the mood.
Pro tipDraw the eyes as two small downward curves to show they are gently closed.



