
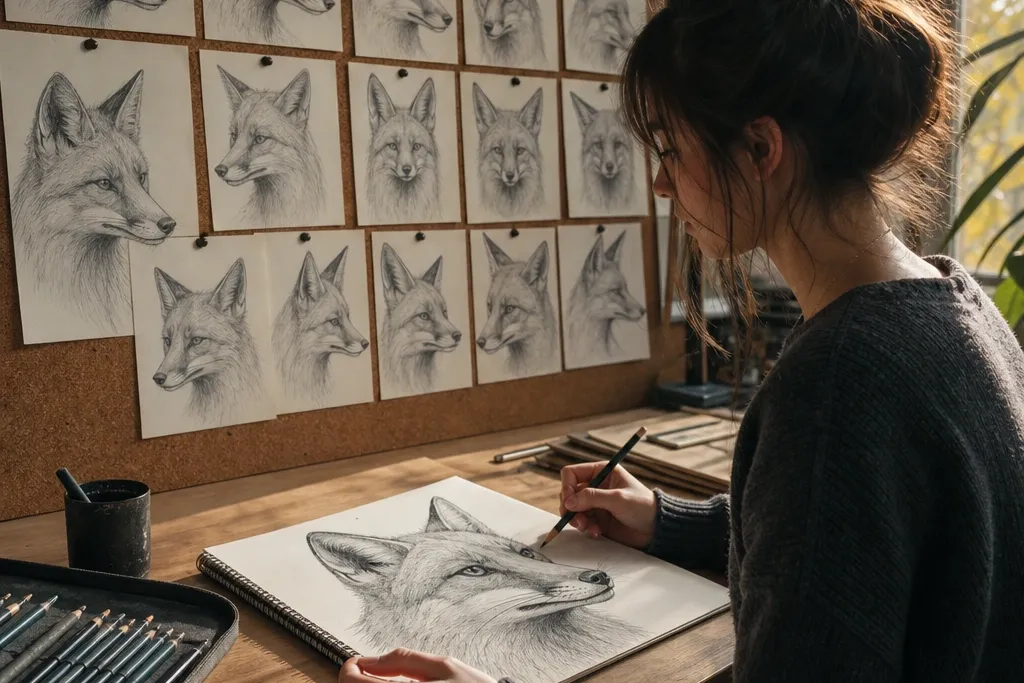
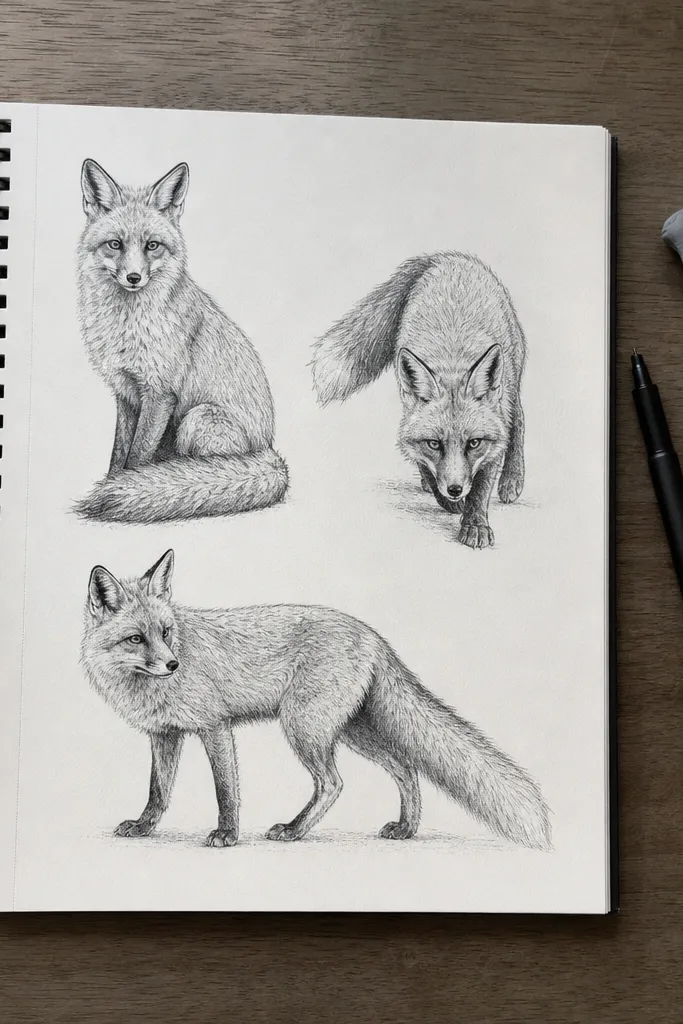
1. Front 3/4 fox head with visible jaw plane
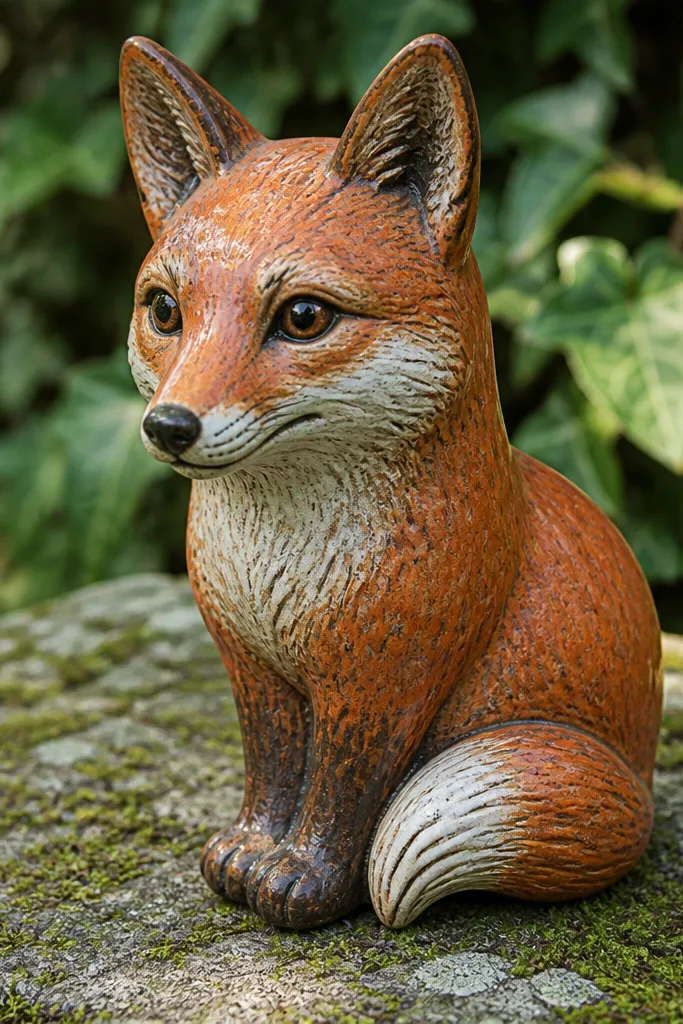
This reference type makes your aesthetic fox drawing look “real” because the jaw plane gives the face structure. You get a readable skull shape, plus a clear transition from cheek fur to muzzle fur. When the reference shows the nose and lower eyelid line at once, your eye placement stops drifting. Pair it with side lighting so the under-chin shadow becomes an easy, photogenic shape.
Step 1: Block in a simple head volume — an oval for the skull and a wedge for the muzzle — then place the jaw line where the lower fur edge turns. Step 2: Position ears so their bases sit slightly behind the eye line, and keep the inner ear shape smaller than your outer ear outline. Step 3: Add fur direction strokes in three groups: forehead to muzzle, cheek to jaw, and the chin fringe.
Use one shadow value under the jaw and keep it clean; messy shading kills the face shape.
Don’t start with whiskers and fur hairs — draw planes first.
2. Profile fox head with ear tilt and nose highlight
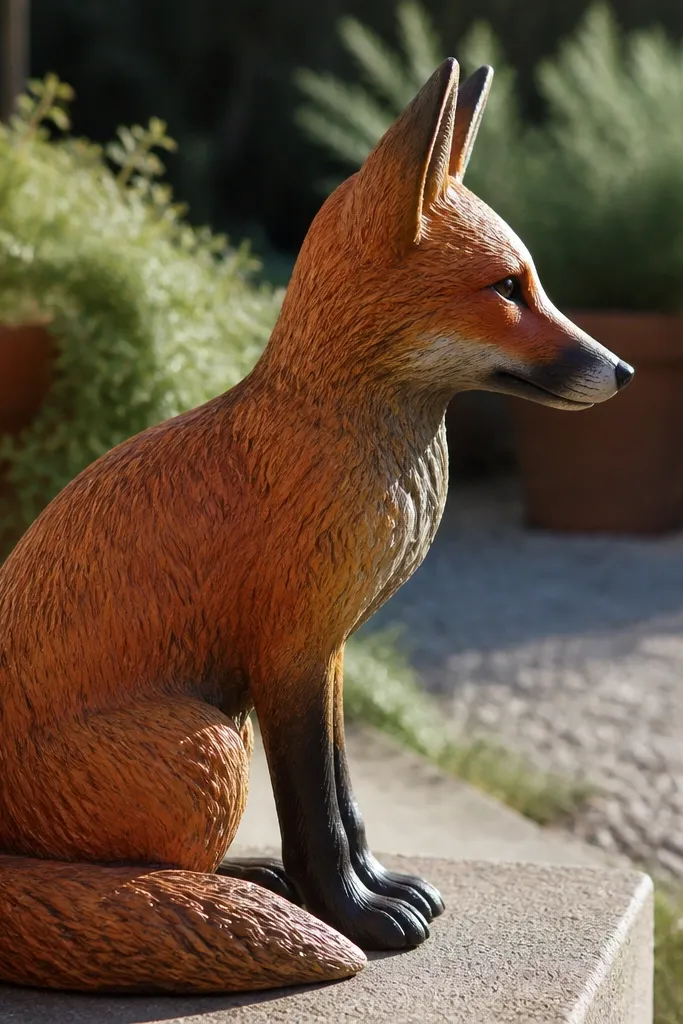
Profile references are the fastest way to nail proportions for an aesthetic fox drawing because the silhouette is unforgiving. You can see the relationship between forehead, muzzle length, and the nose tip without angle confusion. A nose highlight also gives you a natural focal point, which makes your linework look intentional. Add ear tilt from the reference to avoid the “straight-up ears” look that feels toy-like.
Step 1: Draw a clean profile line for skull-to-muzzle, then mark the nose tip and chin line with two short guides. Step 2: Place the ear so its inner edge touches the forehead plane rather than floating away. Step 3: Shade by planes: a dark forehead shadow, a lighter cheek plane, and a small under-muzzle shadow.
Keep the outer ear contour thicker than the inner ear edge for instant depth.
Don’t over-round the muzzle; profile views show every proportion mistake.
3. Low-sun side lighting fox sitting tall
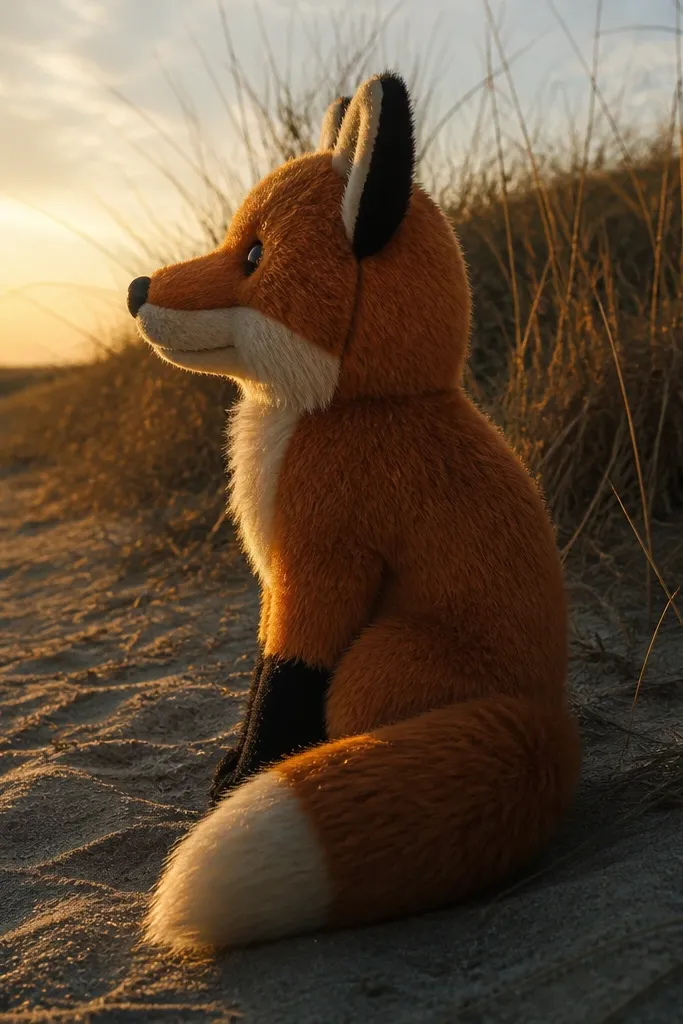
Low-sun side lighting turns a simple sitting pose into a dramatic aesthetic fox drawing. The long shadow shapes create a clean composition — dark mass under the chest and a lighter rim along the back. This reference also gives you a strong fur direction cue along the spine and tail base. If your drawings look flat, this setup usually fixes it because the light defines where you place contrast.
Step 1: Sketch the torso as a rounded wedge and place the tail base behind the body, not directly beside it. Step 2: Block the shadow as one solid shape first, then soften its edge with a single gradient. Step 3: Draw fur strokes that follow the spine direction on the back and sweep outward on the tail.
Pro tipLimit your highlights to the rim edges and the nose; everything else stays matte.
AvoidDon’t shade the whole coat evenly — the shadow mass should be dominant.
4. Running fox mid-trot with overlapping legs
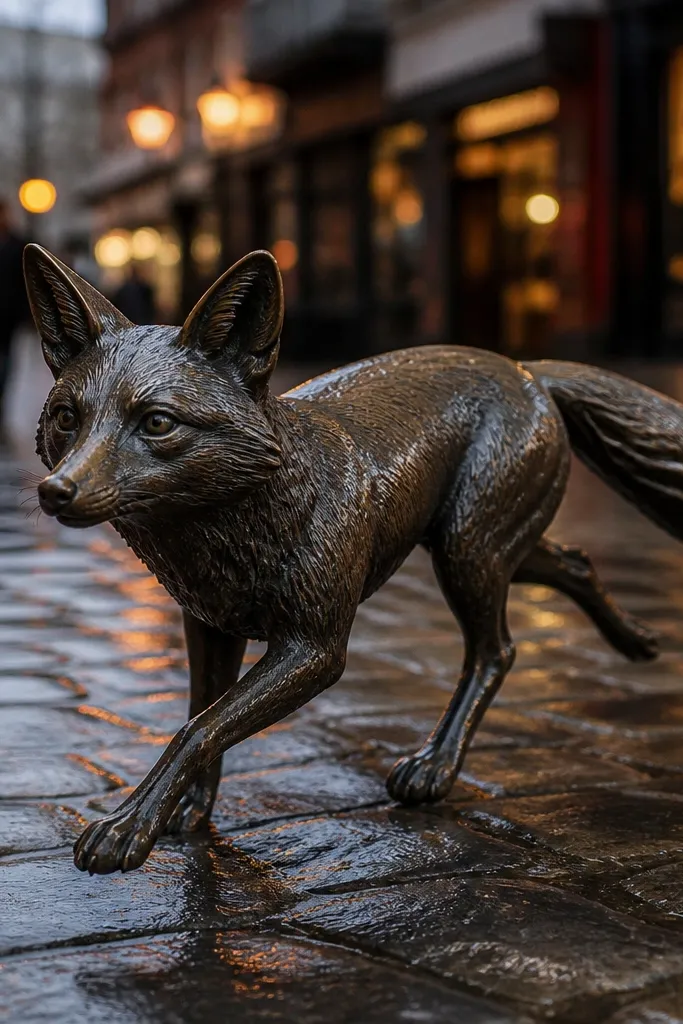
Motion references make your aesthetic fox drawing look alive because overlap tells the body story. When legs cross and the tail streams, your viewer reads speed instantly. The trick is to simplify the fur into directional clumps so you don’t drown the movement in tiny hairs. This reference type also helps you learn where the torso bends during a stride — the chest lifts, then drops.
Step 1: Draw a “spine curve” line from neck to tail and set the torso angle against it. Step 2: Use 3 leg cylinders at different depths, then overlap them so one leg clearly sits in front of another. Step 3: Tail plume goes last — sweep it as a fan shape following the direction of travel.
Use thicker line weight on the front leg edges and thinner lines on the trailing leg.
Don’t keep the tail rigid; it should arc with the stride.
5. Fox crouch with paw reaching forward
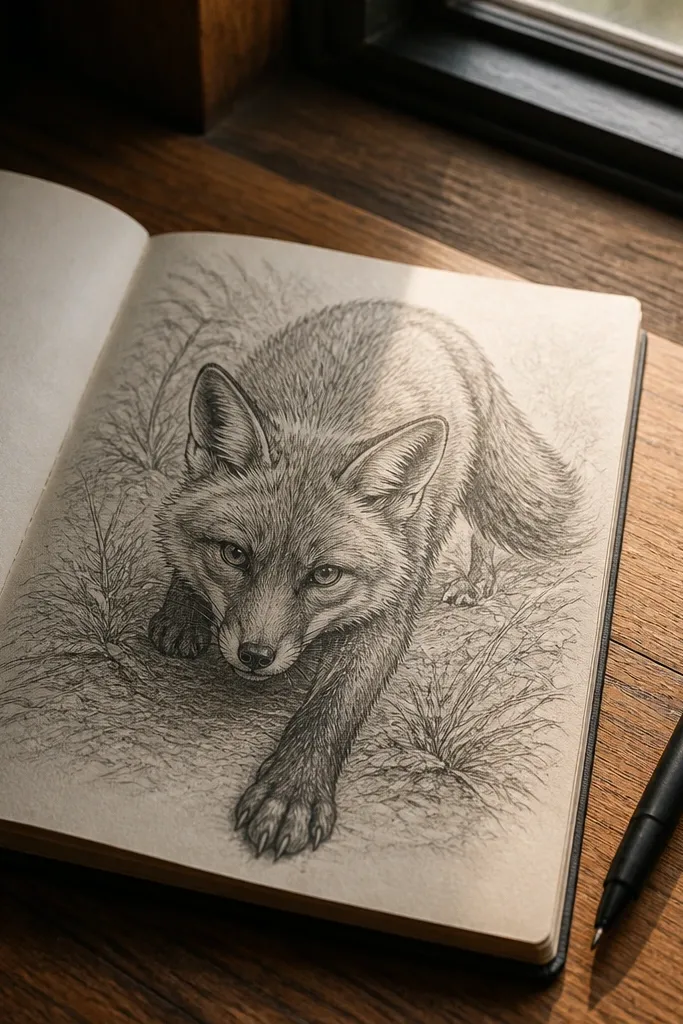
A crouch with a reaching paw gives you a friendly, tense aesthetic fox drawing. The low body position creates a strong foreground shape, and the forward paw adds depth. Ears-forward placement also helps the face read as alert rather than sleepy. Use this reference when your foxes look like they’re standing in place — the pose forces weight shifting.
Step 1: Block the body as a low crouch — front torso higher than the haunches — then place the forward paw toe-first. Step 2: Draw the head angle slightly down toward the paw so the neck line feels connected. Step 3: Shade the chest and belly as a single lighter plane with a darker underside shadow under the torso.
Sketch the paw shape before detailing toes; the paw silhouette is the anchor.
Don’t add fur texture to the paw edges until the hand/foot shape is correct.
6. Tail curl close-up with fur plume separation
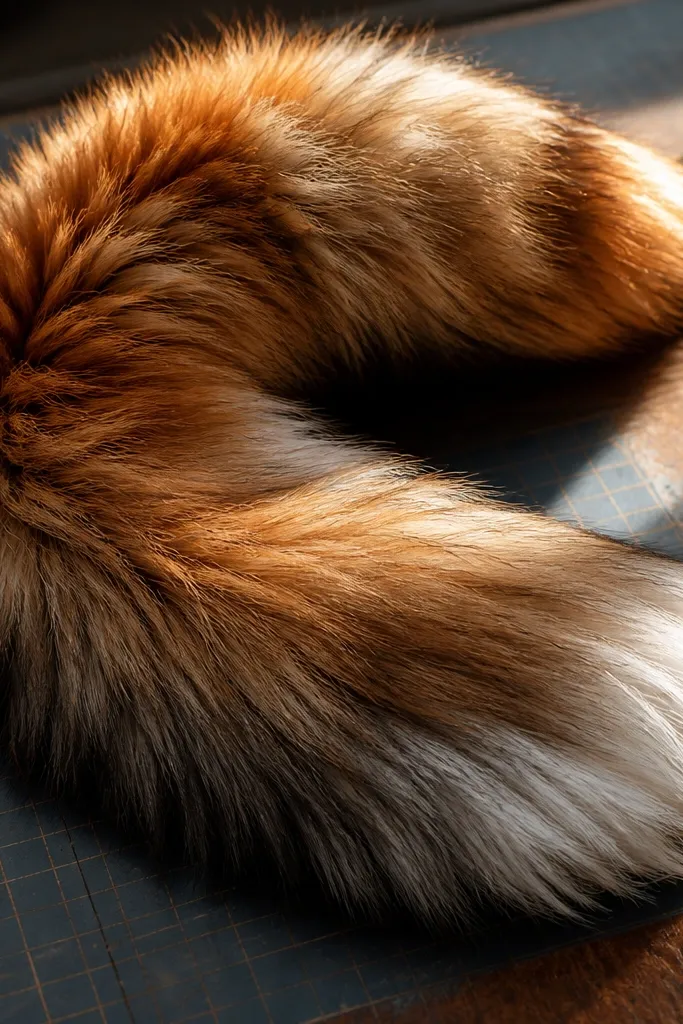
Tail references are where aesthetic fox drawing gets its signature look. A curled tail shows long hairs fanning and layering, which makes your strokes look deliberate. The underside usually has a darker value, and the top rim catches light, so you get an instant contrast plan. Copying the plume separation teaches you how to draw fur without turning it into random scribbles.
Step 1: Draw the tail as a thick C-shape, then mark 3-5 large fur bands that spiral along the curl. Step 2: Add longer plume lines at the outer edge and shorter, tighter strokes on the inner curl. Step 3: Shade by band — one main shadow under the tail curve and a highlight rim on top.
Keep plume strokes curved and parallel to the tail spine; that’s what makes it look “designed.”
Avoid drawing every hair the same length — the plume needs length change.
7. Sitting fox with front paws tucked and belly shadow
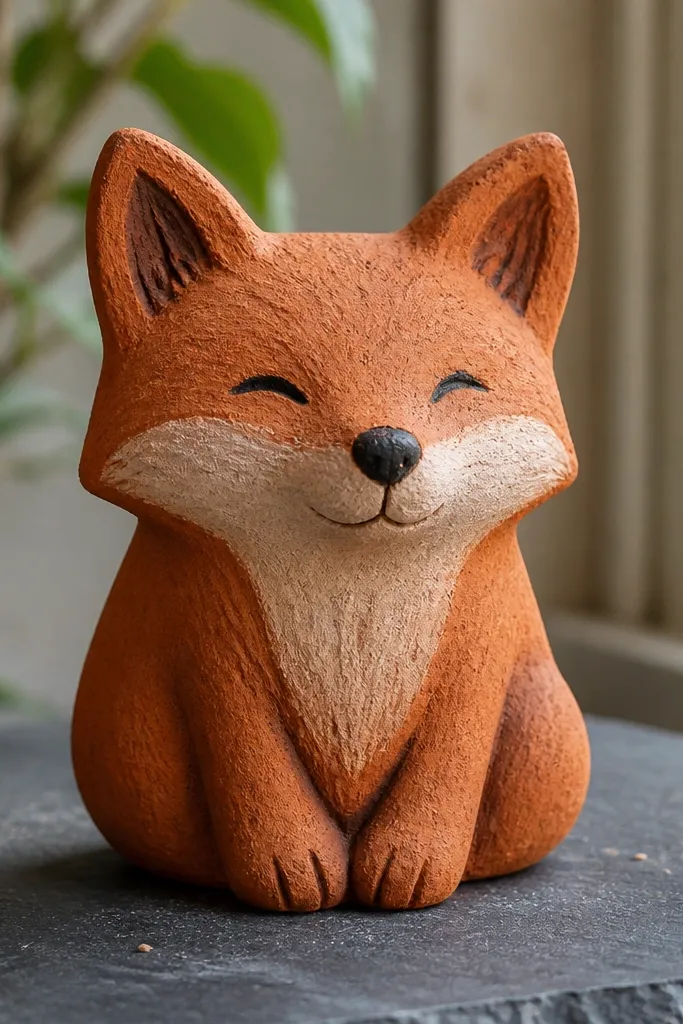
This reference is great for clean, aesthetic linework because the body forms simple shapes. Tucked paws create a clear negative space under the chest, which helps your drawing look tidy. The belly shadow gives you a single large contrast area that makes the coat depth believable. If your foxes look flat, this is one of the quickest fixes because the pose naturally separates light and dark.
Step 1: Draw a rounded torso and then sketch the tucked paws as two partial ovals beneath the chest. Step 2: Place the tail behind the body as a thick strip that curves into the tucked area. Step 3: Add fur direction strokes that wrap the belly and then sweep outward where the tail meets the back.
Pro tipUse a darker line weight under the chest edge where the paws meet the torso.
AvoidDon’t erase away the tuck shadow; that shadow is the depth cue.
8. Head turn downwards with neck fur flow
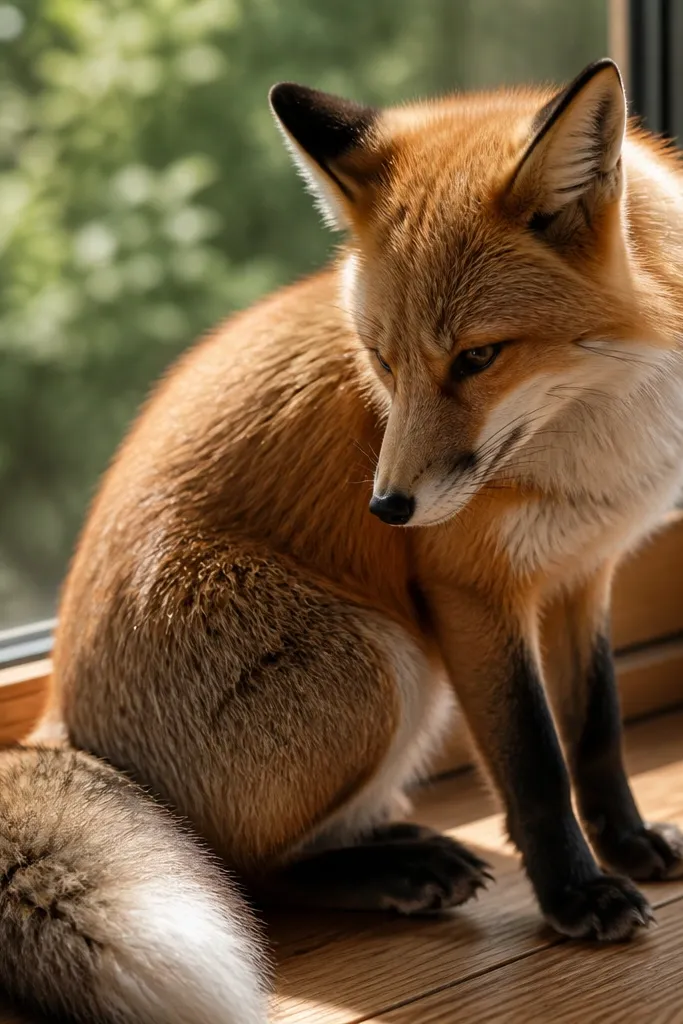
A downward head turn makes the neck and chest connection visible, which instantly improves realism in an aesthetic fox drawing. You get a clean fur flow path from jaw to throat to chest, and it’s easier to keep strokes consistent. This reference also helps you avoid the “head floating” problem where the muzzle doesn’t feel attached to the torso. The angle gives you a softer, more intimate vibe.
Step 1: Draw the head first, then extend a neck cylinder that narrows toward the throat. Step 2: Sketch the chest as a rounded plane and connect the throat line to the chest center. Step 3: Add fur strokes in one continuous direction sweep: jaw fringe down, then chest fur outward.
Pro tipKeep the throat area lighter and let the darker fur start lower on the chest.
AvoidDon’t outline the neck with a hard line; use a gradient edge instead.
9. Ears-forward alert fox with inner ear contrast
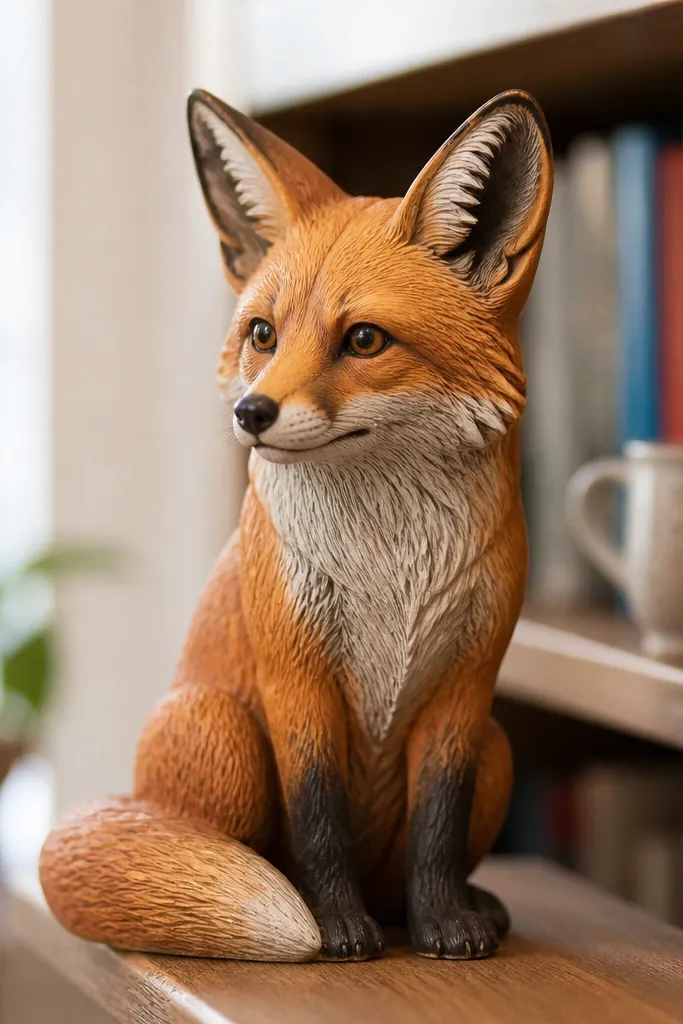
Ears-forward references make your aesthetic fox drawing look alert and intentional even with minimal detail. The inner ear contrast creates a focal zone that reads instantly, and the ear shapes help you get symmetry right. If your foxes look generic, ear placement is the fastest upgrade because it changes the entire expression. Keep the ear inner shape crisp and the outer fur slightly softer.
Step 1: Draw the head silhouette, then place ear bases at equal distance from the midline. Step 2: Block the inner ear as a smaller shape that sits slightly forward, with a clear dark edge along the base. Step 3: Add short fur strokes along the ear outer rim and keep the head fur strokes longer for contrast.
Use one solid dark value for the inner ear base so it doesn’t turn gray and disappear.
Don’t over-detail the ear hairs; the big shapes do the work.
10. Back view fox with tail plume and spine highlight
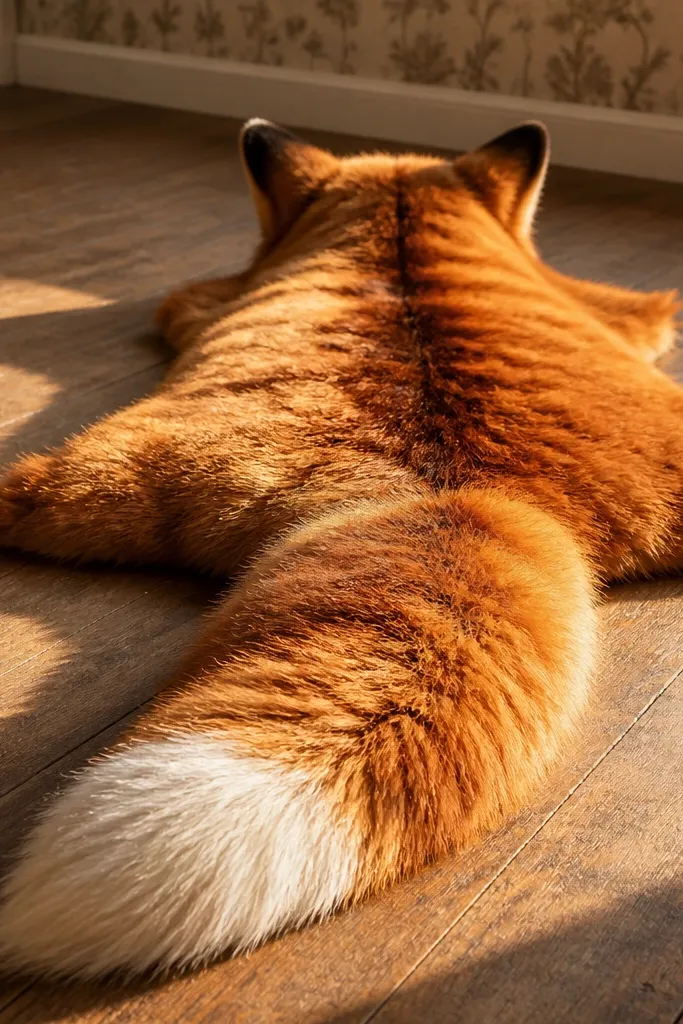
Back view references are underrated for aesthetic fox drawing because they teach fur plane organization. You can see the spine line and how the coat breaks into layers toward the tail. This angle also makes your composition easier — the tail plume becomes the main graphic element. If you struggle with shading, the spine highlight gives you a built-in light guide.
Step 1: Sketch the body as a tapered oval from shoulders to hips, then draw the tail base as a thick root behind the body. Step 2: Mark a center spine highlight stripe and keep it narrow, then shade both sides with one mid tone. Step 3: Draw tail plume strokes outward in a fan, with darker strokes under the plume edge.
Let the tail fur overlap the body outline. Overlap makes it look dimensional fast.
Don’t draw back-view fur as random dots; use directional strokes.
11. Fox with one paw lifted on a textured ground
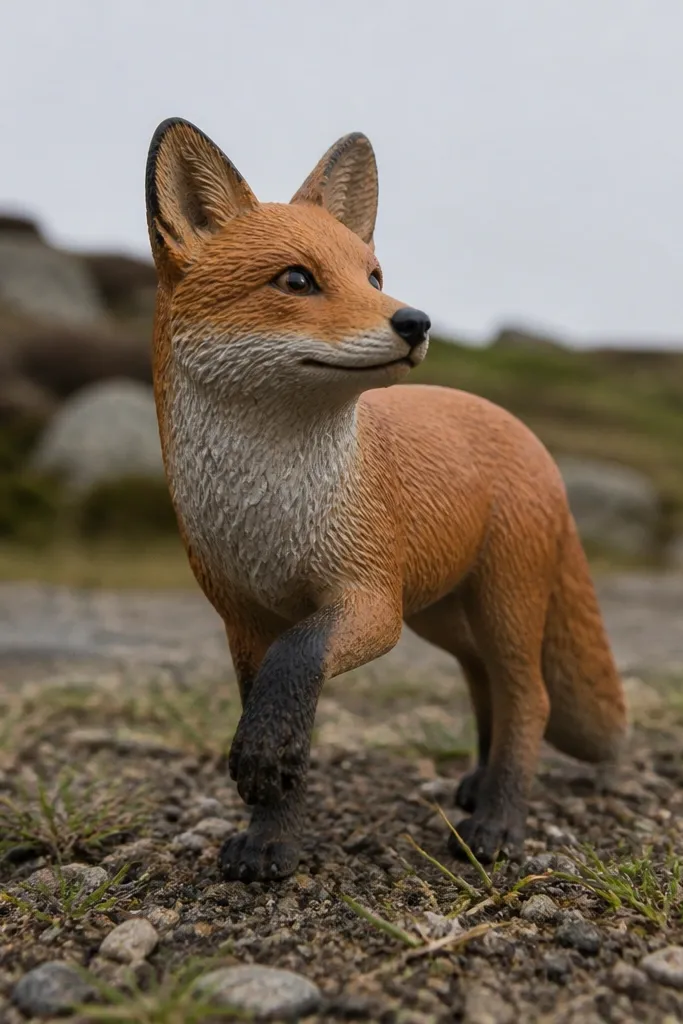
Ground texture is a cheat for making an aesthetic fox drawing feel finished. When the reference includes pebbles, grass, or snow, your fox shadow and paw edges automatically look believable. The lifted paw also gives you a clean silhouette shape, which makes the drawing photogenic. This setup is perfect for practicing edge control: crisp where the paw lifts, softer where the body shadow sits.
Step 1: Block the fox body and paw shapes first, then add a simple shadow mass under the lifted paw area. Step 2: Use texture only in the ground plane, with short strokes that don’t cross into the fox silhouette. Step 3: Shade the lifted paw with one highlight edge and one shadow under the toe.
Keep texture contrast lower than the fox fur contrast so the fox stays the focus.
Don’t texture the fox coat like the ground. Fur and ground should look different.
12. Snow scene fox with rim light on fur edges
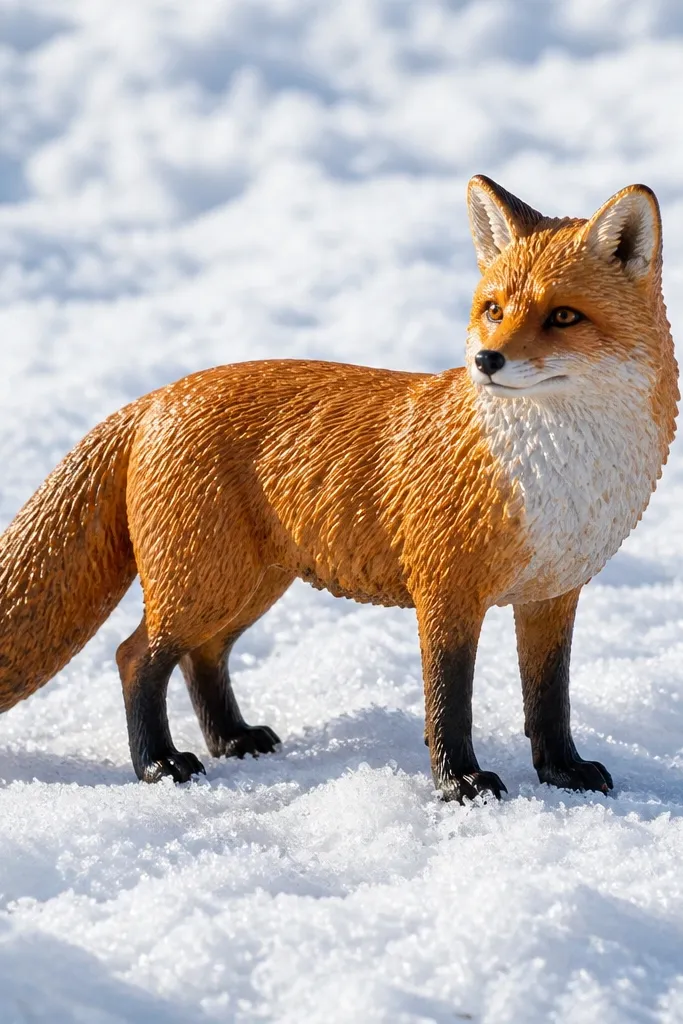
Snow references are beautiful for aesthetic fox drawing because rim light makes fur look like it has volume. The snow background forces a clean separation between the dark coat and the bright environment, so your drawing reads instantly. You also get a natural color plan: warm fox tones against cool whites. Use these references to practice edge control — highlight the fur rim, keep the inner coat softer.
Step 1: Draw the fox silhouette darker than the background, then reserve the rim highlight as a thin band along edges. Step 2: Shade the coat with mid tones, then add a single darker shadow under the chin and belly. Step 3: For snow, keep it light with a few soft shadow patches under the body, not full scribble texture.
If you’re using pencil or ink, blend the rim highlight lightly so it looks like light, not white paint.
Avoid outlining every fur edge in white; that flattens the shape.
13. Woodland fox portrait with soft bokeh light spots
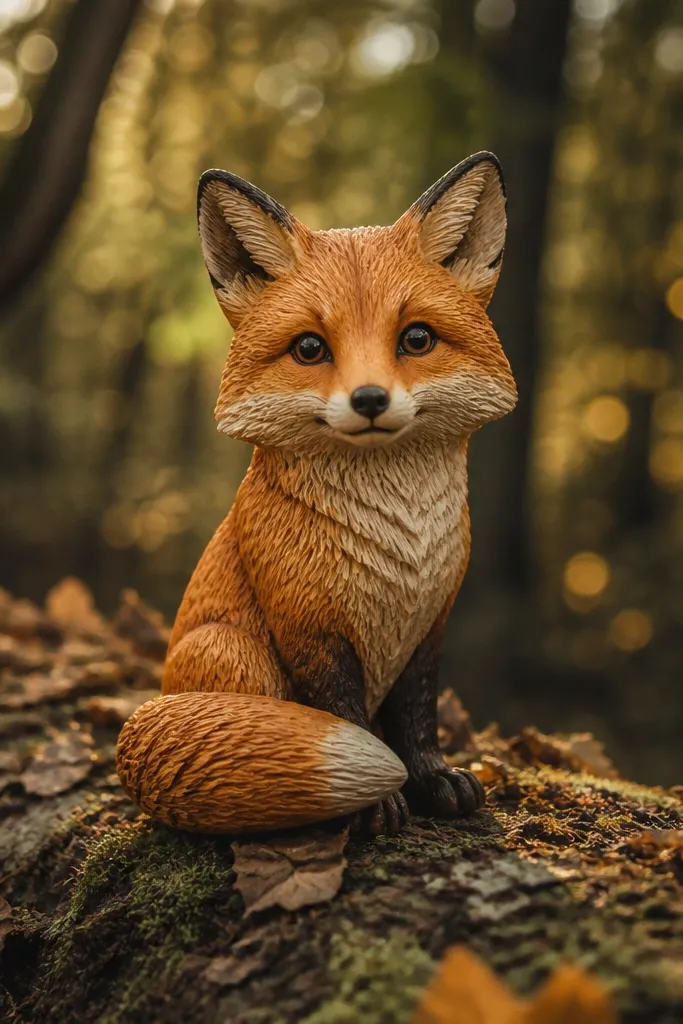
A portrait with a softly blurred background gives you an aesthetic fox drawing that looks graphic and intentional. The bokeh light spots create an easy, photogenic backdrop, so your fox doesn’t need heavy background detail. This reference helps you practice contrast hierarchy: keep the fox sharp and let the background wash out. The result feels like a real “portrait” instead of a standalone sketch.
Step 1: Sketch the fox head and chest with clean edges, then ignore most background detail while blocking in general shapes behind it. Step 2: Add bokeh spots as soft circles or dabs that stay out of the fur silhouette. Step 3: Shade the fox with a simple light-dark split and sharpen only the eye, nose, and ear edges.
Pro tipUse fewer bokeh spots than you think. Sparse lights look cleaner than crowded ones.
AvoidDon’t shade the background as much as the fox. The fox must win.
14. Side-eye fox with calm expression and sharp eye line
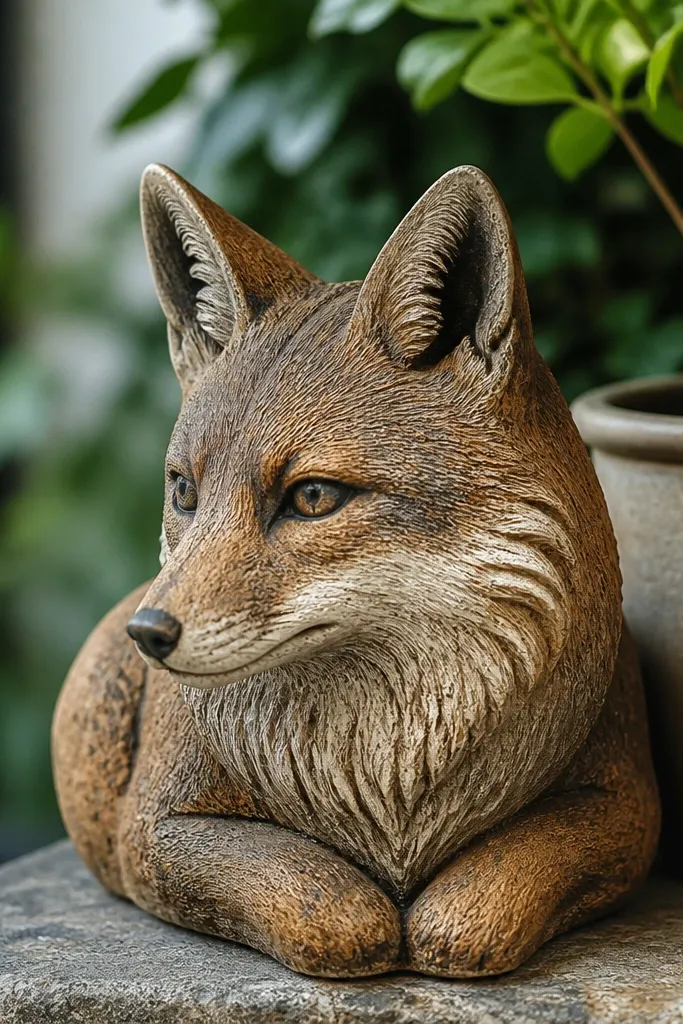
Side-eye portraits look elegant because the eye line carries the expression. The angled gaze forces correct eyelid curvature and eye placement, which makes your fox look more “designed” than random. This reference also teaches subtle muzzle shading — the cheek fur wraps around the eye corner, and the muzzle highlights sit on the nose ridge. It’s a great choice when you want an aesthetic fox drawing that feels calm, not chaotic.
Step 1: Draw the head as a 3/4 volume and place the near eye slightly higher than the far eye. Step 2: Add the muzzle triangle and connect it to the cheek plane using a soft shadow under the cheek edge. Step 3: Shade around the eye socket with a small crescent and keep the nose highlight as a narrow, bright shape.
Pro tipMake the near eyelid edge darker than the far one for instant depth.
AvoidDon’t place the eyes on the same straight line in 3/4 views.
15. Fox curled in a loaf with symmetrical fur mass
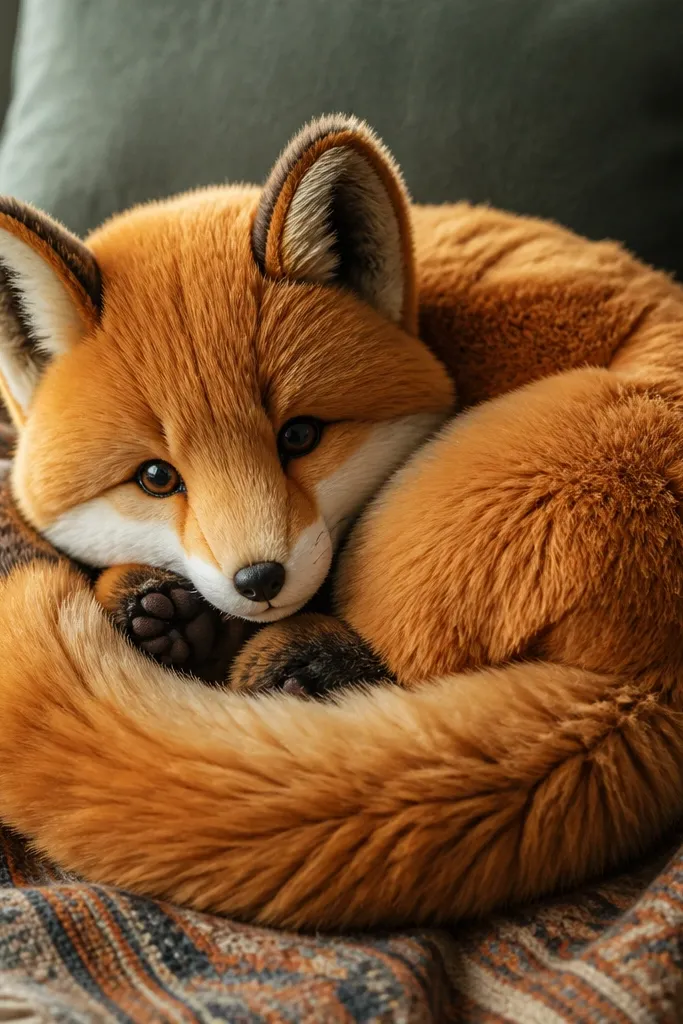
A loaf pose is a gift for people who want aesthetic fox drawing with minimal fuss. The symmetry gives you a strong composition, and the curled tail creates an obvious “fur ring” that guides your stroke direction. This reference type also helps you practice negative space — the gap between paws, belly, and tail looks clean when you get it right. When the coat mass is balanced, even simple lines look polished.
Step 1: Block the loaf shape as one big oval, then carve in the tail curl and paw positions as internal shapes. Step 2: Add a center guideline for the face so the muzzle doesn’t drift left or right. Step 3: Draw fur strokes as curved bands around the loaf, keeping them longer on the outer edge and shorter where the tail folds.
Pro tipKeep the face fur slightly denser than the body. It makes the head feel anchored.
AvoidDon’t erase all the internal shape guides; you need them to keep symmetry.



