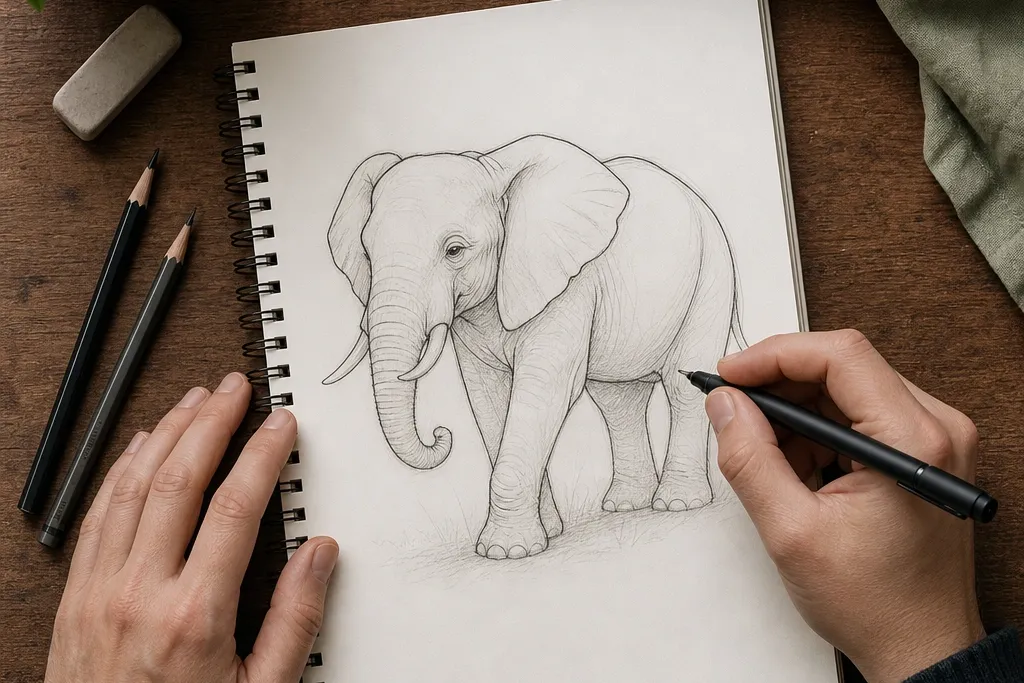

1. Big-Ear Profile Elephant in 3 Shapes
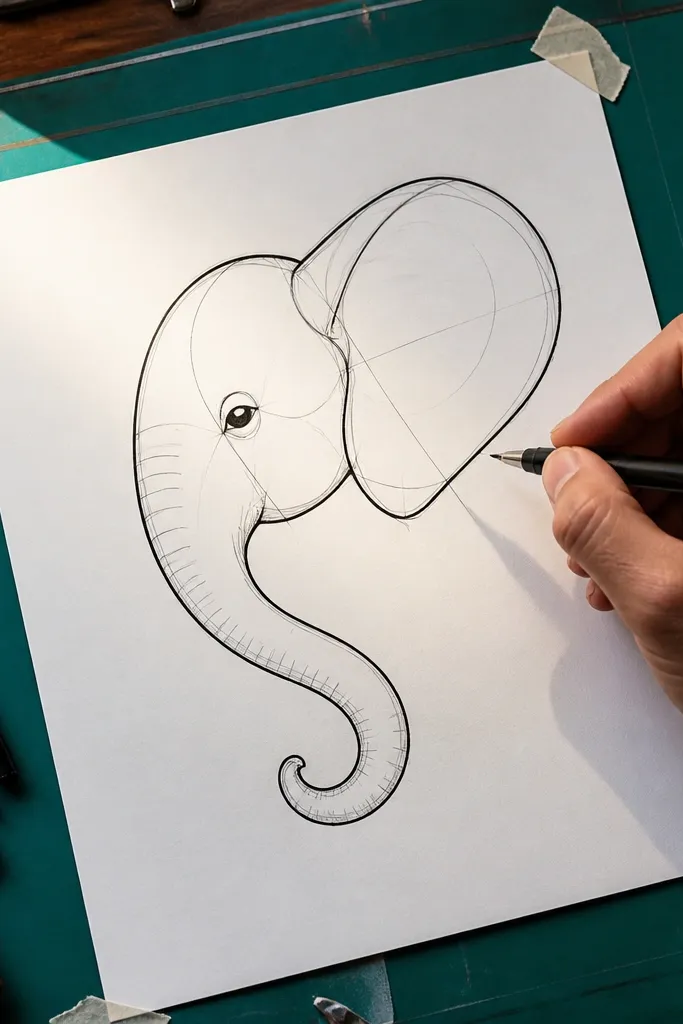
This one is for when you want the elephant to look “done” even if you’re a brand-new drawer. The trick is oversized ears and a trunk that follows one smooth S-curve, so the viewer’s eye reads the whole animal from a single silhouette. Use pencil construction lightly, then lock the outline with fineliner for crisp edges. Finish with two shadow zones — under the chin and beneath the trunk — so it looks dimensional without heavy rendering. Time target is about 25-35 minutes, and it looks great in a white sketchbook page with a clean border.
Step 1 — Draw a head oval and a body oval, then connect them with a gentle neck curve. Sketch the trunk as one continuous S-curve from the chin down and forward, ending in a small curl. Step 2 — Add the ear as a large circle-like shape behind the head, then place the eye with a tiny dot and a short lid line. Step 3 — Erase construction lines, ink the outer contour, and add two shadow blocks with a 2B pencil: one under the chin and one under the trunk fold.
Keep your trunk line thick as it curves — thinning mid-curve makes it look wobbly.
Avoid drawing individual trunk wrinkles early; the silhouette comes first.
2. Front-Facing Elephant with One-Line Trunk Curl
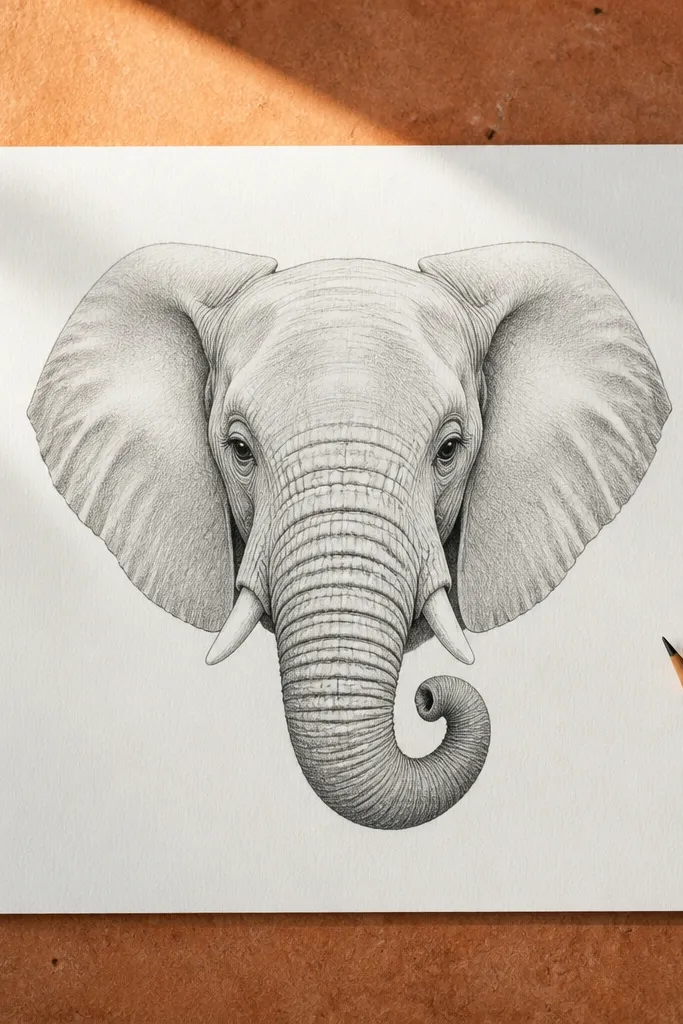
Front-facing elephants are the fastest way to get that “cute but accurate” look. This version uses symmetry as a cheat: two ear shapes that mirror each other and a trunk curl that frames the center of the face. The beauty is in the balance — the eye spacing and trunk curl make it read as an elephant instantly. Keep tusks minimal or skip them entirely; the trunk and ears do the heavy lifting. It works well for pencil-only drawings and also holds up with fineliner ink and a light gray wash.
Step 1 — Draw a face oval centered on the page, then add a second oval beneath it for the body. Mark a horizontal center line and a vertical center line so the eyes land evenly. Step 2 — Place two rounded ears on either side, then draw the trunk as one continuous line that curls inward toward the center. Step 3 — Add a small nostril shape at the trunk tip and two tiny tusk bumps (or just two short arcs). Finish by shading the underside of the trunk and the inner ear edges with a 2B pencil.
Use the center lines as guides for the trunk curl — if it crosses the vertical line off-center, the face feels “off.”
Don’t over-ink the tusks; two small curves beat big, blocky tusk shapes.
3. Elephant Face Only: Eye, Ear, Trunk Tip
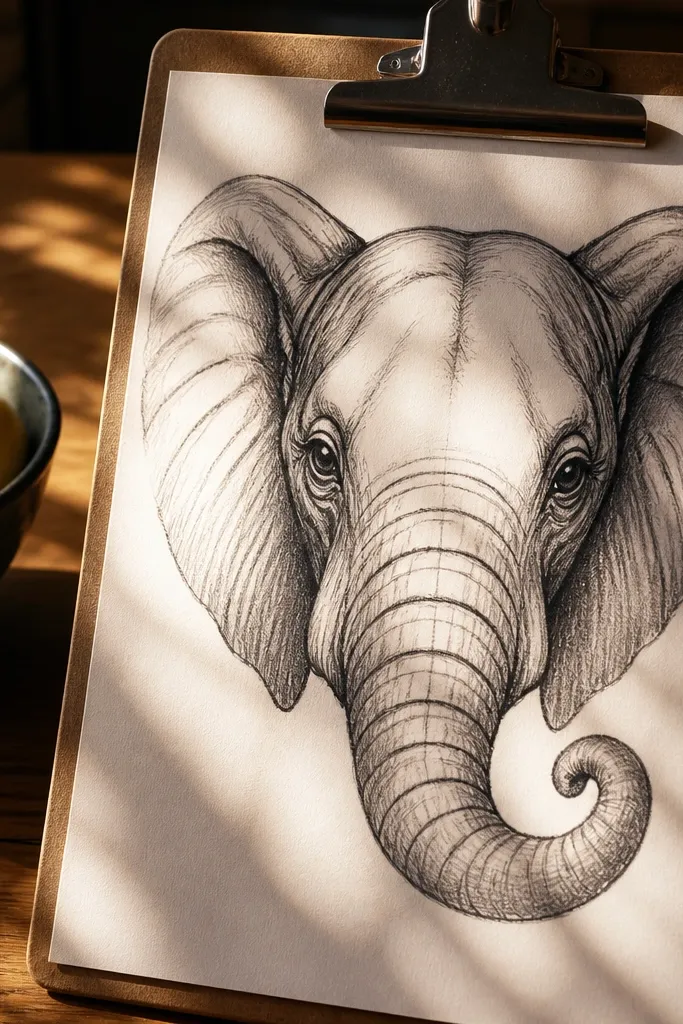
This is a confidence-builder because it removes the hardest parts: legs and body proportions. A face-only elephant looks graphic and modern when you keep the shapes bold and the shading minimal. Focus on the eye placement, the ear outline, and the trunk tip curl so the drawing feels alive. It’s also easy to make photogenic because the composition fills the page and reads clearly even at small sizes. Use a darker pencil for shadows and leave highlights clean on the trunk and cheek.
Step 1 — Draw a large ear outline first, then tuck a head oval behind it. Add the eye as a small circle with a short eyelid curve, positioned slightly above the trunk line. Step 2 — Draw the trunk tip as a curved hook shape, then add one inner fold line that runs from the trunk base to the tip. Step 3 — Shade just three spots: under the eye socket, under the trunk fold, and along the inner ear edge. Clean up with an eraser so the trunk highlight stays bright.
Pro tipIf you’re using pencil, press lightly for the first pass and only darken the fold line once you’re happy with the curl.
AvoidAvoid adding lots of skin texture dots on the face; it will look muddy at this scale.
4. Elephant Walking Side View with Simple Legs
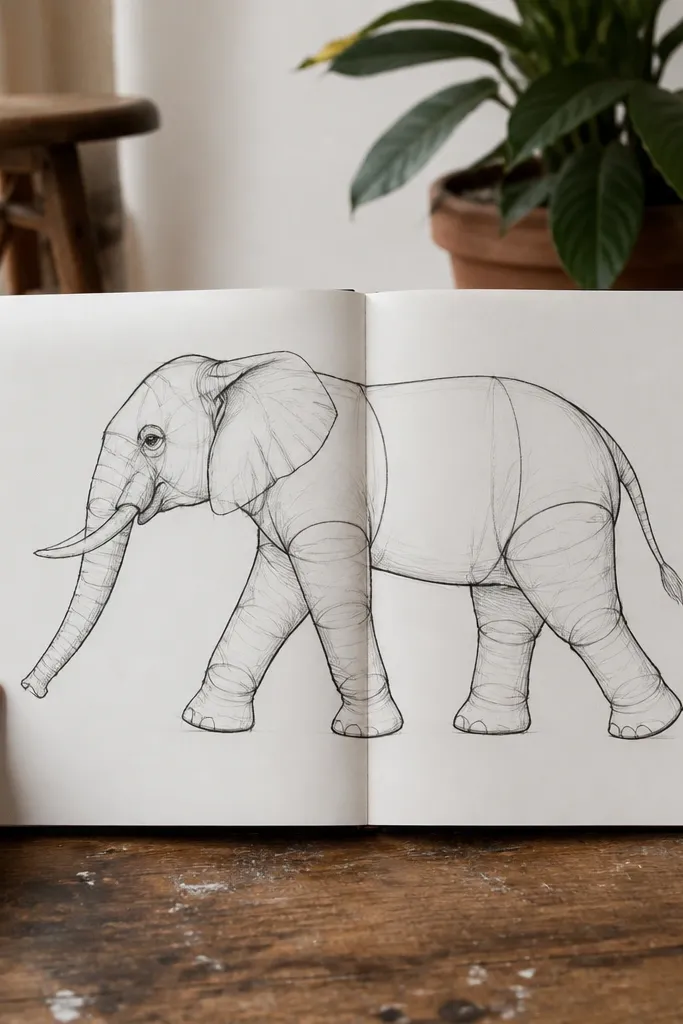
Walking poses look impressive because they show rhythm, but they don’t have to be complicated. This idea uses tube-like legs (cylinders) and a trunk that swings slightly forward. The look is clean and readable because you keep the leg positions simple and the body shape consistent. It’s ideal if you want a dynamic drawing for a sketchbook cover or a small wall print. You’ll spend most of the time on the leg angles and the trunk gesture.
Step 1 — Draw a body oval and a smaller head oval, then connect them with a neck curve. Place the legs as four cylinders with clear bend points: one front leg forward, one back leg forward, and the other pair slightly behind. Step 2 — Add the trunk as an S-curve that leans forward, and draw the tail as a small curve behind the body. Step 3 — Erase overlapping construction lines, then ink the outer contour. Add a ground shadow under the feet using a soft 4B pencil line.
Pro tipKeep the knee bend points at the same height across the body so the walk feels stable.
AvoidDon’t draw feet as separate toes; use rounded hoof bumps so the silhouette stays smooth.
5. Elephant Head with Geometric Tusks
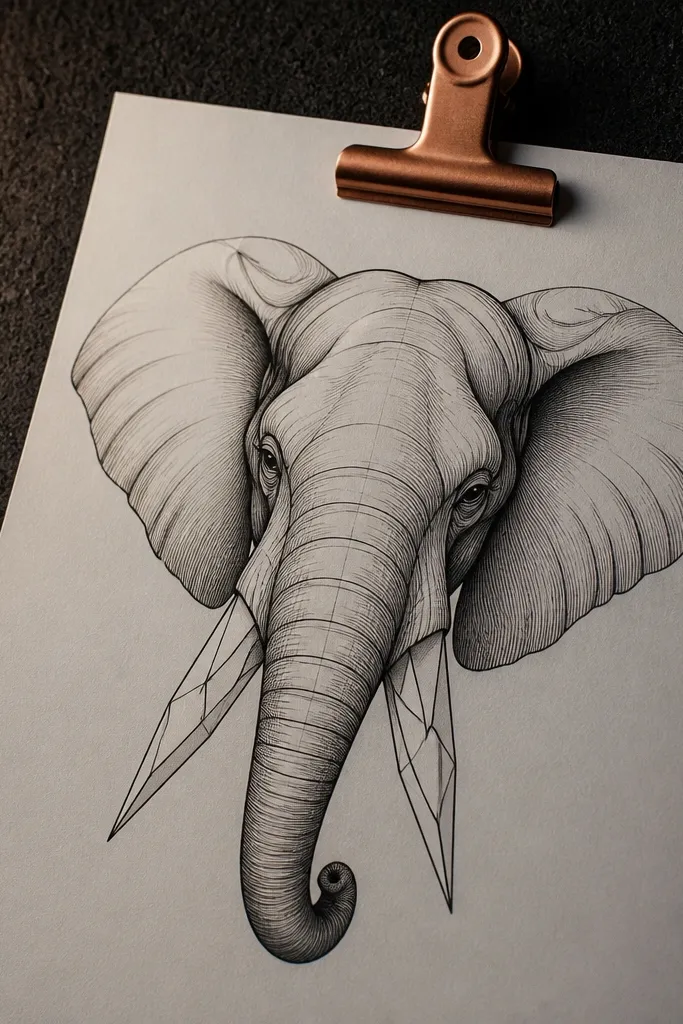
This is for a stylized look that still reads as an elephant. Geometric tusks make the drawing pop because they create sharp contrast against soft ear curves and trunk flow. The beauty comes from mixing rounded anatomy with crisp triangular tusk tips and clean linework. You get a “poster” vibe without needing advanced shading. It’s a great way to practice consistent line weight and controlled edges.
Step 1 — Draw the head oval and a simplified ear shape, then sketch the trunk as one smooth curve with a gentle tip curl. Step 2 — Place tusks as two simple triangles or trapezoids extending from the lower face line. Add a nostril mark on the trunk tip and a small eye dot. Step 3 — Ink the outline with fineliner, then darken the tusk edges slightly with a darker pencil to separate them from the face.
Use a ruler only for the tusk edges if you want that crisp graphic look — keep the rest freehand.
Avoid shading the tusks heavily; keep them mostly flat and let line weight do the work.
6. Elephant with Patterned Belly Dots
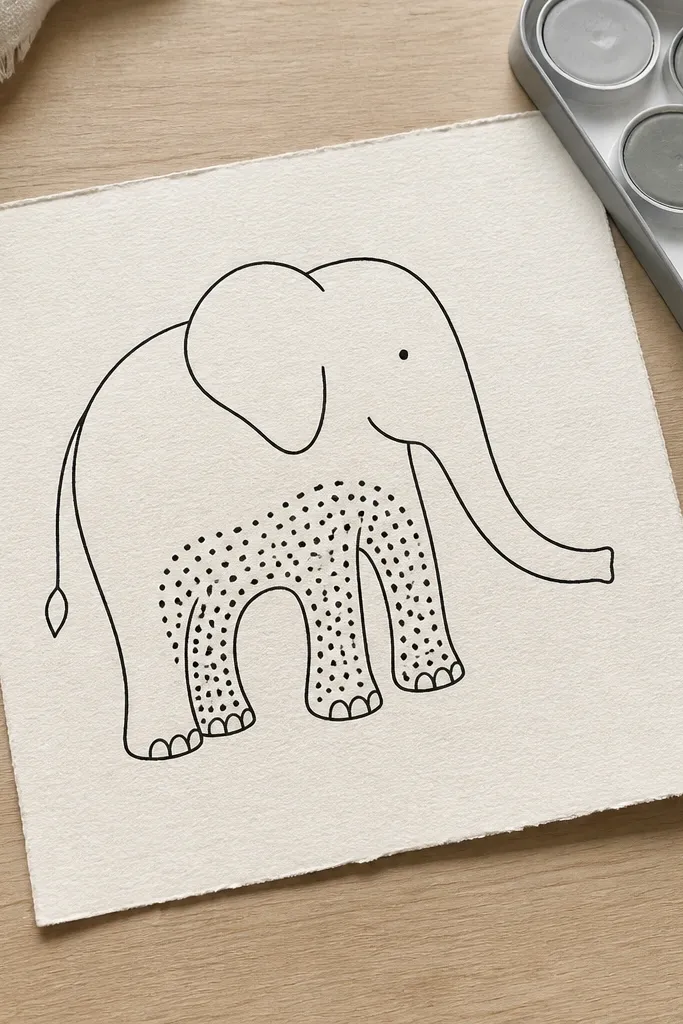
Texture can look amazing when it’s controlled, and belly dots are one of the cleanest options for beginners. This idea uses a simple elephant body outline, then adds dot clusters on the belly and inner legs. It looks photogenic because dots create a clear pattern rhythm and the face stays simple. The drawing still feels “elephant” because you keep the ear shape and trunk curve accurate. Pencil-only works great here, and it also looks good with light gray wash if you want more depth.
Step 1 — Draw a body oval and head oval, then connect them with a neck curve. Sketch the trunk as an S-curve and add two simple legs as rounded columns. Step 2 — Outline the ear as a big rounded shape, then place the eye and a tiny nostril on the trunk tip. Step 3 — Add dot clusters on the belly in 3-4 groups, varying dot size slightly, and shade under the trunk and along the belly edge with a 2B pencil.
Make dots smaller near the center of the belly and bigger toward the edges for a subtle depth trick.
Don’t cover the entire elephant in dots; keep texture limited to the belly and inner legs.
7. Elephant Mom and Baby in One Page
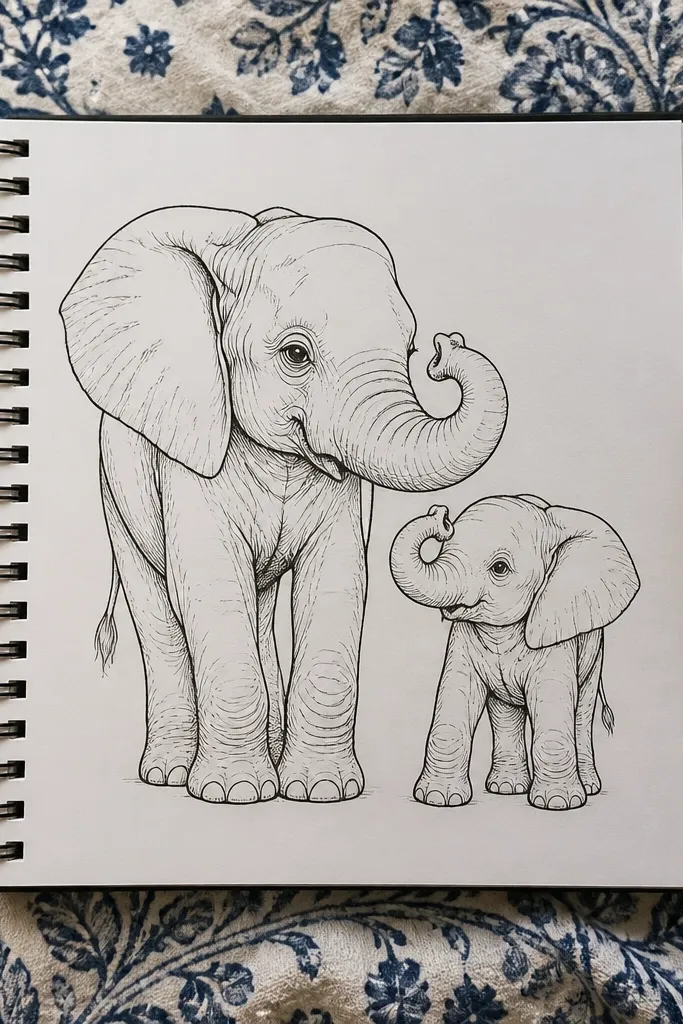
Two elephants create instant charm, and it’s easier than it sounds because you reuse the same head and trunk design at different scales. The larger elephant anchors the composition, while the baby adds balance and cuteness. Keep the trunk gesture similar on both so the page feels cohesive. This is a great beginner project because you can focus on proportions and not on complex details. It also photographs well because the size contrast gives the drawing a clear focal point.
Step 1 — Draw the larger elephant first: head oval, body oval, big ear, and one S-curve trunk. Then draw the baby elephant next to it at about 60% height of the larger one, using the same shapes. Step 2 — Add simple legs for both, then draw eyes and trunk tips. Step 3 — Ink the outer contours, then add light shadows under both trunks and between their legs to show they’re on the same ground.
Pro tipMatch the direction of both trunks — if one trunk curls up and the other curls down, the page feels chaotic.
AvoidAvoid making the baby’s legs too long; shrink the legs too, not just the head.
8. Elephant Under a Soft Sunset Gradient Wash
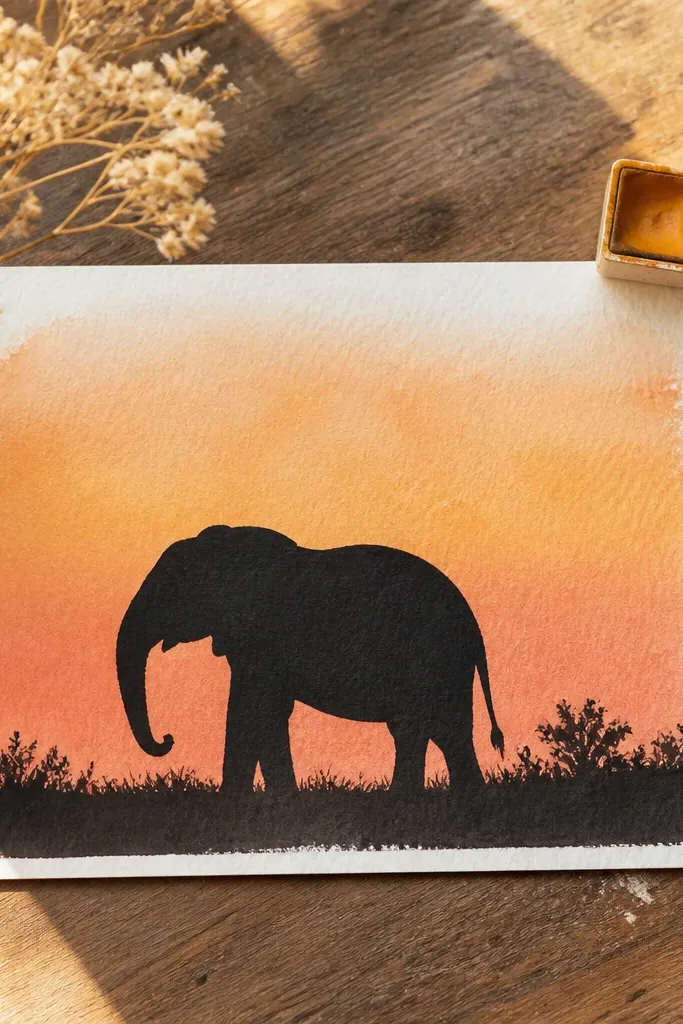
If you want the most “aesthetic” result without complicated drawing, do a silhouette elephant with a simple sunset background. The elephant can be mostly one bold shape, while the gradient does the visual work. This looks great even with rough pencil lines because you ink the silhouette cleanly. The key is to keep the elephant edges slightly irregular — a perfectly smooth outline feels fake. Use light watercolor or watercolor pencils for the background and keep the elephant dark and crisp.
Step 1 — Sketch the elephant in pencil with big ears, a clear trunk curl, and simplified legs. Ink the elephant shape with a fineliner or black brush pen, then erase pencil marks inside. Step 2 — For the background, lightly paint a gradient from warm orange near the horizon to pale yellow above. Step 3 — Add a thin darker band at the horizon and let it blend softly into the sky.
Pro tipKeep the elephant silhouette bigger than you think — it should dominate the page so the gradient doesn’t steal attention.
AvoidDon’t paint the sky over the inked lines without controlling the water; it will bleed and blur the elephant.
9. Elephant in a Frame with Doodle Border
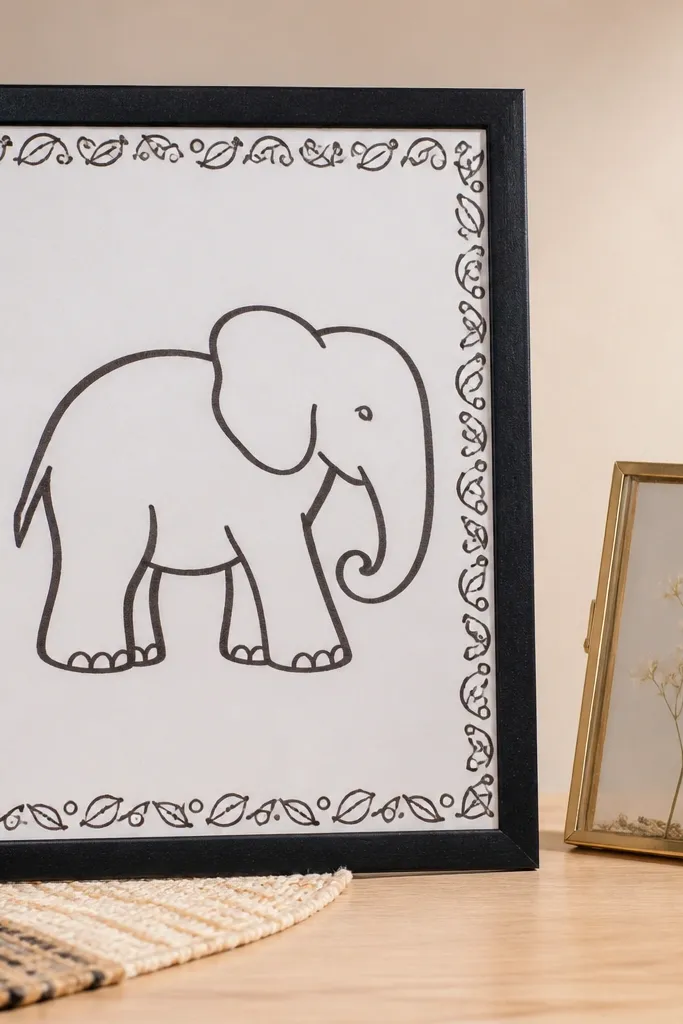
This idea is about presentation as much as drawing. A framed elephant with a clean doodle border makes the page look finished and “designed,” which is what photographs reward. You keep the elephant simple: thick outline, minimal shading, and a readable trunk curve. The border can be repeating shapes like tiny leaves or dots, but keep it light so it doesn’t fight the elephant. Great for beginners because the border gives you structure and hides minor mistakes.
Step 1 — Draw a rectangle frame with a margin of about 1 cm on all sides, then place the elephant in the center using the construction approach. Step 2 — Ink the elephant outline and add a small shadow under the trunk and chin. Step 3 — Fill the frame border with a repeating doodle pattern: small circles on the top and bottom, short leaf shapes on the sides.
Pro tipUse one border motif only; mixing three different doodles makes the frame look messy fast.
AvoidAvoid shading the elephant too much if you’re already adding border details.
10. Elephant with Bowed Head and Soft Shading
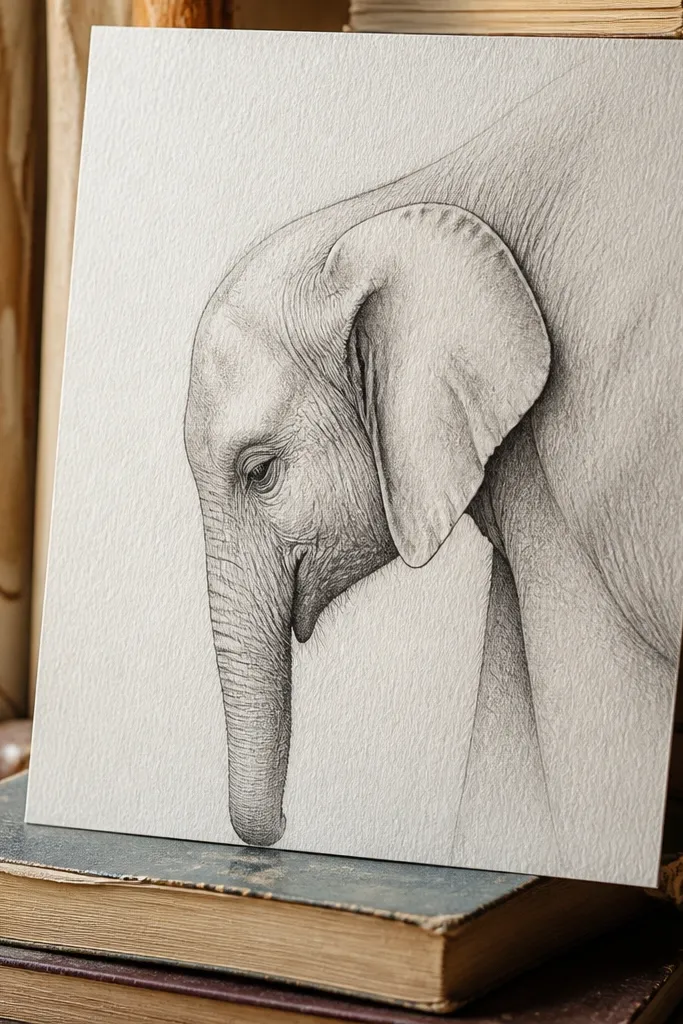
Bowed-head poses look gentle and emotional, and they’re easier than action poses because the trunk hangs naturally. This drawing uses soft shading under the chin and along the underside of the trunk, which creates a realistic volume without demanding anatomy. The look is cozy, almost plush, especially if you use a limited grayscale palette. It also helps beginners because the head and trunk are close together, so proportions feel simpler. Plan for about 35-45 minutes with pencil shading only.
Step 1 — Draw the head oval slightly tilted downward, then add the body oval behind it. Sketch the trunk as a smooth curve that drops from the chin and ends in a small curled tip. Step 2 — Add the ears as rounded shapes and place the eye near the top third of the head oval. Step 3 — Shade with a 2B pencil under the chin, then blend lightly with a tissue at the trunk underside.
Pro tipKeep a highlight gap under the trunk fold so it looks rounded instead of flat.
AvoidAvoid heavy dark shading on the whole face; limit it to underside areas.
11. Elephant Mandala Ear Accent
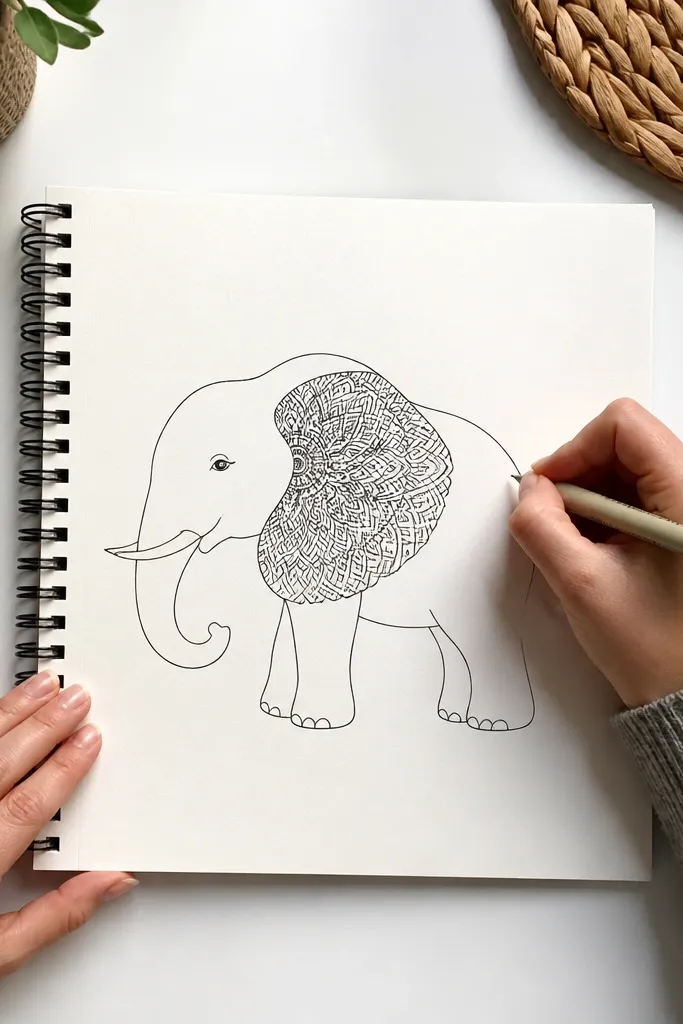
This is a high-impact idea for beginners who want “wow” without complex anatomy. You draw a simple elephant outline, then put the detailed work inside the ear. That placement is smart because the ear is a natural frame, and the pattern stays readable in photos. Use symmetrical repeating shapes like small teardrops, arcs, and dots radiating from the ear center. The elephant face stays clean so the pattern becomes the focal point.
Step 1 — Draw a side-profile elephant with big ear outline and simplified trunk and legs. Step 2 — Divide the ear interior mentally into a circle with a center point, then draw a small rosette in the middle. Step 3 — Add 3-4 rings of repeating motifs: tiny arcs, dot clusters, and teardrop petals pointing outward. Ink the elephant contour and outline the pattern lines, then shade only the ear edge.
Start pattern lines from the center and work outward; it keeps symmetry even when your freehand gets shaky.
Don’t crowd the ear with too many tiny details; 3-4 rings look cleaner than 8.
12. Elephant Watercolor Puddles with Pencil Outline
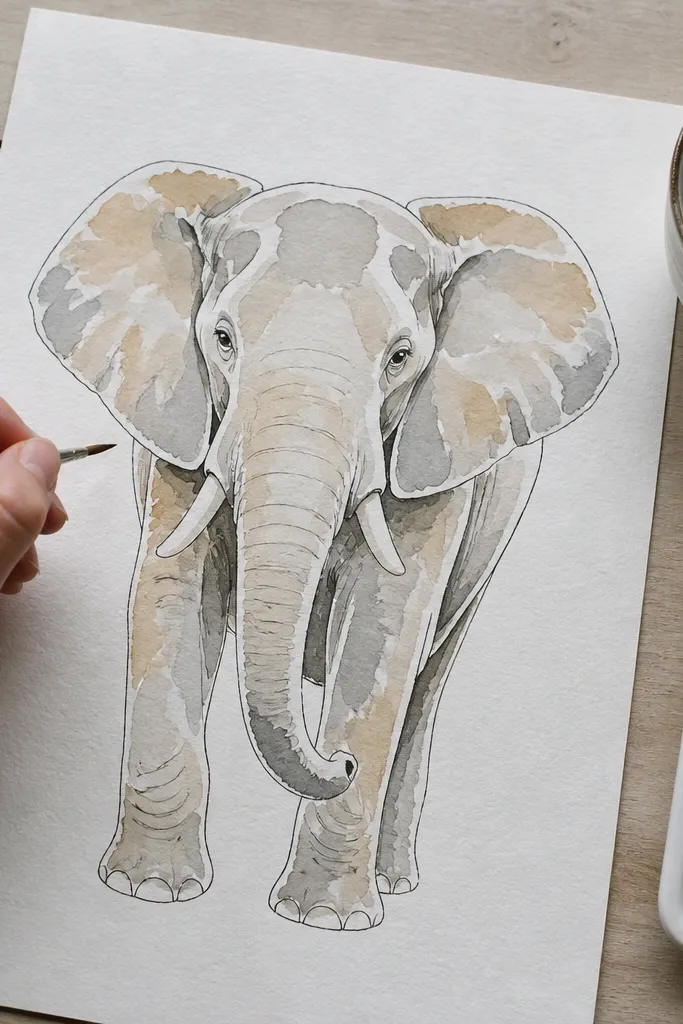
Watercolor puddles look artsy fast because the color does the blending for you. Keep the elephant’s outline crisp with pencil or fineliner, then fill the body with loose, uneven color patches. This avoids the beginner pain of trying to shade perfectly. Choose two earthy tones like warm gray and light ochre, then leave some white paper for highlights. The trunk and ear still need clear shape, but the interior can be painterly and forgiving. It’s a great option if you want an aesthetic result with minimal realism.
Step 1 — Sketch the elephant in pencil with a clear trunk S-curve and big ear shape, then ink the outline. Step 2 — Wet the body lightly with clean water using a small brush, then drop in warm gray and ochre puddles. Step 3 — Add a darker puddle under the chin and along the legs, then let it dry fully before erasing pencil marks.
Use less water than you think; puddles that bleed too much blur the trunk line and ruin the silhouette.
Avoid painting over inked areas too aggressively; it can thin the line and look ragged.
13. Elephant with Paper-Cut Look Using Masking Tape
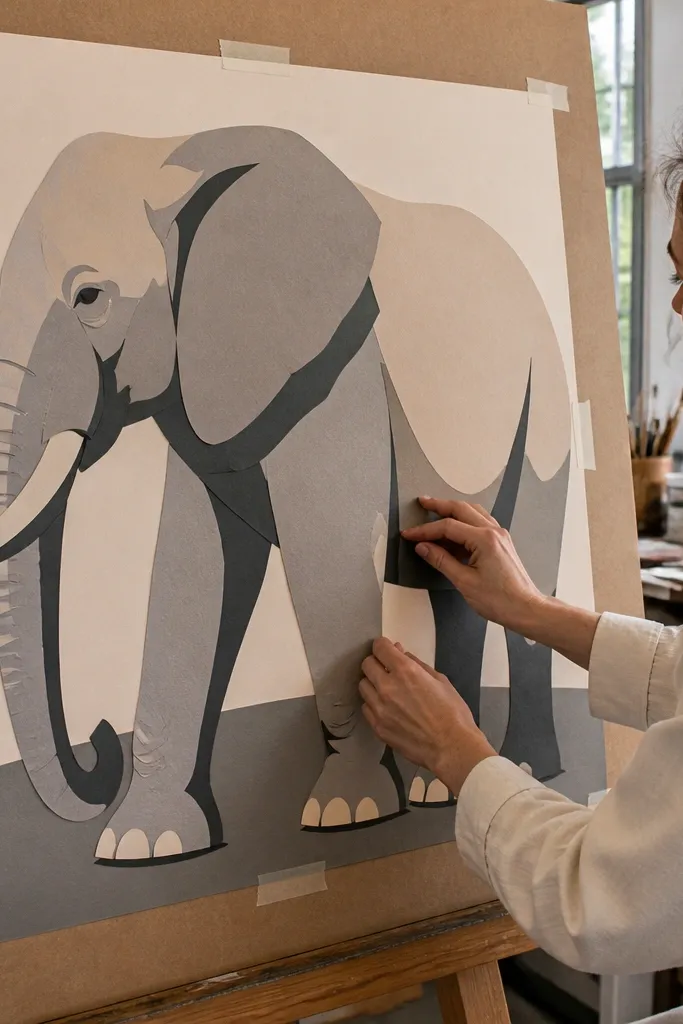
This idea gives you sharp, graphic shapes without needing perfect painting. You build the elephant from layered color blocks for a paper-cut look that photographs cleanly. The elephant stays simple — outline, then fill with two or three flat colors like light beige, gray, and a darker shadow tone. Beginners like it because tape creates crisp borders and reduces smudging. It’s also a nice change from pencil-only drawings if you want something bolder.
Step 1 — Sketch a side-profile elephant in pencil on paper, then trace the outline onto masking tape strips. Place tape along the elephant edges to mask off shapes you want clean. Step 2 — Paint or marker-fill the exposed areas with flat color, starting with the lightest tone. Step 3 — Remove tape while the paint is still slightly tacky so edges stay sharp, then add a darker shadow band under the trunk.
Press tape edges firmly with a fingernail so paint doesn’t creep under the border.
Avoid too many layers; two color layers plus one shadow layer looks clean, three can get messy fast.
14. Elephant Head Turned 3/4 with Clean Line Weight
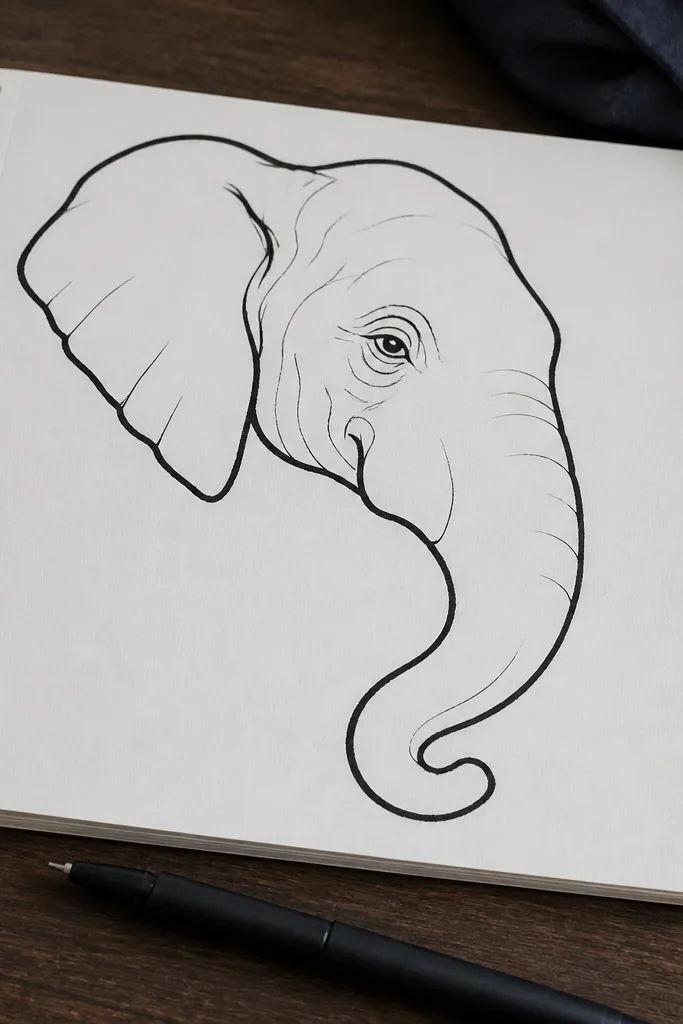
Three-quarter heads look advanced but they’re mostly about line quality and proportion. This drawing is built for beginners who want to practice line weight: thicker outer contour, thinner inner lines for the eye and trunk fold. The trunk is the main challenge, so you keep it simple with one S-curve and a single inner fold line. Add shading only at the underside of the trunk and around the eye socket. The result reads as polished and “designed,” especially if you keep the background blank.
Step 1 — Draw a head oval tilted slightly, then add an ear shape that wraps behind it. Sketch the trunk as one S-curve from the chin to the front, and place the eye with a small lid line. Step 2 — Use a thicker fineliner for the outer contour and a thinner one for inner details like the trunk fold. Step 3 — Shade with a 2B pencil under the trunk and lightly around the eye socket, then blend only the shadow edge.
Pro tipDo a test line on scrap first so your fineliner pressure matches the line weight you want.
AvoidDon’t blend the ink lines with pencil; it smears the crisp look.
15. Elephant Carrying a Leaf in Its Trunk
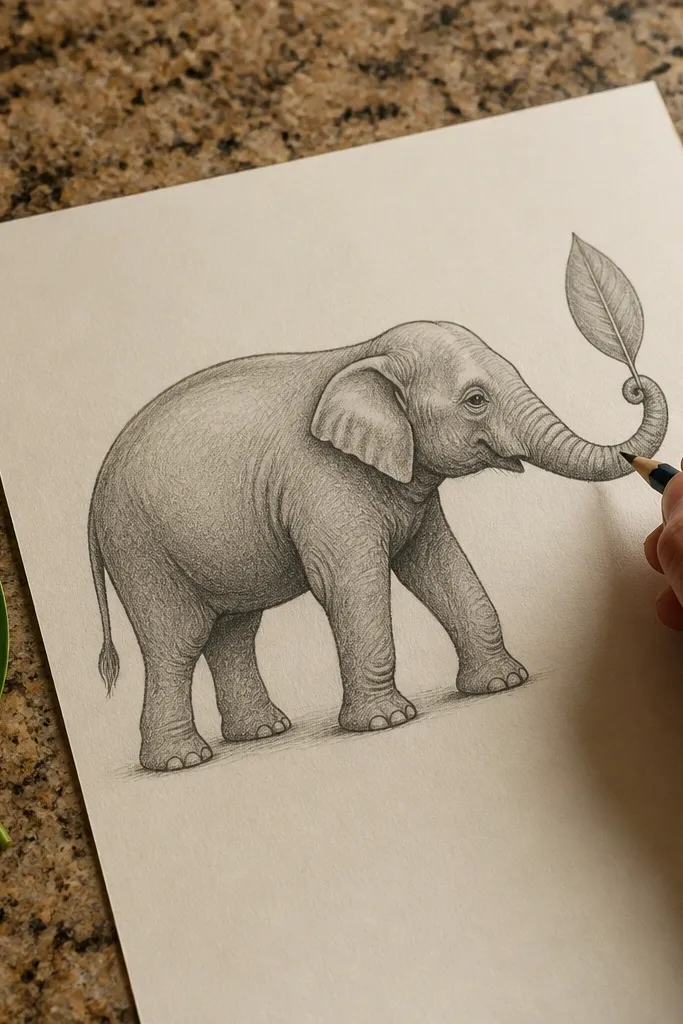
Adding one small object instantly makes the drawing feel like a scene. The leaf is easy to draw with an almond shape and a center vein, and it looks charming because it sits right at the trunk tip. Keep the elephant simple and focus on trunk control — the leaf should look held, not floating. This is a great beginner project for making your drawings feel more “alive” without learning new anatomy. Finish with a tiny shadow under the leaf and under the trunk fold.
Step 1 — Draw the elephant in side profile using the standard head oval, body oval, and S-curve trunk. Step 2 — At the trunk tip, draw the leaf as an almond with a center vein line, then add a small stem line attached to the leaf base. Step 3 — Ink the outline and leaf, then shade under the leaf and along the trunk underside with a 2B pencil.
Make the leaf slightly tilted toward the viewer; flat leaves look like stickers and break the illusion.
Avoid drawing the leaf before you lock the trunk curve — the leaf should match the trunk angle.
16. Elephant with Bold Charcoal Shadow Under Legs
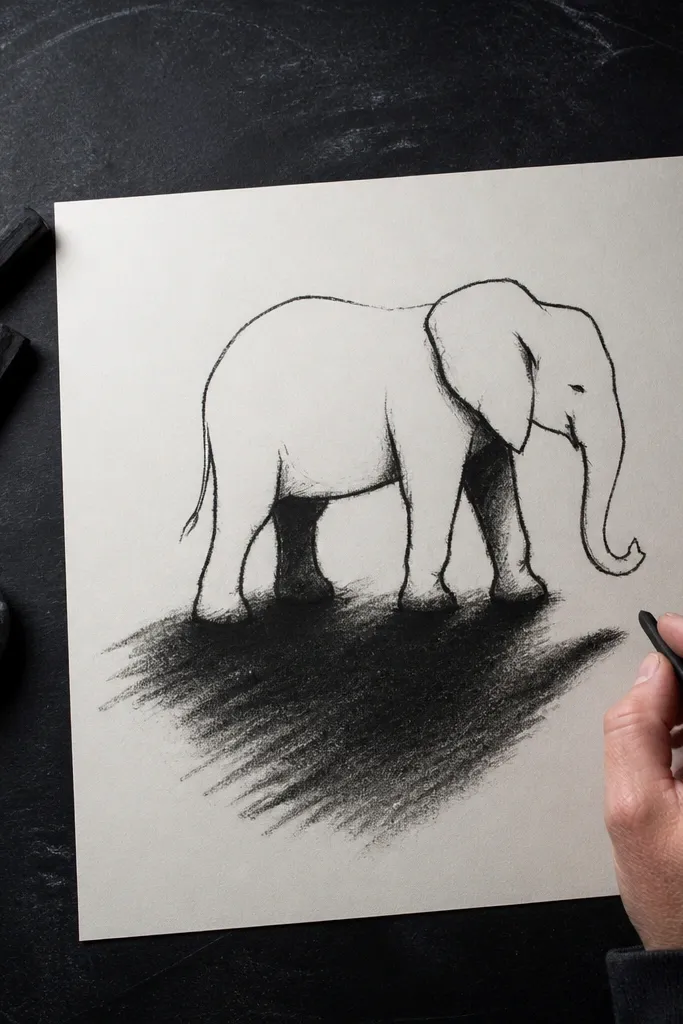
This idea looks dramatic because it focuses on one thing: shadows. You keep the elephant outline clean and then add a bold charcoal shadow under the body and legs. That contrast makes the drawing pop in photos and gives volume without needing fur or heavy texture. Beginners like it because charcoal forgives mistakes and spreads nicely, but you still have to place shadows correctly. Aim for one main shadow shape and one smaller shadow under the trunk fold.
Step 1 — Sketch the elephant side view with simple legs and a clear trunk curve, then ink the outer contour. Step 2 — Use charcoal or a very dark graphite stick to block in a single shadow shape under the body, following the leg positions. Step 3 — Add a smaller shadow under the trunk fold and blend the shadow edge lightly with a tissue.
Draw the shadow first in pencil very lightly; it prevents you from guessing the silhouette after you start charcoal.
Avoid smudging the elephant outline — keep the shadow separate from the contour line.
17. Elephant with Minimal Tusks and a Clean Cheek Line
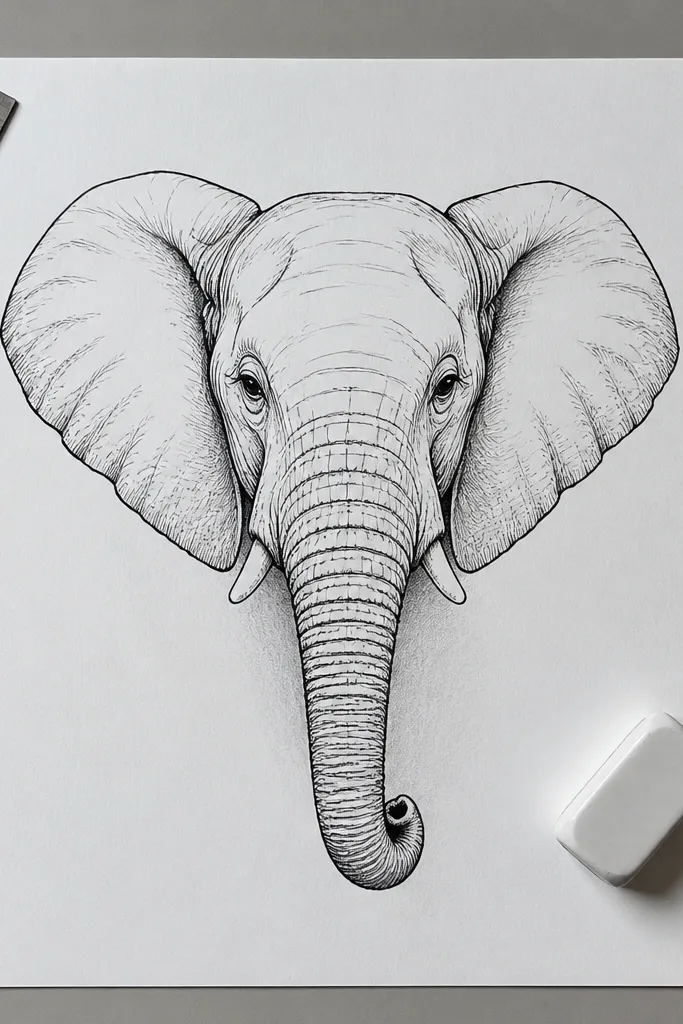
This is the most forgiving tusk approach for beginners. Instead of drawing full tusks with lots of curves, you use minimal tusk bumps and a clean cheek contour line that guides the eye. It keeps the face looking tidy and prevents tusks from dominating the drawing. The trunk and ear still look like the real star, so the elephant reads correctly. This style works in pencil, ink, or mixed media and looks good even with light shading.
Step 1 — Draw the head oval and ear shape, then sketch the trunk S-curve and tip curl. Step 2 — Add the cheek contour as a single smooth line from the eye area down toward the trunk base. Step 3 — Place two tiny tusk bumps as short arcs, then ink the outline and add a small shadow under the trunk fold.
Keep the cheek line slightly darker than the rest; it makes the face look structured.
Avoid drawing tusks that curve outward — they make the face look distorted for most beginners.
18. Elephant Leg Study with Rounded Cylinder Shapes
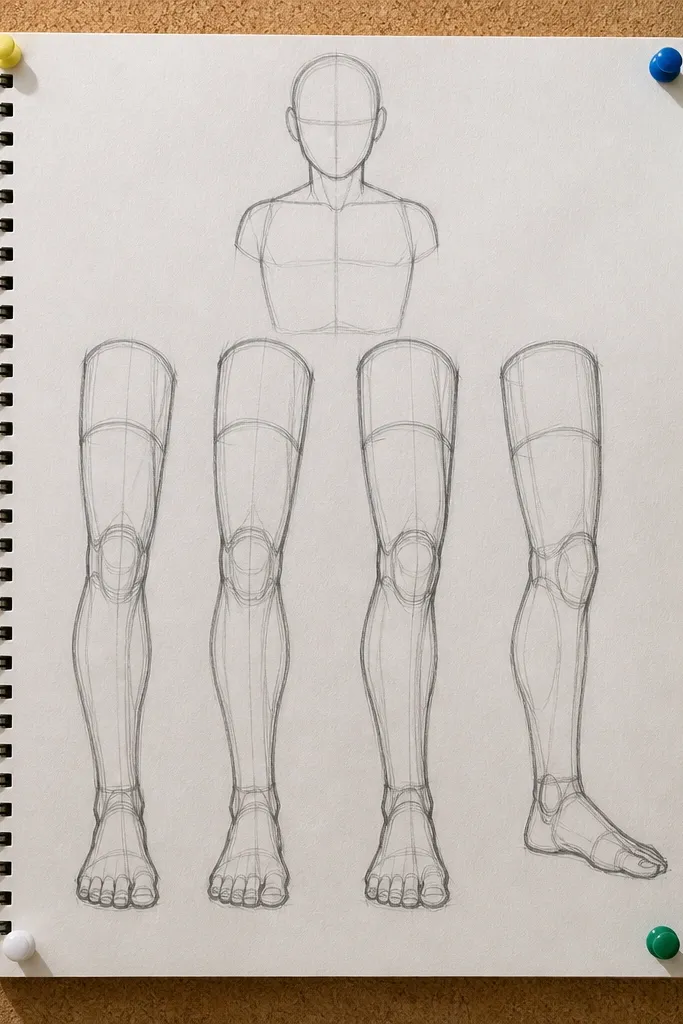
If your elephants look “off,” it’s often the legs. This idea trains your eye on leg volume using rounded cylinders, which is exactly what makes the elephant look grounded. You can draw the legs without finishing a full body, then add a simple head and trunk later. The result is visually strong because thick shapes and clear joints create a sculptural look. It’s great for practicing proportion, and it still photographs nicely because the legs are the focal point.
Step 1 — Draw a simple body oval and a head oval, then place four leg cylinders with clear bend points at knee and ankle. Step 2 — Add joints as small circles or short bands where the cylinder changes angle. Step 3 — Shade only the inside edges of each leg with a 4B pencil and leave the outer edges lighter for a round feel.
Pro tipUse a consistent cylinder width for both front legs; matching widths makes the stance feel believable.
AvoidDon’t add tiny toe details; keep the feet simplified until the body feels stable.
19. Elephant in a Circle Frame with Patterned Background
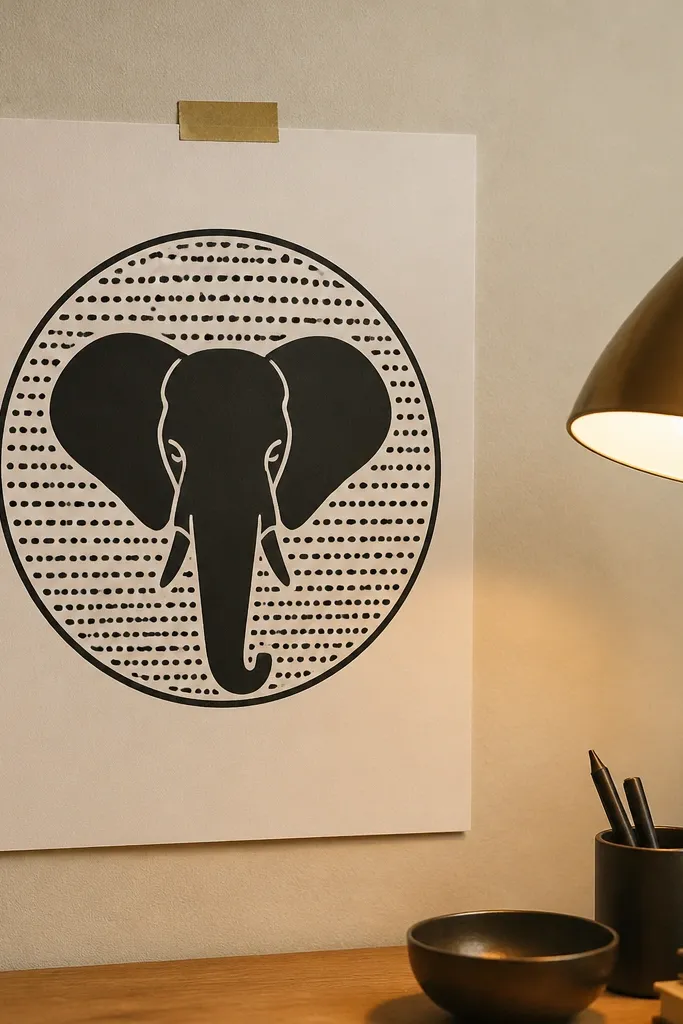
Circle frames make everything look designed, and the background pattern creates a clean contrast. This drawing has a simple elephant silhouette (ears and trunk are the focus), then a repeating dot or dash pattern inside the circle. It’s photogenic because the circle gives the image a clear boundary and the pattern adds texture without cluttering the elephant. Beginners can finish quickly and still get a polished look. It’s also a good way to practice keeping the elephant silhouette bold.
Step 1 — Draw a circle on your page and lightly sketch a side-profile elephant inside it. Step 2 — Ink the elephant silhouette with a thick line and add minimal inner details like the eye dot and trunk fold line. Step 3 — Fill the remaining space inside the circle with a repeating pattern: small dots or short dashes, leaving a clear area around the elephant for breathing room.
Keep dot spacing consistent so the pattern looks intentional, not accidental.
Avoid putting the pattern on top of the elephant silhouette; leave a clean margin.
20. Elephant Trunk Spiral Study
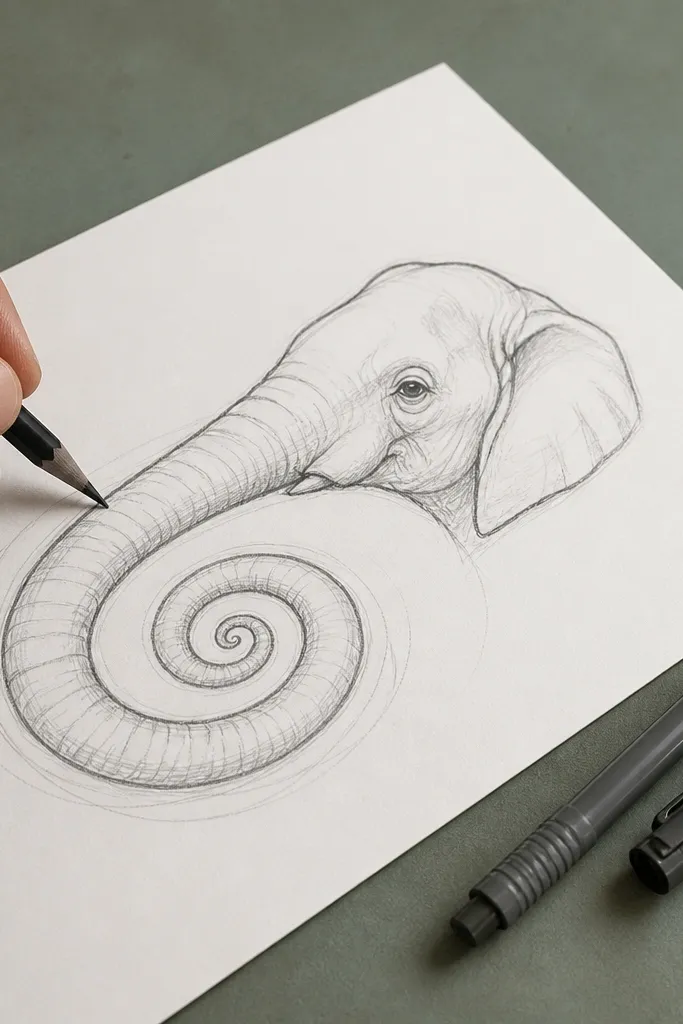
This one isolates the trunk, because the trunk is what makes elephants look right or wrong. You draw the trunk as a spiral-like curve with one inner fold line, then attach it to a simple head and ear. The look is striking because the spiral creates a strong visual rhythm. It’s perfect for beginners who want to practice trunk control without worrying about legs. Finish with a dark outline and one shadow band along the inner fold.
Step 1 — Draw a head oval and an ear shape, then sketch the trunk as a spiral curve that wraps forward and ends in a small curl. Step 2 — Add the inner fold line that runs inside the spiral and stops near the tip. Step 3 — Ink the outline and the fold line, then shade one side of the trunk fold with a 2B pencil.
Start the spiral with a light pencil and adjust the curve until it feels smooth — this is the moment that decides the whole drawing.
Avoid adding multiple fold lines; one inner fold makes it look clean.
21. Elephant with Patterned Ear Veins
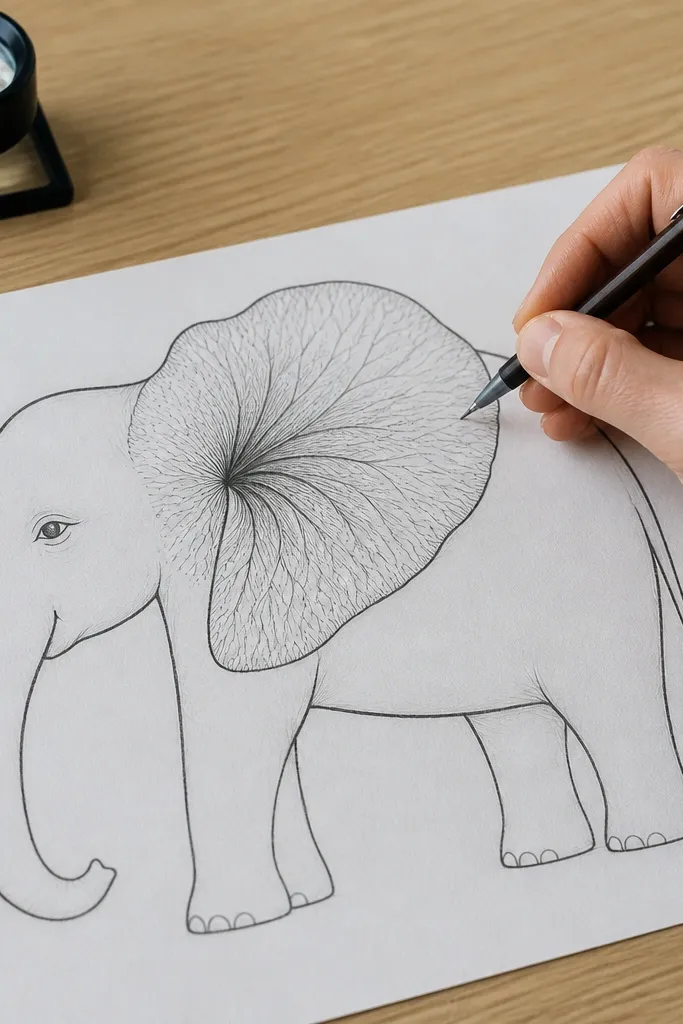
Ear veins look realistic and also look graphic, so you get both “cute” and “skill.” This idea keeps the body simple, then adds vein-like lines radiating from the ear base. It’s photogenic because the ear pattern creates a focal point, while the trunk and eye stay minimal. Use a fine pencil or fineliner so the lines are consistent. It’s a great beginner project because the pattern is repeatable and doesn’t require advanced shading.
Step 1 — Draw a side-profile elephant with a big ear and a trunk S-curve. Step 2 — Add a few main vein lines starting near the ear base, then add smaller branching lines between them. Step 3 — Ink the outer contour, then shade only the underside of the trunk and the ear edge with a light 2B pencil.
Keep vein lines slightly curved, not straight; straight lines make it feel like a diagram.
Avoid filling the ear with dense scribbles; leave space so the veins read clearly.
22. Elephant Silhouette with White Gel Highlights
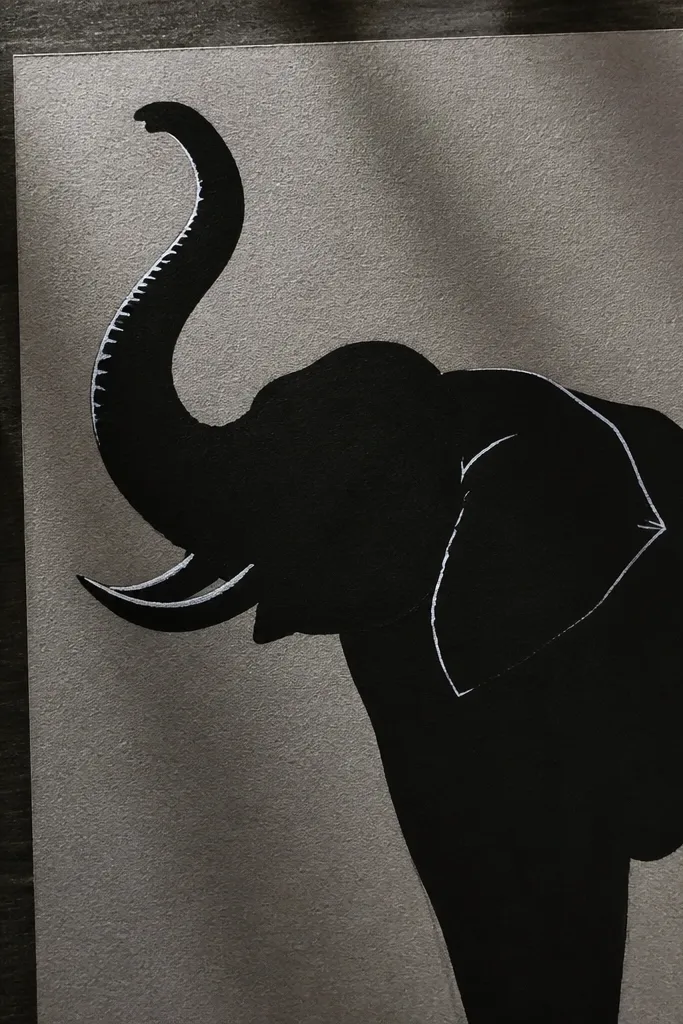
Black silhouette drawings look clean and bold, and white gel highlights make them pop on the page. This idea is simple: draw and ink the elephant silhouette, then add a few highlight strokes on the trunk curve and ear edge. The highlights make the animal feel dimensional without any complicated shading. It’s also very beginner-friendly because you’re not trying to render texture across the whole body. Photograph it against a darker background for extra contrast.
Step 1 — Sketch the elephant side profile in pencil, then trace and ink the full silhouette with black marker or brush pen. Step 2 — Erase pencil lines inside the silhouette. Step 3 — Use a white gel pen to add 3-5 highlight strokes: one along the outer trunk curve, one on the ear edge, and a short highlight under the trunk fold.
Pro tipLet the ink dry completely before adding gel highlights or the gel will smear.
AvoidAvoid adding too many highlights; 3-5 looks intentional, 15 looks chaotic.
23. Elephant in a Minimal Poster Style Background
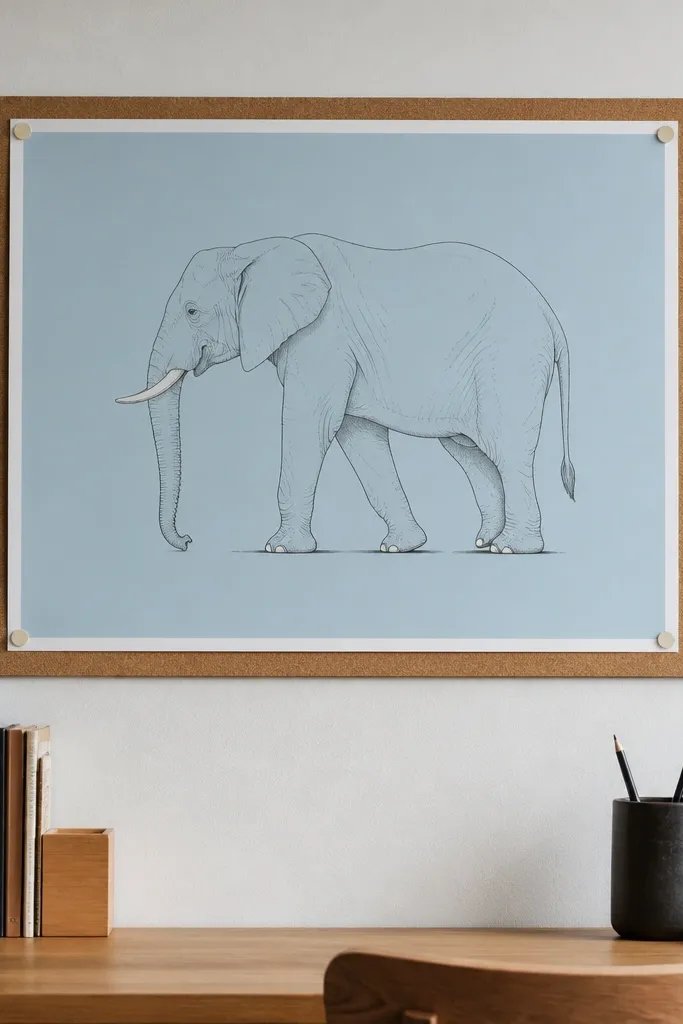
Minimal poster style makes your drawing look like it belongs on a wall. You use one flat background color block, a clean elephant outline, and a small amount of shadow. The beauty is restraint: the elephant outline stays crisp, and the background color frames it. Beginners get a polished look quickly because you’re not trying to render a full landscape. Choose one background color like pale teal or warm beige and keep the elephant either in black ink or graphite with one shadow pass.
Step 1 — Choose a background color and lightly block it in with marker or paint, leaving a margin around the page. Step 2 — Draw the elephant silhouette or outline on top, using head oval, body oval, and trunk S-curve construction. Step 3 — Ink the outline and add one shadow under the chin and one under the trunk fold using a darker pencil.
Keep the background block smooth with one direction of marker strokes so it looks intentional in photos.
Avoid cluttering the background with extra shapes; the elephant needs breathing space.
24. Elephant with Water-Droplet Texture on Trunk
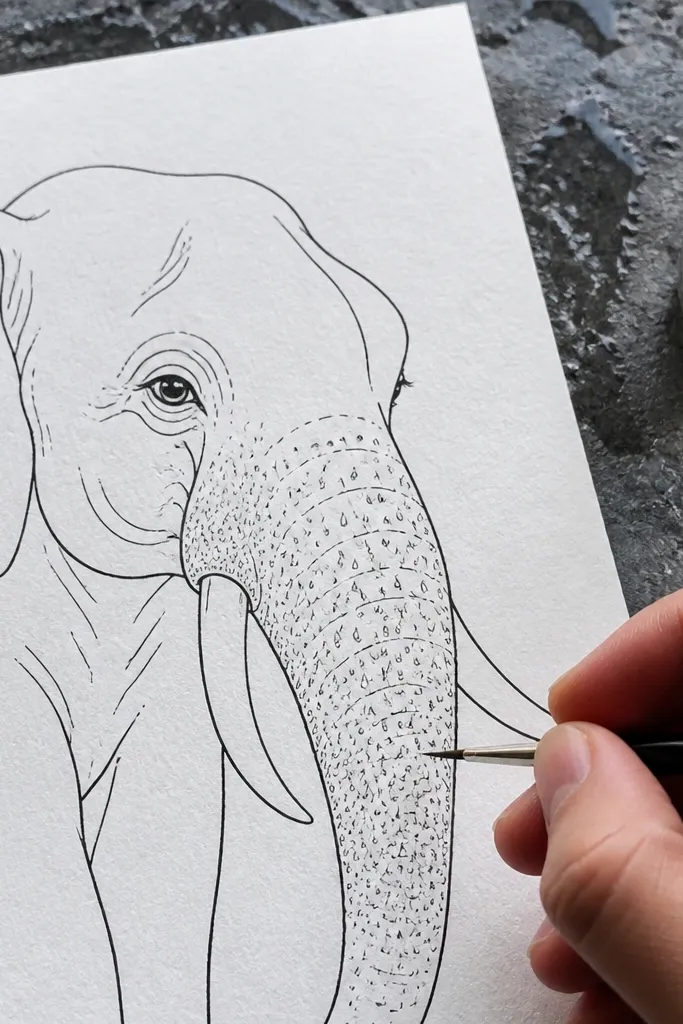
Droplet texture on the trunk looks fresh and photogenic because it catches light in tiny highlights. You don’t need to draw realistic water; you draw stylized droplets with small teardrop shapes and a few white highlight gaps. This idea keeps the rest of the elephant simple, so you don’t drown in texture work. It’s a fun way to practice consistent repetition and spacing. Pair it with pencil shading or light gray ink so the droplets stand out.
Step 1 — Draw a side-profile elephant with a clear trunk curl and simplified legs, then ink the outline. Step 2 — Shade the trunk underside lightly with a 2B pencil so there’s contrast. Step 3 — Add droplet shapes along the top edge of the trunk, leaving small white gaps inside each droplet for highlights.
Pro tipMake droplets smaller near the tip and larger near the base of the trunk for a natural taper.
AvoidAvoid placing droplets randomly across the whole body; keep them on the trunk only.
25. Elephant with Simple Background Hills and Clean Shadow
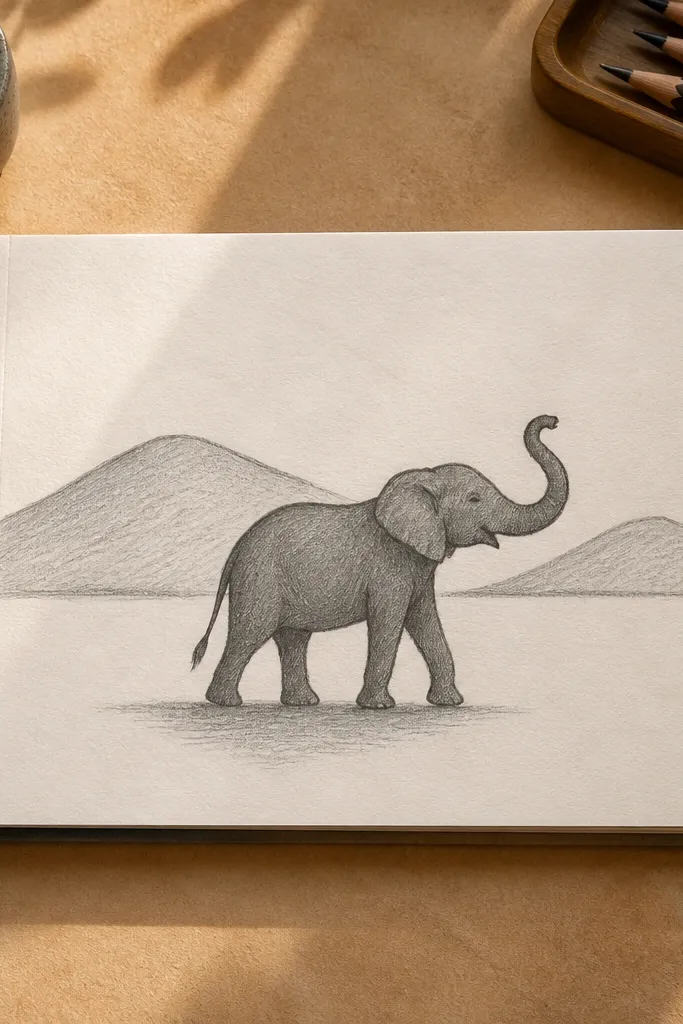
A tiny background makes your elephant look like it belongs in a scene. The trick is to keep background shapes simple: two hill shapes and a clean horizon line, then focus on the elephant silhouette and trunk curve. Add one shadow under the elephant feet so it looks grounded. This is beginner-friendly because you’re not drawing detailed grass or rocks. It also photographs well because it gives the drawing depth without clutter.
Step 1 — Draw the elephant in side profile with construction shapes and ink the outline. Step 2 — Add two simple hill arcs behind the elephant using light pencil or marker, then keep them flat and uncluttered. Step 3 — Shade a single ground shadow under the legs and a smaller shadow under the trunk fold.
Keep hill lines lighter than the elephant outline so the elephant stays the focal point.
Avoid detailed textures in the hills; simple shapes look cleaner in photos.