
1. Circle-Head Fox with Big Triangular Ears
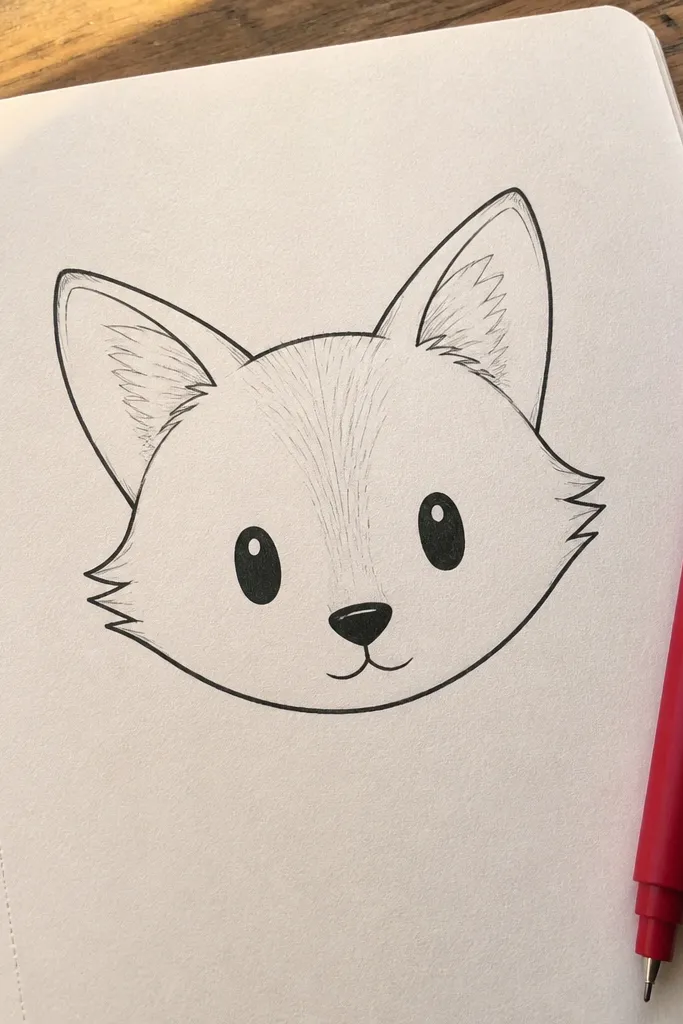
Step 1: Lightly sketch a circle for the head, then add a vertical center line and a horizontal eye line across the circle. Place two triangles for ears — their bases should touch the top edge of the head, and their tips should land slightly above the circle’s top. Step 2: Add two almond-shaped eyes on the eye line, then a small inverted triangle nose centered below, and a short curved mouth line. Step 3: Outline the face and ears with a darker line (2B to 4B), then add a few fur strokes around the cheeks and forehead in short, outward directions.
This is the “start here” beginner-friendly fox drawing because the head shape is the whole foundation. You draw one clean circle, then you place the ears as two triangles that sit on top like bookmarks. The look stays cute and readable because the facial features are simple marks — two eye ovals, a small triangle nose, and a short line for the mouth. It also photographs well because the silhouette is clear and the face takes up most of the page.
AvoidDon’t add fur all over the head — keep it mostly on the edges so the face stays readable.
Pro tipKeep the ears symmetrical by checking that both ear triangles share the same height relative to the circle.
2. Side-Profile Fox with a Curved Nose Bridge
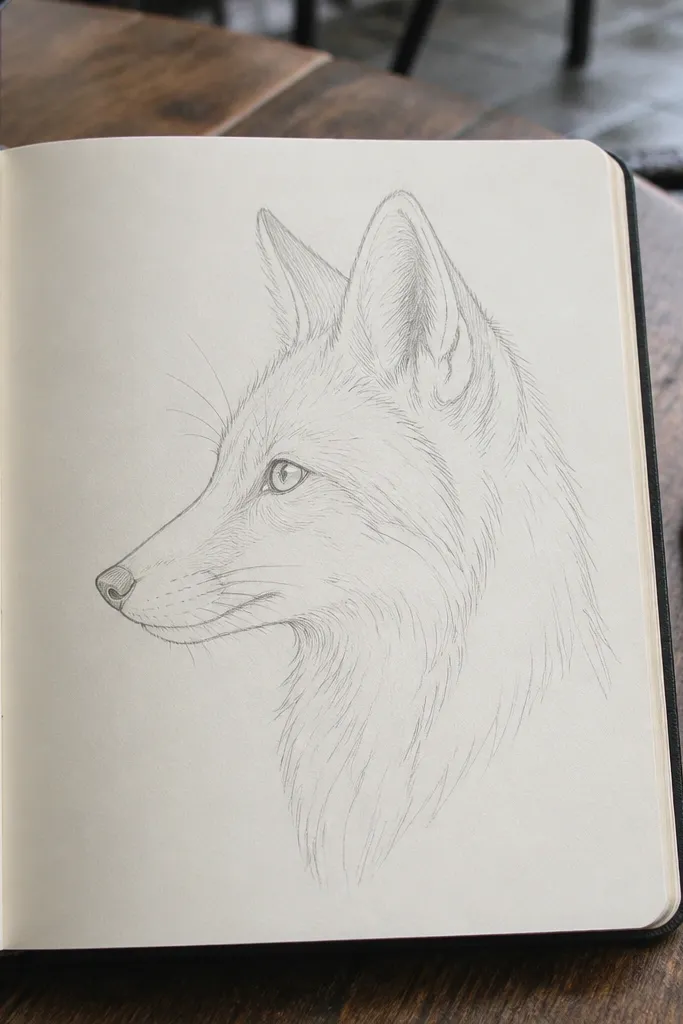
Side profile is where beginners usually get stuck, but it’s also where foxes look instantly “right” when you nail the nose bridge curve. This project uses one long S-curve for the head outline, which makes the jaw and muzzle look natural without needing complicated shading. The fox’s expression reads clearly from a single eye and a firm mouth line. It’s also great for practicing line confidence because the whole drawing depends on a few bold contours.
Step 1: Draw a light vertical guideline for the head, then sketch a curved wedge for the muzzle — think of it like a thick triangle pointing right. Connect the muzzle to the forehead with one smooth curve that becomes the nose bridge. Step 2: Place the eye as a small almond on the guideline, add a tiny ear triangle behind it, then draw the mouth as a short line that dips slightly. Step 3: Darken the outer contour with 4B or fineliner, then add 6-10 short fur strokes along the cheek and neck using the pencil side for soft texture.
If the muzzle looks too pointy, widen the base of the muzzle wedge before you add details.
Skip heavy shading on the muzzle — beginners smear graphite and lose the crisp profile silhouette.
3. Sleeping Fox Curling into a Cinnamon Roll
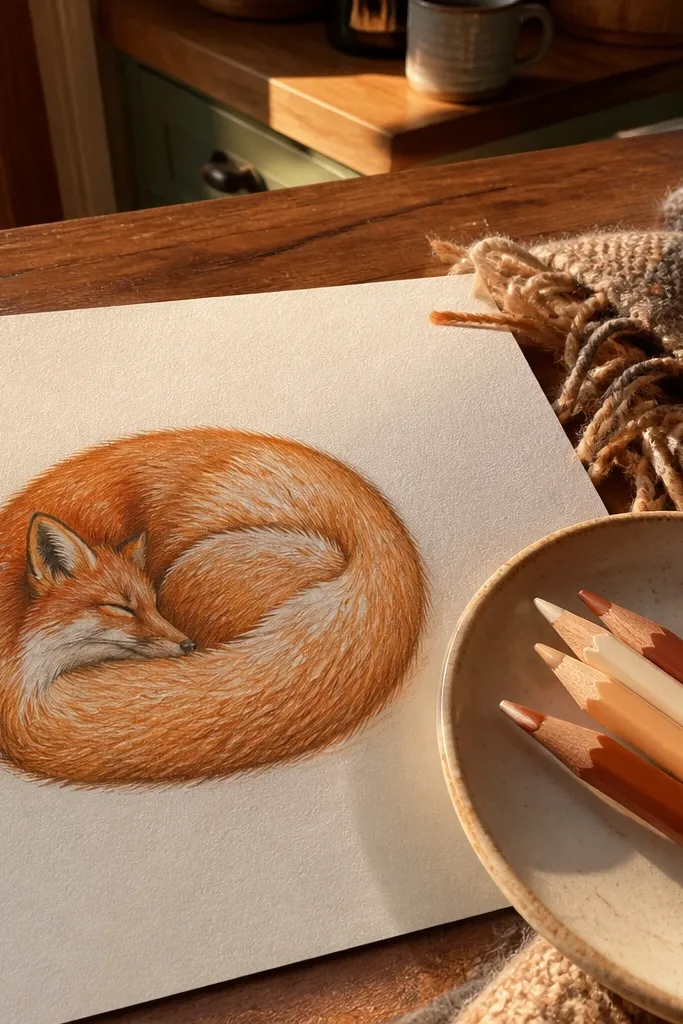
Step 1: Lightly sketch a large C-shape for the tail curl, then place the body as a smaller rounded bump tucked inside the C. Add a small head oval at the open end of the curl, facing toward the center. Step 2: Draw the ear as a tiny triangle, the eye as a small closed oval or dot (sleeping expression), and the nose as a small triangle. Step 3: Outline the whole curl with darker lines, then add fluffy fur texture with short U-shaped strokes along the outer tail edge and a few along the top of the body.
Curling foxes are forgiving because you can simplify the body into one big spiral shape. You get a cozy, aesthetic look with minimal anatomy — the tail does most of the work. The face still matters, but it’s small and compact, so you can keep features simple and charming. This is a beginner-friendly fox drawing that looks finished even if you only add fur texture along the tail edge and paws.
AvoidDon’t draw separate legs — in a curled pose, hide them under the tail and focus on the silhouette.
Pro tipMake the outer tail edge thicker than the inner edge so the curl reads instantly.
4. Fox Kit Face with Raised Eyebrows
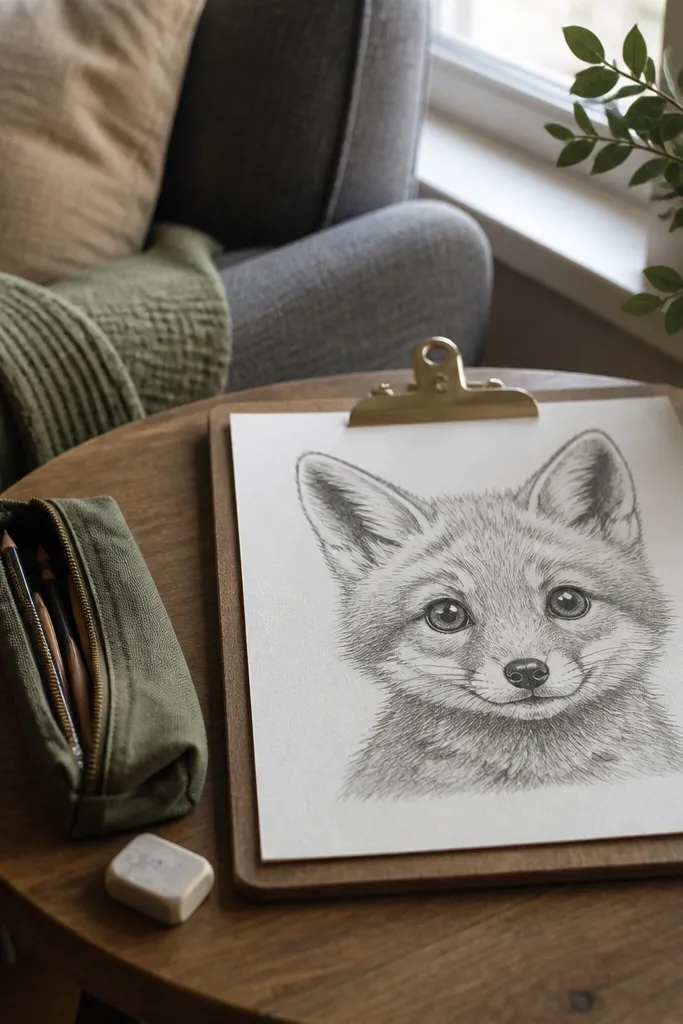
Step 1: Draw a head circle, then add a vertical line and a lower horizontal line for the muzzle placement. Place eyes slightly above the midpoint and make them bigger than you think you should. Step 2: Add raised eyebrows as two short angled lines above the eyes, then draw a small triangle nose and a tiny curved mouth. Step 3: Outline with 4B, then add a few fur strokes on the cheeks and around the forehead — keep them short and clustered so the face stays clean.
If you want a fox drawing that looks expressive without complex anatomy, this one nails it. The secret is the eyebrow line: a simple angled mark above the eye changes the entire mood. The “kit” look comes from rounder cheeks, slightly larger eye area, and a smaller muzzle. It’s beginner-friendly fox drawing because you can keep the fur minimal and still get a face that looks like it has personality.
AvoidAvoid long fur strokes on the cheeks — they make the face look older and less cute.
Pro tipTry making the muzzle half the width of the eyes — that ratio reads “kit” instantly.
5. Front-Facing Fox with a Bowtie Fur Patch
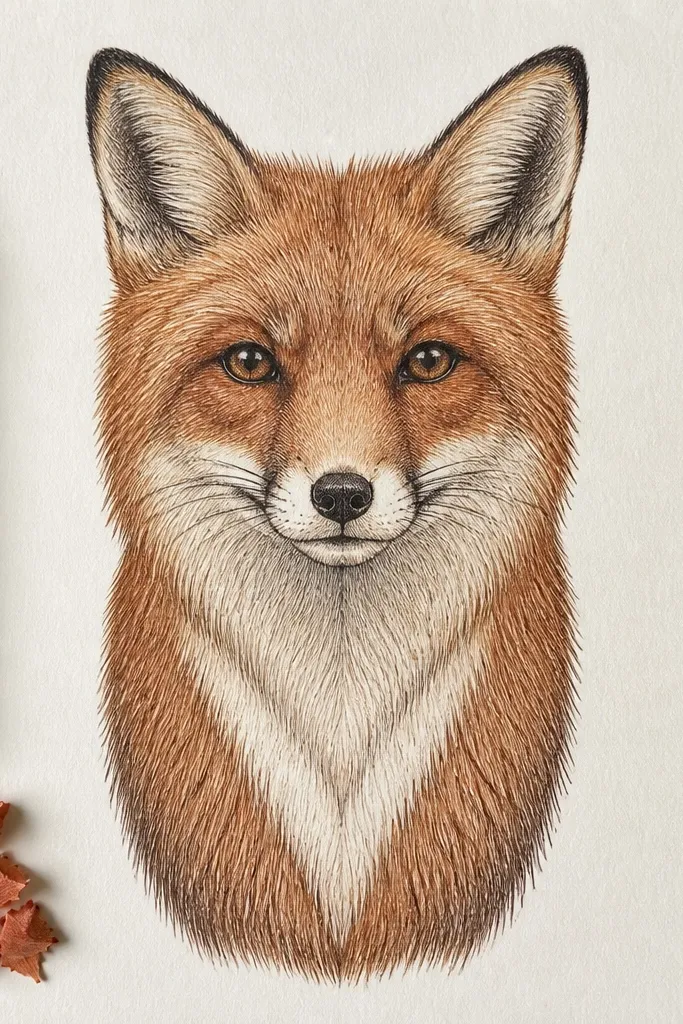
Step 1: Sketch a front-facing head oval and a rounded body shape underneath, using light construction lines. Draw two ears as triangles on either side, then place the eyes and nose centered. Step 2: Add the bowtie fur patch as an inverted V shape on the chest, and keep it unshaded (or lightly shaded) so it stands out. Step 3: Outline everything dark, then add fur marks only on the outer edges of the head and around the body contour, leaving the patch clean.
This idea is visually striking because it uses a single contrast shape. You create a lighter fur patch on the chest like a bowtie or inverted V, which gives the drawing structure without needing full shading. The face can stay simple — two eyes, a nose, and a clean mouth line — and the chest patch makes it look intentional. It’s also great for teaching beginners about negative space: leave the chest patch lighter instead of filling everything in.
AvoidDon’t shade over the chest patch — if it turns the same value as the body, the whole design flattens.
Pro tipUse the pencil side to shade the main body but keep the bowtie patch mostly untouched to preserve contrast.
6. Fox in a Frame Drawing (Poster Style)
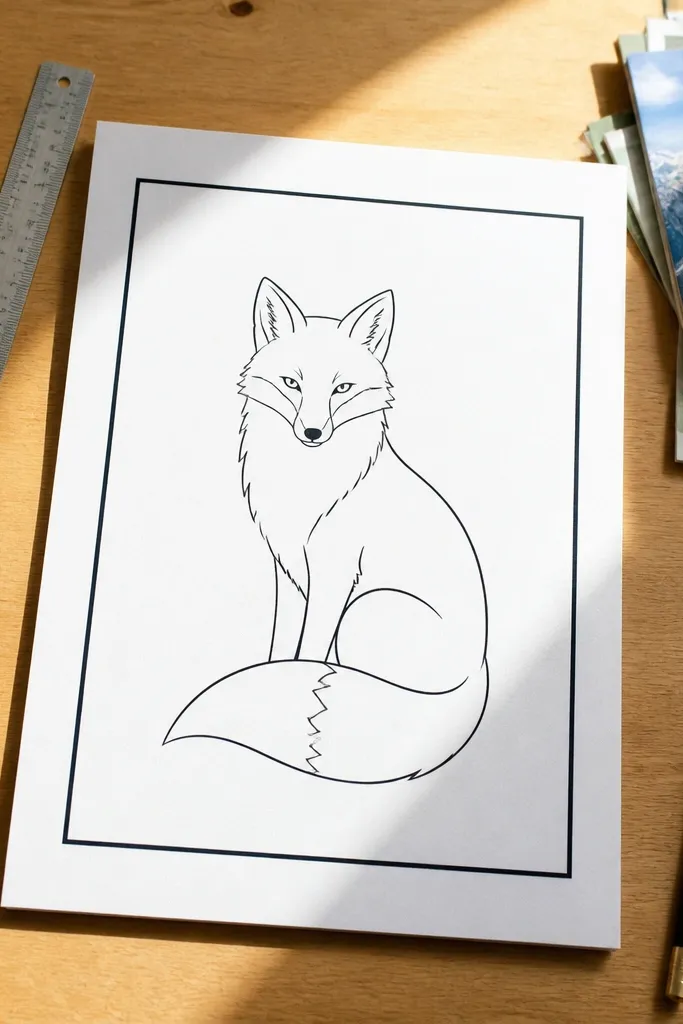
Step 1: Draw a rectangle border with a 1 cm margin from the page edges, then sketch the fox head centered inside. Keep the head shape big and simple — an oval with two ear triangles. Step 2: Add the eyes as dark ovals, nose as a small triangle, and mouth as a short curved line. Step 3: Use 4B for the outer contour and 2B for fur strokes — place fur only around the cheeks and the top of the head so it stays crisp against the border.
Framing makes even a simple beginner-friendly fox drawing feel finished. This poster-style layout forces you to use bold, readable shapes and clean edges because the fox sits inside a rectangle border. You get a graphic look that photographs well and looks great in a sketchbook page scan. The fox can be minimal — outline, eyes, nose, and a few fur lines — and still look like a finished print.
AvoidDon’t cram the fox too small inside the frame — the whole point is readable silhouette.
Pro tipMake the border line darker than the inner fox outline for a poster effect.
7. Fox Face in Three Values (Light, Medium, Dark)
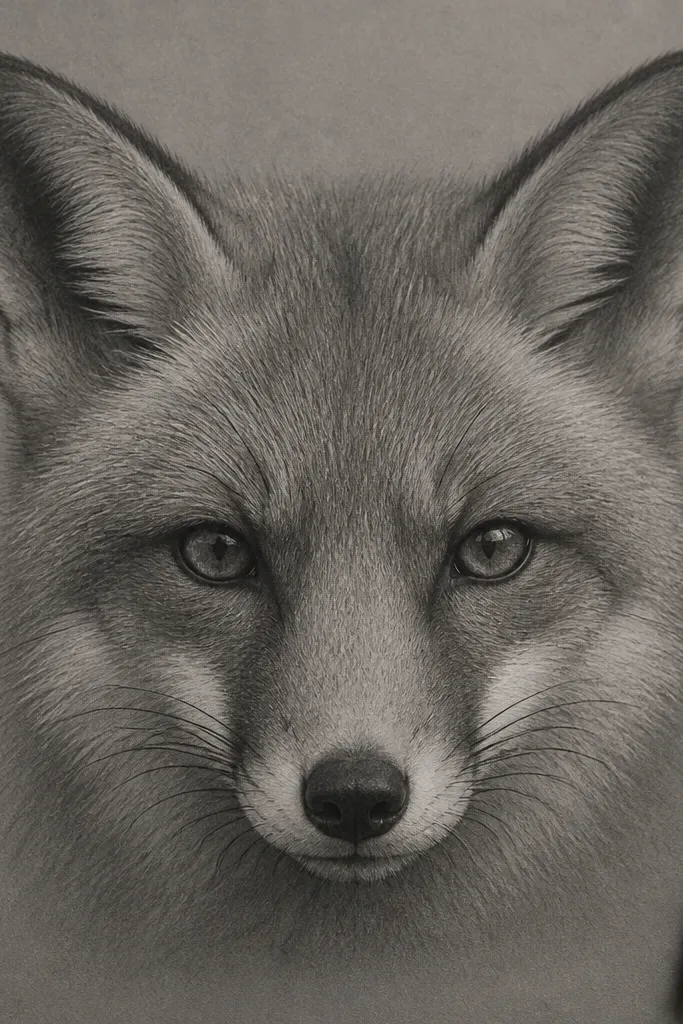
Step 1: Lightly sketch the fox head and features, then decide where your highlight will be — usually the forehead center and muzzle center. Step 2: Shade the mid-tones with 2B using gentle, direction-following strokes on the cheeks and around the brow ridge. Step 3: Add dark accents with 4B for the pupil/eye outline, nose triangle, and the darkest contour line along the jaw and ears.
This one teaches a beginner-friendly fox drawing approach that instantly looks more “designed.” You separate the face into three graphite values: light paper for highlight, medium shading for mid-tones, and dark for eyes, nose, and key outlines. Because the tones are controlled, the fox looks less messy and more intentional. It’s also a great project if your drawings usually look flat or smudgy — you’re forced to place value in specific zones.
AvoidAvoid blending everything — if the mid-tone merges into the dark, you lose the three-value look.
Pro tipUse the pencil side for medium shading and the tip only for small edges like the eyelid line.
8. Fox Tail Texture Study with 5 Fur Brush Strokes
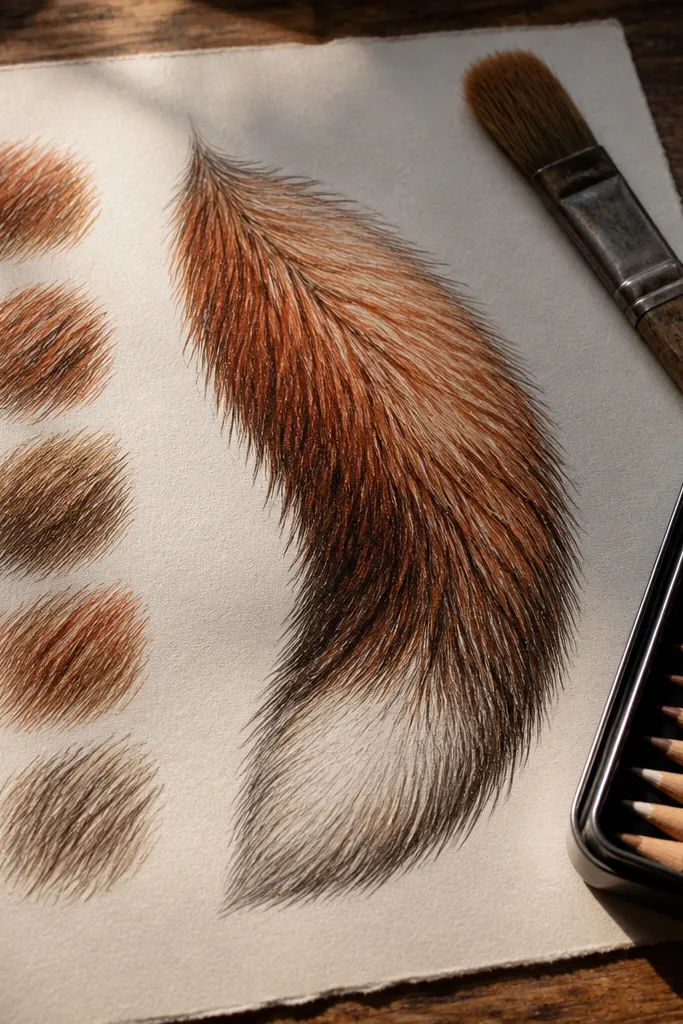
Step 1: Sketch a thick curved tail outline with a taper — thicker at the base, narrower near the tip. Divide the tail into three zones with light guide lines: base, mid, tip. Step 2: Practice and then apply five fur stroke patterns across the zones: short dashes, longer curved strokes, tiny U-shapes, feather-like lines, and a few thicker edge lines. Step 3: Darken the outer tail edge and add a light highlight stripe where the fur direction changes, leaving the highlight lighter than the rest.
This is a fur-technique project disguised as a drawing. You focus on one big tail and repeat five controlled fur stroke types, which gives you a photogenic texture sample while still being a fox drawing. Beginners learn faster when the “fur” is broken into repeatable marks. The tail shape looks dramatic because it’s large, curved, and filled with deliberate texture instead of random scribbles.
AvoidDon’t add fur strokes perpendicular to the tail curve — direction is what makes it look real.
Pro tipRotate your paper slightly so your wrist moves in the direction of the fur strokes.
9. Fox Face with Geometric Background Shapes
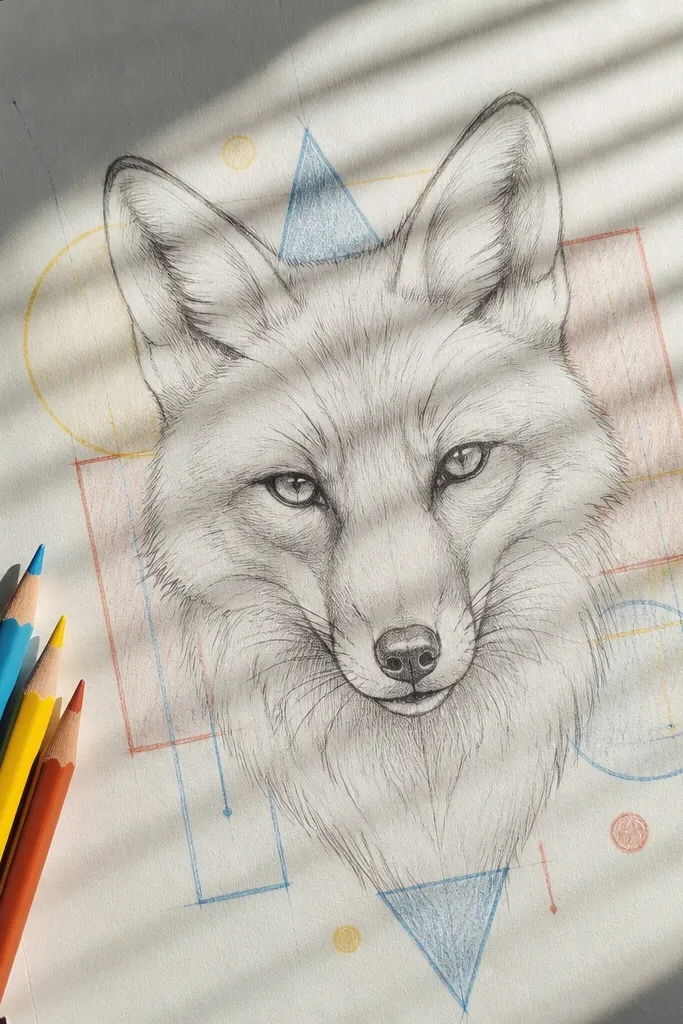
Step 1: Draw the fox head centered, using the circle-head construction and dark outlines. Step 2: Add 4-6 geometric shapes behind the head — keep them spaced so they don’t overlap the face features. Step 3: Color or lightly shade the background shapes with colored pencil, then add minimal fur strokes around the cheek edges and forehead to keep attention on the face.
A geometric background makes the fox pop even if the fox itself is simple. You keep the face clean and then add a few shapes behind it — triangles, circles, and rectangles — in light pencil or colored pencil. This creates a clean, aesthetic contrast and helps beginners avoid overworking the fur. It’s beginner-friendly fox drawing because the background gives you structure and the fox doesn’t need heavy shading to look complete.
AvoidDon’t shade the background too dark — it should sit behind the fox, not compete with it.
Pro tipUse one background color per shape type — like triangles in orange, circles in teal — for a tidy look.
10. Simple Fox Bust with Cross-Hatching Chin Fur
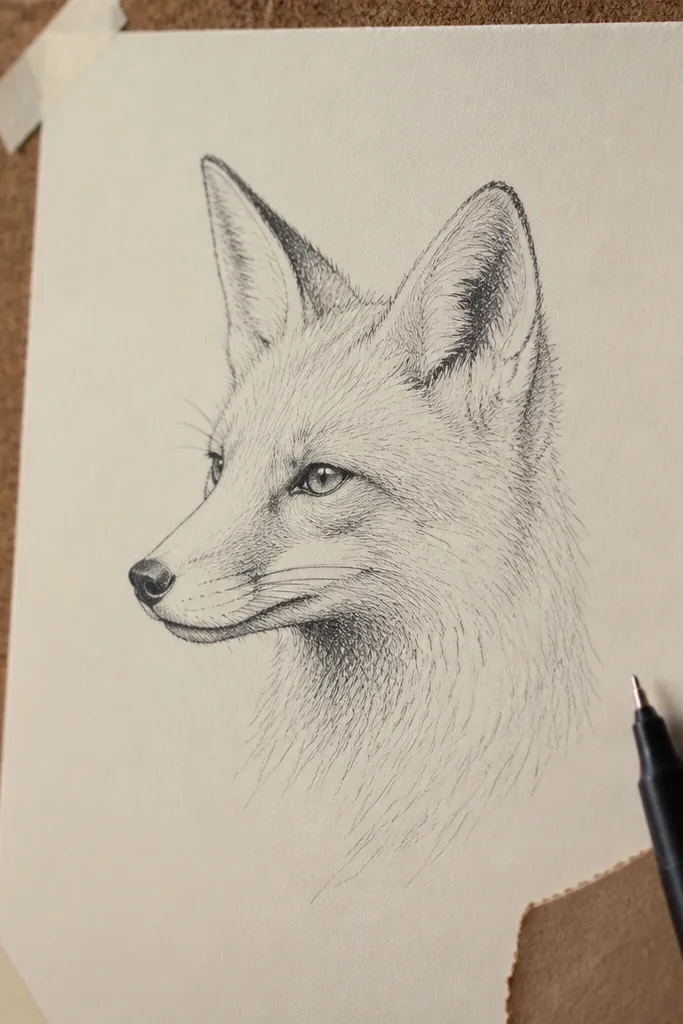
Step 1: Sketch a fox bust shape — an oval head and shoulders — and outline the ears with two triangles. Place eyes, nose, and mouth with light construction lines so they stay symmetrical. Step 2: Shade the cheeks lightly with 2B, then add cross-hatching under the chin using short diagonal lines that meet at a shallow angle. Step 3: Darken the eye lines, nose outline, and ear outer edges with 4B, then erase stray construction lines.
Cross-hatching is a beginner-friendly fox drawing shortcut because it creates texture without needing fancy fur detail. This project keeps the head and ears simple, then uses cross-hatching only under the chin to imply fur thickness. The result looks intentional and clean, not messy. It’s also great for learning where fur is denser — jawline and chin, not random patches all over the face.
AvoidAvoid cross-hatching the whole face — it will turn the drawing into one gray blur.
Pro tipKeep the cross-hatching lines short and close together near the chin, wider as you move toward the cheeks.
11. Fox Standing Pose with Simple Stick Legs
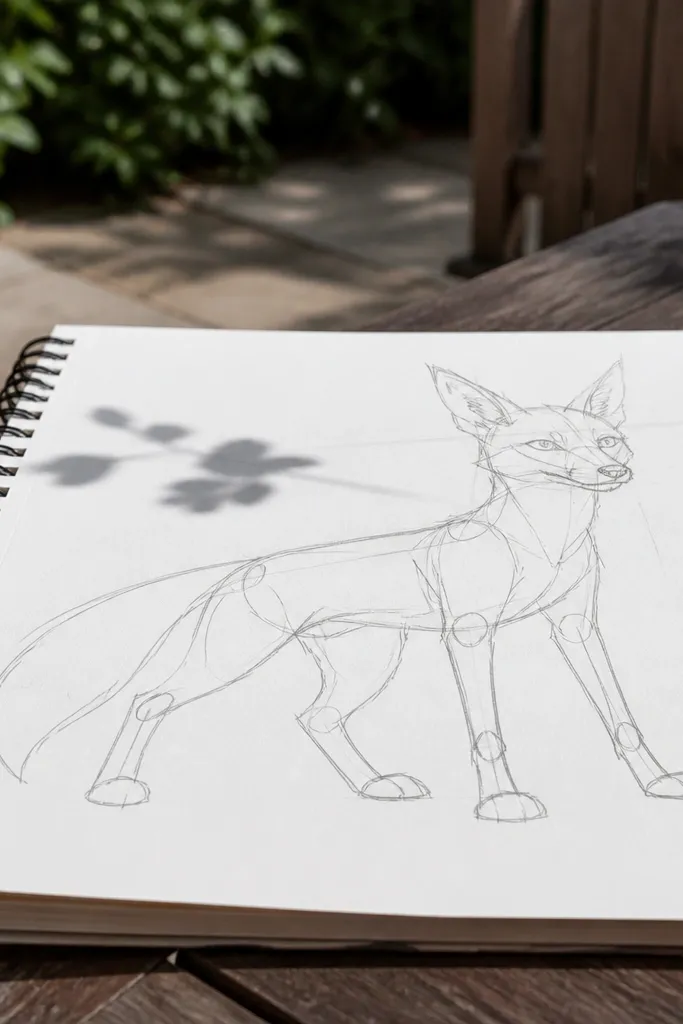
Step 1: Lightly sketch the body as a rounded bean, then draw two pairs of stick legs with slight angles — front legs straighter, back legs slightly bent. Add the head oval on top and a curved tail sweeping behind. Step 2: Convert stick legs into paw shapes by drawing small ovals at the ends and connecting them to the body with short curved lines. Step 3: Outline with 4B, then add fur texture as short strokes on the tail and along the outer edge of the legs only.
Standing foxes look dynamic, but beginners get stuck on leg placement. This version uses stick legs for the first pass so the pose locks in quickly. Then you replace the sticks with simple paw ovals and add a curved tail for the fox’s “energy.” The silhouette ends up crisp and photogenic because the legs are clear and the tail curve frames the body.
AvoidDon’t add too much fur texture on the legs — it hides the pose and makes the silhouette muddy.
Pro tipBefore details, check the leg angles against a horizontal guideline across the page.
12. Fox Head with Soft Gradient Muzzle
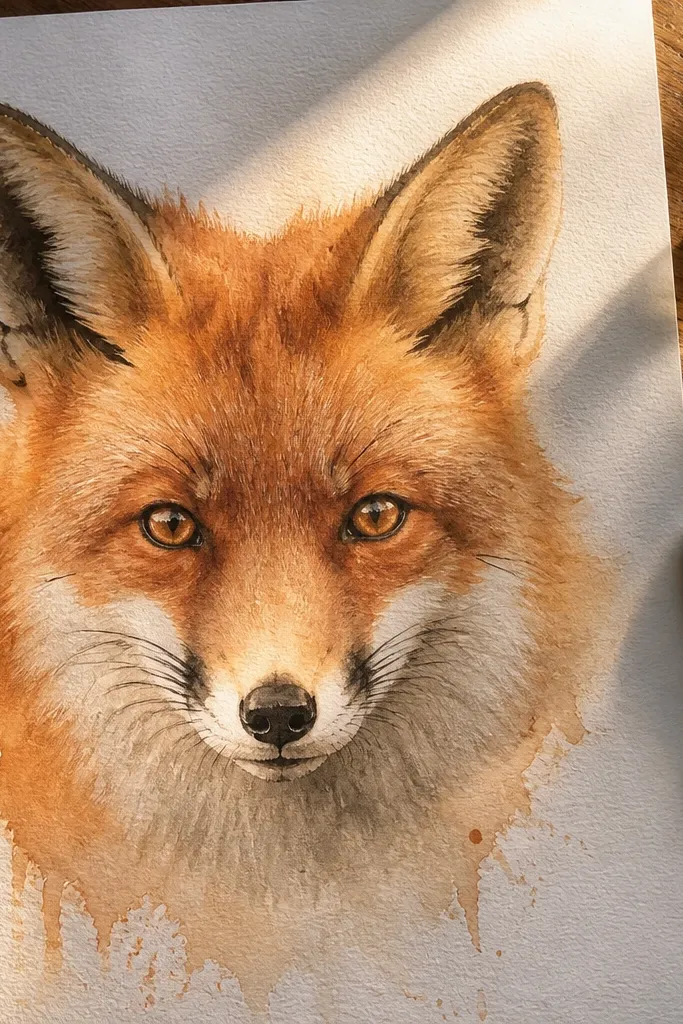
Step 1: Sketch the head oval and features, then outline the muzzle as a rounded shape below the eyes. Step 2: Shade the muzzle with 2B using gentle circular strokes, leaving a small highlight oval unshaded. Step 3: Add the darkest lines around the mouth corners and nose outline with 4B, then lightly blend only the muzzle area with a tissue edge or blending stump, using minimal pressure.
A soft gradient muzzle makes your beginner-friendly fox drawing look more “finished” than line-only work. You still keep the face simple, but the muzzle shading gives it roundness. This approach is photogenic because the lightest area on the muzzle creates a clear highlight. It’s also a controlled way to learn blending without smearing the whole drawing.
AvoidAvoid heavy pressure on the first layer of shading — gradients look best when you build slowly.
Pro tipKeep blending strictly on the muzzle — if you blend the cheeks, the face loses crispness.
13. Fox Face with Patterned Fur Stripes
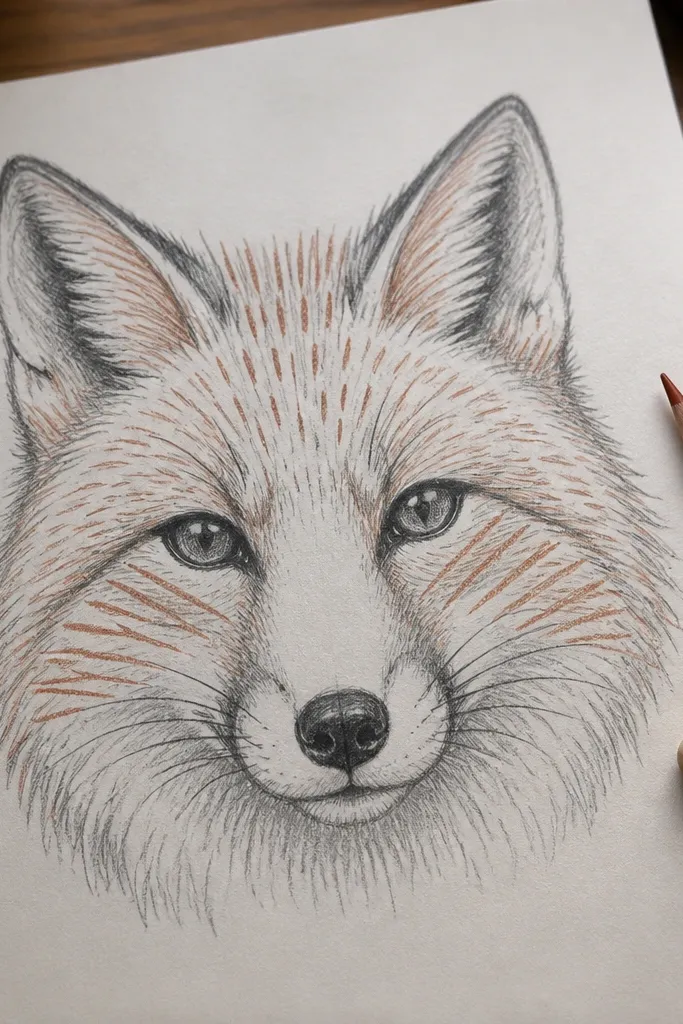
Patterned fur is the easiest way to get a clean look that still feels detailed. Instead of drawing random fur, you place stripes in a repeatable direction: diagonal stripes on the cheeks and short vertical strokes on the forehead. The face stays readable because eyes and nose are bold, while fur texture is controlled. This is beginner-friendly fox drawing because you can copy the stripe spacing and get a consistent aesthetic.
Step 1: Draw the circle-head construction and place eyes and nose first. Step 2: Add cheek stripes as 6-8 short diagonal lines that curve slightly downward toward the muzzle. Add forehead stripes as 5-7 short vertical strokes starting near the brow ridge. Step 3: Darken the outline, then keep stripes lighter than the eye and nose so the face reads as the focal point.
Make stripe ends taper — thicker-to-thinner lines look more natural than blunt strokes.
Don’t crowd stripes around the eyes — keep a clean zone so the eyes stay dominant.
14. Fox in Profile Eating from a Bowl
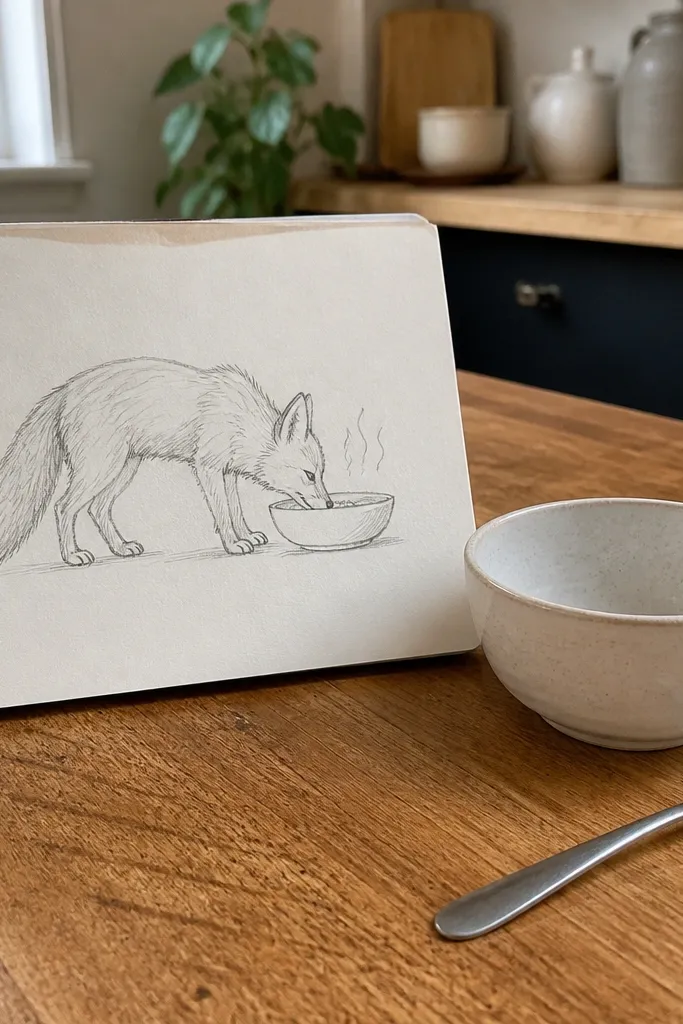
Step 1: Draw the bowl first — an oval with a slightly wider rim and a flat base shadow. Step 2: Sketch the fox in side profile facing the bowl, with a muzzle curve reaching toward the rim and a back curve rising into the tail. Step 3: Outline with 4B, then add 3-5 steam lines rising from the bowl and a few fur strokes on the neck and tail for texture.
This is a beginner-friendly fox drawing that gives you a full scene without complicated storytelling. You add a bowl shape and a few steam lines, and the fox pose becomes the “action.” The fox itself can be simple — profile head, curved back, and a tail tip — while the bowl and steam create charm. It’s photogenic because the bowl gives a strong anchor shape at the bottom of the page.
AvoidAvoid drawing the fox nose touching the bowl rim — leave a tiny gap so it looks like it’s leaning in.
Pro tipKeep the steam lines thin and light so they read as motion, not another heavy outline.
15. Fox Face with a Heart-Shaped Negative Space
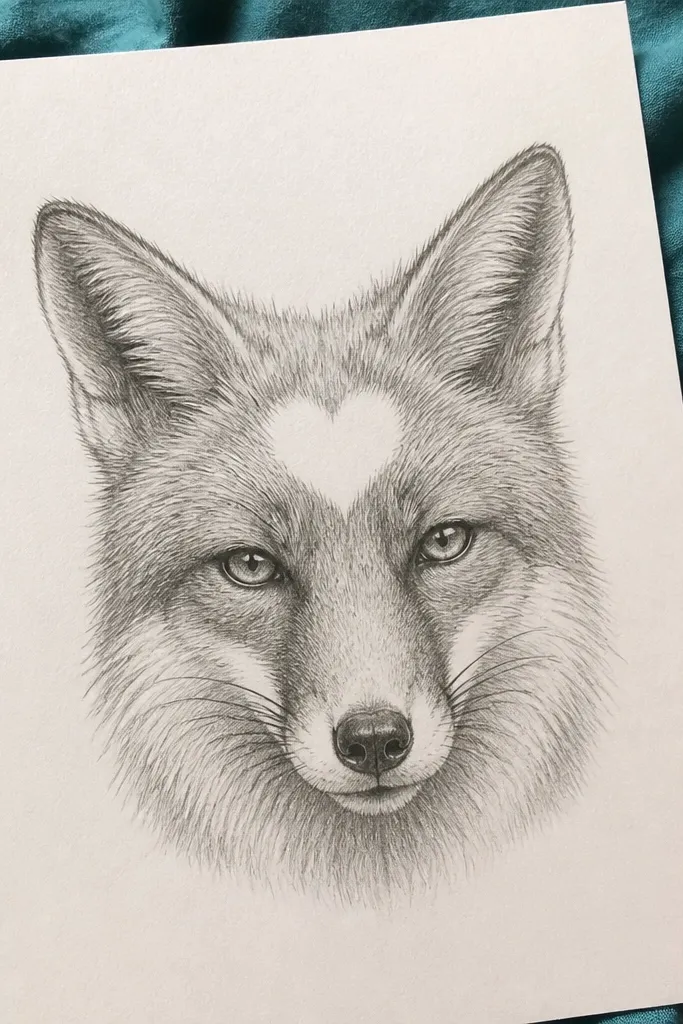
Step 1: Sketch the fox head with construction lines and place the ears. Lightly outline a heart-shaped area on the forehead, then erase it lightly or just commit to leaving it unshaded. Step 2: Shade the forehead and cheeks with a light 2B tone, keeping the heart area paper-white. Step 3: Add dark lines for eyes, nose, and mouth with 4B, then add a few fur strokes around the heart edge so it looks like fur frames the highlight.
Negative space tricks are a fast way to make a beginner-friendly fox drawing look graphic and intentional. You place a heart-shaped highlight area on the forehead or between the ears, then keep it unshaded while the rest of the face gets light pencil tone. The heart shape reads instantly and looks cute in a scan. The fox still needs correct features, but the highlight does the aesthetic work for you.
AvoidDon’t shade over the heart edge — once graphite hits it, the heart loses its clean shape.
Pro tipUse a kneaded eraser to clean the heart edge so it stays crisp against the shading.
16. Fox Portrait with Simple Halo Circle
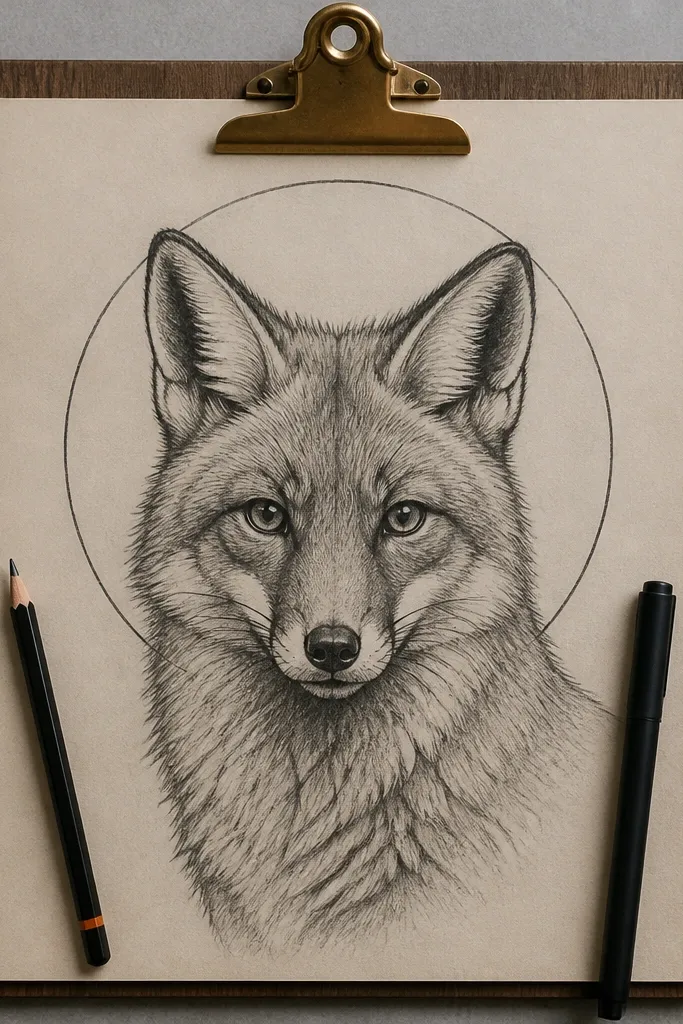
A halo circle is a clean, modern design move that makes a beginner-friendly fox drawing look like a poster. The fox stays simple — bold outline, readable eyes, and a few fur strokes — while the halo provides a strong background shape. It’s also great for practicing symmetry because the halo is just a single circle behind the head. This project looks good in black-and-white and in limited color too.
Step 1: Draw a circle halo behind where the fox head will sit, then sketch the head centered in front. Use light construction lines to place ears and eyes evenly. Step 2: Outline the fox head with 4B and fill the eye shapes darker, leaving highlights. Step 3: Add fur strokes along the ear edges and cheeks only, then darken the jaw contour so the head stands out from the halo.
Make the halo line thinner than the fox outline for a clean separation.
Avoid adding a full shaded background — keep the halo simple so the drawing stays graphic.
17. Fox Head with Split Background Colors (Left/Right)
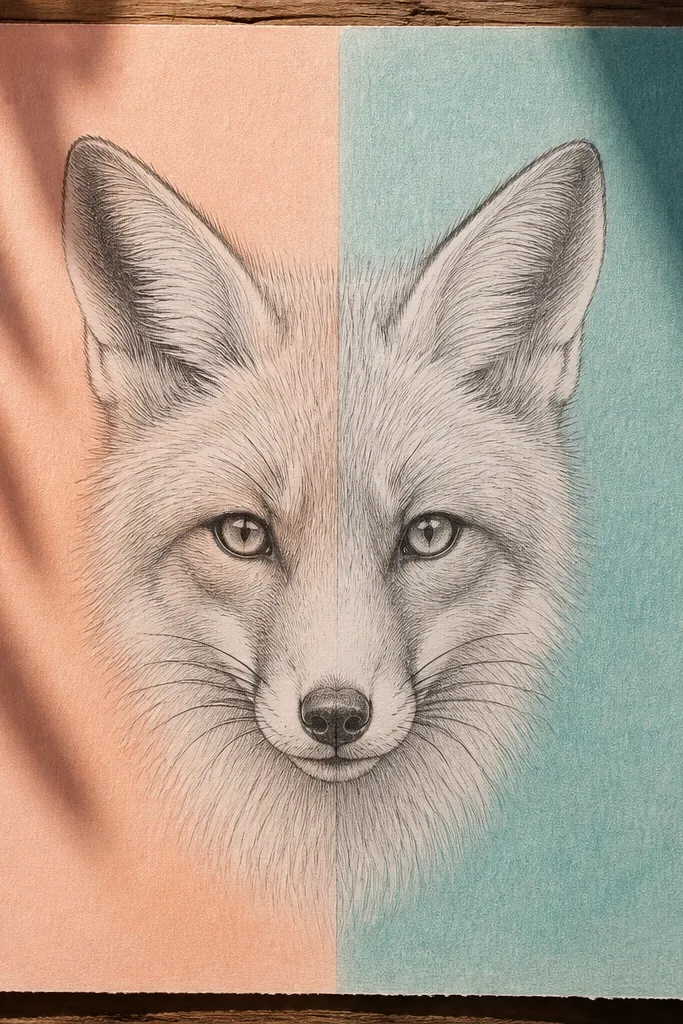
Step 1: Sketch the fox head with a light construction grid and strong outline plan. Step 2: Color the background only — draw a vertical center guideline and color everything left of it with one colored pencil (light pressure), everything right with another color. Step 3: Add dark 4B lines for eyes, nose, and jaw, then add minimal fur strokes so the face stays crisp against the colored background.
Split-color backgrounds make a beginner-friendly fox drawing look instantly styled. You draw the fox face in pencil linework, then color the left half of the page one color and the right half another color, keeping the fox mostly uncolored. This gives you a modern, high-contrast look without needing advanced color blending. It’s photogenic because the colors frame the face and make the eyes pop.
AvoidDon’t color the fox heavily if you’re new — keep color reserved for the background for a clean look.
Pro tipKeep the background light enough that the fox outline stays the darkest thing on the page.
18. Fox Face with Dotted Fur Accent
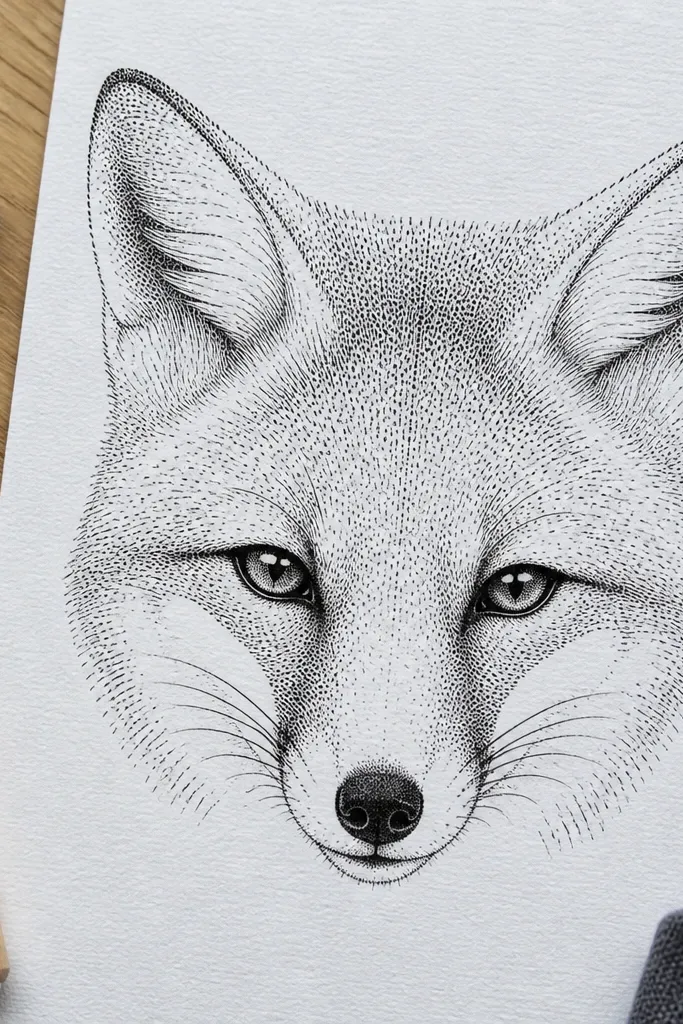
Step 1: Draw the fox face lightly — head oval, ears triangles, eye almonds, nose triangle, and a short mouth line. Step 2: Outline with 4B, then add dots in a curved band on each cheek using a fine pencil tip. Step 3: Add a second dotted band on the forehead near the brow ridge, then stop — keep the center of the face clean so the eyes remain the focus.
Dotted fur is a beginner-friendly fox drawing trick that avoids smudging. Instead of shading with graphite, you use tiny dots and short dot clusters along the cheek edges and forehead. The fox still has fur texture, but it looks tidy and graphic, which scans beautifully. This also works if you’re using markers because dots don’t smear like heavy strokes.
AvoidDon’t fill the entire face with dots — too many dots flatten the facial shape.
Pro tipVary dot size: bigger dots near the outline, smaller dots toward the center.
19. Fox in a Snowy Scene with Minimal Shading
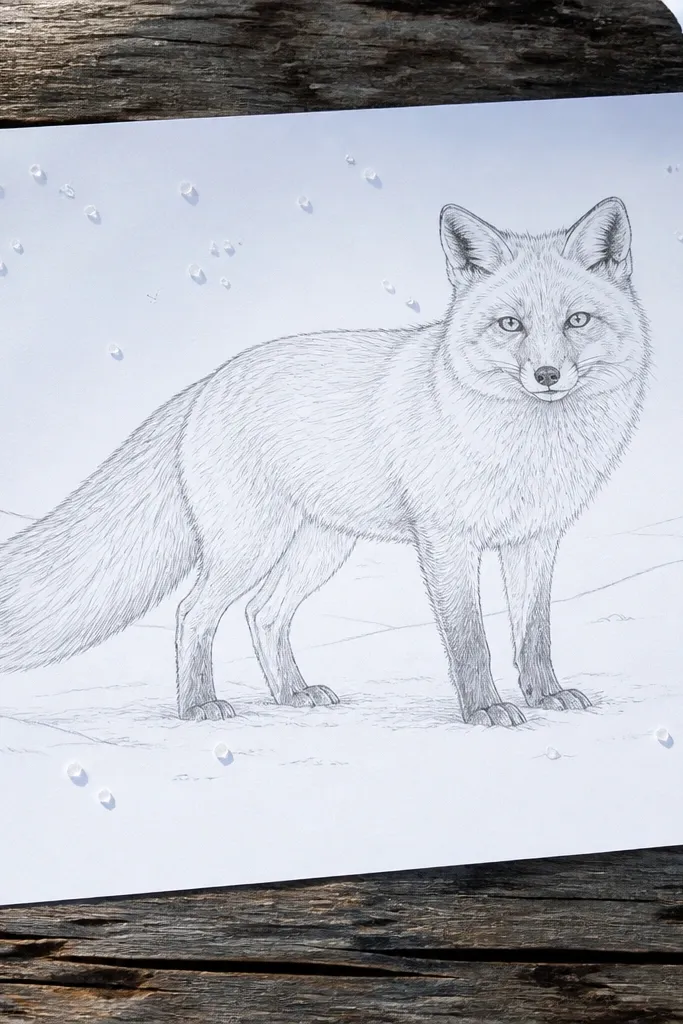
Step 1: Sketch the fox standing with the bean body and stick-leg construction, then outline with 4B. Step 2: Draw 2-3 snow drift shapes at the bottom — simple curves with a slightly darker edge line. Step 3: Shade under the paws lightly with a thin pencil layer to show contact, then add fur strokes only on the tail and outer legs.
Snow scenes look great because the ground can be simple and the fox outline stays sharp. You draw the fox in a standing pose, then add a few snow drifts as curved lines and light shading under the paws. The fox gets the attention because it’s darker and more detailed than the background. This is beginner-friendly fox drawing that looks polished without needing realistic snow texture.
AvoidAvoid gray-filling the whole background; it steals contrast from the fox.
Pro tipKeep the background to linework only — let the fox be the only shaded element.
20. Fox Face with Thick Outline and Clean White Highlights
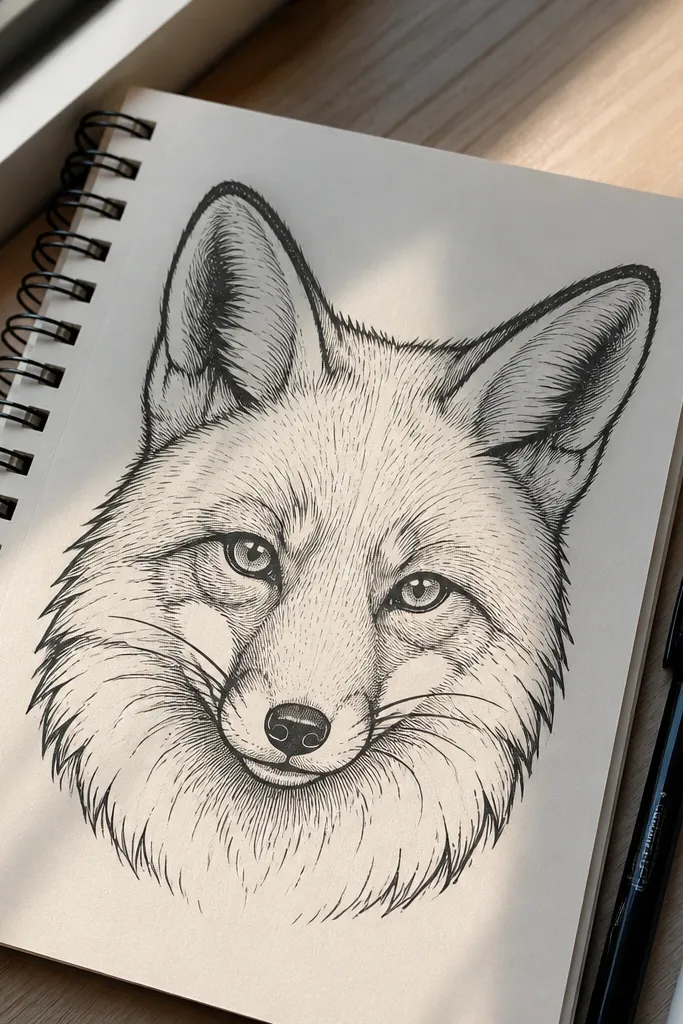
Thick outline is the fastest path to a good-looking beginner-friendly fox drawing because it hides shaky anatomy. You draw the fox with bold outer lines, then leave the highlights unshaded so the face looks bright and crisp. This style works perfectly with pencil and fineliner, and it also survives scans. It’s photogenic because the eye and nose are bold and the highlights give shape to the muzzle.
Step 1: Sketch the head oval and ear triangles lightly, then commit to a bold outline using a fineliner or 4B pressed firmly. Step 2: Add eye ovals and nose triangle in dark, then leave two small highlight shapes on the muzzle and inner eye area unshaded. Step 3: Add only a few fur lines around the cheeks and ear edges — do not overfill the face with texture.
Use the side of the pencil to shade the muzzle edges slightly, then stop before you hit the highlight spots.
Don’t shade over your highlight shapes — that’s what makes the face look flat.
21. Fox Head with Bowtie Collar and Light Shading
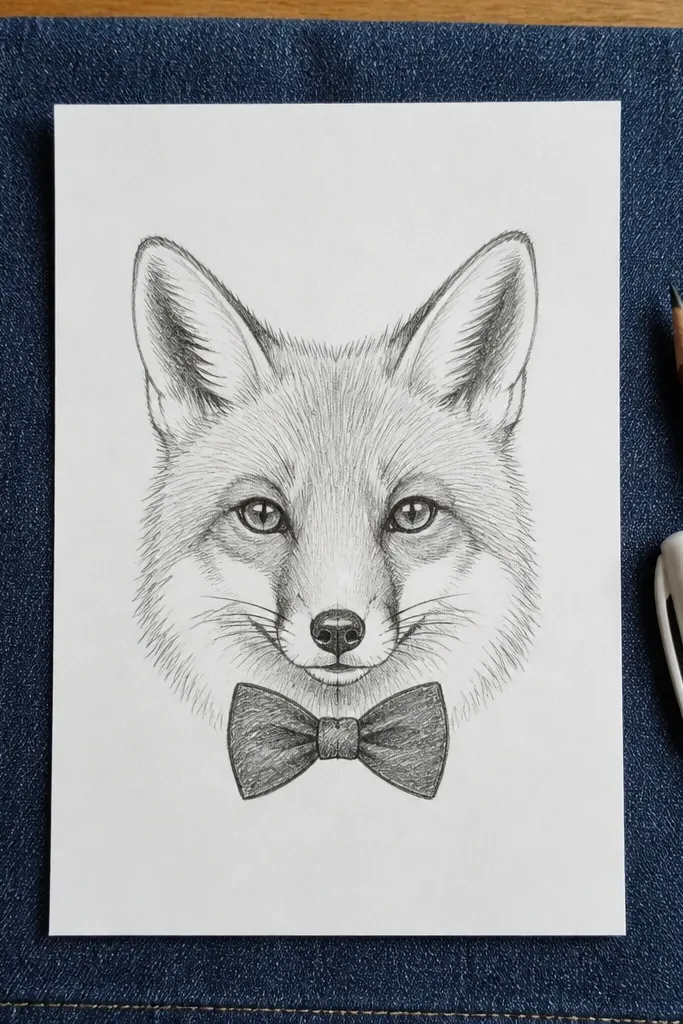
Step 1: Draw the head oval and ears triangles, then place eyes, nose, and mouth with a light center guideline. Step 2: Add a collar shape under the chin as a shallow inverted V, then draw a bowtie on top of it using two triangle folds and a small center knot. Step 3: Shade the cheeks lightly with 2B, then outline the eyes, nose, mouth, and bowtie with 4B for crisp contrast.
A tiny collar detail turns a basic fox face into a styled character drawing. You keep the fox construction simple, then add a bowtie under the chin with two triangles and a small knot. The face stays readable, and the bowtie gives you a clear focal point for beginners who struggle to decide where to add detail. This is beginner-friendly fox drawing that looks cute on a sketchbook page without heavy fur work.
AvoidDon’t add lots of fur lines on the collar area — keep it clean so the bowtie stands out.
Pro tipKeep the bowtie lines straight and sharp; they contrast nicely with softer fur around the cheeks.
22. Fox Face with Side-Glance Eye (Asymmetry Done Right)
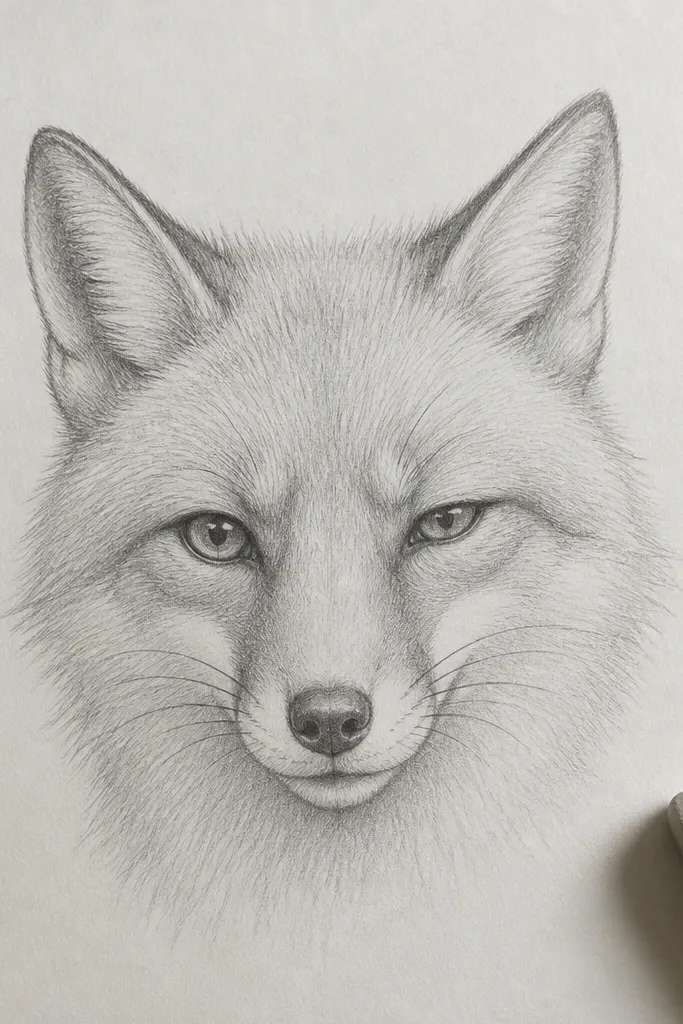
Asymmetry scares beginners, but it’s also what makes foxes look alive. This idea uses a single side-glance expression: one eye sits normal, the other tilts slightly by changing the eyelid angle. The rest of the face stays simple — nose and mouth centered-ish — so the drawing still looks balanced. It’s beginner-friendly fox drawing because you’re practicing one expression change, not full realism.
Step 1: Sketch the head oval and ears, then draw a center guideline. Step 2: Place both eyes as almond shapes, but rotate one eye slightly so it looks toward the side. Add a small nose triangle and a mouth line that follows the tilt. Step 3: Outline with 4B, then add fur strokes only on the brow and cheeks, keeping the highlight area on the muzzle unshaded.
If the asymmetry looks off, fix it by adjusting eyelid angle first, not the eye position.
Avoid moving both eyes — keep one eye placement consistent and change only the angle.
23. Fox in a Circle Motif with Spark Dots
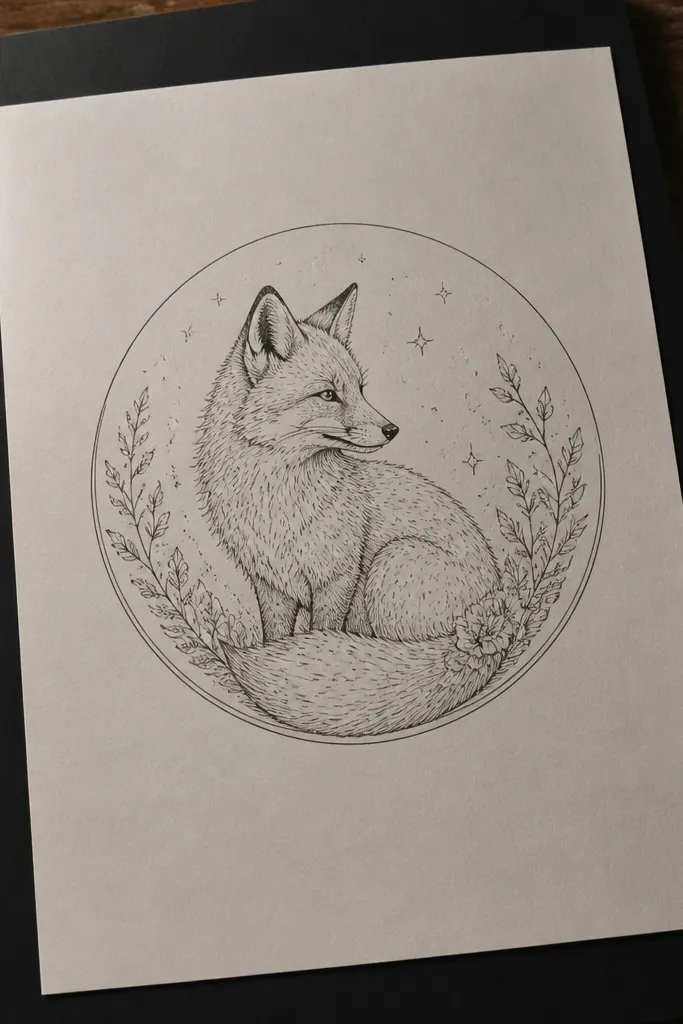
This motif is basically a ready-made composition: circle border plus spark dots. It’s beginner-friendly fox drawing because the circle helps you keep the head centered and sized correctly, and the spark dots add a fun aesthetic without requiring detailed backgrounds. The fox can be linework only, which keeps the project clean and fast. The final look is graphic and easy to pin or print.
Step 1: Draw a circle border, then sketch the fox head inside using light construction lines so the ears don’t touch the circle edges. Step 2: Outline the fox with 4B and darken eyes and nose, leaving small highlights. Step 3: Add 12-20 tiny spark dots around the outside of the fox within the circle — vary their size and keep them evenly spaced.
Make sparks smaller near the circle edge and slightly larger near the fox to create depth.
Don’t overcrowd the sparks; if the dots fill the whole circle, the fox loses focus.
24. Fox Tail Curl with a Single Highlight Stripe
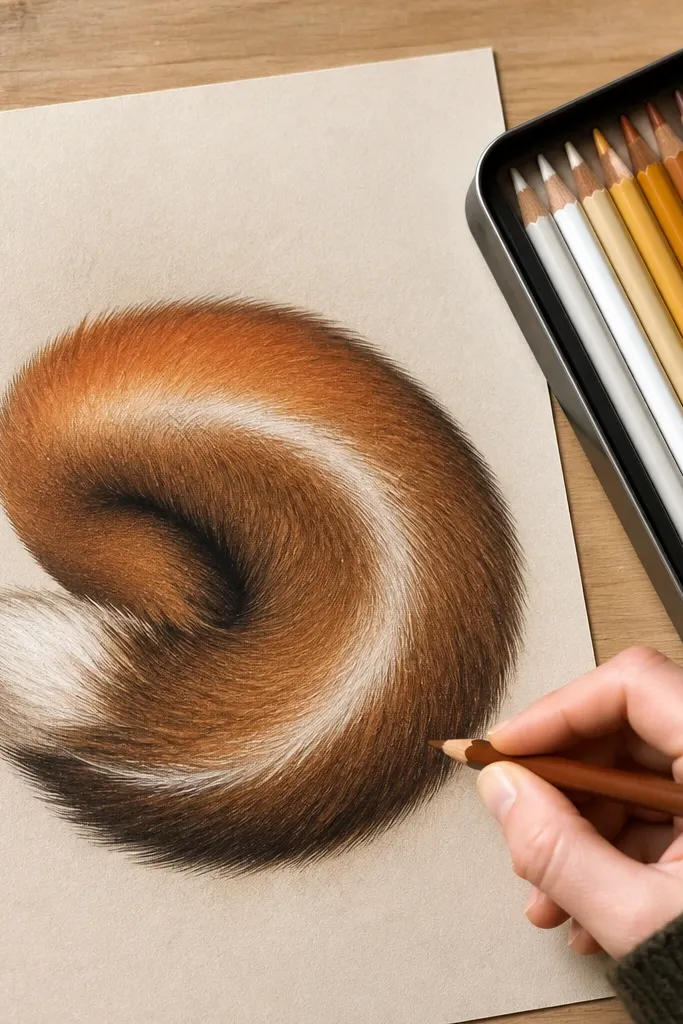
Step 1: Draw a thick tail curve from base to tip, then add a second inner curve to show the tail thickness. Step 2: Mark a highlight stripe down the center with a light guideline, then shade around it with 2B using curved strokes that follow the tail. Step 3: Darken the outer tail edge with 4B and add a few short fur strokes along the highlight stripe border for texture.
This tail drawing looks more advanced than it is because of one simple idea: one highlight stripe. You outline the tail, shade the fur around it, then leave a clean lighter line where the fur catches light. Beginners usually struggle with shading direction, and this forces you to follow the tail curve. It’s beginner-friendly fox drawing that’s still photogenic because the stripe creates a crisp shape boundary.
AvoidAvoid multiple highlight stripes; one is cleaner and reads better.
Pro tipUse a light touch for the main shading, then add darkness only at the outer edge.
25. Fox Face with Folded Ear Inner Detail
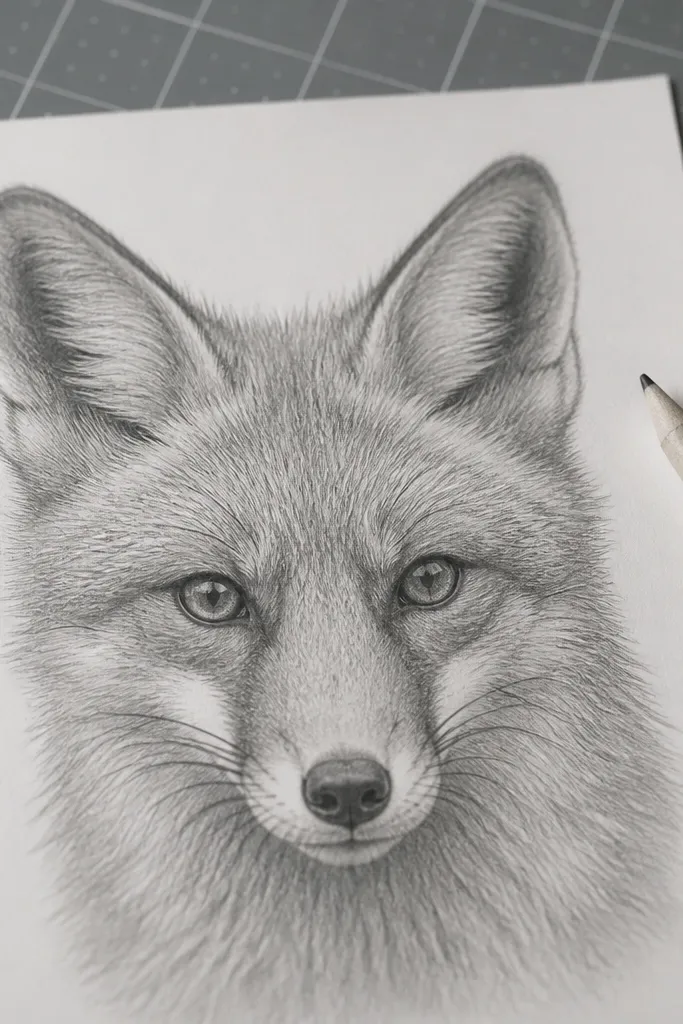
Step 1: Sketch the head oval and draw two ear triangles, using construction lines to keep them aligned. Step 2: Add the inner ear fold by drawing a smaller curved triangle inside each ear outline, leaving it lighter. Step 3: Outline the outer ear edges with 4B, then lightly shade the outer ear edge and add a few fur strokes at the ear base near the forehead.
Ear inner detail is an easy realism upgrade for a beginner-friendly fox drawing. You outline the ear, then add a lighter inner shape that suggests the fold and depth. The trick makes the fox look more dimensional without complex fur shading. It also keeps your attention on the ears and face, which is where most fox charm lives.
AvoidDon’t fully shade the inner ear — the contrast is what makes it look folded.
Pro tipKeep the inner ear shape slightly offset toward the back of the ear for a natural fold feel.



