
1. Single-Line Chocolate Heart Chain
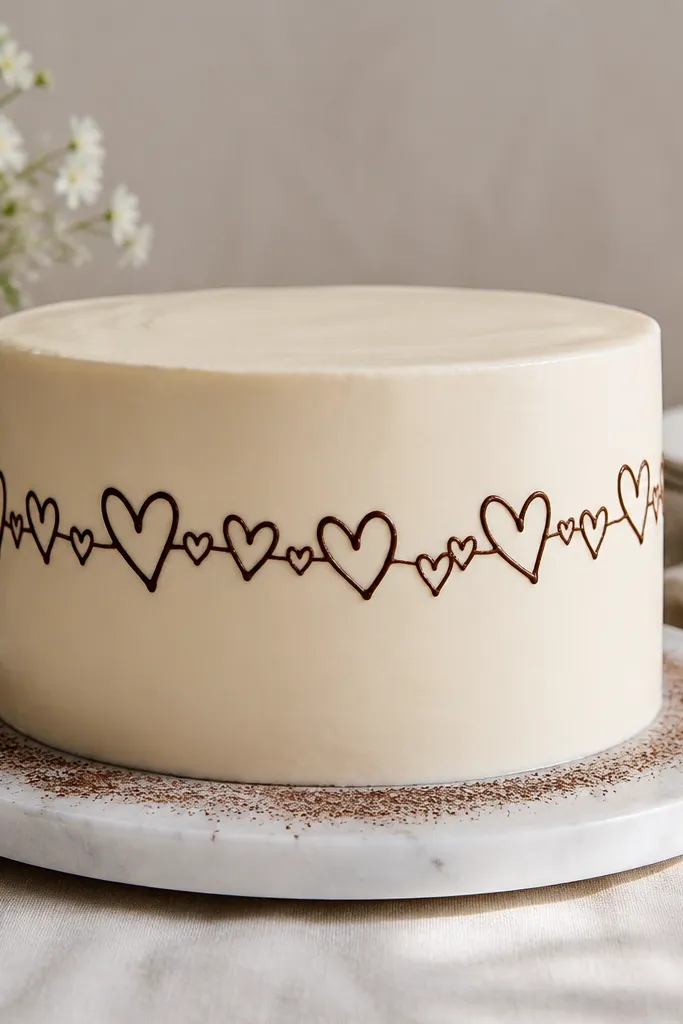
This one looks clean because it uses one continuous style — thin chocolate-brown hearts that feel like a doodle but stay neat. It works best on a smooth, light frosting so the line color reads instantly in photos. Keep the hearts slightly different sizes, then leave small gaps between them so the design feels airy instead of crowded. The result looks cute, modern, and intentional even if you’re not an expert at drawing.
Start with a smooth buttercream finish and chill the cake for 10-15 minutes so the surface is firm. Fit a piping bag with a 1.5mm to 2mm round tip and pipe a thin “C” shape for the first heart outline. Repeat down the side in a gentle wave, keeping the line thickness consistent; after the outlines dry for 2-3 minutes, add tiny highlight dots near the top of each heart using a lighter cocoa-cream color.
Pro tipPractice on parchment first: the goal is consistent line pressure, not perfect symmetry.
AvoidDon’t fill the hearts completely with brown icing — it turns the doodle into a blob.
2. Chocolate Drip With Sketched Cocoa Beans
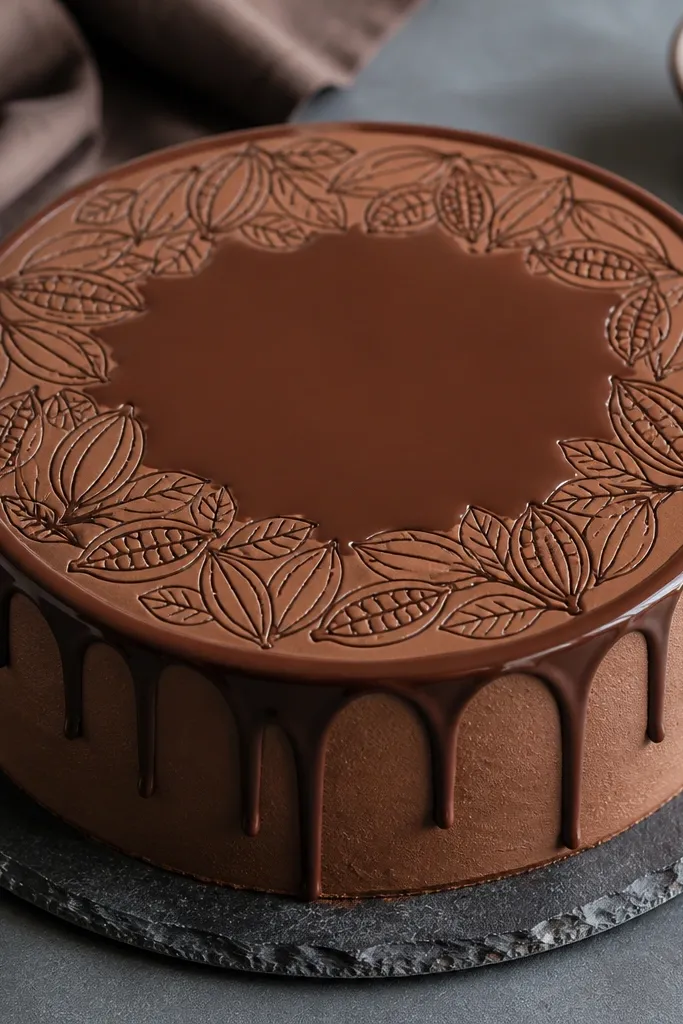
A drip already gives you a strong shape, so the drawing only needs to add personality. Sketched cocoa beans around the drip look like hand-drawn packaging art, which reads great from a few feet away. Use dark brown lines for the bean outlines and add a lighter inner line to suggest texture. This design is photogenic because the drip creates height and the beans create detail without overwhelming the cake.
Pipe a thick chocolate drip effect first, using ganache or a chocolate-brown piping gel, then chill until it sets. With a 2mm round tip, outline 10-14 cocoa beans on the exposed frosting around the drip edge, spacing them evenly. Add one lighter inner seam line inside each bean and finish with tiny leaf-like squiggles at the top of 3-4 beans.
Use ganache that’s thick enough to hold peaks, not a thin pour — thin drips smear when you pipe on top.
Don’t draw beans right after the drip goes on — wait until the drip surface is set.
3. Cocoa Swirl Frame Around a Gold Center
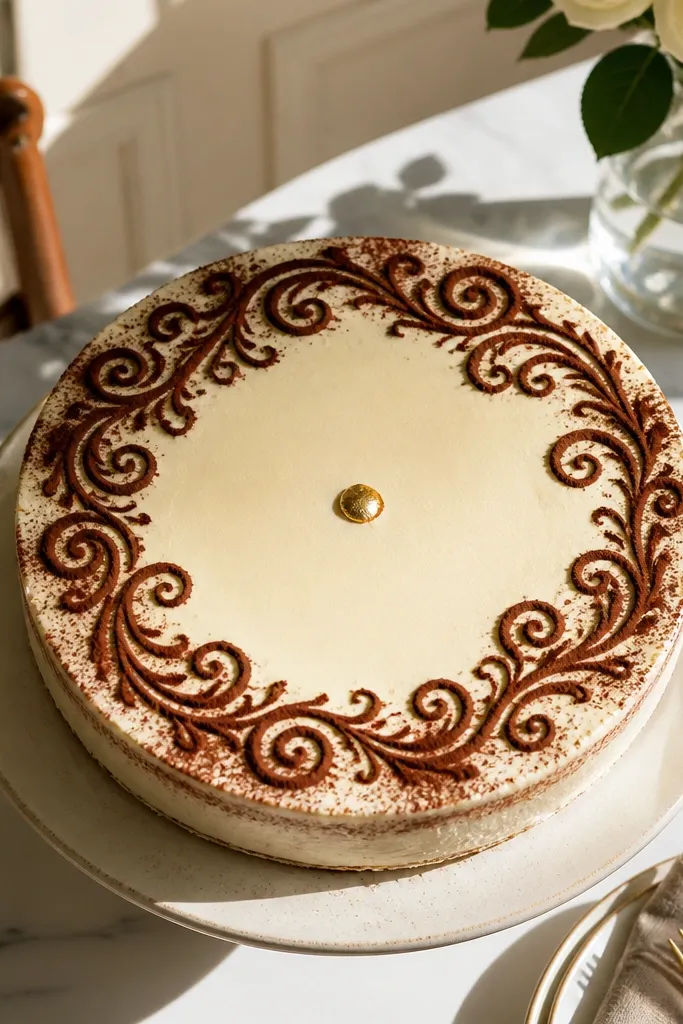
This design looks “designed” because it frames the cake with a controlled swirl and keeps the center calm. The swirl acts like a picture border, making the cake feel styled rather than decorated randomly. A single gold edible dot (or a small gold leaf piece) gives you a focal point that photographs well. It’s a great option when you want a bold look without complex shading.
Smooth the top and chill briefly so the frosting holds fine lines. Pipe a continuous swirl frame using a 1.5mm round tip, starting near the edge of the cake top and looping inward in an oval. Leave a clean blank circle in the center, then pipe 6-8 smaller swirl curls along the frame thickness for dimension. Place a gold dot in the center and let the frame set for 5-7 minutes.
Keep your swirl line slightly thicker at the turns; it makes the drawing look intentional in photos.
Don’t cover the center with more swirls — it kills the focal point.
4. Chocolate Lace Border With Thin Outlines
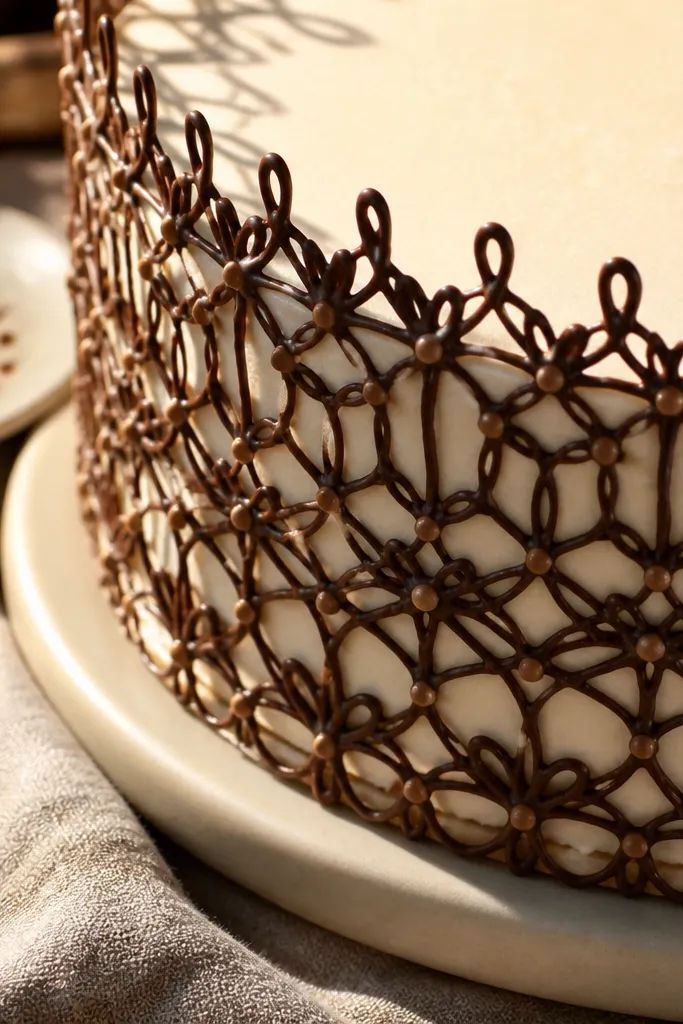
Lace patterns look expensive because they’re mostly negative space and tiny repeating lines. The key is that the lace here is drawn with thin, consistent strokes so it reads like delicate edging, not a heavy mess. Use cocoa-brown piping for the main lace and a lighter brown for small connecting dots. This is a strong choice for a wedding-style look or any cake that needs elegance without bulky fondant.
Chill the cake so the frosting is firm to the touch, then mark a light guideline around the side with a toothpick. Pipe a repeating scallop outline along the guideline using a 1.5mm tip. Add tiny loops between scallops and connect them with small dot intersections using a slightly lighter brown icing. Let the border set 10 minutes before moving the cake.
Pro tipIf you’re shaky, build the lace with short segments rather than one long continuous pattern.
AvoidAvoid thick piping — lace needs thin lines to look like lace.
5. Bold Chocolate Lettering With Underlined Flourish
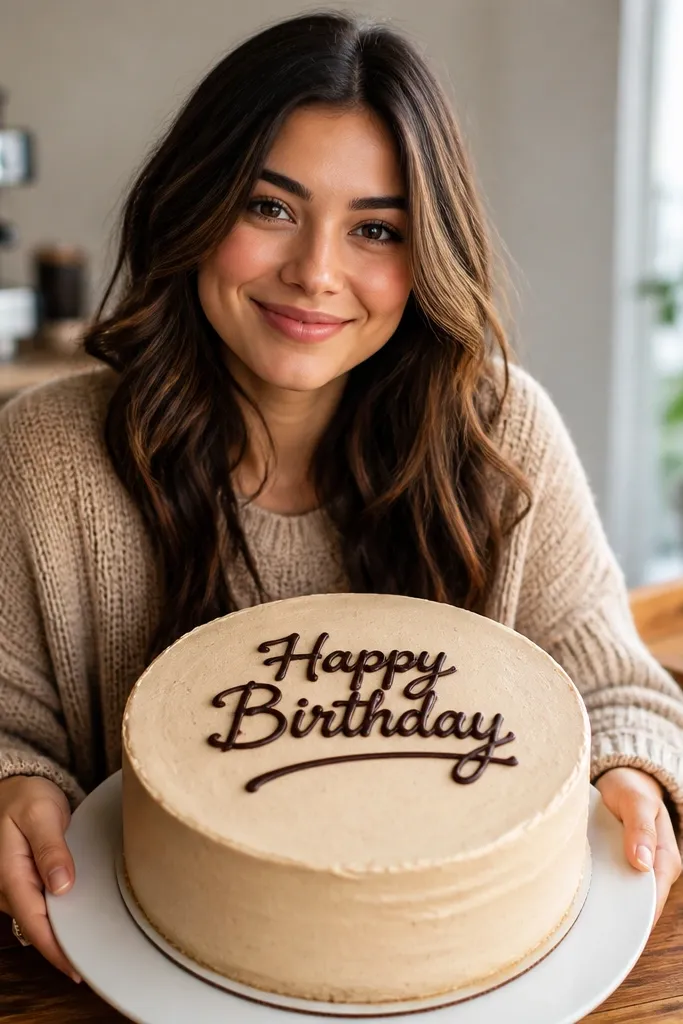
Lettering drawings look stunning because they’re instantly readable and create a clear theme. This idea uses bold chocolate-brown outlines for letters and a single underlined flourish for movement. Keep the background smooth and plain so your message pops in photos. It’s also forgiving: you can make the letters slightly imperfect and it still looks like hand-drawn art.
Choose a short word or two-line phrase and lightly sketch the baseline with a toothpick. Pipe letters in outline form first using a 2mm round tip, keeping stroke thickness consistent. Then underline with a single flowing line that curls at both ends, and add 3 small highlight strokes inside the underline for shine. Let it set until the frosting stops looking glossy.
Pro tipWrite on paper first with a similar pen thickness; match the spacing before you pipe.
AvoidDon’t shade every letter — outline plus a few highlights looks cleaner.
6. Chocolate Botanical Vines With Tiny Leaves
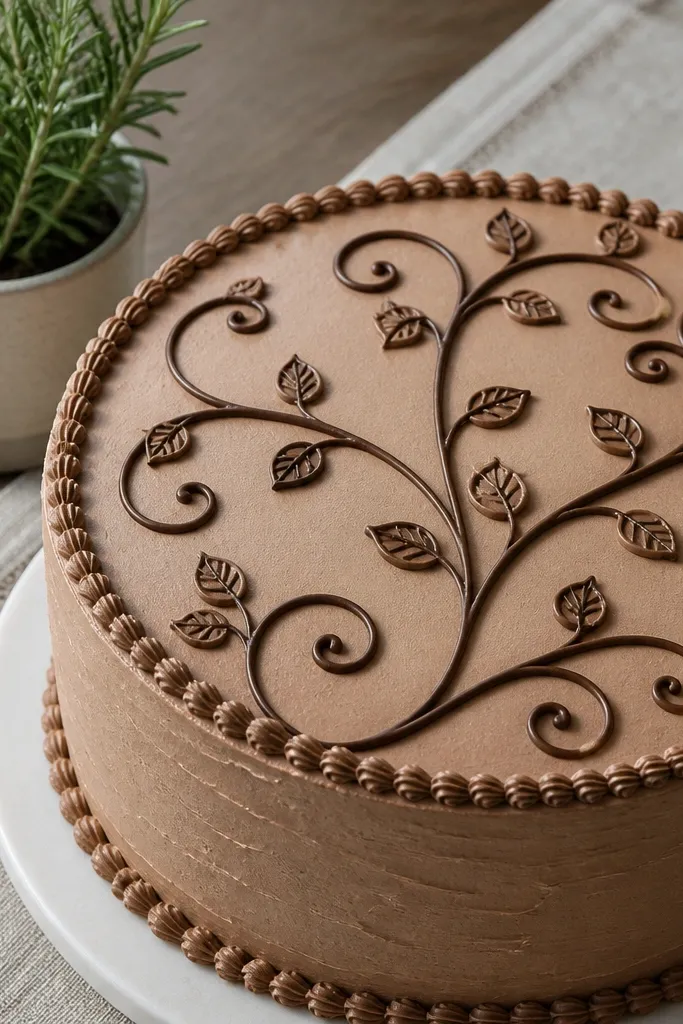
Botanical vines are one of the prettiest ways to make a cake feel garden-inspired without adding fondant. The drawing works because vines have natural curves that guide the eye, and tiny leaves add texture without heavy filling. Use dark brown for the main vine and a slightly lighter brown for leaf vein lines. This style looks best on a light frosting background and feels fresh for spring, baby showers, and birthdays.
Smooth the sides and mark two gentle starting points where the vines will enter from left and right. Pipe a thin vine line with a 1.5mm tip and branch into small offshoot curves. Add tiny leaf outlines as teardrops along the vine, then pipe one lighter vein line through each leaf. Finish with 6-8 small leaf clusters spaced around the top edge.
Pro tipKeep leaves small (about the size of a thumbnail) so the drawing stays delicate.
AvoidDon’t cram leaves into every inch — the empty frosting spaces make it look airy.
7. Chocolate Geometric Lines With Soft Corner Rounding
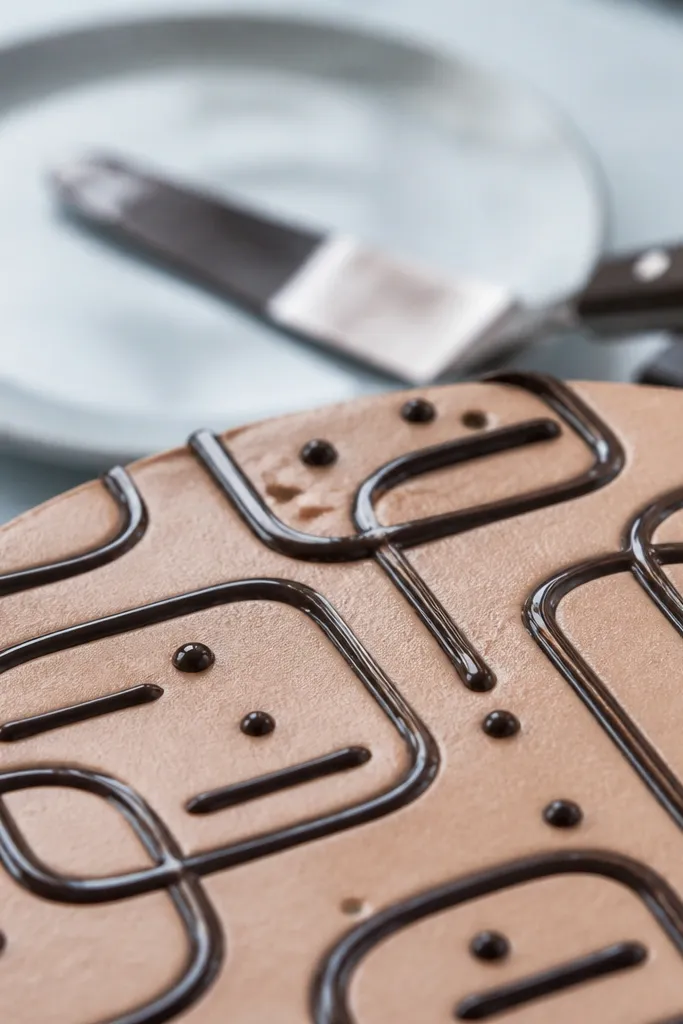
Geometric drawings read crisp and modern because they rely on strong shapes, not shading. This version uses rectangles and rounded corners so it looks friendly instead of harsh. The best part is how photogenic it is: the lines catch light against smooth frosting. Add a few small dots or short dashes to break up the lines and keep the design from feeling too rigid.
Start with a smooth top and lightly mark a grid with a toothpick so your lines stay straight. Pipe thin chocolate-brown rectangles and squares using a 1.5mm tip, then soften the corners by slightly curving the last stroke of each side. Add a second line layer inside one or two shapes for depth, using a slightly lighter brown. Finish by placing 4-6 tiny dots at intersections to “lock” the design.
Pro tipLet your first line set 2-3 minutes before adding the inner detail so it doesn’t bleed.
AvoidSkip the heavy cross-hatching — it turns geometric art into a dark blur.
8. Chocolate Map Lines With a Tiny Compass Rose
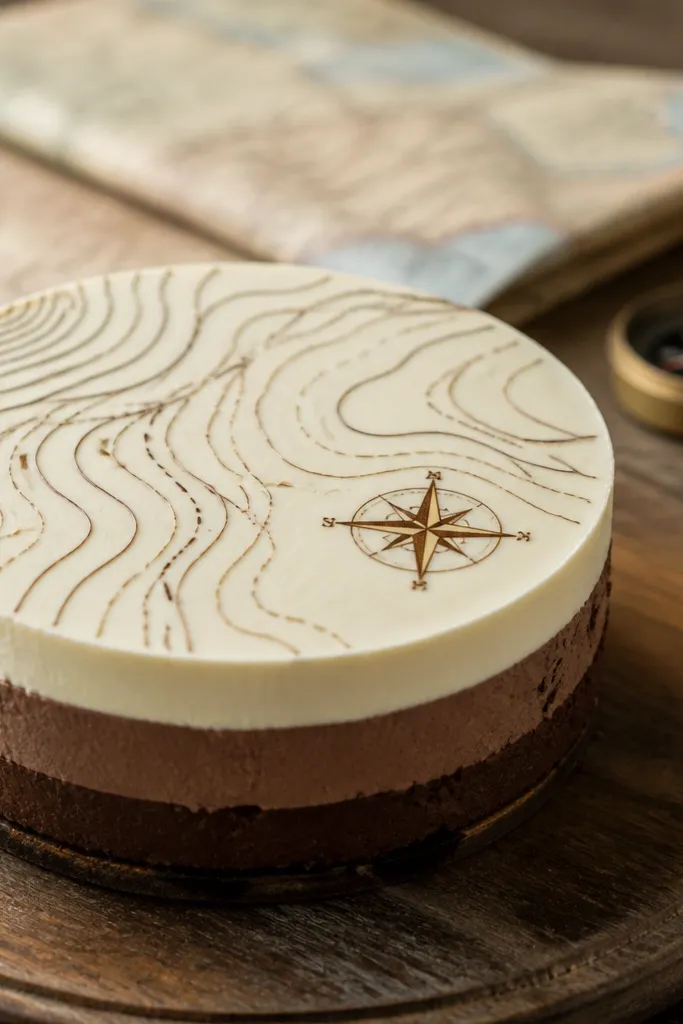
Map-style line drawings feel artsy and different, and they look great because contour lines create motion across a flat surface. Add a small compass rose so the design has a clear focal point. Use thin contour curves in dark brown and a compass rose in slightly lighter brown so it stands out. This is a fun pick for travel themes, anniversaries, or anyone who likes unexpected details.
Smooth the top and choose one main direction for the contour lines. Pipe 12-18 thin curved contour lines with a 1.5mm tip, keeping the curves evenly spaced. Place a small compass rose near the center: outline a circle, then add 4 cardinal direction points with short lines. Add 3 tiny dot clusters around the compass to mimic map markings.
Pro tipUse a ruler for the compass rose circle — straight edges make the whole drawing look intentional.
AvoidDon’t add too many symbols — too much map detail makes it look cluttered.
9. Cocoa Outline Sunburst With White Chocolate Rays
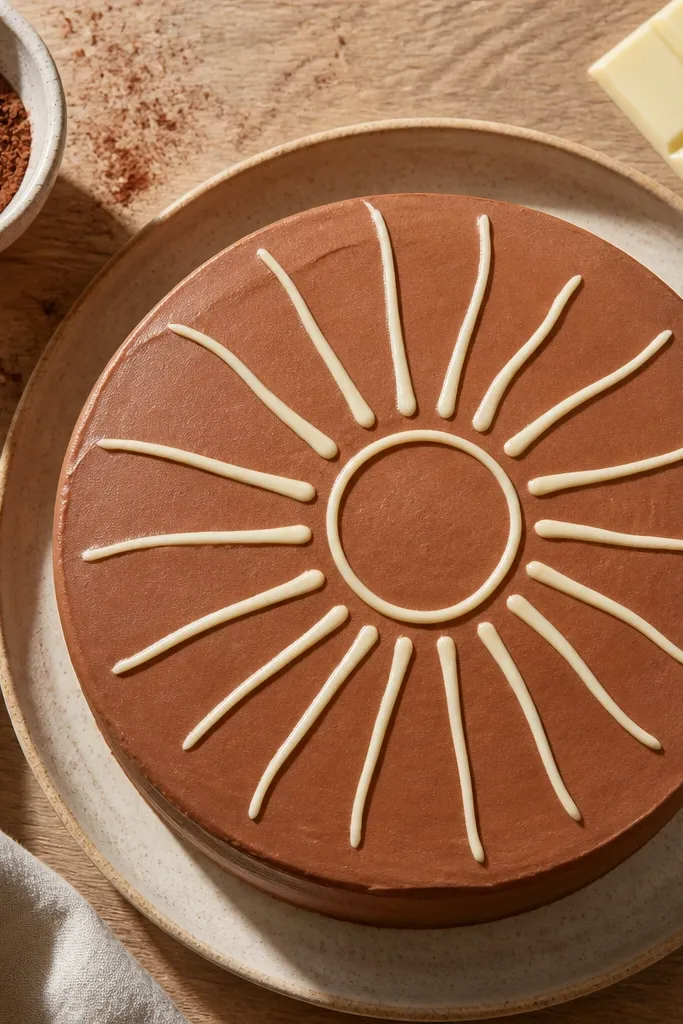
Sunburst drawings are a cheat code for photos because they naturally lead your eye outward. This style uses chocolate-brown outlines for the outer sun shape and lighter rays for contrast. It works on a smooth cake top and also looks good on the side if you wrap the rays around the edge. It’s a cheerful look that still feels “cake-drawn” rather than printed or themed.
Chill a smooth top until it’s firm. Pipe a small circle in the center with a 1.5mm tip, then draw 10-16 rays outward as straight lines, leaving consistent spacing. Add a chocolate-brown outer ring around the rays to frame the design. Finish by piping a few ray highlights in a lighter color (white chocolate ganache or vanilla buttercream tinted light brown).
Keep rays short near the edge; long rays can look uneven when the cake surface curves.
Don’t press too hard — thick rays flatten and lose the crisp sunburst look.
10. Chocolate Burst Confetti Dots With One Big Star
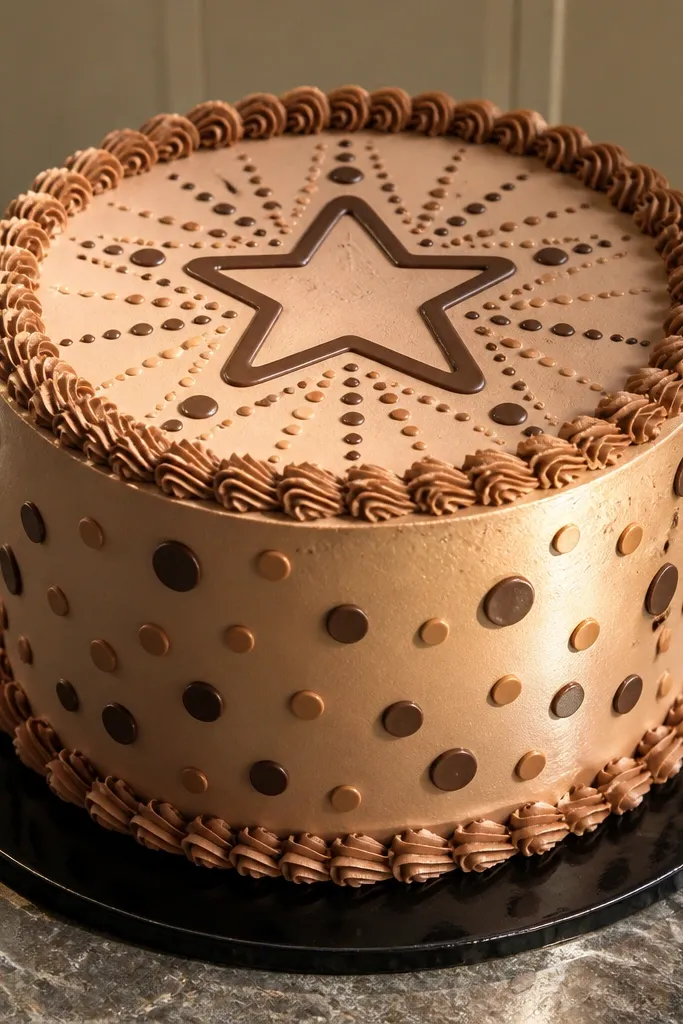
This is the cleanest way to get a party vibe without messy sprinkles. The confetti dots are drawn, so they look intentional and evenly spaced, and the big star creates a strong focal point. Use dark brown for the star outline and lighter brown for the dot accents so the cake doesn’t look one-note. It’s fast, photogenic, and forgiving if your lines aren’t perfect.
Pipe the star first: outline a 5-point star in the center with a 2mm round tip. Next, create a burst by piping small dots in a circle around the star, spacing them evenly like a ring. Add a second ring of slightly smaller dots closer to the edge for depth. Finish with 3 tiny curved lines near the star points to suggest movement.
Pro tipUse a parchment guide dot pattern under the cake so your spacing stays consistent.
AvoidDon’t overdo the dot count — fewer, cleaner dots look more designed.
11. Chocolate Branch With Almond-Color Blossom Outlines
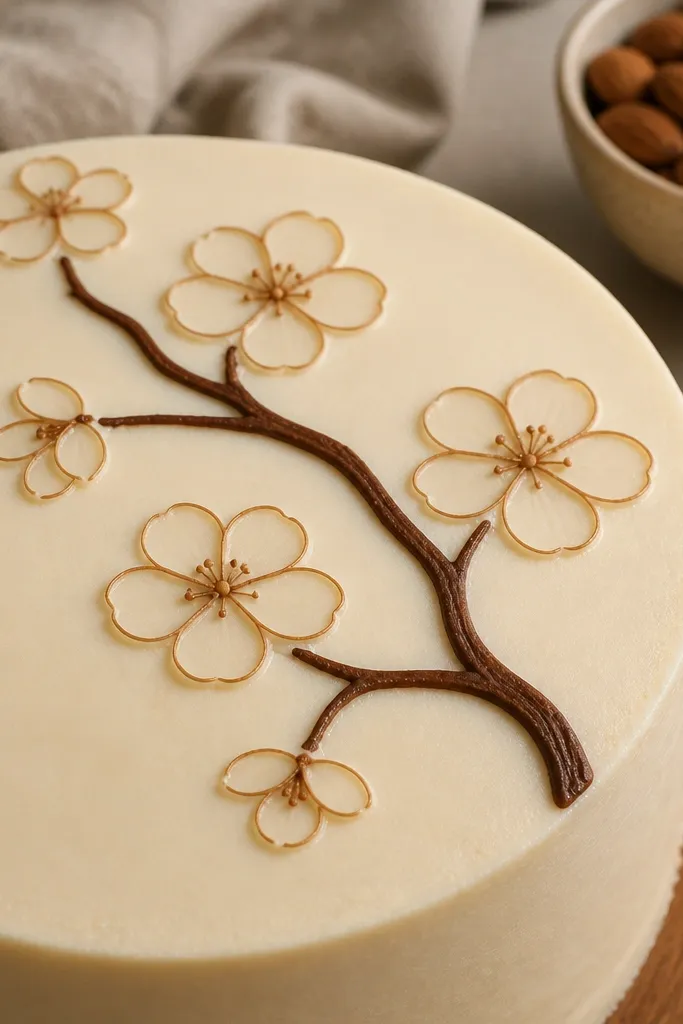
Flower outlines look delicate and expensive when they’re drawn with thin strokes and layered colors. This design uses a single branch line in dark chocolate-brown and blossoms in a lighter almond-brown for contrast. The blossoms are simple five-petal outlines with a tiny center dot, which reads well even from a distance. It’s a great choice when you want a pretty cake drawing without heavy coloring or fondant petals.
Draw a sweeping branch across the cake top using a 1.5mm tip. Add small offshoot twigs with short strokes so the branch looks natural. Pipe blossoms along the branch: each blossom gets five rounded petal outlines and one center dot. Add a lighter inner petal line on every other blossom to create a subtle layered effect.
Keep petal outlines slightly uneven — perfectly identical blossoms look like stamps.
Avoid fully filling petals — outline-only keeps the look airy.
12. Chocolate Portrait-Style Silhouette (Abstract Face)
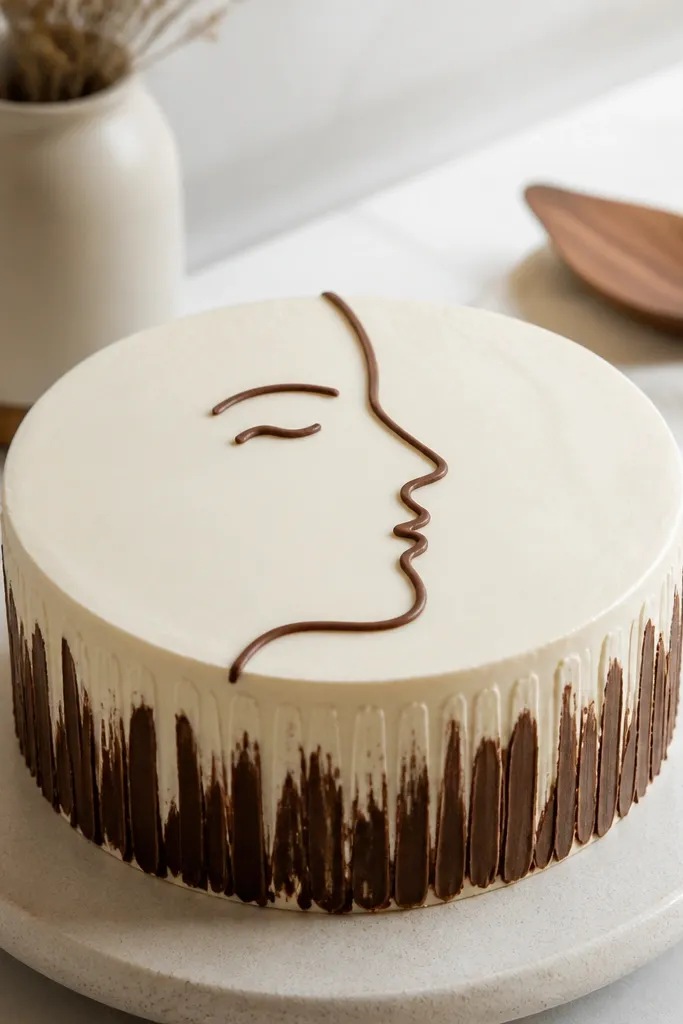
Abstract faces are striking because they’re recognizable with just a few lines. This design uses a smooth chocolate-brown silhouette outline and minimal facial features, like an eyebrow curve and a simple nose line. The look is modern and artsy, especially on a light frosting background. It’s ideal for a milestone cake where you want a personal vibe without writing a name in full script.
Sketch the face shape lightly with a toothpick on the chilled frosting. Pipe the outer silhouette in dark brown with a 1.5mm tip, then add minimal features: one eyebrow curve, a short nose line, and a small mouth arc. Add a lighter brown highlight stripe on one side of the face outline to create depth. Finish by drawing 5-7 small hairline strokes around the top edge for texture.
Pro tipUse a thicker frosting layer under the drawing so lines don’t sink and blur.
AvoidDon’t add lots of facial details — minimal features keep it readable and clean.
13. Chocolate Monogram With Looping Flourish Corners
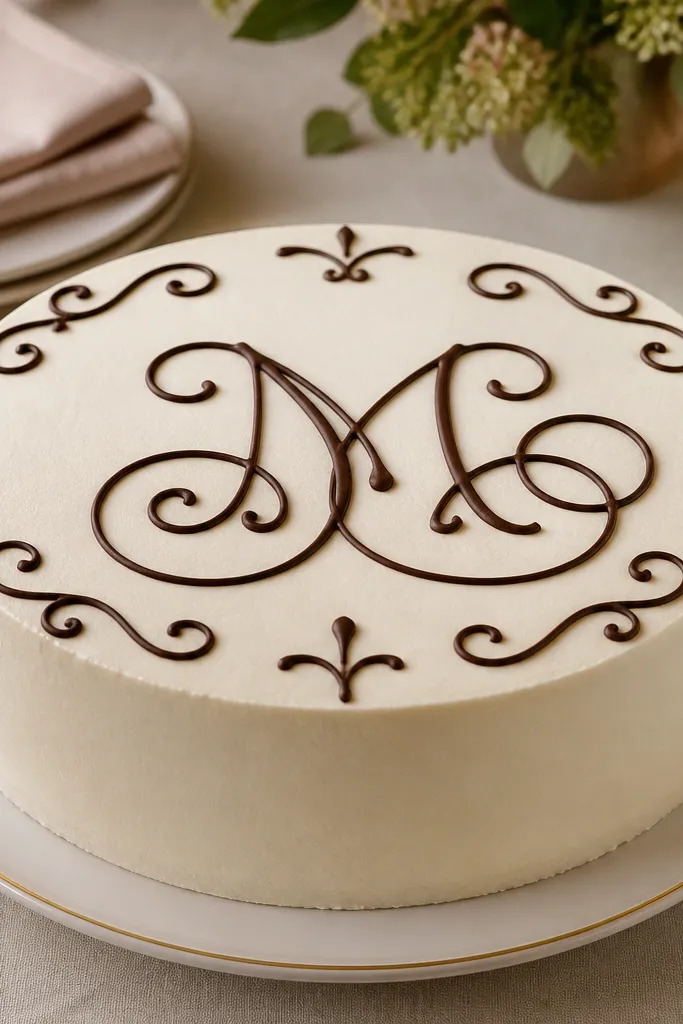
Monograms look polished because they create a clear, personal mark. This version uses one big letter drawn in chocolate-brown outlines with flourishes that extend into the corners. The flourishes make the cake feel framed and styled, not like a single sticker slapped on. Pair it with a simple background and it becomes a strong photo element without extra decoration.
Pick one letter that fills the center of the cake top. Lightly mark the letter boundaries with toothpick dots, then pipe an outline version of the monogram with a 2mm round tip. Extend flourishes from two corners of the letter into the corners of the cake top using thin lines and small curls. Add 3 small highlight dashes along the thickest part of the letter and let it set before slicing.
If your letter lines get shaky, use a slightly thicker tip for the outer stroke and a thinner tip for the inner highlight.
Don’t try to fill the whole letter with solid icing — outline with highlights looks sharper.
14. Chocolate Crown With Dot Gems
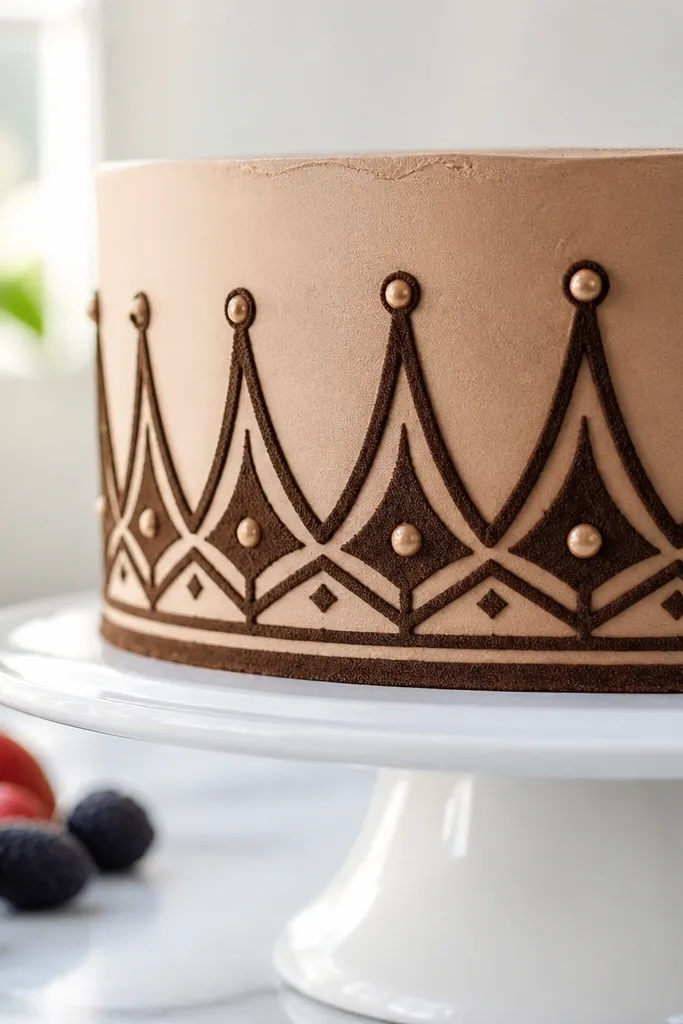
A crown drawing is instantly recognizable and reads well in photos. This one stays elegant because it uses clean points and tiny dot gems instead of heavy shading. The dot gems add sparkle-like contrast without needing edible glitter. It’s a strong choice for birthdays, promotions, or any cake that needs a confident focal point.
Chill the cake top and keep it smooth. Pipe the crown outline first: start with a center peak, then two side peaks, then connect them with thin lines. Add three arches across the middle of the crown using the same 1.5mm tip. Finally, place dot gems: pipe six small dots along the crown points and let them dry for 5-7 minutes.
Pro tipUse a lighter brown for the dot gems so they pop against the dark crown outline.
AvoidAvoid big dots — tiny gems look more like jewelry.
15. Chocolate Cake Tier Ribbons With Cocoa Sprinkles
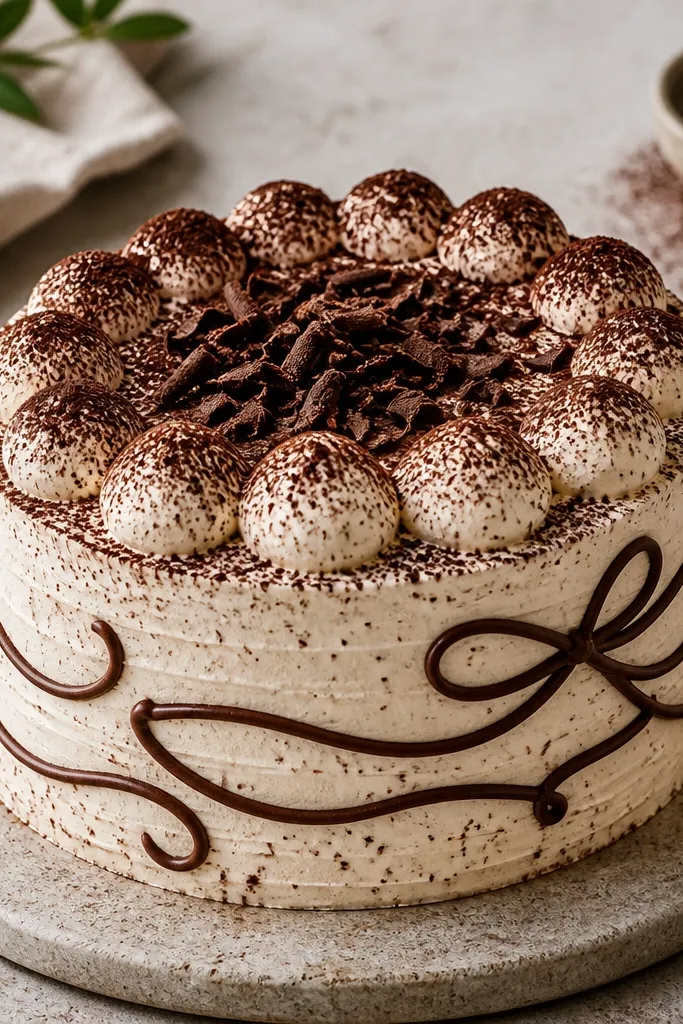
This drawing idea makes a chocolate cake look dressed up without getting messy. You get clear tier shapes, then you add ribbon bands that wrap around the middle like satin — only drawn, so it stays clean and graphic. Finish it with sprinkle dots and tiny “cocoa dust” specks so the frosting surface looks textured instead of flat. It works great for beginners who can draw smooth arcs and simple curves, and it still looks impressive in a small frame or on a sketchbook page. Plan on about 45-75 minutes depending on how dense you make the sprinkle field.
Start by sketching two stacked cake tiers using soft, slightly irregular ellipses. Make the bottom tier about 2 times wider than the top tier, then add a frosting edge line on each tier that follows the ellipse but sits 6-10 mm inside. Draw two ribbon bands: one across the top tier and one across the bottom tier, each with a thicker center stripe and thinner highlight edges, leaving small gaps where the ribbon overlaps. Add sprinkles by dotting tiny ovals and short dashes in a loose band around the ribbon edges, then sprinkle a few finer specks (cocoa dust) scattered inside the frosting area. Ink with a fine liner (0.3 or 0.5 mm), then color the ribbons with warm brown and the frosting with light chocolate tones so the ribbon pattern pops.
Do the sprinkles last, and keep them clustered near the ribbon edges so the texture reads clearly instead of turning into noise.
Avoid outlining every sprinkle — keep most of them as filled dots so the drawing stays crisp.



