
1. S-Curve Ribbon Snake
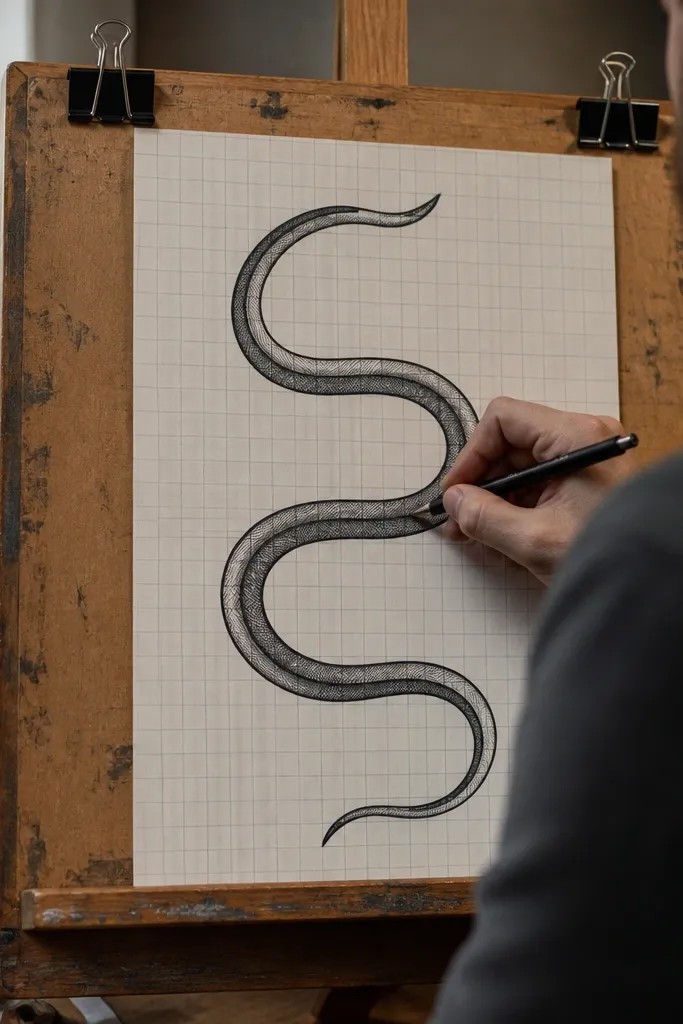
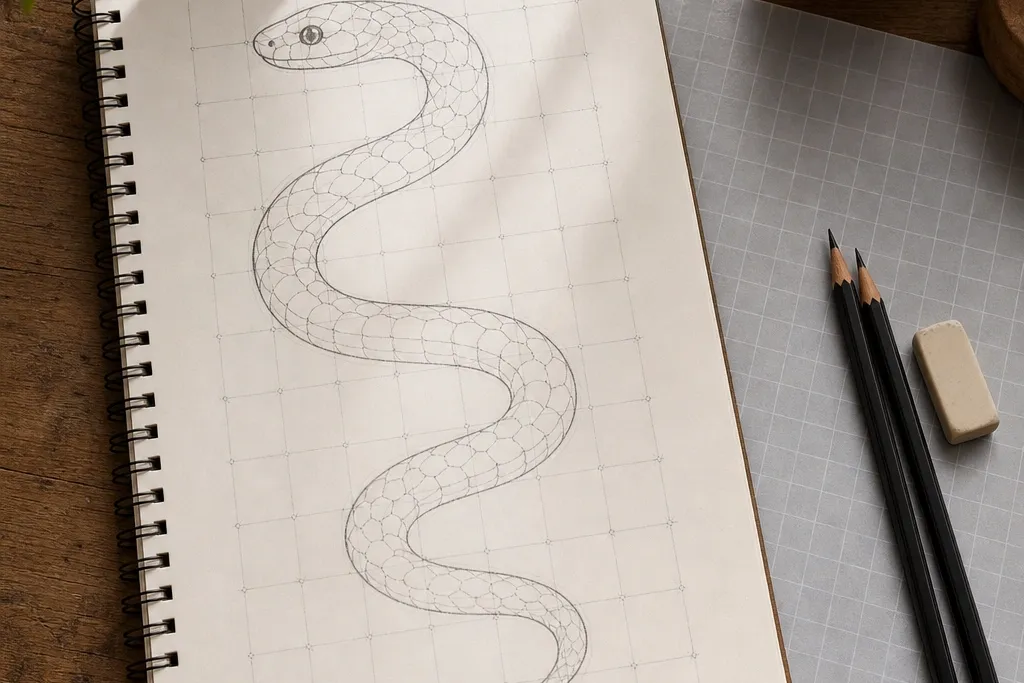
Step 1: Draw a 1 cm grid on your paper. Lightly sketch a center line that makes an S across the page, hitting the grid intersections at the widest bends. Step 2: Create a second line parallel to the center line on both sides to form a ribbon width, then connect the top and bottom lines at the head end. Step 3: Add two or three stripes by drawing bands that wrap across the width, then erase the grid lines lightly so the snake stays crisp.
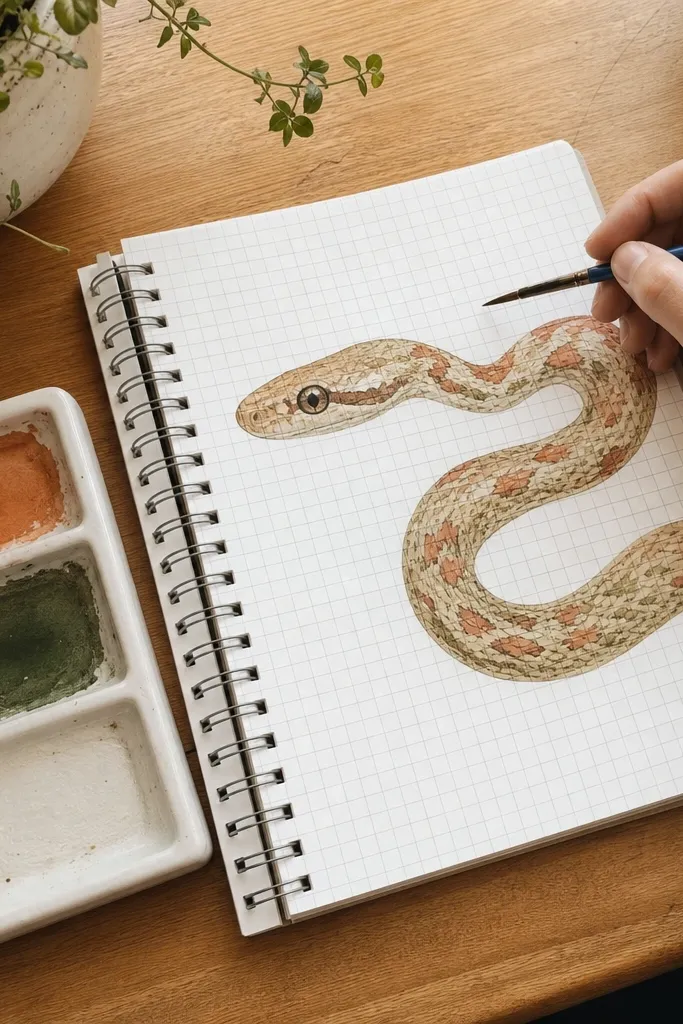
This one is the fastest way to get a snake silhouette that looks like a snake, not a squiggle. The body is one clean S-shaped ribbon that runs through the grid, and you only add thickness after the center line looks smooth. Keep the width consistent and the curves gentle so beginners don’t fight the proportions. Add two or three stripe bands that follow the body’s direction. It’s great for first practice pages and teaches the core grid habit: place the curve points, then connect.
AvoidDon’t add scales before the body width looks correct.
Pro tipUse a 2B pencil for the first sketch and switch to HB for the final lines so your grid doesn’t show through.
2. Coiled Ball Snake With Spokes
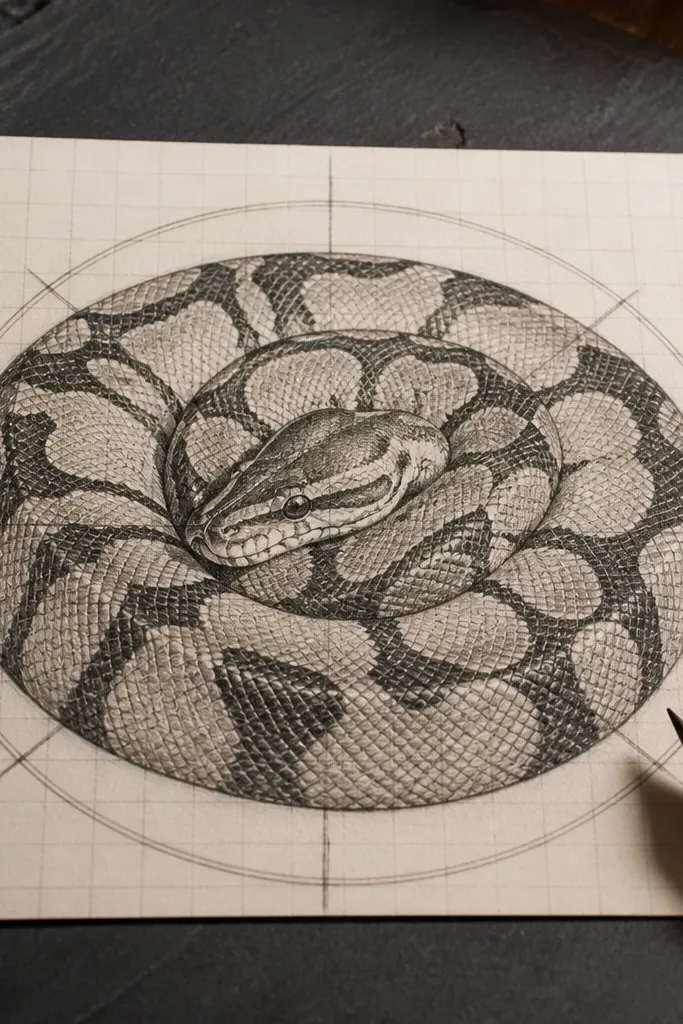
Coiling makes snakes feel “real” even when details are minimal. The trick is to draw a circle boundary and then use a few spokes to guide the body layers. Beginners love this because the grid gives you built-in symmetry and the snake pattern can be simple bands. You’ll get a clear shape quickly: a ring of body coils plus a head peeking out. It’s a good warm-up when your hand feels shaky.
Step 1: Draw a grid and lightly mark a big circle using 6-8 points on the grid intersections. Step 2: Draw one inner circle to show the coil thickness, then draw 3-4 spokes from center to edge to guide where the body overlaps. Step 3: Outline the coil by tracing along the spokes, leaving a small gap for the head opening, then add 3-4 band stripes that repeat around the curve.
Keep the head small compared to the coil so your proportions don’t get crowded.
Don’t make the inner and outer circles the same size — you need visible coil thickness.
3. Peekaboo Head On a Grid Line
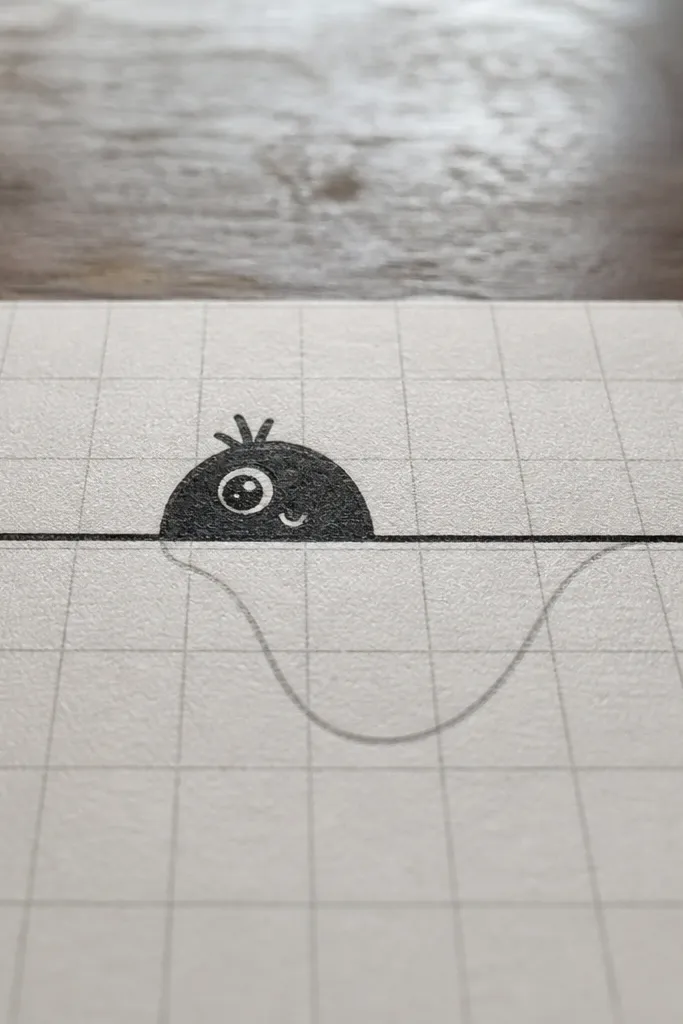
Step 1: Draw a grid and pick a horizontal row as the “ground line.” Step 2: Sketch a short wavy body line that crosses 6-8 grid squares, then stop it and draw the head as an oval with a pointed snout at one end. Step 3: Add a simple eye dot and a curved mouth line, then place one stripe that runs from the top of the head to the snout.
This drawing is excellent when you want the snake to look cute and intentional without heavy body work. You draw a wavy line body that barely enters the frame, then exaggerate the head shape and eye. Grid placement keeps the head angles consistent, so it looks like it’s actually “looking” rather than floating. Add a simple jaw line and one stripe across the snout. This is beginner-friendly because the head details carry the charm.
AvoidDon’t add too many stripes on the head — one clear band reads better.
Pro tipUse the grid row as your head height reference so the snout doesn’t drift upward.
4. Single-Loop Coil With One Stripe
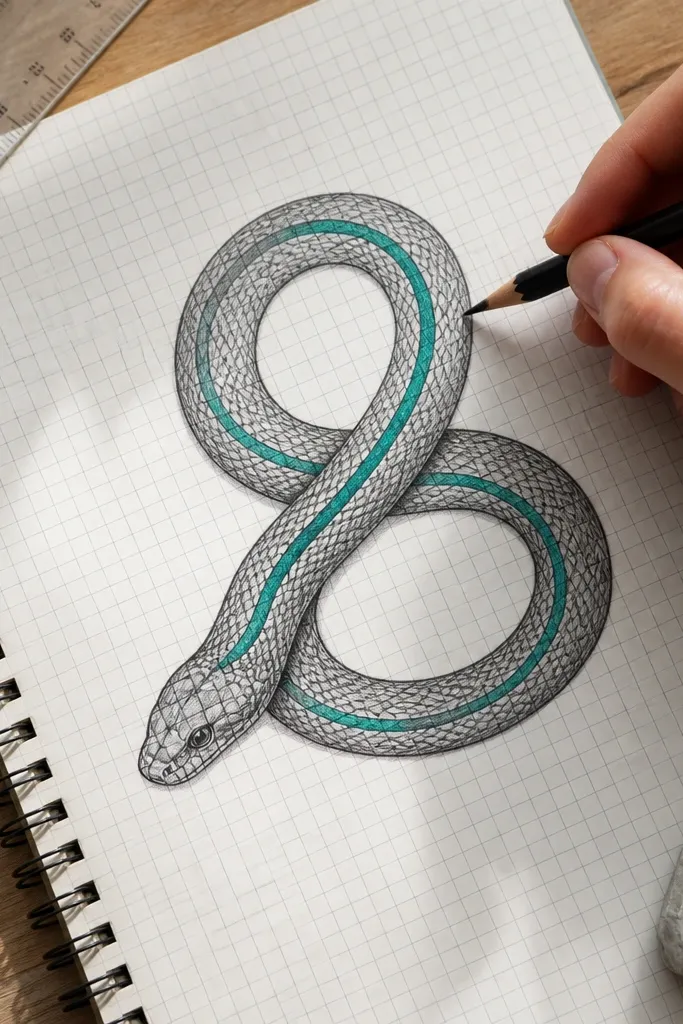
Step 1: Draw a grid and sketch a loop shape like a rounded teardrop that closes into a circle-ish loop. Step 2: Add a second line inside the loop to show thickness, then choose one overlap area and draw the top edge continuous while the bottom edge dips under. Step 3: Add a single stripe following the center of the body, then erase the grid lightly.
One-loop coils are simpler than full balls, but still look like a snake pose. This design teaches you how overlap works on a grid: you decide which side of the loop is “on top.” Use one stripe that wraps along the body so beginners can focus on alignment instead of texture. The result looks clean and graphic, perfect for stickers or simple wall art. It also helps you practice drawing consistent thickness along a curved path.
AvoidDon’t draw the stripe perpendicular to the loop — it should follow the curve.
Pro tipMark the top-over-bottom overlap with one small dot before you ink the lines.
5. Long Stretch Snake With Ladder Segments
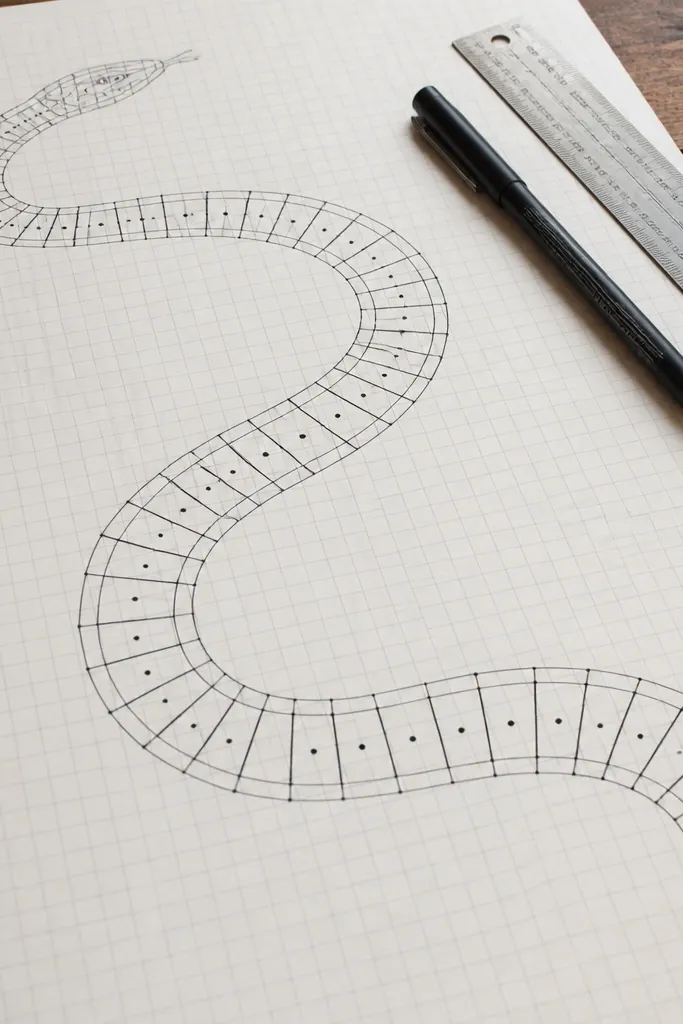
Step 1: Draw a grid and lightly plot 10-14 center points along a long S path that crosses grid intersections. Step 2: Connect the points with a smooth line, then add width by drawing two parallel lines that stay a constant number of squares apart. Step 3: For the pattern, place dot clusters at every other segment point, then clean up your outline with darker pencil.
Stretch poses look impressive but they’re easy when you break the body into ladder-like segments on the grid. You’re basically drawing a long tube that moves in gentle S turns. The grid keeps the segments evenly spaced, which makes the snake look smooth instead of wobbly. Add a repeating pattern like small dots or a simple zig stripe. This is a strong pick for beginners because length is easier than complex twisting.
AvoidDon’t vary width mid-body — it turns the pose into a blob fast.
Pro tipChoose a constant thickness in squares, like 2 squares wide, and keep it for the whole stretch.
6. Grid-Box Head And Neck
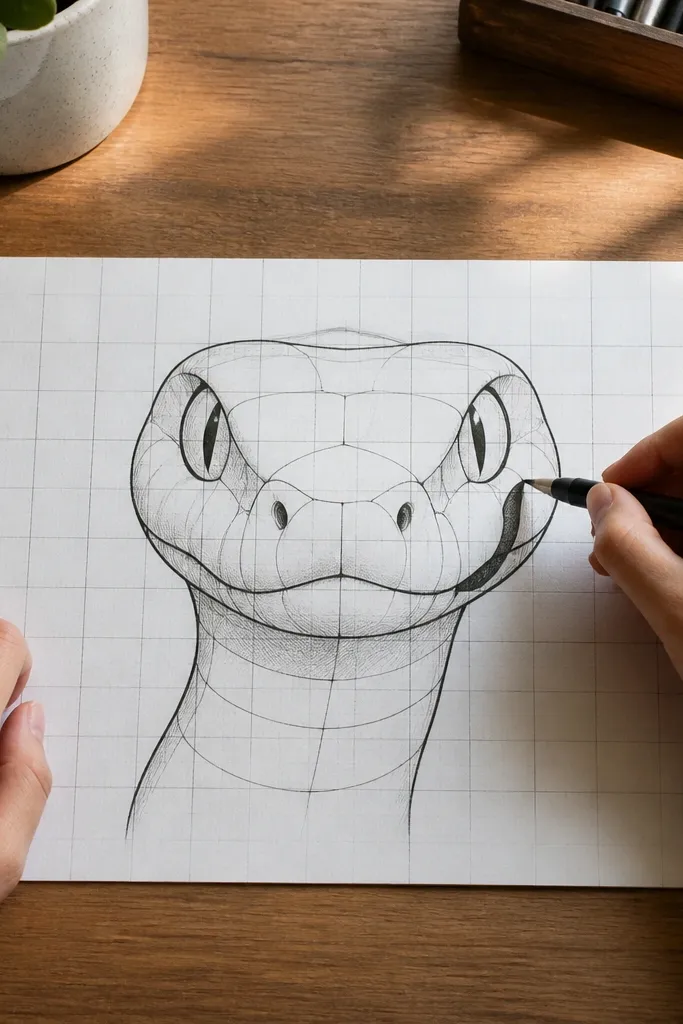
Step 1: Draw a grid and pick a head size that covers about 5x5 squares. Step 2: Sketch a rounded polygon by placing corner points on grid intersections, then round them with curved lines. Step 3: Draw a neck curve out of the head’s bottom edge, keeping the neck width constant, then add a single stripe on the side.
If your heads look lopsided, this idea fixes it by turning the head into a grid-constructed shape. You make the head from rounded blocks, then smooth the edges with a light curve. The neck is a simple curve that connects to the head without changing direction too sharply. Add two nostril marks and a single cheek stripe. This is beginner-friendly because it teaches controlled angles and placement using the grid like a construction scaffold.
AvoidAvoid drawing the head too small — tiny heads exaggerate proportion mistakes.
Pro tipUse a lighter pencil for the head construction lines so you can erase them cleanly later.
7. Triangle-Pattern Viper Style
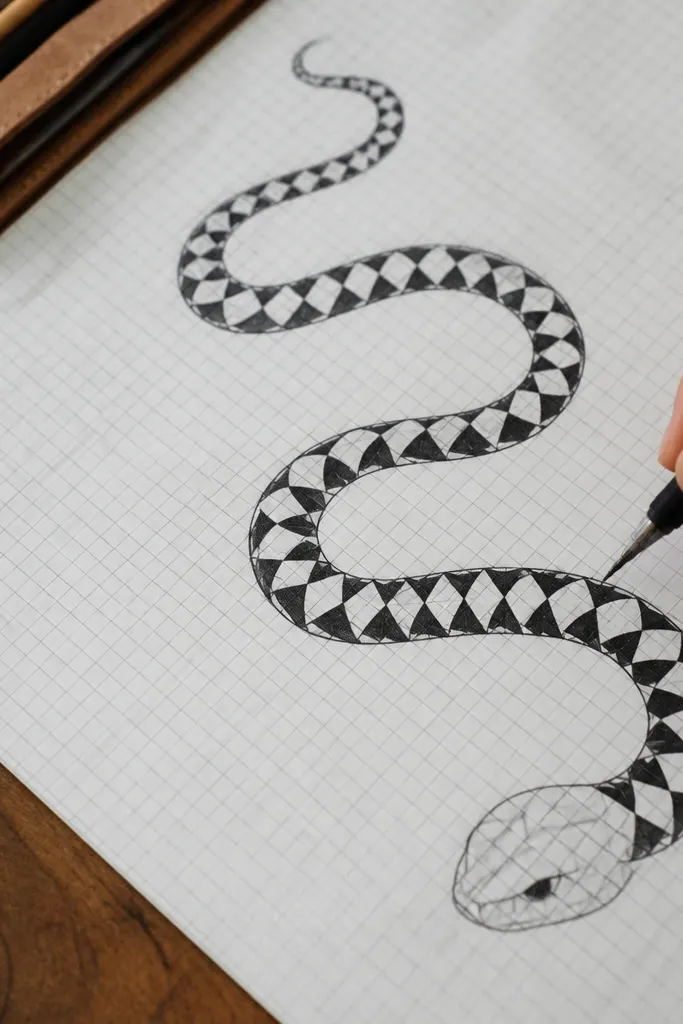
Step 1: Draw a grid and sketch the body as an S curve with a consistent width in squares. Step 2: Divide the body length into equal sections using light dots at grid intersections. Step 3: In each section, draw one triangle pointing toward the center stripe, then repeat down the body; finish by outlining the head with a simple pointed snout.
This is a pattern-first snake drawing that still stays easy because the triangles repeat in a predictable rhythm. You draw the snake body path on the grid, then place triangle “seams” across it like a chain of small arrows. The triangles do the work of making it look scaled without you drawing individual scales. It’s a good choice if you want the snake to look bold and graphic rather than detailed.
AvoidDon’t rotate every triangle randomly; align them to the body’s center line direction.
Pro tipKeep triangle size consistent — one triangle size on the grid reads as intentional.
8. Spots That Follow the Curve
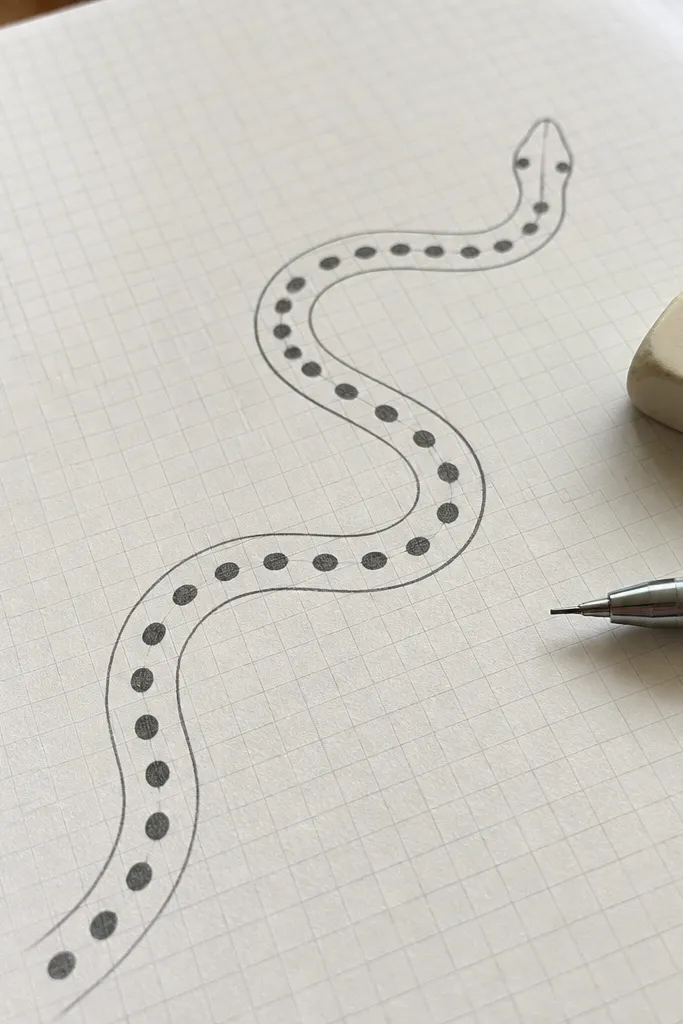
Step 1: Draw a grid and sketch a smooth curved body ribbon with a consistent width. Step 2: Mark spot centers at grid intersections along the center line, spacing them every 2-3 squares. Step 3: Draw circles or ovals for the spots, then darken the outline and erase the grid.
Spots are the easiest way to fake scale patterning because they hide small line wobble. The key is to place each spot so its center sits on the body’s center line, and its size stays consistent even as the body curves. This drawing teaches pattern placement, not detail drawing. The result looks clean and readable, especially on a page where other practice lines might get messy. It’s forgiving because a slightly off outline still looks like a spotty snake.
AvoidDon’t put spots too close together at tight bends — it crowds the curve.
Pro tipMake spots slightly oval, not perfect circles, so they feel like they wrap the body.
9. Two-Stripe Belly And Side
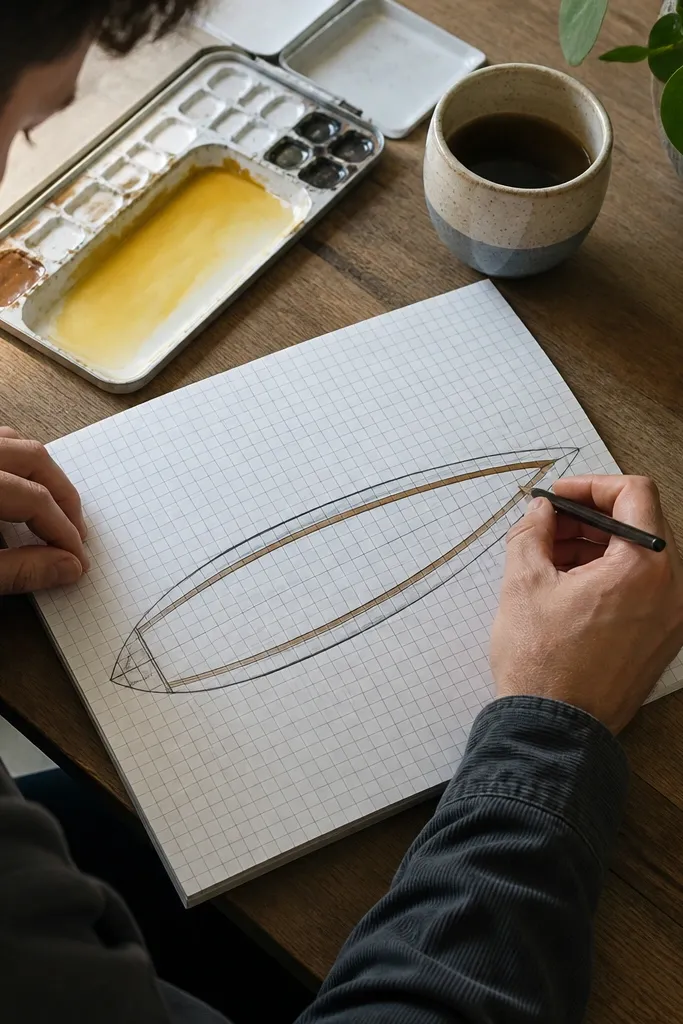
This is a clean, beginner-friendly stripe design that immediately makes the snake look “designed.” You draw the body first, then add two stripes: one along the top third and one along the belly third. Because stripes are straight-ish bands that follow the curve, the grid helps you keep them parallel and evenly spaced. It’s great for learning how to maintain relationships between lines. The head can stay simple with one eye and a mouth line.
Step 1: Draw a grid and sketch the snake’s center line as a gentle curve across the page. Step 2: Add body width by drawing two outline lines, then place two guideline center paths inside the body for the stripes. Step 3: Draw the stripes as thick bands along those guideline paths, then outline the head and add one cheek mark.
Count squares between the two stripes once, then keep that spacing the whole length.
Don’t let one stripe drift off the body width — keep it inside the outline.
10. Grid-Copy Snake From a Photo-Like Silhouette
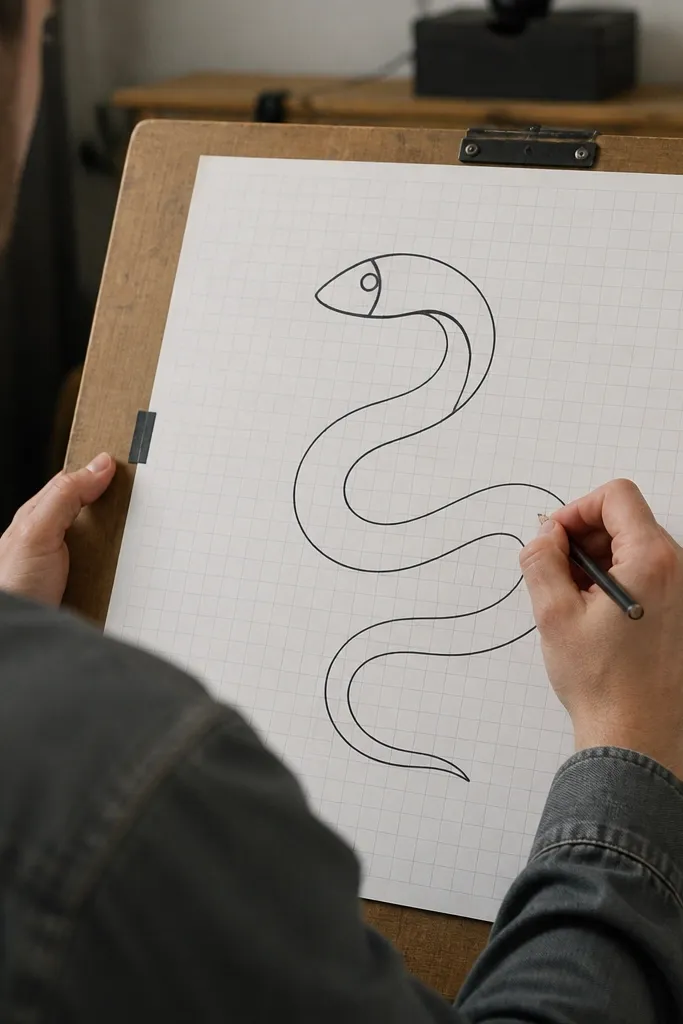
Step 1: Draw a grid on your paper and pick a target snake silhouette that has clear head and body shapes. Step 2: If you’re using a reference image, draw a matching grid on it, then copy each square’s outline point onto your paper. Step 3: Once the outline is done, add one stripe down the center and a simple eye, then erase the construction grid lines.
This one is for beginners who want a “real” snake look without freehand guessing. The method is to copy a simple silhouette using the grid, then decorate minimally. Your goal is a crisp outline and one pattern element, not perfection. The grid does the heavy lifting for proportions: head size, neck thickness, and curve placement all land where they should. It’s beginner-friendly because you can start with a very simple reference shape.
AvoidDon’t start adding scales until the silhouette is clean.
Pro tipChoose a reference with a simple pattern or no pattern so you only copy shape at first.
11. Head Turn Left With Overlapping Neck
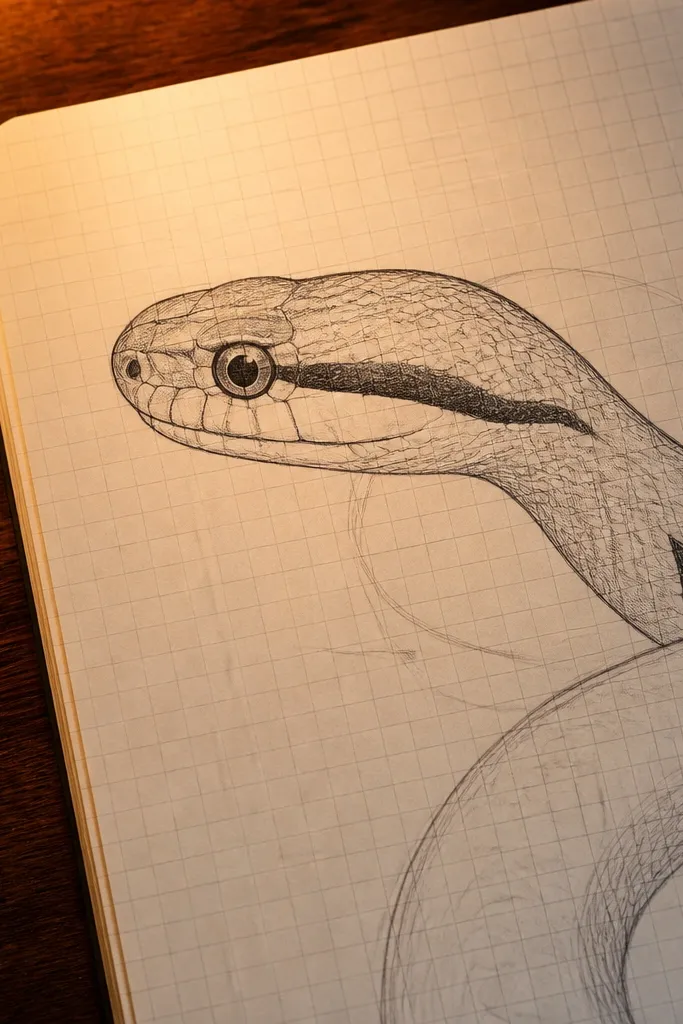
Step 1: Draw a grid and sketch the neck center line as a curve that ends near the left side. Step 2: Draw the head as an oval that points left, then add body width with two outlines. Step 3: At the overlap section near the neck, draw one outline continuous on top and break the other below, then add a single cheek stripe.
Turning the head gives you a more dynamic drawing, but overlap can mess beginners up. This design uses the grid to place the head angle and then uses one overlap line to show depth. You’ll draw the neck curve, then decide where the top edge crosses over the bottom edge. Add a simple stripe on the cheek and one triangle scale at the jaw corner. It looks more complex than it is because the grid makes the pose readable.
Pro tipMark the overlap crossing point with a dot on the grid before you ink.
12. Tail Curl With Simple Scale Caps
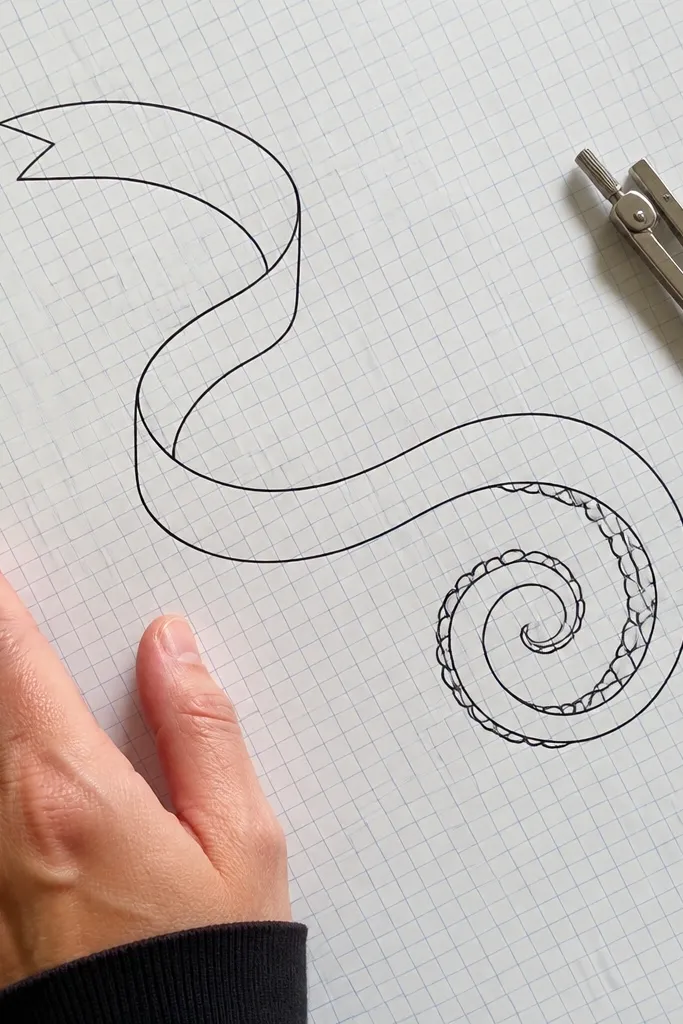
Tail curls look cute and focused because they take up a small area and show a clear shape. This version keeps the body simple and puts most pattern marks on the tail, so beginners don’t get overwhelmed. You’ll add “scale caps” — little rounded bumps — only along the curled tail. The grid helps you keep the cap marks evenly spaced. It’s a good practice piece for controlling line spacing in a small zone.
Step 1: Draw a grid and sketch a short body that ends in a hook-like tail curl. Step 2: Outline the body width, then add scale caps along the tail curve by drawing tiny half-ovals that sit on the outer edge. Step 3: Add one stripe near the base of the head and a simple eye, then erase the grid lightly.
Keep scale caps the same height in squares so they look consistent on the curve.
Don’t fill the whole body with caps — keep them only on the tail.
13. Side View Coil With a Center Groove
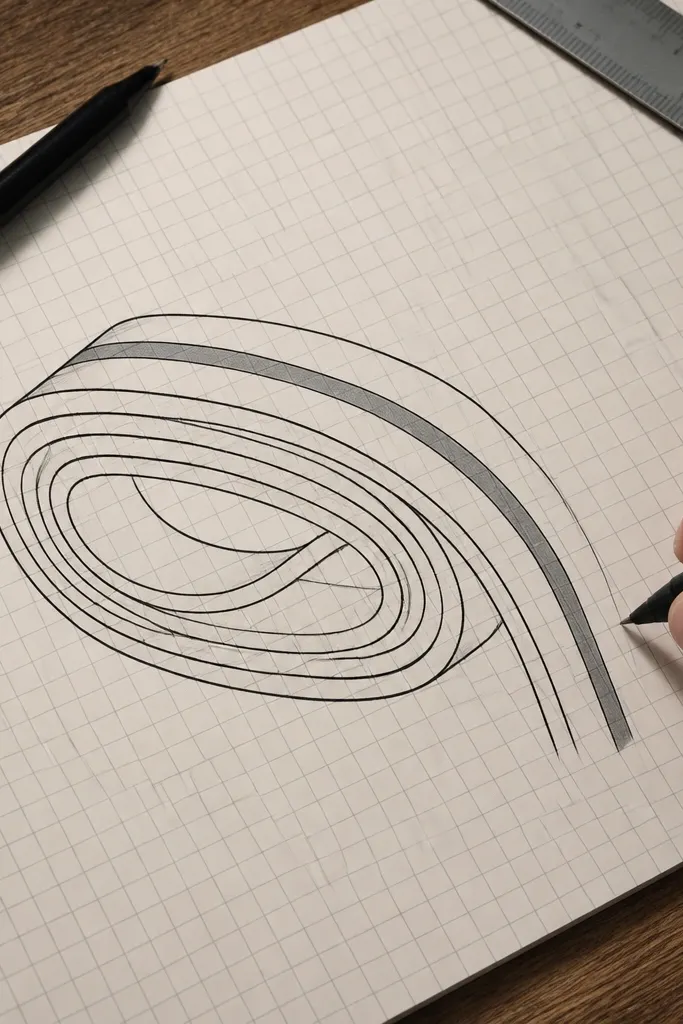
Step 1: Draw a grid and sketch a sideways oval coil, using grid intersections to place the outer curve. Step 2: Add inner outline to show thickness and draw one center groove line between them. Step 3: Outline the head at one end of the coil and add one stripe that matches the groove line, then erase construction lines.
A side-view coil looks more realistic than a top-down circle, but it stays beginner-friendly because you can simplify the body to two outline lines plus one center groove. The grid helps you draw consistent thickness and keep the coil layers parallel. You add a single groove stripe down the center to suggest form. Finish with a small head and one nostril mark. This design teaches how to use a simple interior line to sell the shape.
AvoidDon’t widen the body in the middle of the coil unless you mean to.
Pro tipMake the groove line stay centered in the thickness — that’s what makes it look intentional.
14. Alternating Zig Stripe Snake
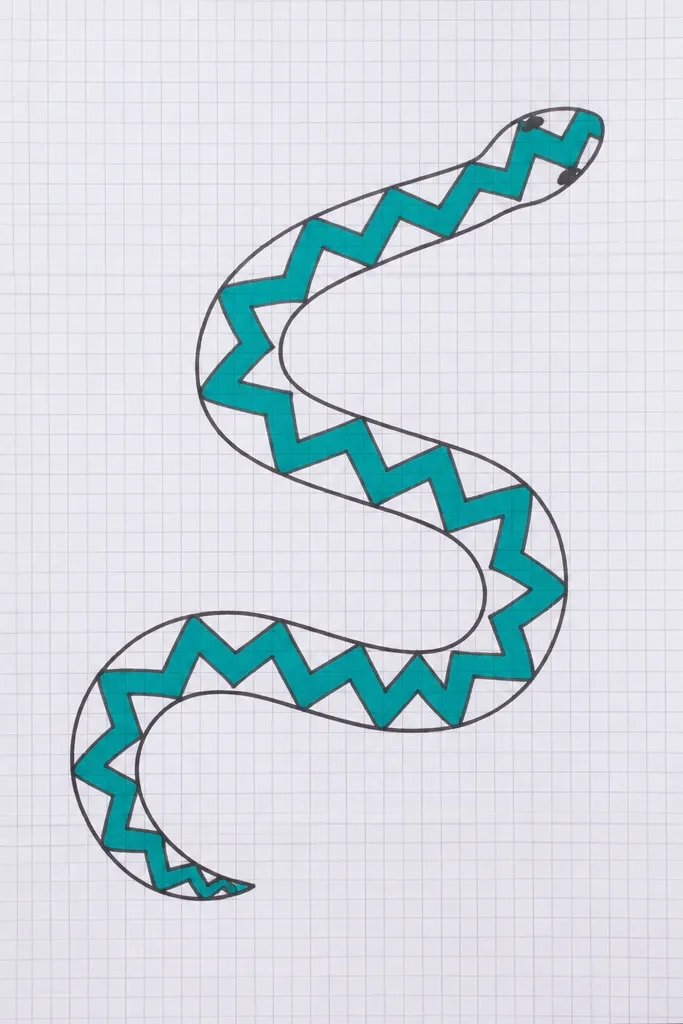
This snake looks bold because the stripes zig across the body, but the drawing stays easy. You don’t draw scales; you draw a repeating zig band pattern that sits on top of the ribbon body. The grid lets you keep the zig steps equal size so the pattern doesn’t drift. It’s great for learning pattern rhythm and controlling where stripes land on curves. Beginners get a confident look with minimal effort.
Step 1: Draw a grid and sketch a wavy body ribbon with consistent width. Step 2: Mark a guideline down the body center line, then draw zig steps across the ribbon by placing points on grid intersections. Step 3: Connect the zig points into a thick stripe, then repeat on the other side if you want a second band; finish with a simple head outline.
Choose zig width first (like 1 square), then repeat it everywhere.
15. Minimal Snake With Three Scale Blocks
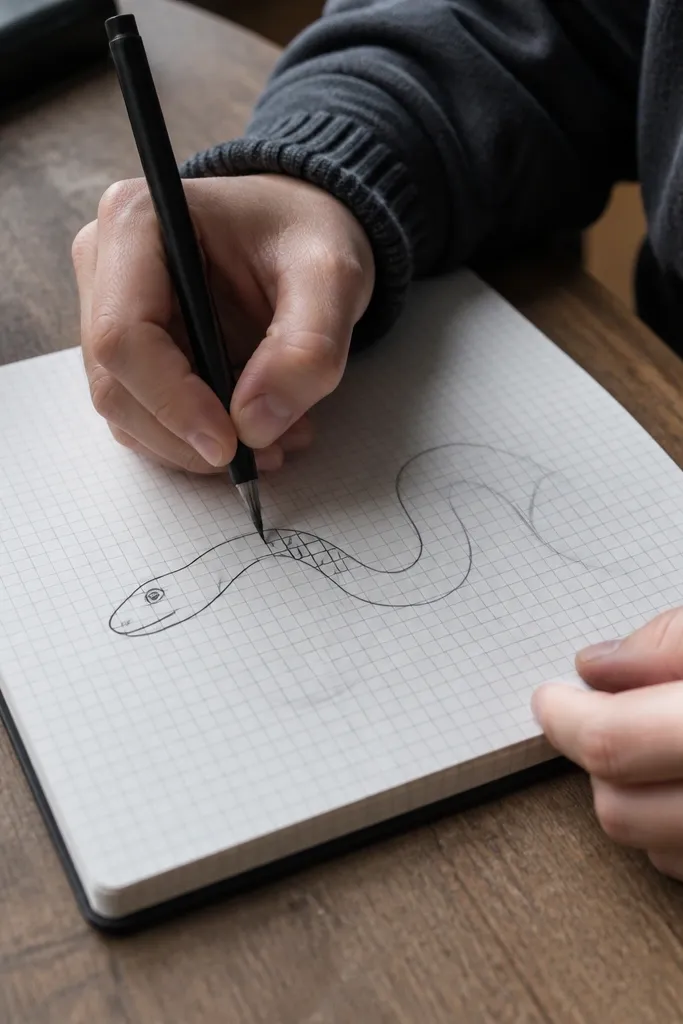
Sometimes the easiest way to draw snakes better is to draw less. This idea uses a basic body ribbon and only adds pattern where it counts: three blocky scale sections on the mid-body. Those blocks give you a sense of segmenting without requiring detailed scale work. The head is simple with one eye and one mouth curve. It’s beginner-friendly because you get a finished look even if your line confidence is low.
Step 1: Draw a grid and sketch a gentle curve body with two parallel outline lines. Step 2: Pick three mid-body areas and draw rectangular-ish scale blocks that fit within the body width, aligning their corners to grid intersections. Step 3: Outline the head, add one stripe or none, then erase the grid lightly.
Keep blocks wider than tall so they read as “scales” instead of random boxes.
Don’t add tiny scale marks everywhere — it turns into clutter fast.
16. Looping S With Two-Color Stripe Guide
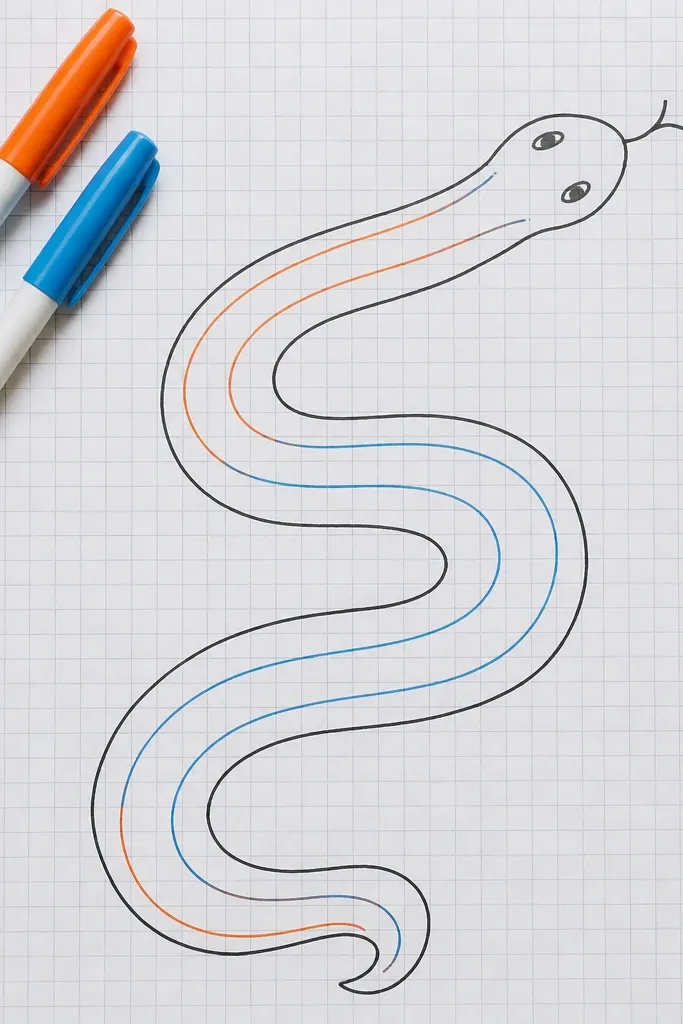
Step 1: Draw a grid and sketch the body ribbon as an S that loops back by about 3-4 squares. Step 2: Add two interior guideline lines that mark where the stripes will go, each a fixed number of squares from the outline. Step 3: Turn those guidelines into thick stripes, then draw the head with a simple pointed snout and one eye.
This design is made for beginners who want to color later and still keep the drawing clean. You draw an S-shaped body that loops back slightly, then you plan two stripe paths that you can color differently. The grid helps you keep the stripes equidistant and aligned to the body curve. When you color, you’ll stay inside the lines because the stripe paths guide you. It’s also a solid exercise in using grid spacing for repeatable shapes.
Pro tipIf you’re coloring with markers, leave a 1-square gap between the two stripe bands to prevent bleed.
17. Circle Head And Oval Body
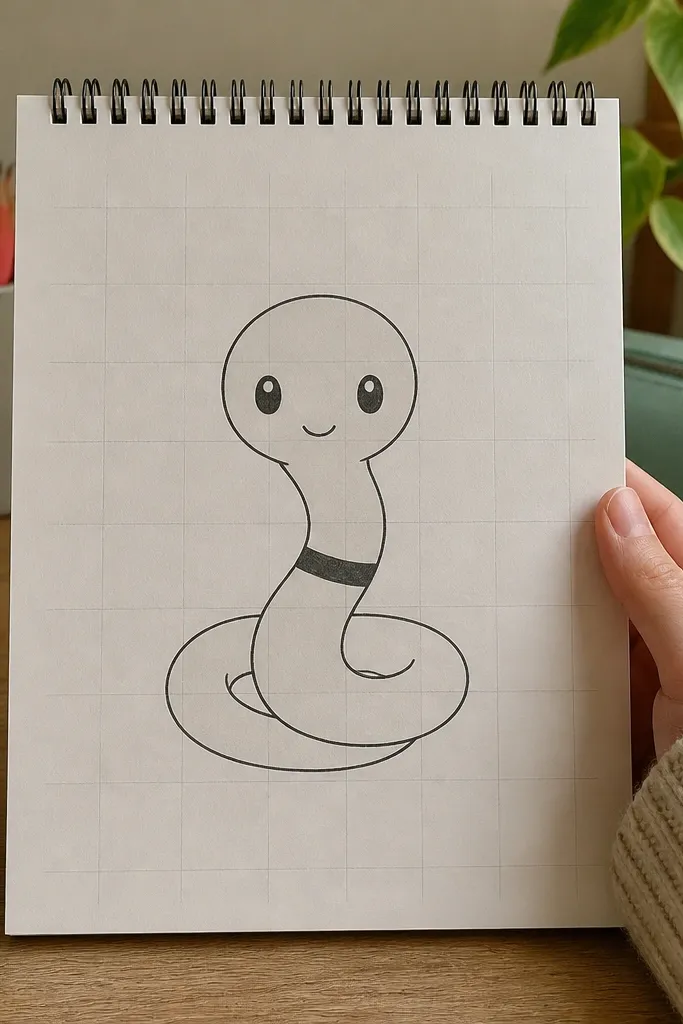
Step 1: Draw a grid and choose a head size, like 4x4 squares, then draw a circle for the head. Step 2: Sketch an oval body ribbon leaving the circle and running diagonally or horizontally across the page, keeping width constant. Step 3: Add a small eye dot and a short mouth curve, then draw one stripe band along the body center.
This is a cute, cartoonish snake that trains proportion fast. You start the head as a circle (or near-circle) and the body as a smooth oval tube that follows the grid. Beginners often struggle with head shapes, and this method gives you a stable starting point. Keep the mouth line small and curved. Add one stripe across the head and body to unify it. The result looks friendly and not too serious.
AvoidDon’t stretch the head circle into an oval too early.
Pro tipOutline the head last — it’s easier to clean the circle edges after you place the body connection.
18. Diagonal Coil With One "Scale Row"
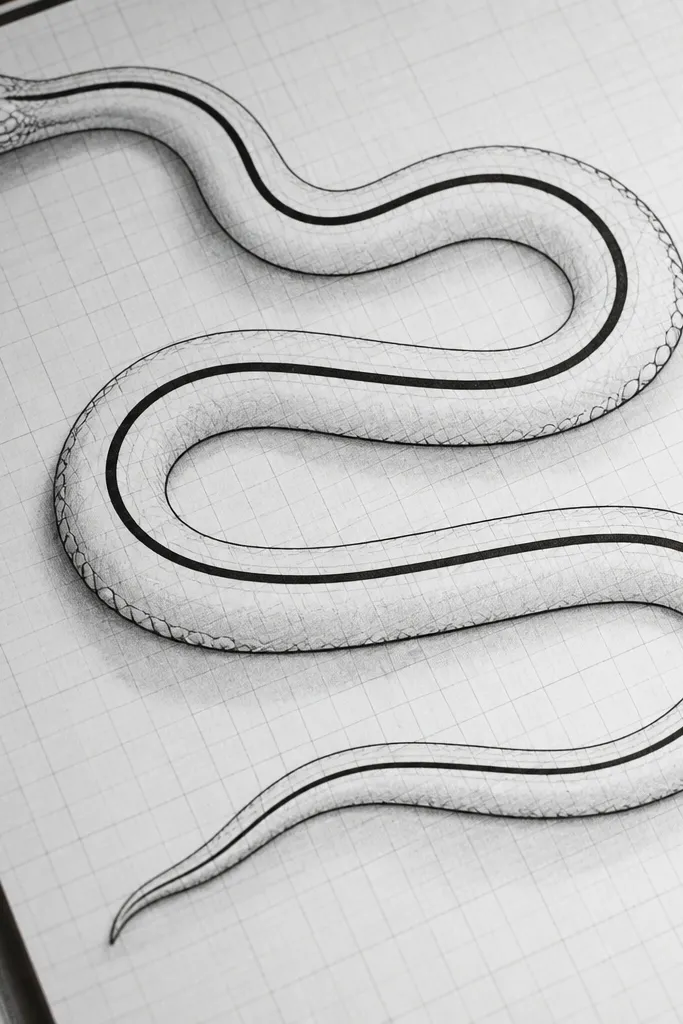
Diagonal coils look more interesting than straight-on ones, and the grid keeps the diagonal angle accurate. This version uses only one scale row on the outer side of the coil, so it stays beginner-friendly and doesn’t turn into a full texture project. The stripe and the scale row create enough detail to feel finished. It’s a good practice for understanding how pattern follows the outside edge of a curve.
Step 1: Draw a grid and sketch a diagonal coil like a sideways “C” that wraps into a partial loop. Step 2: Outline the body thickness with two parallel edges, then pick the outer edge for the scale row. Step 3: Draw small repeating scale marks along that outer edge, like tiny U-shapes facing outward, then add a simple head at one end.
Keep the scale marks one grid square apart so the row looks even.
19. Two-Point Perspective Snake Crawl
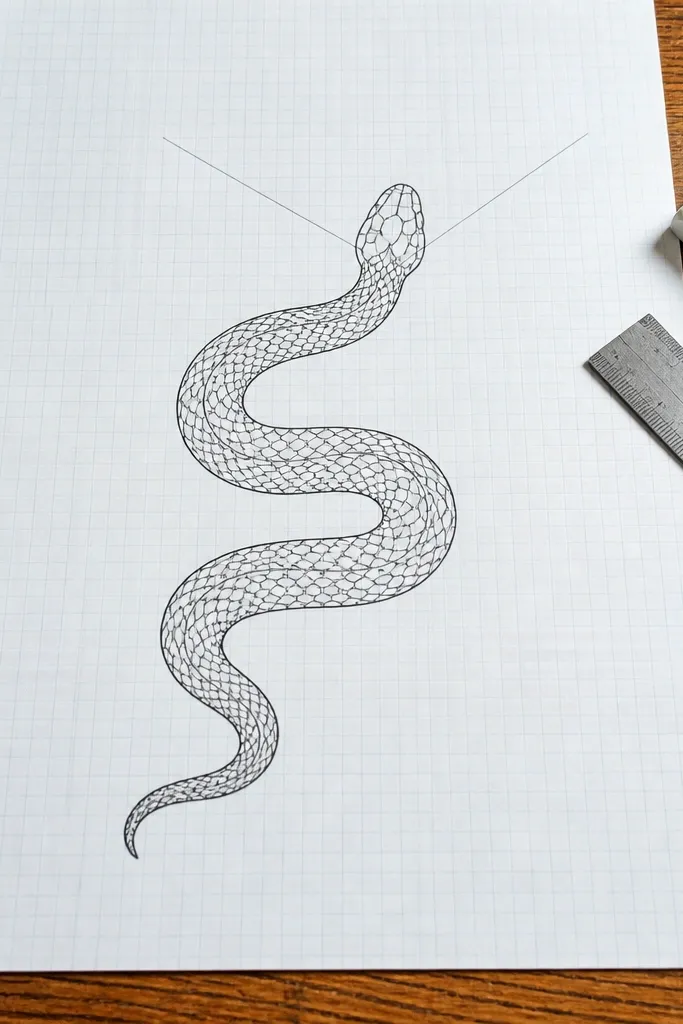
If your snake drawings look flat, this idea adds depth without complex perspective math. You draw a crawling pose where the body tapers slightly using grid-guided spacing. Then you add two simple “direction lines” from the head area to guide the body’s angle, giving the illusion of motion. Keep the body outline smooth and don’t overdo scale texture. This is beginner-friendly because you’re using the grid to control spacing, not learning full perspective rules.
Step 1: Draw a grid and mark two faint vanishing points on the page edges, then lightly draw direction lines from the head area toward each point. Step 2: Sketch the body ribbon by placing center points along those direction lines and keeping thickness small near the head and slightly larger mid-body. Step 3: Outline the head and add one simple stripe down the center so the form reads as a single body.
If it looks messy, reduce the taper to just 1 square difference in width from head to mid-body.
20. Patterned Neck Bow Tie Snake
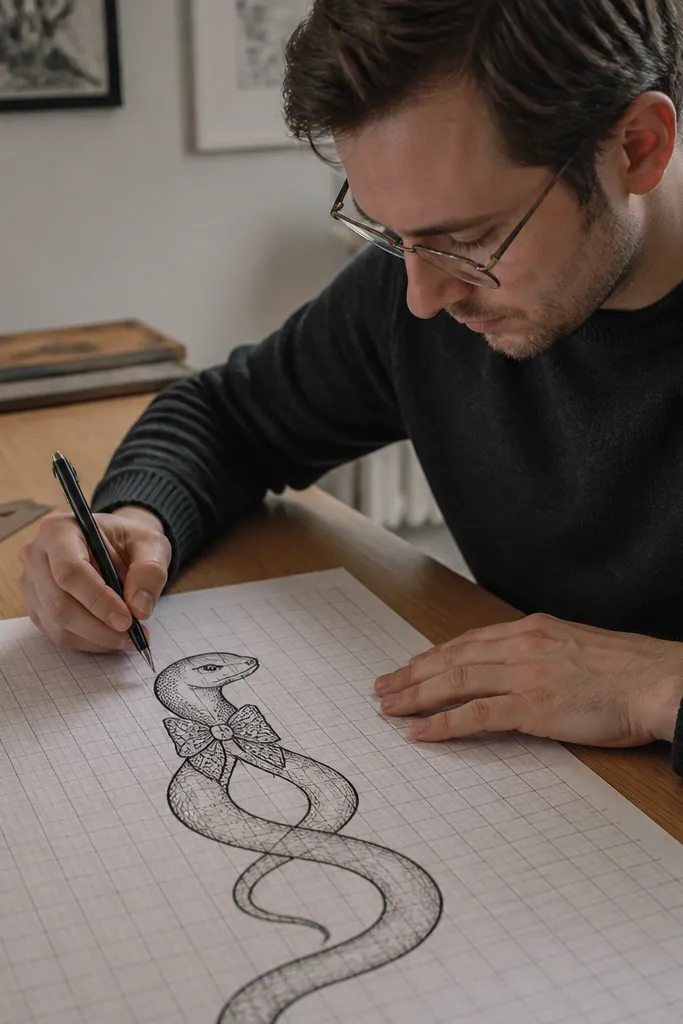
This one uses a bow-tie style neck shape to make the pose easier to draw. Instead of trying to capture a complicated twist, you give the neck two curves that meet in the middle, like a simple hourglass. The grid makes the symmetry manageable. Then you decorate with two thin stripes that meet at the neck center. It looks playful and graphic, which is exactly what beginners need when they’re building confidence.
Step 1: Draw a grid and sketch the neck as an hourglass shape using two curves that narrow at the center. Step 2: Extend the top curve into a head and the bottom curve into a short body segment, keeping widths consistent in squares. Step 3: Add two thin stripes that follow each side of the bow tie and connect near the narrow center, then erase the grid lightly.
Use the grid center line as the symmetry guide for the hourglass neck.
21. Snake Head With Three Scale Triangles
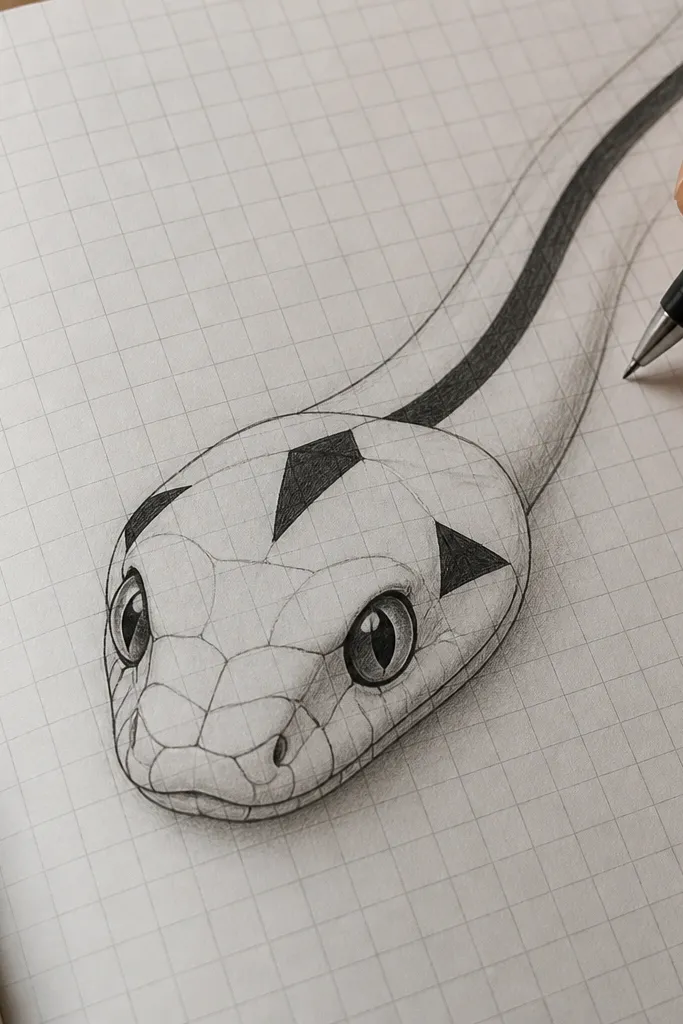
Step 1: Draw a grid and sketch a head shape about 5x4 squares, with a slightly pointed snout. Step 2: Draw the body ribbon trailing out with consistent width. Step 3: On the head, place three triangles that touch but do not overlap, aligning their points to grid intersections, then add one eye dot and a short mouth line.
This is a detail-focused idea that stays easy because it limits pattern to the head. You draw a simple head outline and then add exactly three triangle “scale” marks on the top and sides. Beginners get a strong result quickly because the head is where viewers look first. The body can be a plain ribbon with one stripe. This teaches separation of tasks: build the silhouette first, then add a small pattern set.
Pro tipMake the triangles all the same size so they look intentional, not random.
22. Tail Spiral With Dot Trail
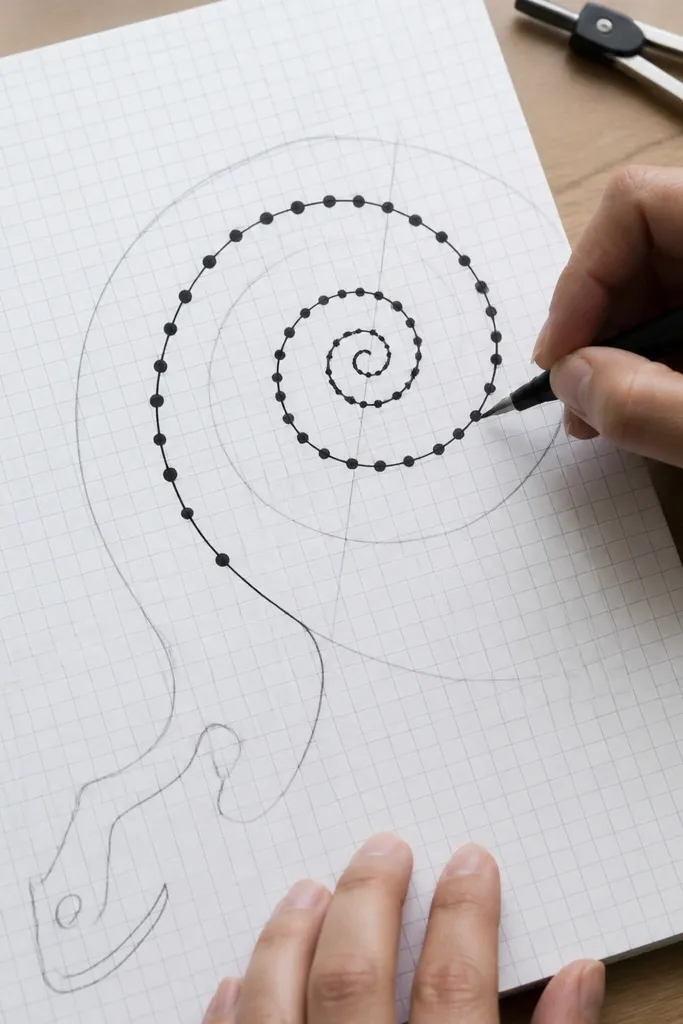
Step 1: Draw a grid and mark a small spiral center point using one grid intersection. Step 2: Draw the spiral by stepping outward in a curve, keeping each curve segment aligned to nearby grid points. Step 3: Place dots along the spiral line at regular intervals, then outline the body thickness near the spiral and add a small head at the other end.
Spiral tails look fun and they teach a simple grid skill: repeating offsets. You draw the tail as a spiral curve, then place dots along the spiral path to imply scales. The dots hide small wobble in your spiral line and make the tail look textured without drawing dozens of scales. This is a good practice piece when you want motion and a clear focal point. It also works great as a design element for stickers or page borders.
Pro tipUse dots first, then connect with a light outline if you want a cleaner shape.
23. Wavy Body With Checker Belly
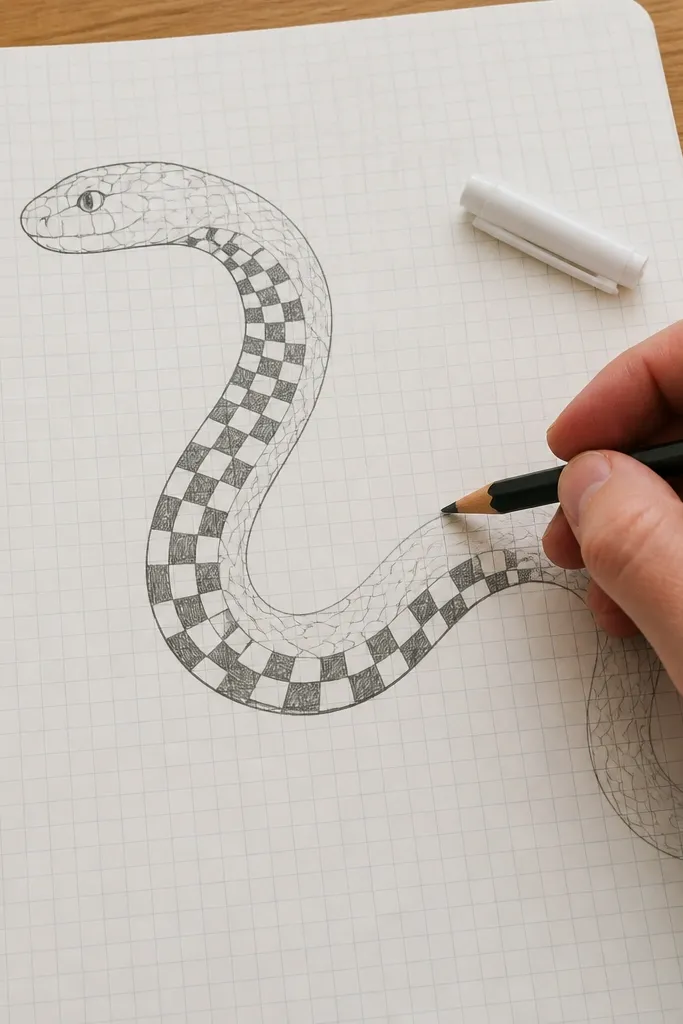
Step 1: Draw a grid and sketch a wavy body ribbon with a clear belly side, using two outline lines. Step 2: Choose the bottom half as the belly region and lightly mark a boundary line inside the body. Step 3: Fill alternating grid squares inside the belly region with a checker pattern, then add a simple stripe on the top and a small eye.
Checker patterns look great on snakes and they’re easy because they’re made from squares. This design makes the belly area a checker field while keeping the top simple. The grid makes spacing automatic — you just fill alternating squares inside the belly region. Beginners get a finished look quickly because the pattern is controlled and repeatable. It also teaches you how to define a region on a curved body without over-detailing the whole snake.
Pro tipKeep the checker size to 1 square each so it doesn’t get tiny and messy.
24. Coiled Snake With Zig-Zag Backbone
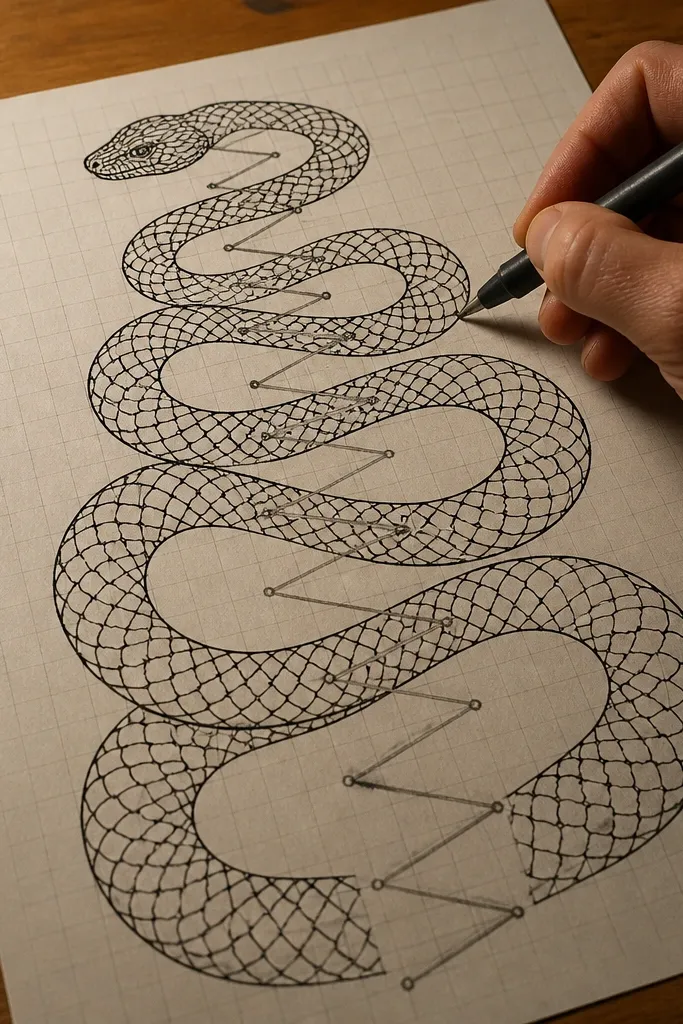
Step 1: Draw a grid and sketch a coil outline roughly in a circle shape. Step 2: Inside the coil, draw a zig-zag line that runs from the head area around the coil, stepping on grid intersections. Step 3: Add body width by drawing parallel edges to the zig-zag line, then outline the head and add a stripe following the zig-zag path.
A zig-zag backbone is a cheat code for smooth coils. Instead of drawing a fully curved center line, you place a zig-zag path through the grid intersections and then wrap the body width around it. The result looks like a coil with a strong pattern direction. This is beginner-friendly because it turns “curve control” into “point placement.” Finish with a stripe that follows the backbone so the whole drawing feels connected.
Pro tipIf your zig-zag looks jagged, smooth the outline edges but keep the backbone line in place.



