
1. Triangle Fin Shark Outline (Silhouette First)
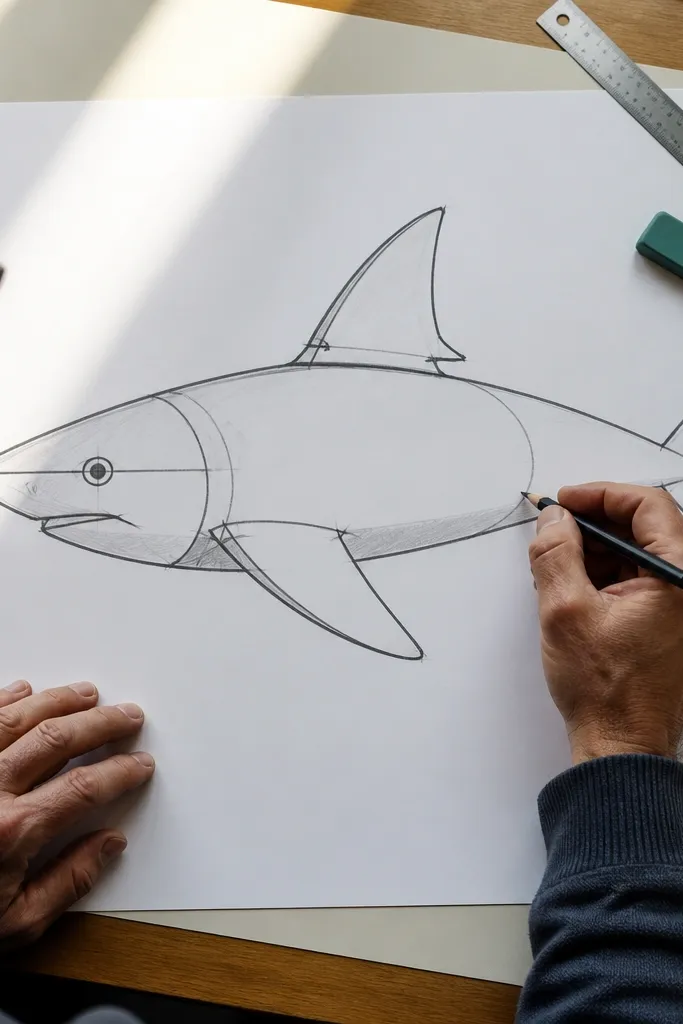
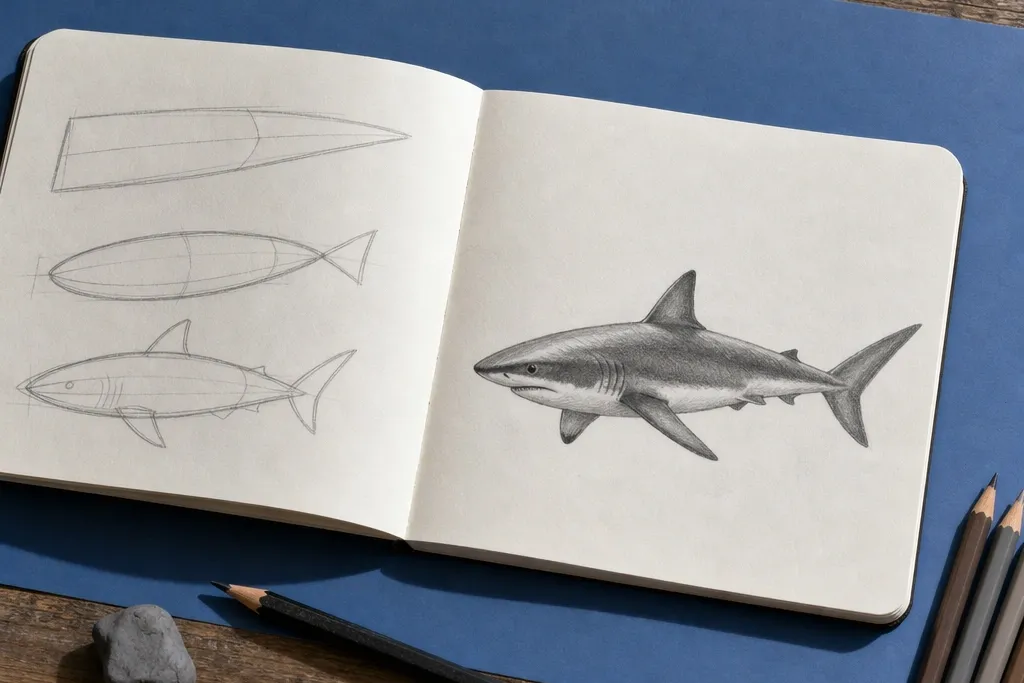
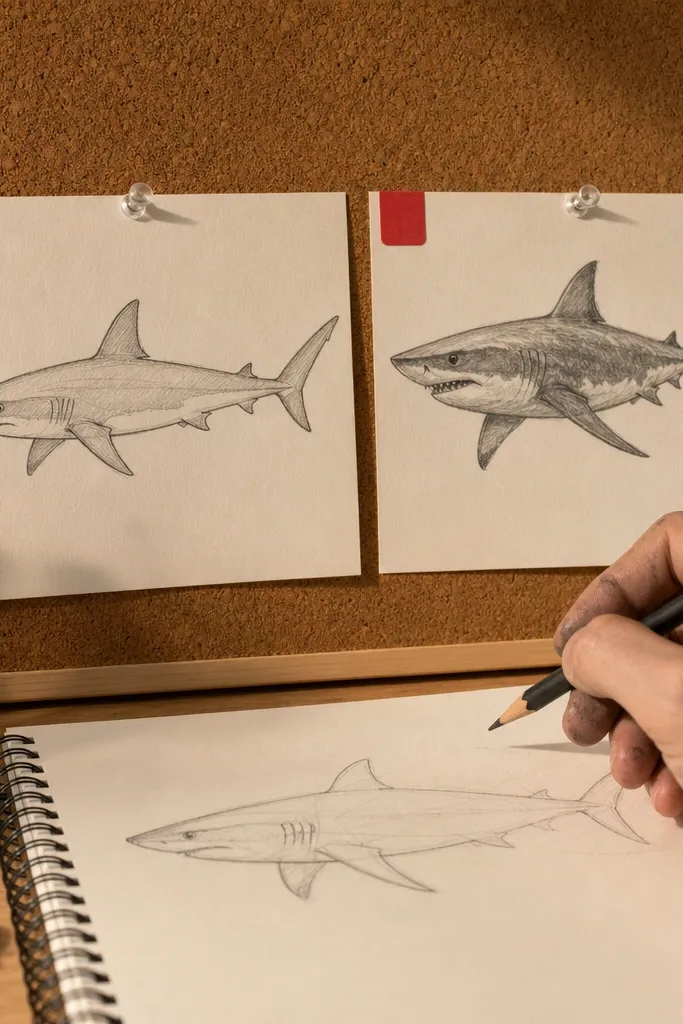
This is the fastest way to stop the “random fish” look. You’re training your eye to place fins relative to the head wedge and the body oval, so the shark reads instantly from a distance. The project uses a clean outline and minimal shading, which keeps focus on proportions. It’s also forgiving — you can redraw the fin triangles until they feel like they belong. This fits sketchbooks, practice paper, and anyone who struggles with getting fins to look anchored.
Step 1: Lightly sketch a head wedge (pointing right or left), then an oval for the body, and a forked tail with two points. Place the dorsal fin on the top edge of the body oval, slightly behind the midpoint. Step 2: Add pectoral fins as small triangles near the “hinge” where the head meets the body, plus a tail fin line that matches your fork angle. Finally, add one row of simple tooth spikes along the mouth edge and erase construction lines after the outline feels stable.
Draw the dorsal fin first, then build the rest around it — it locks the silhouette.
Don’t shade before the fin positions look correct.
2. Side-Profile Shark With 3-Value Shading
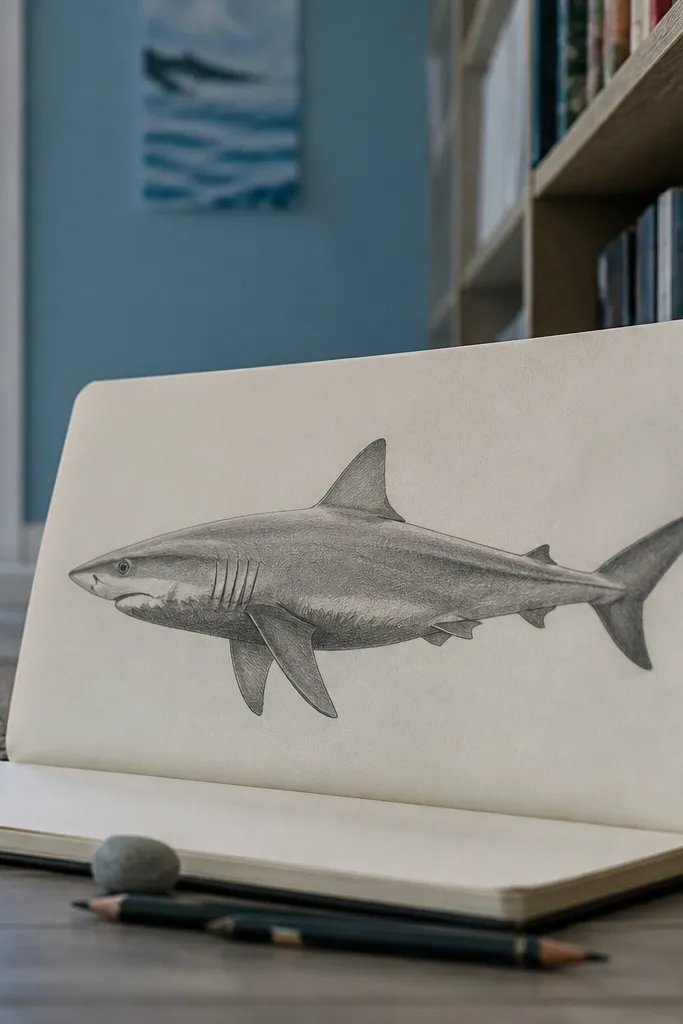
Step 1: Sketch the construction — head wedge, body oval, tail fork — then outline the jaw line and the top ridge behind the eye. Step 2: Choose your light direction and shade only three zones: leave the top ridge and snout highlight mostly blank, shade the mid-tone along the side panels, and add a darker band under the belly and near the fin bases. Finally, add small tooth spikes and a few short texture scratches only where the shading transitions.
This one makes sharks look real without requiring smooth blending. You’re assigning three values: a light highlight zone, a mid-tone body area, and a darker underside or shadow band. That value map is what creates form on a curved body, especially around the snout and gill region. It’s also a good exercise if your drawings look flat even when your outline is decent. Plan for a tidy finish: you’ll get a clean result that still looks hand-drawn.
AvoidDon’t blend everything — keep the edges of your three zones readable.
Pro tipUse a kneaded eraser to keep a crisp highlight on the snout instead of trying to “not color” around it.
3. Front-Facing Shark Head With Eye and Mouth Anchor
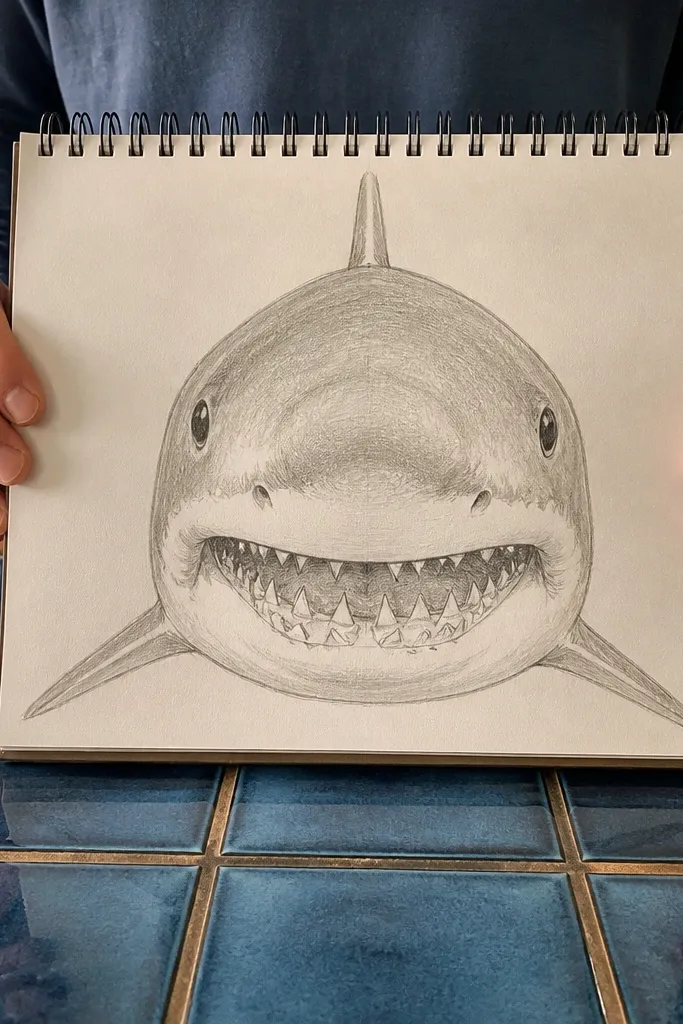
Step 1: Draw an oval for the head, then block in the snout as a smaller oval protruding forward. Mark the eye as a small almond shape slightly above the mouth line, and sketch the mouth as a curved opening using a trapezoid guide. Step 2: Add gill slits as short angled lines on each side of the head, then place tooth triangles along the lower jaw edge. Finally, shade the underside of the snout and the mouth interior with a darker pencil, leaving a small highlight on the eye area.
Front-facing sharks are hard because the face compresses and the mouth sits in a different plane than the body. This study forces you to nail the eye position, the snout width, and the jaw curve before adding teeth. You’ll learn a practical trick: draw the mouth opening as a curved trapezoid, then place teeth along its inner edge. The result gives you a strong “shark identity” even with simple shading. This is ideal for beginners who want the face to look right, not just the body.
AvoidDon’t draw teeth first — they lock you into a bad mouth curve.
Pro tipIf the mouth looks crooked, rotate the curved trapezoid guide before you draw teeth.
4. Beginner Shark in Motion With Simple Tail Twist
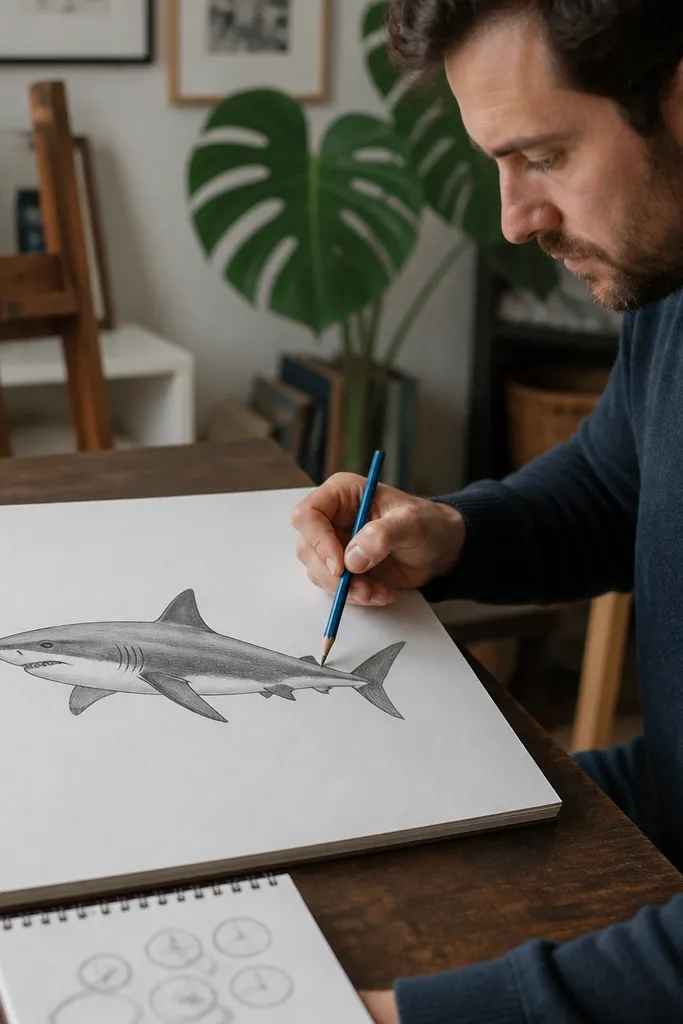
Step 1: Draw a centerline that curves slightly, then place the head wedge along that line. Add the body oval with a subtle twist — the far side should be a little narrower. Step 2: Sketch the tail fork with one side slightly higher to show rotation, then add the dorsal fin and pectoral fin as simple anchored shapes. Finish by shading the underside darker and adding a few tooth spikes and fin shadow lines.
Motion drawings make beginners feel stuck because everything changes at once. This version keeps it under control by using a small tail twist and a gentle S-curve in the body. You focus on the pivot points: where the tail fork turns and where the dorsal fin sits relative to the body curve. The shading stays 3-value like the side-profile project, so you’re not fighting anatomy and lighting at the same time. It’s great for learning how sharks swim without turning your page into a mess.
AvoidDon’t add lots of motion lines until the body curve reads clearly.
Pro tipKeep your fins parallel to the body curve, not parallel to the page.
5. Lateral Line Texture Shark in Underwater Light
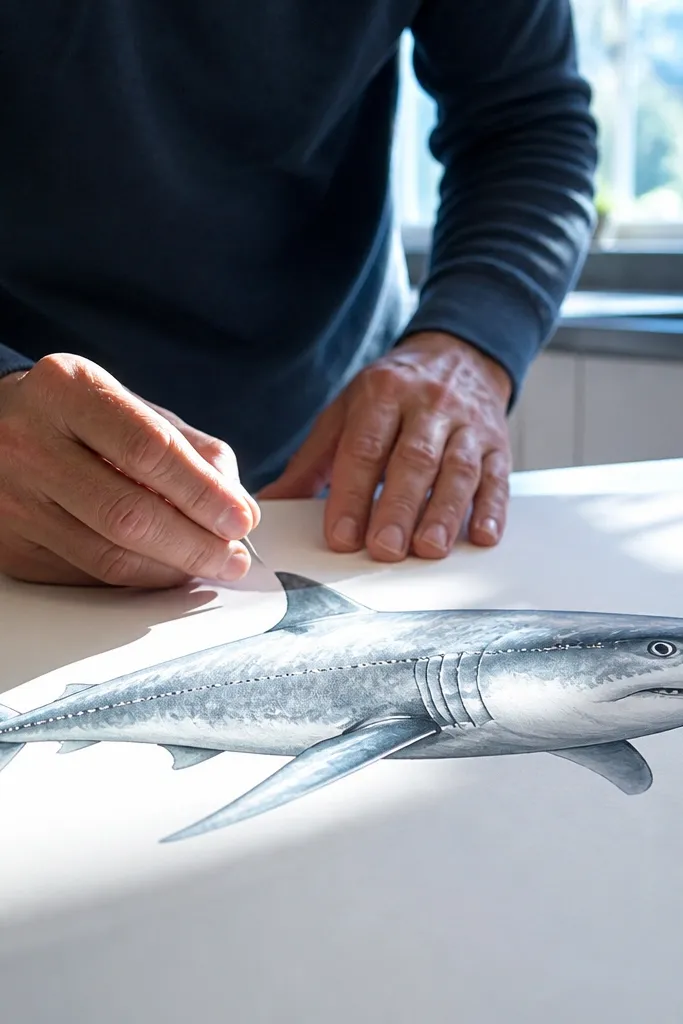
This is where intermediate work starts to look like a shark, not a stylized fish. You’re adding a lateral-line feel using small dot-and-short-line marks that follow the curvature of the body. Then you use underwater light logic: a rim highlight along the top edge and softer shadow on the underside. The texture should be subtle and directional, not random speckles. This project makes your shark look like it has skin patterning and volume. It’s a good fit for anyone with a decent outline who wants realism without going full hyper-detailed.
Step 1: Build the anatomy with construction — head wedge, body oval, tail fork — then outline the dorsal ridge and jaw curve. Step 2: Map three values first: light rim along the top edge, mid-tone on the side, and a darker underside. Finally, add lateral line texture as a line of tiny dots and short dashes that wrap around the body, plus a few scuffs near the fin bases where light catches.
Use the side of your pencil for texture; it keeps marks uniform and prevents hard scratch lines.
Don’t texture over the highlight rim — it makes the light look dirty.
6. Dynamic Tail Turn Shark With Body Twist
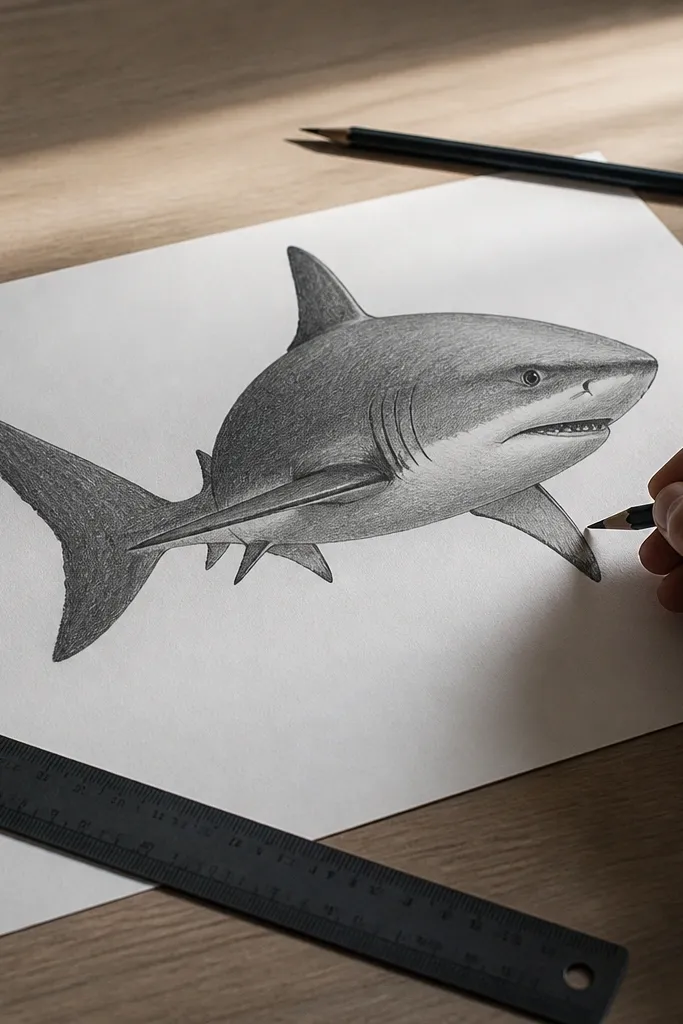
Tail turns are the quickest way to level up because they force you to understand how the body rotates. This project teaches the intermediate skill of drawing the near and far sides of the body differently. You’ll exaggerate the tail fork angle and adjust the body oval into a slightly flattened ellipse on the far side. Add motion lines only where the tail and fin edges cut through water. The final drawing looks energetic while still staying anatomically believable. Best for intermediate drawers who can already place fins and teeth without constant erasing.
Step 1: Draw a centerline that curves into an S-shape, then sketch the head wedge at one end and the body as two overlapping ellipses (near side wider, far side narrower). Step 2: Place the tail fork so one prong points toward the viewer slightly more — that’s your depth cue. Add fins: dorsal fin on the near ridge, pectoral fin smaller and closer to the head, then shade with a mid-tone base and a darker underside shadow. Finish by drawing a few edge highlights on the tail and dorsal fin.
If the tail looks off, fix the fork angle before touching teeth or texture.
Don’t shade the far side the same darkness as the near side.
7. Shark Head Detail Rendering With Gill Slits

This is the intermediate project for people who want the face to look correct at a glance. You’re rendering the gill slits as tiny angled marks, shaping the jaw opening, and controlling value inside the mouth. Teeth alone don’t make a shark look real — the mouth interior value and the gill area shading do. You’ll use careful pencil pressure changes to build depth without heavy smudging. The result is a head study that you can later scale into full-body sharks. It’s best for intermediate drawers who can handle small, clean lines.
Step 1: Start with a head oval, then add a snout wedge and jaw curve guide. Place the eye slightly above the mouth line and sketch the gill slit zone as a band of short angled lines. Step 2: Shade the mouth interior dark, then shade around the gill band with mid-tone and a softer edge. Add teeth as small triangles with uneven spacing, and keep the top row lighter than the shadowed lower jaw. Finally, lift a highlight on the snout ridge with a kneaded eraser.
Use a light touch for gill slits, then go back once with a darker pencil for only a few lines.
Don’t outline every gill slit — value does more work than lines here.
8. Underwater Rim Light Study (Edge Contrast)
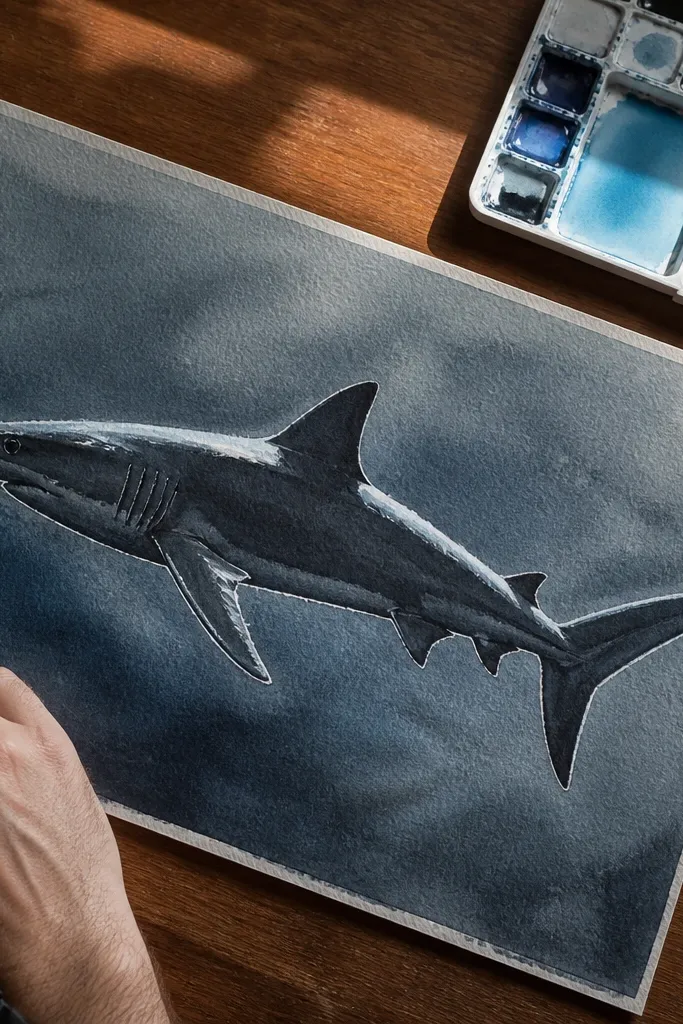
Rim light is how you make your shark pop without drawing a ton of detail. You’ll place a bright highlight along the top and outer edges, then keep the interior values darker so the silhouette separates from the background. This project is intermediate because the shading needs discipline: you control edges and you limit texture to where the light hits. The background is simple — it’s basically a value wash — so the shark stays the focus. This is great if your sharks look good on white paper but lose shape when you add any background.
Step 1: Sketch the shark in construction, then commit to an outline that follows the body taper and tail fork. Block in the background with a light gray wash or very light pencil shading across the whole page. Step 2: Shade the shark with mid-tone first, then deepen the underside and add darker shadow under fins. Finally, draw a thin rim highlight along the top edge and outer fins using a lighter pencil or lifted highlight with a kneaded eraser, then sharpen the outer edge with a darker line only where it meets the background.
Keep the rim highlight thin on the tail — thick highlights there look fake fast.
Don’t add texture to the background — it steals attention from the rim light.
9. Tooth Row Practice Sheet With Mouth Curvature
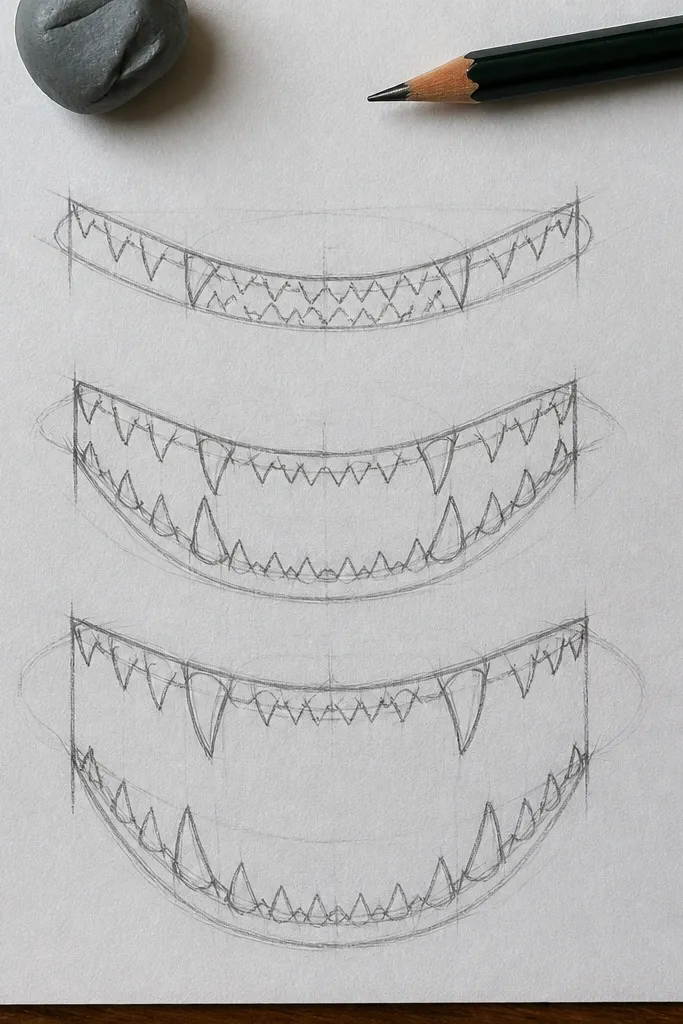
Step 1: On one page, draw three curved jaw openings as guides — one slightly open, one wider, one almost closed. Step 2: For each guide, add teeth as small triangles that follow the curve: the base should sit on the inner jaw line, and the tips should vary in height. Add a single shadow under the top jaw for each mouth so the teeth don’t look like stickers. Finally, erase the guides and keep only the final tooth shapes and mouth outline.
Tooth drawing is where beginners stall, and intermediate drawers sometimes overwork. This project isolates the mouth so you learn curvature, spacing, and how teeth sit on the jaw edge. You’ll draw three mouth guides with different open angles, then match the tooth triangles to each guide instead of drawing teeth as a straight line. The skill transfers directly to every shark idea here because the mouth is the “expression” of the face. It’s perfect for quick practice between bigger drawings.
AvoidDon’t make every tooth the same height.
Pro tipVary tooth size every 3-4 teeth; uniform rows look mechanical.
10. Beginner Shark With Simple Fin Anatomy (Fin Hinges)
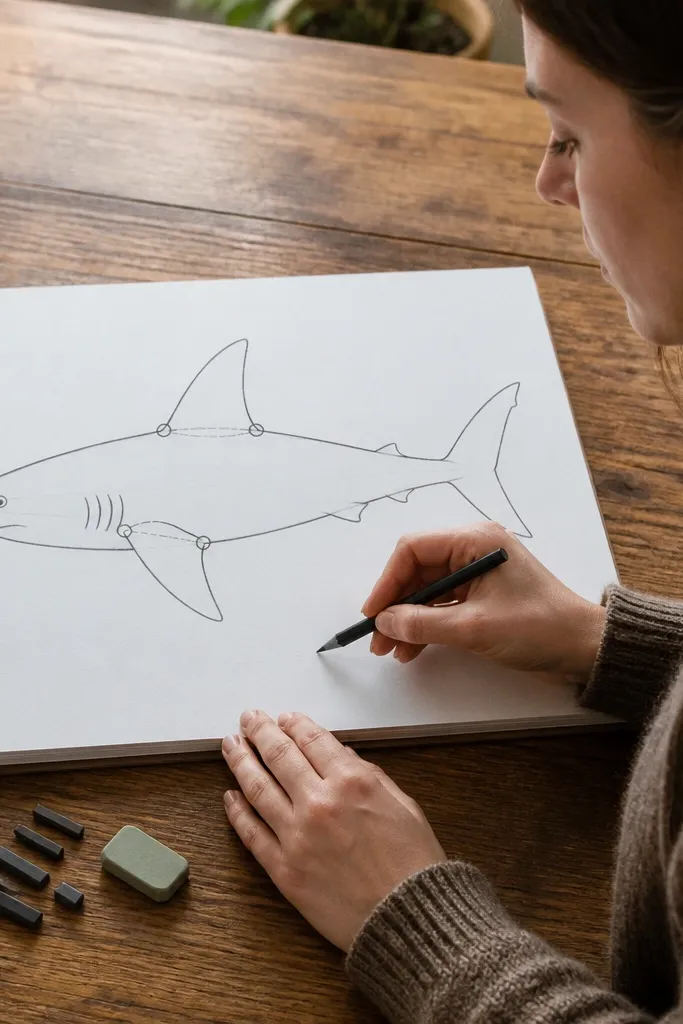
Step 1: Draw the head wedge and body oval, then lightly mark two hinge lines: one under the dorsal fin area and one near the pectoral fin zone. Step 2: Build the dorsal fin as a triangle with a slightly curved base that touches the hinge line, and build the pectoral fin as a smaller curved shape attached to its hinge. Finally, add tail fork and a simple mouth tooth row, then shade only the fin bases and underside shadow band.
Fins are the part that makes beginners' sharks feel off even when the body looks okay. This project teaches a simple concept: fins pivot from hinge lines, not from random points. You’ll draw hinge guides under the dorsal fin and near the pectoral fin, then attach fin shapes to those guides. The result is a shark that looks like it has real movement without needing complex anatomy. It also makes your drawings faster because you’re not guessing fin placement every time. Works well for pencil sketches and quick repeats.
AvoidDon’t attach fins directly to the body outline without hinge guides.
Pro tipKeep hinge guides faint and erase them early — they should disappear from the final sketch.



