
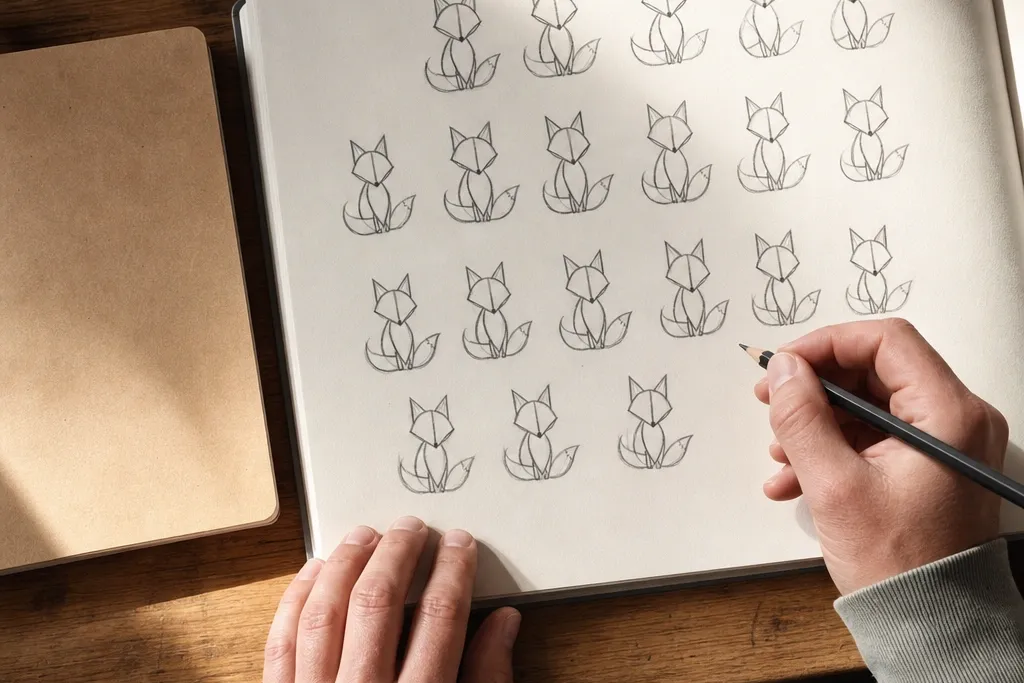
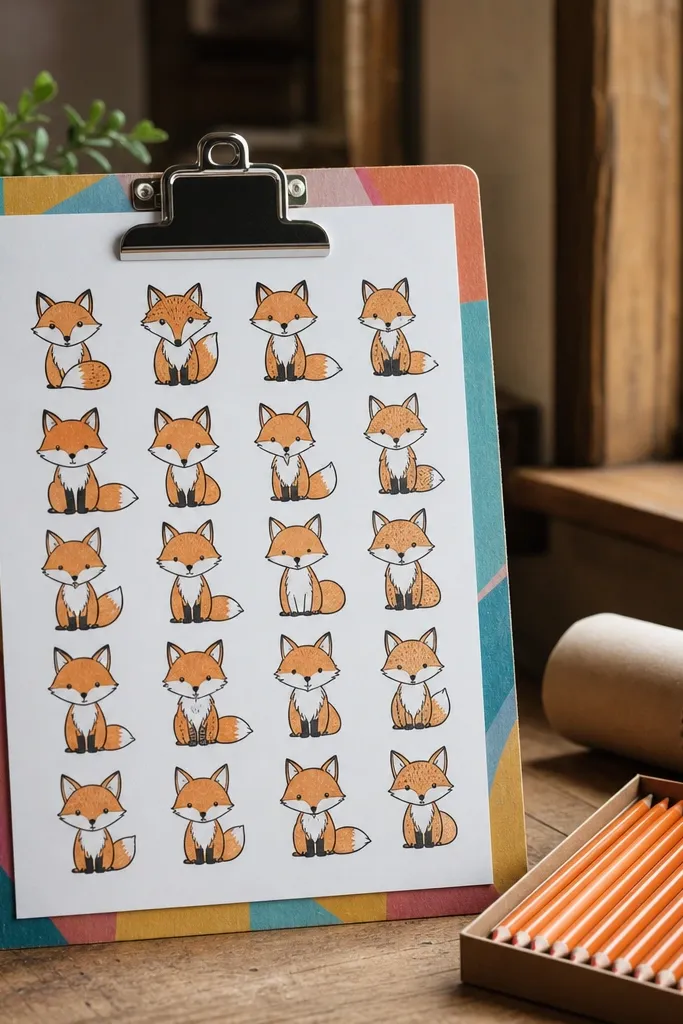
1. Swoopy Ear Cartoon Fox Head
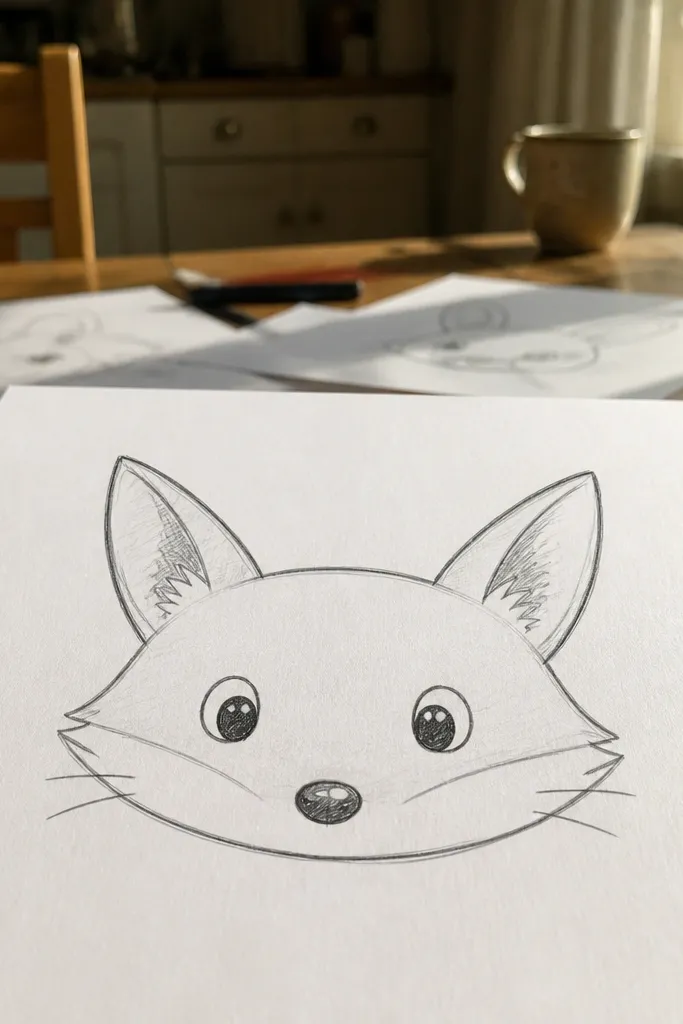
This one is for that “cute fox” look that reads instantly. You build the head from a squashed oval and place the ears as two tall triangles that lean slightly outward, so the silhouette looks lively. Keep the eyes round and centered, then add a tiny nose oval with a dark dot for the nostril. Finish with three short whisker lines on each side and a light mouth curve — the minimal details make it photogenic on paper.
Start by drawing a squashed oval for the head, then draw a light guideline line across the middle for the eyes. Add two ear triangles — the left ear leans a bit left, the right ear leans a bit right — and connect them to the top of the head. Finally, darken the outer contour with a 2B pencil, add pupils, nose dot, and whiskers, then erase construction lines.
Pro tipDraw the ears first, then fit the head to them. It keeps the proportions from drifting.
AvoidDon’t add fur texture everywhere — keep it clean so the face stays readable.
2. Profile Fox With Triangle Snout
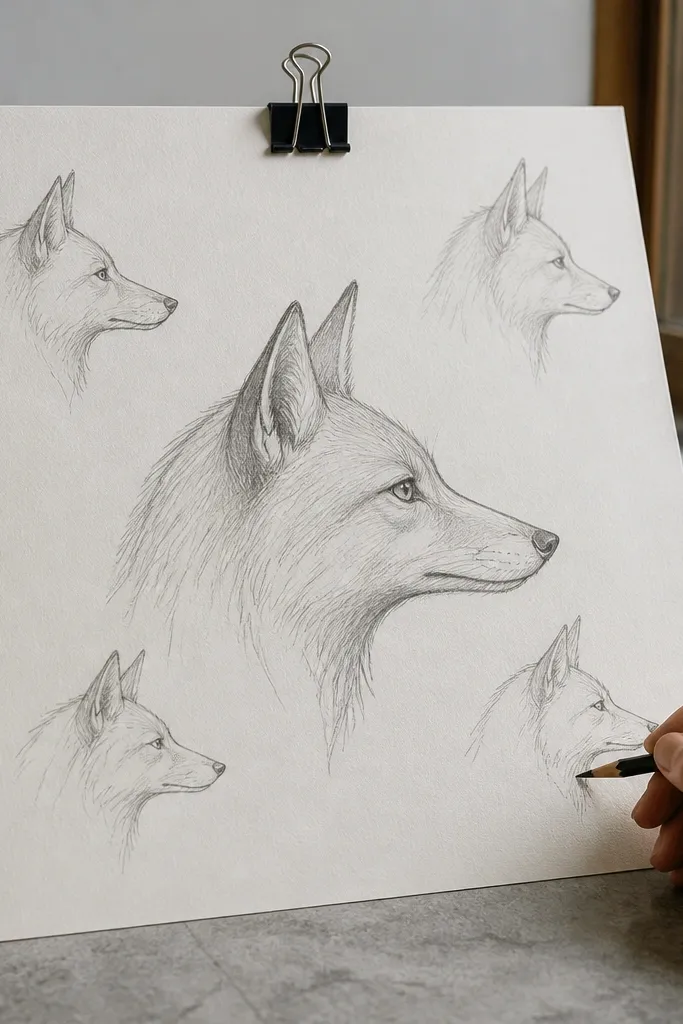
A side profile is the fastest way to make your fox look like it has personality. The triangle snout gives you a clear form even if your lines are still shaky, and it keeps the face from turning into a random blob. Place the eye slightly behind the midpoint of the head oval, then tilt the nose so it points forward. Add one simple cheek crease and two whisker strokes — the result looks sharp and “designed,” not unfinished.
Sketch the head as a slanted oval, then draw a small triangle for the snout at the front. Place the eye as a small almond shape on a guideline, and draw the ear as a pointed triangle behind the head line. Shade the area under the snout with 2B for a subtle shadow, then thicken the forehead and cheek contour.
Pro tipKeep the snout triangle small. A big snout makes the profile look cartoonish in a bad way.
AvoidAvoid drawing the eye and nose on two separate heights — align them with the same guideline.
3. Chibi Fox With Big Tail Curl
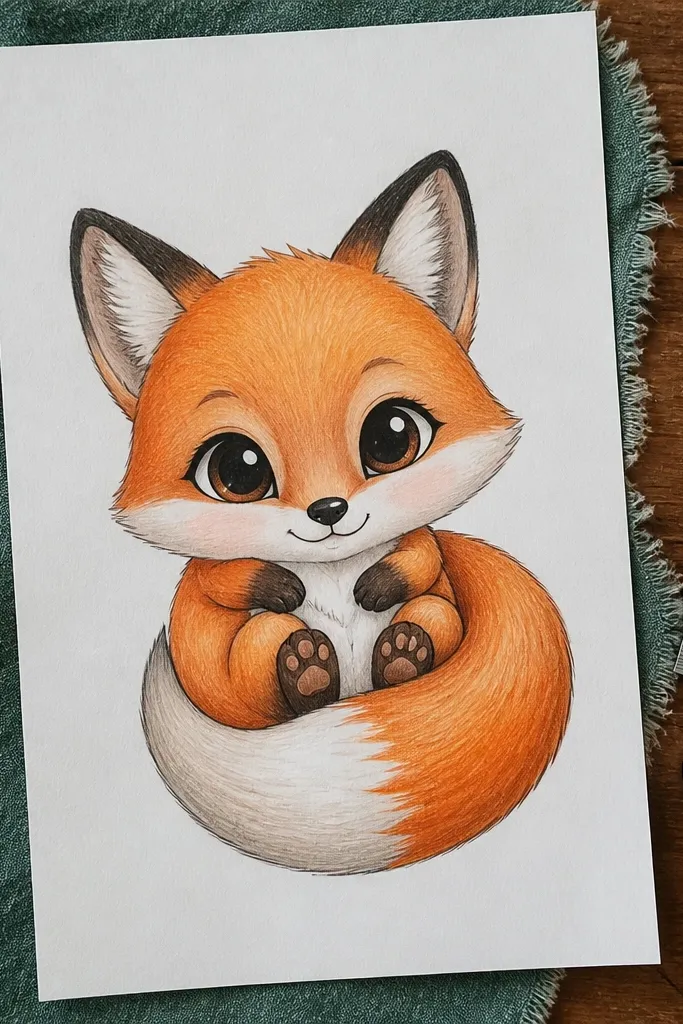
This is the “instant charm” drawing because the curled tail creates a strong shape you can spot in a photo. The body is a simple rounded bean, and the tail wraps around it like a comma. Add tiny paws as small ovals and give the face a slightly oversized head — that proportion makes it look adorable without needing realism. Use a darker outline and a few orange fill patches so it pops against white paper.
Draw a large head circle, then attach a rounded bean body beneath it. Add the tail as a thick curved line that loops in front of the body, ending in a small point. Place two tiny oval paws at the bottom, then add eyes and a small mouth curve. Color lightly with orange pencil or marker, then darken the outline with 2B.
Pro tipMake the tail thickness consistent. Uniform tail width makes the whole drawing look intentional.
AvoidDon’t overcrowd the face with fur lines. Two whiskers and a nose are enough.
4. Fox Face Mask Pattern (Front View)
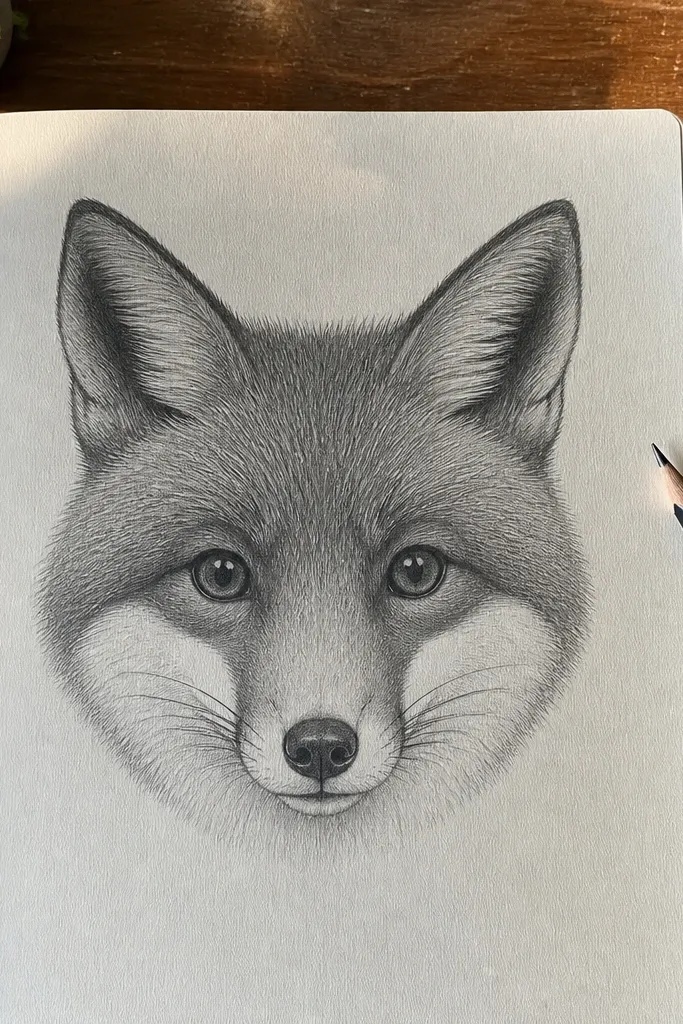
Mask markings are what make a fox look like a fox instead of a generic animal. This design uses three simple “zones”: dark forehead, lighter muzzle, and the white-ish cheek mask shape. You draw the face front-on, then block in the muzzle area as a curved teardrop without over-detailing. The contrast gives you that high-impact look for budget fox drawing because you’re using shapes, not hours of fur shading.
Start with a head oval and a vertical guideline down the center. Draw the eyes and ears first, then sketch the muzzle as a teardrop shape that reaches under the eyes. Add the cheek mask by drawing two curved shapes that sit between the eyes and the mouth line. Finally, darken the nose and pupil areas with 4B, then leave the mask area unshaded or lightly colored.
Pro tipUse a kneaded eraser to lift pencil inside the mask so it stays lighter than the rest.
AvoidDon’t shade the muzzle the same darkness as the forehead — the mask effect disappears.
5. Cute Fox Kit Sitting Pose
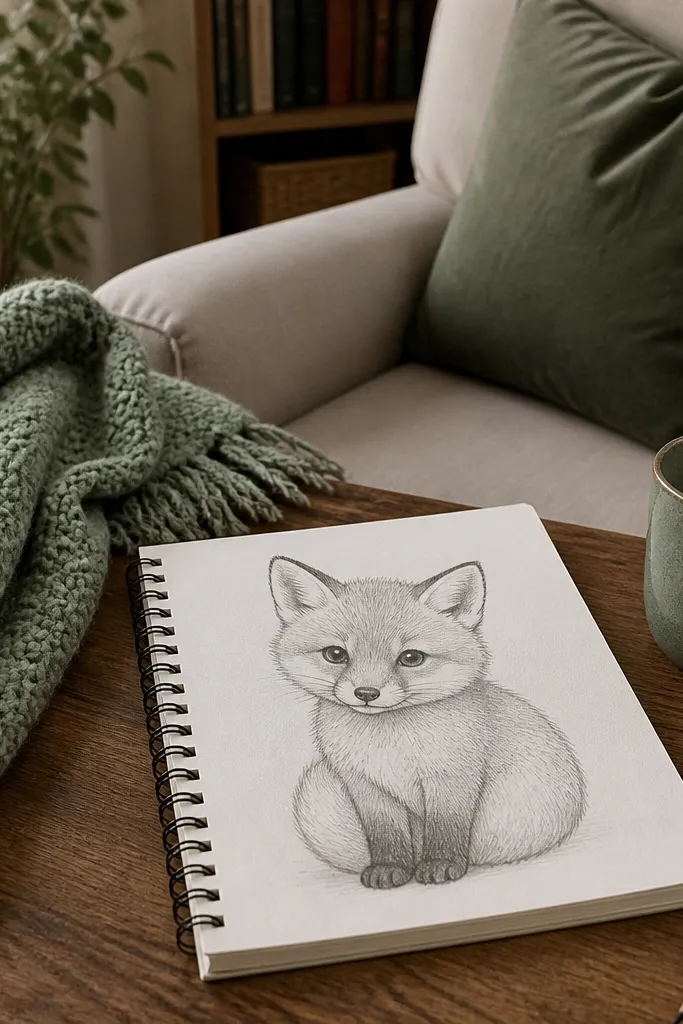
Sitting poses look good because you can show the body shape clearly, and that makes the drawing feel complete. Treat the body as a big rounded oval, with the legs tucked under as two small curves. The head sits on top at a slight angle, giving you a friendly look. Add a simple ear notch and a soft shadow under the chin, and the whole thing reads instantly even without fur detail.
Draw a large oval for the body, then add a smaller head oval on top slightly tilted. Sketch the tucked legs as two short curved lines under the body. Place the ears as triangles, then add eyes, nose, and a small mouth line. Darken the outline, then add chin shadow with 2B using light strokes.
Pro tipKeep the body oval taller than it is wide. It makes the kit proportions look right.
AvoidAvoid long legs. Tucked legs should stay short and compact.
6. Minimal Line Fox in a Circle Frame
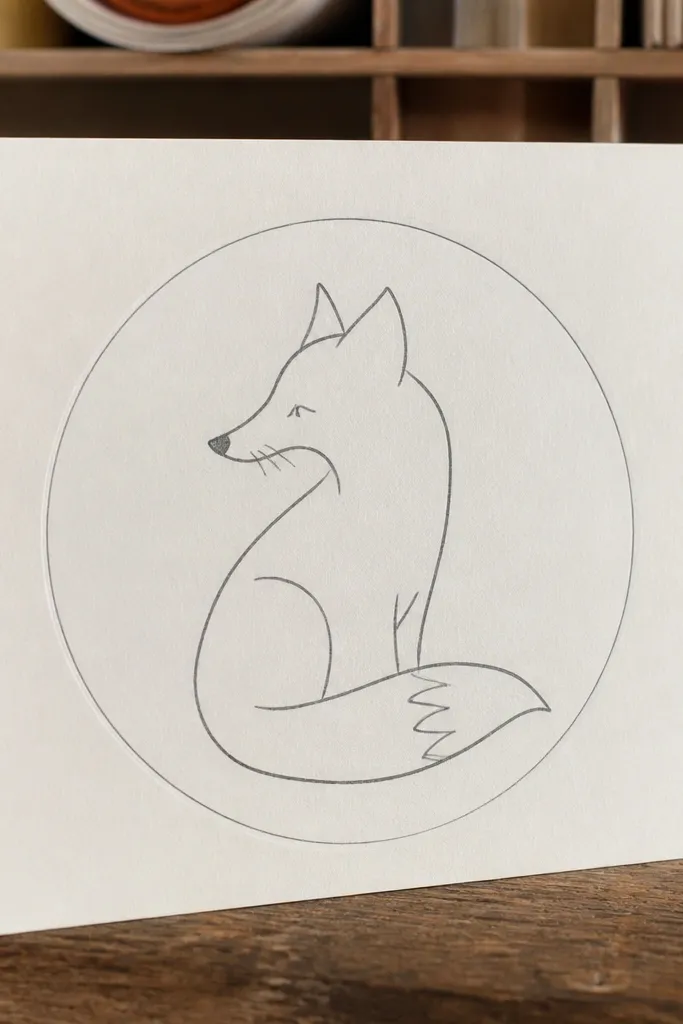
If you want aesthetic without coloring, do thin-line fox art in a frame. The circle border makes your fox look like a designed sticker, and the minimal line work keeps it clean. Use one consistent pencil line weight for the outer contour, then add just three whisker marks and one shadow under the nose. This is a great budget fox drawing because it uses almost no shading and still looks finished.
Draw a clean circle first, then place a head oval inside it that touches the circle slightly at the sides. Add ears as simple triangles and draw the eyes as small almond shapes. Add nose and mouth with short lines, then add three whiskers on each side. Finally, trace the outer contour a second time lightly to make it crisp.
Use a ruler for the circle only if you want it perfect. Otherwise, draw it freehand but keep it smooth.
Don’t add fur scribbles. Thin-line art stays good when it stays simple.
7. Fox Snout Study With Soft Shading
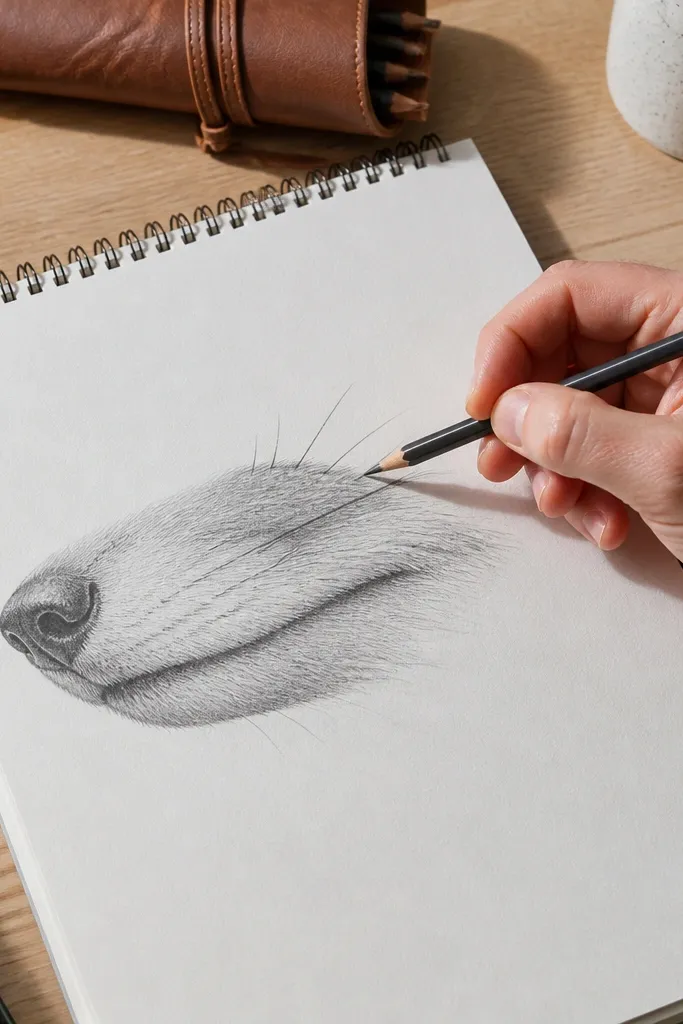
This one trains your shading where it matters: the nose and muzzle. You draw a snout as a rounded wedge, then build a soft gradient under the nose using a 2B pencil. Add the nostril as a small oval with a darker edge, and place the whisker line anchors slightly above the muzzle center. The result looks realistic-leaning without needing fancy tools, and it makes your future fox faces look better immediately.
Sketch the snout shape as a rounded wedge with a slightly pointed tip. Mark two whisker anchor dots on both sides, then draw short whisker lines outward. Shade under the nose first with light 2B strokes, then deepen the nostril area with 4B. Blend by rubbing gently with a tissue or blending stump, then erase stray construction marks.
Stop shading at the whisker anchor line. Clean edges make the snout look sharper.
Don’t over-smooth with heavy blending — it turns the drawing gray and flat.
8. Fox Front Paw Reaching
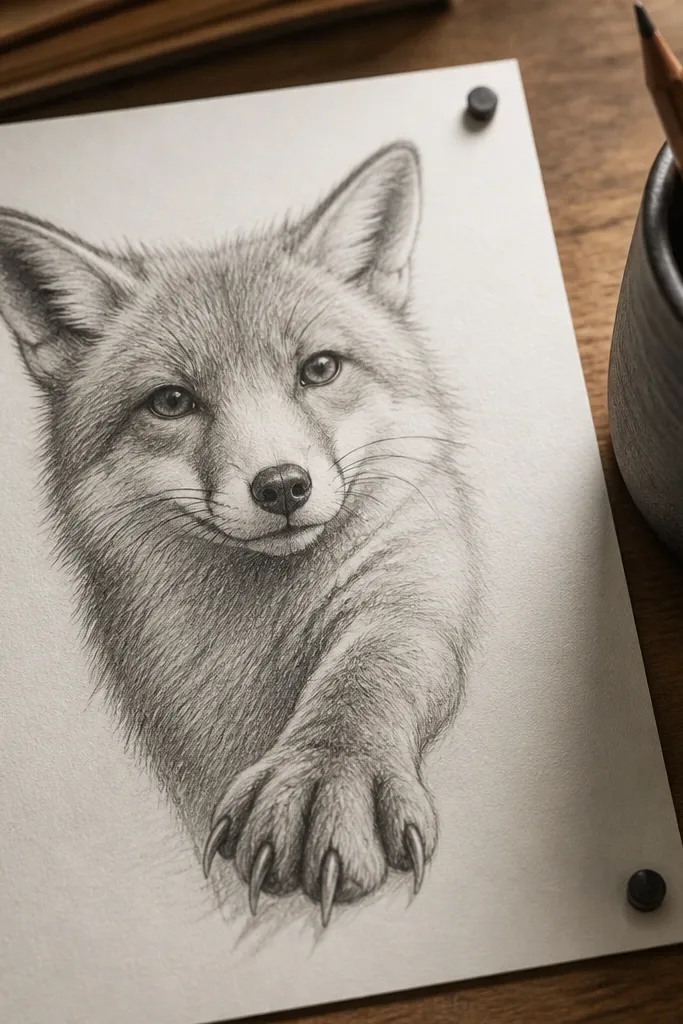
Paws make fox drawings feel interactive, and that’s why this one looks cute in photos. You keep the face simple, then focus on the paw shape: a small rounded hand with four toe ovals. The reaching pose adds a strong diagonal line, which makes the composition feel dynamic. Add a tiny claw tip on each toe and a little shadow under the paw for depth.
Draw the head oval and ears, then add eyes and a small nose. Sketch the body as a short oval behind the head, then draw a reaching paw as a curved arm ending in a rounded paw pad. Add four toe ovals and tiny claw tips at the top of each toe. Shade lightly under the paw with 2B and darken the paw outline with 4B.
Pro tipMake the paw pad slightly larger than you think. It reads better at a distance.
AvoidAvoid drawing the paw as a flat circle. Toes need little separation to look like toes.
9. Fox Lying Down With Oval Body
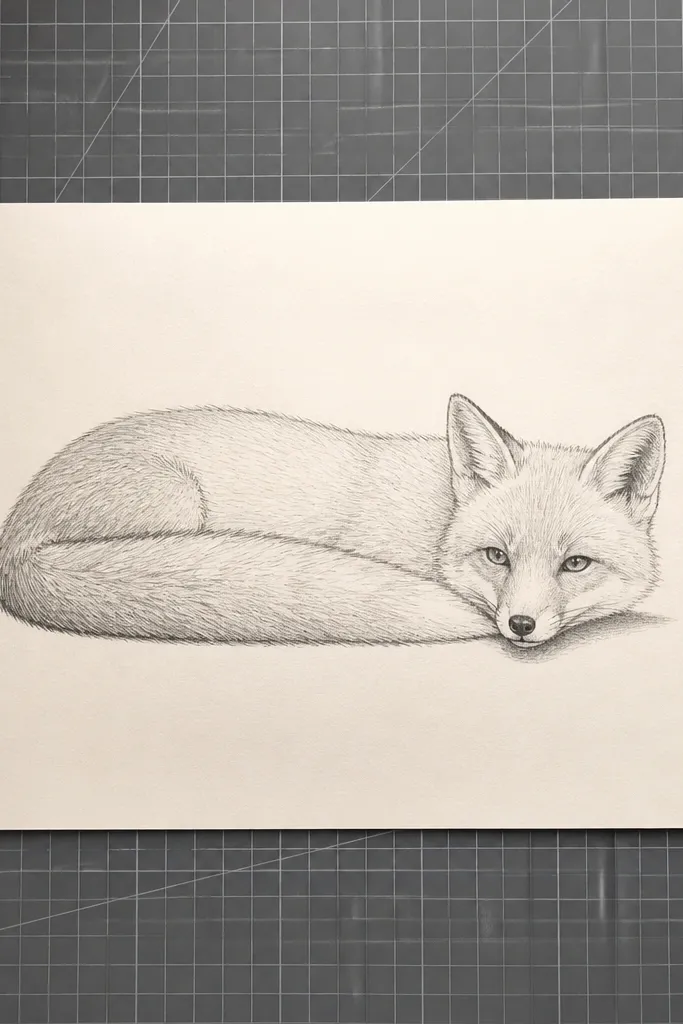
Long, low poses are great for learning proportions fast. The body is a stretched oval, and the tail rests along it so you get a clean silhouette. This drawing looks good because the face is compact and the body lines are smooth — fewer details, stronger shape. Add a small ear tilt and a single shadow under the chin, and it feels complete without fur texture.
Draw a stretched oval for the body, then place a smaller head oval at one end. Add ears as triangles, then add eyes and nose. Sketch the legs as two short curves tucked under the body, and draw the tail as a curved shape that follows the body line. Shade under the chin and along the belly edge with 2B, then darken the outer contour.
Pro tipKeep the belly line lighter than the back line. It helps the body read as 3D.
AvoidDon’t make the head too big compared to the body. Low poses look cartoonish when the head dominates.
10. Fox Tail Feathers Pattern (Top View)
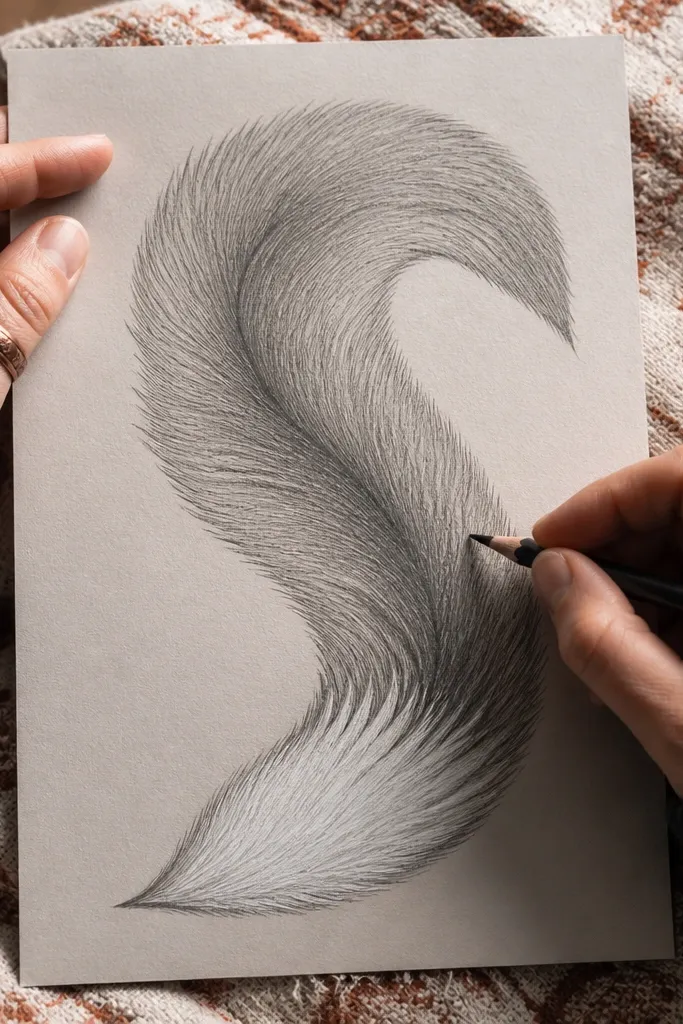
Tail drawings are where budget fox drawing can look surprisingly fancy. The trick is to treat the tail as a fan of stripes that all curve in the same direction. You draw a large curved tail shape, then add evenly spaced “feather” lines that follow the curve. Leave the center stripe slightly darker to create depth. This is photogenic because the pattern fills the page and looks intentional even if the face is simple or absent.
Draw a large curved tail outline as a teardrop that opens at the base. Add a center line down the tail and then draw 8-12 curved stripe lines that all mirror the curve. Color orange lightly, then deepen alternating stripes with 2B or a darker orange pencil. Add a soft shadow at the tail base to anchor it.
Pro tipUse a ruler for the first stripe spacing, then switch to freehand for the rest so it looks natural.
AvoidDon’t make stripes straight. They must curve or the tail looks flat.
11. Face + Belly Split With Bold Color Blocks
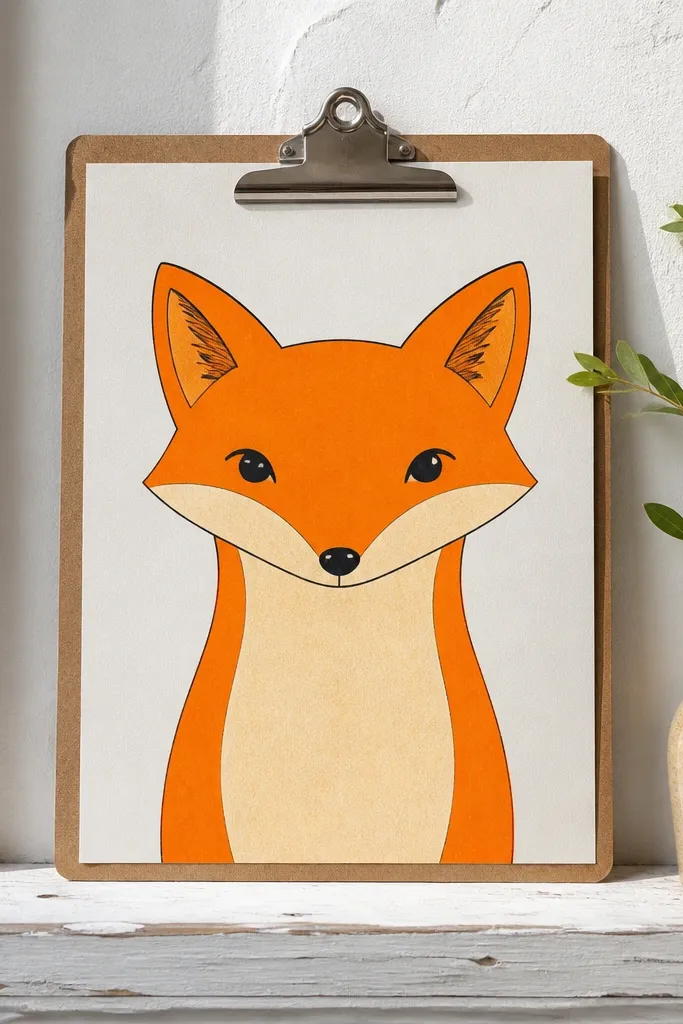
Bold color blocks make your fox drawing look like a real design, not a sketch. You draw the fox front-on, then separate the orange face from the lighter belly with one clean curved line. This approach hides small drawing imperfections because the shapes do the work. Add the eyes, nose, and ear inner details with dark lines, then color only two tones: orange and a pale cream.
Sketch the head and body as two connected ovals, then draw a curved split line where the belly starts. Add ears, eyes, and a simple muzzle shape, keeping the muzzle area cream-colored. Outline the face and belly separation with a dark pencil or marker, then fill the orange areas while leaving the belly light. Finish with whisker lines and a tiny chin shadow under the split line.
Outline first, then fill. It prevents marker bleed into the cream areas.
Avoid using three different oranges. Two tones make the block look crisp.
12. Fox Head Tilt With One Eye Wink
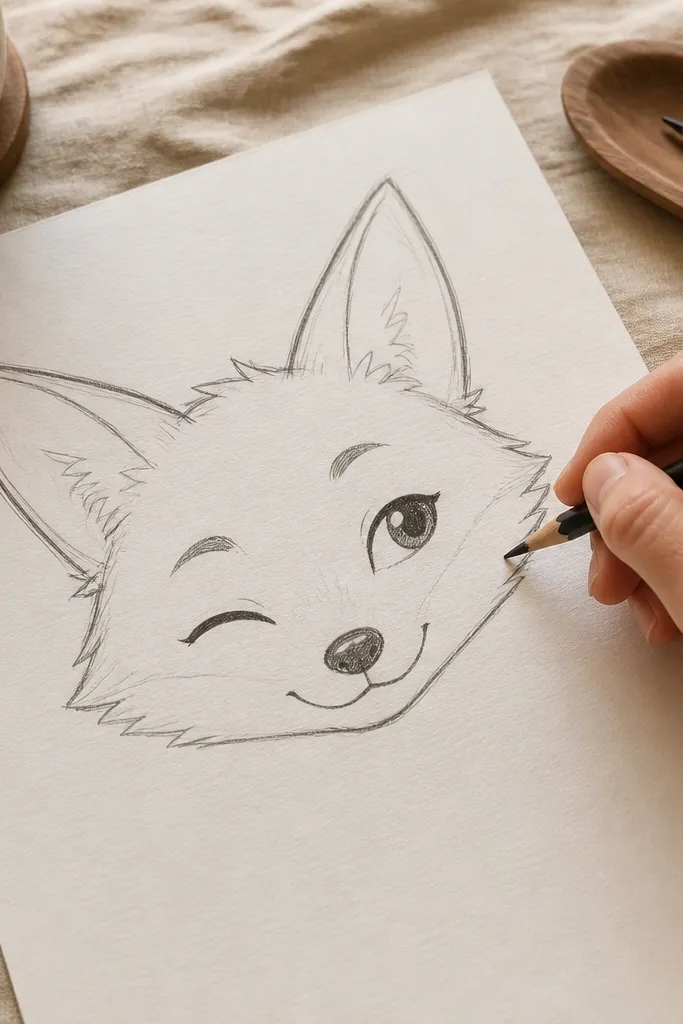
A wink fox is an instant personality boost, and it’s easy to draw cleanly. Keep the head oval slightly tilted, then draw one eye as a closed curve and the other as an almond. Add a little eyebrow line above the open eye and a small cheek curve — that’s enough to sell the expression. The result looks cute and photogenic even in simple pencil.
Draw a head oval with a slight tilt, and place a center guideline so the muzzle stays aligned. Add ears as triangles and then draw one eye open and one eye closed using the same eye height guideline. Add a small nose oval and mouth curve, then place whiskers as short strokes from the muzzle sides. Darken the open eye pupil and thicken the outer head contour with 2B.
Pro tipMatch the wink side eyebrow angle to the head tilt. It makes the expression feel deliberate.
AvoidDon’t close the eye too far. Keep it a gentle curve, not a full line across the face.
13. Fox in Snow With Simple Dots
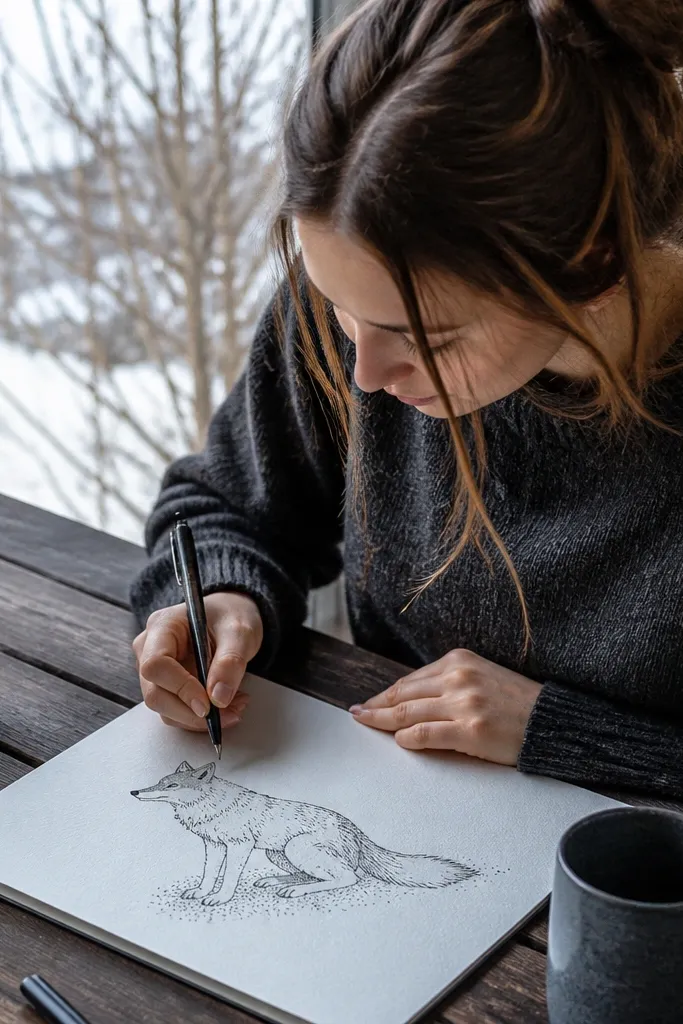
The snow effect turns a basic fox into a scene without adding complex background. You draw the fox face and then build the snow with tiny dot clusters under the chin and around the paws. The dots create texture, which makes the image look finished in photos. Keep the fox line work crisp and leave the snow mostly unshaded so the contrast pops.
Draw a standing fox head and body as simple ovals, then add ears, eyes, and nose. Place the paws on a light ground line. For the snow, add small dots and short specks in clusters under the chin and around the paws, leaving gaps so it looks airy. Finally, shade the fox outline a bit darker and lightly darken the paw underside with 2B.
Pro tipUse a softer pencil (2B) for the fox and keep the snow dots lighter so they don’t steal attention.
AvoidDon’t shade the snow gray. White-looking snow is the whole point.
14. Fox With Leafy Tail Accent
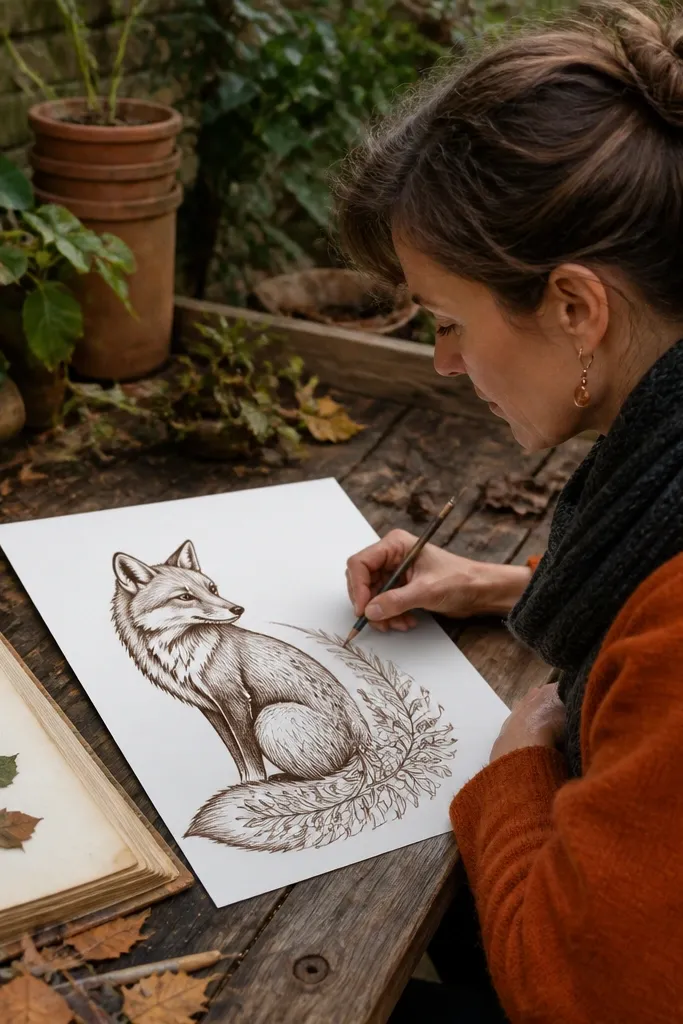
This is a fun aesthetic twist that still stays budget fox drawing friendly. You draw a normal fox tail shape, then add leaf-like accents along the outer edge to create a decorative border. The leaf pattern gives you a high-contrast texture that looks great in a flat photo. Keep the face simple and focus detail on the tail — that keeps the drawing from getting messy.
Sketch the head and body as simple ovals, then draw the tail as a large curved shape behind the body. Add leaf accents by drawing 6-10 small leaf teardrops along the tail outer curve, alternating sides. Outline the leaves lightly and fill the tail orange while leaving the leaves a pale green or unfilled white. Darken the tail base and add a few whisker lines to finish the face.
Pro tipVary leaf sizes slightly. Perfectly equal leaves look like stickers pasted on.
AvoidAvoid adding leaf accents on the face. Keep the tail as the decorative focus.
15. Fox Face With Geometric Eye Triangles
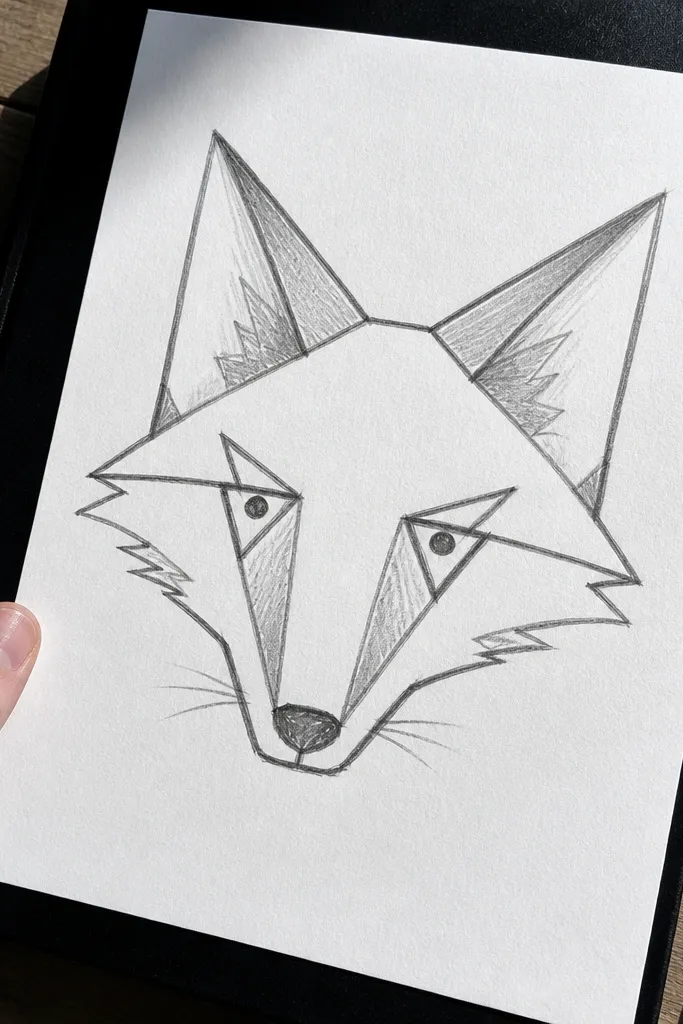
Geometric eyes make a fox drawing look modern and graphic. Instead of almond eyes, you use small triangles or angled polygons for the eye shape and then add a small pupil circle to anchor it. The angular look is photogenic because it creates crisp edges. Pair it with simple line weight and minimal whiskers — the contrast between sharp eyes and soft face oval makes it interesting.
Start with a head oval and draw ear triangles on top. Mark two eye positions on a guideline, then draw each eye as a small angled triangle shape with a cut-in corner. Add a tiny pupil circle and a small highlight spot. Outline the muzzle, draw a nose dot, and add three whisker lines per side. Finish by darkening the outer contour and ears with 4B.
Keep the pupil circle small. Big pupils make it look like a cartoon sticker.
Don’t add realistic fur texture. Geometric style needs restraint.
16. Fox Standing Front With Bowtie
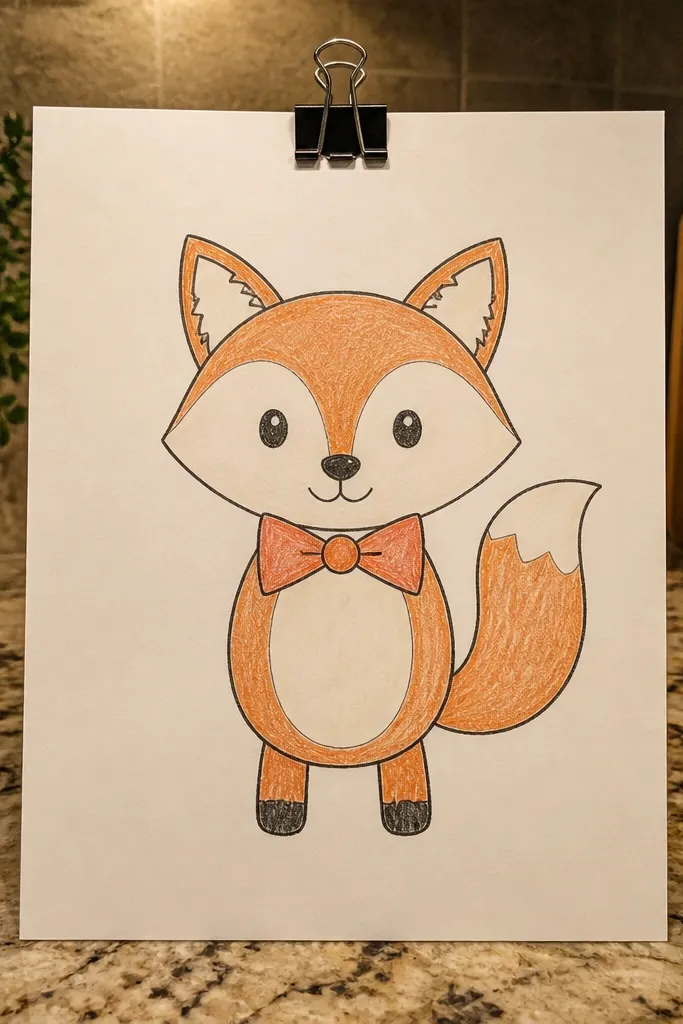
A bowtie turns a simple fox into something you can actually frame. The construction stays easy: head oval, body oval, legs as short lines, tail as a curved hook. The bowtie is the photogenic part — draw it as two symmetrical triangles with a knot circle in the middle. Color the fox in orange and cream, then use black or dark brown for the bowtie to make the face pop.
Draw a head oval and add ears as triangles, then add a body oval beneath it. Sketch two front legs as short rectangles with rounded ends and add two back legs as small curves. Draw a curved tail hook behind the body. Place the bowtie at the upper chest: two mirrored triangles with a small center knot circle, then outline and fill. Color the fox orange and cream, and darken the eyes and bowtie with 2B or marker.
Pro tipMake the bowtie slightly wider than the snout. It balances the proportions.
AvoidDon’t place the bowtie too low. It should sit on the chest area, not the belly.
17. Fox Face With Watercolor Wash Look
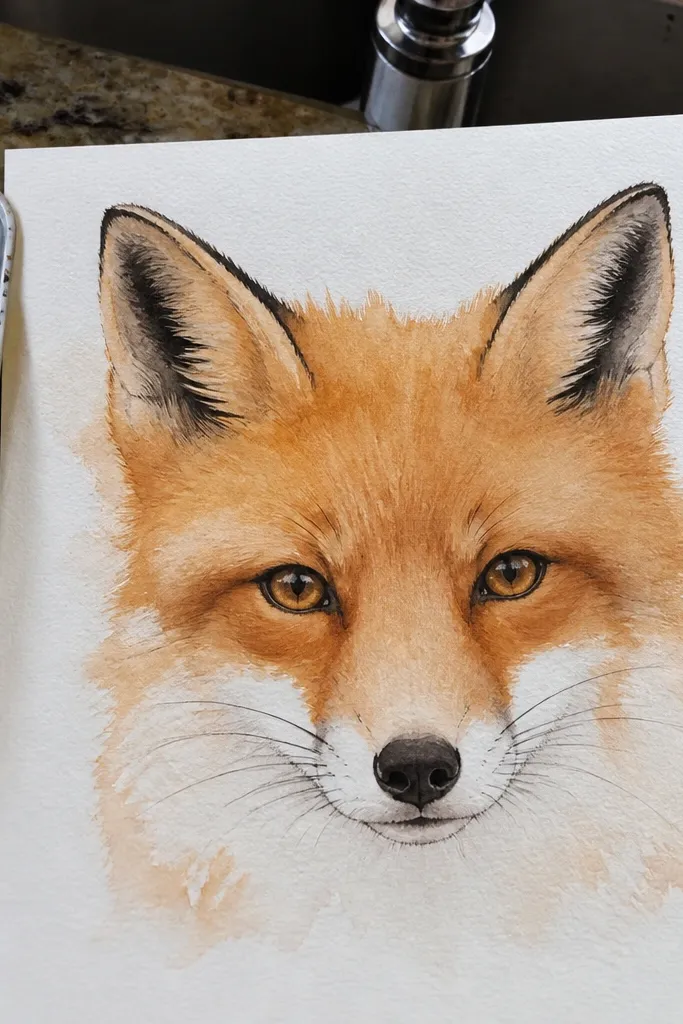
If you want the prettiest “budget fox drawing” look without expensive paint, use watercolor pencils or a watered marker wash. You block in a soft orange wash on the forehead and cheeks, then leave the muzzle lighter. The edges should look slightly feathered, because that’s what makes it aesthetic. Add dark line work for the eyes and nose so the face doesn’t blur into the wash.
Sketch the fox face lightly with HB, then decide where the muzzle stays cream. Apply orange watercolor pencil or diluted marker to the forehead and cheek areas, leaving the muzzle mostly unpainted. While it’s still damp, soften the boundary between orange and muzzle by brushing lightly with water. Once dry, trace the outer contour, eyes, nose, and whiskers with a 2B pencil or dark pen.
Pro tipTest your orange dilution on scrap first so it doesn’t turn muddy.
AvoidDon’t paint over the eyes and nose. Dark features should be added after the wash dries.
18. Fox Head With Spotlight Shadow Under Chin
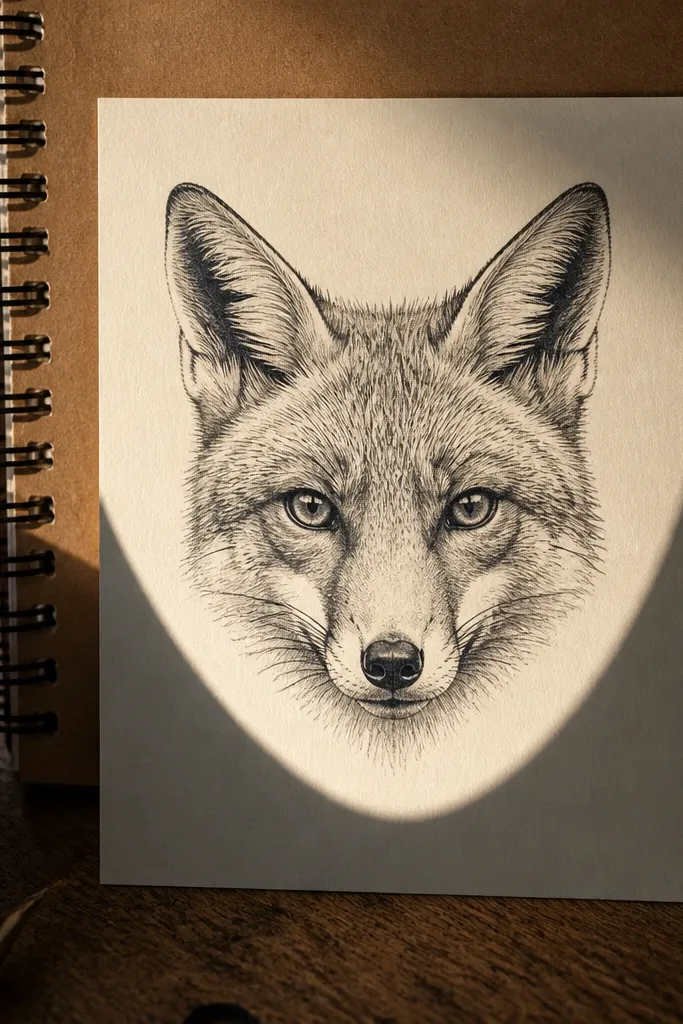
This one looks dramatic because it uses one bold shadow shape instead of lots of fur shading. Draw the fox face front-on, then create a crescent shadow under the chin that curves like a spotlight. The contrast makes the fox look grounded and 3D, even if everything else stays simple. Keep the ears bright and crisp, and darken the nose and pupils for focus.
Sketch the head oval and ears, then draw eyes and nose with light lines. Add a chin shadow as a curved crescent under the muzzle, leaving a clean edge at the top of the shadow. Shade the crescent with 4B using short strokes, then soften the outer edge with a tissue. Darken the outer contour and add whiskers last so they stay crisp.
Pro tipMake the shadow edge slightly darker where it touches the chin. That sells the lighting.
AvoidAvoid shading the cheeks heavily. The chin shadow is the whole look.
19. Side Profile Fox With Patterned Fur Stripes
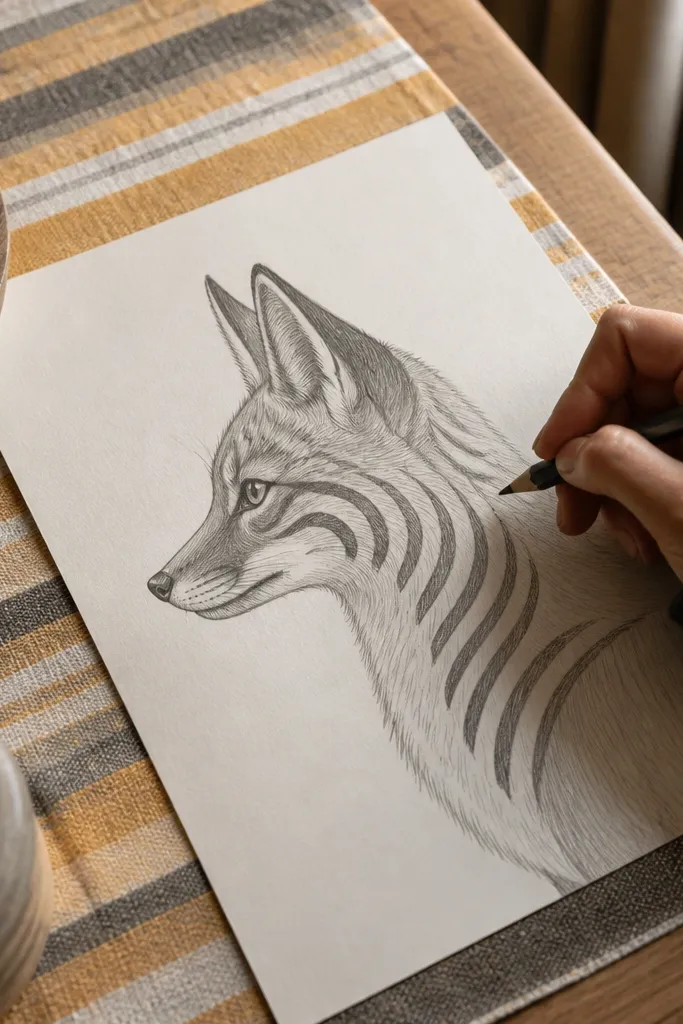
Patterned fur stripes look stylish and take control of your drawing. In side profile, you add a few stripe bands along the cheek and neck so the fox looks textured without needing hundreds of lines. Keep the stripes curved to match the form. This design is great for budget fox drawing because you’re using a repeating motif that’s easy to replicate.
Draw a slanted head oval and snout triangle, then add the ear triangle behind. Place the eye as an almond and draw a small mouth line. Add three to five curved fur stripe lines on the neck and cheek, each following the direction of the head curve. Shade the stripe bases lightly with 2B, then darken the outline and nose for contrast.
Keep stripe spacing even. It looks intentional in photos.
Don’t add too many stripes. Five looks designed; ten looks messy.
20. Fox Face With Checkerboard Background
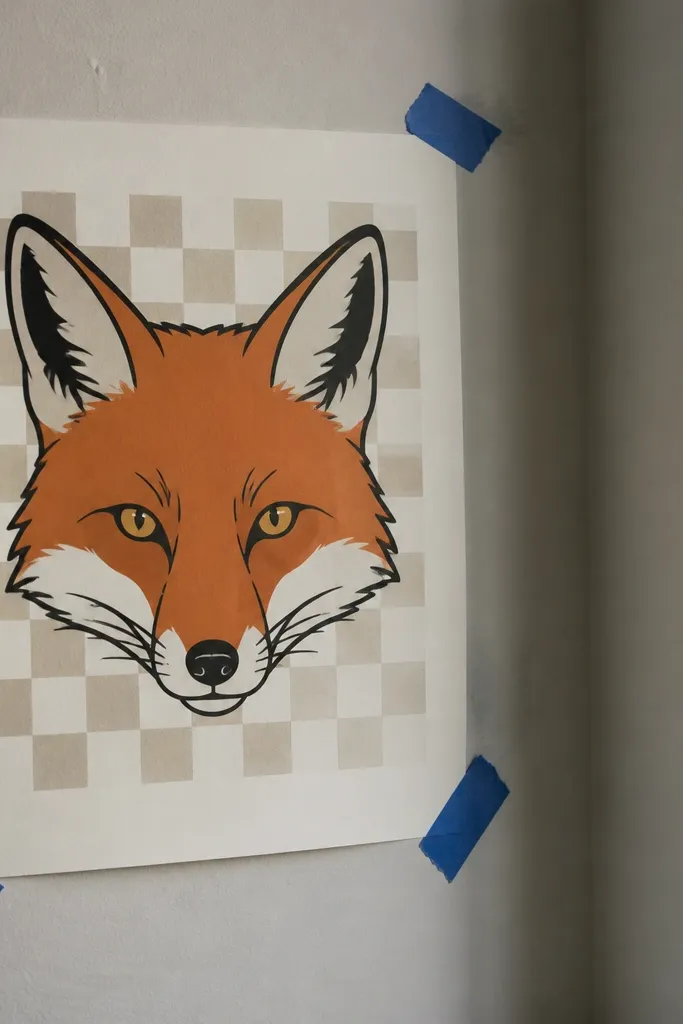
A checkerboard background is one of the easiest ways to make a simple fox drawing feel graphic and ready for sharing. The pattern frames the face and adds visual interest without complicated scenery. Draw the fox in bold outline and minimal details, then keep the checkerboard light so the fox stays the focus. This is also a great way to hide uneven coloring because the background pattern distracts pleasantly.
Draw the fox face and ears with a light pencil sketch, then outline it with 2B. Add a checkerboard behind it using light pencil squares, about 1 cm each, arranged in a grid. Color the checkerboard alternating pale orange and cream or leave it pencil-only and lightly shade squares with HB. Finally, darken the fox eyes and nose and erase any rough checker lines that cross the face.
Pro tipUse a light hand on the background. The fox outline should be the darkest part.
AvoidDon’t make the checkerboard too dark. It competes with the face.



