
1. Plane-blocked fox head (skull + muzzle rails)
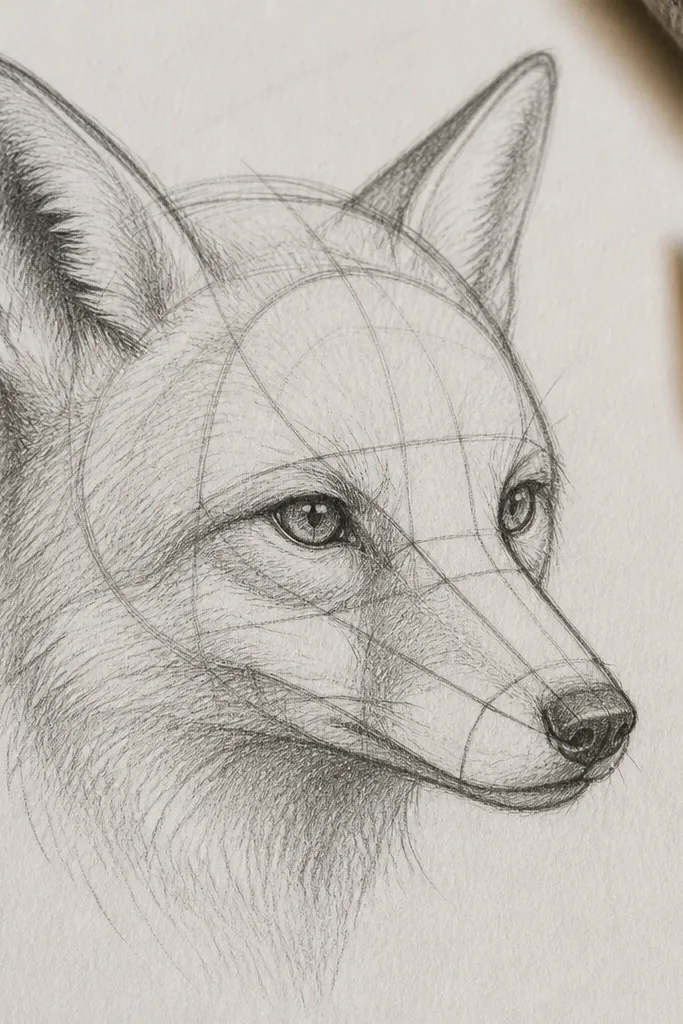
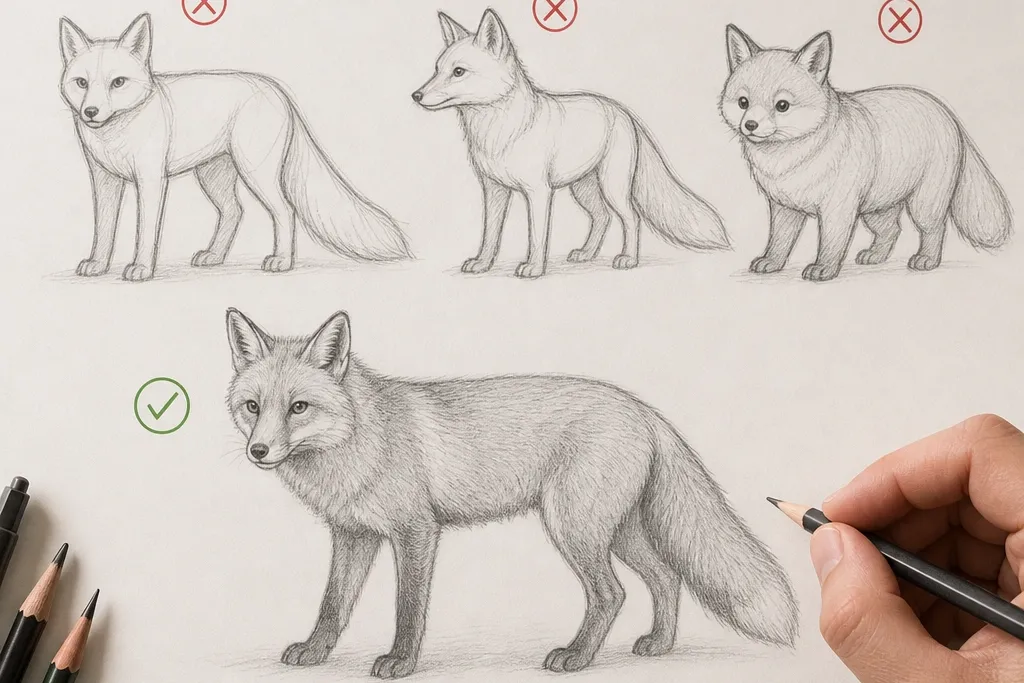
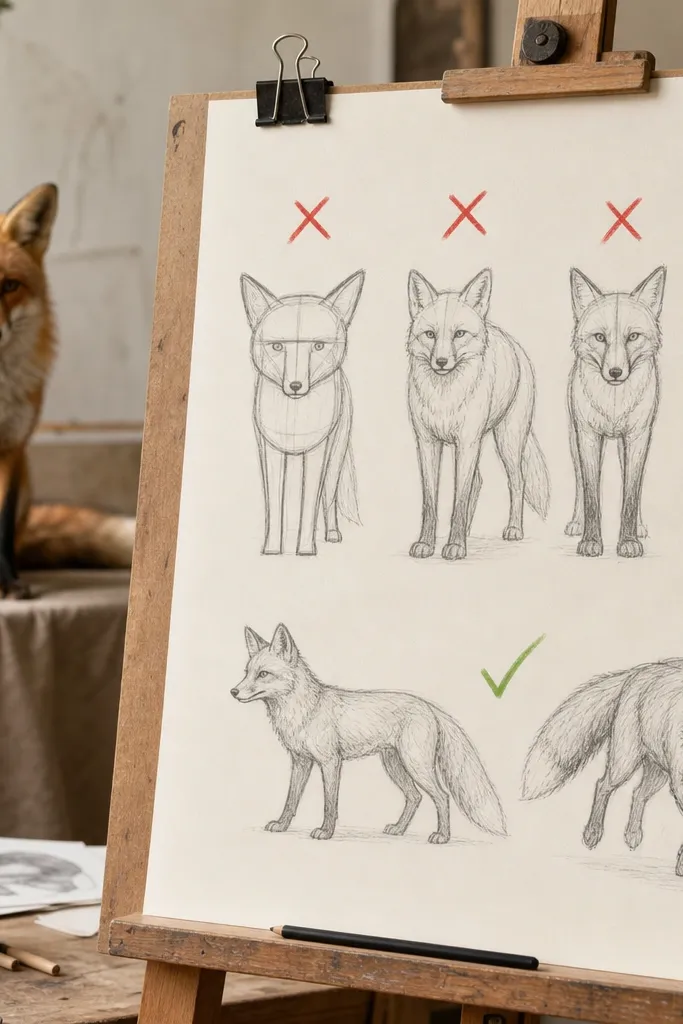
This is the fix for the biggest common mistakes fox drawing — the “triangle head” look. You’re training your eye to see the skull as the largest shape, then the muzzle as a separate, forward plane. When those two planes line up, the face reads even if you only add a few fur marks. Use a light pencil for the blocks so you can erase without ghosting. This approach works for pencil, ink, and markers because the construction guides every later step.
Start by drawing a large oval for the skull, then add a center guideline for the face direction. Add two rails for the muzzle: one for the bridge that slopes forward, and one for the cheek that turns slightly down. Place the eye sockets where they touch the skull plane — not on the muzzle. Finally, draw the nose shape as a small wedge at the end of the muzzle rail, then erase the extra construction lines before fur.
If the muzzle looks too short, extend the muzzle rail until the nose tip lands past the front edge of the skull oval.
Don’t start with ears and eyes — they lock in wrong proportions and you’ll keep correcting them.
2. Eye socket alignment grid for fox 3/4 views
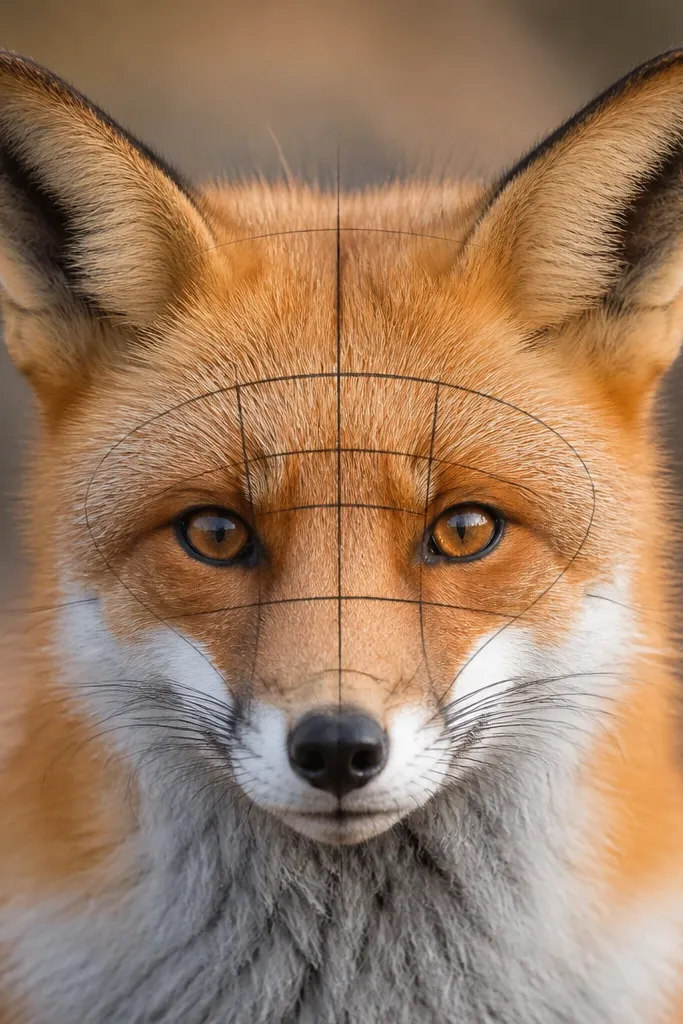
People mess up fox eyes more than they think, and it makes the entire head feel off. The eye problem isn’t just the iris — it’s the socket position and tilt relative to the muzzle plane. This drawing method adds a tiny alignment grid so the eye sockets sit on the same imaginary plane. You’ll notice how quickly the fox stops looking surprised or cross-eyed. It’s a great method when you’re drawing from photos with a slight head turn.
Lightly draw a horizontal eye line across the skull oval. Add a vertical guideline through the center of the face direction. Mark the eye sockets as two small ovals that touch the skull oval, then keep the distance between them consistent with the head width. After that, place the irises so the top of the iris sits slightly under the upper lid fold, then erase the grid lines.
Pro tipTilt the eye line to match the photo, not your page — a level page can still have a tilted eye line on the subject.
AvoidAvoid drawing the eyes as circles — fox eyes need the socket angle first, then the eye shape.
3. Muzzle depth fix using the nose-to-cheek shadow
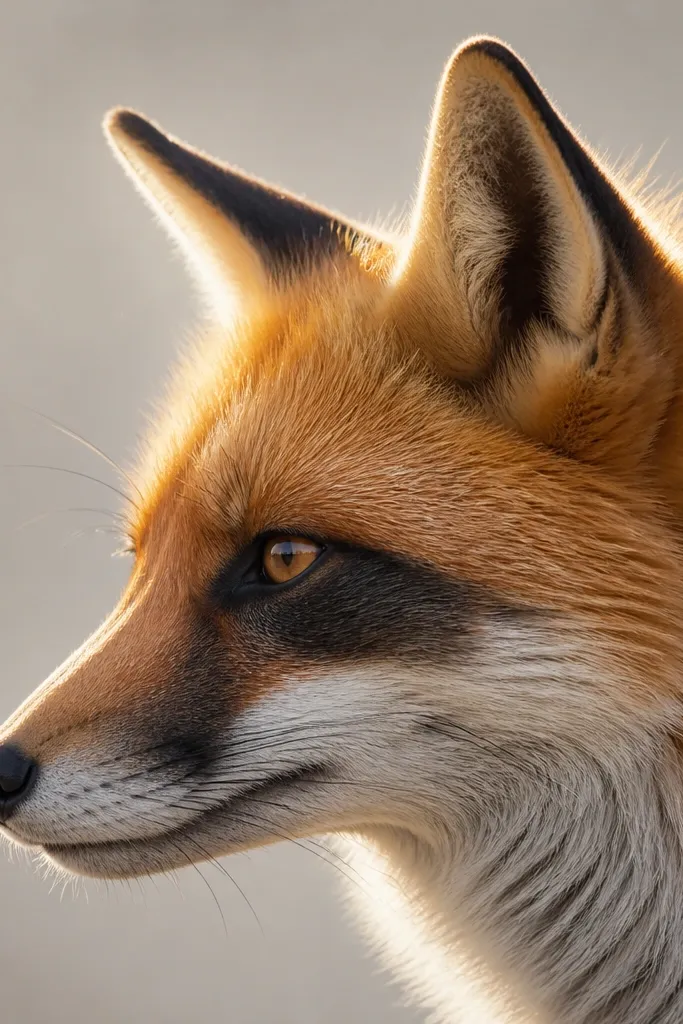
Flat muzzles are one of the most common mistakes fox drawing because people shade fur only, not the structure. The nose-to-cheek shadow is the simplest depth anchor you can add. It’s a soft, curved shape that sits under the cheek and around the side of the nose bridge. When you place it correctly, the muzzle “pops” forward and the face looks more real without heavy rendering. This works for grayscale pencil, charcoal, or ink because it’s about shape value, not texture detail.
Block in the muzzle rails first, then draw the nose tip and the upper lip line lightly. Add a shadow shape under the cheek that follows the curve from the nose side to the cheek corner — keep it darker near the nose and lighter as it spreads. Shade the area between the shadow and the muzzle plane with a mid-tone so there’s a clear value step. Finally, add only a few fur strokes over the lighter areas and leave the shadow edge cleaner than the fur.
Use a kneaded eraser to lift the highlight on the muzzle bridge — that single highlight sells the form.
Don’t black out the whole muzzle — the depth comes from the edge of the shadow shape, not full darkness.
4. Ear construction that hugs the skull angle
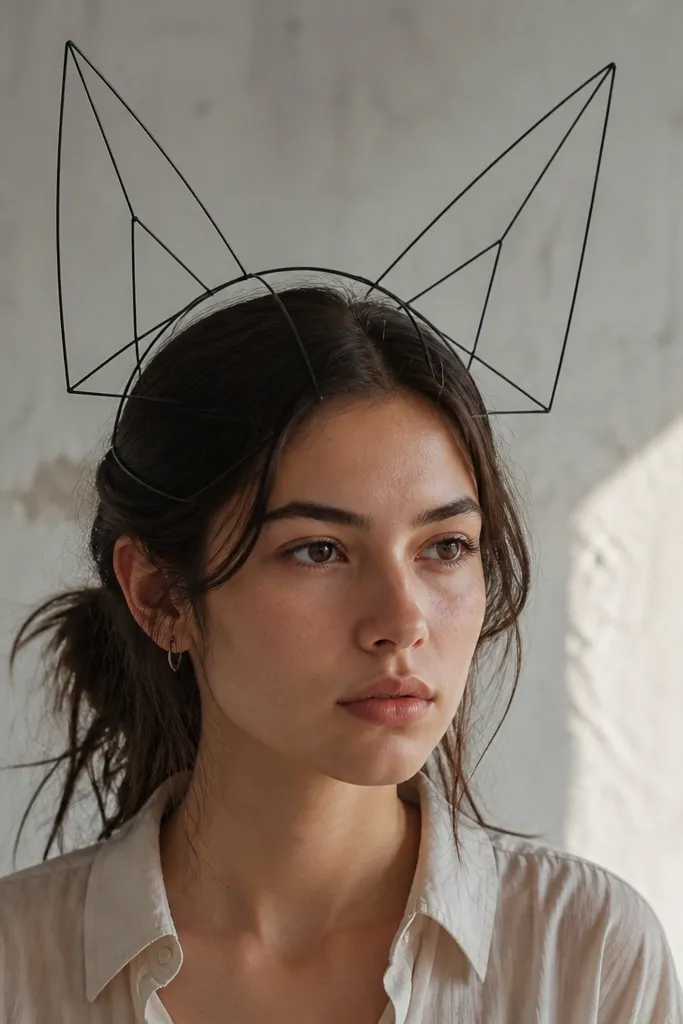
Ears that float off the skull are a dead giveaway. The fix is to treat the ears like planes that attach to the top sides of the skull oval, then taper toward the tip. When ears match the skull angle, the fox looks alert instead of pasted on. You can keep the fur minimal and still get a believable head because the ear silhouette carries most of the “fox” read. This is especially helpful for quick sketches and marker drawings where you can’t rely on lots of texture.
Start with the skull oval and mark where the ear bases touch the skull sides. Draw each ear as a slightly curved wedge that rotates away from the skull in the same direction as the head turn. Add the inner ear shape as a smaller wedge inside, leaving a thin highlight edge between inner and outer shapes. Darken the inner ear base and keep the outer ear edges lighter for separation.
If an ear looks too big, shrink the ear base point on the skull first — not the ear tip.
Avoid drawing ears as perfect triangles — the base angle and attachment point matter more than the tip.
5. Fur direction map (forehead ridges and cheek sweep)
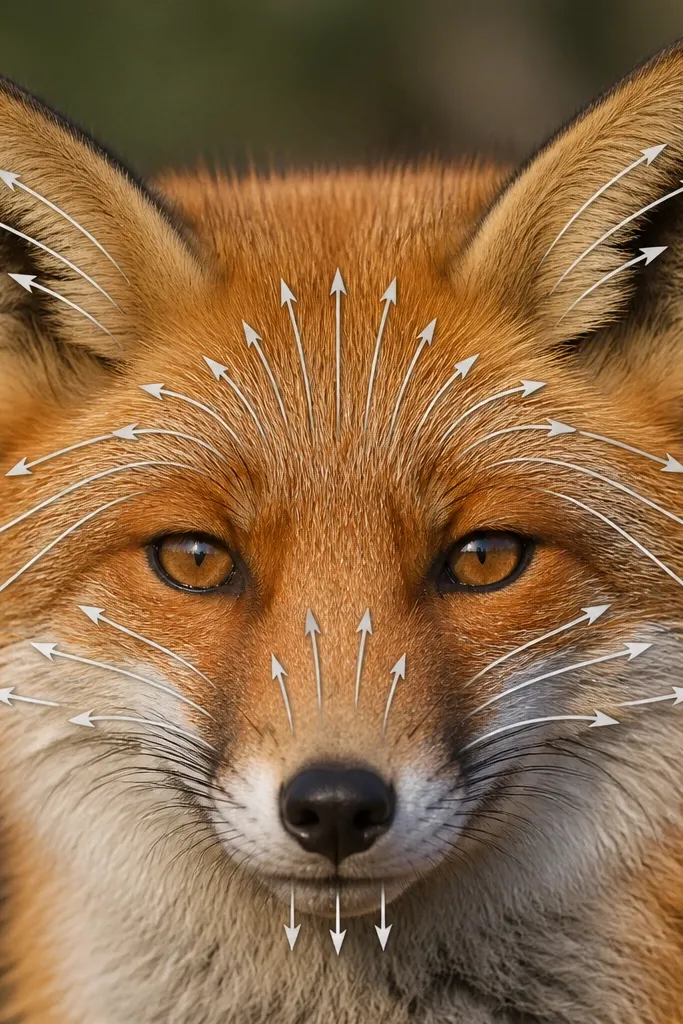
Random fur strokes are one of the classic common mistakes fox drawing because they flatten the head. A fur direction map forces every stroke to wrap the skull and muzzle planes. You’ll get rid of that “scratchy everywhere” look because strokes change direction where the form turns — especially across the forehead ridges and onto the cheek. This approach also makes your shading cleaner, since you’re not smearing texture over value shapes. It’s a low-effort method that improves both line art and shaded drawings.
After blocking the head planes, draw a few light guide arrows: forehead strokes should angle toward the nose, and cheek strokes should sweep slightly backward. Keep strokes short near the eye and longer on the muzzle plane so the surface reads as rounded. Shade the shadow areas with direction-following strokes, then leave highlight areas mostly blank except for a few edge hairs. Erase or lighten the guide arrows before you commit with darker lines.
Pro tipUse three fur stroke lengths: short (near eyes), medium (forehead), long (muzzle) — it creates rhythm without extra detail.
AvoidDon’t texture the background and the face the same way — the face needs plane-wrapped strokes, background should stay simpler.
6. Tail mass first, then texture bands
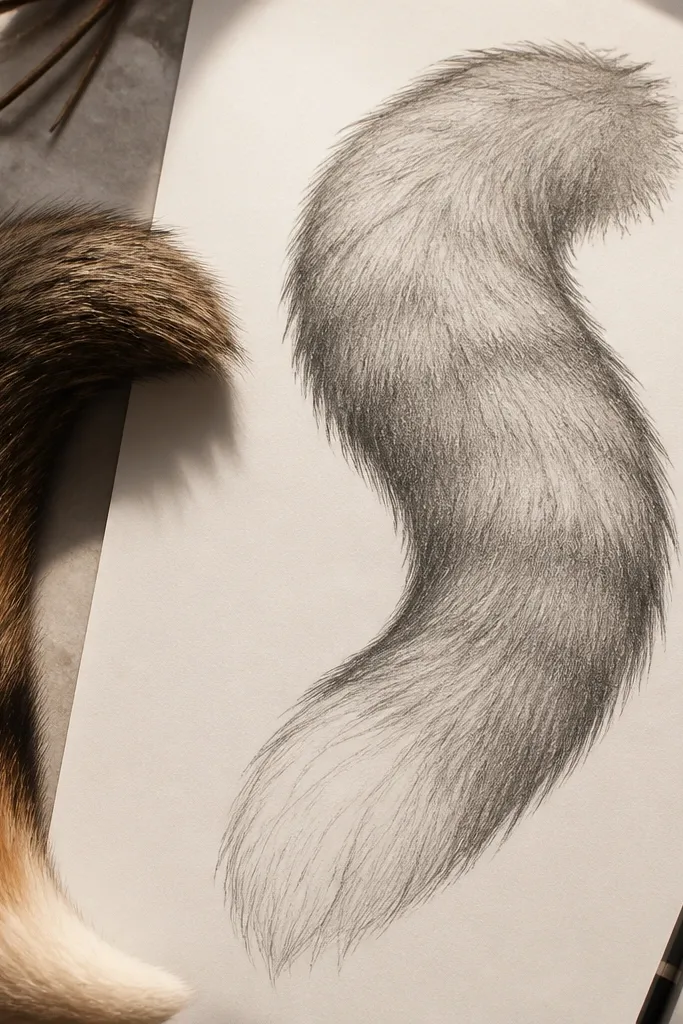
A scrappy tail is another frequent issue. People jump to fur strands and forget the tail is one big volume that wraps around the body. If you draw the tail silhouette as a single mass first, the fur texture looks intentional instead of noisy. Texture bands work like contour lines: they follow the curve and separate light and dark fur areas. This keeps the drawing readable, even at small sizes. It’s also faster, because you’re not drawing individual hairs everywhere.
Block the tail as a single curved shape that connects to the body’s centerline. Add one or two value bands across the tail that follow the wrap — place the darkest band on the underside curve. Then add fur texture with short strokes that bend around the tail’s curve, keeping them denser on the dark band. Finish by adding a few longer guard hairs at the outer edge of the tail for crisp silhouette.
Pro tipBefore you add fur, check the tail silhouette from far away — if it reads as one shape at arm’s length, you’re on track.
AvoidAvoid drawing the tail as a flat ribbon — the underside value band sells the volume.
7. Leg joint placement to stop the fox from looking 'stretched'
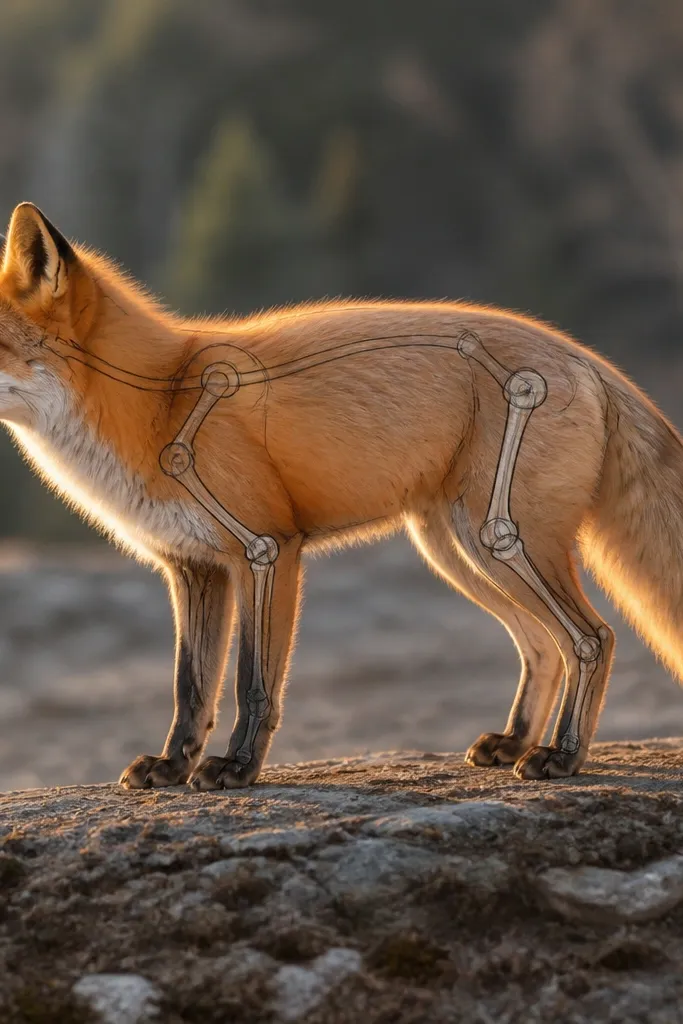
When fox legs look wrong, it’s usually joint placement, not anatomy detail. Many drawings end up with knees too far forward or ankles too low, and the body looks stretched or awkward. The fix is to block the legs as simple cylinders that meet at clear joints, then refine paws last. You’ll keep the pose believable even with minimal fur. This is a lifesaver for beginners who focus on face first and then “sketch the legs in,” hoping they’ll work out.
Draw the torso as an oval or egg shape, then add a centerline through it. Place the hip joint where the torso meets the leg line, then sketch the knee as a marked point that sits slightly above the midpoint of the lower leg. Connect knee to ankle with a simple cylinder line, then add a small foot wedge at the ankle. Only after the joints look right do you add paw pads and fur texture.
Pro tipKeep the paw width consistent with the leg cylinder width — mismatch here makes the whole pose feel off.
AvoidDon’t add paw detail before you lock the knee and ankle positions.
8. Ink-ready line control using a 3-value plan
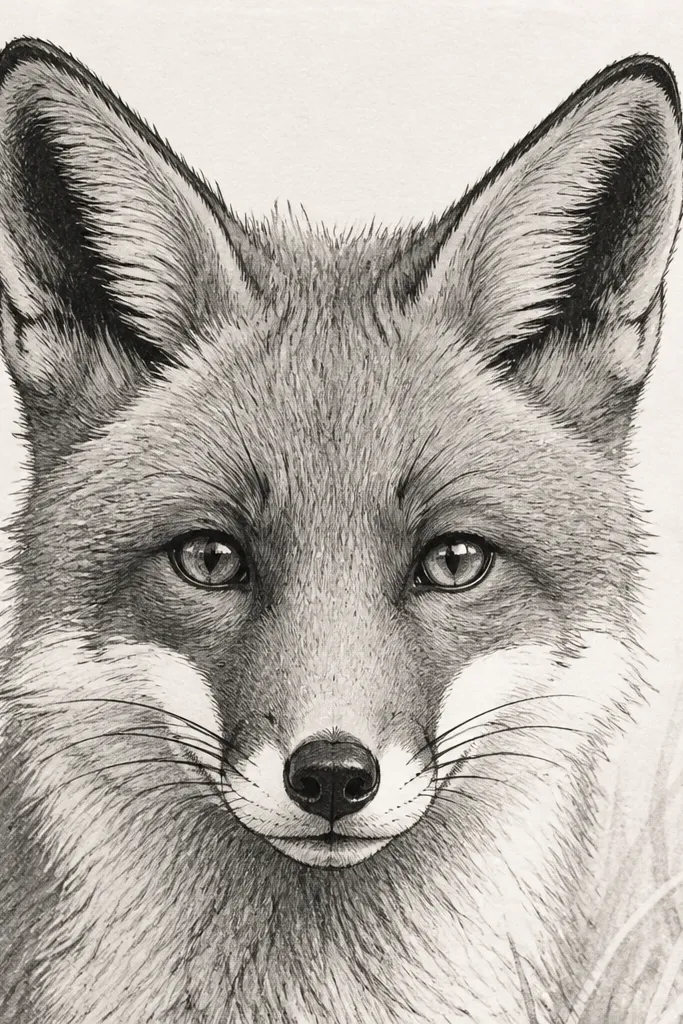
If your ink fox looks muddy, it’s usually because you used one value everywhere. A 3-value plan fixes that fast: light base, mid shading, and one darker accent zone (usually around eyes and nose shadow). This keeps lines crisp and prevents overworking. It also helps you place contrast exactly where the viewer’s eye should land. You’ll get a cleaner read even if you only do a short fur pass. Great for marker and fineliner work where erasing is limited.
Start with a clean construction drawing, then commit to light base shapes only. Add mid-tone shading in two areas: under the cheek and along the forehead planes. Reserve the darkest accents for the nose shadow edge and the inner eye corner, then ink over the construction lines lightly. Finish with a few fur strokes that follow your direction map, but keep them lighter than your darkest shadow accents.
Pro tipDo a quick value check by squinting or covering the page with your palm — if everything is the same darkness, simplify the fur.
AvoidAvoid inking every fur line — pick a few fur marks and let the value plan do the heavy lifting.
9. Pencil-to-finish workflow that prevents smudges
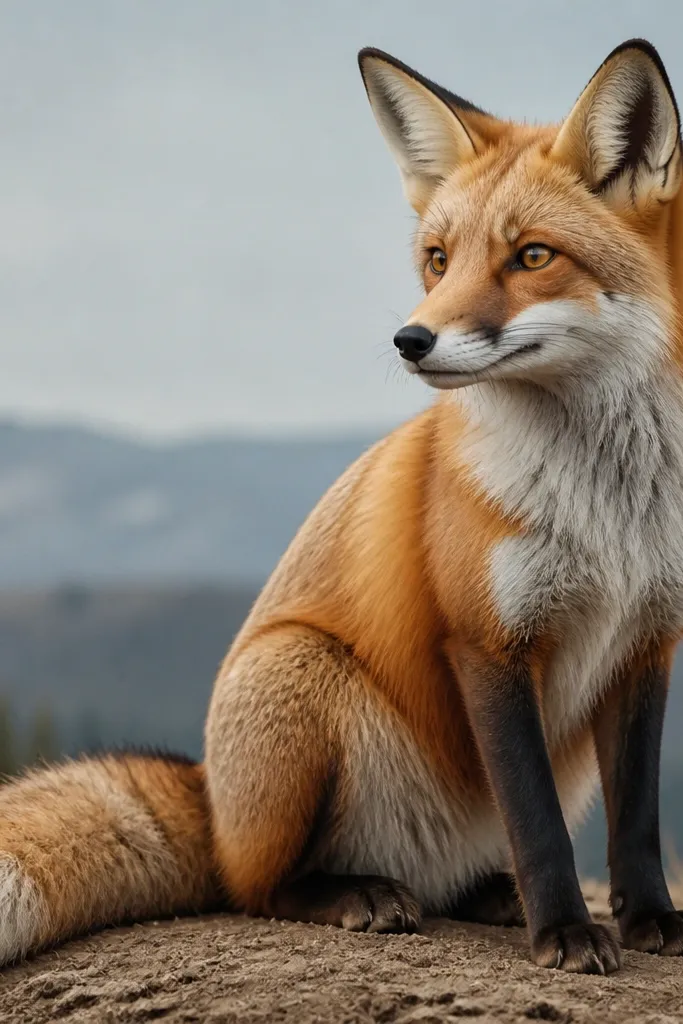
Smudging is a silent killer for fox drawings because fur texture spreads and the face loses its crisp edges. The fix is a workflow that separates construction from texture and controls how much you shade early. You’ll keep the muzzle and eye areas clean, which is where most common mistakes fox drawing happen. This method is also good for layered pencil or charcoal because it prevents reworking the same spot until it turns gray. You can still build detail, just in a controlled order.
Begin with a light HB sketch for construction and block values as very light shapes. Work from face to tail: finish the eye and nose shadow edges first, then move outward to cheeks and forehead fur. Use a blending stump or tissue only on the mid-tone blocks, not on the darkest accents. Once you’re happy, erase any remaining construction marks and add final fur strokes with a harder pencil to keep them sharp.
Use a piece of tracing paper or a clean scrap sheet as a hand rest so you don’t grind graphite into the paper.
Avoid heavy blending over the eye line and nose shadow — that’s where clarity gets lost.



