
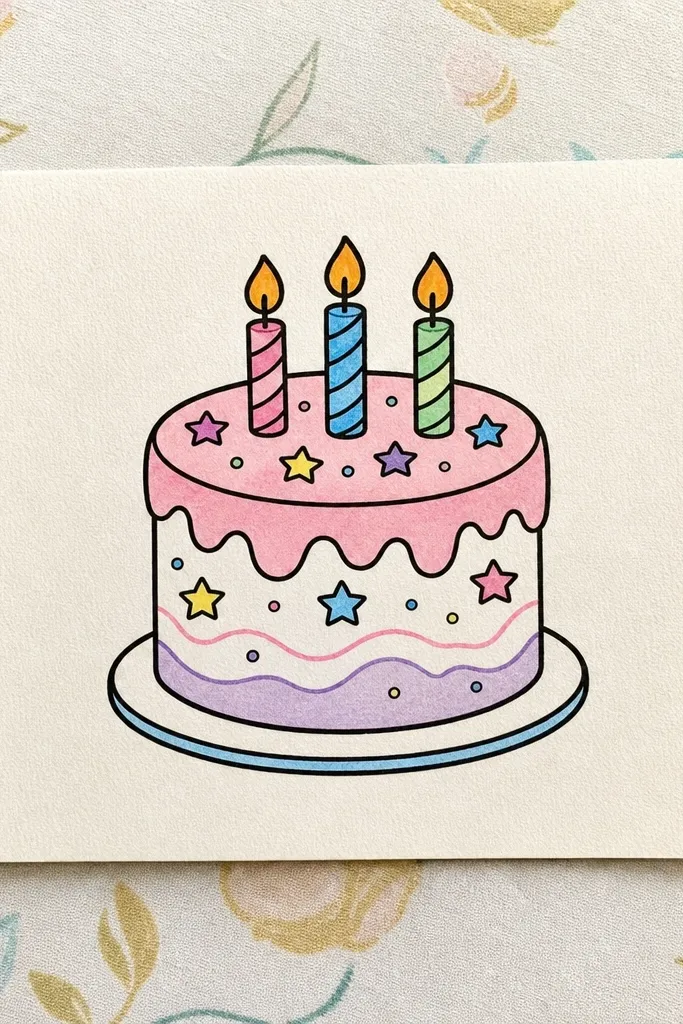
1. Pastel Drip Cake with Three Candles
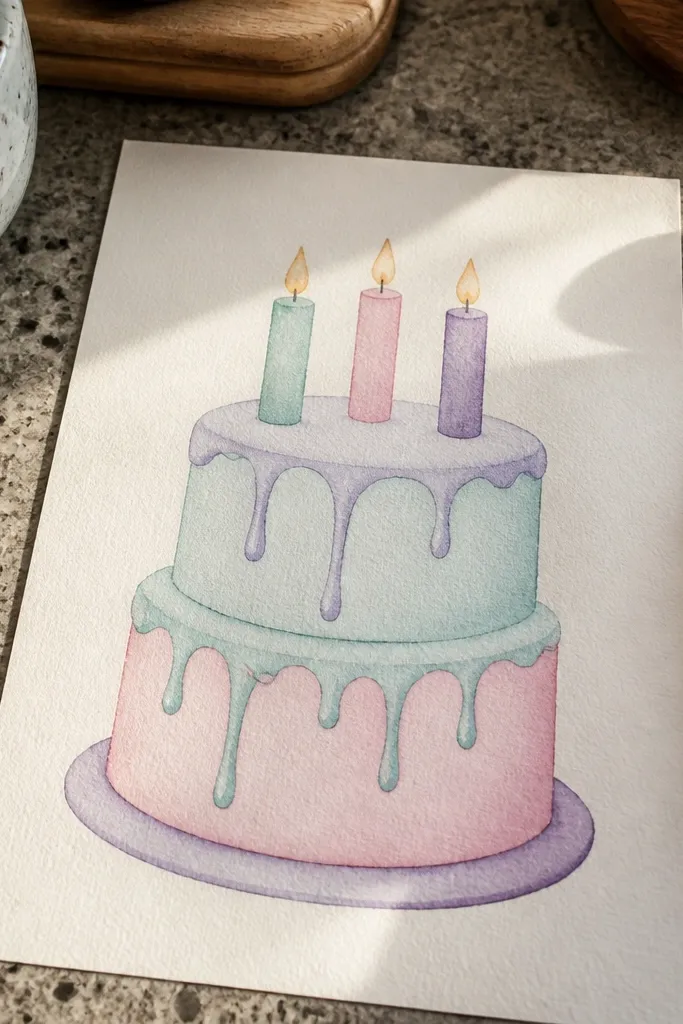
This drawing looks cute because the drip icing creates movement without adding clutter. Start with a simple two-layer cake shape, then draw three even drips that taper at the bottom. The candles are the “readable” feature: thick candle bodies with small flame shapes so the design pops even if your lines are imperfect. Use pastel color pencils or markers for the drips and keep the cake outline solid black for contrast.
Step 1: Draw a rounded rectangle for the top layer and a wider rounded rectangle for the bottom layer, then add a thin frosting band between them. Step 2: From the top frosting band, sketch three drips spaced evenly; each drip should be wider at the top and narrower at the bottom. Step 3: Add three candles in a row, then draw short flames above each candle and a small wax base line. Finish by coloring drips in three soft colors and leaving the cake body mostly white or lightly shaded.
If your drips look uneven, align the drip bottoms to an invisible straight line before you ink.
Avoid adding tiny sprinkles everywhere — the drips already do the work.
2. Rainbow Sprinkle Side-Frosting
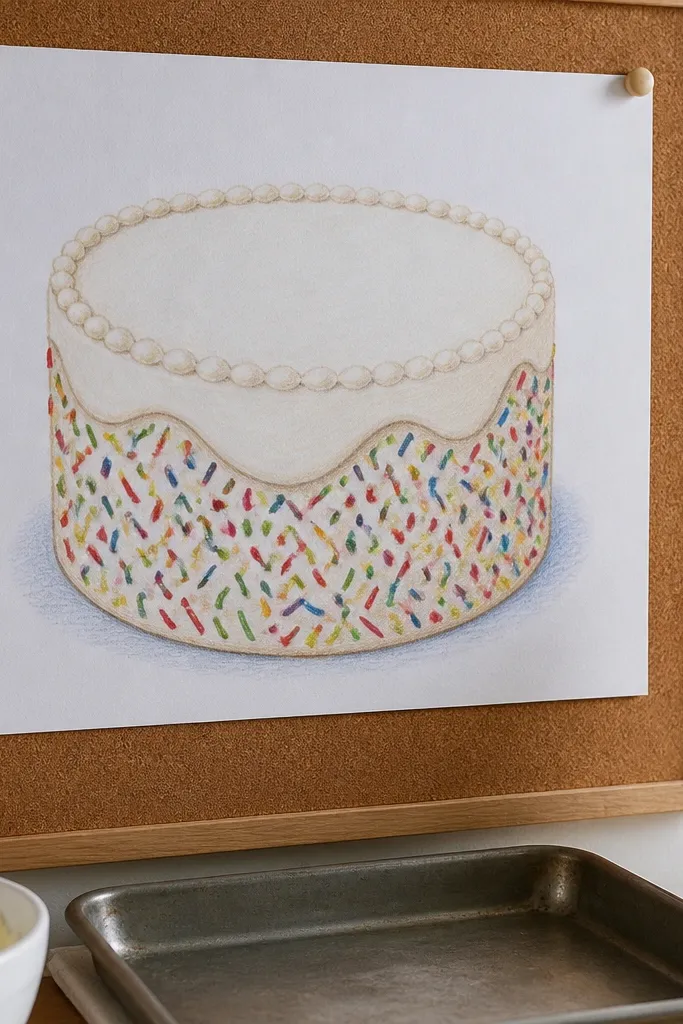
This one is photogenic because it uses color dots as a controlled pattern. The cake stays clean, while the side frosting creates a textured edge that frames the sprinkles. Draw the frosting as a wavy band that wraps around the cake sides, then add short sprinkle strokes that point in different directions. Keep the cake outline thick so the rainbow dots don’t blur into the background.
Step 1: Draw a tall oval cake top with a slightly wider base, then add a simple plate oval under it. Step 2: Sketch side frosting as a wavy band around the cake, leaving small gaps where the cake shows through. Step 3: Add sprinkle shapes — small rounded dashes and dot sprinkles — along the frosting band only. Step 4: Color the sprinkles in a rainbow order and keep the cake frosting mostly white with light shading.
Pro tipLimit sprinkles to one horizontal stripe so it looks intentional instead of random.
AvoidDon’t draw sprinkles on the top surface — it makes the cake read smaller.
3. Single Slice Cake with Big Bow
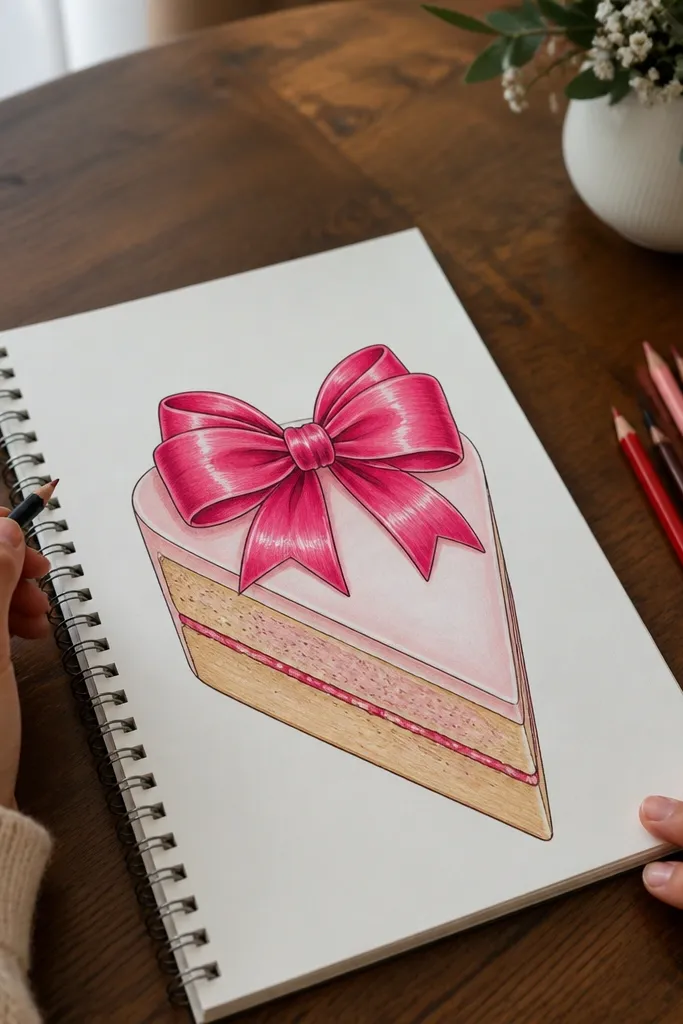
A slice drawing is cute because it instantly looks like a gift moment. This version uses a big bow to create a focal point without needing lots of frosting texture. The slice has clear geometry — triangular wedge with a smooth frosting layer — so it’s easier to copy accurately. Add a few glossy highlights on the frosting to make it look creamy in photos.
Step 1: Draw a triangular cake slice with rounded corners, then add a frosting layer along the top edge and down the front face. Step 2: Sketch a ribbon bow on top: two loops with a small knot in the center, plus thin ribbon tails. Step 3: Add three small dots or tiny star sprinkles near the frosting edge. Step 4: Color the bow one strong color (pink or teal) and shade the frosting with light yellow or pale peach.
Use the bow as your scale guide; if the bow feels too small, the whole drawing will look off.
Avoid cluttering the slice with too many candle-like details — the bow already carries the cuteness.
4. Cupcake with Ruffled Frosting Swirls
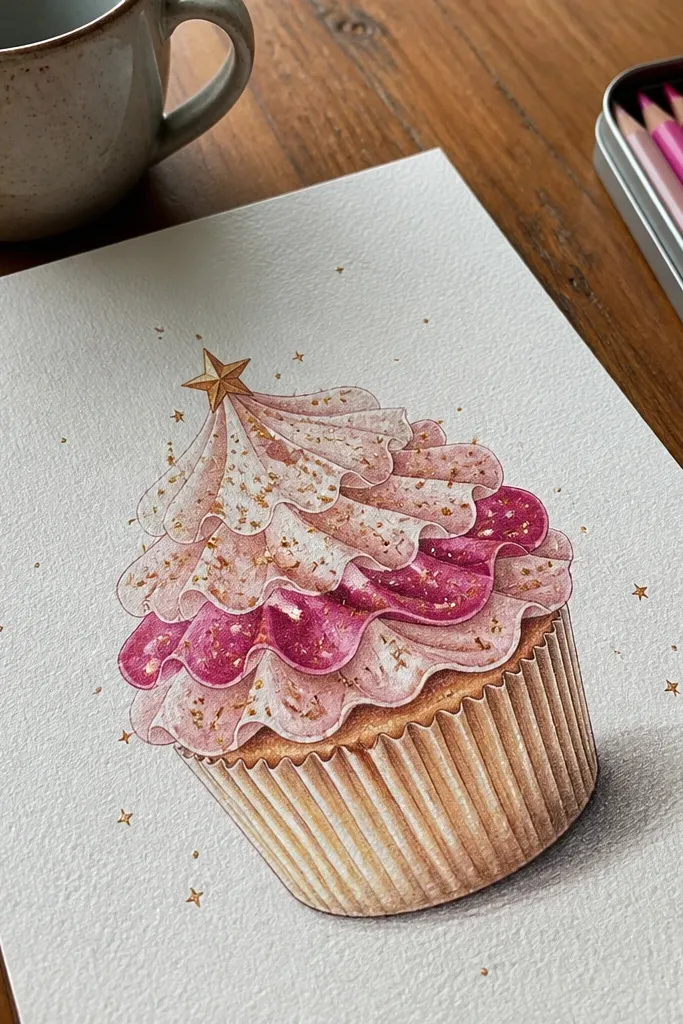
Ruffled frosting gives texture without complicated linework. This cupcake drawing uses repeating scallops around the top, then a few dots or tiny stars for sparkle. It’s great for beginners because the ruffles are a pattern you can keep consistent. When colored, the ruffles look dimensional, especially with one darker shade along the scallop edges.
Step 1: Draw a cupcake wrapper as a rounded cup with a slightly flared top, then add a gentle inner curve for the frosting base. Step 2: Create ruffles by drawing a ring of small scallops around the top frosting, each scallop touching the next. Step 3: Add a few dots on the frosting and two tiny curved lines as highlights. Step 4: Color the wrapper in a light pattern and color the ruffles with two shades of the same color.
Pro tipKeep scallop size consistent by drawing one ruffle shape first, then repeating it around the circle.
AvoidDon’t make the scallops too tall or they’ll look like flames instead of frosting.
5. Chocolate Bar Cake with Tiny Cocoa Drips
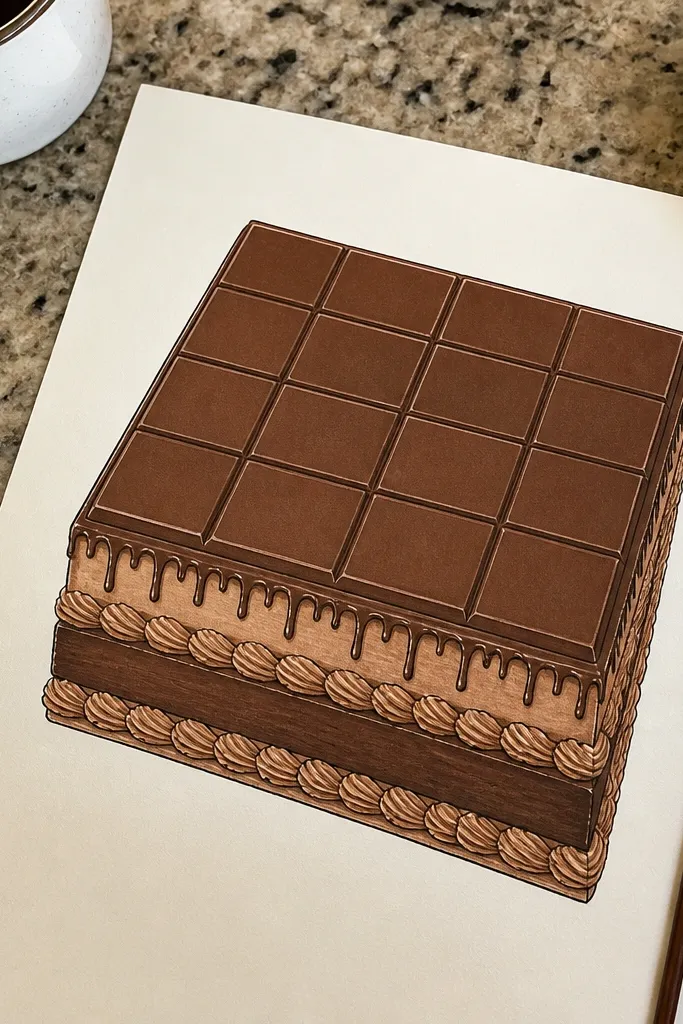
This drawing looks good because it mixes solid shapes with tiny drips. The “chocolate bar” top gives a clean graphic block, while the small drips add charm. Use short vertical drip lines that stop at the first frosting band, not long drips that dominate the whole cake. It’s a nice change from pastel drips if you want a darker, trendy look.
Step 1: Draw a two-layer cake with thick outer outlines, then add a rectangle “chocolate bar” on top with a few thin horizontal lines. Step 2: From the bottom of the bar, draw 5-7 short vertical drips, each one slightly different length. Step 3: Add a simple plate oval and a small heart or dot near the side frosting. Step 4: Color everything with cocoa browns and leave the drips slightly darker than the frosting.
Make the drip count odd (5 or 7) — it balances the top without looking random.
Skip big sprinkles here; the bar top already gives the visual structure.
6. Minimal White Cake with Outline Candles
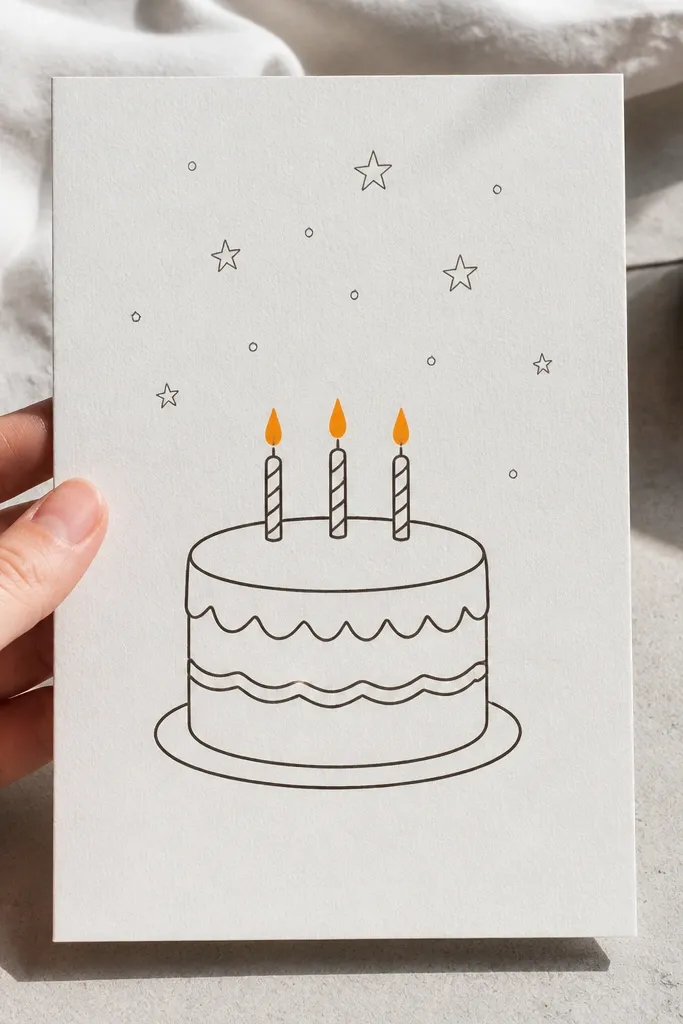
This is the “clean and cute” option when you don’t want heavy coloring. The cake is mostly white space, and the candles are outlined, not shaded. Tiny stars around the top make it feel celebratory without adding mess. Use a single ink color (black or dark brown) and add a small accent color to the flames only.
Step 1: Draw a simple two-tier cake using smooth rounded rectangles and a single line frosting band. Step 2: Add two or three candles as simple rectangles with rounded tops and small flame shapes. Step 3: Place 6-10 tiny stars around the top tier, spaced so they don’t overlap the candles. Step 4: Color only the flames with bright yellow/orange and leave everything else unfilled.
If lines look wobbly, redraw only the outer contour — leave internal stars lighter.
Avoid shading the whole cake; it kills the clean look.
7. Berry Smash Cake with Half-Smeared Frosting
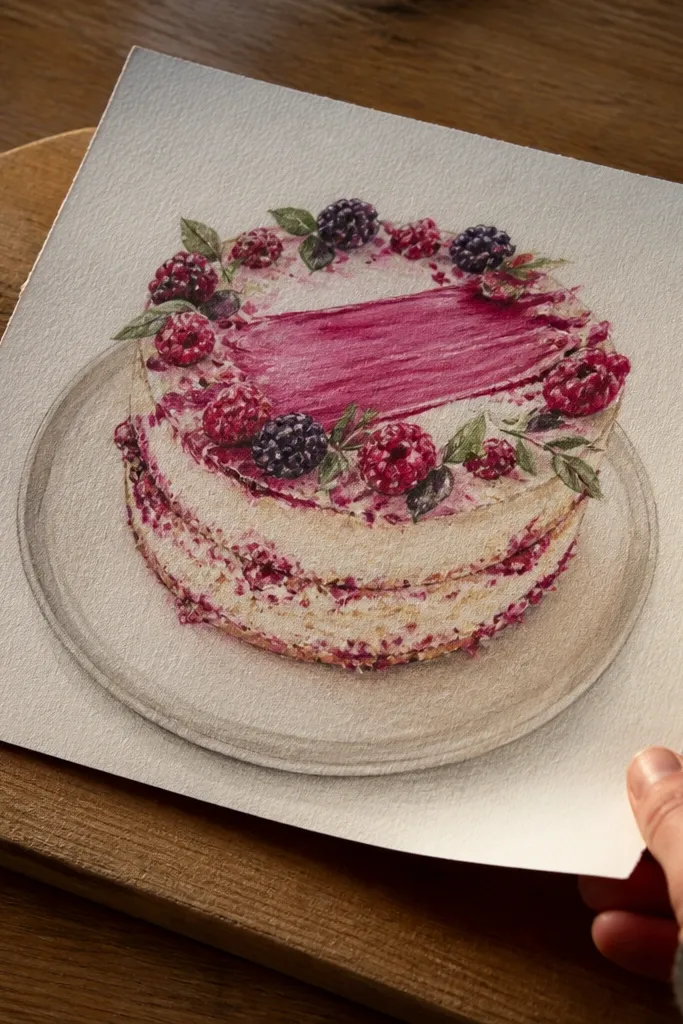
This drawing looks handmade and cute because the frosting is intentionally imperfect. The top has a soft smear that looks like it was swirled and then dragged, and that makes the cake feel real. Add a few berry dots and small leaf shapes to frame the “smear.” It’s perfect for birthdays with a fruity theme or for anyone who hates perfect symmetry.
Step 1: Draw a two-layer cake with a slightly lopsided top curve so it doesn’t look machine-made. Step 2: Create frosting by drawing a thick blob on top, then dragging a few curved lines through it to show smear streaks. Step 3: Add 5-7 berry dots with tiny highlight circles and two small leaf shapes. Step 4: Color berries in red or purple and use a pale pink or cream for frosting with darker smear lines.
Use one direction for smear streaks; random directions make it look accidental.
Don’t add sprinkles on top — berries already fill the space.
8. Birthday Banner Cake Topper
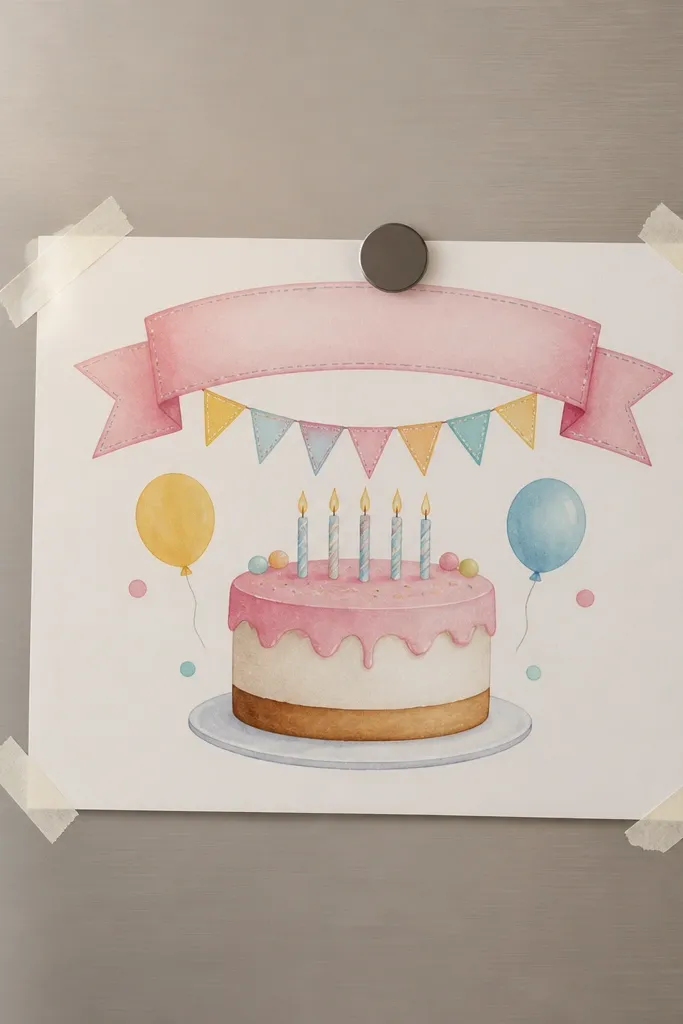
A banner topper makes the drawing feel like a real birthday moment without writing actual names. The cake stays simple, and the banner provides shape, curves, and a clear focal point. Draw the banner as a curved ribbon with small triangular flags or stitched edges. Add two tiny balloons or dots behind it to create depth in a low-effort way.
Step 1: Draw a single cake layer with a thick outline and a smooth frosting cap line. Step 2: Add a banner across the top: two ribbon ends hanging slightly, with 3-5 small flag triangles along the middle. Step 3: Place two small balloons or dot clusters behind the banner for a background accent. Step 4: Color the banner in two contrasting colors and keep the cake frosting pale so the banner reads instantly.
Pro tipKeep the banner height small compared to the cake — if it’s too tall, it crowds the cake.
AvoidAvoid detailed letters; blank banner shapes look cleaner in line drawings.
9. Candy Cane Stripe Cake with Bow
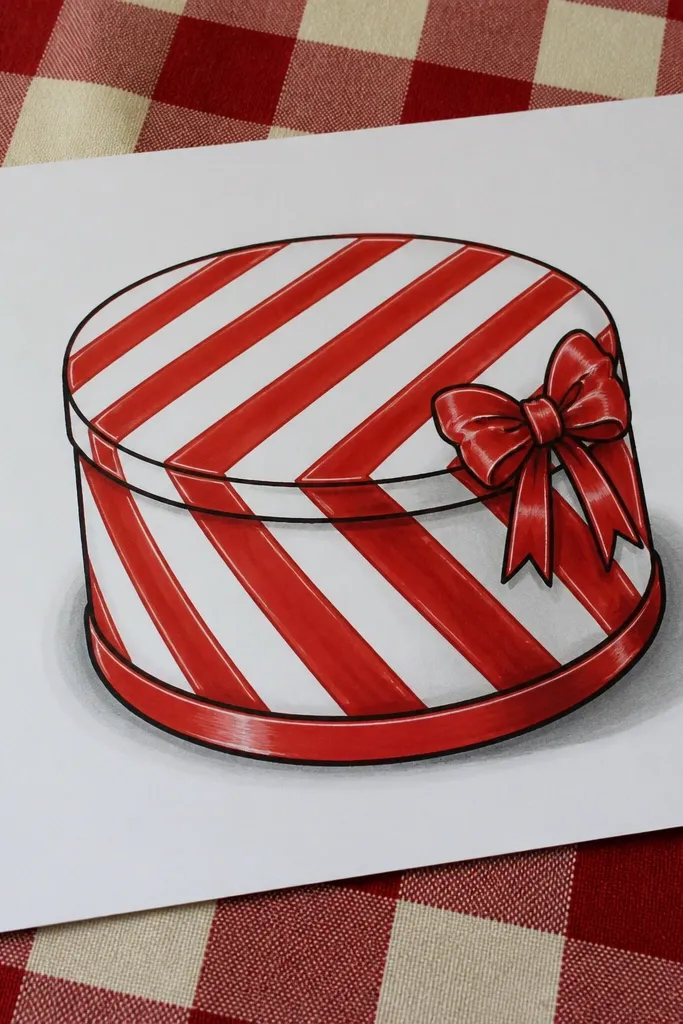
Stripe frosting looks graphic and cute because it creates crisp movement. This drawing uses candy-cane stripes on the frosting top and a small bow on one side. The stripes also hide minor line mistakes because the pattern guides your eye. Choose red and white with black outlines for the cleanest look.
Step 1: Draw a two-layer cake with a flat-ish top frosting slab. Step 2: On the top slab, draw diagonal stripe lines across the frosting, keeping spacing even. Step 3: Add a small bow on the front edge of the top layer, with two loops and a knot. Step 4: Color alternating stripes red and leave spaces white, then lightly shade the cake sides with a pale gray or brown.
Pro tipUse a ruler for the stripe spacing if you’re drawing on paper for transfer.
AvoidDon’t extend stripes down the sides; keep them on top for a cleaner read.
10. Sunflower Cake with Petal Border
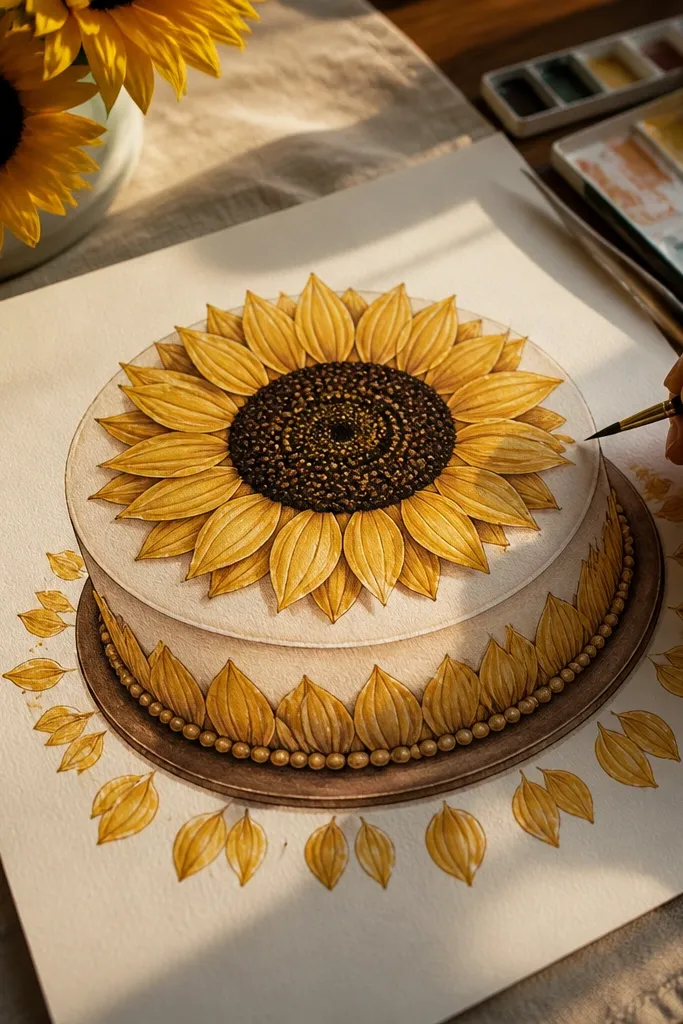
A sunflower theme makes the cake drawing feel cheerful and different from the usual candles-and-sprinkles look. The petals give you a built-in border, so the composition doesn’t feel empty. Draw the sunflower on top as a simple circle with layered petal shapes, then add a few extra petals around the cake. This is a great pick if you want something that looks bright even in limited colors.
Step 1: Draw the cake base as a simple two-layer stack with frosting on top. Step 2: On the top, draw the sunflower center as a filled circle, then add 12-14 petal shapes around it. Step 3: Add 6-10 small petal shapes around the cake edges as a border. Step 4: Color the petals yellow and the center brown, then add tiny dot seeds inside the center circle.
Keep petal count consistent on the sunflower; it looks intentional in photos.
Avoid too many small details in the center — keep it bold.
11. Ghost Candle Cake with Cute Face
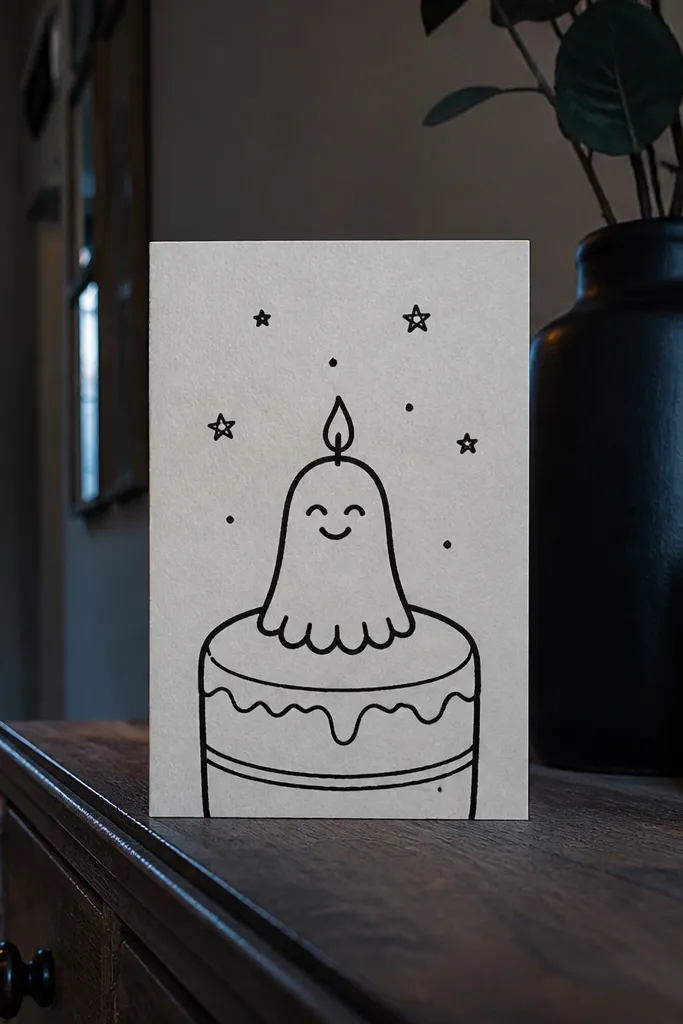
This is the “cute character” drawing that still reads as cake art. The cake is simple, but one candle turns into a ghost with a tiny face, which makes the whole thing memorable. Keep the ghost candle outline thick, and use two small curved eyes and a smile. Add a few tiny stars above the candle so it feels playful instead of spooky.
Step 1: Draw a two-layer cake with a frosting top line and a simple plate. Step 2: Replace one candle with a ghost shape: a rounded rectangle body with a wavy bottom. Step 3: Add a simple face on the ghost candle and draw a small flame above like a light. Step 4: Add 5-7 small stars around the ghost candle and color the ghost outline in black with a light gray fill.
Make the ghost bottom waves 3-4 bumps total so it stays readable at small size.
Don’t add a full background scene — keep it to stars and the cake.
12. Teacup Cake on a Saucer
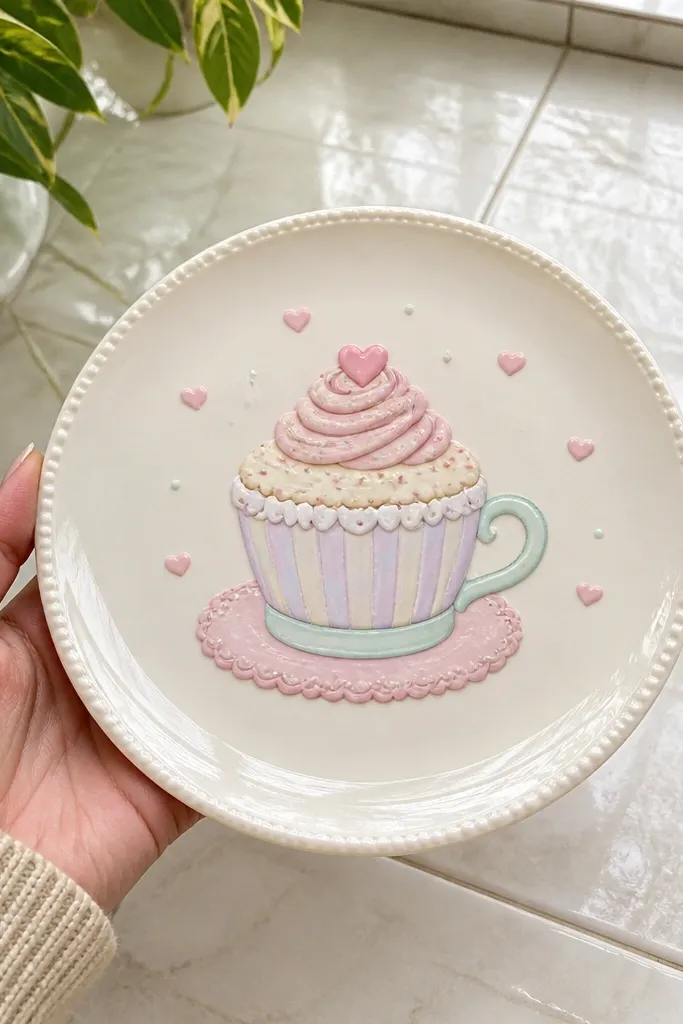
This drawing feels whimsical because the cake sits like a teacup treat. The trick is to draw the saucer first so your cake has a stable base. Then make the “cup” shape with frosting on top and a small handle. Add a few tiny dots or mini hearts around it to keep it celebratory without crowding.
Step 1: Draw a saucer as a wide oval with a rim line and a smaller inner oval. Step 2: Draw the teacup body as a rounded cup sitting on the saucer, then add a handle on one side. Step 3: Add frosting on top as a scalloped ring and a small drip at the front. Step 4: Color the cup with a pastel tone and leave the frosting white with a faint shadow line.
Pro tipUse one consistent rim thickness for saucer and cup so it looks designed, not random.
AvoidAvoid drawing too many sauce-like swirls; one drip is enough.
13. Geometric Party Confetti Cake
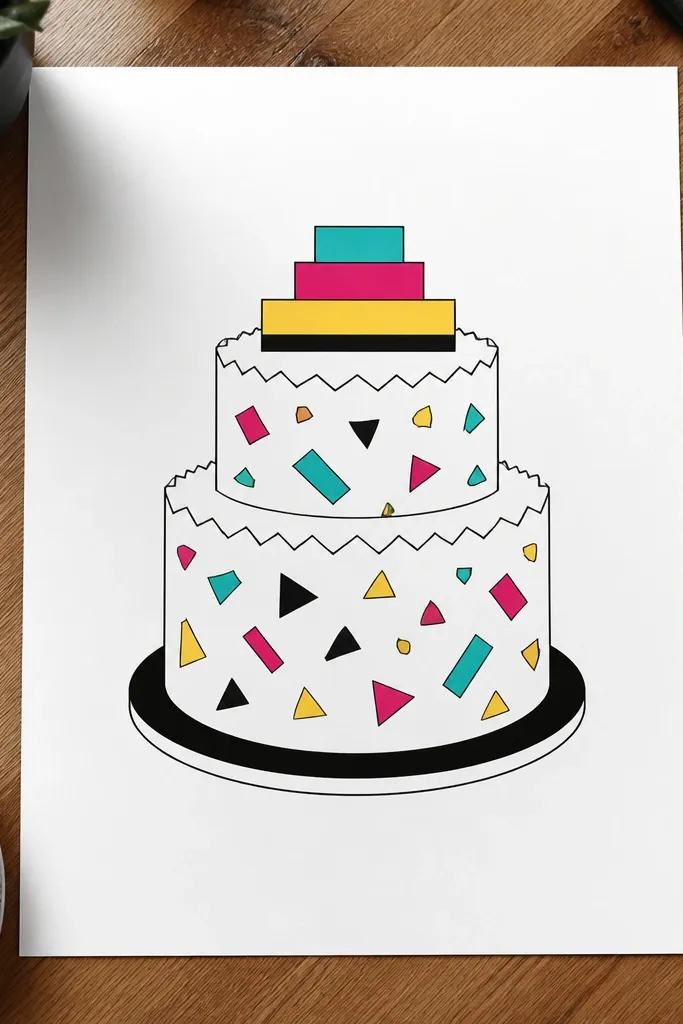
Geometric confetti makes your drawing look modern and clean. The cake itself is drawn in simple shapes, and the “party” comes from triangles and rectangles around it. Use a frosting top that has clean zigzags or a stepped edge, then scatter confetti shapes in 3-4 colors. This one photographs well because the colors are bold and separated.
Step 1: Draw a two-layer cake using rounded rectangles with a frosting band on top. Step 2: Add a geometric frosting edge: draw short zigzag peaks across the top band. Step 3: Scatter confetti around the cake — triangles, small rectangles, and dots — keeping most shapes near the top half. Step 4: Color confetti with 3-4 bright colors and keep the cake frosting white or light gray.
Limit confetti colors to 4 so the image stays crisp.
Don’t fill the entire page — leave white space around the confetti.
14. Polka Dot Candle Party Cake
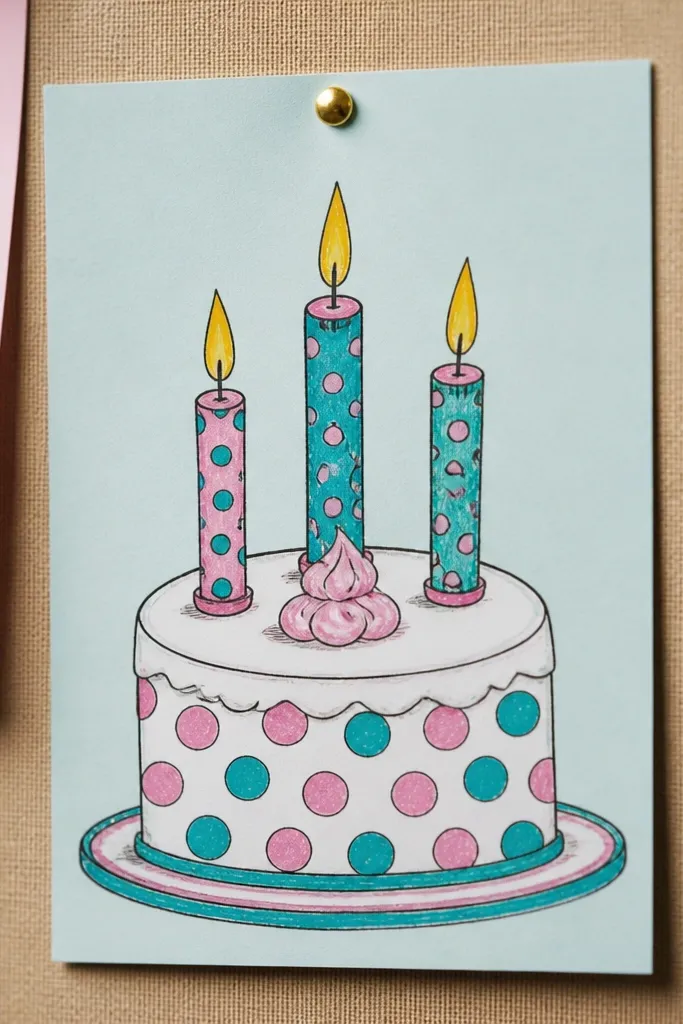
Polka dot candles are cute because they bring a pattern into the smallest area — candles. The cake can stay simple, which makes copying easier and keeps the design readable. Draw three candles with different heights, then fill each candle with polka dots in two colors. Add one small frosting swirl on top so it doesn’t look flat.
Step 1: Draw a cake with two layers and a frosting top line, then add a single swirl on top. Step 2: Draw three candles: two rectangles and one slightly taller one, each with a small flame shape. Step 3: Fill each candle with polka dots — keep dots evenly spaced and consistent in size. Step 4: Color dots in two coordinated colors and keep the candle body a light base color so dots pop.
Pro tipDot consistency matters more than perfect spacing; aim for uniform dot size.
AvoidAvoid dotting the cake frosting too — keep the pattern only on candles.
15. Chocolate Swirl Top with Gold Dots
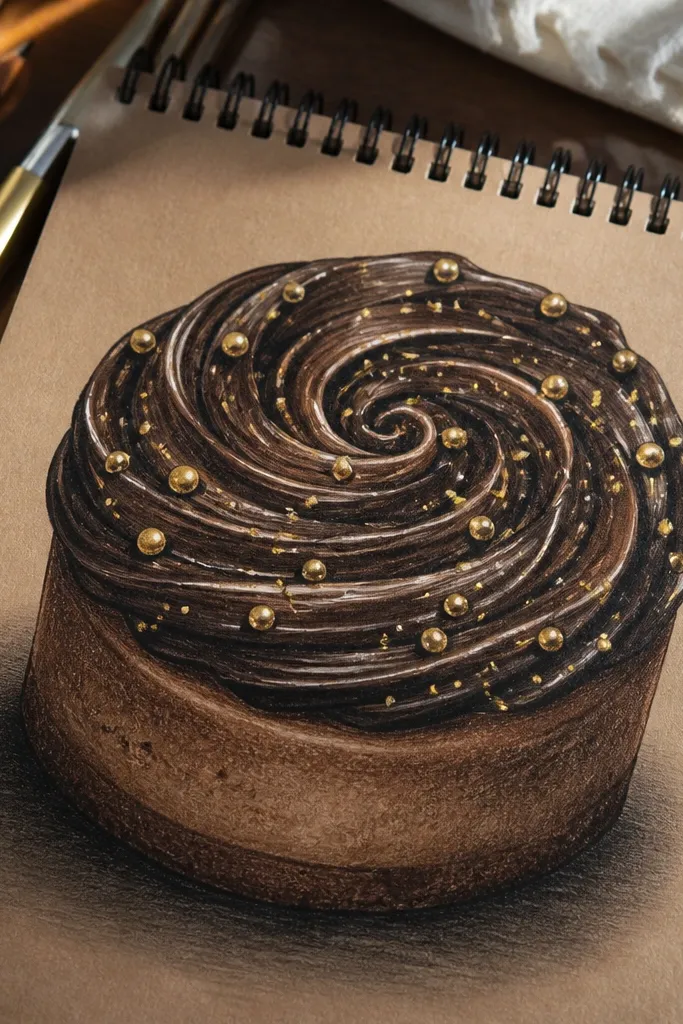
This one looks luxe because the frosting swirl gives movement and the gold dots add a celebratory sparkle. You don’t need glitter — just a metallic gold marker or gel pen for the dots. The swirl should be thick and bold, with a few curved highlight lines so it looks creamy. Keep the cake body simple and let the top do the work.
Step 1: Draw a two-layer cake with thick outlines and a smooth frosting top cap. Step 2: Add a large chocolate swirl on the top: draw a spiral with thick outer lines and a couple inner curves. Step 3: Place 8-12 gold dots around the swirl and near the frosting edge. Step 4: Color swirl in dark brown and add a lighter brown highlight stroke inside the swirl line.
Gold dots look best when you keep them small and evenly spaced, not oversized.
Don’t add too many swirls — one big top swirl reads better.
16. Strawberry Shortcake with Leafy Top
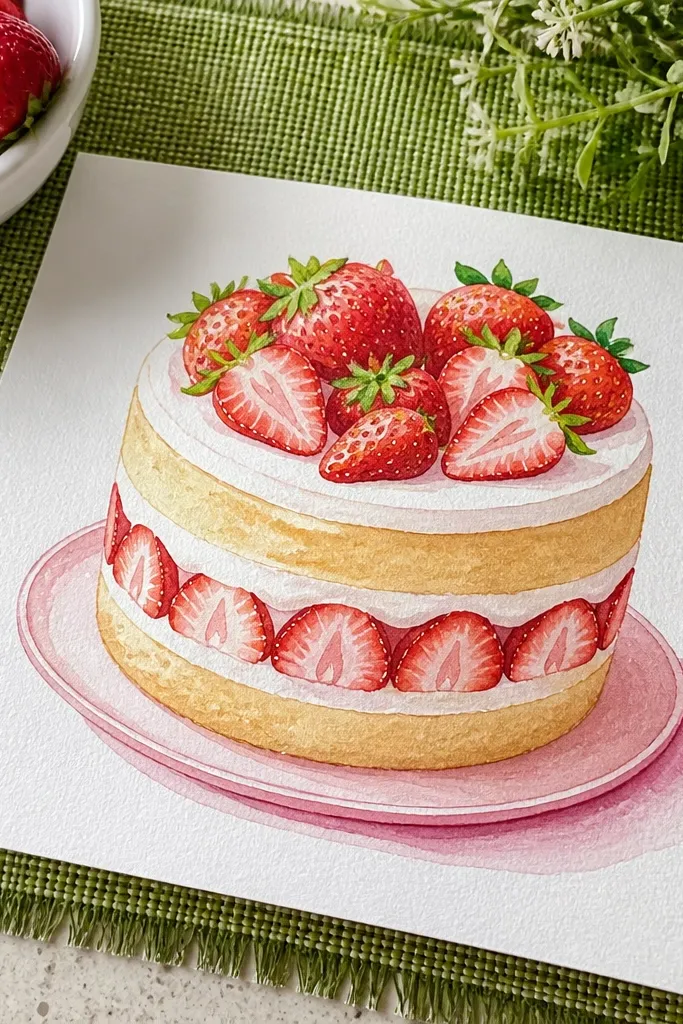
Shortcake drawings look cute when the toppings are stacked clearly. This design uses strawberry slices with visible seeds and a few tiny leaves, so the top looks full without turning into a mess. The cake layers are simple and thick, which keeps the drawing readable. It’s a great choice for spring birthdays or anyone who loves fruit themes.
Step 1: Draw a round shortcake with two layers and a wavy frosting edge between layers. Step 2: Add 6-8 strawberry slices on top, each slice as an oval with small seed dots and a red fill. Step 3: Add 2-3 green leaf shapes near the strawberries and a small cream dollop between them. Step 4: Color strawberries with red plus a darker red outline on the edges, then lightly shade the cream in pale yellow or off-white.
Seed dots should sit along the curve, not scattered randomly across the whole slice.
Avoid adding other berries or sprinkles; strawberries are enough.
17. Birthday Cake with Balloon Arch Behind
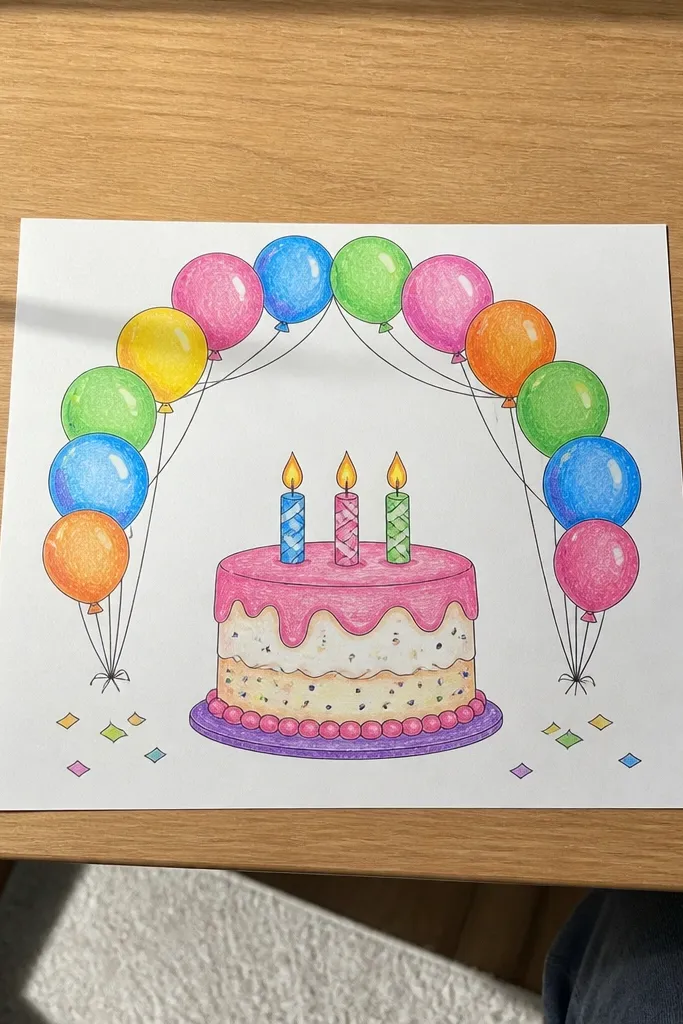
A balloon arch makes your cake drawing look like a full party scene while still staying centered. The key is layering: balloons behind the cake, cake in front, and no overlapping lines that tangle. Draw the balloons as simple circles or ovals with thin strings that meet at the top center. Then add a couple small confetti dots near the base to keep it celebratory.
Step 1: Draw the balloon arch first: two curved lines forming an arch, then add 7-9 balloon shapes along it. Step 2: Add balloon strings that meet near the bottom center, then draw the cake in front of the arch. Step 3: Sketch the cake with two layers and a frosting top, plus one neat drip or swirl. Step 4: Color balloons in 3-4 colors and keep the cake frosting pale so it stands out against the arch.
Keep balloon strings thin and straight; thick strings make it look messy fast.
Avoid placing balloons in front of the cake — they should frame it.
18. Simple One-Layer Cake with Star Sprinkles
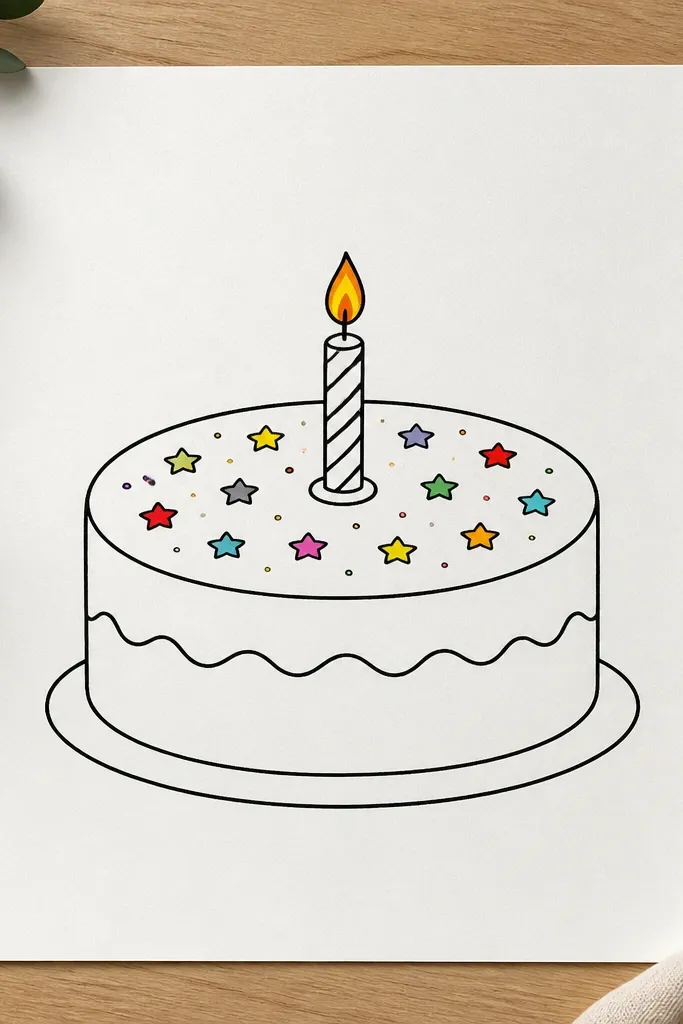
This is the most copy-friendly option when you want a cute birthday look without overthinking frosting. One-layer cakes are easier to draw cleanly, and star sprinkles give instant celebration. Add a single candle so the image reads clearly as “birthday” without needing a full set of candles. Keep the frosting line smooth and use stars only on the top edge.
Step 1: Draw a one-layer cake as a rounded rectangle with a curved top edge and a thin frosting cap. Step 2: Add one candle in the center with a small flame and a short wick line. Step 3: Place 10-15 star sprinkles along the frosting cap only, varying sizes slightly. Step 4: Color the candle base in a light tone and color the stars in matching bright colors, leaving the cake mostly light.
Pro tipTiny star sprinkles look best when you keep them consistent in outline thickness.
AvoidAvoid sprinkling stars on the sides — it makes the cake feel smaller.
19. Frosting Ruffles Cake with Heart Topper
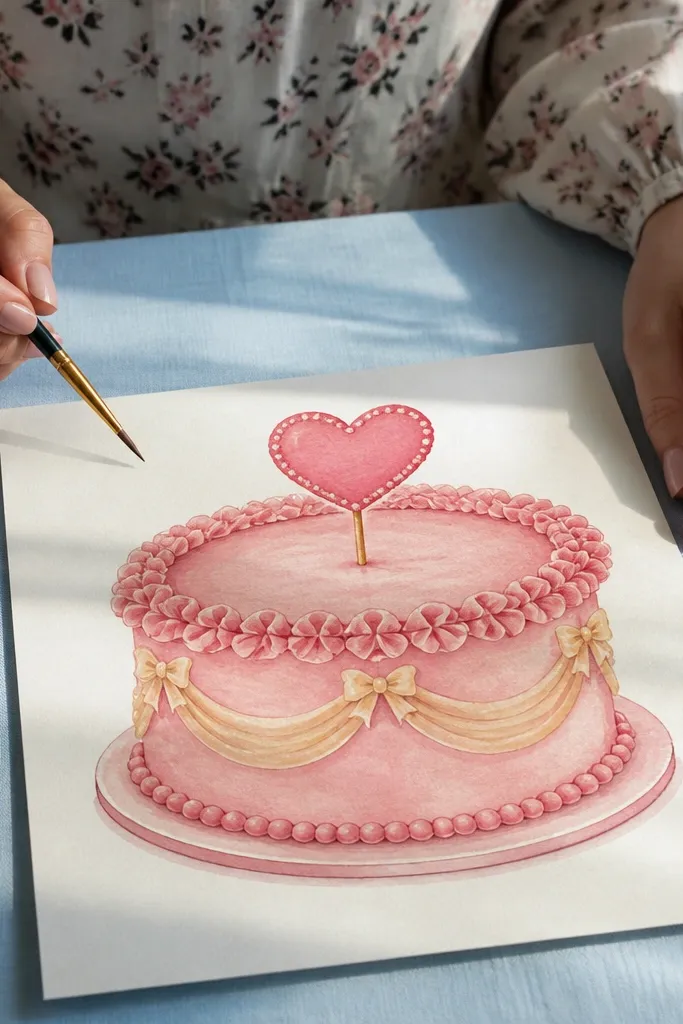
Ruffles around the edge make the cake feel soft and celebratory, and a heart topper gives it a clear theme. This drawing works because the ruffles are a frame, not a whole separate pattern to manage across the entire cake. You draw one ruffle strip around the top border, then a simple heart centered above. It’s sweet, clean, and easy to copy accurately for cards and cake boards.
Step 1: Draw a two-layer cake with a wide top and a thin frosting band. Step 2: Create ruffles by drawing small U-shapes or scallops along the top edge, forming a single continuous band. Step 3: Draw a heart on top centered, with a small highlight line on the heart. Step 4: Color the heart one strong color and color ruffles in a pale frosting shade with a darker edge line.
If ruffles look shaky, draw the band first lightly in pencil, then ink over it once.
Don’t add additional toppers like balloons — the heart already anchors the design.
20. Mini Cake Stand with Cupcake Pair
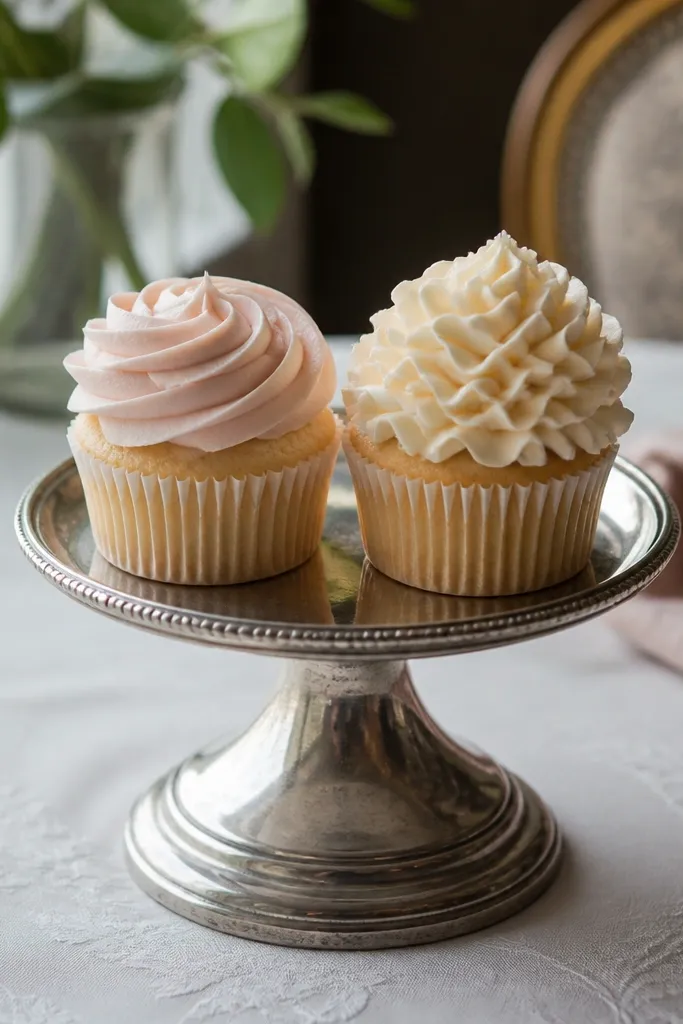
This drawing is cute because it looks like a dessert table miniature. The cake stand gives structure, and two cupcakes create symmetry without needing a full big cake. The cupcakes can have different frosting textures, which keeps the image interesting while still being easy to draw. It’s ideal for a birthday invitation card where you want the illustration to feel playful and bouncy.
Step 1: Draw the stand as a base oval with a vertical support line and a round top plate. Step 2: Place two cupcakes on the plate, left and right, with frosting tops and small wrapper lines. Step 3: Add different frosting styles: one cupcake with ruffles, one with a smooth swirl. Step 4: Color wrappers in two contrasting colors and add tiny dots on each frosting top.
Pro tipKeep cupcake spacing even so the stand looks balanced in photos.
AvoidAvoid adding a third dessert — two cupcakes is the sweet spot for clarity.



