
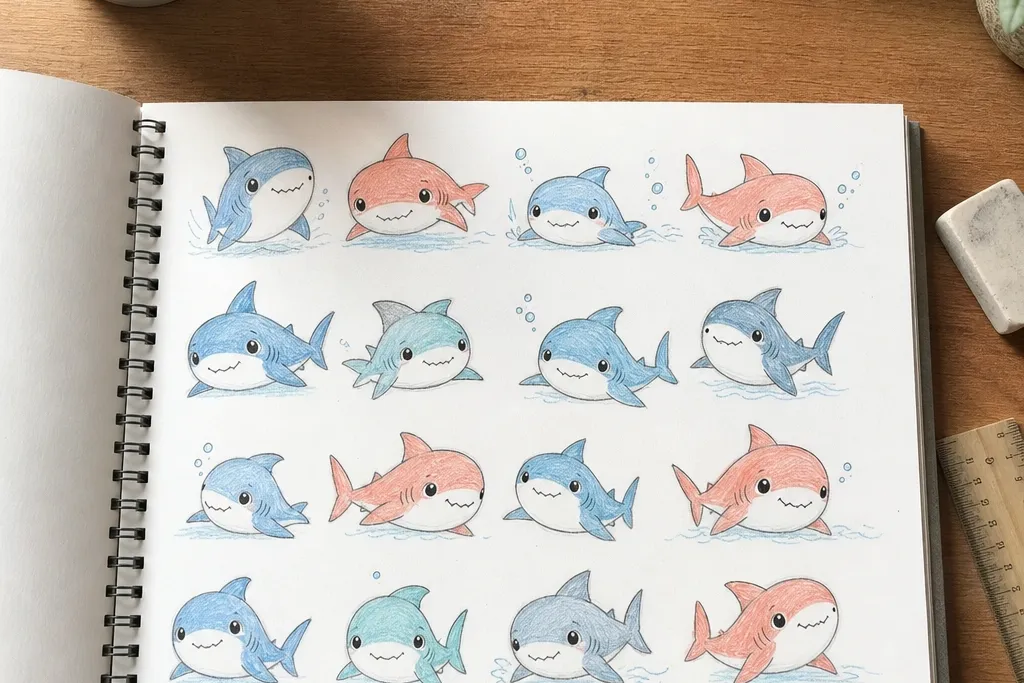
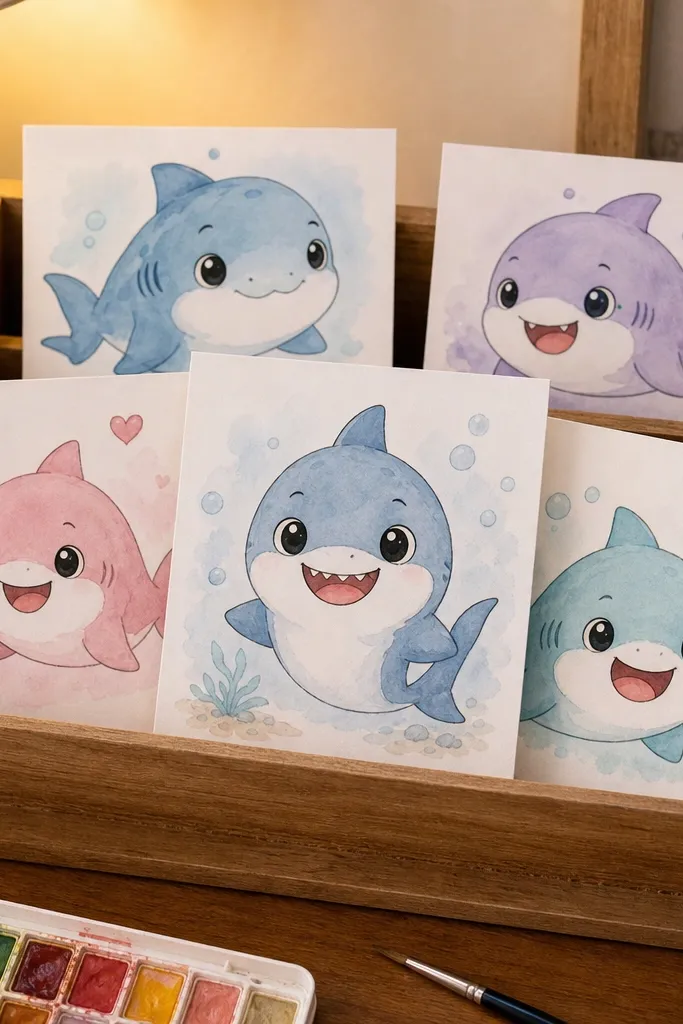
1. Bubble Buddy Shark with Two Big Eyes
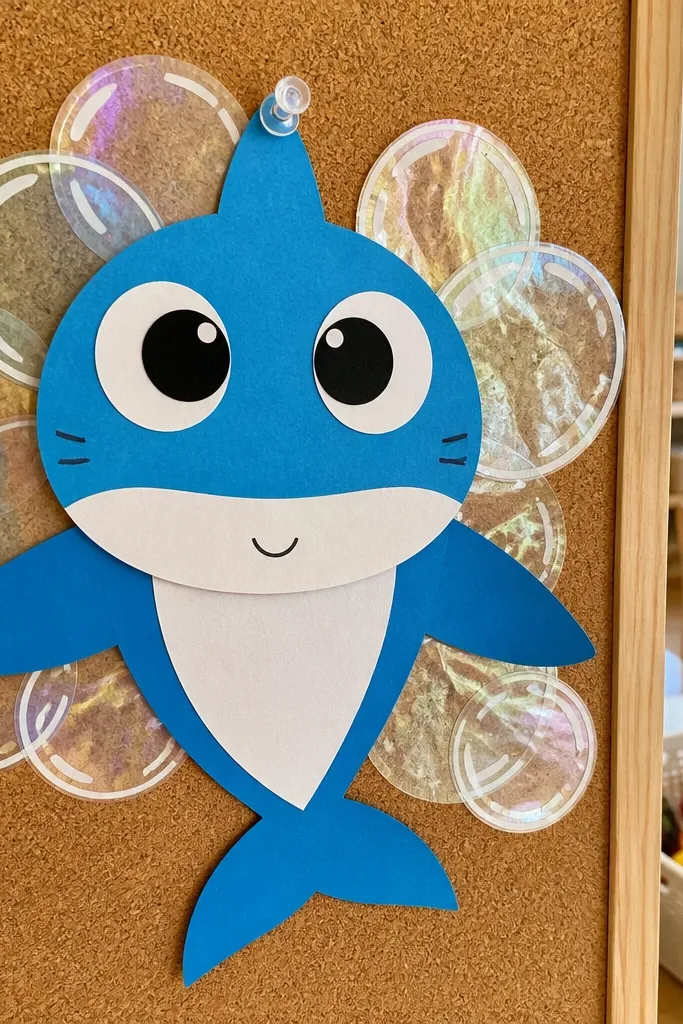
This one is adorable because the shark’s face is basically a cartoon mask. The eyes are oversized and placed high on the head, so it reads as curious instead of predatory. The mouth is a short, curved line with a tiny smile, and the body is a simple oval that keeps everything round. Add bubbles as the background detail and you get instant charm without needing complicated shading. It’s great for stickers, quick classroom art, and any card where you want the shark to look friendly in under 10 minutes.
Step 1: Draw a large oval for the head and add a smaller rounded body underneath. Place two big circles for eyes near the top, then add tiny pupils centered so the shark looks straight at the page. Step 2: Add a small dorsal fin on top and a triangle tail on the back edge. Draw a short curved smile and then scatter three bubbles around the head — two small and one medium. Step 3: Outline with a 0.8 pen, erase pencil lines, then color the shark with light gray and a darker gray for a simple fin and tail shadow.
Keep the mouth shorter than you think; if the jaw takes up half the face, it stops looking cute.
Don’t draw a full row of teeth — one tooth peak is enough.
2. Kawaii Shark in a Teacup
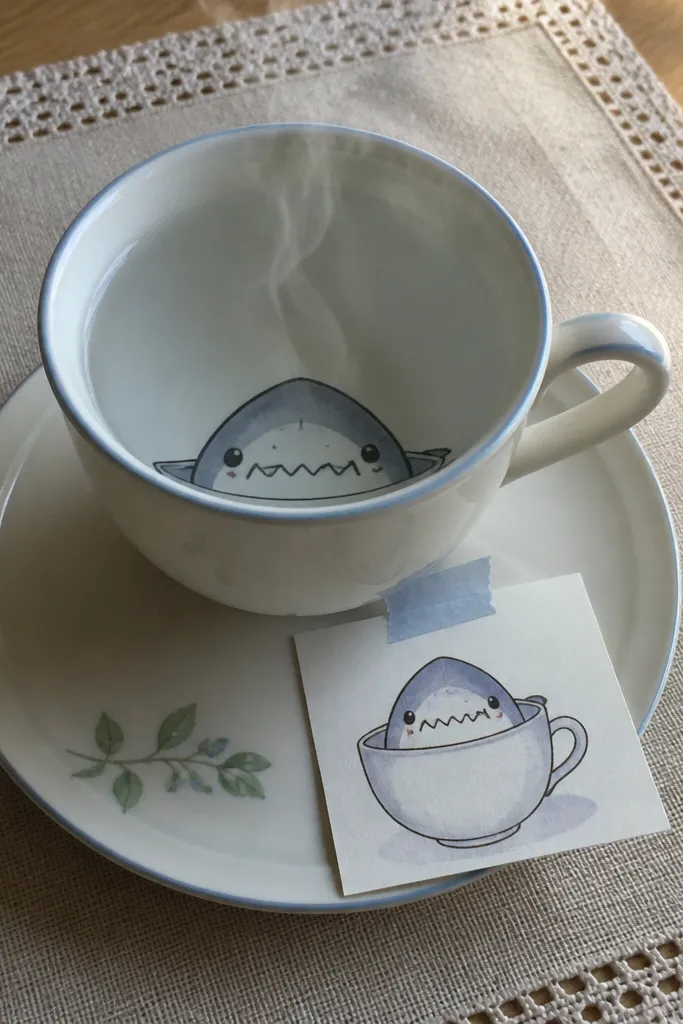
This drawing is cute because the teacup hides most of the shark, so it looks smaller and safer. You’re basically using the cup as a “frame,” which makes the shark look like it’s being served like a little character. The steam lines add movement and make it feel cozy, not aggressive. Use a simple fin and a rounded snout so the face stays soft. It works perfectly for Mother’s Day cards, tea-themed decor, and any project where you want a shark that feels friendly and charming.
Step 1: Draw a teacup shape first — a wide oval top and a slightly narrower base. Add a small handle on the right with a simple curved line. Step 2: Inside the cup, draw only the shark’s head and one fin. The snout should be a rounded bump, and the eyes should sit above it like the shark is peeking. Add a tiny smile and 4 short steam lines rising upward. Step 3: Outline everything, then color the cup with warm cream or pastel blue and the shark with pale gray plus a darker gray for the fin tip.
Make the steam lines thicker at the base and thinner at the top for a nicer “lift” effect.
Don’t put the shark’s full body under the cup — the peek is the whole cuteness.
3. Shark Wearing a Bow Tie
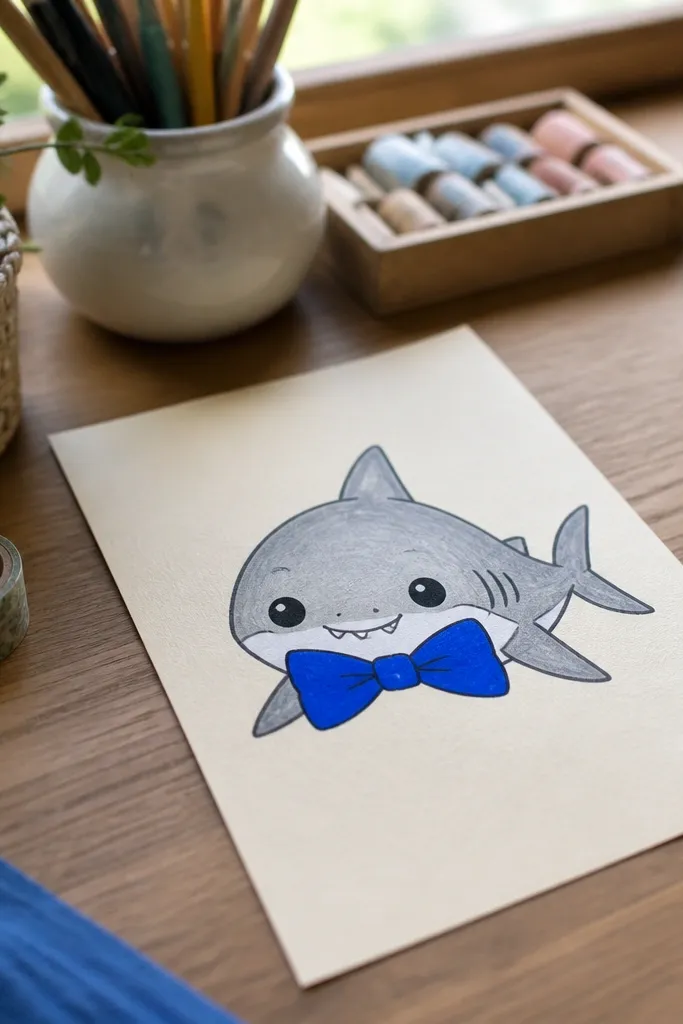
A bow tie works because it adds “human” cues that read as cute instantly. The shark’s face stays simple: round eyes, a tiny smile, and a smooth head outline. Keep the bow bold and centered so it becomes the focal point. This is a great choice for party invitations, kids' crafts, and sticker sheets where you want a character that looks playful even at small sizes. You can color the bow in bright pink or navy and keep the rest of the shark neutral for a clean, photogenic look.
Step 1: Draw a rounded head oval and a shorter body oval underneath. Add a small dorsal fin and a tail that looks like a rounded triangle, not a sharp wedge. Step 2: Place two round eyes near the top and draw a small curved mouth line. Then draw the bow tie: two symmetrical loops on either side with a small center knot. Step 3: Outline with a dark marker, erase pencil, and color — pale gray body, darker gray outline accents, and a bright bow color with a lighter highlight on one loop.
If the bow looks lopsided, redraw it bigger before you ink — symmetry matters for charm.
Don’t add extra accessories like hats and scarves; the bow tie is the one feature you want.
4. Shark with Heart Fin Splash
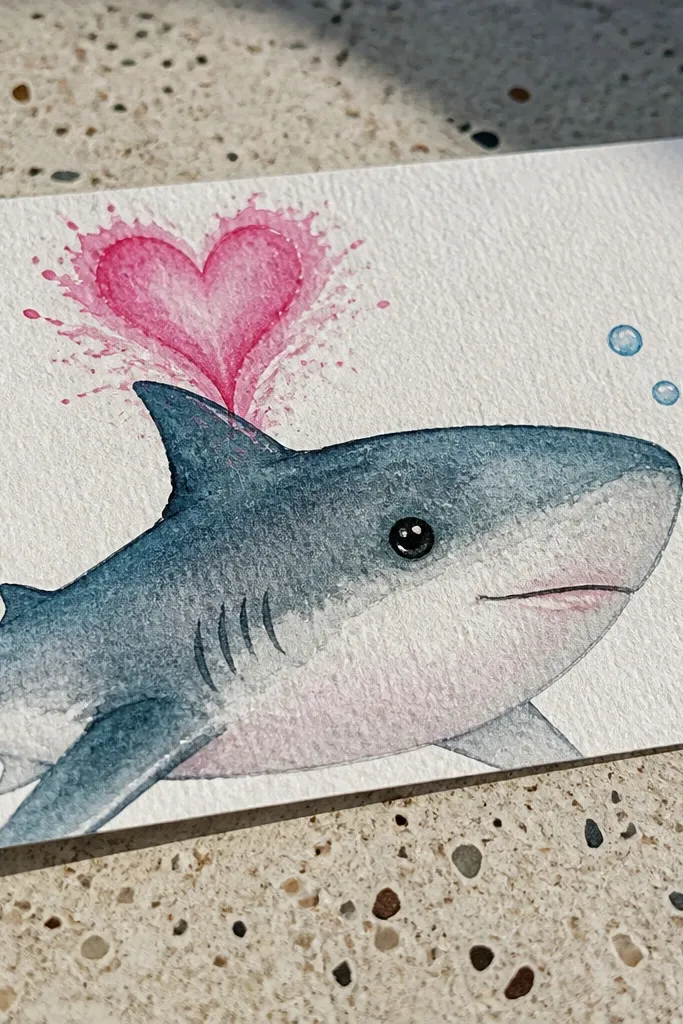
This drawing is adorable because the heart fin makes the shark’s personality obvious without teeth or fear cues. The heart shape replaces the usual fin triangle, so the design instantly reads as love or friendship. Keep the mouth small and closed or a micro-smile. Add a few bubble dots around the head to fill space and make it look lively. It’s perfect for Valentine crafts, friendship cards, and simple printable art where you want cuteness to be the main point, not realism.
Pro tipSize the heart fin so it takes about one-third of the head height. Too small looks like a mistake, not a design.
Step 1: Draw a head oval and body curve like a bean shape. Replace the dorsal fin with a heart shape — draw a heart outline and keep it attached at the top center. Step 2: Add two eyes and a tiny nose dot in the snout area. Draw a small curved mouth and add 5-7 dots for bubbles around the head. Step 3: Ink the outline, erase pencil, then color the body light gray and color the heart fin a strong red or coral with a lighter pink highlight.
AvoidDon’t draw sharp teeth even if the mouth is open — the heart fin already does the work.
5. Shark Face with Sunglasses
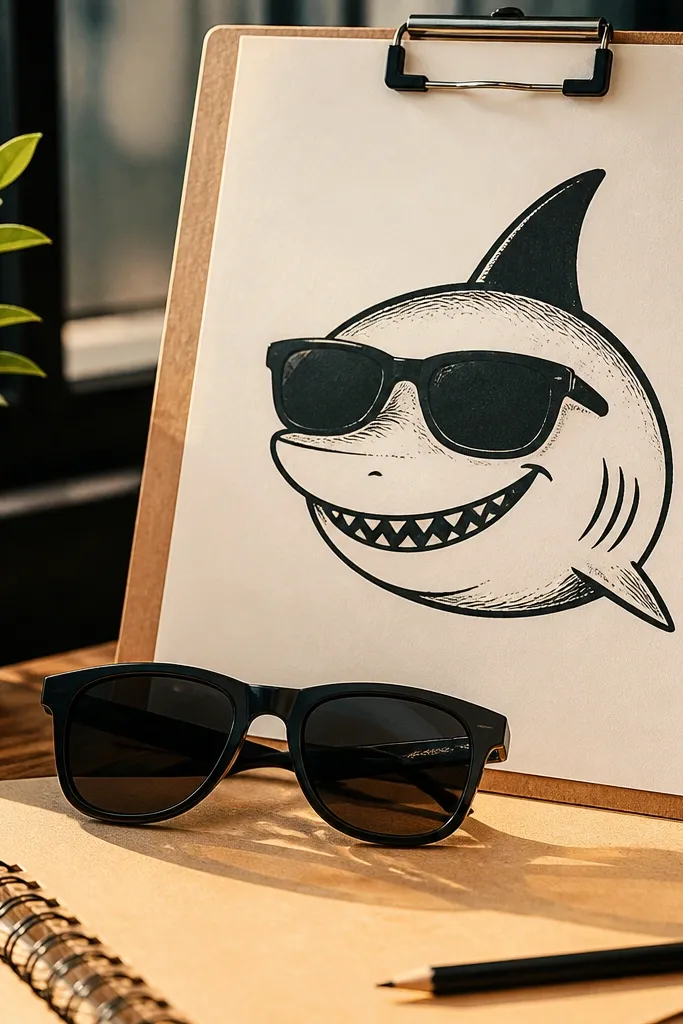
Sunglasses make the shark look instantly cool and friendly, because they cover the eye area while keeping the face readable. The trick is to draw the sunglasses as a simple rounded rectangle with thick frames, then place a tiny smile underneath. The rest of the head stays smooth with minimal details. This one looks great in bold marker drawings and works well for posters, sticker packs, and summer-themed crafts. Use a darker gray or black for the frames and keep the shark body pale for contrast.
Step 1: Draw a large head oval and a smaller snout bump at the front. Add two small fins — one dorsal and one side fin — as simple arcs. Step 2: Draw sunglasses across the top half of the face: a rounded rectangle frame with a gap for the nose area. Add a small curved smile under the sunglasses and a few bubble dots in the background. Step 3: Outline, erase pencil, then color — pale gray shark and black or dark navy sunglasses with a light reflection line on one lens.
Make the sunglasses slightly wider than the head oval. It looks more “confident” and less like a sticker mistake.
Don’t add heavy eyebrow lines; sunglasses already cover that area.
6. Tiny Shark and Big Planet
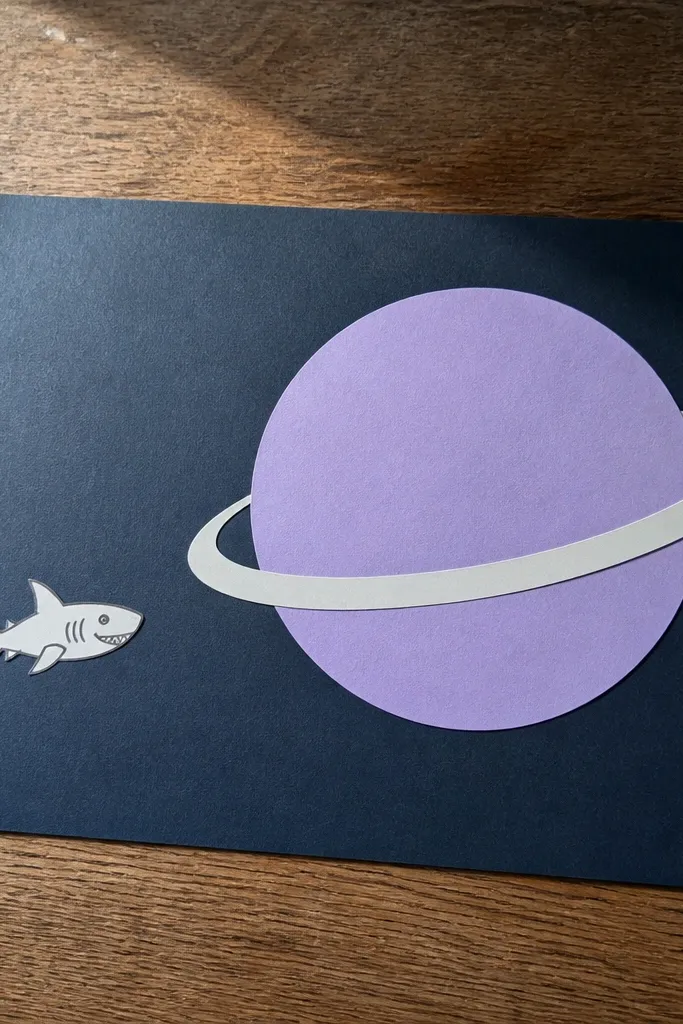
This drawing is adorable because it uses scale. A tiny shark next to a big planet makes the shark feel safe and playful, like it’s exploring space. Keep the shark shape small and round with big eyes so it reads clearly even at a glance. The planet gives you a clean background shape that makes the whole piece look designed, not random. It’s great for science-themed classroom projects, space stickers, and wall art that needs a simple but eye-catching composition.
Step 1: Draw a large circle for the planet in the background and add 2-3 curved ring lines around it. Step 2: Draw a small shark in the foreground — a rounded head and a short body curve. Place big eyes on the shark head, add a tiny smile, and include one dorsal fin. Step 3: Outline everything, then color the planet with a strong teal or purple and add simple lighter streaks. Color the shark light gray and add a darker gray fin outline.
Use one clean color for the planet plus one highlight color. Too many colors on the planet steals attention from the shark.
Don’t cram bubbles and stars everywhere. One or two background elements look more intentional.
7. Shark with a Sailboat Hat
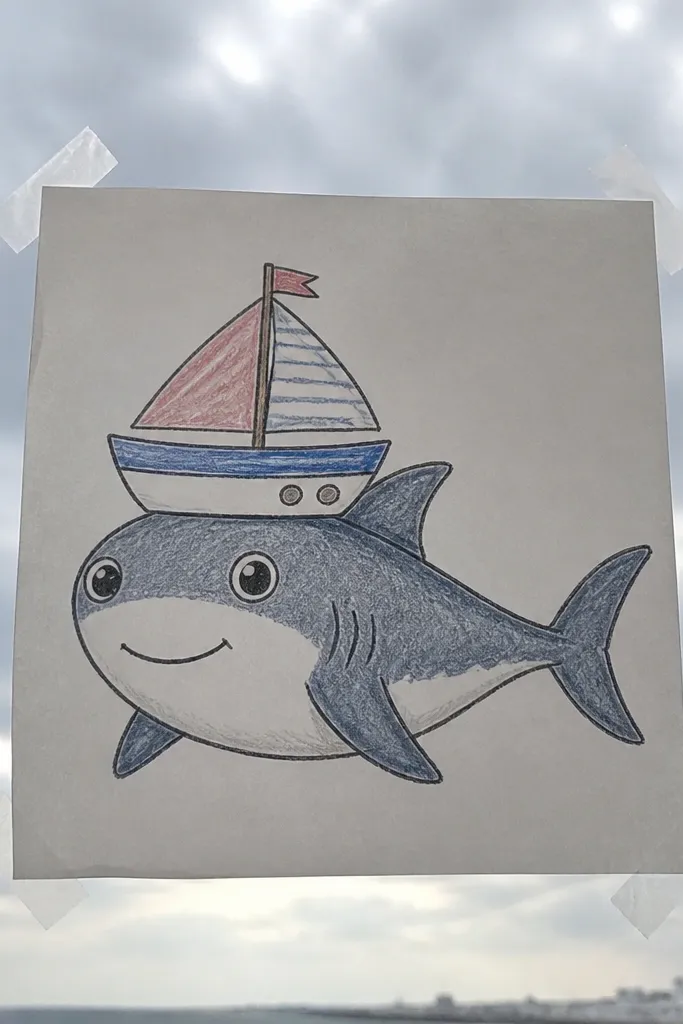
A sailboat hat makes the shark feel like a vacation character. The design stays cute because the hat sits on top of the head like a playful accessory, not like a realistic boat. Keep the shark’s face simple with round eyes and a small smile. The sailboat details are minimal: a triangle sail, a small mast, and a tiny line for the deck. This is a fun option for summer cards and beach-themed crafts where you want a shark that looks like it’s having a good time.
Pro tipTilt the sail just a little. Straight-up sails look more stiff and less cute.
Step 1: Draw a head oval with a rounded snout and a small body curve. Add the dorsal fin and tail — keep both rounded. Step 2: Place the sailboat hat on top: draw a vertical mast line, then a triangle sail tilted slightly, and a small curved base line where it meets the head. Add two eyes below the hat and a tiny smile. Step 3: Ink, erase, then color — light gray shark, darker gray outline accents, and a bright sail color like coral or sky blue.
AvoidDon’t add rigging lines. Simple shapes look cleaner at small sizes.
8. Shark Holding a Crayon
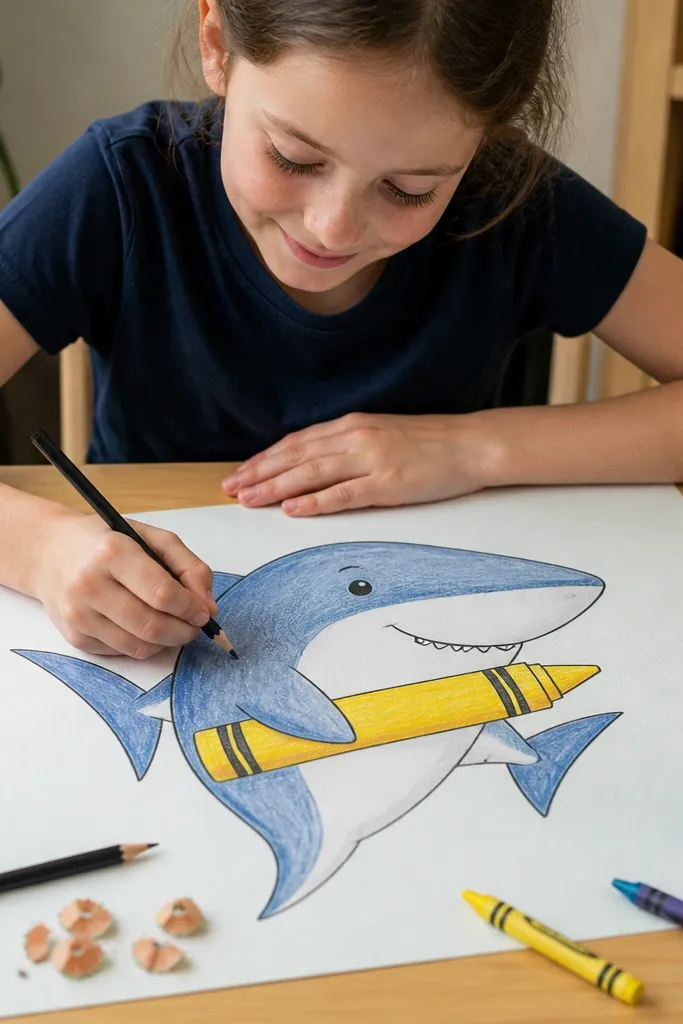
This drawing is great for craft posters because it turns the shark into a “creator.” The shark gets cute by having a relaxed face and a rounded snout, while the crayon adds a clear, fun object that fills space. Draw the crayon as a simple rectangle with rounded ends and a little tip. Add small hand-like fins around it. The result looks lively and kid-friendly, especially if you use bright crayon colors and thick outlines. It’s perfect for art class signs and coloring-page headers.
Step 1: Sketch the shark body first — a rounded head and body with a dorsal fin and tail. Place the eyes near the top and draw a small curved mouth. Step 2: Add arms as short curved fin shapes in front of the body, then draw a crayon between them. The crayon should be slightly angled for energy, with a small pointed tip. Step 3: Outline everything, erase pencil, then color the crayon in one bright shade and color the shark light gray with a darker gray fin edge.
Color the crayon a bright primary and leave the shark mostly gray. The contrast makes the drawing pop.
Don’t draw hands with too many finger lines. Two simple fin curves are enough.
9. Shark with a Rainbow Bubble Trail
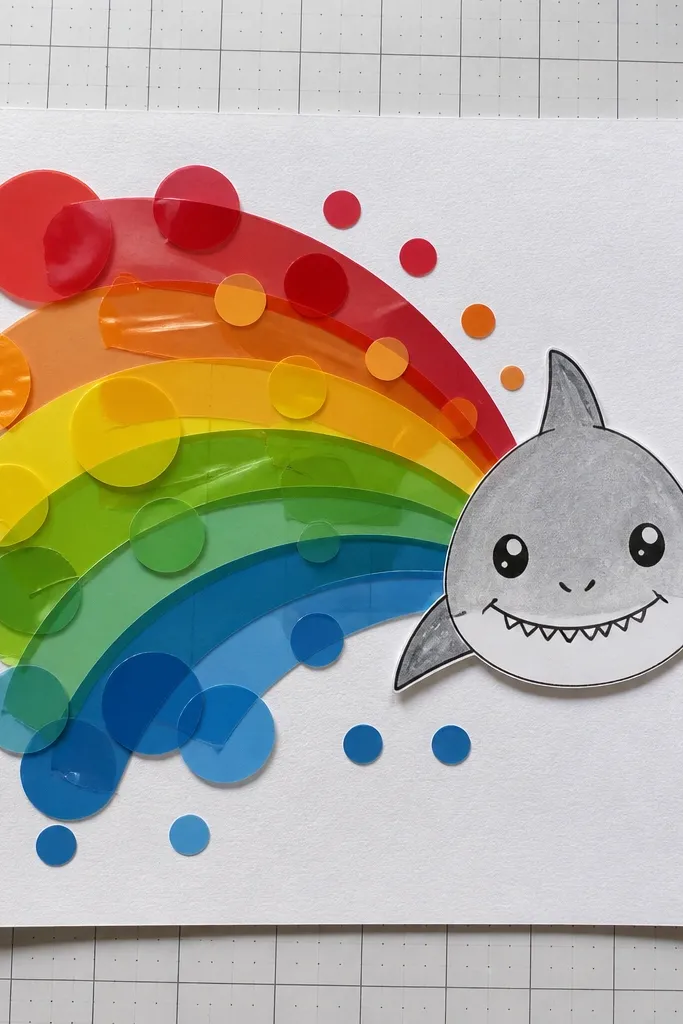
A rainbow bubble trail looks adorable because it adds a moving, cheerful pattern without needing complex anatomy. The shark’s face stays cute and simple: big eyes, short smile, and a smooth head. Then the bubbles become your design element. Use layered arcs of color so the rainbow reads clearly even if the drawing is small. This one is ideal for party decor, classroom bulletin boards, and printable art because the rainbow gives you instant visual interest.
Step 1: Draw a shark head oval and a small body curve, with one dorsal fin and a rounded tail. Place eyes high and draw a micro-smile. Step 2: Add a bubble stream from the mouth area. Start with 3-5 bubble circles and then color them in an arc pattern — red through violet, left to right. Step 3: Outline, erase pencil, and fill the shark body light gray. Add subtle shading with a darker gray under the head for a clean finish.
Keep the rainbow bubbles in one smooth arc. A jagged rainbow looks messy, not cute.
Don’t add teeth or a wide-open mouth. The rainbow bubbles should do the talking.
10. Shark in a Life Ring
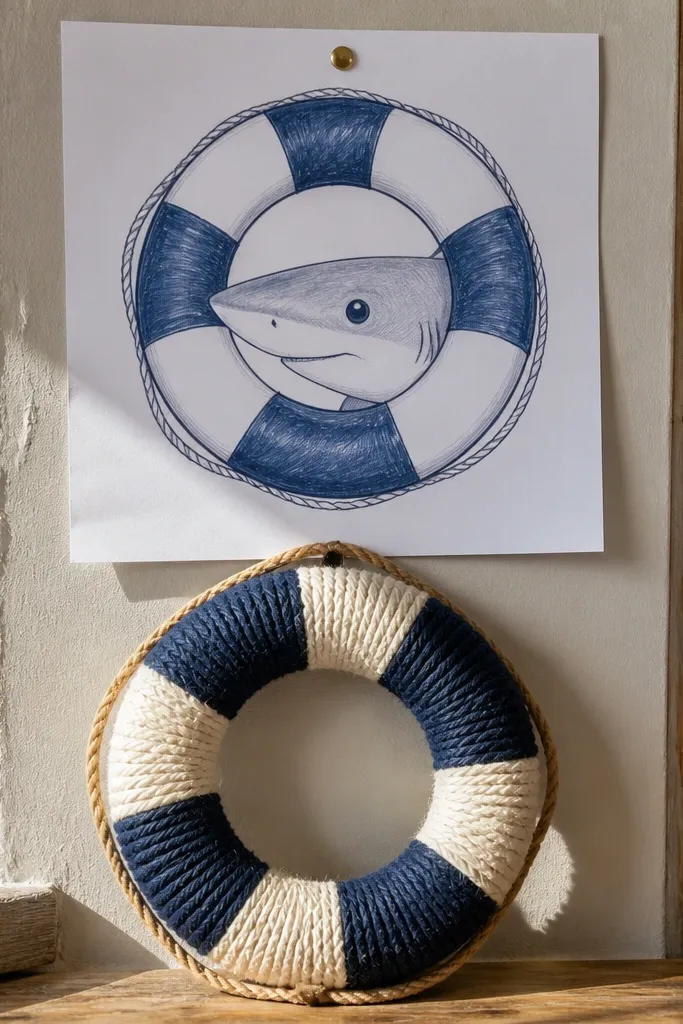
This is a clean, photogenic composition because the life ring frames the shark like a badge. It instantly signals “safe” and “friendly,” which is what you want for adorable shark drawings. The shark can be minimal — just head, one eye set, and a small smile. Add stripes on the life ring for a graphic look. Use this for printable labels, party favors, and beach craft templates where you need a strong shape and clear subject.
Step 1: Draw a big circle for the life ring and add 2-3 curved stripe lines across it. Leave a gap at the bottom where the shark’s body sits. Step 2: Inside the ring, draw a shark head oval and a small body curve. Add big round eyes and a tiny smile, plus a dorsal fin and small tail tip. Step 3: Outline with a dark pen, erase pencil, then color the ring bright white with orange or red stripes, and color the shark pale gray with darker fin edges.
Center the shark’s face so the eyes sit at the vertical midpoint of the ring. That balance reads “designed.”
Don’t let the shark overlap the ring too much. The ring frame is part of the cuteness.
11. Shark Wearing a Hoodie
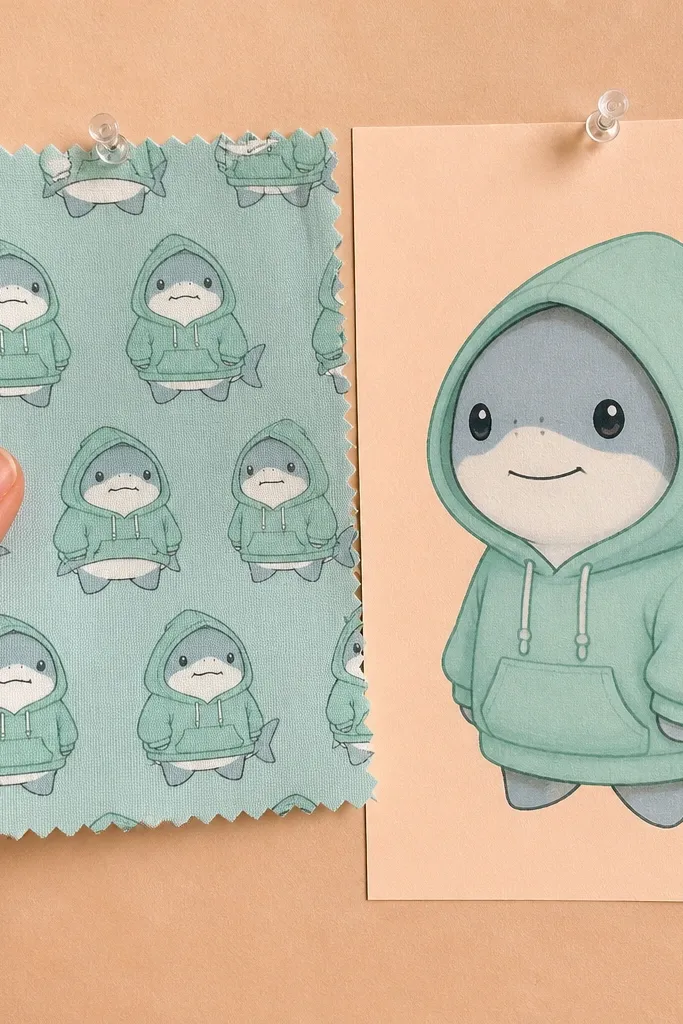
A hoodie makes the shark feel like a teen character, which is why it looks cute instead of scary. The hoodie also gives you a simple way to add folds and shapes without drawing realistic skin. Keep the shark’s face simple with round eyes, a tiny nose dot, and a small smile. Color the hoodie with a solid pastel and add one darker shade for the pocket. This works great for personal art prints, sticker designs, and any project where you want a character that looks modern and friendly.
Pro tipMake the hoodie pocket slightly wider than the snout. It keeps the proportions looking cute.
Step 1: Draw the shark head oval and a rounded body. Add dorsal fin and tail as simple rounded shapes. Step 2: Draw the hoodie around the body: a curved collar at the neck, then two sleeve shapes down the sides and a front pocket as a small rectangle. Add hoodie drawstrings as two thin lines with tiny ends near the snout area. Step 3: Place eyes on the head, draw a micro-smile, outline, erase pencil, then color — pale gray shark and a pastel hoodie with a darker pocket shade.
AvoidDon’t add too many hoodie details like zippers and logos. One pocket and drawstrings are enough.
12. Shark with a Little Sail Flag
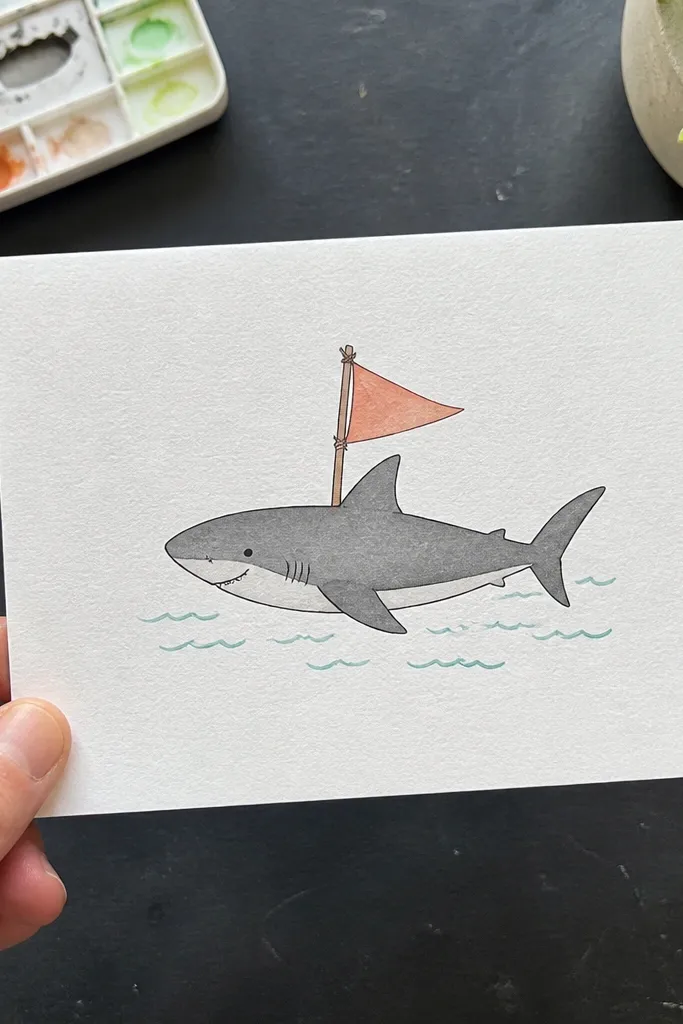
This drawing is adorable because it combines a friendly face with a single simple prop. The flag adds a triangular shape that echoes the shark’s fin without making it look sharp or scary. Keep the shark outline rounded and the smile small. Add a few tiny wave lines behind the shark for a sense of motion. It’s good for nautical-themed crafts, summer party signs, and simple wall art where you want one clear character with one playful accessory.
Step 1: Sketch the shark body as a rounded head oval and a short curved body, then add a dorsal fin and tail. Place big eyes and a tiny smile. Step 2: Draw a small stick held in front by two short fin curves. Attach a triangle flag to the top of the stick, and add a short fold line inside the triangle. Step 3: Outline, erase pencil, then color the shark pale gray and color the flag in a bright color with a lighter highlight line.
Keep wave lines behind the shark to only 3 curves. More lines make it cluttered fast.
Don’t draw realistic waves or foam. Cartoon waves only.
13. Shark with a Starfish Friend
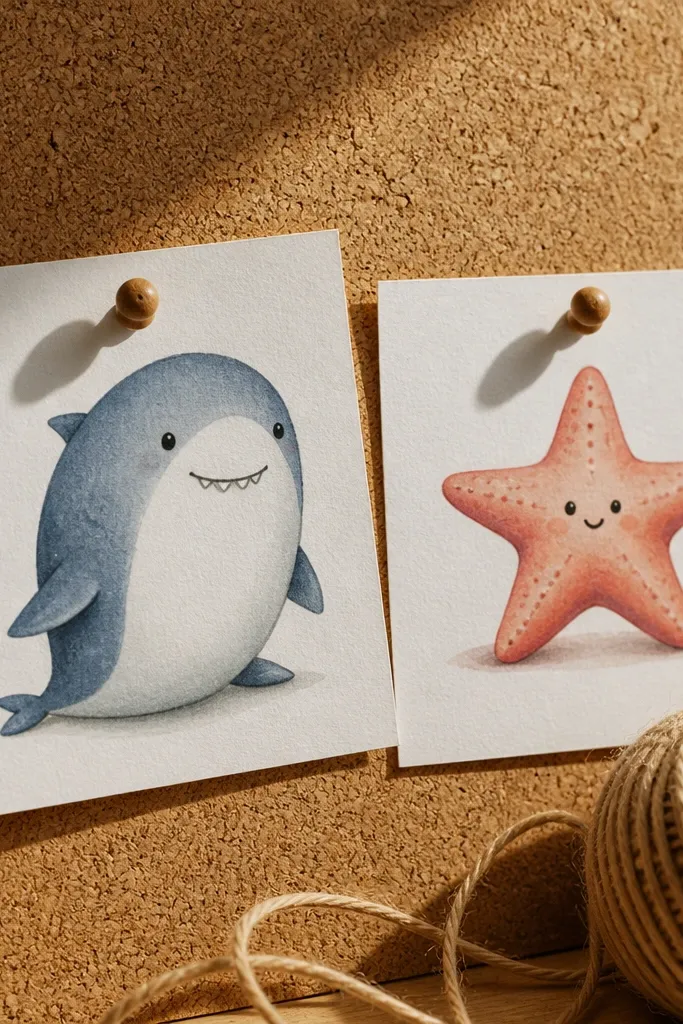
This one is cute because you’re adding a second character that makes the scene feel friendly. The starfish gets tiny eyes and a small smile, so it looks like it’s “talking” to the shark. Both shapes stay simple: the shark is a rounded oval with fins, and the starfish is a five-point star with soft curves. Put them close together and leave a little space for bubbles or a small heart. Great for kids' crafts, friendship-themed cards, and classroom posters.
Pro tipPut the starfish slightly lower than the shark’s eyes so the shark looks like the bigger friend.
Step 1: Draw the shark first — head oval, small body curve, dorsal fin, tail tip, big eyes, and a small smile. Step 2: Add a starfish next to it — a five-point star with rounded tips, plus two tiny eyes and a curved mouth. Add 3-5 small bubbles around both characters. Step 3: Outline everything, erase pencil, then color the shark light gray and color the starfish with bright coral or yellow plus a darker outline shade.
AvoidDon’t add too many bubble circles between them. Fewer bubbles keep the faces readable.
14. Shark Mom with Baby Sharks
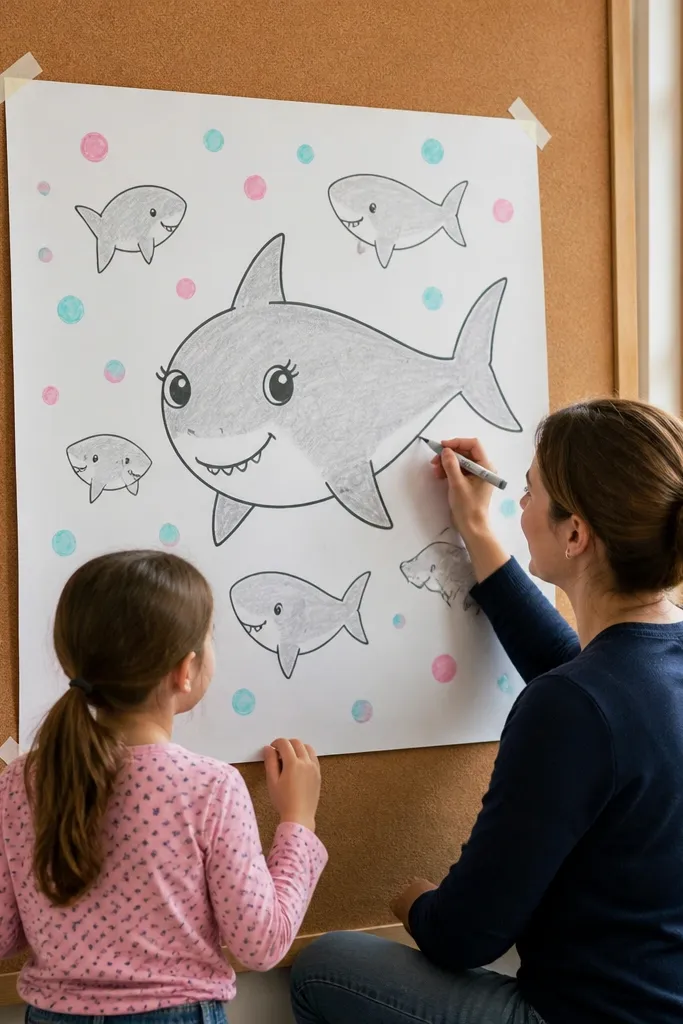
This drawing is adorable because the “family” layout uses scale and repetition. The mother shark is bigger with a friendly smile, and the baby sharks are small with simpler faces. Keep the mother’s head round and give her slightly larger eyes. For baby sharks, use fewer details — just one fin and a tiny smile. This looks great for kids' birthday cards, end-of-year classroom art, and any project where you want a story in one page.
Pro tipSpace the babies far enough apart that each face is visible — crowding kills the cute factor.
Step 1: Draw the mother shark as a large head oval and body curve, with dorsal fin and tail. Add big eyes and a small smile. Step 2: Draw three baby sharks around her — each one is a smaller oval head with one fin and tiny eyes. Keep their mouths as micro-smiles. Step 3: Outline, erase pencil, then color the mother with one shade of gray and color the baby sharks with a slightly lighter or more pastel gray so they separate clearly.
AvoidDon’t make the babies have full teeth. Micro-smiles only.
15. Shark in a Snow Globe Bubble
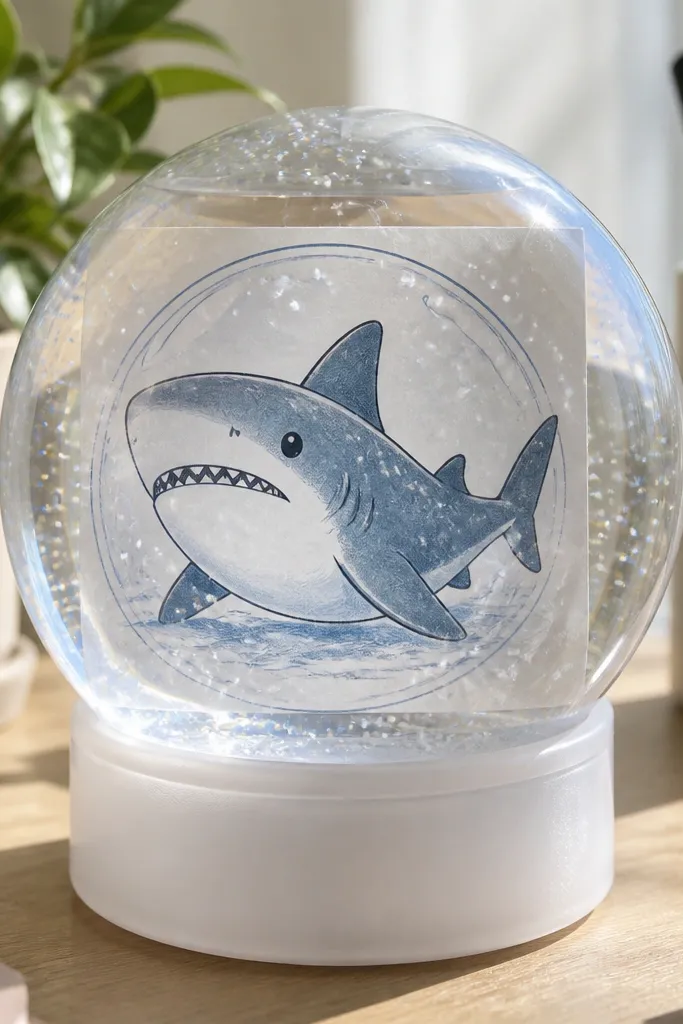
This drawing is adorable because it turns a shark into a little character trapped in a toy-like moment. The big clear bubble shape makes everything feel cozy and giftable, and the “snow” sparkle gives you instant cuteness without needing complicated shading. It also solves the usual problem with shark art — the body can look stiff — because the bubble frame forces a rounded, friendly silhouette. Use a thick outline and simple dot details so the shark reads clearly at a small size. This one looks great as a card, sticker-style print, or a framed doodle for a kids' room or bathroom shelf.
Pro tipUse a white gel pen for the “snow” dots — it stays opaque on top of blue and reads better than pencil. If you want extra sparkle, mix a pinch of fine glitter into a clear glue dot pattern only on the bubble background.
Draw a large circle first, then add a slightly smaller circle inside it to create the “bubble” space. Sketch a cute shark face in the center using a rounded snout, two tiny nostrils, and a smile line; add one fin and one little tail tip peeking out from the lower edge of the bubble. Color the shark with light blues and a pale belly, then dot the bubble background with tiny white glitter dots (or white gel pen specks) to mimic snow. Add a few small bubble rings around the shark so the scene feels full, not empty. Finish with a thick black marker outline on the shark and the bubble edge, then let any gel ink dry flat before you display it.
AvoidDon’t shade the whole bubble — keep the bubble mostly clear so the shark stays the focus.



