Drawing a deer is far easier than it looks once you follow the right order. Work from big shapes to small details — block the body and head first, connect the neck and legs, then add the face, antlers, and finally shading. That sequence keeps the proportions right and stops you fussing over detail before the foundation is set. This guide walks you through 6 simple steps that work in pencil or pen, plus a few bonus variations to try once you have the basic deer down.
The single most important rule for drawing animals is to build from big shapes to small ones. Block the largest masses — the body and head — first, then connect them and add the legs, and only then work on the face, antlers, and texture. If you start with an eye or an antler tine too early, the proportions drift. This deer method is built around that order so each step sets up the next.
Before you start, keep it simple — a regular pencil, an eraser, and paper are all you need, plus a pen if you want to ink it. Draw the early shapes lightly so you can adjust and erase them, and press harder only once the outline is settled. Have this page or a reference nearby for the leg joints and antler branching, which are the two parts beginners find trickiest.
These six steps take you from a blank page to a finished deer, and the bonus variations after show how to adapt the same method for a grazing deer, a leaping one, a doe, and a fawn. Follow the steps once as written, then make the deer your own.
Step by step
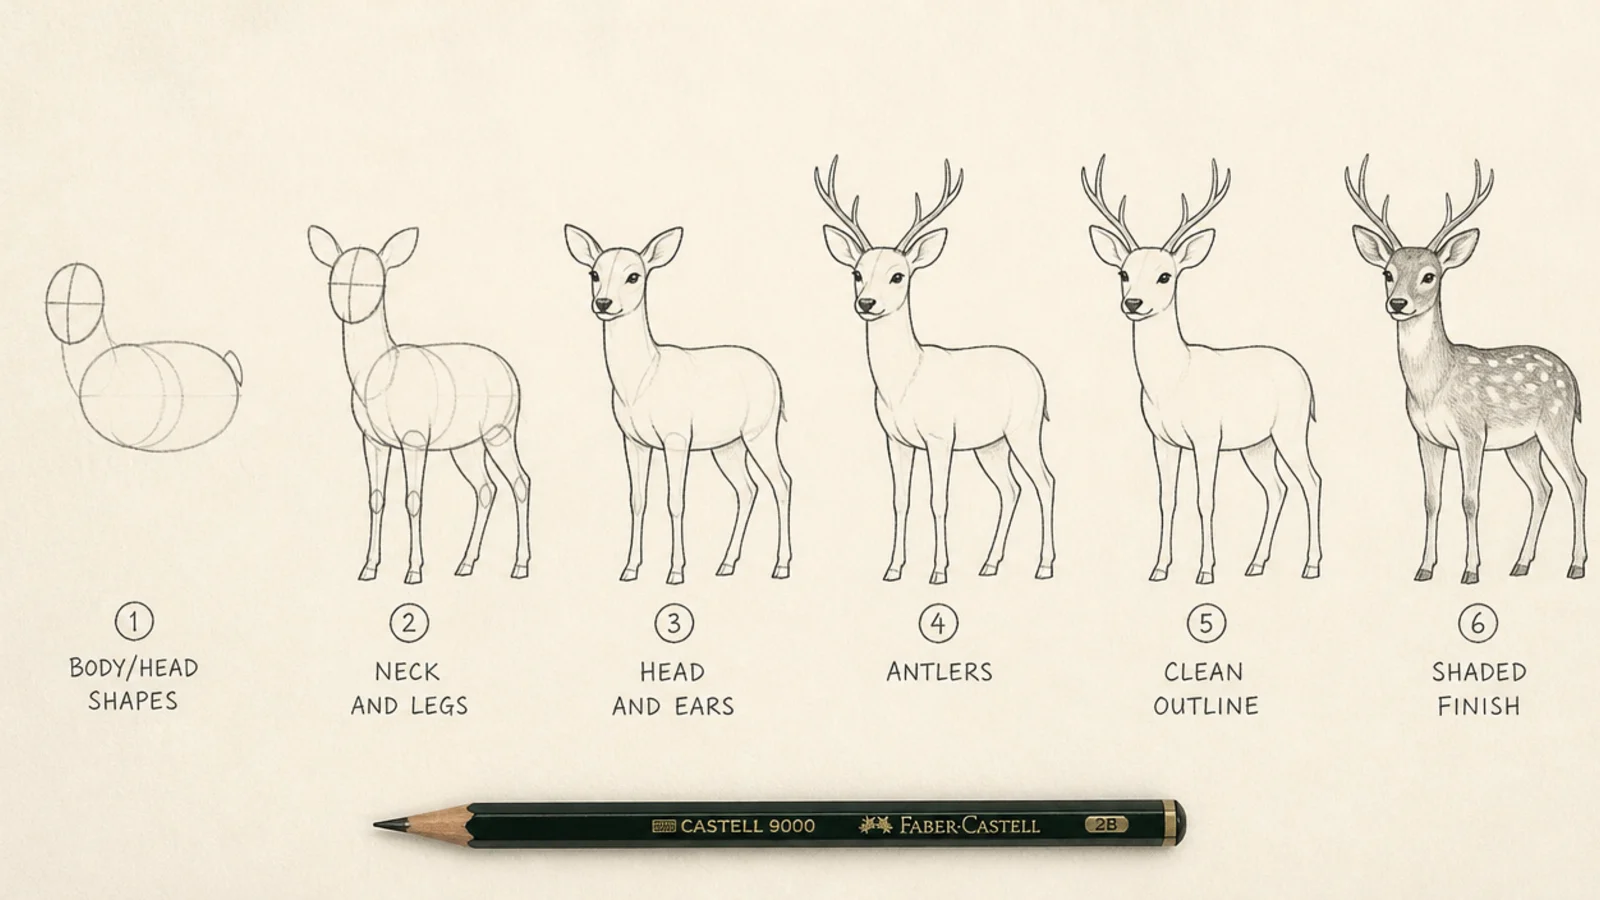
Block the body and head shapes. Lightly draw a horizontal oval for the body in the middle of your page, then a smaller circle for the head up and to one side. Leave a gap between them for the neck. Keep these shapes light and loose — they are just a foundation. Getting the body-to-head size right now, with the head about half the body’s width, sets the proportions for everything that follows.
Connect the neck and add the legs. Join the head circle to the body oval with two short curved lines for the neck. Then add the four legs as thin lines: the two front legs nearly straight under the chest, and the two back legs with a gentle backward bend at the hock under the hips. End each leg in a small pointed hoof. Keep the legs thin and evenly spaced so the deer stands steadily.
Refine the head and add the ears. Shape the head circle into a wedge by adding a short tapering muzzle at the front. Add two tall leaf-shaped ears on top, angled slightly outward. Place a small almond eye on the side of the head and a little dark nose at the tip of the muzzle. Now the deer has a clear face and you can see which way it is looking.
Add the antlers. For a buck, draw two antlers rising from just behind the eyes — a curving main beam on each side that sweeps up and back, with two or three short tines branching off, all sweeping the same direction. Keep them roughly symmetrical. For a doe or fawn, skip this step and leave the head plain and rounded. Either way, your deer now reads clearly as male or female.
Outline and add details. Trace one clean confident outline over your construction shapes, then erase the light guides underneath. Add a short tail, a slightly furry chest line, and a hint of fur where the legs meet the body. If you are drawing a fawn, dot a few light spots along the back now. This is where the loose sketch becomes a finished drawing.
Shade and finish. Pick one light direction and add simple shading on the opposite side — under the belly, the far side of the neck, inside the legs, and under the chin. Follow the fur direction with your strokes. Add a bright little highlight in the eye and a soft shadow on the ground beneath the hooves. This final light-and-dark pass gives your deer real form and a sense of standing in space.
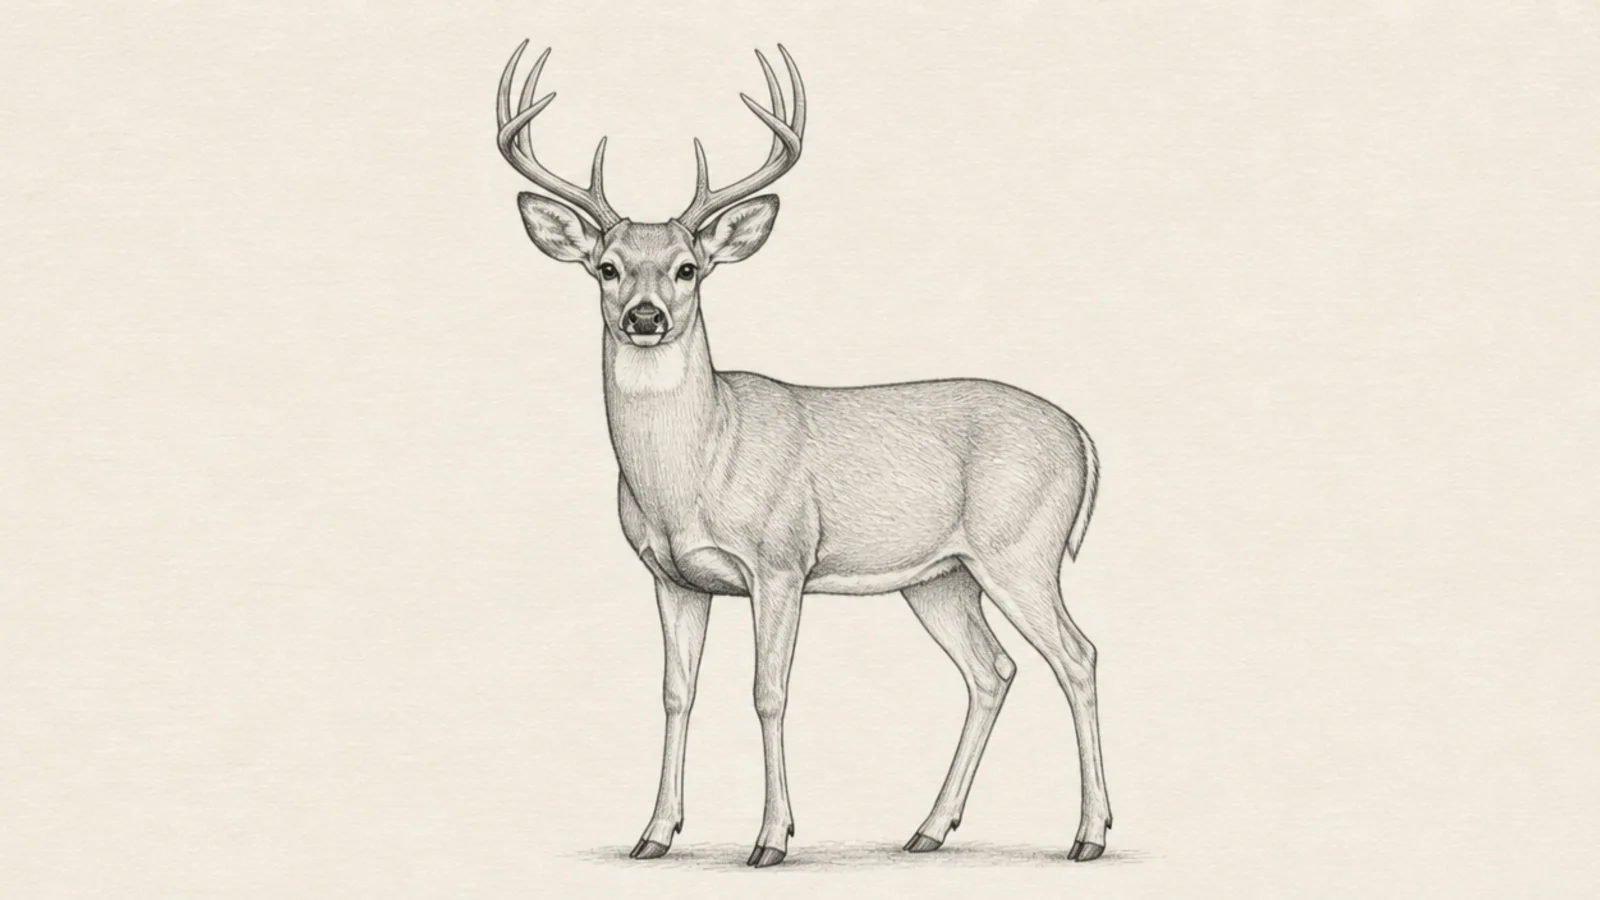
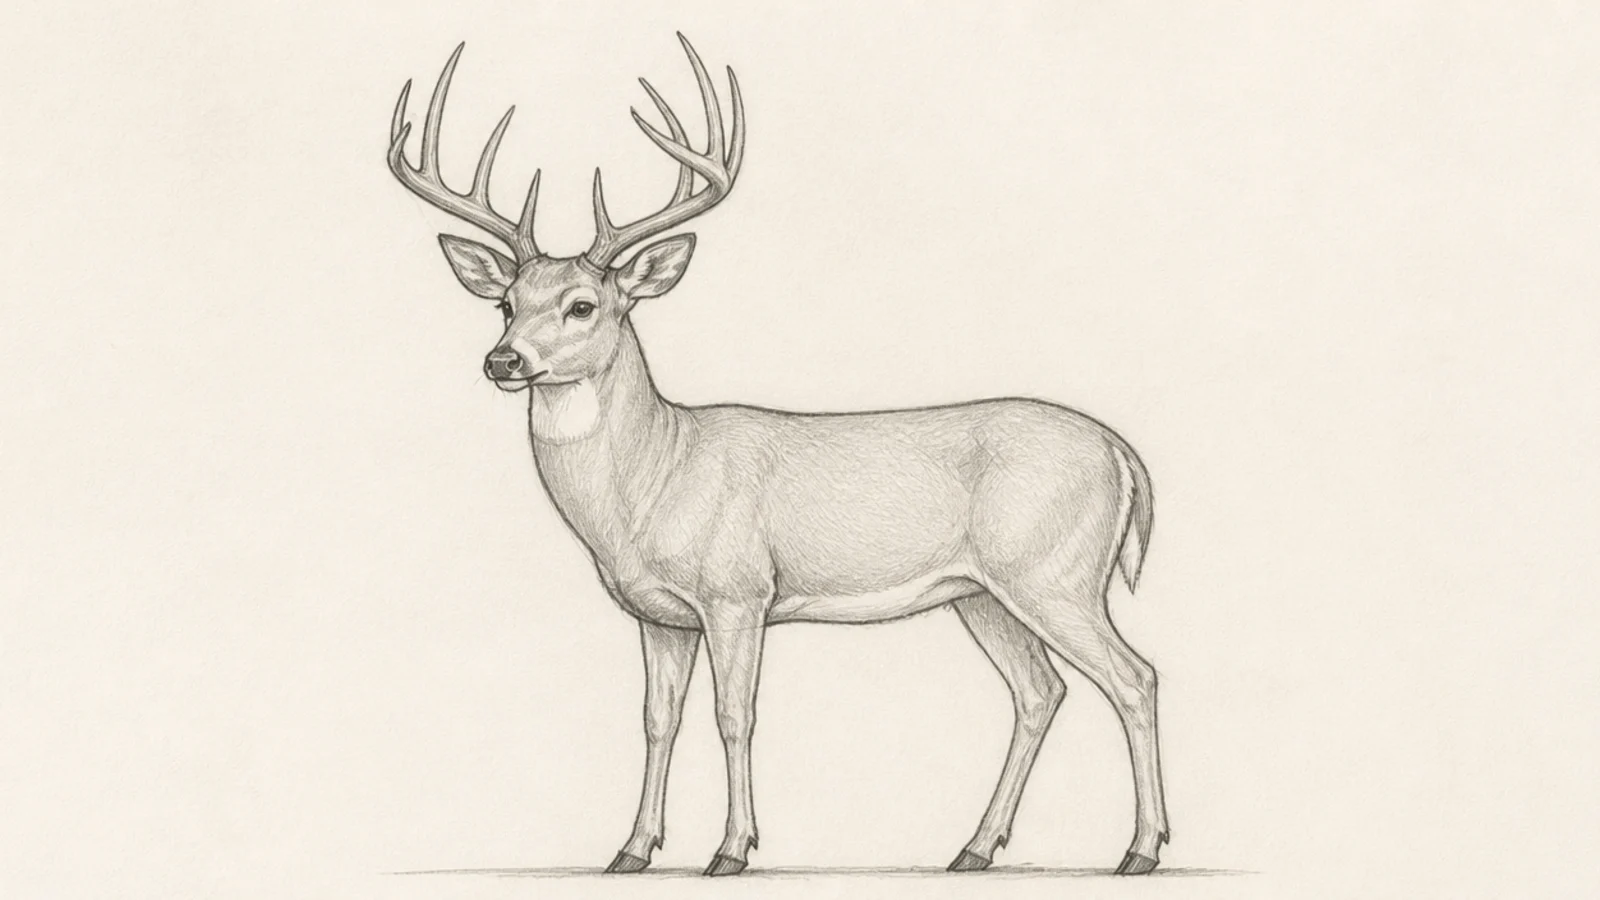
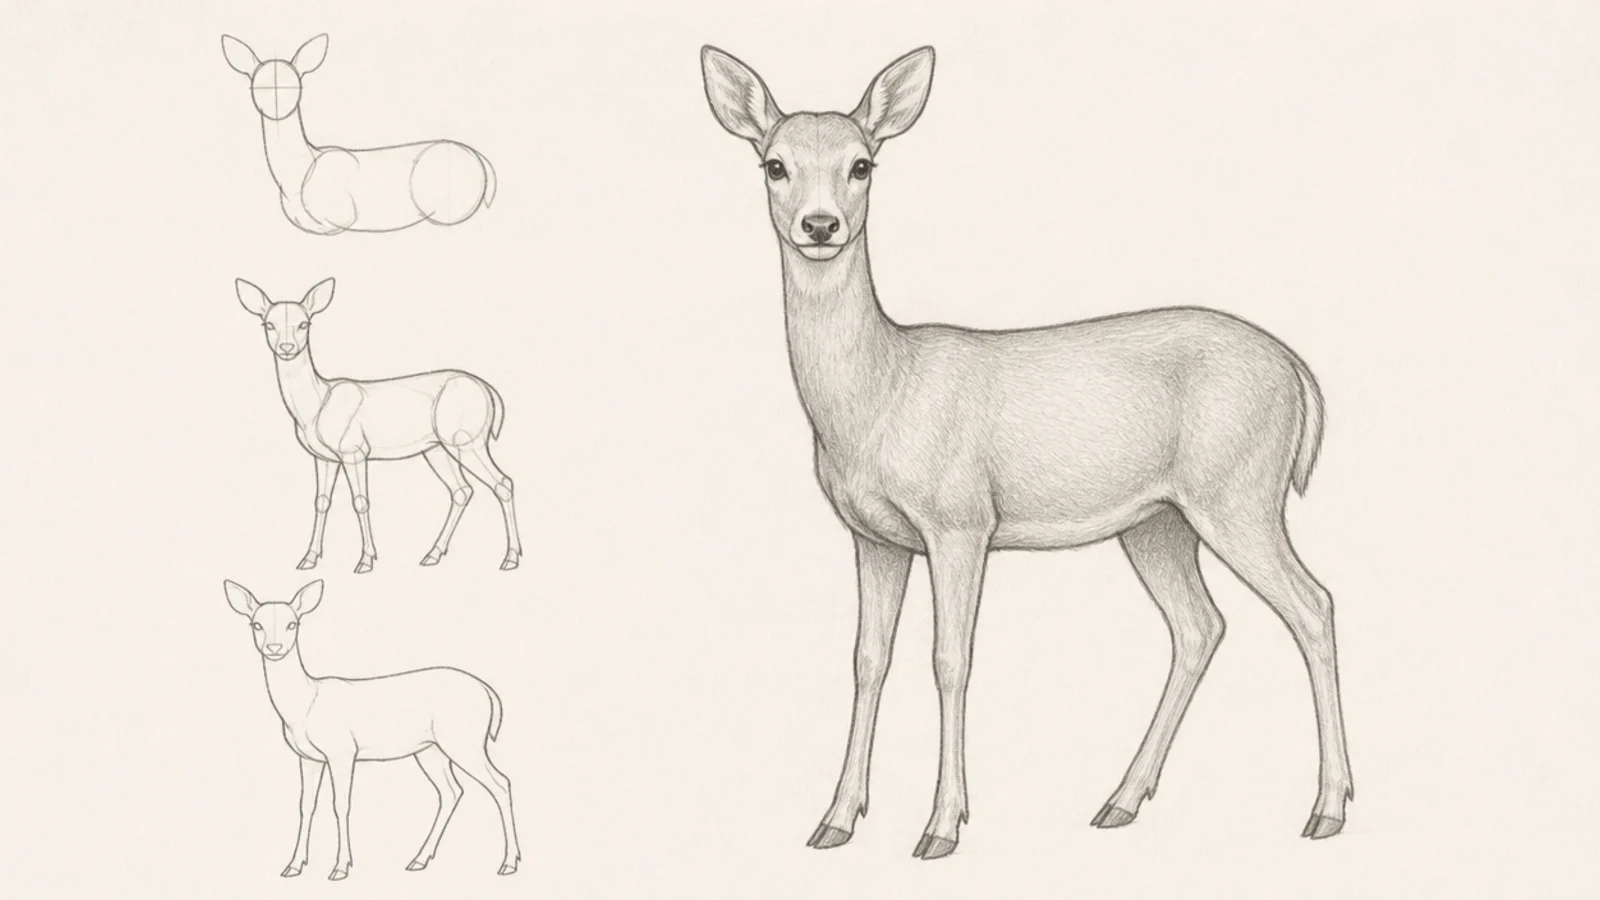
The straightforward result of the six steps — a standing buck with antlers. It is the version to master first before trying the others. It shows the method fully finished.
Follow all six steps as written, keeping the pose a calm side-view stand. Add a fuller antler rack once you are confident with the branching.
Keep the four hooves level on an imaginary ground line so it stands solidly.
Don’t rush the legs; even thin legs make the stand look stable.
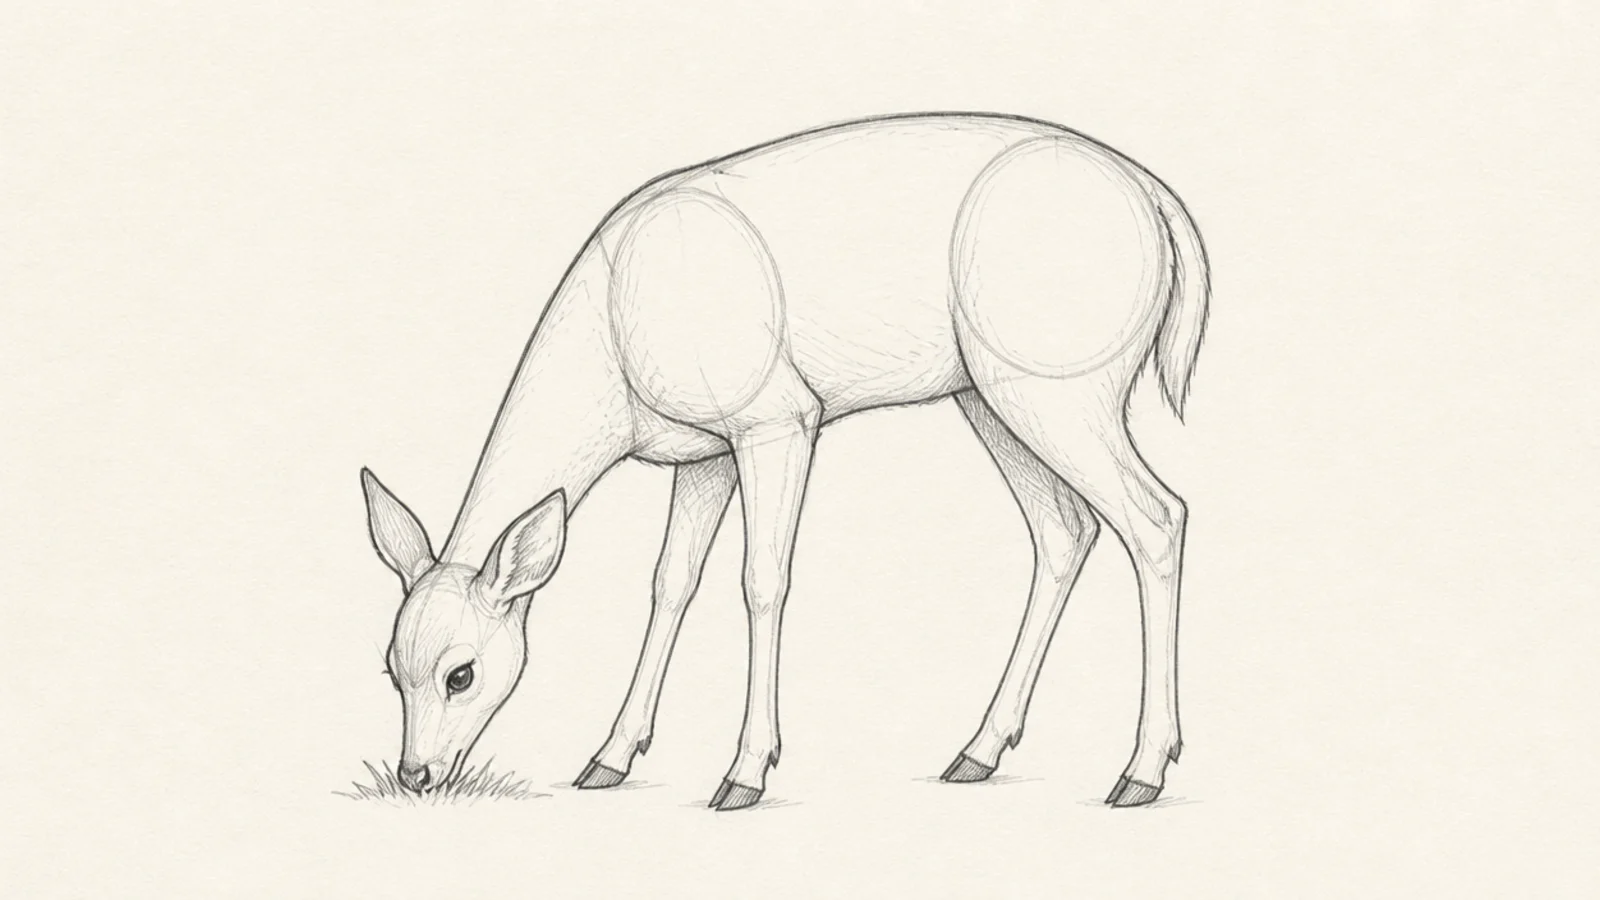
The same method with the head lowered to the ground for a grazing pose. It shows how one changed step alters the whole mood. It teaches a calm, natural stance.
Pro tipCurve the neck in one smooth arc so the head reaches the ground naturally.
At step two, curve the neck downward instead of up so the head reaches the grass. Follow the rest of the steps and add a few grass blades under the muzzle.
AvoidDon’t leave the neck stiff; a soft downward curve reads as grazing.
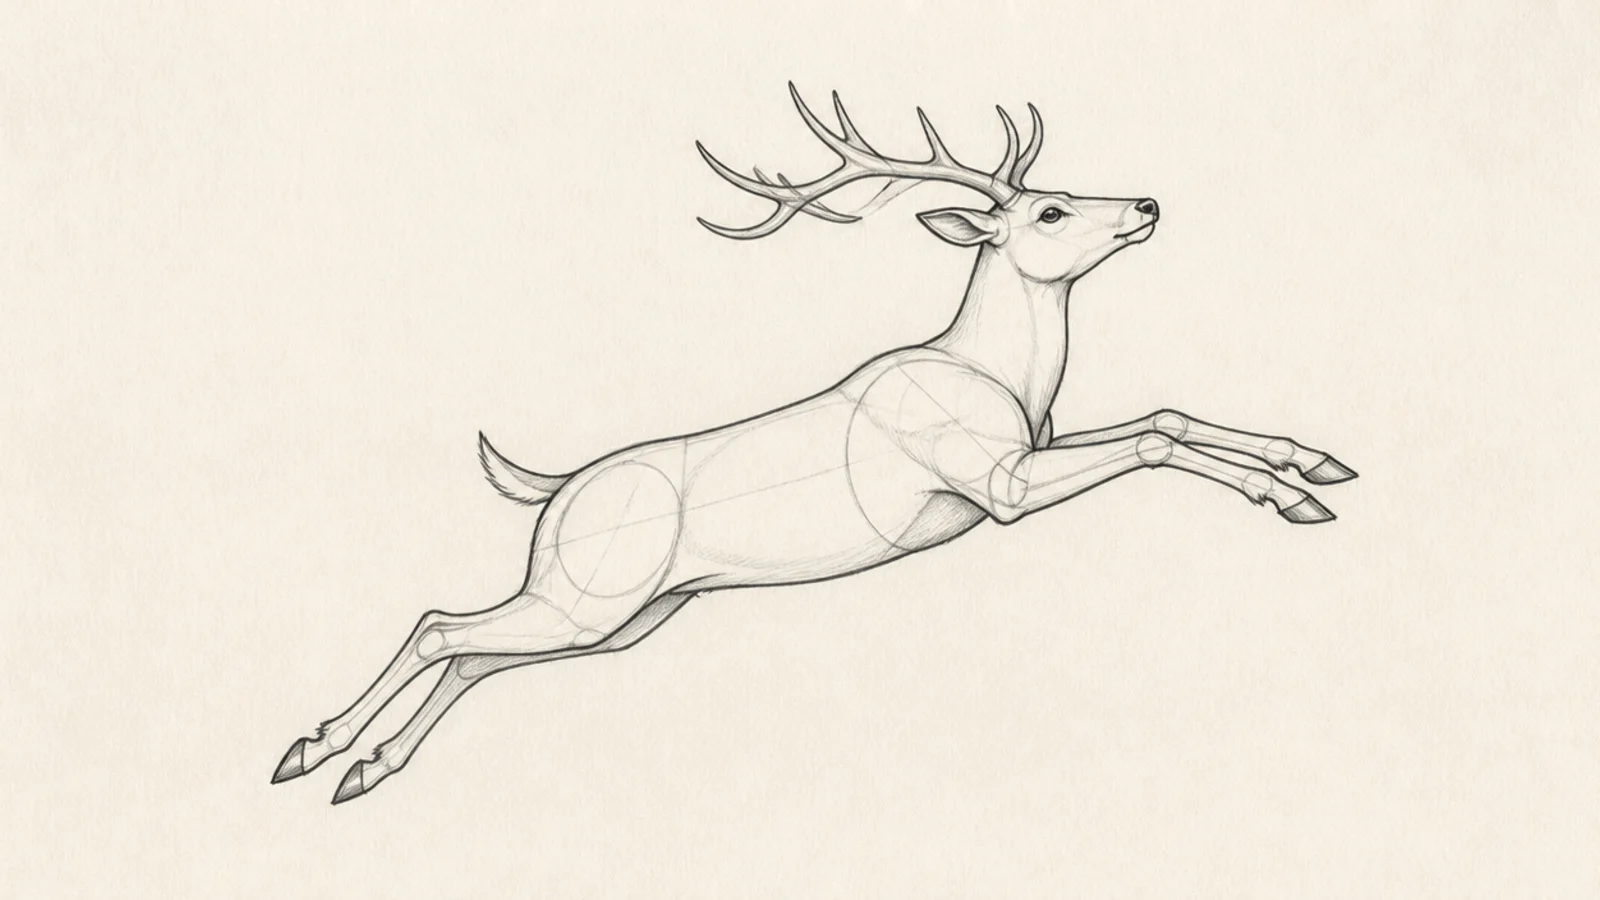
The method applied to a dynamic leaping pose. It shows the same shapes tilted for action. It teaches how to add movement to the basic deer.
At step one, tilt the body oval diagonally upward. Stretch the front legs forward and the back legs behind at step two, then finish the remaining steps.
Angle the whole body up and stretch the legs fully to sell the leap.
Don’t tuck the legs; extended legs are what make a leap read.
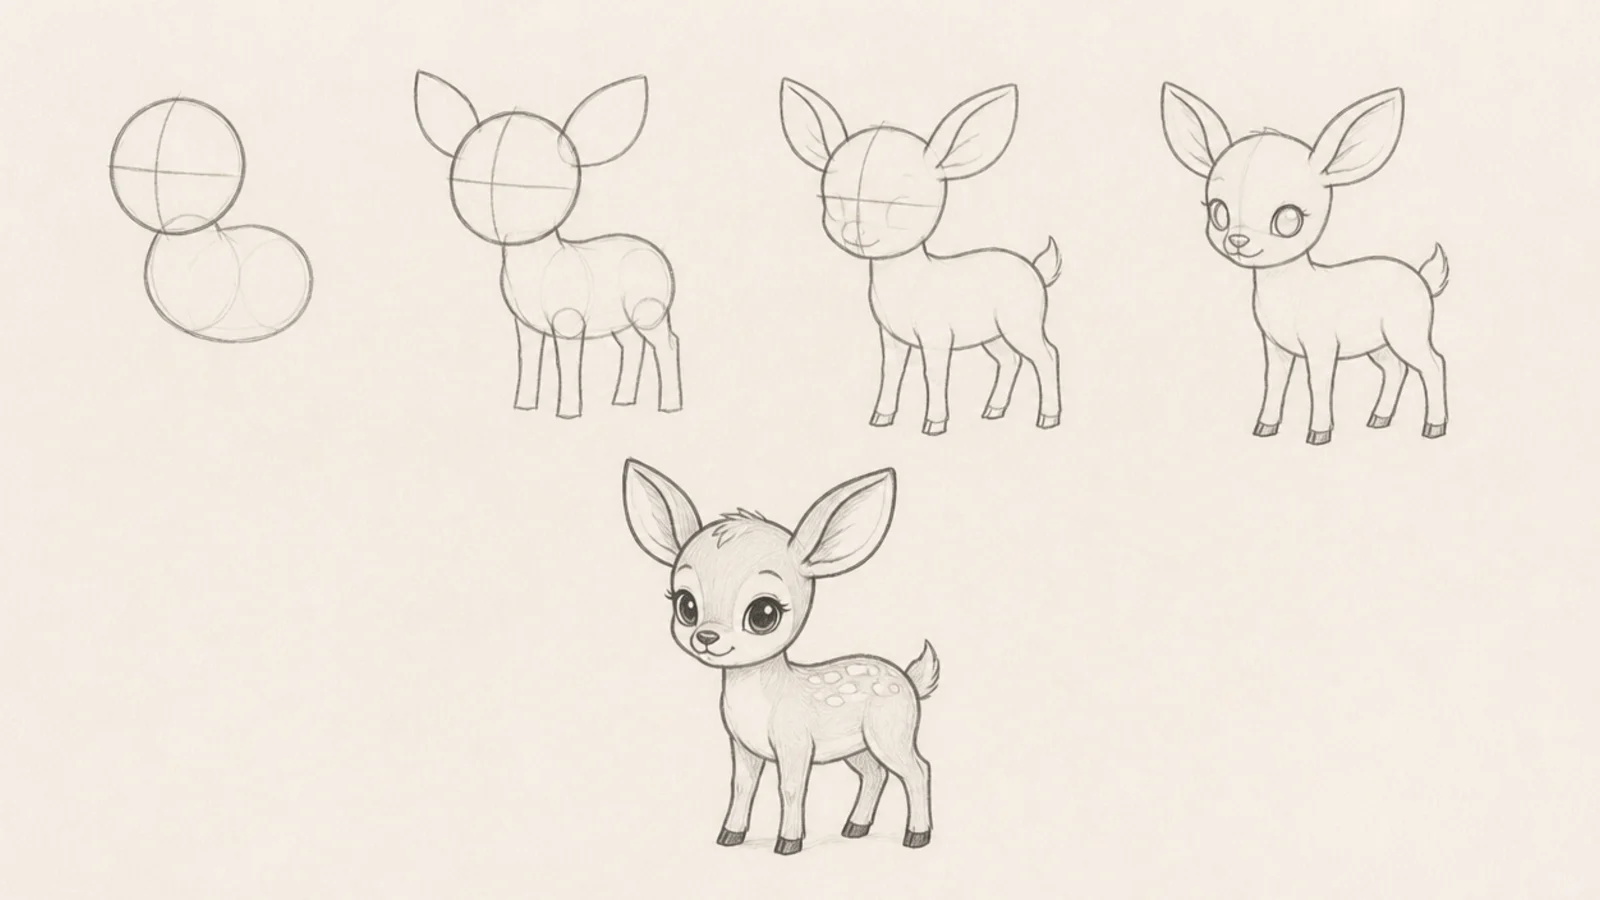
The method adjusted to baby proportions for a fawn. It shows how changing the sizes makes a young deer. It teaches proportion as a tool.
At step one, draw a rounder body and a larger head. Keep the legs short at step two, skip the antlers, and add a scatter of spots at step five.
Enlarge the head and shorten the legs to get the baby fawn look.
Don’t use adult proportions; short legs and a big head make a fawn.
Quick answers
What is the easiest way to draw a deer step by step?
Work in order from big shapes to small details — block an oval body and a circle head first, connect the neck and add four thin legs, then refine the head and ears, add antlers, outline, and finish with shading. Following that sequence keeps your deer drawing in proportion because each step sets up the next instead of fussing over detail too early.
How do I draw deer legs correctly?
Keep them thin and long. The two front legs are nearly straight lines under the chest, while the back legs bend backward at the hock like a bent Z under the hips. End each leg in a small pointed hoof. Drawing the legs thin, with that backward bend in the back pair, is what makes them read as real deer legs.
Do I have to draw antlers on my deer?
No. Only bucks have antlers, so you can draw a doe or a fawn with a plain rounded head, which is actually simpler. If you do want a buck, add two curved beams rising from behind the eyes with a few forked tines that all sweep the same direction. The method is the same either way up to the antler step.
How do I make my beginner deer look finished?
Commit to one clean outline over your light construction shapes, erase the guides, and add simple shading on one side — under the belly, the far side of the neck, and inside the legs — plus a small ground shadow. That single light-and-dark pass turns a flat outline into a deer with form, and it is all a beginner drawing needs to look complete.