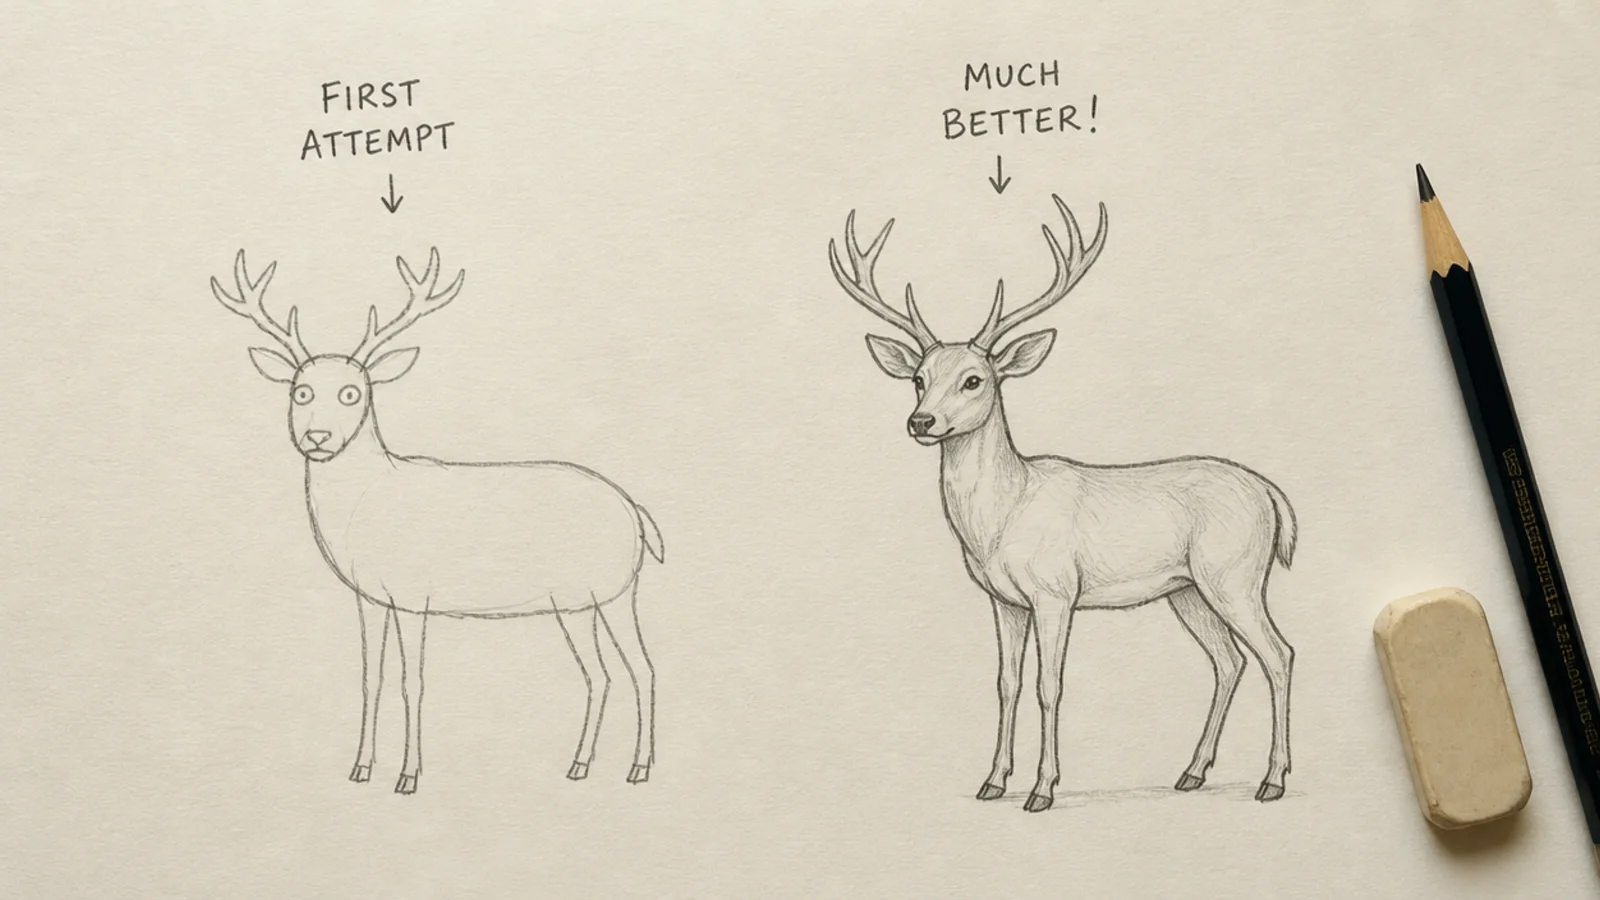
The first deer I ever drew looked like a horse crossed with a dog, and it took me a few tries to work out why. Following a deer drawing tutorial helped, but the real lessons came from the specific mistakes I kept making — small things that quietly wrecked the whole animal. Here are the five honest mistakes from those early attempts, each one an easy fix I wish someone had told me on day one. Skip these and your first deer will come out looking far more like a deer than mine did.
When I started, I thought drawing a deer was about talent I did not have. It was not — it was about a handful of specific errors, and once I named them, each was easy to fix. A good deer drawing tutorial gives you the steps, but it does not always warn you about the traps a beginner falls into, so that is what these lessons are.
None of these fixes needed better supplies or years of practice. They were tiny changes in approach — how thick I drew the legs, where I put the eyes, the order I worked in. Each one made an immediate difference, and together they turned my lumpy first attempts into something I was actually proud of.
Below are the five mistakes in the order I made and fixed them, each with what I was doing wrong, what changed, and how to apply it to your own deer. Read them, then go draw one. The mistakes themselves turned out to be the best teacher I had.
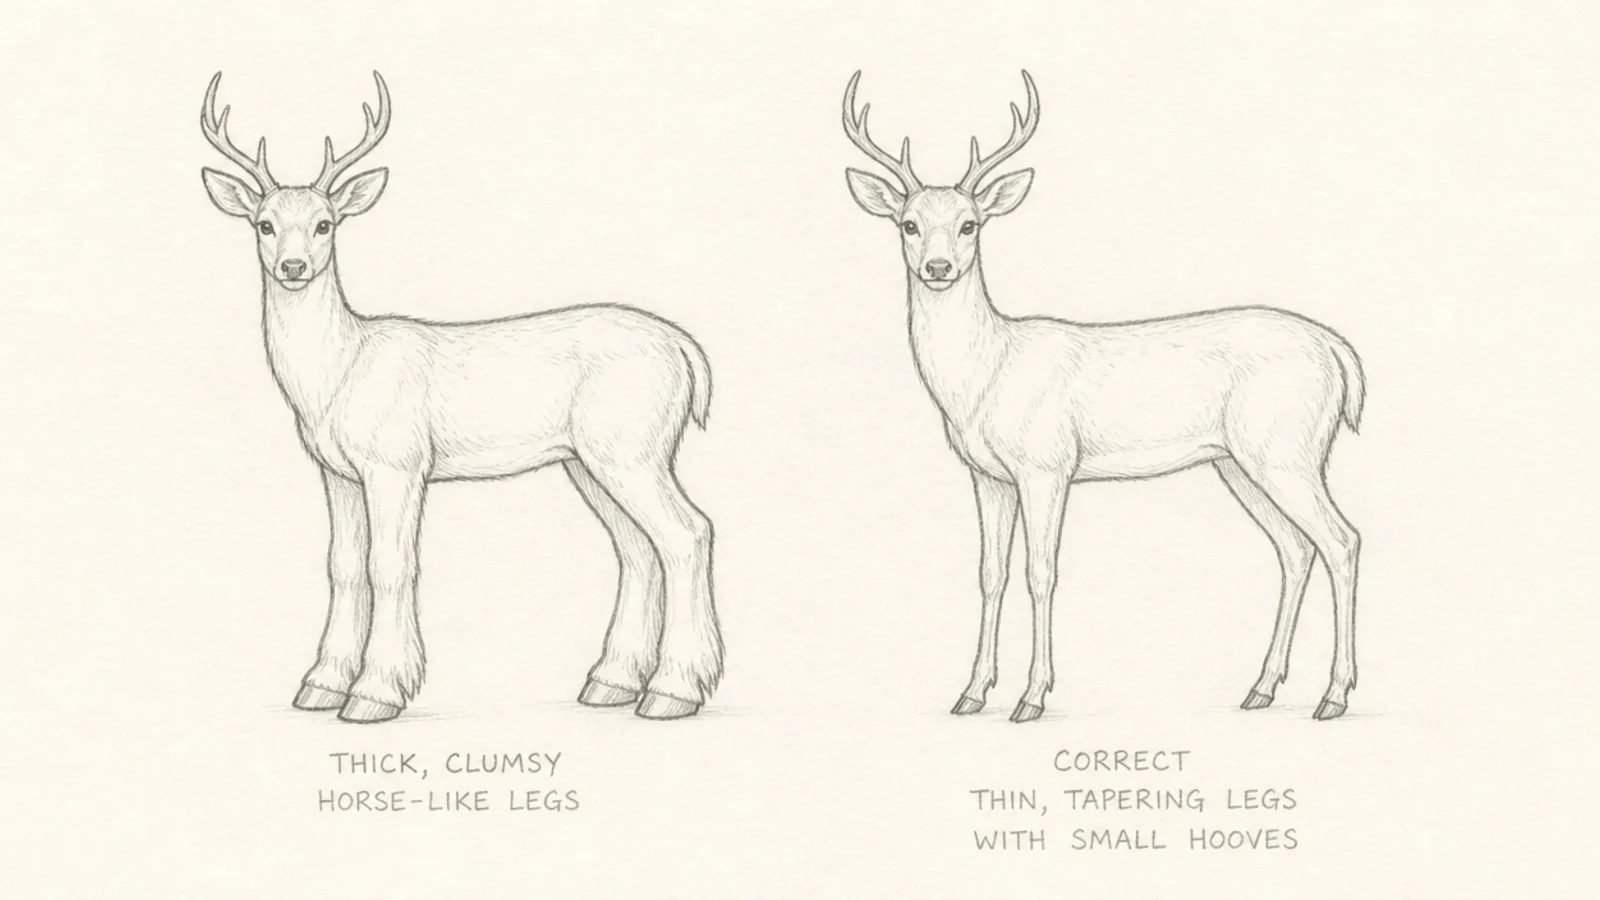
My first deer had chunky legs, and it instantly read as a horse or a dog instead. Deer legs are surprisingly thin and delicate, and that was the single biggest thing making my animal look wrong.
I redrew the legs as thin lines that thicken only slightly at the top and taper to small pointed hooves. The two front legs stayed nearly straight; the back legs got a backward bend at the hock.
Pro tipDraw the legs thinner than feels right — deer legs are slimmer than beginners expect.
AvoidDon’t draw sturdy thick legs; they turn a deer into a farm animal.
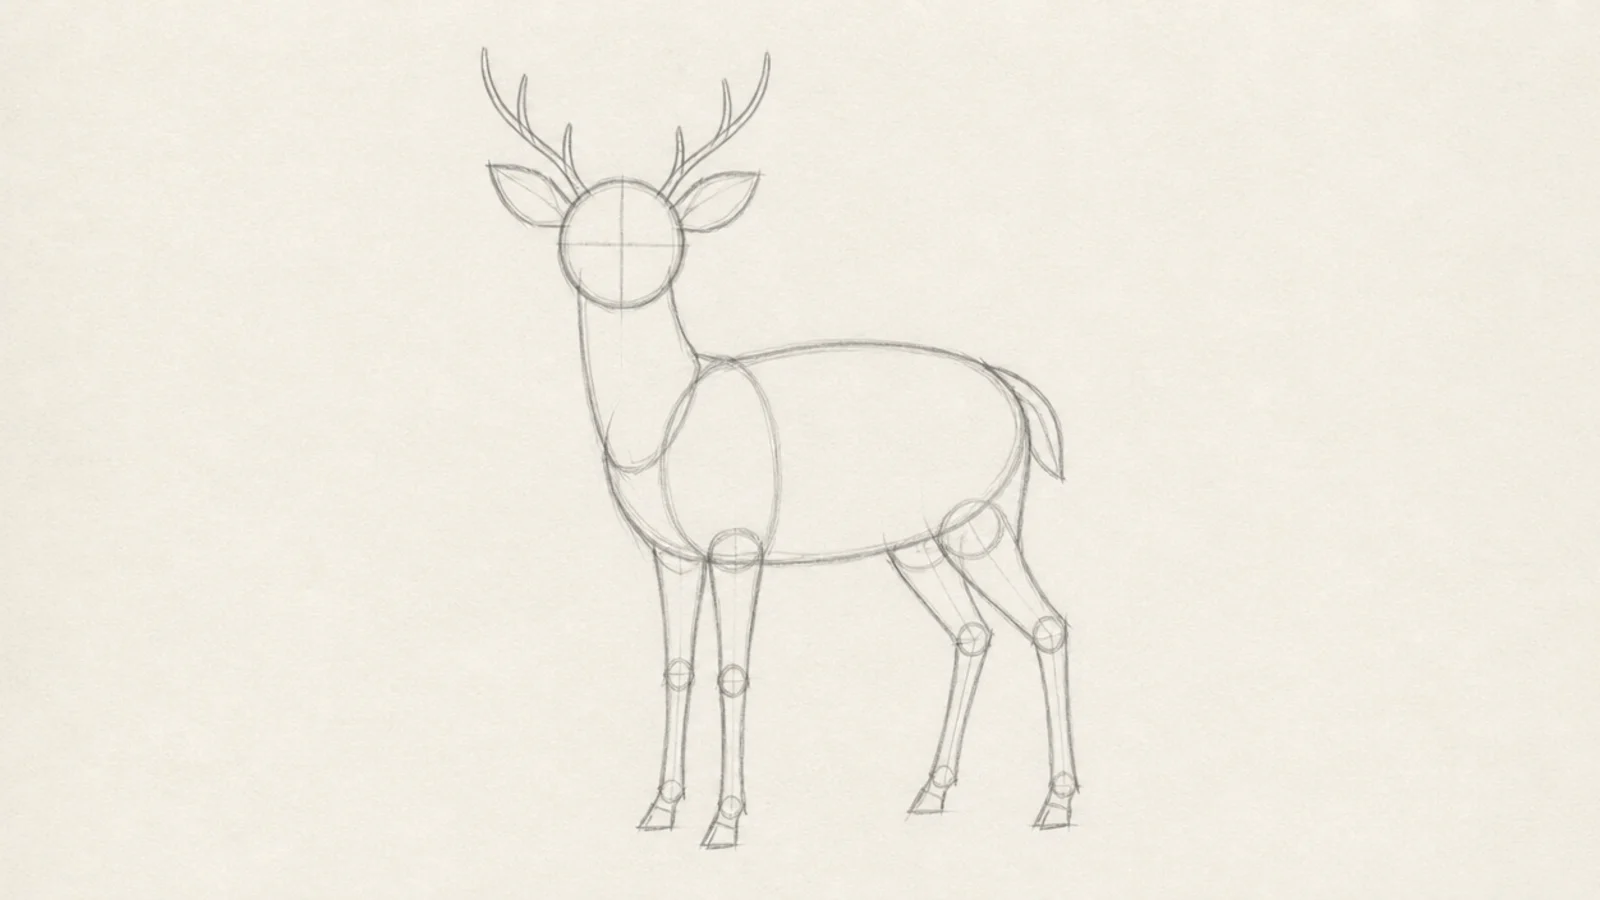
I started with an eye and the antler tips, and by the time I got to the body nothing lined up. Working detail-first meant the proportions drifted before the drawing even took shape.
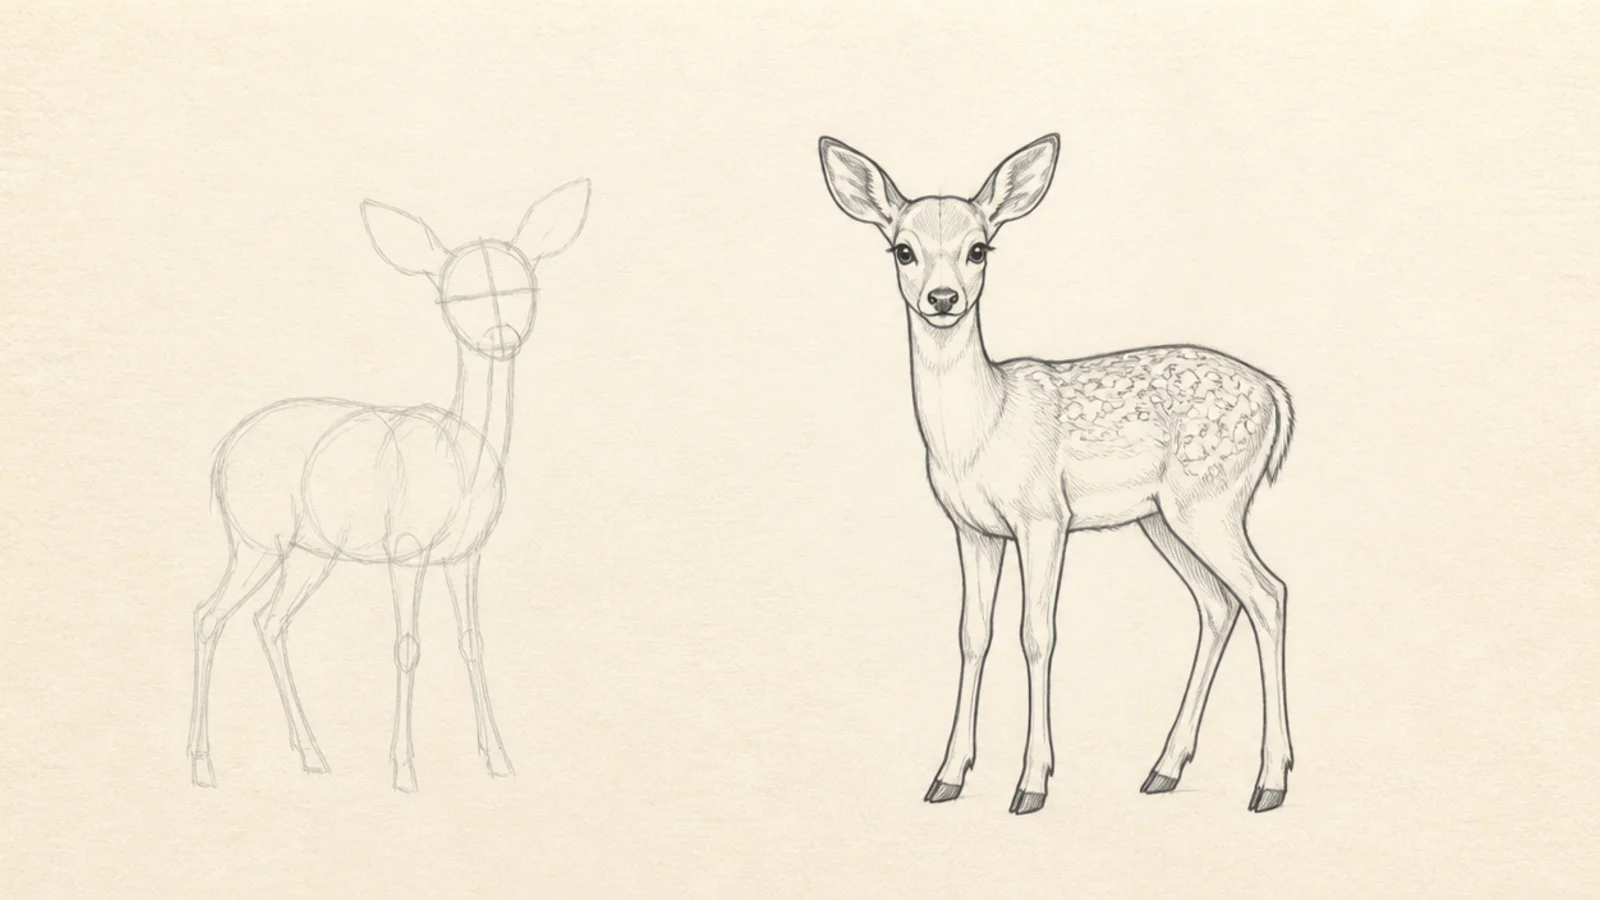
I switched to blocking the big shapes first — an oval body, a circle head, the neck, then the legs — all light. Only once those looked right did I add the face, antlers, and fur.
Pro tipBlock the body and head before any detail so the proportions are locked in early.
AvoidDon’t begin with an eye or an antler; the big shapes have to come first.
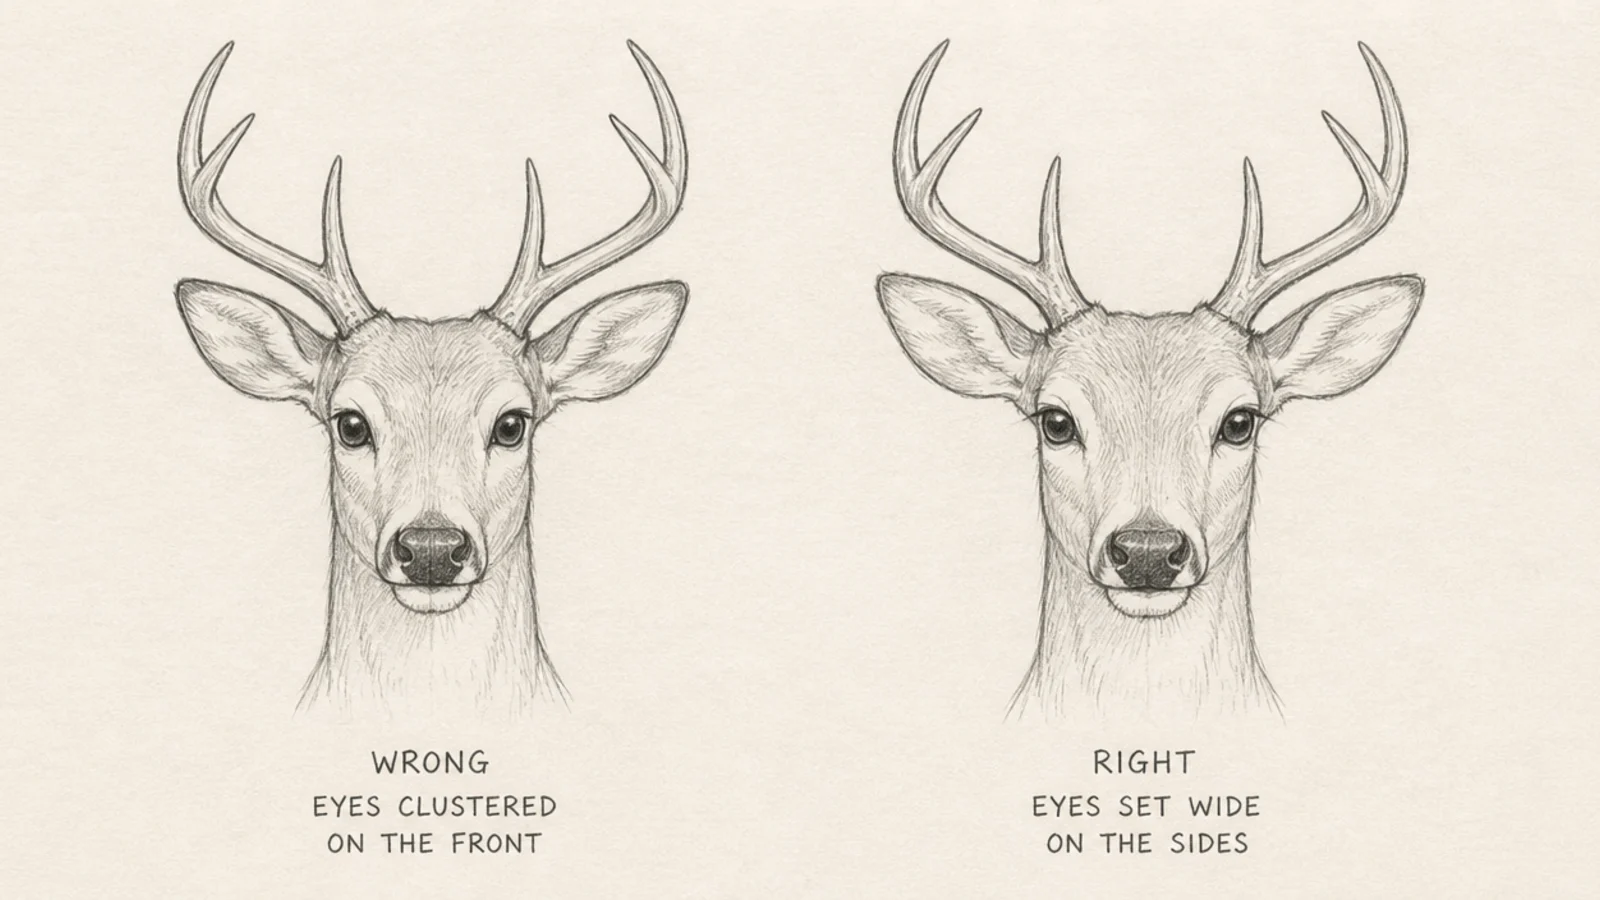
I placed the eyes on the front of the face like a human or a cartoon, and my deer lost its gentle look and seemed almost predatory. Deer are prey animals with eyes on the sides of the head.
I moved the eyes out to the sides of the head, wide apart, and gave each a soft almond shape with a highlight. That one change brought back the calm, alert deer expression.
Set the eyes wide on the sides of the head for the gentle prey-animal look.
Don’t cluster the eyes on the front of the face; deer eyes sit on the sides.
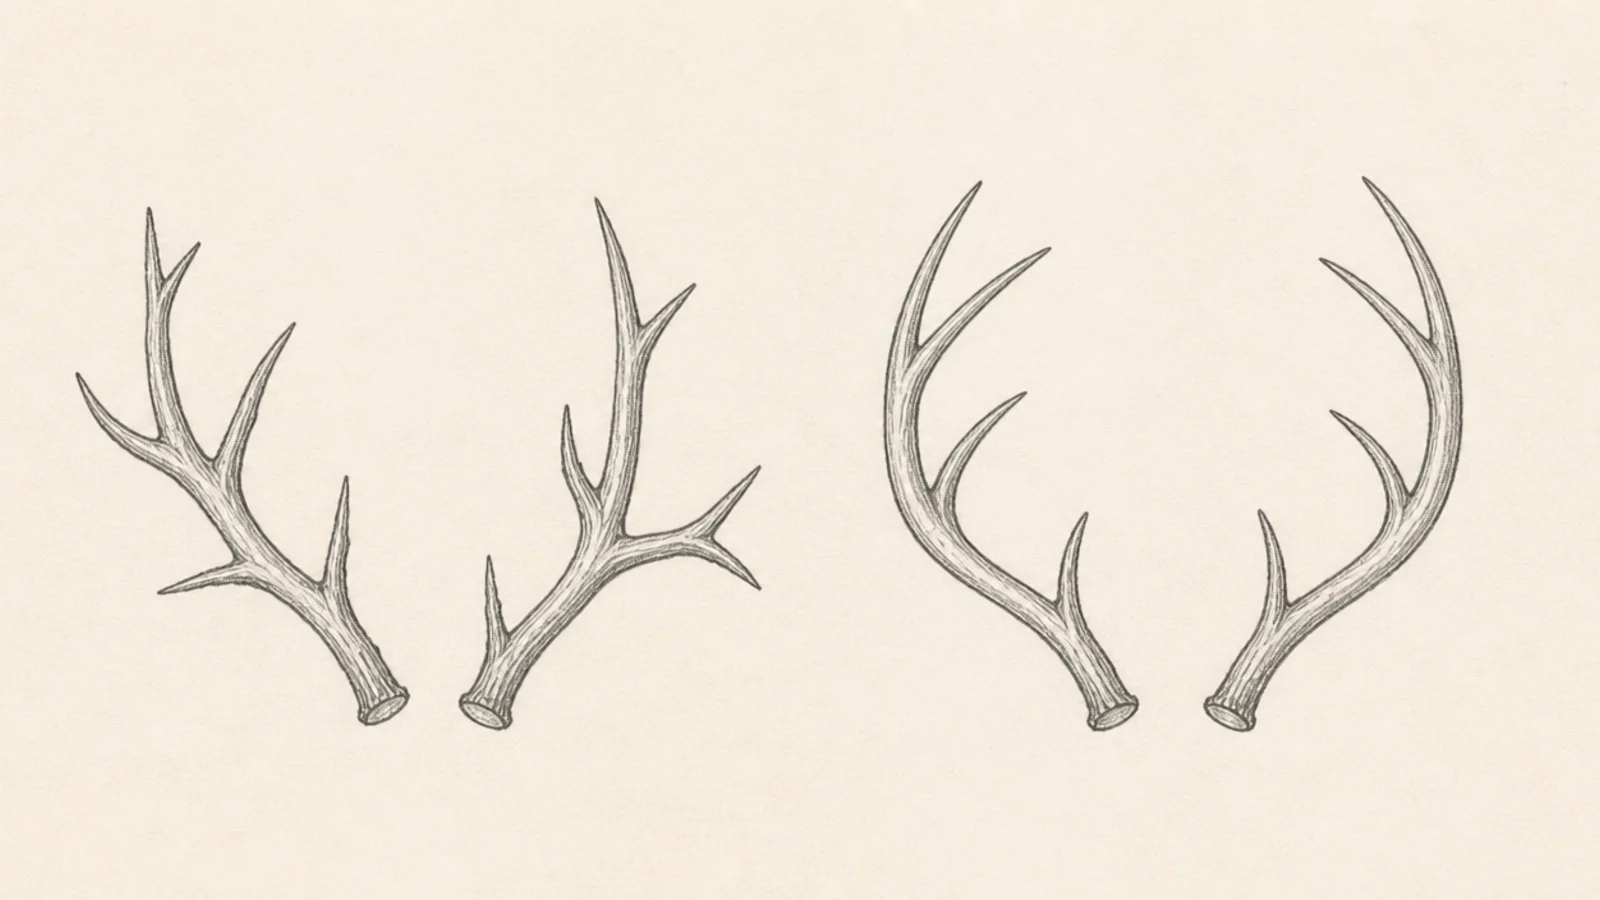
My first antlers had tines poking out in every direction like a broken fork, and they looked mechanical and wrong. I had not noticed that real antlers flow together in one direction.
I redrew the main beam as one confident curve, then branched the tines so they all swept up and forward together. I kept the pair roughly symmetrical but nudged a few tines so they were not identical.
Sweep all the tines the same direction, then vary a few slightly for a natural look.
Don’t point the tines every which way; matching sweep is what reads as antlers.
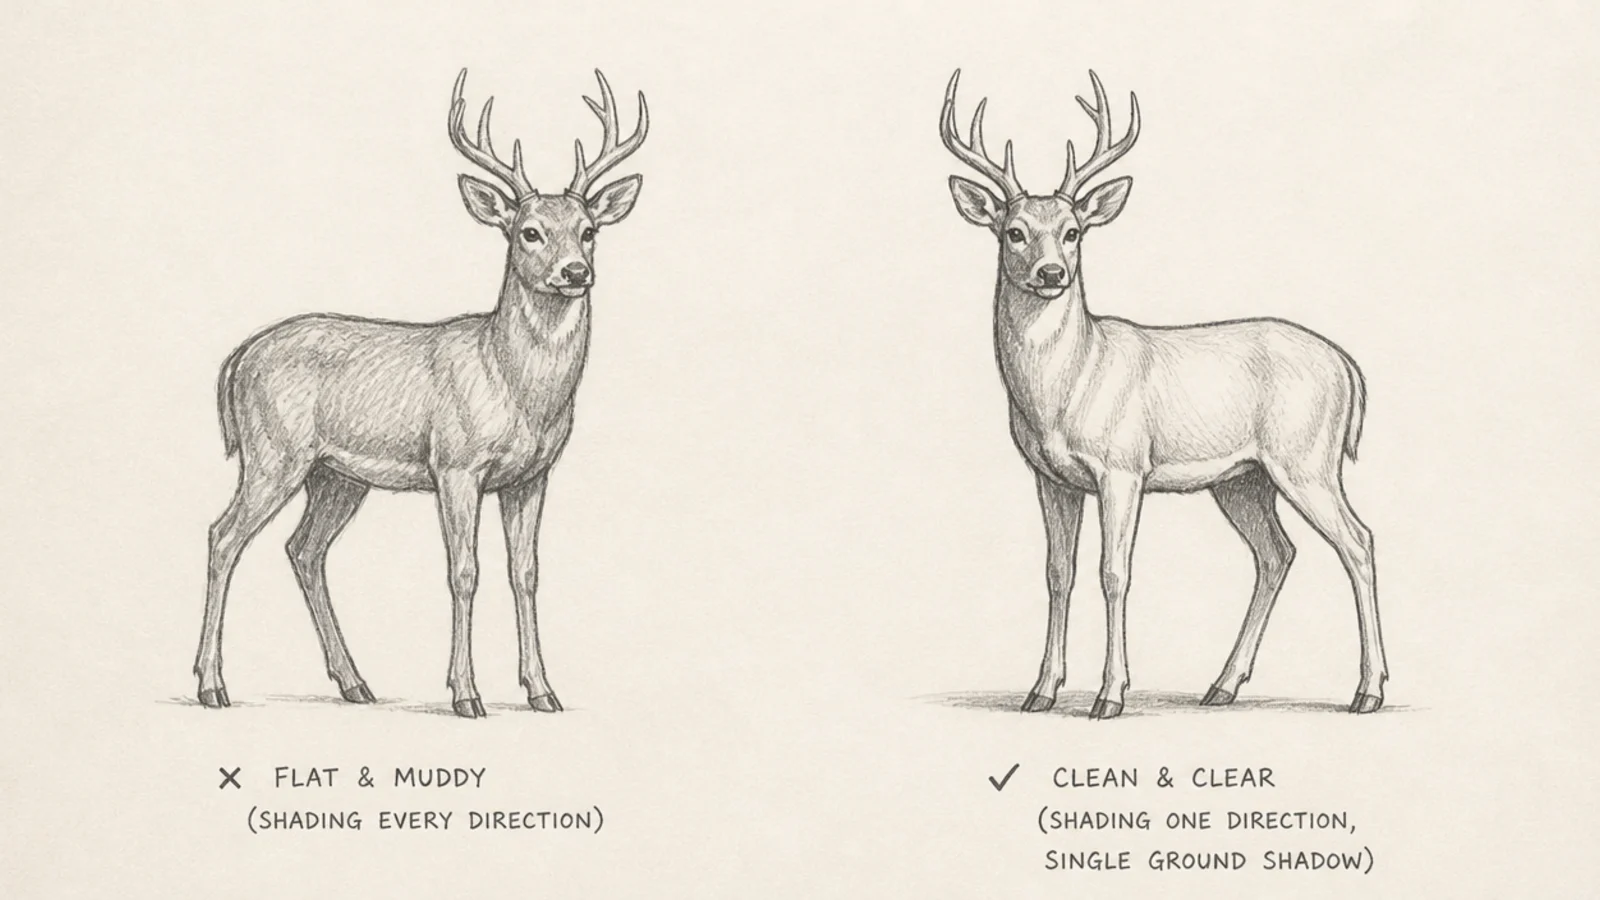
I shaded each part of the deer separately without thinking about the light, and the whole thing turned flat and muddy. My shadows fought each other instead of describing a form.
I picked one light direction and kept every shadow on the opposite side — under the belly, the far neck, inside the legs, and under the chin. I left the lit side bright and added one ground shadow.
Pro tipChoose one light direction first and put every shadow on the opposite side.
AvoidDon’t shade each part in isolation; light the whole deer together for real form.
Quick answers
What are the most common deer drawing mistakes for beginners?
The big ones are drawing the legs too thick, starting with details instead of blocking the body and head first, putting the eyes on the front of the face instead of the sides, making the antlers stiff or random, and shading from several light directions at once. A good deer drawing tutorial helps, but knowing these specific traps ahead of time is what saves you the most frustration.
Why does my deer look like a different animal?
Usually it is the legs and the head. Thick legs make a deer read as a horse or dog, and eyes placed on the front of the face instead of the sides remove the deer’s gentle, wide-eyed look. Thin legs, a tapering muzzle, and side-set eyes are three small changes that pull the drawing back to looking clearly like a deer.
How do I fix stiff, wrong-looking antlers?
Draw the main beam first as one confident curve, then branch the tines so they all sweep in the same general direction rather than sticking out randomly. Keep the pair roughly symmetrical but nudge a few tines so they are not identical. That shared sweep plus a little natural variation is what turns stiff, gear-like antlers into believable ones.
Is it normal for a first deer drawing to look bad?
Completely — my first deer looked like a horse-dog hybrid. Early drawings are supposed to be rough, and the mistakes are how you learn. Each specific error you notice and fix, like thick legs or misplaced eyes, makes your next deer noticeably better. The drawing itself, mistakes and all, is the real tutorial.