
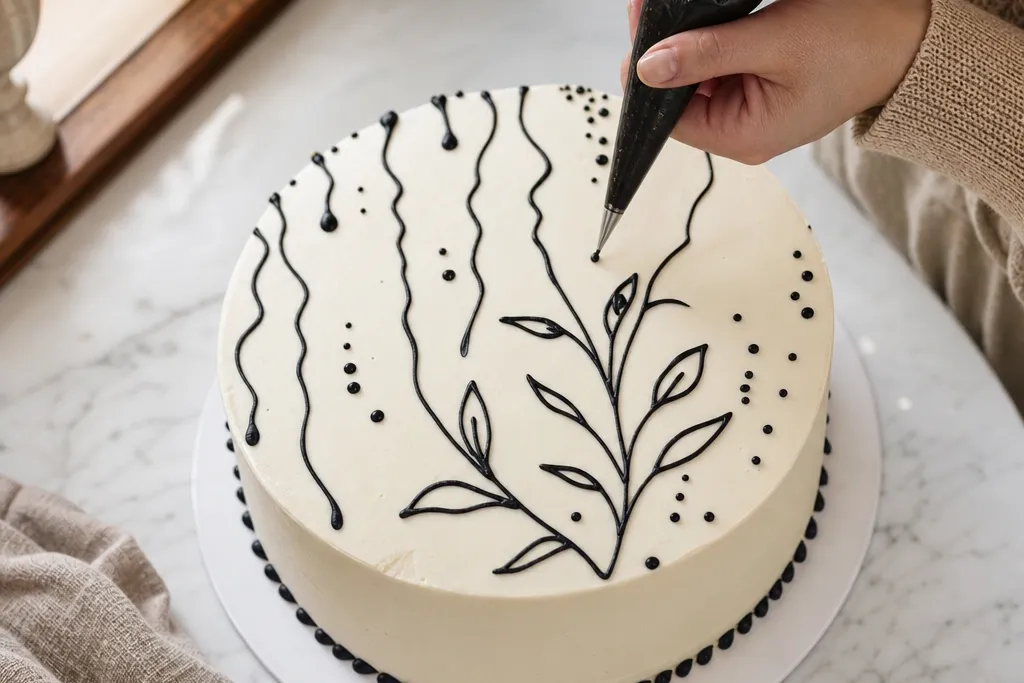

1. Single-Line Heart with Dot Halo
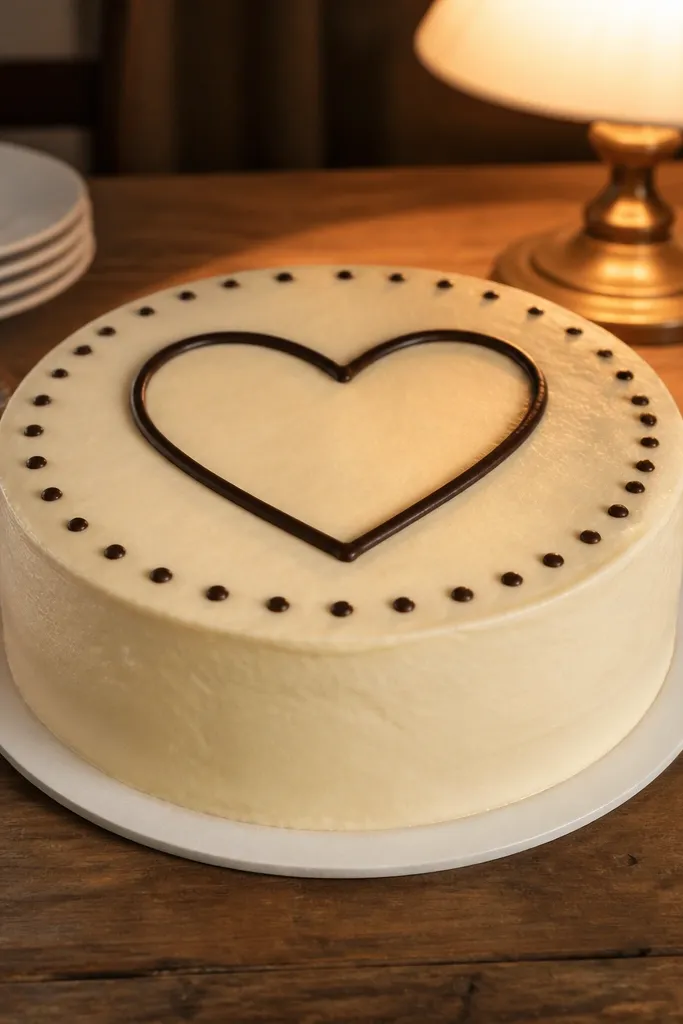
Start by leveling your frosting on top into a smooth 1/4 inch layer so the line has a stable surface. Pipe an outline heart using a medium tip (around 2-3 mm opening) or a squeeze bottle with a fine nozzle. Then add dots in a circle around the top half of the heart, keeping the dot spacing consistent. Let it set 10 minutes in the fridge before slicing if you used buttercream.
This drawing is the fastest way to make a cake look intentional. The single-line heart gives a clean silhouette, and the dot halo adds texture without turning into a busy mess. Use a dark color like black cocoa or dark chocolate icing so the outline reads clearly in photos. It’s great for birthdays and date-night cakes because it looks sweet without needing elaborate piping skills. Expect about 15-20 minutes if you keep the heart centered and the dots evenly spaced.
AvoidDon’t add glitter or sprinkles before the outline sets — they smear into the line.
Pro tipIf your line gets shaky, stop and let it crust for 1-2 minutes, then continue instead of dragging through wet icing.
2. Chocolate Drip Logo Style
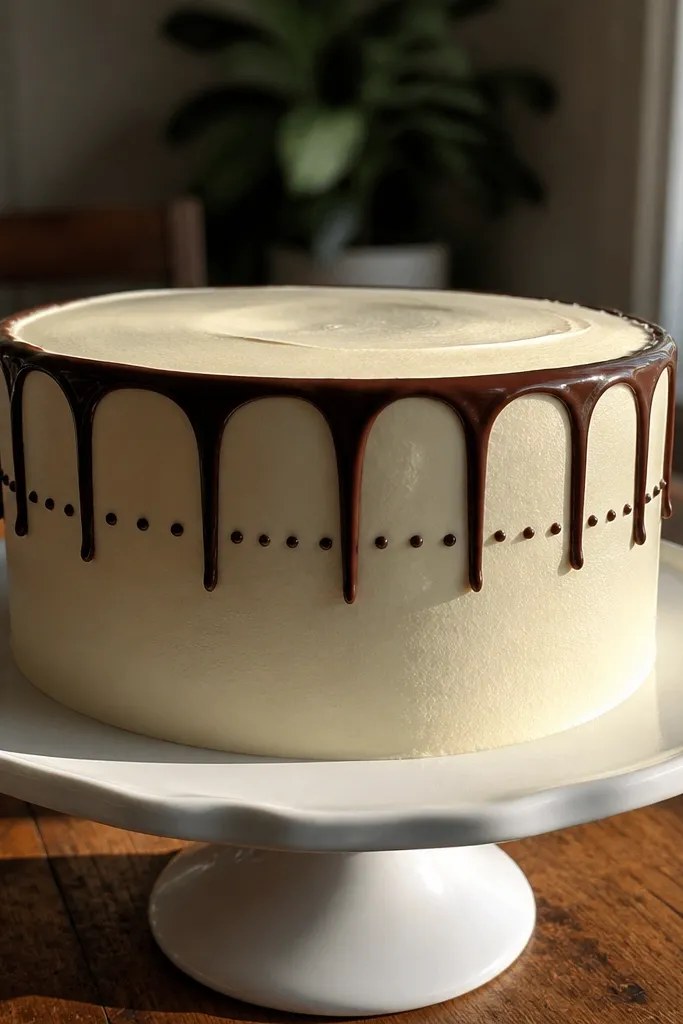
Drips look fancy, but you can keep them simple and still get that “custom bakery” vibe. This version uses three to five thick drips that stop cleanly, then a single dot line for a modern finish. Choose a dark drip color (chocolate, cocoa, or espresso icing) and keep the base top smooth and pale. It’s photogenic because the drips create vertical movement that reads well in overhead shots. This is a good choice when you want something bold without a lot of drawing time.
Spread a smooth top layer and chill it for 5-7 minutes so it firms up. Pipe 3-5 drip blobs from a center point, letting each one elongate slightly before you stop squeezing. Then add a short line of dots near the widest drip area using a smaller tip. Finish by nudging any uneven drip edges with a toothpick tip.
Practice the drip length on a scrap plate first so you don’t oversqueeze on the cake.
Skip thin drips — they run too far and ruin the top surface.
3. Minimal Sun Rays with Center Blossom
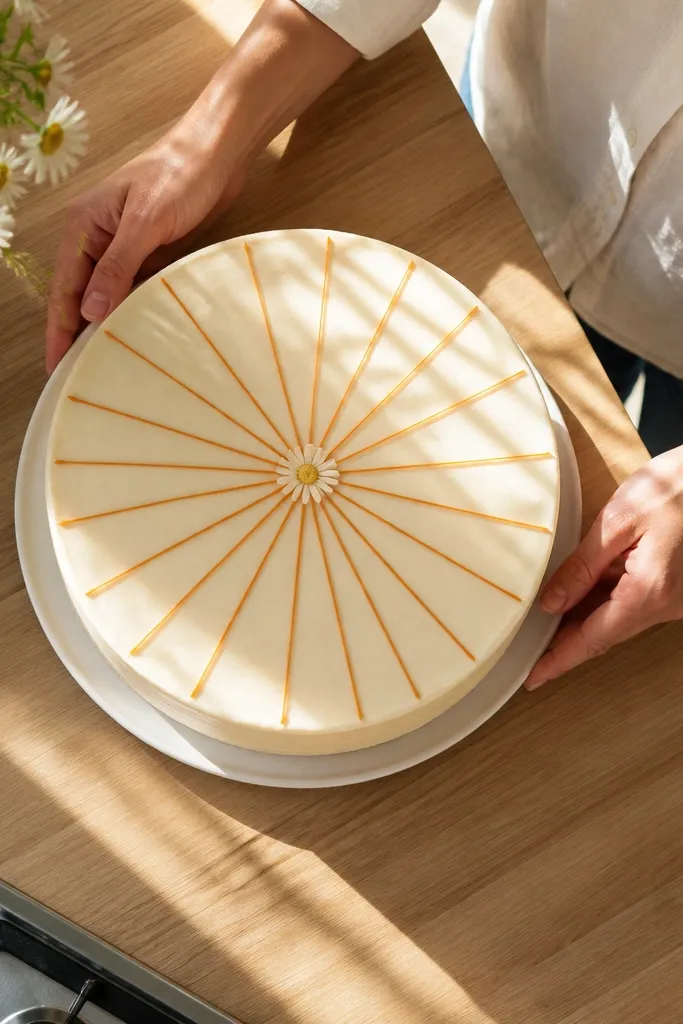
Sun rays are one of the easiest ways to make a cake look bright even if you only use two colors. Keep the rays thin and evenly spaced, and add a tiny blossom center so it feels designed, not accidental. Use orange icing for the rays and a contrasting yellow or white for the center. This drawing works for spring birthdays, kids' parties, and sunny-themed events. It also holds up well when sliced because the rays create a clear focal point.
Mark a center point on the cake top with a tiny dot of icing, then smooth the top so rays land cleanly. Pipe 10-14 straight rays starting from the center, each ray about 1/2 inch long. For the blossom, pipe a small circle and add 5-6 petals around it using short teardrop strokes. Let it chill 10 minutes to set the petals.
Use a parchment cone or a squeeze bottle with a fine tip so your rays look like lines, not blobs.
Don’t make the rays too long — they get crowded and blur into the frosting.
4. Faux Calligraphy Swash (One Word)
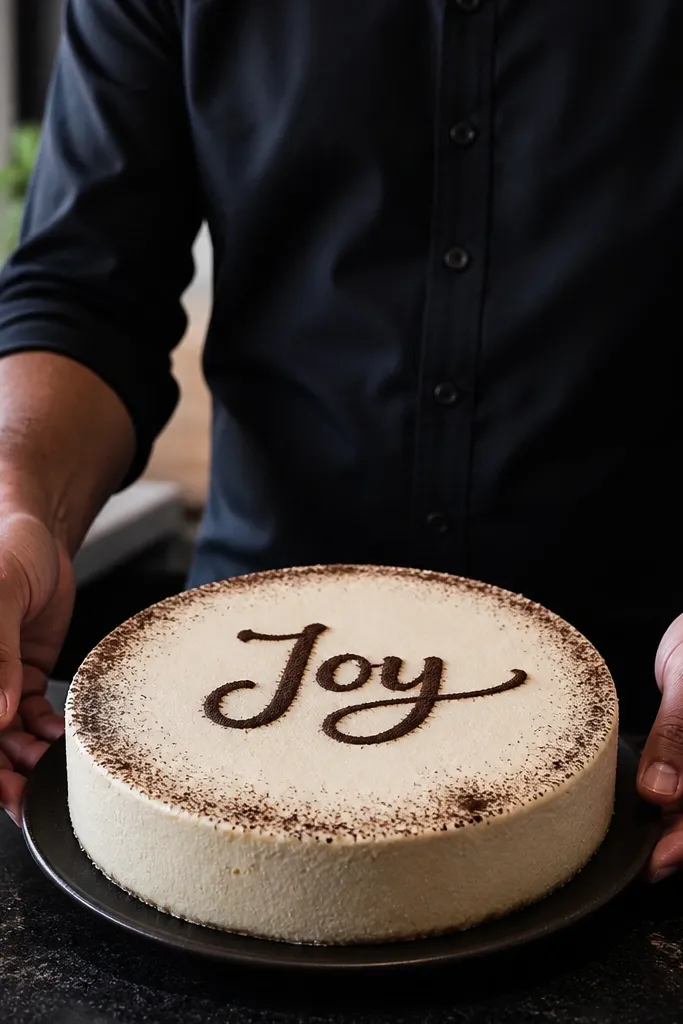
Plan the word size by tracing the letters lightly on parchment, then flip the parchment under the cake board as a guide. Pipe the thick strokes first, then pull thin strokes by using lighter pressure and a smaller tip. Add the swash tail last so it’s the focal flourish. Chill 10-15 minutes before adding any sprinkles or edible pearls.
One-word calligraphy looks high-end because it has movement. You don’t need real lettering skill; you need consistent thickness. This project uses one short word (like “hello,” “love,” or a name) plus a thick-to-thin swash line so it reads like calligraphy. Use a thick gel color or cocoa-dark icing for strong contrast. It’s perfect when you want a clean, elegant look without filling the whole cake.
AvoidDon’t choose a tiny font — small letters merge when people cut the cake.
Pro tipIf your line thickness changes mid-stroke, pause pressure for a split second to reset your flow.
5. Geometric Triangle Confetti Top
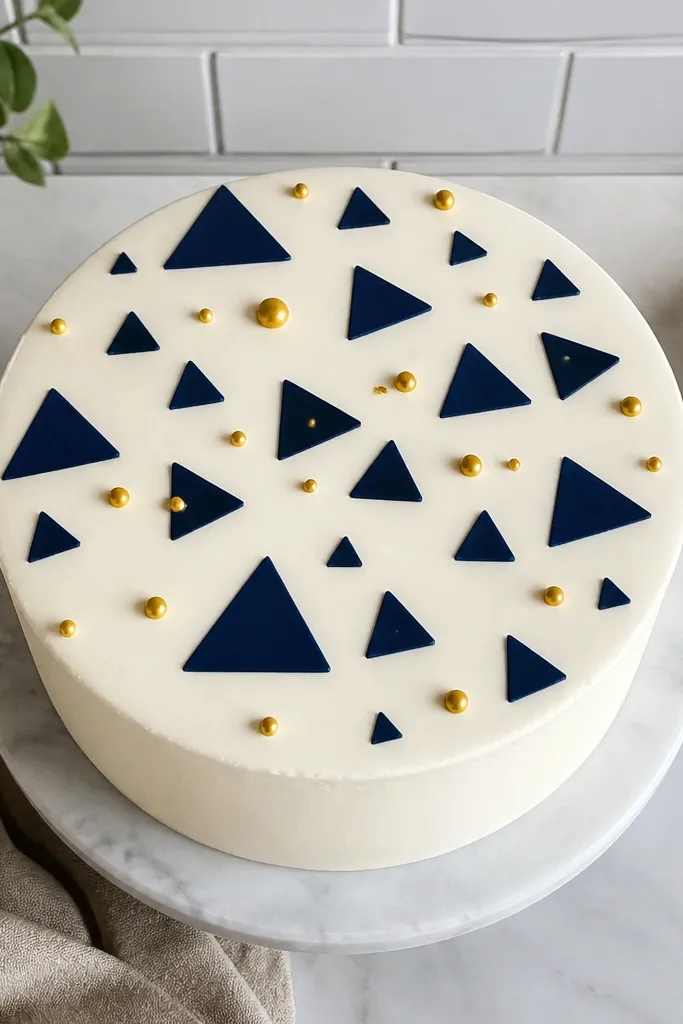
Geometric confetti turns a plain cake into something graphic fast. Triangles are forgiving because slight irregularities still look intentional. This drawing uses three triangle sizes and two colors max so the top stays crisp in photos. Keep the base smooth and use a contrasting palette like navy plus gold on white. It’s ideal for modern birthdays and graduation cakes when you want clean, structured shapes.
Smooth the top frosting into an even 1/4 inch layer and chill briefly. Pipe small triangle outlines using a fine tip, then fill only the triangles you want colored so the rest stays white. Place triangles in clusters around a center, leaving breathing space between clusters. Finish by adding a few tiny dots between triangles for extra separation.
Use a ruler or a triangle template under parchment to keep triangle angles consistent.
Don’t use more than three triangle sizes — the pattern gets chaotic.
6. Buttercream Feather Fan
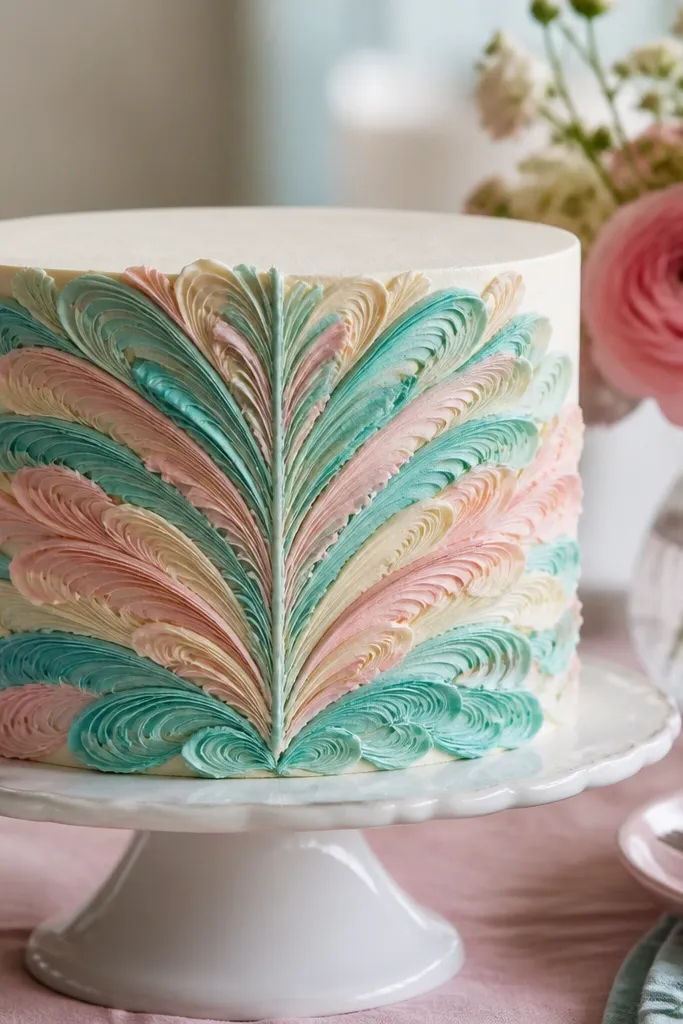
Start with a light-colored base and mark a curved outline using a toothpick dipped in icing. Pipe the center spine first — a straight line that curves slightly at the top. Then pipe short curved lines branching out from the spine, alternating sides as you go. Add a few darker accents near the spine for depth, then chill 15 minutes.
Feathers look complicated, but the trick is repeating the same curved lines. This design draws a fan shape with a central spine and evenly spaced mini arcs on both sides. Use pastel colors like teal, blush, and light cream for a soft aesthetic. It’s great for bridal showers, spring parties, and anything where you want something artsy without heavy fondant. The fan shape also frames the center so your photo has a clear composition.
AvoidDon’t pack too many arcs — the feather turns into a fuzzy blob.
Pro tipUse a small round tip and keep each arc the same length for that “real feather” look.
7. Doodle Cloud with Raindrop Outline
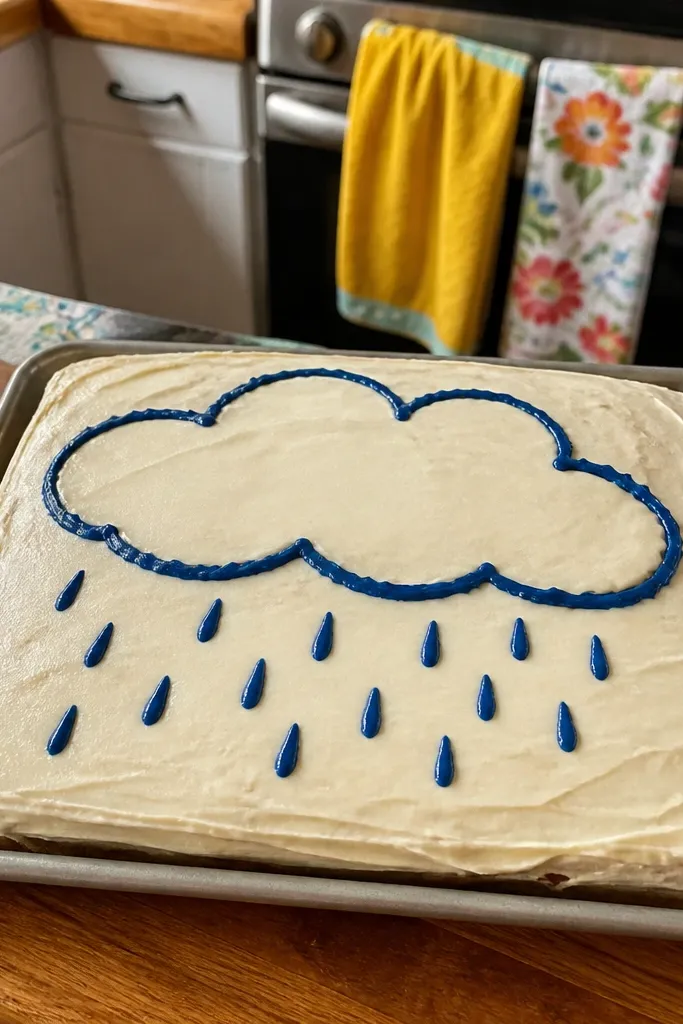
Pipe a cloud outline first using a thicker tip so the line stands out. Draw three to five raindrops under the cloud, each one a straight teardrop line with a small point at the bottom. Add tiny accent dots on the cloud to suggest texture. Let it set 10 minutes, then add any white highlight dots if you want a shinier look.
This doodle is perfect for kids' cakes because it’s cute and readable from a distance. It uses a thick outline cloud plus simple raindrop lines that hang below. Keep the cloud outline slightly irregular — that’s what makes it look hand-drawn. Use blue icing for raindrops and a darker outline color for the cloud. It’s also a good “theme filler” when you don’t want to commit to a character or a full scene.
AvoidDon’t flood the cloud with thin icing — it spreads and loses the doodle vibe.
Pro tipOutline first, then fill — it keeps your shapes from getting muddy.
8. Polka Dot Border with Center Accent
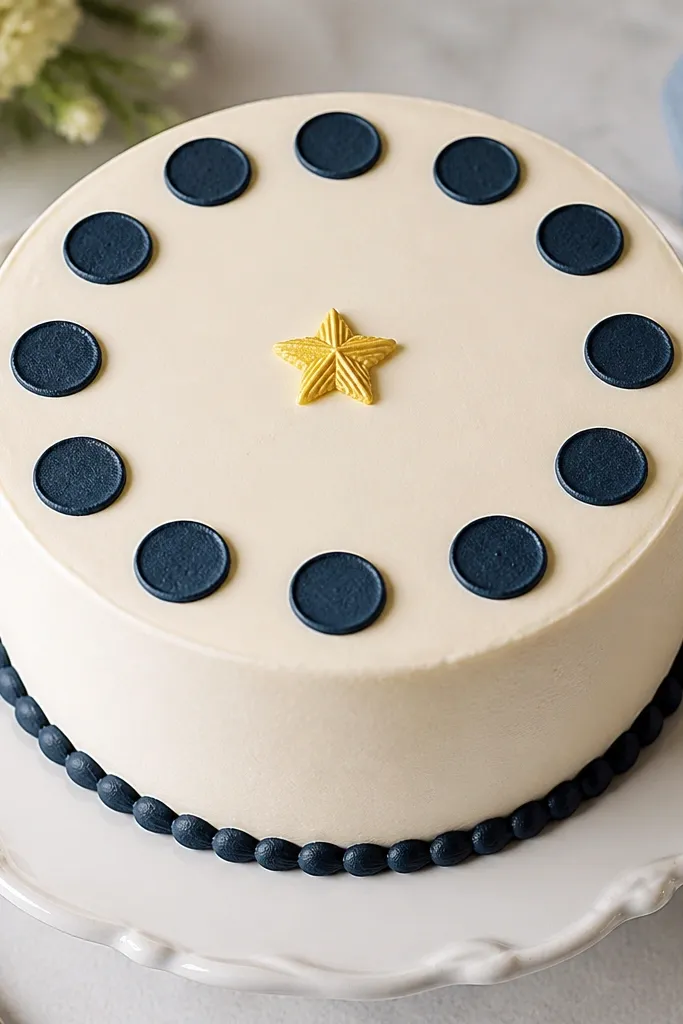
A dot border makes the cake look designed instantly. The ring creates a framing effect, and the center accent keeps it from feeling repetitive. This drawing is easy because all your dots are the same size. Use a single color for the dots and a different color for the center star or heart. It’s a safe pick for any party because it fits without clashing with the cake flavor or theme.
Smooth the top and chill for 5 minutes so dots don’t sink. Pipe dots in a circle around the edge of your drawing zone, spacing them about 1/2 inch apart. Keep the dot size consistent by applying steady pressure for the same time each dot. Add a small center star by piping a star outline or a simple 5-point shape.
If you’re struggling with spacing, lightly mark dot positions with a toothpick before piping.
Don’t place the dot ring too close to the cake edge — it smears when people cut.
9. Rose Line Drawing on White Frosting
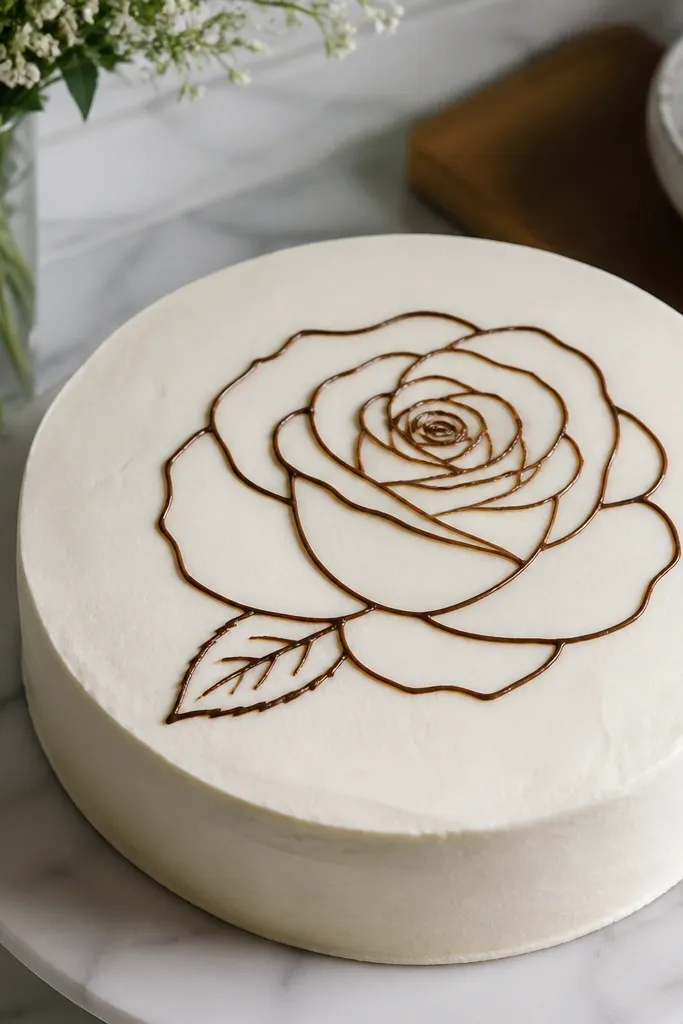
A single rose line drawing looks elegant without requiring fondant. The line work gives a delicate look, but it still photographs clearly when you use a dark color. This design is also forgiving for beginners because you can build the rose with overlapping curved petals. Add one small leaf for balance. It suits anniversaries, romantic birthdays, and “adult” cakes where cartoon themes feel too young.
Pipe the rose center first with short spiral curves. Then add outer petals by drawing teardrop loops around the center, keeping each petal slightly different. Add one leaf by drawing a curved oval with a center vein line. Chill 10-15 minutes so the petal outlines hold shape.
Use a slightly thicker line for the outer petals — it makes the rose pop in photos.
Don’t use a too-light color for line art — it disappears in overhead shots.
10. Starburst Rays Around a Candle
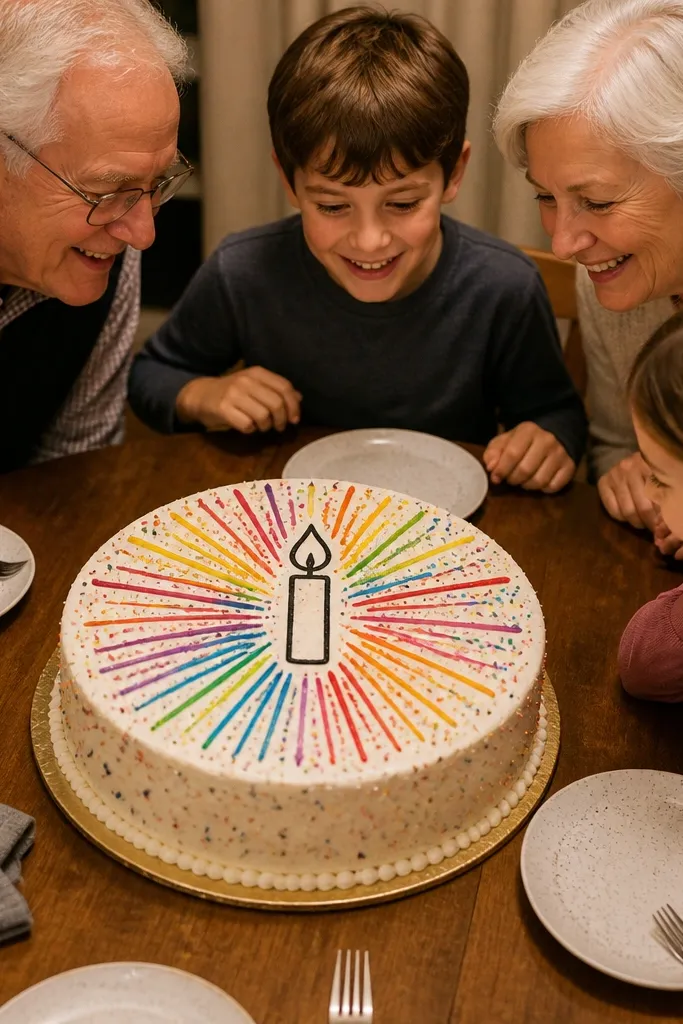
This is a fun way to show “celebration” without adding a lot of decoration. A candle outline gives the center symbol, and the starburst rays fill the space with motion. Use bright colors for the rays, but keep the candle outline dark so it stays readable. It’s great for milestone birthdays because it looks like a graphic poster. The starburst also keeps the slice interesting even when the cake is cut.
Create a small candle outline in the center using a dark icing. Pipe 12-16 rays radiating outward from behind the candle, each ray about 1 inch long. Add a few tiny burst dots between rays for a confetti effect. Chill 10 minutes so the rays don’t slump.
Start rays from the candle base, not the flame, so the composition stays centered.
Don’t make rays the same exact length — a perfectly uniform burst looks flat.
11. Simple Butterfly Wing Veins
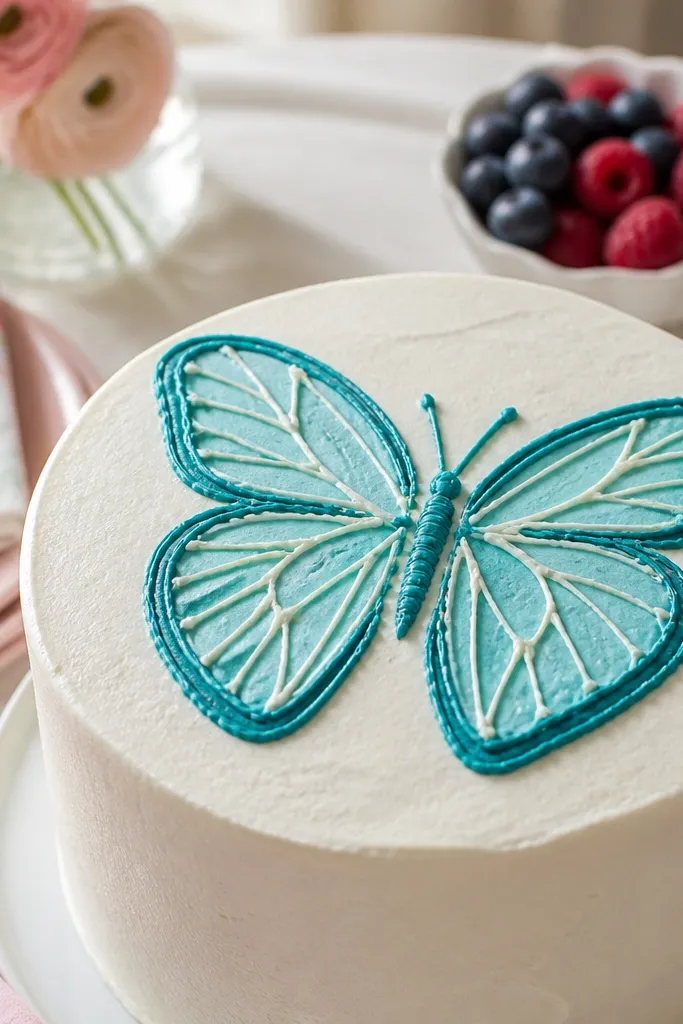
Butterfly drawings look cute, but the “wow” is in the wing veins. This design uses a smooth wing outline and a few curved vein lines that make it look detailed without being hard. Use one main color for the wings and a second lighter shade for the veins. It’s a great pick for spring cakes, baby showers, and light pastel themes. It also works on both round and square cakes because the wings can be centered.
Pipe a symmetrical butterfly outline by drawing one wing first, then mirror it on the other side. Add a few vein lines inside each wing using gentle curves from the top edge to the bottom. Add a small body line in the center with two antenna dots. Chill 15 minutes so the lines set before you add any edible pearls.
Keep the veins to 5-7 lines per wing. Too many lines crowd and blur.
Skip heavy filling under the lines — it makes the veins disappear.
12. Monogram Initial with Shadow Stroke
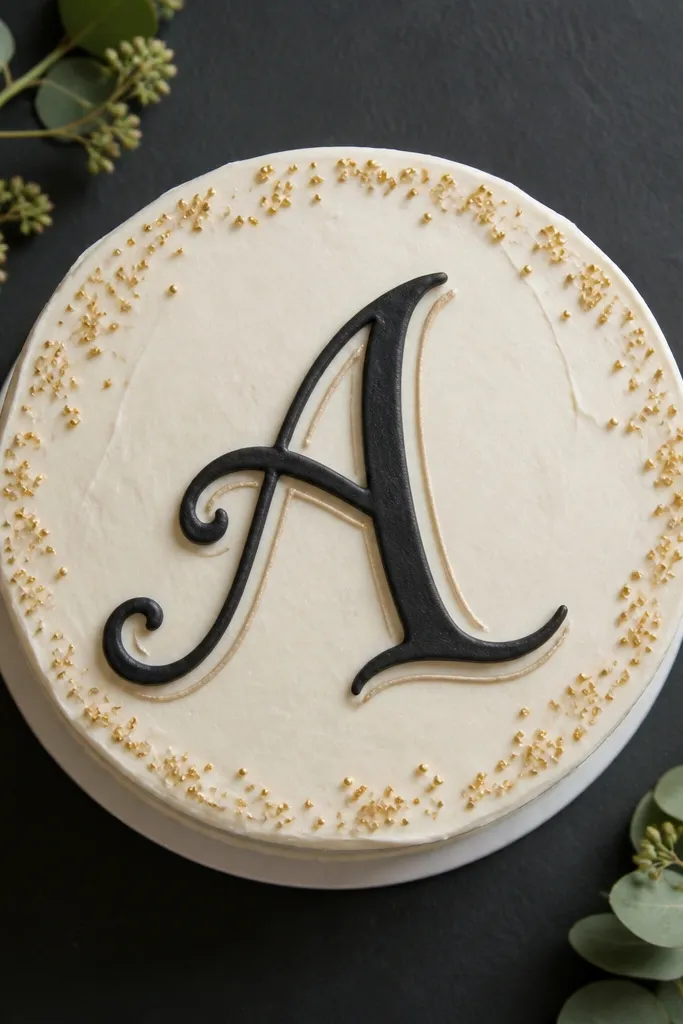
Monograms look professional because they’re big and simple. The shadow stroke adds depth while still staying beginner-friendly. Pick a single initial and make it take up about half the cake top. Use dark icing for the main letter and a lighter shade for the offset shadow. This design is perfect for weddings, anniversaries, and any cake where you want a personal touch without character art.
Choose an initial size about 5-7 inches tall for a 9-inch cake. Trace the initial lightly on parchment and use it as a guide on top. Pipe the shadow first by offsetting the letter shape slightly, then pipe the main initial on top. Let it set 10-15 minutes before smoothing any stray edges with a damp toothpick.
Use a thicker tip for the main letter so it doesn’t look like a sketch after cutting.
Don’t center the monogram too close to the edge — slices will clip it.
13. Rainbow Arc with Cloud Outline
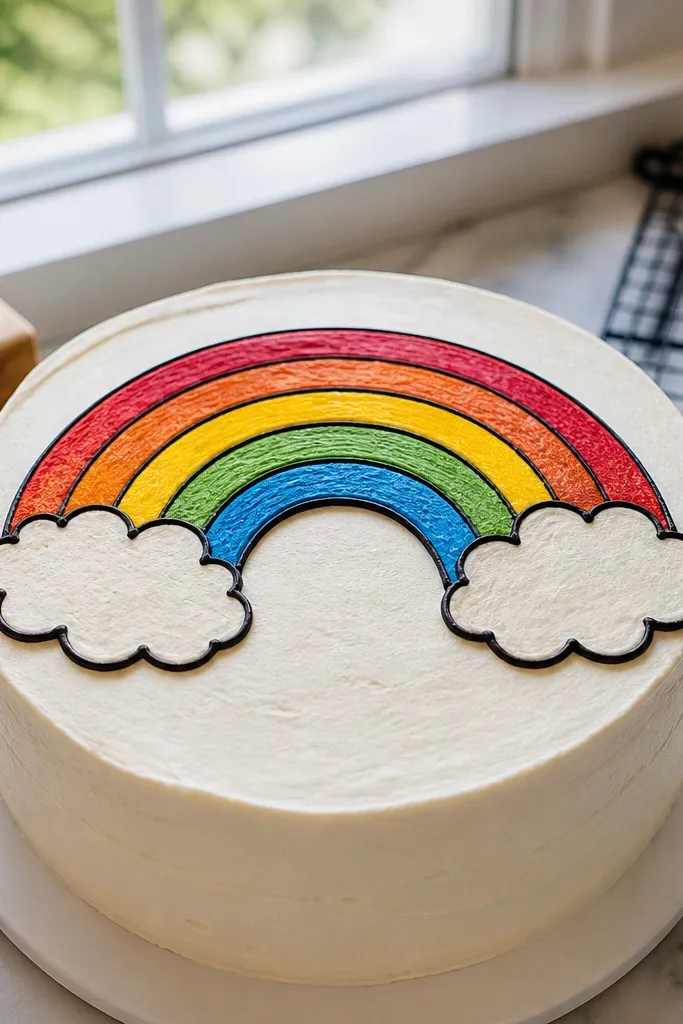
A rainbow arc reads instantly, and the clouds frame it so the drawing looks complete. This version keeps the rainbow in clean bands and uses outlines so the colors don’t blend. Use 4-5 rainbow colors, not 7, so it stays simple and still looks like a rainbow. It’s ideal for parties that want color without complicated scenes. The arc also stays visible on slices because it sits high on the top surface.
Pipe two cloud outlines first at either side of your drawing zone. Then pipe an arc made of 4-5 curved bands, stacking each color band carefully along the arc. Add a few small cloud dots or tiny lines for texture. Chill 15 minutes so the bands set before you add any finishing touches.
Keep each rainbow band narrow — wide bands smear together if your frosting is soft.
Don’t use runny food coloring gel in icing — it thins the frosting and blurs bands.
14. Rosemary Sprig Doodle
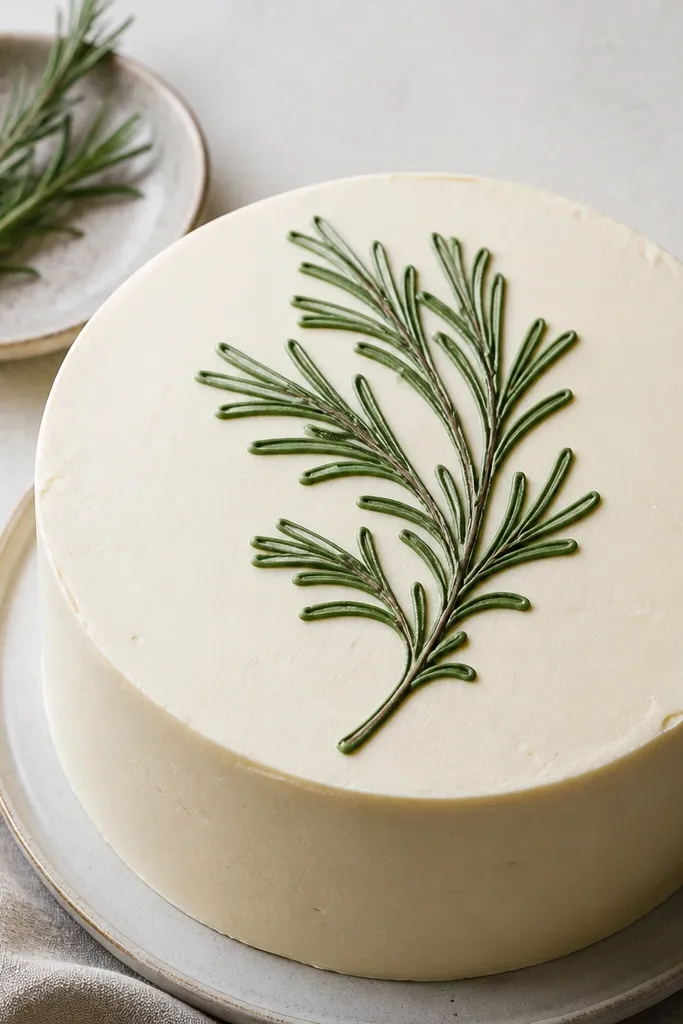
This is the grown-up version of a leaf doodle. A rosemary sprig looks fresh, and it photographs well because the thin leaves create texture. Use green icing for the sprig and add a light outline in a darker green or brown so it stays readable. It works on neutral cakes, especially for holidays and “simple but pretty” celebrations. It also looks good on both white and chocolate frosting bases.
Start with a center stem line that curves slightly. Then add pairs of small leaf ovals along the stem, each leaf pointing outward. Add a few short vein lines on the leaves using lighter pressure. Finish with a couple tiny buds near the top. Chill 10-15 minutes so the thin leaf lines don’t collapse.
If leaf tips spread, let the stem set 5 minutes before adding leaves.
Don’t make leaves too large — big leaves flatten and stop reading as a sprig.
15. Cocoa Scribble Border with Gold Dot Accents
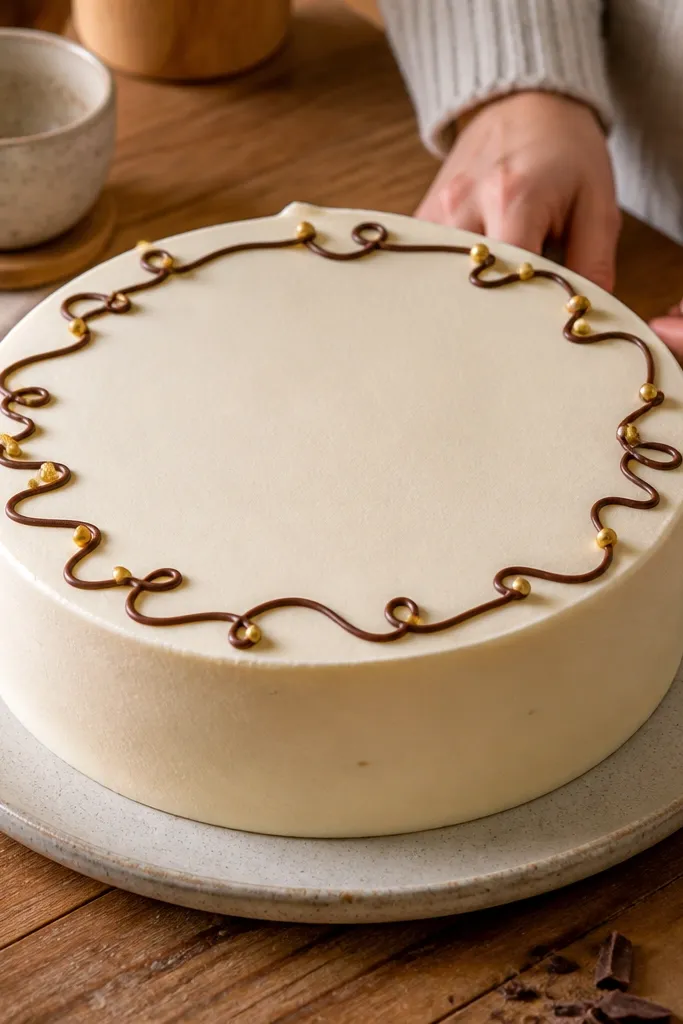
Smooth the top frosting and mark a circle zone with a light guide dot. Pipe a wavy border line around the zone, keeping the wave height small (about 1/8 inch). Then add 8-12 gold dots inside the circle, placed near the waves. Chill 10 minutes so the border line stays crisp.
Wavy scribble borders look artsy but still controlled. This one uses a cocoa-colored wavy line around a central blank area, then adds small gold dot accents for contrast. It’s a great option when you want something stylish that doesn’t require perfect symmetry. The center blank keeps the design clean and gives you space for a small topper later. It’s also easy to match with almost any cake color because the border is neutral.
AvoidDon’t overfill the center — the blank space is what makes the border look intentional.
Pro tipUse a slightly thicker tip for the border so it reads clearly against the cake surface.
16. Buttercream Lace Edge with Single Flower Center
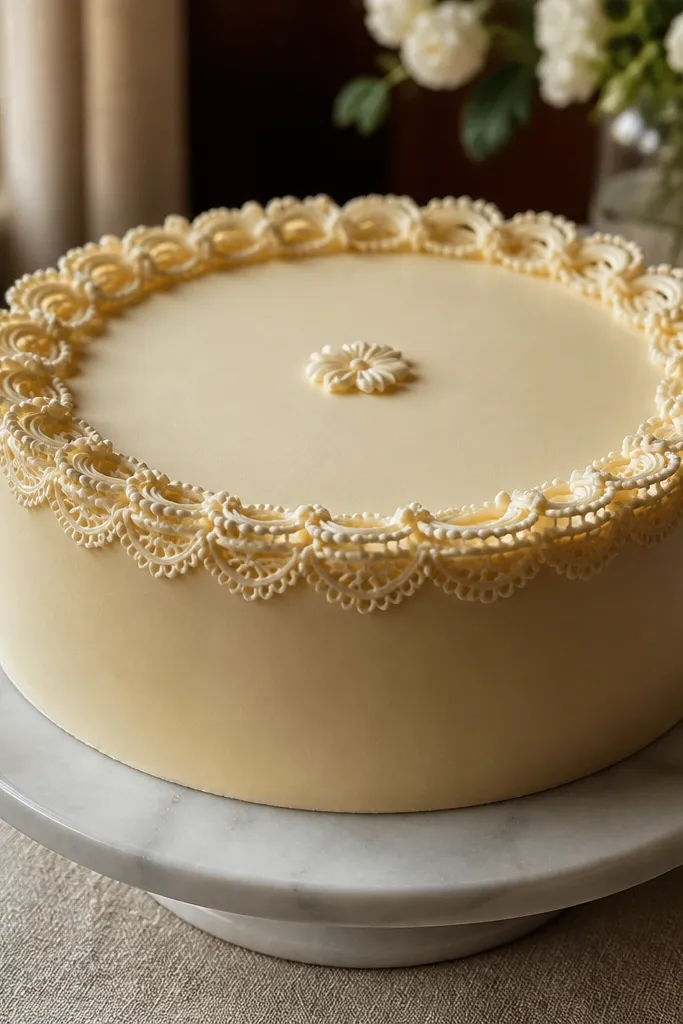
Lace edges look fancy, but you can do them as a simple scallop pattern. This design uses a lace-like ring around the outer drawing zone and keeps the center minimal with one small flower. It’s photogenic because the scallops create a rim of texture that catches light. Choose a white-on-pale base, or go bold with a dark lace edge on a light cake. It fits weddings, showers, and any cake that needs a soft, pretty finish.
Pipe a scalloped ring around the edge of your drawing zone using a small star tip or round tip for textured dots. Add tiny connecting arcs between scallops to create a lace look. Then pipe a single flower in the center: a small circle and 5-6 petals around it. Chill 15 minutes so the lace edge firms up before cutting.
Work in short sections so the lace line doesn’t crust while you’re still piping.
Skip thick buttercream for lace — it spreads and loses the scallop detail.
17. Tiny Dinosaur Footprints
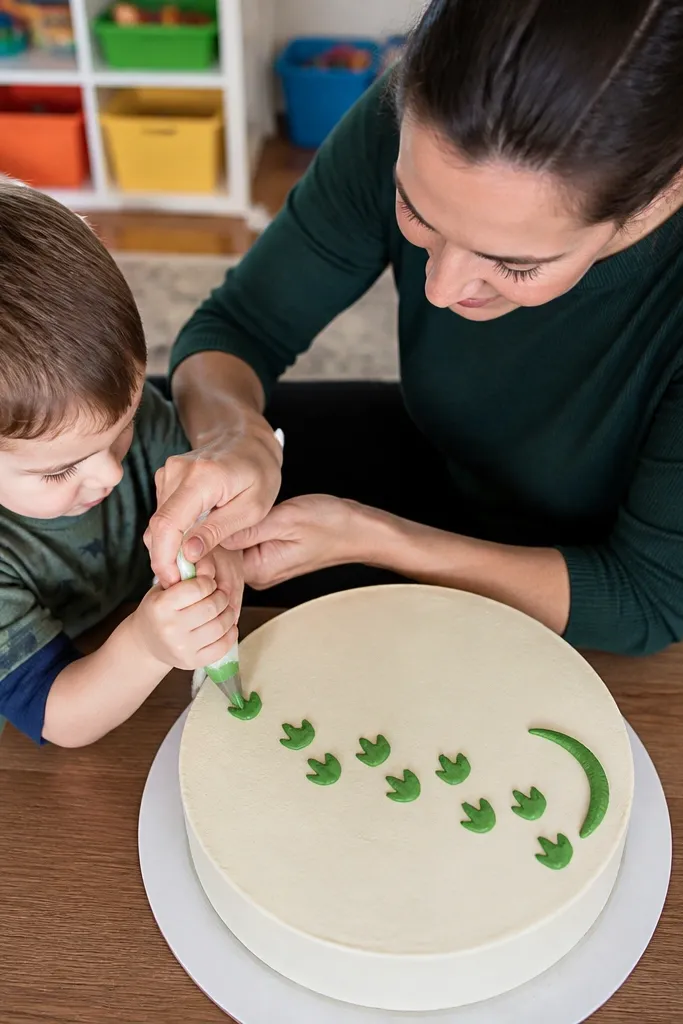
Kids love footprints, and this drawing makes the theme obvious without turning into a cartoon. The footprints are simple shapes: three toes and a heel, repeated in a line. Add a short tail swoosh to suggest movement. Use green icing for footprints and a darker green for the outline so it stays readable. It’s beginner-friendly because repetition does the work. The footprints also look good on slices because the trail runs across the top.
Pipe the first footprint outline as three rounded toe bumps plus a small heel curve. Repeat 6-10 footprints in a gentle diagonal line across the top. Add a short tail swoosh near the first footprint using a thin line. Chill 10-15 minutes so the repeated shapes don’t smear together.
Keep toe spacing consistent — that’s what makes it look like real footprints, not random dots.
Don’t pack footprints too close — they merge into one blob.
18. Comic Pop Bubble Frame
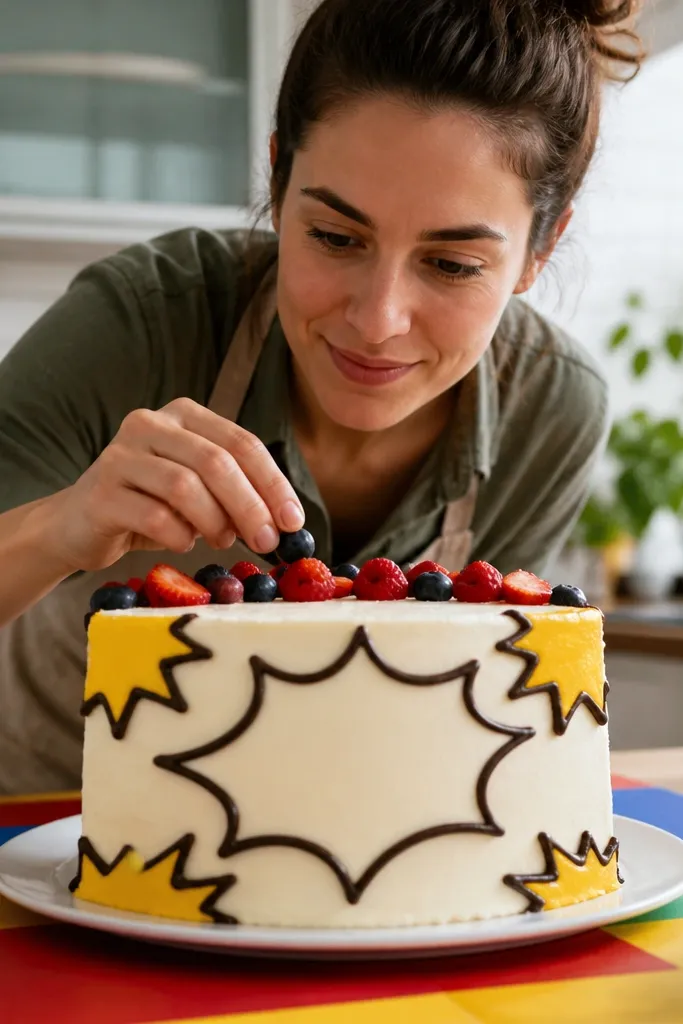
Comic bubble frames add a playful, modern look that photographs well under bright light. This design uses thick bubble outlines around a center area and a few star bursts to fill the corners. Keep the bubble line thick and smooth so it reads like a comic panel border. Use black or dark brown outline, then one accent color for stars. It’s ideal for teens, gaming parties, and any cake that needs energy without complicated art.
Start by drawing a rounded rectangle or oval bubble frame using thick dark icing. Pipe the outer bubble outline first, then add an inner parallel outline to create the comic thickness. Add 4-6 star bursts inside the frame at the corners. Chill 10 minutes so the thick lines hold their shape.
If your bubble line wobbles, draw it in two passes: outer line first, then inner line.
Skip thin icing for the frame — it looks like handwriting, not comic art.
19. Watercolor Dot Fade (Two-Color Ombre)
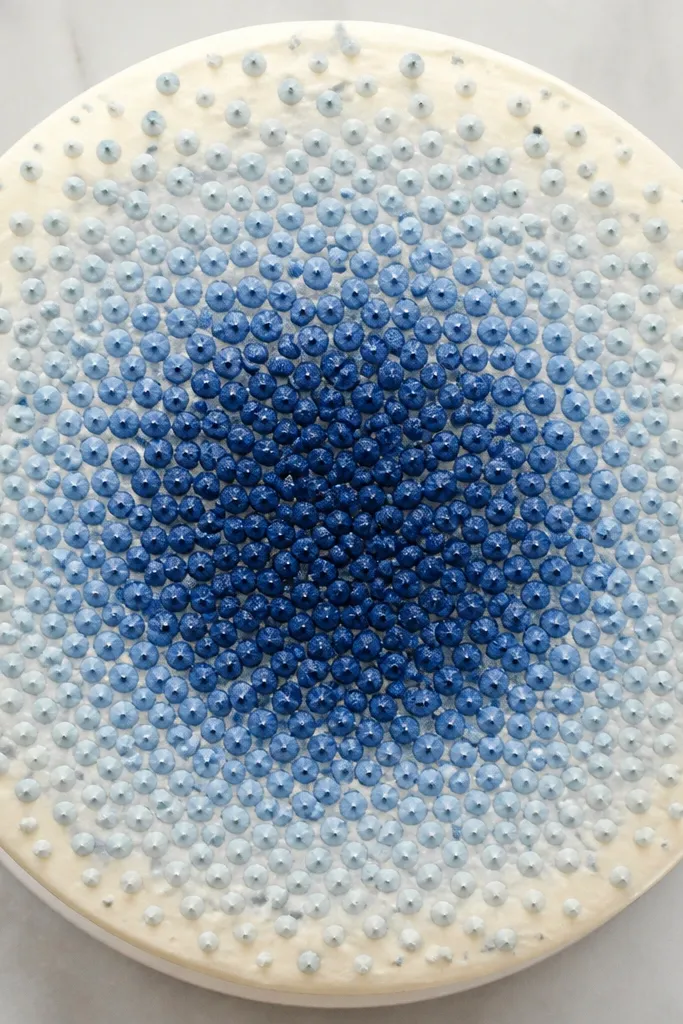
This one looks like watercolor, but it’s made from dots. You pipe dots in a gradient — dense in the center, lighter toward the edge — and it reads as an ombre wash. Use two close colors like navy and powder blue, or red and pink. The dot fade is photogenic because it creates texture and a soft edge. It works for elegant parties too, as long as you keep the dot sizes consistent.
Pick a drawing zone about 4-6 inches wide and lightly mark its center. Pipe dots with the darker color in the center, then switch to the lighter color as you move outward. Keep dot spacing wider near the edge so the gradient feels like a fade. Chill 10 minutes to set, then add a few extra light dots to smooth the transition.
Use the same tip each time and keep your dot size identical; the gradient comes from spacing, not blob size.
Don’t smear with a toothpick — the watercolor look comes from dot placement.
20. Sliced Citrus Corner with Zest Lines
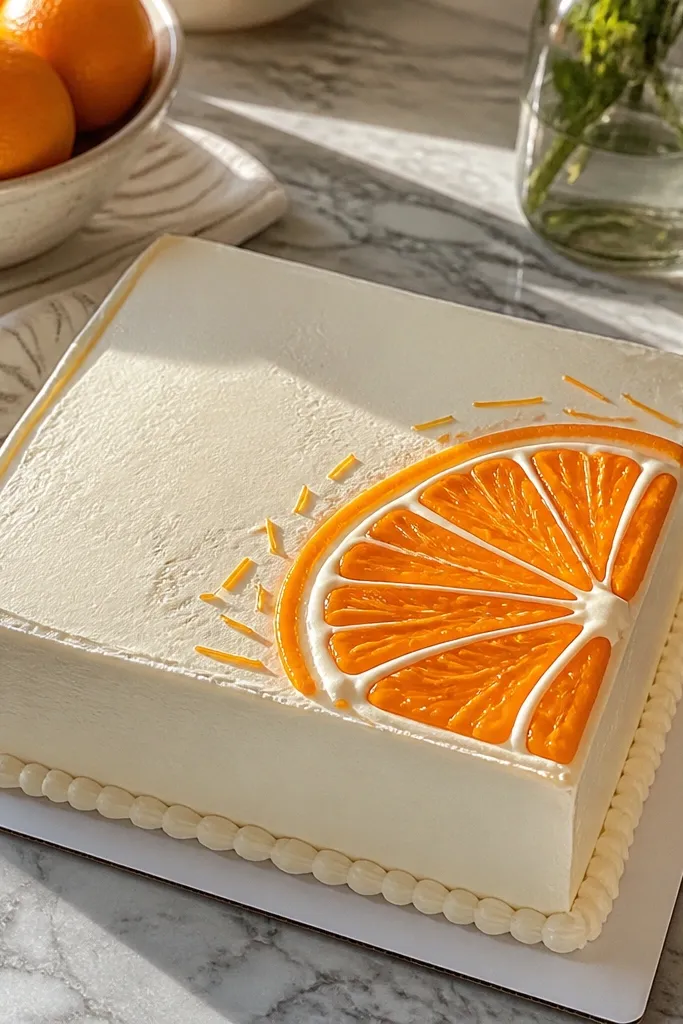
Step 1: Pipe a small corner frame by drawing two straight lines that meet like a picture frame in the top-left or top-right of the cake. Make the frame lines 1.5 cm apart and about 6 cm long each, using a medium-consistency buttercream or royal icing in one color (lemon yellow or orange). Step 2: Add the citrus slices inside the corner — pipe one thick half-moon slice and one thinner slice angled behind it. Use a #2 or #3 round tip for the outer slice outline, then add 6 to 8 curved segments with lighter yellow for a rind texture. Step 3: Finish with zest lines — pipe 8 to 12 short curved strokes radiating out from the slice edge and touch the ends with a tiny dot of white icing so it looks glossy.
This drawing looks fancy without being hard because it uses a simple shape language — a half-moon slice, a few curved segments, and thin zest strokes. The contrast pops on cakes because the slice is mostly warm color with a clean white highlight line, so it reads well even in photos. You get a dessert-shop vibe that fits birthdays, spring parties, and anything with lemon or orange flavors. It takes about 25 to 35 minutes total if you already have a piping bag ready. This is a great pick when you want something photogenic but you do not want a lot of tiny details.
AvoidDo not flood the slice outline — if the icing spreads, the segments blur and the whole drawing loses that clean “slice” look.
Pro tipKeep your icing slightly thicker than your usual writing consistency so the zest strokes hold their curve instead of melting into the frosting.



