

1. Rainbow Arch with Cloud Edges
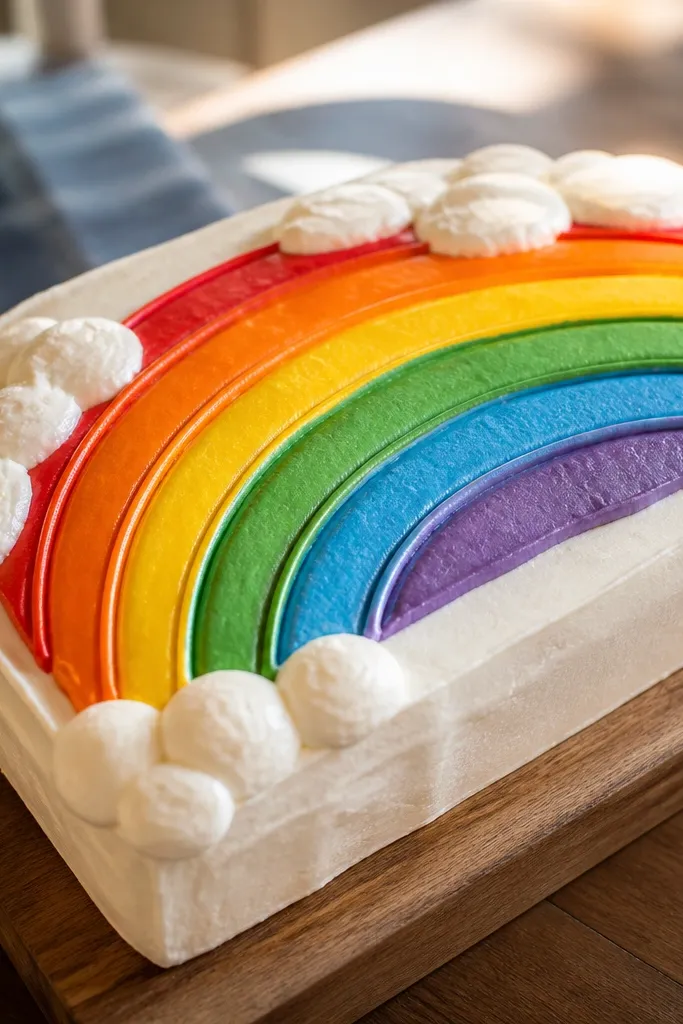
This one looks like a poster because the arcs read instantly from across the room. You’re drawing clean curves that don’t require tiny handwriting skills, and the cloud edges hide slight thickness differences in the frosting lines. Use a light frosting base so the rainbow colors pop, then add a few “puff” bumps with a toothpick for texture. Kids enjoy it because they can pick the order of colors and the final result looks celebratory even if the lines wobble.
Start by sketching a simple arch with a thin line of red gel, using the cake center as your anchor. Then add bands for orange, yellow, green, blue, and purple, keeping each band about 1/2 inch tall on a 6-8 inch cake. Finish by dabbing white gel for cloud tops and pulling a couple of short strokes outward with a toothpick to shape the puffs. Chill 5 minutes so the colors set before serving.
Pro tipFor smoother arcs, warm the gel bottle in your hands for 20-30 seconds before squeezing.
AvoidDon’t flood the frosting with thick lines; heavy gel smears when you add the next band.
2. Polka Dot Party Border
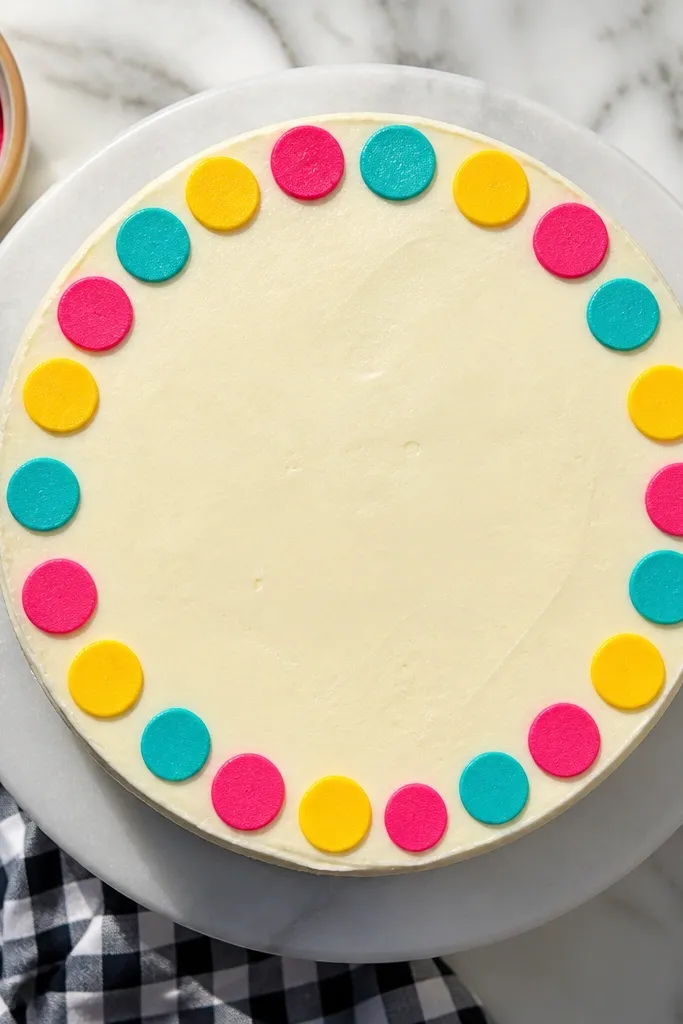
Polka dots are the easiest “drawing” that still looks designed. You’re not asking kids to create a scene, just place dots with consistent rhythm, which reads as neat in photos. This also works as a cover-up when the center frosting has little imperfections. Choose 3-4 bright colors and repeat them in a pattern so it looks intentional, not random.
Pipe a thin outline ring near the edge of the cake top using a contrasting color like dark blue. Then place dots along the ring by squeezing a tiny amount and lifting straight up. Alternate colors in a repeating order around the circle so the border looks balanced. Add a few larger dots in the corners of the ring for extra visual pop.
Pro tipUse a toothpick to nudge any dot that lands crooked before the gel sets.
AvoidSkip freehand spacing; counting or using a gentle ring guide keeps it photogenic.
3. Simple Smiley Face in a Circle
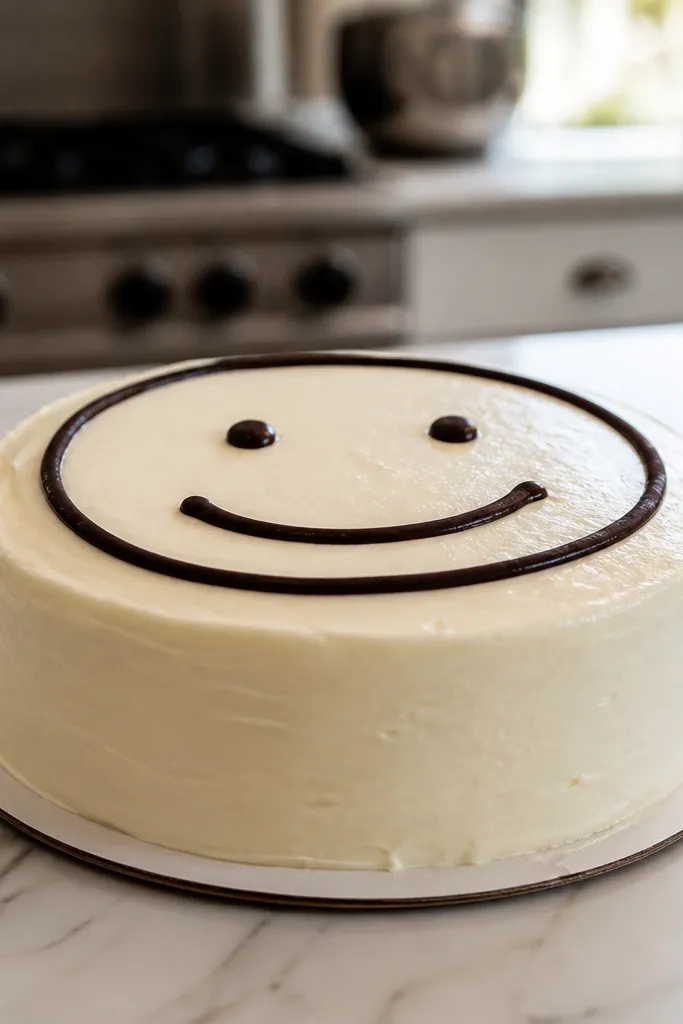
A single face is instantly recognizable and takes almost no planning. The circle frame makes the design look clean, even when the mouth curve isn’t perfect. Use black or dark brown gel for the face lines so it reads sharply on camera. Kids love it because it’s expressive — they can choose a happy, wink, or surprised mouth and feel like they made something “theirs.”
Sketch a circle around the top center with a dark gel, using the rim of a glass as a size guide. Then add two dot eyes and a curved mouth in the middle, keeping each feature about 1 inch wide on an 8 inch cake. For a wink, replace one eye dot with a short curved line. Finish with two small cheek circles in pink or peach.
Pro tipIf the gel is too runny, mix it with a tiny pinch of powdered sugar to thicken for steadier lines.
AvoidDon’t make the face too big; leaving 1-2 inches of frosting around it keeps the cake looking balanced.
4. Heart Garland Across the Top
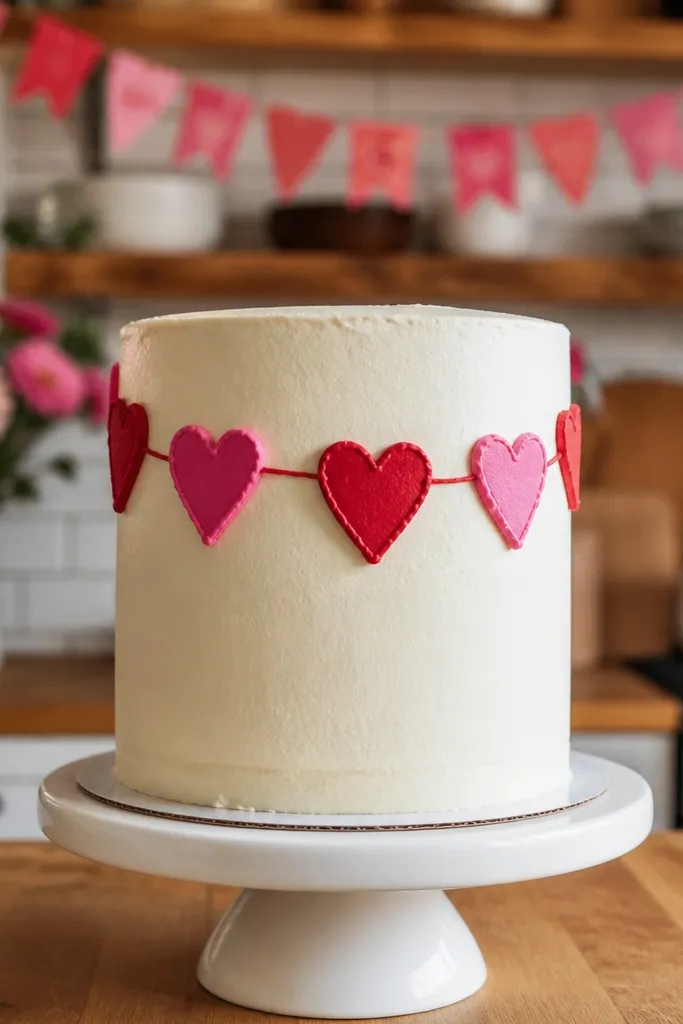
Hearts look sweet and graphic, and garlands give you a sense of motion without complex drawing. This design is forgiving because hearts can be slightly different sizes and still look cute. The connected “string” line also hides uneven dot placement and makes the whole cake feel cohesive. Use strong colors like red, hot pink, and purple on a pale base for maximum contrast.
Draw a gentle straight line across the cake top where the garland will sit, using a dark purple or brown gel. Then pipe hearts by drawing a V shape for the top points and filling in a small teardrop bottom, or use a heart stencil if you want perfect symmetry. Space hearts evenly so the row stays readable. Add tiny sparkle dots with white gel between hearts.
Pro tipPipe one heart fully, then match the next one’s width by eyeballing the first heart edge-to-edge.
AvoidDon’t use pastel-on-pastel; low contrast makes the lines vanish on photos.
5. Cat Whiskers and Bow Tie
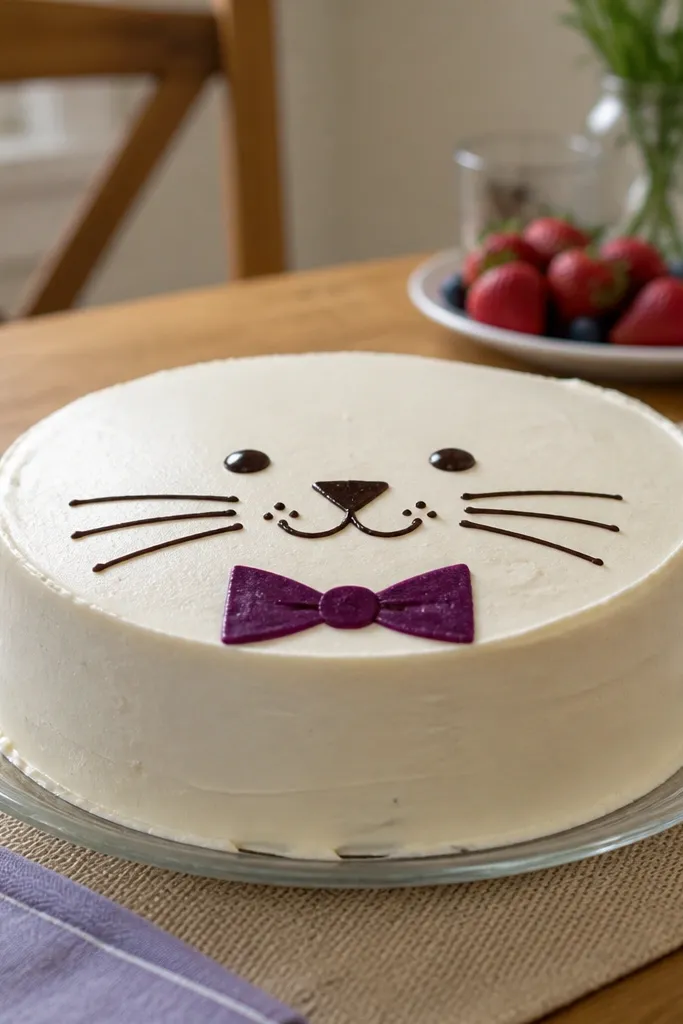
This is a crowd-pleaser because it reads like a character without needing detailed fur. The bow tie adds a “designed” look, and the whiskers create a fun line pattern that’s visually satisfying. Kids can choose the bow color and whisker length, so the face feels personalized. Keep the face simple: dots, a small triangle nose, and a curved smile.
Place a small circle or oval in the center using a light outline color, then fill it with a slightly darker gel so the face area stands out. Add two dot eyes, then pipe a tiny triangle nose and a curved smile. Draw three whisker lines on each side, starting from the cheeks and pulling outward with a toothpick for clean taper. Add a bow tie under the nose with two loops and a knot dot.
Pro tipFor whiskers, use a steady squeeze and lift quickly; dragging makes them thick.
AvoidSkip tiny details like individual whisker dots if your kid is rushing; clean lines look better than clutter.
6. Stars with a Glow Dot
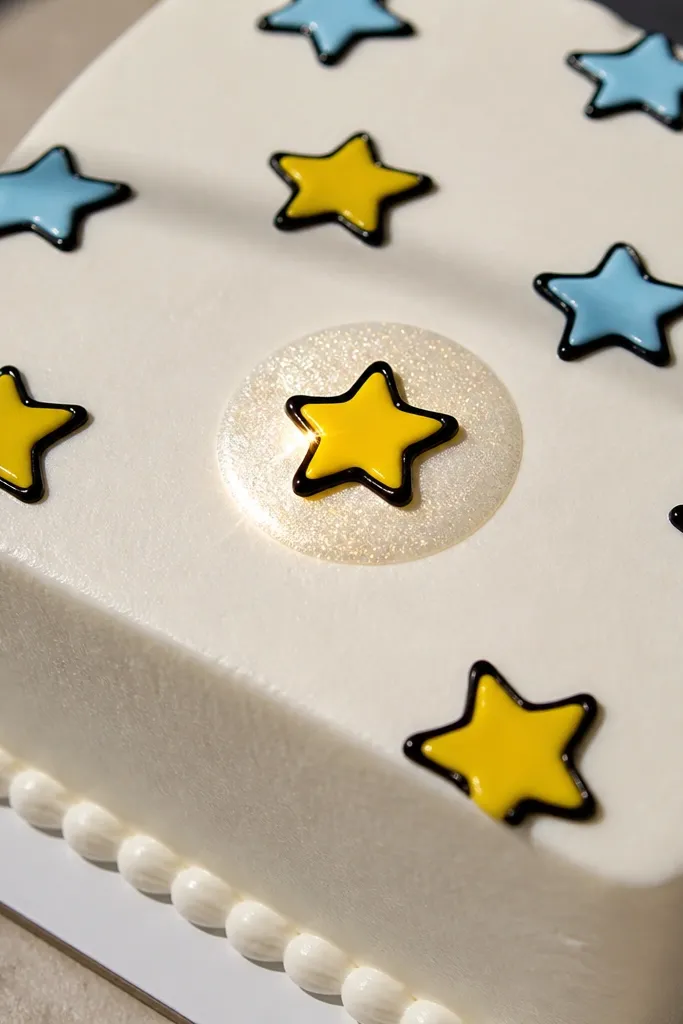
Star drawings look magical in photos, but they don’t have to be hard. You’re using simple five-point shapes and repeating them, which makes it easy for kids to stay confident. Add a single glow dot behind or near one star to create a focal point. This design works on any cake color and scales well for different sizes.
Start by drawing one large star in the center with yellow or gold gel, about 2 inches across on an 8 inch cake. Then add smaller stars around it using a second color like orange and a third color like teal. For the glow, place a soft dot of white gel with a tiny smear outward using a toothpick tip. Let it chill 5 minutes so the glow doesn’t spread.
Use a toothpick to clean up star points by lightly tapping the edges after piping.
Don’t overfill the top with stars; 7-12 total shapes looks intentional, too many looks messy.
7. Ladybug with Dot Pattern Wings
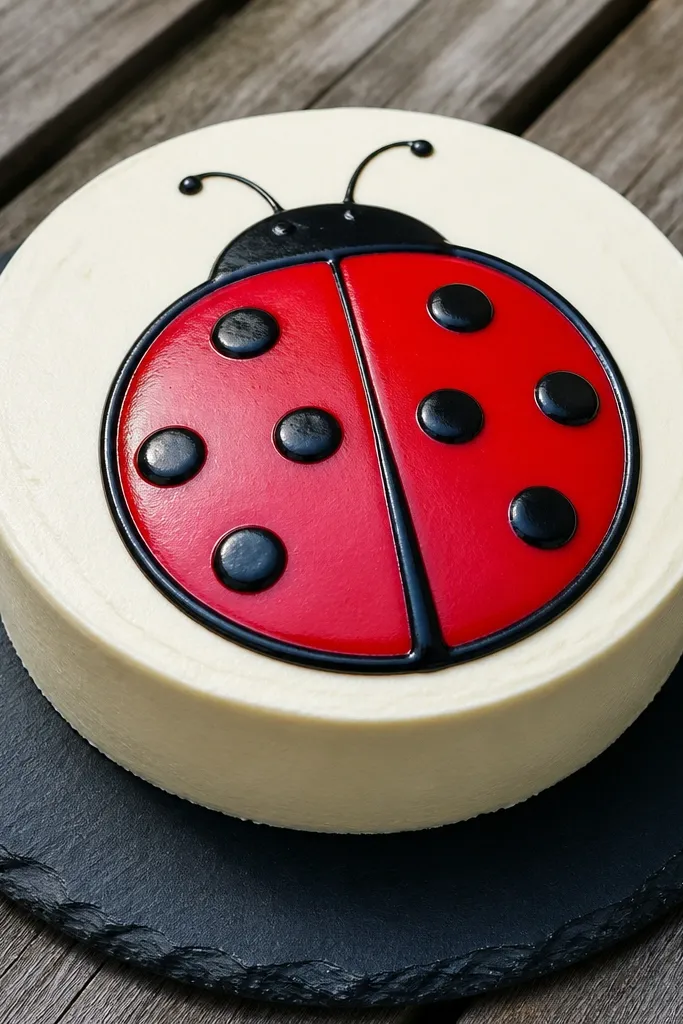
Ladybugs are perfect because they combine a big shape with repeatable dots. The wings pattern is made by placing dots in a left-right rhythm, so kids get a structured task. Use black gel for dots and outline, then a glossy red for the body so it looks alive. This design looks like a cartoon but still has crisp edges.
Draw a red oval for the ladybug body in the center. Add a black line down the middle to split the wings. Pipe 5-7 black dots on each side and finish with a small black head dot area at the top. Add two tiny white dots inside the body for eyes or highlights, then chill until set.
Pro tipIf your dots merge, wipe the toothpick and re-sharpen the outline before adding the next dot row.
AvoidDon’t use thin, watery gel for dots; it spreads and kills the dot shape.
8. Construction Block Numbers
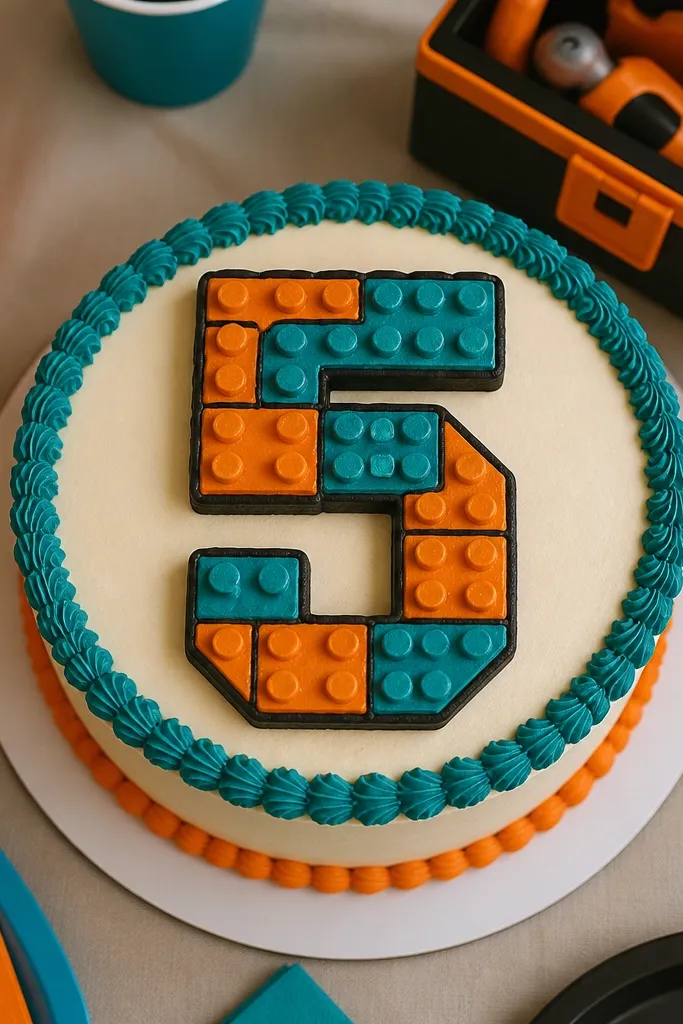
This one is the most “birthday-ready” drawing because the number is the centerpiece. It looks like a toy made of blocks, which makes the cake feel playful without being complicated. Kids can write the number they want, then decorate it with simple lines and dot “details.” Choose thick frosting lines so the number stays readable from a distance.
Pick a bold number and lightly sketch it with a pencil on parchment, then trace it onto the cake using a toothpick dipped in gel (or just freehand with gel). Outline the number with black or dark brown gel, then fill each block shape with a bright color like orange, teal, or yellow. Add tiny dots in corners and short dash marks on the edges to mimic block seams. Chill to set before adding any extra sprinkles.
Pro tipUse one main color for the number and one accent color for seams; too many colors makes it look noisy.
AvoidSkip thin outlines; thin lines disappear once the cake is cut and smeared.
9. Butterfly Wing Swoops
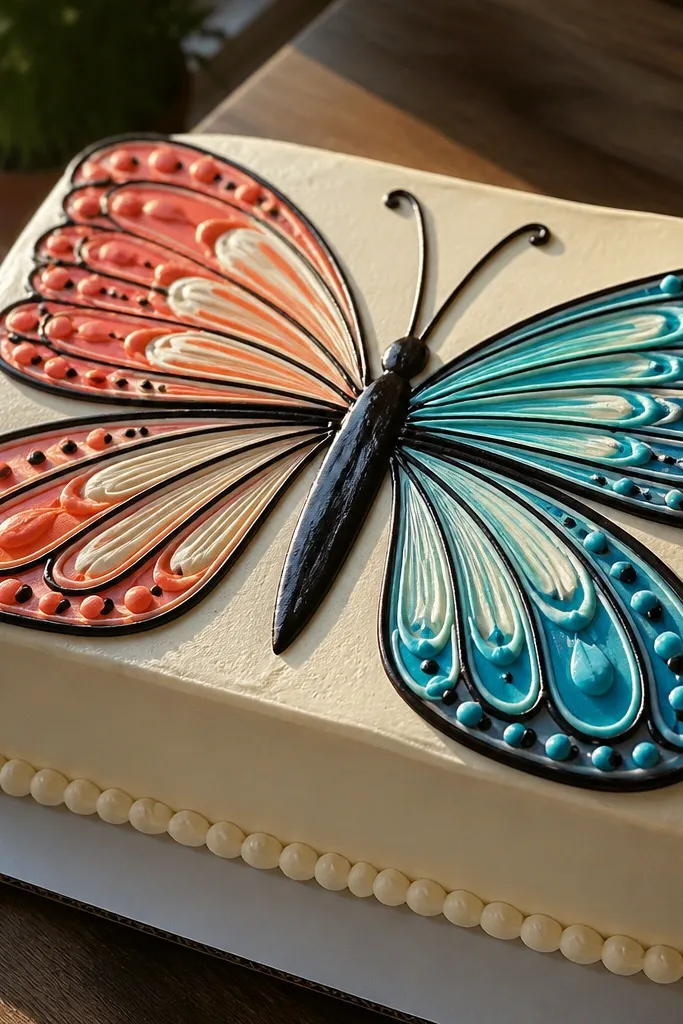
Butterfly drawings look polished because symmetry does the heavy lifting. You’re drawing wing swoops and repeating small dots, which creates a neat look even with wobbly hands. Use a contrasting outline color and then fill with simple line patterns like short stripes. This design is great when you want the cake to look like it came from a party store, minus the cost.
Draw a vertical center line, then outline the left wing with a big curve and a pointy tip at the top. Mirror that curve on the right side to form symmetrical wings. Add small dots along the outer edge and a few short curved stripes inside each wing using two colors. Finish with a tiny circle body in the center and two short antenna lines.
Pro tipChill the cake between outline and fill if your frosting is soft; it keeps symmetry from warping.
AvoidDon’t add too many stripe directions; stick to one stripe style per wing.
10. Ice Cream Cone Outline + Drips
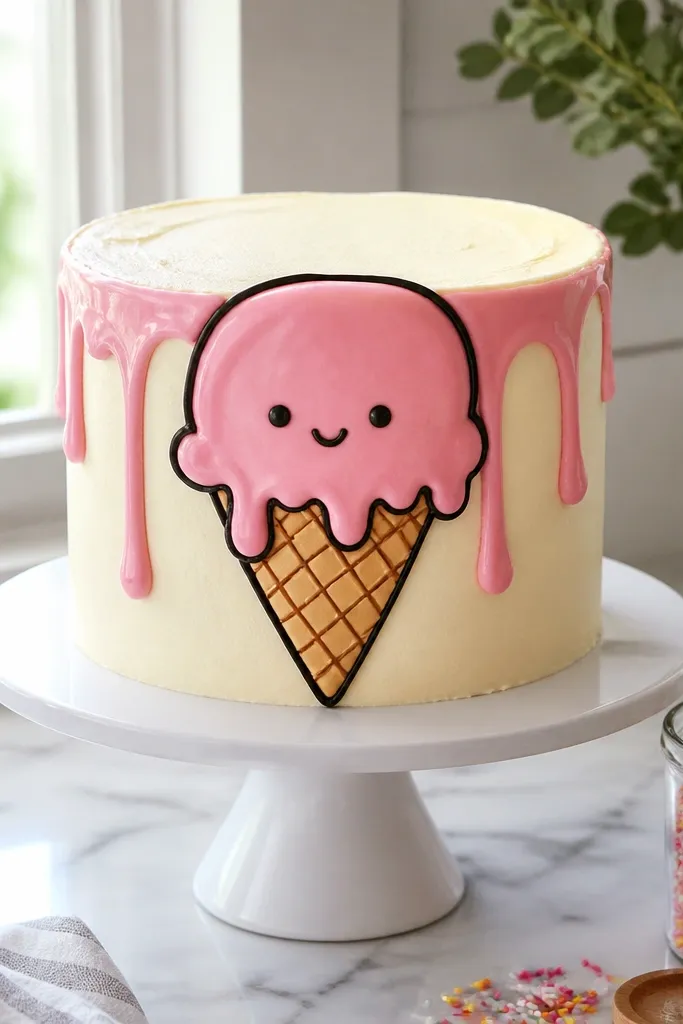
This is one of the most photogenic kid drawings because it has clear shapes: cone, scoop, and drips. The drips are forgiving and make the design look playful instead of precise. Kids can pick scoop colors and add a tiny face, which makes the cake feel fun rather than “just decoration.” Keep the outline thick so it holds up when you cut the cake.
Draw a cone triangle in the center with brown gel, then add two short lines inside the cone to suggest texture. Outline the ice cream scoop with a thicker line in pink or mint, then add 3-5 drip lines downward from the scoop using the same color or a darker shade. Use white gel to add small highlight dots on the scoop. Finish with a tiny smile and two dot eyes if you want a character look.
Use a darker shade for drip edges; it creates depth without extra work.
Don’t make drips too long; if they reach the edge of the cake top, the drawing looks stretched.
11. Sun with Rays and Tiny Face
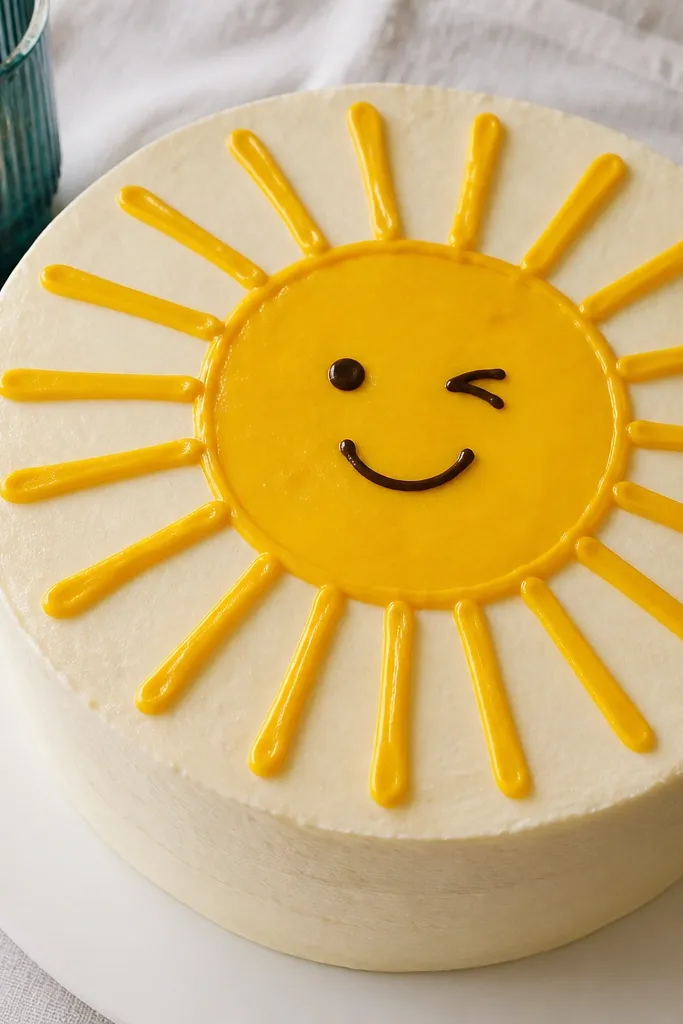
A sun drawing is bright, simple, and reads instantly in photos. The rays create texture and help the cake look lively without clutter. Kids can choose a straight-laced smile or a squinty wink, and it still looks good. This design works on any cake color and looks especially clean on white frosting.
Pipe a yellow circle in the center, then add short ray lines around it like a simple wheel. Make rays about 1/2 inch long for an 8 inch cake. Add a tiny face inside the sun with two small dark dots for eyes and a curved line for the mouth. Use orange gel for a few rays to create a two-tone look.
If rays look uneven, count them out loud while piping so the spacing feels consistent.
Avoid tiny rays; small marks get lost on camera and after cutting.
12. Teddy Bear Ears and Nose
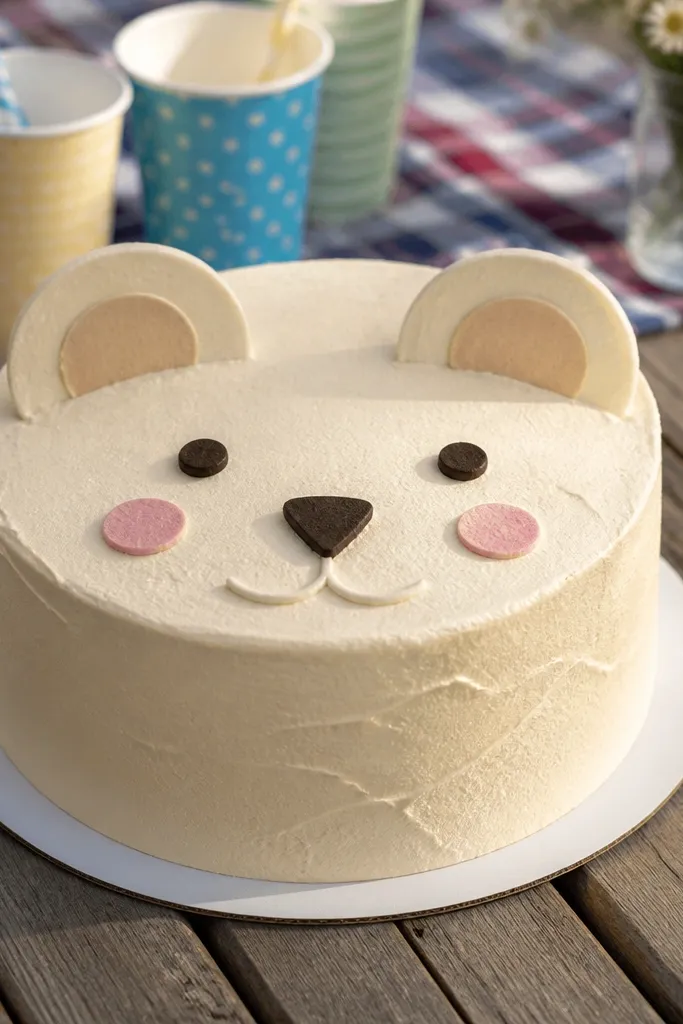
Teddy bear faces look adorable and are easier than they seem because you’re drawing big circles and a few features. The ear circles do most of the work and keep the face centered. Add a small nose and a couple of blush dots for a “cute” look that still holds up when kids press their fingers into the gel area while decorating.
Draw two round ear shapes on top of the head area, then outline a bigger oval for the head. Add two dot eyes and a small oval nose in the center. Finish with a curved smile and two blush dots on the cheeks using pink gel. Optionally add a thin bow outline under the chin to make it birthday-ready.
Pro tipUse a toothpick to drag blush dots into tiny ovals so they look intentional, not smeared.
AvoidSkip heavy filling on the head; leave frosting visible so the face shape stays crisp.
13. Geometric Triangle Confetti
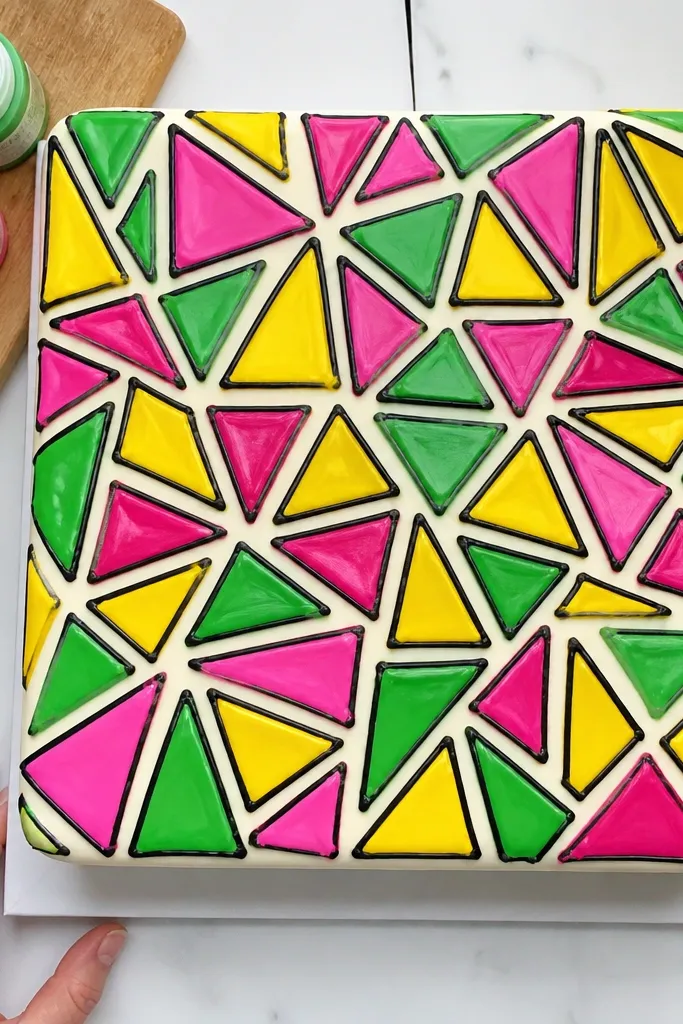
Geometric triangles look modern and bright, which makes them great for party photos. This is also a low-pressure drawing because triangles are just repeated shapes. Kids can color in triangles with different gel colors, and the pattern still looks neat even if edges aren’t perfect. Use a bold outline color so the triangles stay separated.
Lightly sketch a grid of triangles on top using a toothpick dipped in dark gel, keeping triangle sizes around 1 inch each. Outline each triangle with dark gel, then fill with bright colors like red, yellow, green, and blue. Add a few white gel “sparkle” dots between triangles for contrast. Chill 5-10 minutes so the colors set before moving the cake.
Choose one dark outline color and keep triangle fills to 3-4 colors max for a clean look.
Don’t let triangles touch without an outline; color bleeding makes the pattern look muddy.
14. Wave Lines with a White Foam Cap
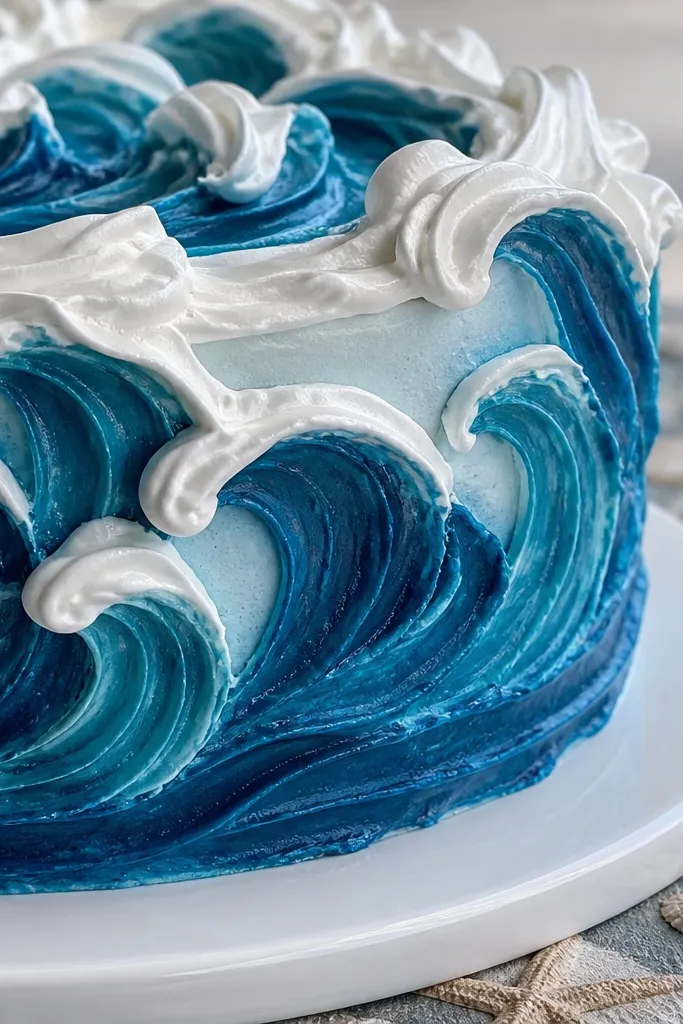
Waves look like a scene but they’re really just repeating curves. The foam cap adds a high-contrast detail that makes the whole drawing feel finished. Kids can count waves and repeat the same curve pattern, which keeps it tidy. This looks especially good on a pale frosting base with a single color wave.
Pipe a thick line of blue gel across the middle of the cake top. Then add stacked wave curves above and below it, using 3-5 lines total depending on cake size. Finish each wave with a small white foam curl at the top of the curve, pulling the curl with a toothpick for a sharp peak. Chill 5 minutes so the foam doesn’t smear.
Pro tipKeep wave spacing consistent by using the same toothpick length as your spacing guide.
AvoidAvoid very thin wave lines; they disappear when frosting gets cut.
15. Rainbow Swirl Lollipop Spiral
A spiral lollipop looks like candy and draws the eye fast. The swirl is fun for kids because it’s one continuous motion, and it looks impressive without being detailed. Use thick gel so the spiral bands stay separated. This is a great option if you have one kid who wants a single big project instead of many small shapes.
Draw a small circle in the center, then pipe a thick spiral band outward using red gel. Continue the spiral with orange, yellow, green, blue, and purple bands, keeping the spacing about 1/4-1/3 inch between lines. Add two small white highlight lines inside one band using a toothpick tip. Let it set in the fridge for 10 minutes.
Pro tipIf the spiral gets messy, stop, chill 5 minutes, then continue from the last clean edge.
AvoidDon’t use too many bands; 5-6 colors reads better than a rainbow with 10 thin lines.
16. Bookmark Border with Stars
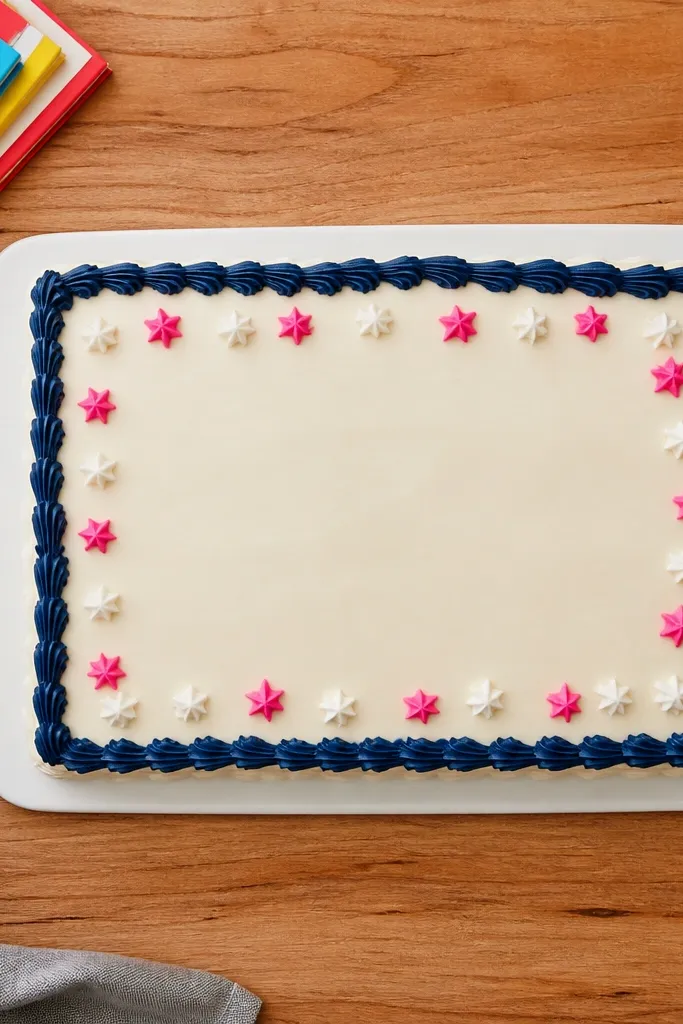
A bookmark-style border is a clean, graphic look that frames the whole cake. It also hides small spacing issues because the border defines the design area. Kids can focus on drawing a rectangle and placing stars inside, which feels like “crafting” more than messy drawing. Use a single border color and 2 accent colors for stars.
Draw a rectangle near the cake edge, leaving about 1/2 inch of frosting margin. Add small triangle “tabs” at the top corners to mimic a bookmark cutout. Then place 6-10 small stars inside the rectangle using two colors, alternating for balance. Add a tiny dot pattern along the bottom edge of the rectangle for extra polish.
Pro tipUse a ruler or straight edge to keep the rectangle corners sharp before you pipe stars.
AvoidSkip rounded borders; sharp rectangle corners look more intentional in photos.
17. Monogram Initial with Confetti Dots
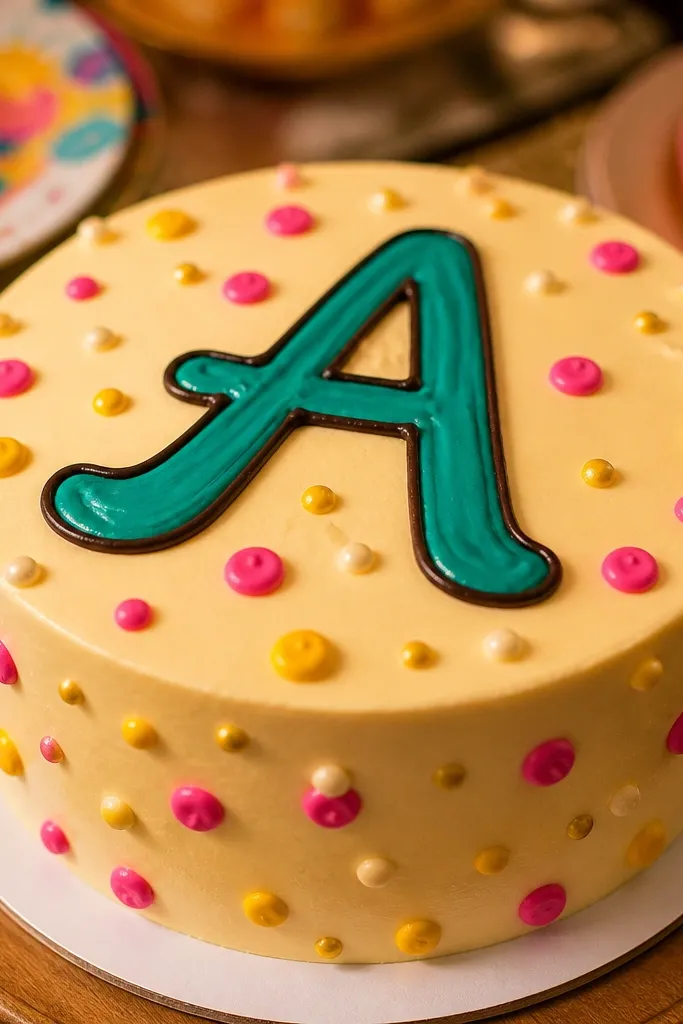
Monograms look “grown-up” and still kid-friendly because they let kids pick one letter and then add simple confetti. The big letter is the main structure; the dots are decoration, not a complex scene. Keep the letter thick and centered so it looks bold. This is a smart pick for birthdays where you want the cake to say a name or age without detailed characters.
Choose one letter and sketch it lightly on parchment first, so you know it fits on the cake top. Transfer the outline onto the cake with gel, then fill the letter with a single color. Pipe small confetti dots around the letter using 3 colors max, with a few dots touching the letter outline to look cohesive. Add 1-2 tiny curved lines like swooshes for motion.
Pro tipIf kids rush, keep the initial simple like A, S, or L. Complex letters drag and look uneven.
AvoidDon’t add confetti before the letter sets; overlapping lines cause smudges.
18. Cookie Cutter Shapes on a Tray
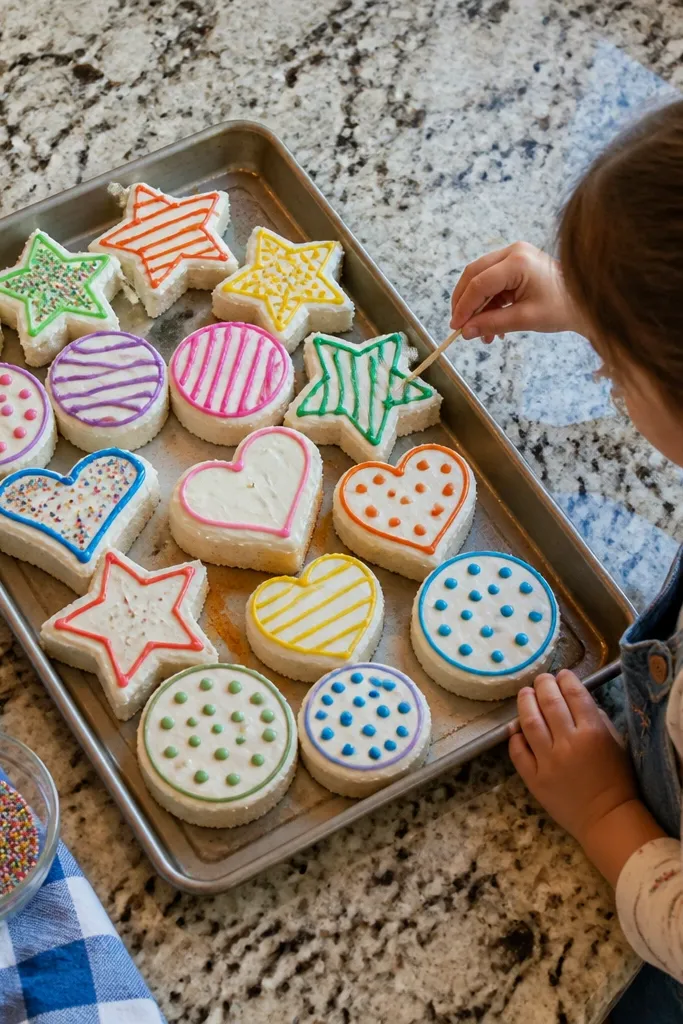
This design looks like a pretend art tray, which makes it fun and photogenic. You’re using recognizable shapes kids already know, and they can “decorate” each shape with a simple pattern. The tray idea lets you keep the center organized and prevents the cake from turning into random scribbles. Use outlines and then add stripes or dots inside each shape for a clean finish.
Draw a big rounded rectangle tray on the top using a dark outline gel. Inside, place 6-8 shapes like circles, stars, and triangles, each about 1 inch across. Outline each shape, then fill with either stripes (drag a toothpick through gel) or dots (tap with a toothpick). Finish with a few small sprinkles only inside the tray area for a neat “contained” look.
Pro tipKeep fillings simple: one pattern per shape reads cleaner than mixing stripes and dots everywhere.
AvoidDon’t use too many different shapes; 6-8 is the sweet spot for a tidy photo.
19. Rainbow Feathers with a Center Dot
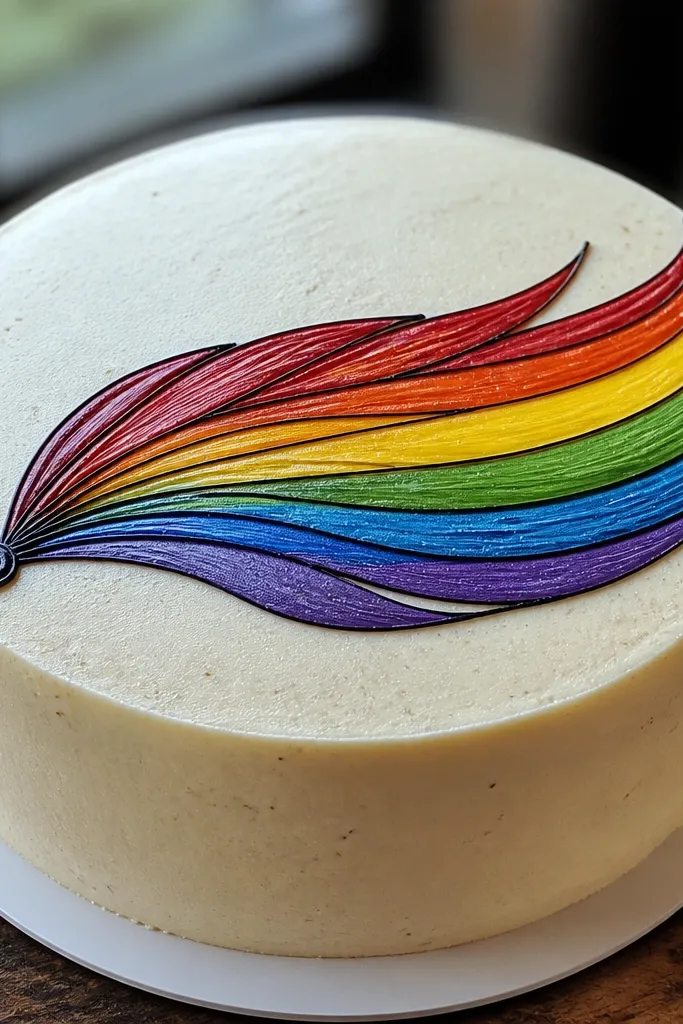
Feather drawings look fancy but they’re just layered curves. The center dot gives a focal point so the design stays intentional even if the feather edges are slightly uneven. Kids can choose the feather colors in order, and the final effect is clean and playful. This works well when you want one main motif instead of lots of small elements.
Draw a feather outline shape with a pointed tip and a wider base in the center of the cake top. Then pipe parallel curved lines inside the feather from base to tip, alternating rainbow colors. Add a small dark dot at the feather base and a tiny white highlight dot near the tip. Chill 5-10 minutes so the colors don’t run.
Pro tipUse fewer feather lines than you think; 7-10 curved lines look better than a dense rainbow scribble.
AvoidAvoid thin, closely packed lines; they blur together once the cake is handled.
20. Birthday Candle Trio with Wicks
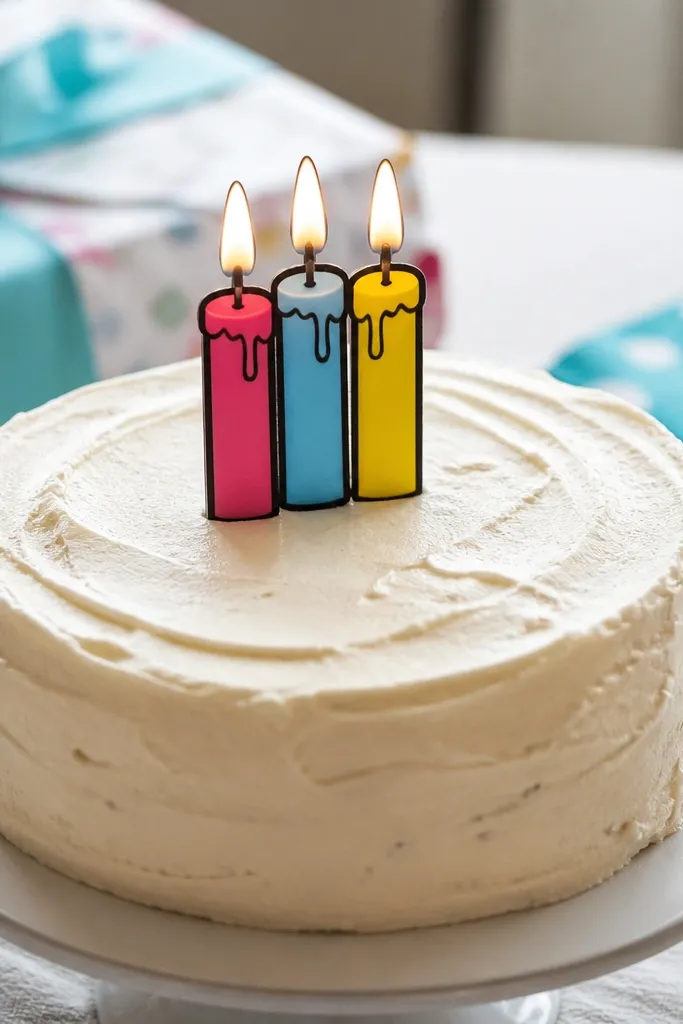
Candles are the easiest “instant birthday” image, and they photograph well because the shapes are tall and clear. Kids can pick flame colors and add tiny drips to make the candles look cute. This design also teaches clean outlining since candles have consistent edges and a simple top wick. Keep the candles grouped so the top doesn’t look empty.
Draw three candle rectangles in a row, leaving space between them for flames. Outline each candle with a dark gel, then fill with bright colors like yellow, blue, and pink. Add a small wick line at the top of each candle and a flame using a teardrop shape, then color the flame with orange and yellow. Finish with a few tiny “melt” dots under each candle for a playful touch.
Pro tipIf flames look uneven, use a small spoon edge to gently shape the teardrop tip after piping.
AvoidSkip candles that touch each other; they merge visually and lose the trio effect.



