
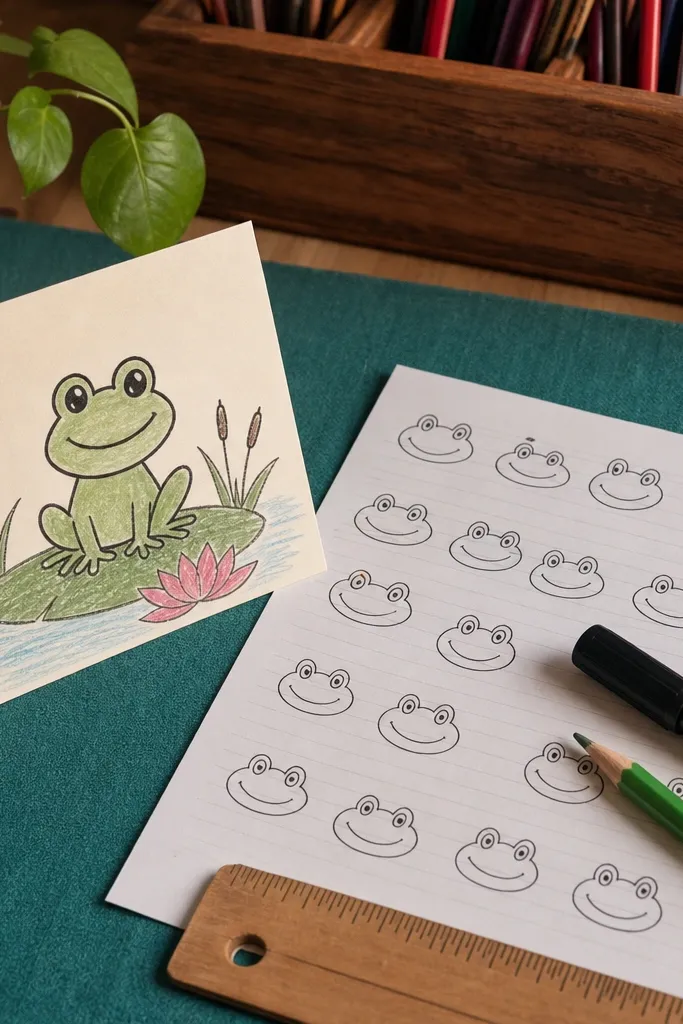
1. Classic Oval Frog Face (2 Eye Circles)
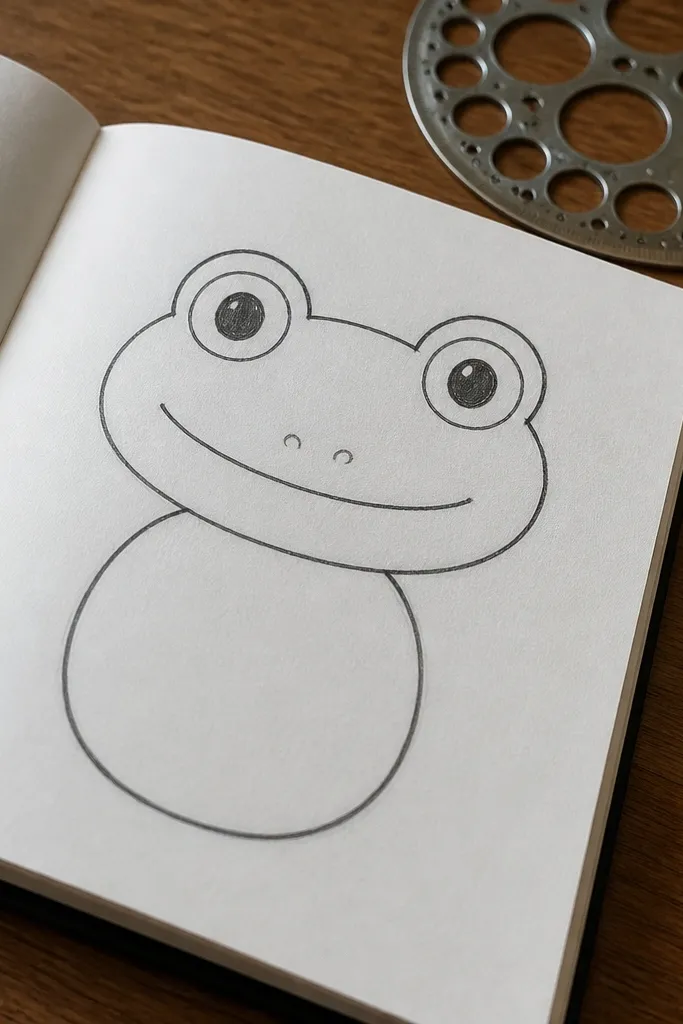
This is the easiest frog drawing because it starts with a face you can fix instantly. You’ll draw two equal eye circles, then add a small nose bump and a gentle mouth curve. The body can be a simple oval that sits under the face, so you get a complete frog without worrying about anatomy. It works great for first-time drawing because the expression is controlled by the mouth curve — lift it for “happy,” flatten it for “neutral.” Expect about 10 to 15 minutes on your first attempt.
Step 1: Lightly sketch two circles for the eyes, spaced so each eye is about the same distance from the center line. Then draw a small oval nose bump between them and a curved line for the mouth. Step 2: Add an oval body under the face, and connect the cheeks to the body with two short arcs. Finally, trace the cleanest lines with a darker pencil or fine liner, then erase construction marks.
Pro tipKeep the eye circles slightly taller than they are wide; it makes the frog look cute instead of weirdly flat.
AvoidDon’t draw the mouth first — it locks your proportions in the wrong place.
2. Standing Frog Buddy (Ball Body + Toe Dots)
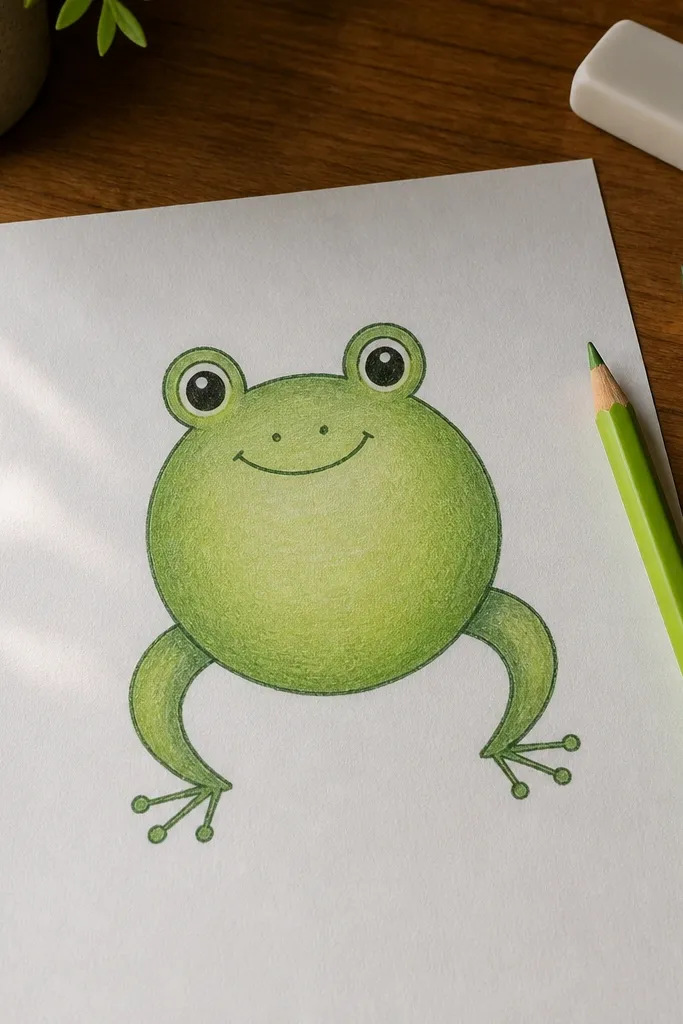
This frog looks “real enough” without being hard, because the entire body is built from one ball shape. You’ll place the eyes on top of the ball, then sketch two legs as simple curved lines that end in tiny toe bumps. The toe dots are forgiving — even if they’re uneven, the frog still reads as friendly. This one is perfect if you want a full frog, not just a face, and you want it to look like a character you can reuse on notes or stickers.
Step 1: Draw a circle for the body, then sketch two big eye circles near the top. Add a small mouth curve and a short chin line under the nose. Step 2: Draw two legs as “bent sticks” from the lower sides of the body and end them with three small toe bumps each. Add a short tail line or a rear leg curve, then darken the final outlines.
Pro tipGive the feet a tiny width by drawing toes as bumps along a shallow curve, not as separate floating dots.
AvoidDon’t over-detail the legs; keep them as smooth curves or your drawing will feel stiff.
3. Side-Profile Frog (Half Eye + Snout)
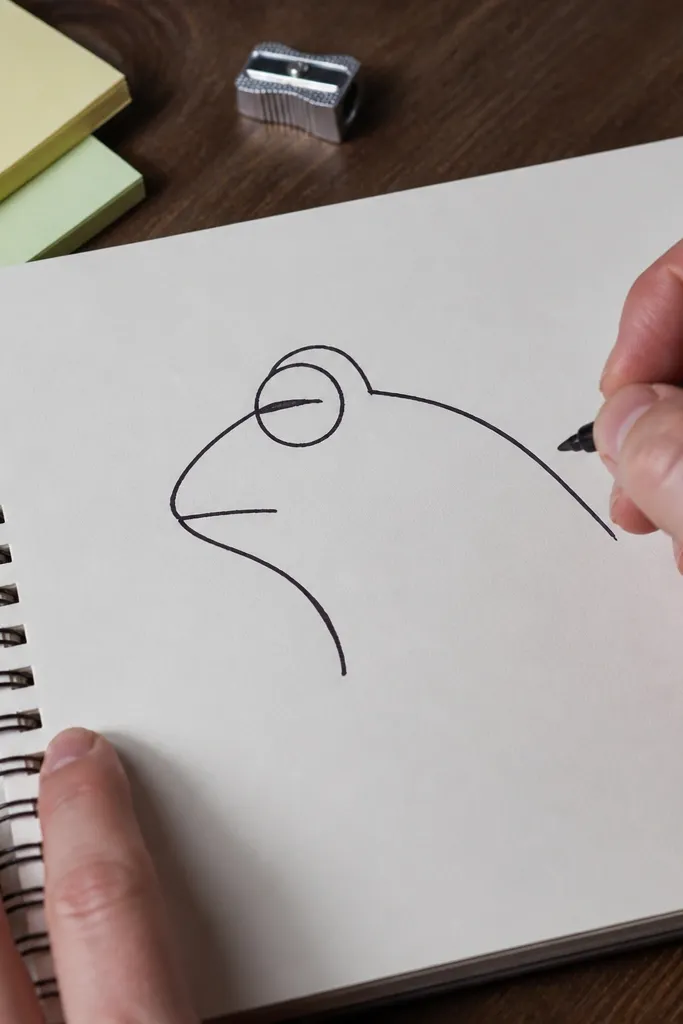
Side profile is harder than a front face, but this version stays beginner-friendly by using simplified landmarks. You draw one eye as a circle with a cut edge, then shape the snout as a rounded wedge. The mouth line stays short, and you avoid tricky body perspective. This is a great choice if you want variety in your frog drawings and you’re bored of straight-on faces.
Step 1: Draw a long oval for the head and a smaller oval for the body behind it. Place one eye circle on the front side, then cut it with a vertical line so it reads as half. Step 2: Add a rounded snout by extending a short curve forward from the head oval, then draw a short mouth curve under it. Finish with one visible leg as a curved line and a toe bump at the end.
If the snout looks too pointy, fix it by widening the wedge at the base before you darken the outline.
Don’t try to draw a full eye in profile — the half-eye trick keeps it easy.
4. Frog on a Lily Pad (Leaf + Tiny Legs)
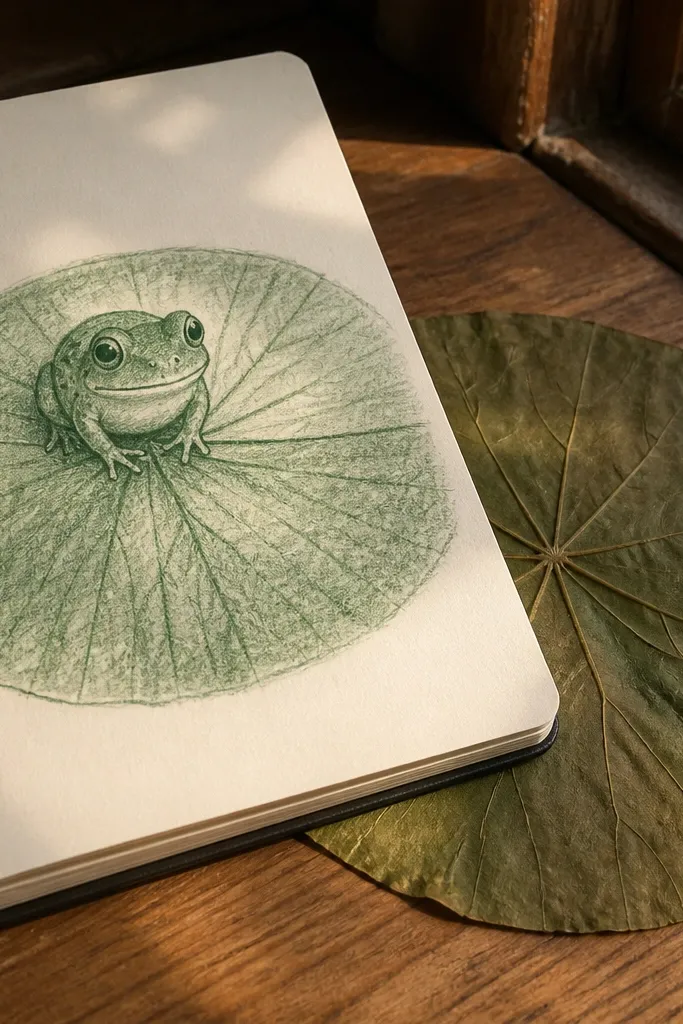
This one is easy because the lily pad does half the composition work for you. You’ll draw a simple leaf shape with a few curved veins, then seat the frog on top with short legs and big eyes. The frog body can be a rounded oval, so you don’t need to worry about full posture. It’s great for cards and quick art prompts because it looks complete even if your frog lines are still shaky.
Step 1: Draw a wide leaf shape like a rounded teardrop, then add 3 to 5 curved vein lines radiating from the center. Step 2: Place the frog on top: draw two eye circles, then a small nose bump and a mouth curve. Add a body oval sitting on the pad and two short legs tucked in. Darken the outlines and lightly shade one side of the leaf.
Pro tipShade the underside of the lily pad with a single pencil pass to make it look lifted off the page.
AvoidDon’t overcrowd the veins; 3-5 lines is enough for a clear lily pad.
5. Cute Frog Mask (Big Eyes + Smooth Face)
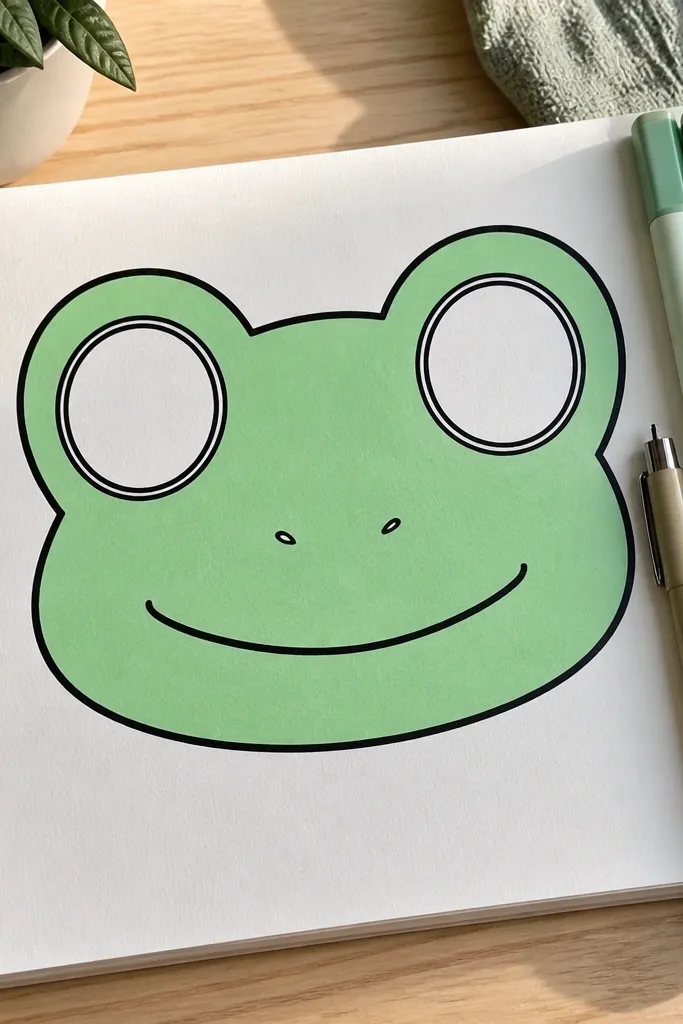
A frog mask is beginner gold because it removes the need to draw a full body. You focus on the face shape, which means you can get the eyes and expression right without worrying about legs or hands. The “mask” look also hides minor mistakes, since the face outline is smooth and continuous. Use this when you want a clean drawing that still feels like a character.
Step 1: Draw a rounded rectangle or oval face shape, leaving space for two huge eyes. Place two large circles inside, then draw thick eyelids as curved arcs above them. Step 2: Add a small nose bump and a short smile curve, then connect cheek lines down to the face outline. Finally, erase the pencil guides and trace the mask outline with a darker line.
Pro tipMake the eyelids thicker than you think — it gives structure even if the eyes wobble.
AvoidDon’t add a lot of wrinkles; keep the face smooth for a clean beginner win.
6. Frog with Polka Dot Belly (Pattern Practice)
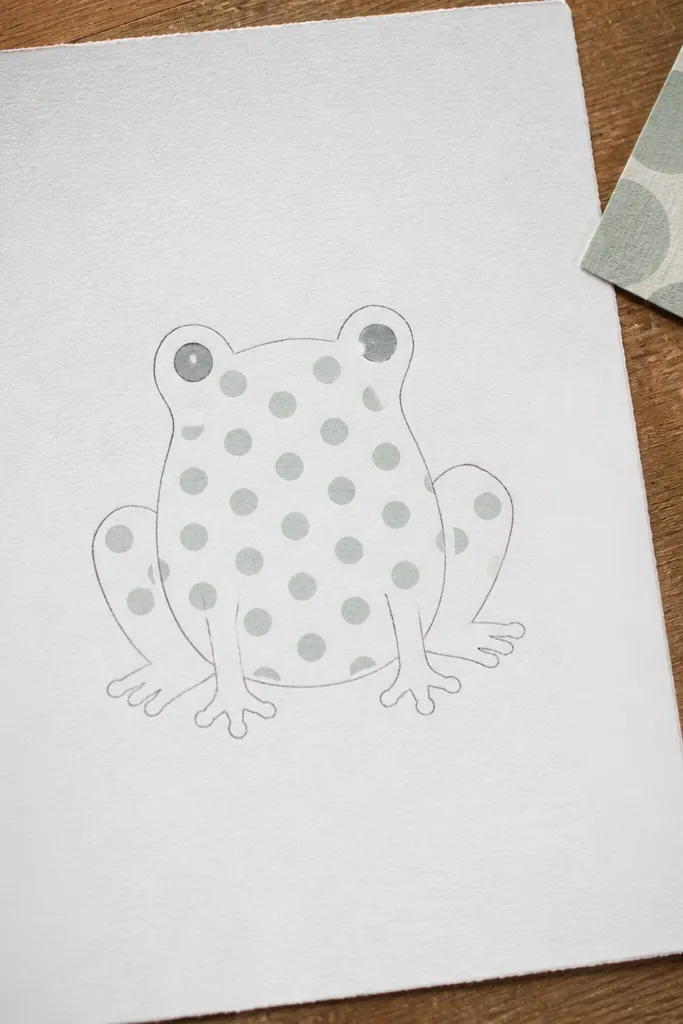
Patterns make your drawing look finished even if your lines are still learning. This frog uses a simple body shape, then adds polka dots only on the belly area. The dots are easy to place because you can treat them like a grid — even spacing, same size, light pressure. It’s a good project if you want a frog that looks intentional and fun without heavy shading.
Step 1: Draw an oval body and place two eye circles near the top. Add a basic mouth curve and two small nostril marks on the snout area. Step 2: Mark the belly area with a light oval or curved rectangle, then add evenly sized dots inside it. Darken the frog outline and lightly erase dot guides if you used any.
Pro tipUse a ruler for the belly boundary only; the dots themselves look better if they’re freehanded, not perfectly aligned.
AvoidDon’t put dots everywhere — keep them only on the belly so the design reads clearly.
7. Frog Jumping Pose (Arc Body + Splayed Toes)
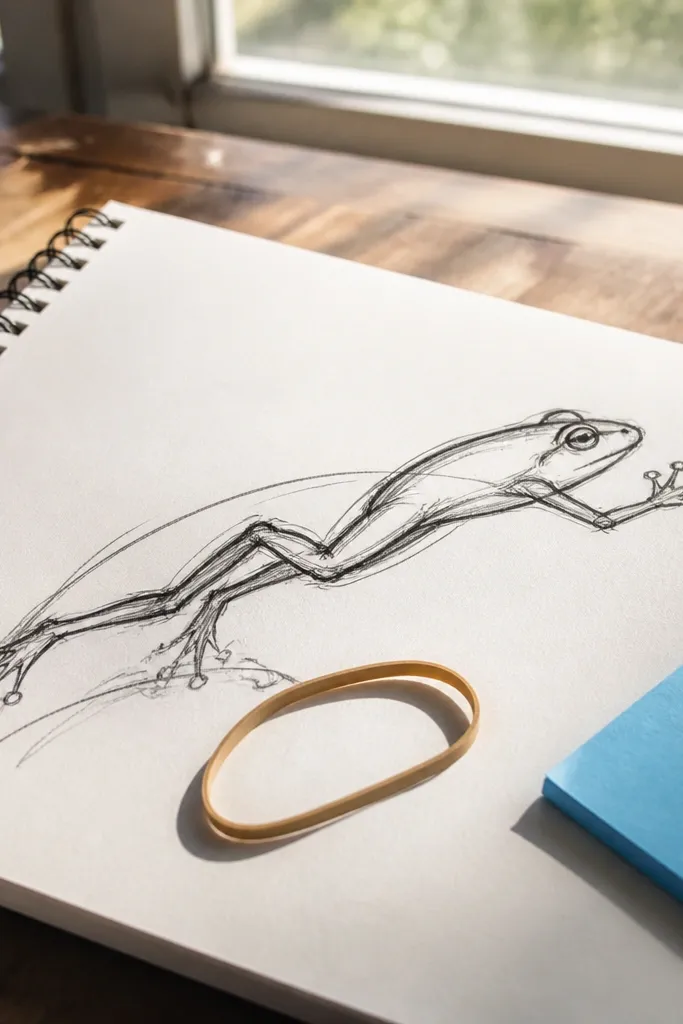
Jumping frogs look energetic, but you can simplify the pose with an arc. You draw the body as a curved line with two eye circles, then place one leg forward and the other back as long bent curves. The splayed toes are small and forgiving, and they sell the motion. This is a great step up from standing frogs, and it still stays beginner-friendly.
Step 1: Sketch a curved “C” shape for the motion path, then draw the body oval along it. Place two big eye circles on the front side of the body, then add a nose bump and mouth curve. Step 2: Draw the back leg as a long bent line stretching behind, and the front leg as a shorter line forward. End each leg with 3 toe bumps spread slightly outward.
If the jump feels lopsided, fix it by matching toe spread on both feet even if the leg lengths differ.
Don’t make the legs too thin; thick lines make the pose look intentional.
8. Frog in a Raindrop Frame (Simple Droplets)
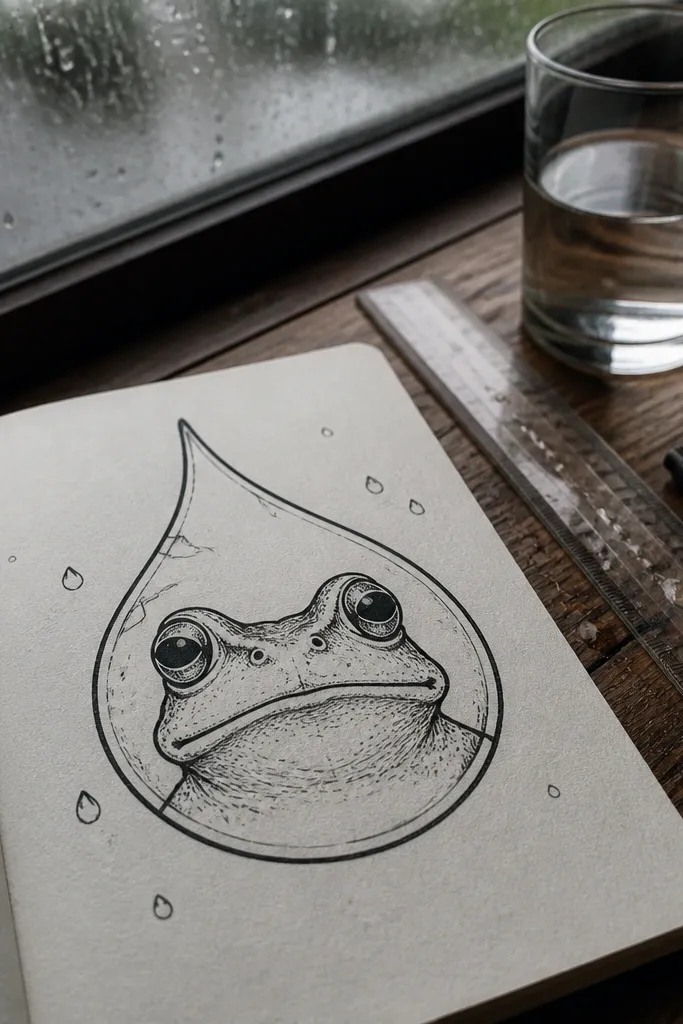
This is an easy composition trick: the raindrop frame gives your frog a ready-made boundary. You draw one big droplet outline, then place the frog face inside it with a clean front view. Add a few tiny droplets outside for a cute “rainy day” vibe. It’s perfect for beginners because the framing prevents the drawing from looking unfinished at the edges.
Step 1: Draw a large raindrop outline in the center of the page. Inside it, draw two eye circles, a small nose bump, and a simple smile curve. Step 2: Add a body hint with a curved line under the mouth, then draw 3 small droplets around the main raindrop. Darken the frog lines and lightly shade one side of the raindrop frame.
Pro tipShade raindrops with a single highlight gap — leave one white stripe instead of trying to blend.
AvoidDon’t over-ink the raindrops; keep them lighter than the frog outline.
9. Frog Face with Caterpillar Eyelids (Funny Expression)
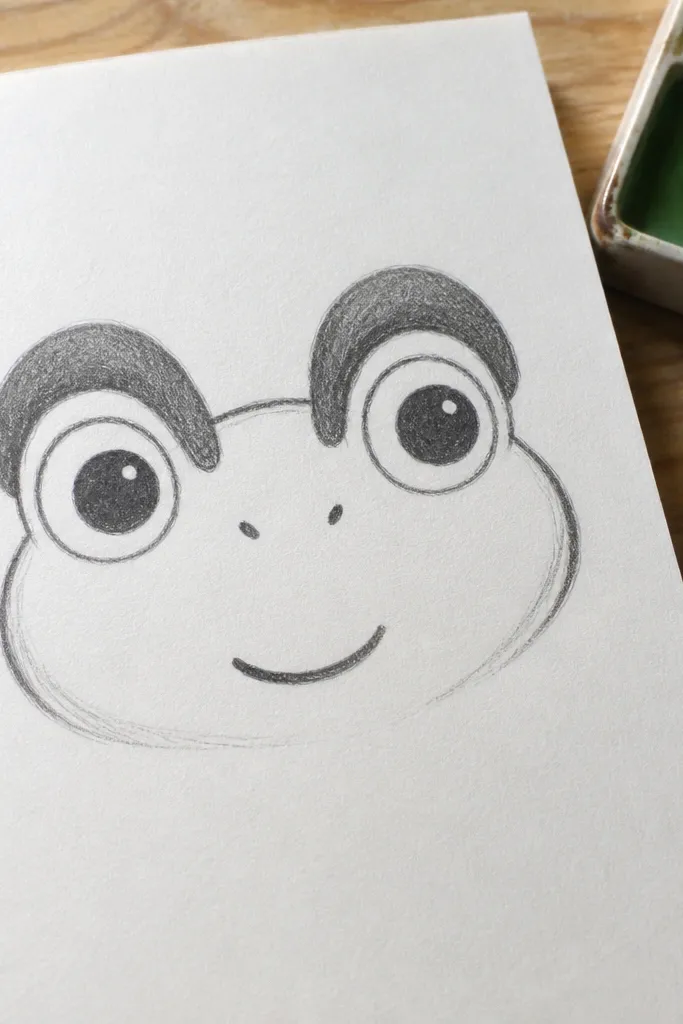
This one is a beginner-friendly way to learn expression without complex anatomy. The eyelids are drawn as simple arcs that you can thicken, like two caterpillars resting over the eyes. The mouth is a short open curve, which reads as “goofy” even if your proportions are still shaky. It’s fun for practicing facial features because you’re changing only one variable — the eyelid shape.
Step 1: Draw the classic oval face, then place two eye circles. Add eyelids as thick curved arcs above each eye, leaving the pupils visible. Step 2: Draw a small open mouth curve and add a tiny tongue line if you want. Darken the outlines and erase the original light construction lines.
If the frog looks too sleepy, raise the eyelid arcs slightly and widen the smile curve.
Don’t shrink the pupils; big pupils keep it cute and readable.
10. Frog with Simple Shading (One Light Side)
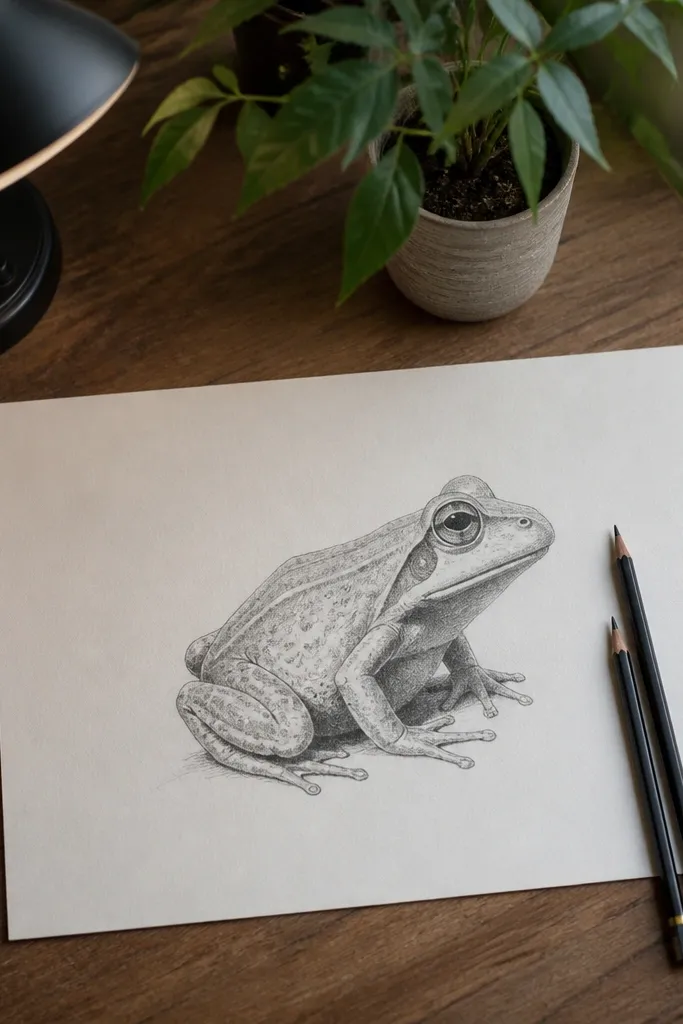
Shading can look intimidating, but this version uses one light direction so you don’t have to blend perfectly. You draw the frog outline first, then add shading only on the underside of the chin, around one eye, and along the lower body. The result looks dimensional without complicated gradients. This is a step up from flat cartoons, and it’s still beginner-friendly because the rules are clear.
Step 1: Draw a front-facing frog with the classic oval body and big eyes. Pick a light direction, like “light from the left,” and keep it consistent. Step 2: Shade the right side of the body and the underside of the chin with short pencil strokes. Add a small shadow under the mouth and a darker line under the eyelids, then blend lightly with a tissue if you want softer edges.
Use the side of the pencil for shadows, not the tip; it produces smoother coverage.
Don’t shade the whole frog evenly; uneven shadows create the shape.
11. Frog Holding a Stick Bug (Tiny Props)
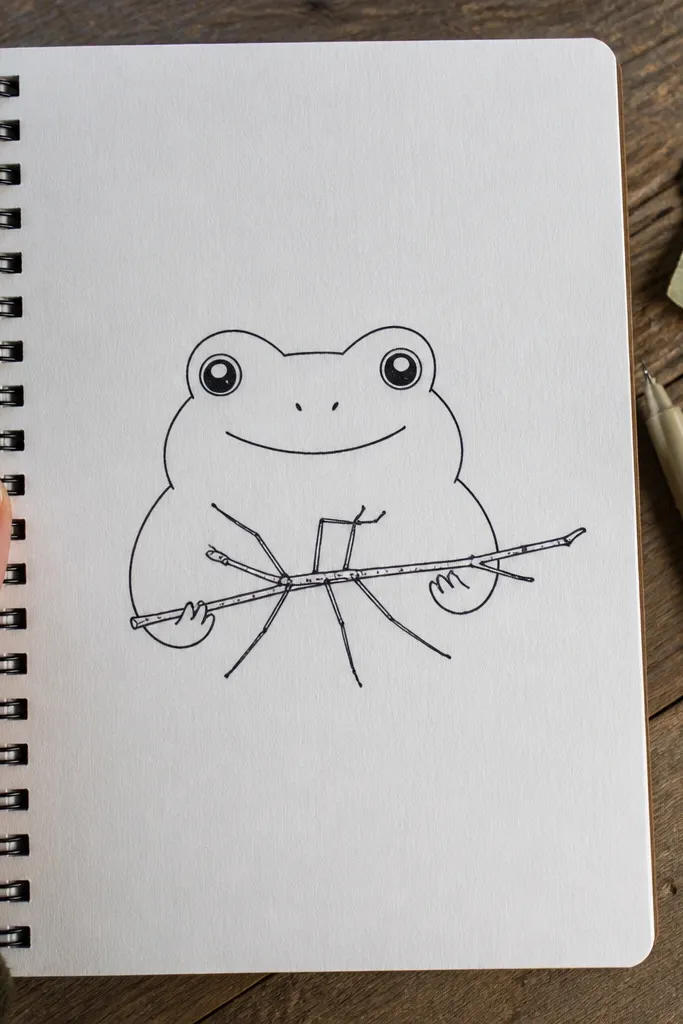
Adding one small prop makes your frog drawing feel like a scene without adding anatomy. The frog still uses the classic eyes and mouth, and the “arms” are just two short curved lines holding a stick. The stick bug is a simple line with a few legs, so you don’t need to draw insects in detail. This is great for beginners because the prop gives you something to practice drawing straight lines and small shapes.
Step 1: Draw the frog face and body as an oval with two big eyes, then add a simple smile. Add two short arm lines on each side of the body that curve inward to hold a stick. Step 2: Draw a thin stick horizontally across the frog’s arms, then add a small stick bug on it as a narrow oval. Add 3 to 4 tiny leg lines on the bug, then ink the outlines.
Pro tipKeep the stick bug smaller than the eyes so the frog stays the main focus.
AvoidDon’t make the arms too long; short arms look cuter and are easier to place.
12. Frog with Water Droplets on Head (Highlight Practice)
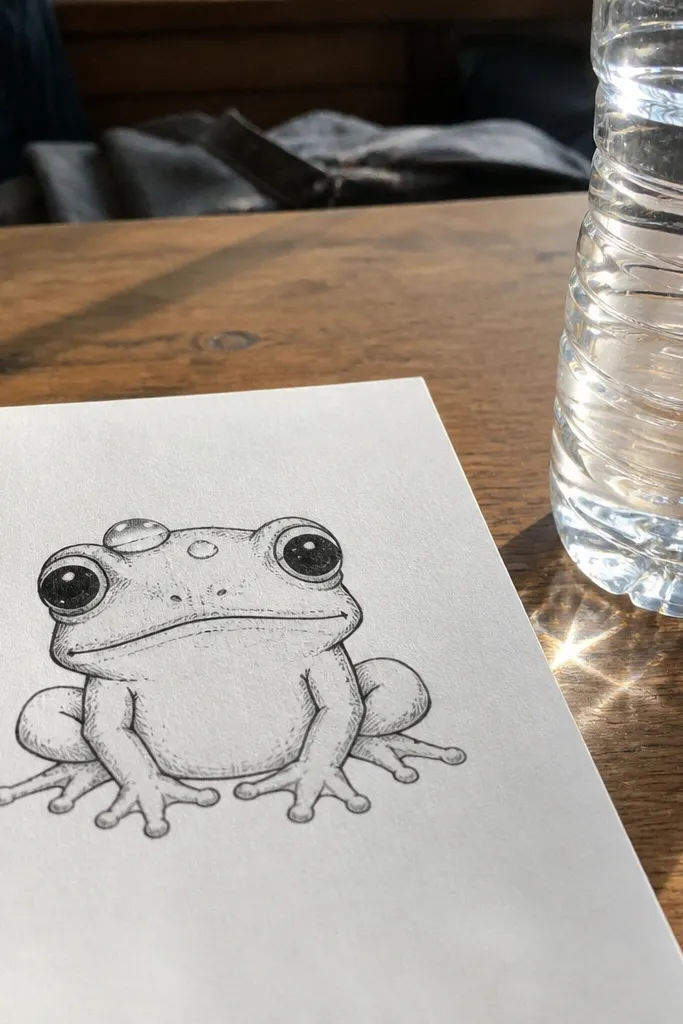
This drawing teaches highlights without complicated rendering. You’ll place two or three droplets on the frog’s head, then leave a small white highlight area inside each droplet. The frog itself stays simple and cartoon-flat, so your attention stays on drawing clean droplet shapes. Beginners like it because the “shine” rules are straightforward and the result looks polished quickly.
Step 1: Draw a frog face with two big eyes and an oval body. Add 2-3 small rounded raindrop shapes on the top of the head. Step 2: Inside each droplet, leave a tiny unshaded oval or curved line to represent shine. Draw a faint outline around the droplets, then shade the frog body lightly around the edges.
If droplets look messy, outline them first with a light pencil, then ink once you like their spacing.
Don’t shade inside the highlights; leaving the shine unfilled is the whole point.
13. Frog Face with Heart-Shaped Belly (Cute Symbol)
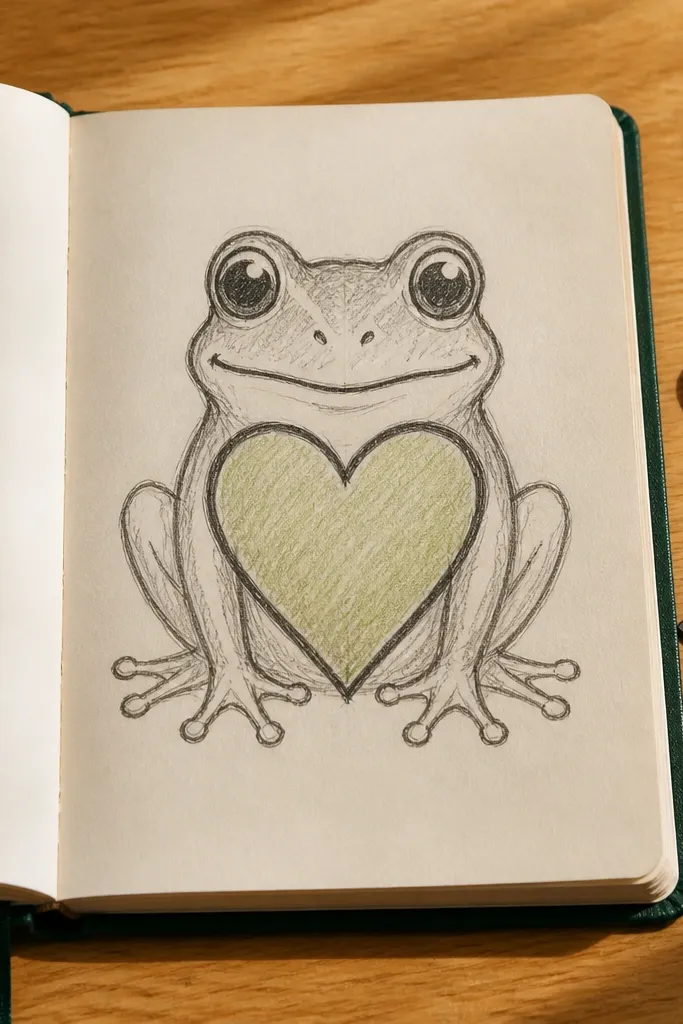
Heart-shaped belly designs look adorable and are easy to build because the heart shape already tells you where the belly goes. You keep the face classic and then replace the belly oval with a heart. The heart also guides symmetry, which helps beginners who struggle with uneven shapes. This is a good choice for Valentine-style cards or just for learning how to swap one body shape for another.
Step 1: Draw the frog face with two eye circles, a nose bump, and a mouth curve. Under the face, draw a heart shape centered on the body area. Step 2: Add two short legs as curved lines at the bottom of the heart, ending with toe bumps. Ink the face and heart outline last, then erase construction lines around the heart tips.
Make the heart points slightly rounded, not sharp, so it matches the frog’s softer look.
Don’t let the heart overlap the eyes; keep it below the face so the layout reads cleanly.
14. Frog with Stripes (Beginner Pattern Lines)
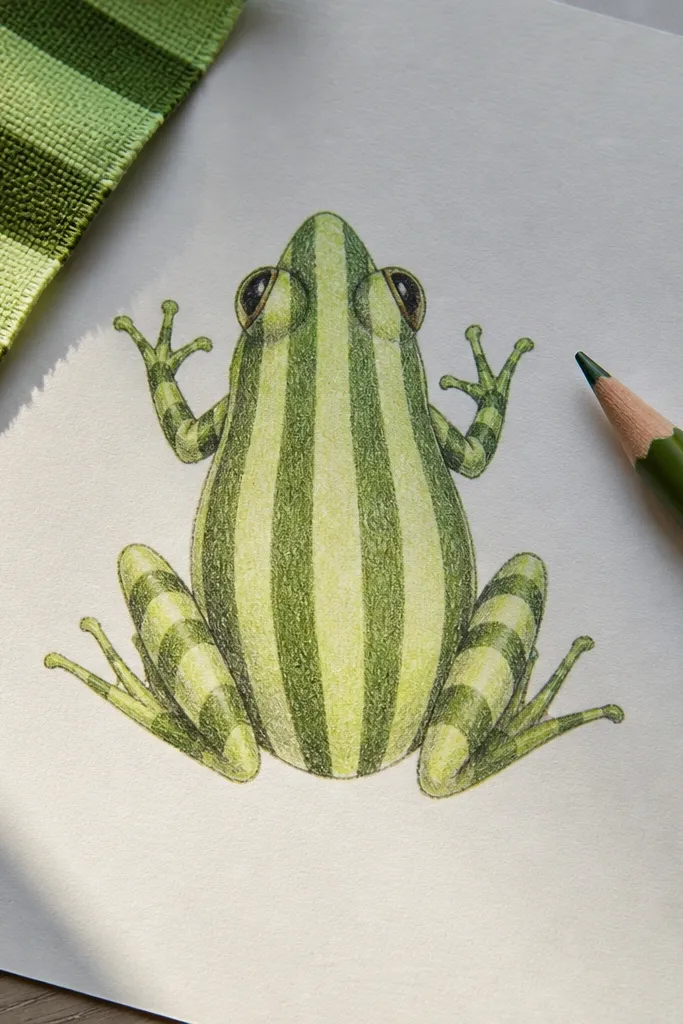
Stripes teach you to keep spacing consistent, which makes your drawing look “designed” instead of random. The frog outline stays simple, and the pattern lines sit on top of the body oval. You’ll use 3 to 5 stripes that curve slightly to follow the body, which is easy for beginners. This style is great if you want a frog that looks lively without shading.
Step 1: Draw the classic frog body oval and add two eye circles on top. Add a simple mouth curve and two nostril dots. Step 2: Lightly mark 3 to 5 stripe guide lines across the body, spaced evenly. Darken the stripes, then erase the light guides if you used them. Finish with a darker outline around the frog so stripes don’t overpower it.
Pro tipAngle stripes slightly downward toward the belly; it makes the frog look like it has form.
AvoidDon’t draw stripes straight across like a barcode; curve them a little with the oval.
15. Frog in a Circle Badge (Logo-Style)
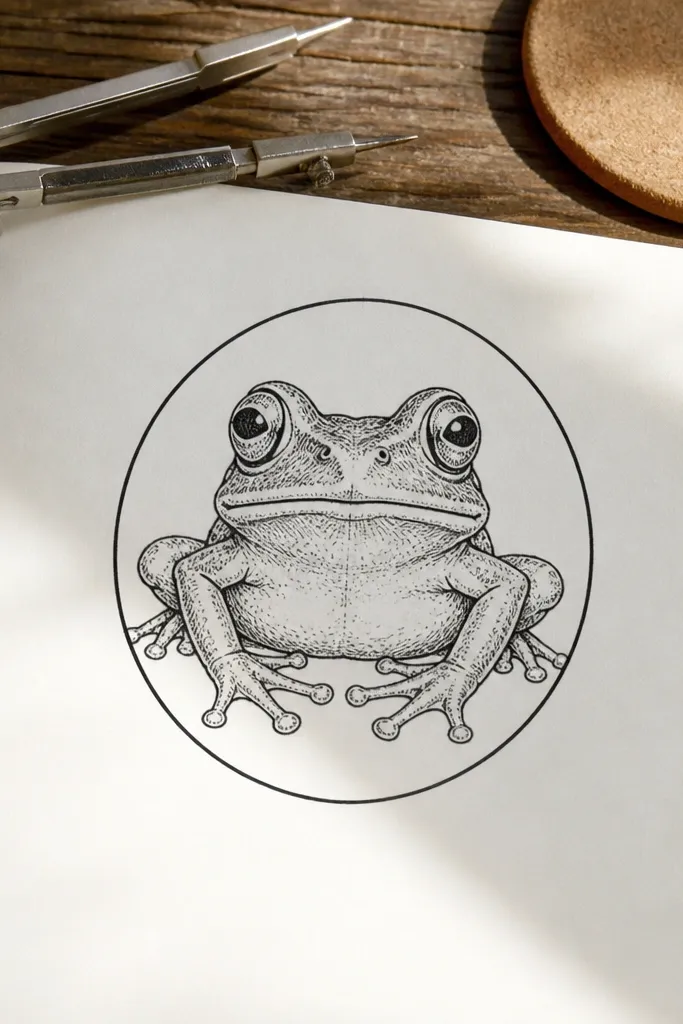
A badge drawing is easy because the circle forces clean proportions. You draw the circle first, then fit the frog face inside it using the eyes as your anchors. This style is great for beginners who struggle with “where do I put everything?” because the badge boundary answers that question. It also works well as a label for bookmarks, water bottles, or handmade stickers.
Step 1: Draw a neat circle on your paper. Inside the circle, sketch two big eye circles and place them so they sit slightly above the center of the badge. Step 2: Add a nose bump and mouth curve, then draw a small body oval at the bottom edge of the circle. Darken the frog outline, then trace or thicken the badge circle last.
Pro tipIf your frog looks stretched, adjust by resizing the eye circles first; the face will follow.
AvoidDon’t thicken everything at once; badge outlines should be slightly bolder than facial features.
16. Frog with Little Flippers (Water-Friendly Shape)
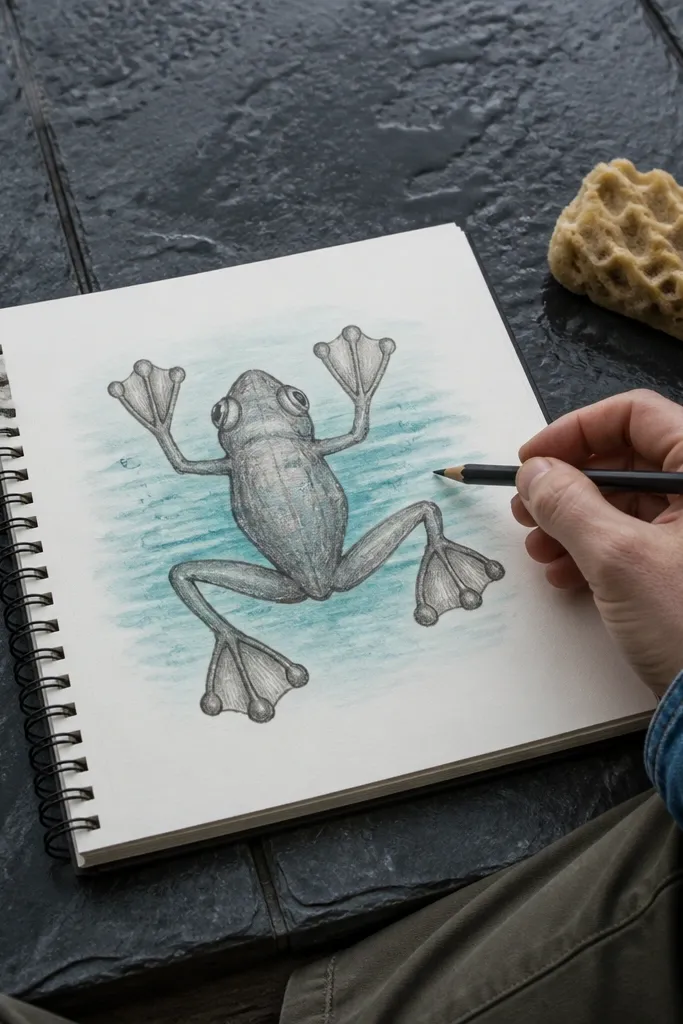
Flippers are a friendly shortcut for hands and feet. Instead of worrying about separate toes, you draw a rounded flipper shape at the end of each arm and leg. That keeps the drawing easy while still looking different from the standard toe-bump style. This frog is perfect if your toes keep turning into random lines, because the flipper silhouette reads clearly even when it’s imperfect.
Step 1: Draw the frog body oval and place two eye circles on top. Add a mouth curve and small cheek lines if you want. Step 2: Draw two arms as short curved lines ending in rounded flipper shapes, then draw two legs similarly. Keep the flippers wider than the arms so the frog looks balanced.
Make flippers slightly wider at the outer edge; it gives a natural “paddle” look.
Don’t draw flippers too narrow; thin flippers look like sticks, not hands.
17. Frog with Big Eyebrows (Brow-Driven Expression)
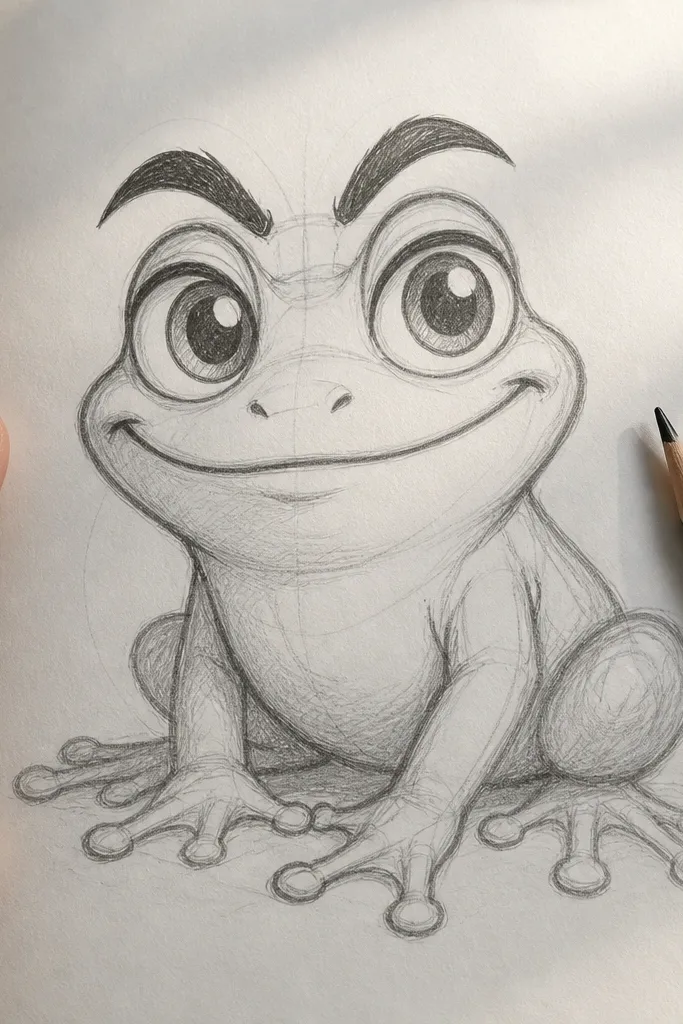
Big eyebrows turn expression into something you can control without touching anatomy. You still draw the classic eye circles, but the brows are the main feature, drawn as thick curved lines. Beginners like this because you can change the mood instantly by tilting the eyebrow arcs. It also helps your frog look “alive” even if your mouth line is simple.
Step 1: Draw a frog face oval, then place two eye circles. Add two thick eyebrow arcs above each eye, leaving a small gap between brow and eye. Step 2: Add a small nose bump and a short mouth curve, then lightly sketch cheek outlines. Darken the brows and eyes last, so they stay the focal point.
Pro tipTo make it look curious, raise the inner ends of the eyebrows slightly higher than the outer ends.
AvoidDon’t make the eyebrows the same height as the eyes; the face needs separation.
18. Frog Face with Bubble Cheeks (Roundness Trick)
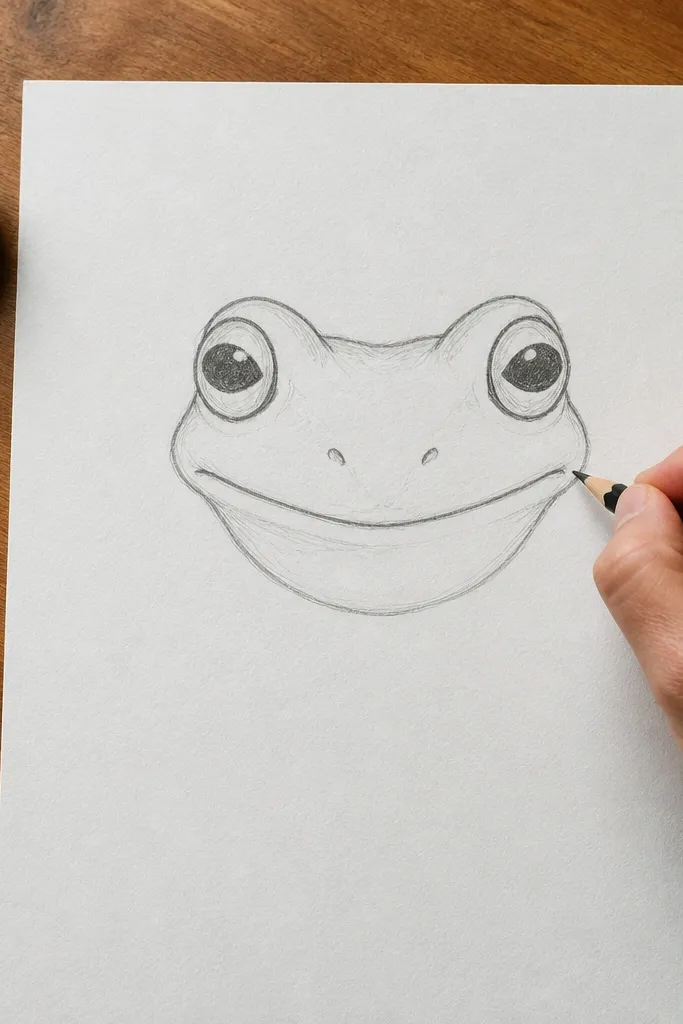
Bubble cheeks are an easy way to make your frog look cute without adding complicated shading. You draw a classic face, then place two small cheek circles or rounded bumps under the eye area. The cheek shapes give volume, so the face looks fuller even with minimal detail. This is a great starter if you tend to leave faces too flat and you want an instantly better look.
Step 1: Sketch the face oval and place two eye circles near the top half. Add a small nose bump between them and a gentle mouth curve. Step 2: Draw two cheek circles as rounded bumps on either side of the mouth area, slightly lower than the eyes. Connect cheeks to the face outline with short curves, then erase construction lines.
Keep cheek circles smaller than the eyes; if they’re equal, the frog looks like a cartoon mask that’s too big.
Don’t place cheeks too far outward; keep them inside the face oval boundary.
19. Frog with Lily-Pad Spots (Dot-to-Leaf Transfer)
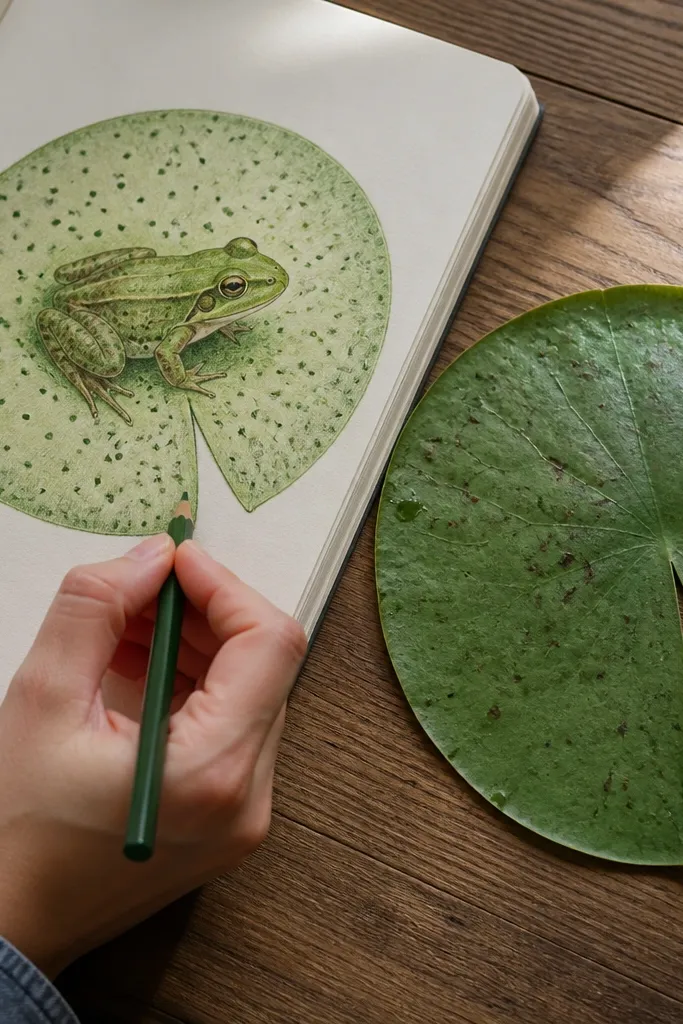
This is a two-skill drawing: lily pad shape plus a simple spot pattern. The frog stays basic, while the lily pad gets spots that make the whole scene feel more finished. Spots are easy to control because you’re repeating one small circle shape. It’s a solid project if you want to practice pattern placement without heavy shading or realism.
Step 1: Draw a lily pad leaf shape in the lower half of the page and add 3 curved vein lines from the center. Step 2: Add 10 to 20 small spots on the leaf — keep them mostly toward the center. Then place the frog on top with two eye circles, a nose bump, and a simple mouth curve, plus a rounded body oval. Ink the outlines and erase the leaf guide lines.
Pro tipVary spot sizes slightly (some tiny, some medium) for a more natural look without extra work.
AvoidDon’t make the spots perfectly uniform; a slightly uneven pattern looks more believable.
20. Frog Head Only (No Body, Just Expressions)
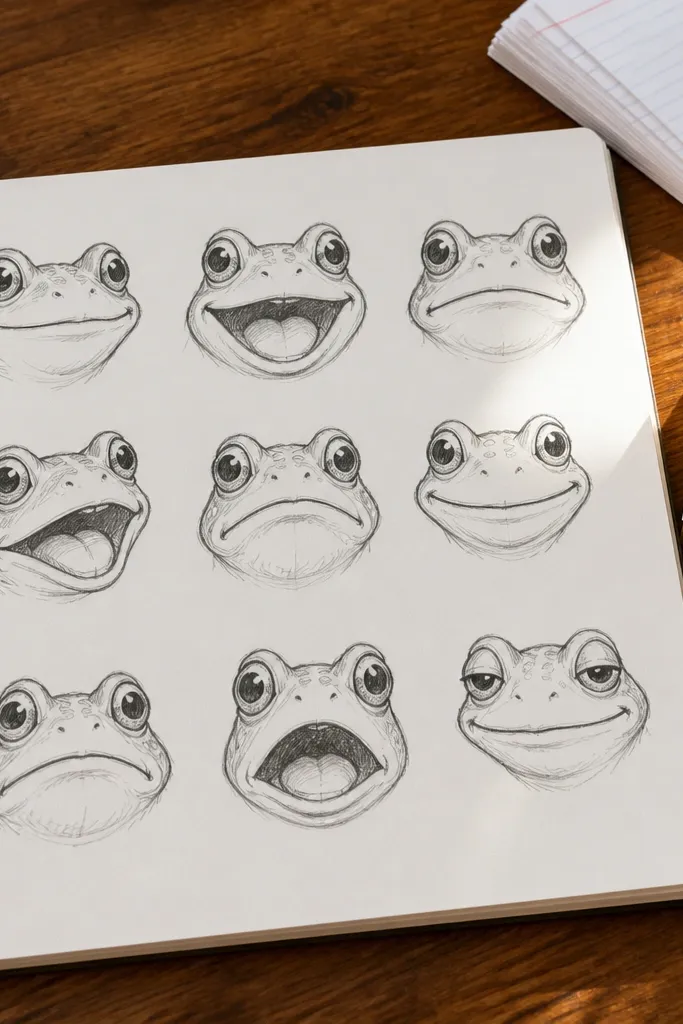
Head-only frogs are the fastest way to practice drawing without getting stuck on legs. You’ll focus on the face outline, eye placement, and mouth curve, which are the core skills behind every frog drawing. This is great when you’re short on time or you want to make a set of expressions on one page. The technique is forgiving because you can keep the head oval consistent and swap only the mouth and eyelid shapes.
Step 1: Draw a head oval and lightly place two eye circles so they sit at about the same height. Add a small nose bump and a mouth curve in the lower center of the head. Step 2: Add simple eyelids or cheek lines if you want, then darken the final features and erase the construction. Keep the outline smooth and continuous.
Pro tipUse a single guideline line through both eyes to keep them level across the page.
AvoidDon’t stretch the head oval too wide; it makes the eyes look misaligned.
21. Frog with Simple Watercolor-Style Wash (No Real Paint)
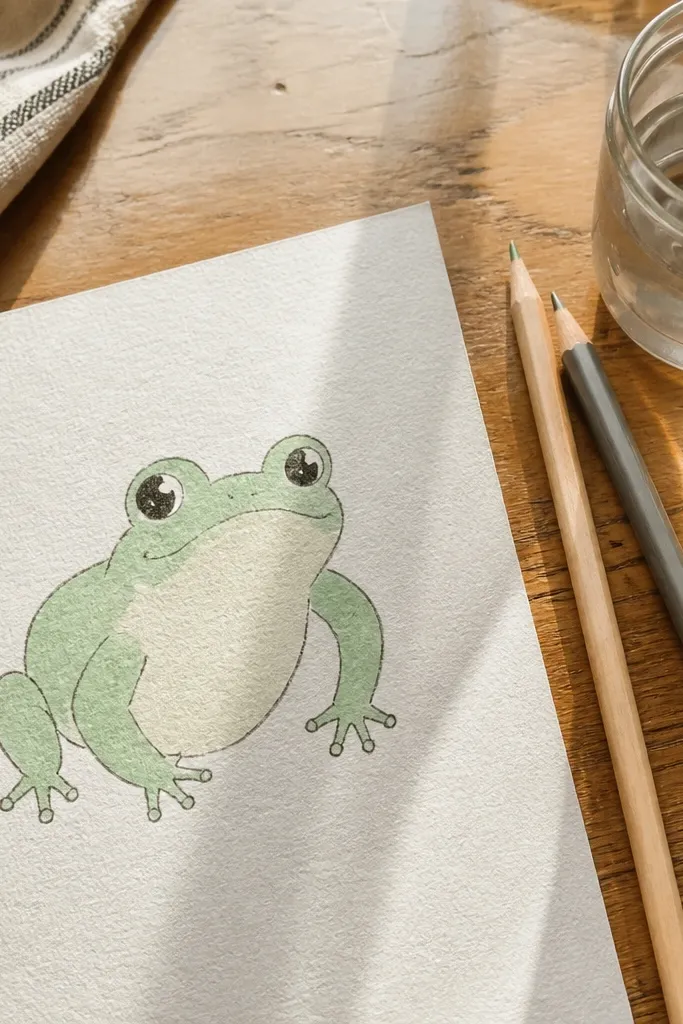
You can get a watercolor vibe without true painting by using a light colored pencil wash or watered marker lightly over your outline. The frog stays simple: pencil sketch first, then gentle color only on the body and eye area. The wash softens your lines and makes the drawing look finished even if your outlines aren’t perfect yet. This is a beginner move because you’re not asked to blend like a pro — you’re just laying in color with light pressure.
Step 1: Draw the frog in pencil with big eyes and a clear outline, then erase only the light construction lines. Step 2: Color the body area with light green (or a mix you already own) using short strokes. If you have a brush pen or water brush, lightly dampen the colored area to spread it, then let it dry. Darken the eye outlines after it dries so the eyes stay crisp.
Pro tipKeep the wash lighter under the eyes so the face still looks readable.
AvoidDon’t flood the whole page; wet paper warps and ruins the clean frog outline.
22. Frog with Side Eye and Open Mouth (Surprised Look)
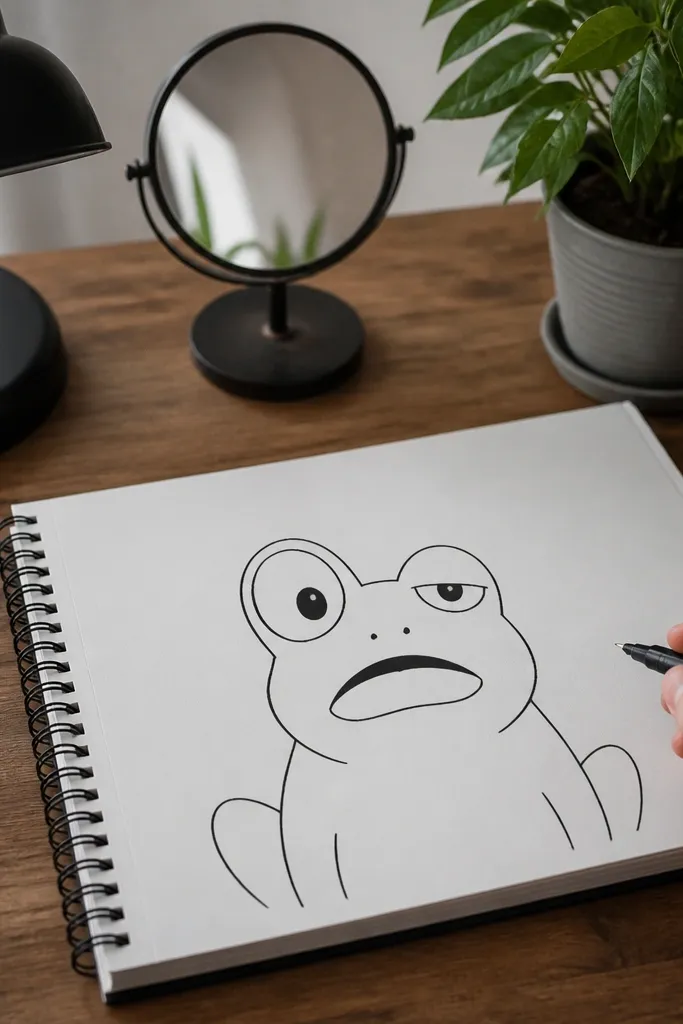
This style teaches you a powerful beginner trick: expressions change when you change eye size and mouth shape. You’ll keep the body oval simple, but you’ll draw one eye slightly larger or more open. The mouth becomes a wider curve, which reads as surprise without needing teeth or realism. It’s a good project if your frogs all look the same and you want variety fast.
Step 1: Draw a body oval and place two eye circles, but make one eye slightly larger. Add a small nose bump and a mouth curve that opens wider than your usual smile. Step 2: Add a small line inside the mouth to suggest depth, then outline the face more firmly. Finish by erasing guide lines and cleaning the edges around the eyes.
Pro tipIf the surprise feels too intense, reduce the mouth width and keep the eyes equal again.
AvoidDon’t add extra details like teeth; the open mouth curve is enough.



