
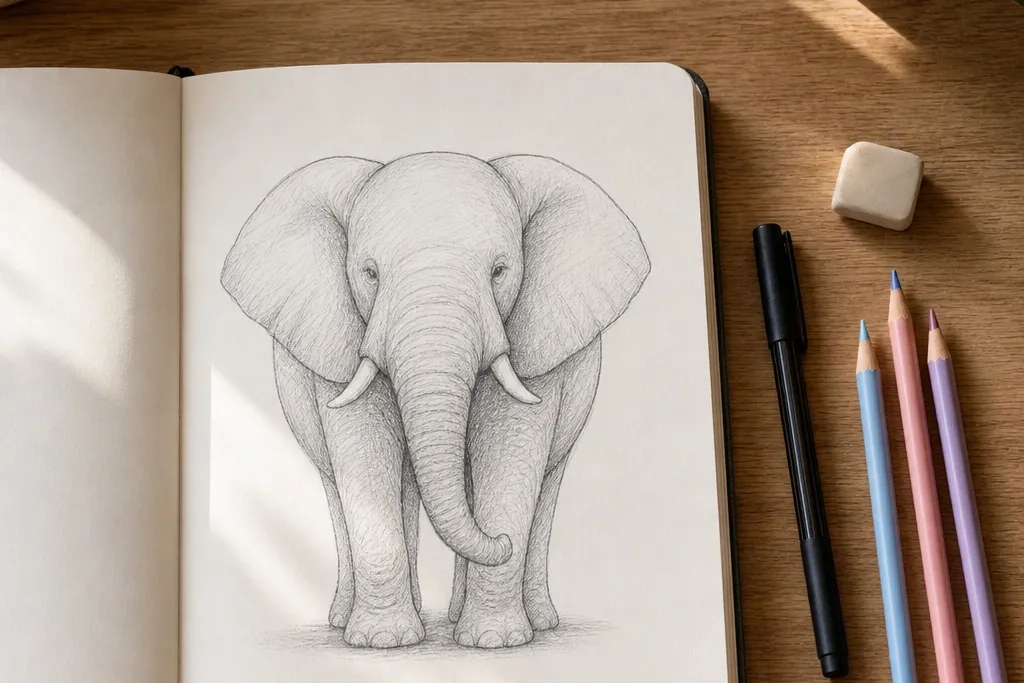

1. Big Oval Head Minimal Elephant
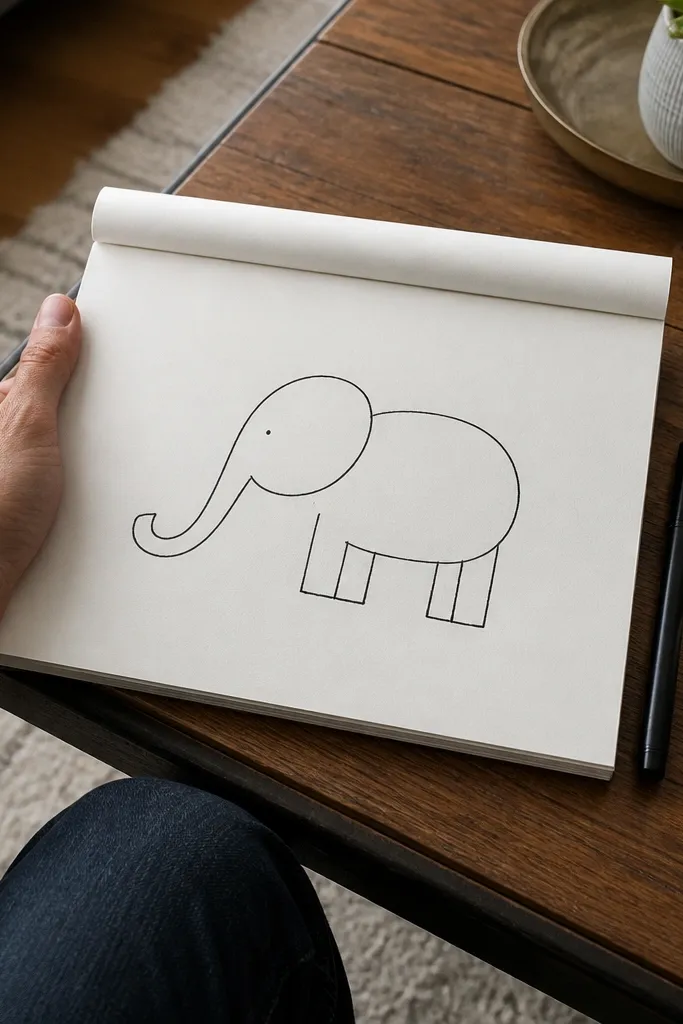
This one is for when you want an elephant drawing that looks crisp even with zero realism. The head is a big oval, the body is a second oval, and the legs are four short rectangles that sit under the body like a toy. The trunk is a single smooth curve that ends in a tiny hook, so the whole drawing reads instantly from a distance. Finish with a clean ear outline and a small eye dot for the cutest “cartoon but not childish” look. It’s perfect for bookmarks, quick sketchbooks, and small wall prints because the silhouette stays bold.
Step 1: Draw two overlapping ovals — one large for the head and one slightly larger for the body — then place the body oval so it sits slightly lower than the head. Step 2: Add four leg columns under the body using short rectangles, then connect them with a gentle belly line. Step 3: Draw the trunk as one long curve starting at the head and ending near the front legs, then add a small ear shape on the side of the head.
Pro tipUse a ruler only for the leg bottoms if your lines wobble — the rest should be freehand.
AvoidDon’t put the trunk coming from the top of the head; it should start near the lower front of the head oval.
2. Side-Profile Tusks and Trunk Curve
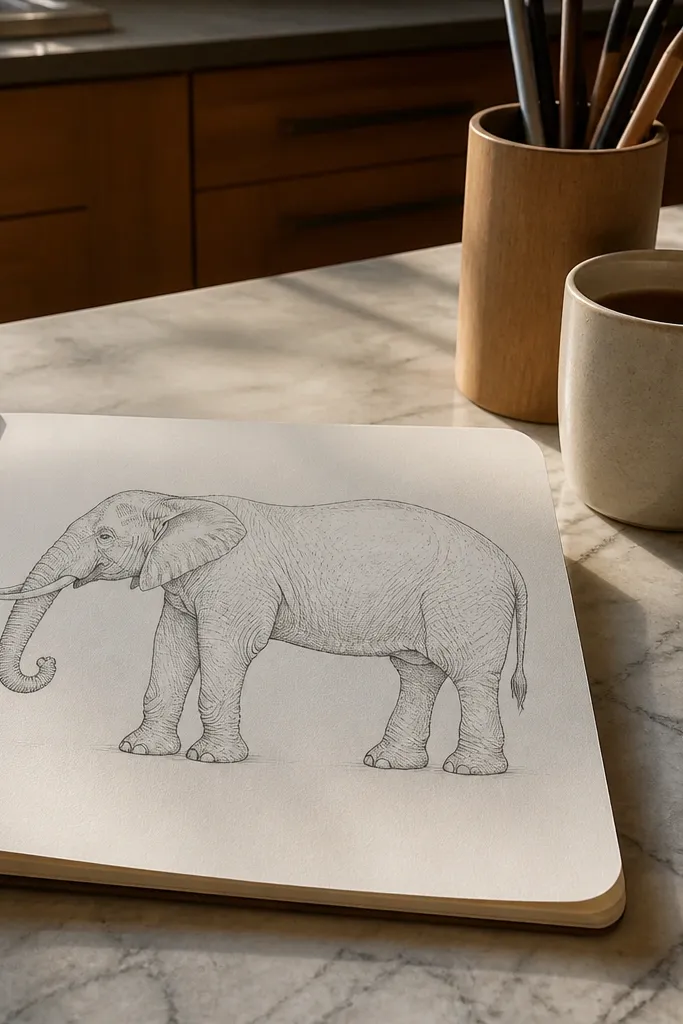
A side profile looks “realer” without getting hard, because the body is mostly one continuous shape. This style gives you tusks and a trunk that curls forward, creating a strong silhouette that reads like an illustration. The key is placing the tusks slightly below the eye line so they don’t look like horns. Add one shaded cheek patch and a soft shadow under the chin to make it look finished. It’s a great option if you want a drawing that looks good as a single centered figure.
Step 1: Draw a long oval for the body, then add a smaller oval for the head angled slightly upward. Step 2: Sketch the jaw line as a gentle curve forward, then place the eye as a small dot and the tusks as two short curved lines from the jaw. Step 3: Build the trunk as a thick-looking curve that wraps toward the front, then add the ear as a simple triangle-like flap.
Pro tipMake the trunk line thicker than the rest using a fineliner with firmer pressure.
AvoidSkip drawing the legs as separate disconnected lines; connect each leg to the body with a short curve.
3. Cute Baby Elephant Balloon Trunk
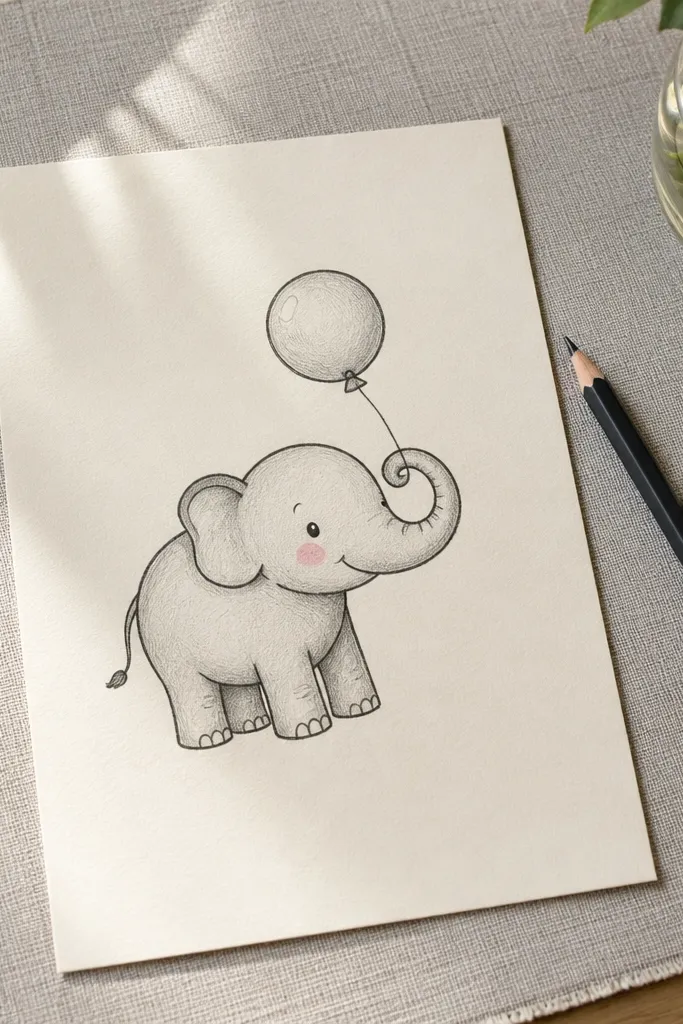
This is the easiest way to make an elephant look adorable without making it weirdly round. The trunk is the star: it looks like a balloon curl, which instantly gives you a friendly expression. Keep the ears small and rounded, and use short legs with rounded ends so the whole animal looks compact. Add a tiny blush dot on the cheek and a little tail nub for charm. It’s perfect for kids' rooms, greeting cards, or any page where you want the drawing to feel light and playful.
Step 1: Draw a big circle for the body and a smaller circle for the head that overlaps slightly. Step 2: Add short legs as thick, rounded rectangles and connect them with a curved ground line. Step 3: Draw the trunk as a thick “C” loop with a small inner line, then add small rounded ears on both sides.
If you want it extra cute, make the trunk curl end wider than it starts.
Don’t stretch the body oval too tall; baby elephants look best when the torso is almost round.
4. Mandala Ear Frame Elephant
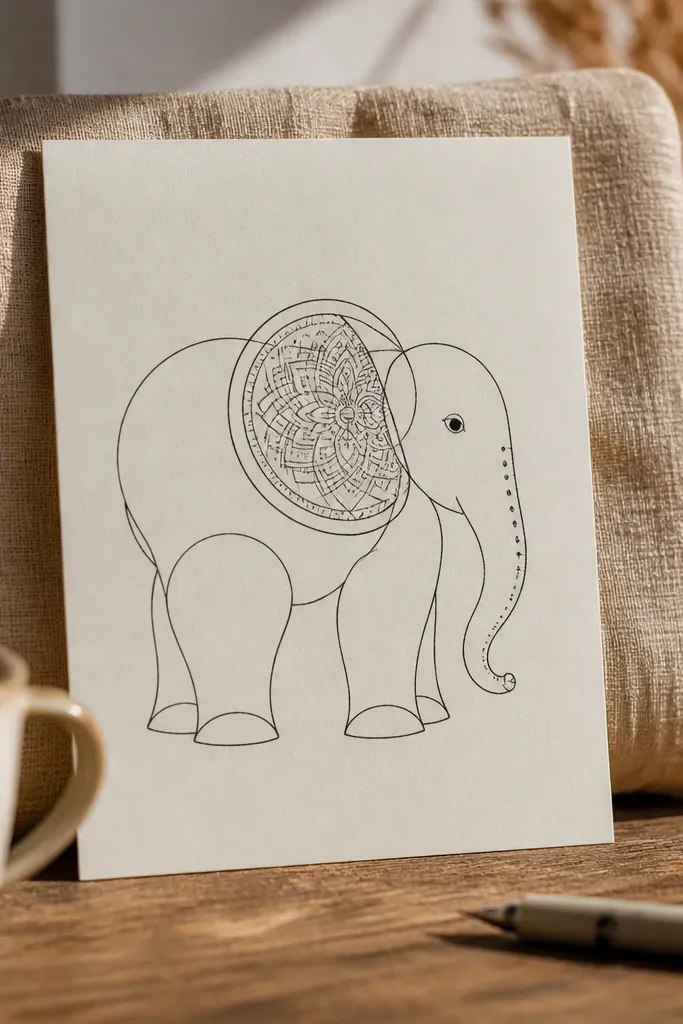
This one is visually striking because the pattern sits where your eye naturally looks first — the ear. You still keep the elephant easy with simple body shapes, but the mandala ear turns it into a “designed” piece. Use thin fineliner lines for the pattern so it doesn’t overwhelm the silhouette. Add a few dots on the trunk and one small tusk edge for balance. It’s great if you want an art-page look that feels more like illustration than practice.
Step 1: Sketch a simple elephant silhouette with two ovals, four legs, and a trunk curve, then ink the outline lightly. Step 2: Draw an ear outline large enough to hold pattern, then fill it with concentric arcs and tiny leaf shapes. Step 3: Add 5-8 small pattern marks on the trunk and a single shaded patch on the body.
Pro tipStart the mandala with one center dot, then build outward so the spacing stays even.
AvoidDon’t pattern the entire body; keep the pattern concentrated in the ear for a clean focal point.
5. Geometric Block-Elephant (Low Detail)
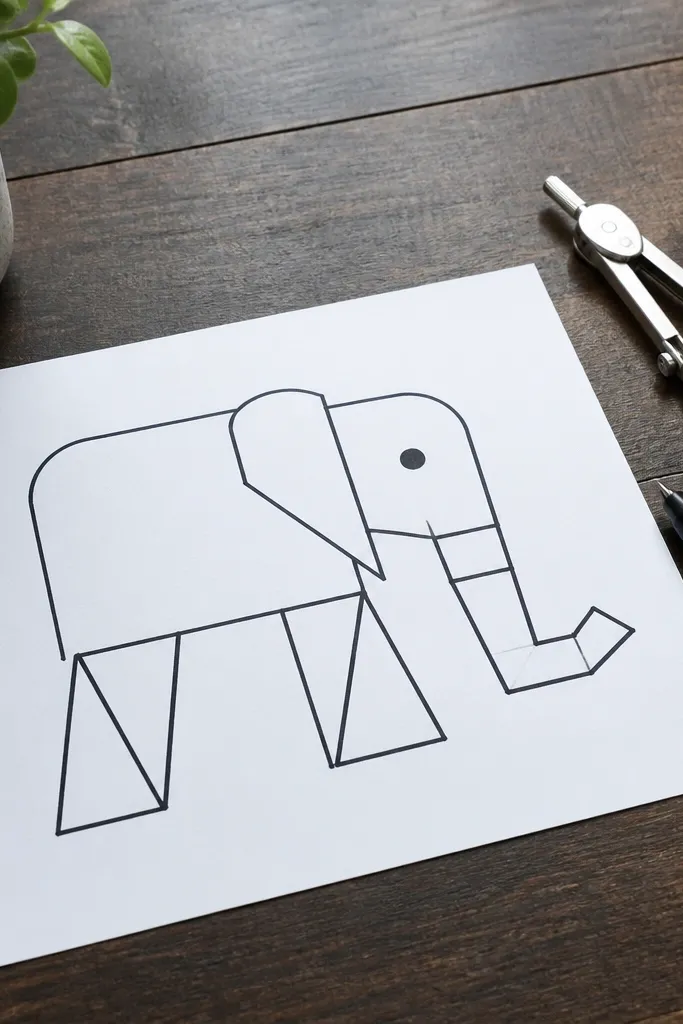
If your hand gets messy, use geometry to control it. This elephant is built from blocks — rounded rectangles for body and head, triangles for the legs and ears, and straight-ish lines for the trunk. The result looks modern and graphic, like a poster you’d see in a gallery wall. You only need a few straight edges, which makes it easier than it sounds. Add one flat gray fill on the body and one darker shadow under the chin for that crisp, aesthetic punch.
Step 1: Draw the body as a large rounded rectangle and the head as a smaller one attached at a slight angle. Step 2: Build the legs from four rectangles with triangle “feet” and keep them aligned under the body corners. Step 3: Create the trunk as a thick polyline curve, then ink everything with a fineliner and add one gray fill using a marker or pencil shading.
Pro tipUse a single gray tone — one color is what makes this style look intentional.
AvoidAvoid drawing every line thin; some edges should be bolder, especially the outer silhouette.
6. Single-Line Continuous Elephant
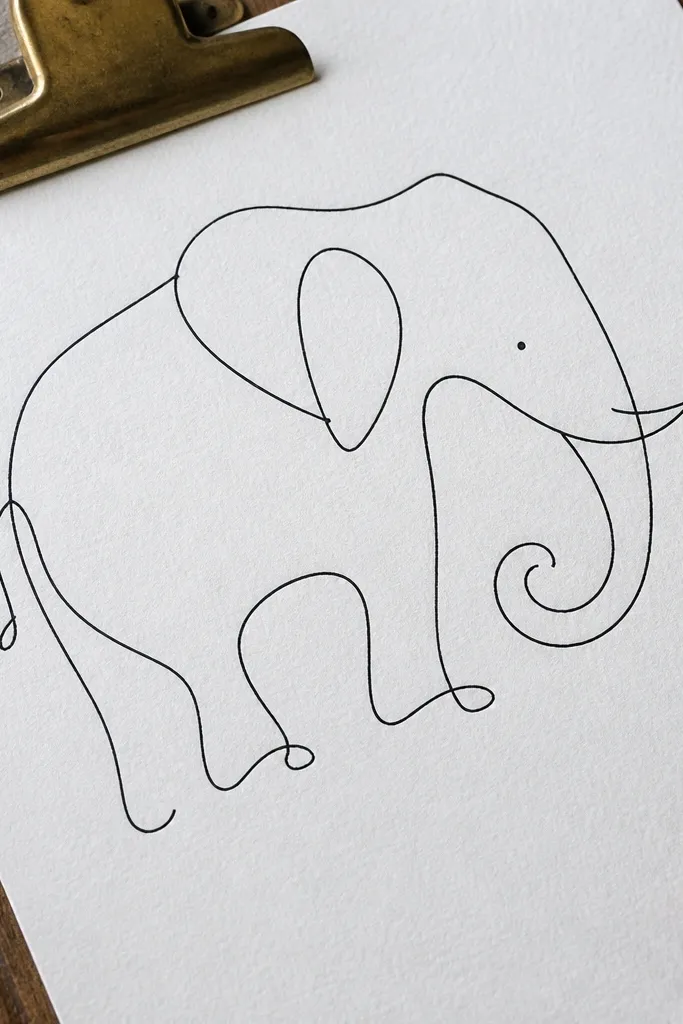
Single-line drawings look impressive because they prove your shapes connect. This one is elephant-shaped, but it’s also a clean calligraphy exercise. Use a continuous line to wrap around the head, trunk, legs, and tail, then add one small eye dot and tusk hint as tiny breaks. It’s also perfect for practicing smooth curves because you cannot “fix” proportions with extra lines. The final looks great on a plain background and works well with a single color pen.
Step 1: Pick a starting point near the back of the head and draw one smooth curve around the head oval. Step 2: Continue into the trunk as one continuous arc, then loop down to sketch the legs as a single connected path. Step 3: Finish at the tail and add a small eye dot and a tiny tusk curve where the jaw line would be.
Pro tipSlow down on the trunk curve; that’s the line that decides whether it looks elegant or tangled.
AvoidDon’t lift the pen mid-trunk; if you pause, the drawing will look stitched together.
7. Pastel Shaded Elephant with Soft Spots
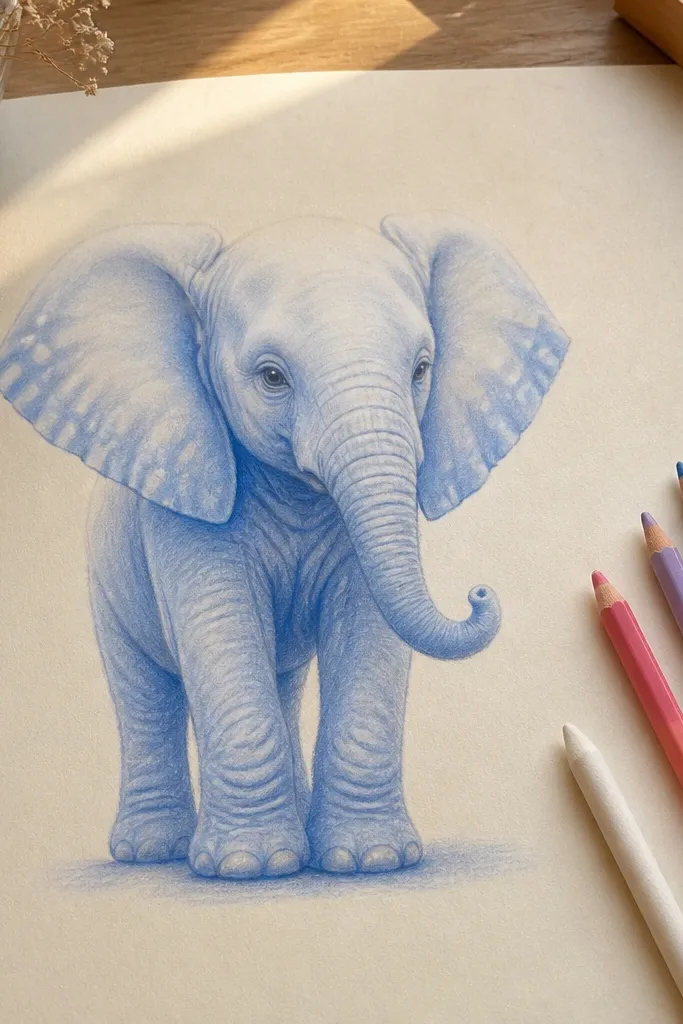
This is the “pretty for your desk” elephant. You keep the sketch easy with ovals and simple legs, then add pastel shading in gentle layers so it looks airy instead of flat. Add a few soft spots on the body and one shadow under the trunk to create depth. Choose one main pastel (powder blue, warm pink, or pale lavender) and one darker neutral (gray-brown). The result looks good in photos because the shading has smooth transitions and the silhouette stays clean.
Step 1: Sketch the elephant with HB pencil using the oval skeleton, then erase lightly so lines are faint. Step 2: Color the body with a pastel pencil or chalk pastel in light layers, leaving the highlight area near the belly mostly clean. Step 3: Add spots using a darker pastel and blend gently with a paper stump or tissue, then finish with a light gray shadow under the chin and legs.
Keep your darkest shading in three places only: under the chin, between legs, and at the trunk curve.
Don’t outline heavily after shading; it makes pastels look muddy.
8. Tusk-Forward Elephant with Patterned Trunk
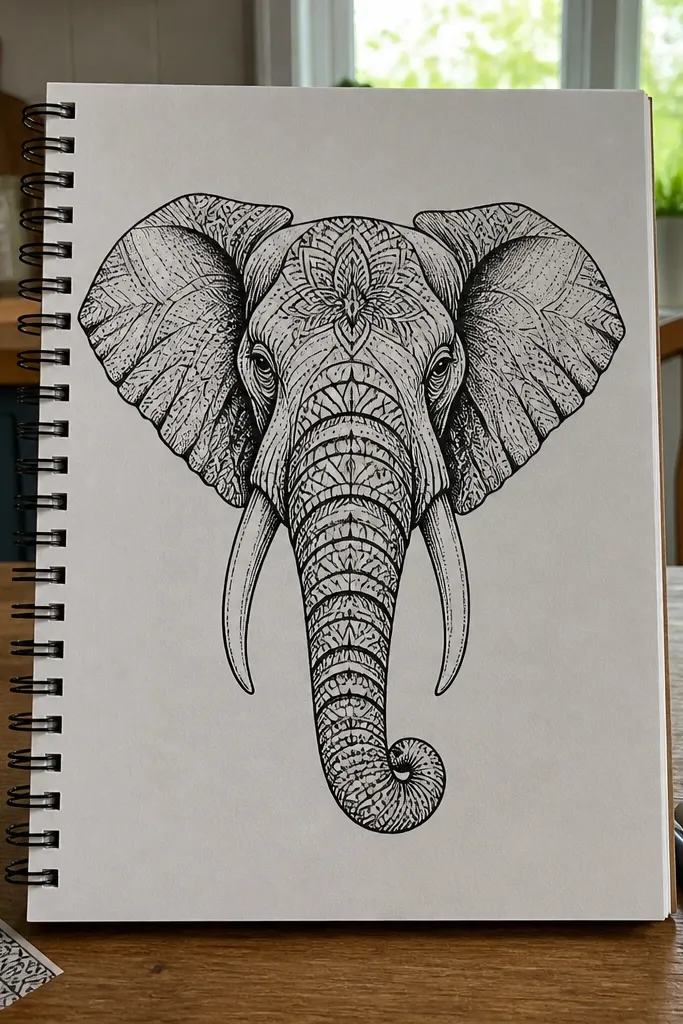
Front-facing gives you maximum cuteness and maximum clarity, but it can get lopsided fast. This design solves that by making the tusks symmetrical and using a trunk pattern that follows the center line. Think of the trunk as a thick ribbon that curves down, then add simple repeating arcs inside it. The pattern makes the trunk look intentional even if your hands wobble on details. Add a small forehead highlight and a dot eye and you’re done.
Step 1: Draw a head oval centered above a body oval, then place four legs as two front columns and two back columns slightly behind. Step 2: Sketch the trunk as a centered curved ribbon from the bottom of the head, then add two tusk curves from each side of the jaw. Step 3: Fill the trunk with 6-10 small repeating arcs and add ear outlines that sit slightly higher than the tusks.
Draw a center guideline through the head to keep tusks and trunk aligned.
Avoid placing one tusk higher; symmetry is what makes front-facing look cute.
9. Minimal Line Elephant with One Splash Shadow
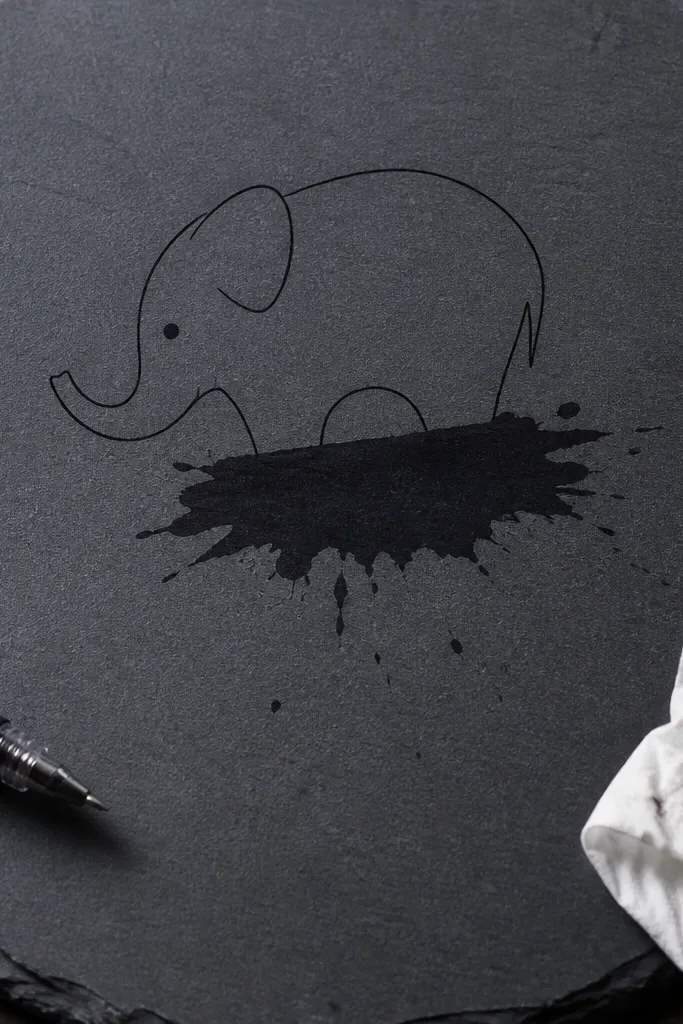
This is for clean, modern aesthetics. You draw a simple elephant with thin line work, then add exactly one bold shadow shape — like a paint splash — under the body. That single dark patch gives the drawing weight and makes it look intentional in a photo. Keep details minimal: one ear line, one trunk curve, and one eye dot. The result looks good even when the paper is cheap because the contrast is controlled.
Step 1: Sketch the elephant silhouette with HB pencil — head oval, body oval, four legs, and trunk curve — then ink the outline with a fineliner. Step 2: Erase the pencil lines once ink is dry. Step 3: Add one shadow shape under the belly as an irregular oval or splash, then darken the underside where legs meet the body.
Make the shadow bigger than you think; it’s the contrast that sells the look.
Don’t add multiple shading areas; the style depends on one shadow block.
10. Elephant with Hanging Charm Pendant
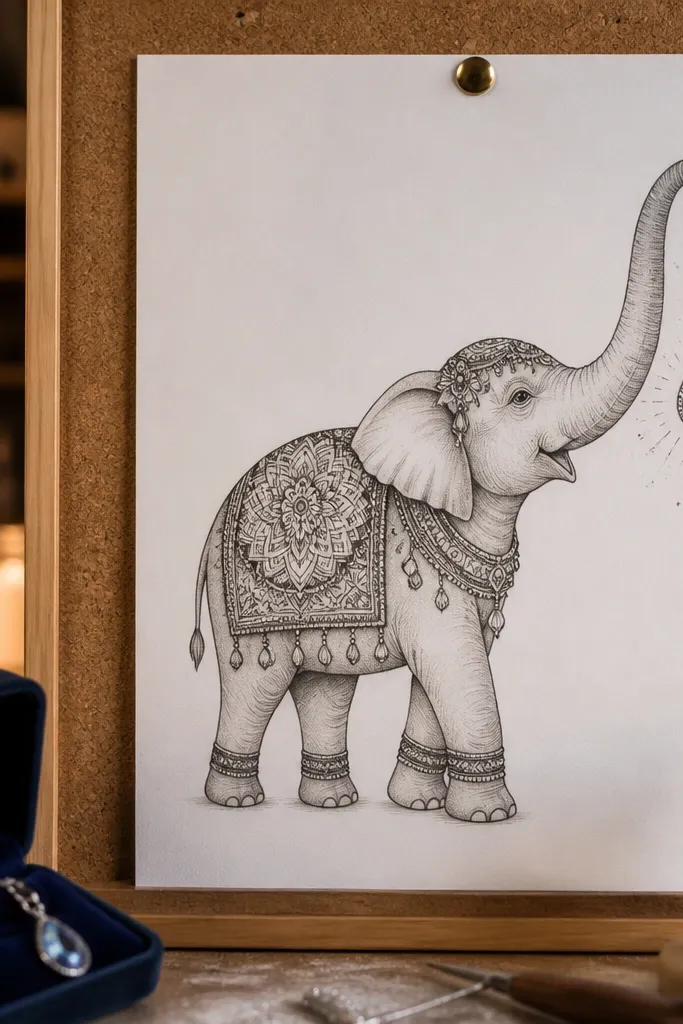
This is a “cute prop” elephant that looks styled, not generic. The elephant itself is easy, but the pendant gives you a clear focal point and a reason to add one extra line detail. Use a small teardrop charm on a short chain from the trunk tip. Add tiny sparkle dots around it. It’s great for card designs and sticker sheets because it reads fast and feels playful.
Step 1: Draw a side-view elephant silhouette with head and body ovals and a trunk curve. Step 2: Extend the trunk tip forward and add a small chain line that ends in a teardrop pendant. Step 3: Ink the outline, then add two or three small sparkle dots near the pendant and a tiny tail nub.
Pro tipKeep the pendant simple: one teardrop shape and one highlight line is enough.
AvoidDon’t make the charm heavier than the trunk tip; it should look like it’s hanging, not attached to the body.
11. Elephant Silhouette Cutout Style
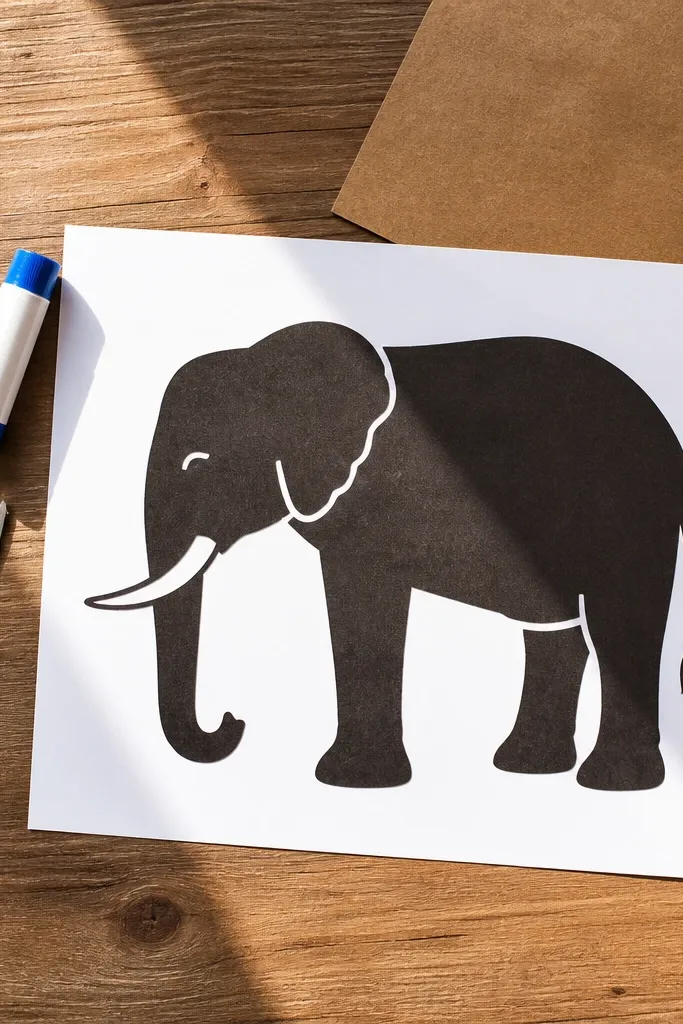
Filled silhouettes look polished because they ignore detail errors. You draw the elephant outline, then you fill it in solid black or dark brown. The tusks and eye can be left as white spaces or tiny carved lines, which makes the drawing look clean and graphic. This style is also super forgiving for beginners because you can correct proportions by reshaping the outer edge before filling. It’s ideal for poster art, tote bag designs, and stickers.
Step 1: Sketch the elephant outline lightly with HB pencil: head oval, body oval, legs, and trunk curve. Step 2: Ink the outline and then fill the entire elephant body with a brush pen or thick marker. Step 3: Add the eye as a white dot (skip ink there) and draw tusk curves as small unfilled shapes.
Pro tipUse thick paper or marker-friendly paper so the fill stays even without bleeding.
AvoidDon’t rush the fill — uneven edges are what make silhouettes look sloppy.
12. Elephant Head Only Poster Face
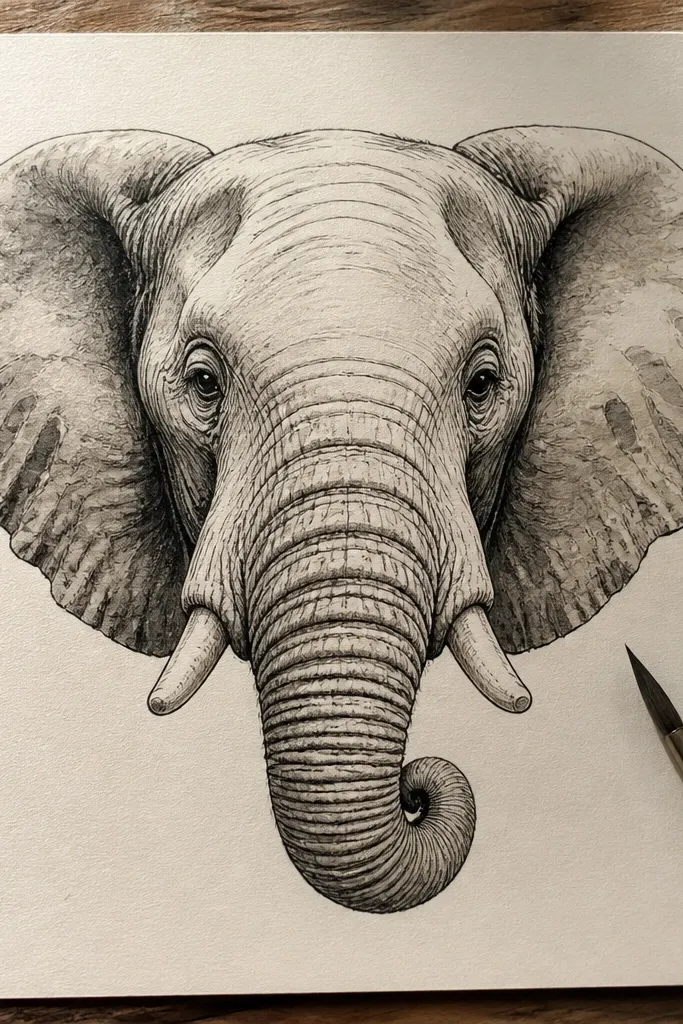
Head-only drawings are the easiest way to make a “poster look” without drawing legs. This one focuses on the face shapes: big ears, a curved trunk end, and tusk bumps. Because the composition is tight, even simple lines look intentional. Add one small shading patch on the cheek and one on the trunk fold. It’s a solid choice for small canvases, phone wallpapers, and framed mini prints.
Step 1: Draw a large head oval that fills most of the page, then add two ear shapes on the sides like rounded triangles. Step 2: Place the eye as a dot slightly above the trunk start and draw the trunk as a curled end that dips down. Step 3: Add tiny tusk bumps under the jaw line and ink the outline, then shade lightly with a 2B pencil on the cheek.
Pro tipKeep the ears slightly bigger than you think — it makes the face look friendly.
AvoidAvoid placing the eye too low; it makes the face look tired.
13. Elephant in a Circle Frame (Badge Style)
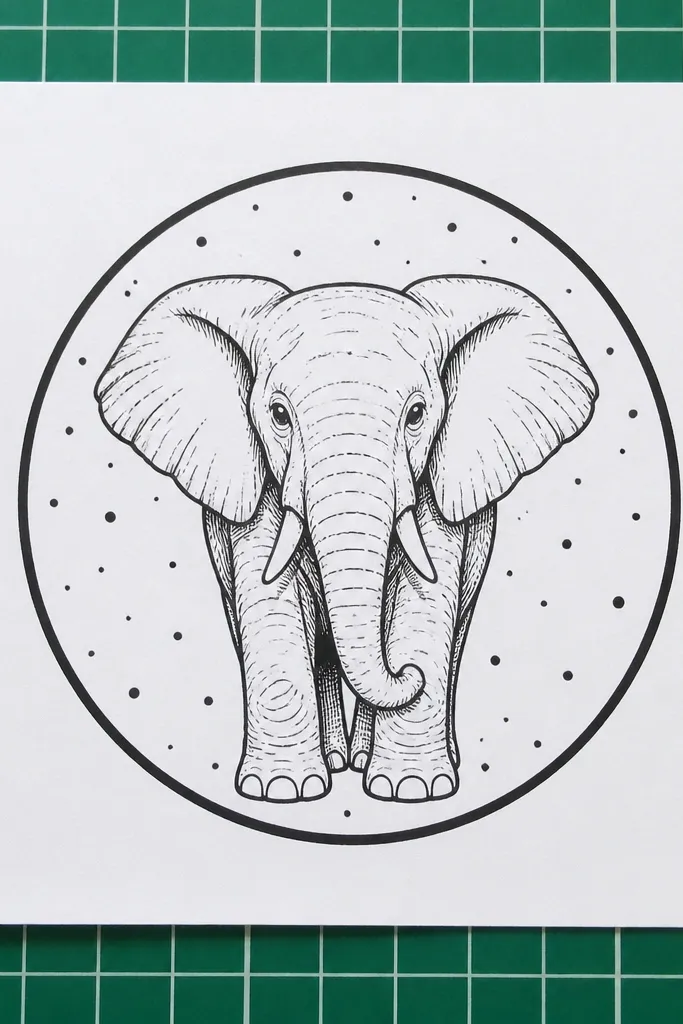
A circle frame makes any drawing look finished. This elephant is easy because it sits inside a round border, and you can adjust the outline for balance. The trunk curl and ear placement are designed to fit the circle, so it stays centered. Add small dot confetti around the elephant, then ink a clean border. The badge style looks great on paper labels, gift tags, and social posts.
Step 1: Draw a large circle with a light pencil line, then sketch the elephant centered inside using the oval skeleton. Step 2: Ink the elephant outline, then add a simple trunk curve and ear shapes that follow the circle space. Step 3: Add 10-15 small dots around the elephant inside the circle, then ink a second border line around the circle edge.
Pro tipUse fewer dots than you think; 10-15 looks crisp, 30 looks busy.
AvoidDon’t let the ears touch the border; leave a small gap so the badge looks clean.
14. Elephant with Patterned Belly Band
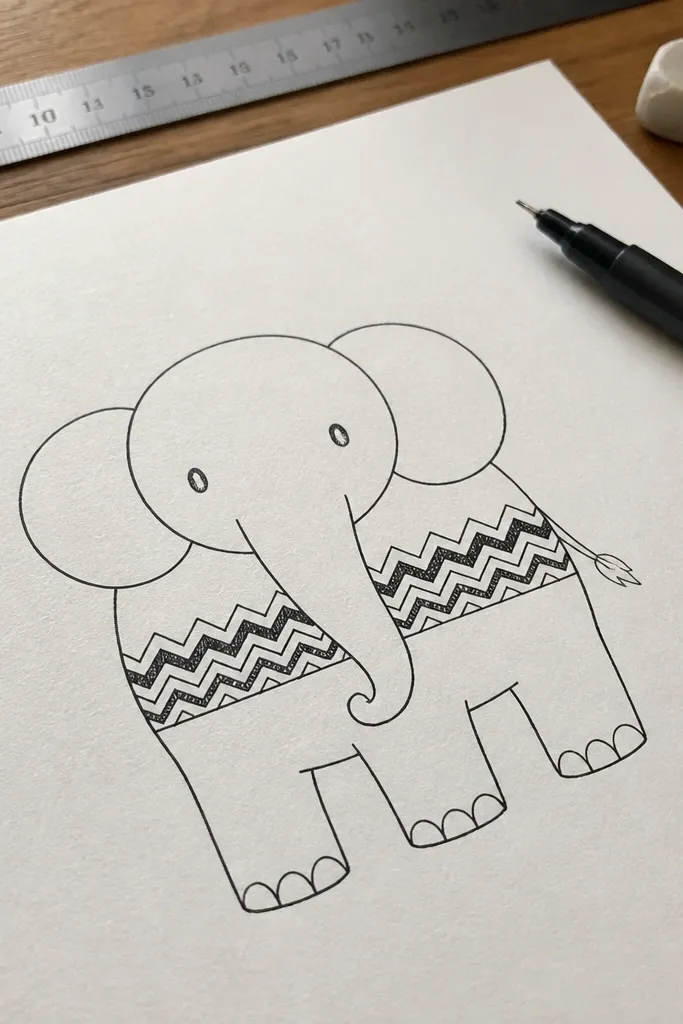
The belly band turns a basic elephant into a decorative illustration. You draw a simple elephant shape, then add a horizontal patterned strip across the belly — stripes, zigzags, or tiny hearts. This gives you a strong visual break that makes the elephant look layered and intentional. Keep the rest of the elephant mostly clean lines or light pastel shading so the pattern is the hero. It’s great for making a set of matching elephants with different pattern bands.
Step 1: Sketch the elephant silhouette with two ovals and four legs, then ink the outline. Step 2: Draw a curved band across the belly, following the body oval curve, and divide it into 6-8 sections. Step 3: Fill each section with one pattern type (zigzag, dots, or tiny arcs), then shade the belly lightly around the band with a gray-brown pencil.
Pro tipMatch pattern thickness to your outline thickness — thin pattern lines look best with thin outlines.
AvoidDon’t pattern the trunk and belly band at the same time; pick one main pattern area.
15. Elephant Trunk Swirl + Spark Dot Background
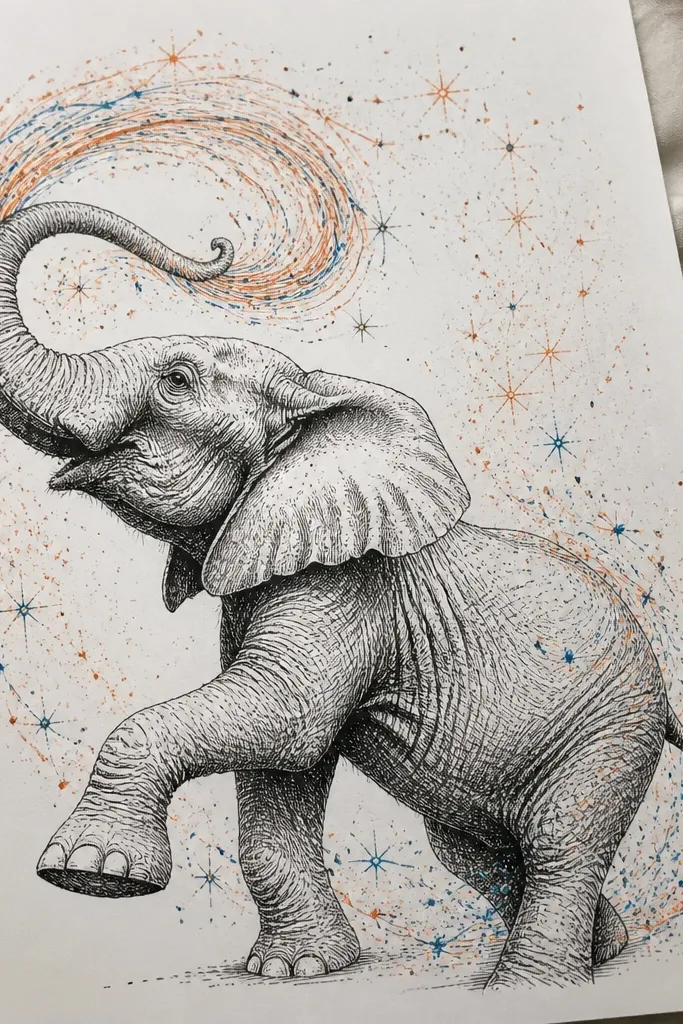
This one is photogenic because you add movement in the trunk and a clean dot background. The trunk swirl gives the elephant a sense of motion, while the spark dots create a playful, airy vibe. Keep the elephant itself simple and let the background do the work. Use a black fineliner for the elephant and a second color for the dots (golden brown or teal works great). It looks amazing in a single-color photo because the dot field frames the subject.
Step 1: Draw a simple side-view elephant silhouette with HB pencil and ink it with a fineliner. Step 2: Make the trunk a thicker swirl that curls outward, then add one small inner line to show the trunk fold. Step 3: Around the trunk and ears, add 20-30 tiny spark dots and short dash marks, then optionally color only the dots.
Keep the dots farther from the outline than you think so the elephant stays readable.
Avoid crowding dots inside the body silhouette; that kills contrast.
16. Elephant with Hanging Leaf Motif Ears
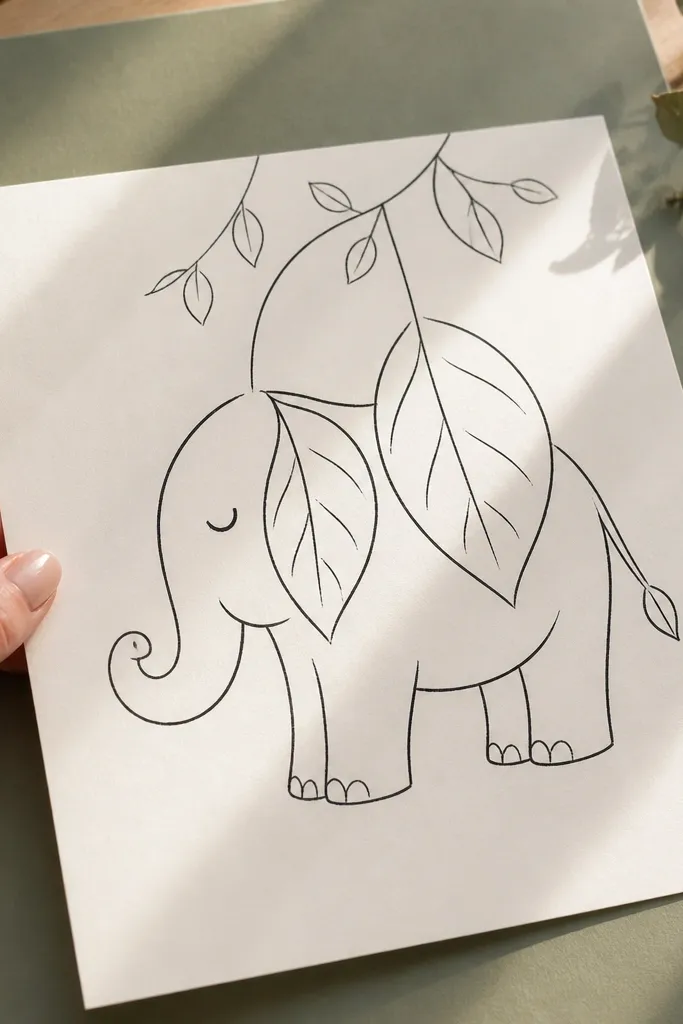
Leaf motifs make an elephant feel like a natural illustration without adding realism. The ear becomes a decorative leaf shape, and you add two or three leaf veins for clarity. The body stays easy: ovals, simple legs, and a clean trunk curl. This style works well for seasonal pages and it looks great with light green pencil shading on the leaves. It’s also a good project if you want a slightly more “illustrator” look than cartoon.
Step 1: Sketch the elephant silhouette using the oval skeleton and ink the outline lightly. Step 2: Replace the simple ear shape with a leaf outline — wider at the top, narrowing toward the bottom — then draw 3-4 vein lines inside. Step 3: Add a small trunk curl and a tiny tail nub, then shade only the leaf ears with light green pencil.
Shade the leaves unevenly — leave one thin highlight strip uncolored for a glossy look.
Don’t shade the whole body green; keep the color cue limited to the ears.
17. Elephant with Minimal Watercolor Wash
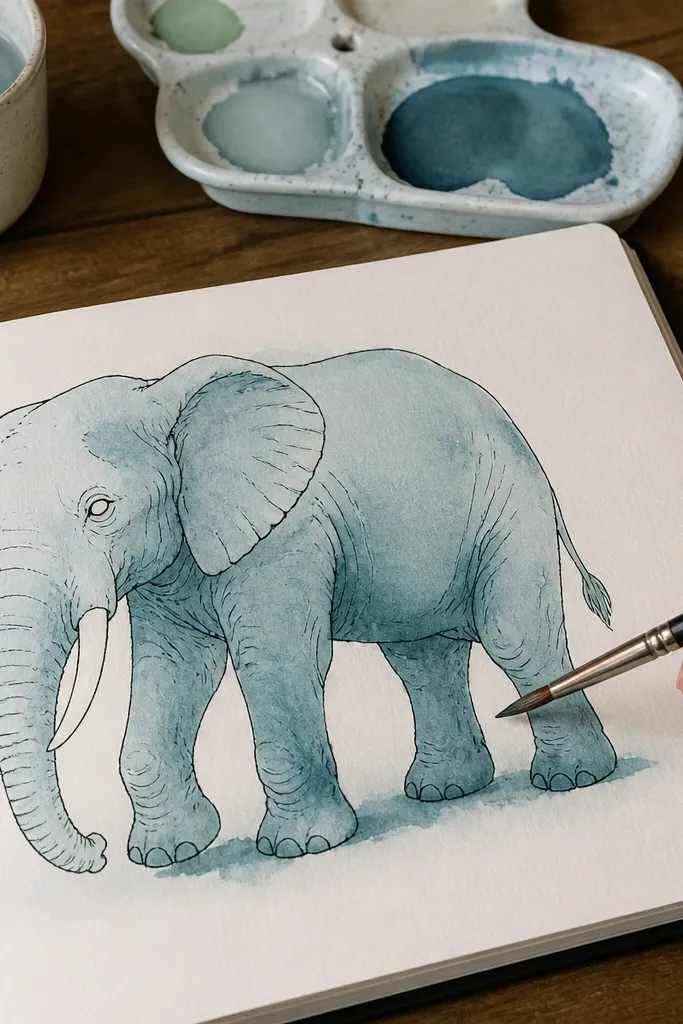
Watercolor makes even a simple elephant look finished because the pigment creates natural gradients. You keep the drawing easy by using ink first, then a very light wash on the body. Use one wash color and let it pool slightly near the legs for depth. Keep the eyes and tusks unpainted or only lightly tinted so the face stays sharp. This is a good choice for anyone who wants that artsy look but still needs a reliable structure.
Step 1: Draw and ink the elephant silhouette with a fineliner, then erase pencil marks. Step 2: Wet the body area lightly with clean water using a flat brush, then apply a thin watercolor wash (gray-blue, warm gray, or pale terracotta). Step 3: Add a second darker wash only under the belly and around the trunk fold, then let it dry fully before adding any extra dots or highlights.
Pro tipUse more water than paint — thin washes look better on paper than bold blobs.
AvoidAvoid painting over your tusk edges; crisp tusks make the face read instantly.
18. Elephant Crayon Scribble Texture
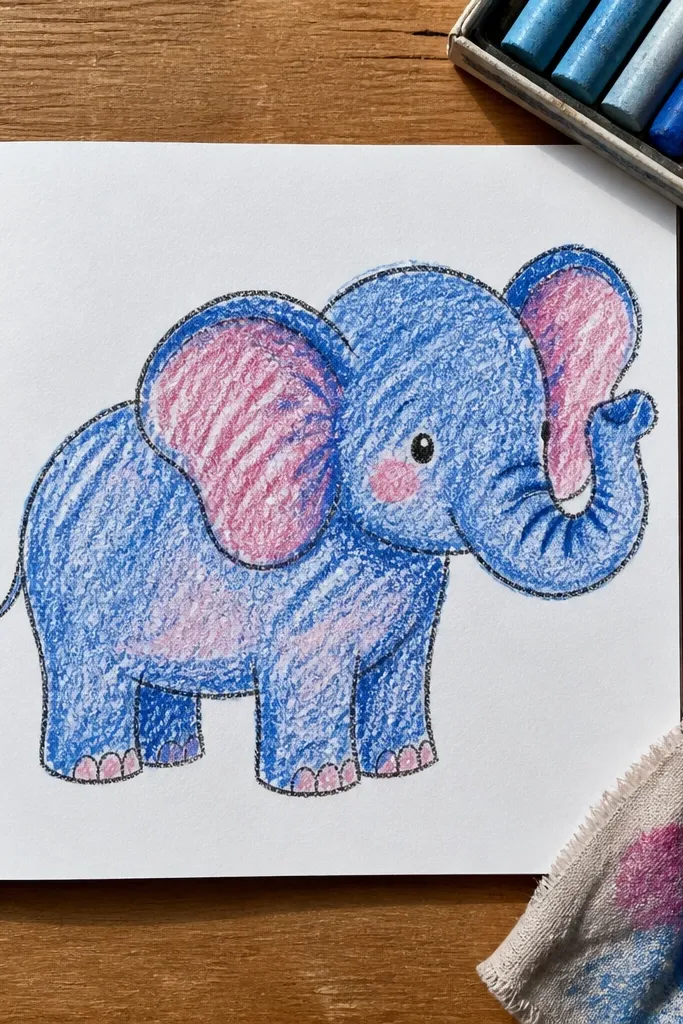
Crayon scribble texture gives you an aesthetic, handmade look without needing smooth shading. You ink the outline clean, then fill the elephant with messy crayon strokes that stay inside the lines. The trunks and ears look extra cute with a slightly darker crayon for folds. This method also helps beginners because they don’t have to blend perfectly. It’s great for sketchbooks and for making a set of elephants that all look cohesive even if your lines vary.
Step 1: Sketch the elephant with HB pencil and ink the outside contour with a black fineliner. Step 2: Color the head and body with crayon using short back-and-forth scribbles, leaving tiny highlight gaps. Step 3: Add a darker crayon on the trunk fold and under the chin, then lightly blend with a tissue if you want softer edges.
Press harder only on the shadow areas, not the whole body.
Don’t skip the outline; scribble-only elephants look like blobs in photos.
19. Elephant with Minimal Background Hill
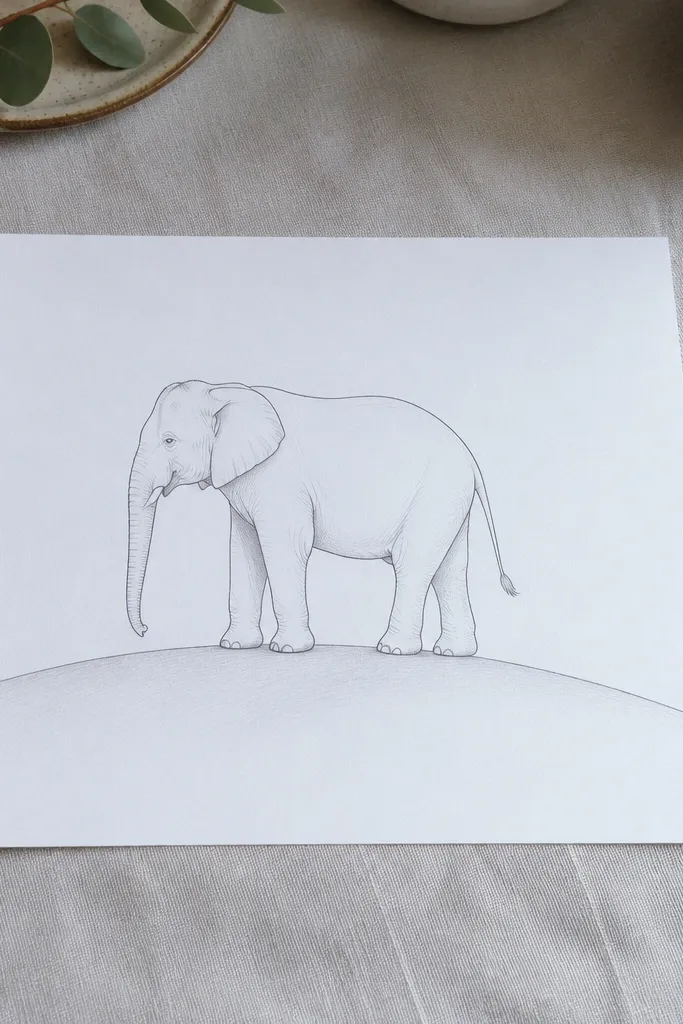
A single background line makes your elephant look like it belongs in a scene. This style keeps the elephant easy and readable, then adds one curved hill under the feet. You can shade the hill lightly to create separation, which makes the elephant pop even if your coloring is minimal. The look is calm and modern, and it photographs cleanly because the composition has one clear horizon. It’s a good pick if you want your drawing to feel “finished” without adding lots of details.
Step 1: Draw the elephant silhouette using the oval skeleton and ink the outline. Step 2: Add a single curved hill line under the legs, then connect the front legs to the hill with short curves. Step 3: Shade the hill with a light gray-green or brown pencil and shade under the belly slightly to anchor the elephant.
Keep the hill line thicker than your interior lines; it frames the figure.
Don’t add a full ground texture; one smooth hill line keeps it clean.
20. Elephant with Stitched Outline Effect
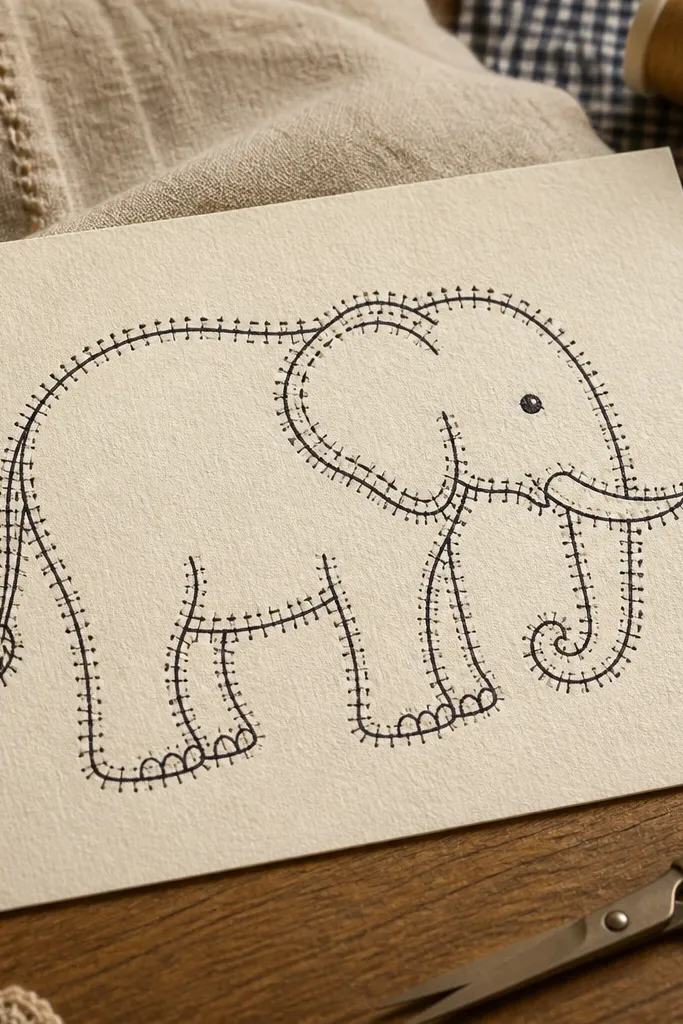
Stitched outlines look handmade and cozy, like fabric art translated to paper. You draw the elephant in normal line work, then add a second outline and connect the two with short stitch marks. This makes every edge look intentional and gives you a strong texture that reads well in photos. Keep the face simple: one eye dot, one trunk curl, and a small ear notch. It’s a fun option for crafts, scrapbooking, and anyone who likes tactile aesthetics.
Step 1: Sketch and ink the elephant silhouette with a fineliner, then add a second outline slightly inside the first. Step 2: Place short stitch marks between the two outlines along the body edge and around the trunk and ear. Step 3: Add a few tiny dots as “thread ends” near the stitch clusters and darken one shadow patch under the trunk fold.
Pro tipMake stitch marks the same length all over; consistency is what sells the fabric effect.
AvoidDon’t stitch the entire interior; keep stitches around the outer silhouette only.



