
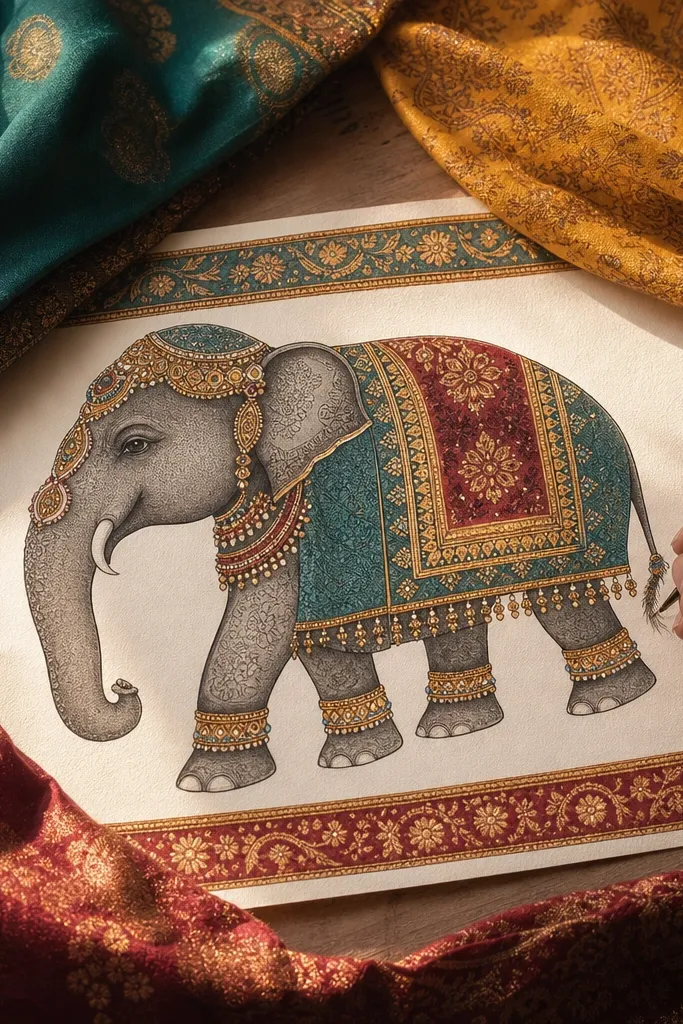
1. Mughal-inspired front-facing elephant with gold-trim saddle
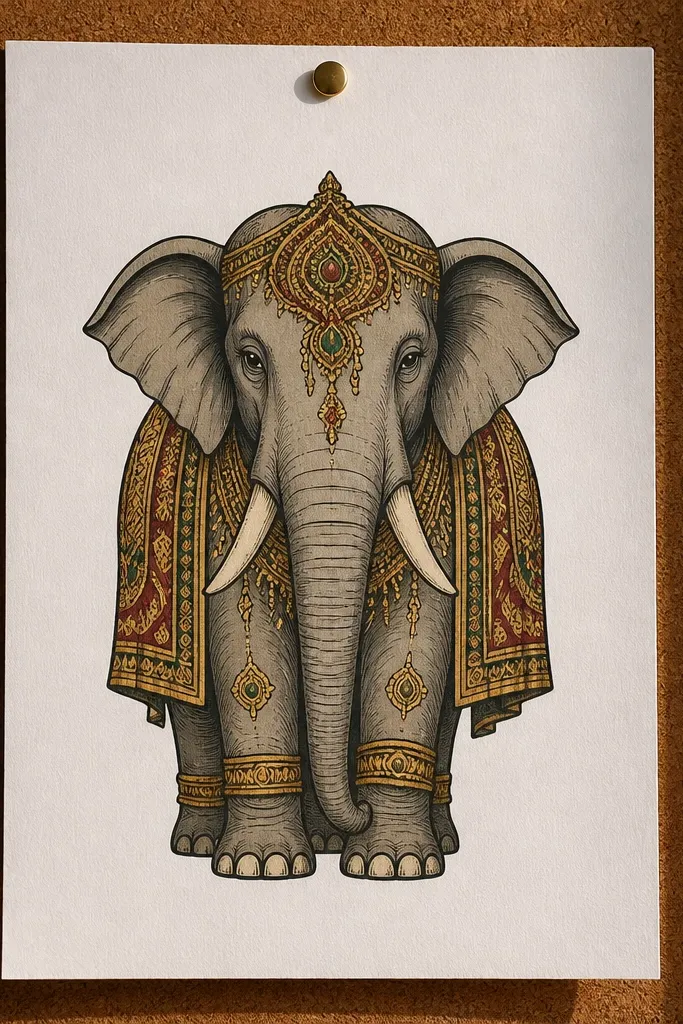
This look is all about symmetry and crisp ornament. Draw the elephant facing forward, then keep the legs and trunk lines bold so the shape reads instantly in a photo. The saddle is where the “Indian elephant style” vibe comes from: use repeating bands, tiny medallions, and a strong border line. Color the saddle in 2-3 tones only, then punch it up with a lighter highlight on the trim. It’s a solid pick if you want a clean, decorative drawing that still feels detailed.
Step 1: Sketch a front-facing head-first guide circle, then place the trunk as a single tapered curve ending just above the ground line. Step 2: Outline the saddle in one smooth arc across the back, then add 3 stripe bands: dark outer border, mid pattern band, and a light inner line. Step 3: Shade using colored pencil in controlled blocks on the body — keep the forehead and trunk darker, belly lighter. Finish by tracing the saddle trim with a metallic gold gel pen or a yellow-orange pencil pressed lightly.
Use a ruler for the saddle stripe borders, then freehand only the medallions so it looks handcrafted, not mechanical.
Don’t shade the whole body with soft graphite — it kills the jewel-like pattern contrast.
2. Rajasthani profile elephant with patterned ear fans
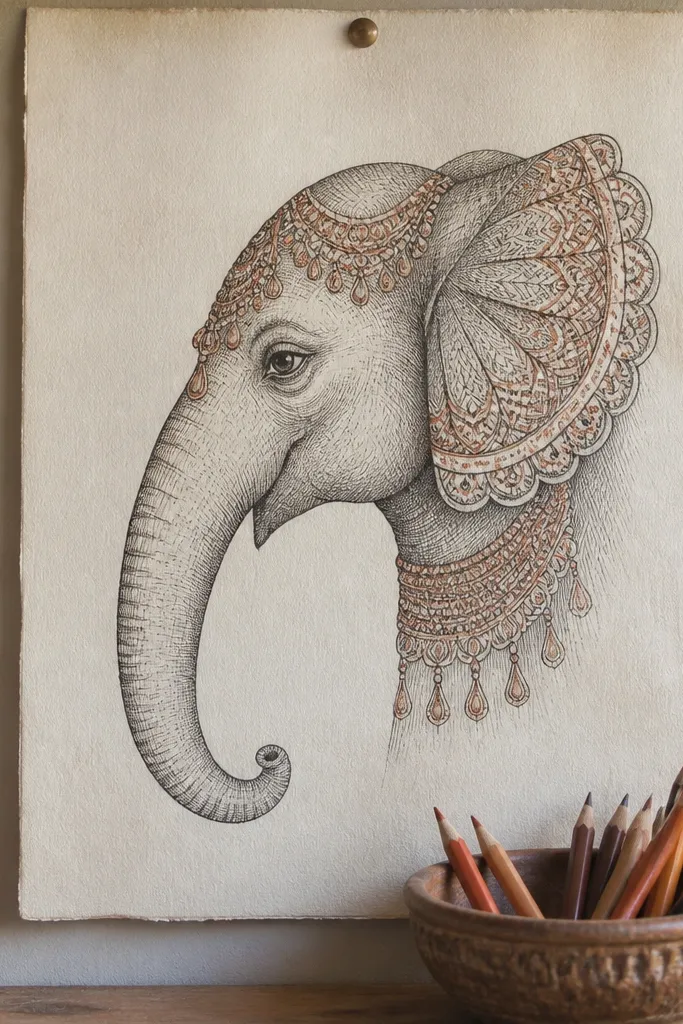
Step 1: Draw the profile using one continuous guideline for the forehead-to-back line, then add the trunk as a second curve that tapers to the tip. Step 2: Outline the ear fan with a scalloped edge, then fill the ear with 4-6 curved stripes that follow the fan shape. Step 3: Add neck jewelry as three bands: thick collar band, dangling bead line, and a small forehead ornament. Step 4: Shade the body with colored pencil in two values only — a mid tone on the back and a lighter tone on the belly.
A profile view gives you a clean silhouette, and patterned ear fans make it instantly eye-catching. Keep the trunk line long and elegant, then build the ear as two stacked fan shapes with scalloped inner edges. The jewelry around the neck and forehead should be drawn as repeating loops so it looks like fabric and metal, not random circles. This style looks gorgeous on toned paper because the patterns pop when you use dark outlines and lighter washes. It’s also fast to finish because the elephant body can stay mostly graphic while the ears and ornaments carry the detail.
AvoidDon’t over-detail the legs — let the ear fans and jewelry do the heavy visual lifting.
Pro tipFor ear stripes, lightly mark 6 anchor points first; it keeps the pattern even without overthinking.
3. Kerala temple elephant with forehead tilak and temple garlands
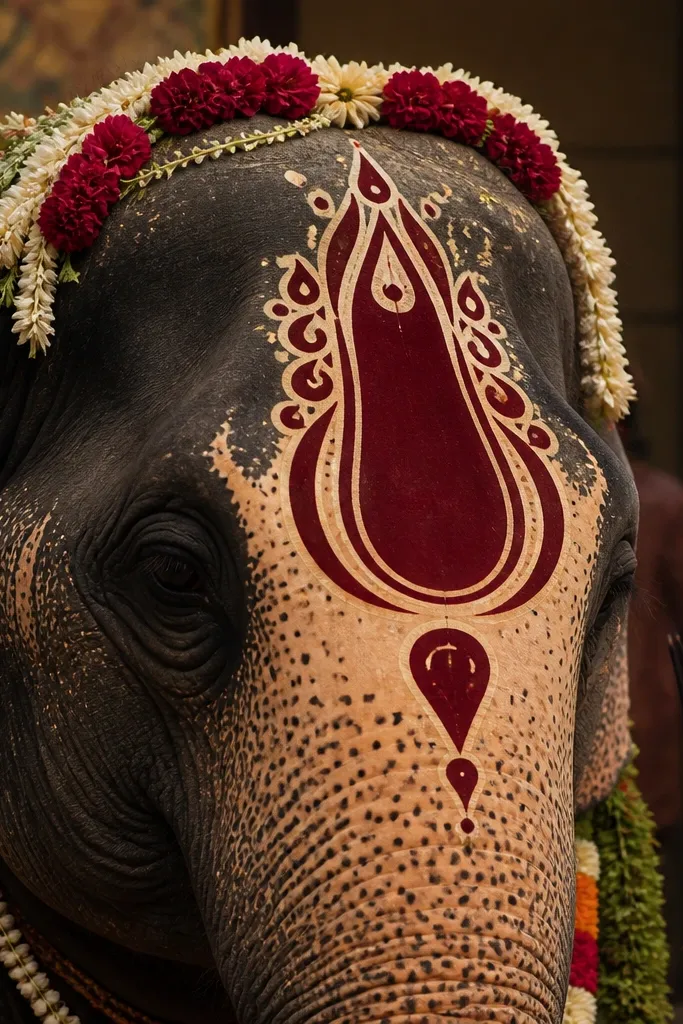
This idea leans into the face — the forehead tilak and garland drape make it look ceremonial. Use a large, clean tilak shape on the forehead, then mirror a smaller motif on the trunk base for balance. Garlands should hang in a few confident arcs, not a messy tangle. If you want a striking look, add a deep red or maroon accent to the tilak and garlands, then keep the body shading minimal so the face stays the hero. It suits beginners because the composition is simple and the details are concentrated.
Step 1: Start with a head-and-trunk sketch, then block in the forehead tilak as a bold oval with a thin border line. Step 2: Draw 3 garland strings from the neck down to the chest, each with 6-10 small bead or flower dots. Step 3: Outline the elephant with a dark pen, then shade the trunk and forehead with colored pencil using short strokes that follow the curve. Step 4: Add one highlight line on the trunk using an unshaded area or a white gel pen.
Keep the garland spacing even by drawing the strings first, then placing the beads at equal distances.
Avoid gray shading under the tilak — it makes the face look dirty instead of devotional.
4. Elephant in Gond-style dotwork border frame
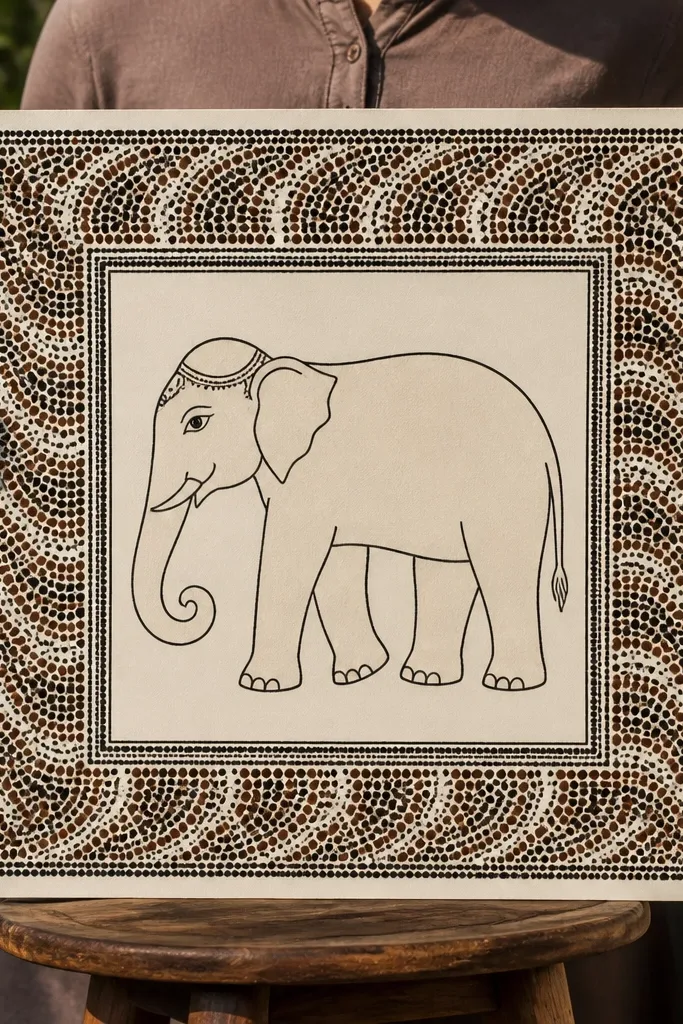
Step 1: Draw the elephant in profile or three-quarter view with bold outlines, leaving the interior mostly blank except for a few band shapes. Step 2: Add a rectangular border around the drawing, then fill the border with dot clusters: 5-7 dots per cluster, varying sizes slightly. Step 3: Place one dot halo around the head and one around the trunk, using fewer dots than the border. Step 4: Color only the saddle or one decorative band using 2 colors max.
Dotwork makes everything look intentional because it’s controlled and repeatable. In this concept, the elephant stays mostly outline and flat areas, while the border frame gets dense Gond-style dots. That contrast is what makes the final image pop in photos. You’ll also get a strong “Indian elephant Drawing Indian elephant style” feel without needing super-realistic shading. This works best with black fineliner and a limited color palette so the dots don’t turn into clutter.
AvoidDon’t dot the entire elephant body — it kills readability and turns the face into a texture blob.
Pro tipUse a 0.3 or 0.5 fineliner for the dots; thicker pens smear when you crowd them.
5. Pattachitra-like swirls with trunk curling banner
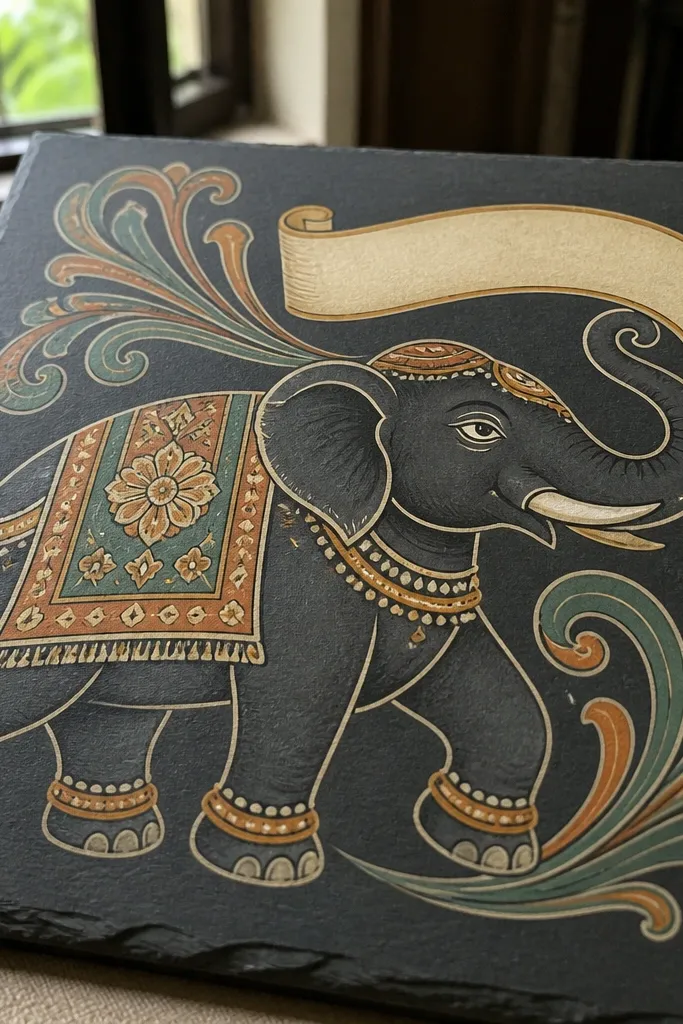
Step 1: Sketch the elephant in three-quarter view, then draw the trunk as a curve that ends in a curled ribbon shape. Step 2: Add 6-8 swirls behind the elephant, each swirl starting near the head and curving outward. Step 3: Fill the trunk banner with alternating bands of two colors, and put small dot nodes at swirl intersections. Step 4: Shade the elephant body lightly with colored pencil, leaving the background mostly white or lightly washed.
This one is pure decorative energy. The trunk curl becomes a banner, and the background gets swirls that echo the trunk shape. You get a clean, aesthetic composition because the motion lines guide the eye around the elephant. Keep the body in solid outline and light color blocks, then let the swirling motifs fill the space behind. It’s a great choice if you want a page that looks like folk art without turning into a complicated painting.
AvoidDon’t add too many colors to the swirls — two colors plus black outline looks sharper.
Pro tipDo the swirls first, then draw the elephant on top; it keeps the motifs from going out of order.
6. Tribal Warli elephant with geometric belly patterns
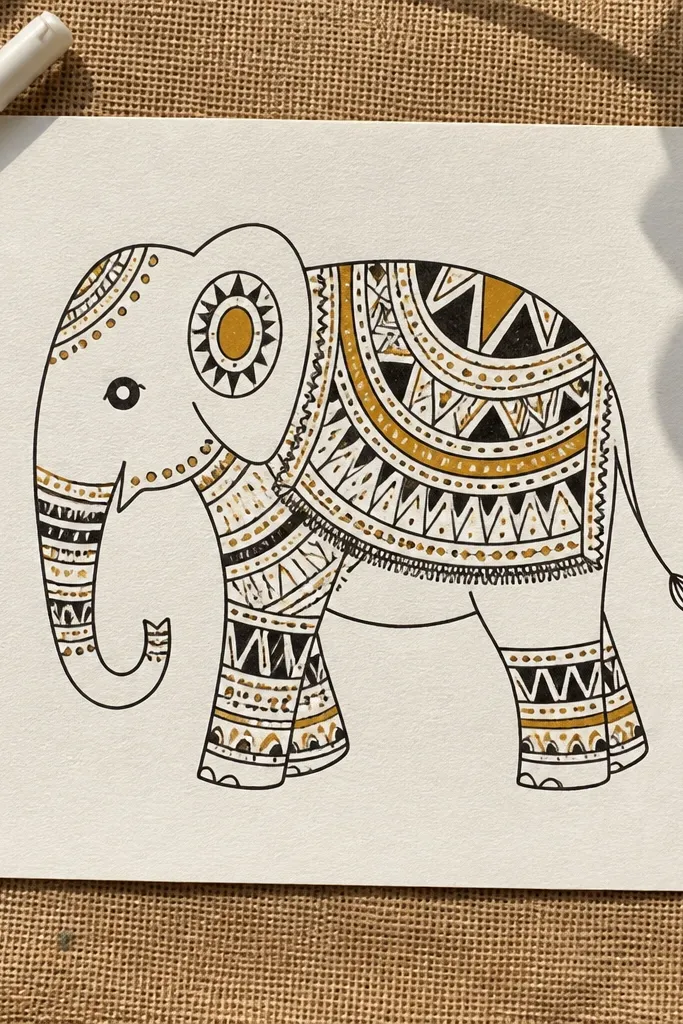
Step 1: Draw the elephant outline in one steady motion, then mark 3 geometry zones: ear base, belly, and saddle. Step 2: Fill the belly zone with stacked triangles pointing up and down, separated by a curved dot line. Step 3: Add small dot clusters around the saddle edge and a few dots near the legs. Step 4: Color only the saddle band in a warm accent like terracotta or maroon.
Warli-style geometry is perfect for making an elephant look graphic and modern. This design uses simple shapes — triangles, dots, and curved bands — placed in a few strong zones like the belly and saddle. The elephant outline stays clean, so the geometry reads clearly in a photo. It also lets you use limited tools: pencil, black pen, and one accent color. If you like minimalist but still “Indian,” this is one of the best directions.
AvoidAvoid filling every empty space with dots — it makes the page look busy instead of clean.
Pro tipKeep triangle size consistent by counting them: 6-8 triangles per belly band looks balanced.
7. Elephant with Rangoli-style mandala halo behind the head
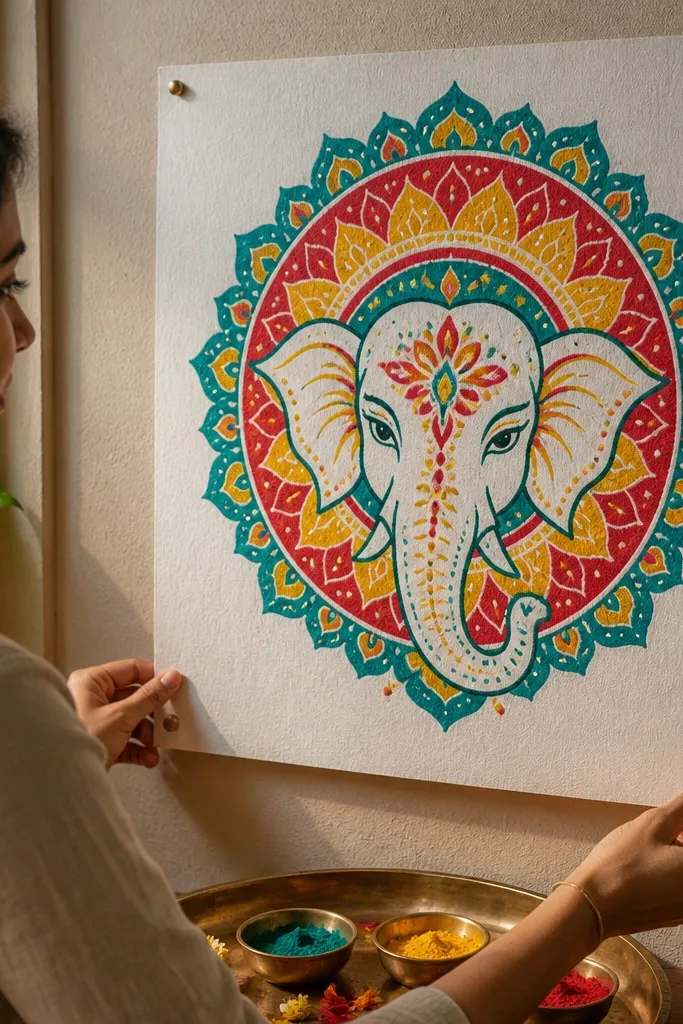
The mandala halo is what makes this drawing feel festive and camera-friendly. You draw the elephant first in crisp outline, then build a multi-ring rangoli pattern behind the head. The rings create depth even if you only use flat colors. Use 3-4 ring colors max and keep the center closest to the elephant face slightly darker so the face stays readable. This is a strong pick for wall art because it looks finished even with a simple background.
Step 1: Draw a three-quarter elephant head and keep the trunk line clean, then leave space behind the head for the halo. Step 2: Sketch 5 concentric circles, then divide the rings into 8 sections with light guideline lines. Step 3: In each section, alternate motifs: tiny petals, dot nodes, and short curved lines. Step 4: Color the rings in 3 colors, then outline the mandala with a dark pen for crisp edges.
Use a coin or small lid as a circle guide for the halo rings.
Don’t let the mandala touch the elephant outline — keep a small gap so both layers read clearly.
8. Elephant with miniature temple carvings on the saddle
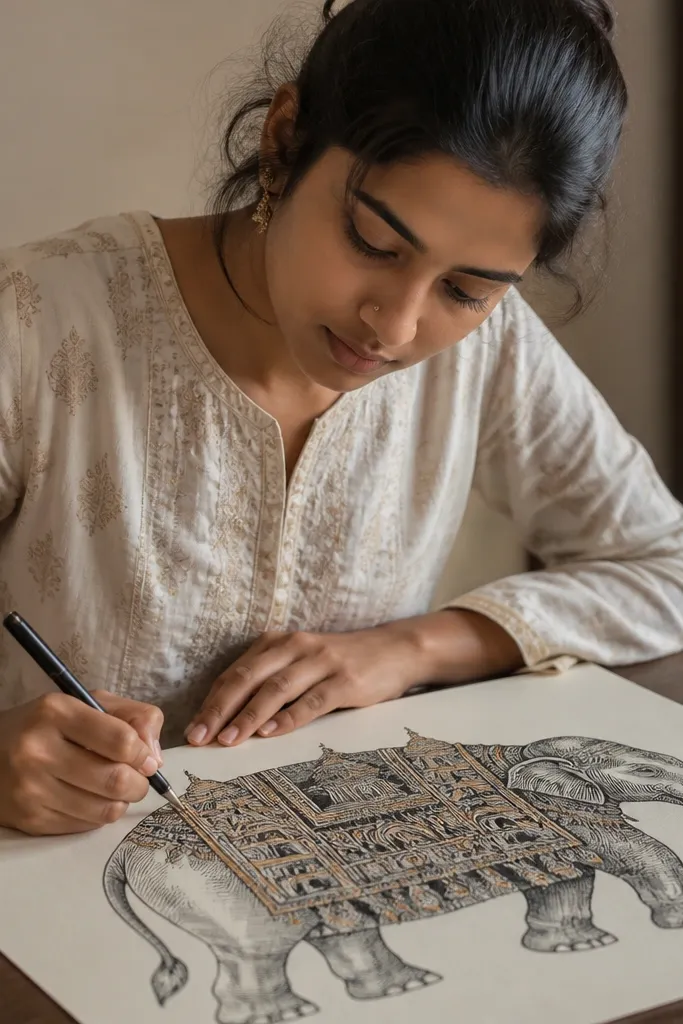
This is detail-heavy in a controlled way. The saddle becomes a strip of miniature temple carvings — tiny towers, arches, and dot accents stacked in rows. It looks gorgeous because the pattern is all the same “language,” so your eye stays on the saddle instead of getting lost. Keep the elephant body more restrained so the tiny architecture doesn’t overwhelm the silhouette. This style is great if you enjoy drawing repeating shapes and want a result that looks like a handcrafted artifact.
Step 1: Draw the elephant body and saddle outline, then mark the saddle into 3 horizontal bands using light pencil lines. Step 2: In the top band, draw small temple towers: a rectangle base, triangular roof, and a tiny door arch. Step 3: In the middle band, draw repeated arch shapes; in the bottom band, add dot borders and 2-3 thin line stripes. Step 4: Ink the saddle patterns first, then shade the body with light pencil or a single wash of diluted brown.
Draw one tower carefully, then copy it 10-12 times; consistency makes the pattern look expensive.
Avoid shading the saddle — keep it mostly line-and-flat color so the carvings stay readable.
9. Elephant with watercolor gradients inside bold ink outline
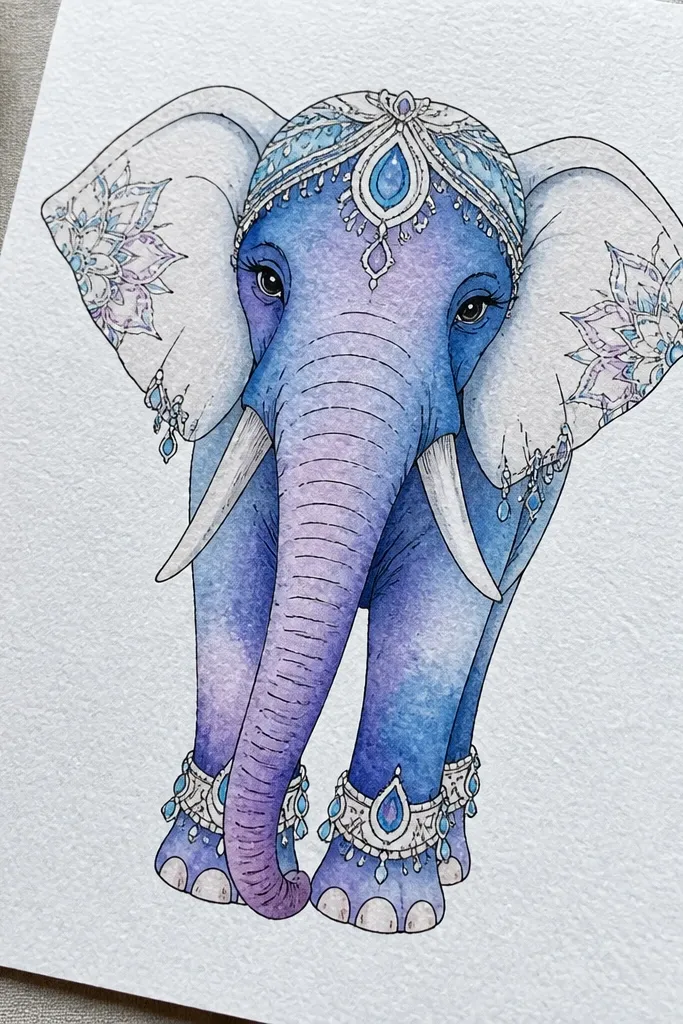
This concept looks polished because the ink outline is crisp and the color inside is soft. You get a clean “Indian elephant Drawing Indian elephant style” look without needing tons of pattern work. The trick is to use controlled watercolor gradients on the trunk, forehead, and legs only — keep the ears and jewelry as simpler shapes. Choose one dominant color family, add a warm highlight (like yellow-orange) and a deeper shadow (like burnt umber). It’s perfect for people who want a pretty result with less drawing time.
Step 1: Outline the elephant with a waterproof black fineliner, including the ear folds and trunk curve. Step 2: Wet only the body areas you want to color (trunk, forehead, belly) using a damp brush, then apply diluted watercolor in 2 tones: lighter first, then shadow near edges. Step 3: Let it dry, then add jewelry and saddle bands with colored pencil or gel pen to keep them sharp. Step 4: Finish with a few tiny white highlight strokes on the trunk using a white gel pen.
Test your watercolor puddle on scrap — if it blooms too much, use less water and more pigment.
Don’t paint over unfinished pencil lines; they show through and gray the final look.
10. Elephant with colored pencil crosshatch shading and gold dots
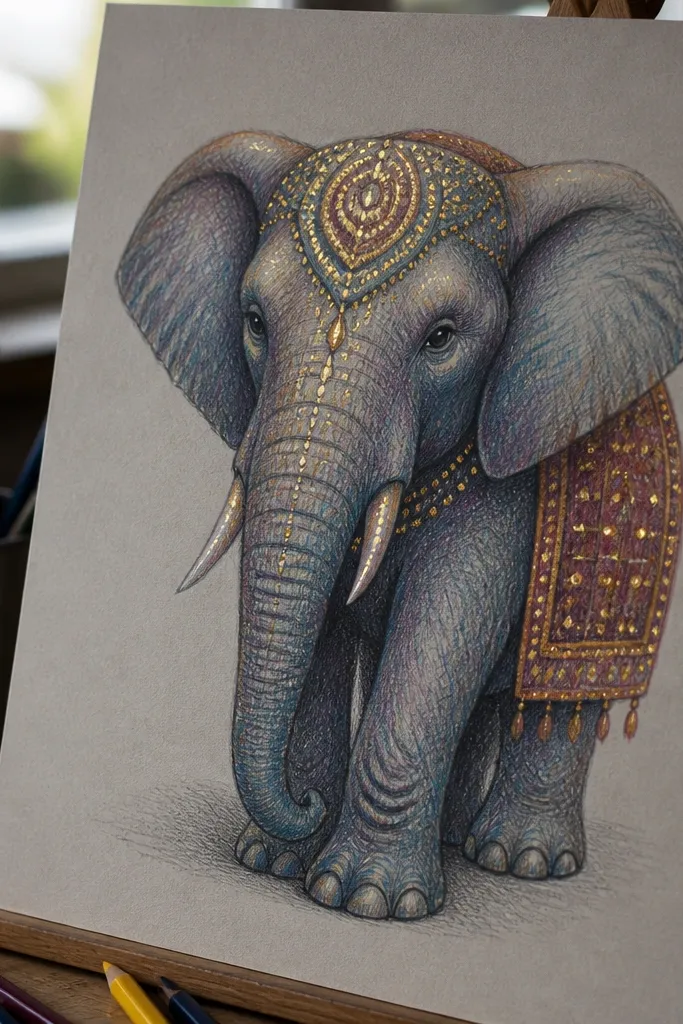
Crosshatch shading makes the elephant look dimensional without turning realistic. You use overlapping pencil strokes to build texture on the trunk and body, then add gold dots on the saddle and forehead ornaments. The gold dots make the drawing feel festive and photo-ready because they catch light under most lighting. This is a great mid-skill project: it’s more work than flat color, but the method is repeatable and stays neat.
Step 1: Outline the elephant with a dark pencil or fine pen, then block in the saddle and forehead ornaments as flat shapes. Step 2: Shade the trunk and body with 2-direction crosshatching using a medium pencil (2B) — keep the darkest lines near the inner ear and under the chin. Step 3: Add colored pencil in one warm base tone (like ochre) and keep crosshatch visible. Step 4: Use a metallic gold gel pen to dot along the saddle border and the forehead ornament edge.
Keep crosshatch spacing slightly wider on the belly so the shading looks intentional, not heavy.
Avoid layering too many pencil tones; 2-3 pencil shades look cleaner than a rainbow.
11. Elephant portrait with geometric tessellated background shapes
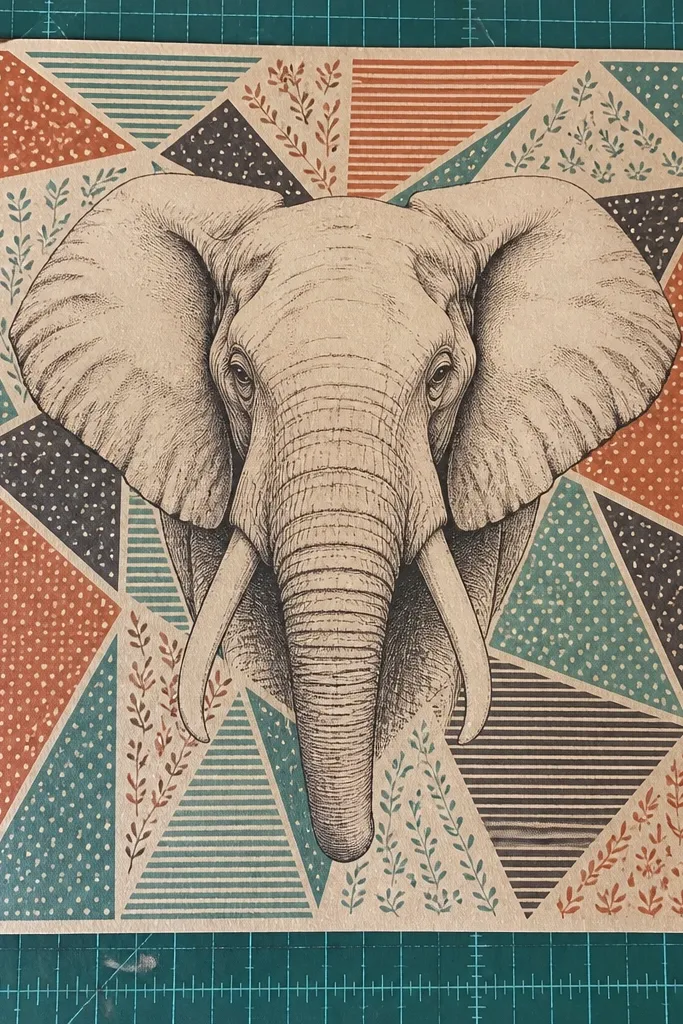
Step 1: Draw the elephant head and upper body, then darken outlines for the eyes, forehead, and trunk tip. Step 2: Behind the head, sketch a tessellation of triangles and irregular polygons using light pencil guidelines. Step 3: Fill each patch with one simple texture: some patches get dots, some get short stripes, some get small leaf marks. Step 4: Color only 40-60% of the patches, leaving others white or lightly colored for contrast.
A tessellated background makes your elephant drawing look modern while still using Indian motifs. Think triangles and polygon patches behind the elephant head, with 2-3 patterned fills: dots, stripes, and tiny leaf shapes. The elephant itself stays in crisp outline and minimal shading so the background geometry doesn’t steal the show. This style looks great on social because it reads instantly as graphic art. If you want something that feels “designed,” this is the one.
AvoidDon’t color every patch — empty space makes the elephant pop.
Pro tipUse a limited palette: one cool color (teal) and one warm color (coral) gives a clean, high-contrast look.
12. Elephant with bold black contour drawing and minimal color wash
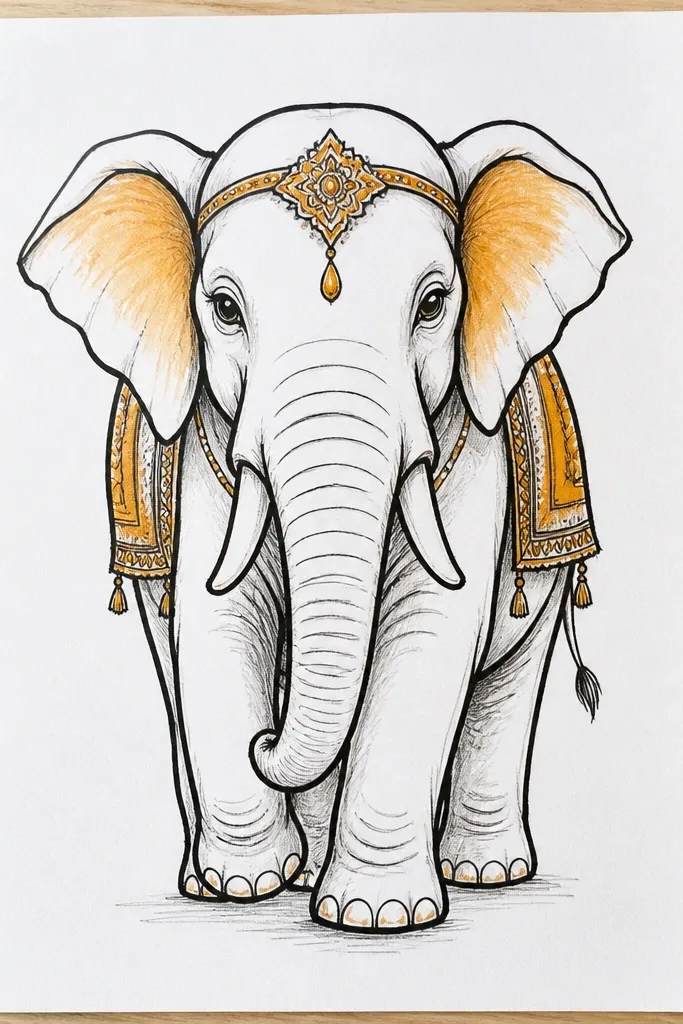
Step 1: Outline the elephant with a thick fineliner or brush pen, focusing on clear edges: forehead curve, ear folds, trunk contour, and leg outlines. Step 2: Add tiny jewelry lines with a thinner pen to avoid clumps. Step 3: Apply a light watercolor wash only inside the saddle and inner ear, keeping edges soft but not runny. Step 4: Add a single highlight line on the trunk with white gel pen and darken the eye with black.
This is the fastest route to an aesthetic, photo-ready result. Thick black contours keep the elephant crisp, even if your coloring is simple. Put a small wash of color only on the saddle and the inner ear, then leave the rest mostly white with light pencil shading. It looks intentional because the color is restrained. This style is ideal if you want an elegant look without spending hours on patterns.
AvoidAvoid washing the body — light gray watercolor over everything dulls the look.
Pro tipLet the outline dry fully before watercolor so the ink doesn’t bleed.
13. Elephant with miniature paisley repeats on the body panels
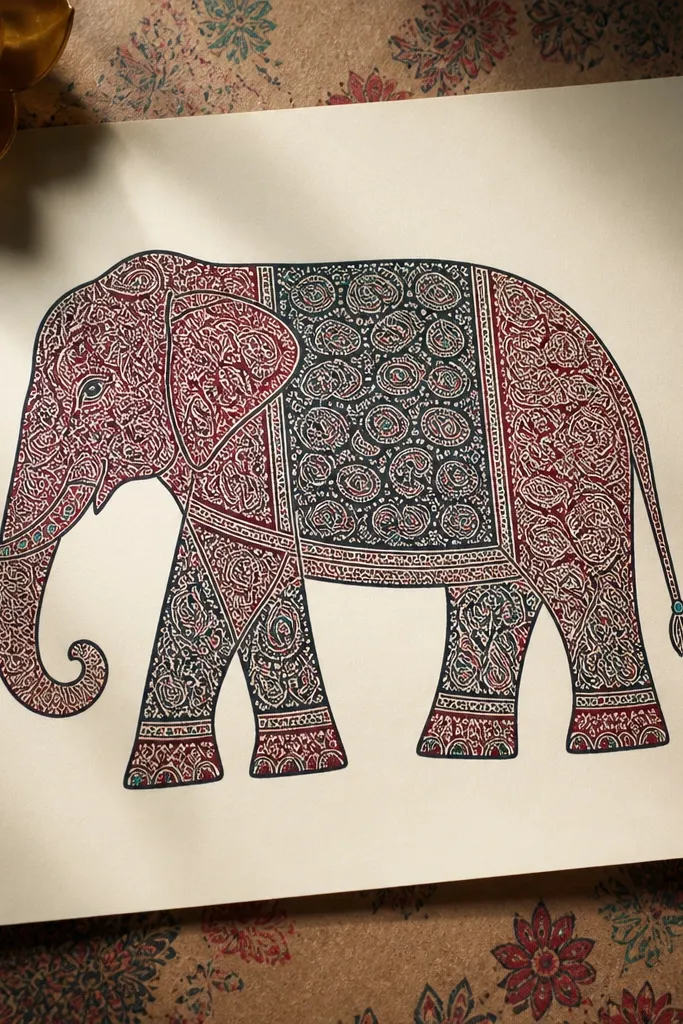
Step 1: Draw the elephant outline and saddle outline, then lightly mark 3 body panels (forehead-to-neck, mid-body, belly area). Step 2: Fill each panel with tiny paisleys: one teardrop shape, one inner curve, and a dot at the tip. Step 3: Color the paisleys in 2 tones only, leaving some white gaps for crispness. Step 4: Add a darker outline around each motif with a fine pen if you want extra contrast.
Paisley repeats give you a refined Indian decorative look without requiring heavy painting. Split the body into 3-4 visual panels using thin lines, then fill each panel with small paisley motifs that point in the same direction for consistency. Keep the motifs smaller than you think so they feel like fabric print. The saddle can use a simpler border pattern so the body paisley remains the focal texture. This one looks amazing on camera because the repeating shapes create rhythm.
AvoidDon’t make paisleys too big — large motifs clutter the body and flatten the silhouette.
Pro tipMake a paisley stamp template on scrap paper; tracing the same proportions makes it look designed.
14. Elephant with mandala belly medallion and concentric dots
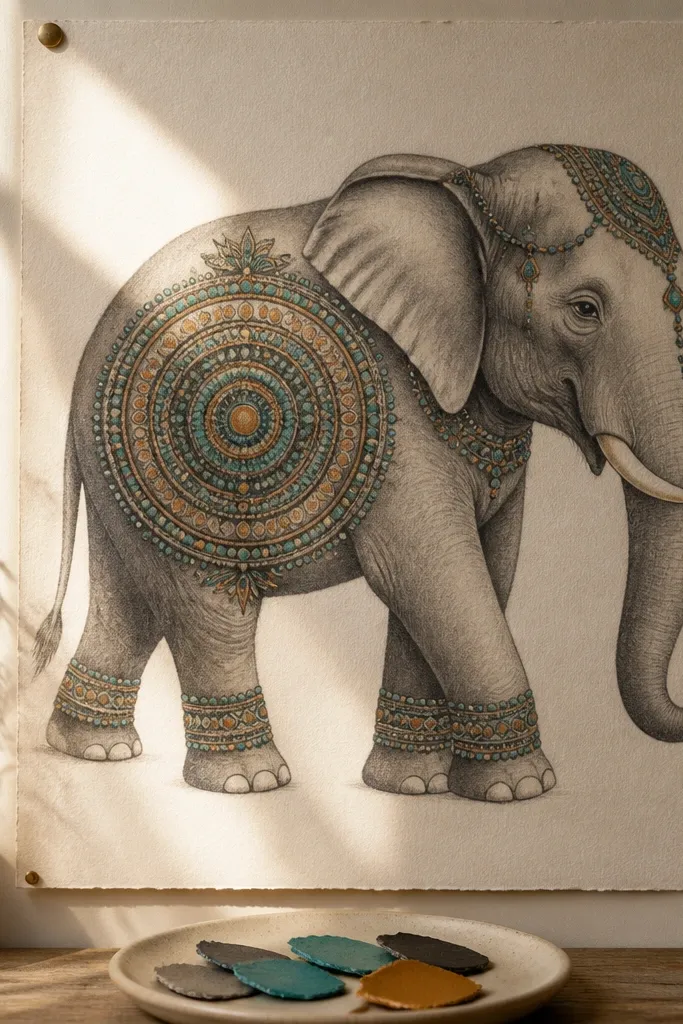
Step 1: Sketch the elephant and mark where the belly sits, then draw a circle medallion centered on that area. Step 2: Inside the circle, draw 4-6 concentric rings, then add dot nodes between rings for texture. Step 3: Add one small matching medallion on the forehead or saddle corner so the motif repeats. Step 4: Shade the belly lightly around the medallion so it looks embedded, not floating.
A belly medallion is a sneaky way to make your drawing look finished. It gives the eye a focal center and helps you place other ornaments with better spacing. Draw a circular medallion on the belly, then build it with concentric rings and dot nodes. The elephant body stays clean with light shading, while the medallion provides the Indian decorative feel. This works for both pen-and-pencil and colored pencil versions, and it’s a great project if you want a symmetrical element without doing a full background mandala.
AvoidAvoid placing the medallion too low; it should sit on the belly curve, not on the legs.
Pro tipUse a small compass or a jar lid if you want the medallion perfectly round.
15. Elephant with ink-only blueprint lines and colored accents
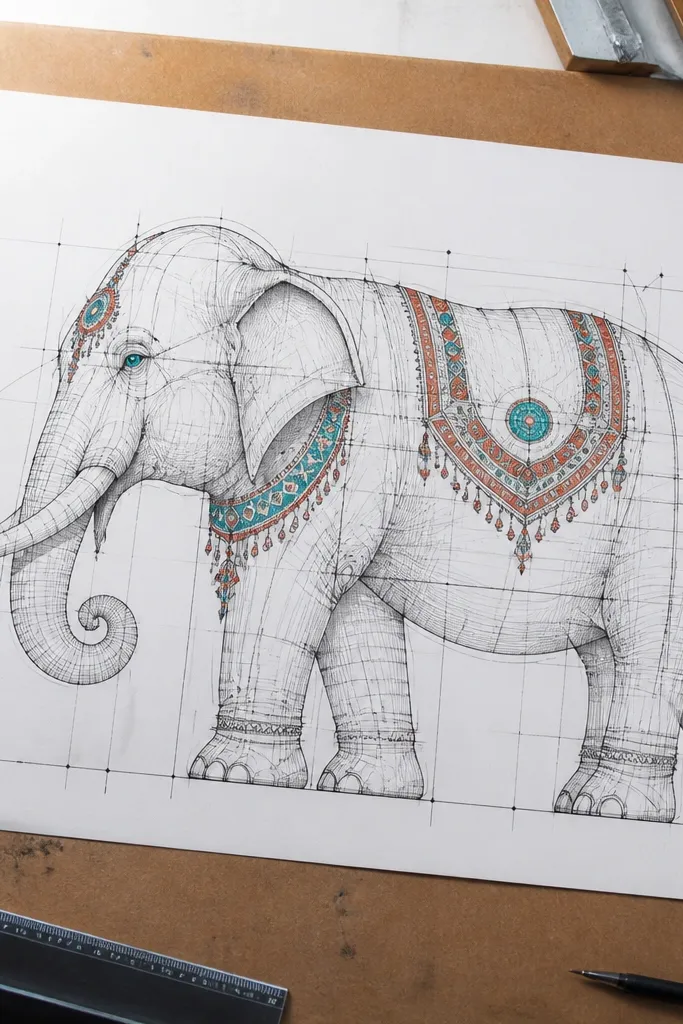
Step 1: Outline the elephant with black fineliner, then add internal blueprint panel lines: a vertical trunk panel, ear fold lines, and belly contour segments. Step 2: Add tiny tick marks near panel borders and a few curved “guide” arcs around the head. Step 3: Color only 2 ornament zones with colored pencil or gel pen — for example, the forehead tilak and saddle border. Step 4: Darken the eye and add a small white highlight dot for crispness.
This look is graphic and modern, and it reads clearly even in low-resolution photos. The elephant is built with ink-only blueprint lines: contour lines, measurement-like ticks, and panel outlines. Then you add color only to ornaments — eye, collar, or saddle bands. It feels Indian elephant drawing Indian elephant style because the ornament patterns and tilak shapes still carry the tradition, but the presentation is clean and design-forward. It’s a good choice if your hand lettering or pattern drawing is stronger than your shading.
AvoidDon’t shade with gray ink — blueprint lines should stay crisp, not smudged.
Pro tipKeep your color to 10-15% of the page; the blueprint lines do the rest.



