
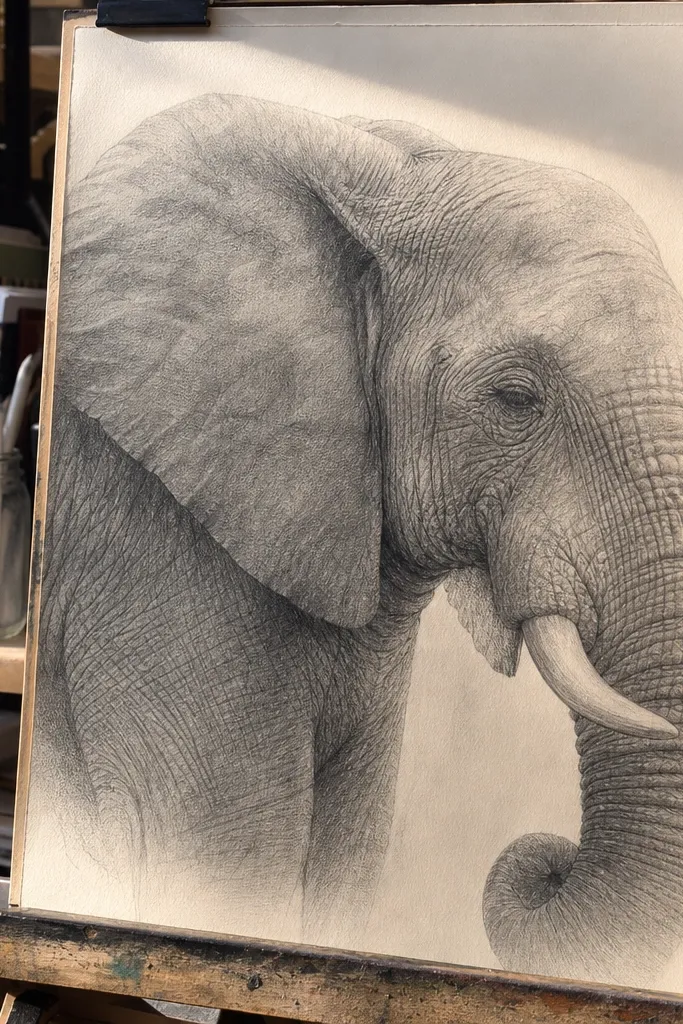
1. Side-Profile Elephant with Trunk Lift and Soft Wrinkle Highlights
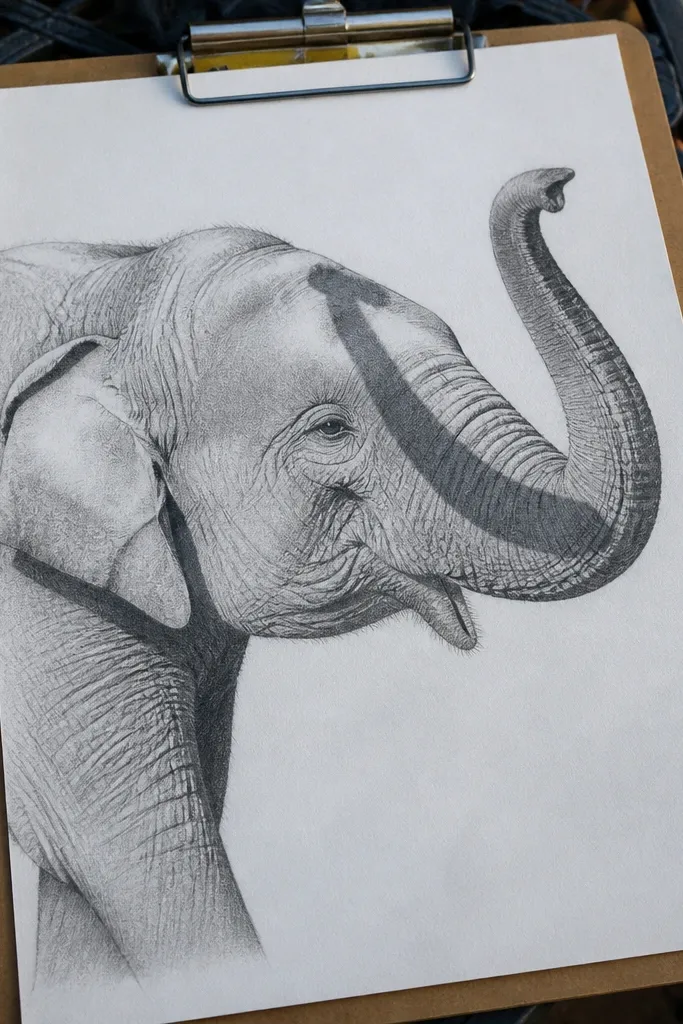
This drawing is all about form control. A side profile gives you clean silhouettes, so your realism depends on how well you place the shadow under the jaw, the curve of the forehead, and the big trunk cast shadow. The trunk lift creates a natural highlight band along the folds, which is where most pencil drawings turn muddy. Keep the wrinkles thinner than you think and let the value transitions do the work. It looks great on a plain page because the composition is simple and the shading reads clearly from a distance.
Pro tipUse a kneaded eraser to lift highlights in narrow strips along the trunk folds instead of trying to “erase lines.”
Start with a light construction sketch: draw the head mass as a rounded block and the trunk as a thick curved tube, then connect them with a simple jaw line. Block in the darkest values first using a 4B under the jaw, around the nostril notch, and in the crease where the trunk folds over itself. Then blend midtones with a 2B, leaving thin highlight gaps where the wrinkle ridges catch light. Finally, add crisp edge lines only at the nostril, eye lid line, and trunk fold boundaries using a 6B for the darkest accents.
AvoidDon’t outline every wrinkle; outline only the major fold edges and let shading suggest the rest.
2. Three-Quarter View with Eye Depth and a Dark Nostril Anchor
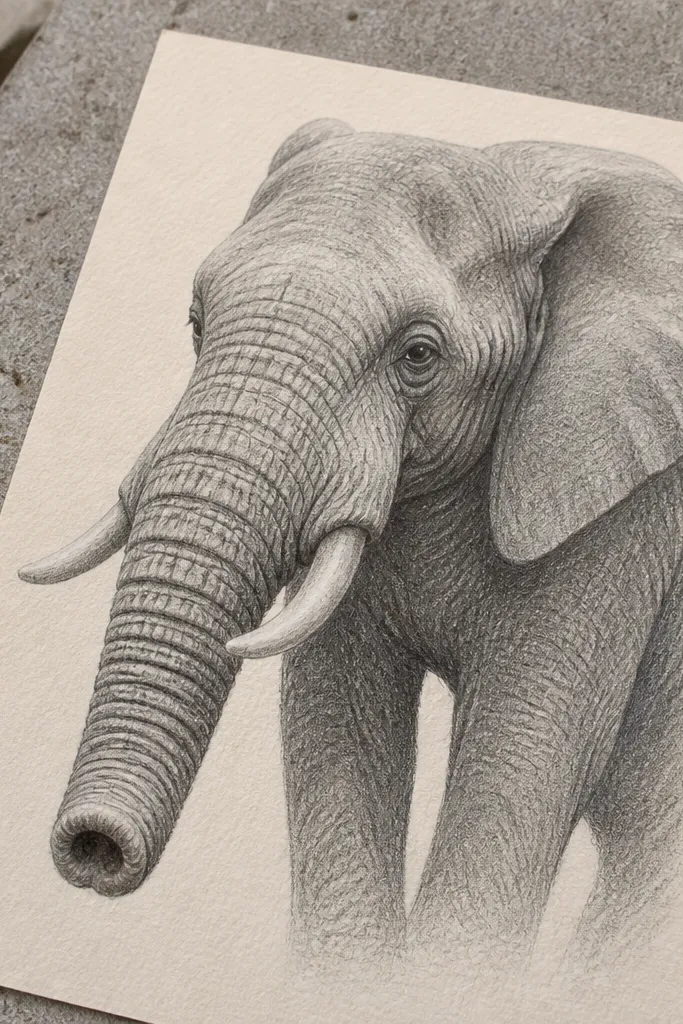
Three-quarter views look dramatic because you see both the near and far planes on the head. The realism comes from eye depth: the eye isn’t a circle, it’s a pocket with a shadowed rim and a highlight. The nostril is your best anchor point — if it’s not dark enough and placed correctly, everything else looks washed out. This project also teaches you how to taper the highlight on the forehead so the head looks rounded. It’s visually striking because the face has clear light direction and strong contrast without looking harsh.
Pro tipDraw the eye highlight last with a sharpened pencil point so it stays crisp and believable.
Sketch the head in two big shapes: a large forehead mass and a cheek/jaw mass, then place the eye as a slanted oval. Shade the eye socket and the area under the brow with a 4B, and make the nostril opening the darkest spot on the page. Build midtones on the forehead with a 2B, blending toward the light side while keeping a soft gradient near the brow ridge. Finish by adding a small, controlled highlight on the eye and reinforcing the lid line with a 6B.
AvoidDon’t smear the eye socket with your blending stump; keep that area darker and sharper than the surrounding skin.
3. Front-Facing Elephant with Symmetry Guidelines and Soft Center Light
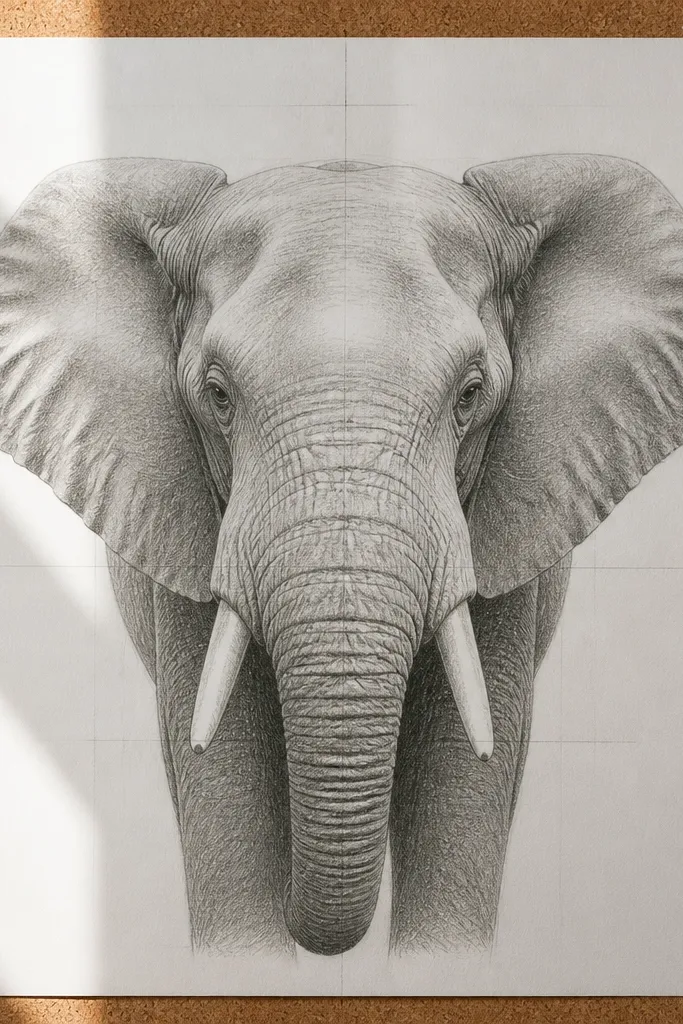
A front-facing elephant is unforgiving, which is why it’s a great realism drill. You’ll learn how symmetry can still look natural because the shadows aren’t mirror-perfect — the trunk and wrinkles shift slightly. The trick is a soft center light: let the brightest values sit along the centerline of the forehead and down the trunk ridge. This drawing is photogenic because the face reads instantly, even at small sizes. It also teaches you how to keep wrinkles from becoming a patterned texture; they should flow with the form.
Lightly draw a vertical center line through the head and block in the forehead and trunk as two overlapping rounded masses. Place the eyes slightly above the midpoint of the head mass and keep the nostril opening centered but angled. Shade the darker areas first with a 4B: eye sockets, nostril shadows, and the crease where the trunk meets the cheek. Then work outward with a 2B for midtones, leaving a clean soft highlight on the centerline. Use a kneaded eraser to keep the brightest trunk ridge smooth, then add 6B accents only at the deepest crease lines.
Check symmetry by flipping the paper upside down or sideways; fix value imbalance, not the outline.
Don’t make the trunk look like a tube with uniform thickness; taper it so it wraps the nose opening.
4. Elephant Head Detail Study on Wrinkles and Skin Grain
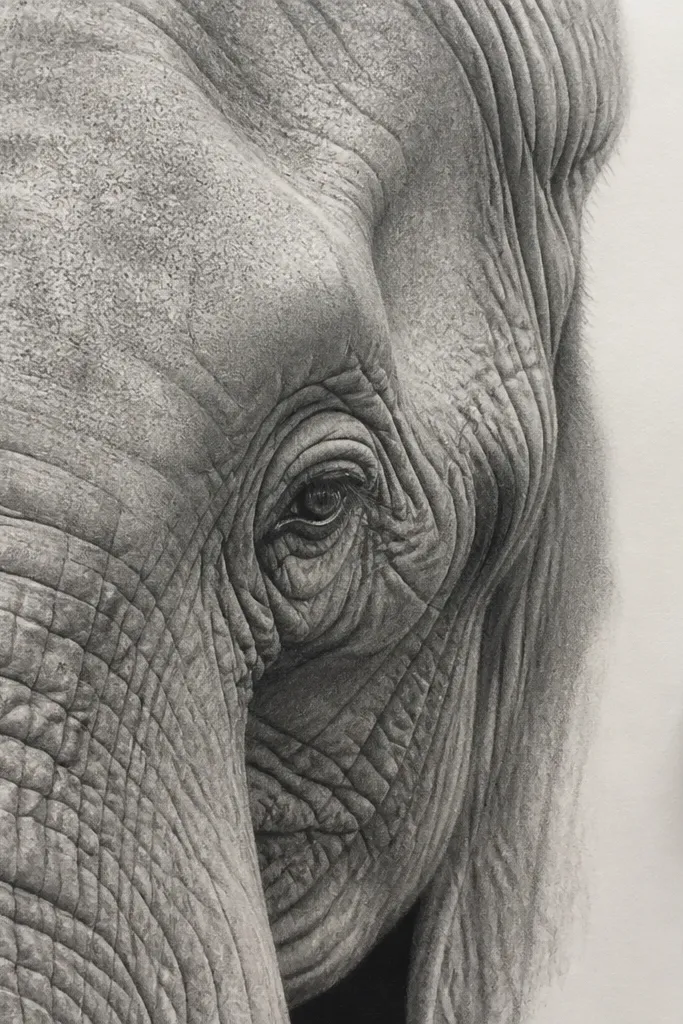
This one is a texture masterclass. Instead of drawing the whole elephant, you zoom into the head wrinkles around the forehead and cheeks. Realism here is about how wrinkles stack: some are shallow planes that fade, others are deeper folds that cast tiny shadows. Pencil realism improves when you slow down and treat each wrinkle as a curved ridge with a highlight, a midtone, and a shadow edge. It’s visually satisfying because you get that “skin depth” look without needing a complex scene.
Sketch only the head area you want, then decide your lighting direction before shading. Use a 2H or HB to map wrinkle ridges lightly, marking the highlight edges as you go. Shade the deeper folds with a 4B, keeping the shadow edge slightly darker than the midtone skin around it. Blend with a paper stump or soft brush, then lift controlled highlights with a kneaded eraser. Finish by sharpening a 6B point and tracing just the darkest fold shadows, not the entire wrinkle length.
Press lighter than you think for wrinkle highlights; if you press hard early, you can’t erase cleanly later.
Skip heavy blending over all wrinkles; you need contrast between ridges and valleys.
5. Elephant Walking with Dusty Ground and Crisp Leg Shadow Shapes
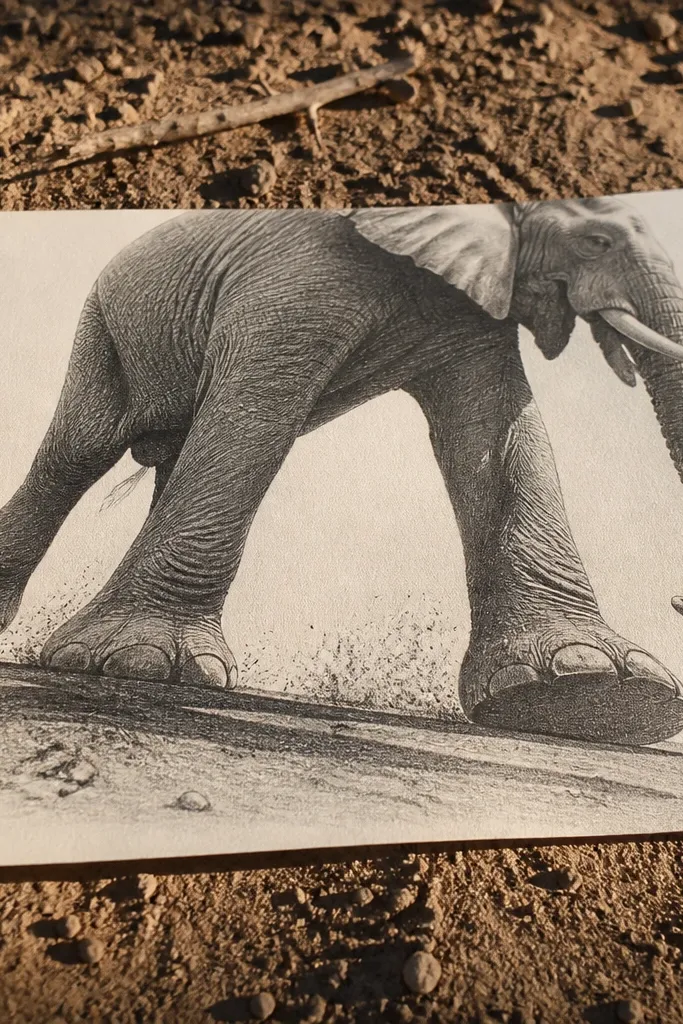
This is realism with motion. The legs and underside shadows are what make walking elephants look alive, not the wrinkles. Start by getting the ground contact: where each foot touches, where the shadow falls, and how the body weight shifts. Dusty ground gives you an easy texture area that balances the smoother skin shading. This drawing looks good because the composition has a clear story — head forward, trunk relaxed, and legs mid-step — with strong value structure.
Draw a simple action line from the trunk to the back, then sketch the leg positions as thick cylinders to avoid wonky joints. Block the body shadows with a 4B, especially under the belly and around the knee creases. Add the ground as a light tone wash with a soft graphite layer, then deepen the shadow under the feet with a 6B for crisp edges. Blend midtones on the legs with a 2B while keeping the highlight planes on the thighs and shoulders smoother. Finish by adding a few dust specks with the side of a graphite pencil and lifting tiny sparkles with a kneaded eraser.
Keep shadows darker near the foot and fade them as they travel across the ground to sell depth.
Don’t outline the legs; draw them with value bands and let the darkest shadows define the form.
6. Elephant in Profile Behind a Simple Grass Silhouette
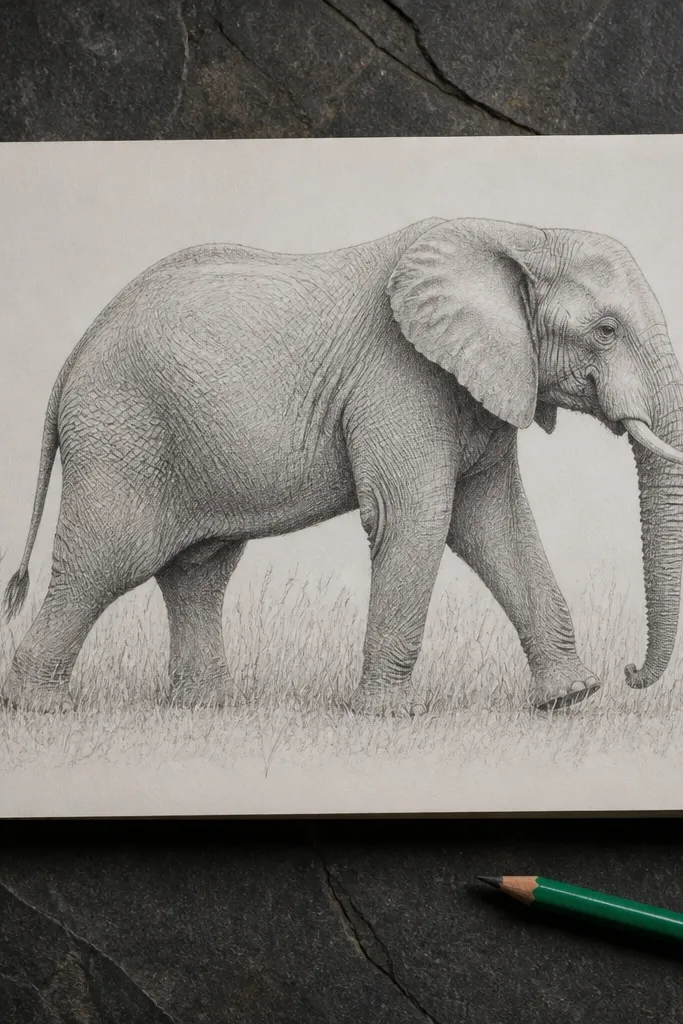
This one is about contrast and readable shapes. A simple grass silhouette makes the elephant pop without turning the page into a busy background. You learn to separate subject from background by keeping the elephant values smoother and the grass values lighter and more broken. The realism comes from the elephant’s controlled shading, while the grass stays graphic. It’s photogenic because the silhouette creates a clean edge and the elephant’s face stays the focal point.
Pro tipUse the side of a 2B pencil for grass mass; it creates fast, consistent texture.
Sketch the elephant first in light values, then block the grass as a single dark mass behind it. Shade the elephant with a 2B for midtones and a 4B for core shadows, keeping the darkest values reserved for eye, nostril, and under-jaw. Leave the grass as mostly light graphite with a few darker strokes so it doesn’t compete. Add grass blades only where they overlap the elephant edge, then soften the elephant background transitions so the outline stays crisp. Finish by darkening the elephant’s nearest edge with a 6B and gently blending the far side with a softer pencil.
AvoidDon’t shade the grass like skin; keep it broken and lighter than the elephant shadows.
7. Elephant Head with Tusk Edges and Chalky White Highlights
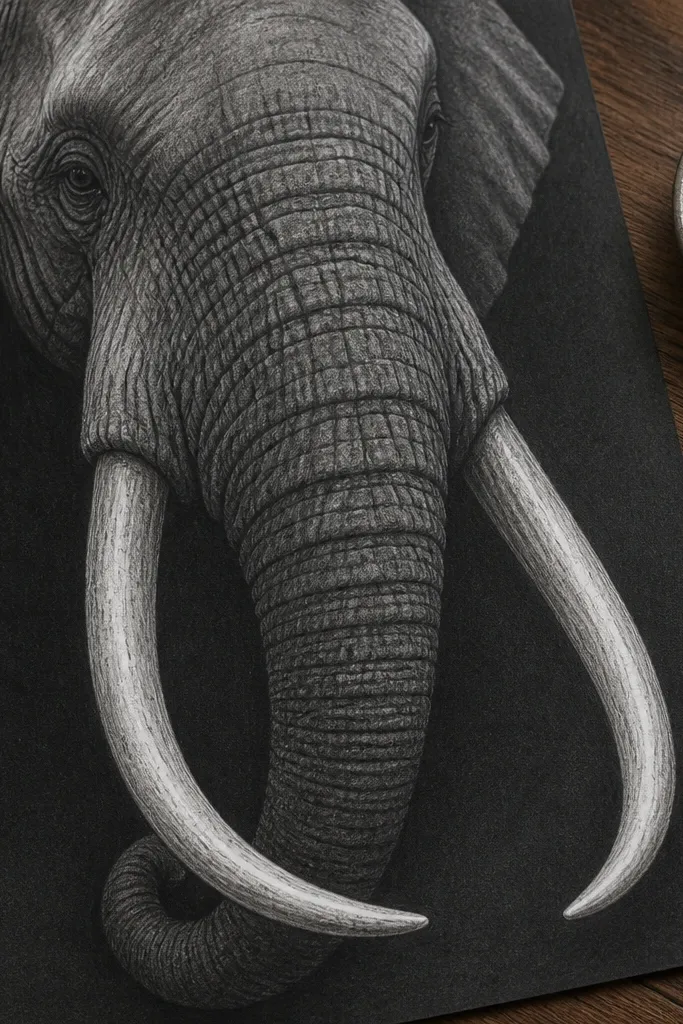
Tusk drawings separate beginners from people who actually understand pencil realism. Tusks are hard, smooth, and they catch light differently than skin. This project teaches you to draw tusks with a brighter highlight and a darker core shadow, then create a subtle gradient along the tusk curve. The contrast makes the whole face look more dimensional. It’s visually striking because the tusk gives you a second focal point and lets you practice crisp edges without turning the skin into outlines.
Pro tipSharpen your pencil until it draws a hairline; tusk edges look wrong when the point is blunt.
Sketch the head structure first, then place the tusk as a curved wedge with a clear thickness. Shade the tusk with a 2B in broad strokes, leaving a bright highlight strip unshaded. Deepen the tusk underside and near the mouth crease with a 4B, then add the darkest shadow line with a 6B. For skin, keep wrinkles softer around the tusk area so the tusk stays the sharpest object. Blend the skin midtones smoothly, then use a kneaded eraser to keep the tusk highlight clean.
AvoidAvoid gray tusks; if the highlight isn’t bright enough, tusks disappear into the face.
8. Elephant Trunk Wrap with Tight Fold Curves
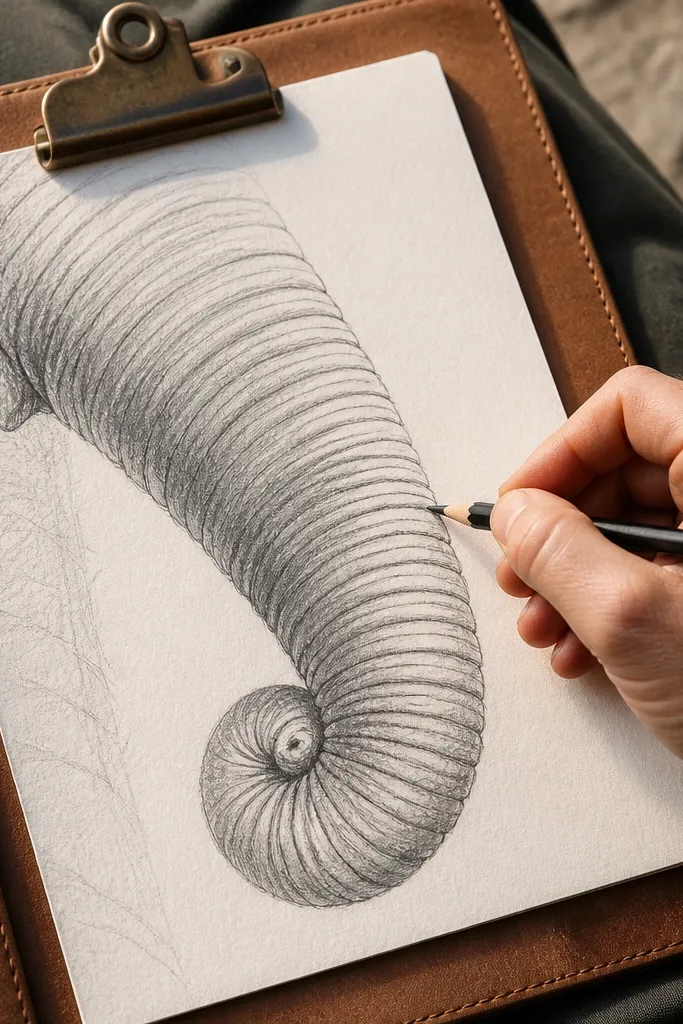
Trunk folds are where realistic pencil drawings often fall apart. The trunk looks like a single tube only in textbooks; in reality, folds wrap around and overlap, creating narrow highlights and sharp shadow pockets. This drawing focuses on fold curvature and how each fold casts a thin shadow on the next. You’ll learn to draw the trunk as layered planes, not as a single shaded shape. It’s beautiful because the highlight lines look almost glossy while the shadow pockets stay deep.
Pro tipKeep highlight strips narrow and consistent; wide highlights make the trunk look flat.
Sketch the trunk as a thick arc, then add 3-4 fold lines as curved ridges that follow the tube. Shade the deepest overlap shadows first with a 4B, focusing on the areas where one fold hides another. Add midtone skin with a 2B, keeping transitions smooth but short. Leave thin highlight strips along each ridge, then lift them with a kneaded eraser if your shading gets too even. Finish with a 6B to reinforce the darkest fold pockets and the shadow edge where folds meet.
AvoidDon’t draw fold lines darker than the shadows; fold lines should be implied by value, not heavy outlines.
9. Elephant Shoulder and Ear with Crisp Edge Contrast
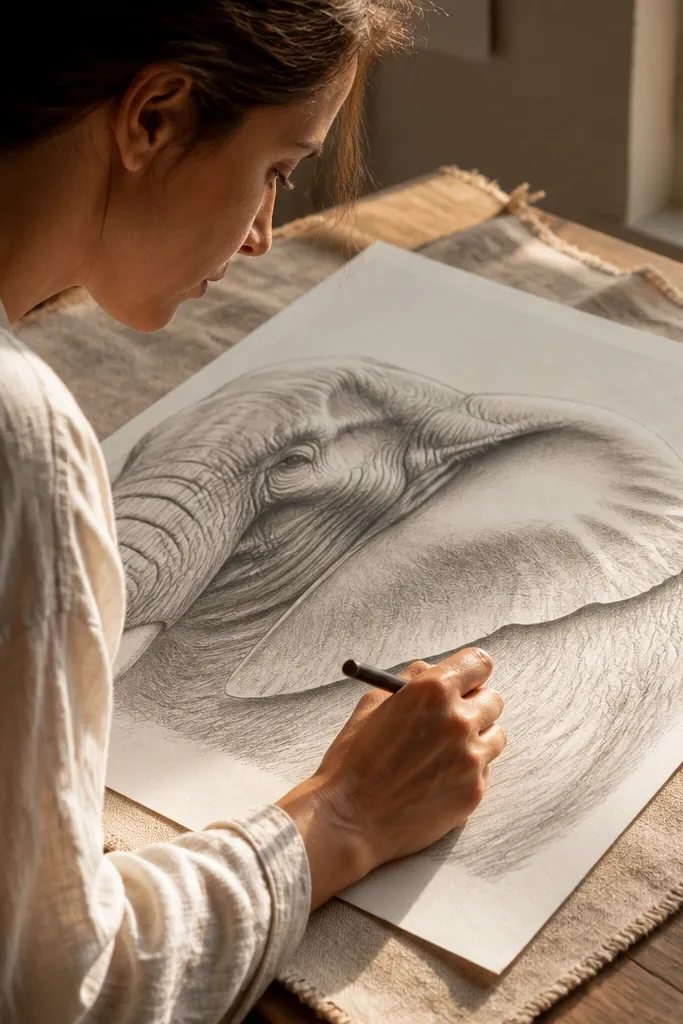
This project is about edge control. The shoulder has big, soft planes; the ear rim has a thin highlight edge; and the ear interior has layered shadows. When you manage edges correctly, the elephant looks dimensional even with minimal detail. It’s a great option if you want an aesthetic drawing that still teaches realism — you get bold contrast without clutter. The ear shape also gives you a clean silhouette, making the piece look polished.
Sketch the shoulder and ear as simplified shapes: a rounded shoulder mass and a curved ear flap. Shade the shoulder midtones with a 2B, then deepen the core shadow under the ear base with a 4B. For the ear rim, leave a thin highlight line and build the ear interior with layered grays using 2B and 4B. Add the darkest ear shadow and the deepest fold crease with a 6B. Blend only the shoulder planes, not the ear outline, so the ear edge stays crisp.
Use masking tape to protect the highlight line on the ear rim while you build surrounding tones.
Don’t overblend the ear outline; softening the edge too much kills the ear’s shape.
10. Elephant Under Soft Spotlight with Gentle Gradients
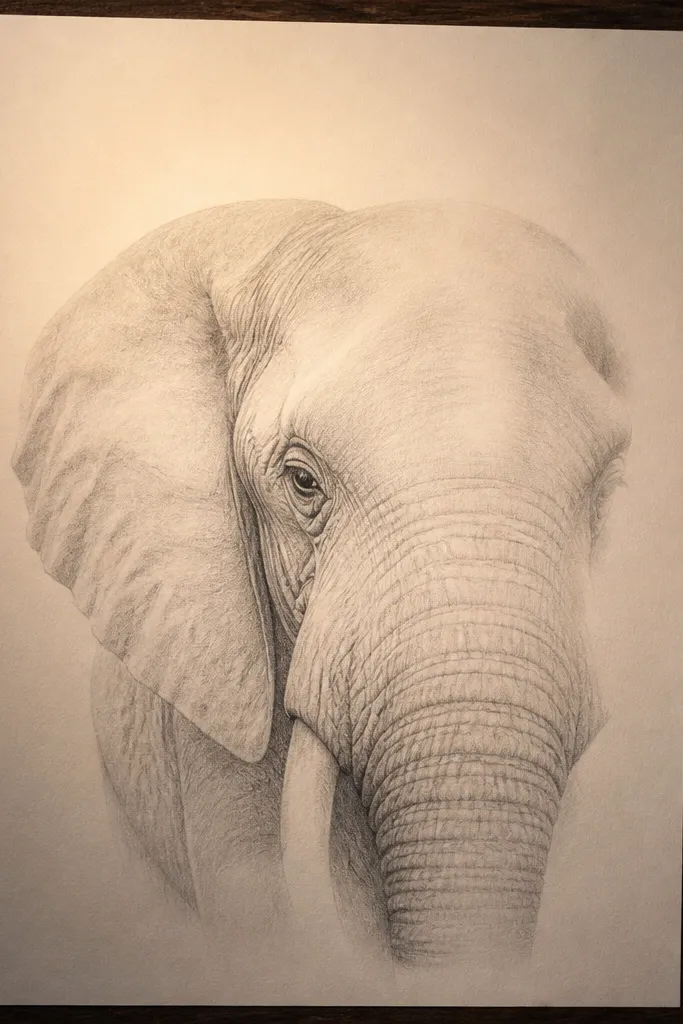
Softlight drawings look expensive when you do gradients cleanly. This one teaches controlled blending without turning everything into the same gray. The goal is a smooth transition on the forehead and cheeks, with only a few dark anchor points around the eye and trunk base. You’ll also learn to keep wrinkle ridges subtle — they should show as value shifts, not hard lines. It’s photogenic because the elephant has a calm, studio-like look that reads instantly.
Sketch the elephant and lightly block the lightest planes you want to stay bright: forehead center, top of trunk, and cheek highlights. Use a 2H or HB to set a light base tone, then build midtones with 2B in gentle passes. Add the core shadows with 4B only in the eye socket, under-jaw, and trunk base. Blend the gradients with a stump lightly, then lift tiny highlight spots with kneaded eraser to prevent flatness. Finish with 6B accents only at the darkest creases.
Blend in short strokes following the elephant’s form direction, not side-to-side squiggles.
Don’t chase realism by darkening everything; keep most of the drawing in a narrow value range.
11. Elephant with Water Droplets on Skin and Bright Specular Spots
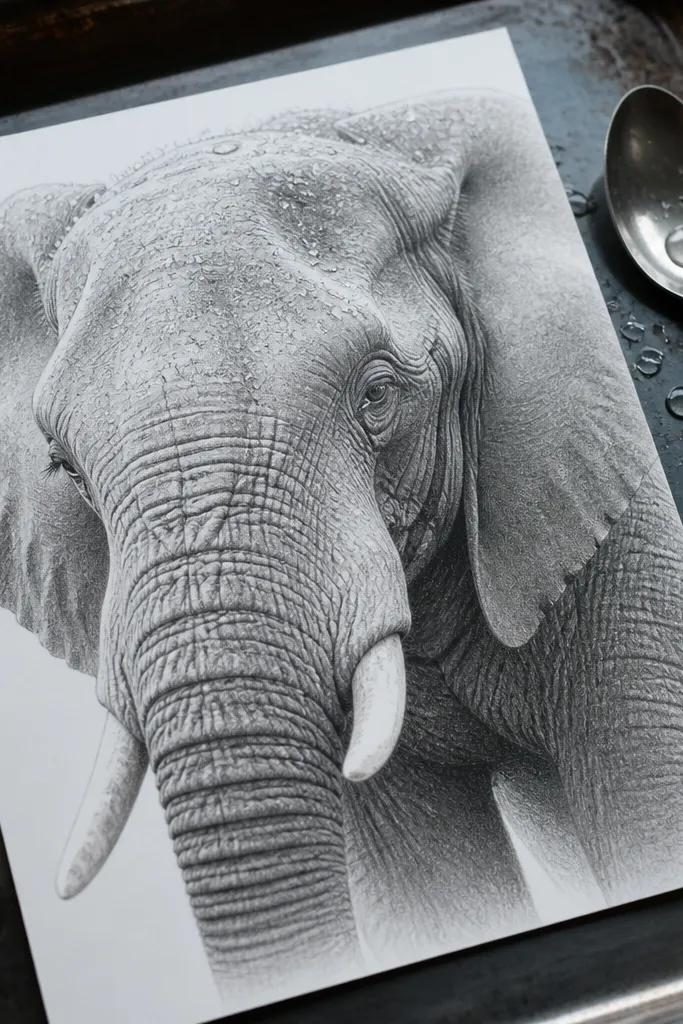
Droplets make pencil drawings pop because they add tiny, high-contrast shapes on a soft surface. The trick is simple: droplets are small lenses, so they have a bright specular highlight and a soft halo, not a scribbled circle. This drawing teaches you how to place highlights precisely and keep the surrounding skin values slightly darker so the droplets look wet. It’s visually striking because your eye goes straight to the highlights. You also practice skin shading at the same time, which keeps the piece grounded.
Draw the elephant head or shoulder first with a normal value plan using 2B and 4B. Leave small areas unshaded where you want droplets to sit. Add droplet halos by lightly shading around those spots with an HB or 2B, keeping the halo edge soft. Then use a kneaded eraser to sharpen the brightest highlights and a 6B point to add the droplet’s tiny shadow under the highlight. Finish by blending the skin around droplets so the wet spots read as part of the surface.
Keep droplet highlights tiny and placed consistently on the light side of the form.
Don’t draw droplets as outlines; wet realism comes from value and a bright highlight, not outlines.
12. Elephant in Frame with Minimal Background and Strong Value Separation
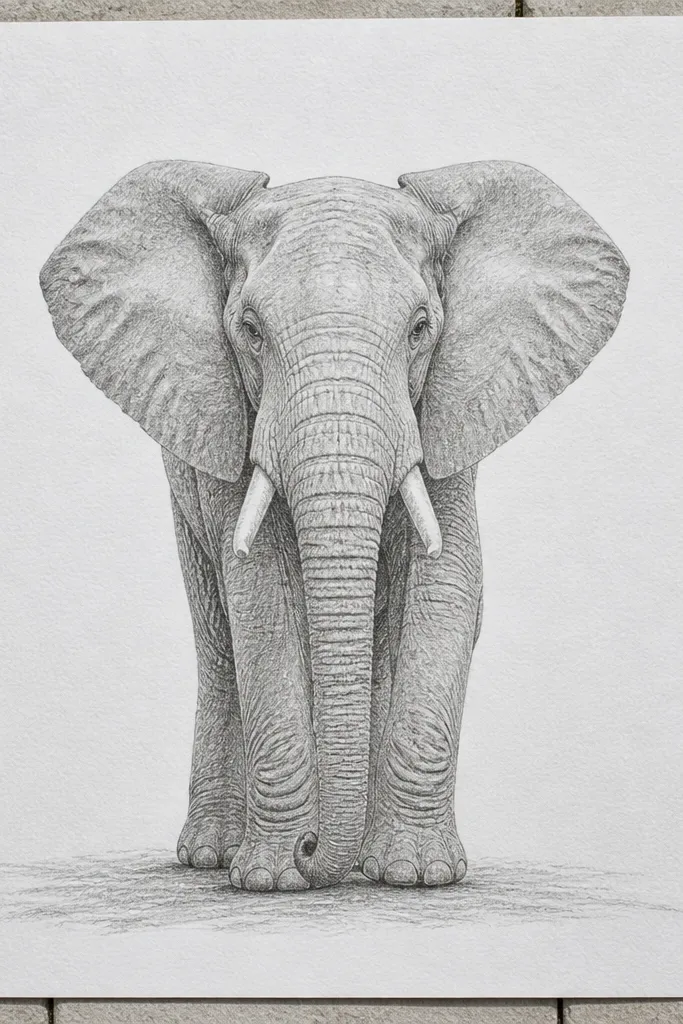
Minimal backgrounds are the cheat code for realistic pencil drawings that look clean online. This project is designed for a crisp, gallery-style result: the elephant stays sharp with clear value separation, while the background is quiet enough to make the skin look dimensional. You’ll learn to create depth by darkening the core shadow and leaving the background mostly light. It’s photogenic because the negative space frames the elephant. You also avoid the time sink of drawing a full scene.
Sketch the elephant lightly and decide the edge you want the viewer to notice — usually the nearest shoulder and jaw contour. Block the background with a very light graphite tone using HB, leaving the space behind the elephant mostly untouched. Shade the elephant with 2B for midtones and 4B for core shadows, keeping the darkest values for eye socket, nostril, and under-jaw. Deepen the nearest shadow edge with 6B to separate the elephant from the background. Blend the elephant planes smoothly, but keep the background grainy and light so it stays out of the way.
Use a kneaded eraser to clean up the silhouette edge after shading; it makes the drawing look intentional.
Don’t fill the whole page with graphite; background value should stay lighter than the elephant.
13. Elephant Ear Backlit with a Bright Rim Glow
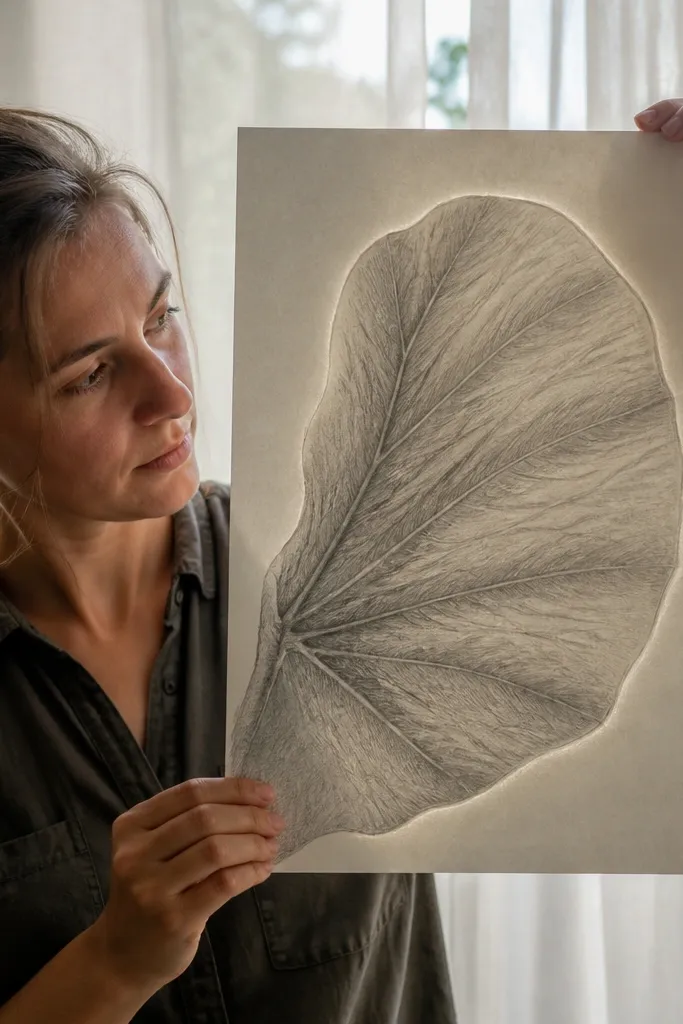
Backlit ears look amazing because the rim glow turns a simple shape into something dimensional. This project gives you a clear target: keep the ear edges bright, then layer warm grays inward. In pencil, that means you leave a highlight strip along the rim, then build darker tones toward the interior crease. The rest of the elephant can be simpler because the ear carries the drama. It’s a great, aesthetic practice piece that still teaches realism — edges, gradients, and controlled contrast.
Sketch the ear shape and lightly mark the rim highlight line. Leave the rim highlight mostly unshaded, then shade the ear interior with 2B and 4B in smooth layers. Put the deepest shadow in the fold where the ear curves inward using a 6B. Blend the transition from rim to interior with a stump, but keep the highlight edge clean by lifting lightly with a kneaded eraser. Finish by reinforcing the darkest crease and adding a few subtle texture lines inside the ear with a sharp pencil point.
If the rim highlight looks gray, lift more graphite with the kneaded eraser and reapply only midtones around it.
Don’t outline the ear rim with dark lines; the rim glow should be a bright value, not a dark border.
14. Elephant Portrait with Graphite Burnishing for Smooth Skin
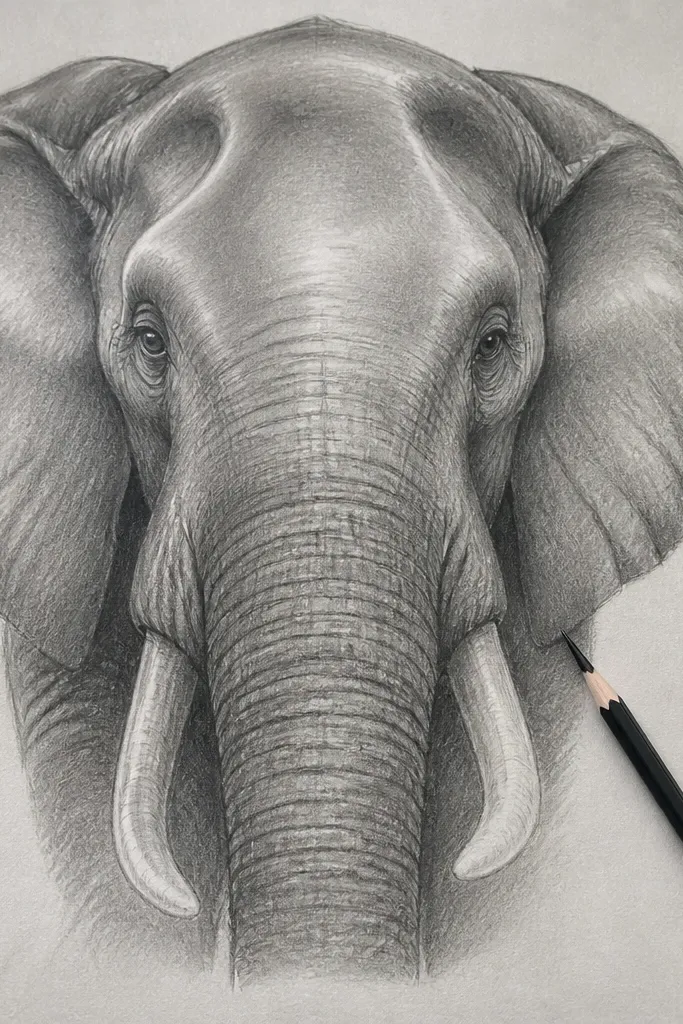
Burnishing is the pencil trick that makes skin look smooth and slightly reflective. This drawing focuses on large, clean planes on the forehead and cheeks, then uses softer blending for wrinkles. You’ll get that “polished graphite” look without needing colored pencils or inks. The portrait format makes it easy to keep the eye, nostril, and forehead values working together. It’s a beautiful project if you want your realism to look more refined and less sketchy.
Pro tipBurnish after the shadows are in, not before, so you don’t smear your darkest anchors.
Start with a light sketch and establish your value blocks using HB and 2B. Shade the forehead and cheeks with 2B in repeated light layers until the surface looks evenly toned. Then burnish the brightest areas by rubbing gently with a clean blending tool or the side of a light pencil, keeping pressure consistent. Use 4B for core shadows and 6B for the eye socket and nostril crease, then blend those edges softly into midtones. Lift a few pinpoint highlights with a kneaded eraser so the burnished skin doesn’t look flat.
AvoidDon’t burnish over the darkest creases; keep those areas crisp and textured.
15. Elephant Drawing realistic pencil on Dry Sand Textured Paper with Dusty Halo
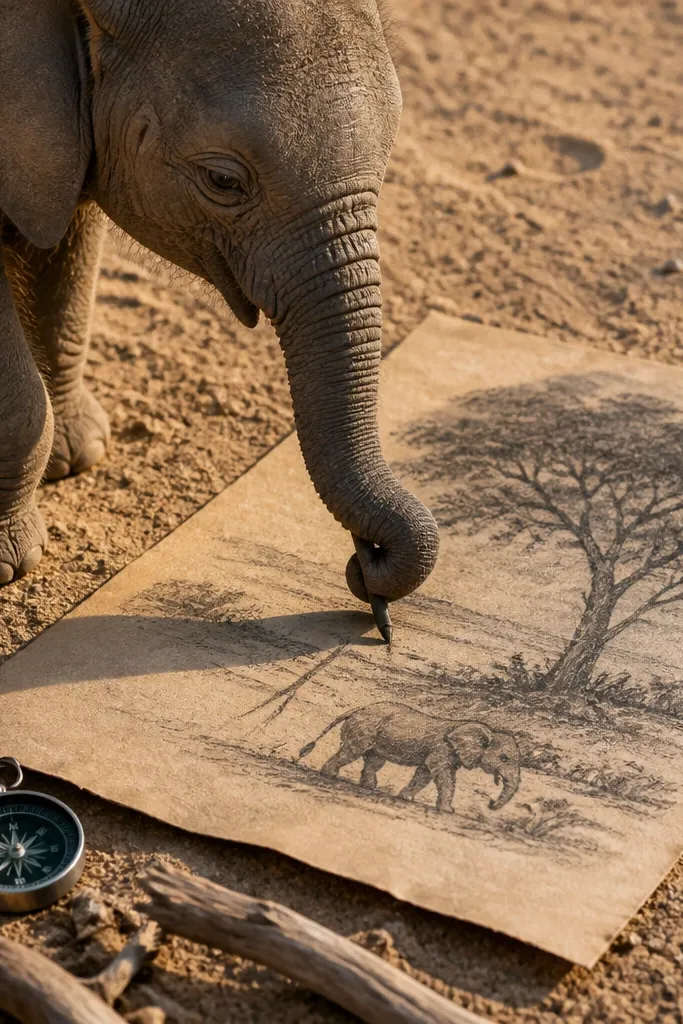
This one is about making the elephant look like it belongs in a real outdoor scene without drawing a full background. The sandy paper texture does half the work for you, so the skin grain looks natural instead of airbrushed-smooth. You build a dusty halo around the body using controlled smudging and lifted graphite, then keep the elephant’s edges crisp where they should be sharp. It’s a great project if you want realistic pencil elephant results that photograph well because the paper tooth creates believable micro-shadows. It takes about 2-3 hours for a medium size sheet and suits beginners who can follow a step plan, plus anyone who wants a more atmospheric, “sunlit dust” look.
Pro tipKeep a separate clean blending stump for the halo so you don’t smear dark skin graphite into the dust area.
Start with a sheet of dry sand textured paper (mixed media paper works too, but the texture has to feel slightly gritty when you rub it with your fingertip). Lightly sketch the elephant in pencil HB, then block the big shapes: head mass, shoulder slope, and belly curve, keeping the legs slightly simplified. Use 2B for midtones and 4B for the darkest folds under the belly and behind the ear, blending with a tortillon only on skin planes, not along the silhouette. Create the dusty halo by rubbing an eraser lightly around the outer edge of the elephant, then feather the lifted graphite outward with a clean blending stump. Finish by adding a few sharp hairline marks at the trunk tip and ear edge with a mechanical pencil set to 0.5 mm, then seal with a light fixative spray from 12-16 inches away.
AvoidDon’t blend the entire elephant smooth — leave paper texture showing on the skin to keep it realistic.



