
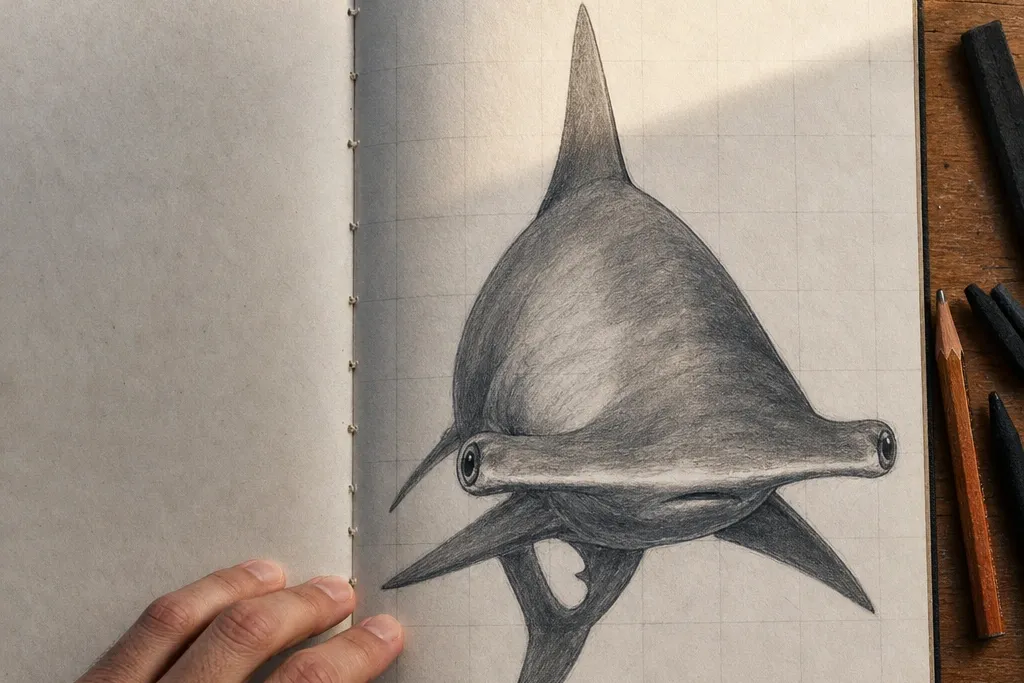
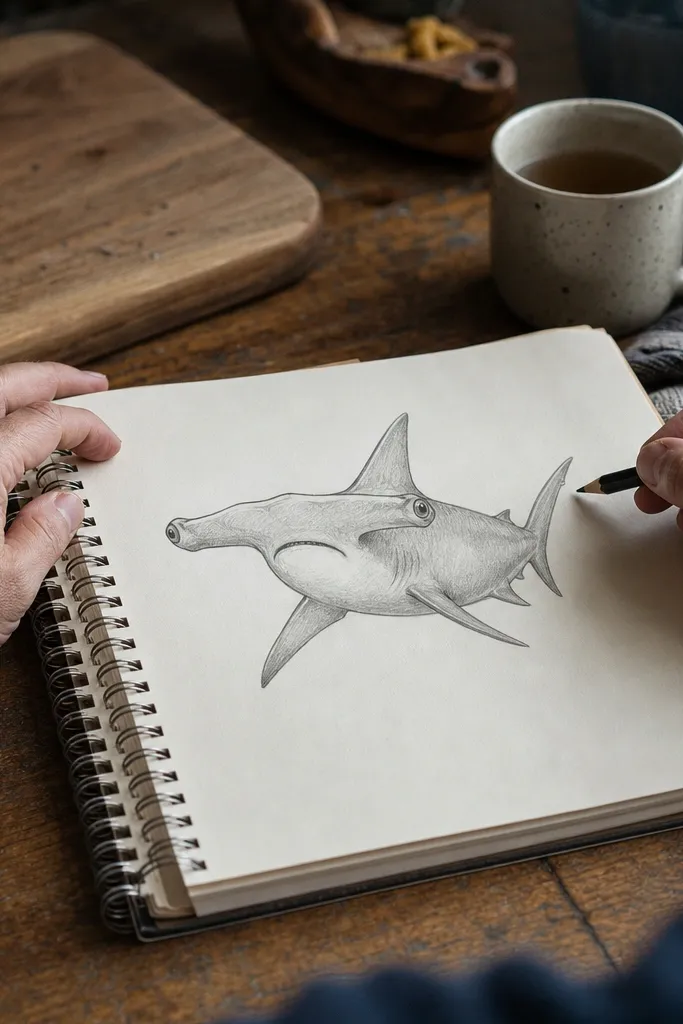
1. Neon Head Bar Hammerhead in 3-Color Blocks
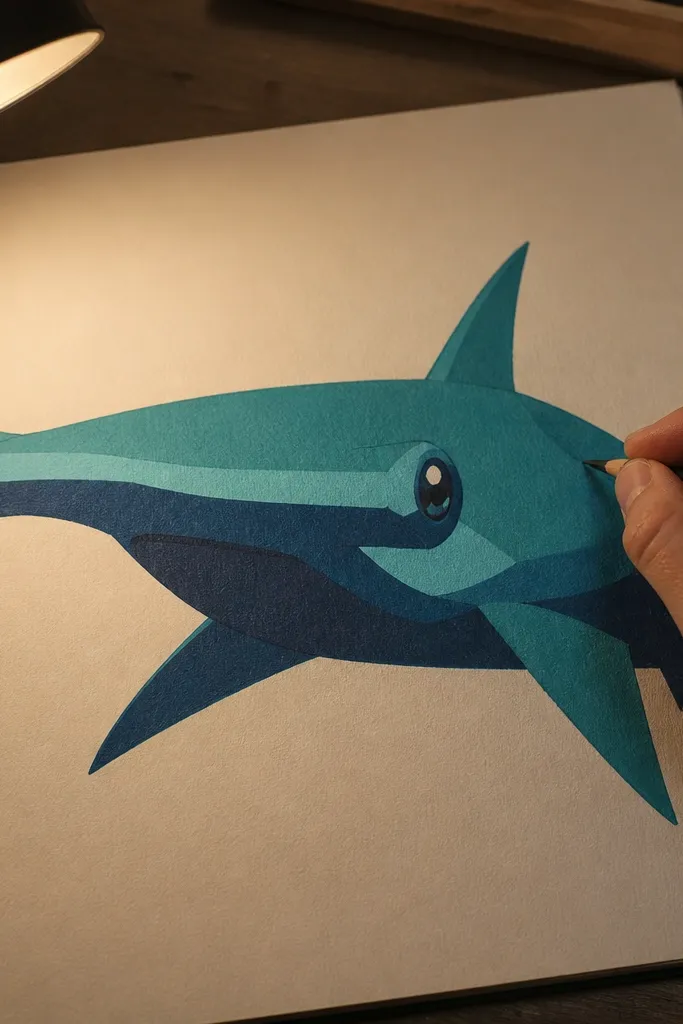
This one is built for clean, eye-catching contrast. The hammerhead head bar is drawn as a bold, flat shape, then filled with three controlled colors: teal for the top plane, lighter aqua for the side plane, and a darker navy under-plane. The eyes sit at the outer ends and get tiny white highlights so they pop even in a simple photo. Finish with a thin black outline and one glossy highlight streak on the head bar. It looks modern, graphic, and easy to photograph because the colors stay separated instead of blending into gray.
Start by sketching the hammerhead silhouette: a wide head bar with a slight taper into the body, then mark the eye positions at the outer ends. Add a centered mouth line and a soft gill crease line so the face doesn’t look like a sticker. Next, draw black contour lines, then fill only three regions: top plane, side plane, and underside. Finally, add two tiny white highlights in the eyes and one highlight streak on the head bar, then leave the rest of the background mostly blank.
Use a white gel pen for the eye highlights so they stay crisp after scanning or photographing.
Don’t blend the colors together — if the planes merge, the hammerhead silhouette stops reading.
2. Charcoal and White Gel Highlight Underwater Profile
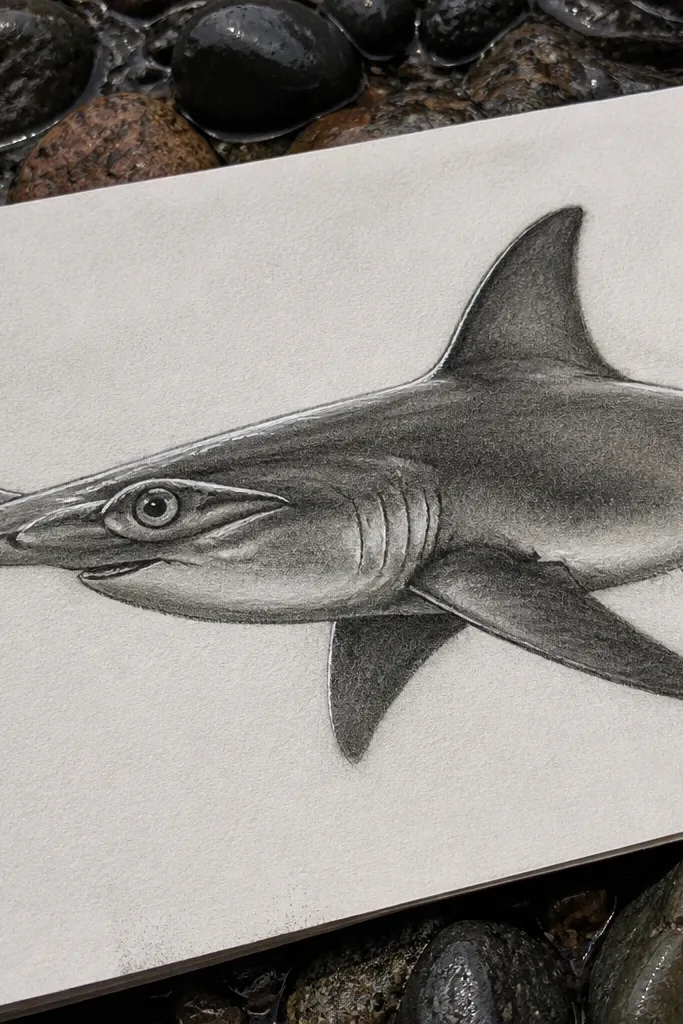
If you want a dramatic, gallery-looking sketch, this is the move. The shark is drawn in side profile with charcoal for midtones and a white gel pen for sharp specular highlights along the head bar and belly. The trick is keeping the shadow edges soft on the body but keeping the head bar highlight lines crisp. Add a light background wash behind the silhouette so the shark floats forward visually. This project teaches you how to make one subject look dimensional without overworking every scale detail.
Begin with a light pencil outline of the side profile, then erase the inner sketch lines so only the main contour remains. Shade the underside and the area under the head bar with charcoal, pressing harder near the belly curve and easing pressure toward the sides. Use a blending stump to smooth midtones on the body, but keep the head bar shadows slightly darker and less blended. Finish by drawing 2-3 white gel highlight streaks: one across the top plane edge of the head bar, one on the belly curve, and one small highlight near the eye.
Pro tipSpritz a tiny amount of fixative over the charcoal before adding gel highlights so the highlights don’t smear.
AvoidSkip full shading all over — the look depends on letting the paper breathe between shadows.
3. Patterned Hammerhead with Dotwork Skin Tiles
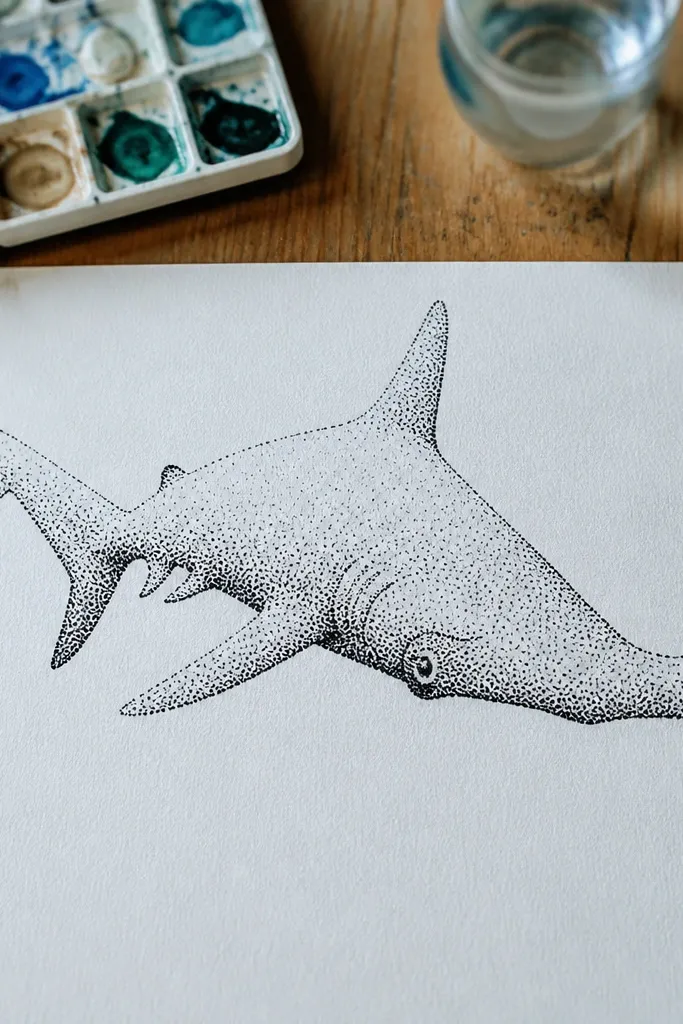
Dotwork makes hammerheads look instantly stylized and textured. Instead of shading with gradients, you build form with clusters of dots that get denser near the underside and behind the head bar. The head bar looks especially striking because you can vary dot sizes between the top plane and side planes. Add a simple ocean ripple background in thin lines so the shark stands out without stealing attention. This idea is great if you want a finished page that feels detailed but still controlled.
Sketch the hammerhead silhouette with a light pencil, then ink the outer contour and eye placement. Divide the body into three zones: top plane, side plane, underside. Start dotting the underside with the densest dots, then reduce density as you move up the sides and top. Keep dot spacing consistent on each zone so the planes read clearly, then add a few larger dots around the gill area for a focal texture. Finish with a couple of thin ripple lines behind the tail to frame the shape.
Pro tipUse a 0.3 or 0.5 fineliner consistently for dot size control — switching nibs ruins the pattern rhythm.
AvoidDon’t scatter dots randomly everywhere; the planes need different densities to look like real structure.
4. Minimal Line Hammerhead with One Splash of Color
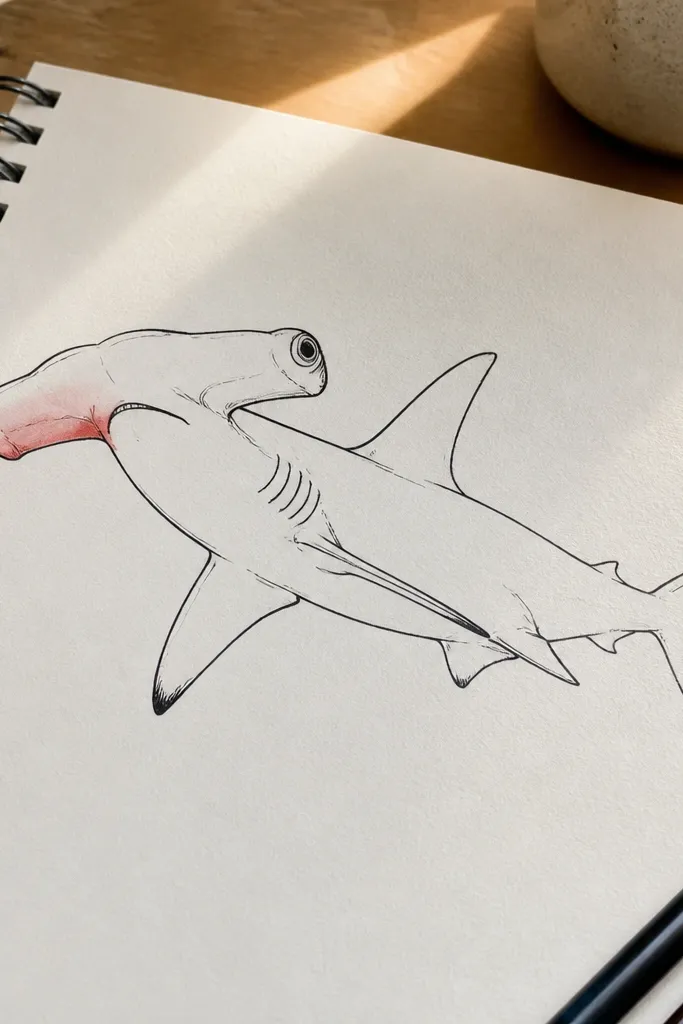
This is the cleanest option for people who want an aesthetic drawing without hours of shading. You keep the linework thin and confident, then add one intentional color accent — usually a small wash on the underside of the head bar or around the gill area. The rest stays monochrome, so the hammerhead silhouette is the hero. It’s also one of the easiest to redraw repeatedly for practice because you’re not fighting complicated rendering. The result looks modern, calm, and crisp.
Draw the hammerhead silhouette lightly, then ink the outer contour with smooth, continuous lines. Place the eyes at the outer ends and keep the mouth line centered below the head bar. Add only 2-3 internal lines: one gill crease line, one belly curve line, and one tail fin crease. Leave everything else blank. Finally, apply a small color wash with a brush or marker only under the head bar edge or around the gill crease, then stop immediately so the color stays contained.
Pick a single accent color like coral or electric blue, and keep it to a small area under the head bar for instant focus.
Don’t add multiple color spots; the minimal look collapses when there are too many focal points.
5. Perspective Hammerhead with Overhead Head-Bar Twist
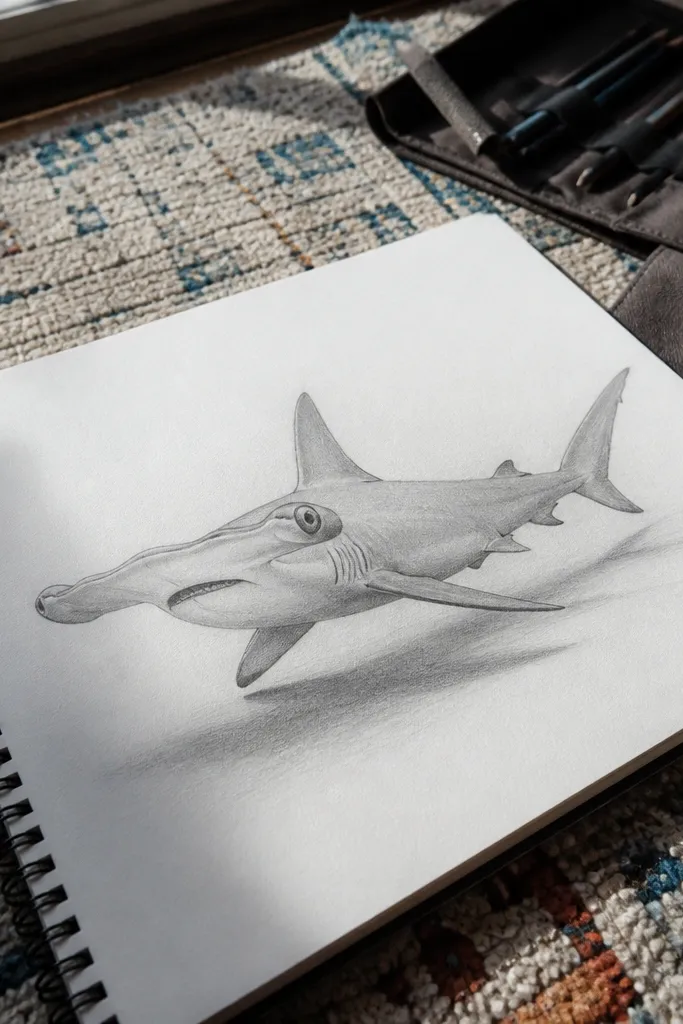
This one fixes the most common drawing problem: the head bar looks flat because you’re drawing it like a front-on symbol. Instead, you tilt the head bar slightly so it has a top plane and a side plane. The eyes still sit on the outer ends, but one eye should feel slightly closer to the viewer. Add a subtle shadow under the head bar to sell the twist. The overhead angle makes the drawing feel dynamic and more “designed” for a photo.
Start with a simple 3D block sketch: draw a long head-bar rectangle in perspective, then taper it into the body. Mark eye positions at the outer ends, then shift one eye slightly closer by making it larger. Ink the outline, then add the top plane edge line and a short side plane edge line to show the twist. Shade with pencil: darken the underside of the head bar and the near edge of the body, leaving highlights on the far side. Finish by adding a shadow shape under the head bar edge.
Use a ruler for the head bar edges during the first pass so your perspective stays clean.
Don’t make both eyes the same size when the head is tilted; that makes it read like a sticker.
6. Vintage Engraving Hammerhead with Crosshatch Sea
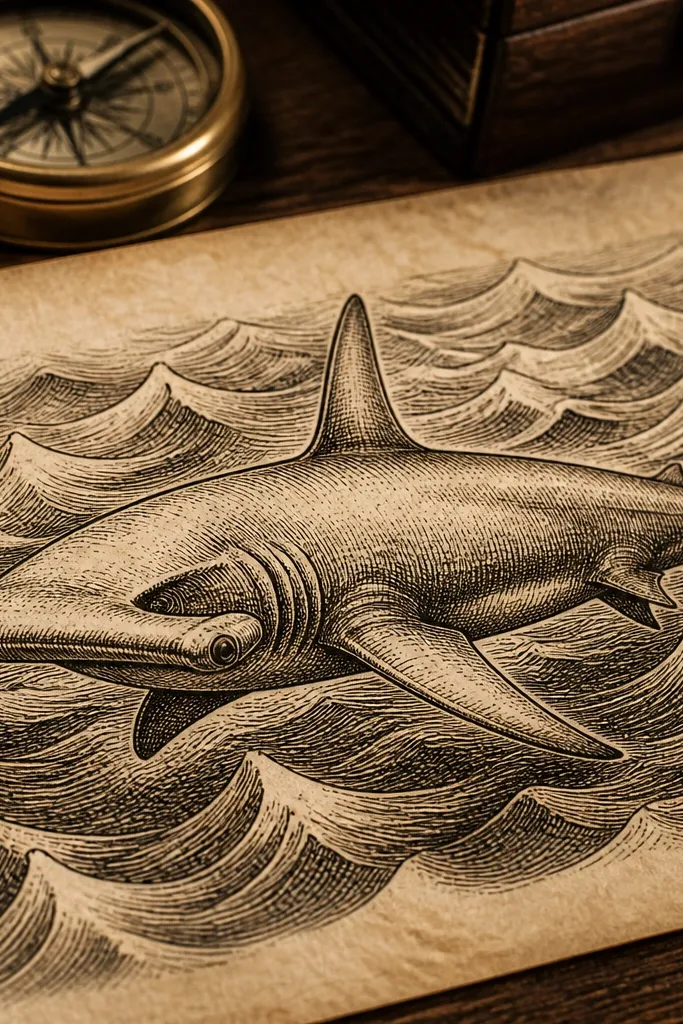
Engraving style looks great because it has built-in texture and strong contrast. You draw the hammerhead with fine lines, then shade using crosshatching that follows the body curve. The head bar gets heavier crosshatching in the underside, with lighter hatch on the top plane. Add a sea background made of repeating wave lines so the whole piece feels cohesive. This is a strong choice if you like slow, satisfying line work and want a page that looks finished even without color.
Sketch the hammerhead silhouette in pencil, then ink the contour and eye placement carefully. Use crosshatching for value: start with light diagonal hatch on the sides, then add denser crosshatch on the underside and around the gill crease. Keep hatch lines curved to match the body, not straight across everything. Add a simple wave background with 2-3 repeating wave arcs behind the body. Finish by darkening a few anchor areas: the underside of the head bar and the base of the tail.
Pro tipWork from light to dark — build hatch density gradually so you don’t blow out the details.
AvoidSkip heavy black filling everywhere; engraving style needs controlled midtones.
7. Acrylic-Style Watercolor Wash Hammerhead on Speckle Paper
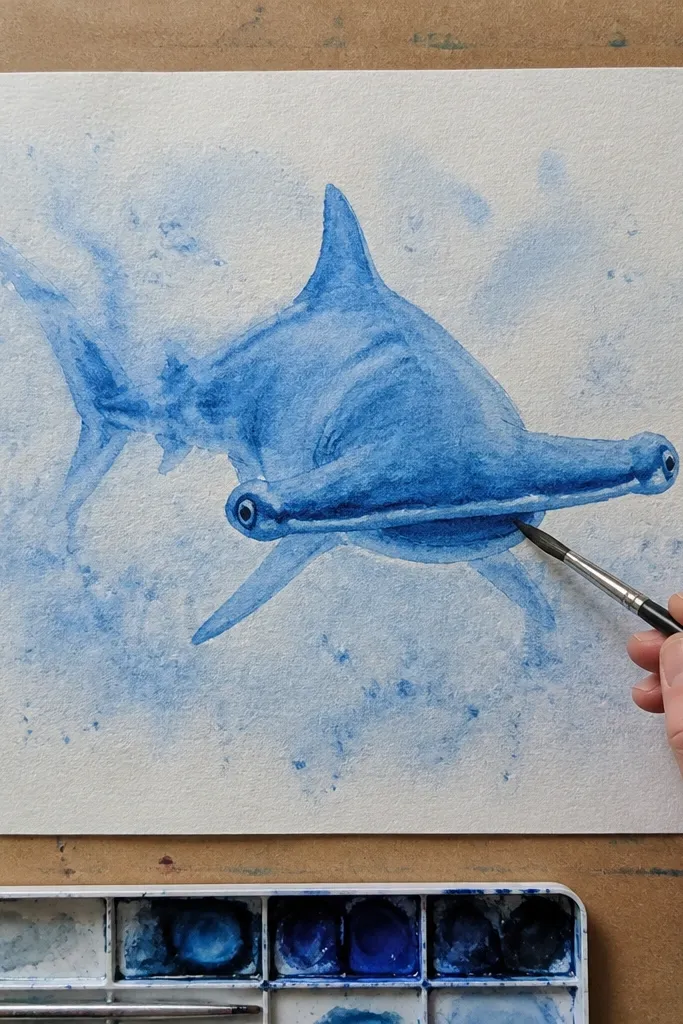
This idea is about soft motion and color, not strict realism. You paint the hammerhead silhouette with a wet-on-wet watercolor wash, then deepen the head bar underside with a second pass. The eyes get a small dark dot and a tiny light highlight so the face still reads. Add speckles in the background for a watery feel, keeping them away from the shark so edges stay clean. It’s photogenic because the contrast between soft background and sharper silhouette gives it depth.
Lightly pencil the hammerhead outline, then wet the paper lightly around the shark area. Apply a diluted wash for the top plane, then let it dry slightly before adding a deeper wash under the head bar and along the belly. Use a small brush to paint the eye area last, keeping it crisp. While the background is still damp, flick a little diluted paint for speckles, then stop before it reaches the shark edges. Darken the outer contour with a fine pen once everything dries.
If edges blur too much, dry the brush on a paper towel and pull it away from the outline — it helps keep a clean boundary.
Don’t overwork the head bar — repeated washes make it muddy and flatten the silhouette.
8. Graphite Smudge Gradient Hammerhead Face Study
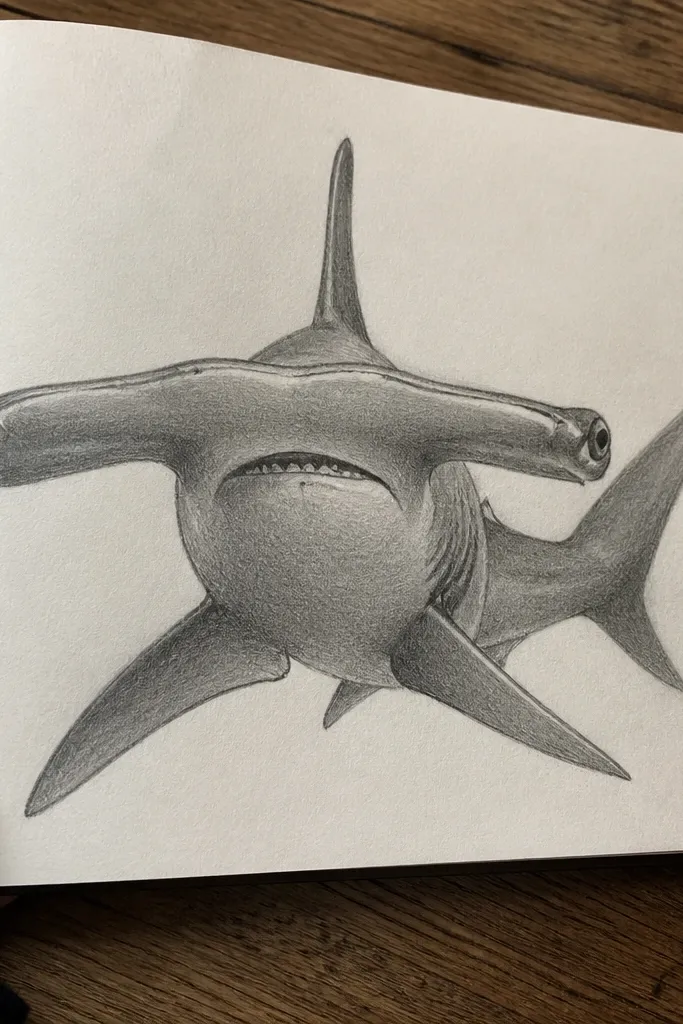
This is a practice-friendly beauty shot: a face-forward hammerhead that teaches control of gradients. The head bar should have a smooth value shift from highlight edge to shadow underside. You keep the eye area slightly darker and sharper than the surrounding shading. The body can be simpler — the focus is the face structure and the way the “T” shape catches light. This works well for close-up photos because the paper texture and smooth smudging look intentional.
Draw the hammerhead head bar and upper body in pencil with light pressure, then outline the eyes at the outer ends. Use a kneaded eraser to carve a highlight strip along the top plane edge of the head bar. Build graphite shading with a soft pencil, then smudge gently with a blending stump so transitions stay smooth. Darken the underside shadow under the head bar with a firmer pencil and blend only the edge. Add a tiny highlight dot in each eye using a white gel pen.
Pro tipKeep a clean blending stump corner — once it’s filled with dark graphite, it smears highlights away.
AvoidDon’t smear the eye outlines — if the eyes lose their edges, the face stops reading.
9. Color Pencil Rimlight Hammerhead with Hard Edge Shadows
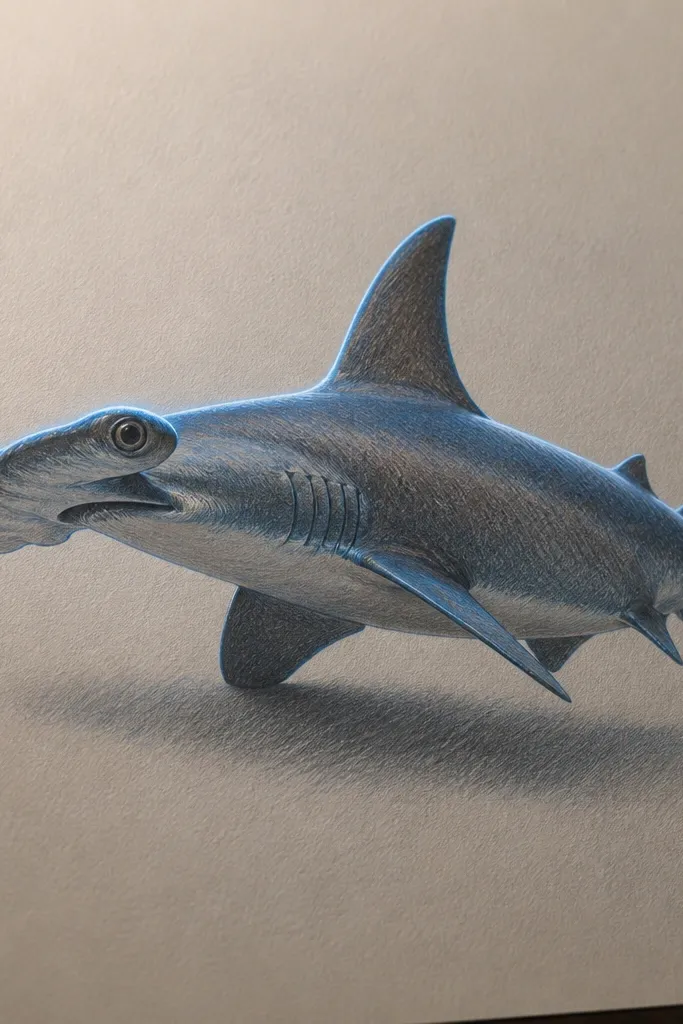
Rimlight makes sharks look dramatic without complex detail. You draw the hammerhead in side profile and shade it with color pencils, then add a bright rim along the head bar top edge and the upper fin edges. Shadows stay sharper than the highlights, so the drawing looks like a stylized lighting study. The eye area gets a dark ring and a small highlight so it looks alert. This is the kind of drawing that looks great framed because it has clear contrast and a clean lighting story.
Sketch the silhouette and ink lightly with a fine pen, then color the base body with a midtone gray-blue. Shade the underside and the underside of the head bar with a darker pencil, keeping that shadow edge crisp. Add a lighter color along the top plane and upper edges, then burn in a rimlight band with a bright pencil like cool cyan or pale teal. Use a white gel pen sparingly for the strongest highlight line on the head bar edge. Finish by sharpening the eye outline with a dark pencil and adding the small highlight dot.
Pro tipUse a paper stump or blending tool only for midtones; keep the shadow edge mostly untouched for that graphic look.
AvoidDon’t blend rimlight into the shadows — you want a visible separation line.
10. Monochrome Brush Pen Hammerhead with Water Droplet Texture
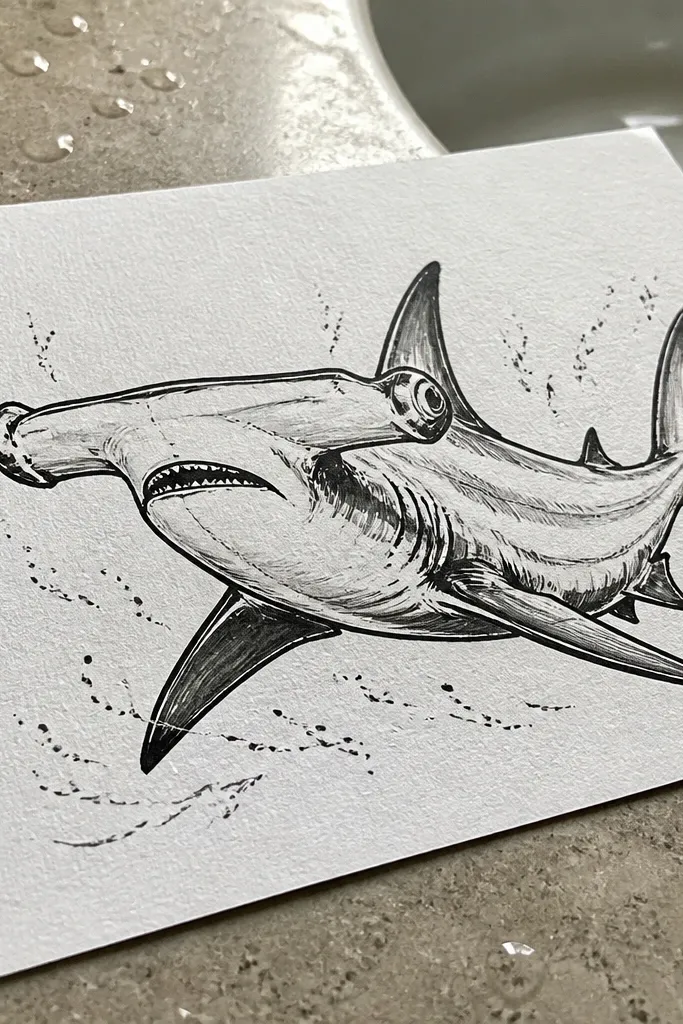
Brush pen linework gives you thick-and-thin control that looks alive on paper. This design uses a bold contour for the head bar and body, then builds texture with tiny droplet marks in the background. The shark’s interior stays mostly clean, so the silhouette does the heavy lifting. Add a few short highlight strokes on the head bar and a slightly heavier line under the chin for shape. It’s striking because it has movement cues without turning into a busy mess.
Draw the hammerhead silhouette in pencil, then ink the outer contour with a brush pen, pressing harder at the head bar edges and easing pressure along the belly. Add the eyes at the outer ends and keep the mouth centered with a short line. Leave the body mostly unfilled and instead add 3-5 short highlight strokes on the head bar. For the background, flick a few tiny droplet dots around the shark, keeping clear space near the silhouette. Finish by darkening the tail base and the underside shadow with a darker pen or second pass.
Pro tipPractice one test flick on scrap paper so your droplets are the right size before you mark the real drawing.
AvoidDon’t outline every fin detail — too many thin lines make the silhouette look fuzzy.
11. Cut-Paper Collage Look Hammerhead with Torn Head Bar Edges
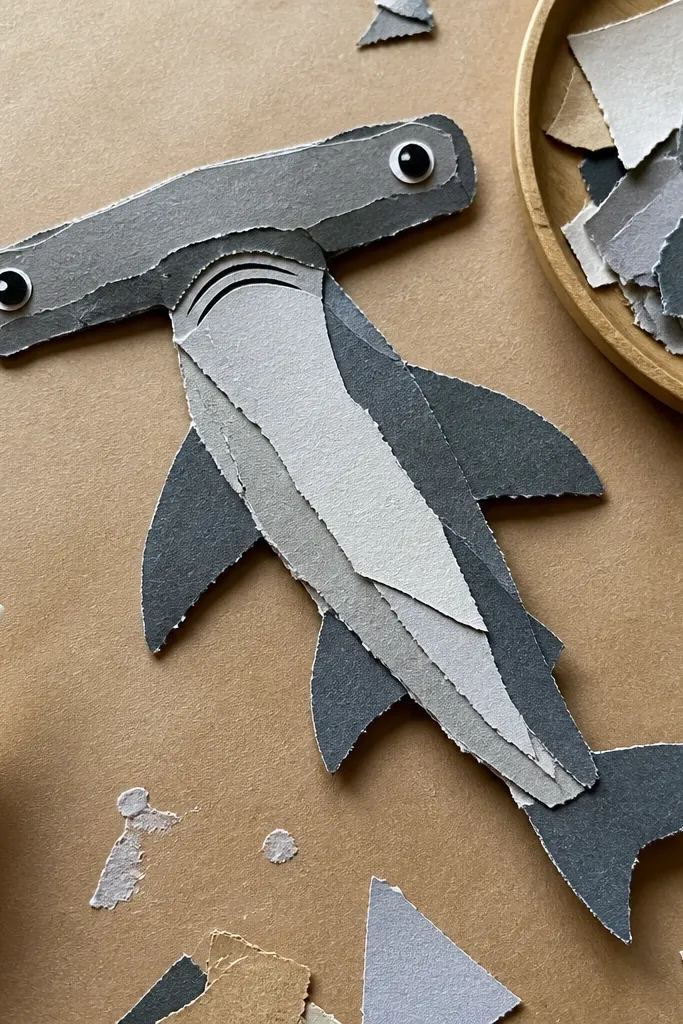
This is a pure aesthetic project: the hammerhead reads as layered paper shapes, so it looks dimensional even in a flat photo. You build the head bar in two or three layers with different grays and slight warm tones, then add torn paper edges to create natural texture. The eyes go on last as small cut circles with a white highlight dot. Add a simple blue paper background with a few drawn wave lines. The collage look is forgiving — small imperfections look intentional, not wrong.
Print or trace the hammerhead silhouette lightly onto cardstock and cut it out as your template. Cut 2-3 paper layers for the head bar and body using different shades of gray, then glue them so the head bar has a visible top and underside layer. Add torn edge texture by trimming the paper slightly irregularly along the head bar outer edge. Glue the eyes as small dark circles with a tiny white dot highlight. Finally, draw a few thin wave lines on the blue background and mount the shark with a slight offset shadow under it.
Use matte glue so the layers don’t shine under camera flash.
Don’t use glossy paper — it reflects and makes the edges look messy in photos.
12. Sketchbook Margin Hammerhead with Bold Title-Card Composition
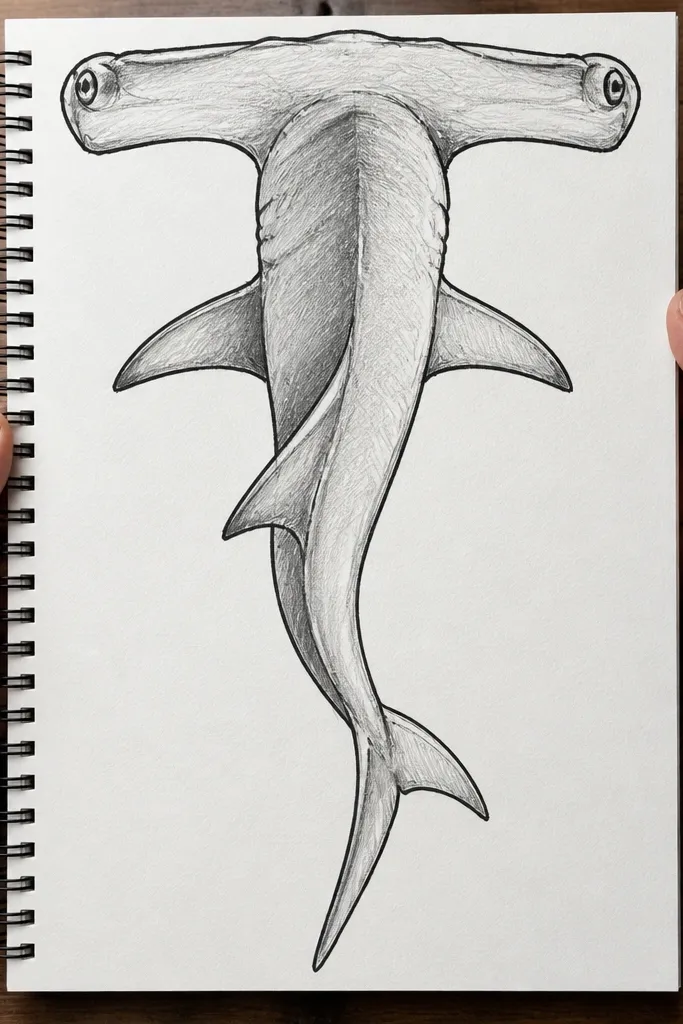
This one makes your drawing look like a poster, not just a sketch. The hammerhead is drawn large and placed so the head bar nearly touches the top margin, then you add a simple frame or banner in the negative space. The shark uses thick outline lines with a small amount of shading right under the head bar and along the belly curve. Minimal background keeps the face readable. It’s great for people who want “aesthetic” without complicated rendering — composition does a lot of the work.
Sketch a rectangular frame on your page with a ruler, leaving a clean margin around it. Place the hammerhead silhouette so the head bar sits near the top edge and the tail points toward the lower right. Ink the outline thickly, then add two small shading areas: a shadow under the head bar and a belly gradient using light pencil. Add a simple banner line or small text block as a frame element, then keep the rest blank. Finish by darkening the eyes and adding a small highlight dot.
Leave at least 1 cm of clean margin around the frame so the piece looks intentional when cropped for social media.
Don’t cram the shark into the center — the poster look comes from margin pressure.
13. Foil Pen Hammerhead with Metallic Specular Highlights
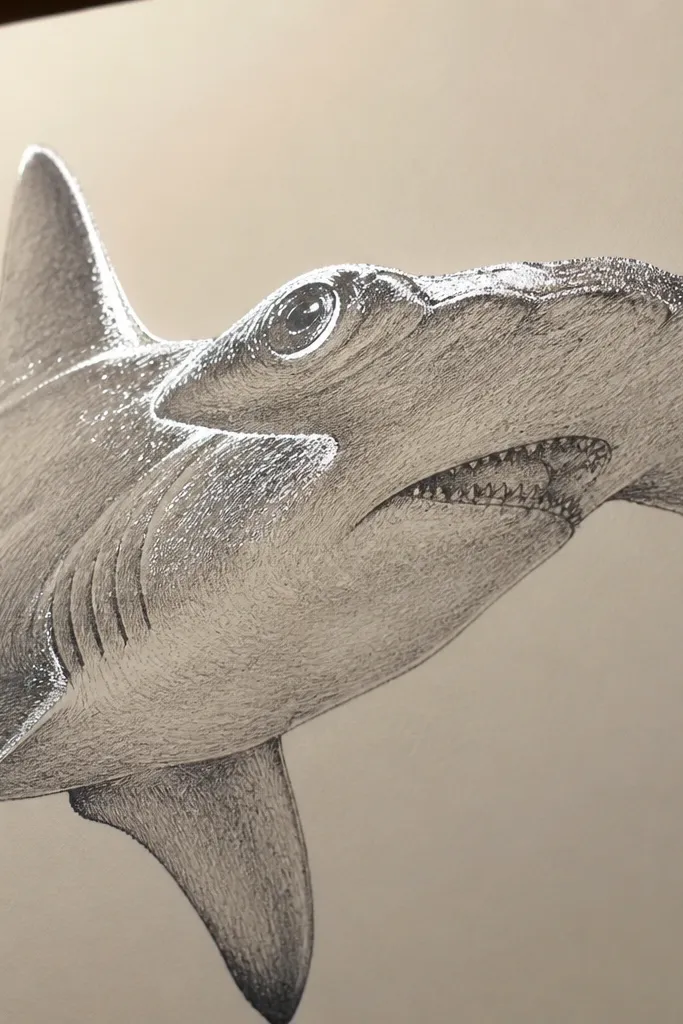
Metallic highlights make this hammerhead look premium on paper. You draw the shark in pencil or pen first, then use a metallic gel pen to trace specular lines on the head bar top edge, along the dorsal fin, and around the outer eye rim. Keep the rest matte so the metallic parts stand out as true light reflections. This style is photogenic because metallic ink catches overhead light and creates a bright focal point. It also teaches you where real highlights go — mostly on edges facing the light.
Draw the hammerhead silhouette and ink the main contour. Shade with a light gray pencil or soft pen tones, focusing shadows under the head bar and along the belly. Once dry, apply metallic gel pen to three narrow highlight lines: one on the top edge of the head bar, one along the dorsal fin ridge, and one short line near the eye outer corner. Add one extra metallic dot highlight in each eye for sparkle. Let it dry flat so the metallic doesn’t smear.
Pro tipUse a light touch with metallic ink — two thin passes beat one heavy pass for sharper lines.
AvoidDon’t outline everything in metallic — it stops looking like light and starts looking like glitter.
14. Night Ocean Hammerhead with Starry Speckle and Glow Eyes
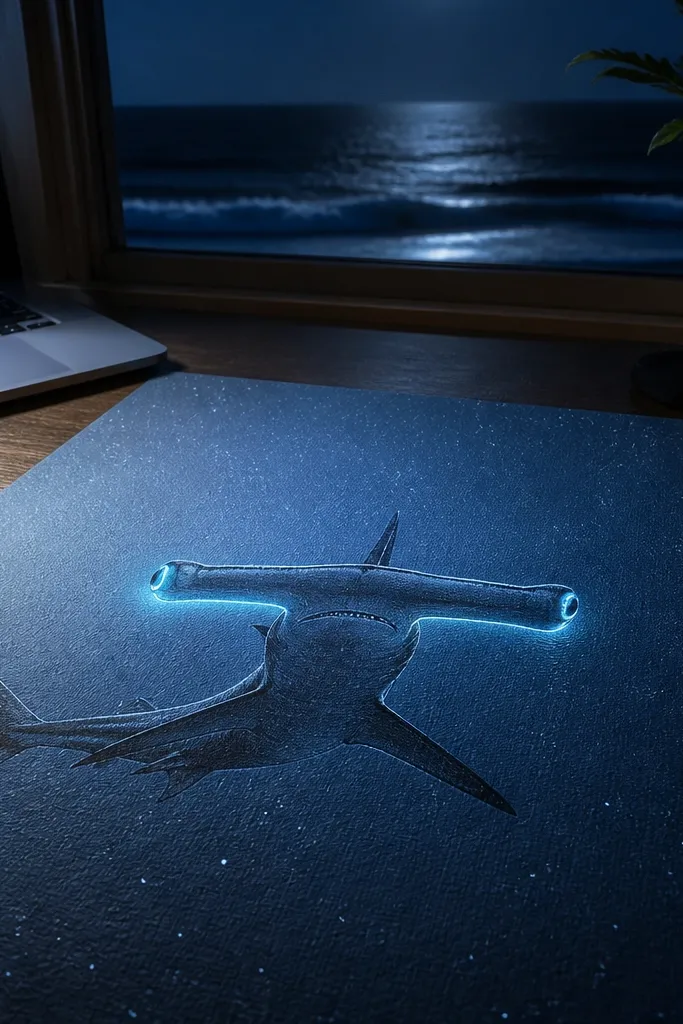
Dark backgrounds make hammerhead drawings feel cinematic. You draw the shark in a deep navy or charcoal base, then add a starry speckle field behind it. The eyes get a small glow ring using a bright color like neon green or icy cyan, placed at the outer ends of the head bar. Add a soft glow smear under the head bar so the silhouette feels lit from above. This is a strong option if you want your page to look like artwork, not practice.
Sketch the hammerhead silhouette in pencil and ink the contour. Fill the shark with deep navy or charcoal shading, keeping the top plane slightly lighter than the underside. Paint or dot a starry background behind the shark using a fine brush or toothbrush technique, but keep the speckles sparse near the shark edges. Add glow eyes by coloring the eye area with a bright pencil or marker, then place a small white highlight dot. Finish by lightly airbrushing or smudging a faint glow under the head bar edge.
Pro tipIf you’re using markers, test the speckle density on scrap so the background doesn’t overpower the shark.
AvoidAvoid covering the entire page in stars — keep the brightest speckles behind the body for depth.
15. Bas-Relief Look Hammerhead with Side Light and Cast Shadow
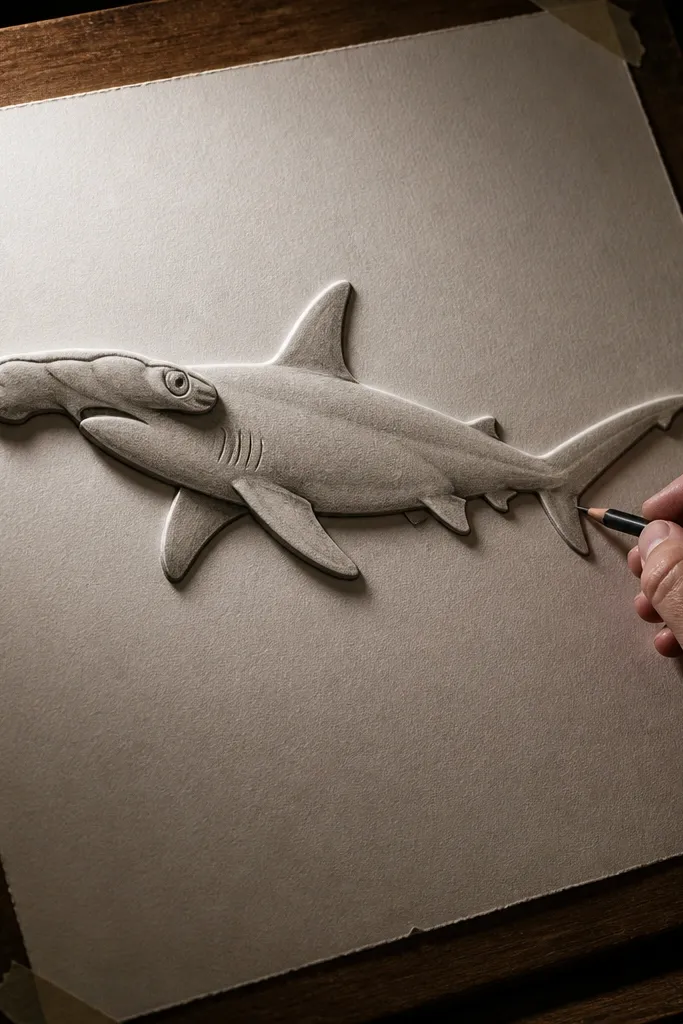
This idea makes your drawing look raised off the page. You treat the head bar and body like a carved relief: highlight the side facing the light, darken the opposite side, and add a cast shadow that matches the light direction. The hammerhead shape becomes crisp because the shadow under the head bar gives it structure. You can do it with pencil shading, then accent the brightest edges with a white gel pen line. The result looks architectural and very “designed.”
Decide your light direction first, like from upper left. Draw the hammerhead silhouette and ink the outline, then shade the upper-left side of the head bar and body with a light pencil tone. Shade the lower-right side darker with firmer pressure, keeping the transition edge slightly sharp. Add a cast shadow under the head bar and along the belly curve, drawn as a soft shape that extends down-right. Use a white gel pen on the brightest edge lines of the head bar and dorsal ridge, then deepen the underside shadow with charcoal or a dark pencil.
Pro tipDraw the cast shadow first as a faint pencil shape, then refine the edges after you finish the body shading.
AvoidDon’t skip the cast shadow — without it, the relief effect disappears.



